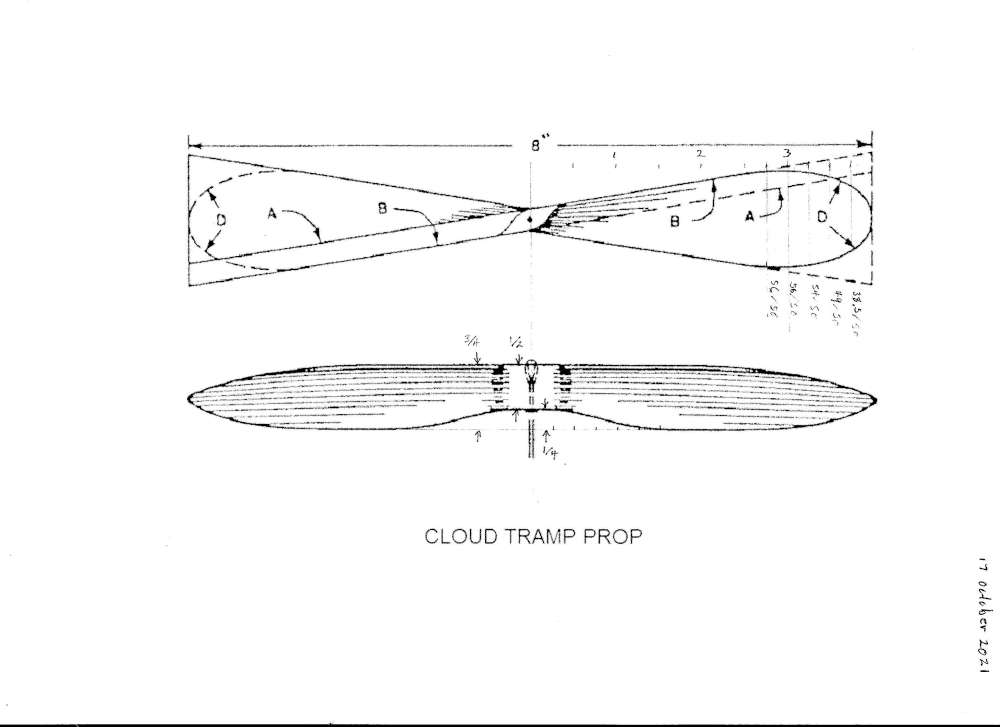
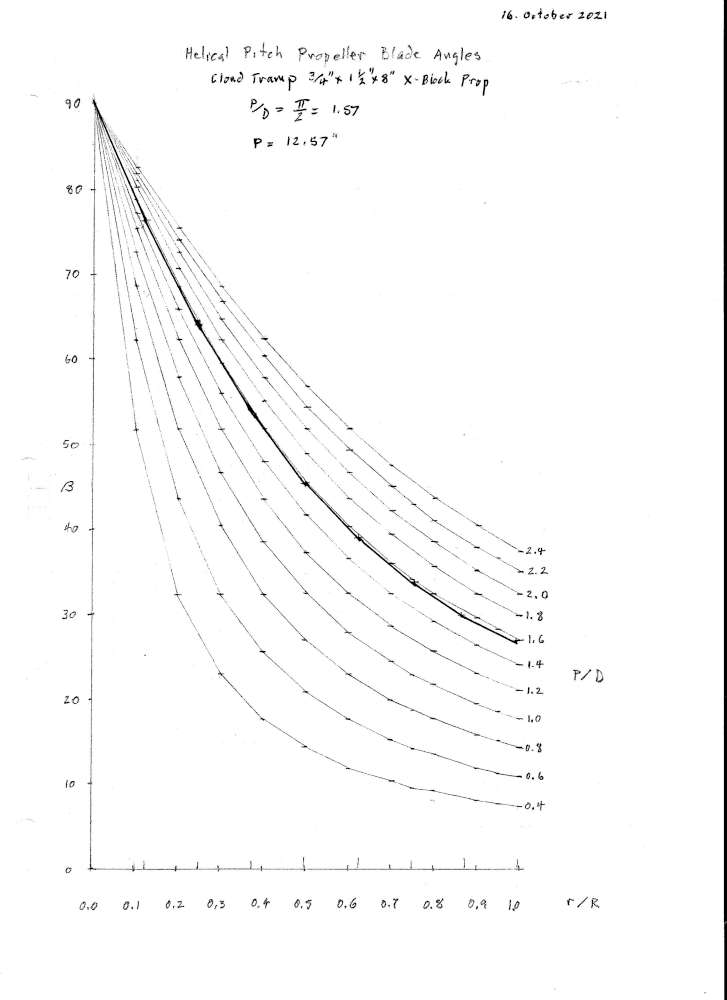
I was getting questions about building a Cloud Tramp, so I decided to build another one, take pictures of each step and publish a tutorial on EndlessLift. I had extra parts, so built two of them. I took pictures of my first build in 2009, but the computer drive crashed and I lost all the pictures. I had a lot of trouble with the prop. Sawed blanks as shown on the plan are not available. I made a fan formed blank, but the blade pattern extended beyond the edge of the sanded blank. I have spent a lot of time since thinking about this prop design and why the blade pattern did not fit the blank. The drawings on the plan contradict each other and show an impossible prop. No way you could carve a prop and photograph it and the photos would match the drawings. Curve D shows an X-block prop with P/D = 1.57. The sawed blank has a P/D = 1.89. I used to do the impossible at work all the time, so the Cloud Tramp prop was not out of the ordinary. Where there was a conflict, I went with the part that would work best and ignored the other. Here is the result.
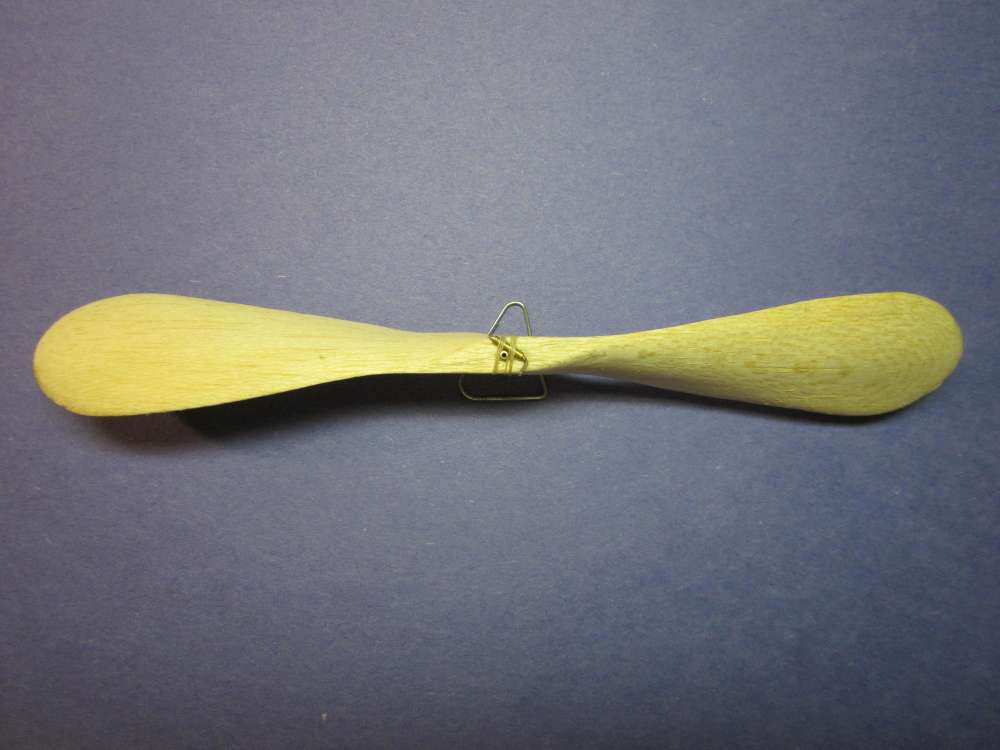
This was carved as an X-block. The obvious difference is in the hub area. Not a sawed block. Also, the blades are wider than the sawed block would have permitted. My first CT prop was fan formed to get as close as possible to the sawed blank, but the blade pattern extended 3/16″ beyond the edge of the back face. ????
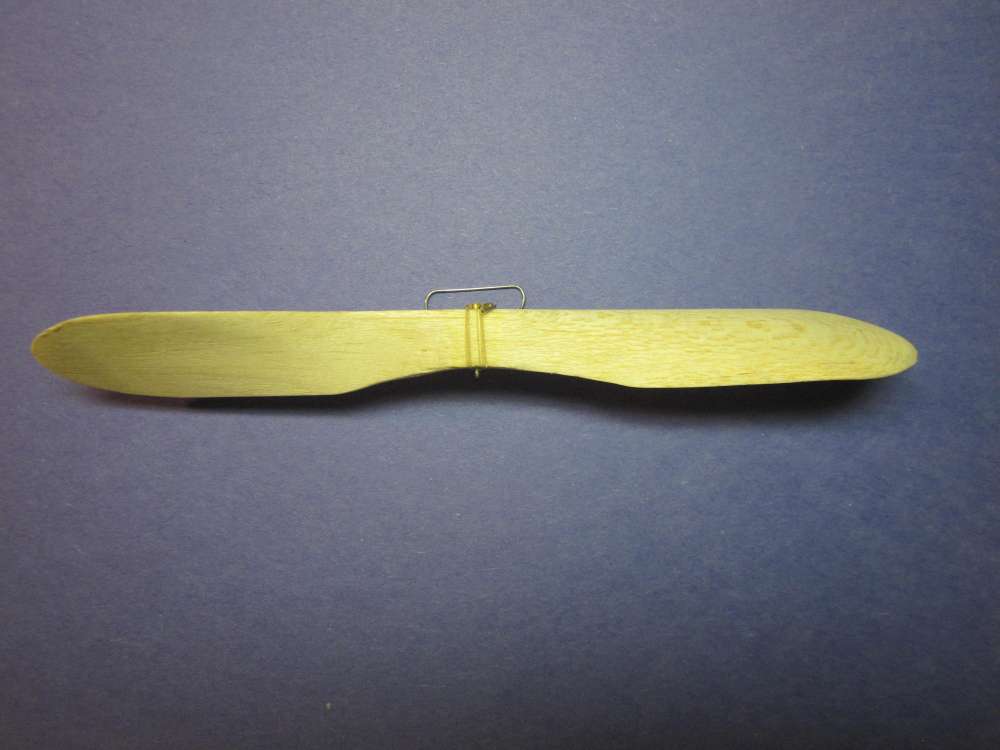
This pretty closely matches the drawing. The tips are more blunt here, but that is because the tips were developed from the front view and the side view does not match. I have a picture of a prop made by Grant and the tips look like this but no cutout at the hub.
The geometry of the carved block is important because the blade pattern has to fit on the twisted helical plate formed by the carved back face of the block. When you develop the helical plate, it is not a rectangle or trapezoid; it has curved sides.
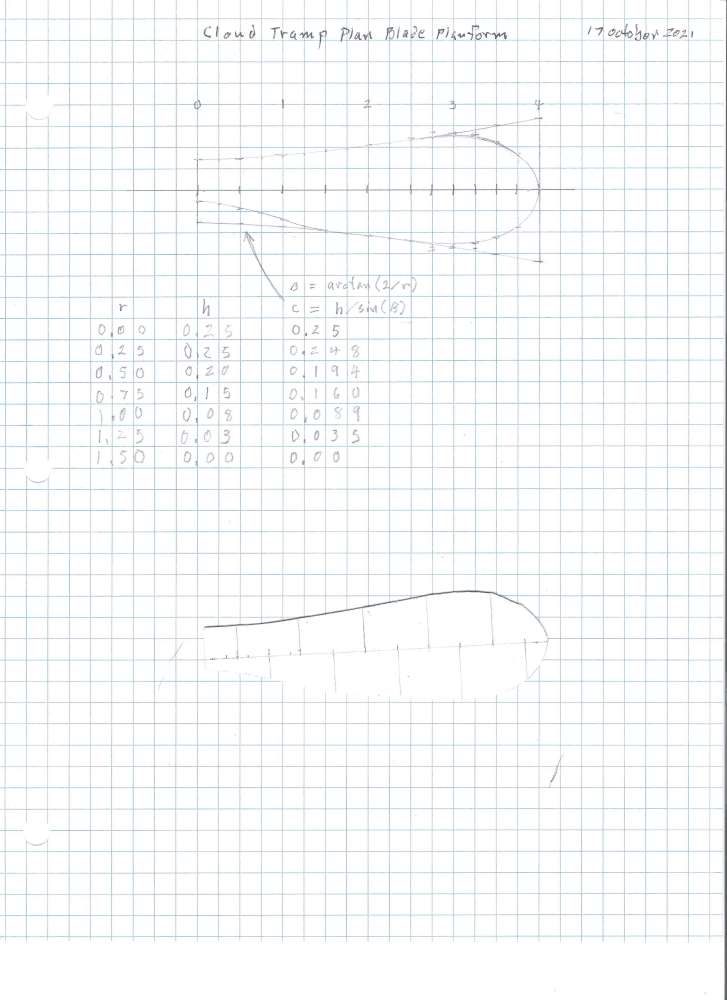
The left end is the thickness of the block and the right end is the diagonal of the end of the block. The placement of the curved edges of the pattern are derived from measurements on the front view and the cosine of the blade angle for the tip and measurements on the side view and the sine of the blade angle for the hub. The flat pattern can’t be placed on the helical back of the prop. The curved leading edge then lies right along the straight line of the X. The cardboard pattern has slits cut from the edges to the center every quarter inch from alternate sides so it can be twisted. It is clamped to the blade with clothes pins and the pattern traced onto the block.
Note that on the X-block the leading edges are colinear, not the case on the sawed blank.
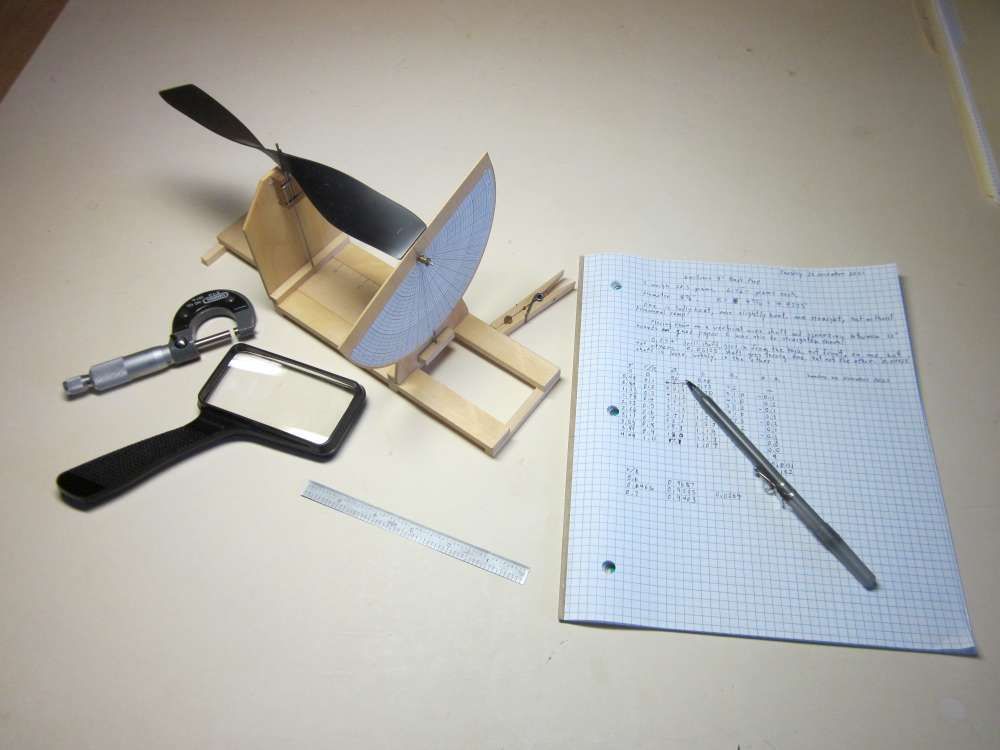
When I do the final sanding I check the blade angle on the prop gauge, so I get a constant pitch, helical prop.
That’s as good as I can get it. The prop has flown successfully. I don’t know that it is the best prop for the CT, I’m pretty sure not, but it will be flown in the comparison trials if I ever find a place to fly with still air.
If you build a half sized Cloud Tramp, Volare Products has old, 4 inch sawed blanks. Or even if you don’t. They’re so traditional, you have to drill the hole yourself. Volare also has 8 inch blanks, but they’re a bit fancier.