There will be indoor model airplane building and flying in the Moreland Community Center Gym on Sunday, May 23 from 4 to 8 PM. The address is 1850 Fallbrook Avenue in San Jose, 95130. Fallbrook is off Campbell Avenue, between Saratoga Avenue and San Tomas Expressway. Flyers 19 or over pay $6 and flyers 18 or under pay $3. Building instruction is available at $10 per 2-hour session. Separate materials fees are payable to the instructor. There is no charge for observers.
Last Week
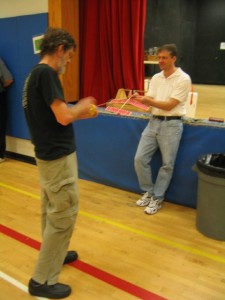
Mike held the prop as his friend Doug wound the motor. This is Doug’s first time flying in the Gym. He built the Dandiflyer at home.
He did a good job. It flew quite well, as you can see.
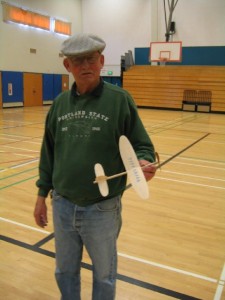
Truman had his Pipe Dream with a tube fuselage. Get it? Pipe.
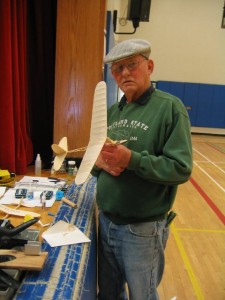
He also had a scale primary trainer glider launched with an elastic catapult.
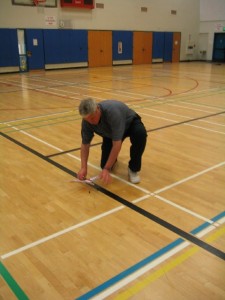
Phil tried wheels on his AMA Racer.
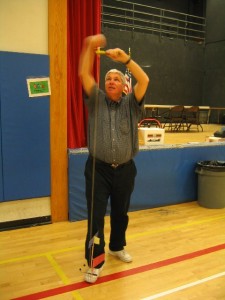
He wound his Dandiflyer with the assistance of a wire foot stooge.
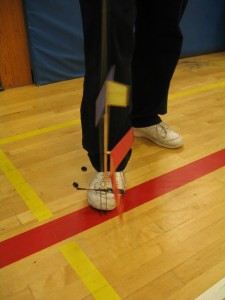
The hooks at the top hold the prop and the foot holds the base to the floor. Don’t let it get away from you with the rubber stretched.
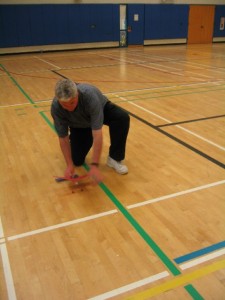
Away it goes!
New Klutz Book: “Rubber Band Powered Flying Machines” by Pat Murphy
I mentioned that Lou Young, Michael Norcia and I consulted with Klutz books to produce a book of rubber powered free flight planes. The book is now being shipped from Amazon and Klutz.
The book contains parts and materials for making three free flight rubber powered airplanes. Common to all three are foam plastic flying surfaces, wood sticks, plastic fittings and propellers.
The first is the Firebird, a 19″ span, off-the-shelf toy airplane with a plastic wing pylon and weighing 21.6 grams. The motor is 64″ of 1 mm square brown rubber that is made up into an 8 strand motor. I have remade it into a 6 strand motor for more turns. It will do about 1 1/2 circles in 15 seconds. It exhibits a strong up pitch under power and a strong down pitch in glide, making trim through the entire power pattern very difficult. It has a yaw divergence.
I made several modifications to lighten it and improve performance. It is my hope that these planes will stimulate learning and experimentation by kids, as my friends and I did with the North Pacific planes when we were kids and as shown in the article referenced last week:
My modifications are:
1. Omit plastic wing anglers.
2. Omit plastic wing clamp.
3. Omit wing hold down rubber band.
4. Omit plastic boom.
5. Omit pine stick.
6. Use a longer balsa stick with tailplane taper.
7. Crease camber wing.
8. Cut cambered gore at wing root to allow closed join at dihedral joint.
9. Glue wing to pylon, rather than use double sided tape.
10. Reduce fin size.
11. Reduce tailplane size.
I cut some 4 mm x 6 mm balsa sticks from some 1/8″ sheet. I cut a 14″ long piece. I cut a tailplane taper of 3 mm in 48 mm. This puts the tailplane approximately parallel with the prop shaft, eliminating the strong down pitch. The tailplane and fin came clean off the plastic tail boom and were glued to the new stick with Formula 560 glue. The wings did not come clean from the mount. I had to cut them off just outside the mount and square the ends. I cut a cambered curve in the wing roots so they would join smoothly at the dihedral juncture. I creased them in six places at 10% chord steps, starting at the leading edge, marked at the root and polyhedral fold line. (See the Lightning Looper instructions for how to do this.) I glued the leading edge cut at that fold line. The wings were glued to the mount with Formula 560. Spread the glue and let it get tacky. Strapped on with rubber bands and allowed to dry for several hours. The fin span was reduced to 52 mm and chord reduced to 45 mm. The tailplane span was reduced to 150 mm and root chord to 48 mm. Nice slow glide. Span is 19″, length 14 3/4″, weight 14.6 gm. I have got flights of 48 seconds, several circles and over treetops, maybe 40-50 feet high. With a better motor, this could get a flyaway. I put my name and phone number on the stick. I added a Sky Master landing gear for ROG flights. A Dandiflyer landing gear would also work, or make up your own. As modified, the plane would be a thrilling flyer for a kid. One further modification I would like to try is cutting down the pylon. Bringing the wing down will bring the CG closer to the thrustline, reducing the up pitching moment even more. I also think the wing incidence is too high. That will require cutting and regluing the plastic pylon.
The second plane is the Shooting Star, a foam AMA Cub reduced to a 4″ prop size. It is 9 7/8″ span, 10 1/8″ long and weighs 5.36 grams without the 0.53 gram motor. This was intended to be flyable inside the house. Because of its relatively high weight and flying speed, this is quite a trick, requiring delicate adjustments of wing position, rudder deflection and aileron to balance torque. I recommend flying it in a gym or outside at first, where the more open circle will not be so difficult to trim. Some early production models have 6# wood. This would seem to be an advantage, except that the 3 mm x 4 mm stick breaks easily at the prop hanger when it collides with walls. I recommend reinforcing the sides of the stick at the nose with a coating of glue. I have replaced my stick with some 10# wood that has withstood many collisions without damage. The wing did not seat well in the wing mounts. I removed the tape, lightly slit the underside of the wing along the centerline with a razor and straightedge to permit a crisp dihedral break and glued the wings to the mounts with Formula 560 glue. The prop hook had to be opened a bit to get the motor on without nicking it. A small balsa wedge is needed to hold the wing mount in place on the stick.
The third plane is the best flyer right out of the box. It is the Lightening Looper. With a short, strong motor, tightly wound, it will loop. With a longer, thinner motor, it will fly away, so put your name and phone number on it. This is the plane I told you about previously. It is 11″ span, 9″ long, weighing 4.6 grams, compared with the original North Pacific Skeeter weight of 6.3 grams. It has a full span cambered wing, formed by creasing the foam wing at the first six 10% chord points and maintained by a cambered wing mount. In the instructions we tell you to put the wing on top of a piece of paper, put a steel rule on top of the crease line and pull the paper up to form the crease. Another way is to put the crease line on the edge of a block of wood and press down on it to bend it over the edge. The clear tape on top of the wings is not necessary. The holes in the wings do not match up with the locating pins. Somebody forgot that the chord is shorter than the arc length. Start the wings at the trailing edge and press the wing down on the front pin to mark its location. Punch or cut a new hole in the correct location. Trim away the leading edge corner as needed so the foam clears the mounting box. Cut off the pins projecting up from the wing clip boxes. Glue the wing clip boxes to the underside of the wing platform with 560 glue to make the assembly more rigid. The top piece may be discarded. Glue the wings to the wing mount with 560 glue. You can glue the tailplane and fin onto the stick if you prefer. We supplied double sided tape because glue can dry out or leak. The prop hook must be opened to get the motor on without risk of a nick. The kit comes with a 38″ length of 0.044″ x 0.065″ Tan Super Sport. You are told to make three 6″ motors. I made a 6″ motor and a 12″ motor. I put the 12″ motor on the plane. (You might try the 12″ motor on the Shooting Star as well.) Wing position was adjusted to get balance at about the high point of the camber. A small balsa wedge must be forced into the forward wing mount box to keep it from sliding. Be careful how, when and where you fly this one. As I said before, mine flew away on its first flight, never to be seen again. I have since flown a couple more for videos and all flew well. I have even flown it with a 7″ x 1/16″ office rubber band.
When I received a pre-publication copy of the book, I had not worked on it for some time and was impressed at how much information we got into this small book. It is 48 pages with lots of bright color illustrations. Notes on Penaud and the Wright brothers, parts of a plane, building instructions for each plane, rubber motors, preflight checklist, test flights, trimming and troubleshooting, field size and wind considerations for outdoor flying, indoor flying, power to loop, basics of air forces, forces in flight, use of control surfaces, games and contests, what next.
The online Klutz store has a section for extra supplies. Replacement kits are available from the link above. The nice thing about this is that you can use parts to build planes of your own design. It is my hope that kids will use parts and salvaged foam to make their own planes. It is also my hope that we will put out another book with more planes. Your comments and constructive criticism are welcome.
See you in the Gym,
Gary Hinze


