I have long wanted to build and fly kites like those of Pacific Oceania, as shown in Clive Hart, Kites, an historical survey, 1967. It was called to my attention that tapa kites had recently been seen flying in Hawaii. An Internet search found a vast quantity of information about these kites. In particular, I was impressed by a research project by Damion Sailors to recreate and evaluate historical kites of the region. Reconstructive experimental archaeology adds a scholarly purpose to making these kites.
I decided to start with a Hawaiian Honu kite, so named because of its resemblance to the carapace of a honu, sea turtle.
Materials
The traditional kites of Pacific Oceania are made from native plant materials. Those materials are not handy everywhere, so substitutions must be made. The original kite may have been sparred with twigs of the tea tree, but bamboo also may have been used. They may have been covered with tapa, made by pounding strips of mulberry bark. Japanese Kozo paper is also made from mulberry bark, so is a good substitute. Various plant fibers were used to make the lashings and rigging on these kites. I will use thread or cotton kite string.
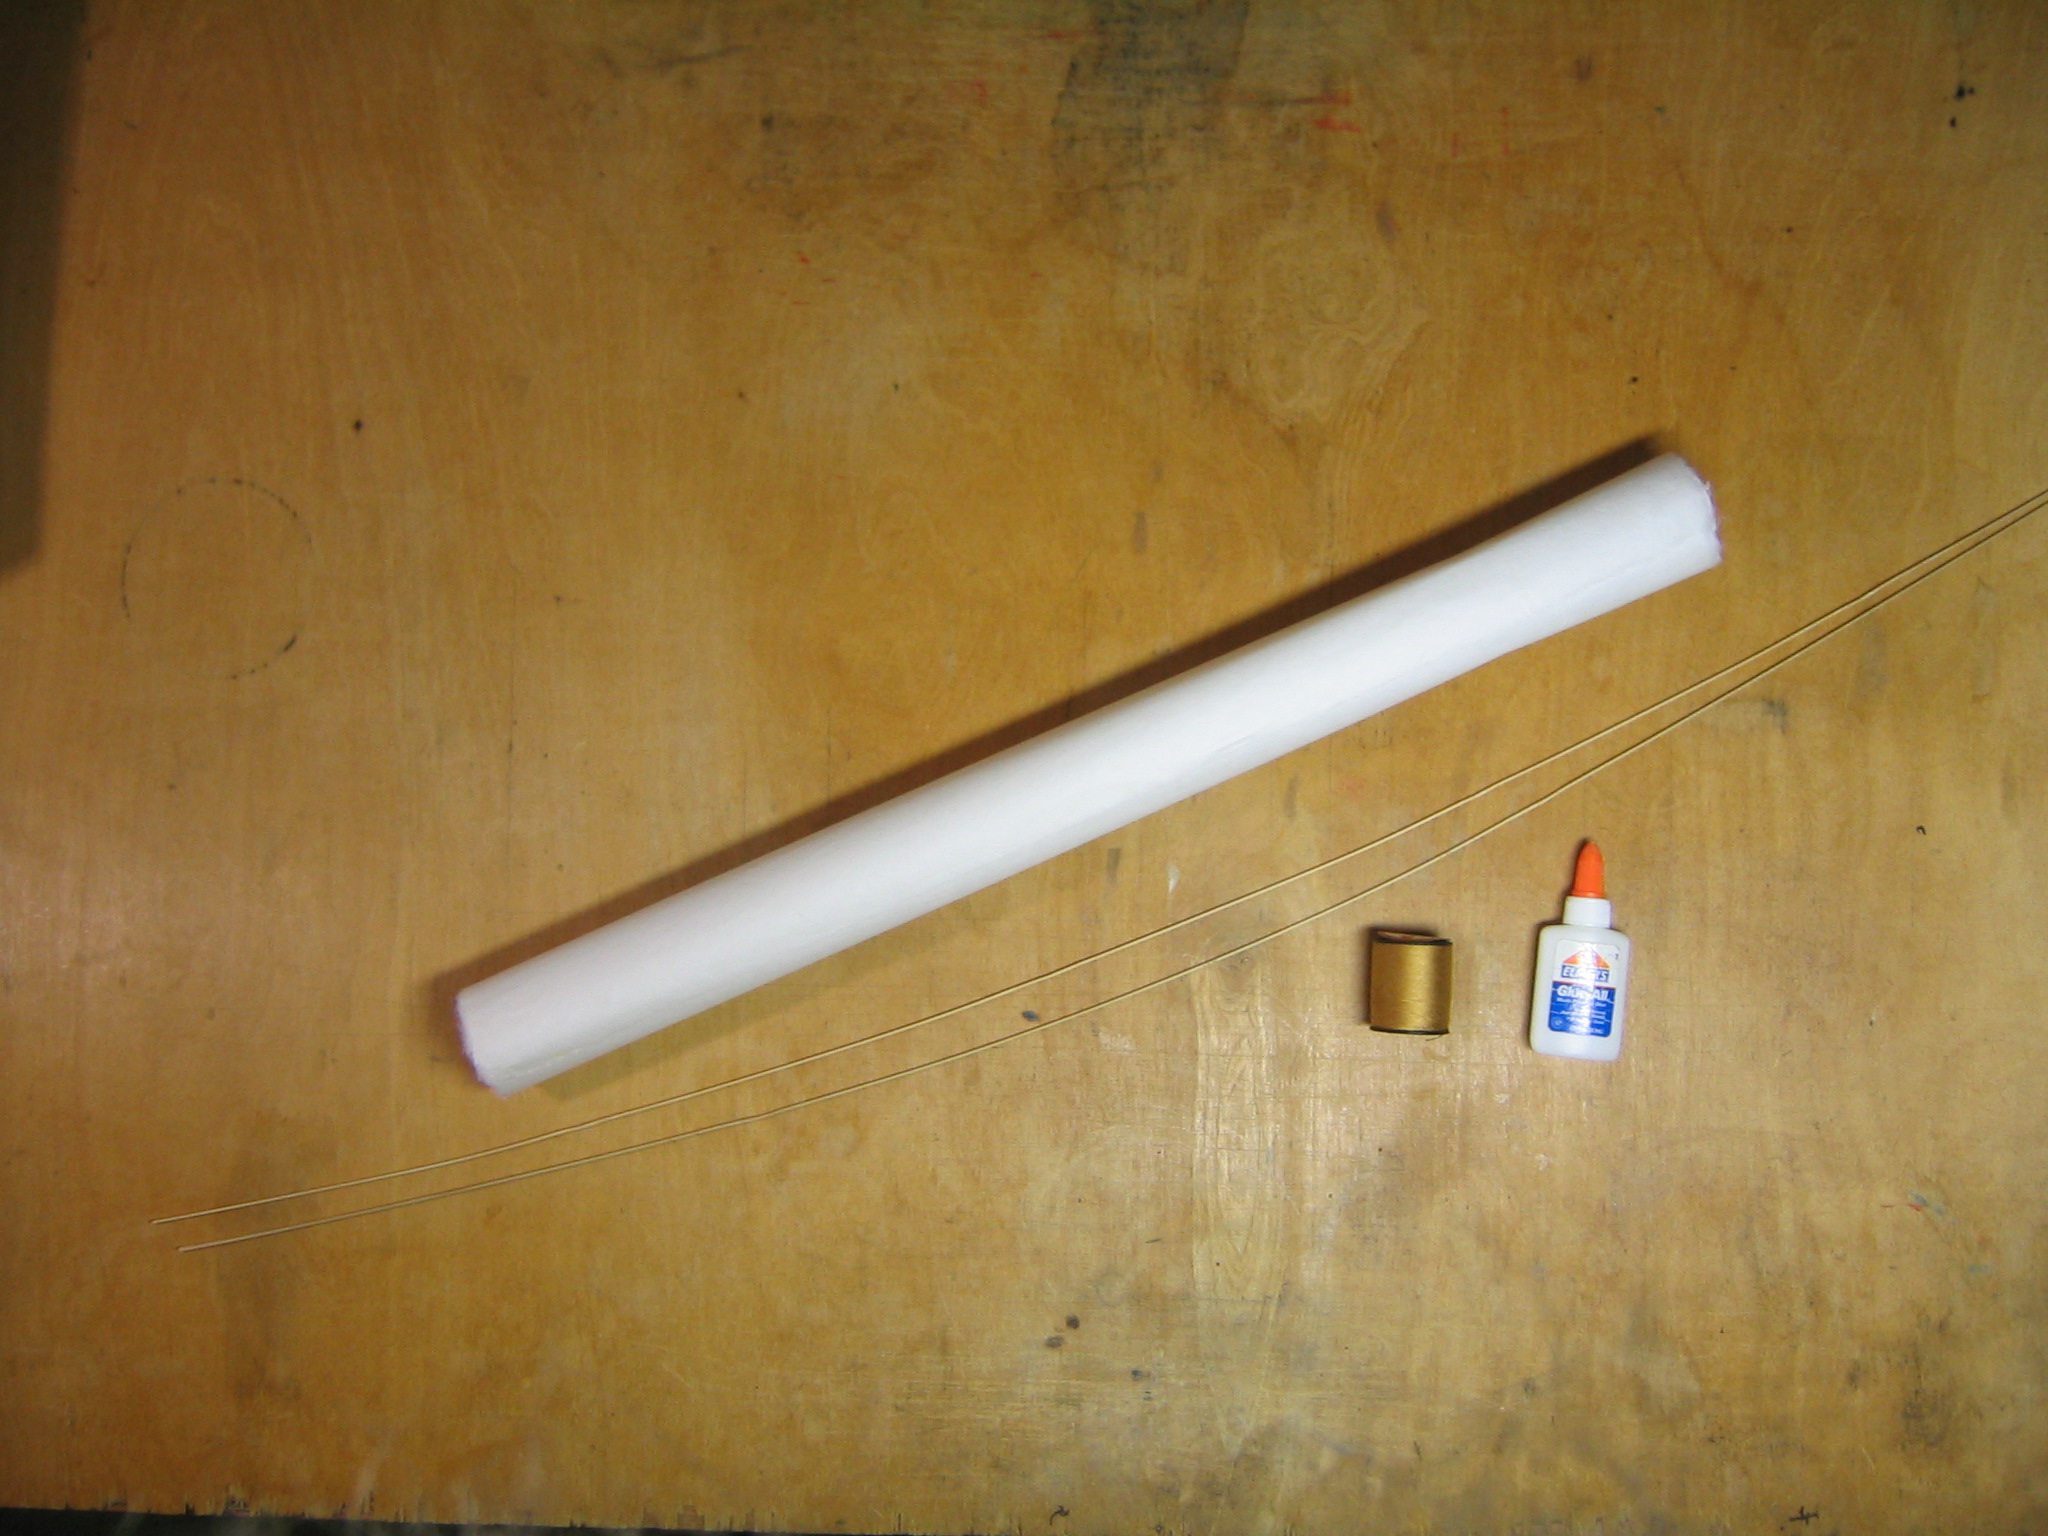
These are the materials used to make this kite. This is going to be a small kite with less than a square foot of surface area. Lightness is important in a small kite. The covering is kozo washi weighing 26 grams per square meter, from Hiromi Paper. The spars were made from two pieces of 1.5 mm x 3 mm x 3.5′ bamboo from Drachen Foundation. These sticks were measured to be 1.43 mm x 2.86 mm x 41 3/4″. Seven of them weighed 31.0 grams, so the linear density is 1.27 grams per foot. Lashings and rigging will be some strong thread. Glue for paper and wood in a convenient bottle with a dispenser nozzle is handy.
Mark and Cut Sticks
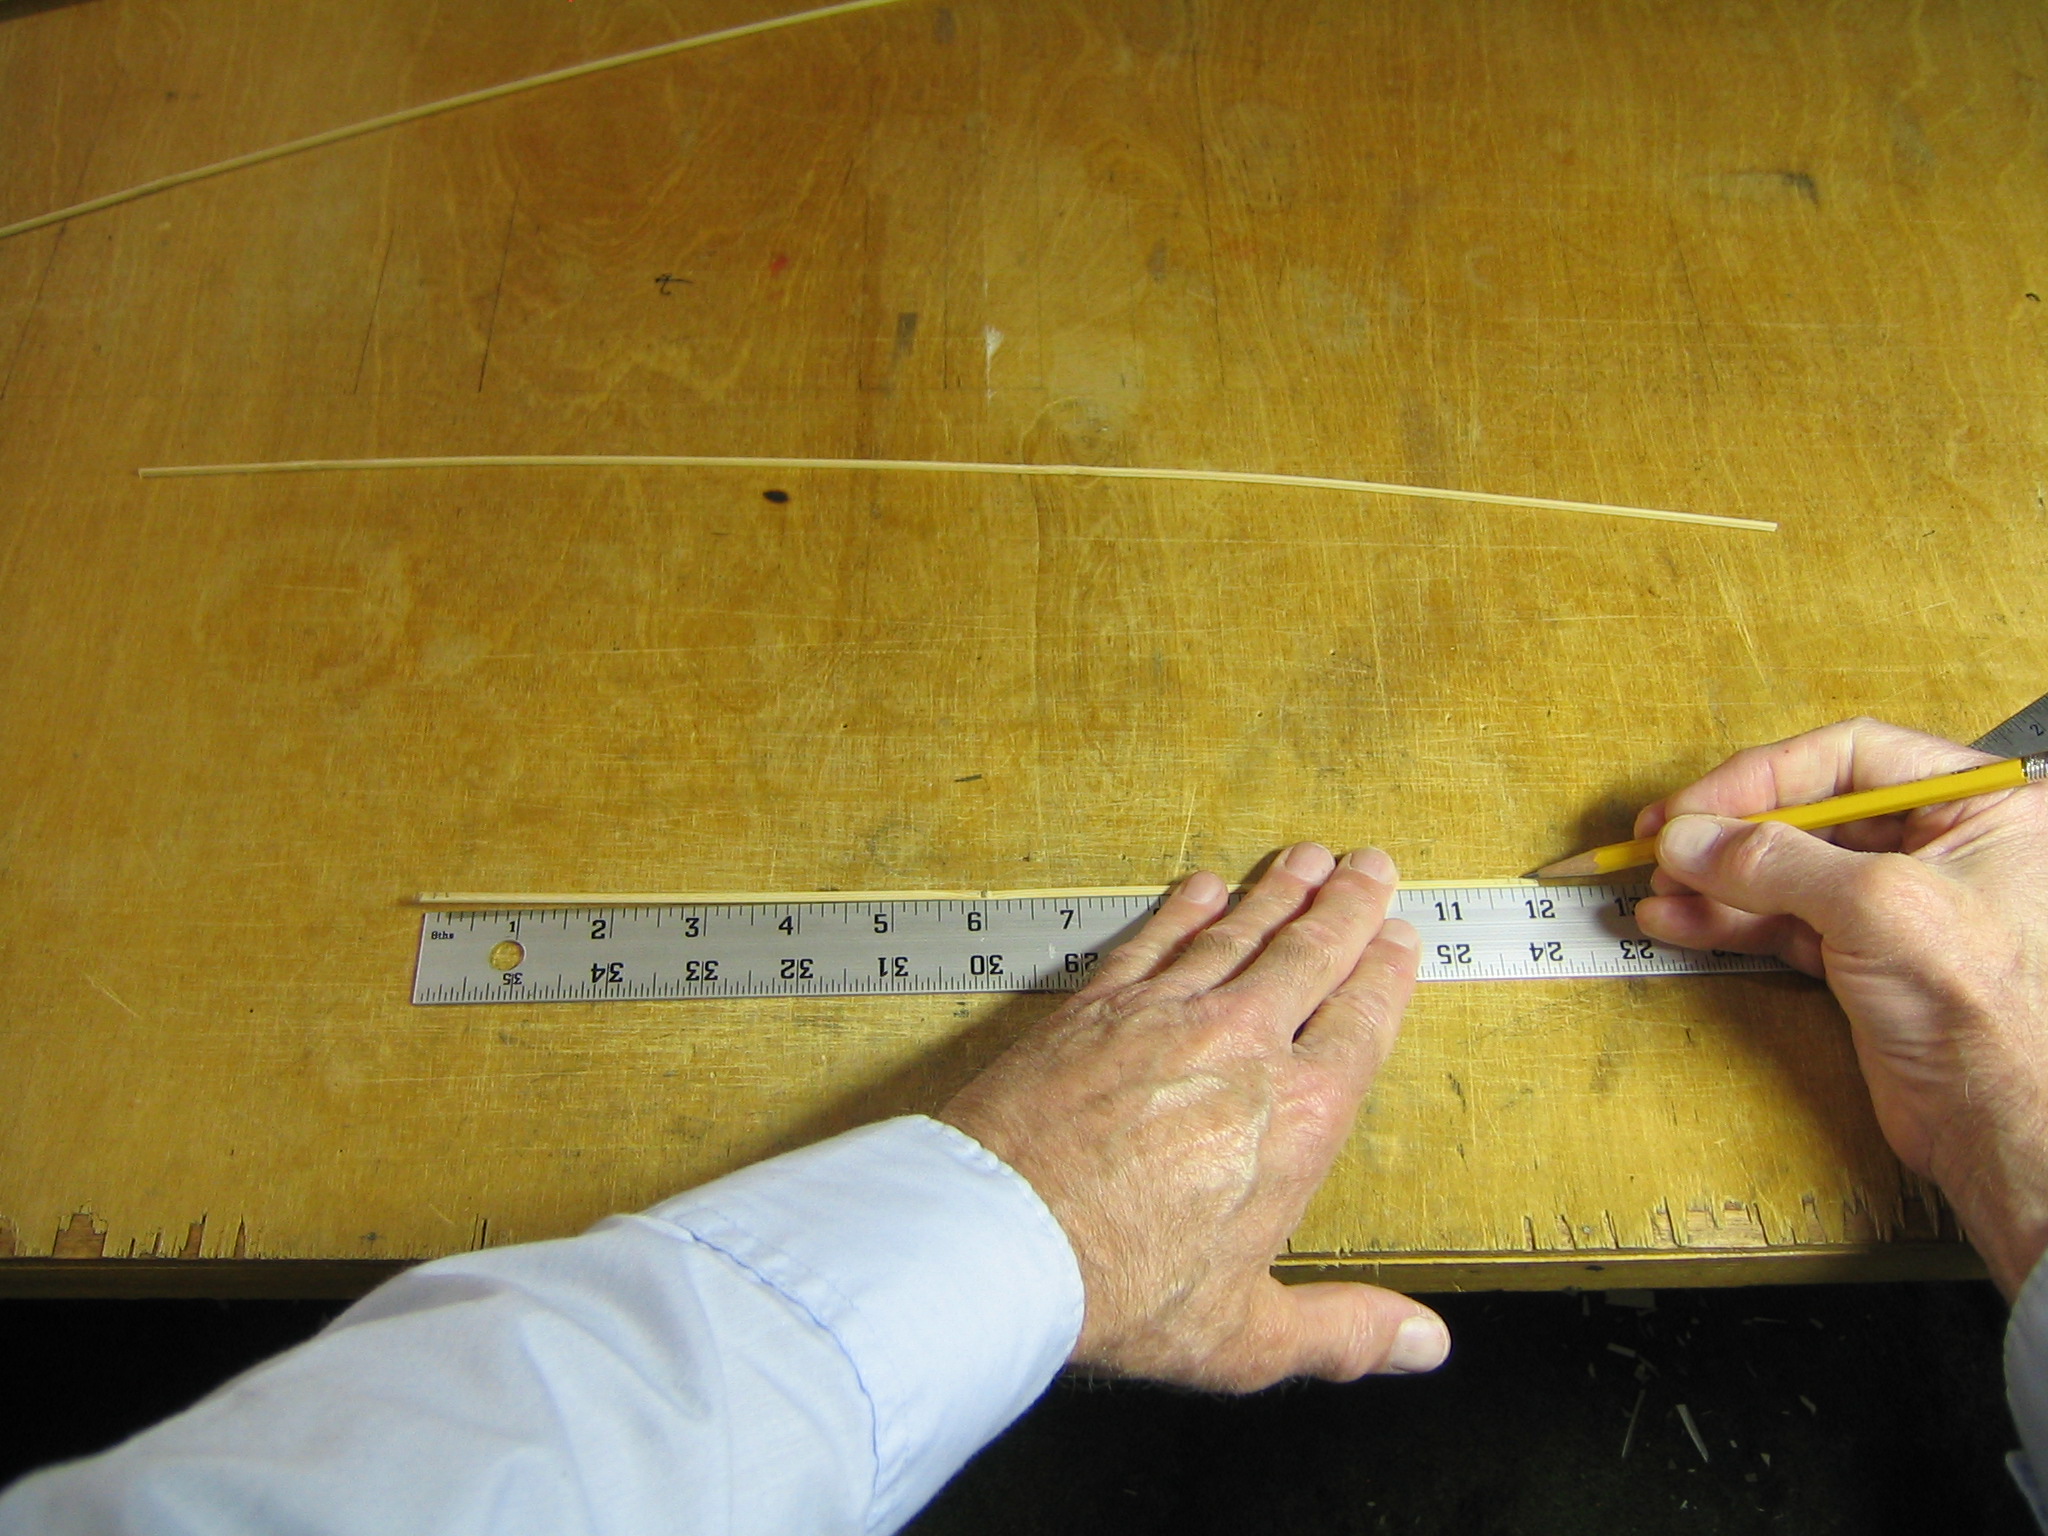
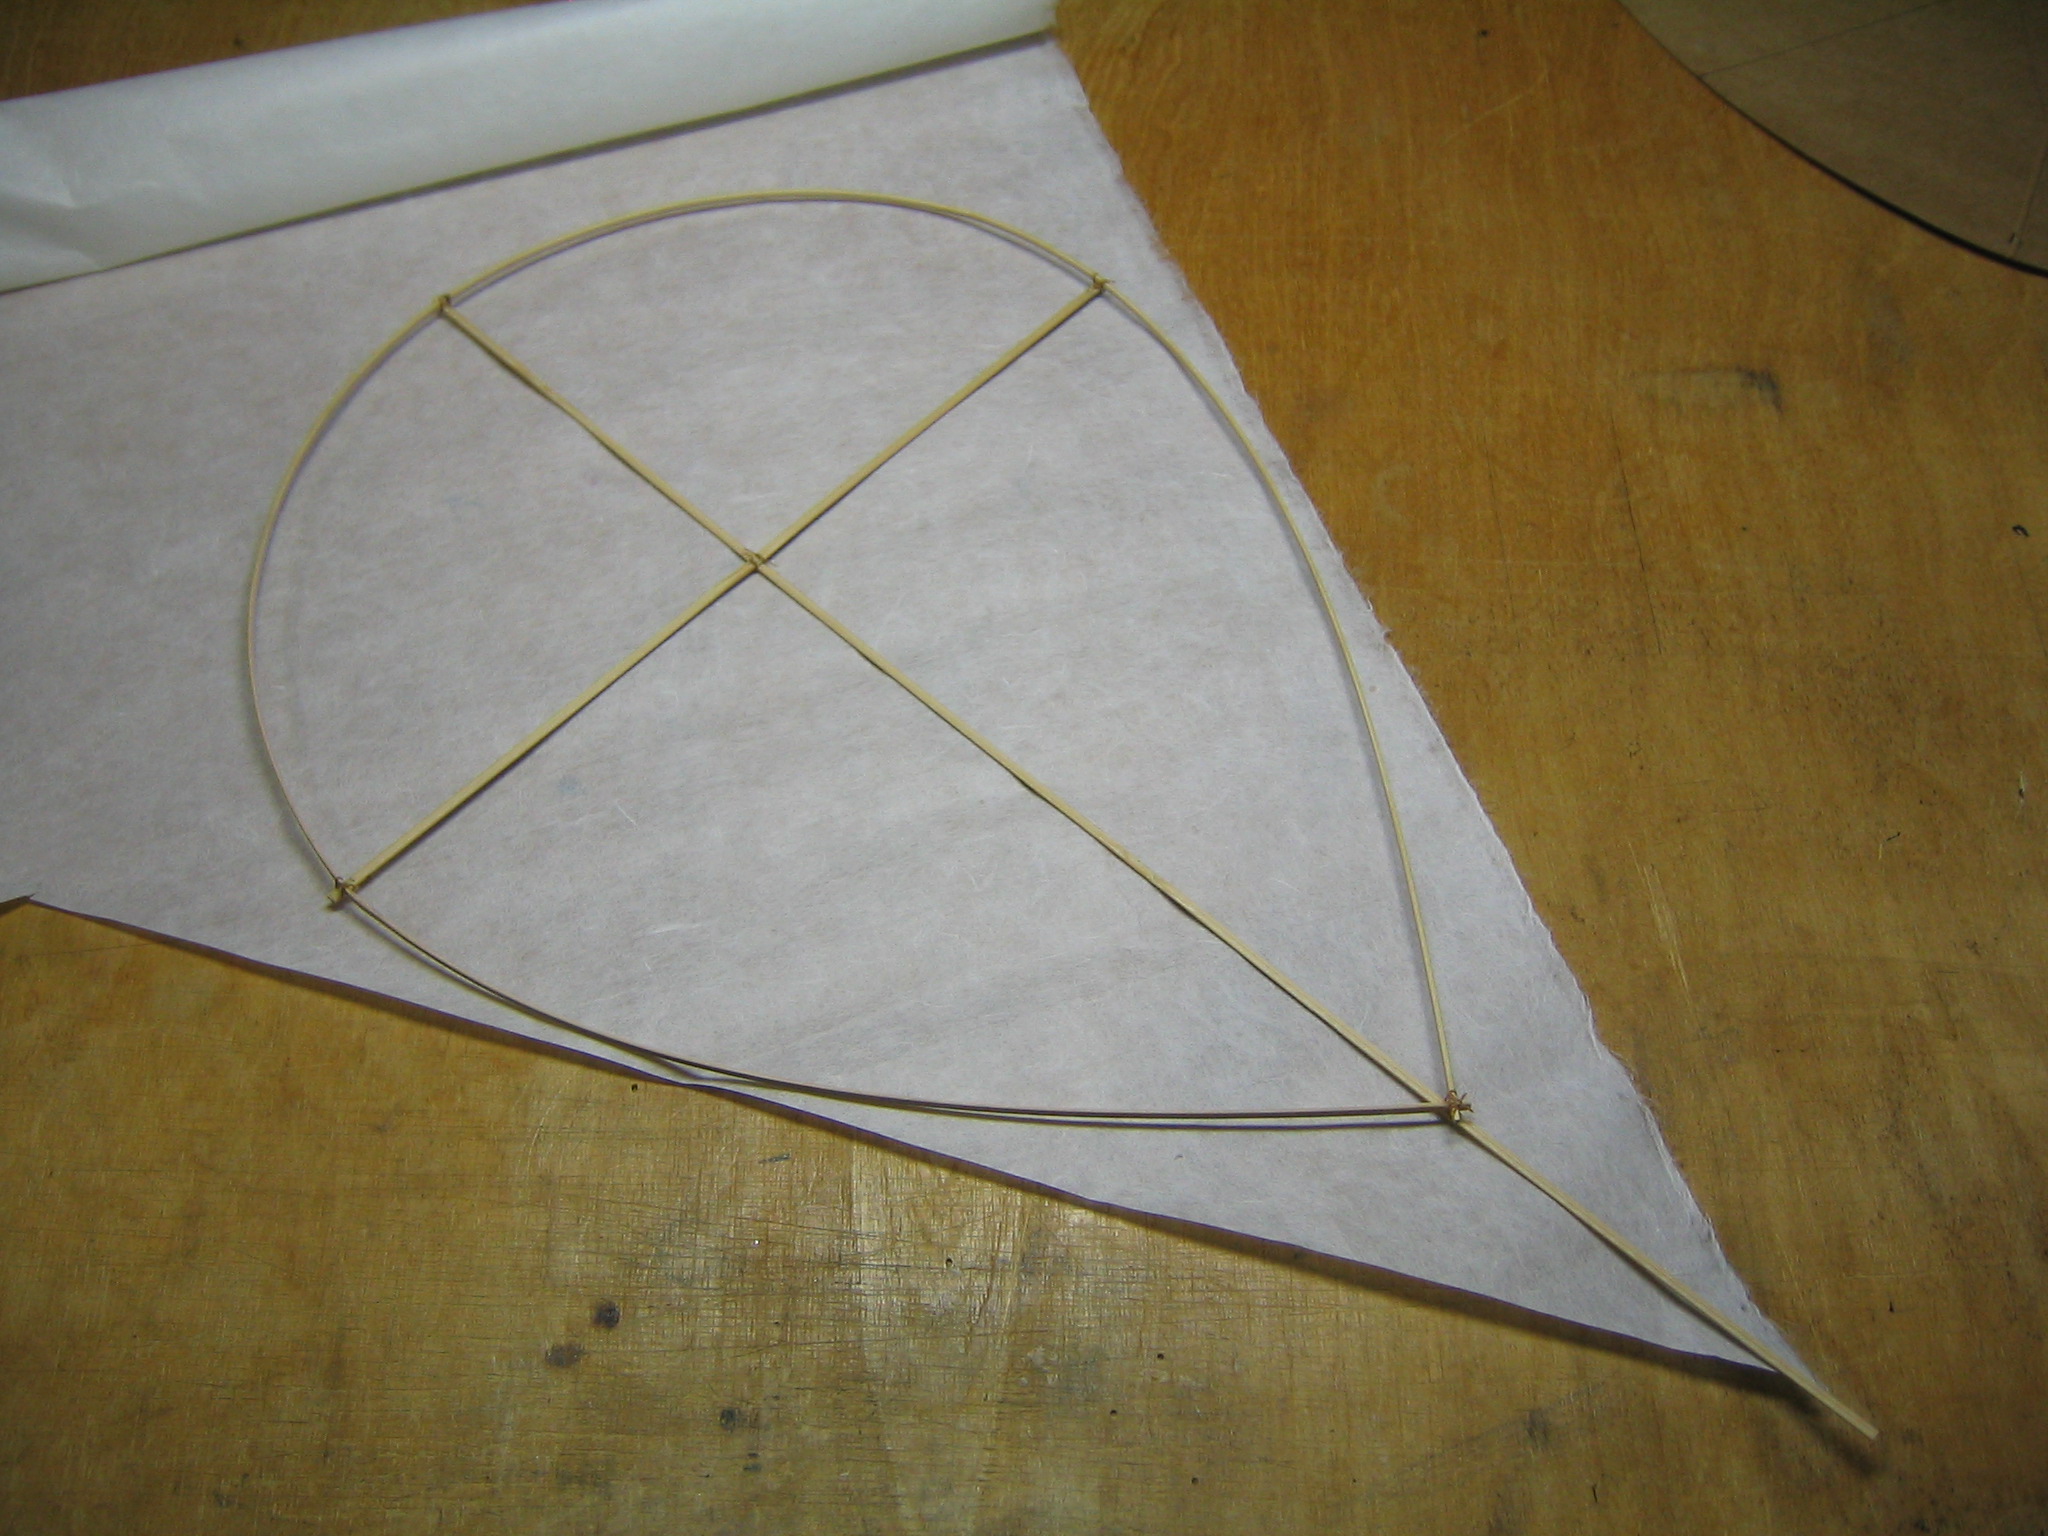
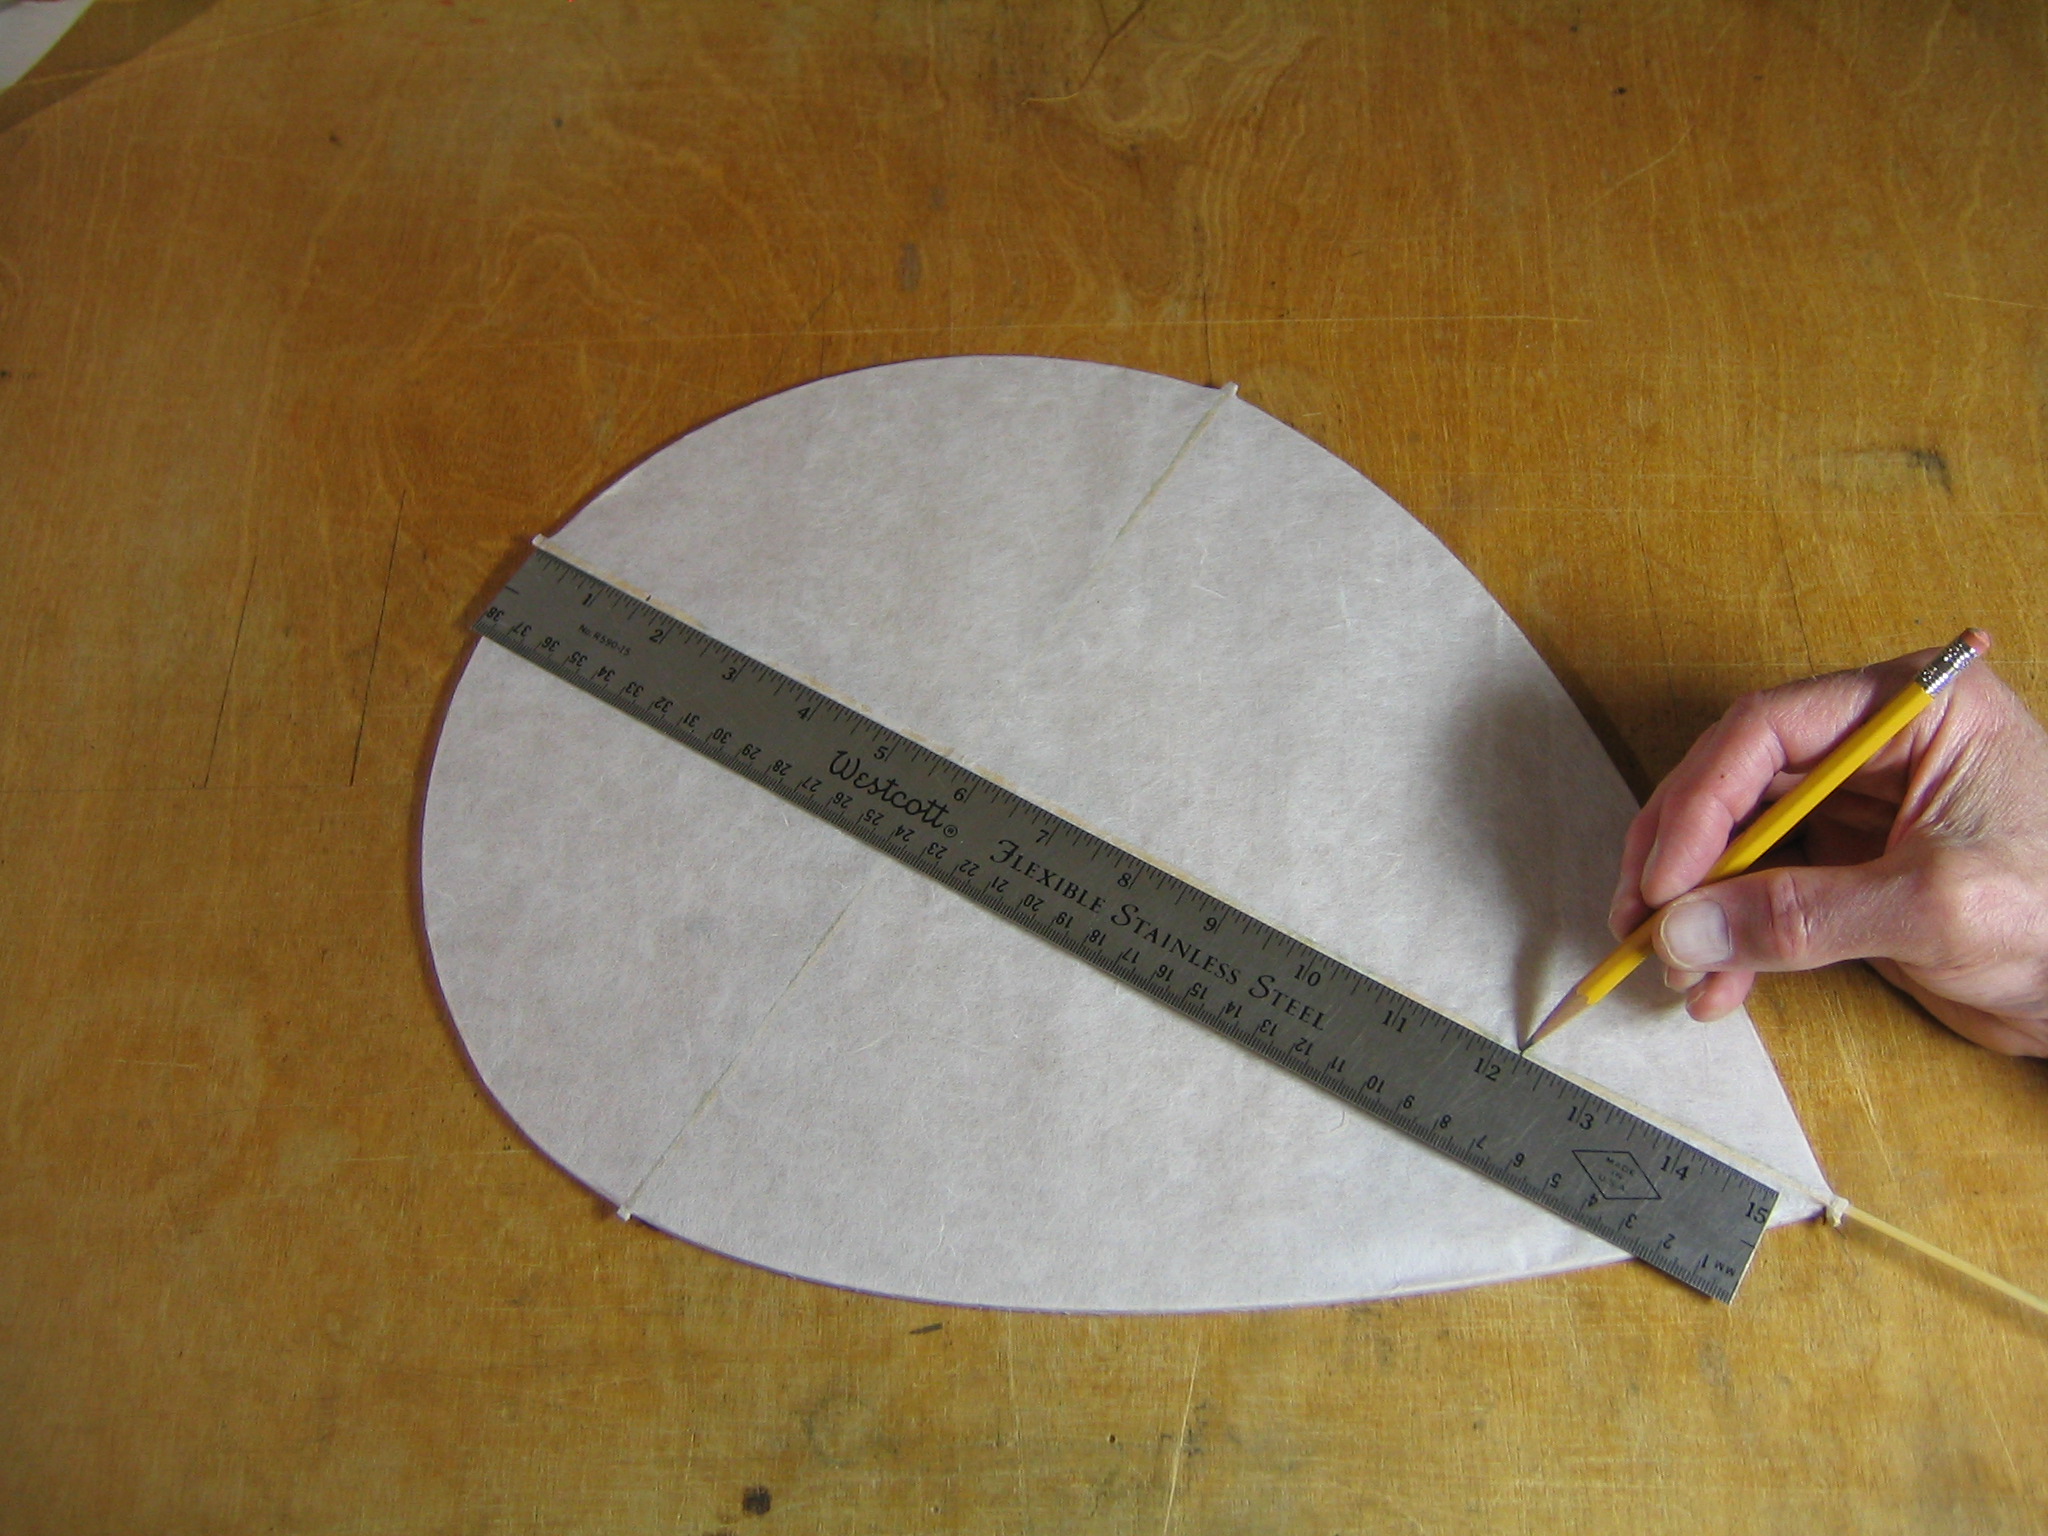
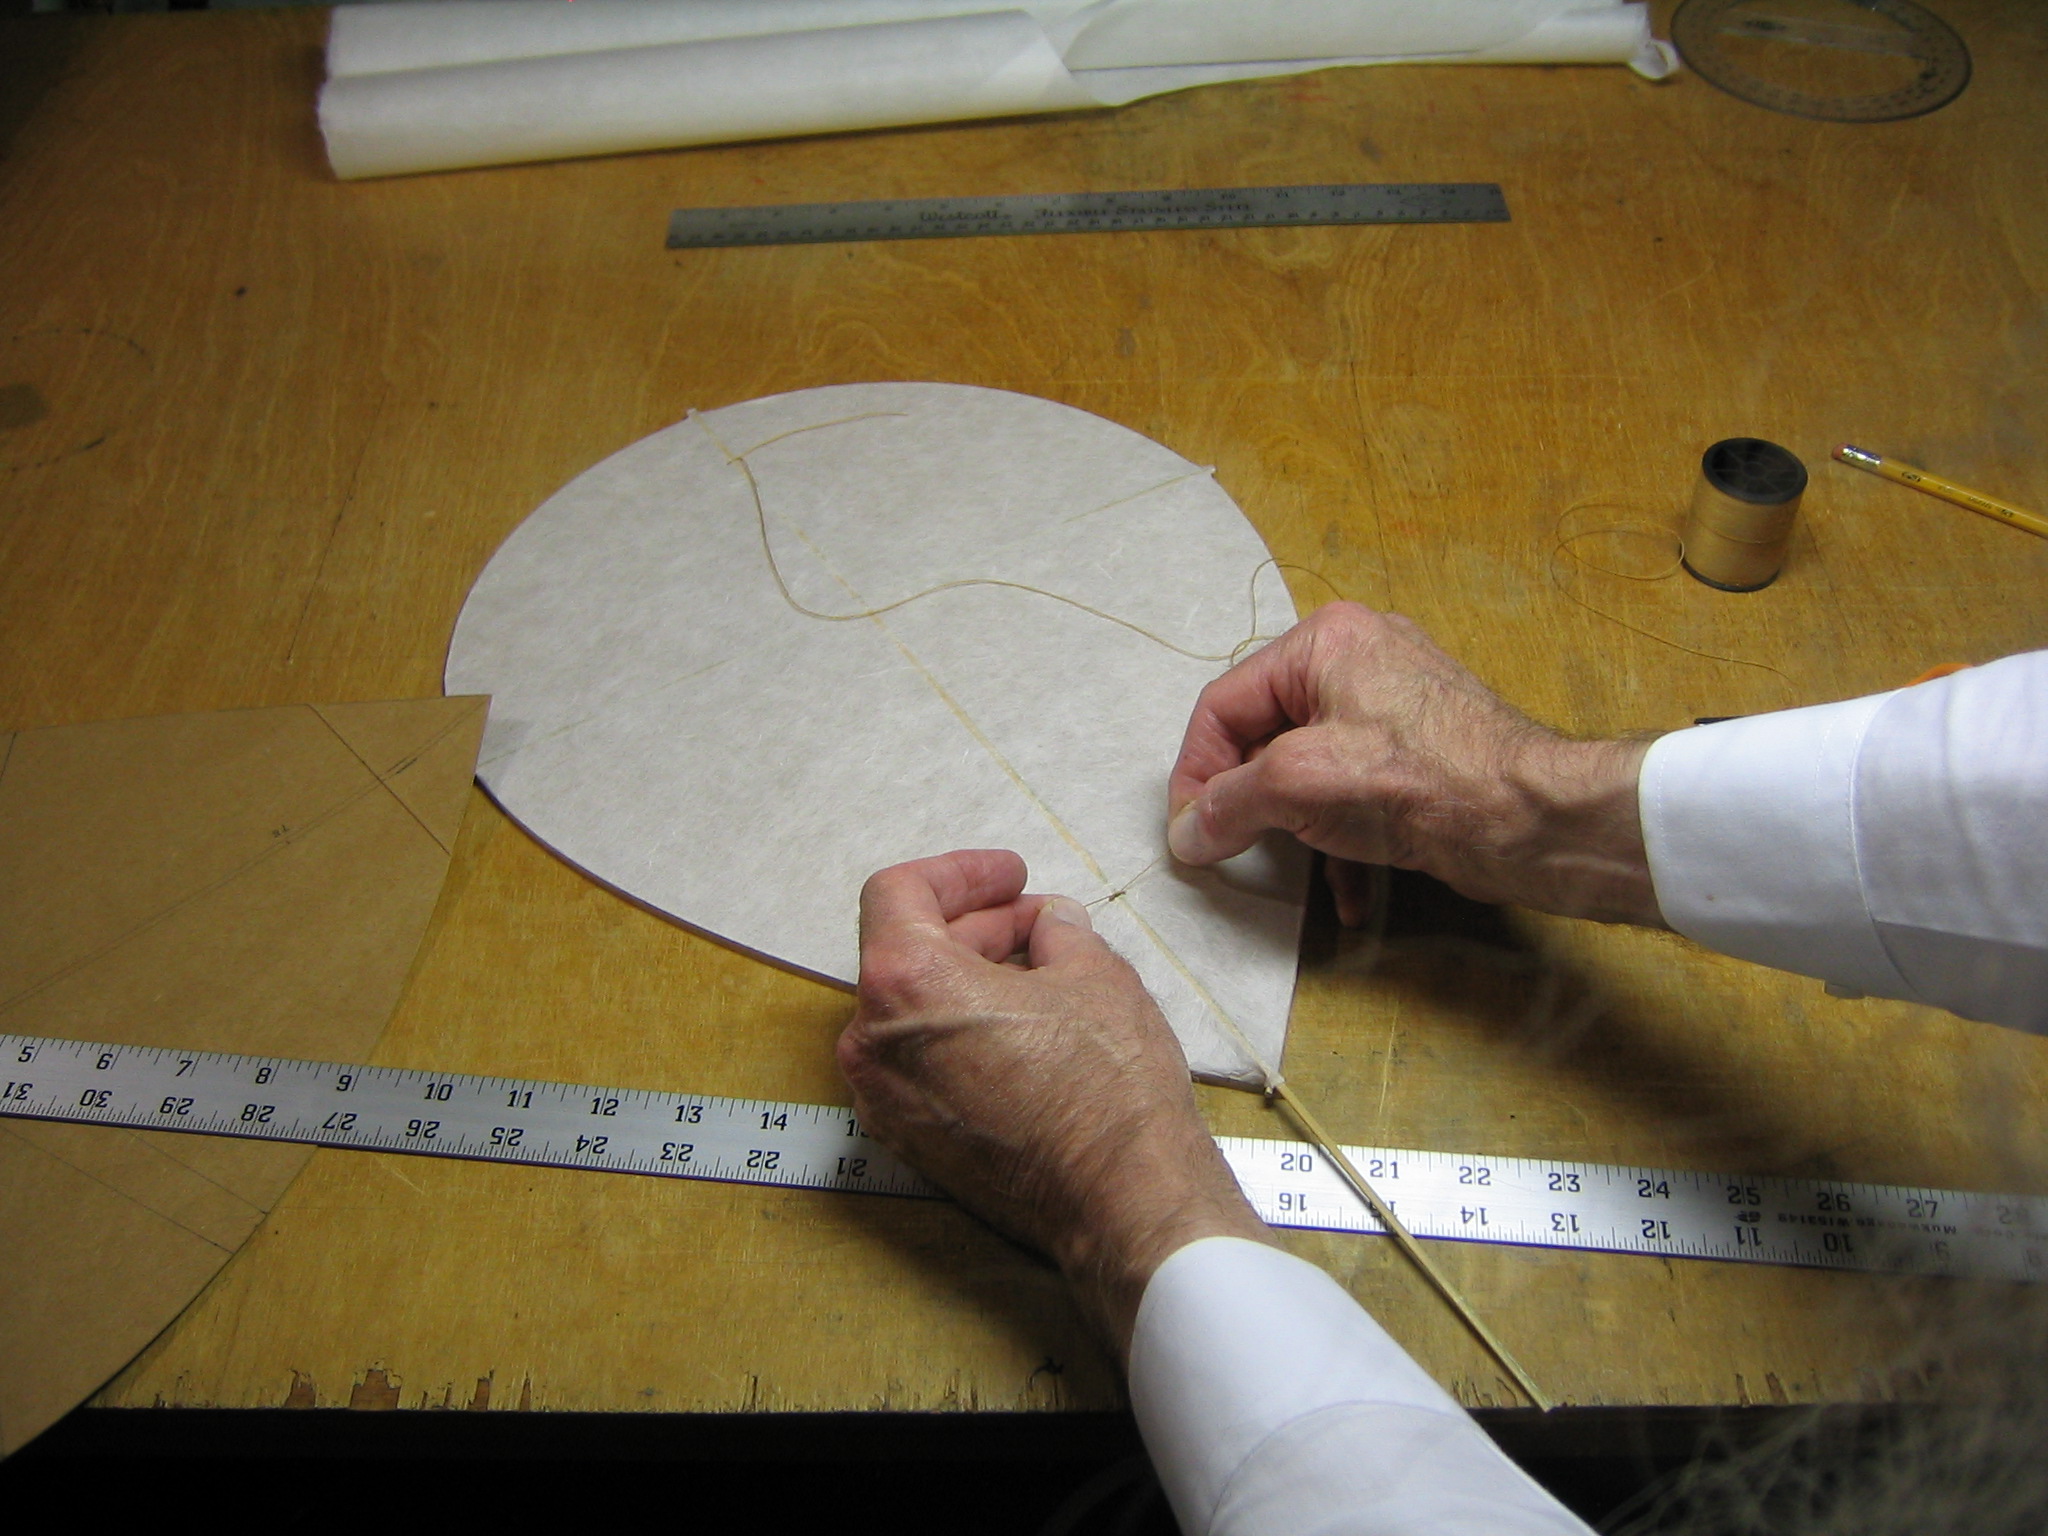
One stick will be used full length to make the perimeter. The locations where the other sticks cross it must be measured and marked.
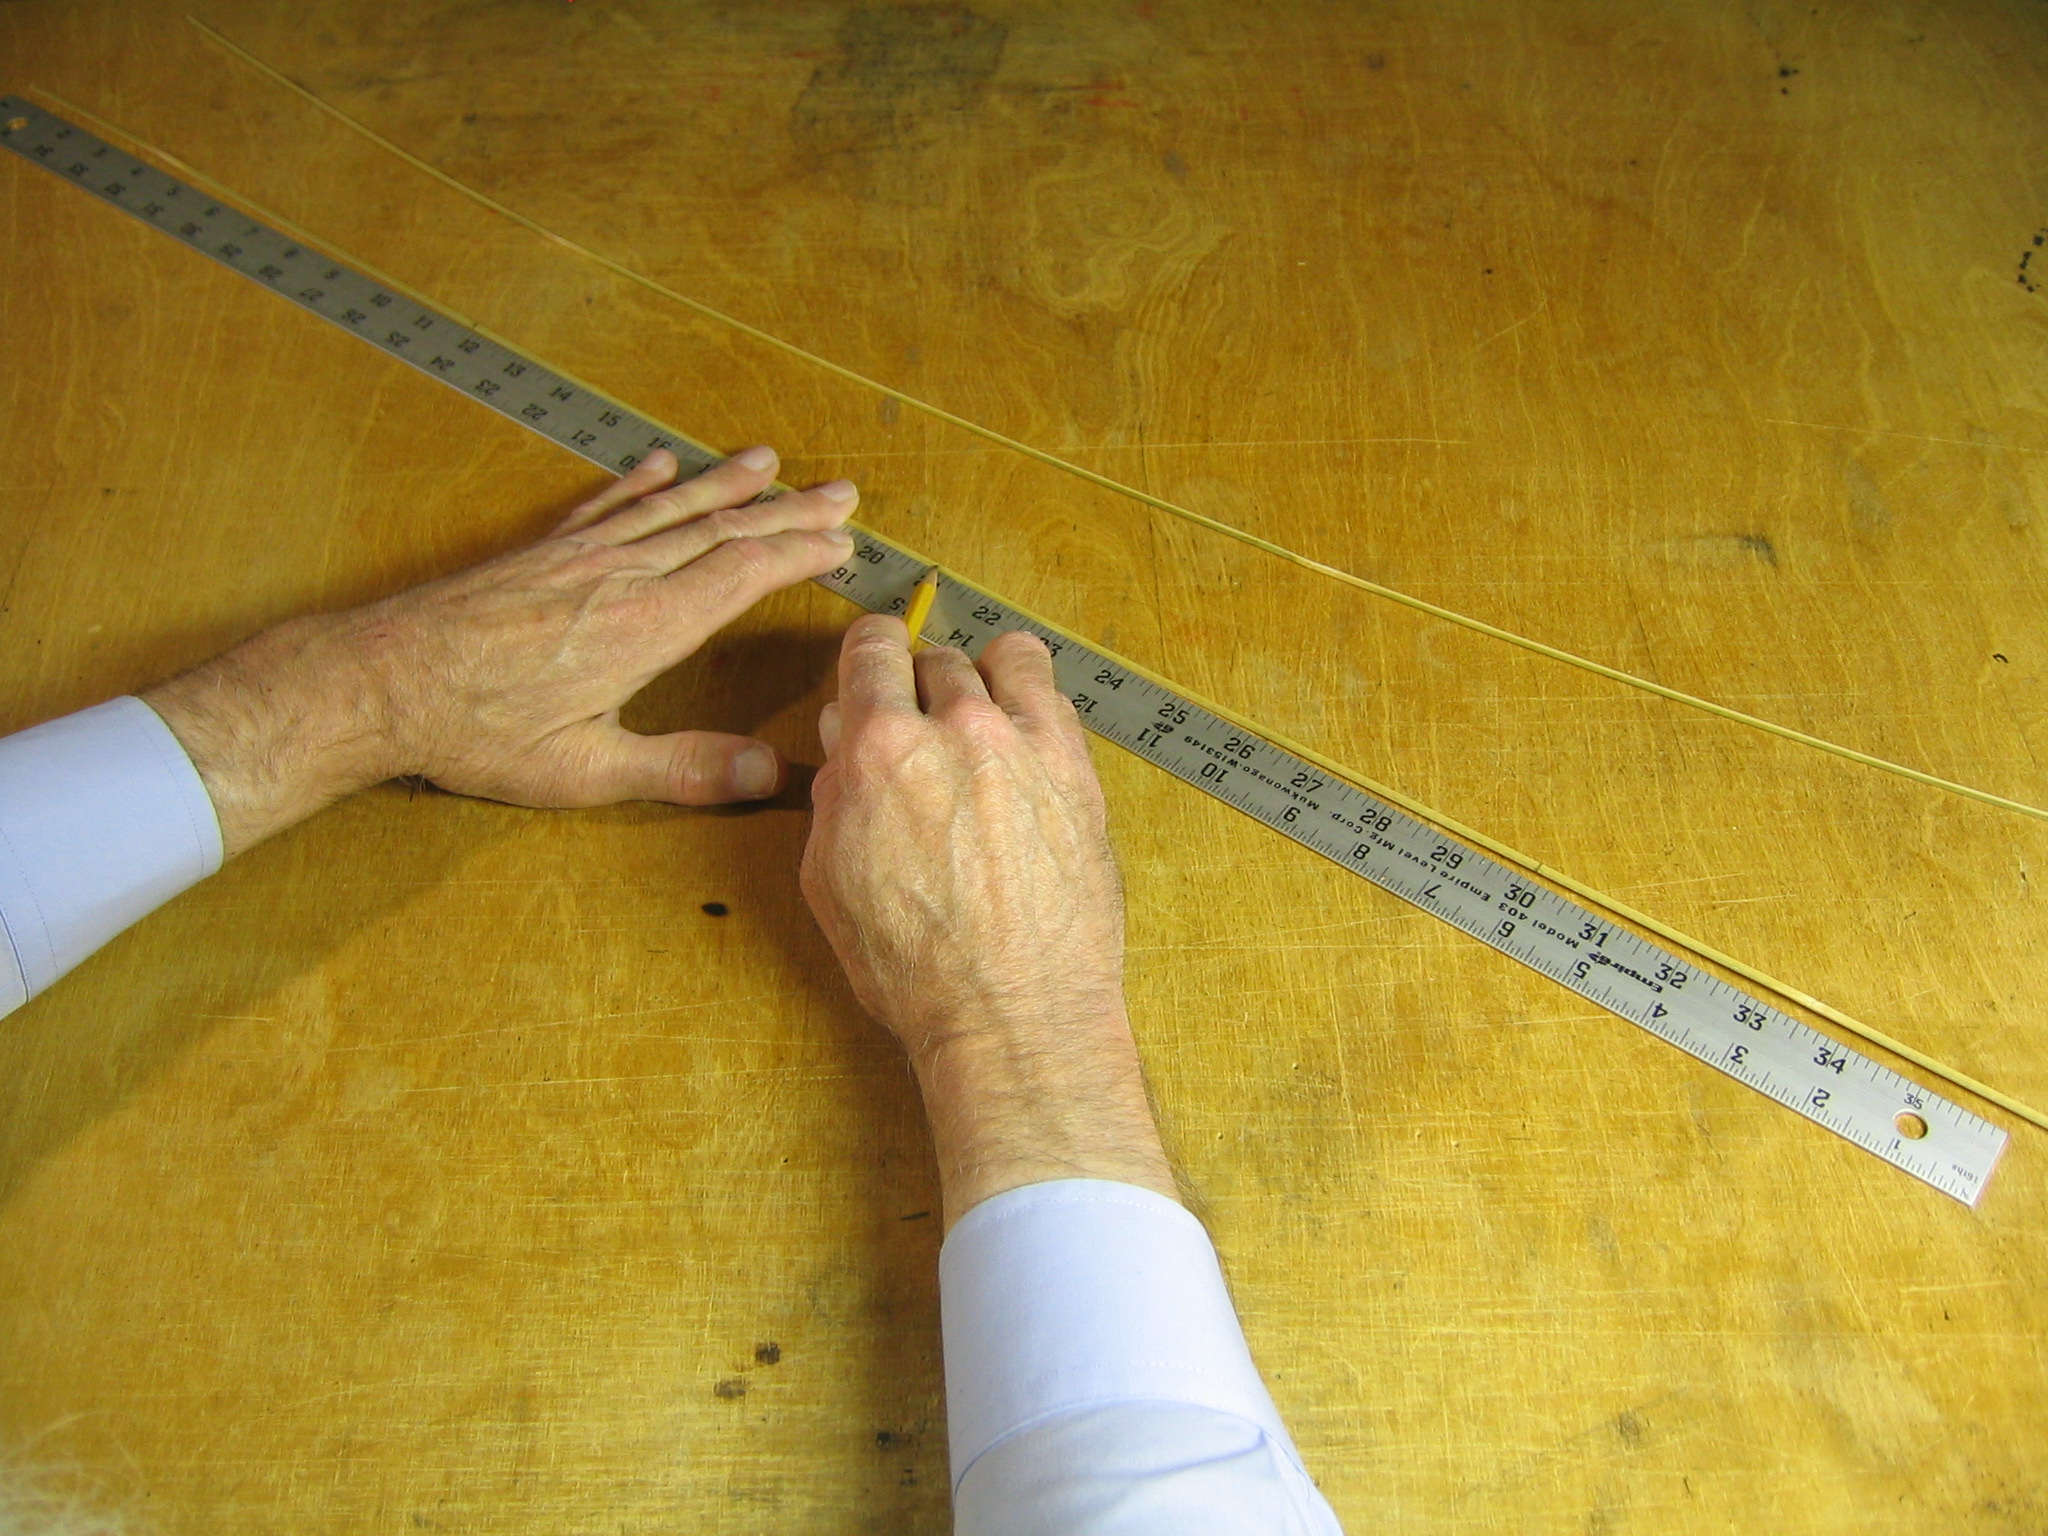
Mark at half the length. This stick was 41 3/4″ long, so half way would be 20 7/8″. This is where the spine will be tied to the perimeter.
Mark 9 1/8″ on one side of the center, or 11 3/4″ from the end.
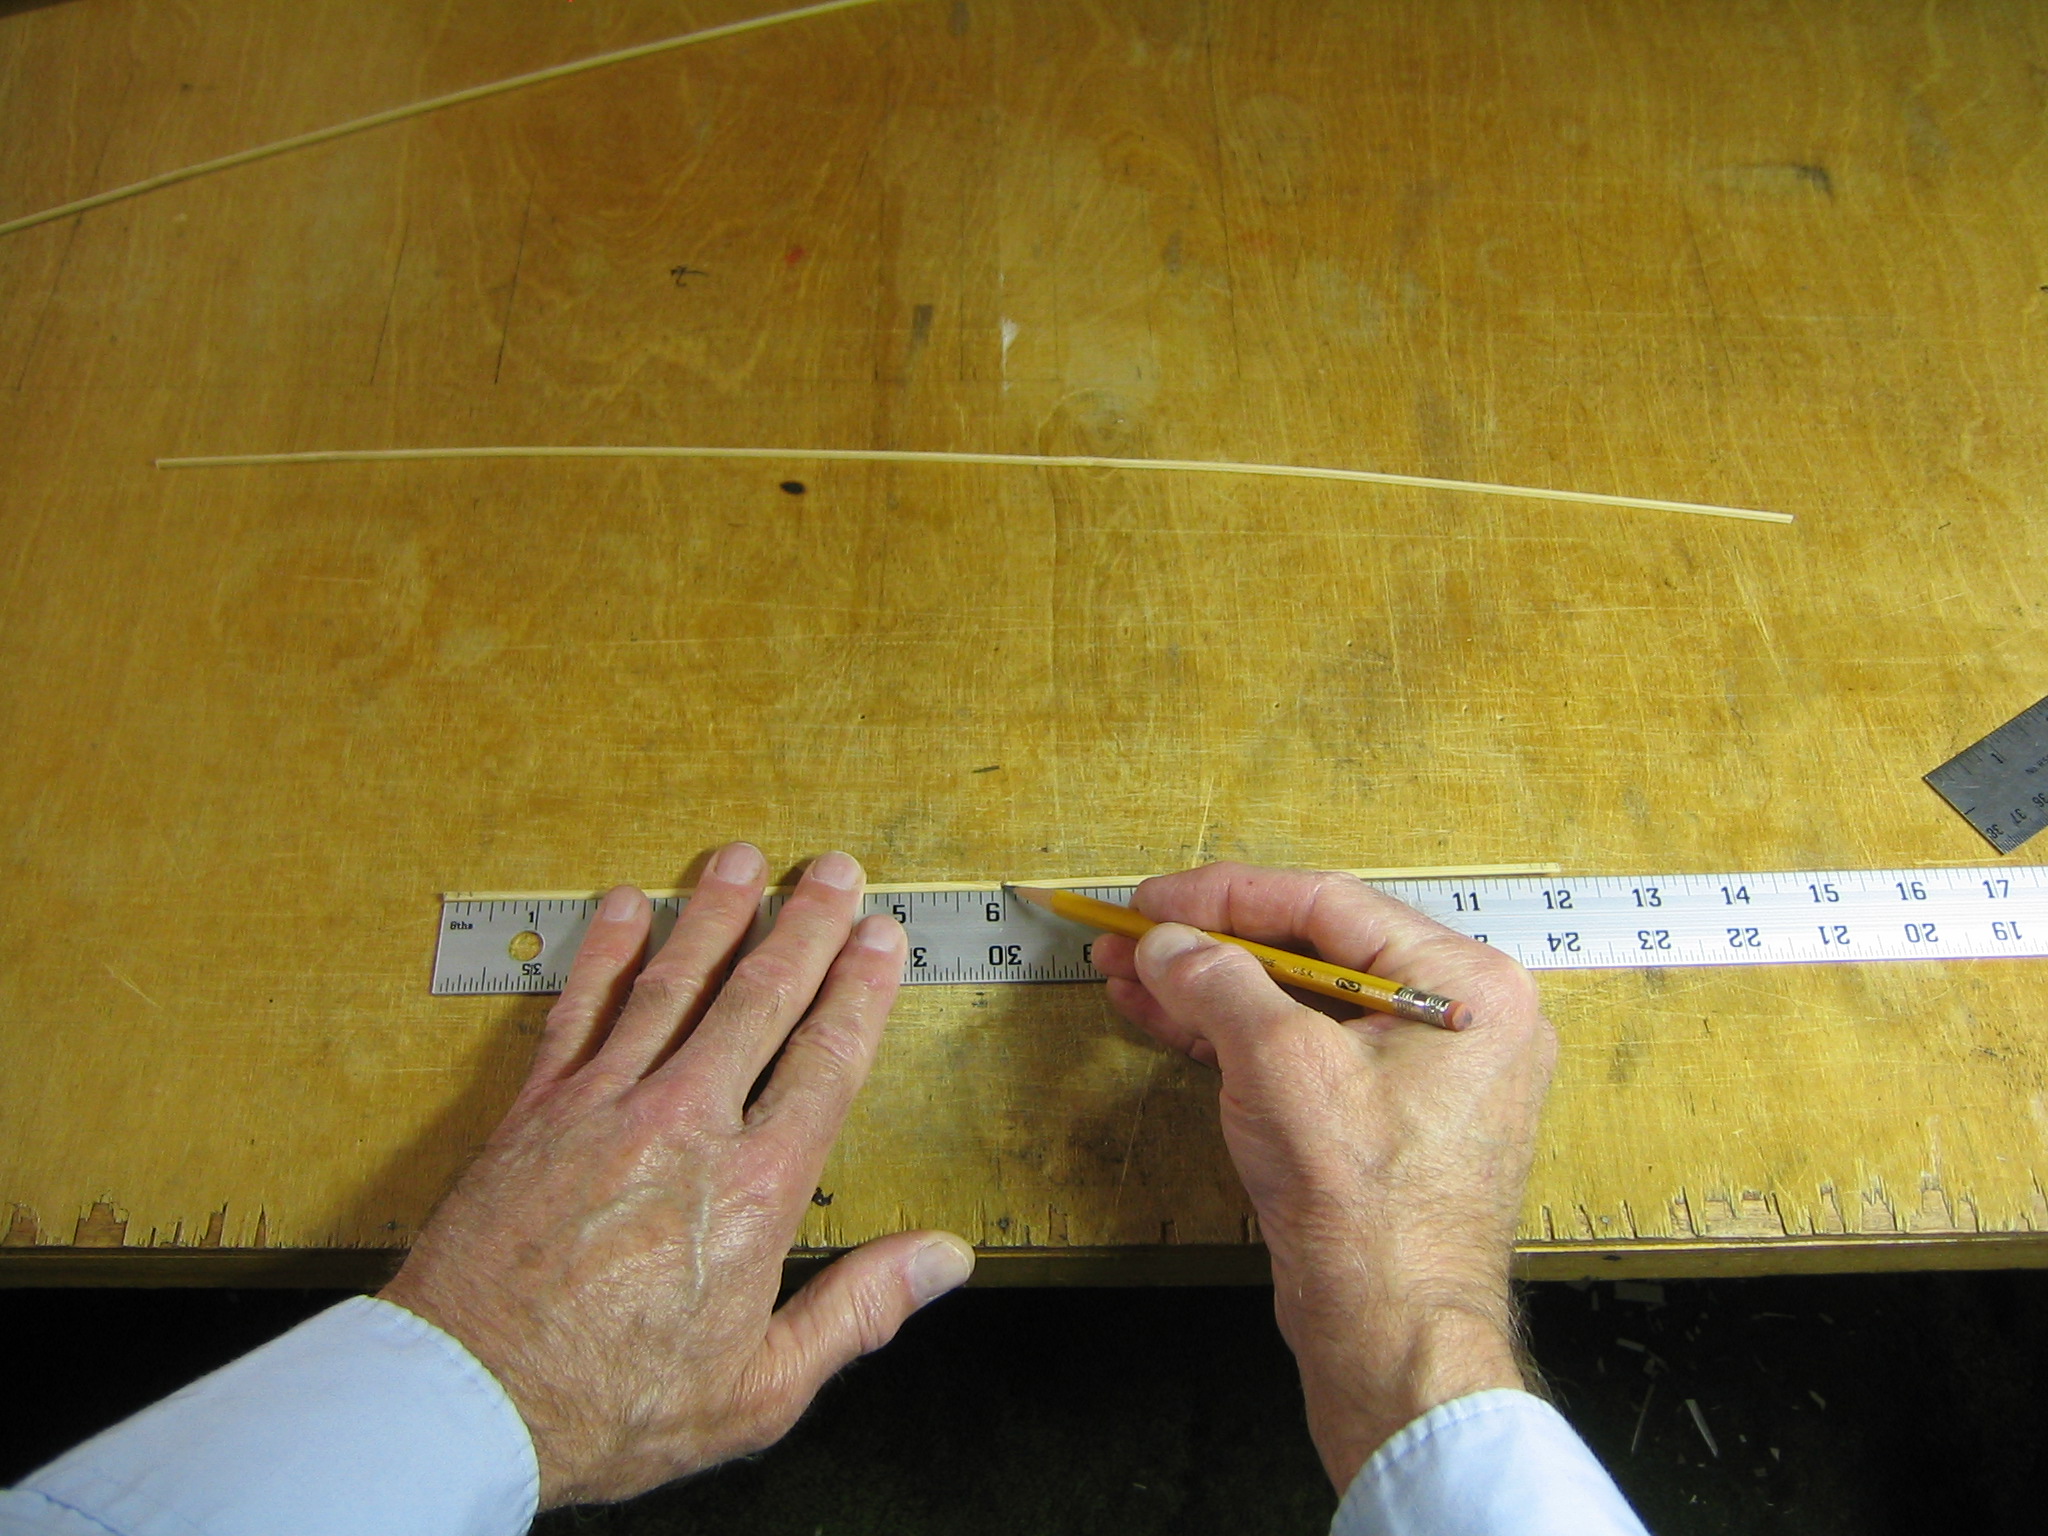
Mark 9 1/8″ on the other side of the center, or at 30″ from the end. These two mark where the cross stick will be tied to the perimeter.
Mark 1/4″ from each end of the 41 3/4″ stick. This is where the ends of this stick will cross each other.
The other sticks must be cut to length. There will be a 20 1/2″ spine and a 12″ cross stick. (After flying this kite I decided the spine should be longer, to make the tail more effective. Cut the cross stick off at 12″ and keep the entire remaining 29 3/4″ length for the spine. This allows a longer sting behind the kite.)
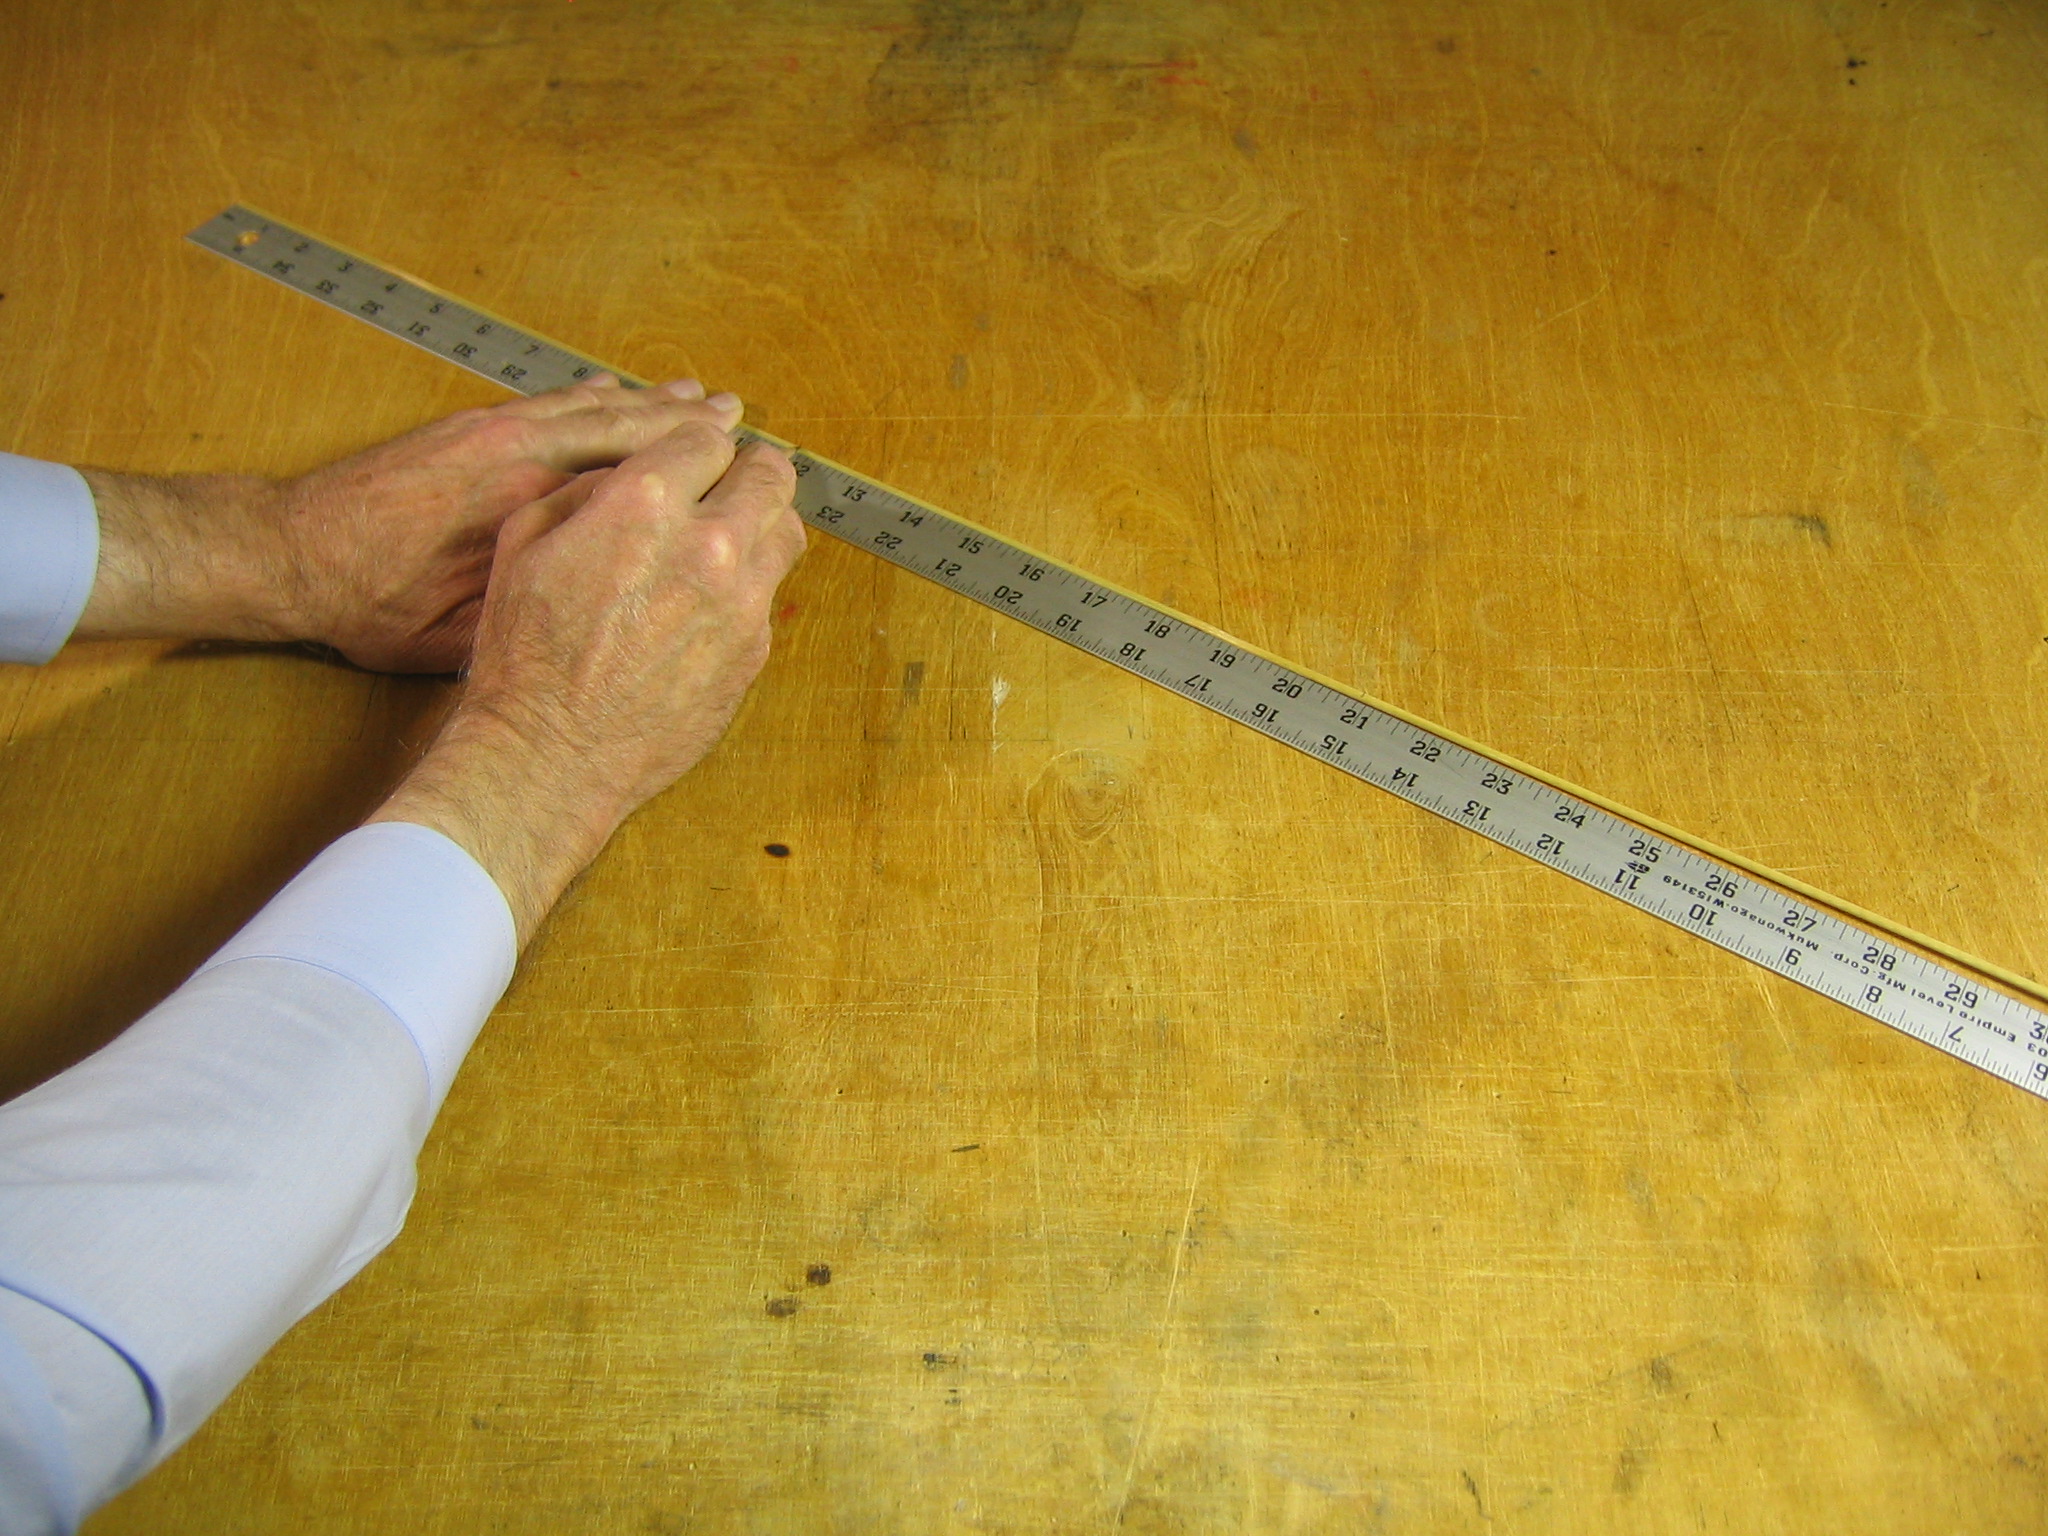
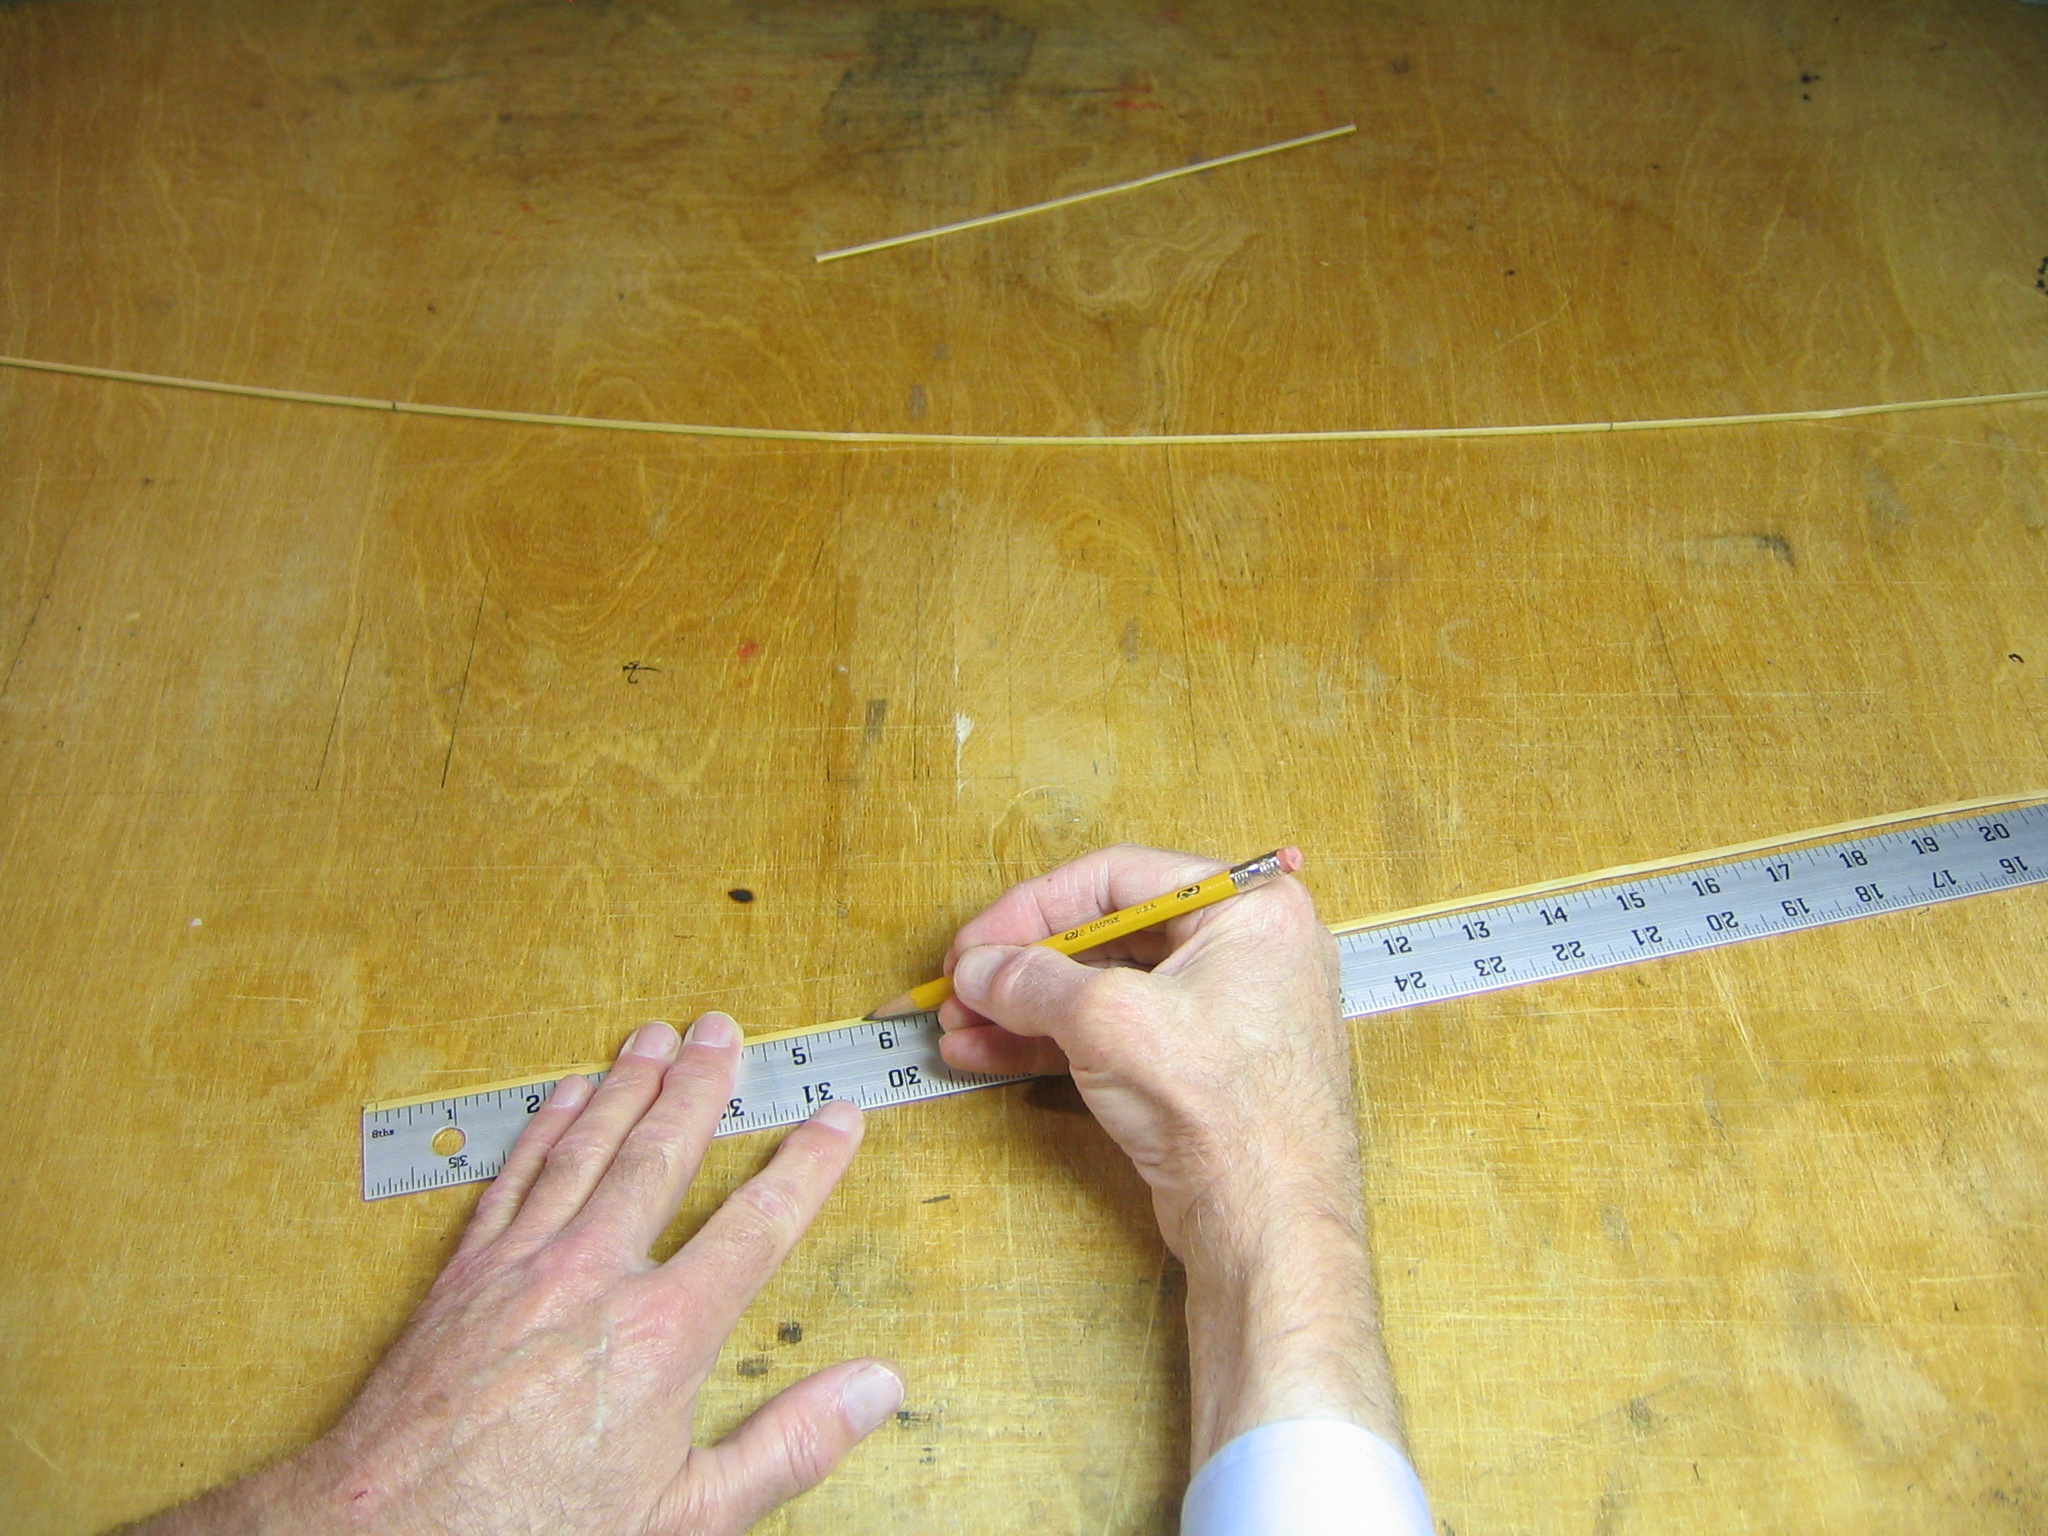
Set aside the first stick. Mark 12″ from one end of the second stick.

Mark 20 1/2″ from the other end of the second stick. (Skip this step to retain full length for a longer sting.)

Cut the stick at both marks. (Cut only at the 12″ mark to retain full length for a longer sting.)
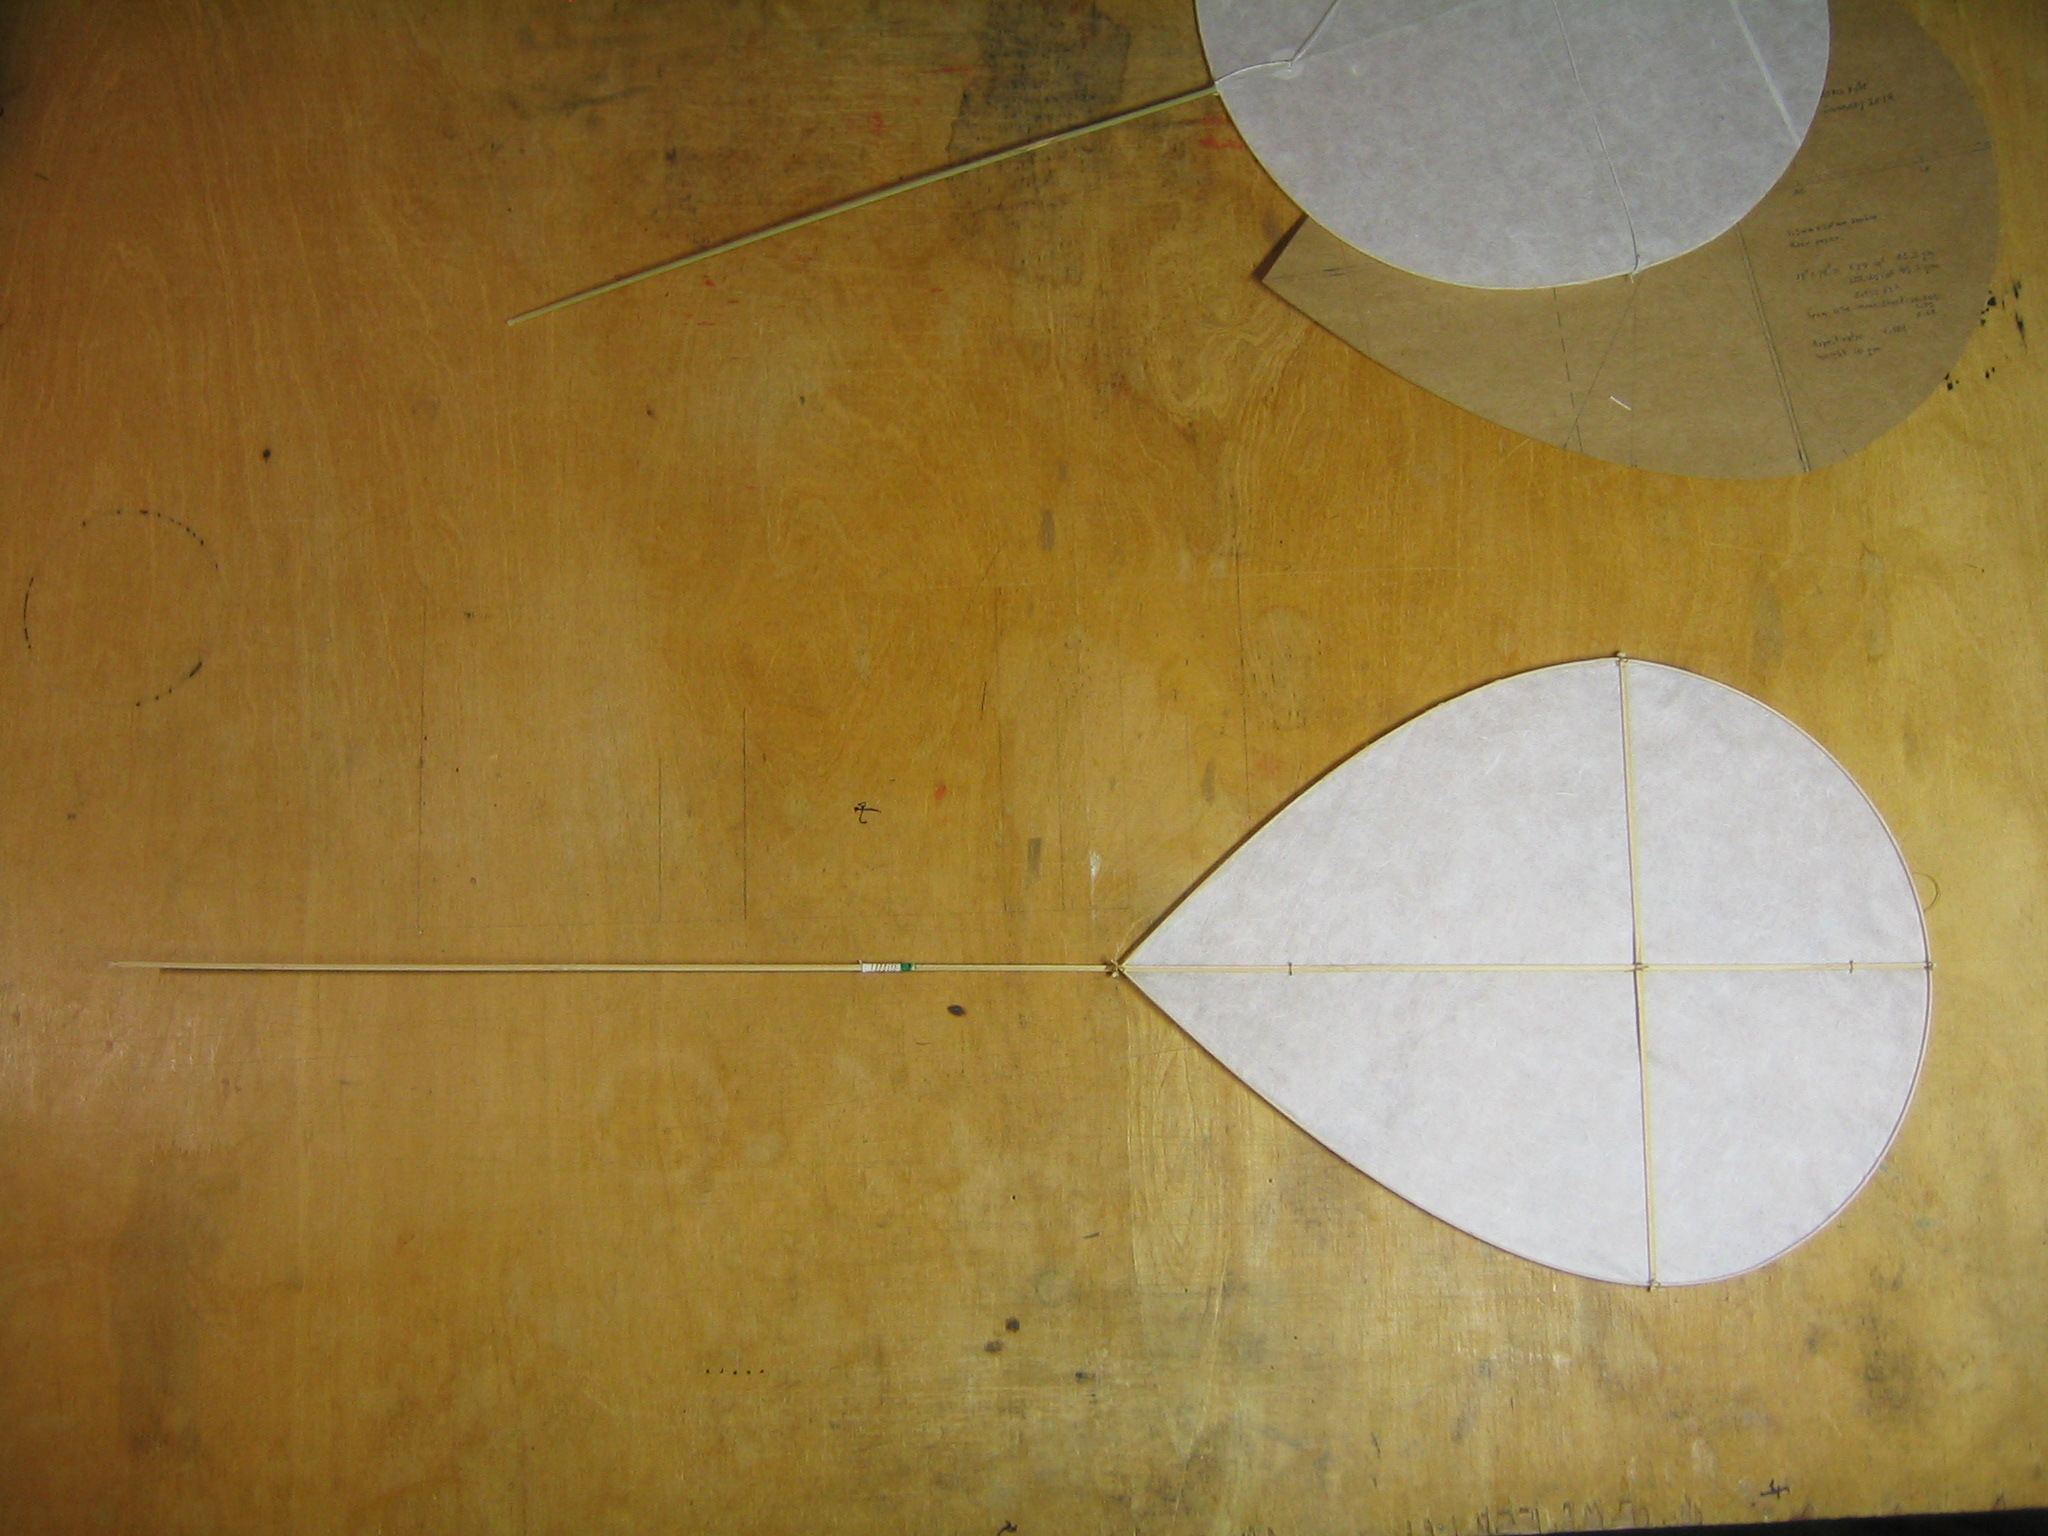
These are the three sticks that will be used in this kite, a 41 3/4″ perimeter, a 20 1/2″ (29 3/4″) spine and a 12″ cross stick.
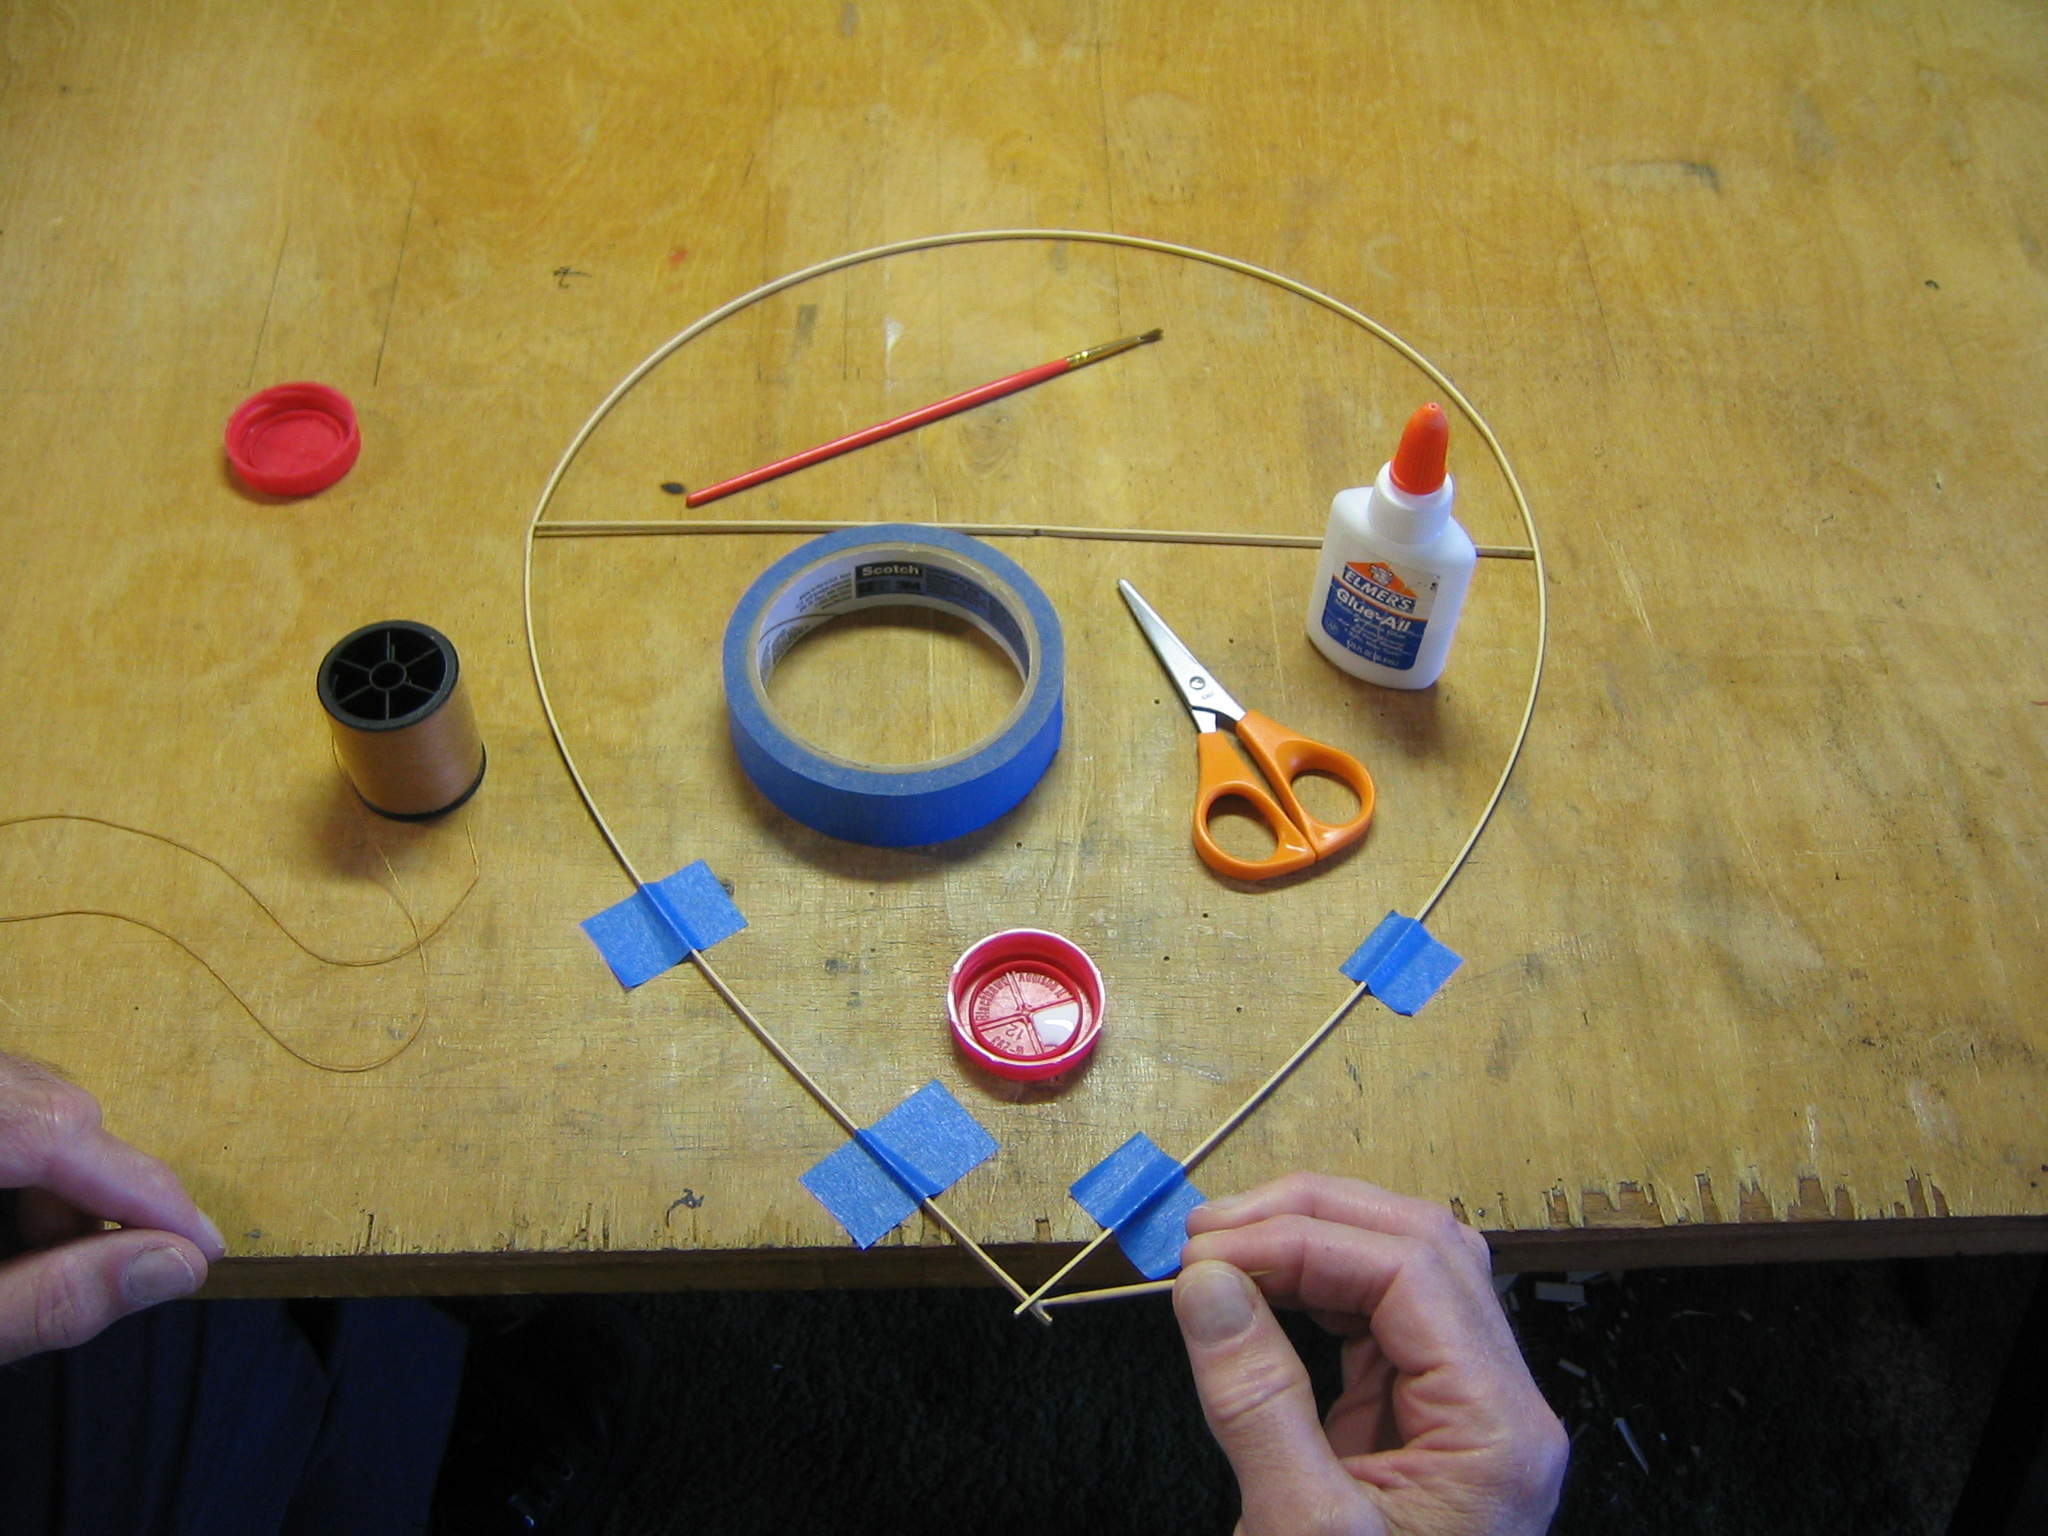
Mark 1/8″ from each end of the 12″ stick.
Mark the center of the 12″ stick at 6″.
Mark 1/8″ from one end of the 20 1/2″ (29 3/4″) spine. You can see that I looped the perimeter and temporarily lashed the ends together with a small rubber band to check fit.
Mark 5 7/8″ from the same end of the 20 1/2″ (29 3/4″) spine. This is where the cross stick will be tied.
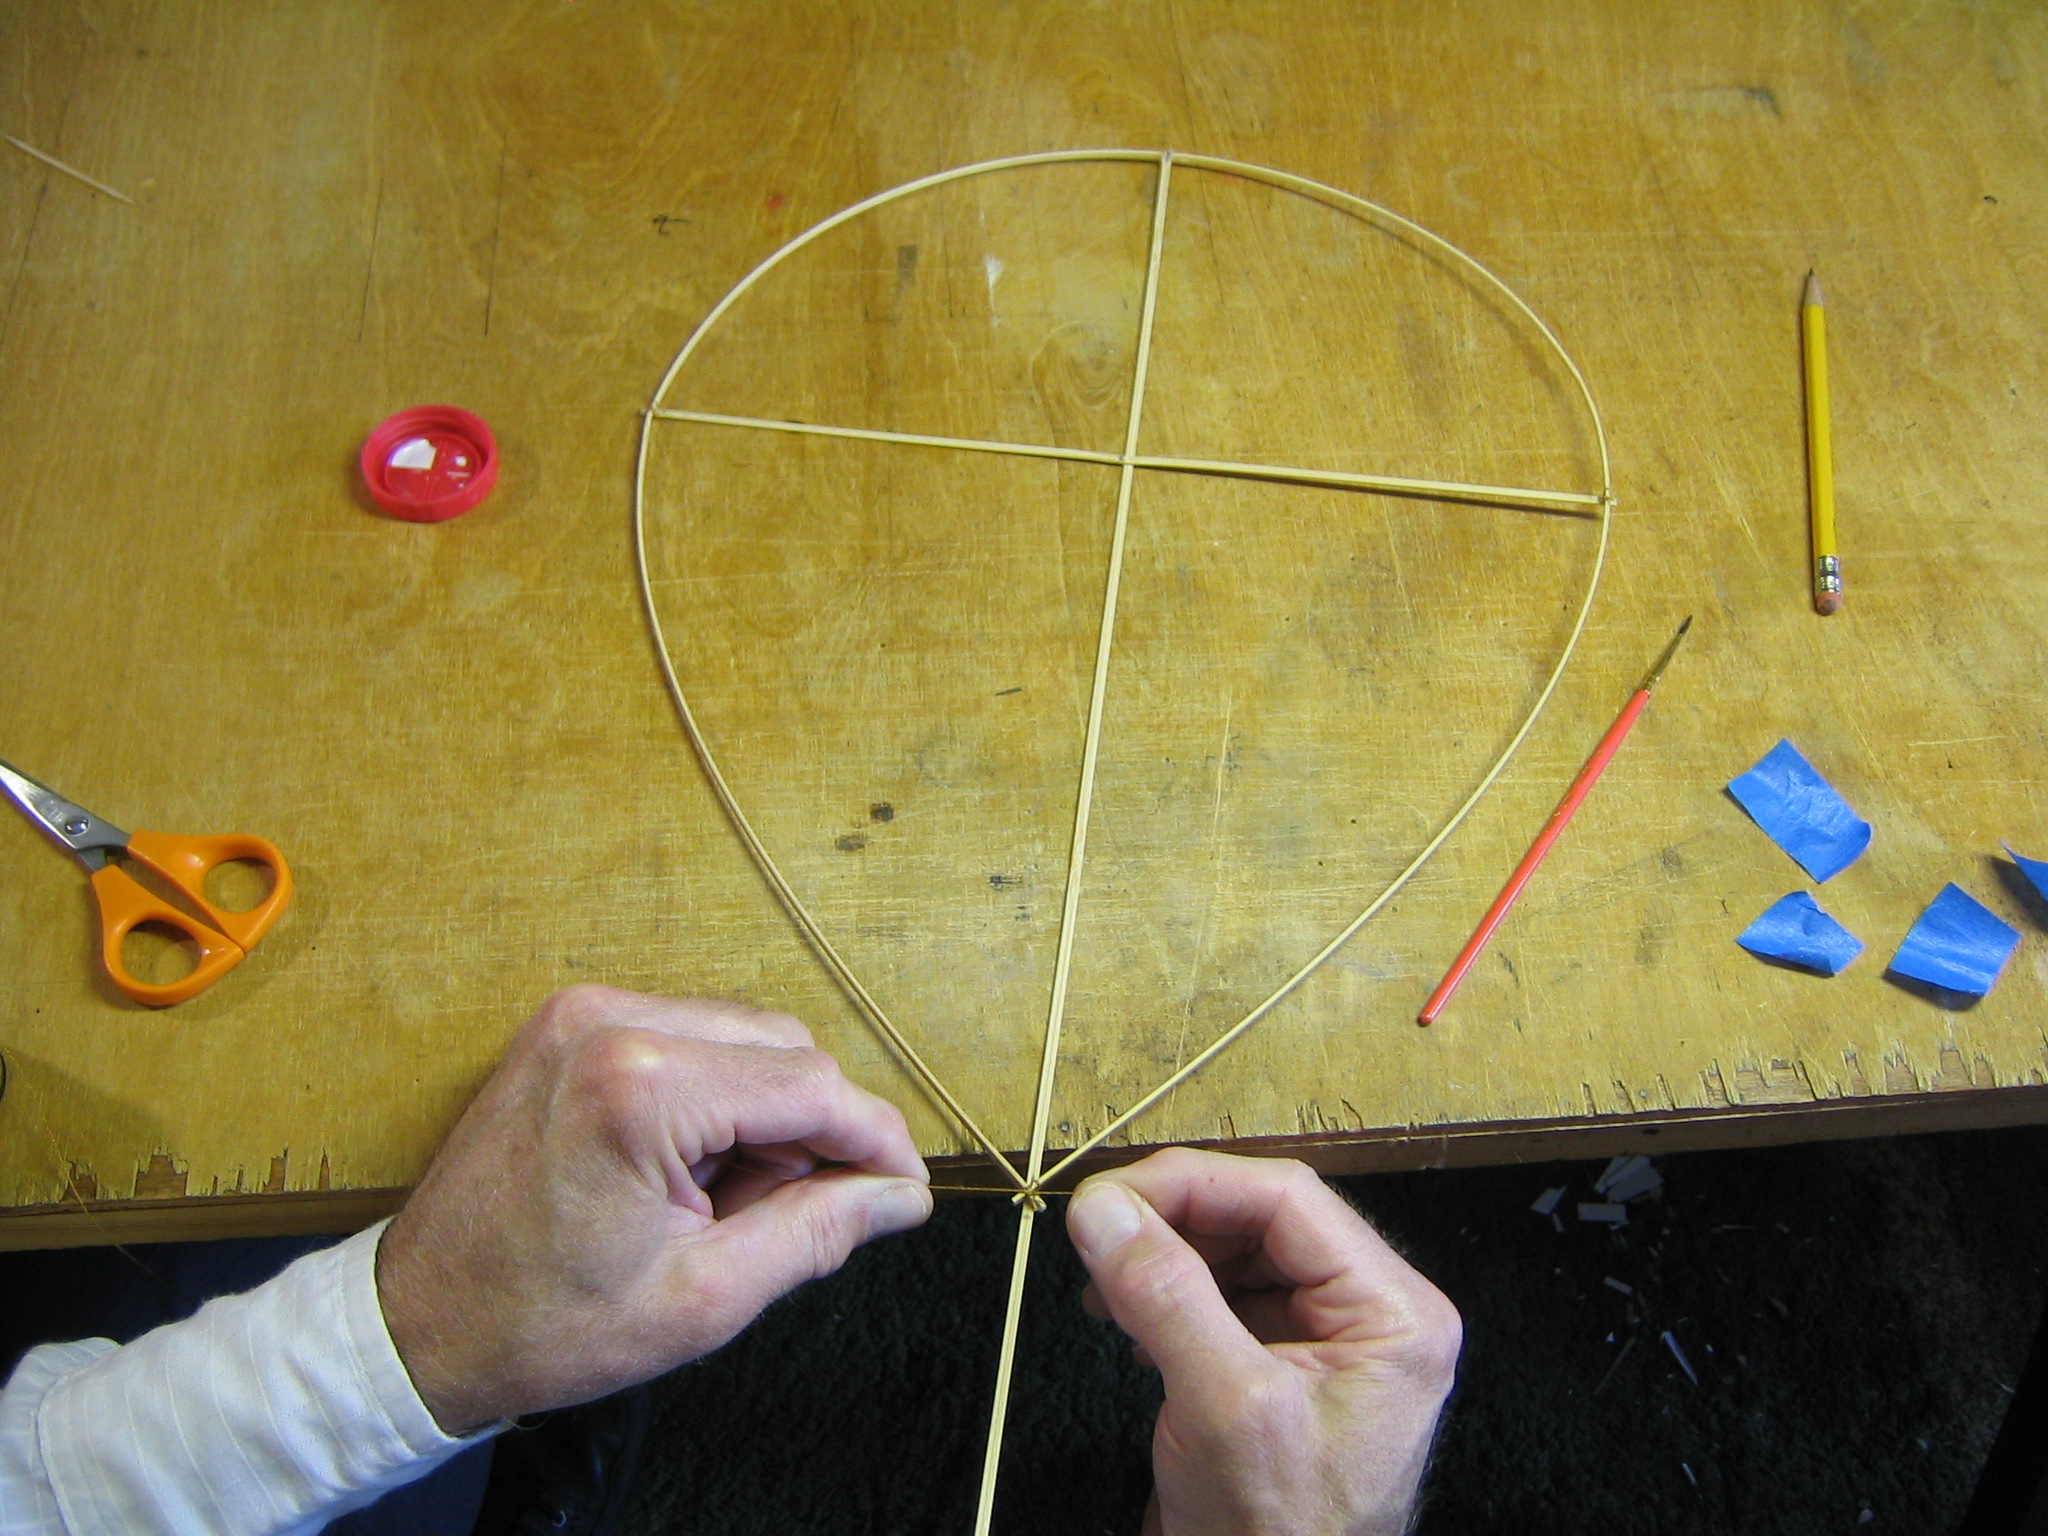
That completes the marking out of the sticks. Next they are assembled to make the framework.
Framework Assembly
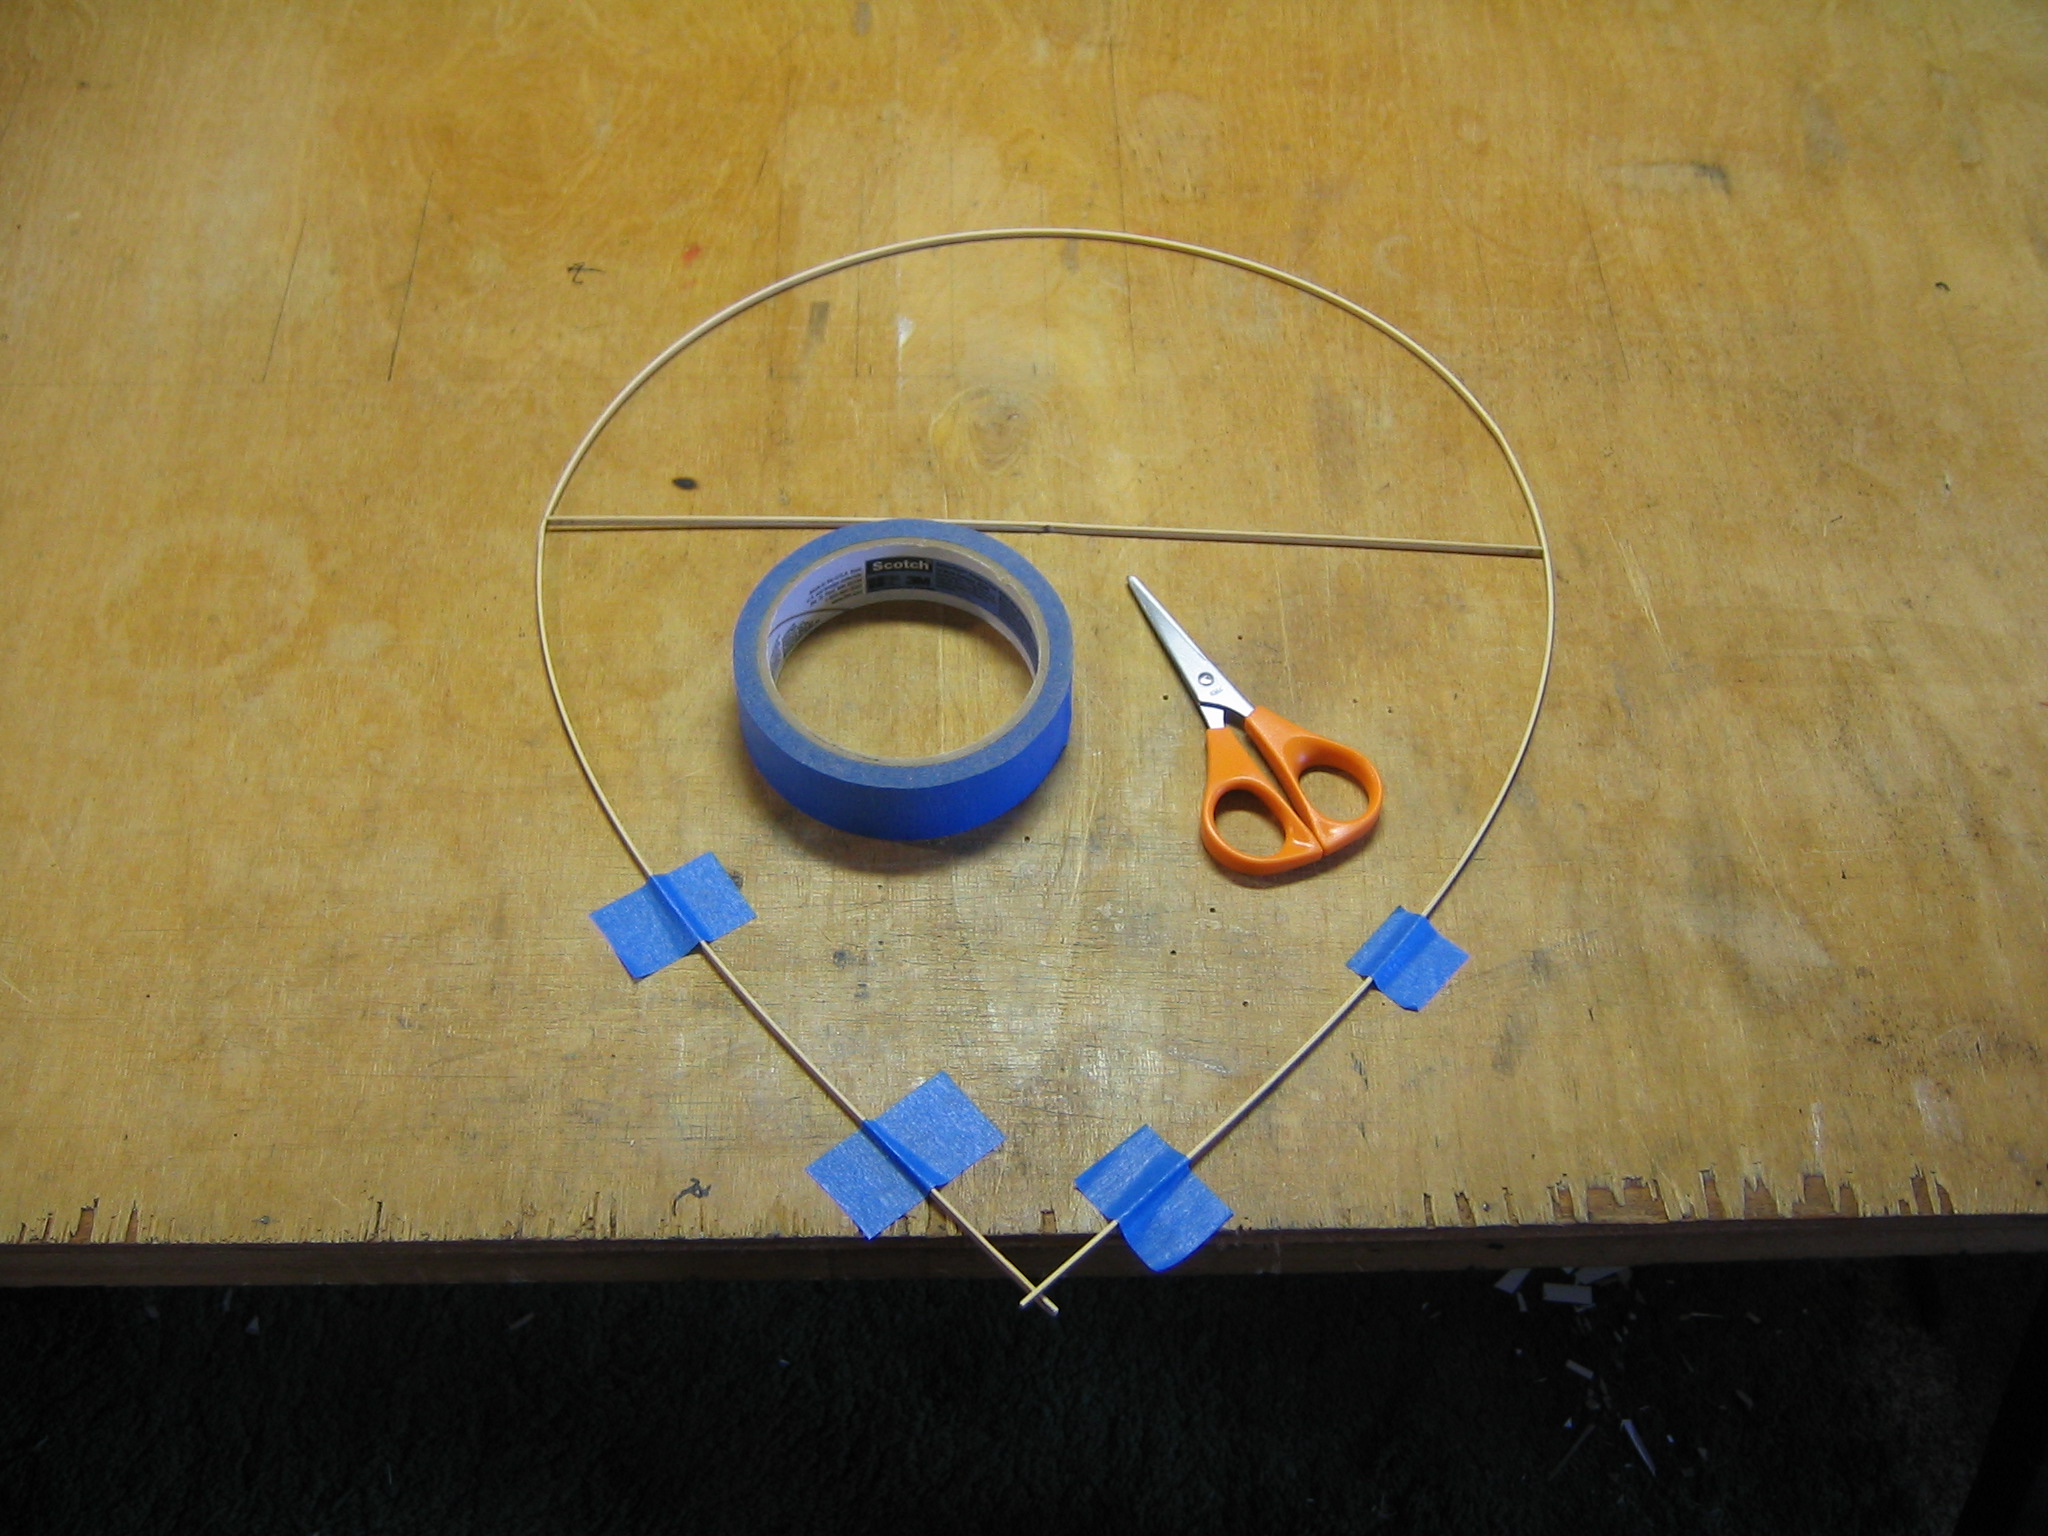
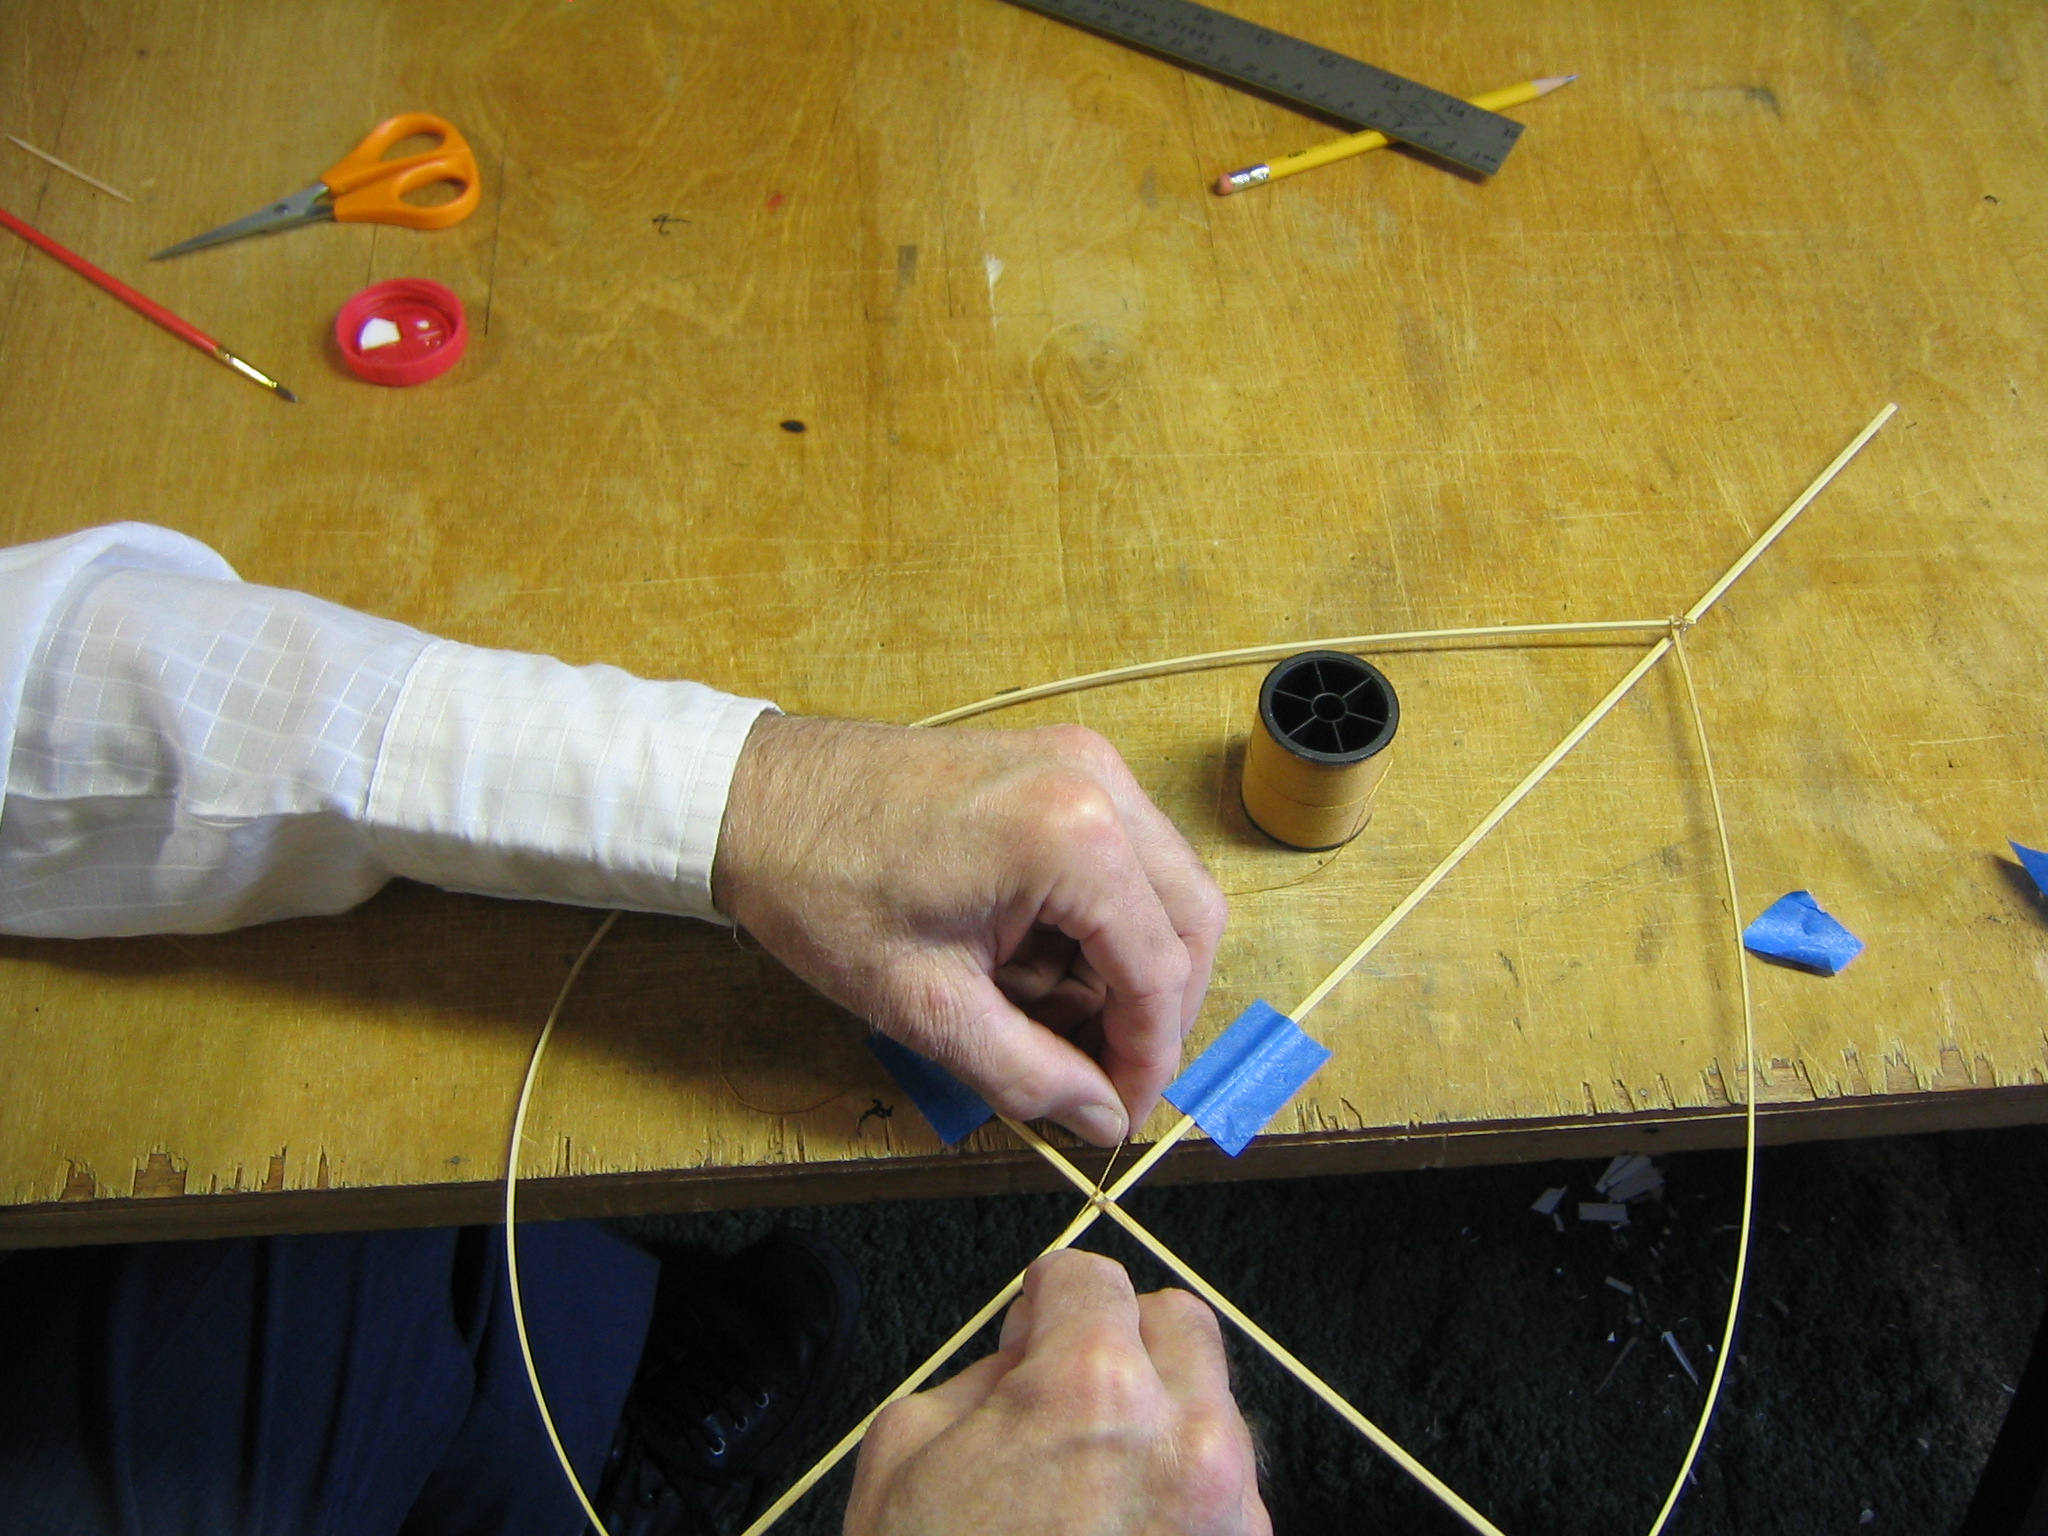
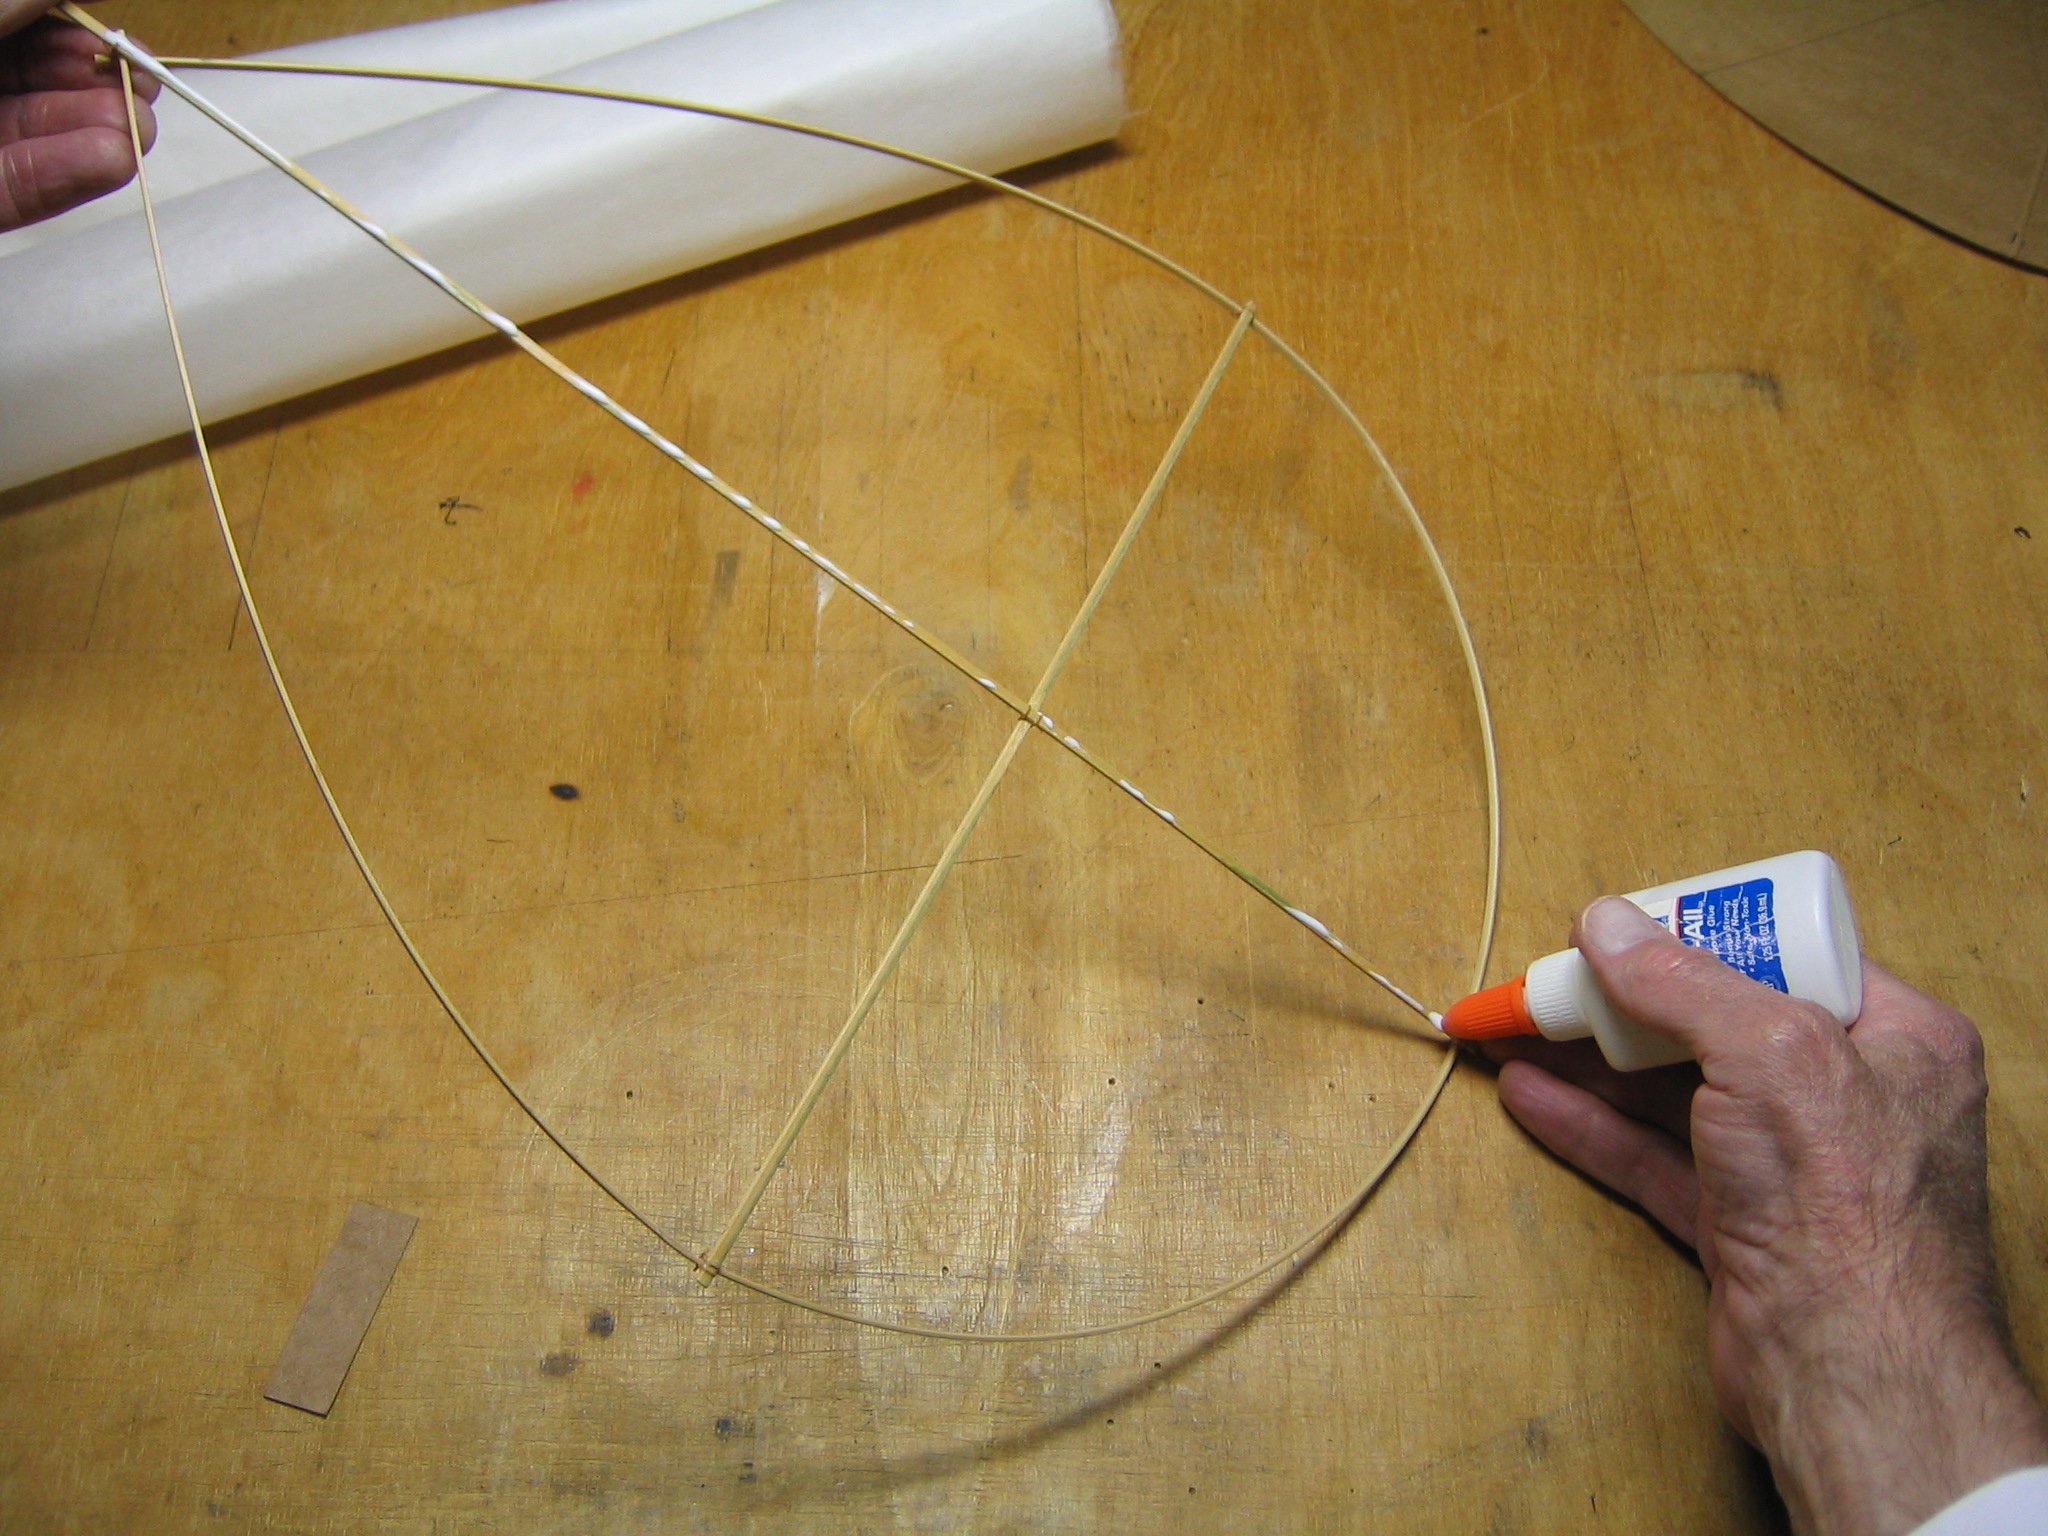
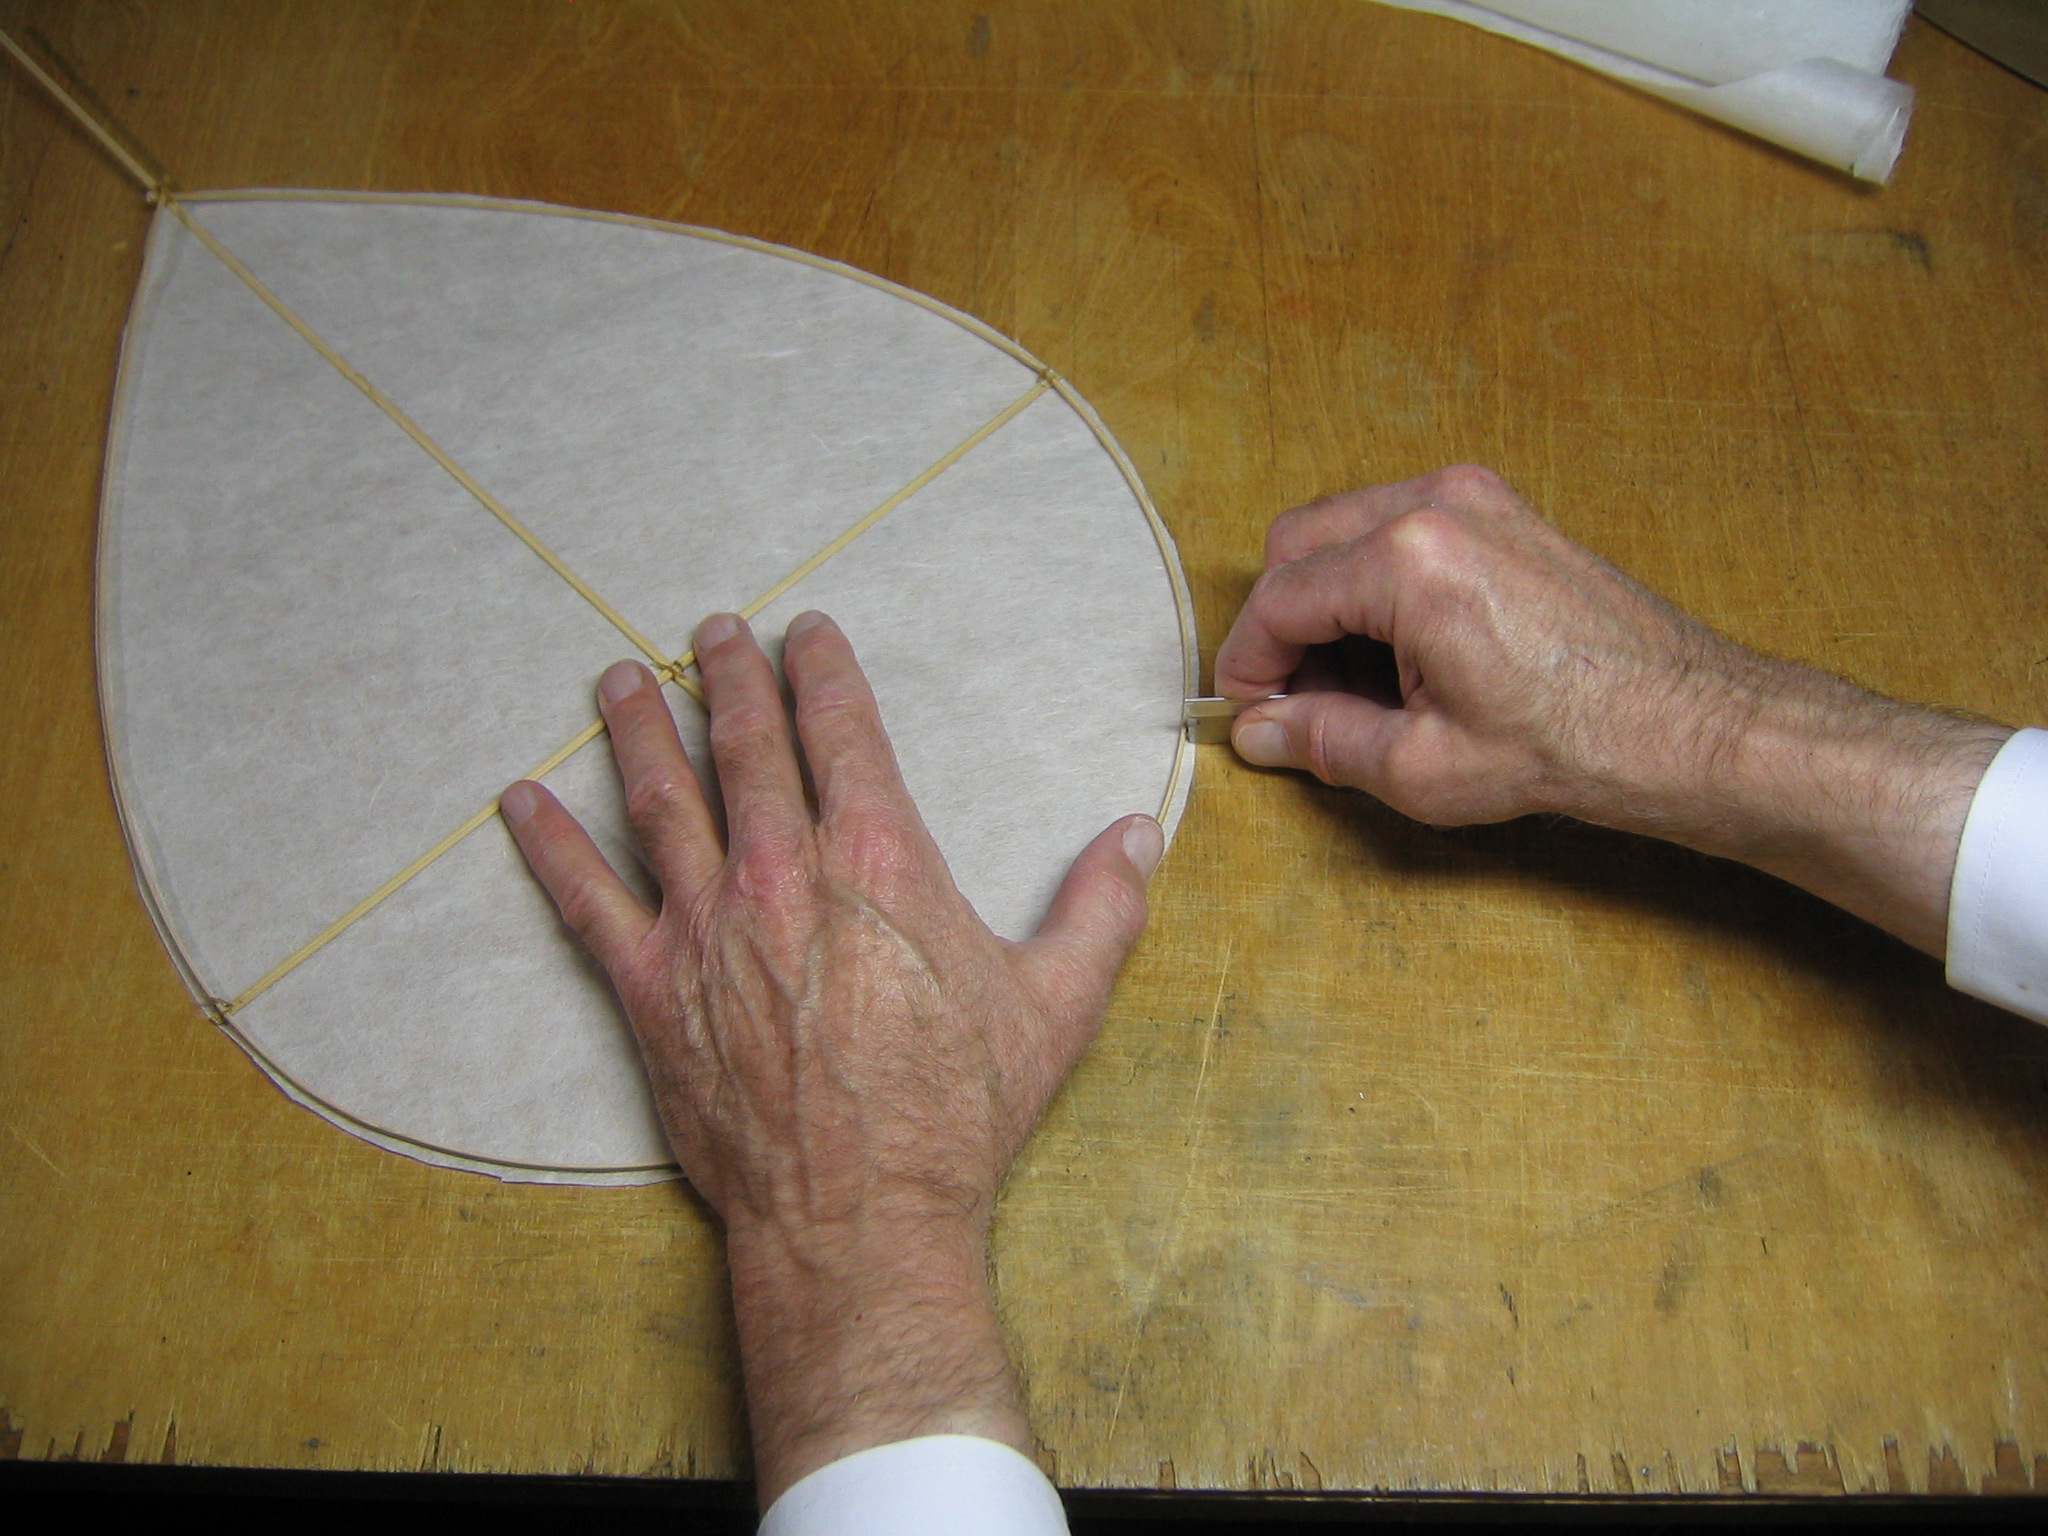
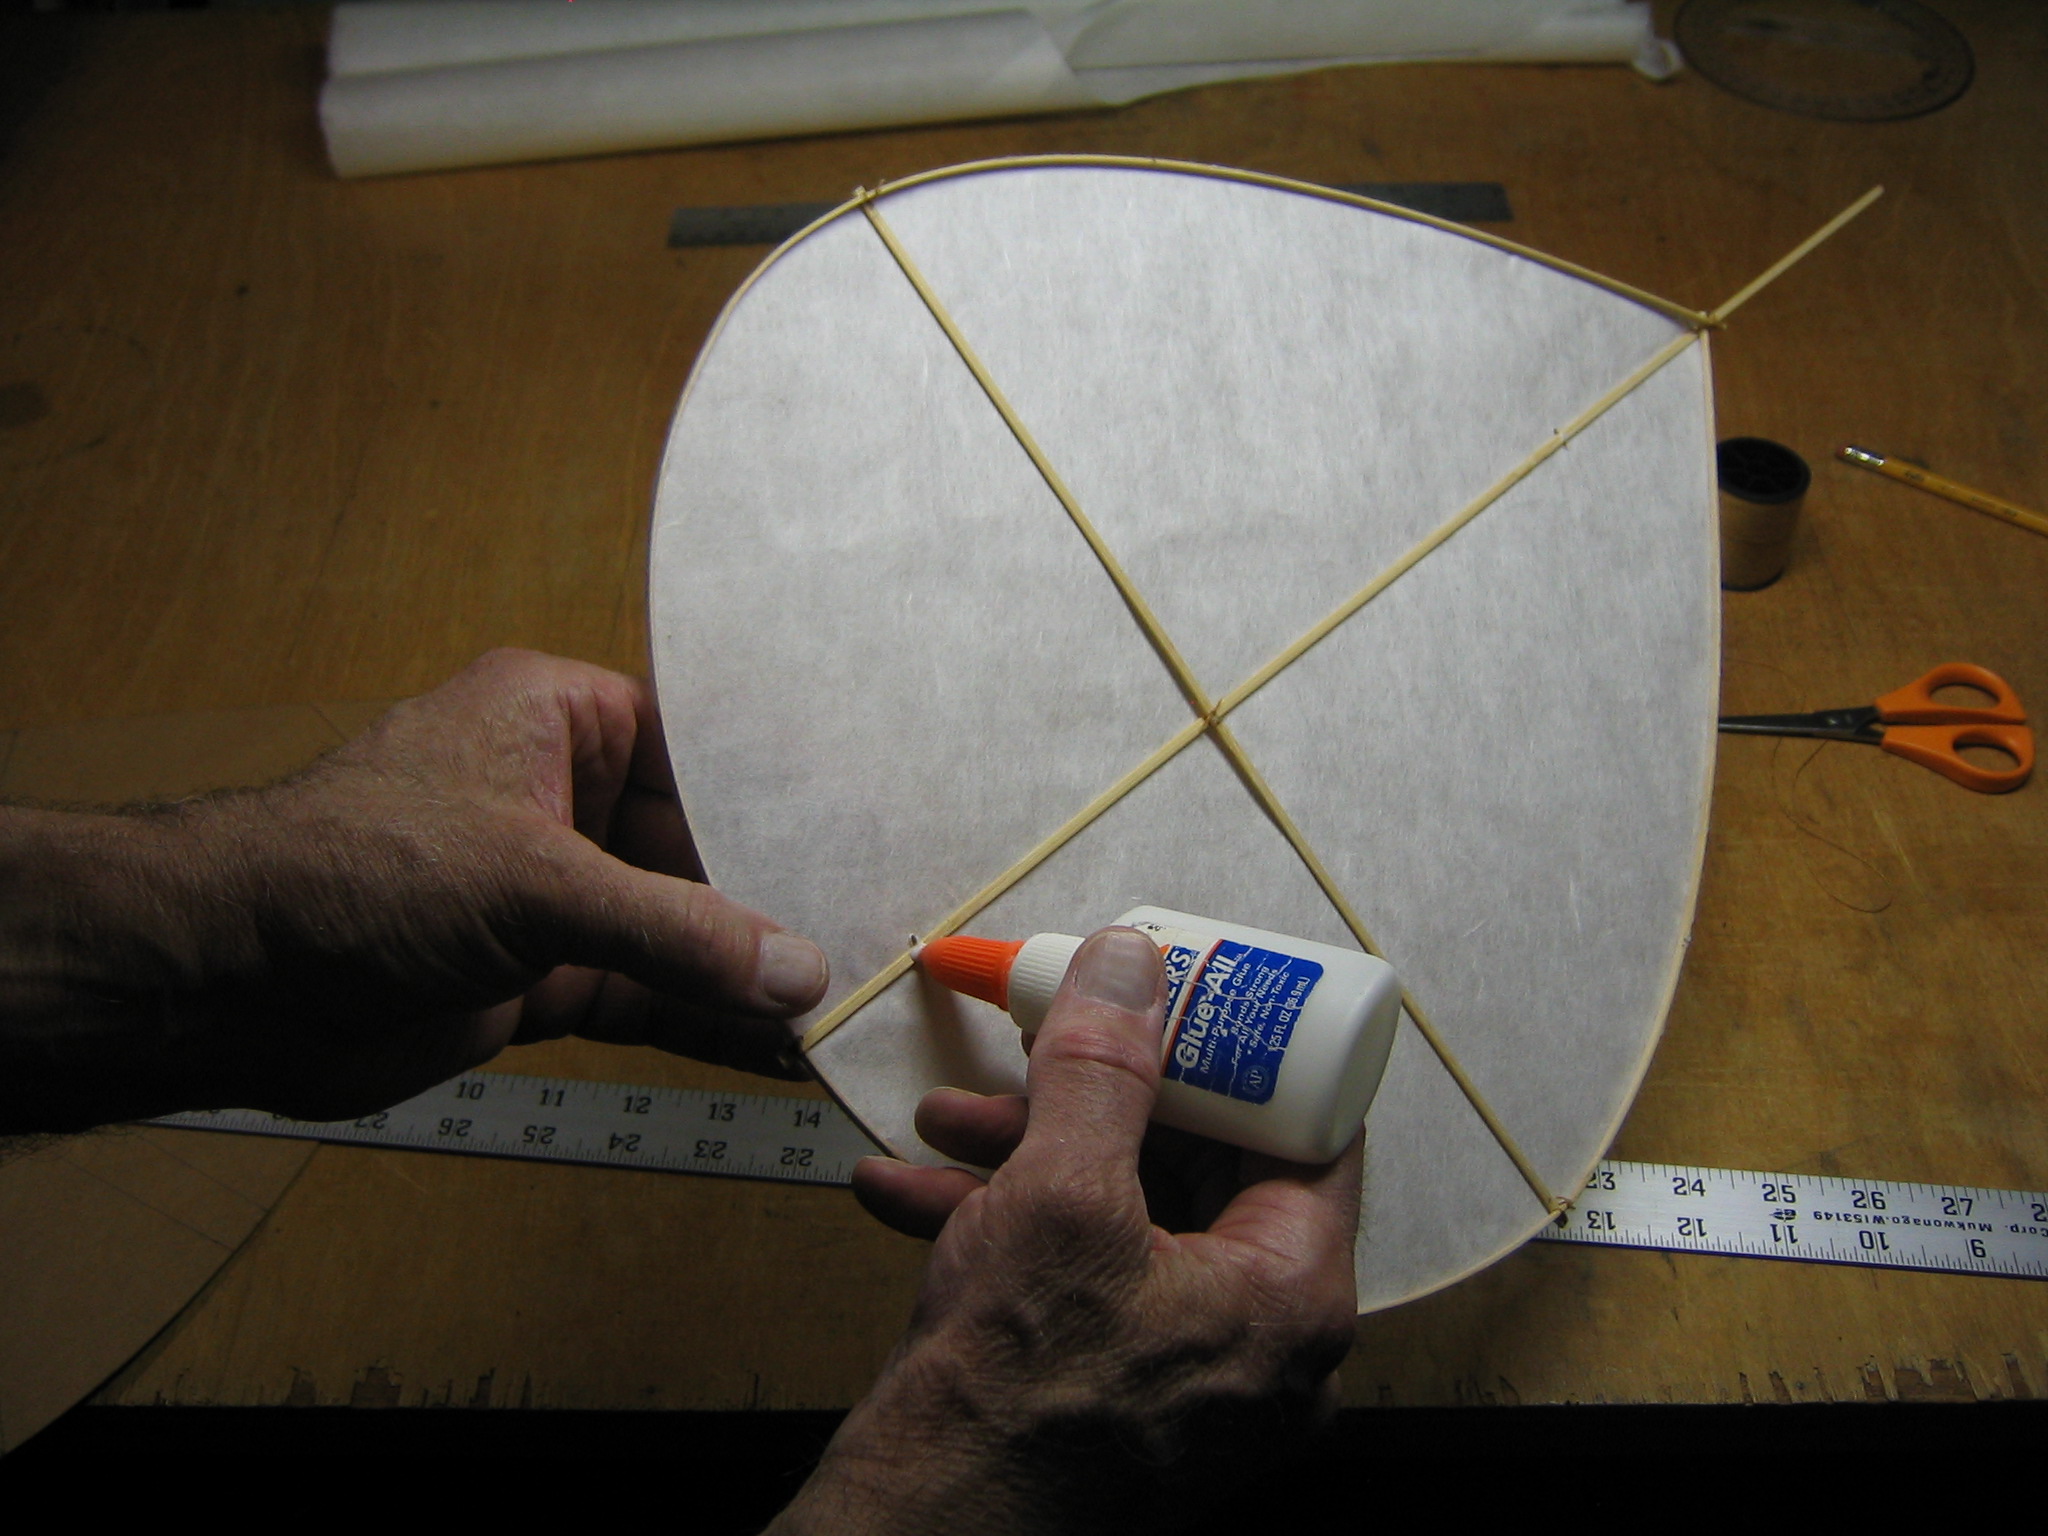
Tape the perimeter stick to the table with the ends crossing at the 1/4″ marks and the 12″ stick in place to hold the approximate finished shape.
Apply glue between the sticks and around the joint.
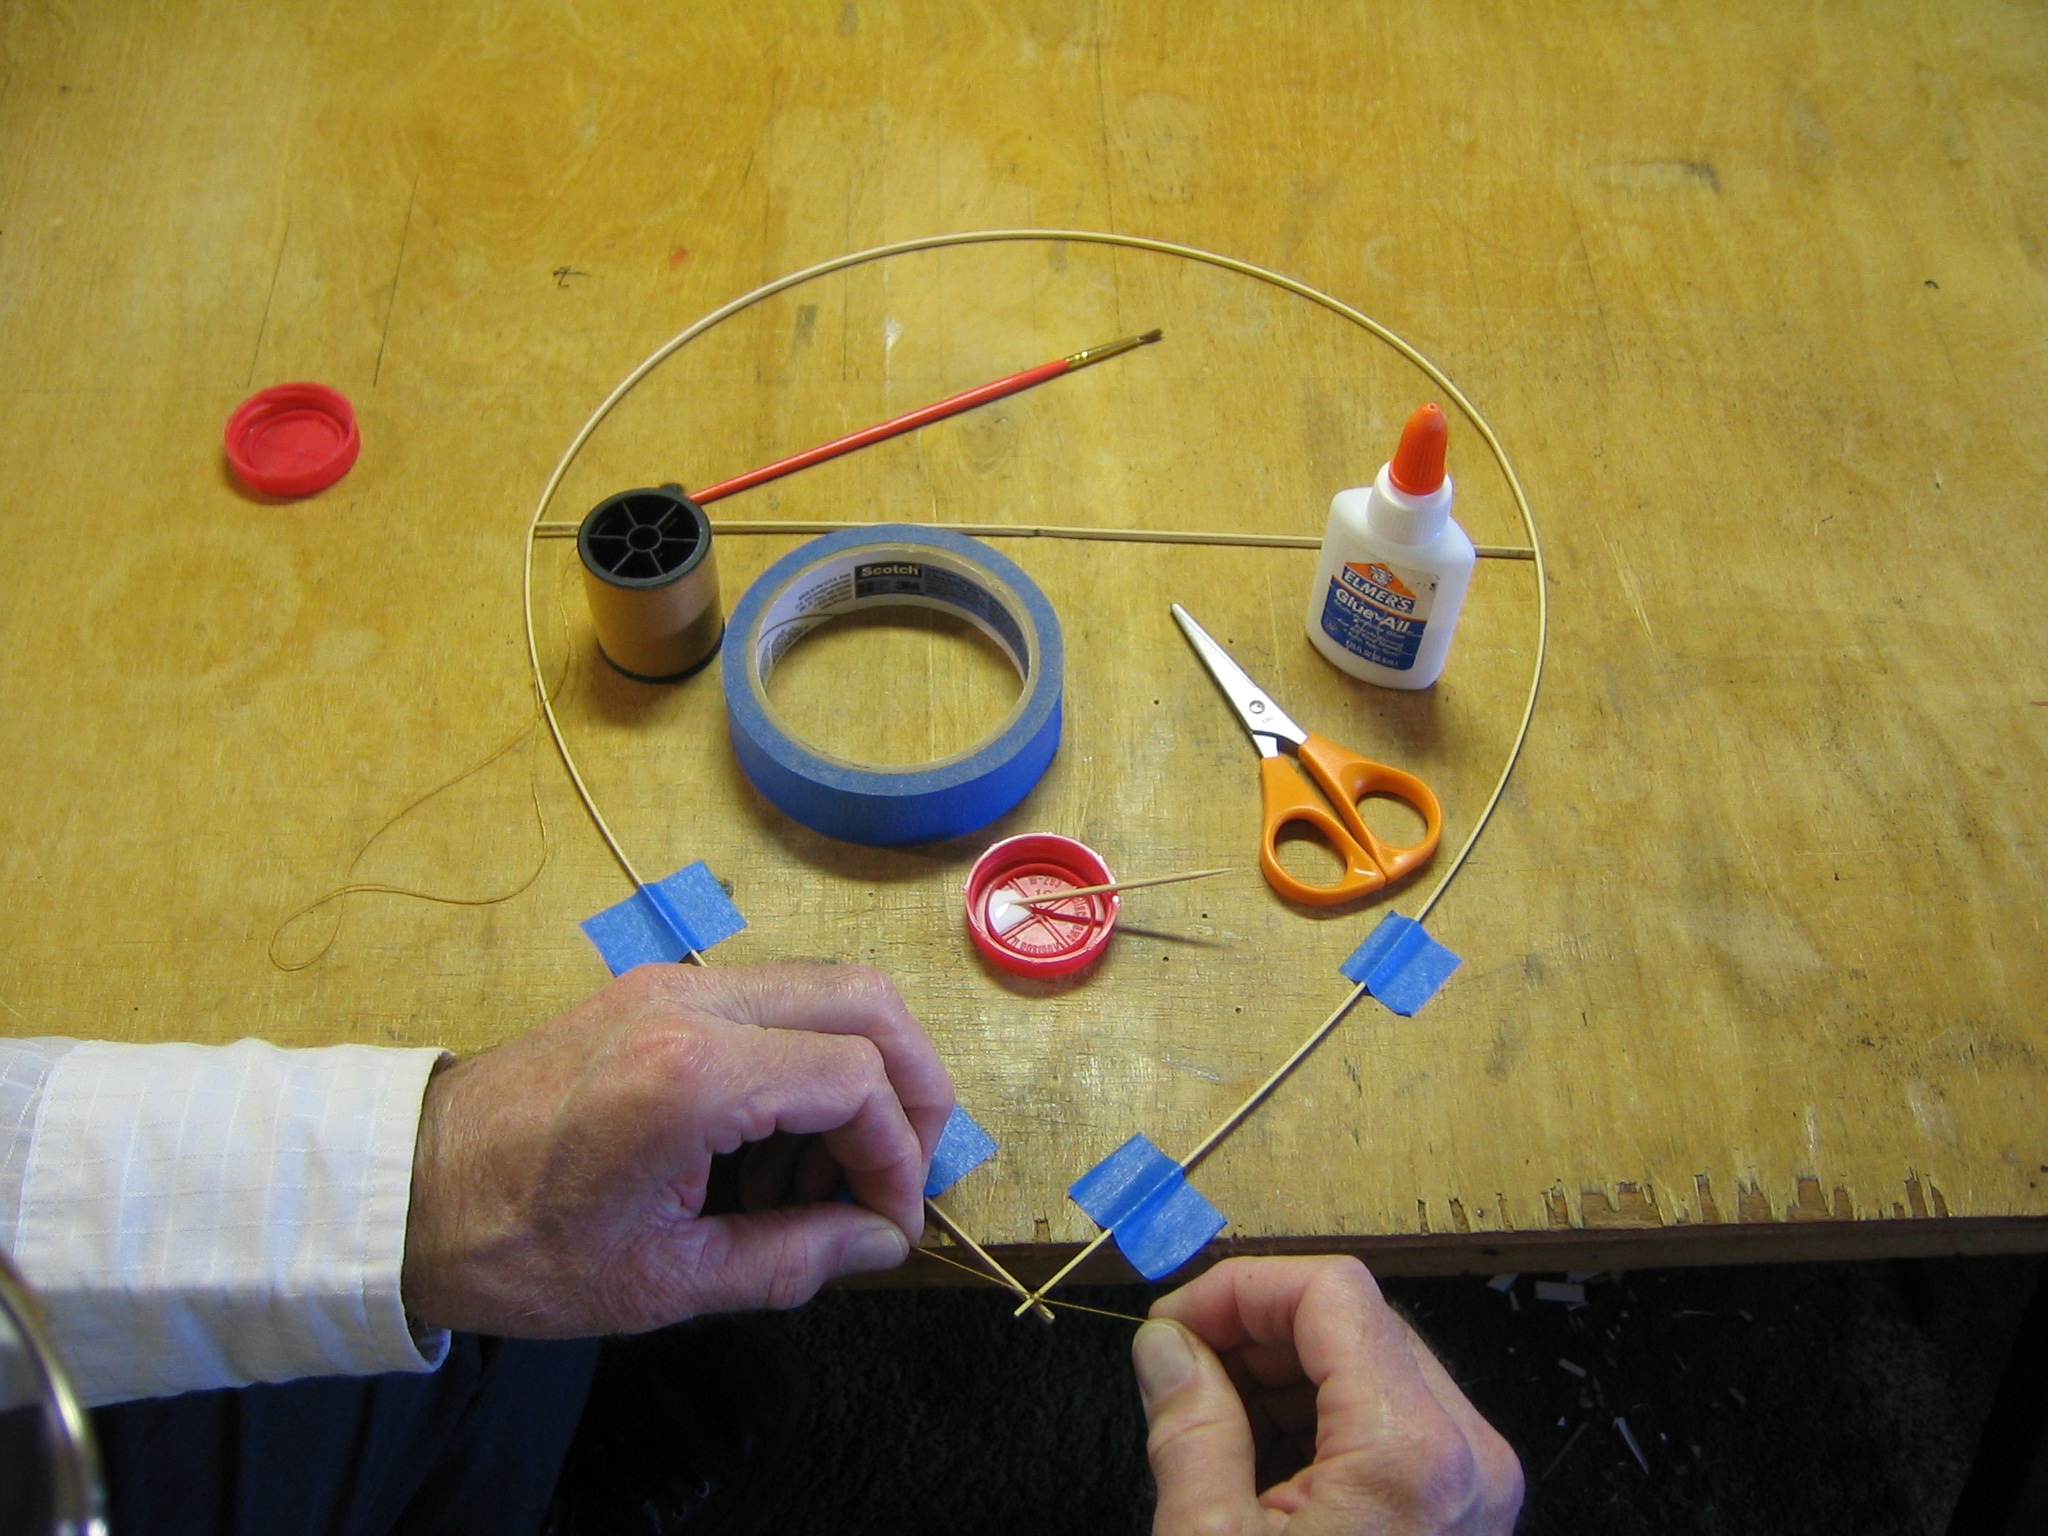
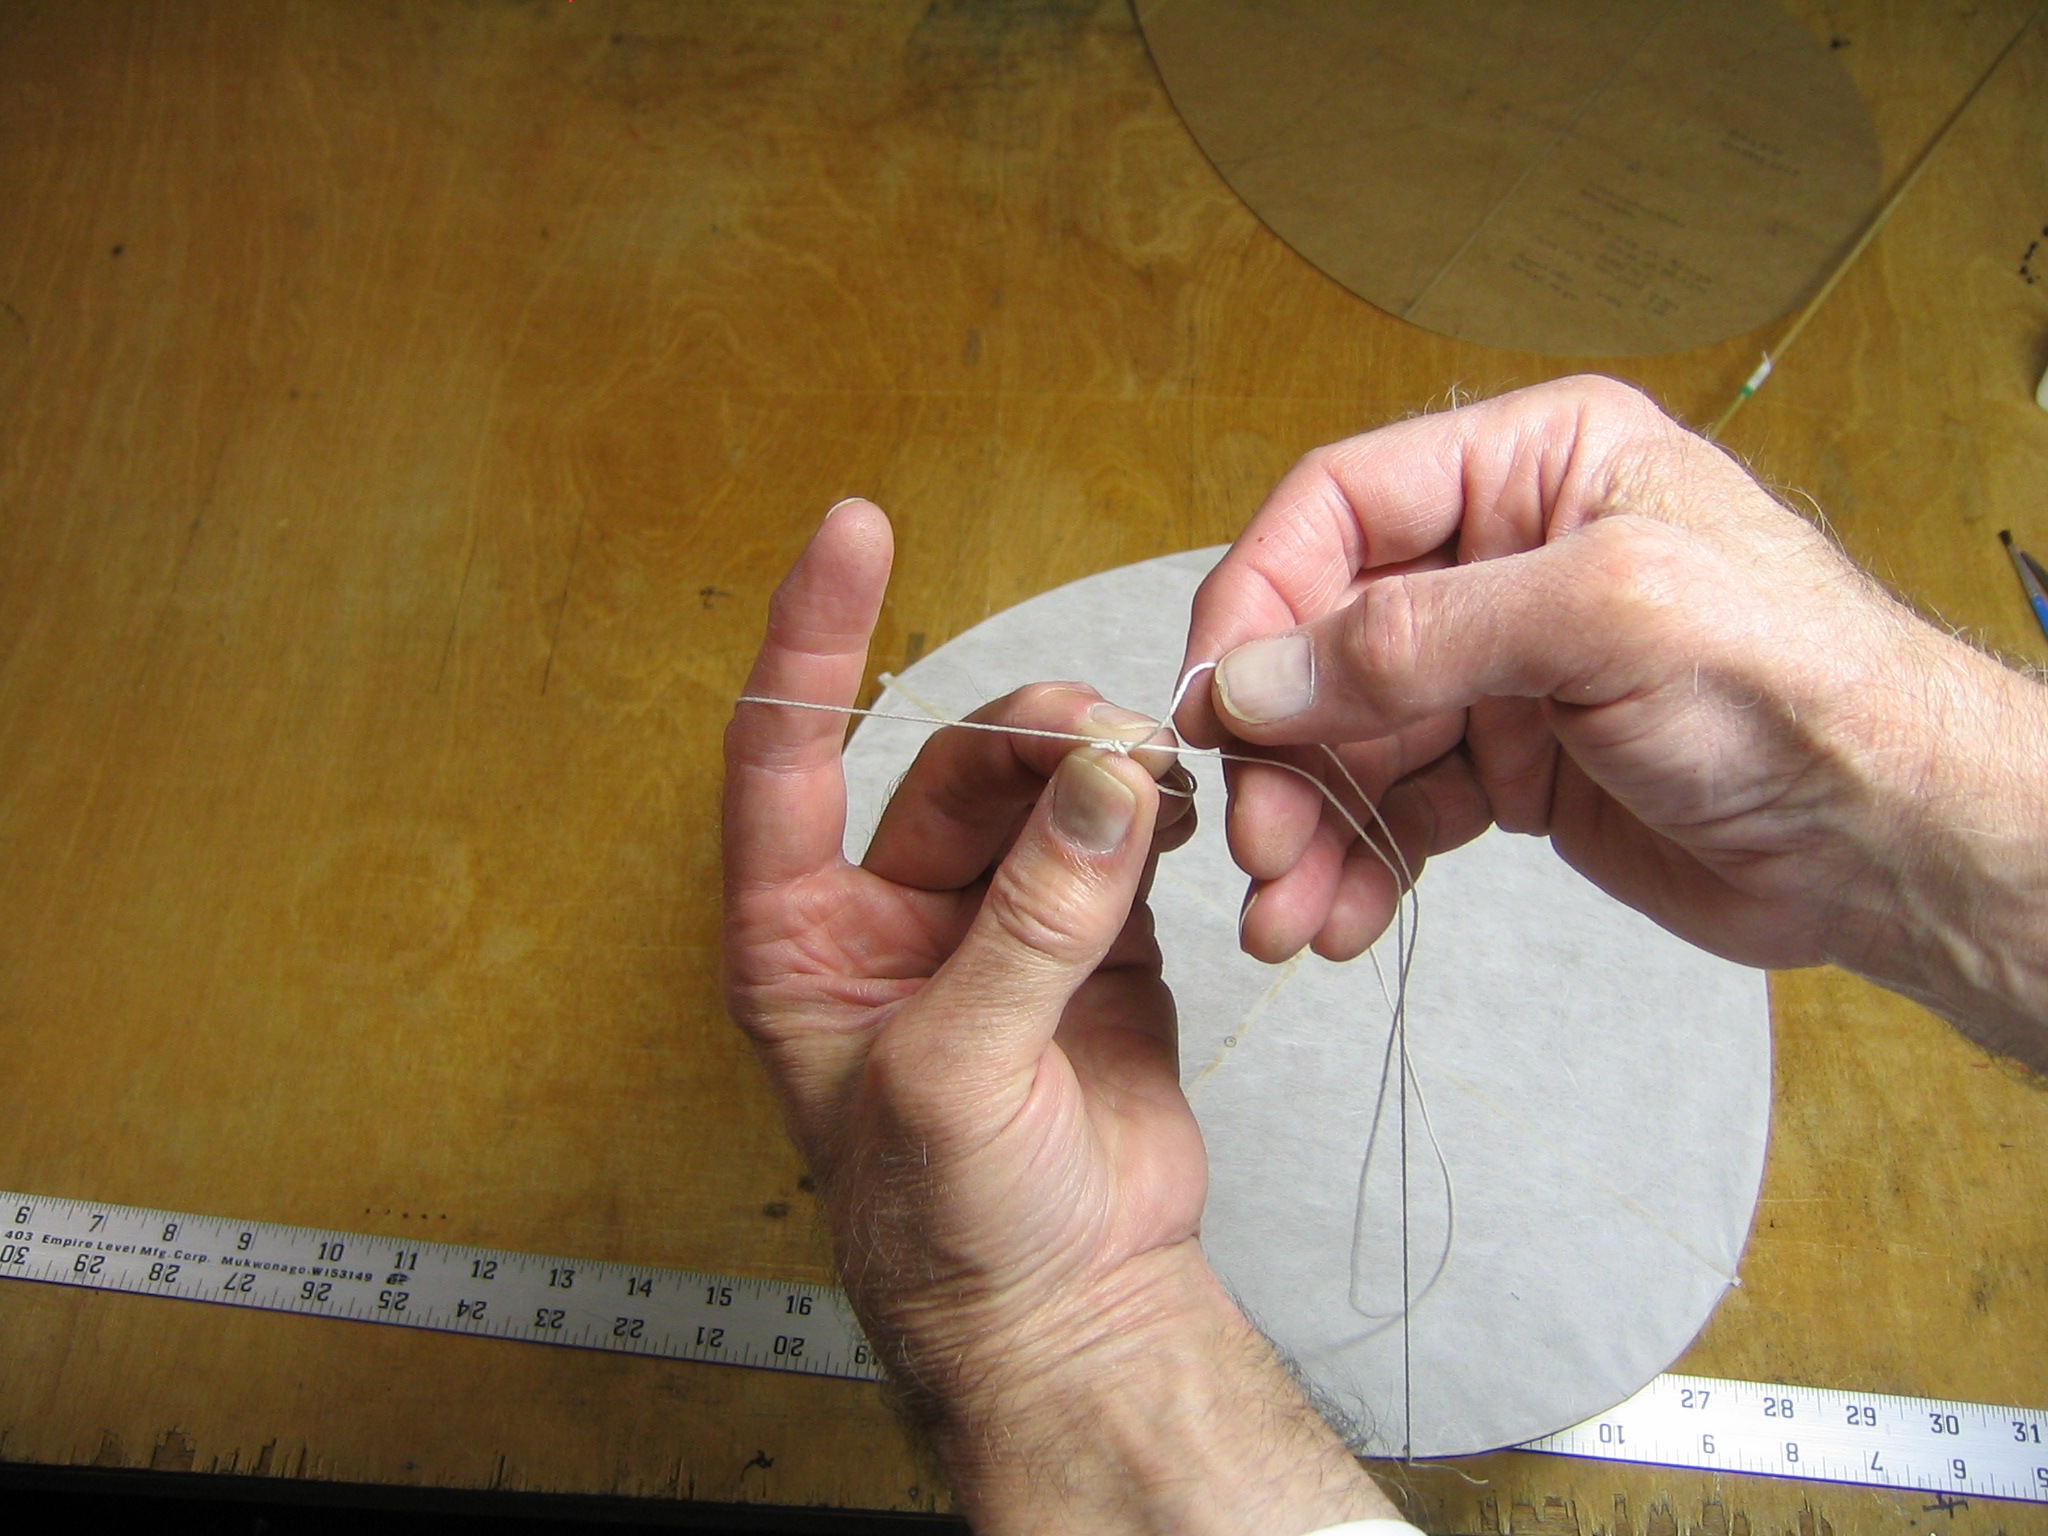
Lash the sticks together with thread.
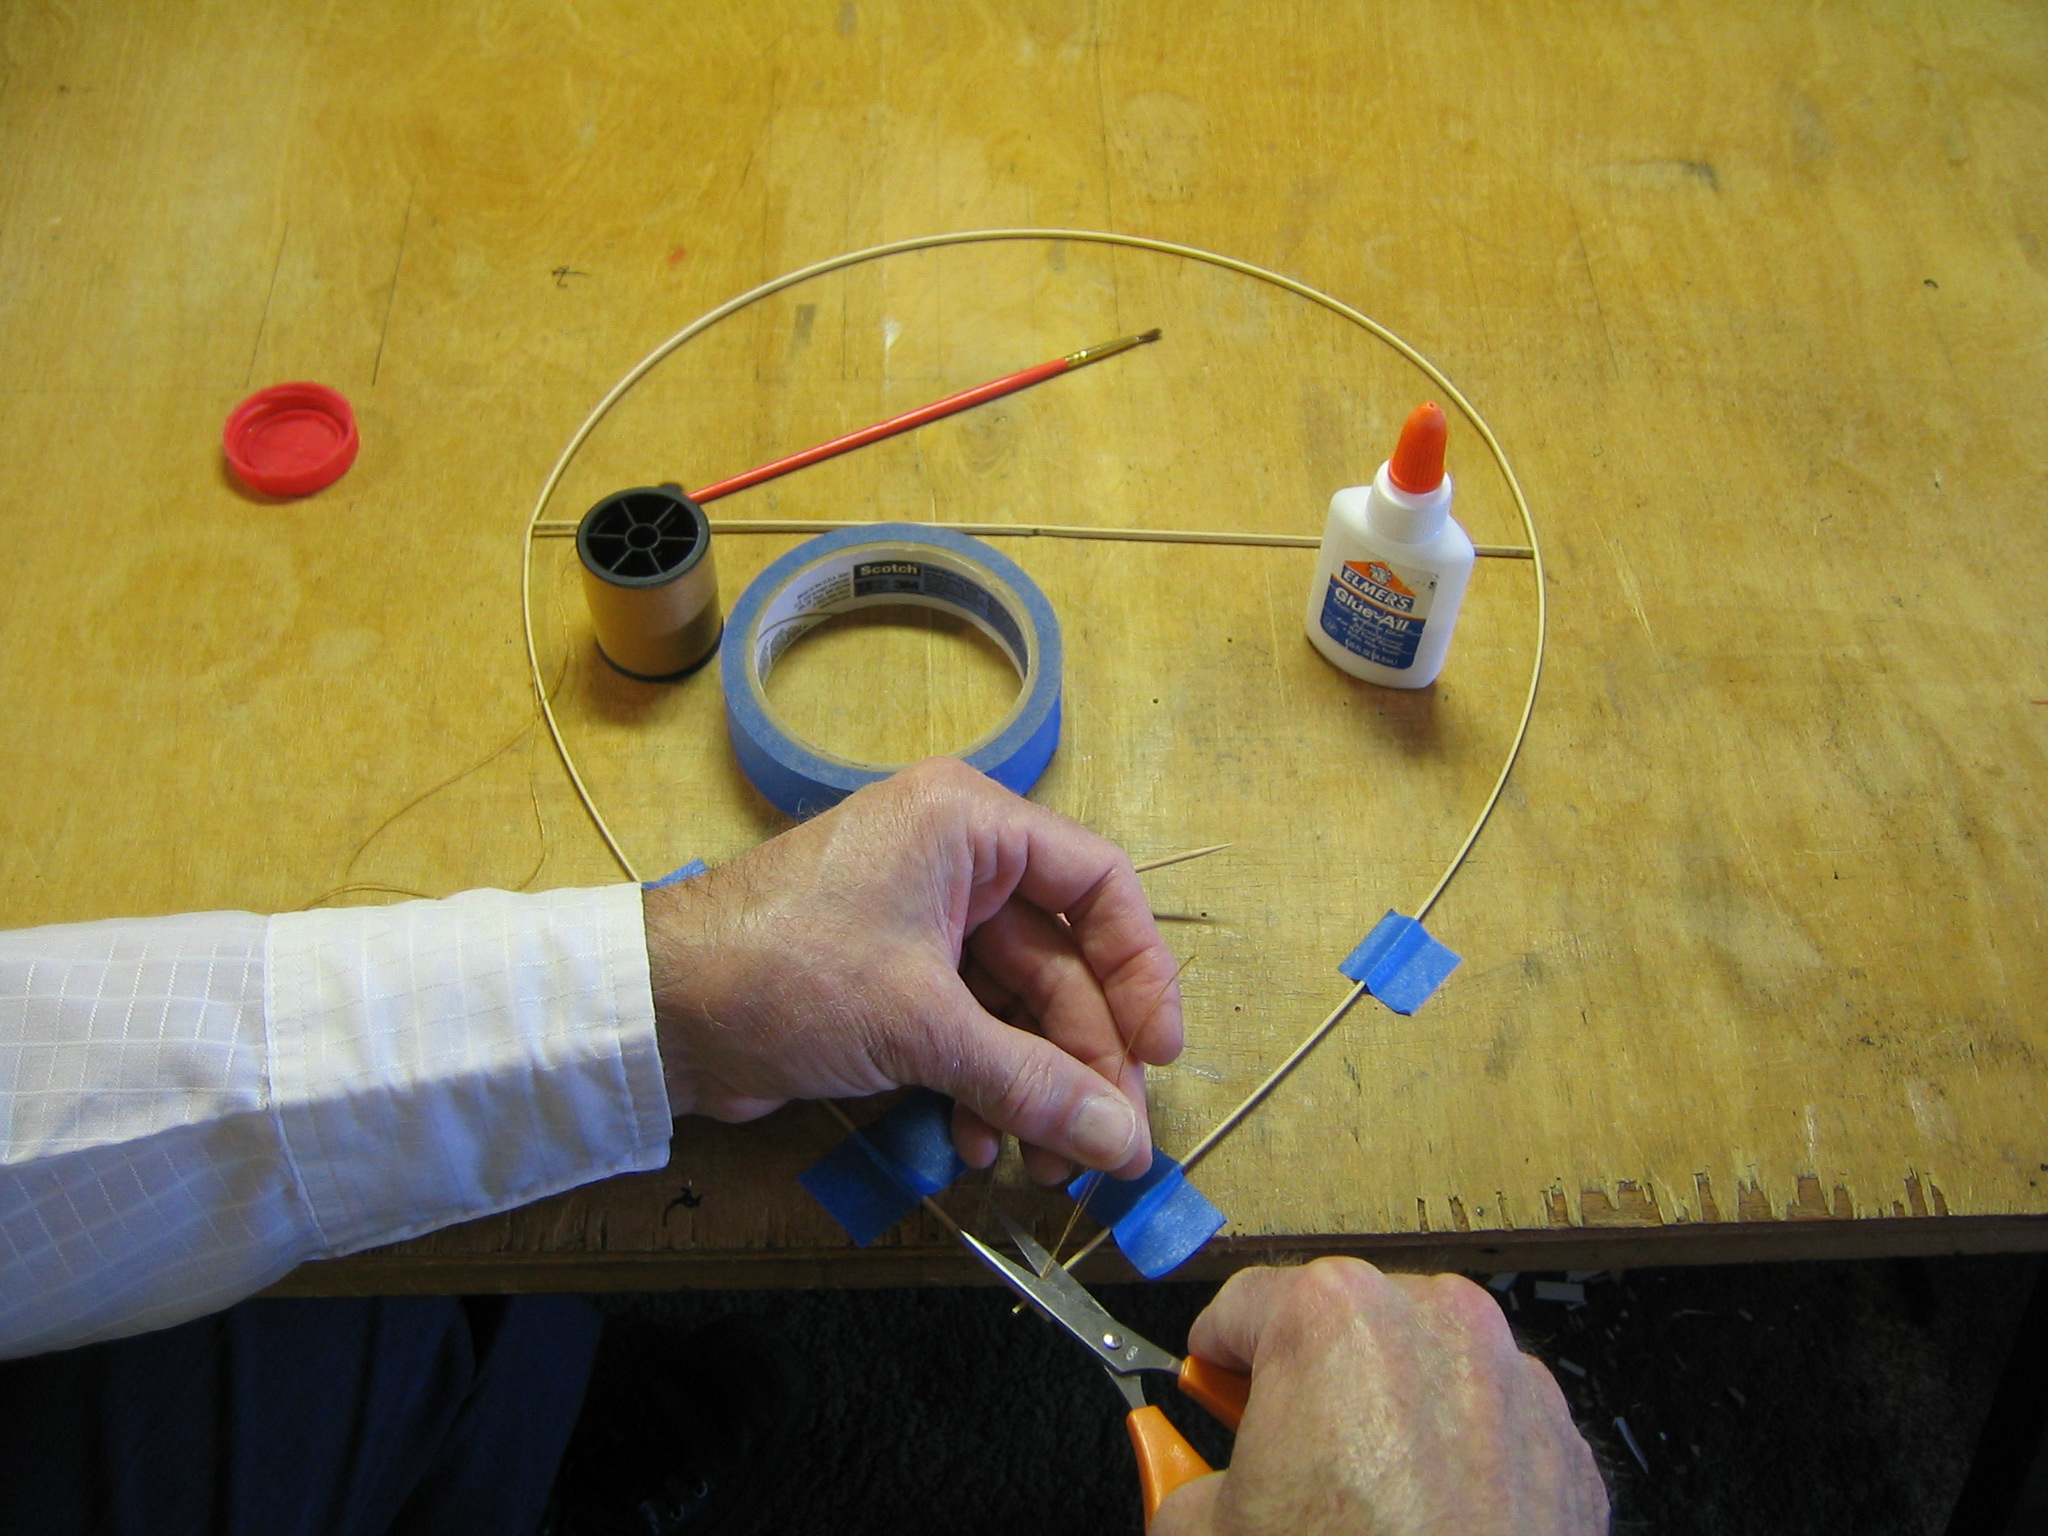
Cut the thread off about 1/8″ from the knot.
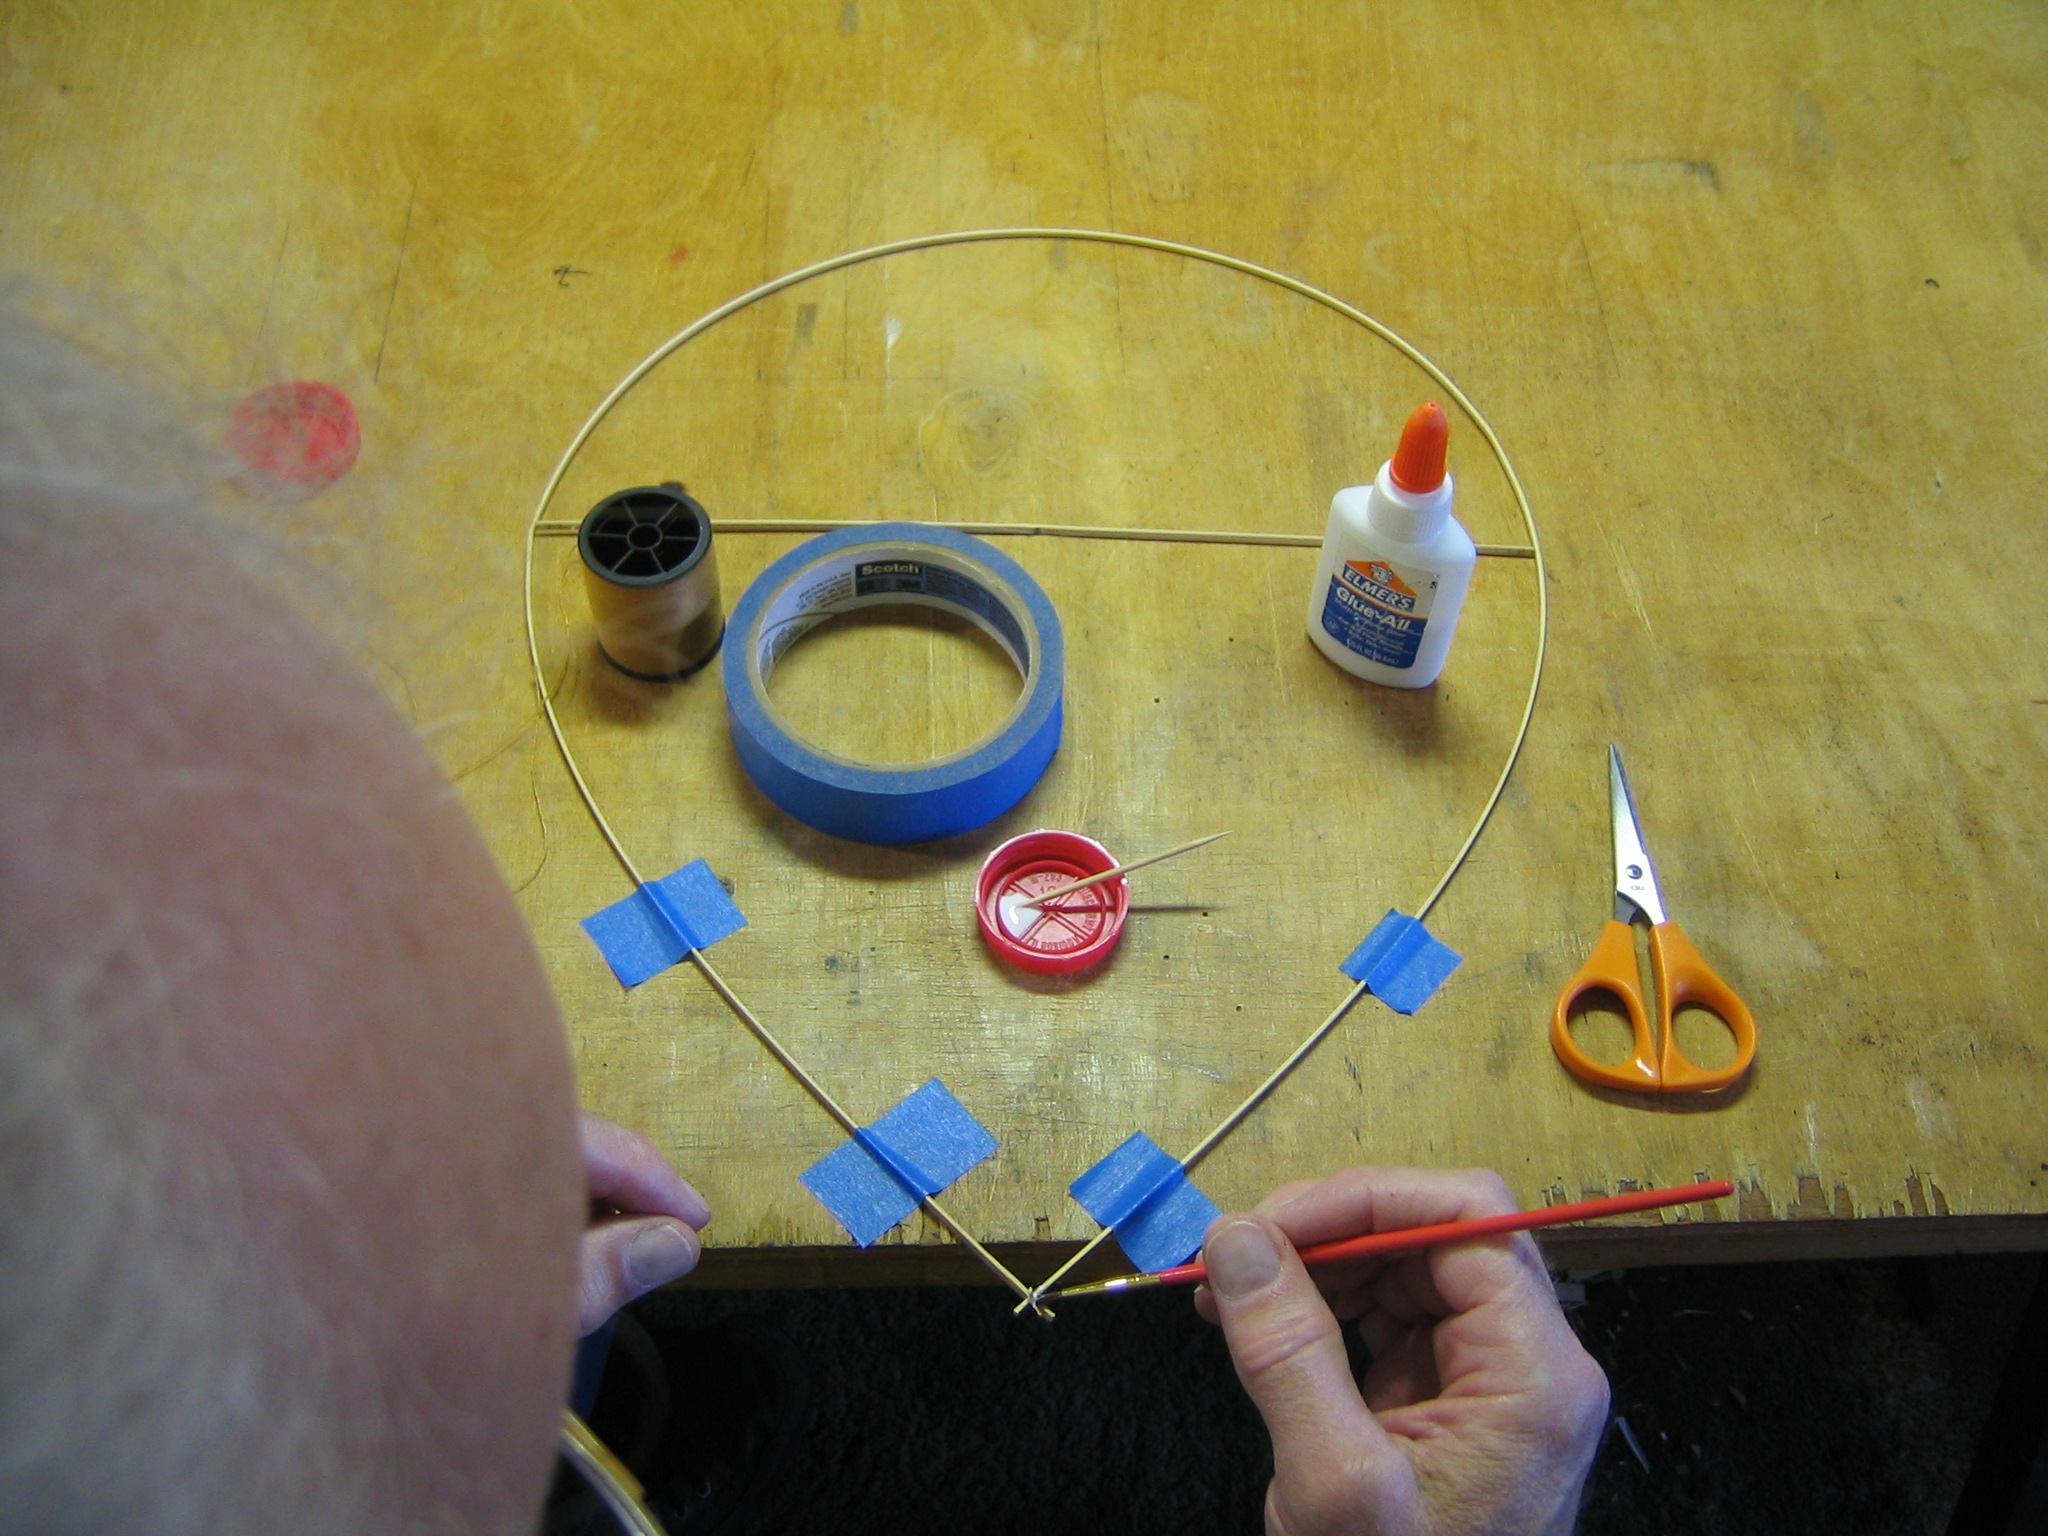
Paint the knot and thread with glue.
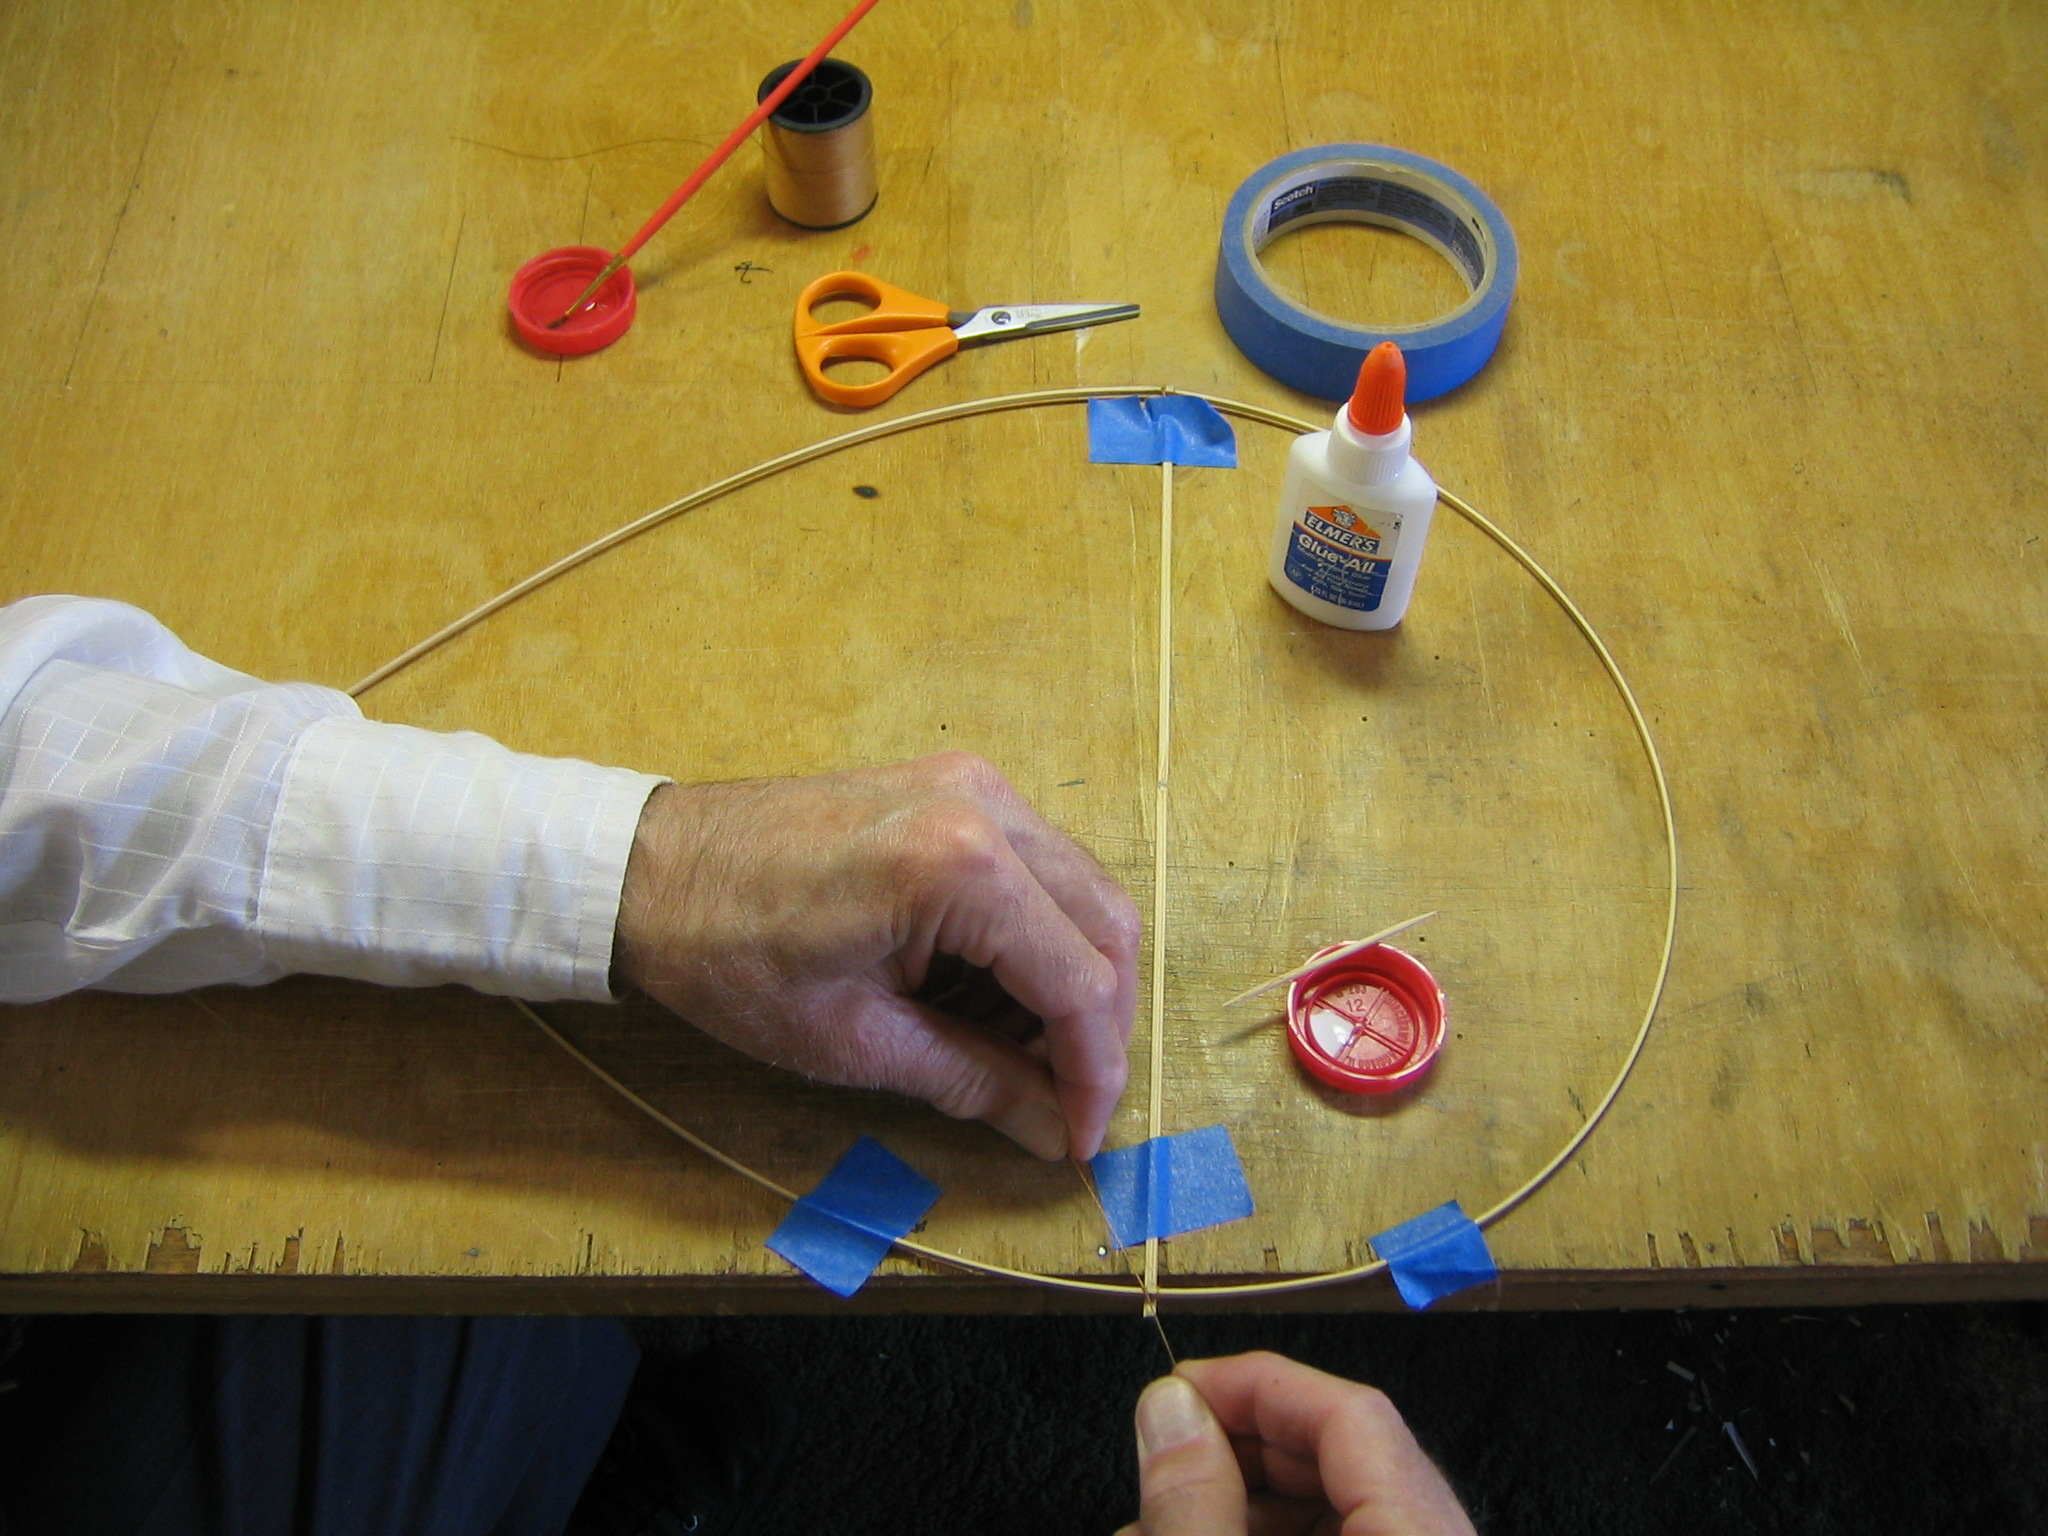
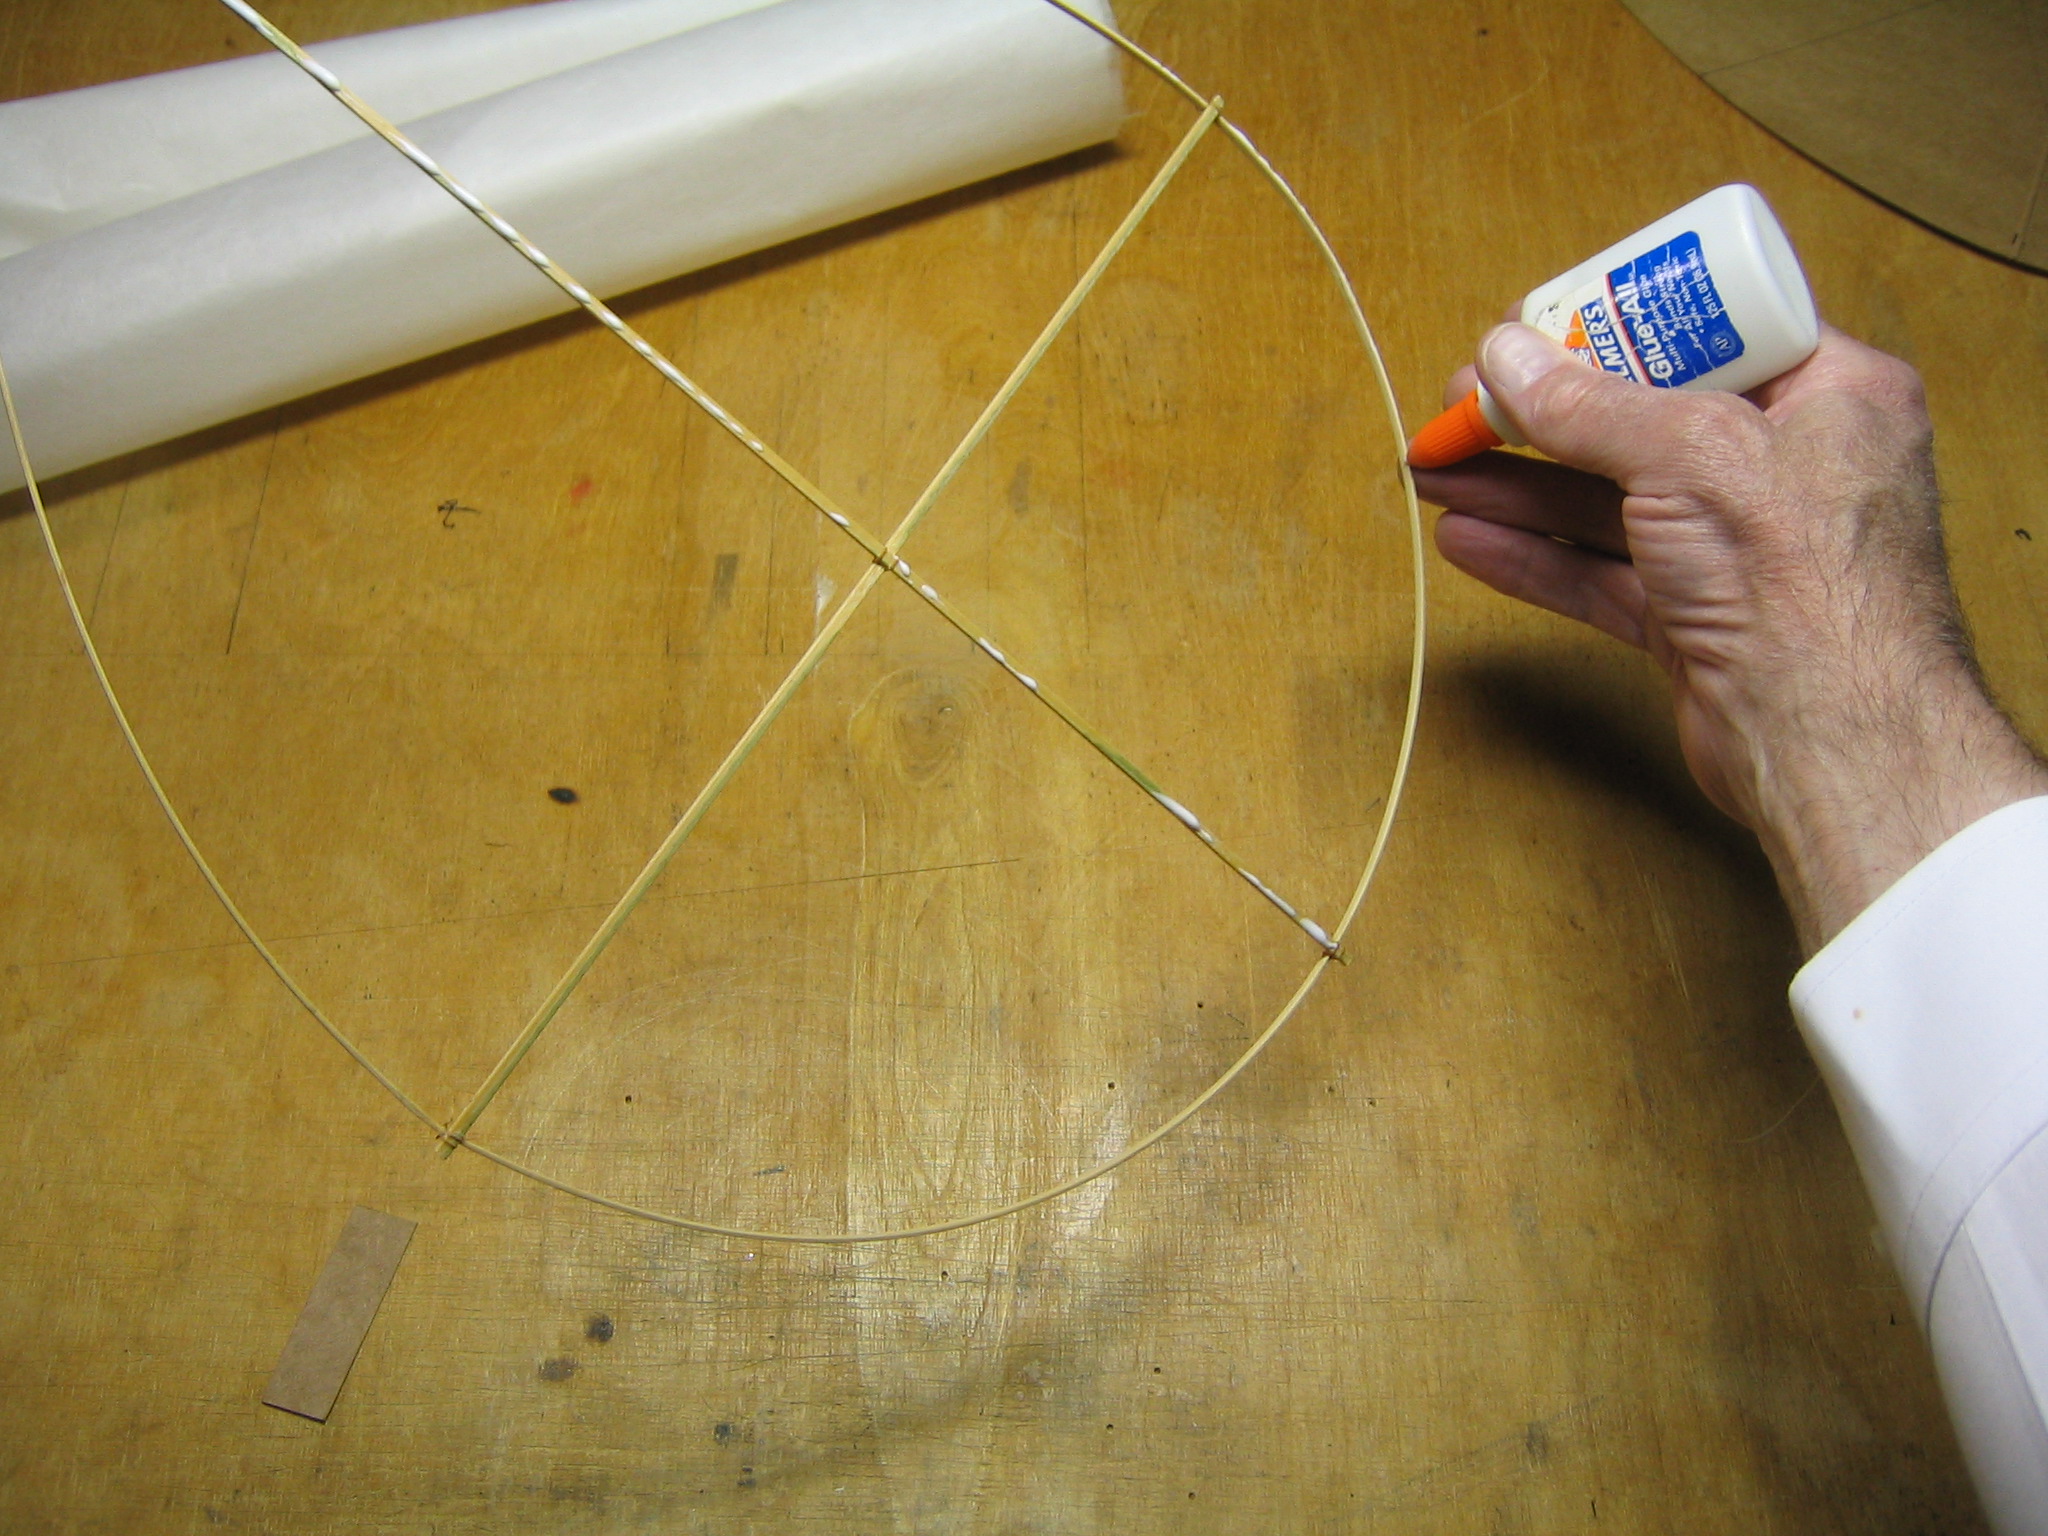
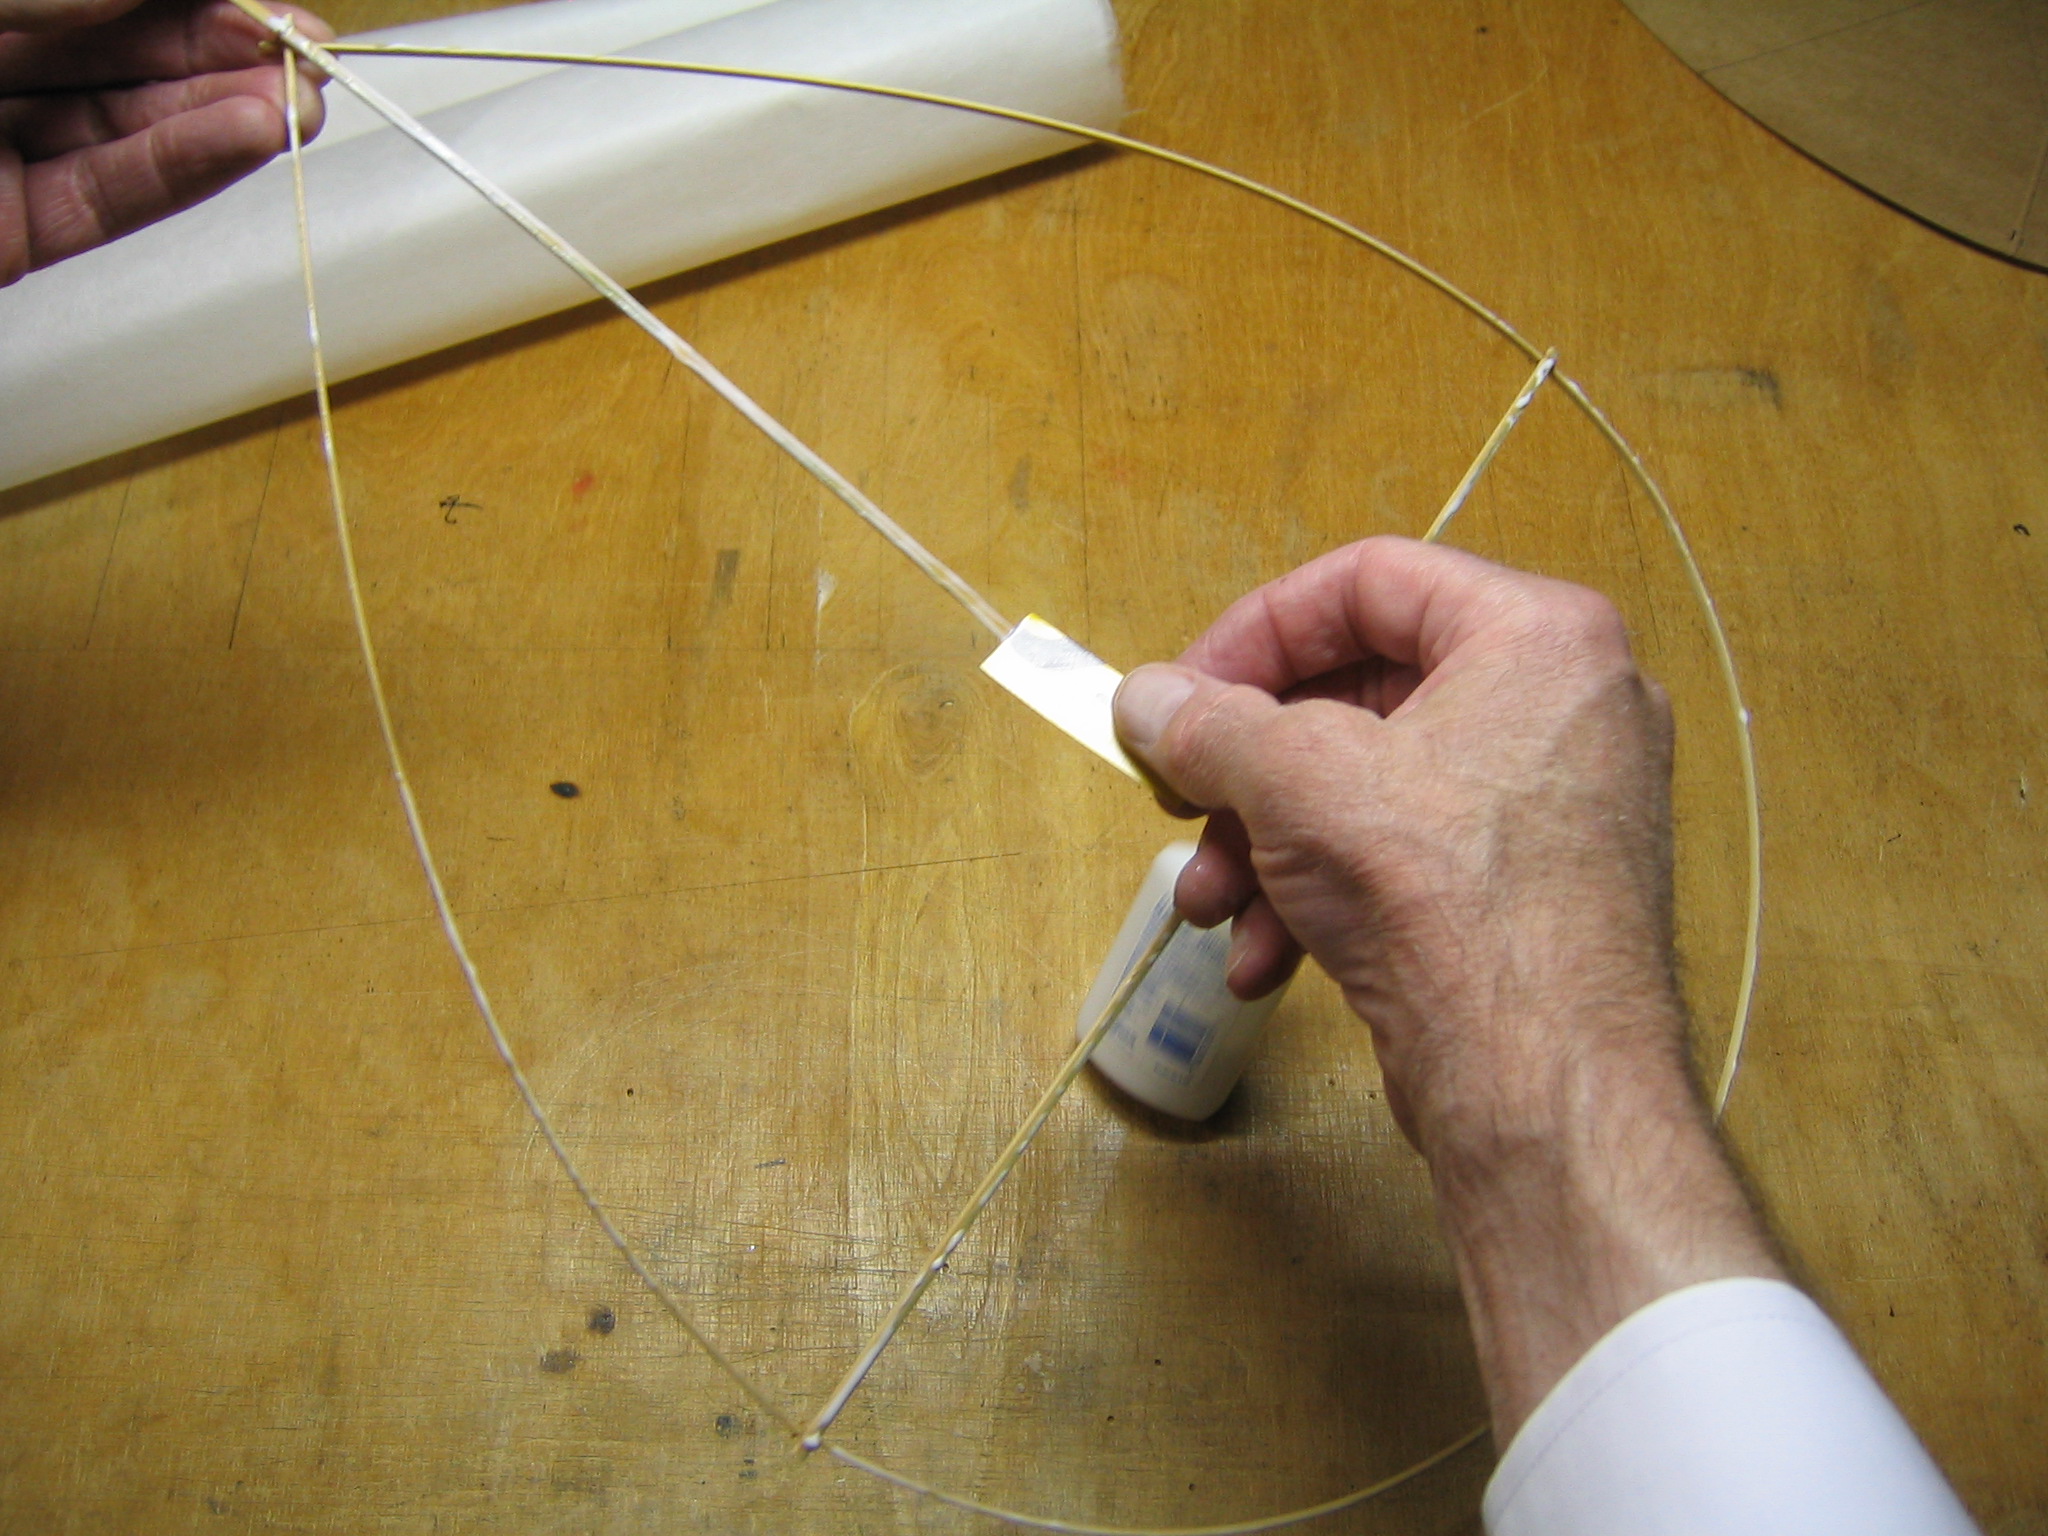
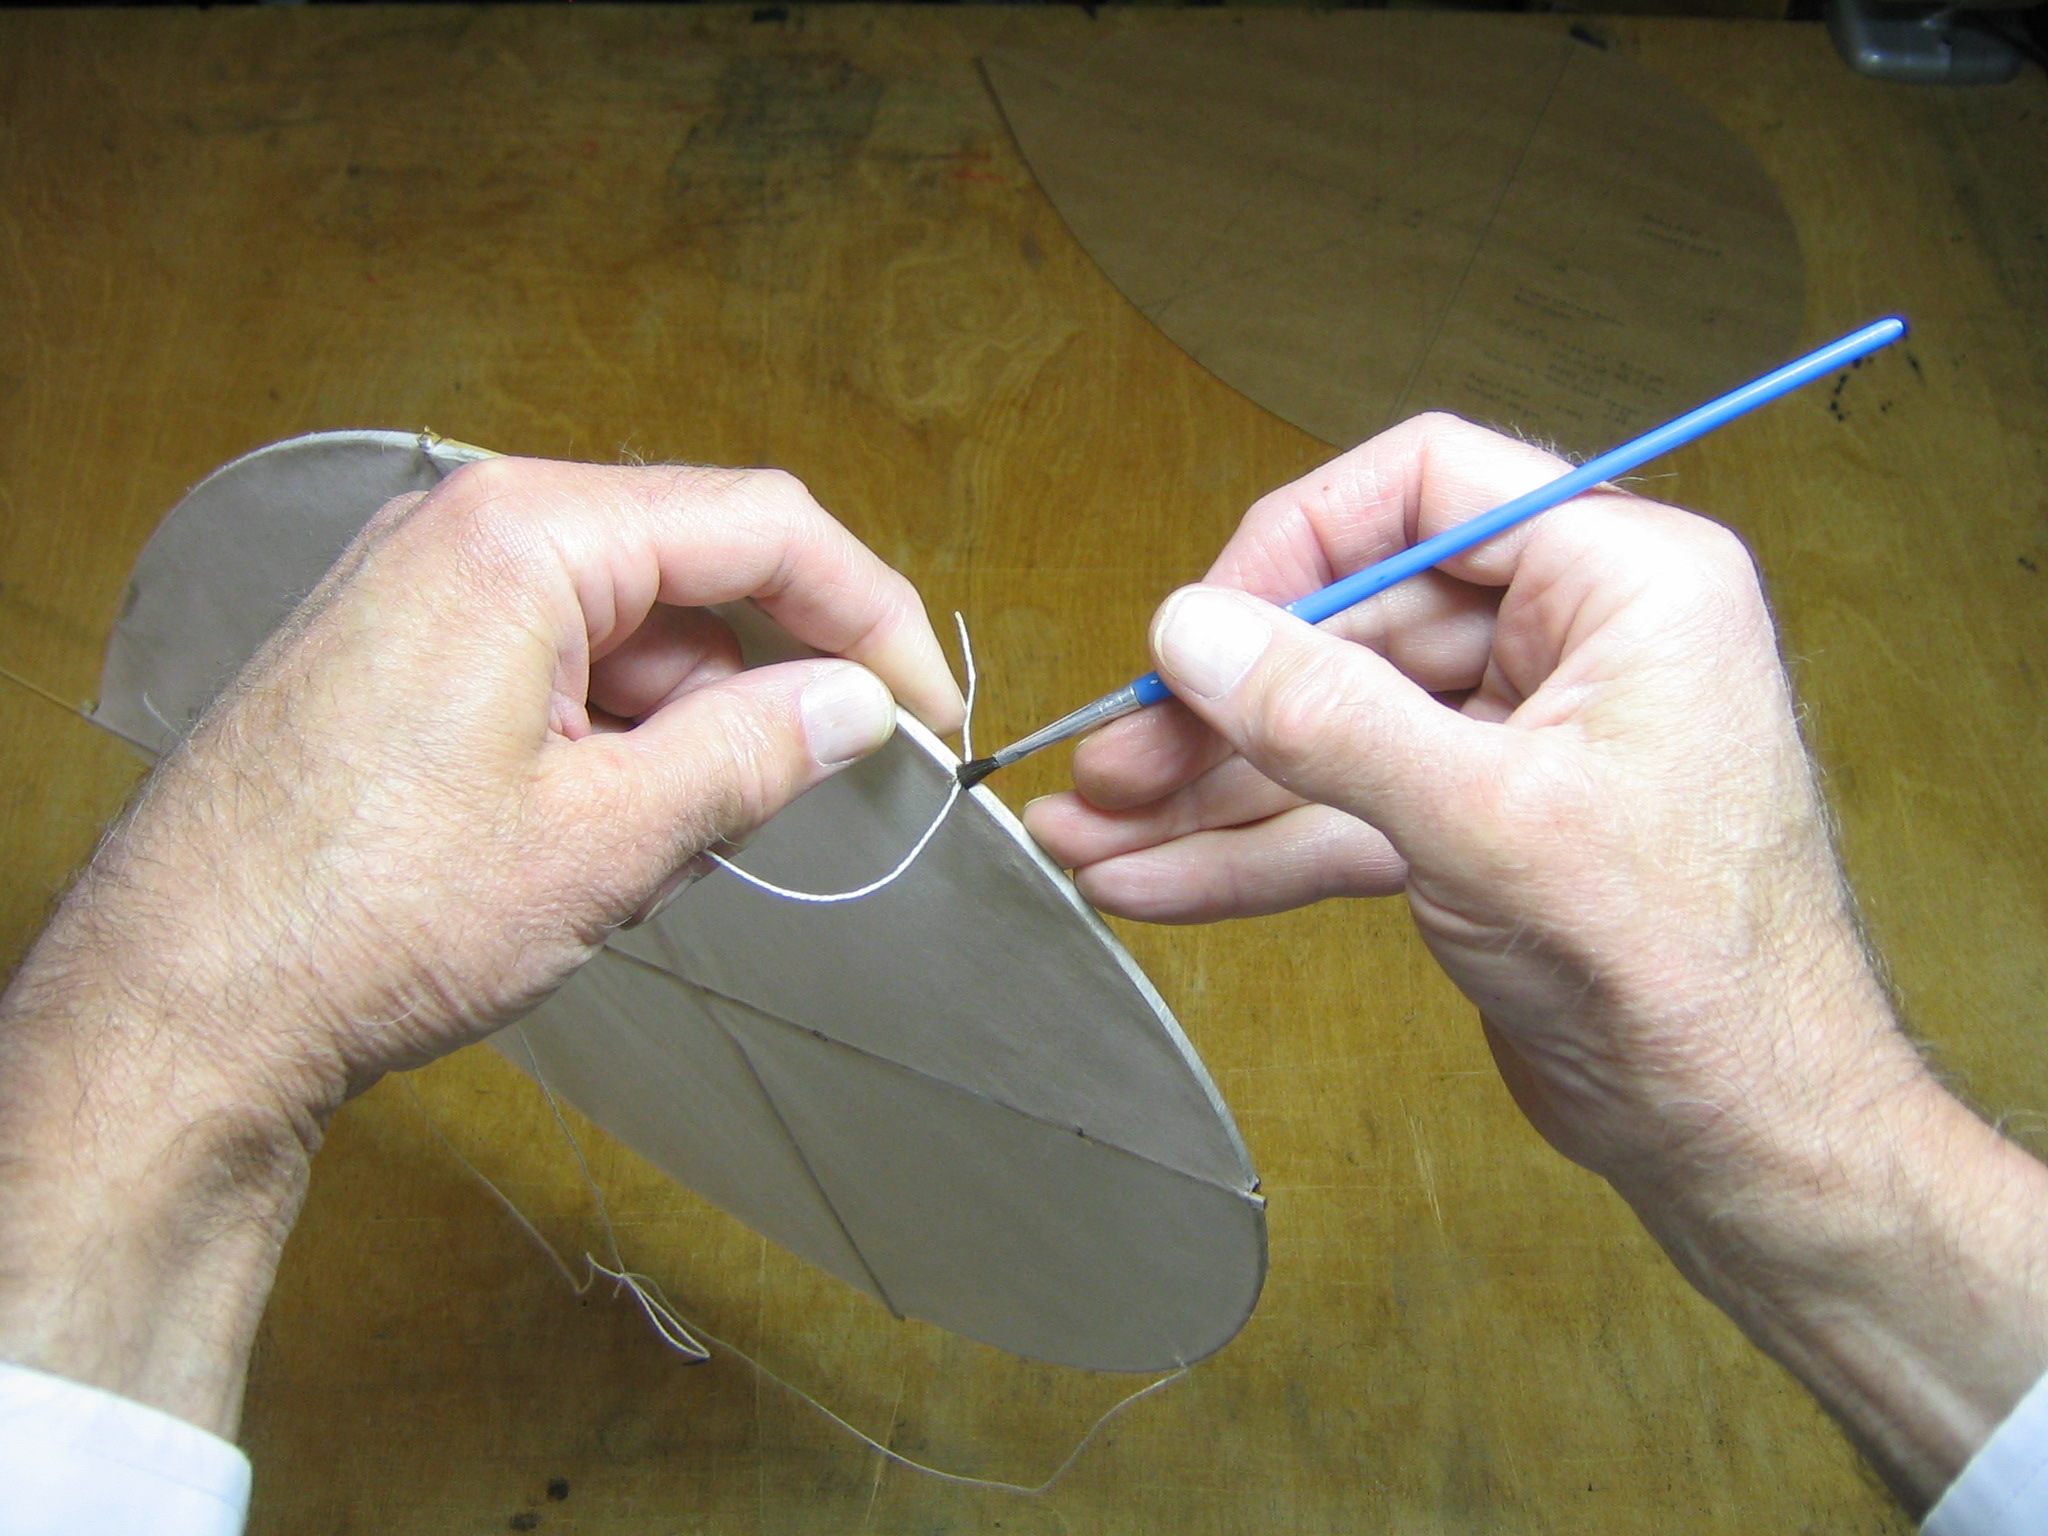
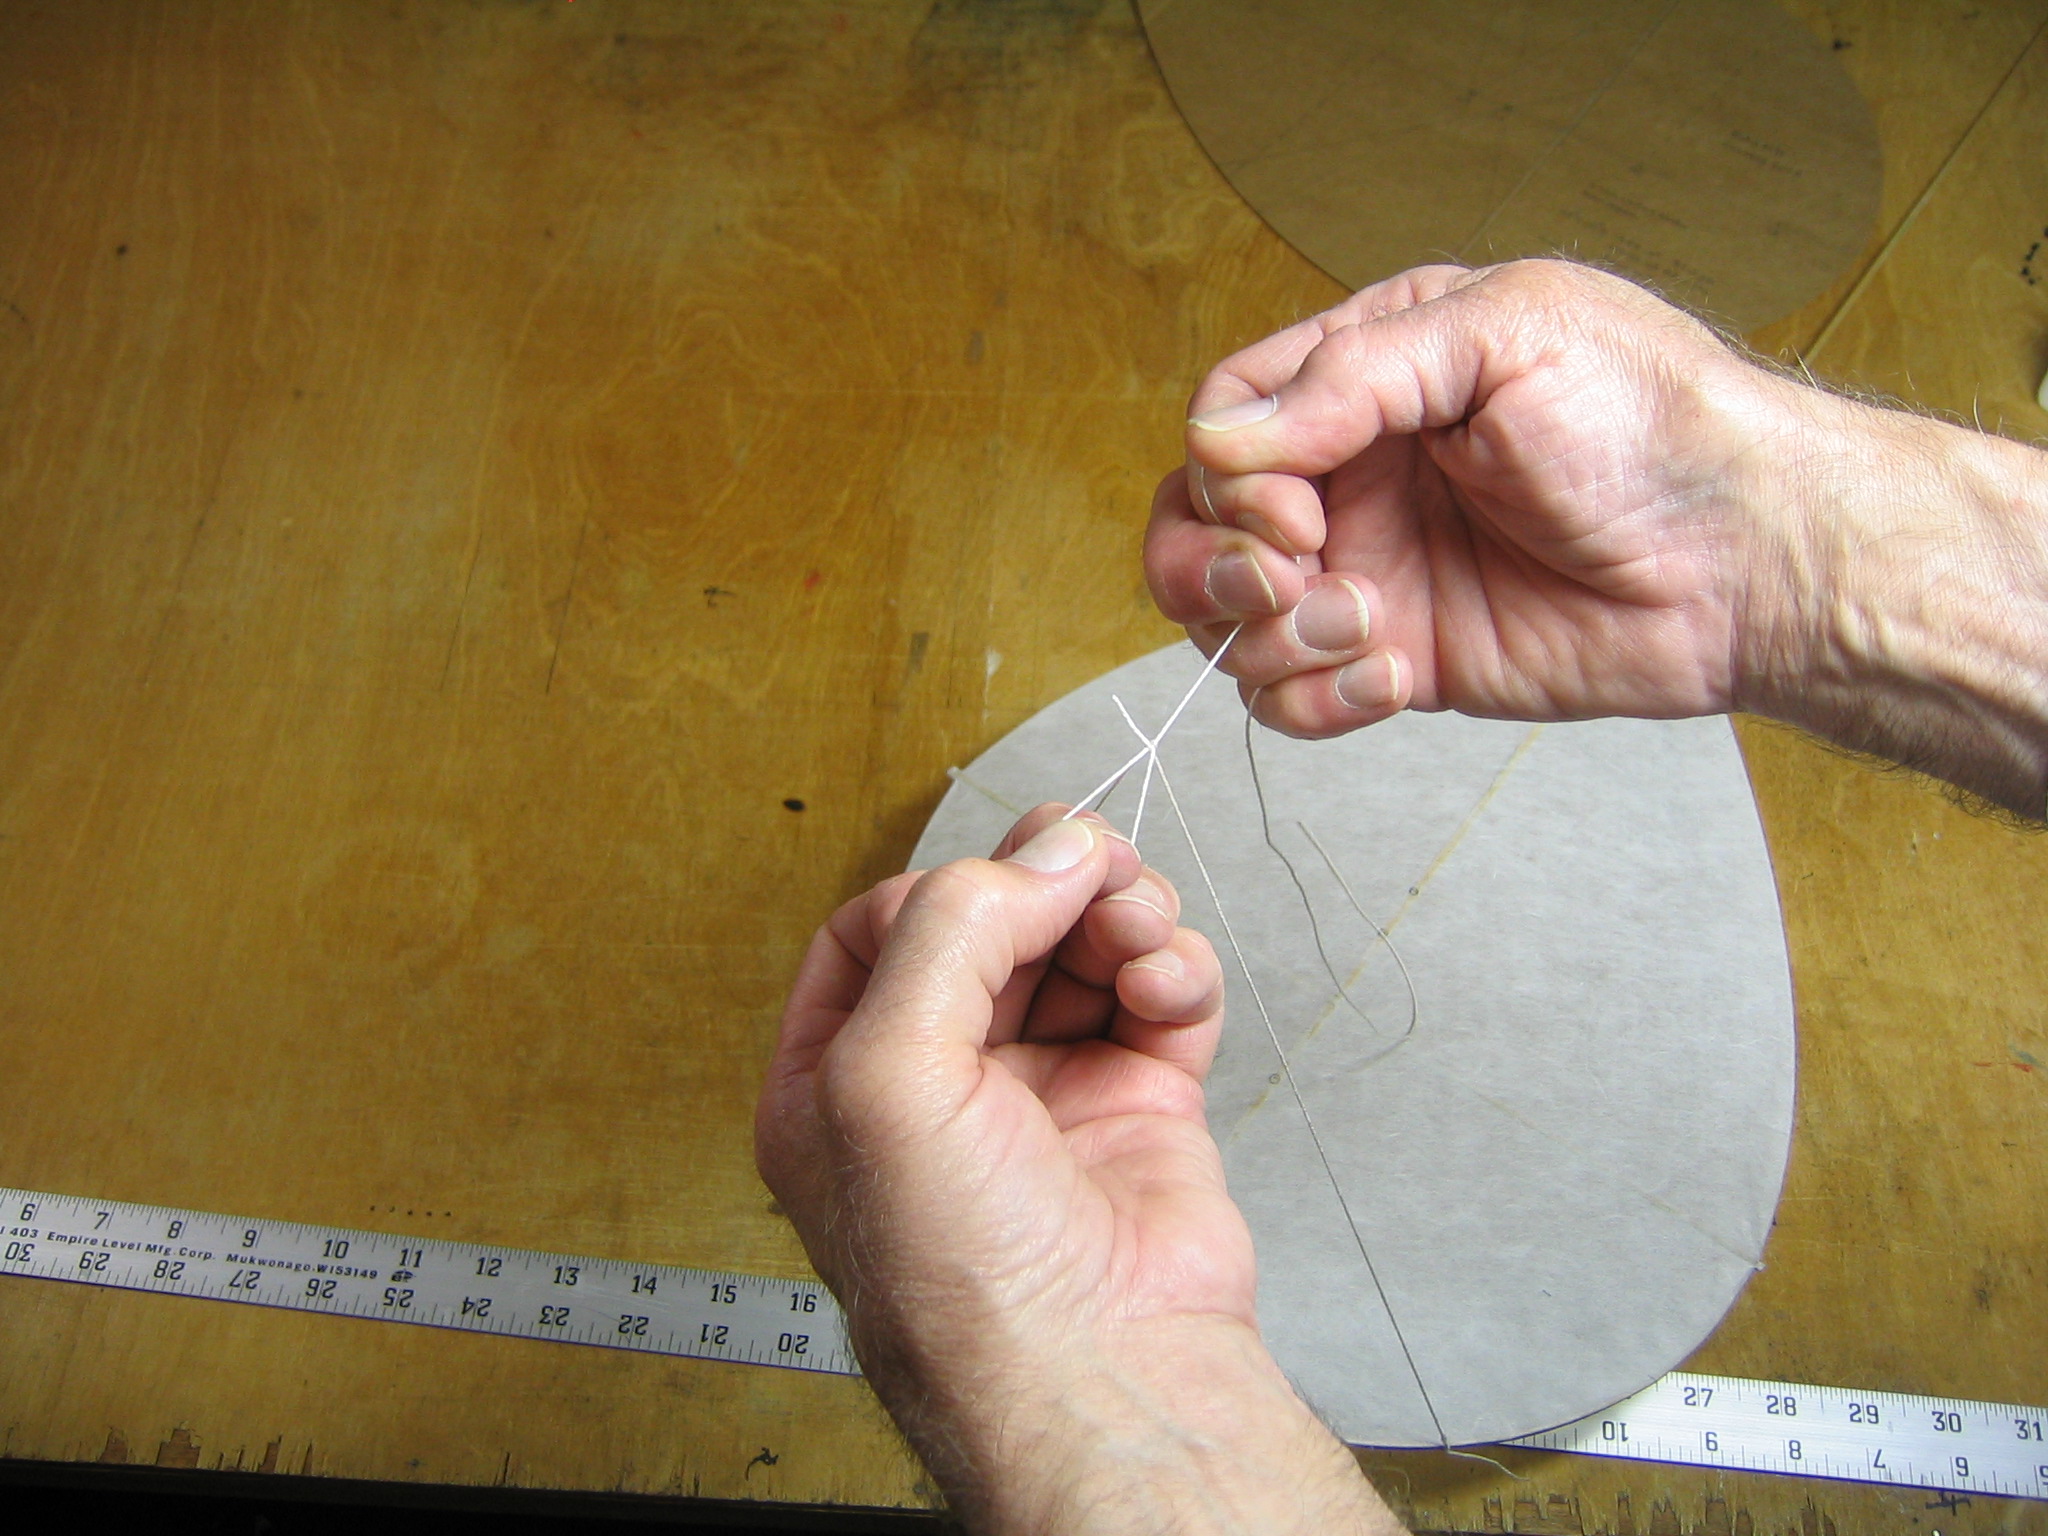
Next do the same for the cross stick. Tie and glue both ends to the perimeter loop.
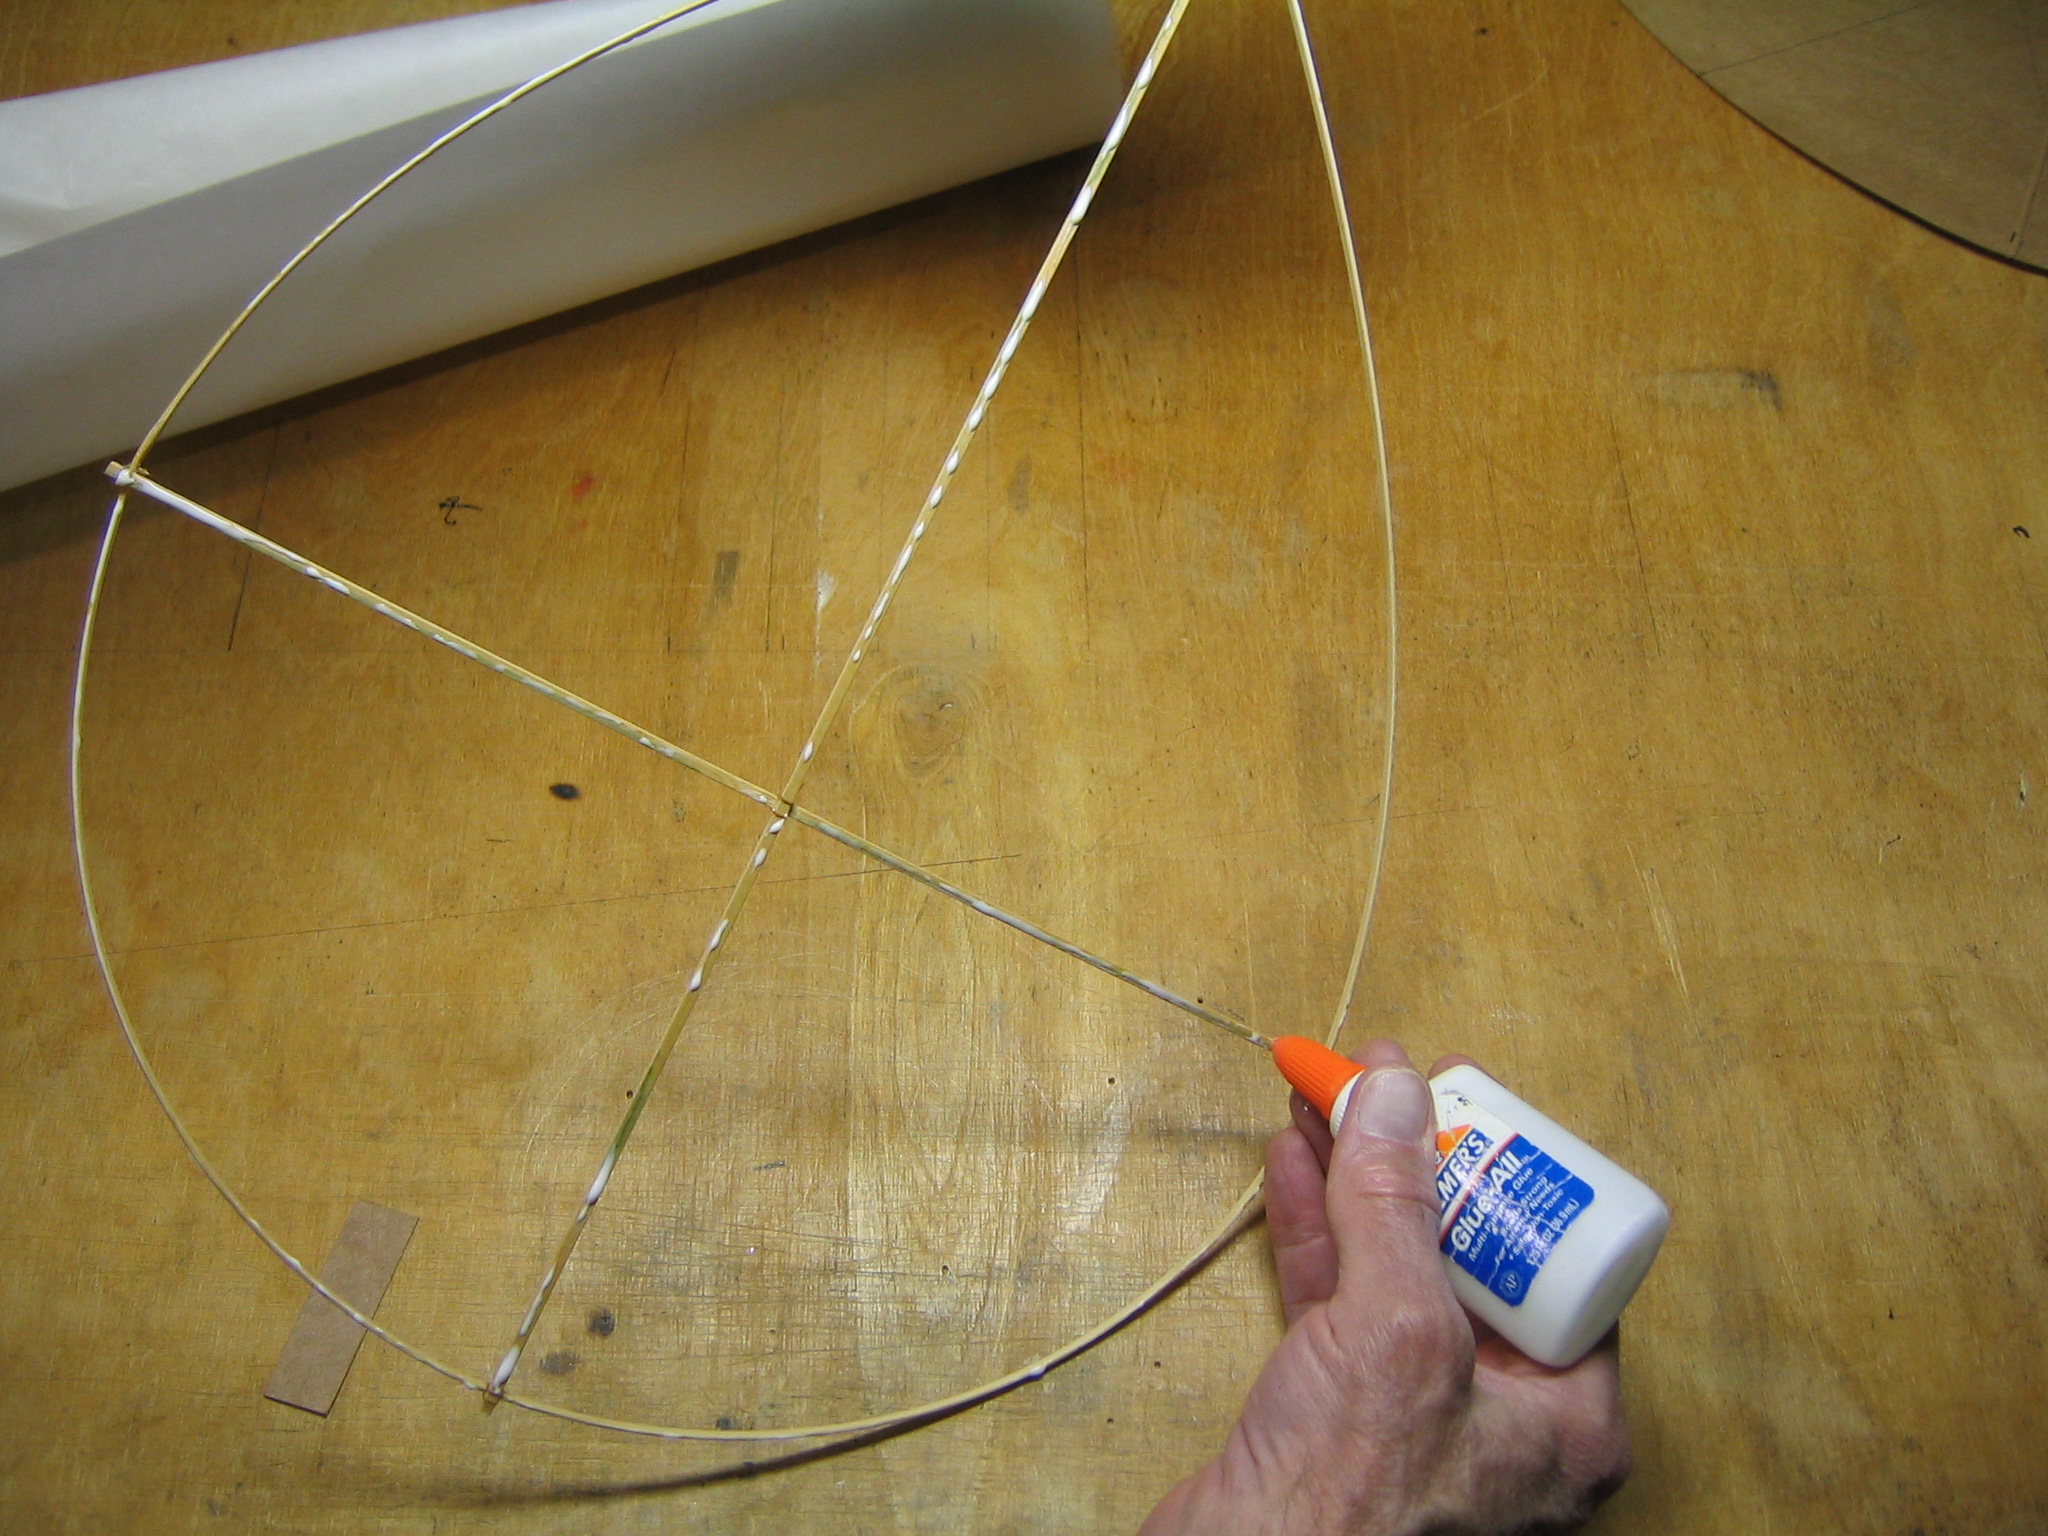
Now glue and tie the spine to the front bow of the perimeter stick at the 1/8″ mark.
Tie the spine to the overlapping joint of the perimeter stick.
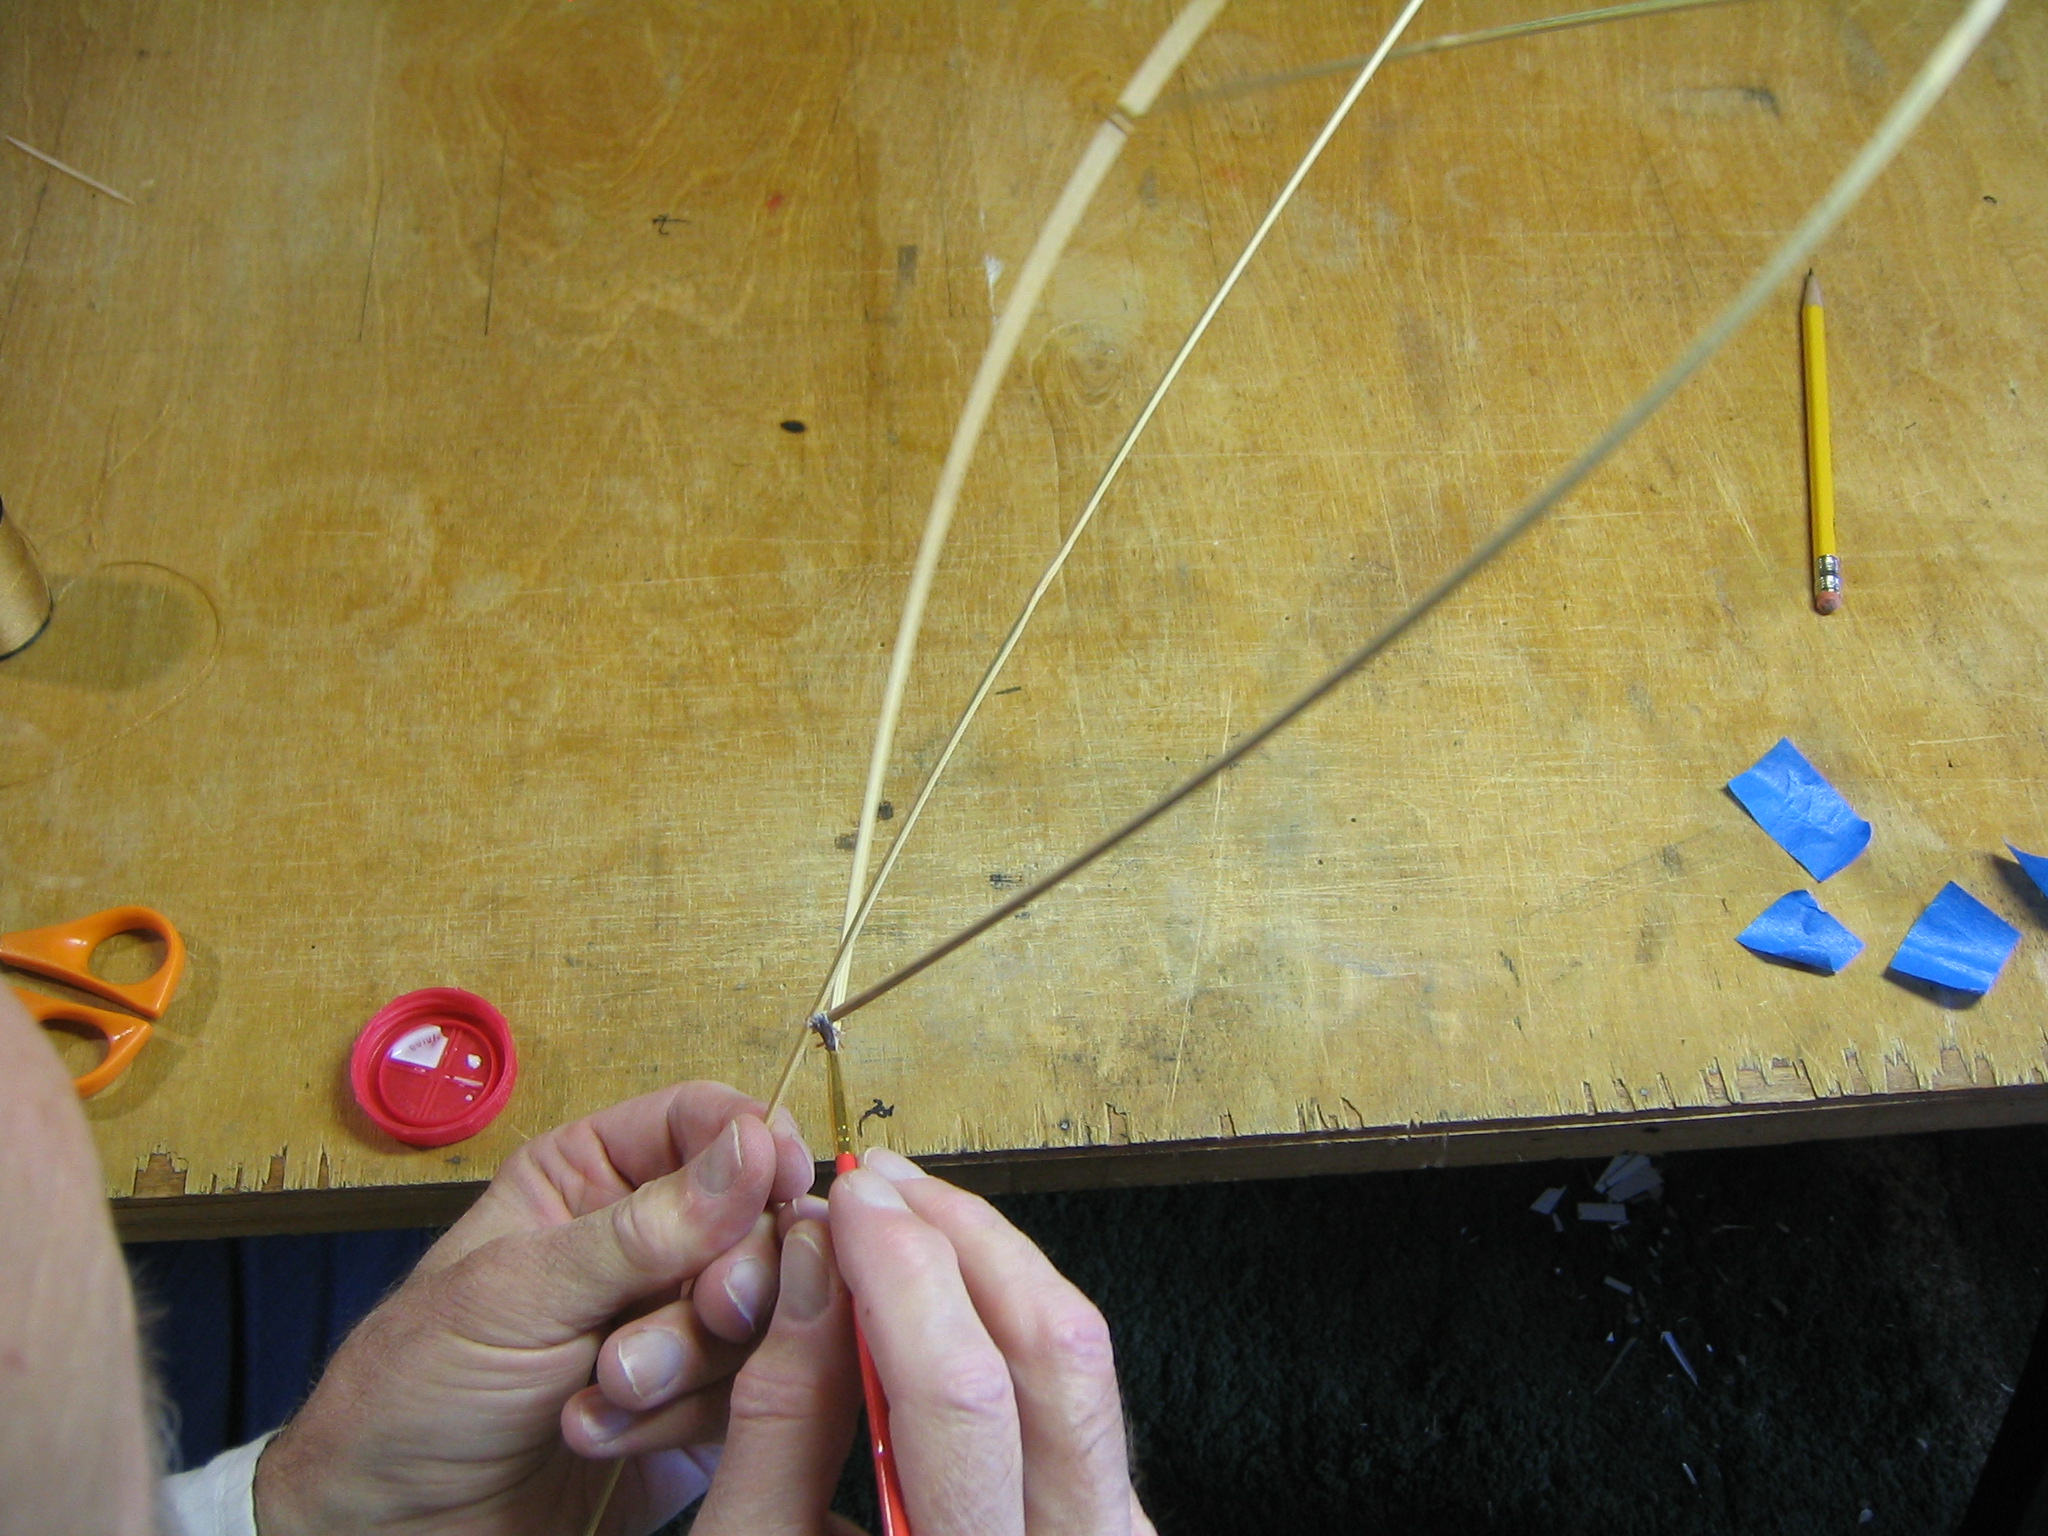
Paint glue all over the joint.
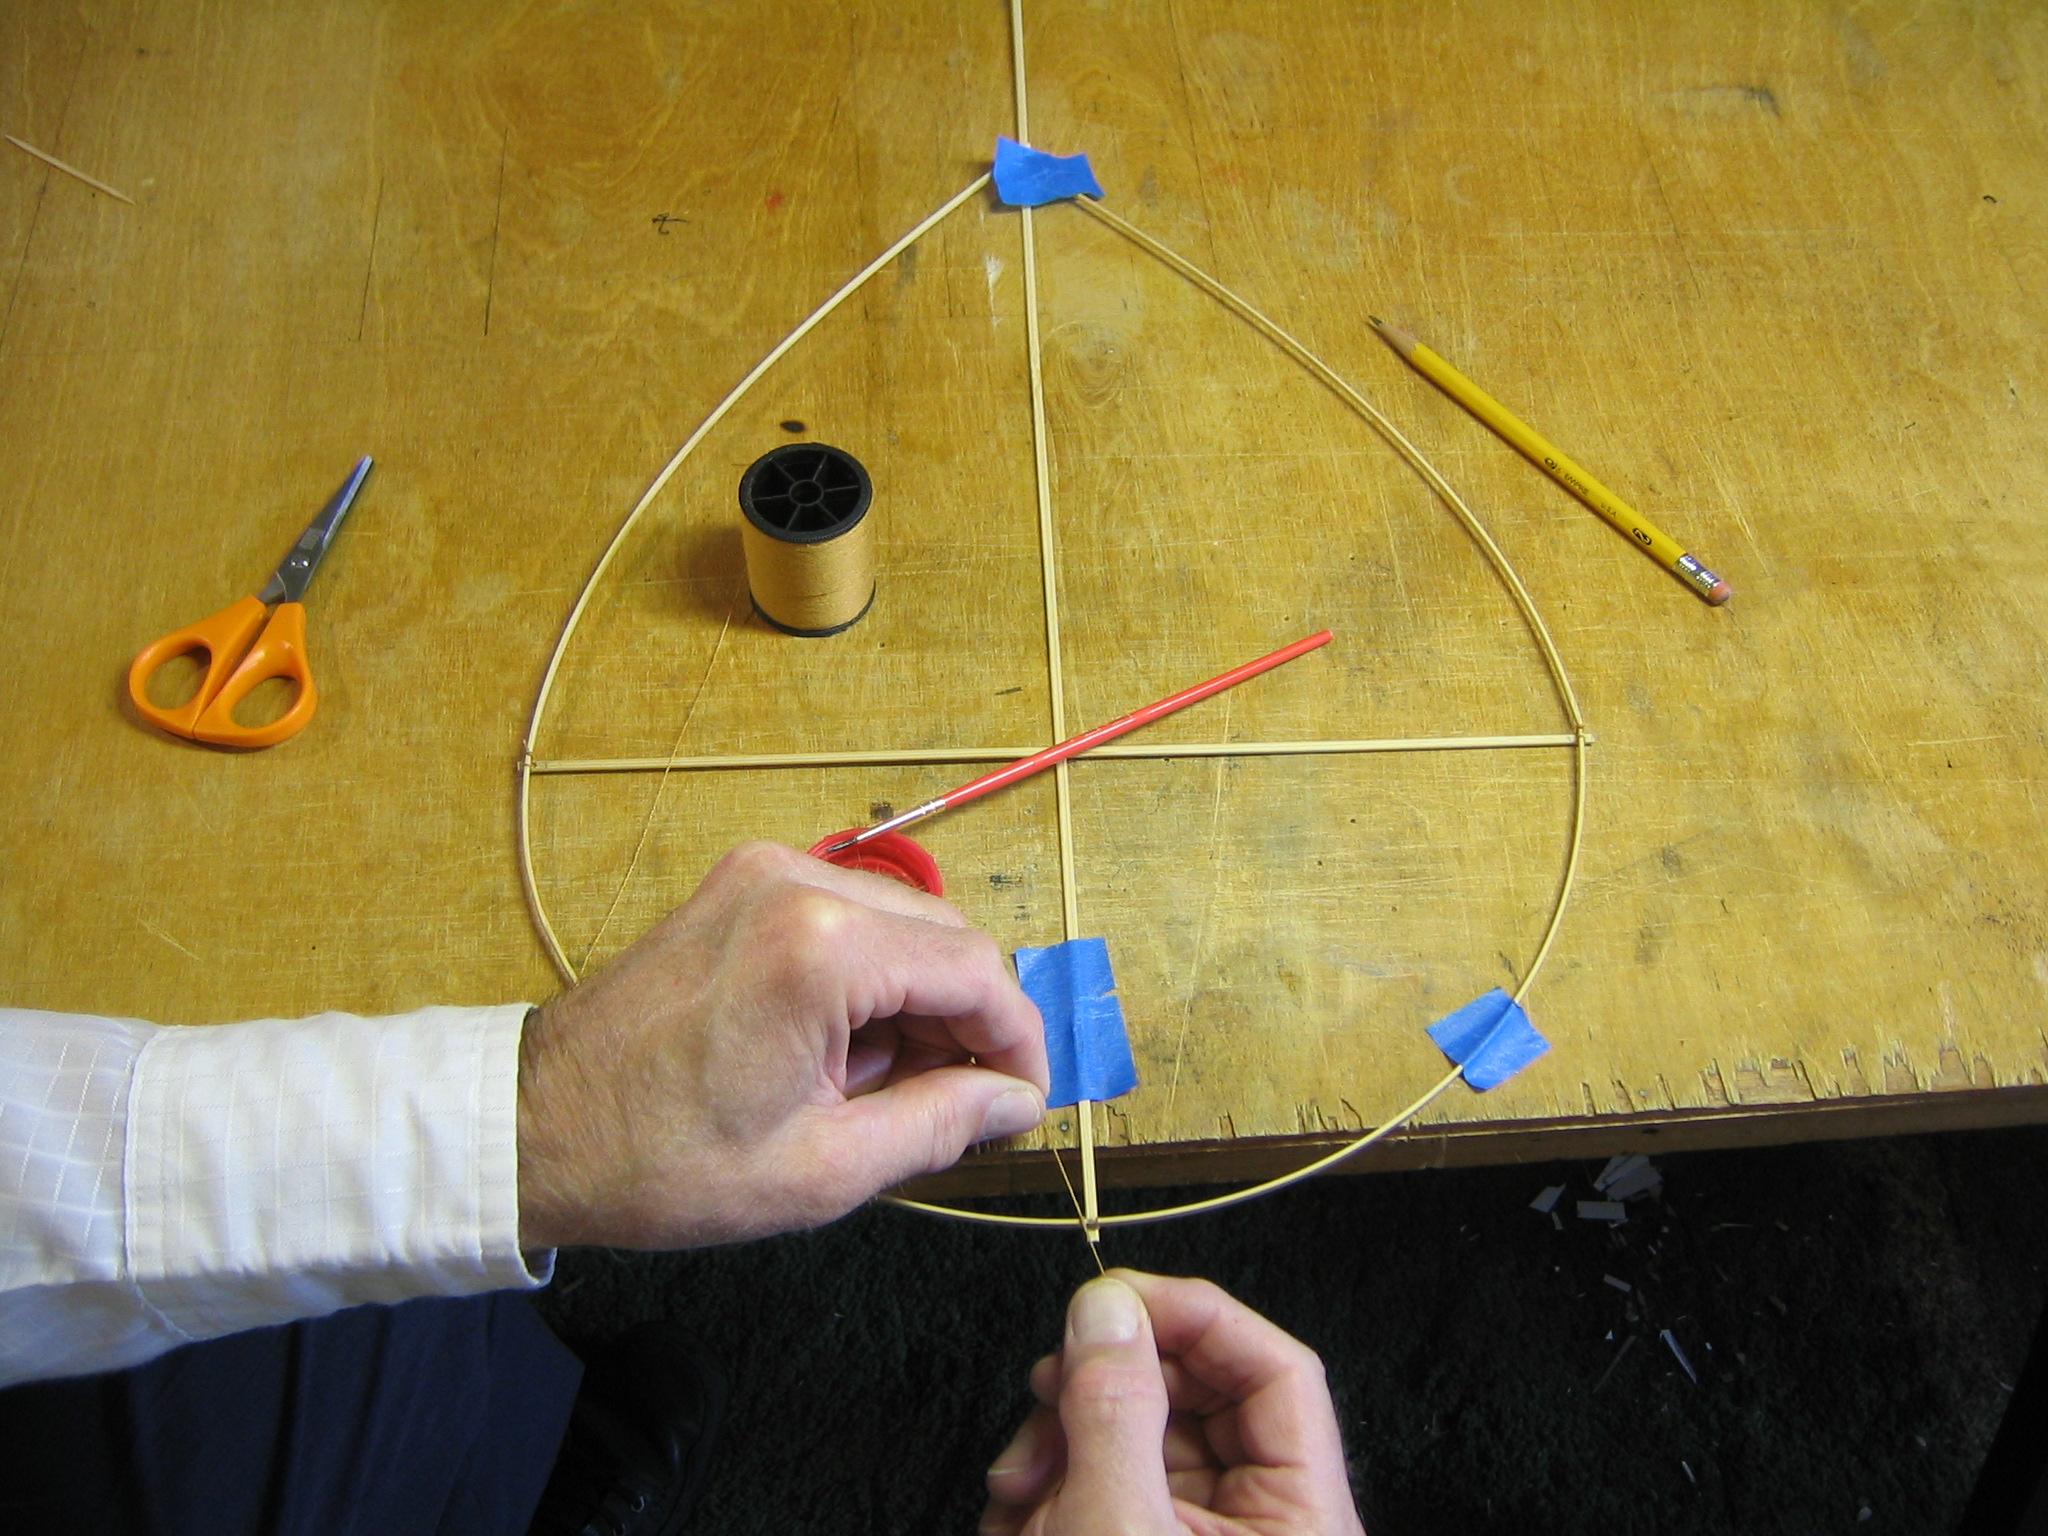
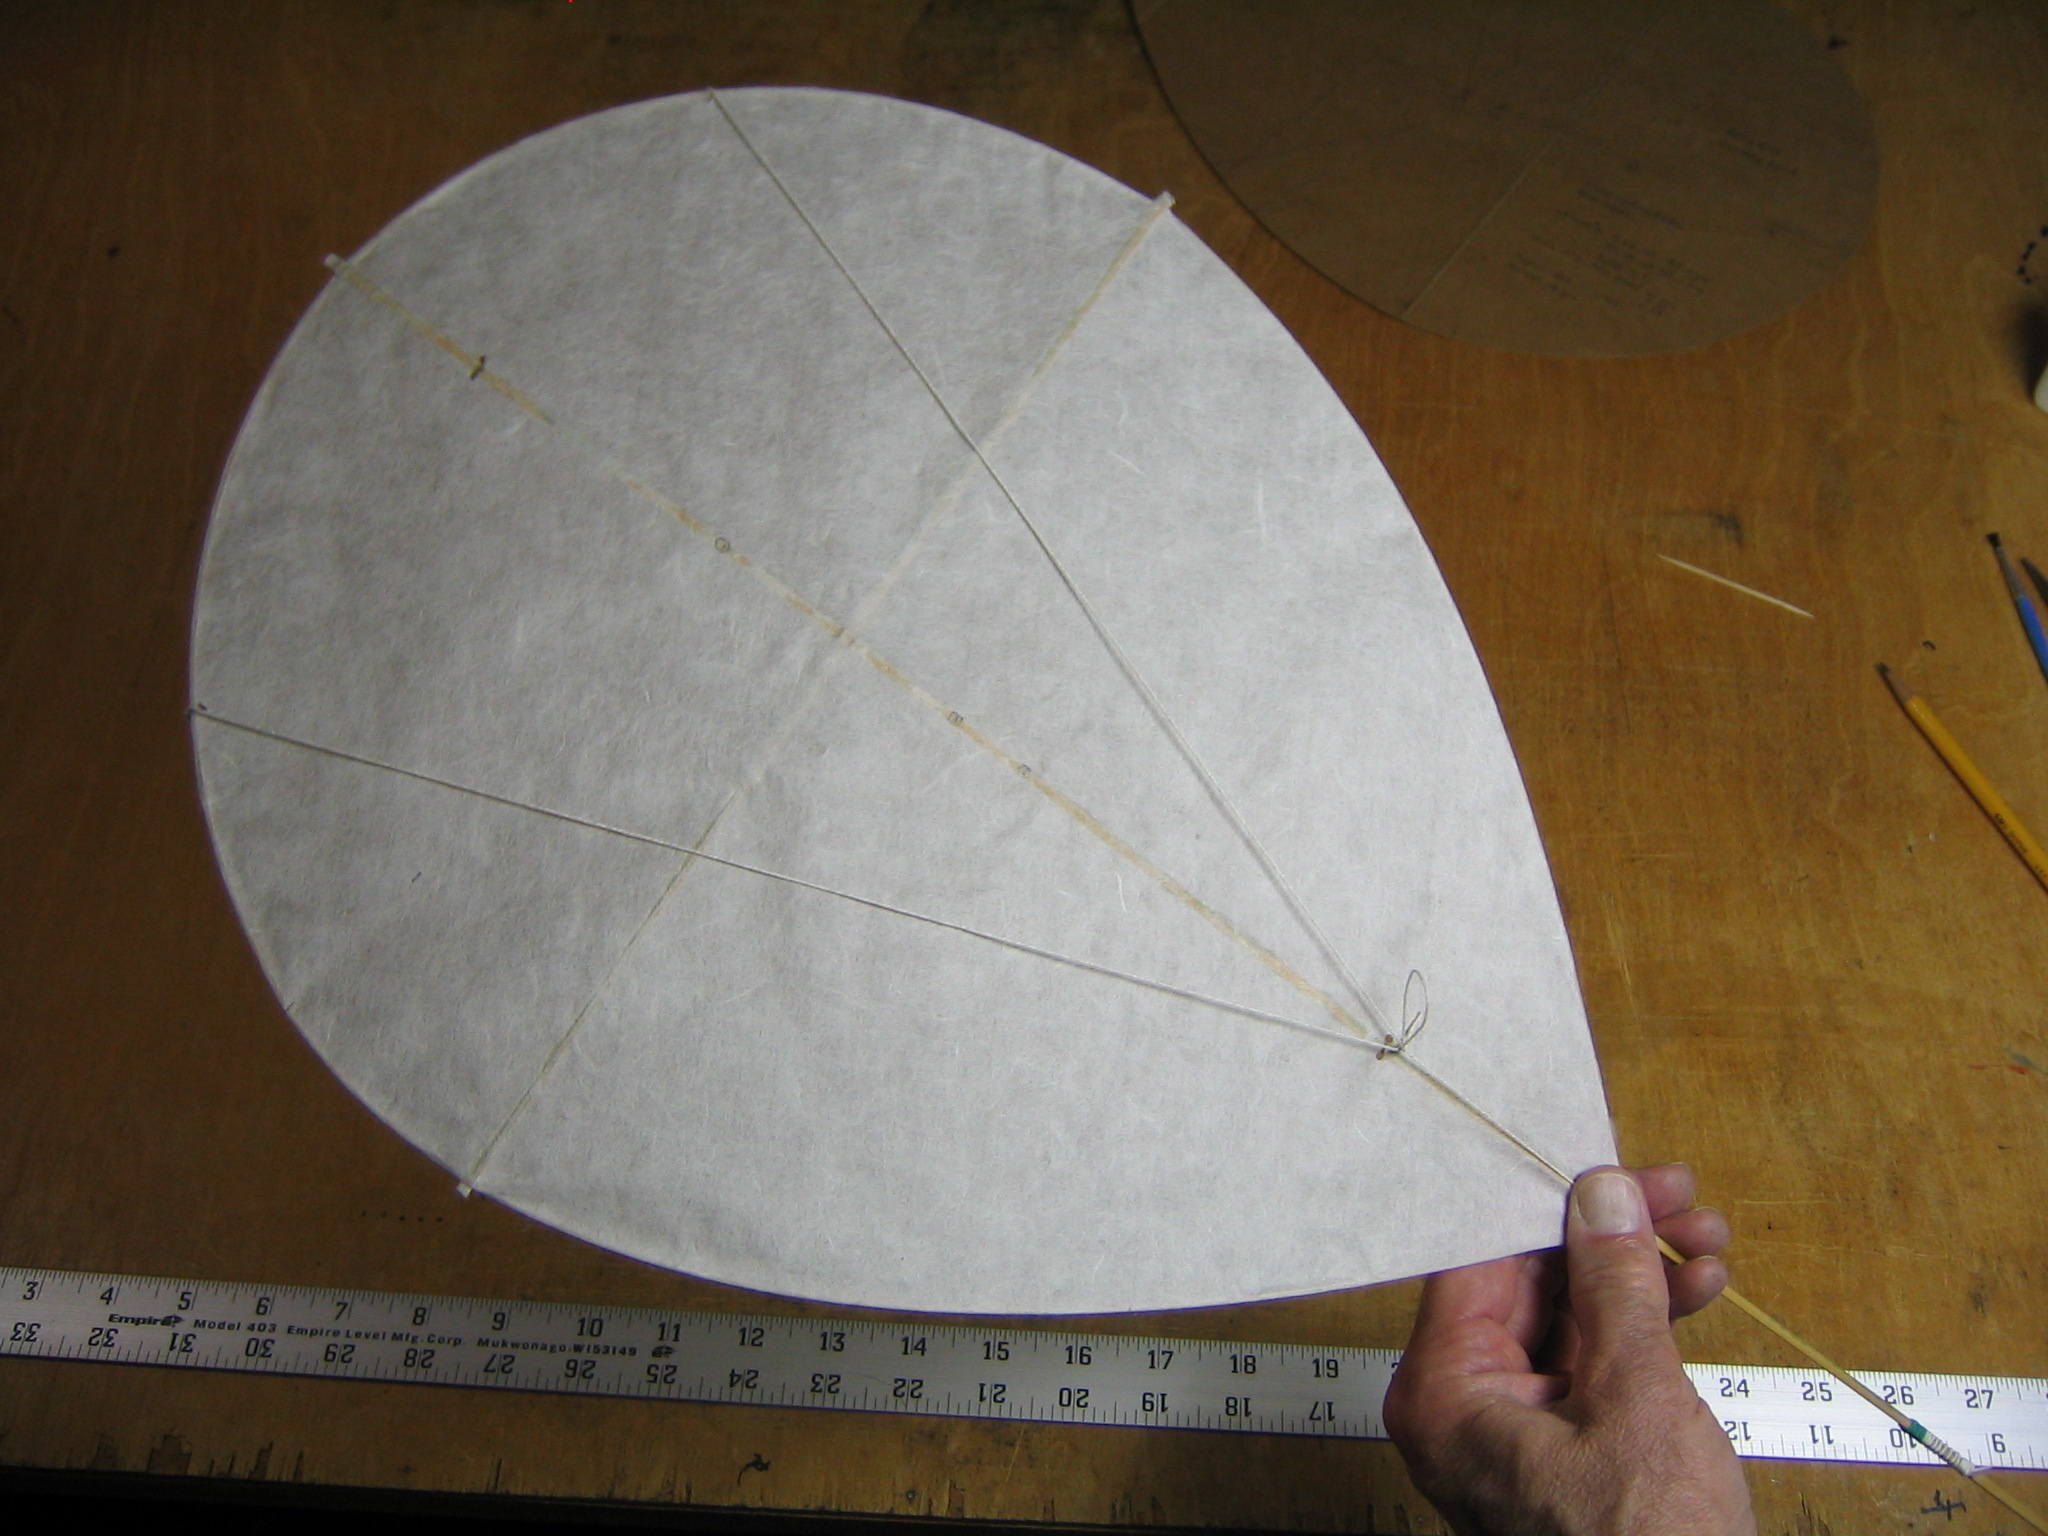
Tie and glue the cross stick to the spine. Note that the order of the sticks is, from table top up, spine, cross stick, perimeter.
Area Measurement
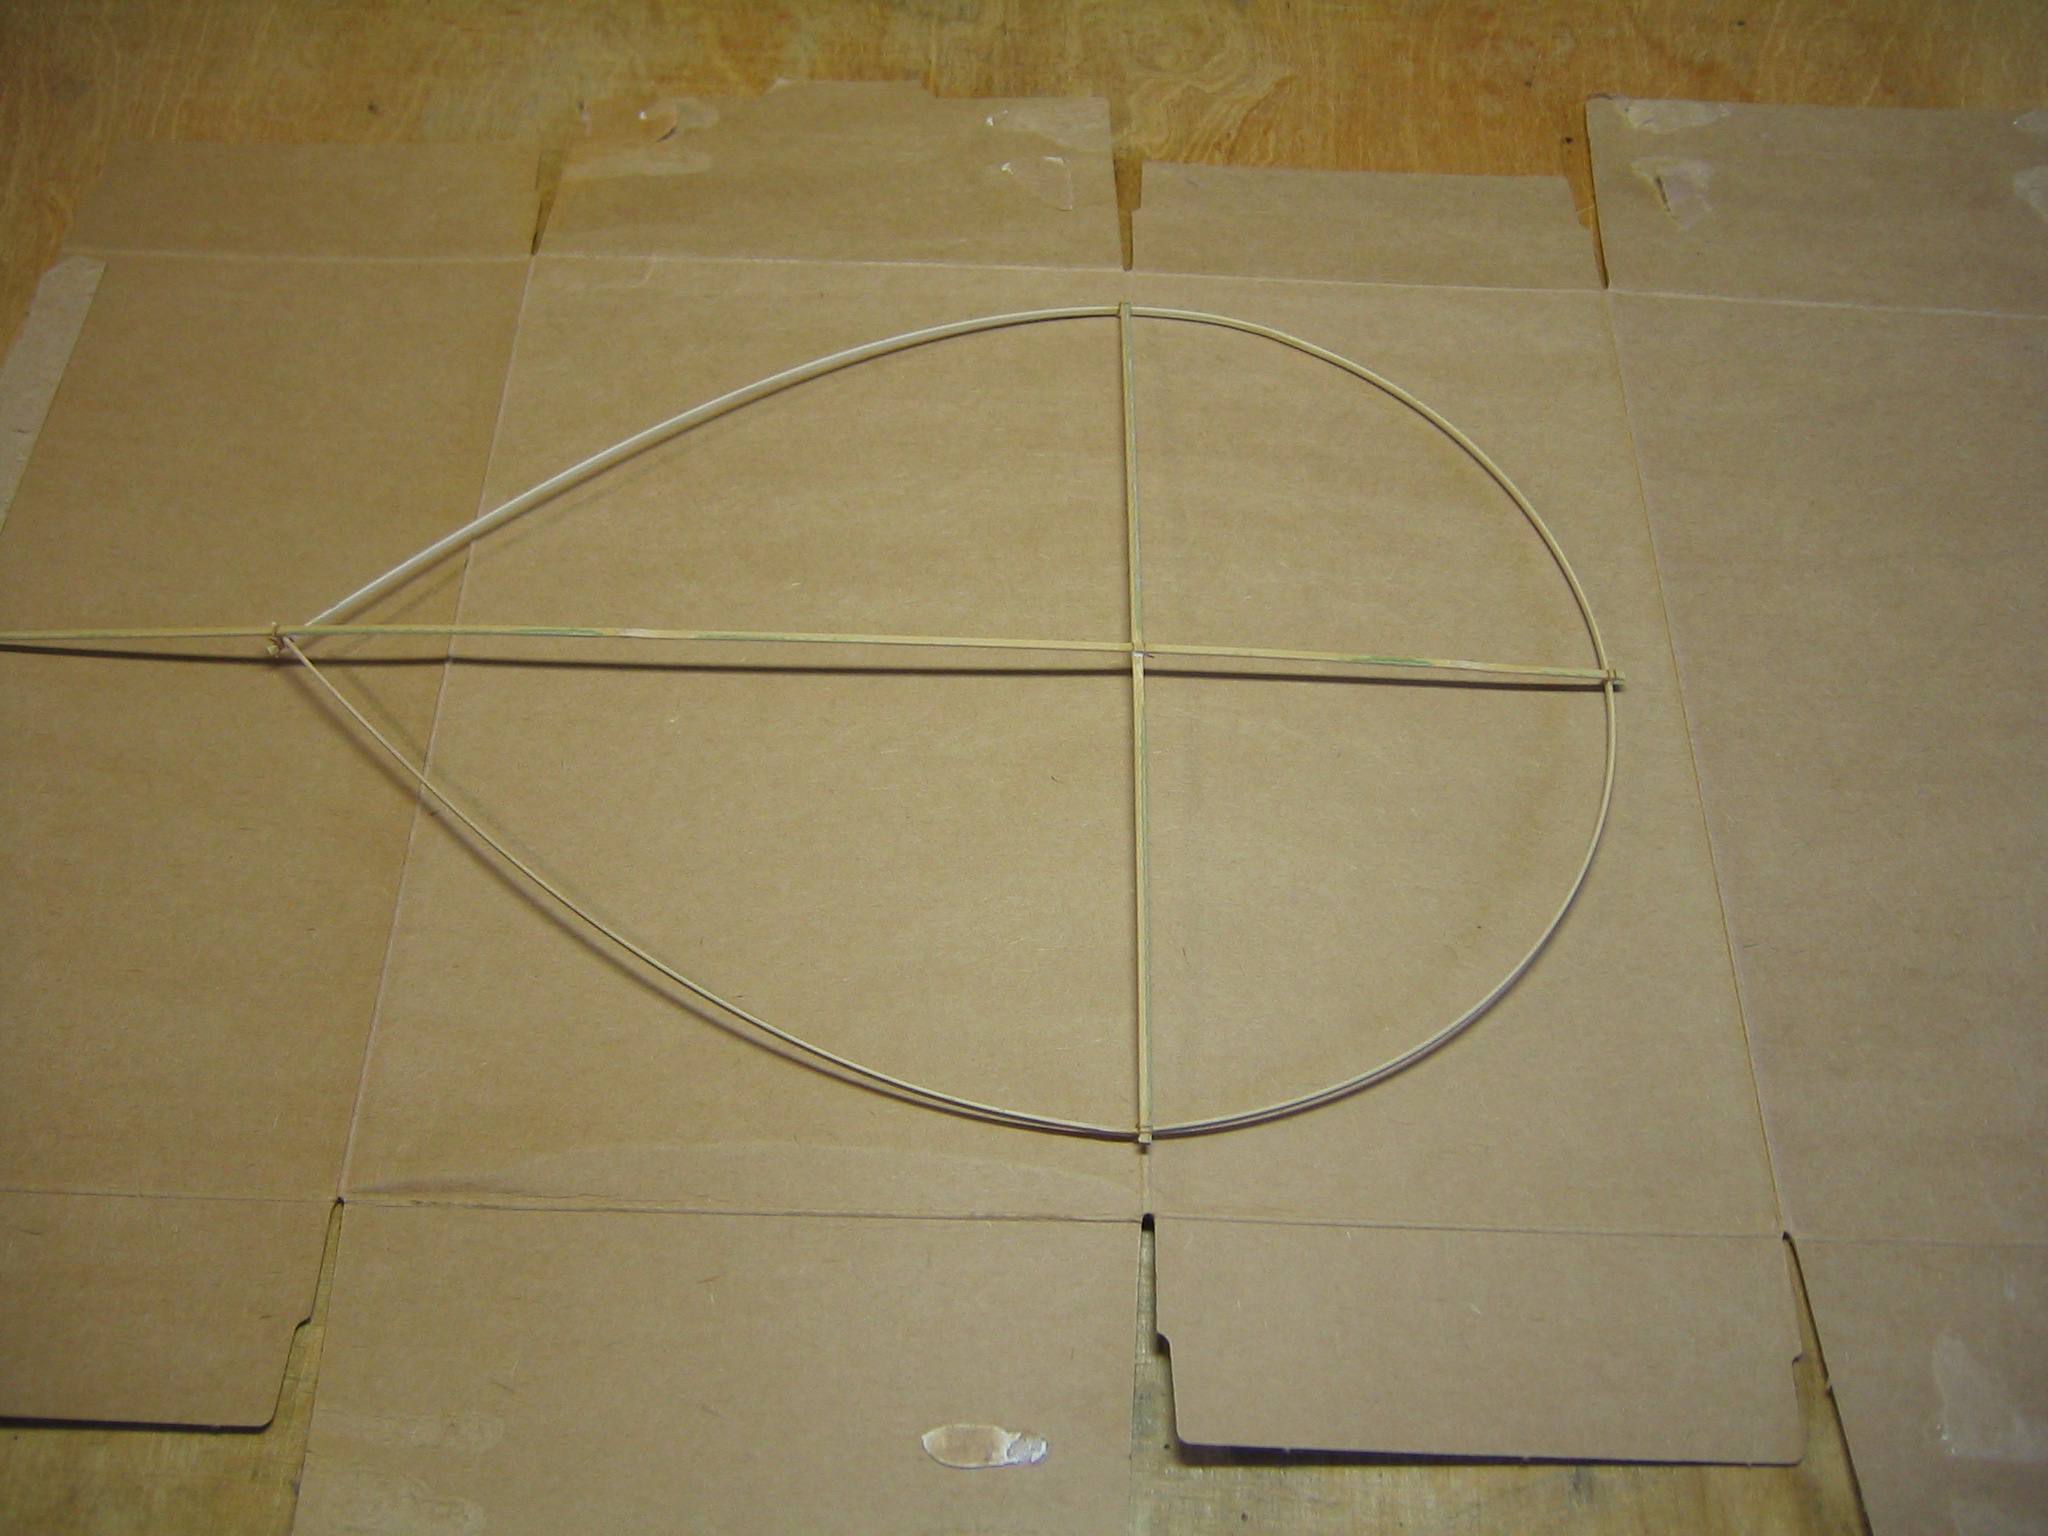
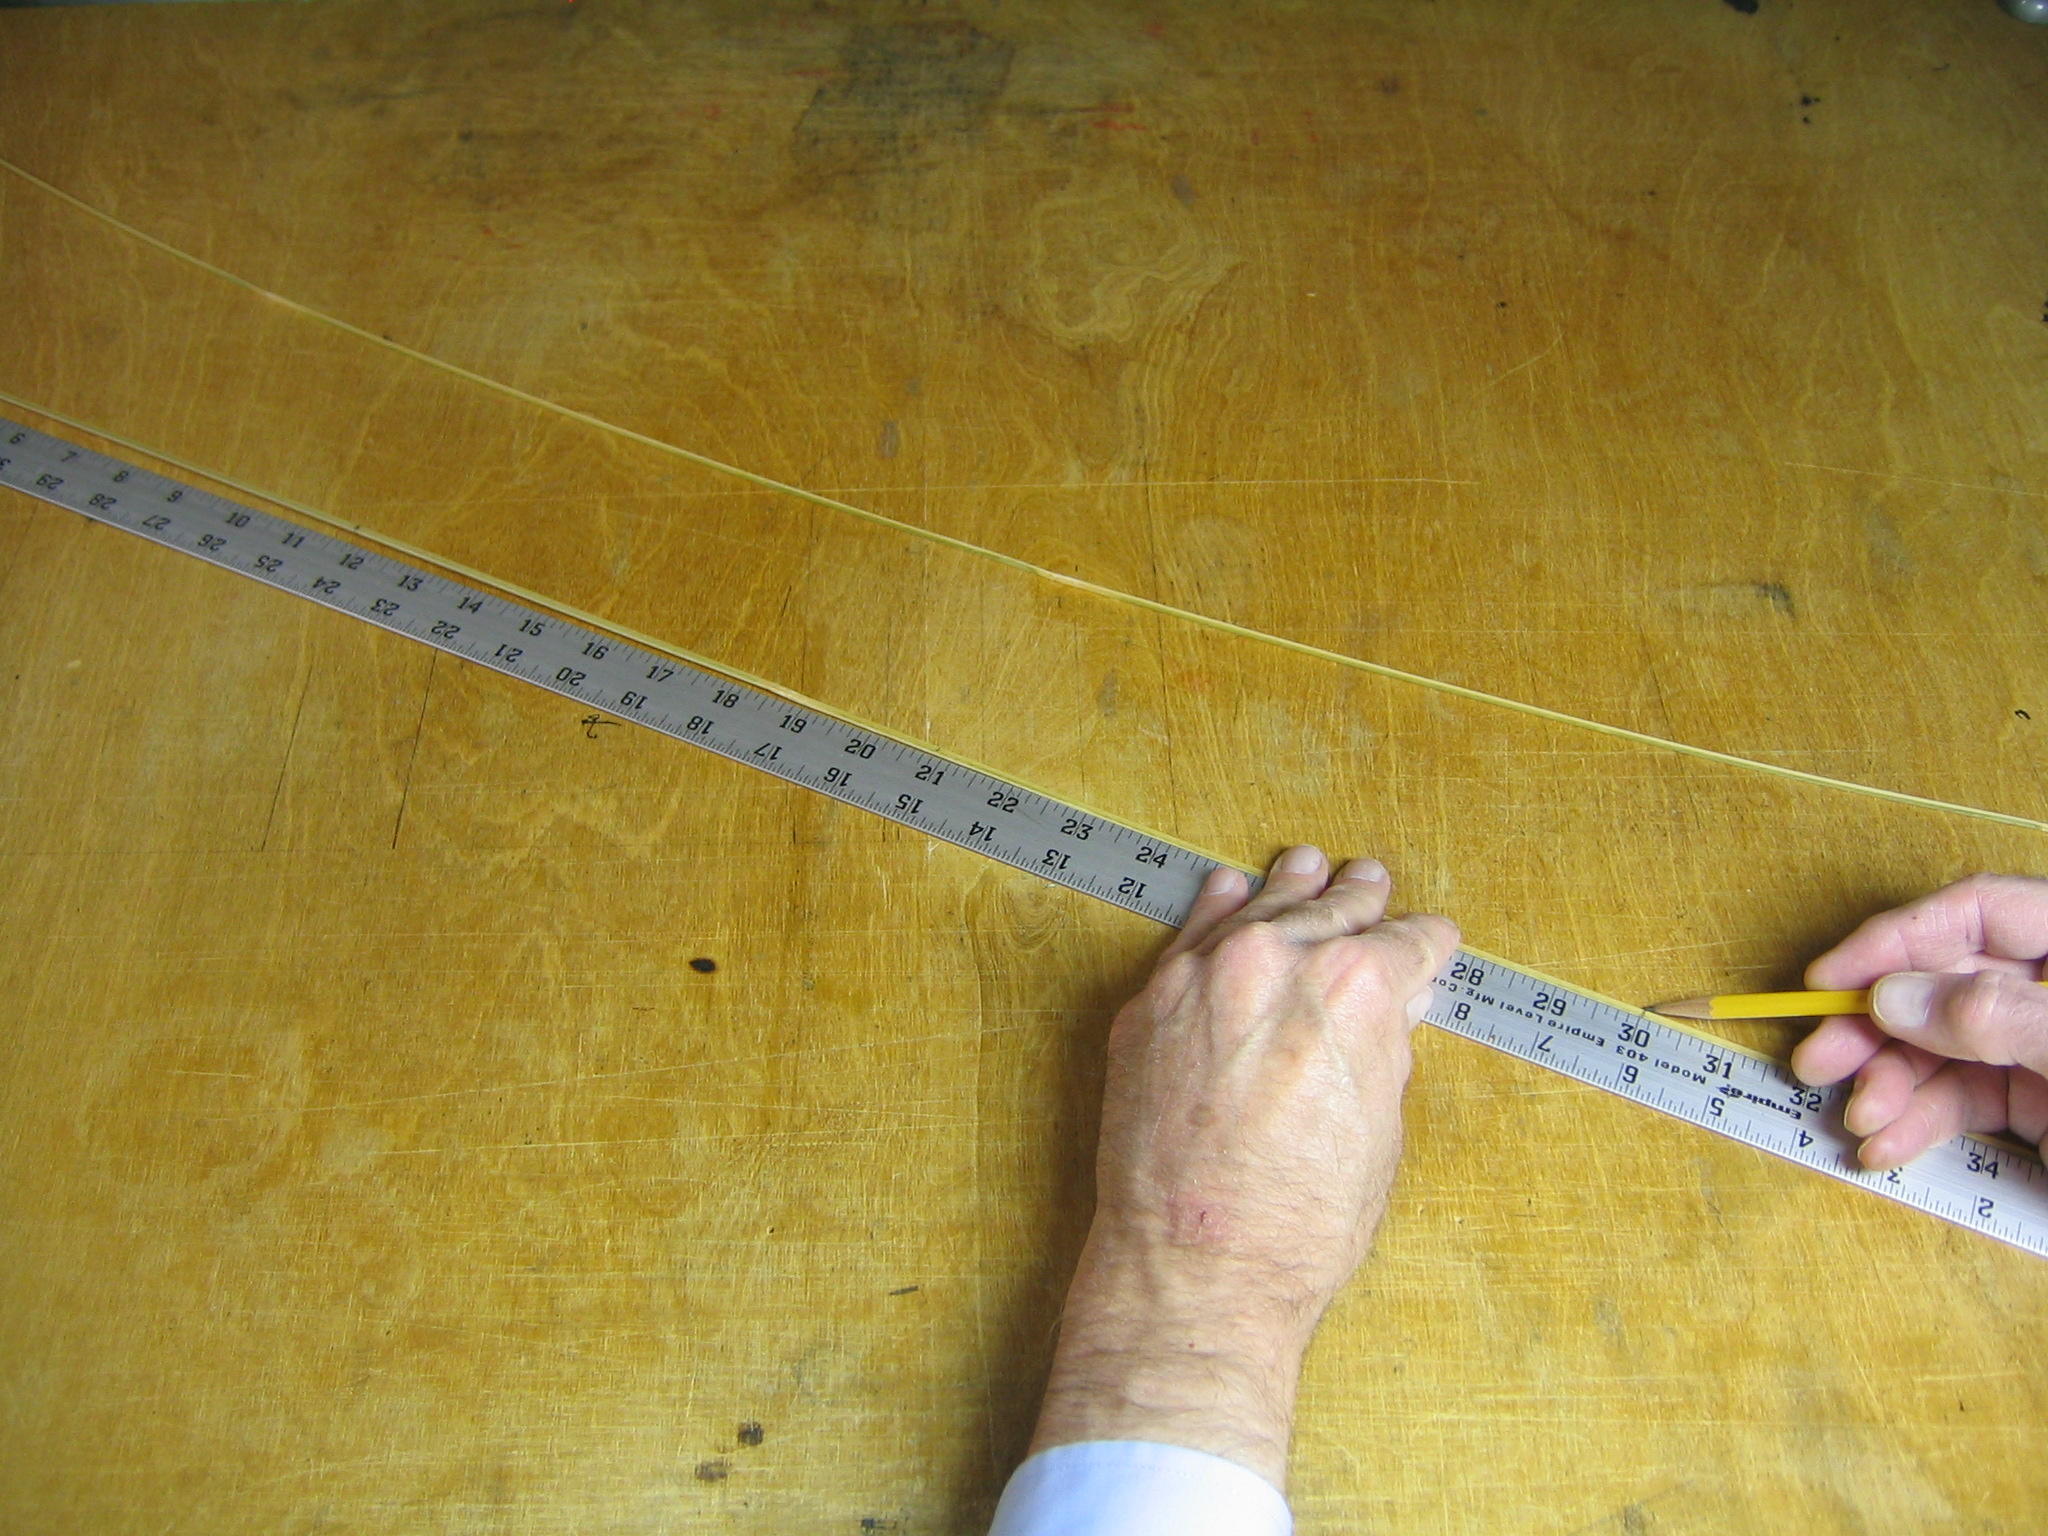
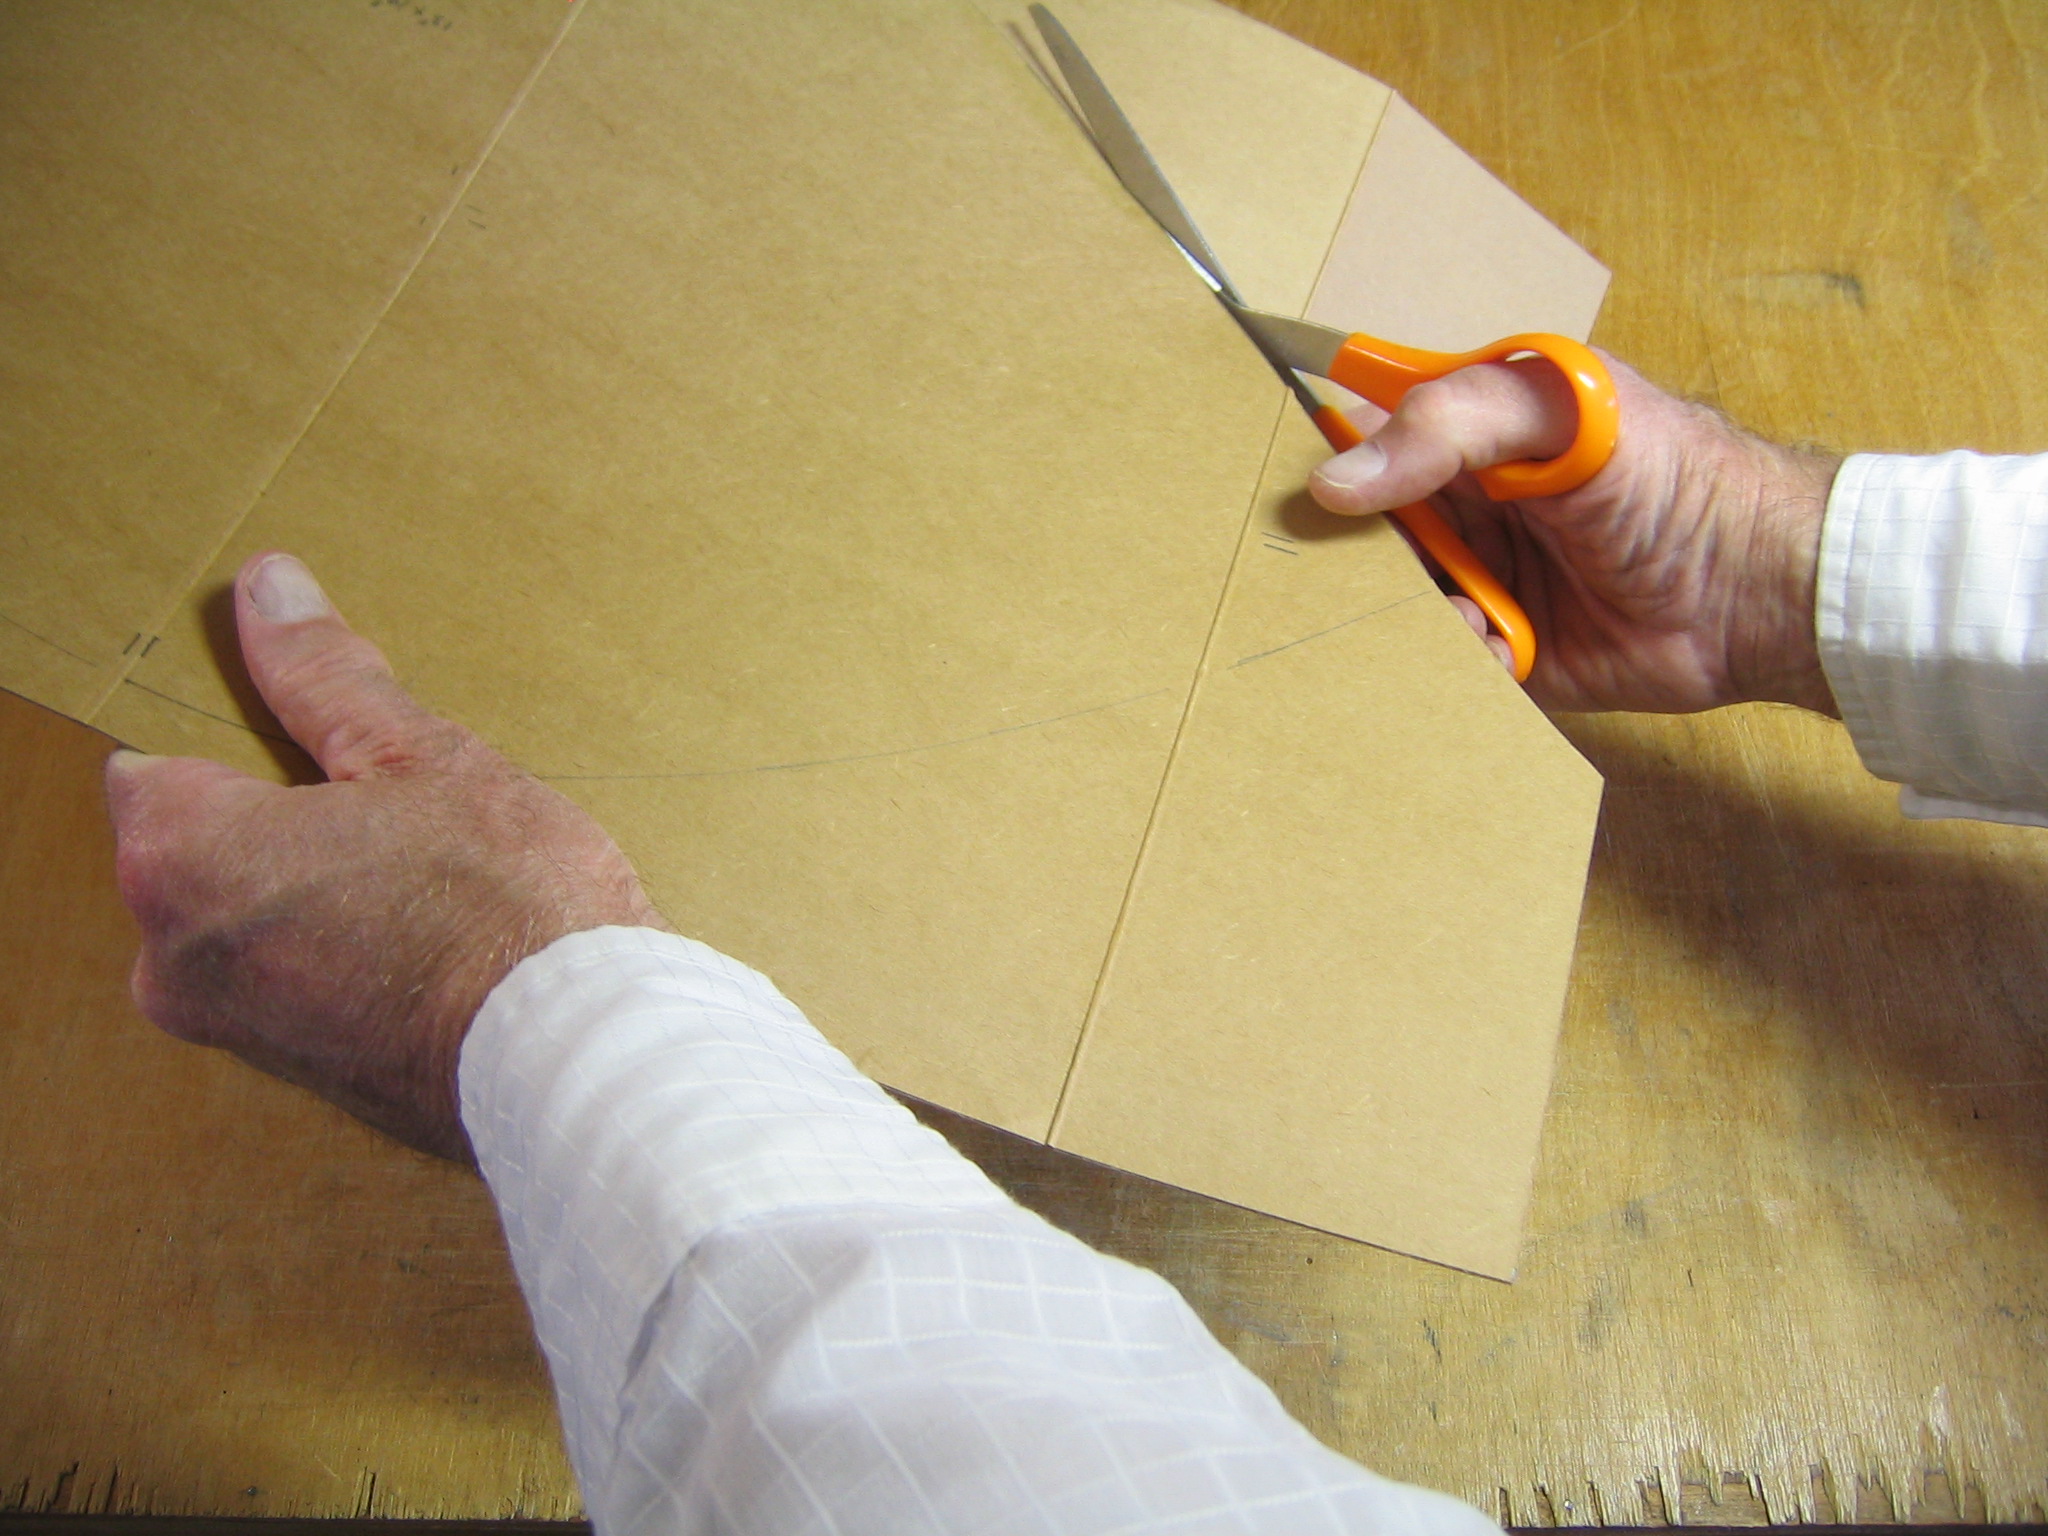
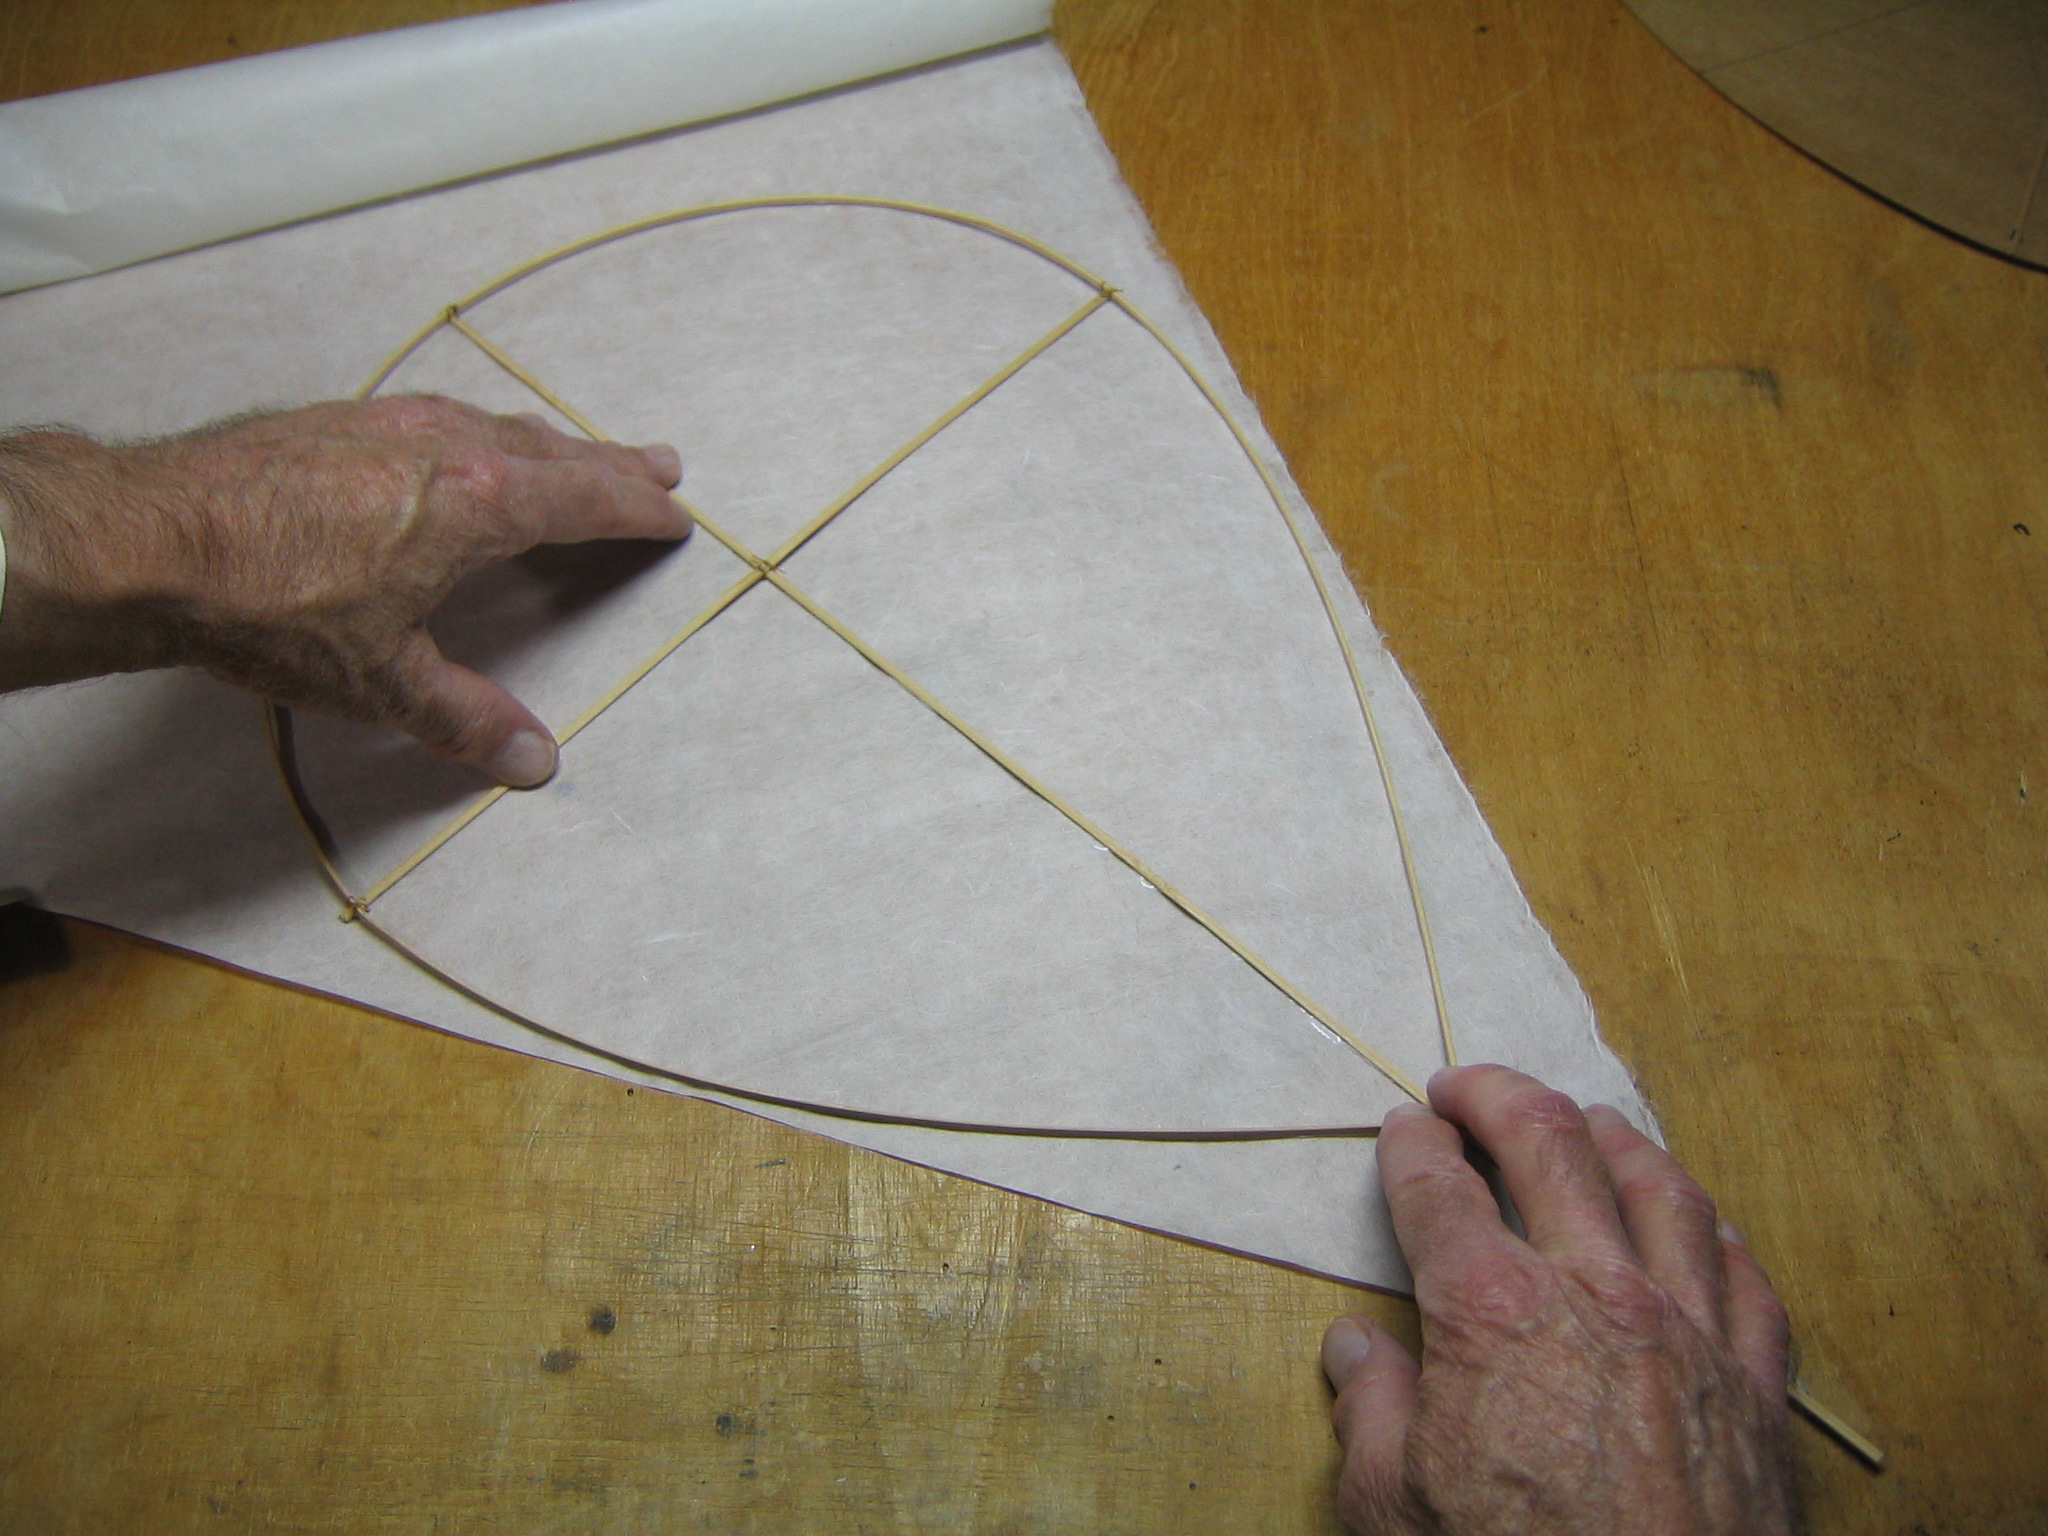
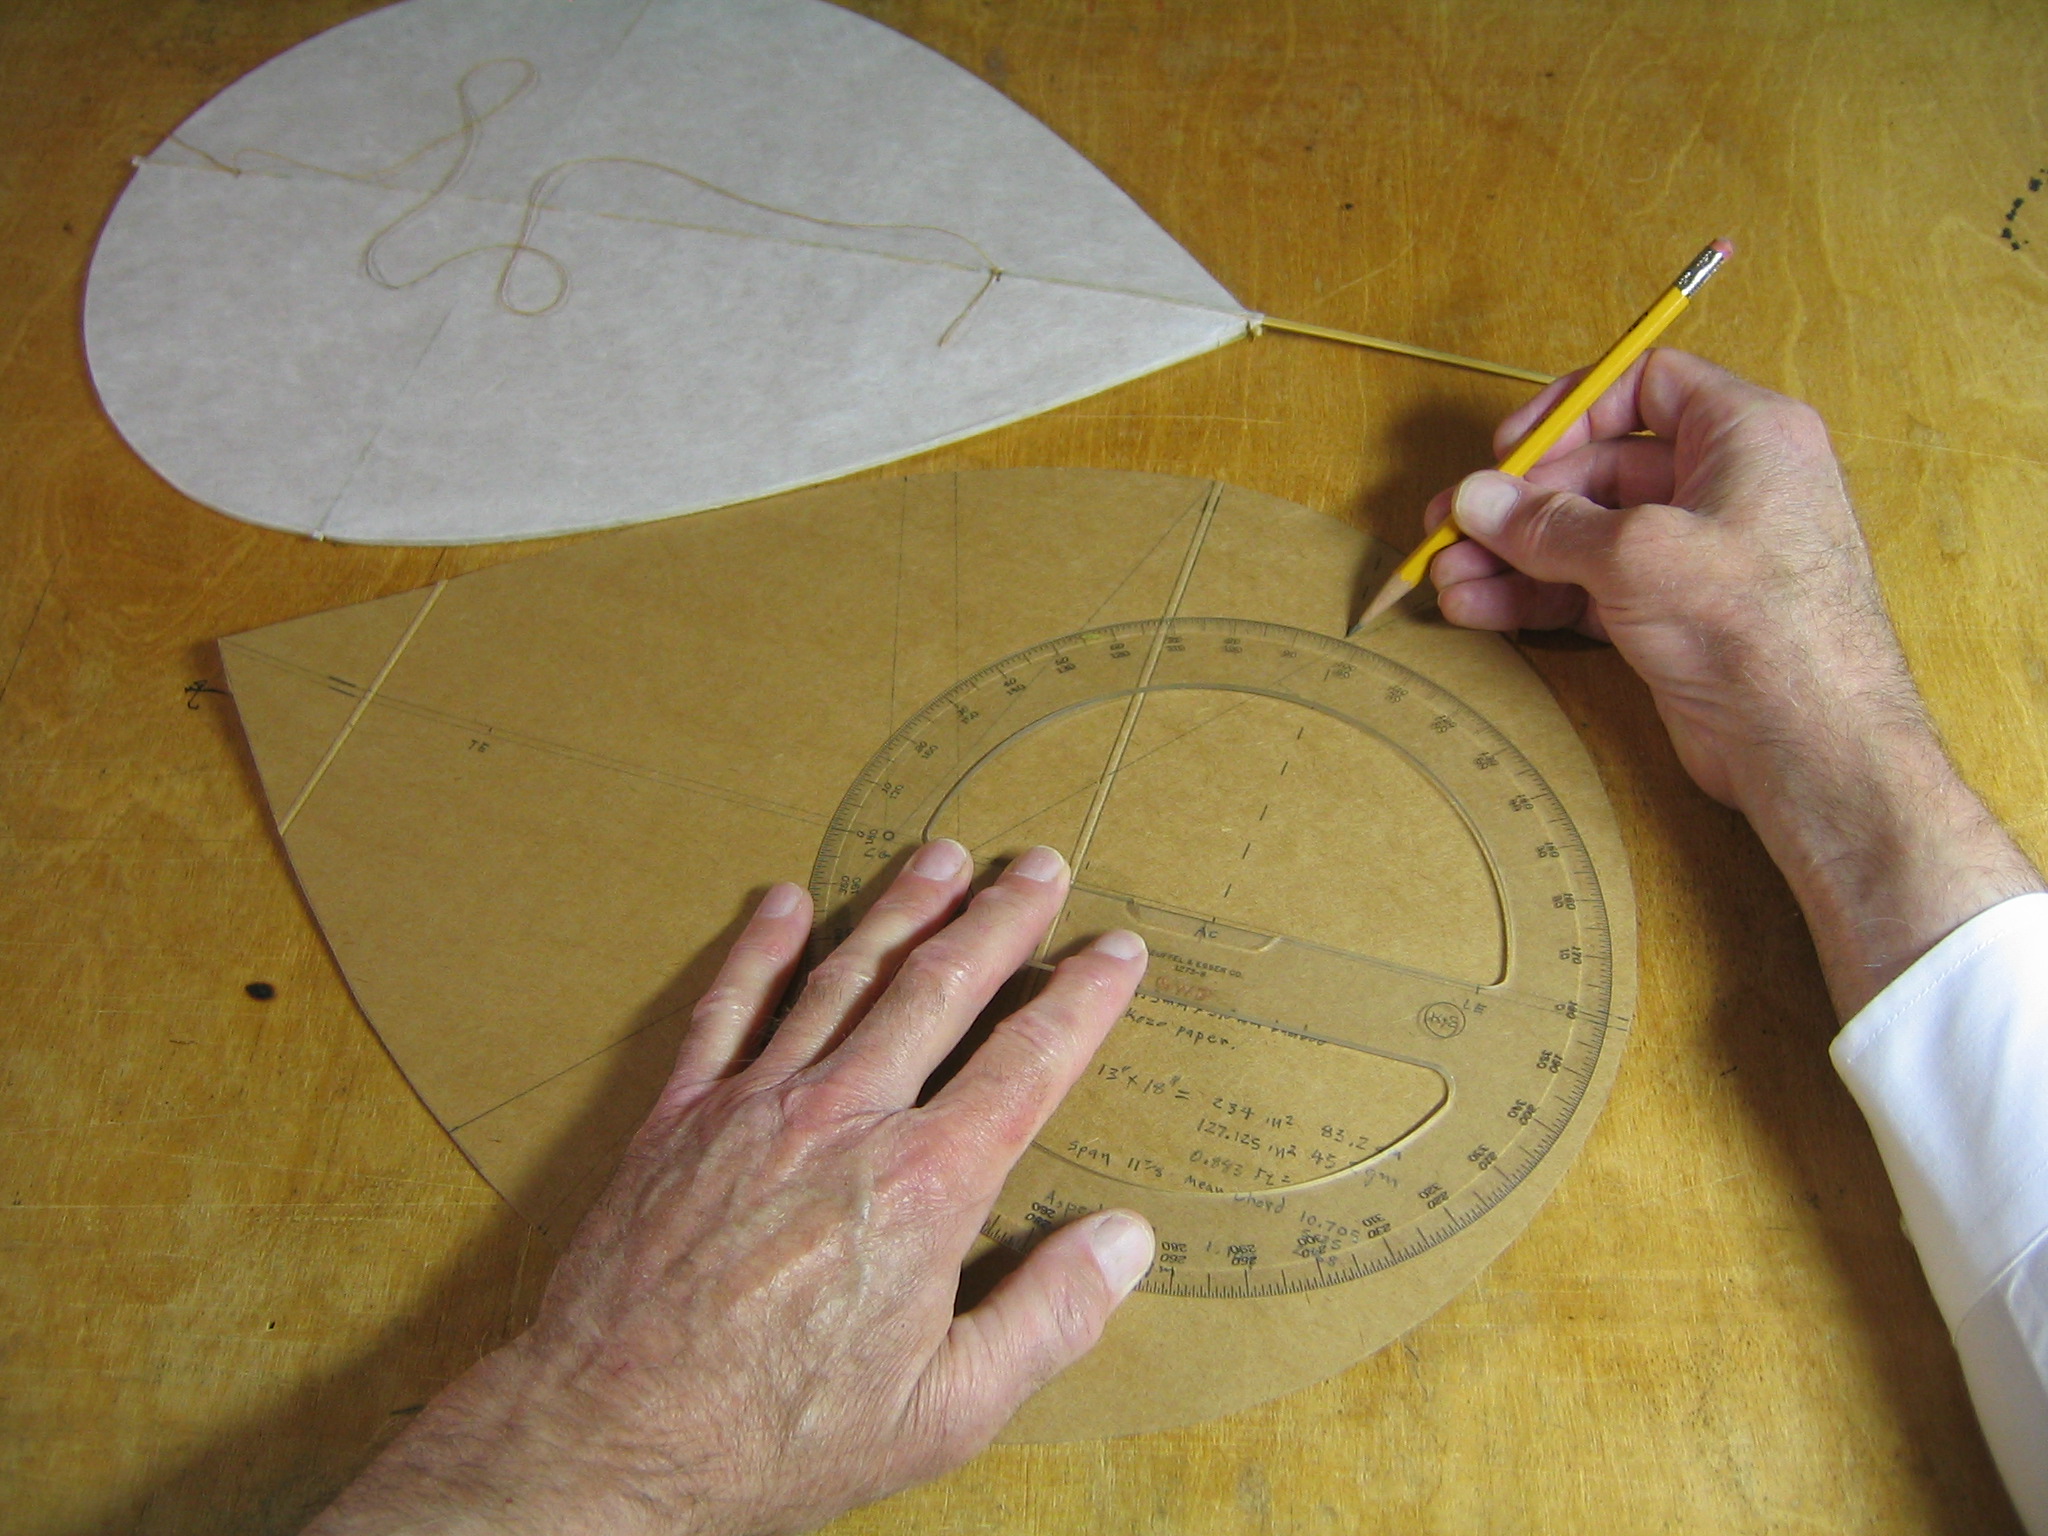
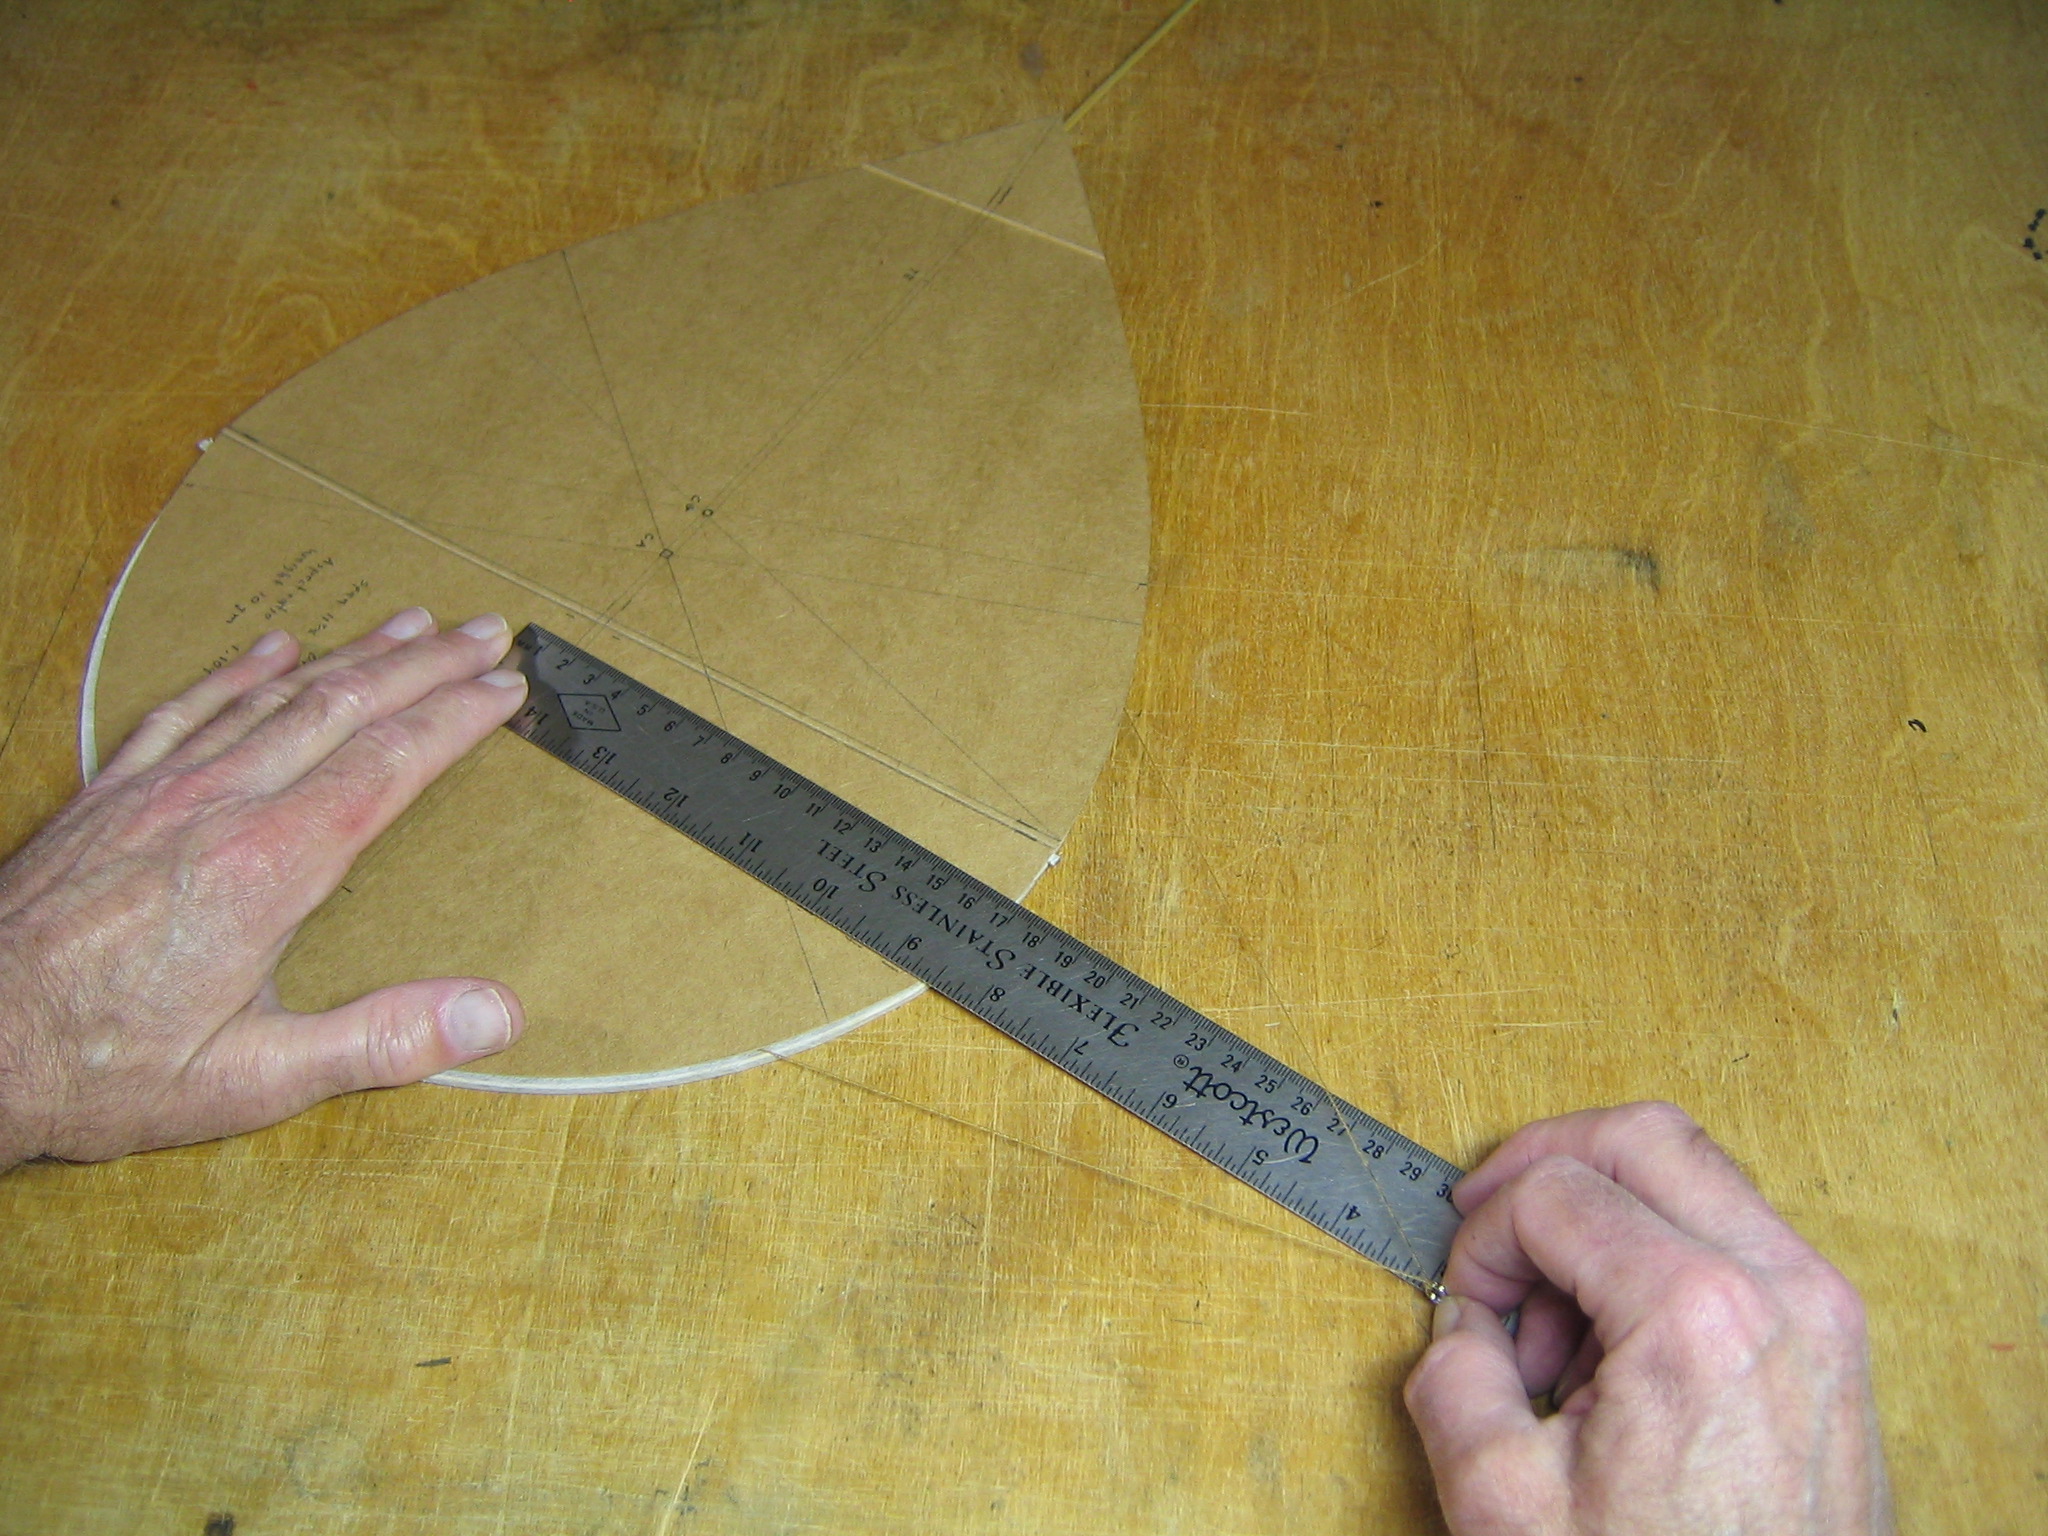
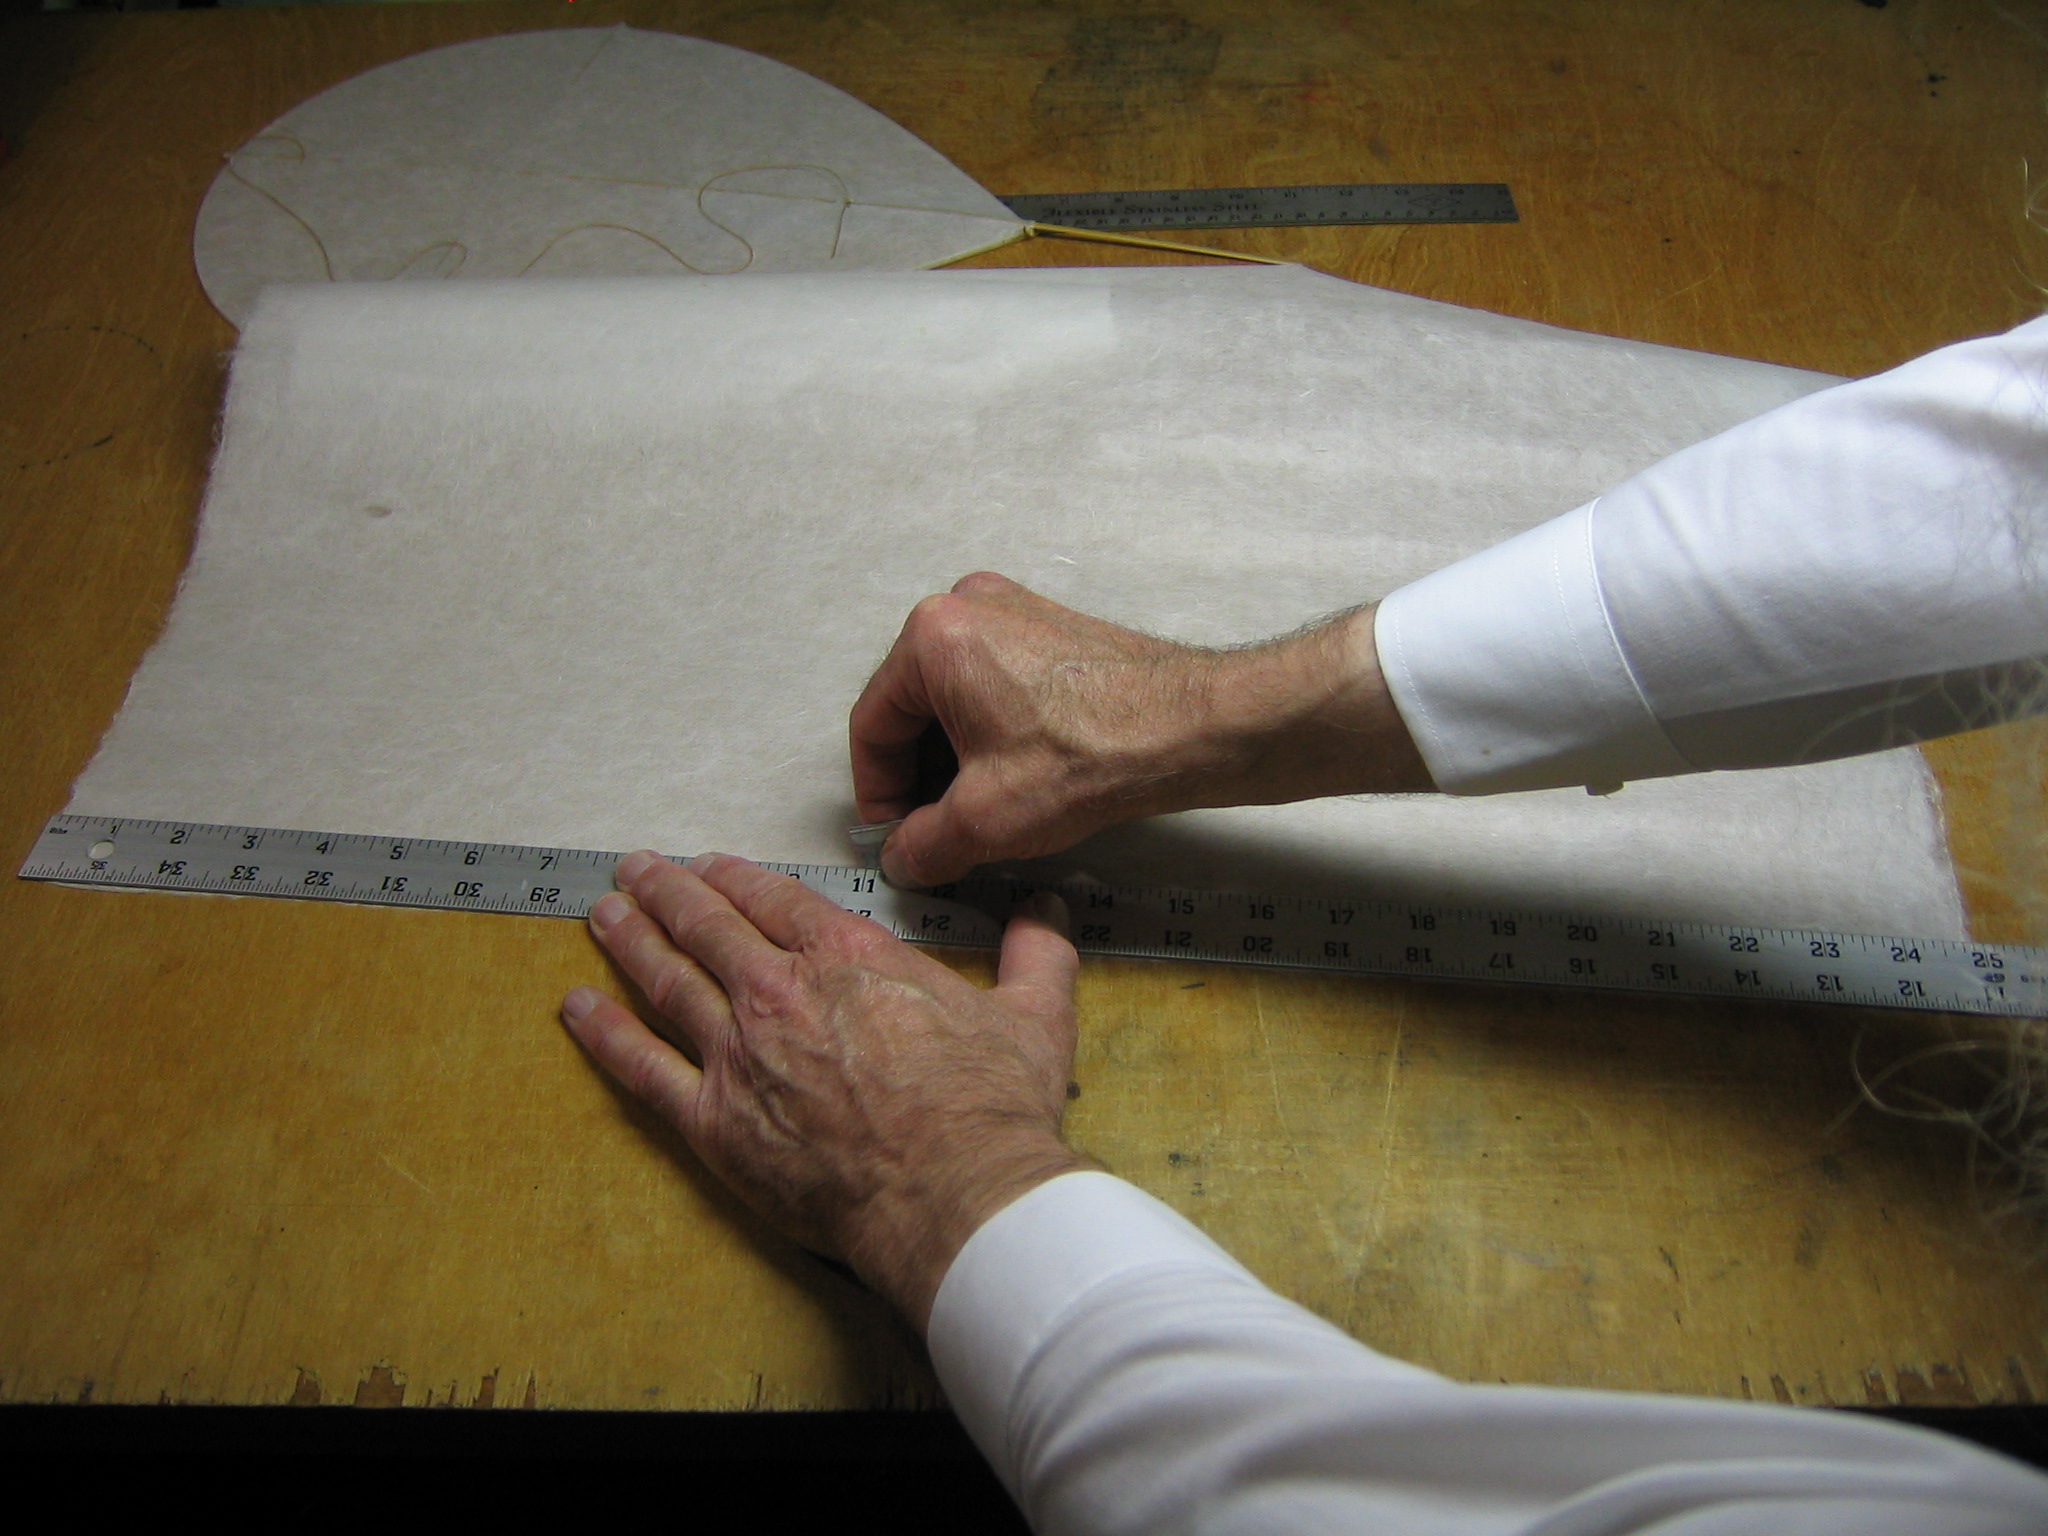
That completes the framework. This is part of a project to evaluate the design of these little known kites. The project includes measuring the area, weight and balance of the kites. The simplest way to measure the area of this unusual shape is to trace the shape on thin cardboard, cut it out and weigh it. I opened up a cereal box and placed the kite framework on the cardboard. I must start with a rectangle of cardboard just a little larger than the kite. The kite will fit within a 13″ x 18″ rectangle.
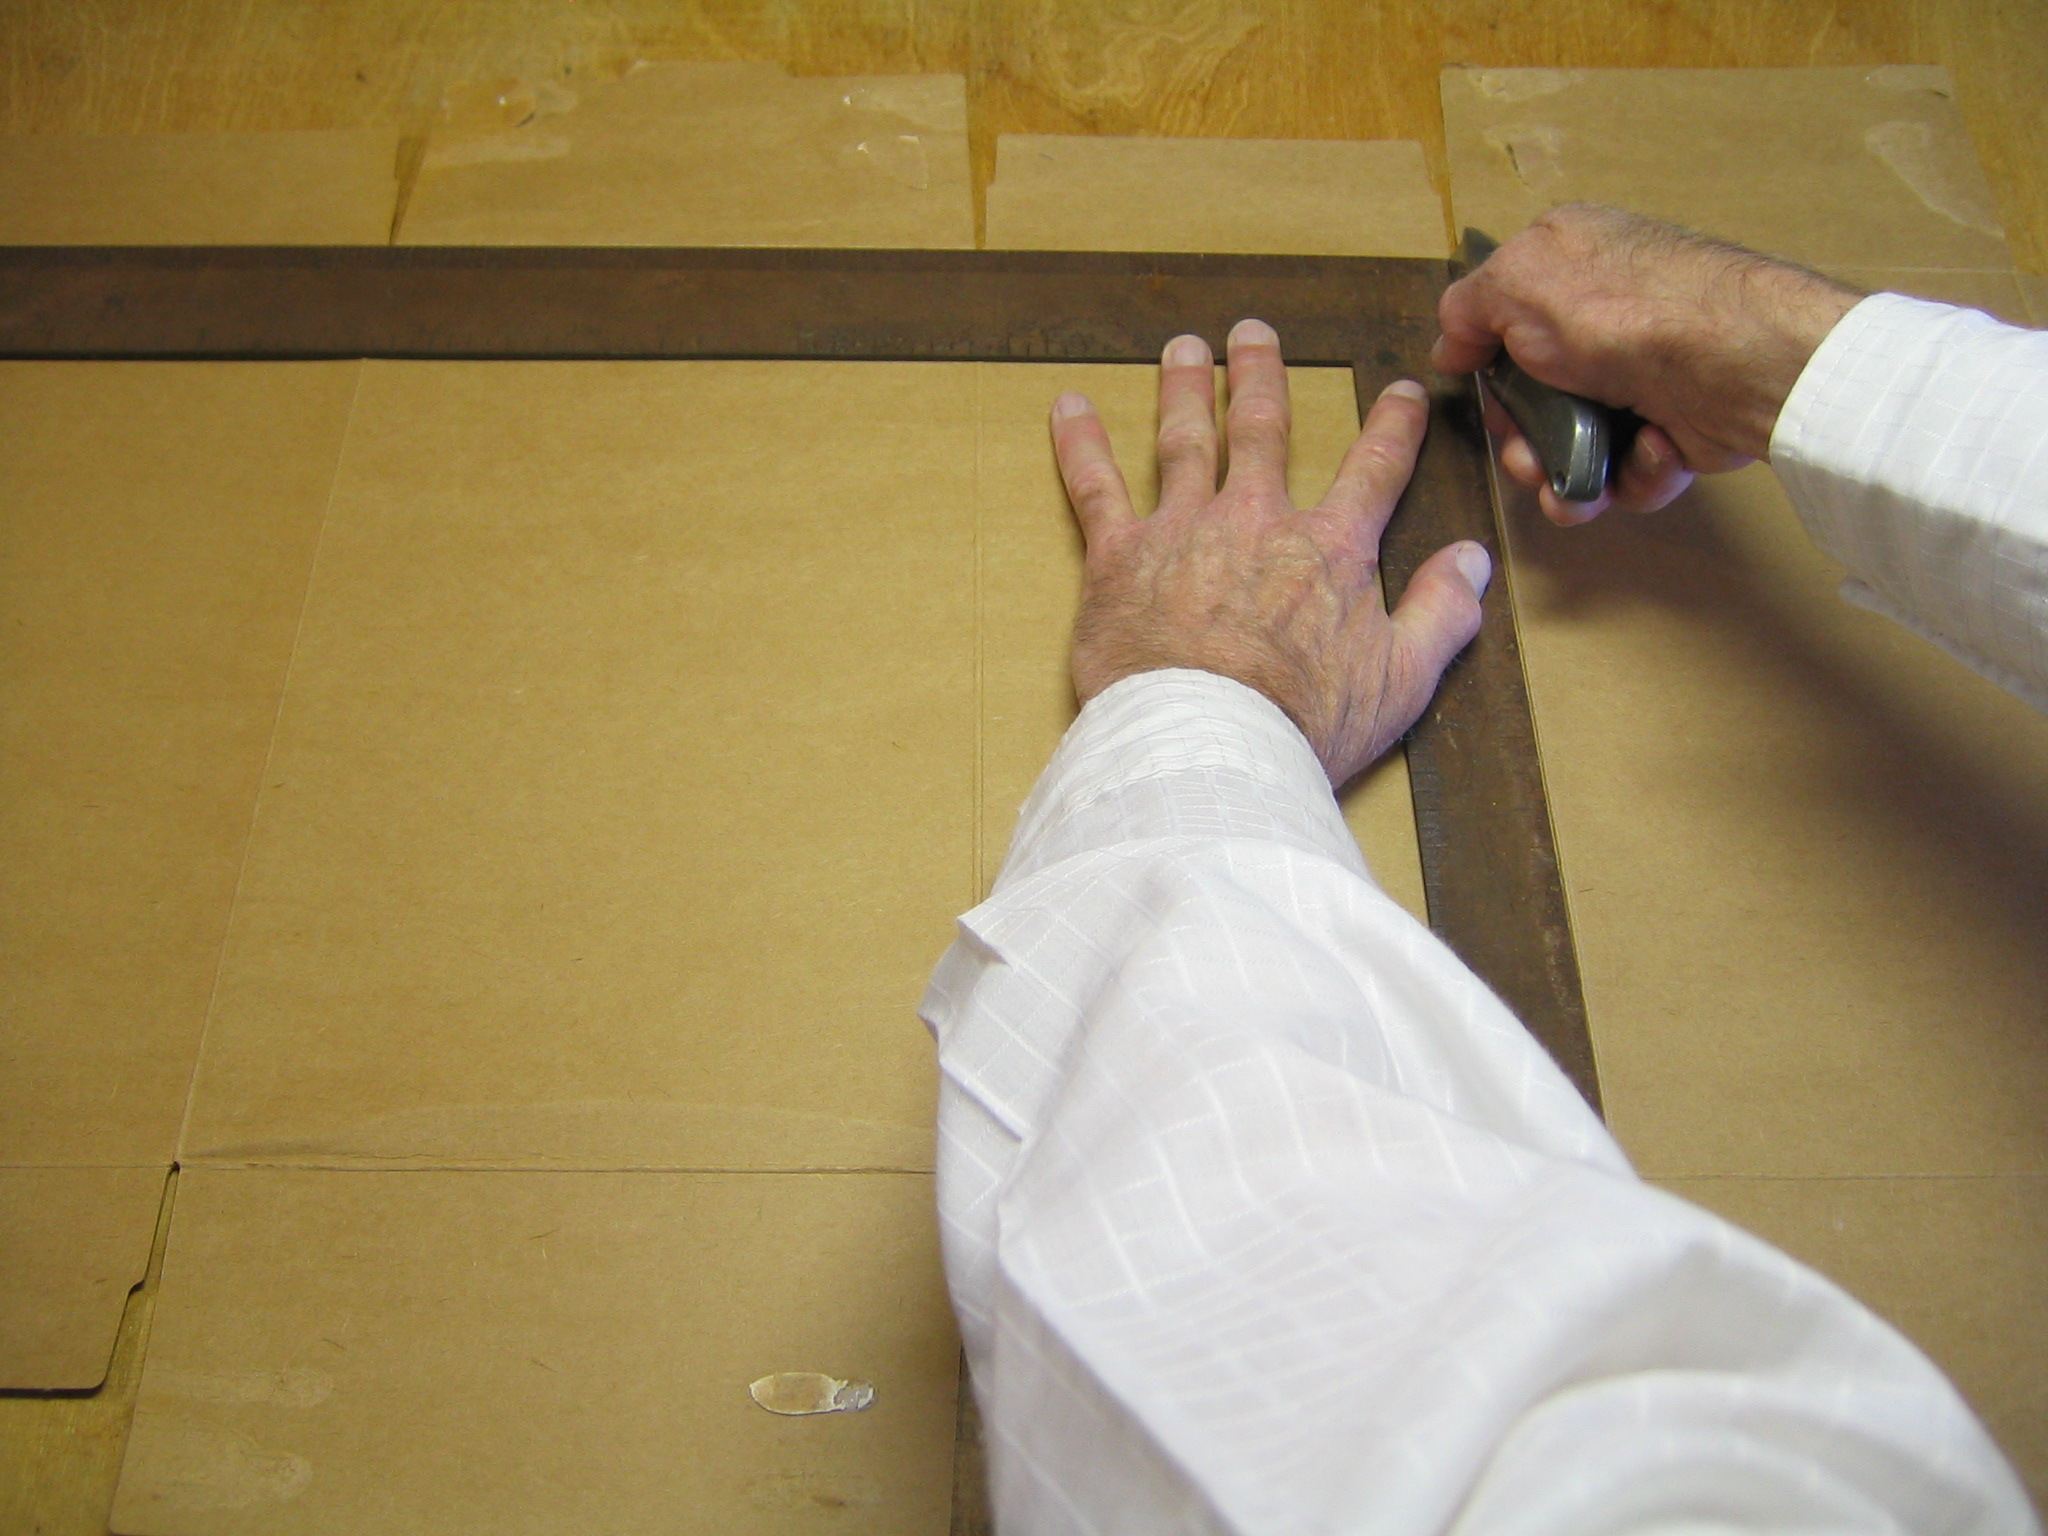
Cut two sides of the rectangle with a carpenter’s square and knife.

Mark lengths at 18″ on the longer side and 13″ on the shorter side.
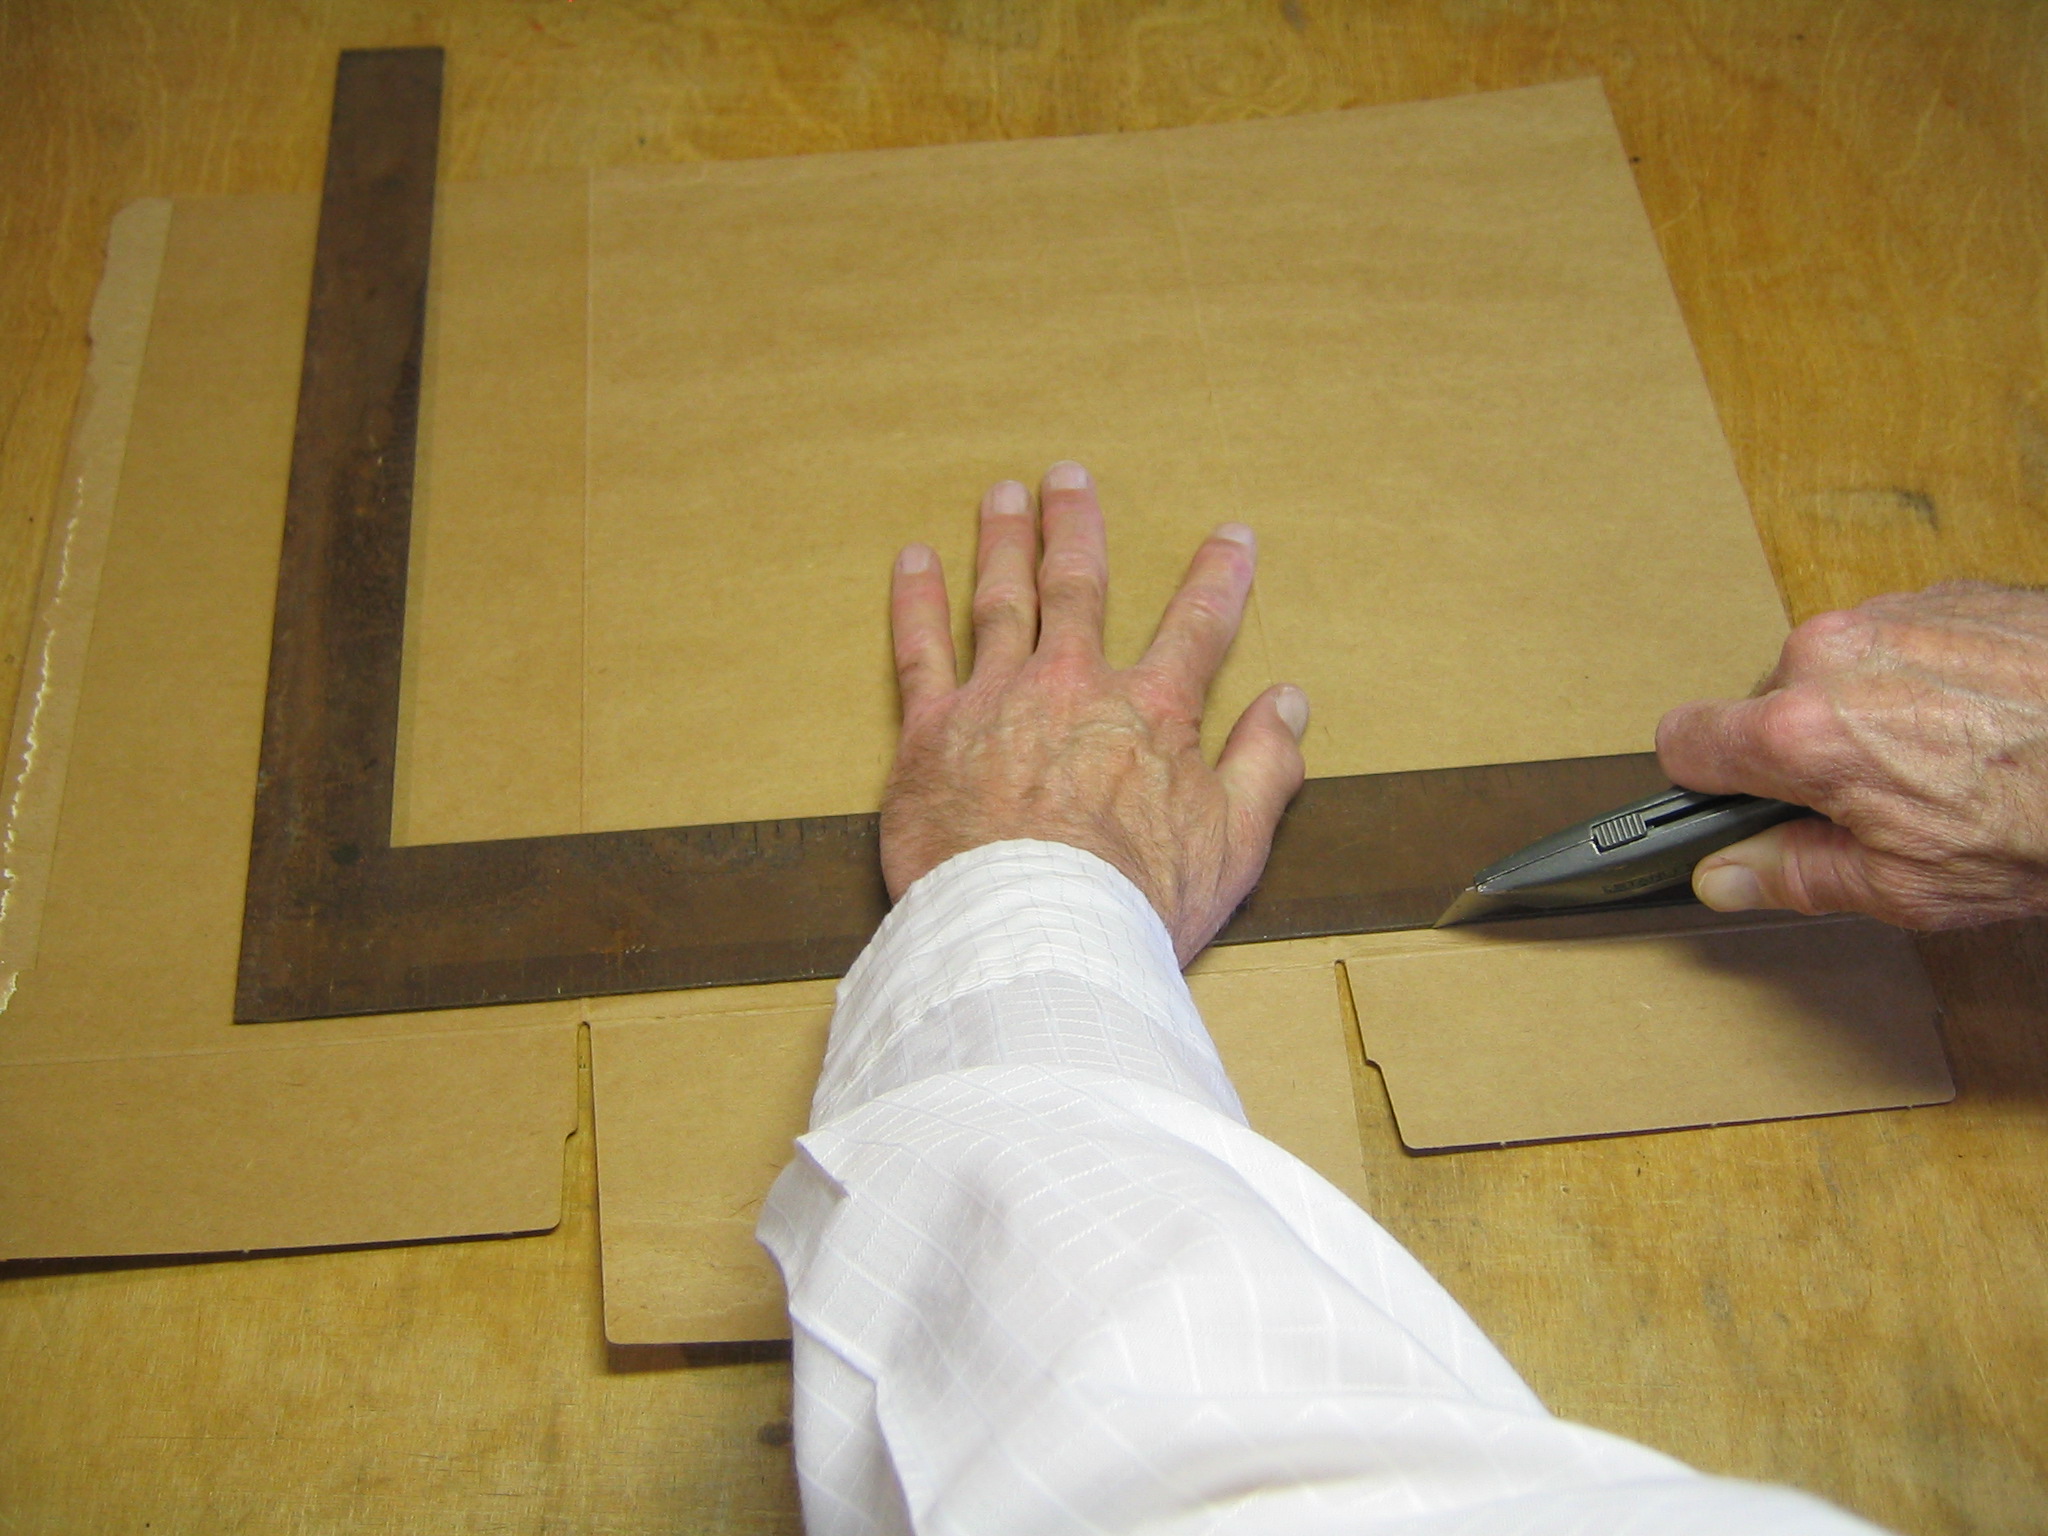
Turn the square around and carefully align its 18″ with the 13″ mark on the cardboard and its 13″ with the 18″ mark on the cardboard. Now cut the other two edges of the rectangle.
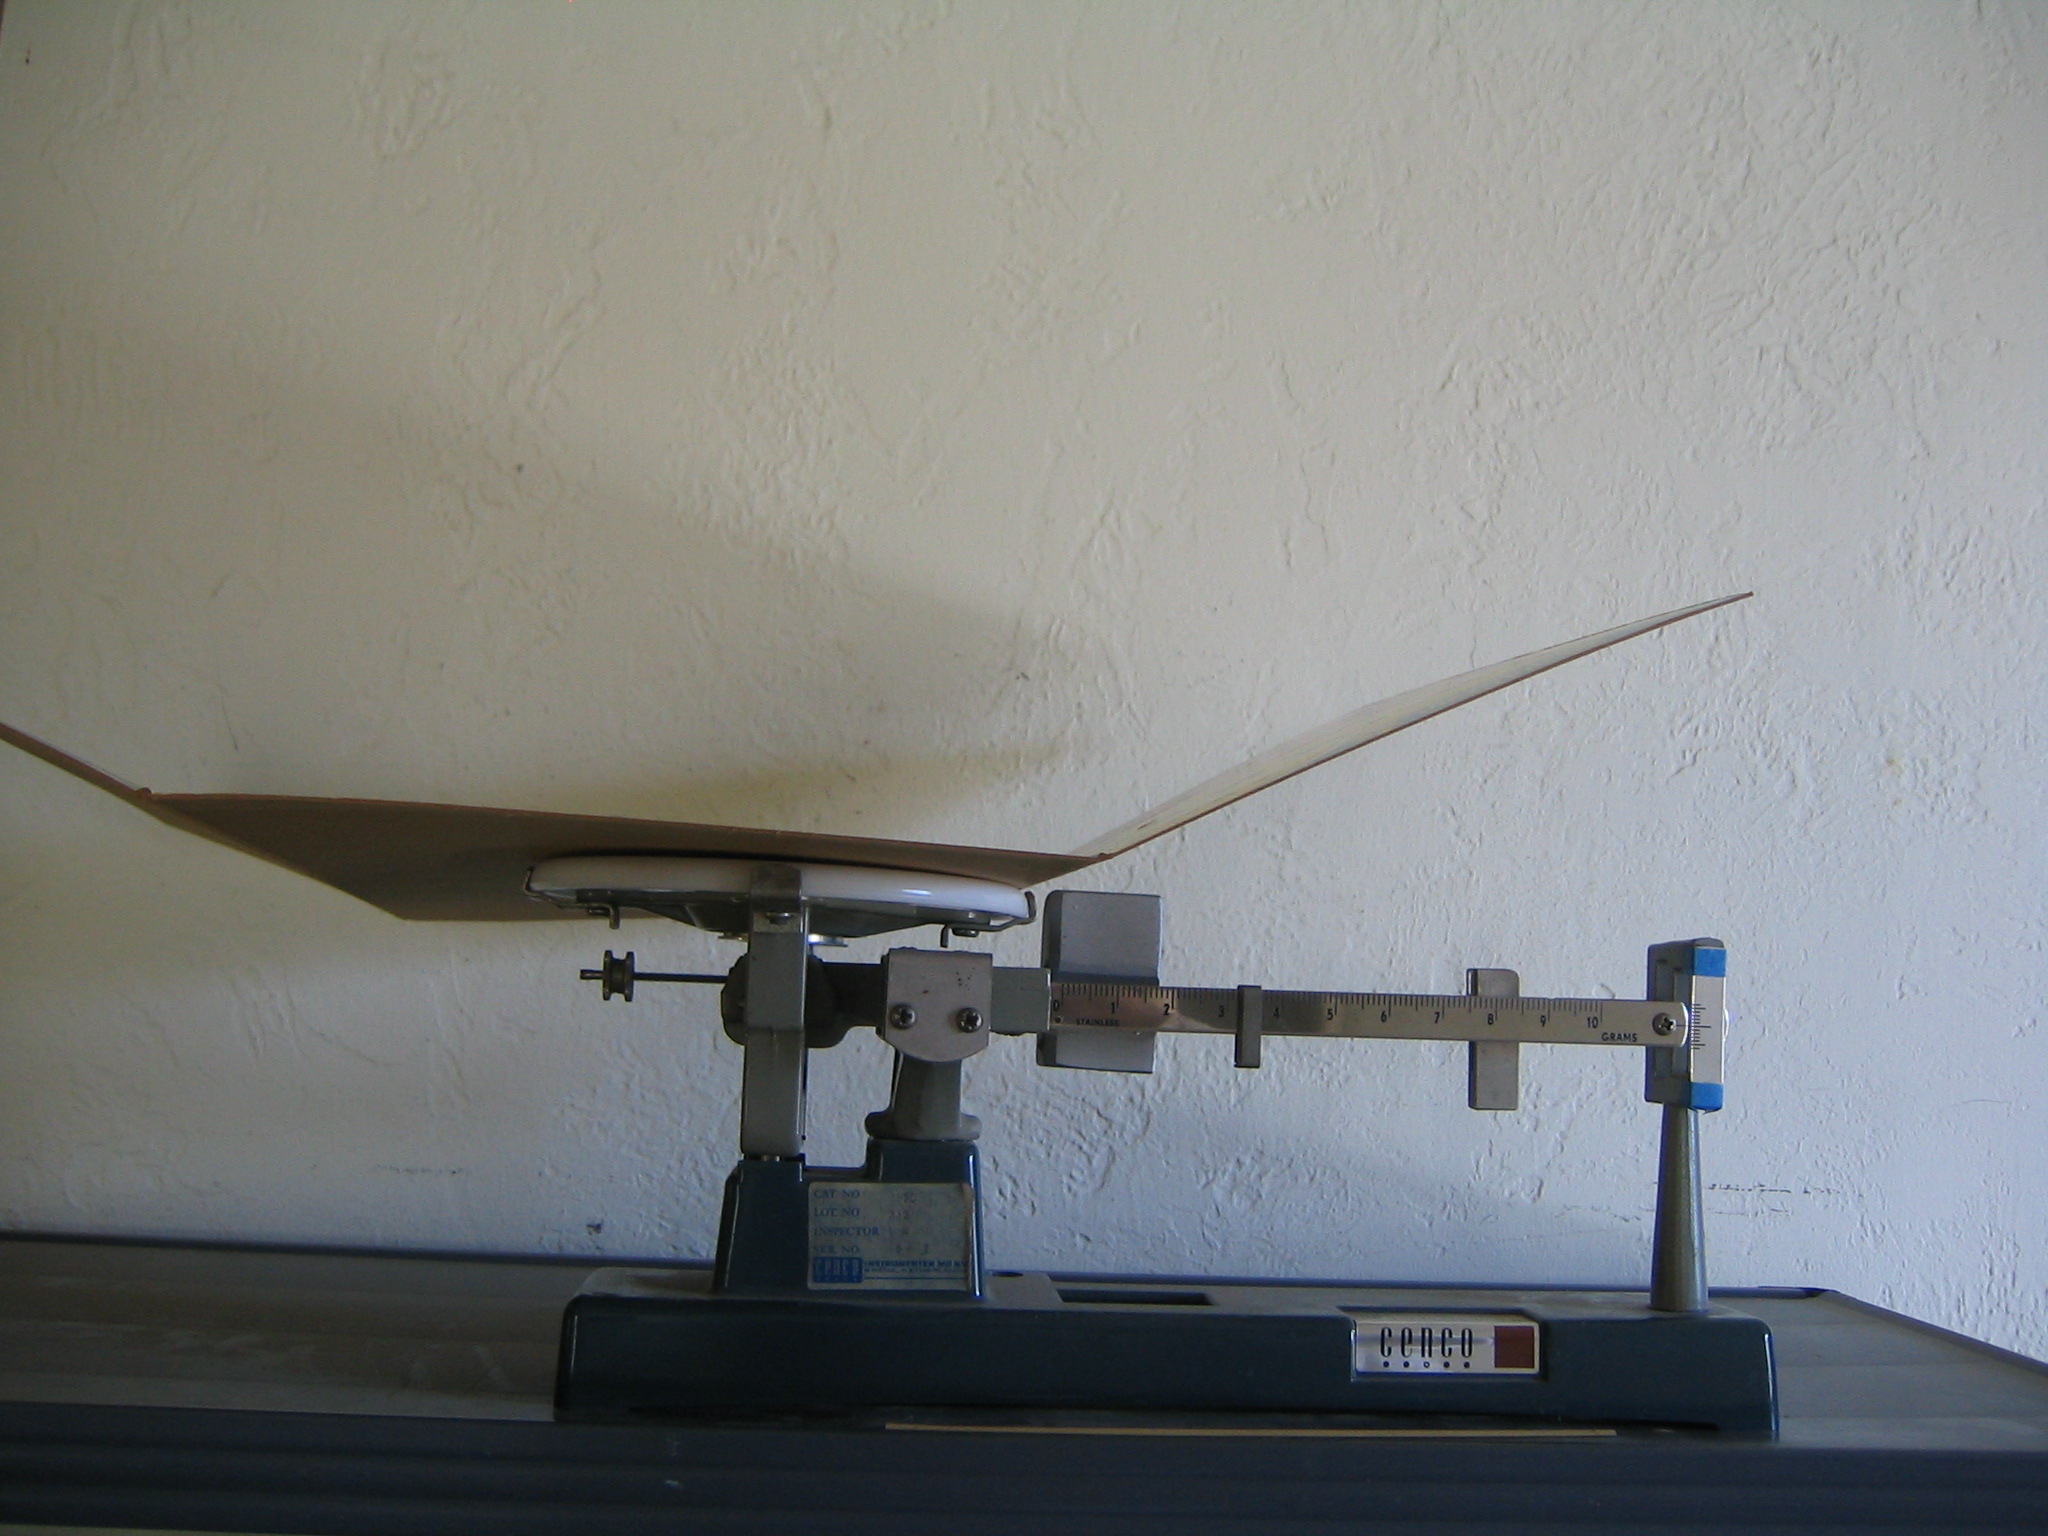
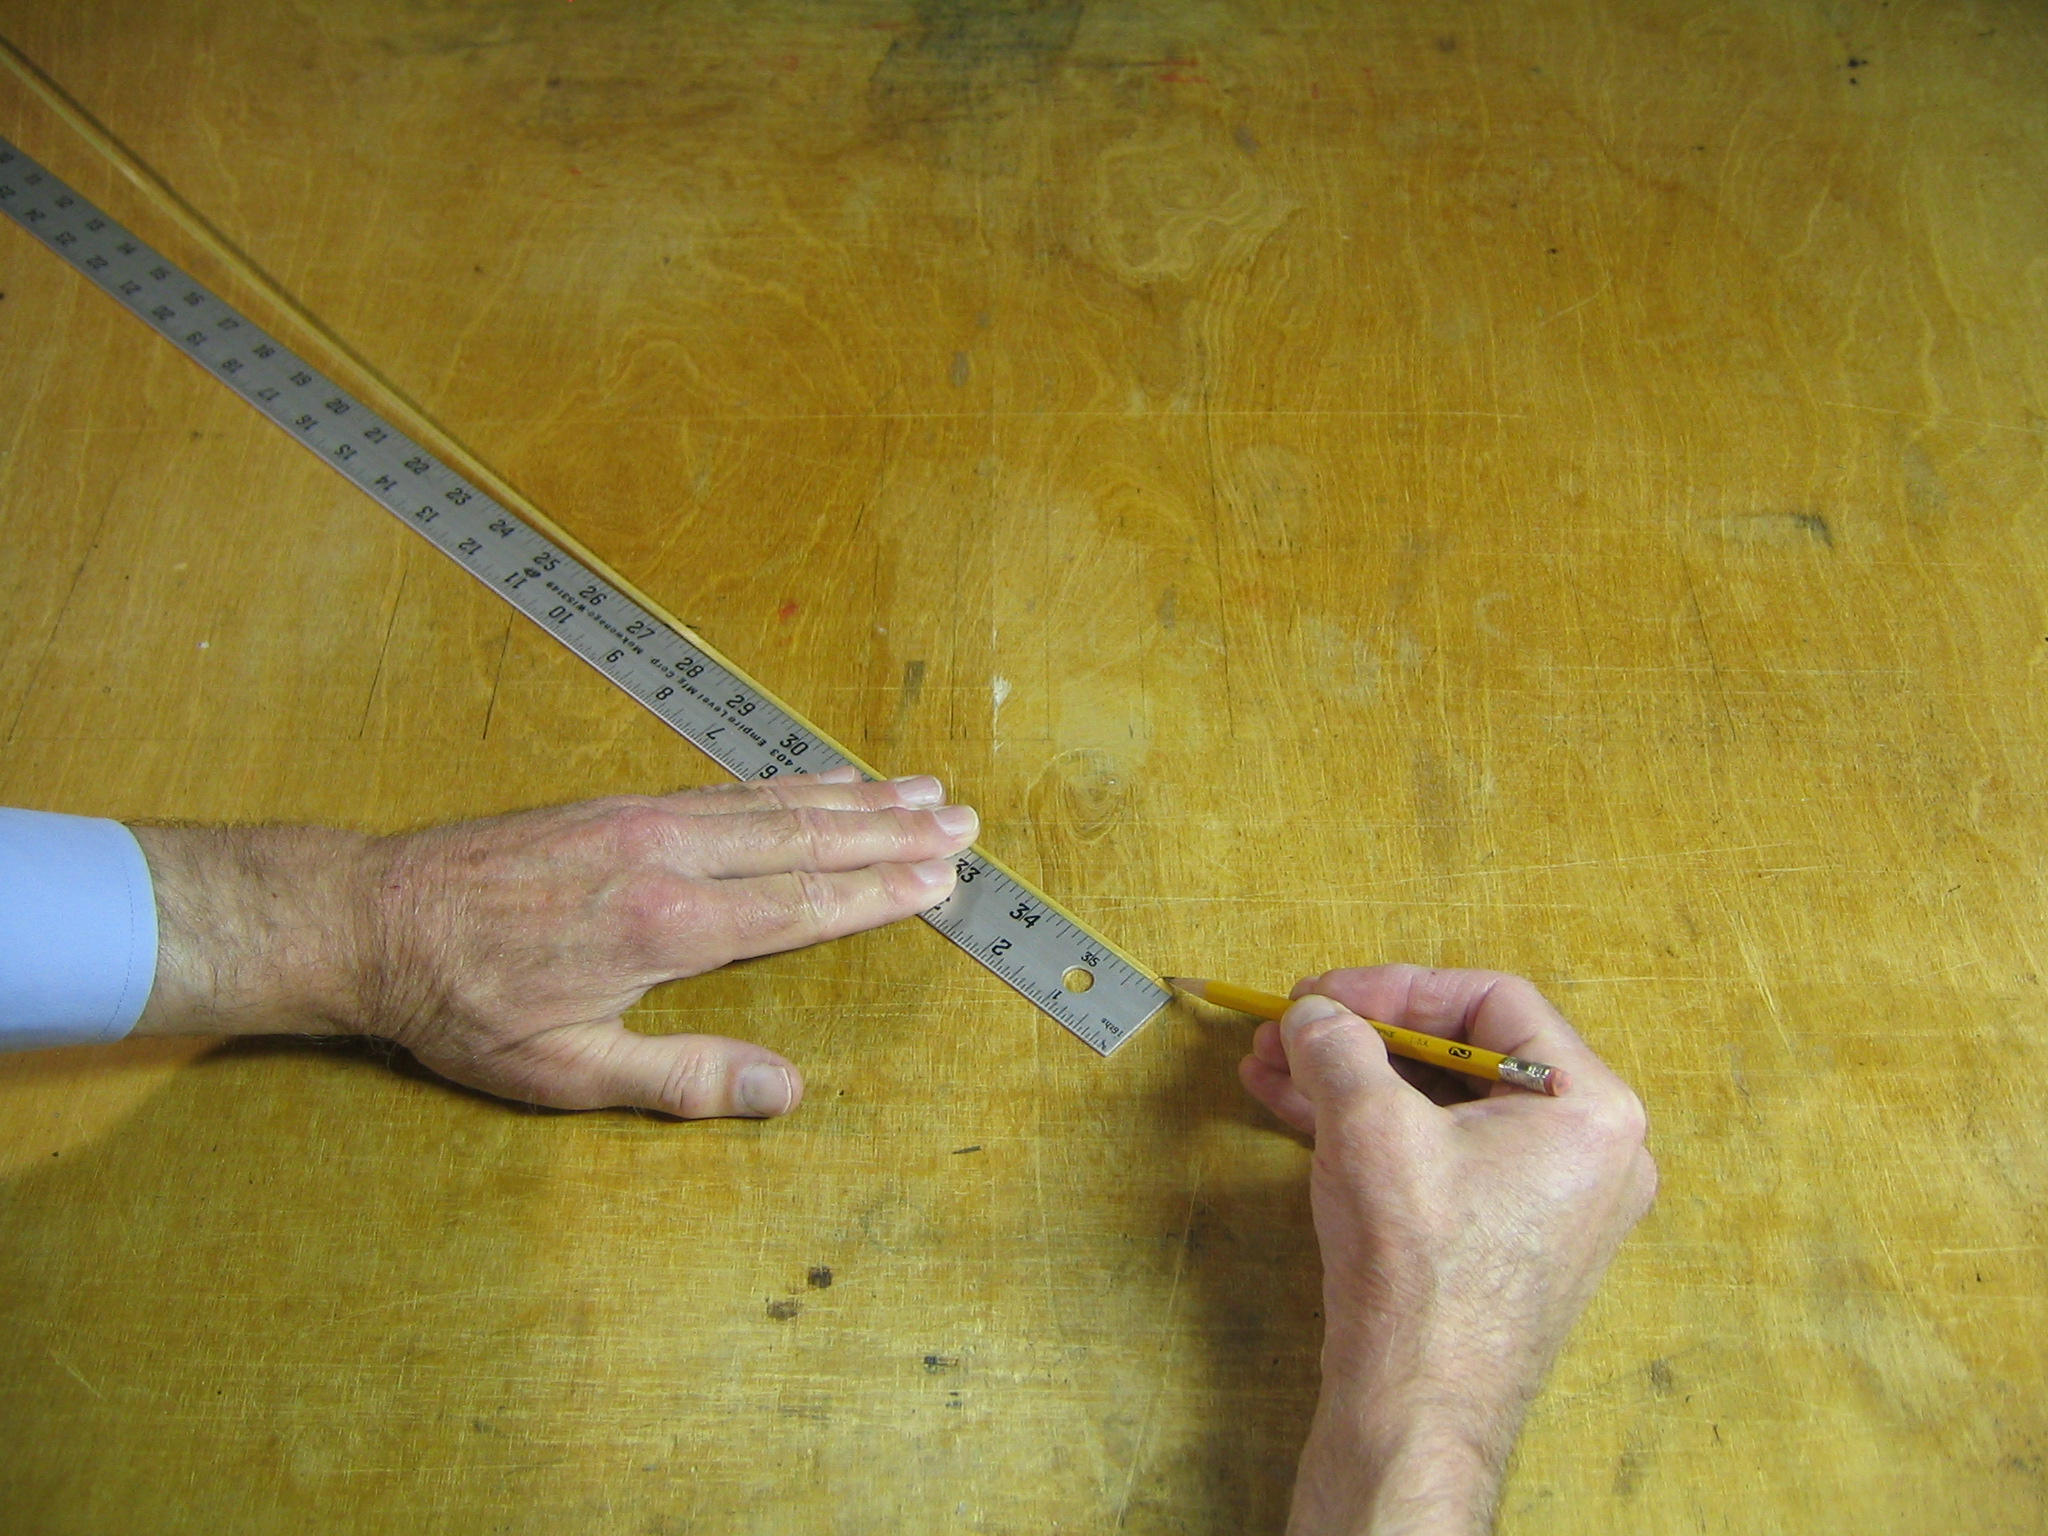
Weigh the rectangle of cardboard. It weighs 83.2 grams.
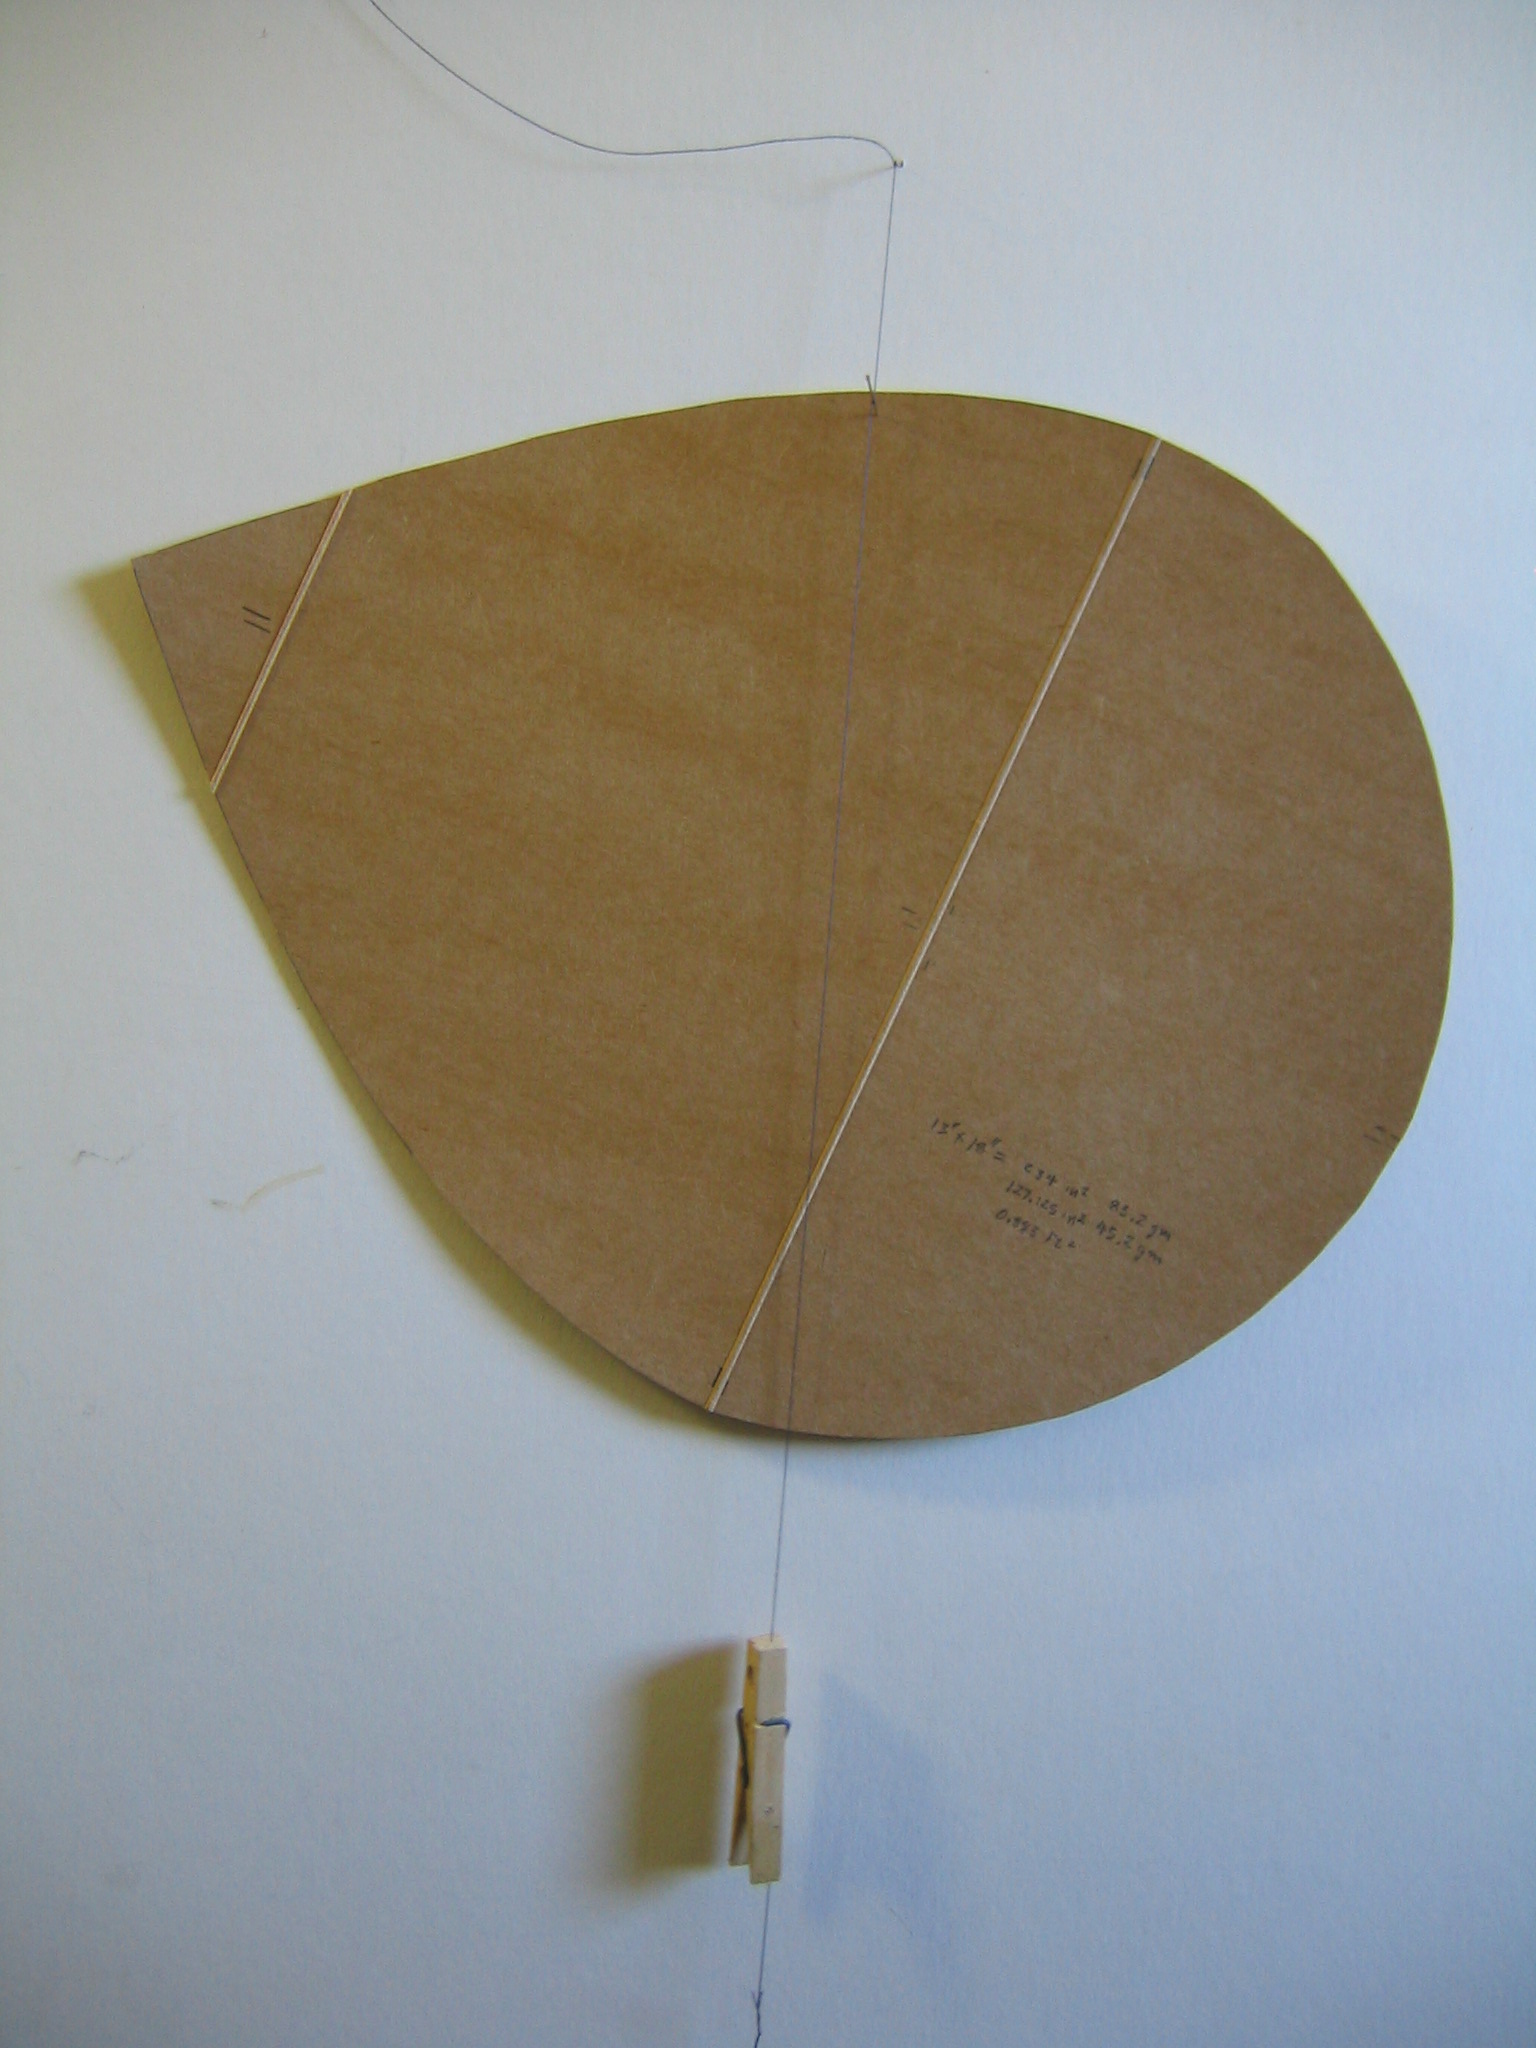
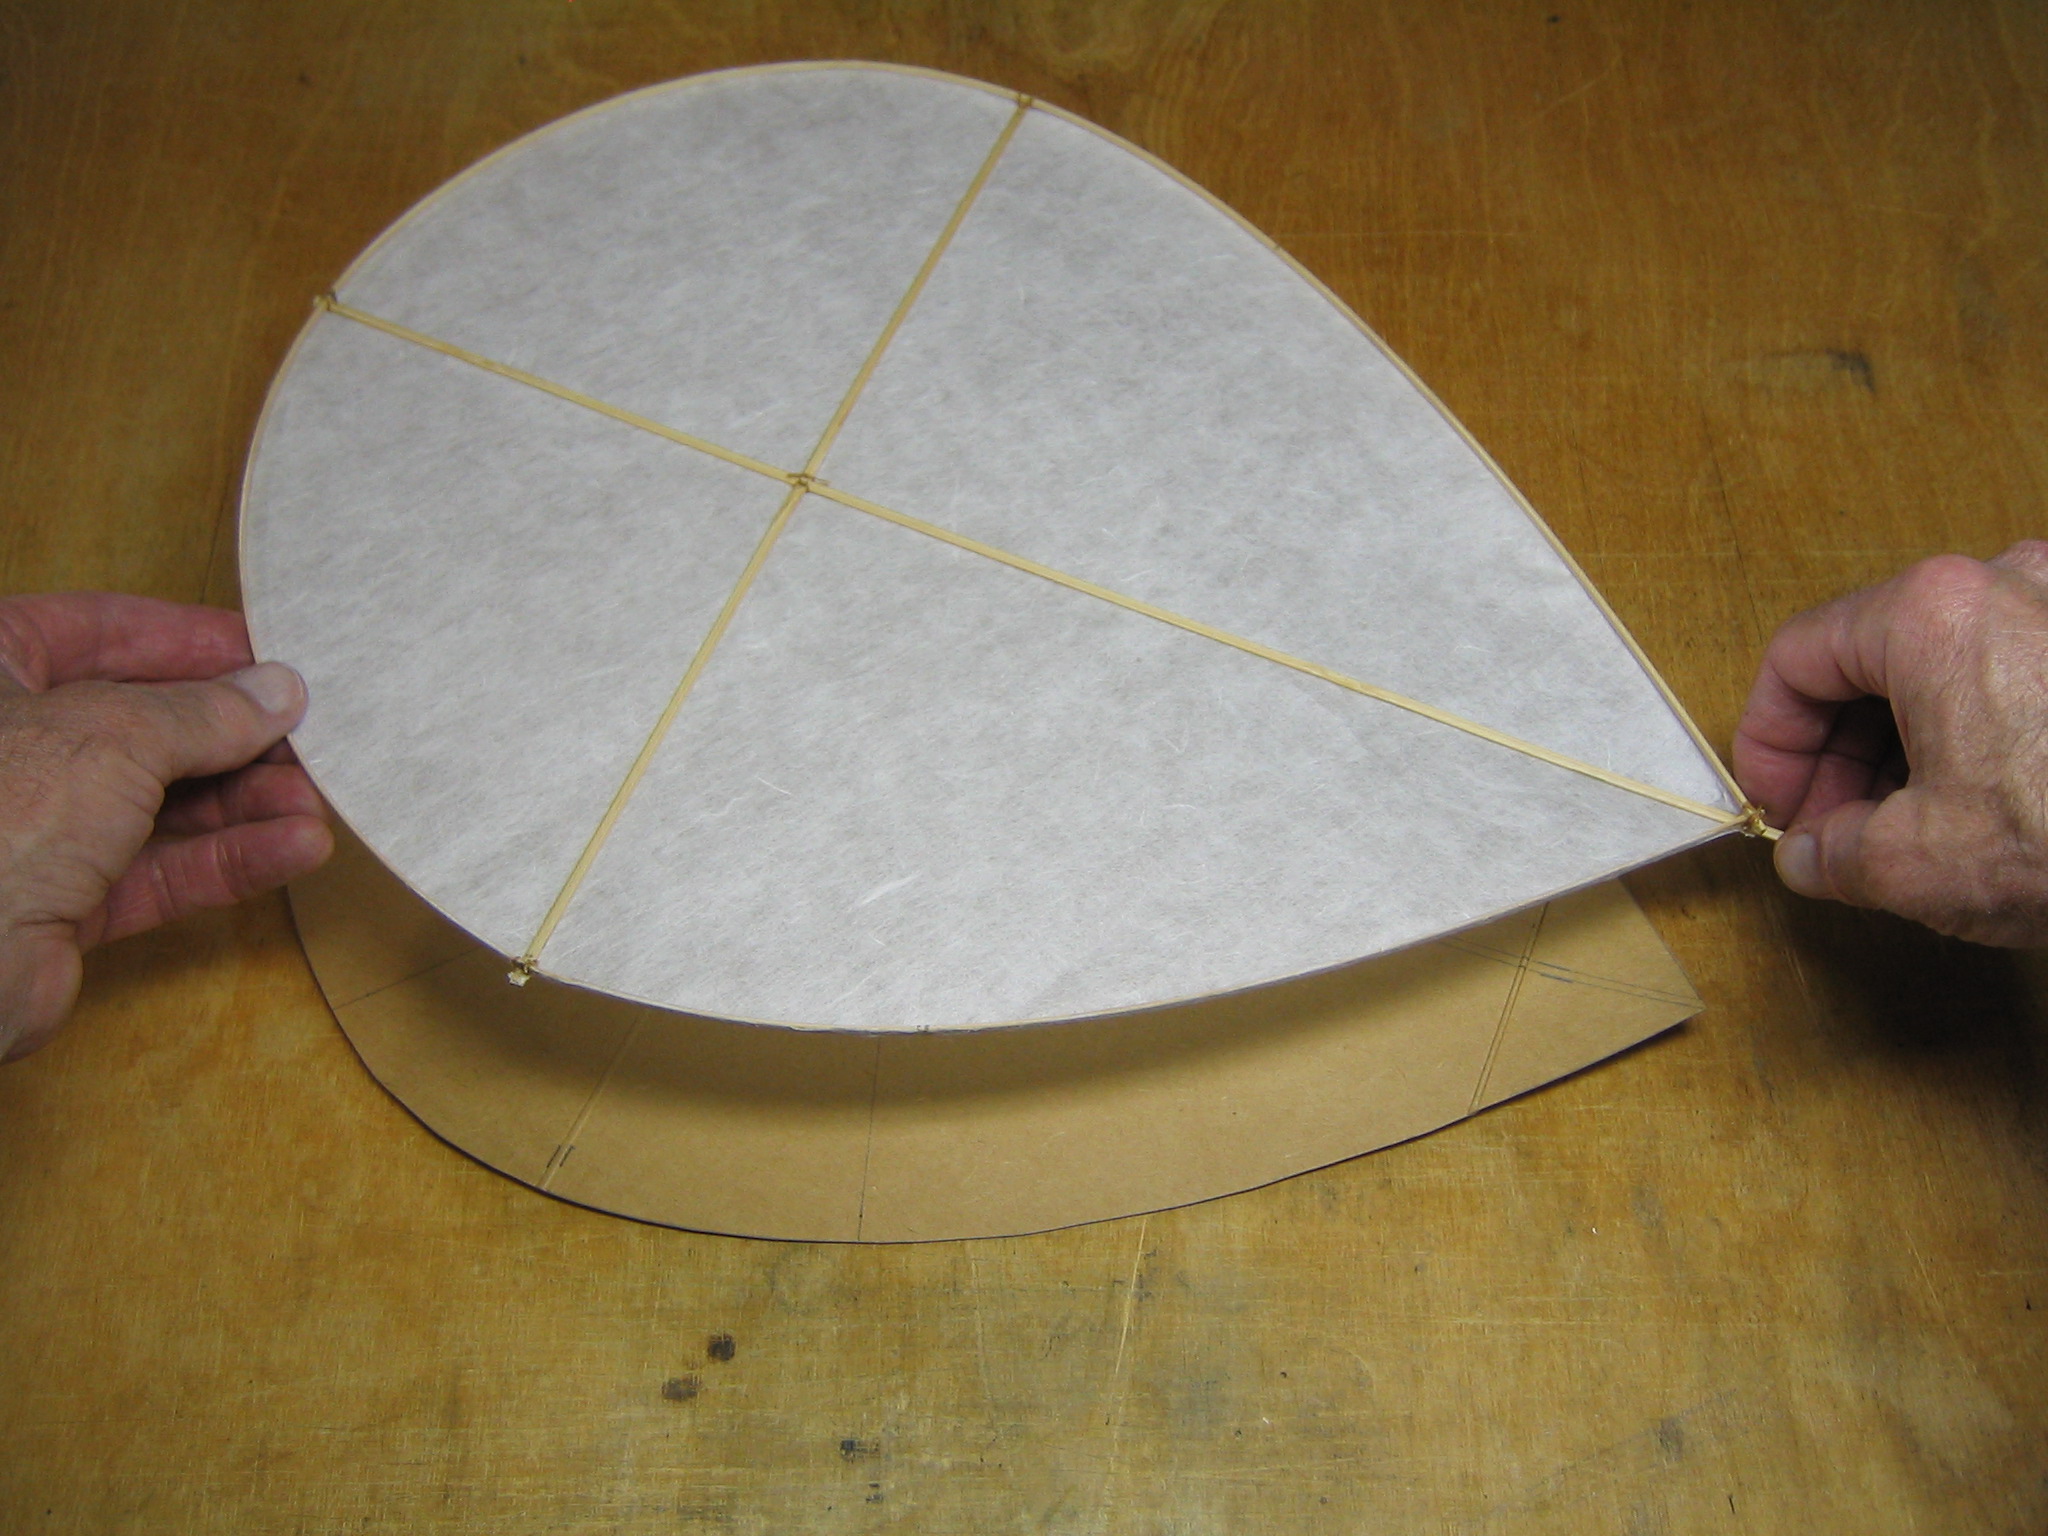
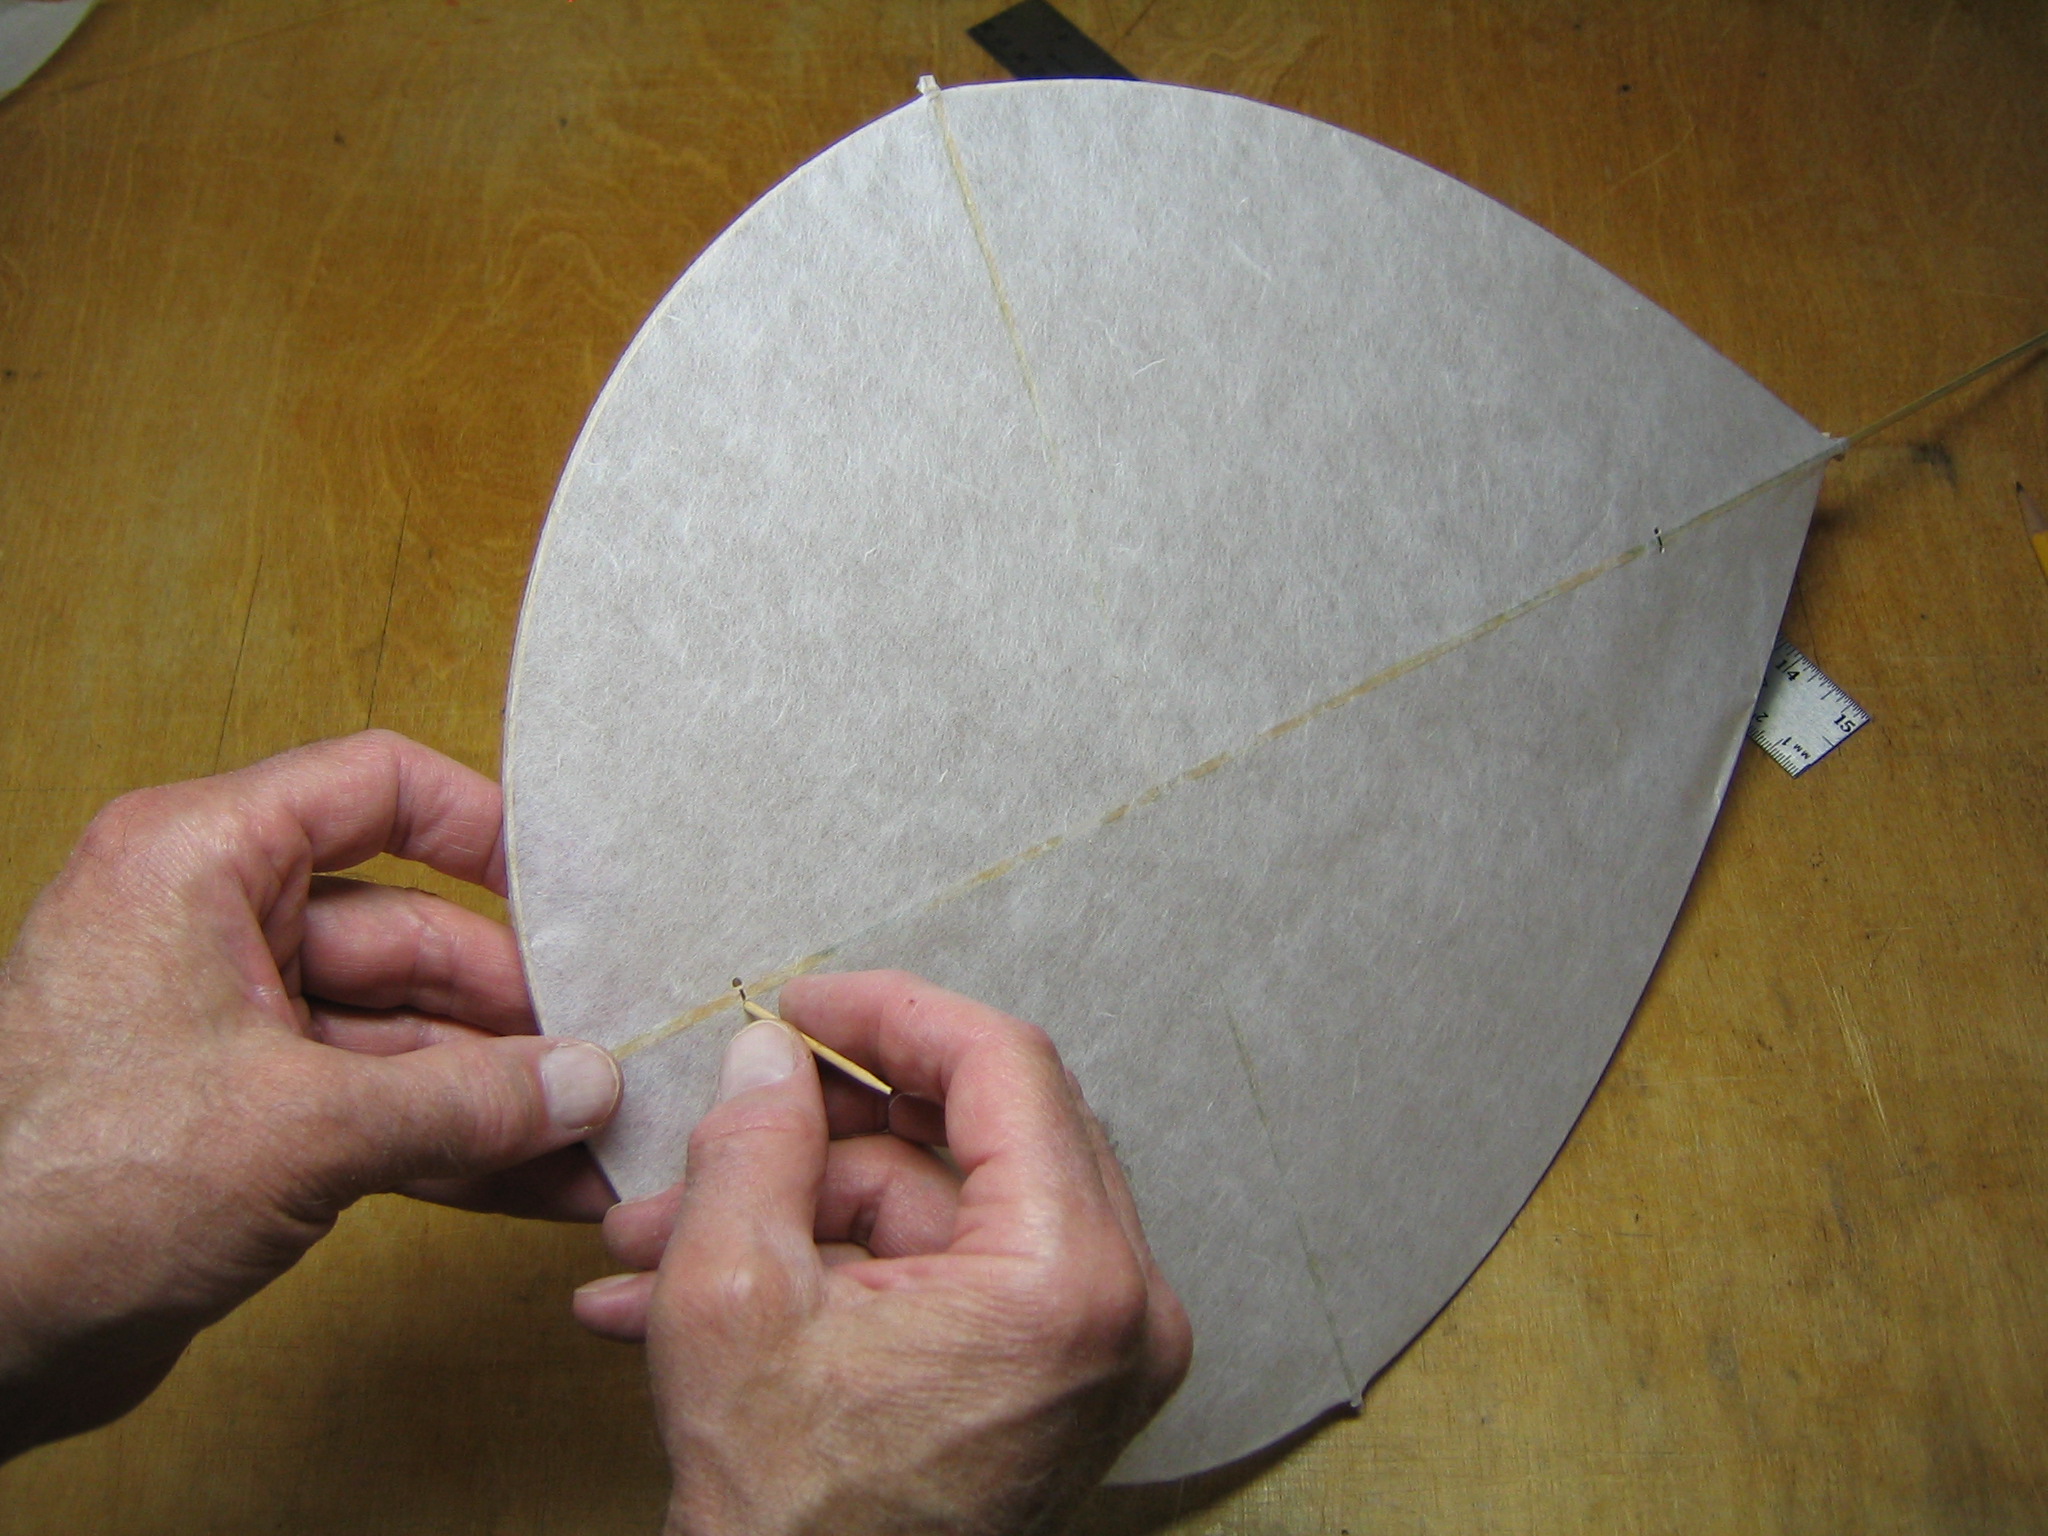
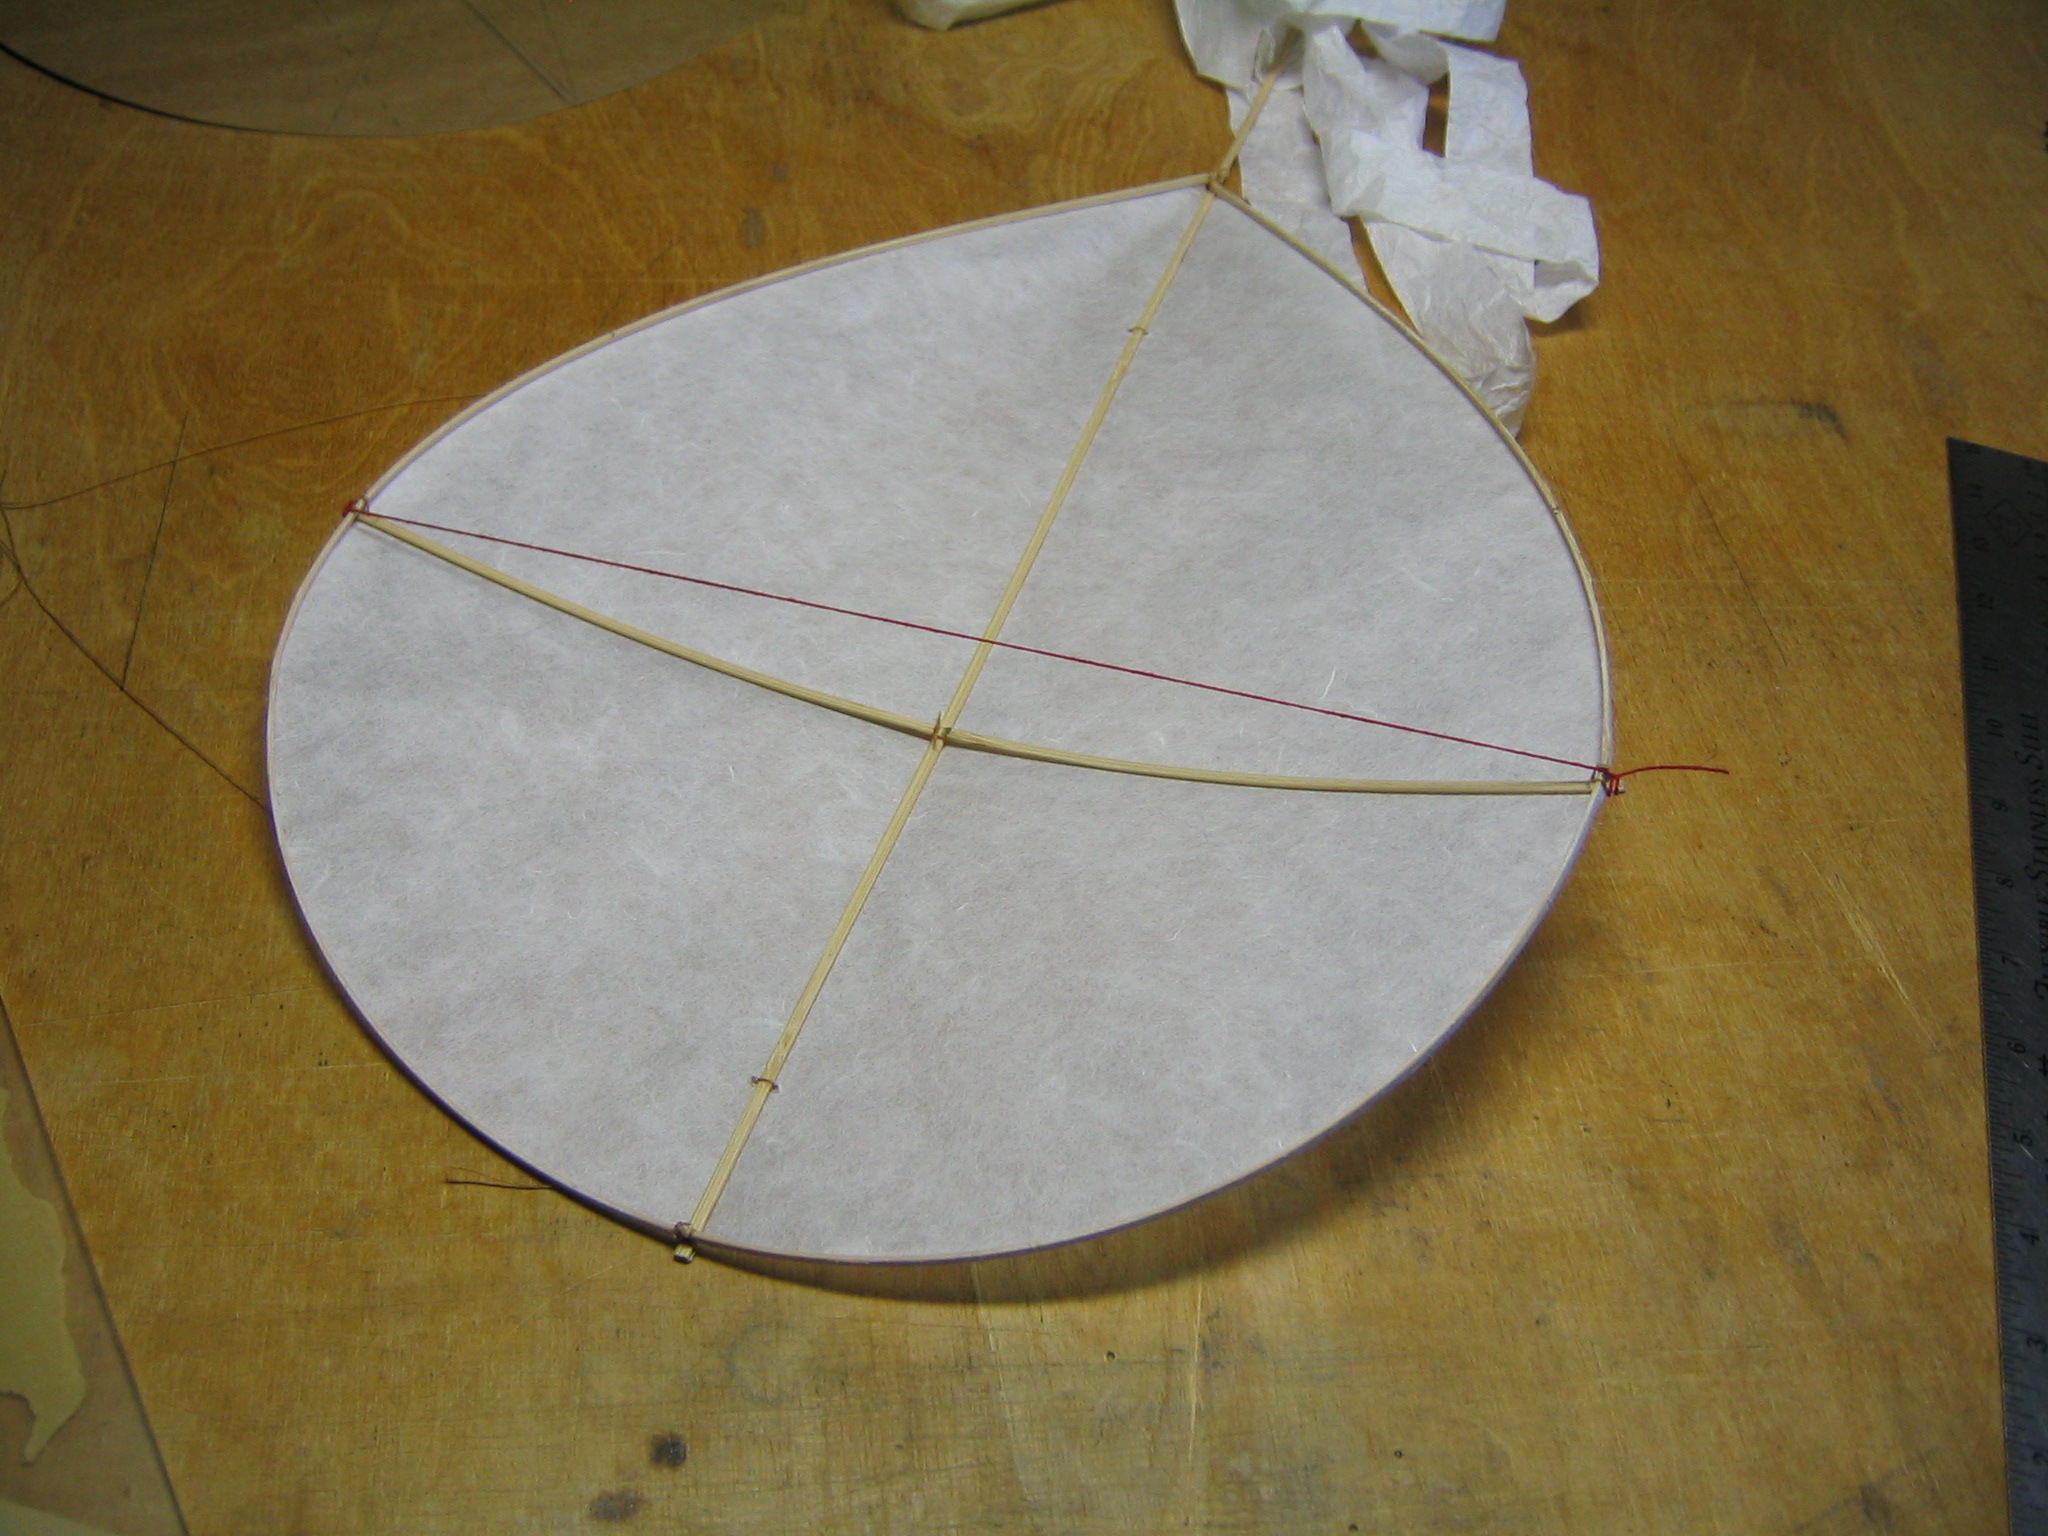
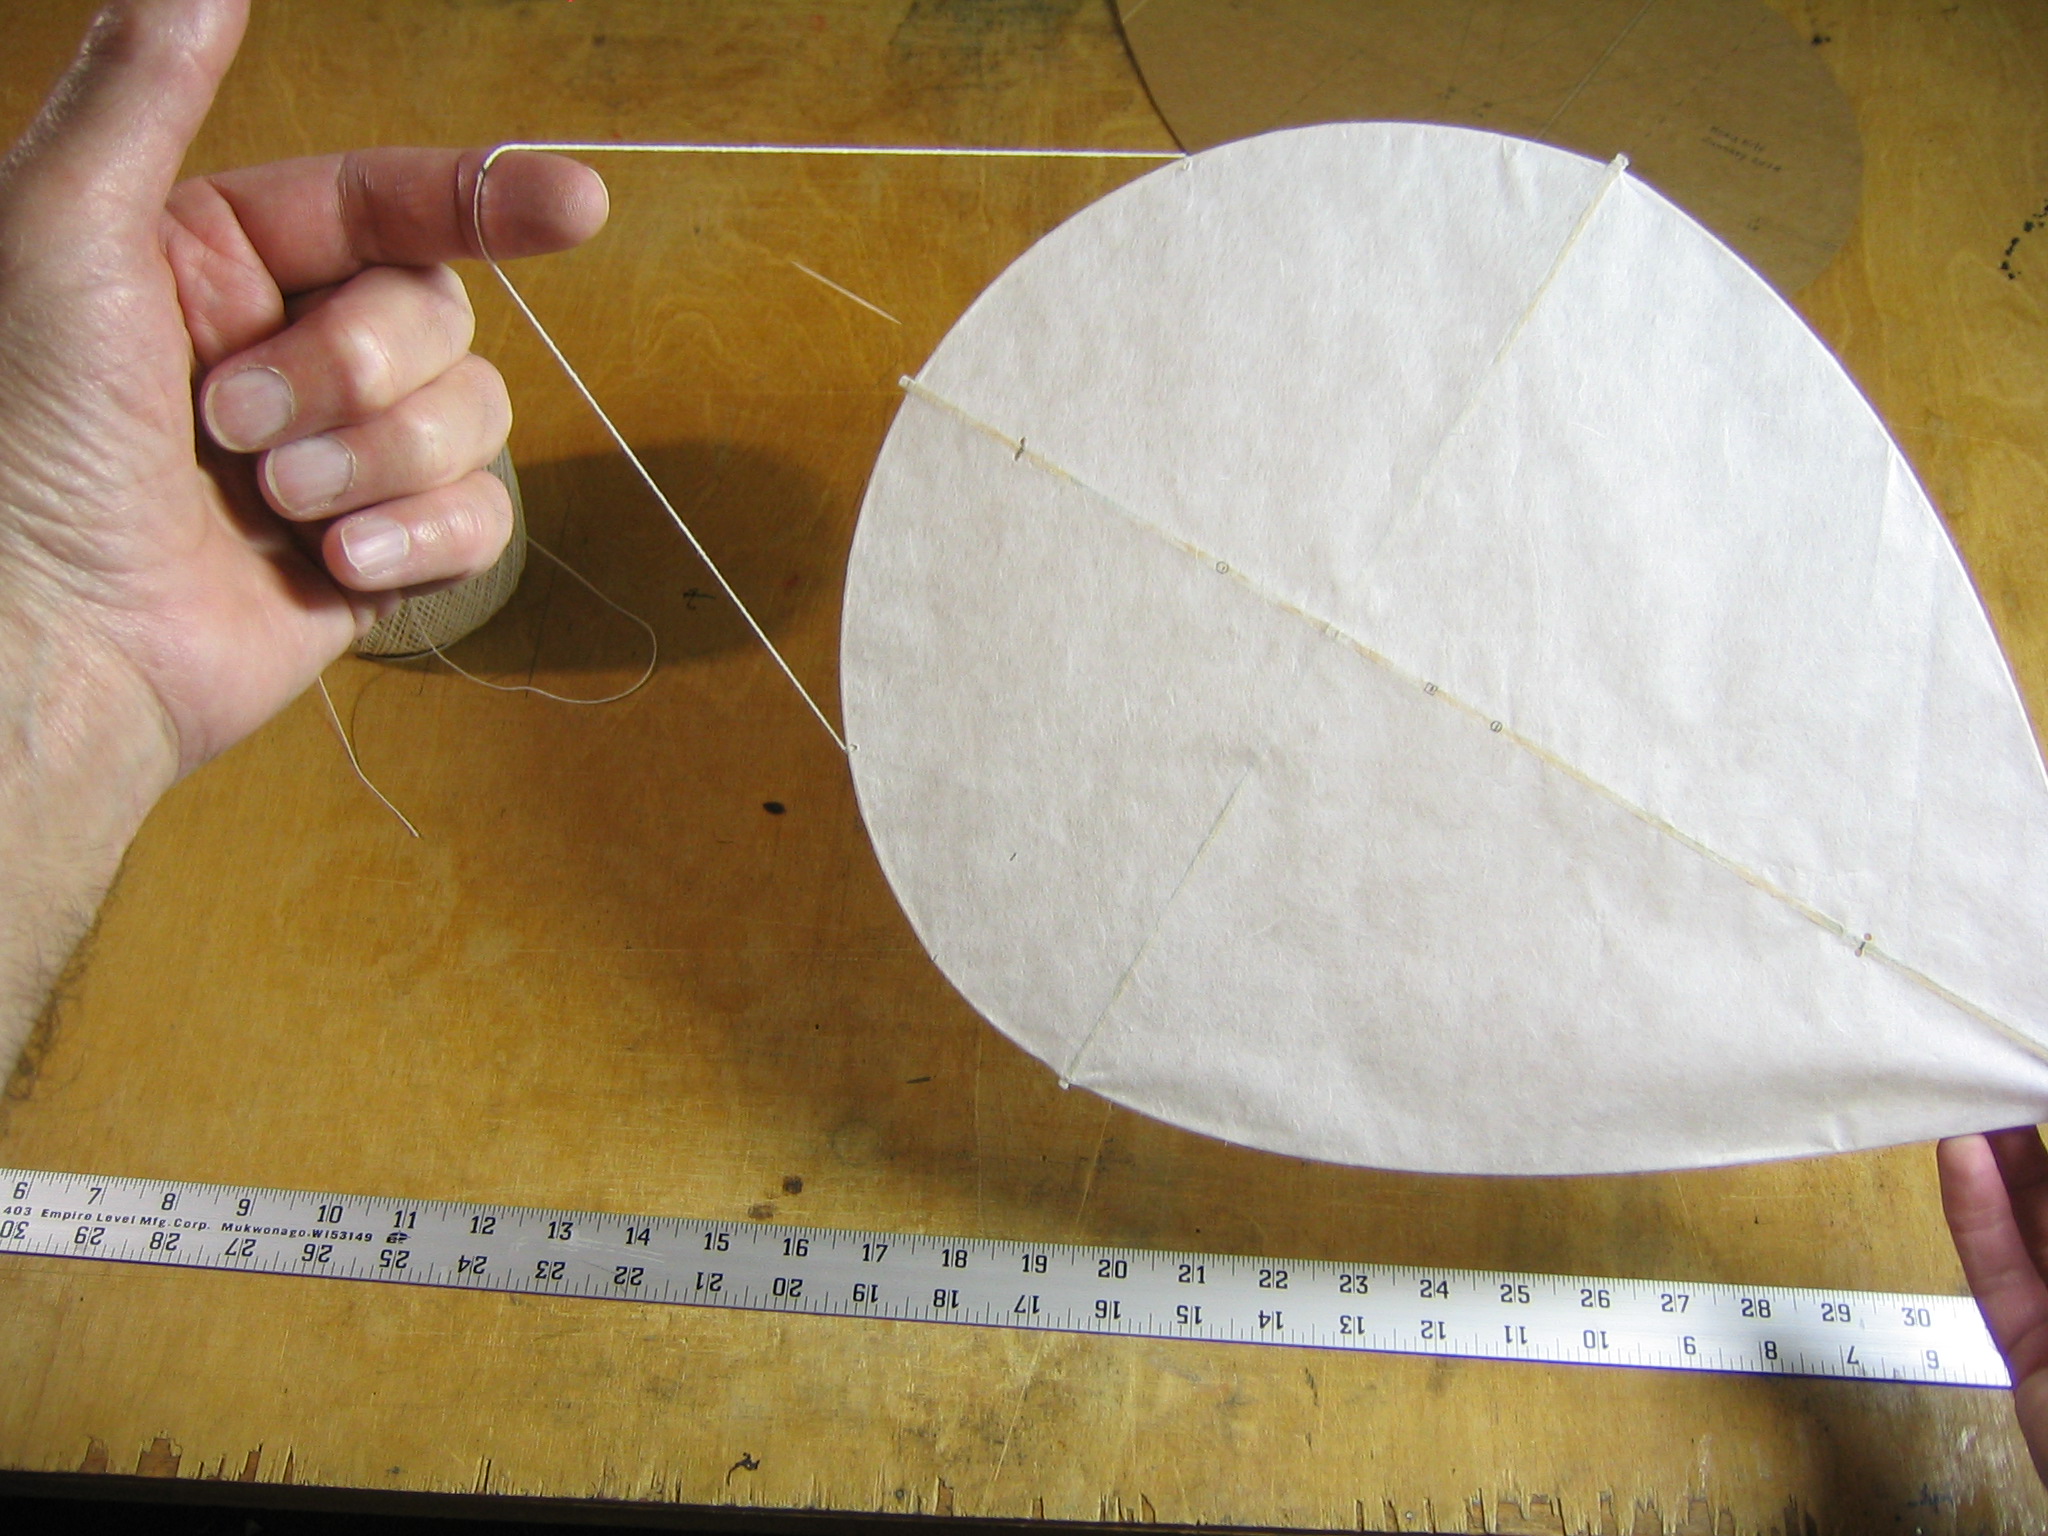
Place the framework on top of the cardboard, place weights on the framework to hold it securely in place and trace around the perimeter with a pencil. Be careful to not bend the framework when tracing. Hold it in place while tracing.
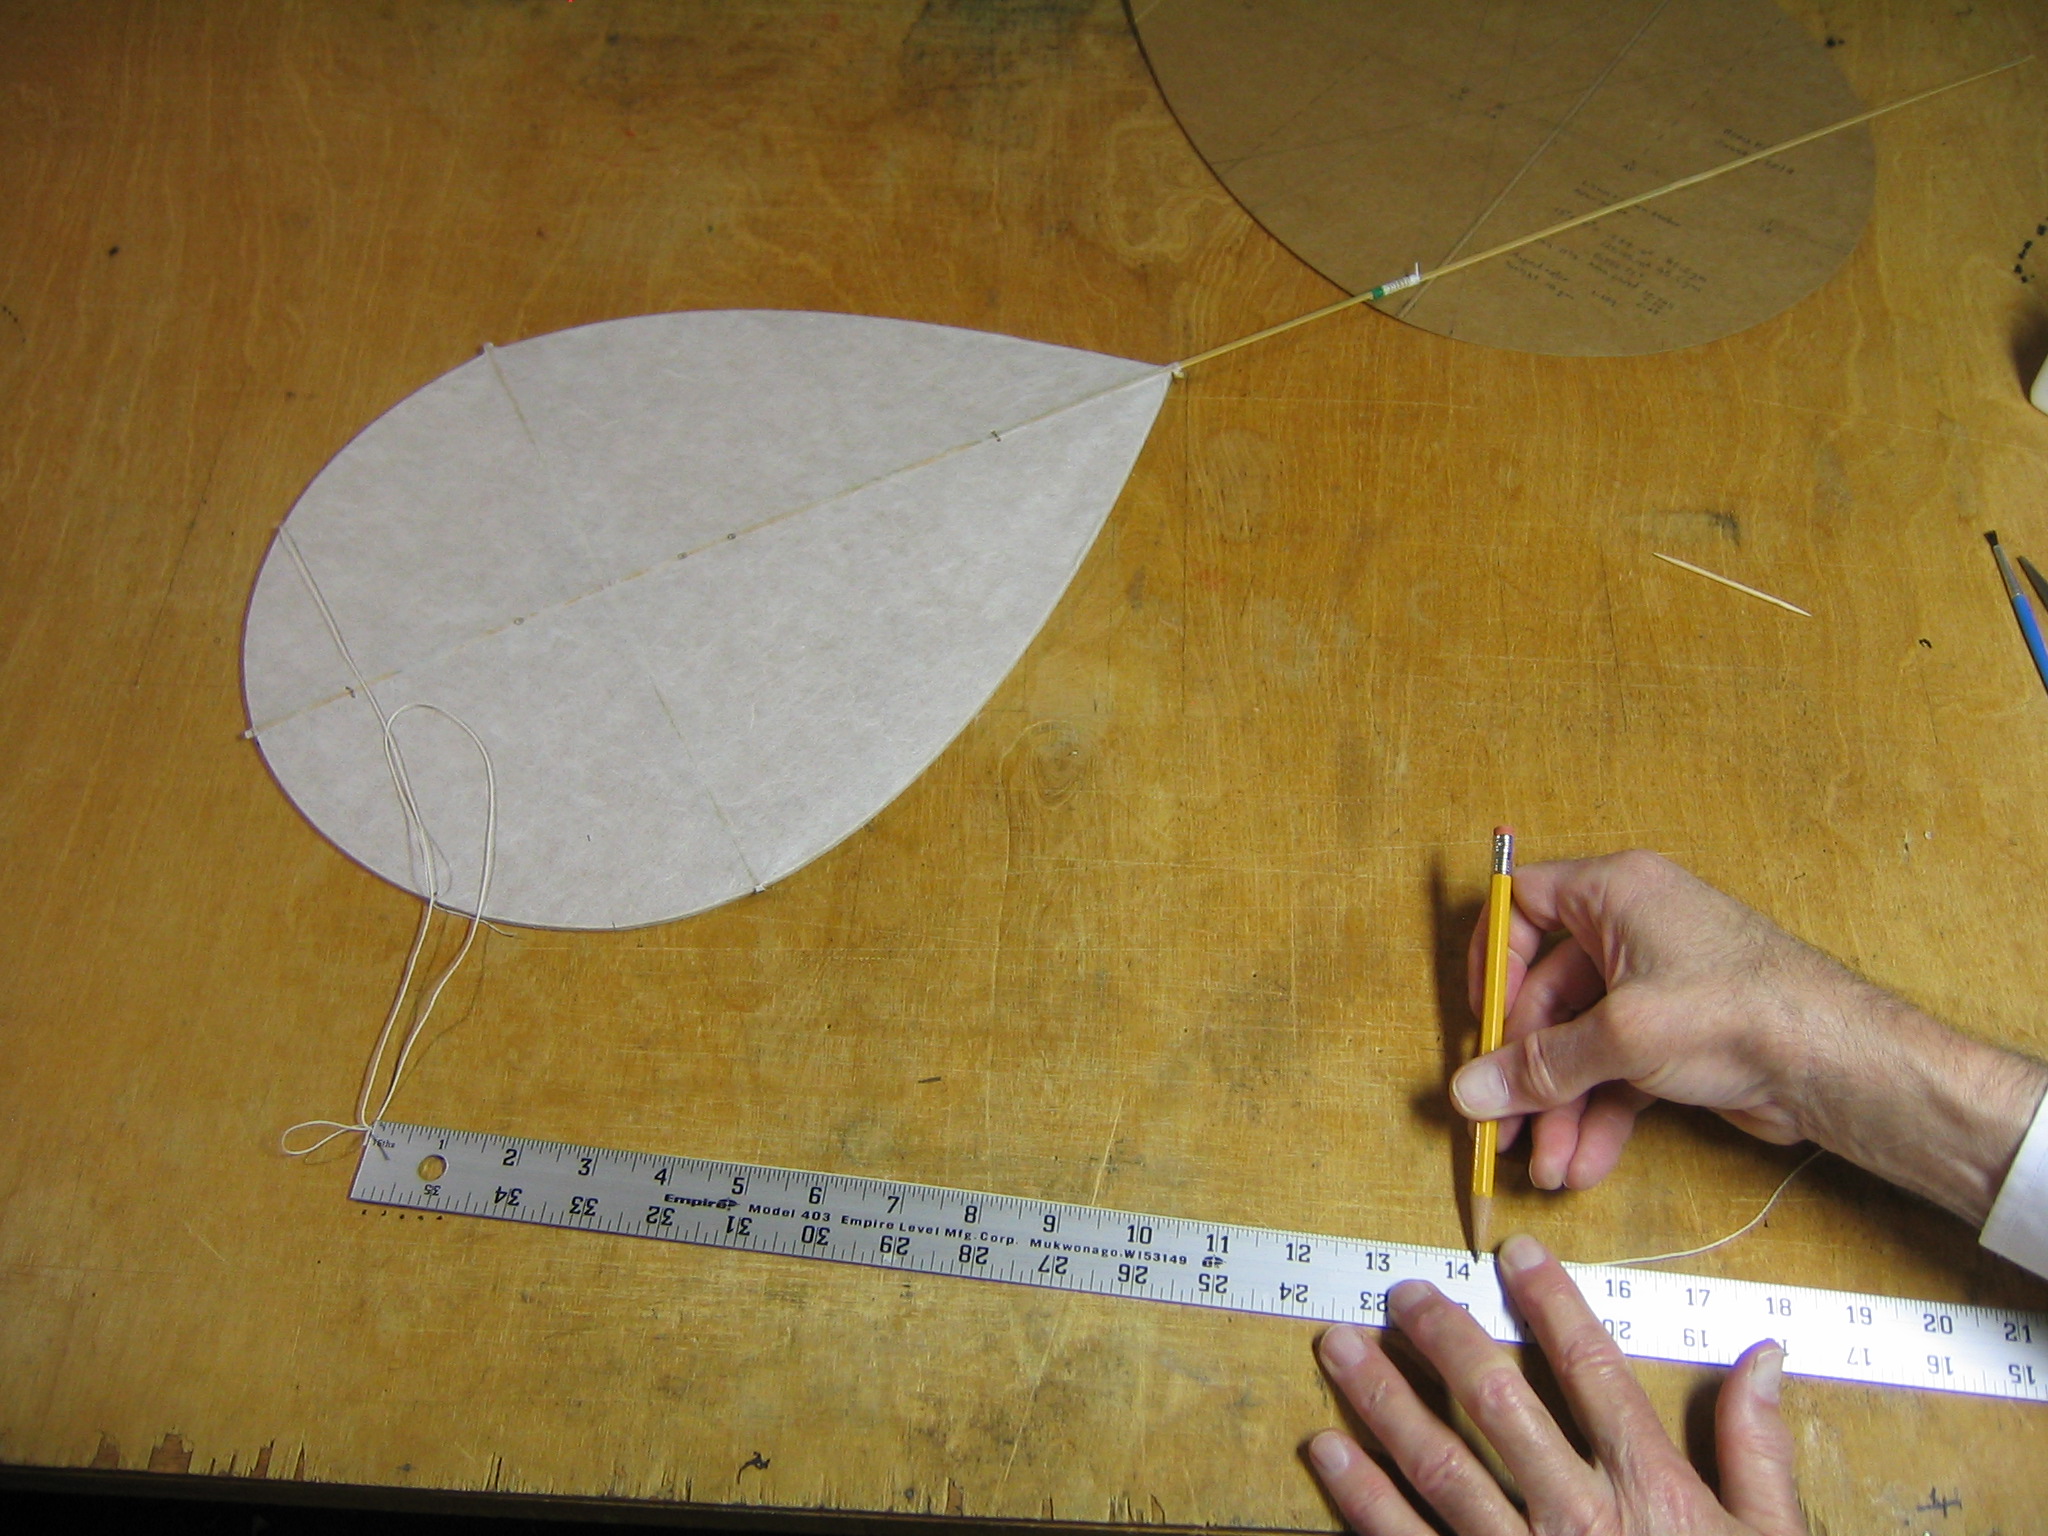
Mark the locations of the spine and cross stick at the same time.
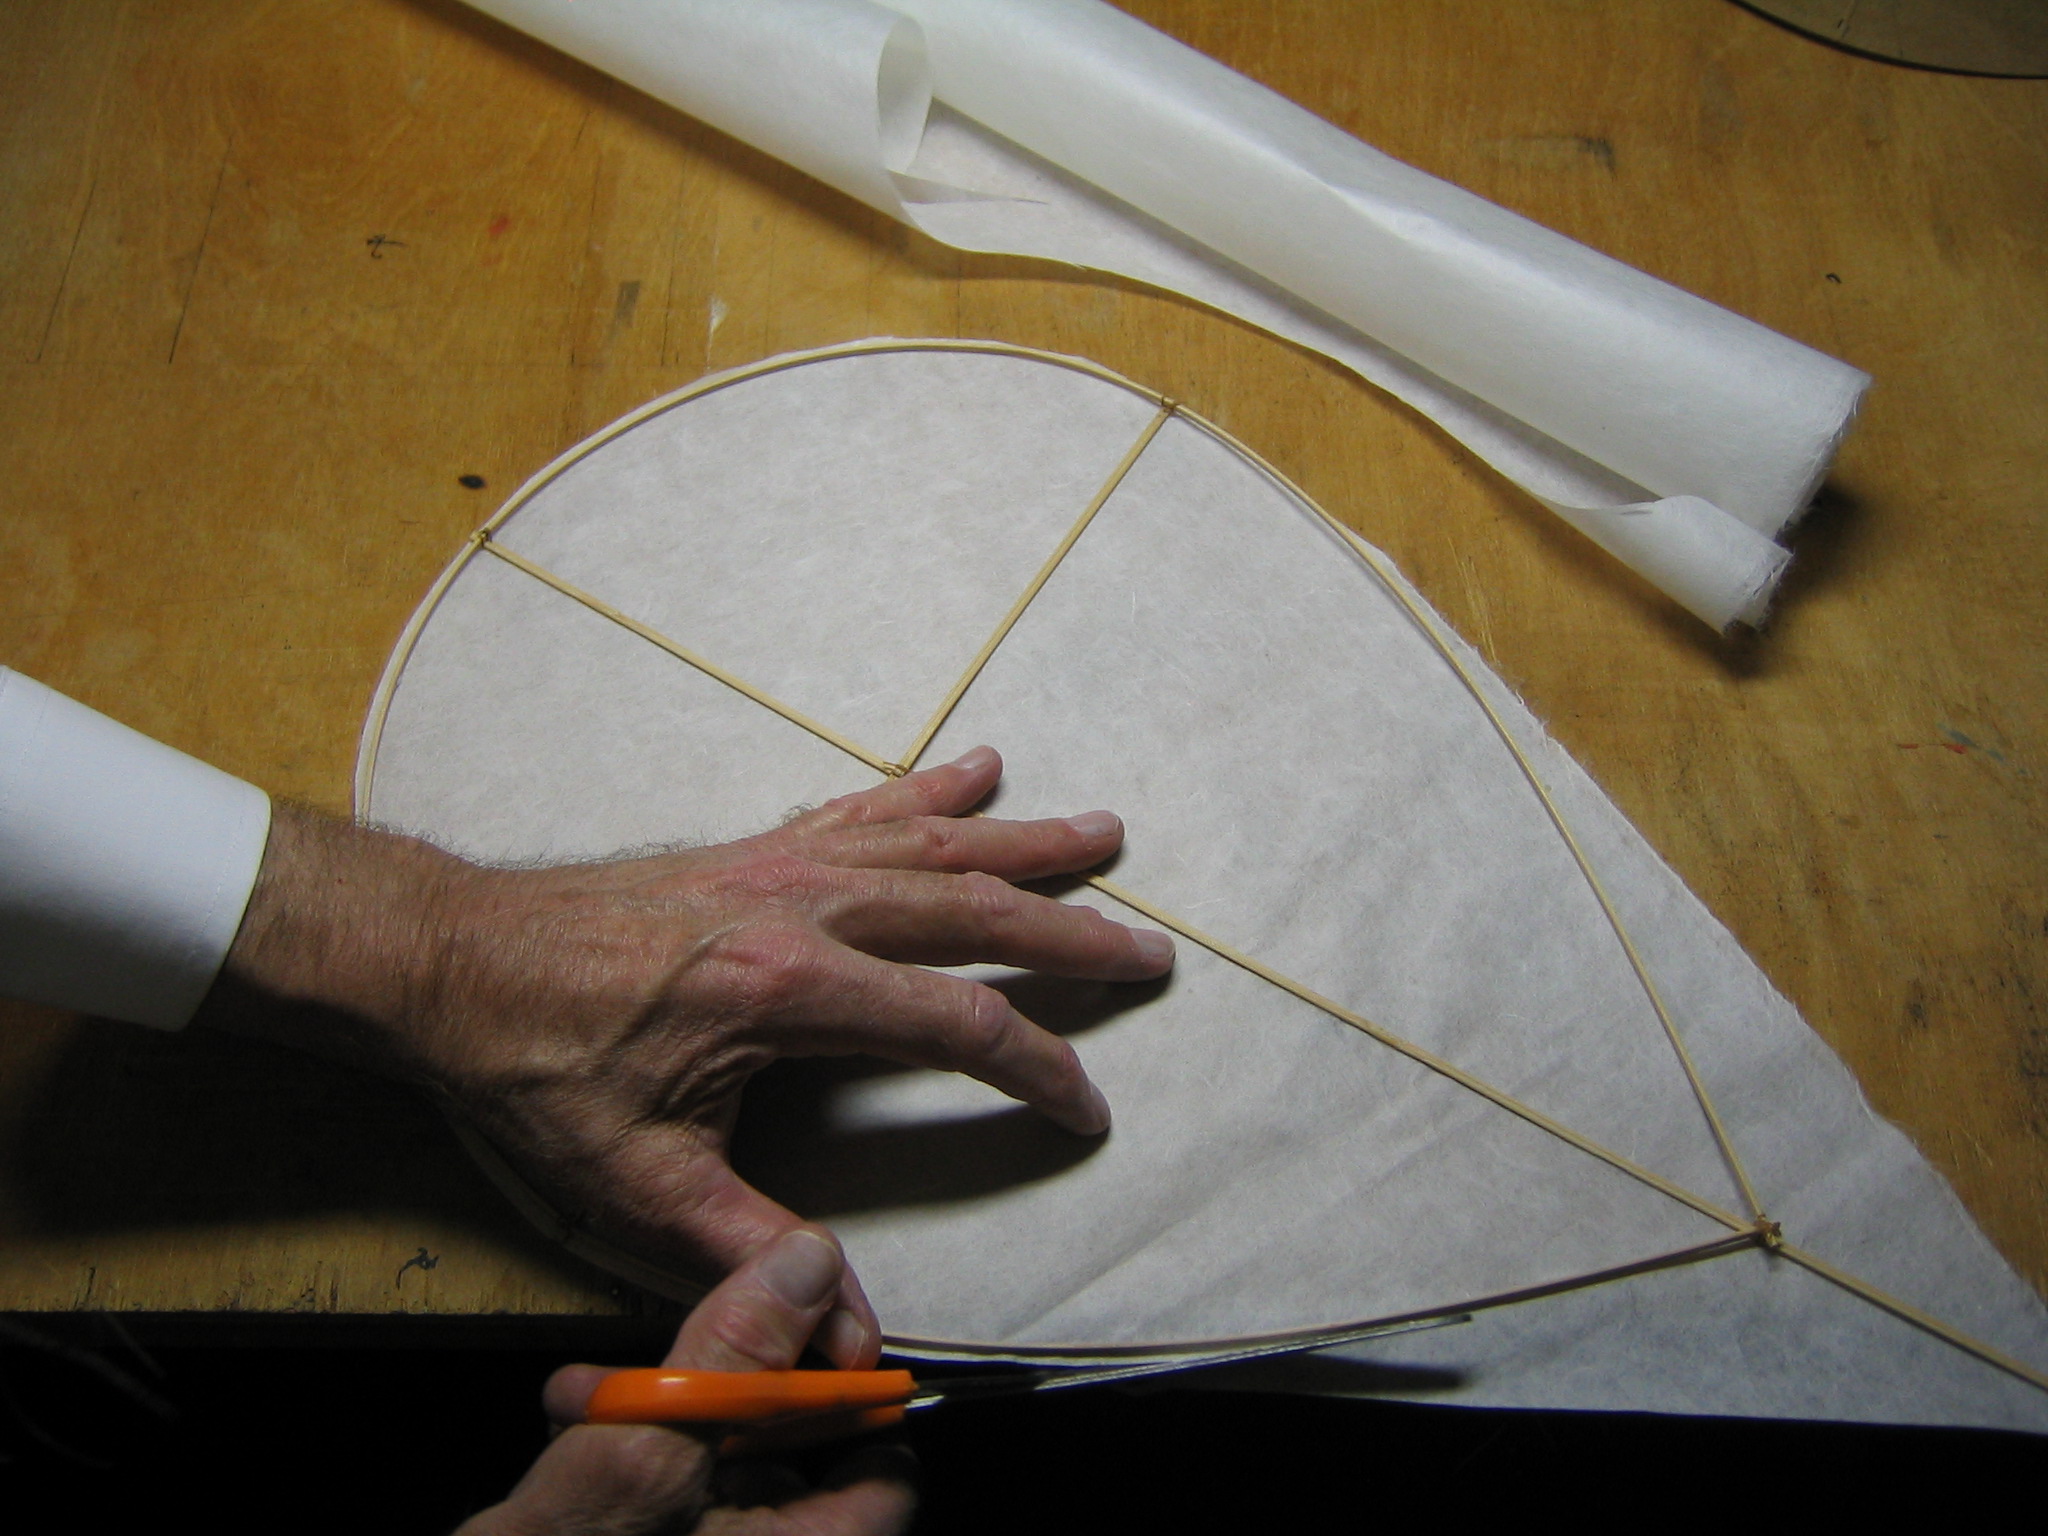
Cut out the cardboard pattern.
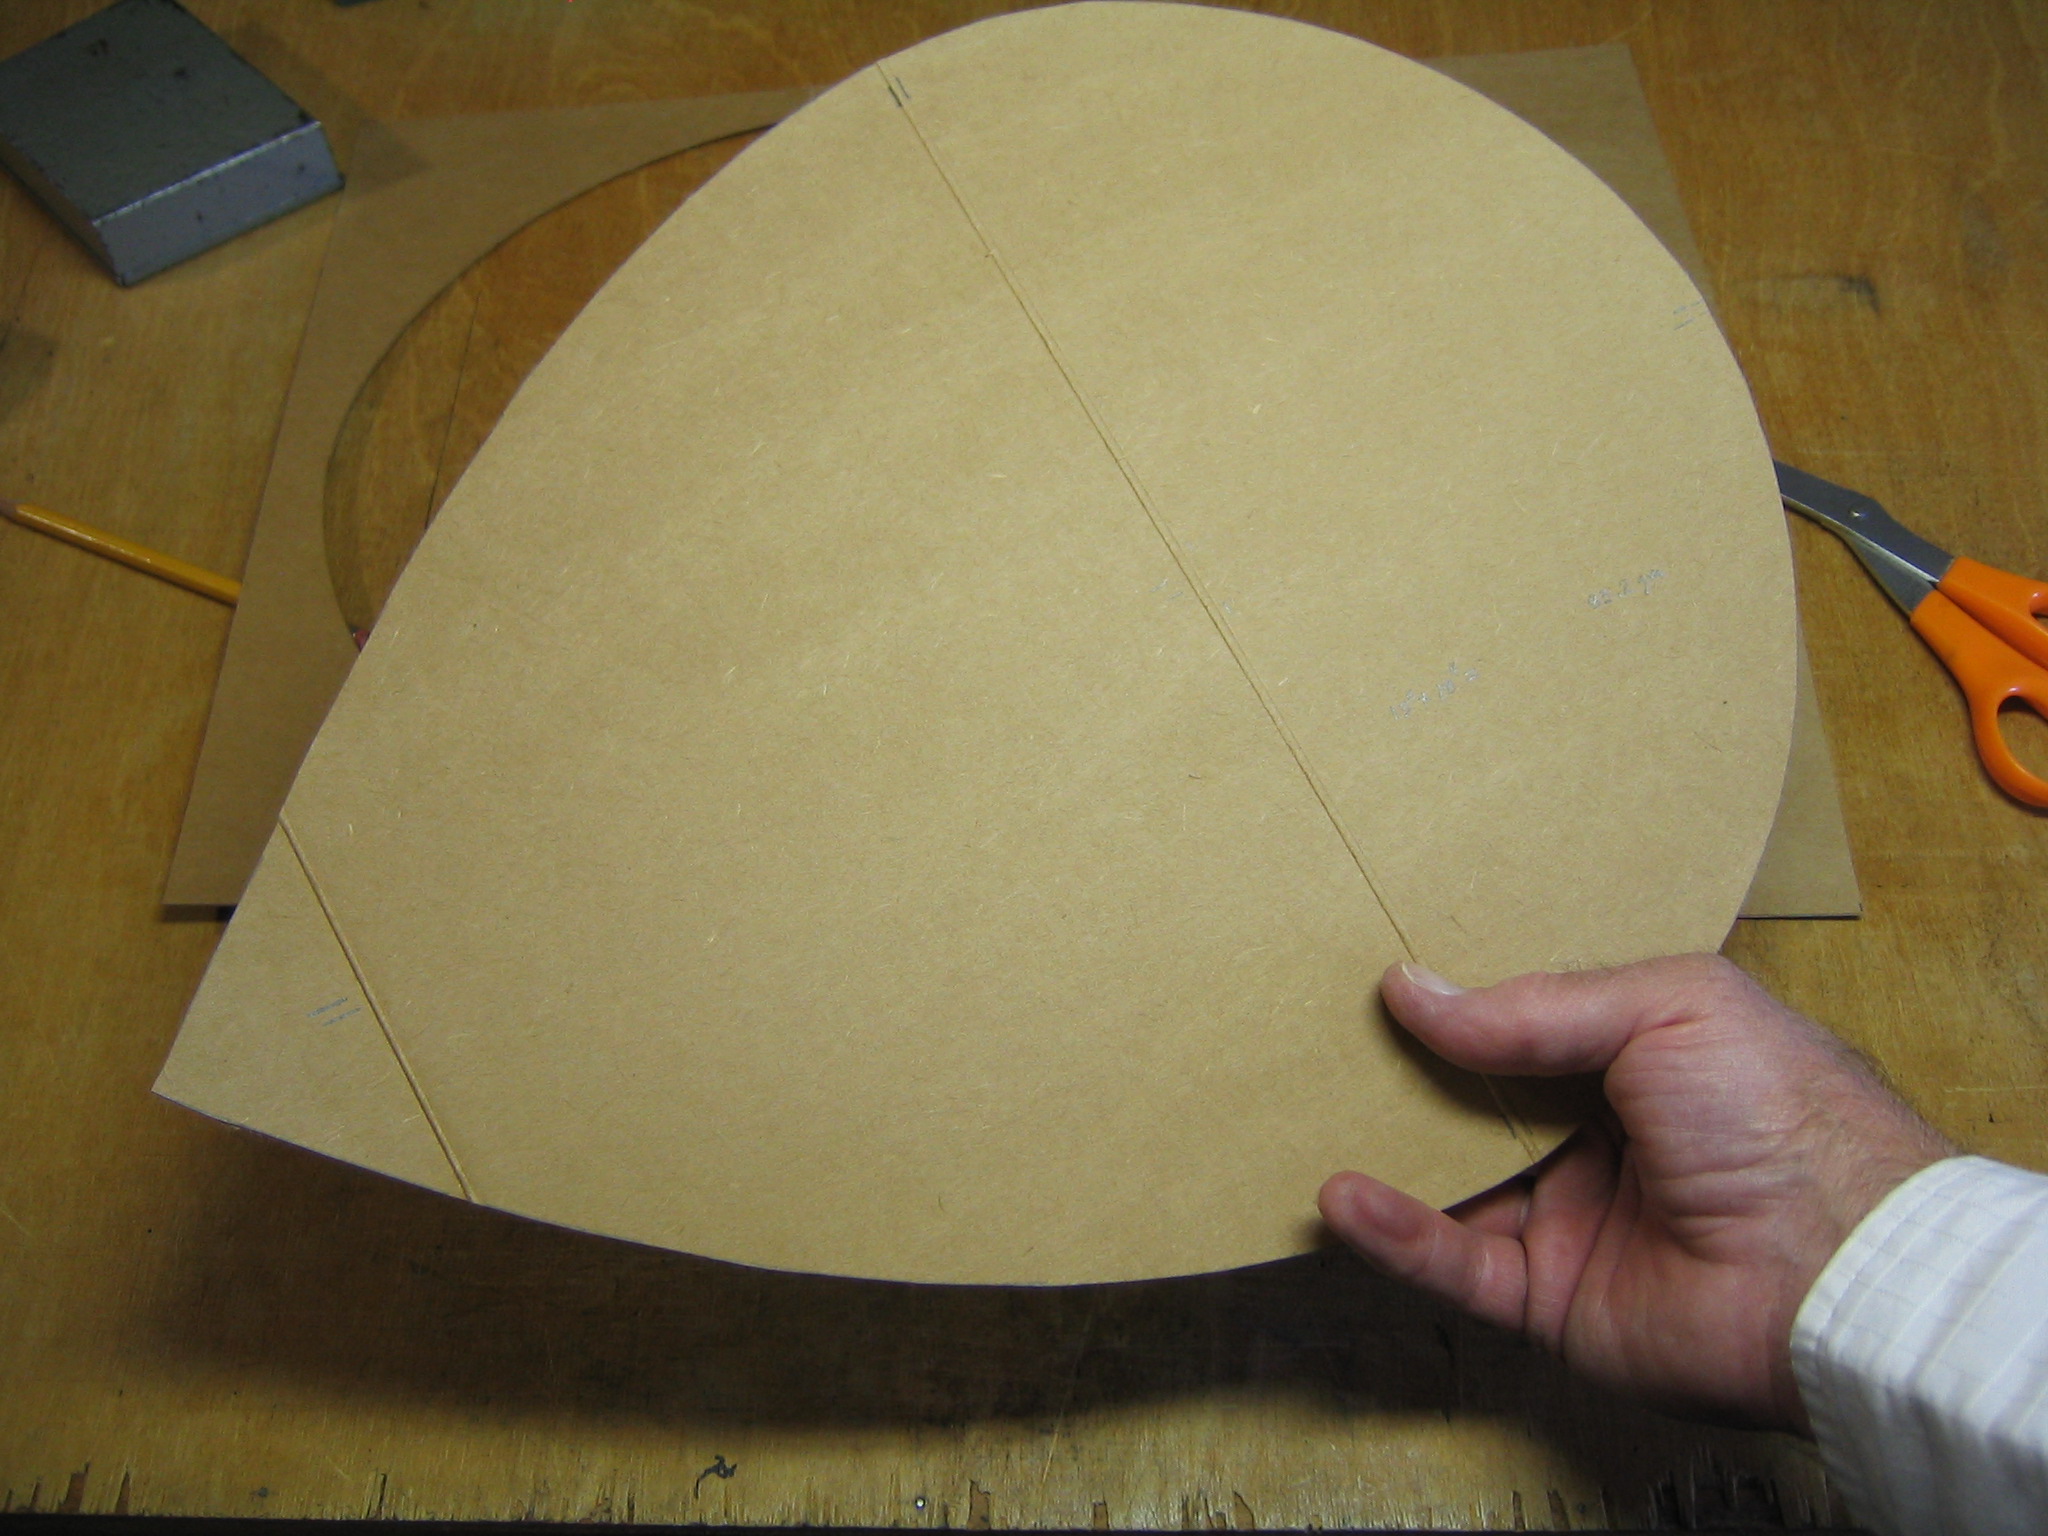
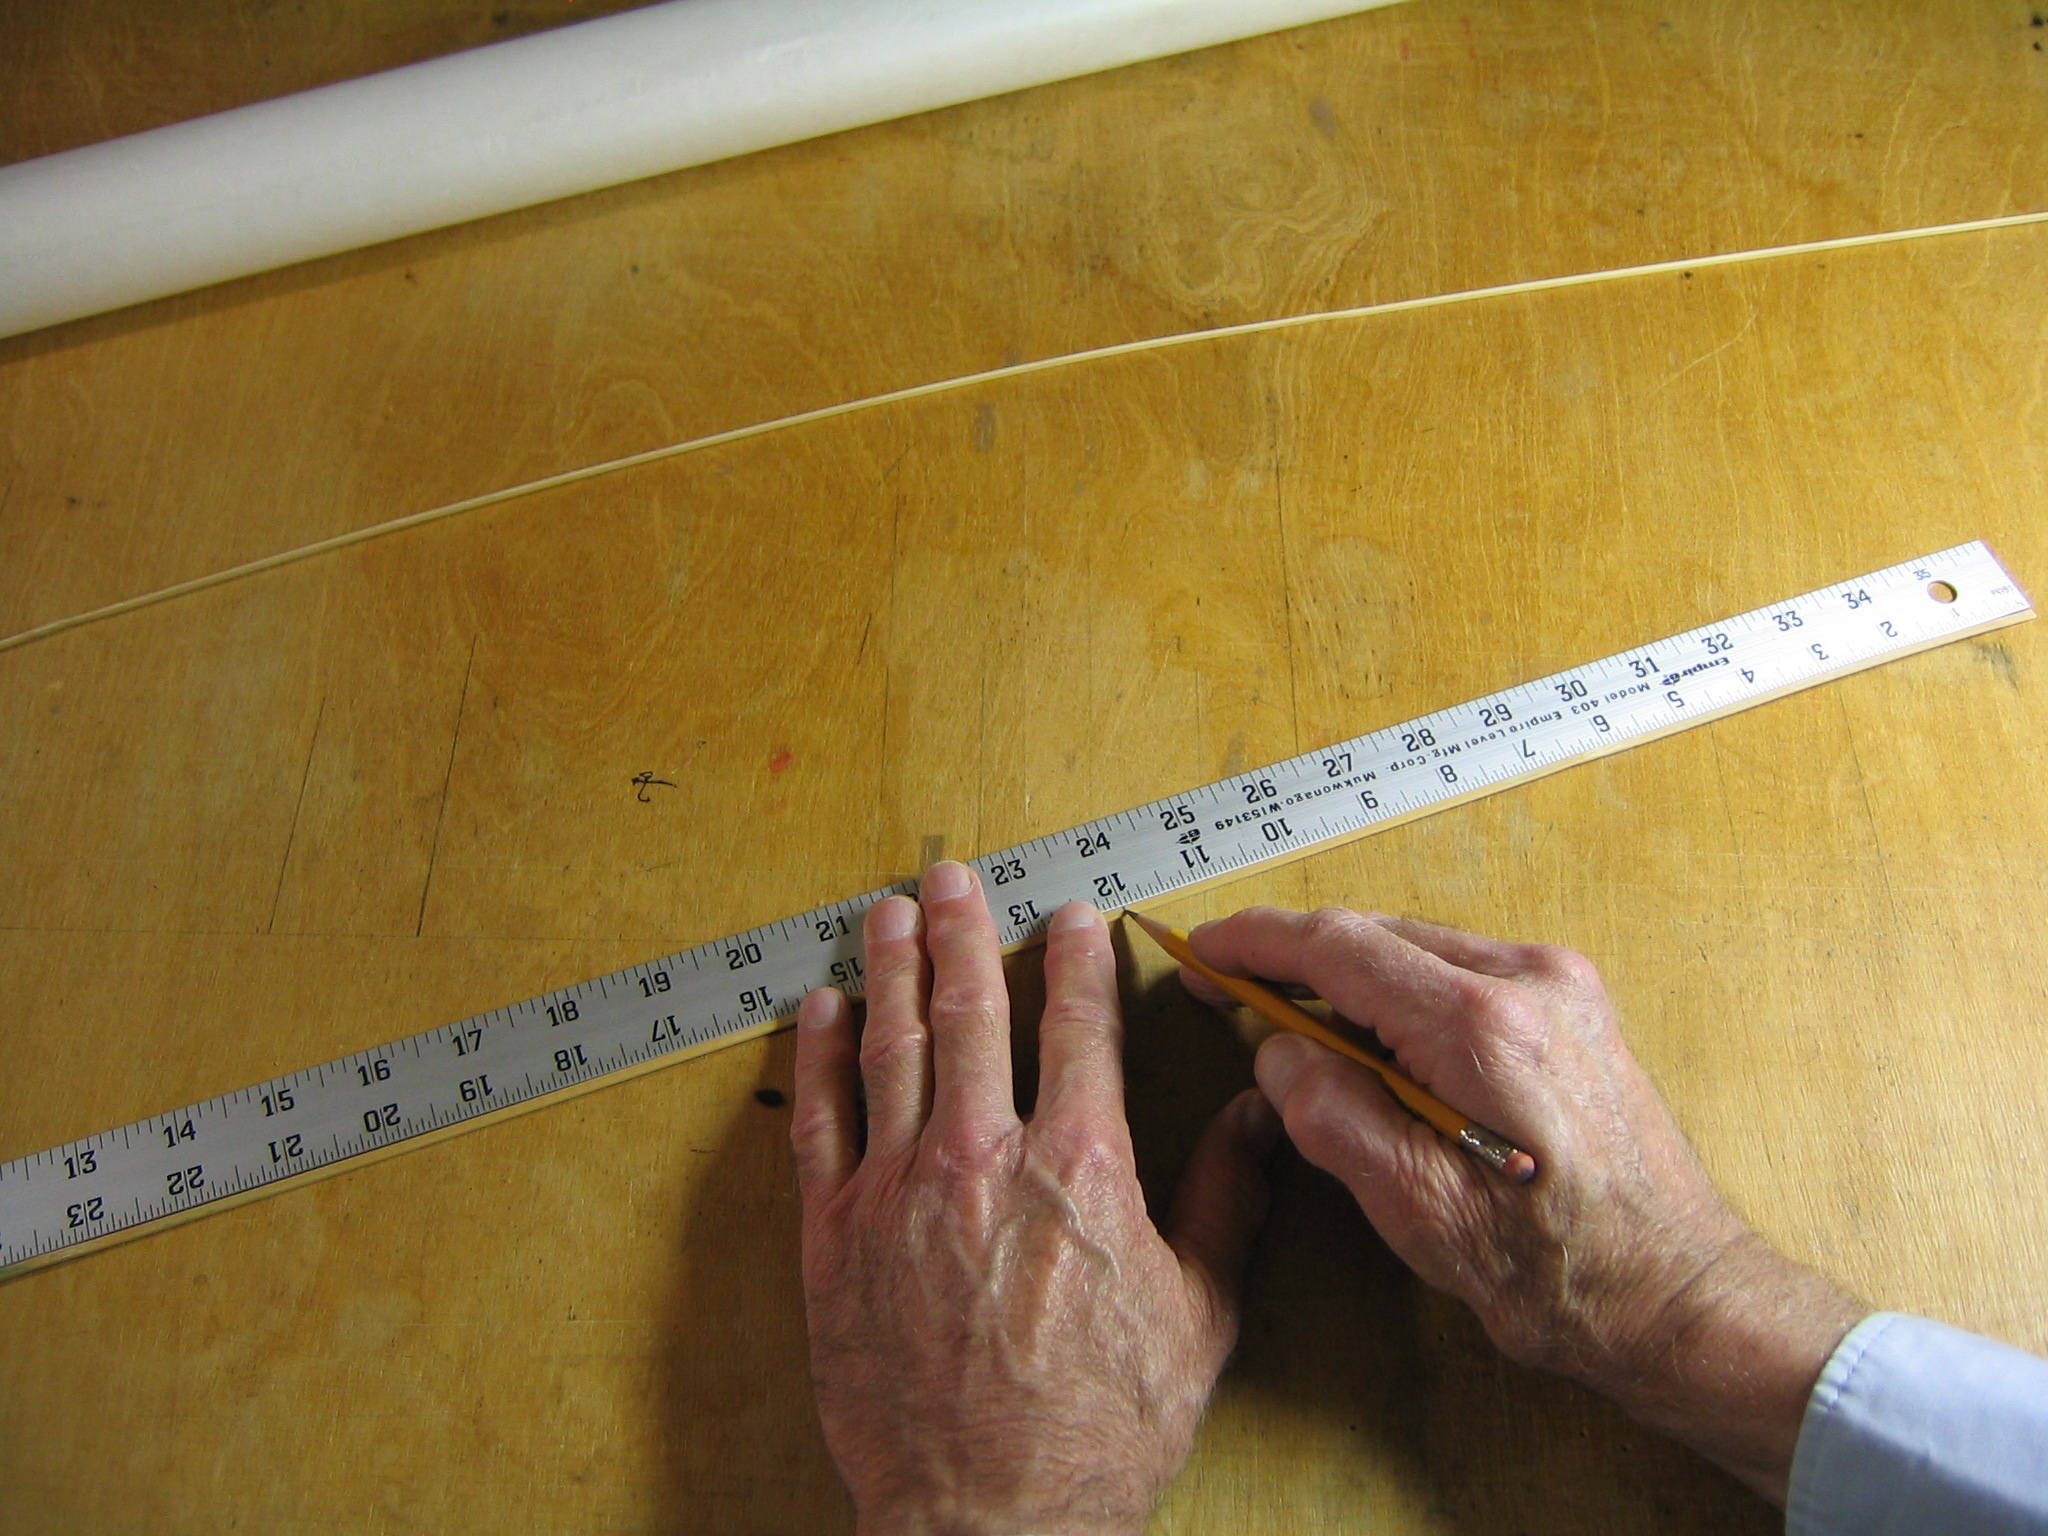
The cardboard pattern has the same area as the kite’s lifting surface.
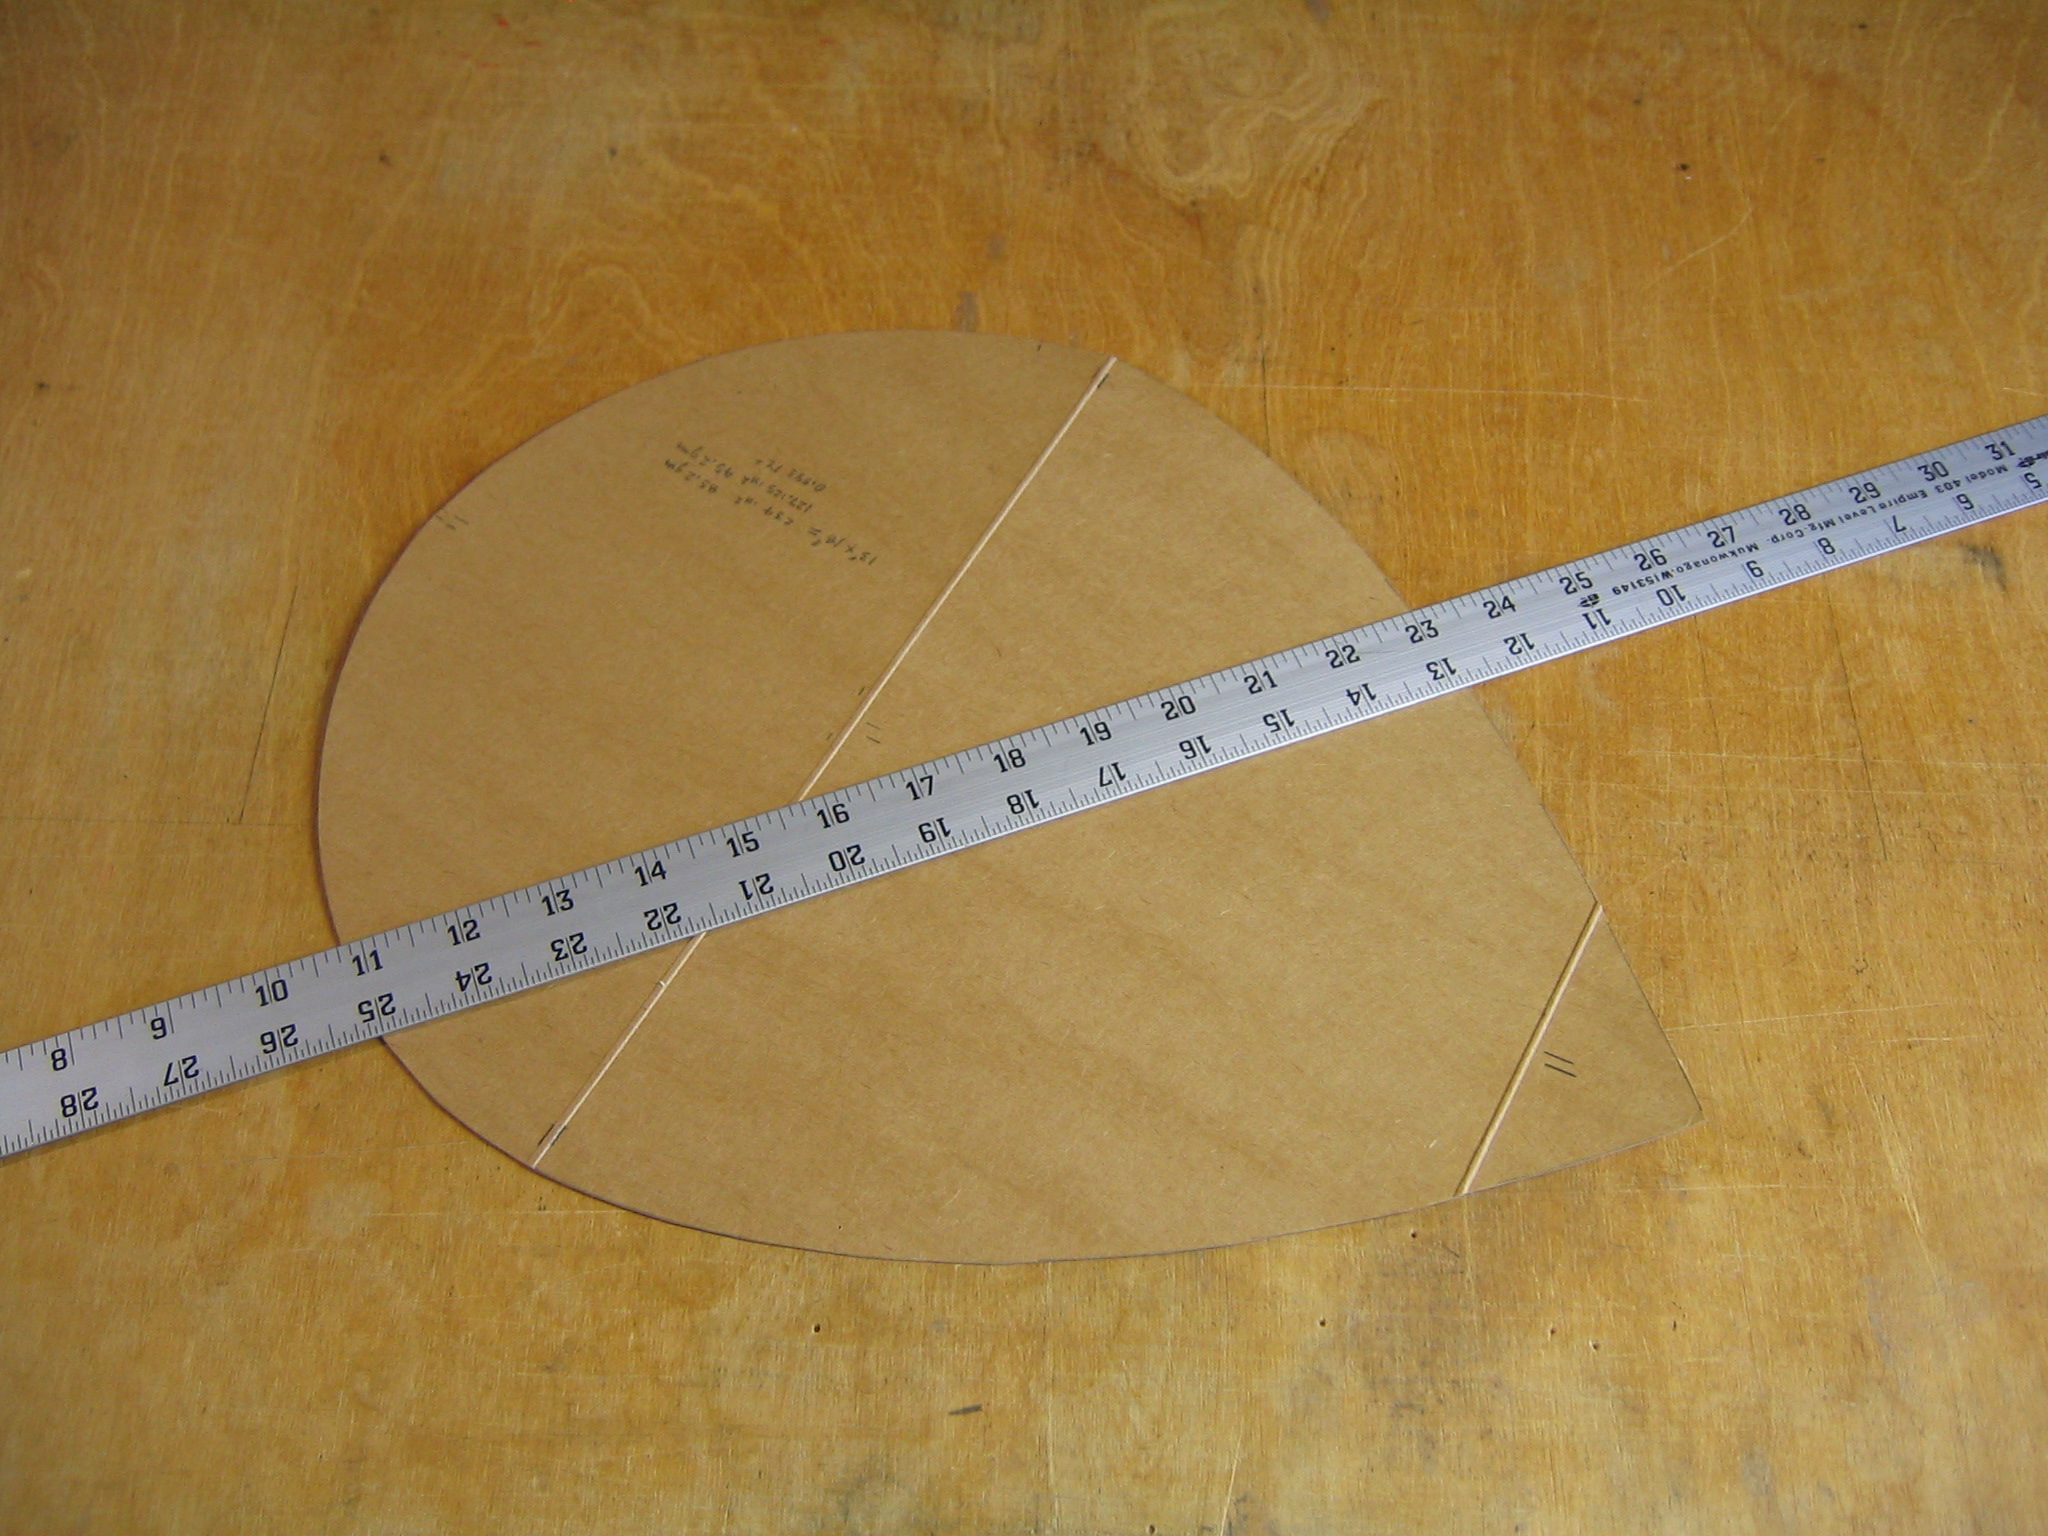
Weigh the cardboard pattern. It weighs 45.2 grams.
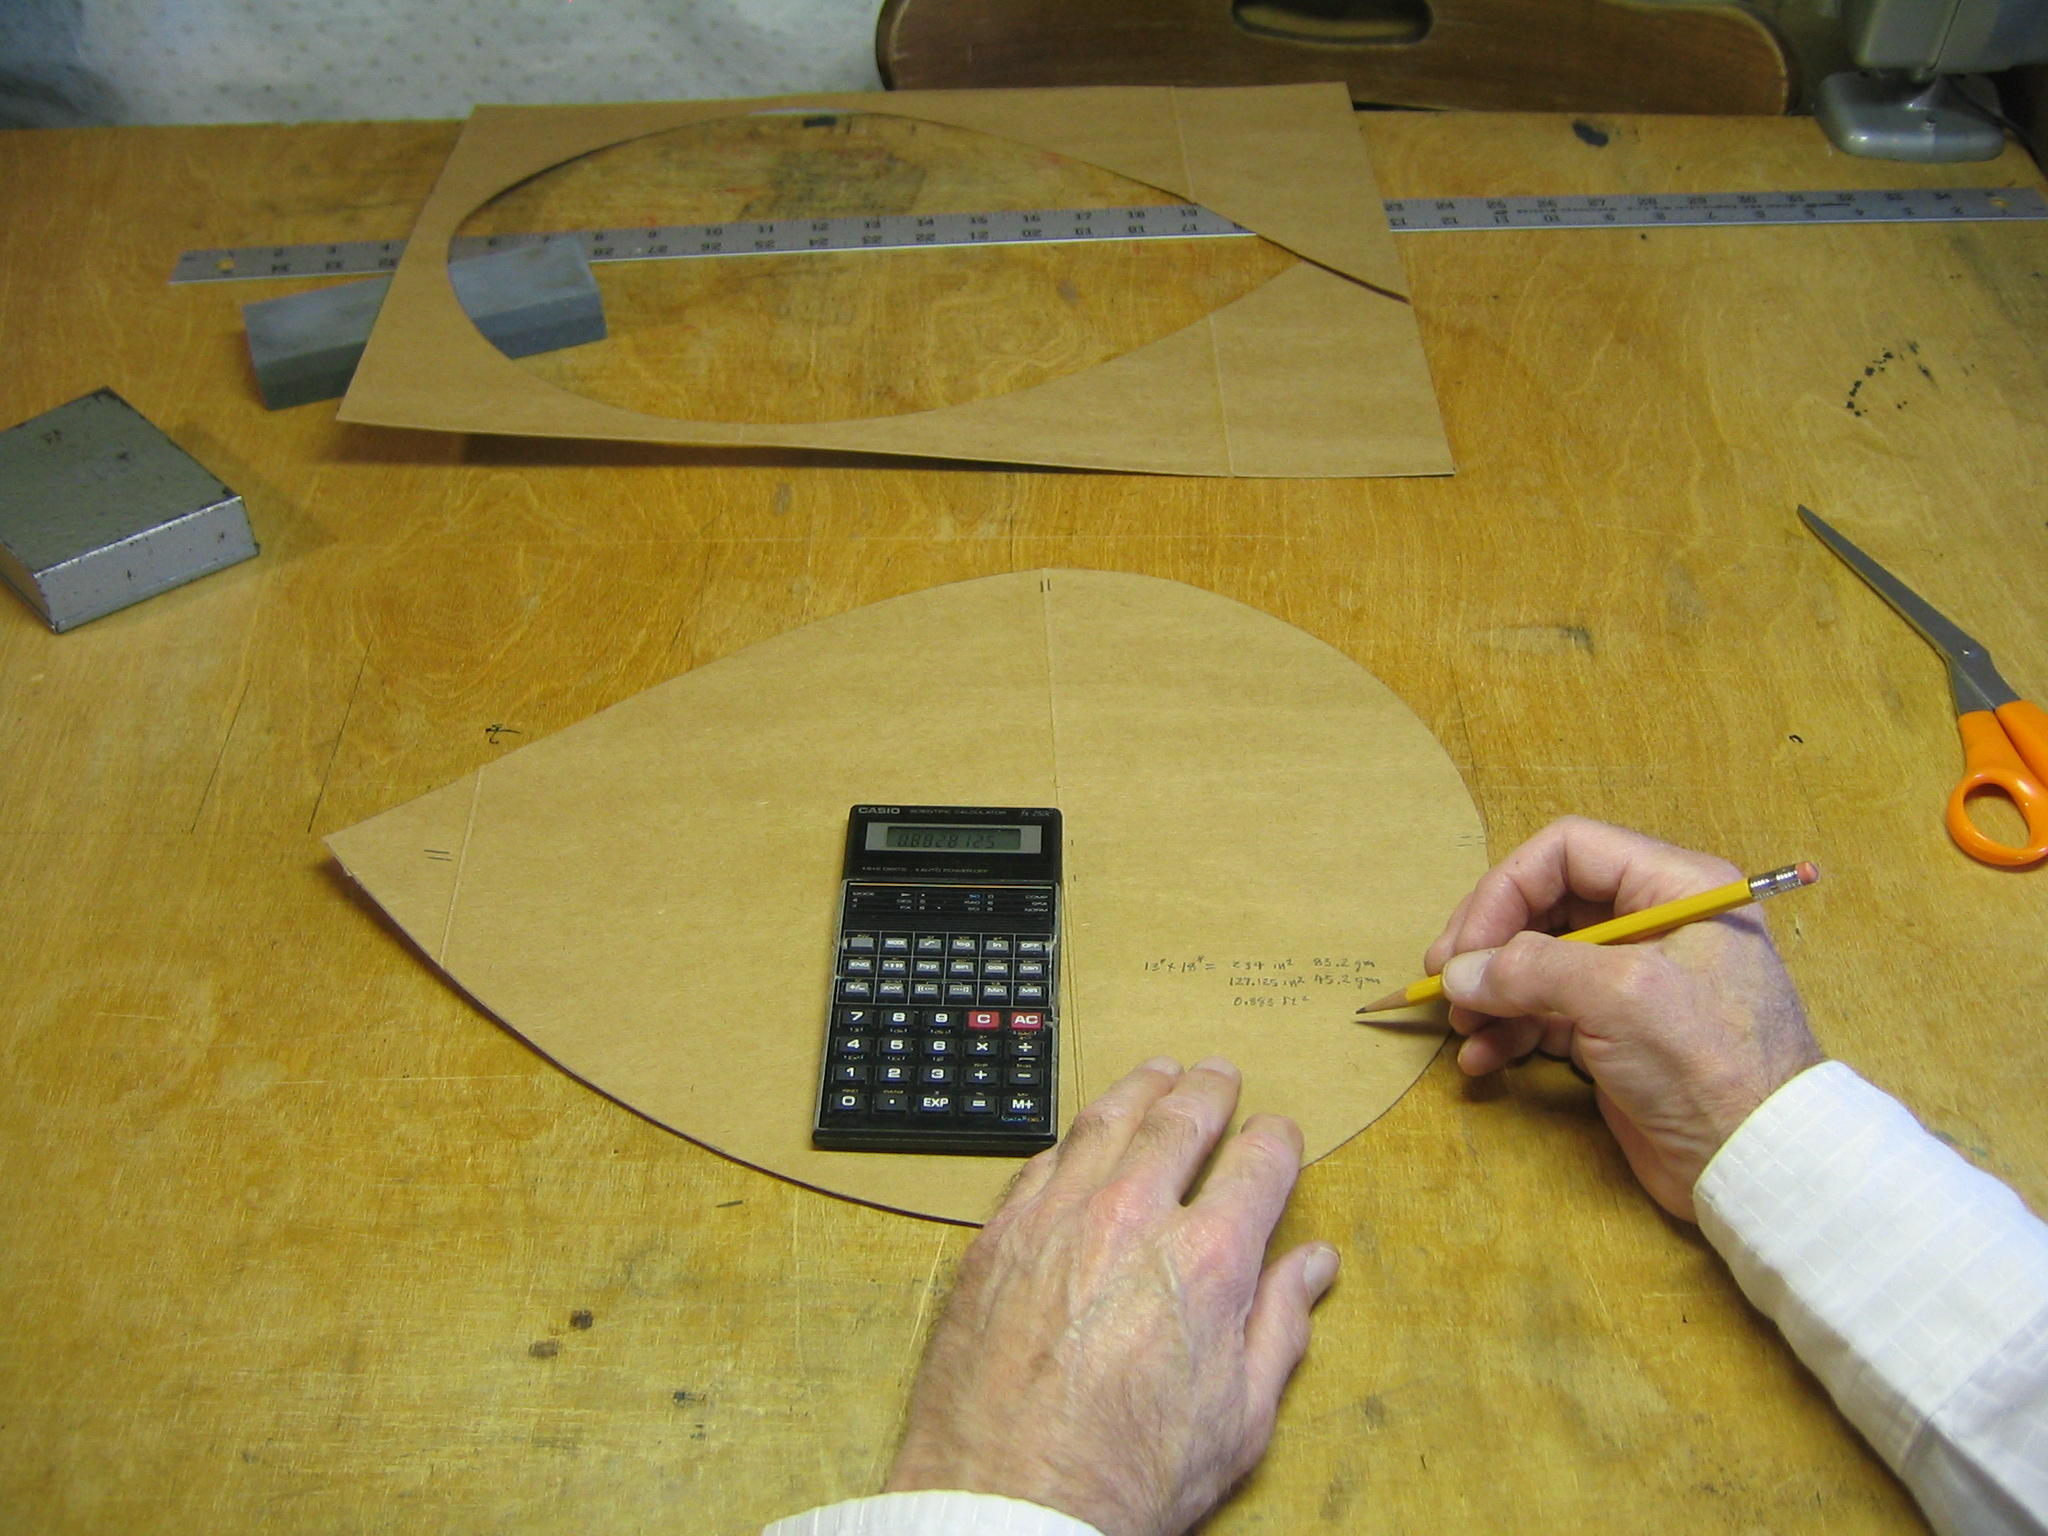
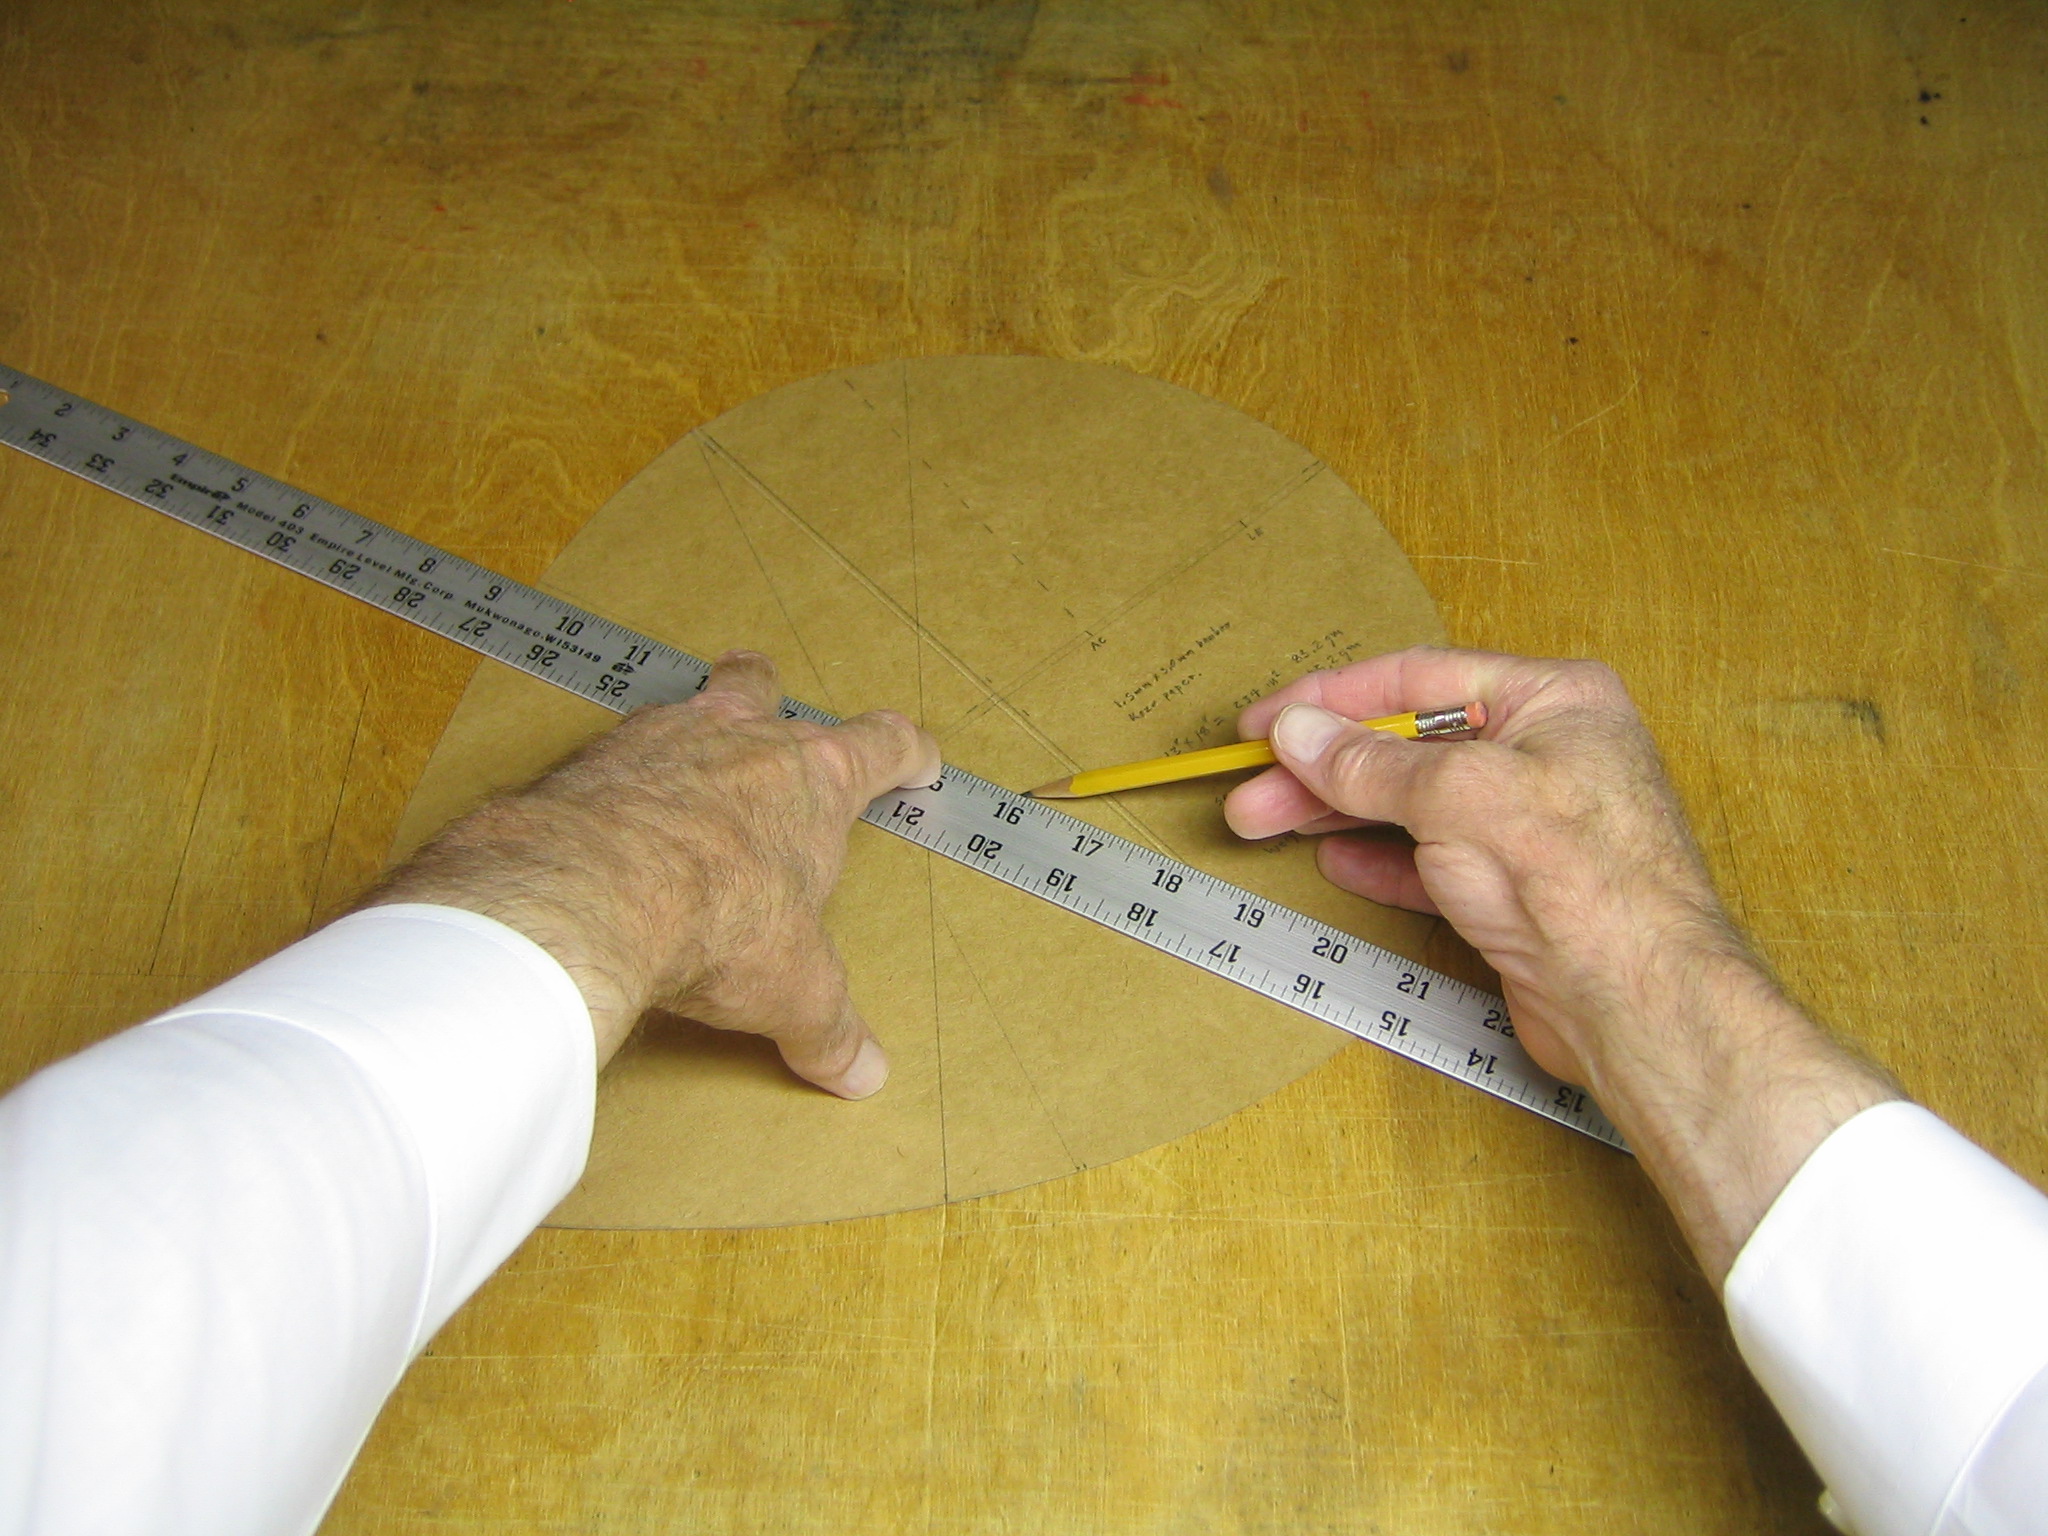
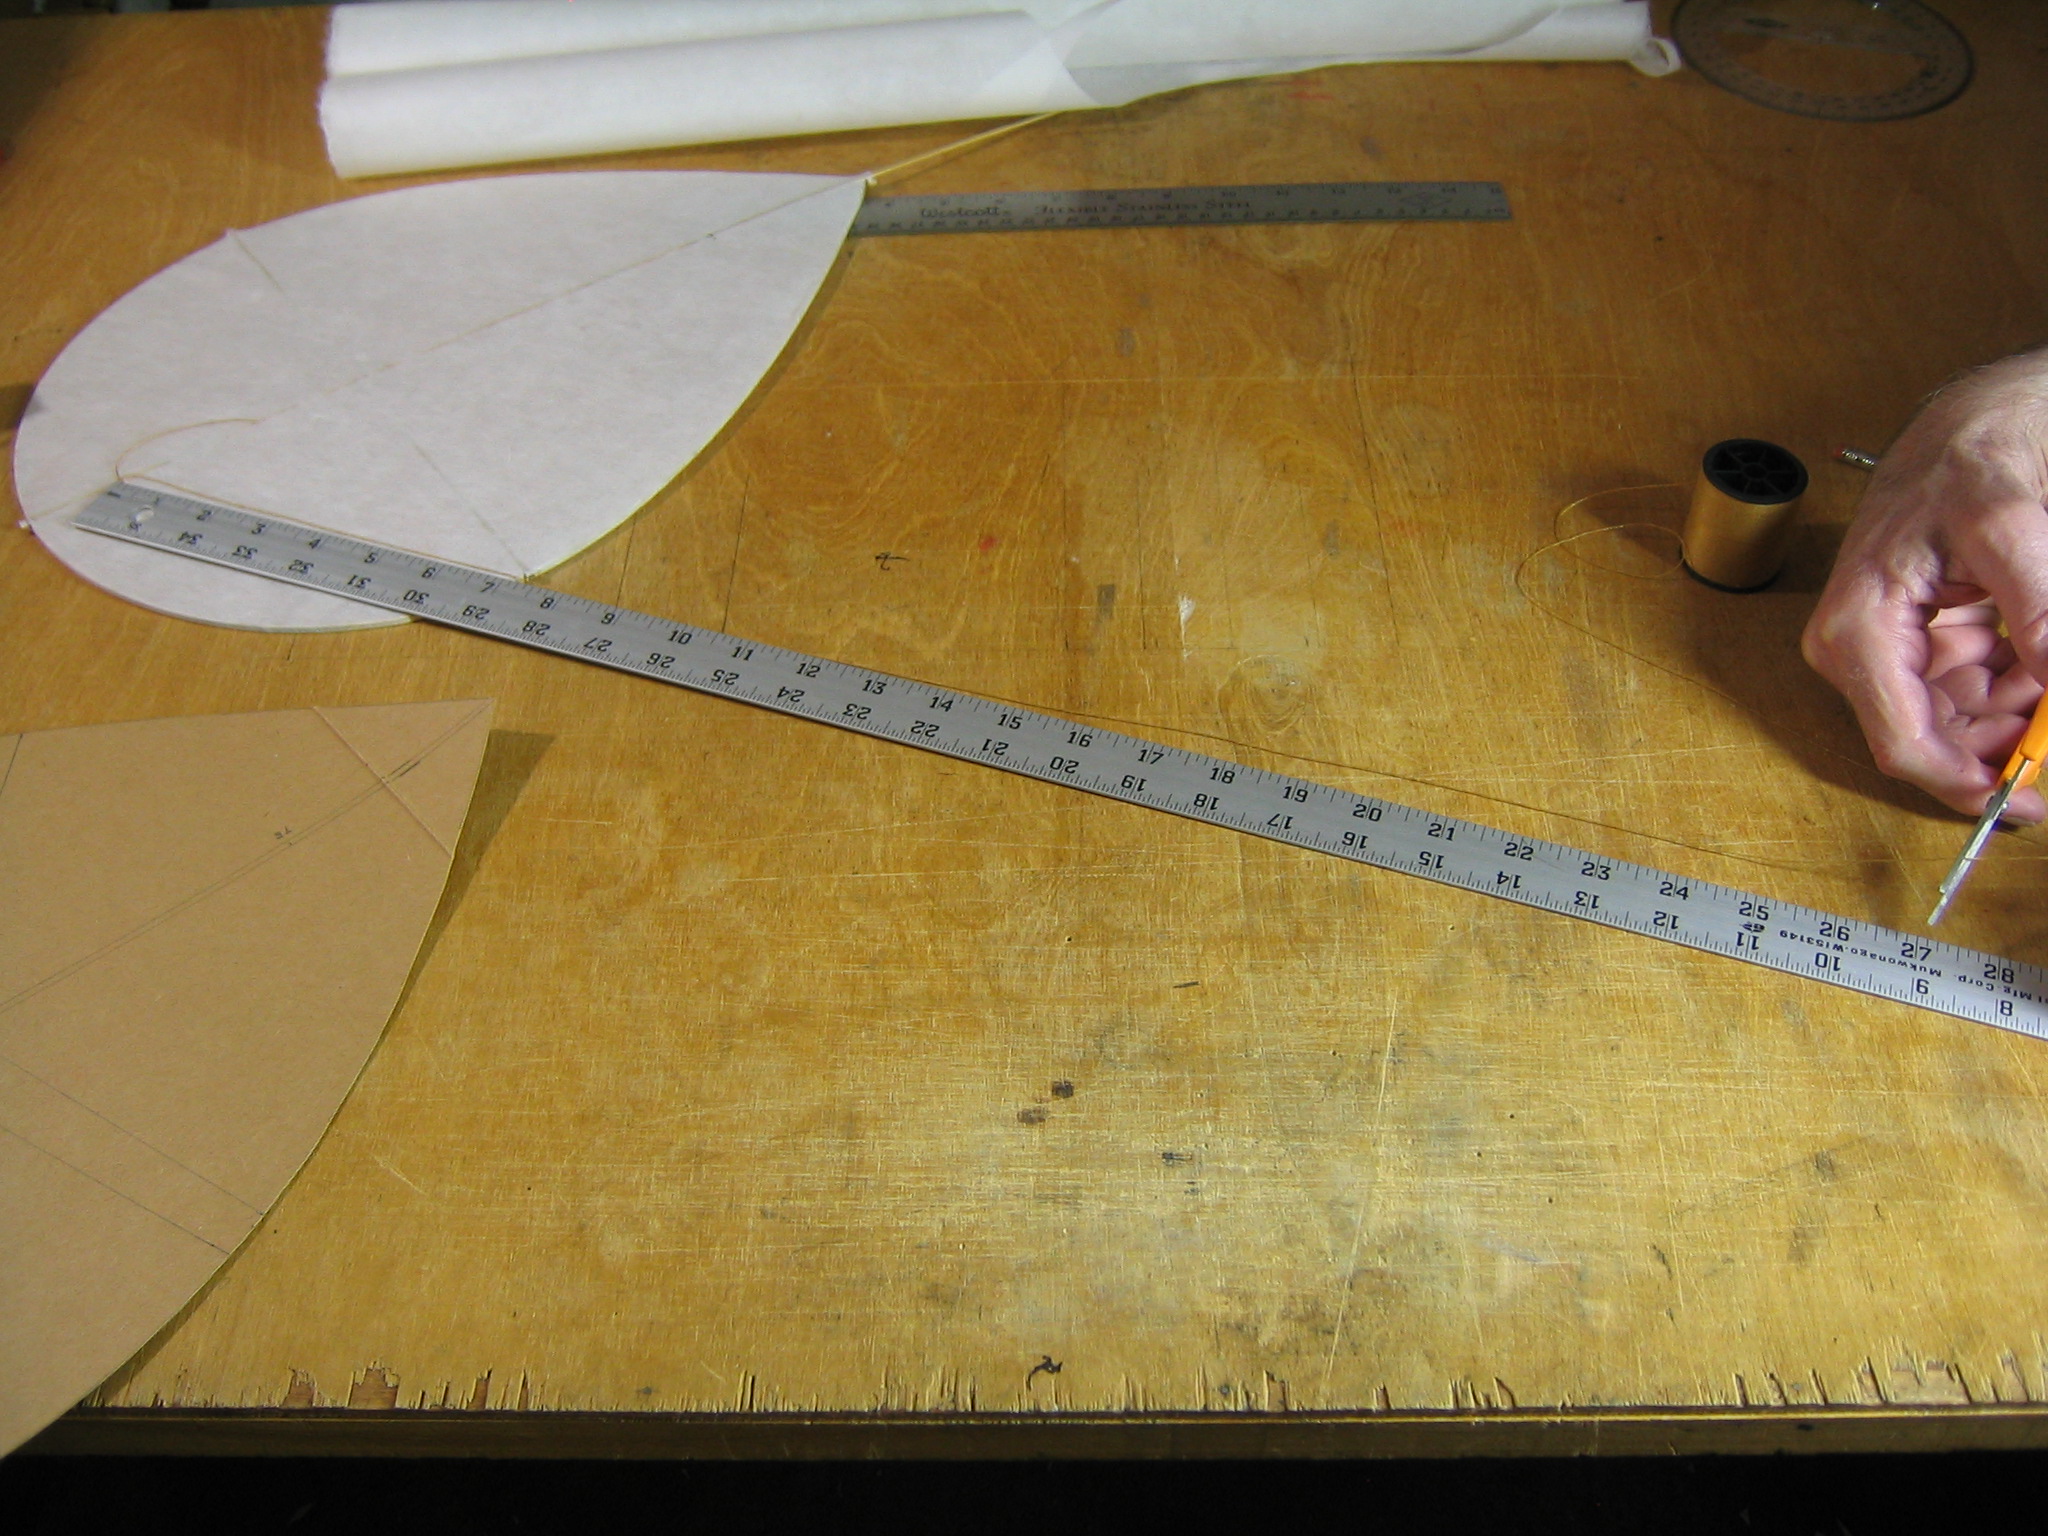
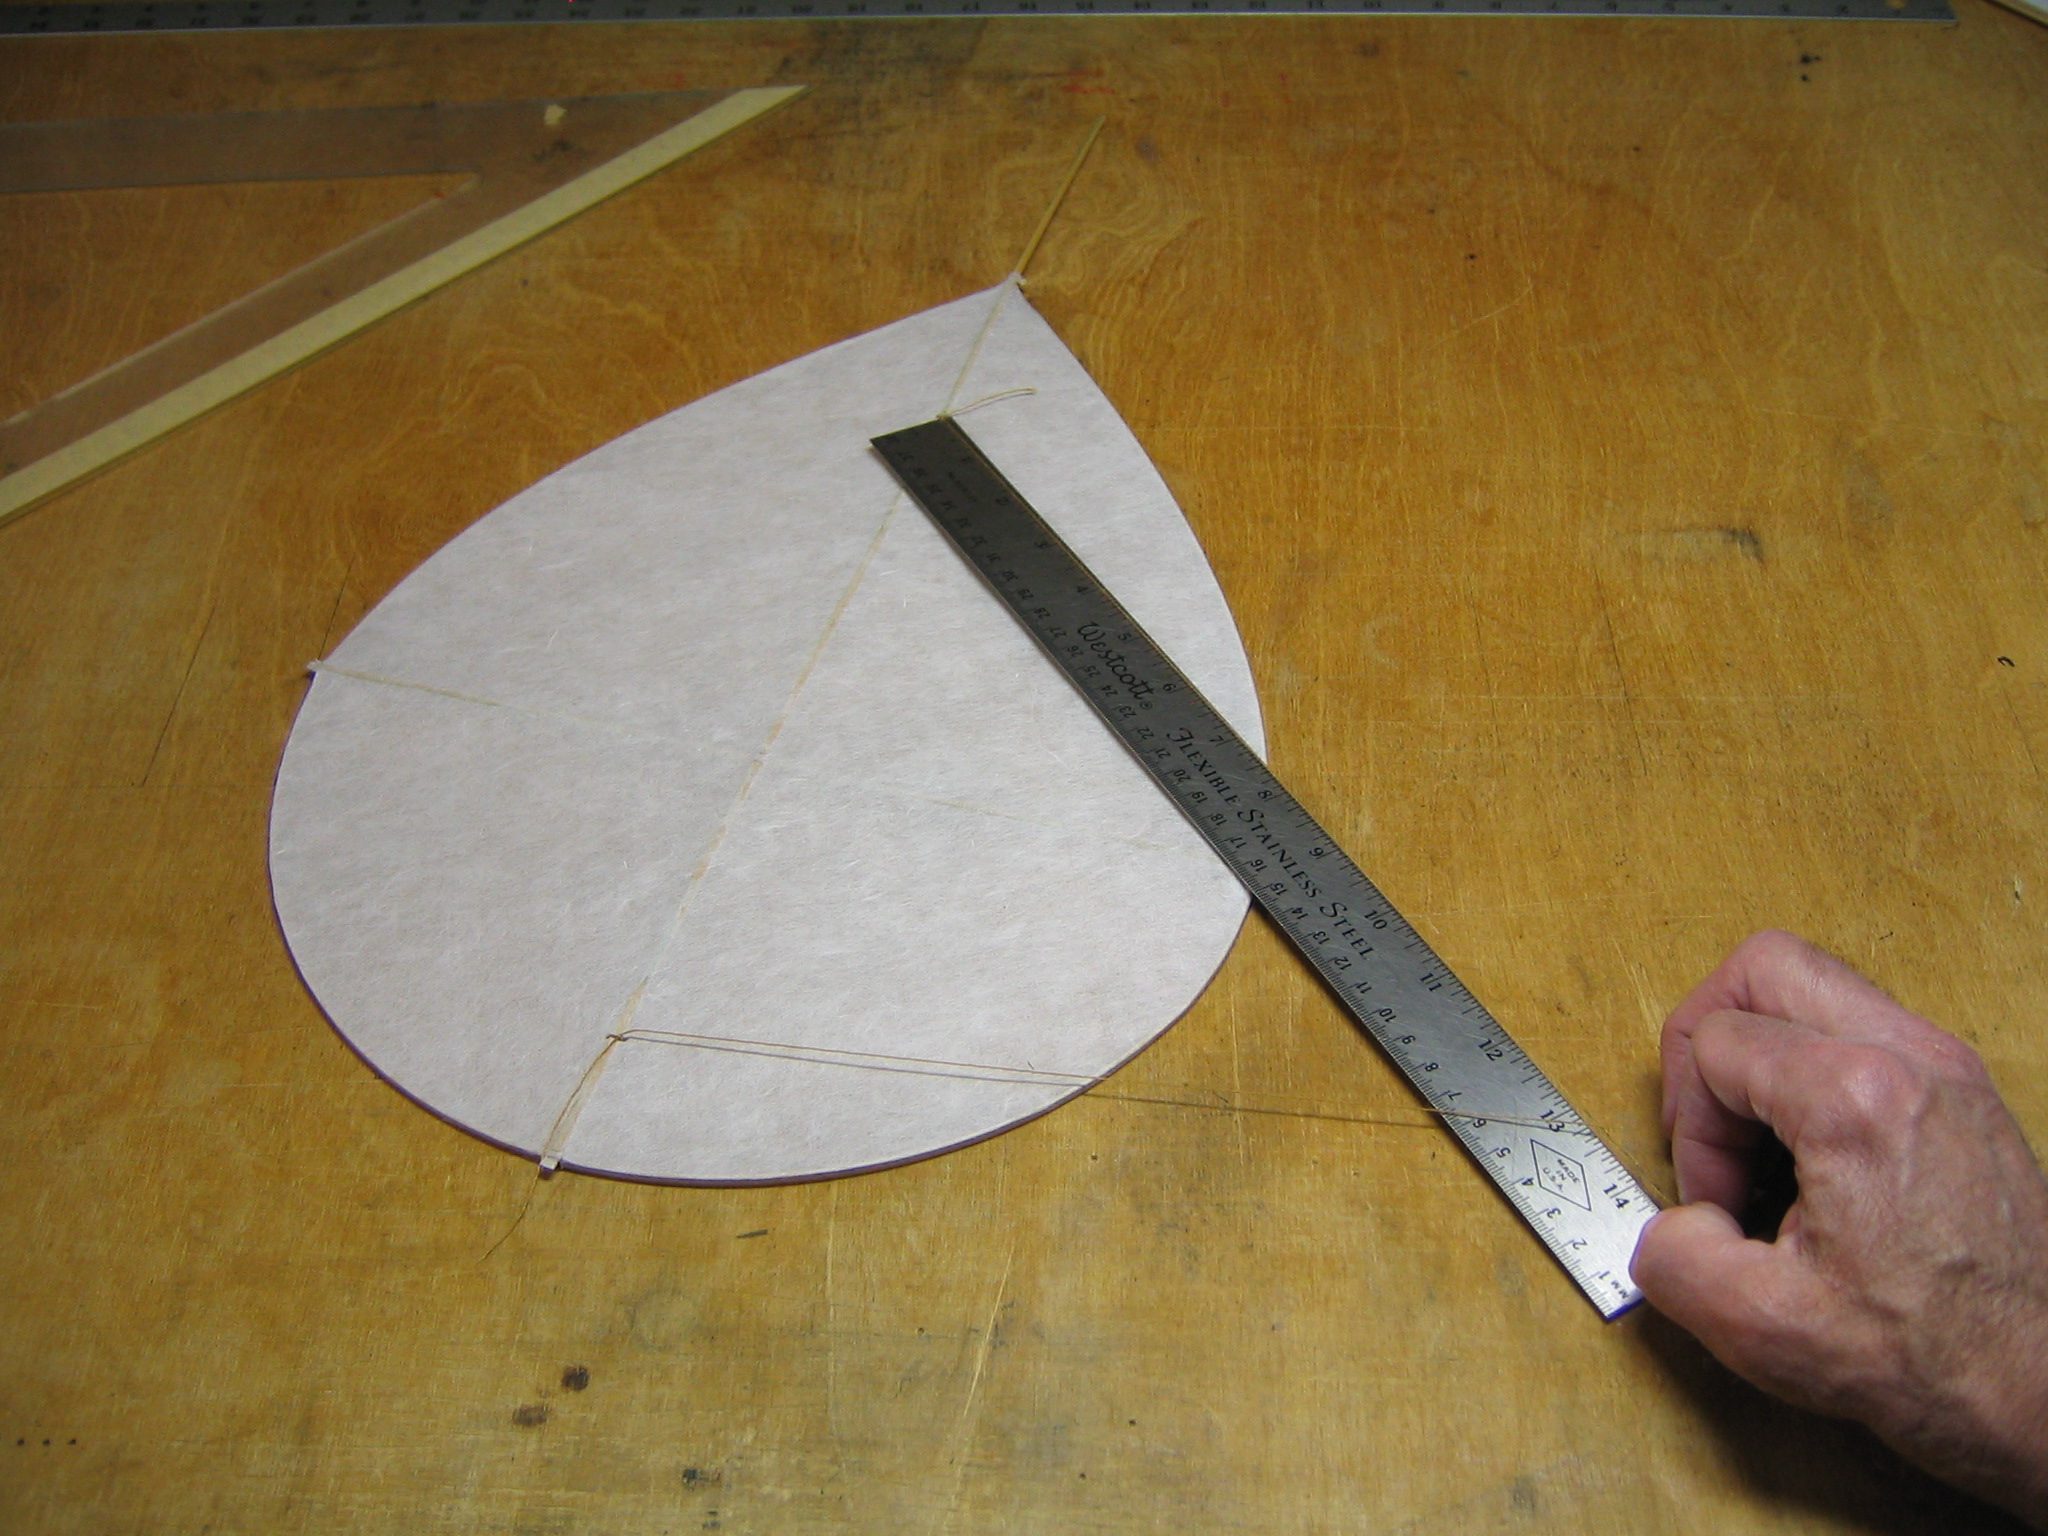
The area of the pattern is the same fraction of the area of the rectangle as the weight of the pattern is of the weight of the rectangle, 45.2/83.2 = 0.543. The area of the rectangle is 13″ x 18″ = 234 square inches. The area of the pattern is therefore (45.2/83.2) x 234 = 127.125 square inches. We may also calculate the mean chord as the area divided by the span. The span is 11 3/4″, so the mean chord is 10.82″. The aspect ratio is the span divided by the mean chord (numerically equal to the span squared divided by the area) 11.75/10.82 = 1.086. The numbers are written on the pattern for a permanent record.
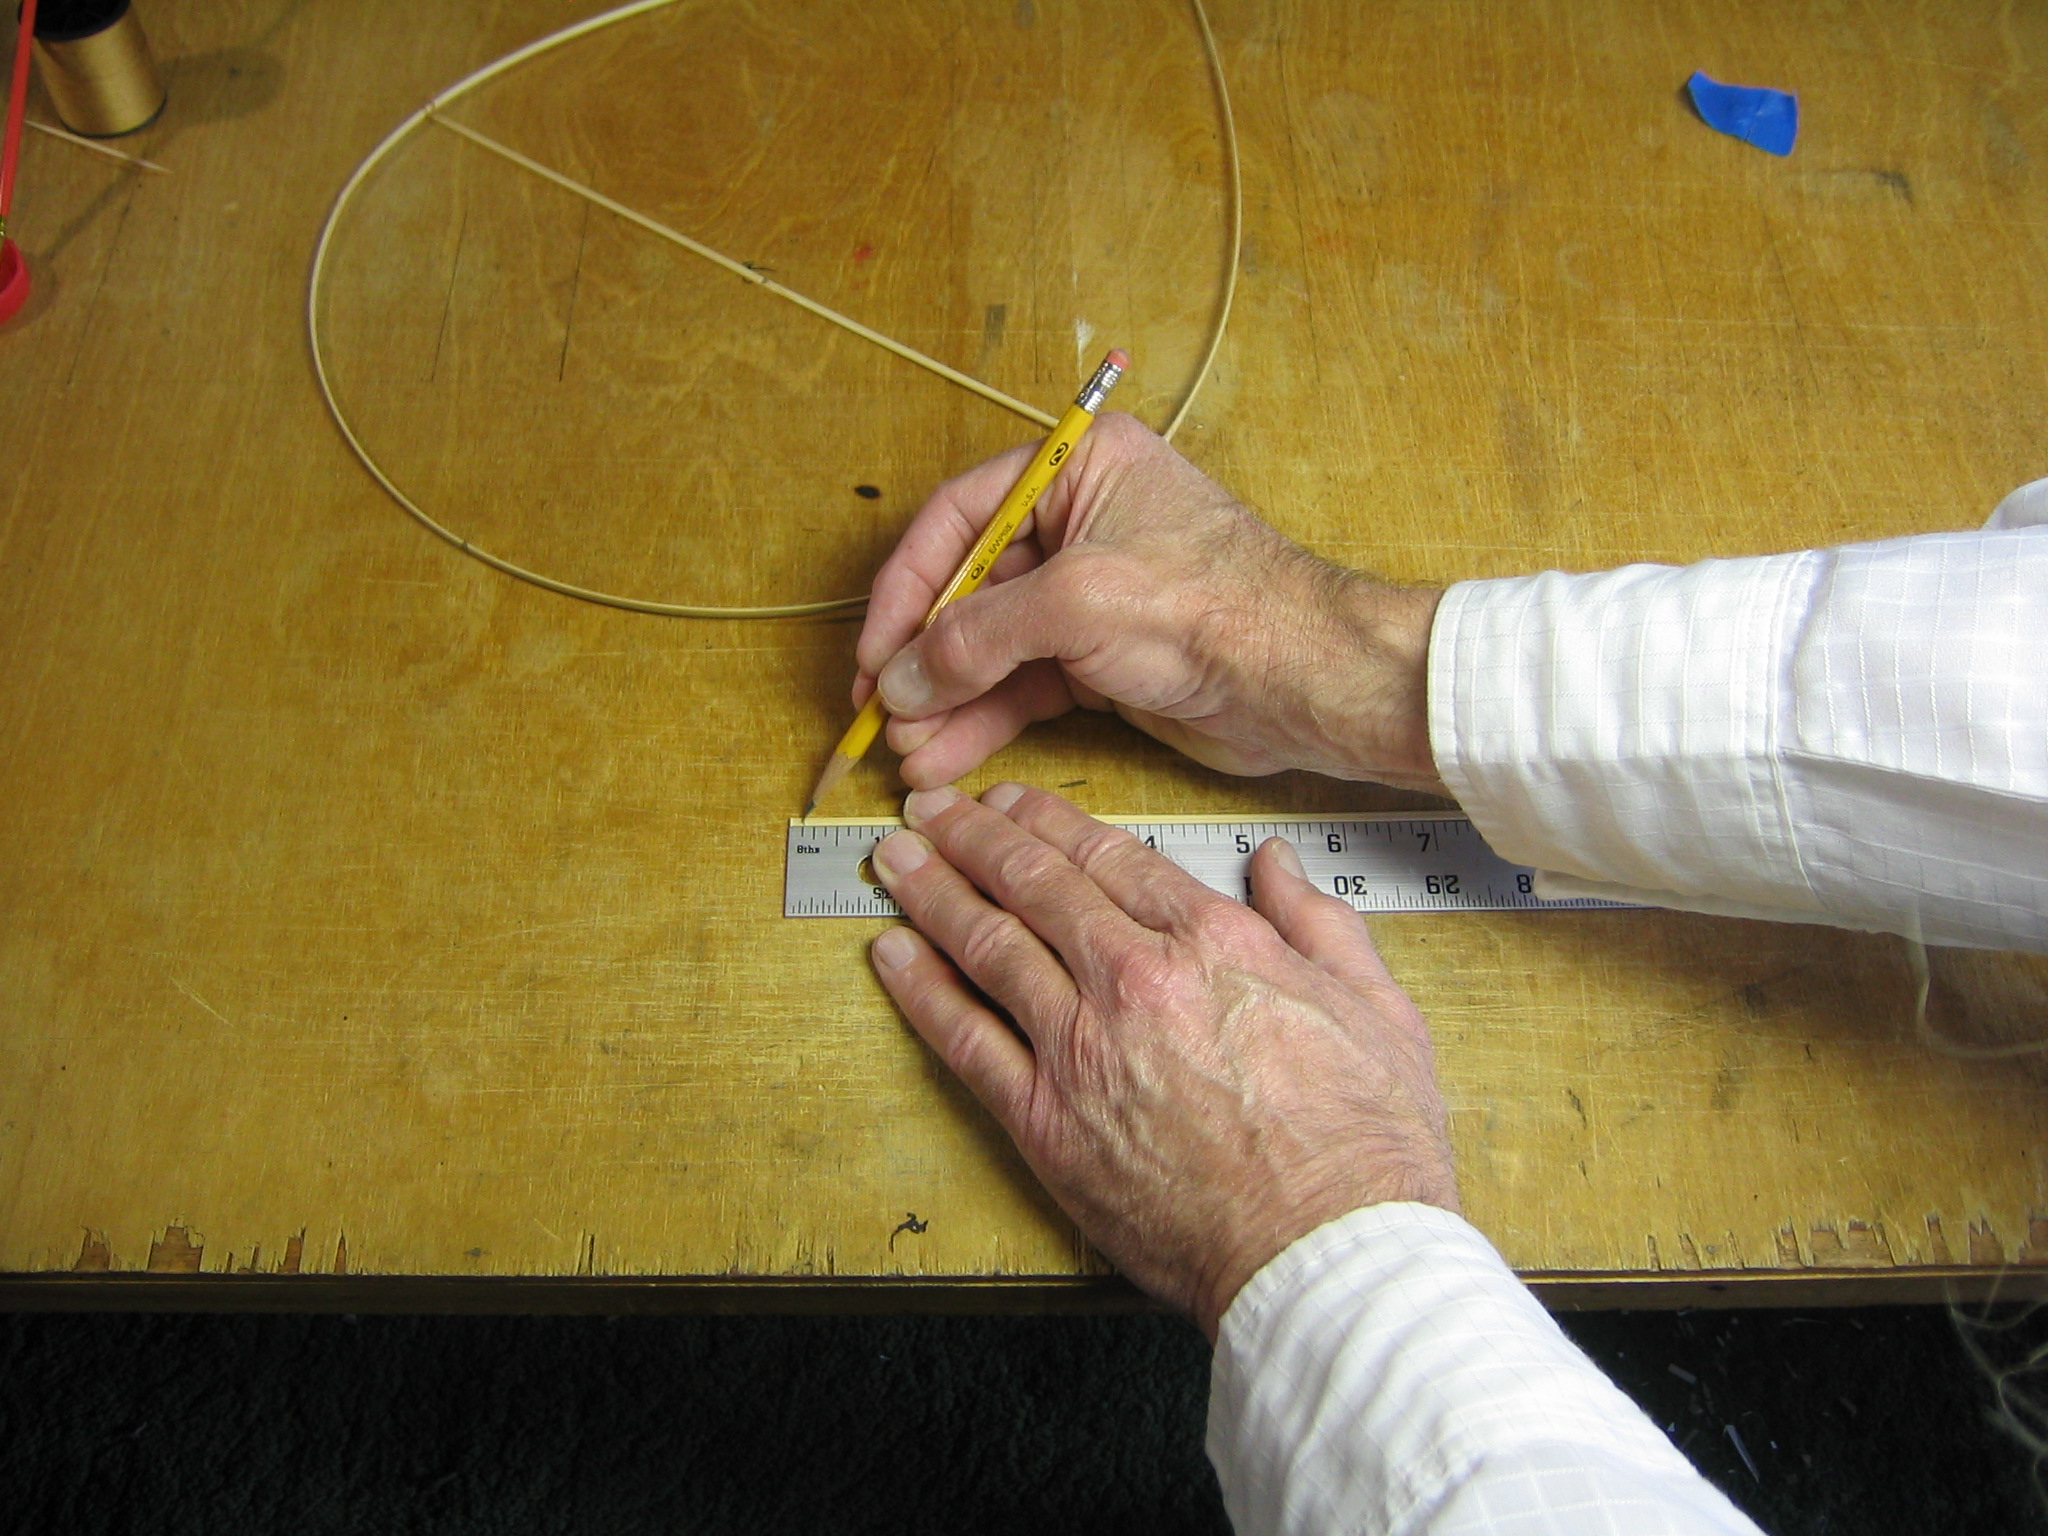
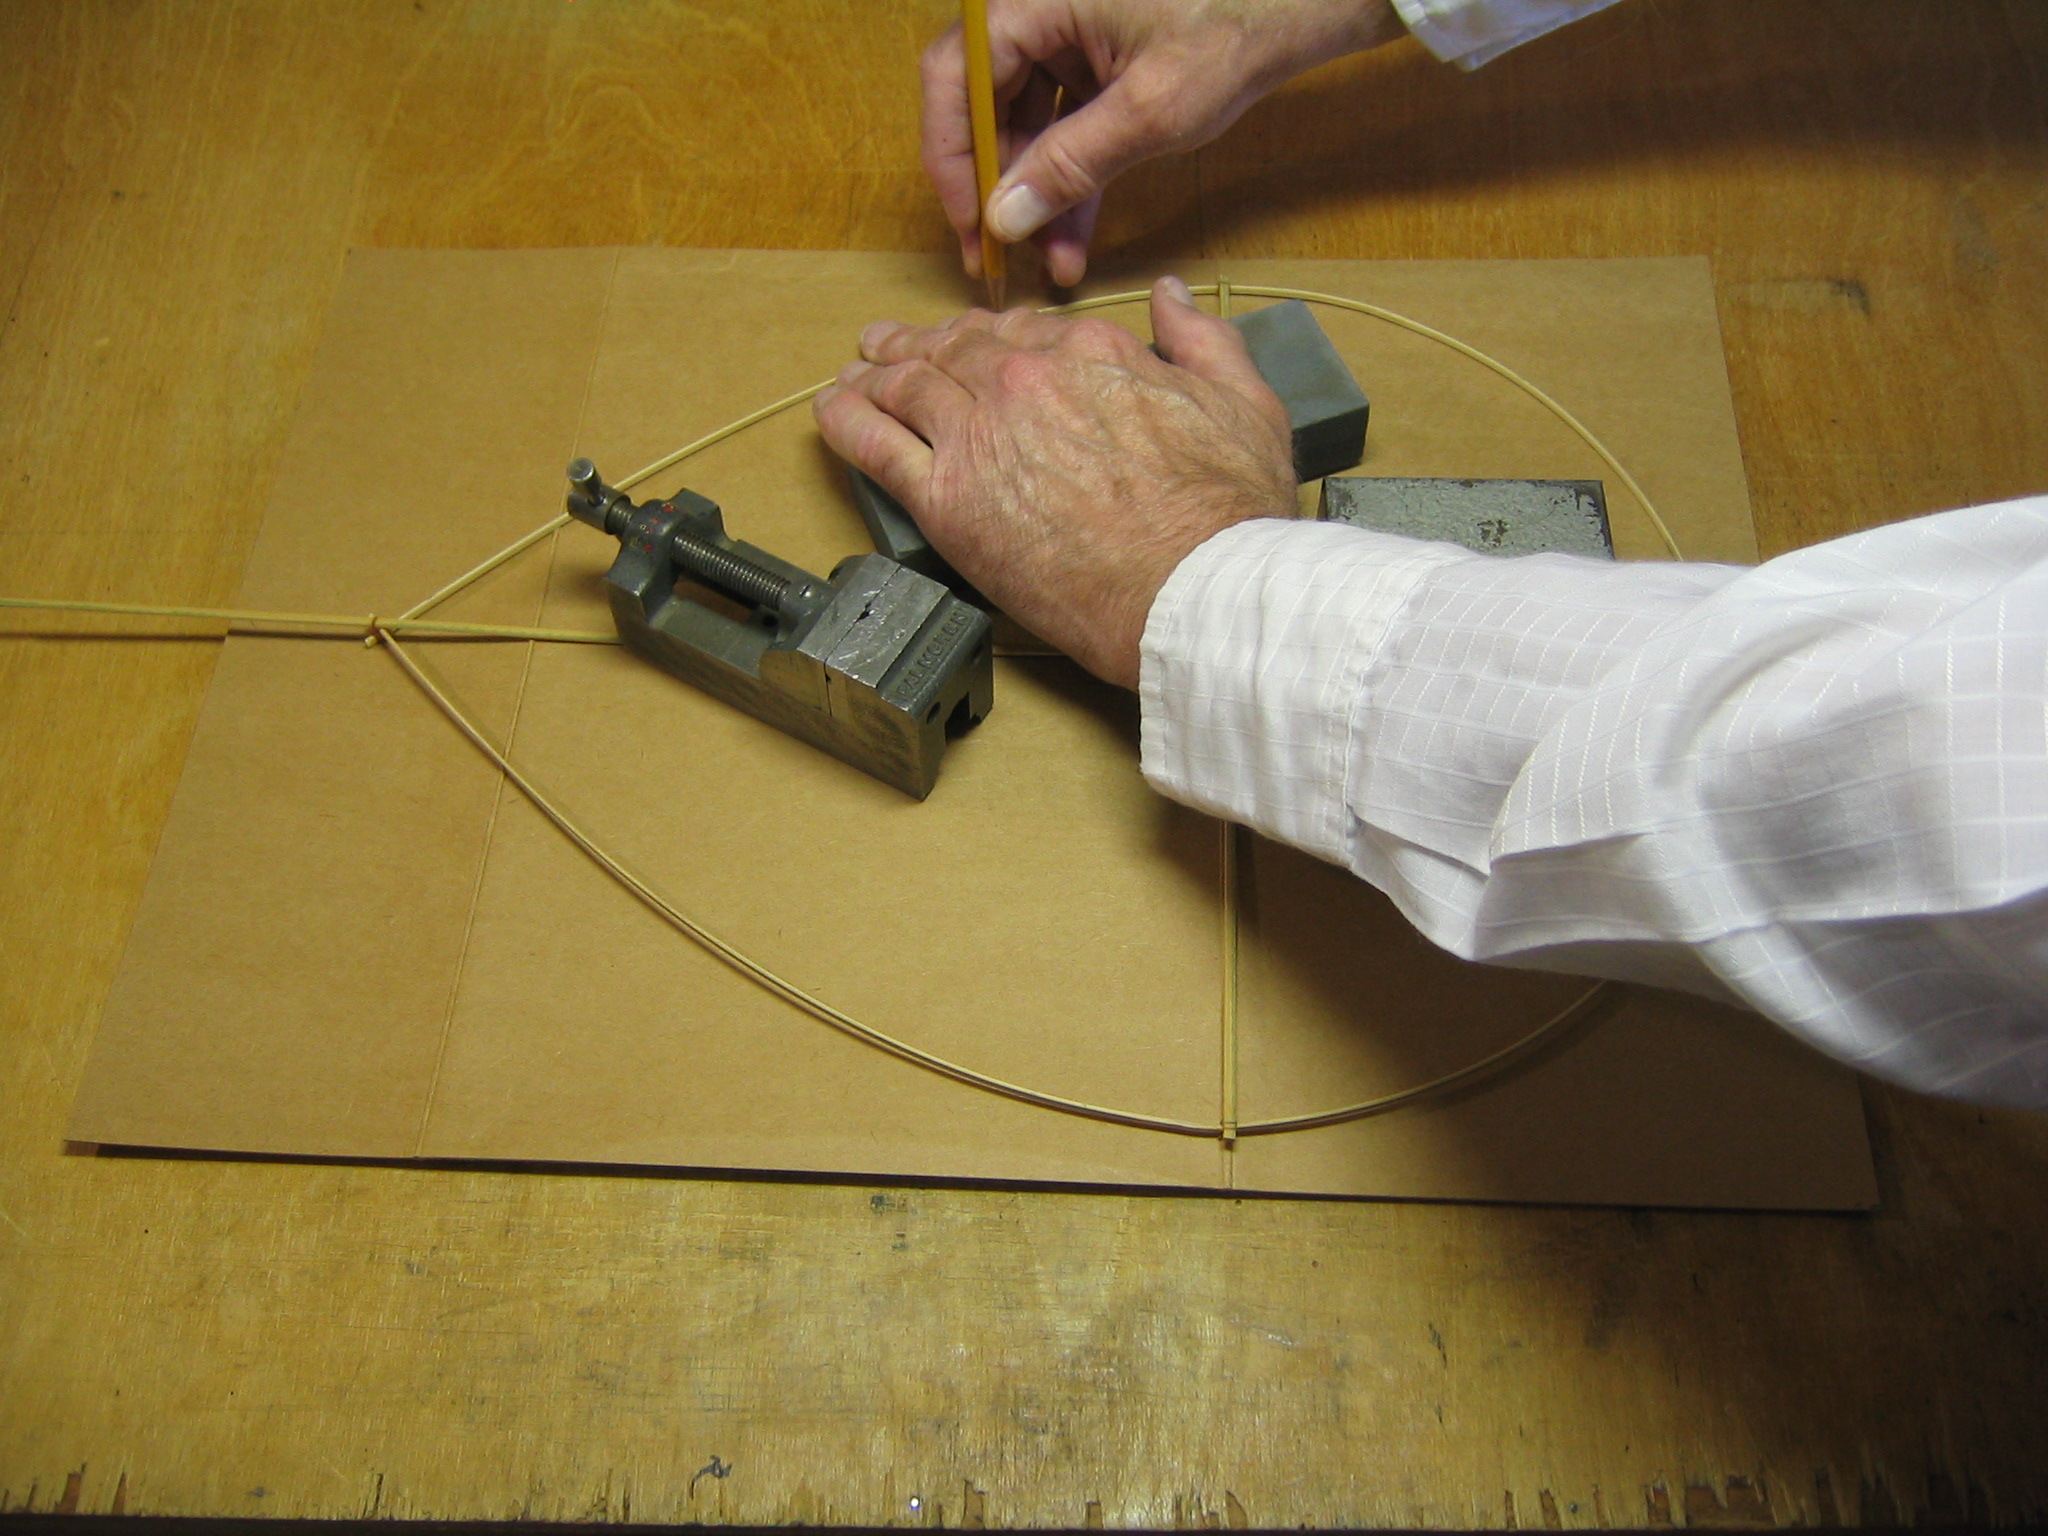
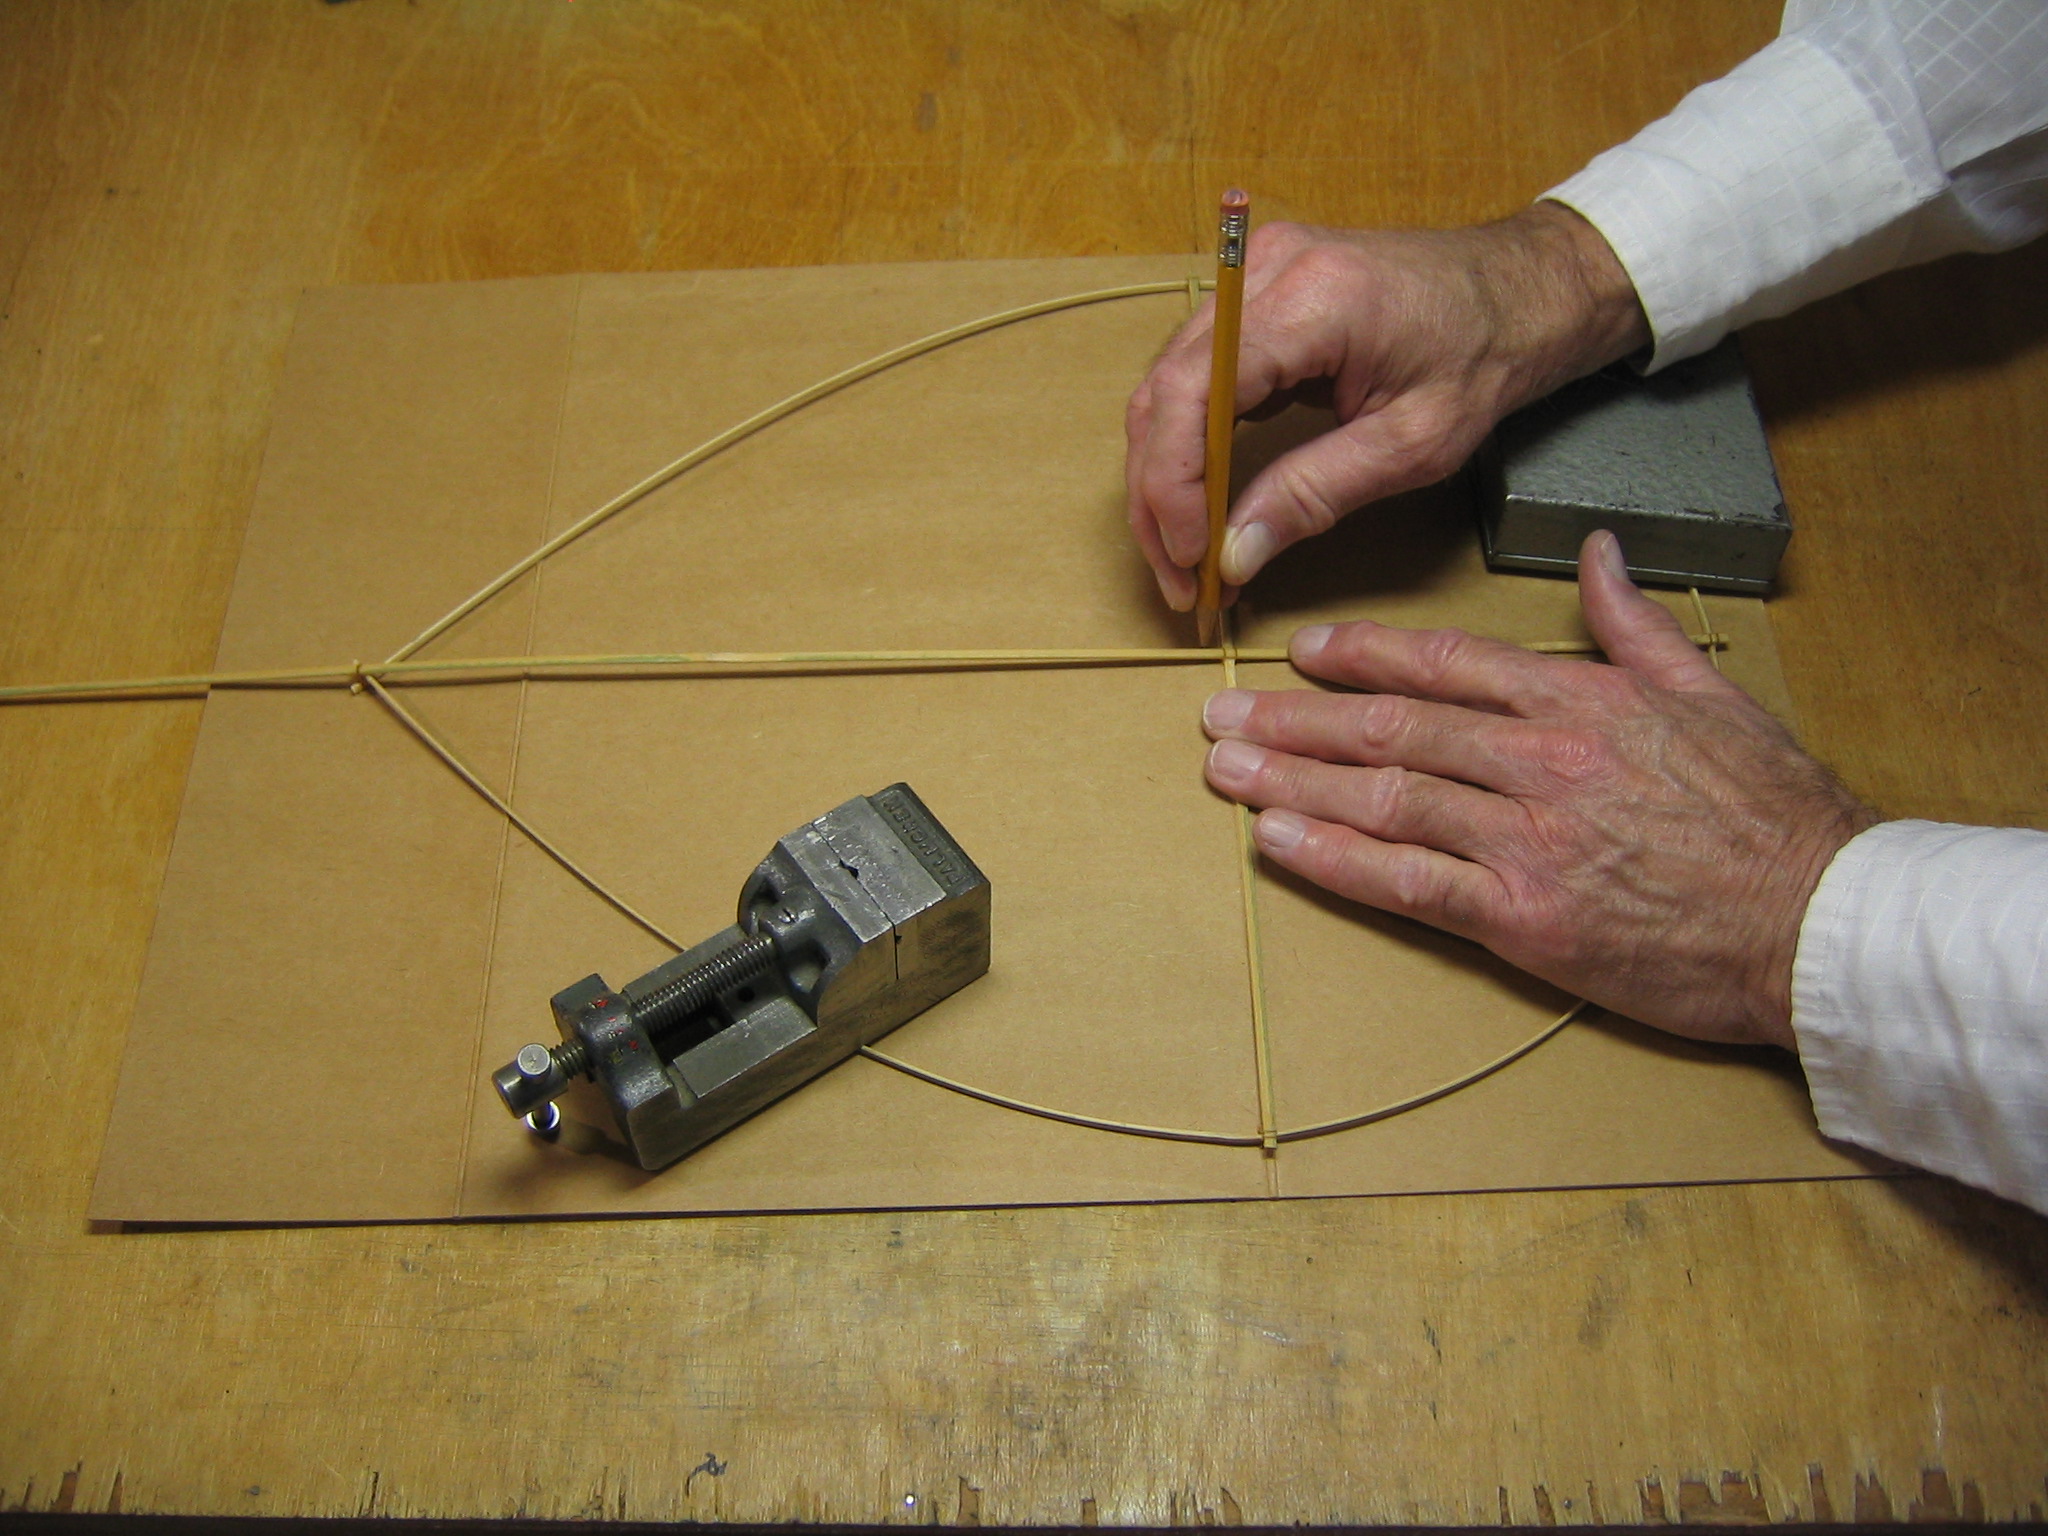
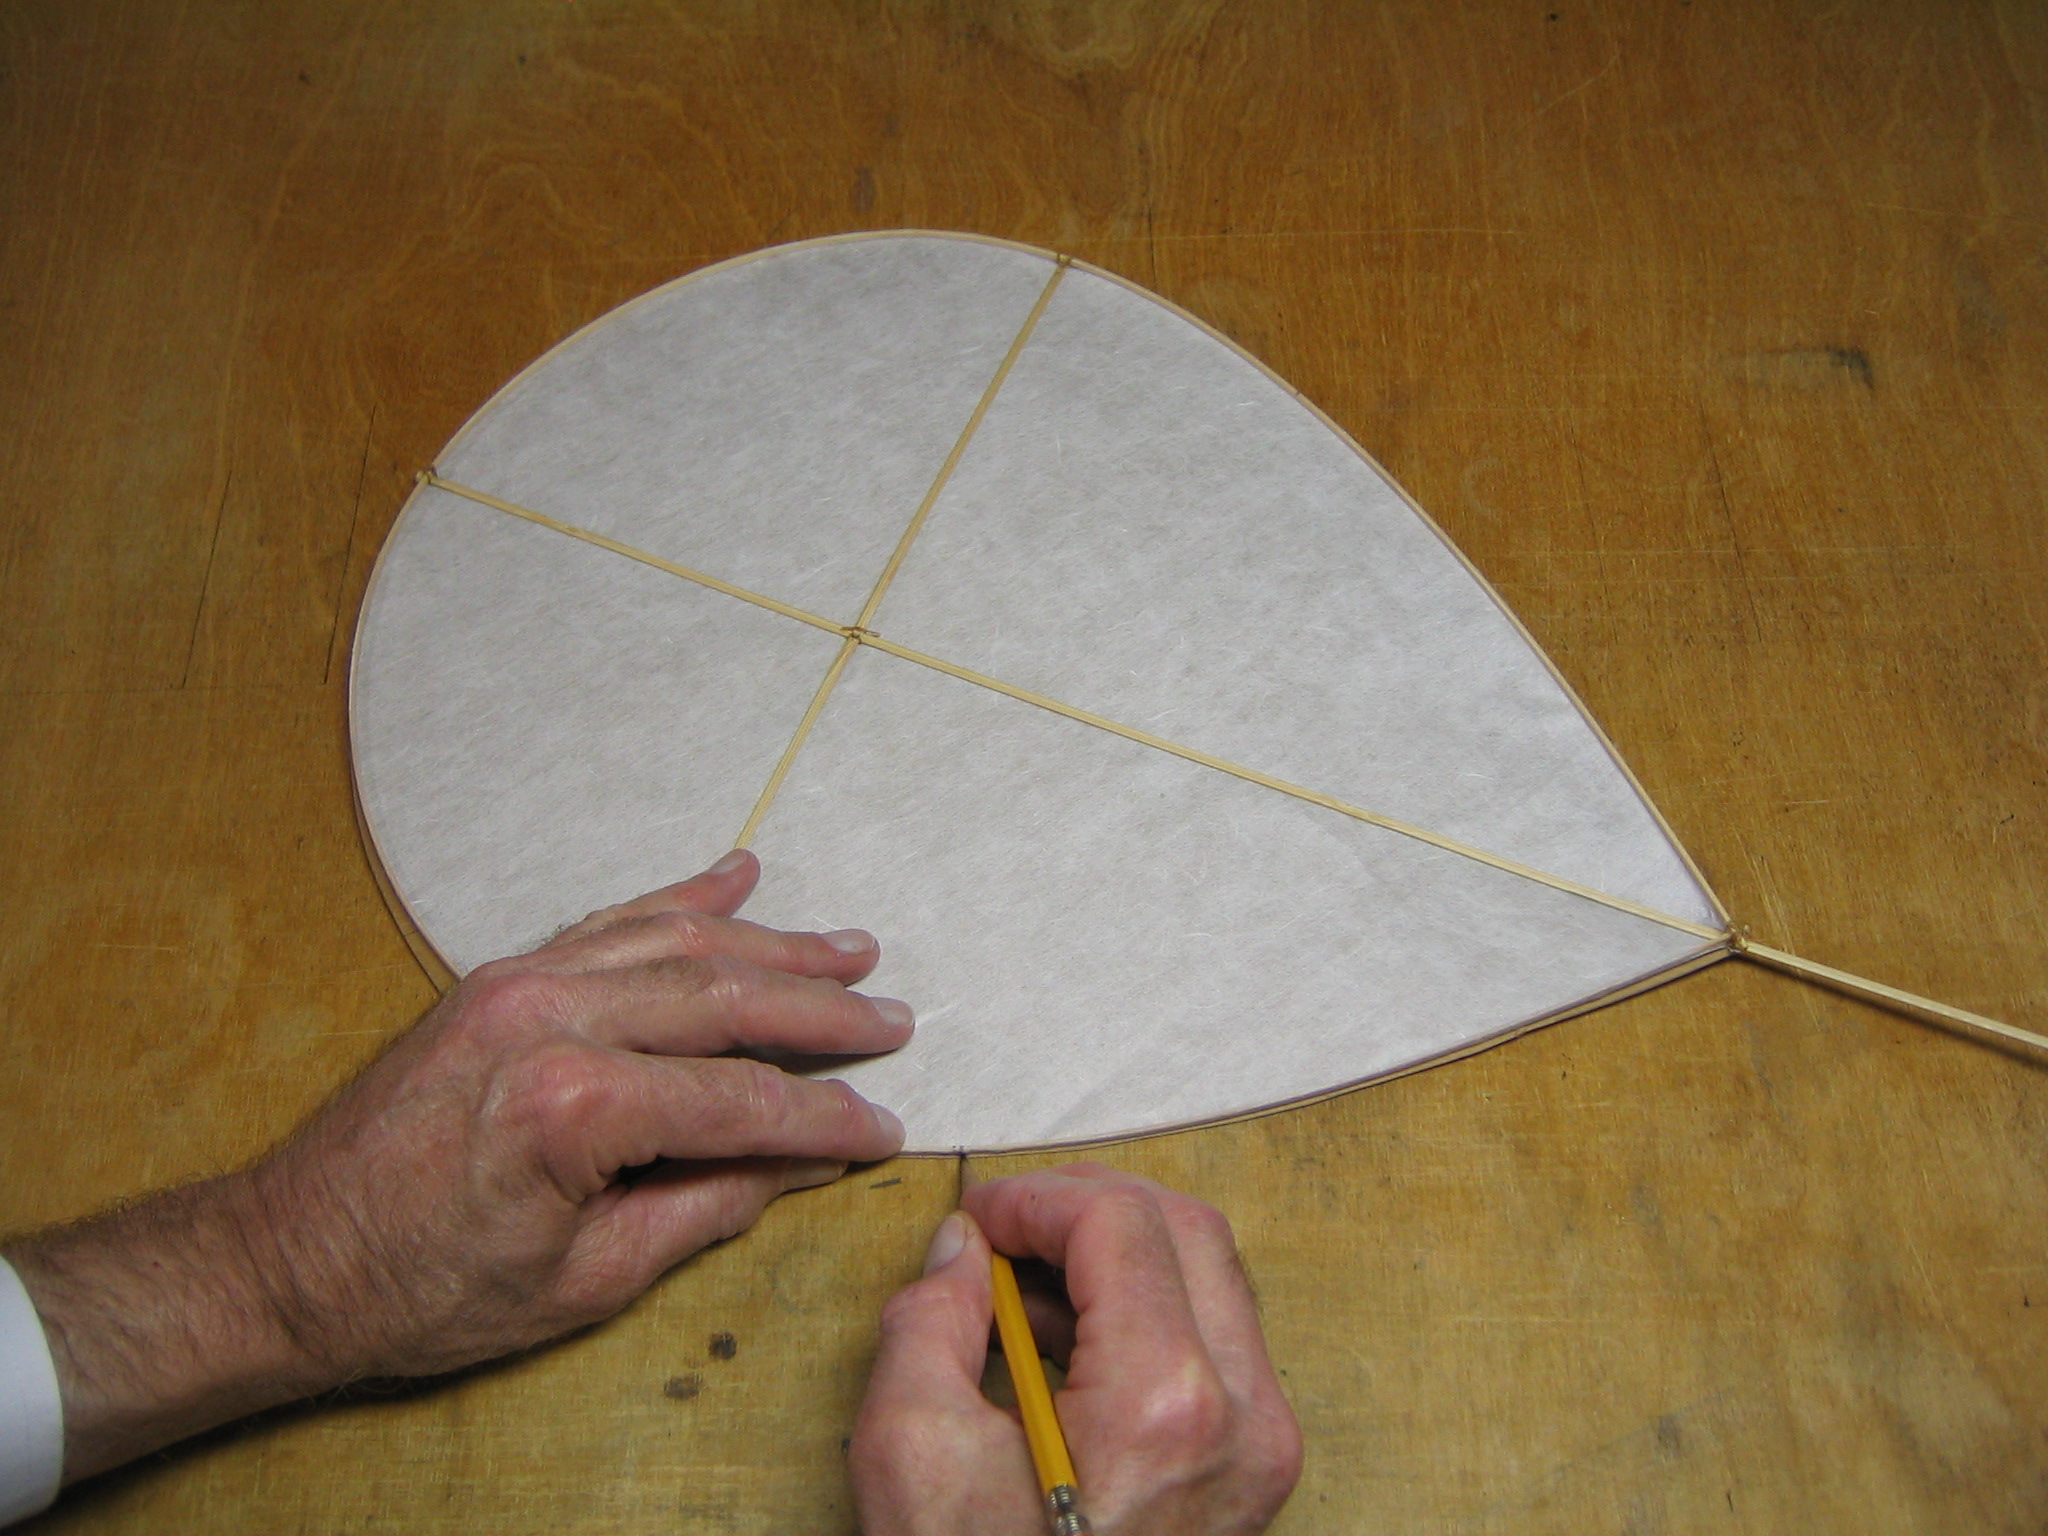
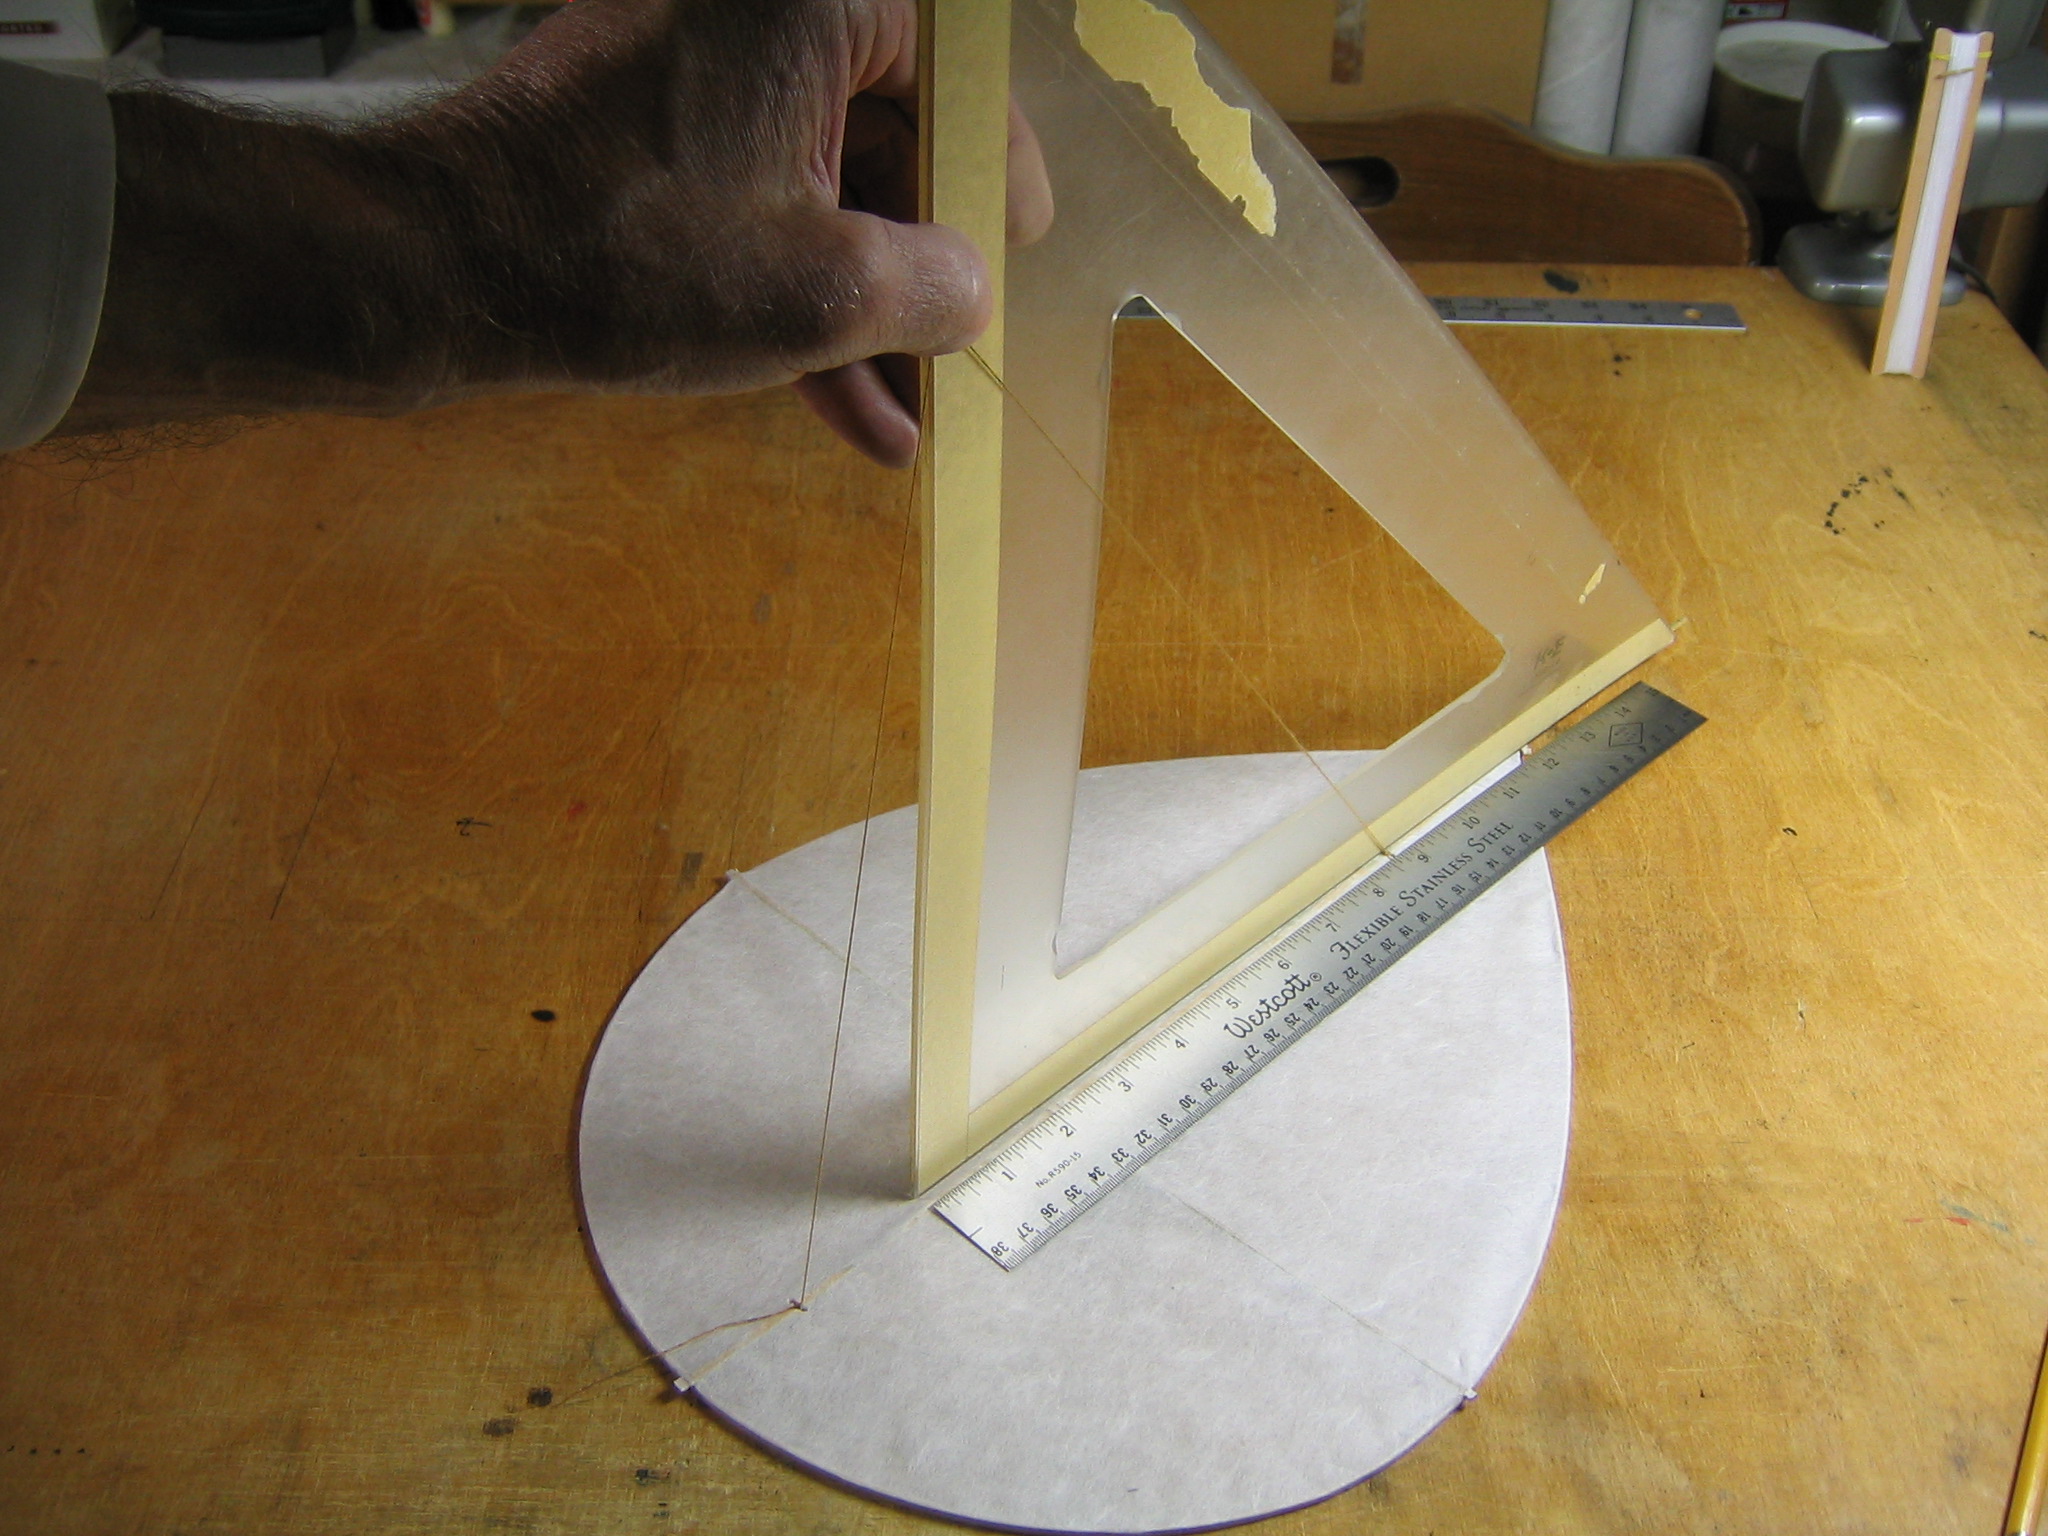
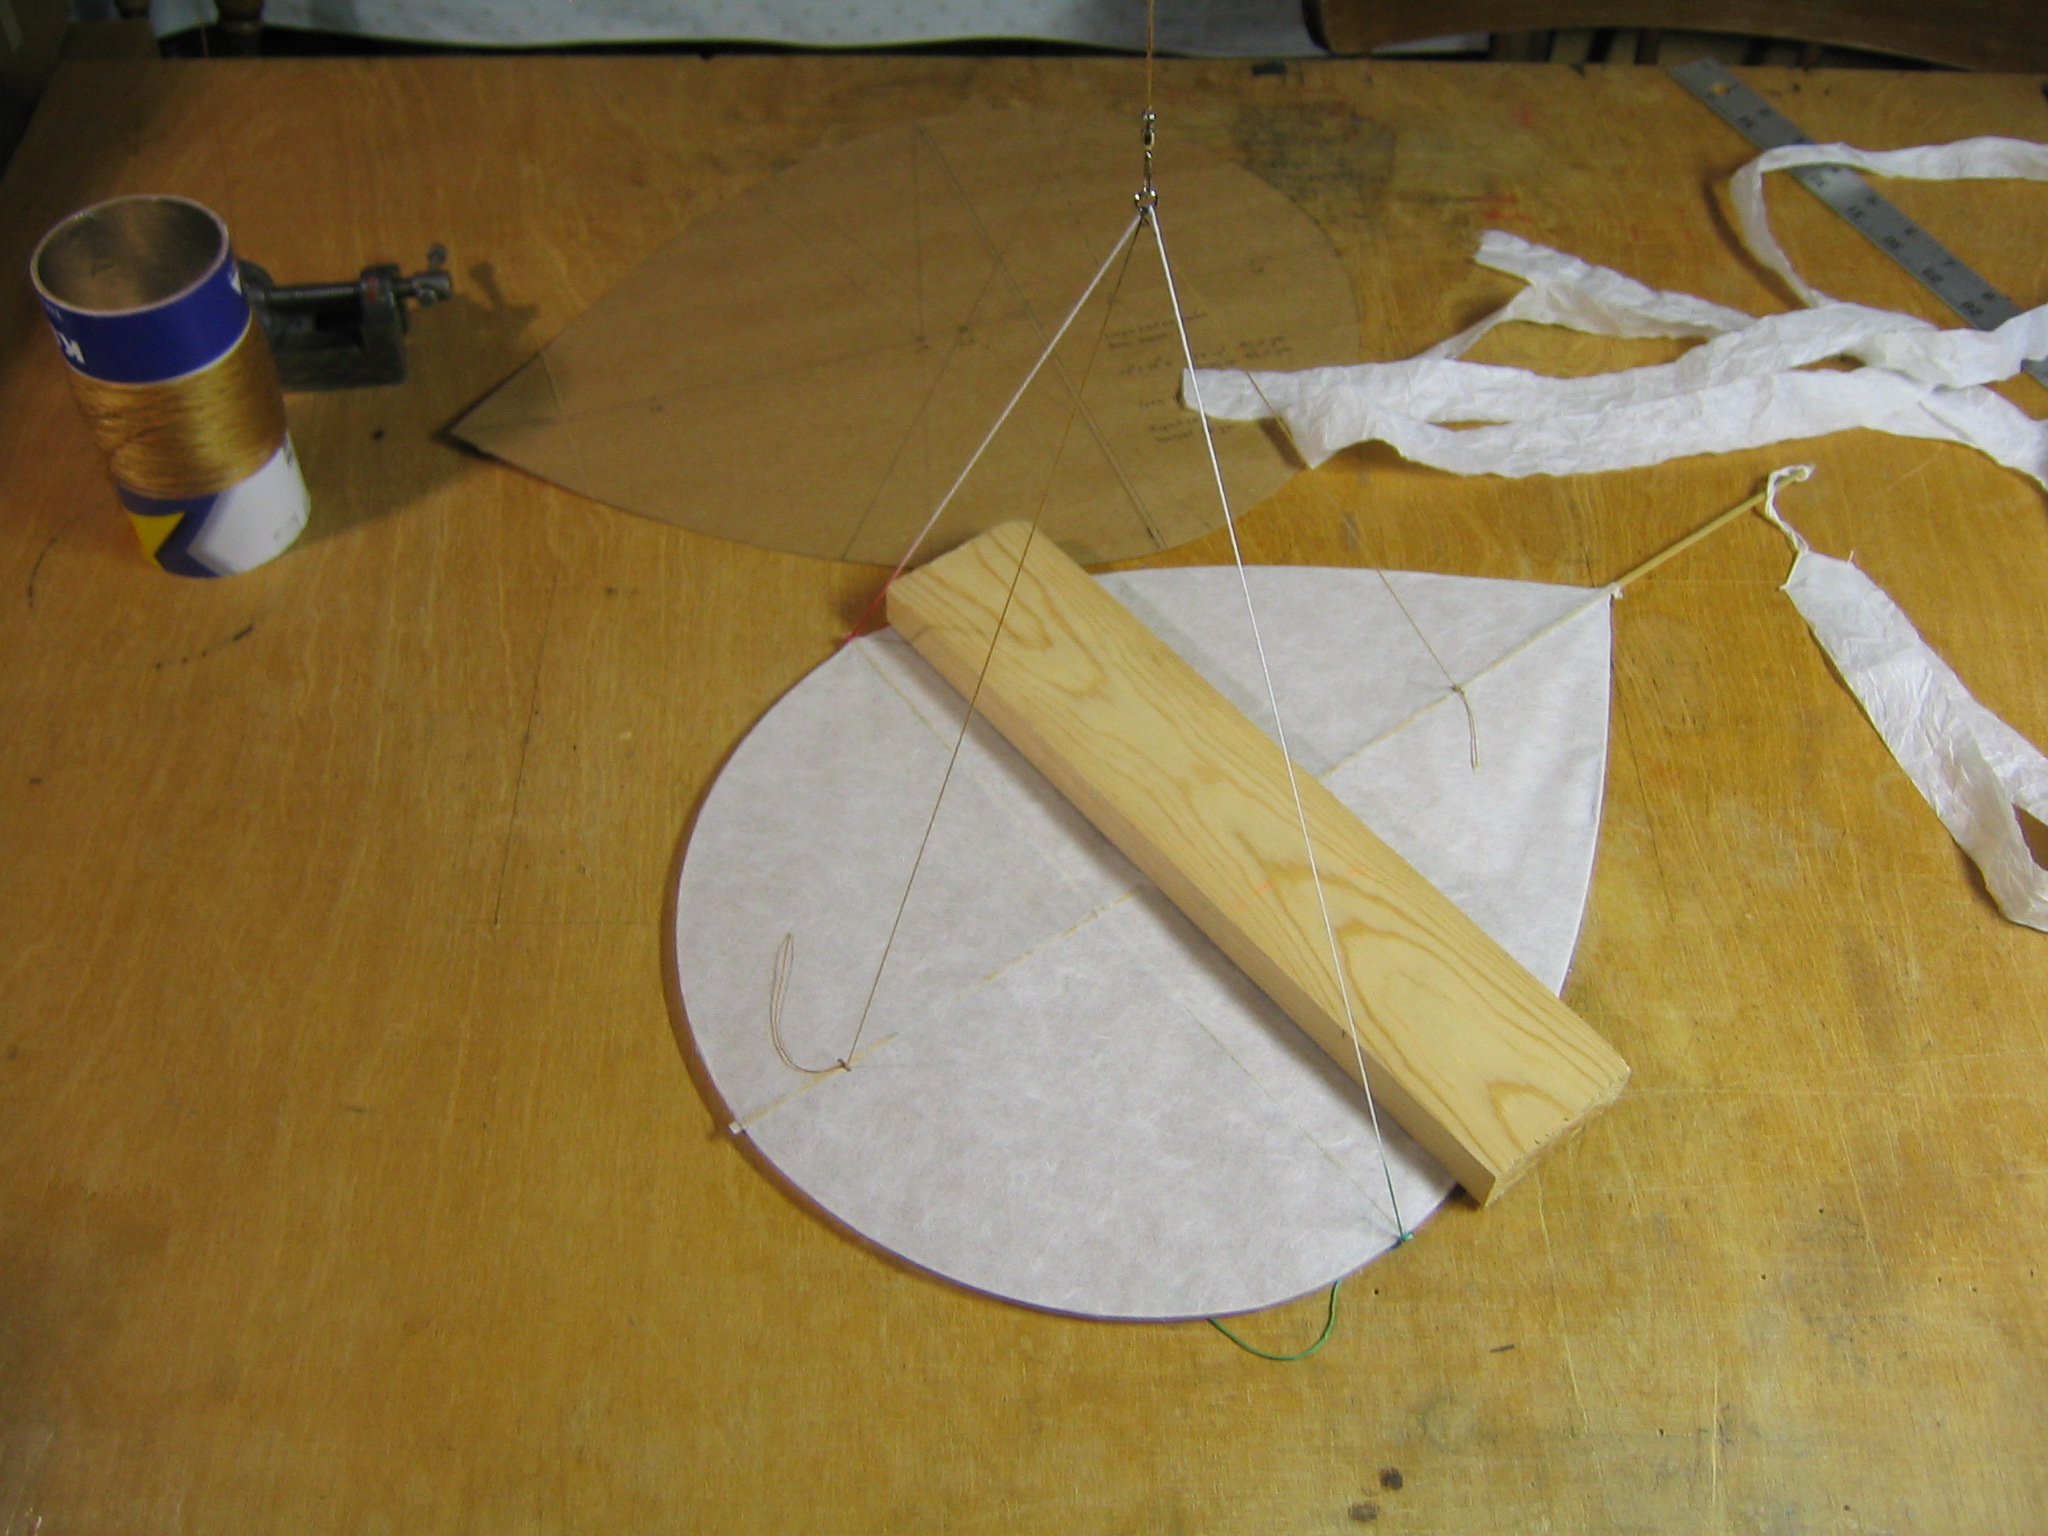
Next we find the center of area of the wing pattern.
The pattern is suspended on a pin such that it is free to swing. At the same time a plumb line is suspended from the same pin so that it is free to swing. The point where the plumb line crosses the opposite perimeter is marked with a pen or fine pointed brush.
The yardstick is aligned with the hole made by the pin and the perimeter mark.
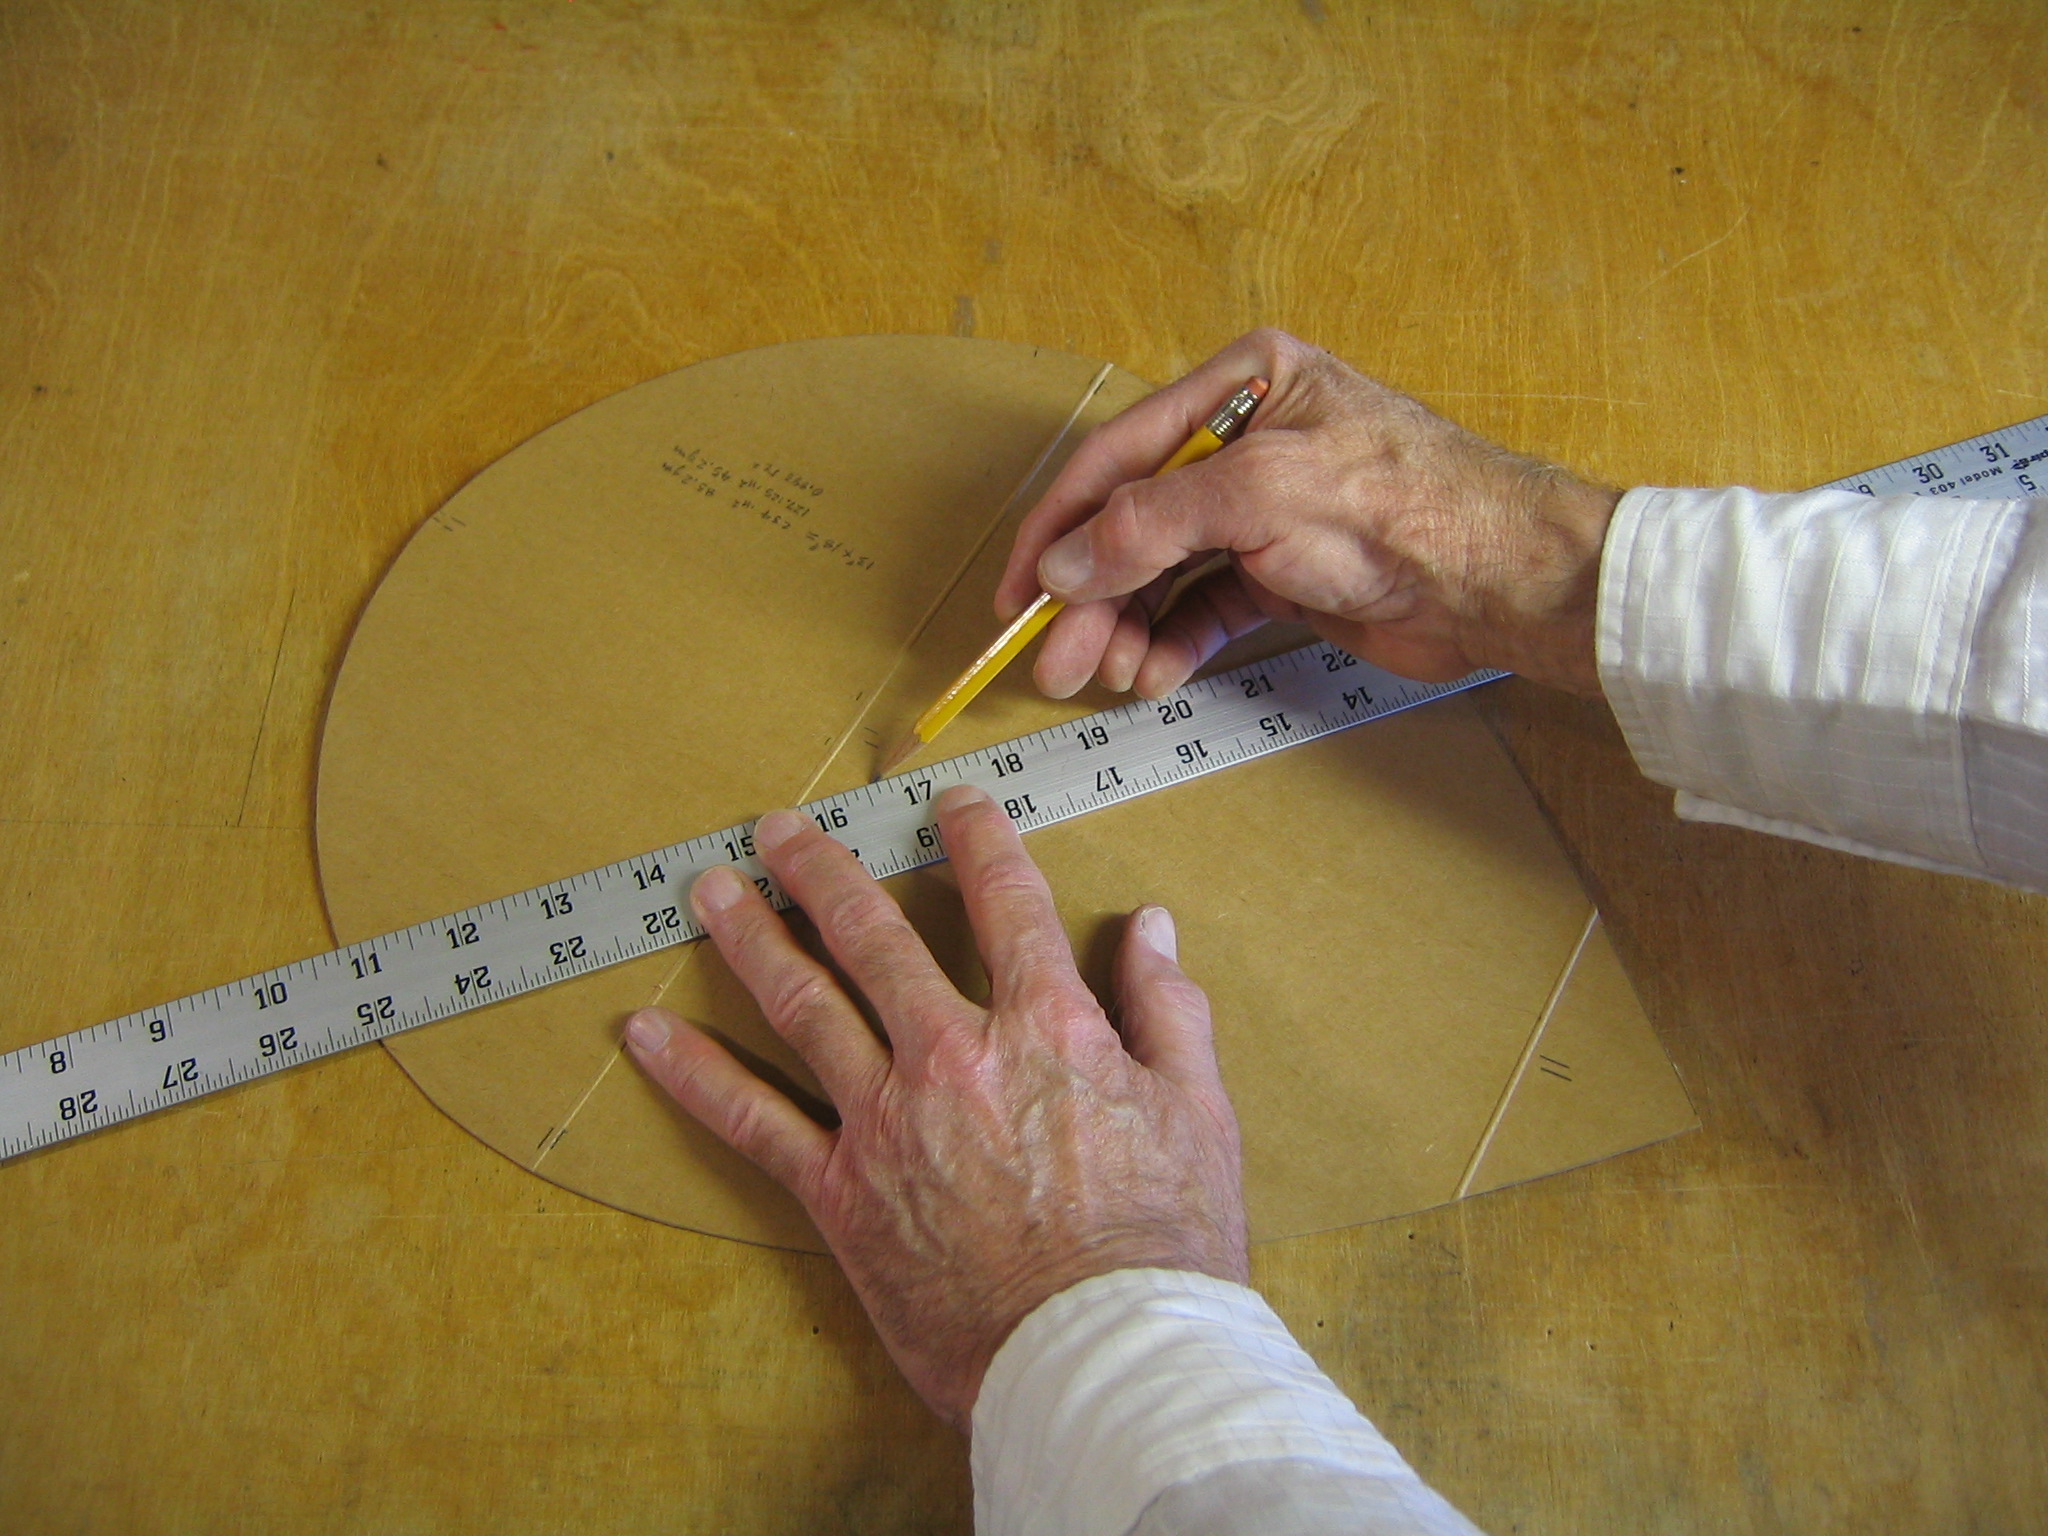
A line is drawn through these points. The whole process is done a second time with a plumb line approximately perpendicular with the first. The center of area is the point where the two plumb lines cross.
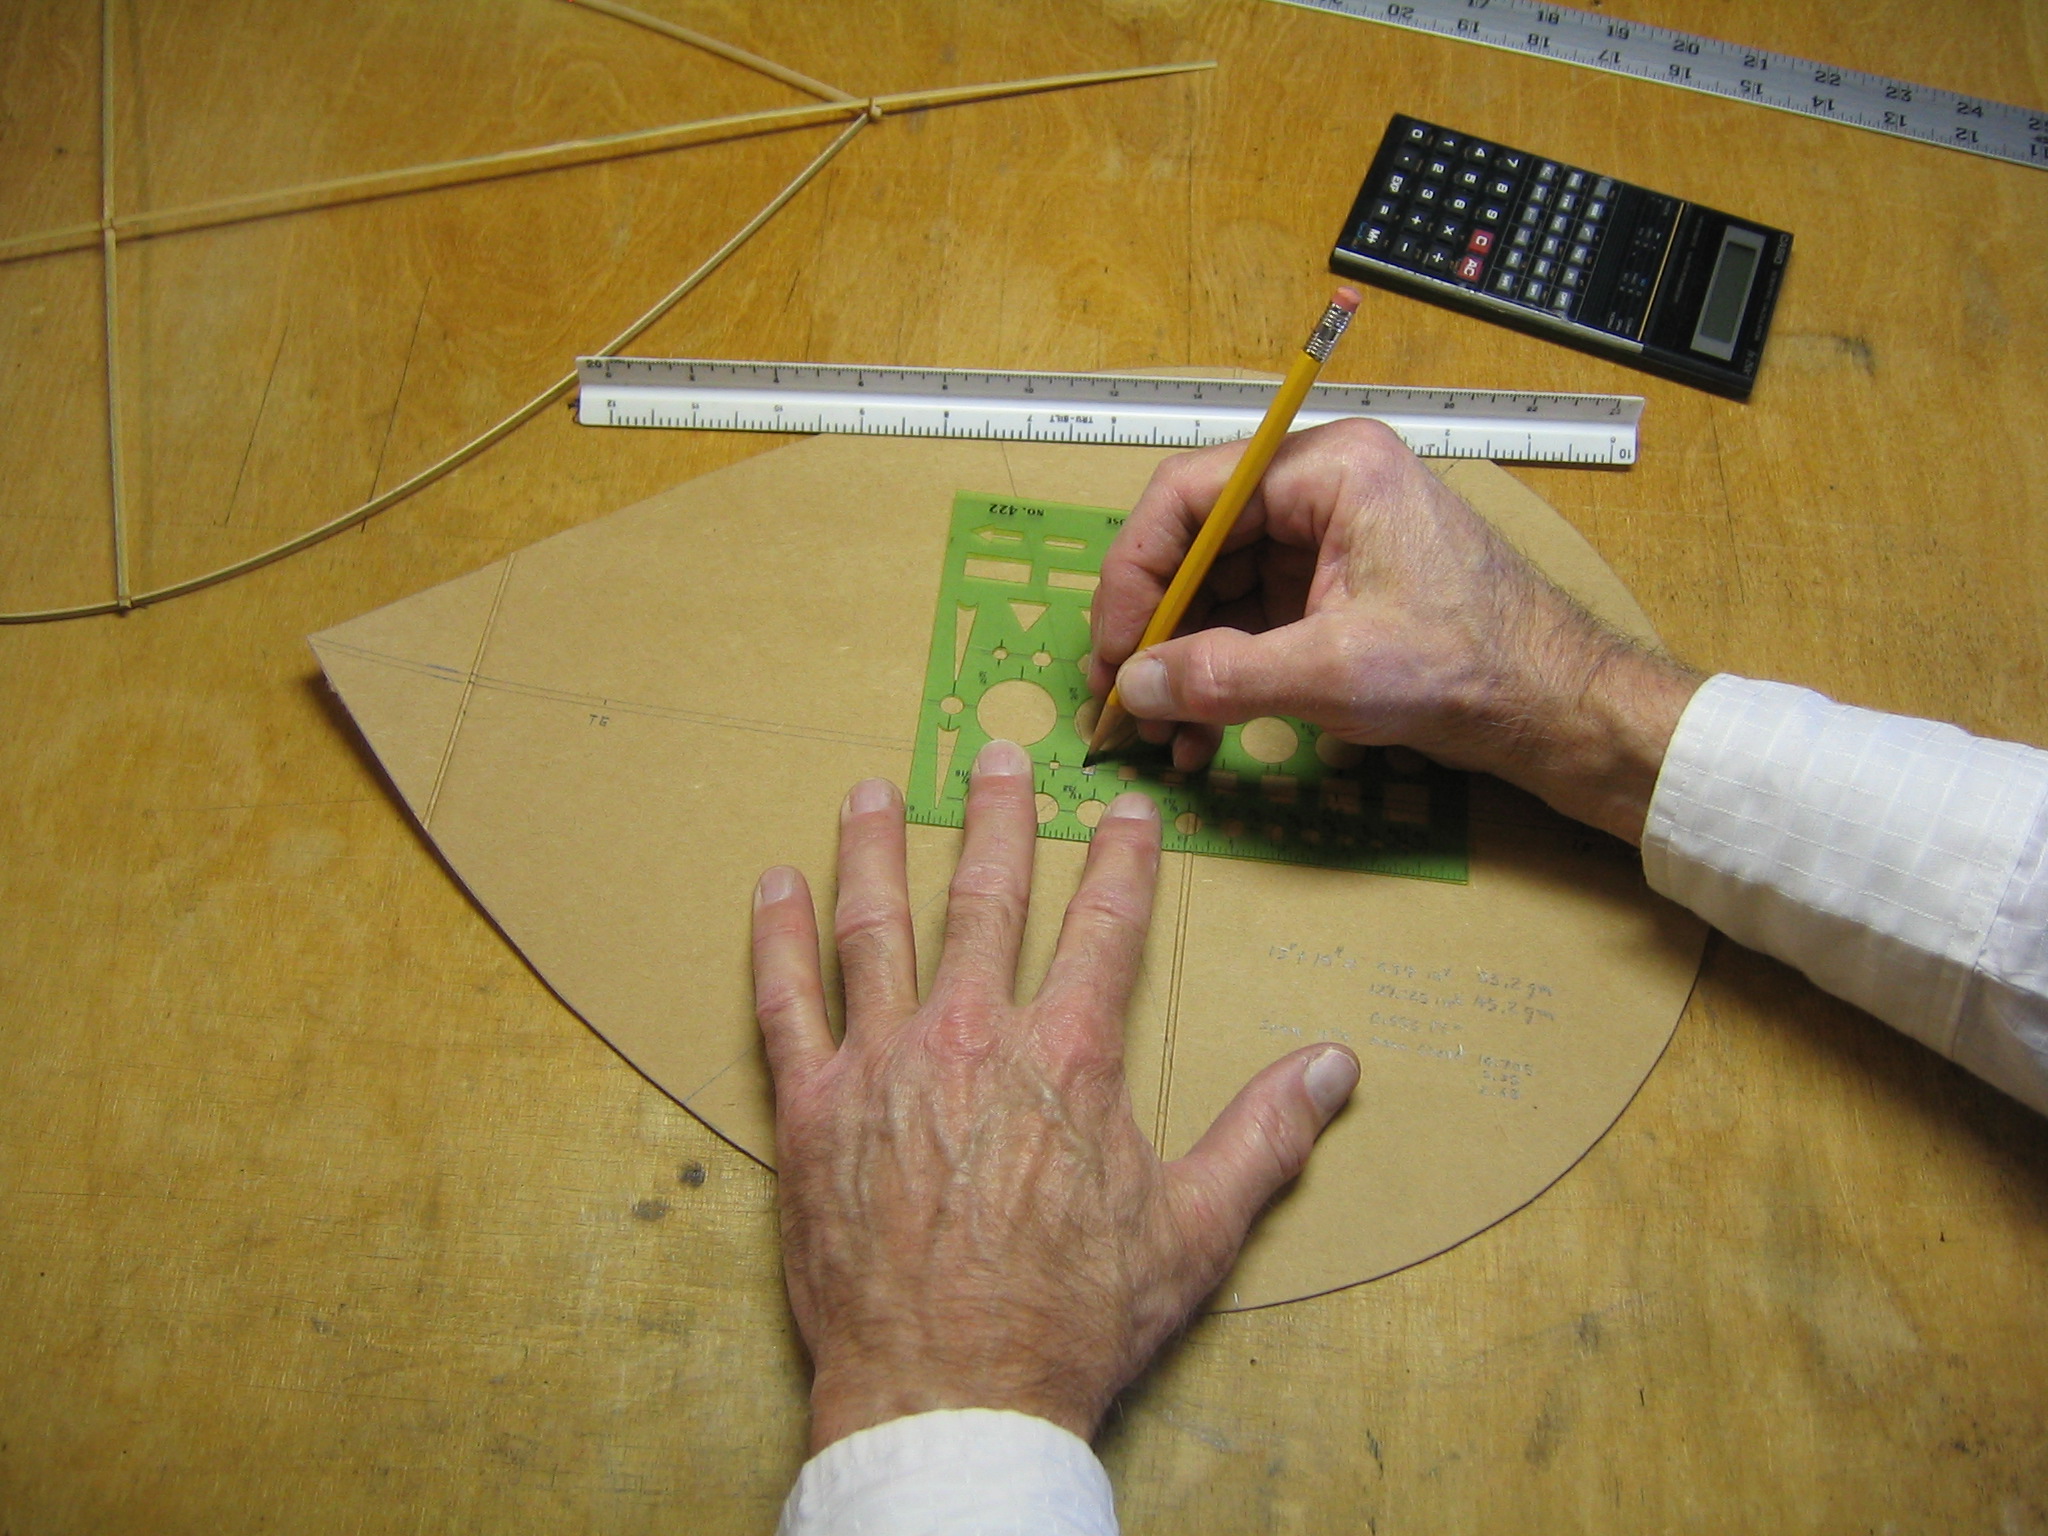
I mark the center of area with a 1/8″ square and label it CA. I have also located the center of the mean chord at the center of area and marked the leading edge LE and the trailing edge TE. At one quarter of the mean chord back from the LE I have marked the aerodynamic center as AC. The significance of these will be discussed later.
Paper Covering
The framework is placed on the paper where it makes a good fit with a minimum of waste.
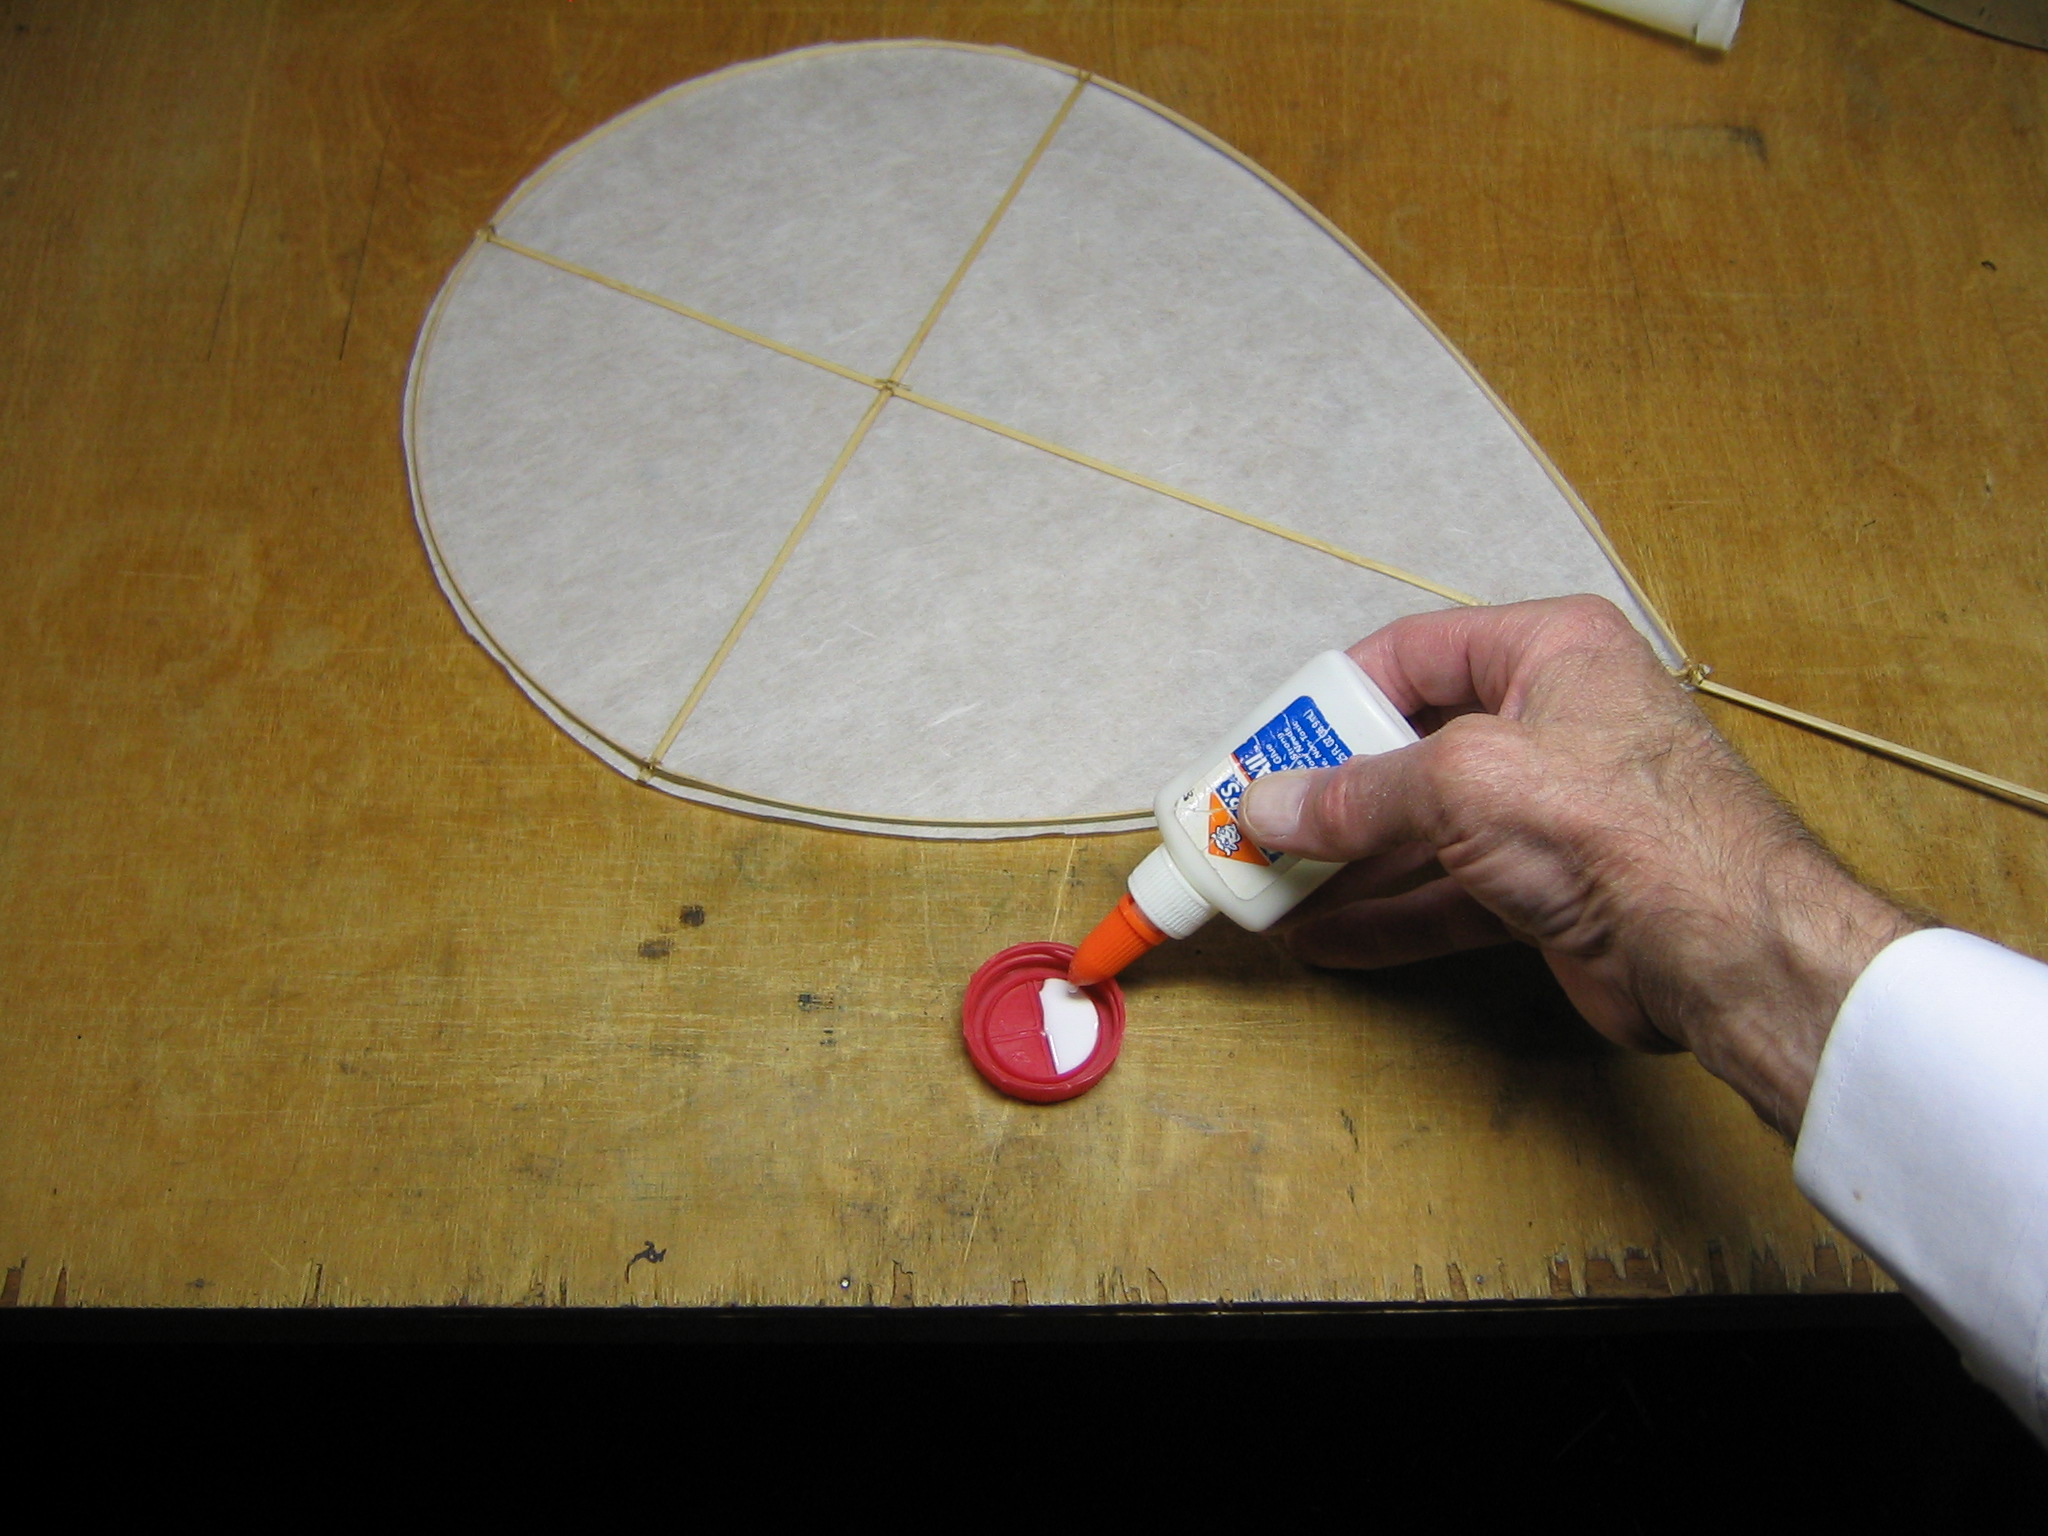
Glue is applied to the spine, only from the perimeter crossing to the end, where the paper will cover the kite.
Glue is applied to the perimeter.
Glue is applied to the cross stick.
The glue is spread to a uniform thin film. Excess globs of glue are removed. We want only enough glue to make the surface glossy. More than that will take longer to dry and will add unnecessary weight to the kite.
The framework is placed on the paper and pressed down.
Weights are placed on the framework to hold it down until the glue dries. (You can use this time to make the tails.)
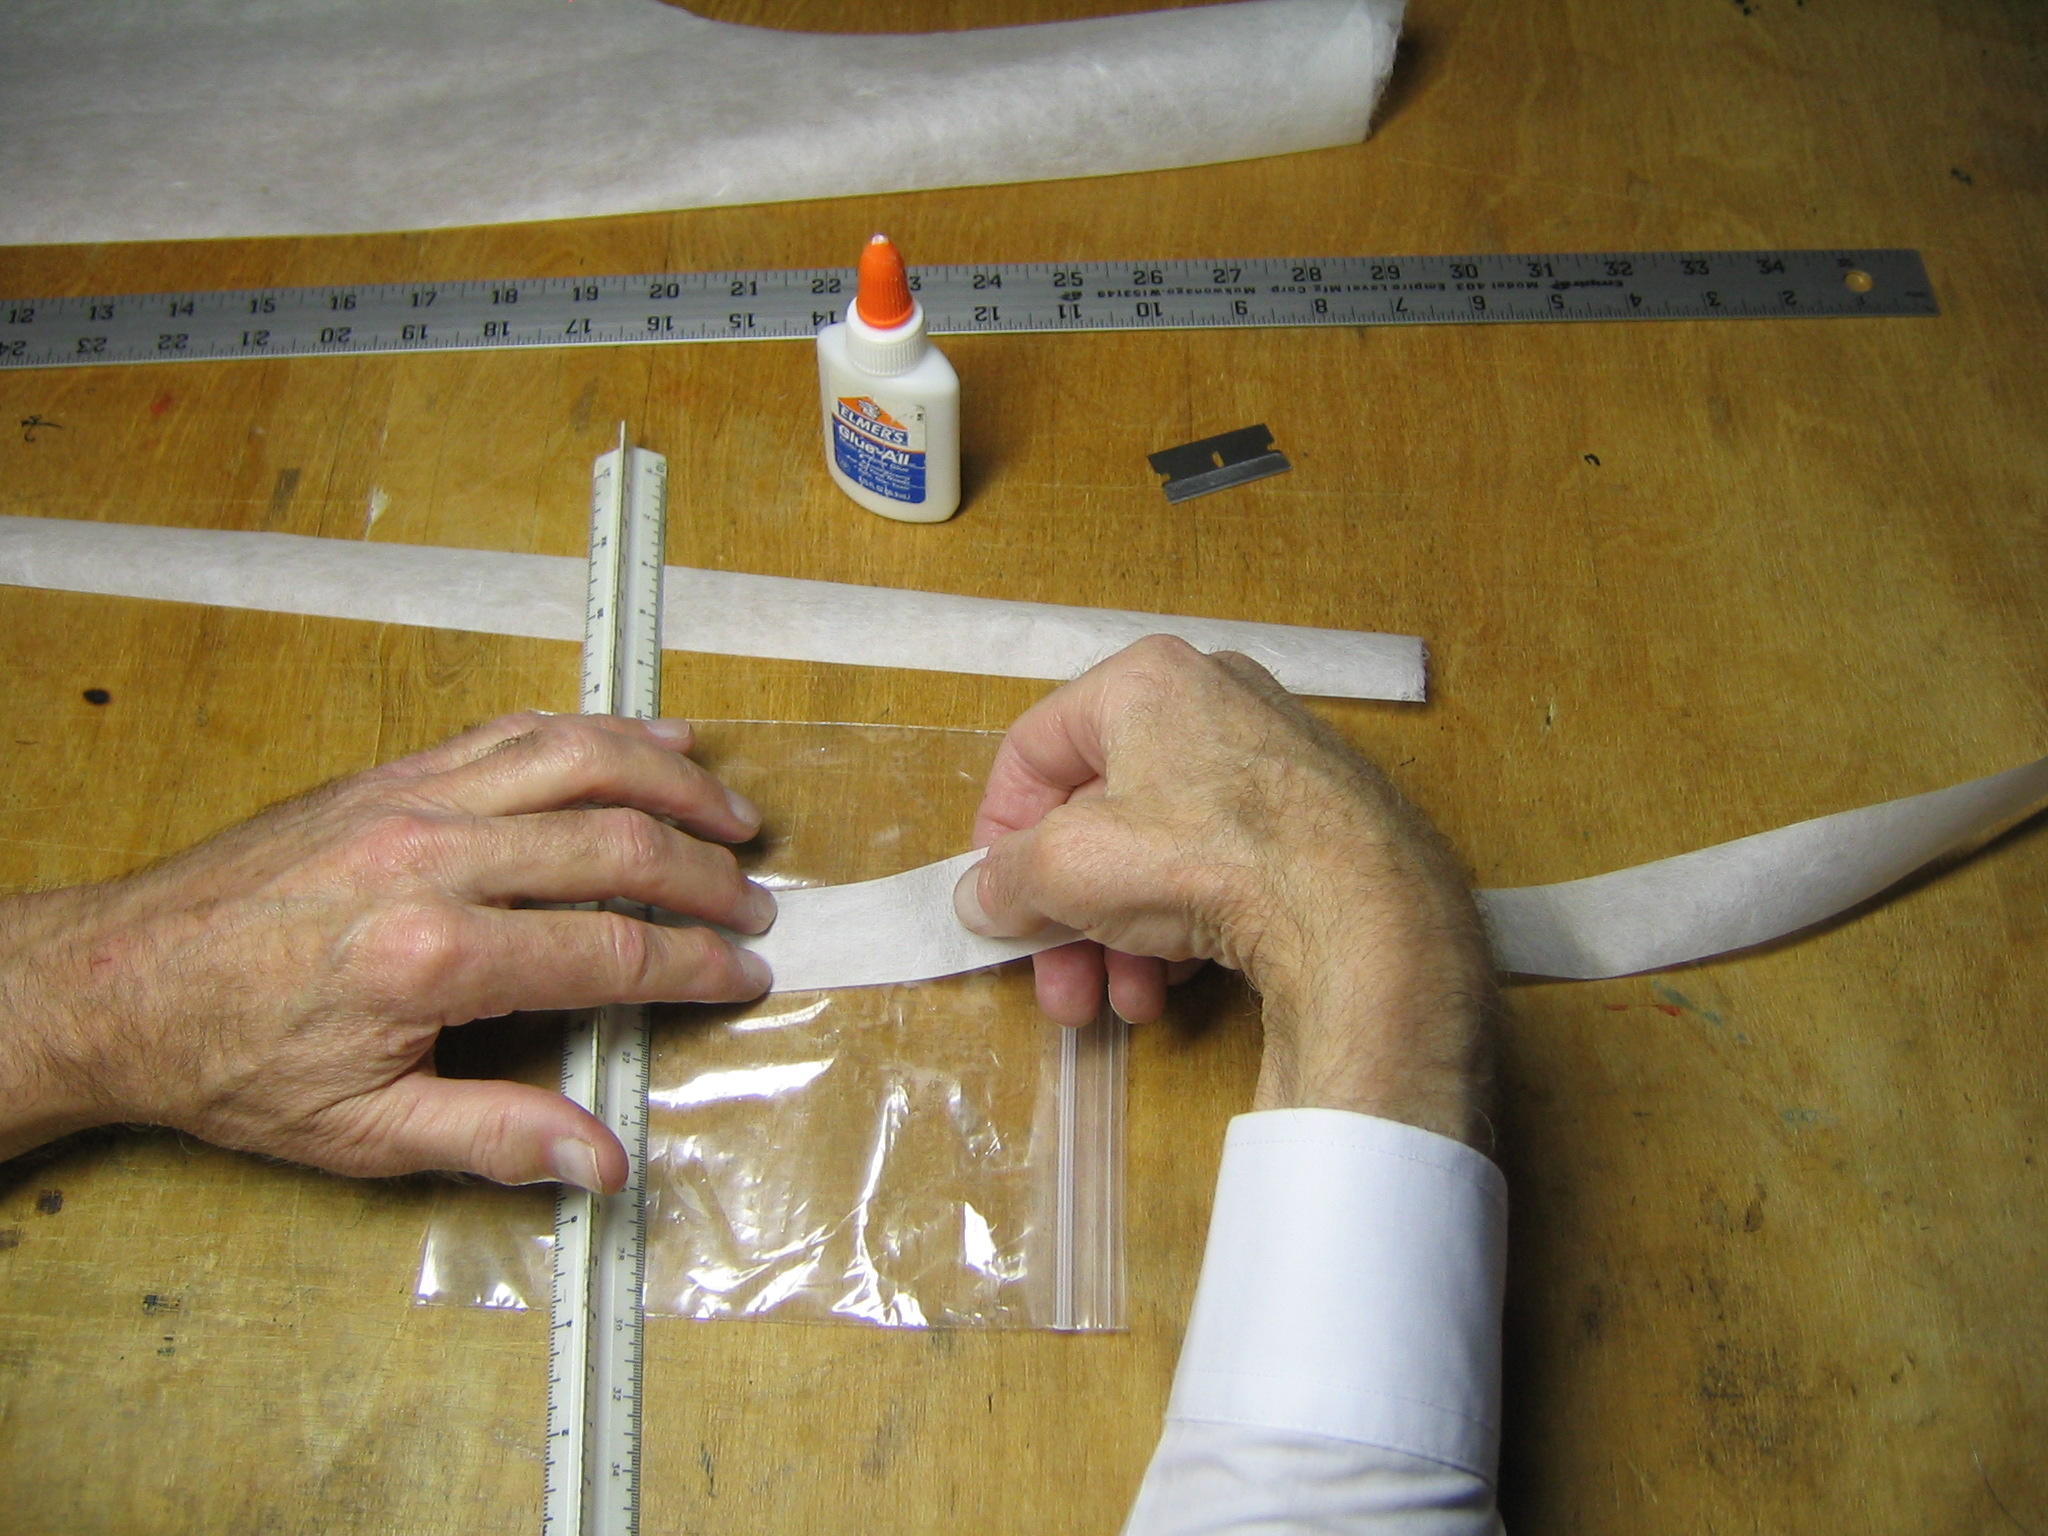
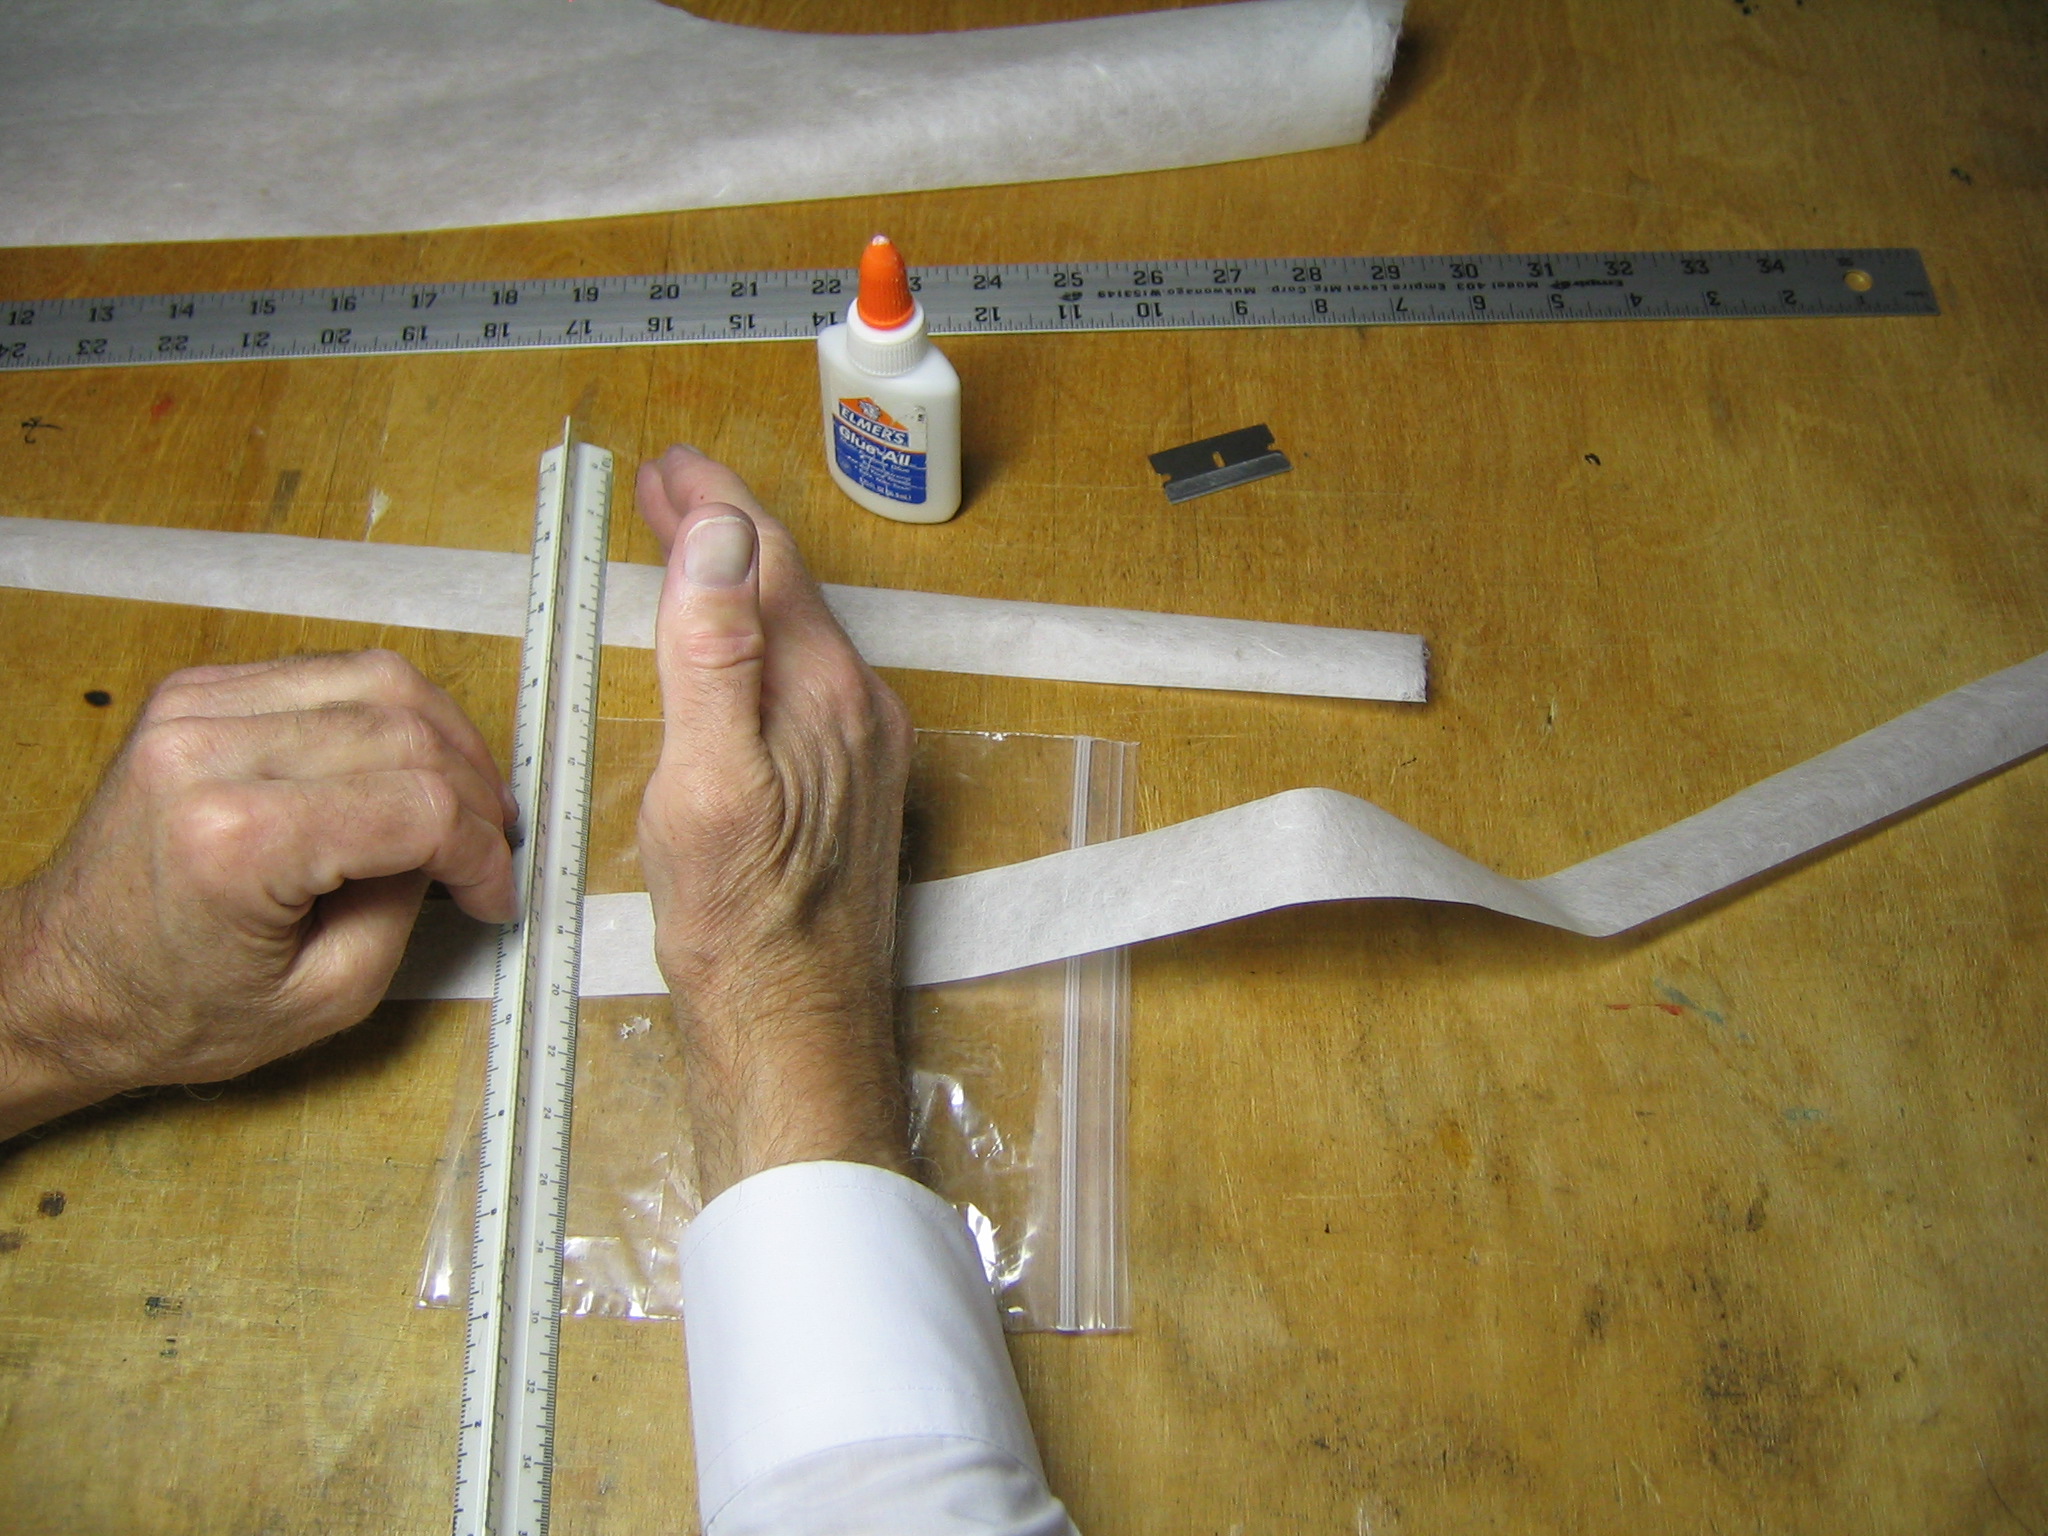
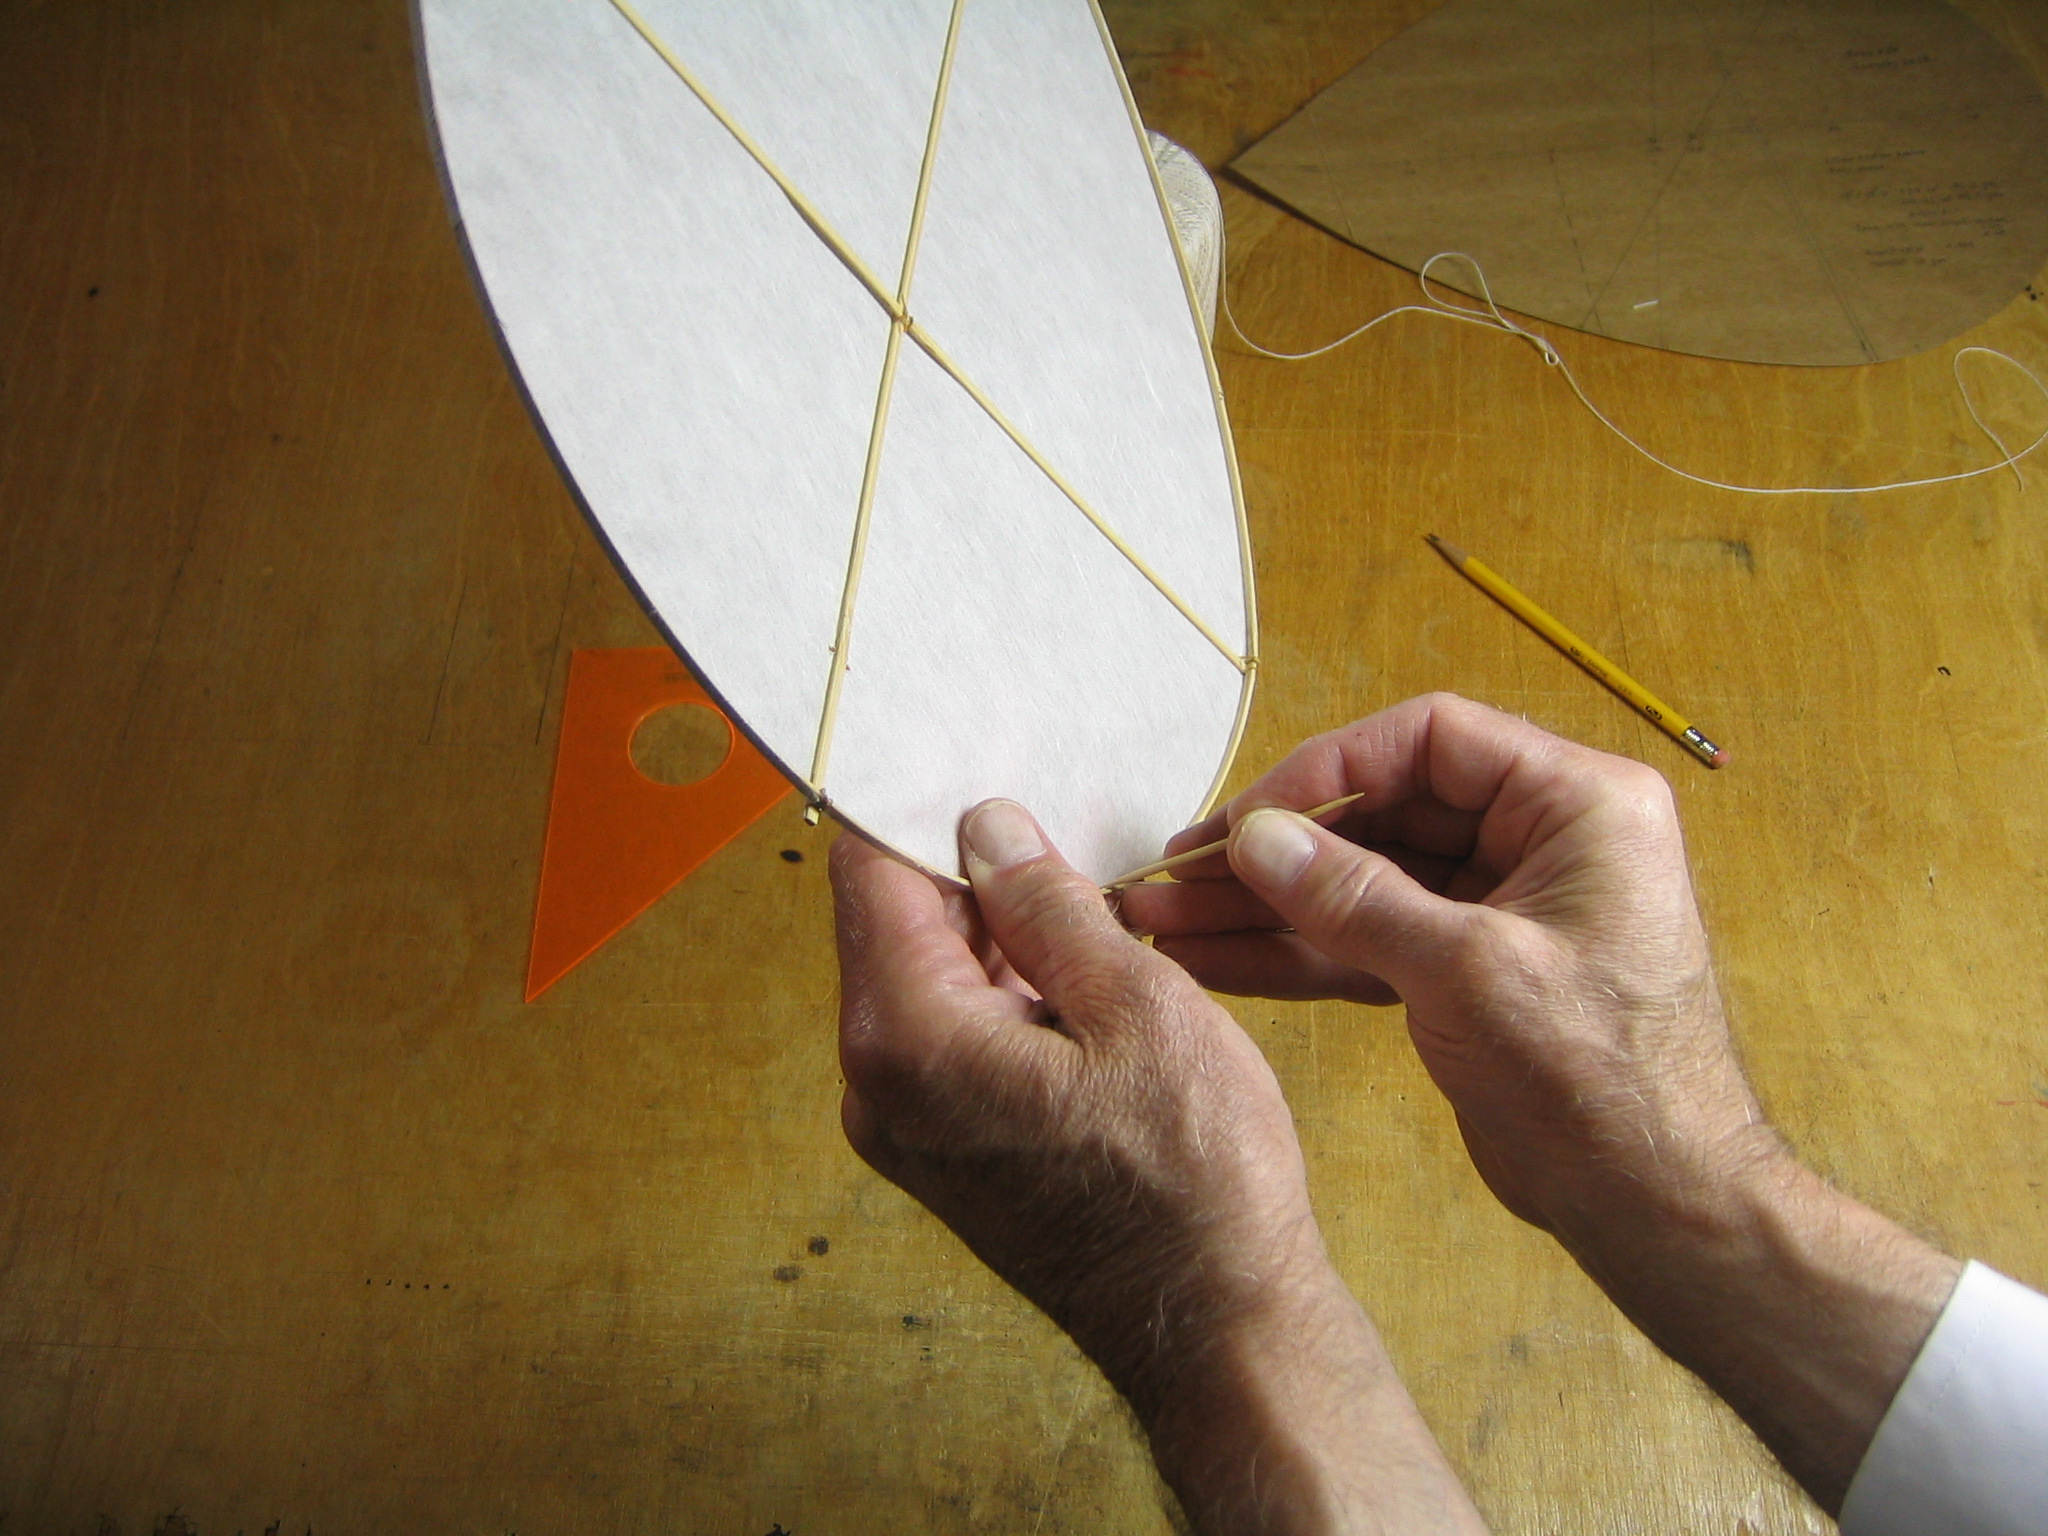
When the glue has dried, cut the paper around the perimeter about 3 mm out from the stick, a little more where it will have to reach up to get stuck to the side of the perimeter stick, where the sticks cross.
Slit the paper about every 1/2″ from the stick out to the edge to facilitate folding up along side the perimeter stick. Slit it also on both sides of the sticks where sticks cross over the edge.
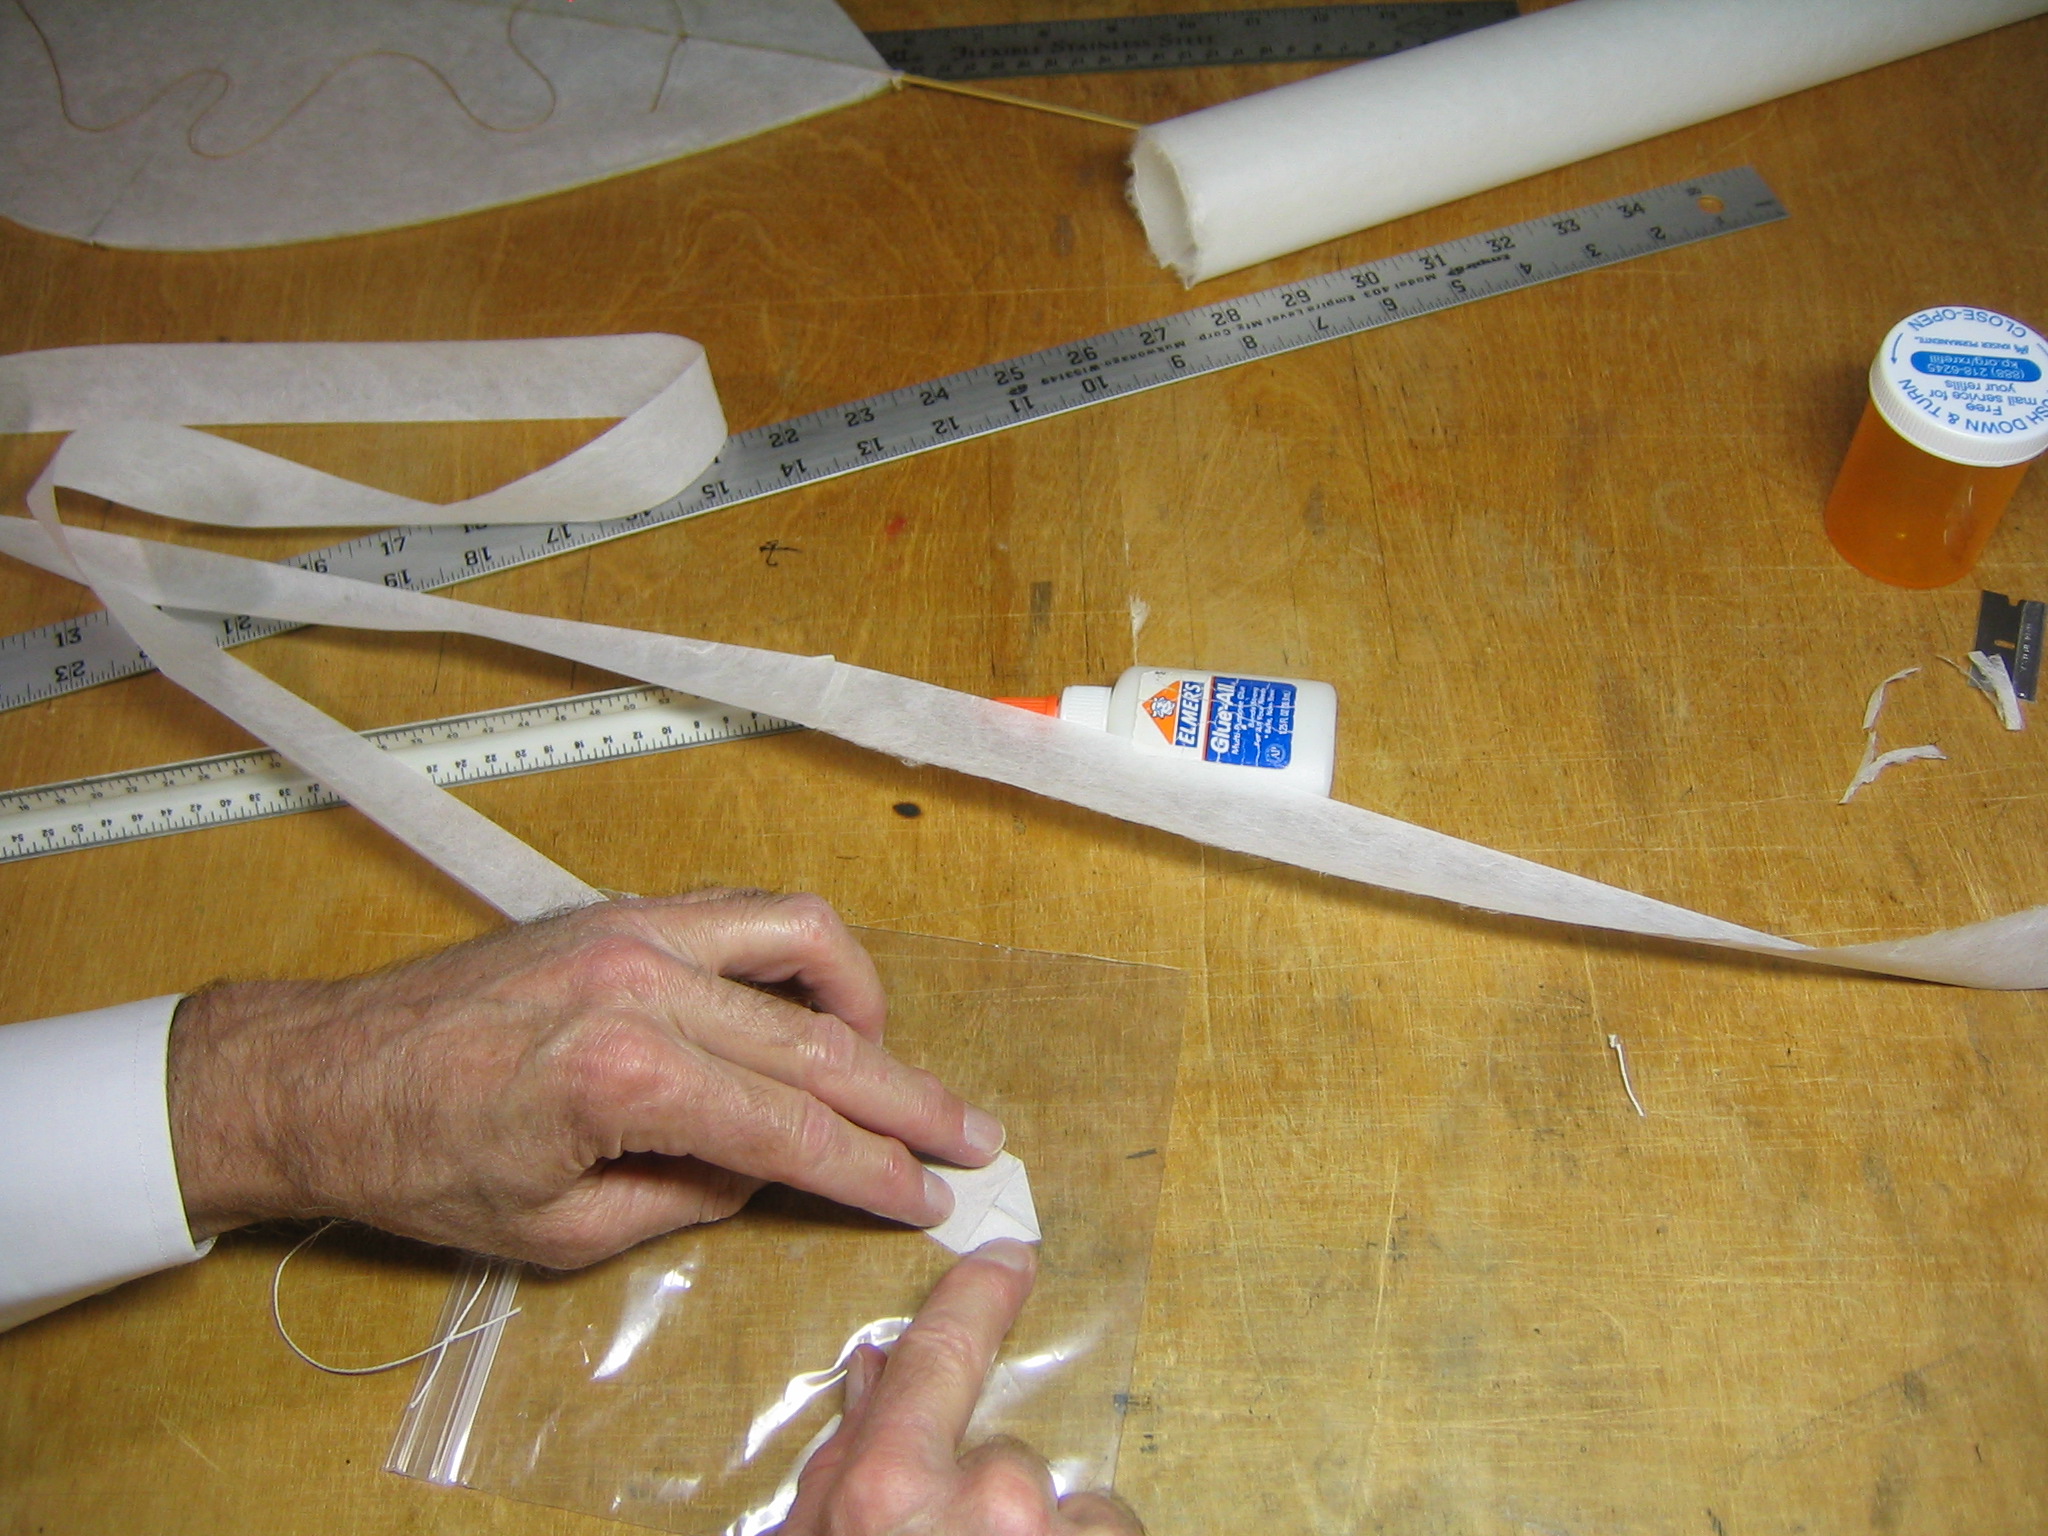
Put some glue in a small container, like this plastic milk bottle cap.
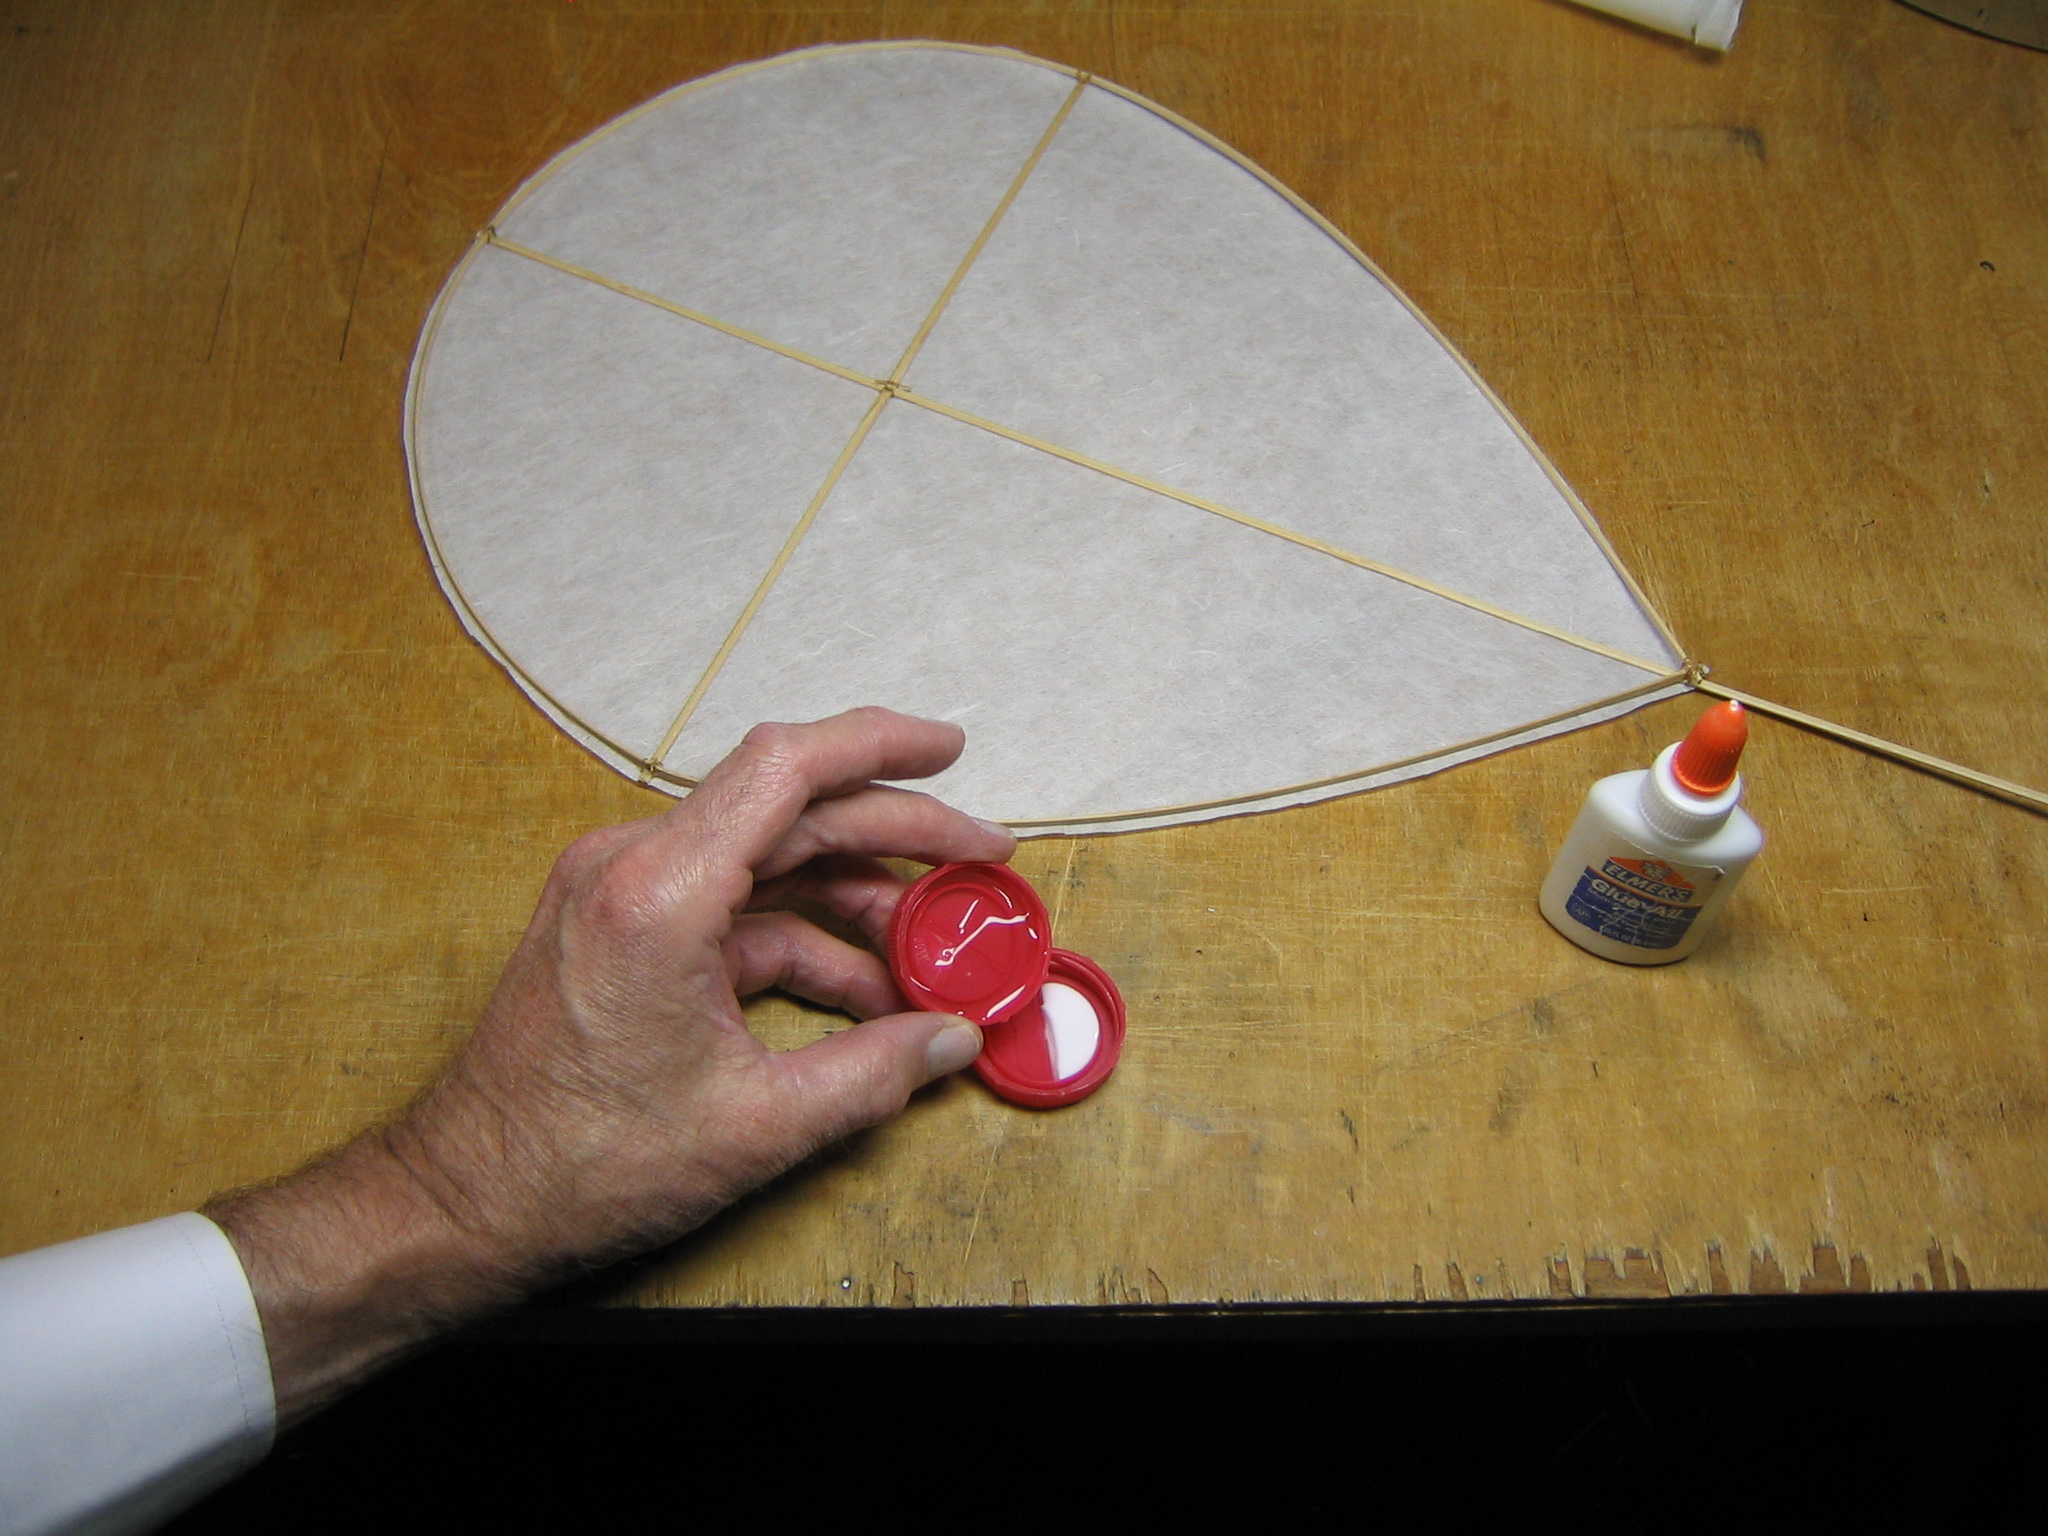
Add an equal volume of water.
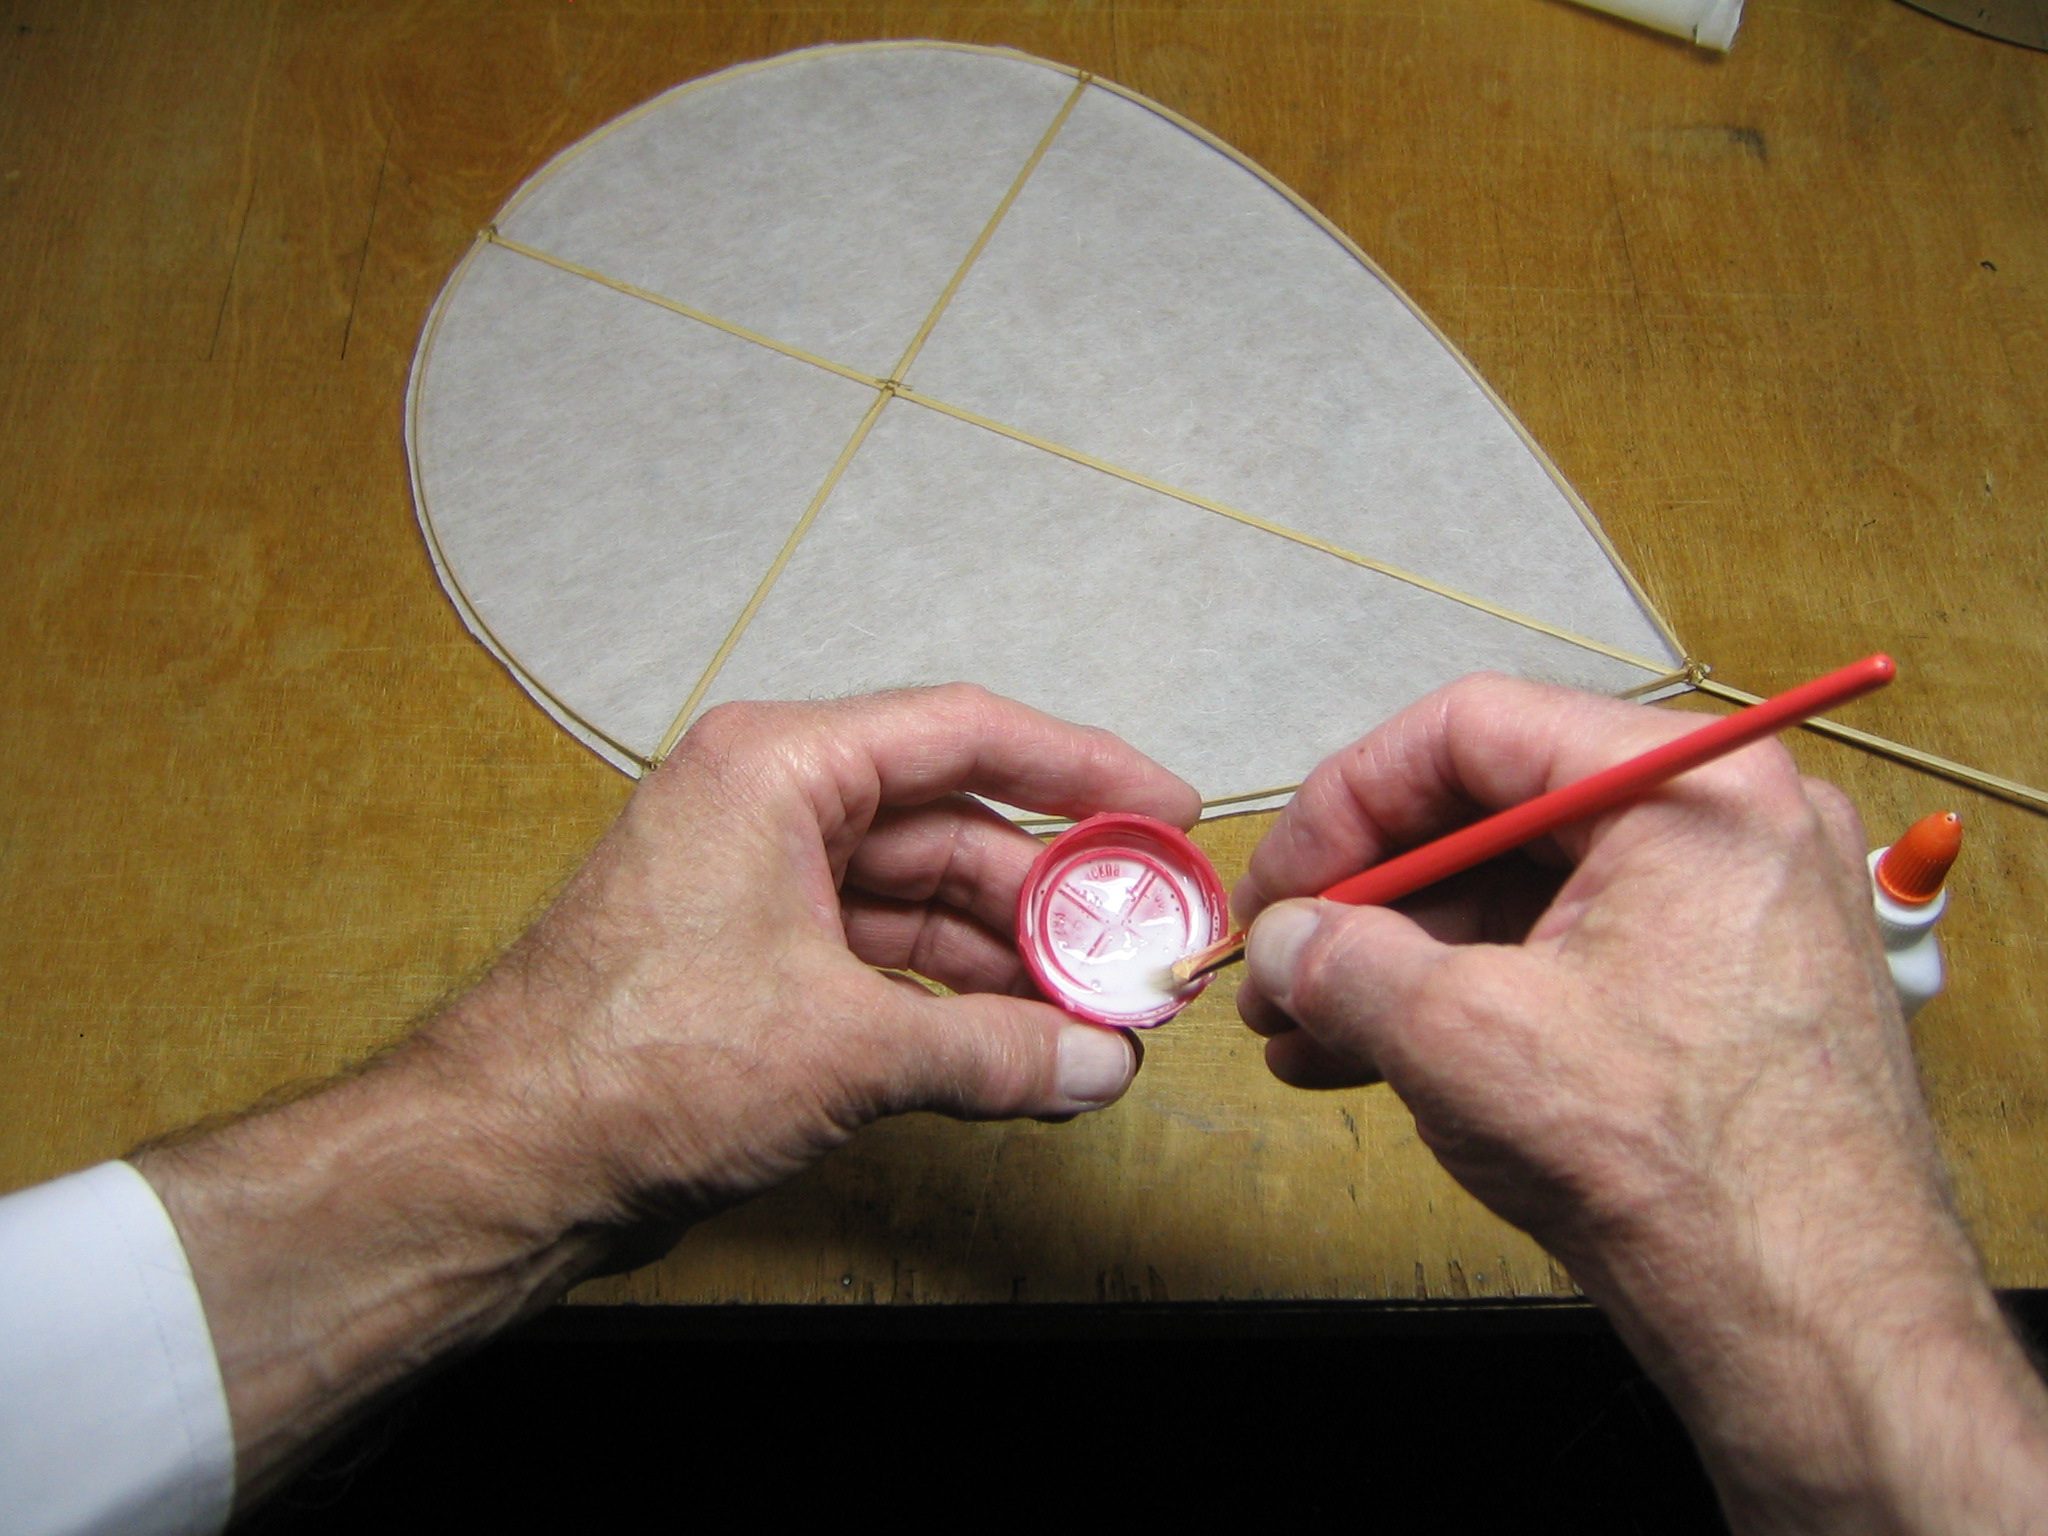
Mix the glue and water thoroughly.
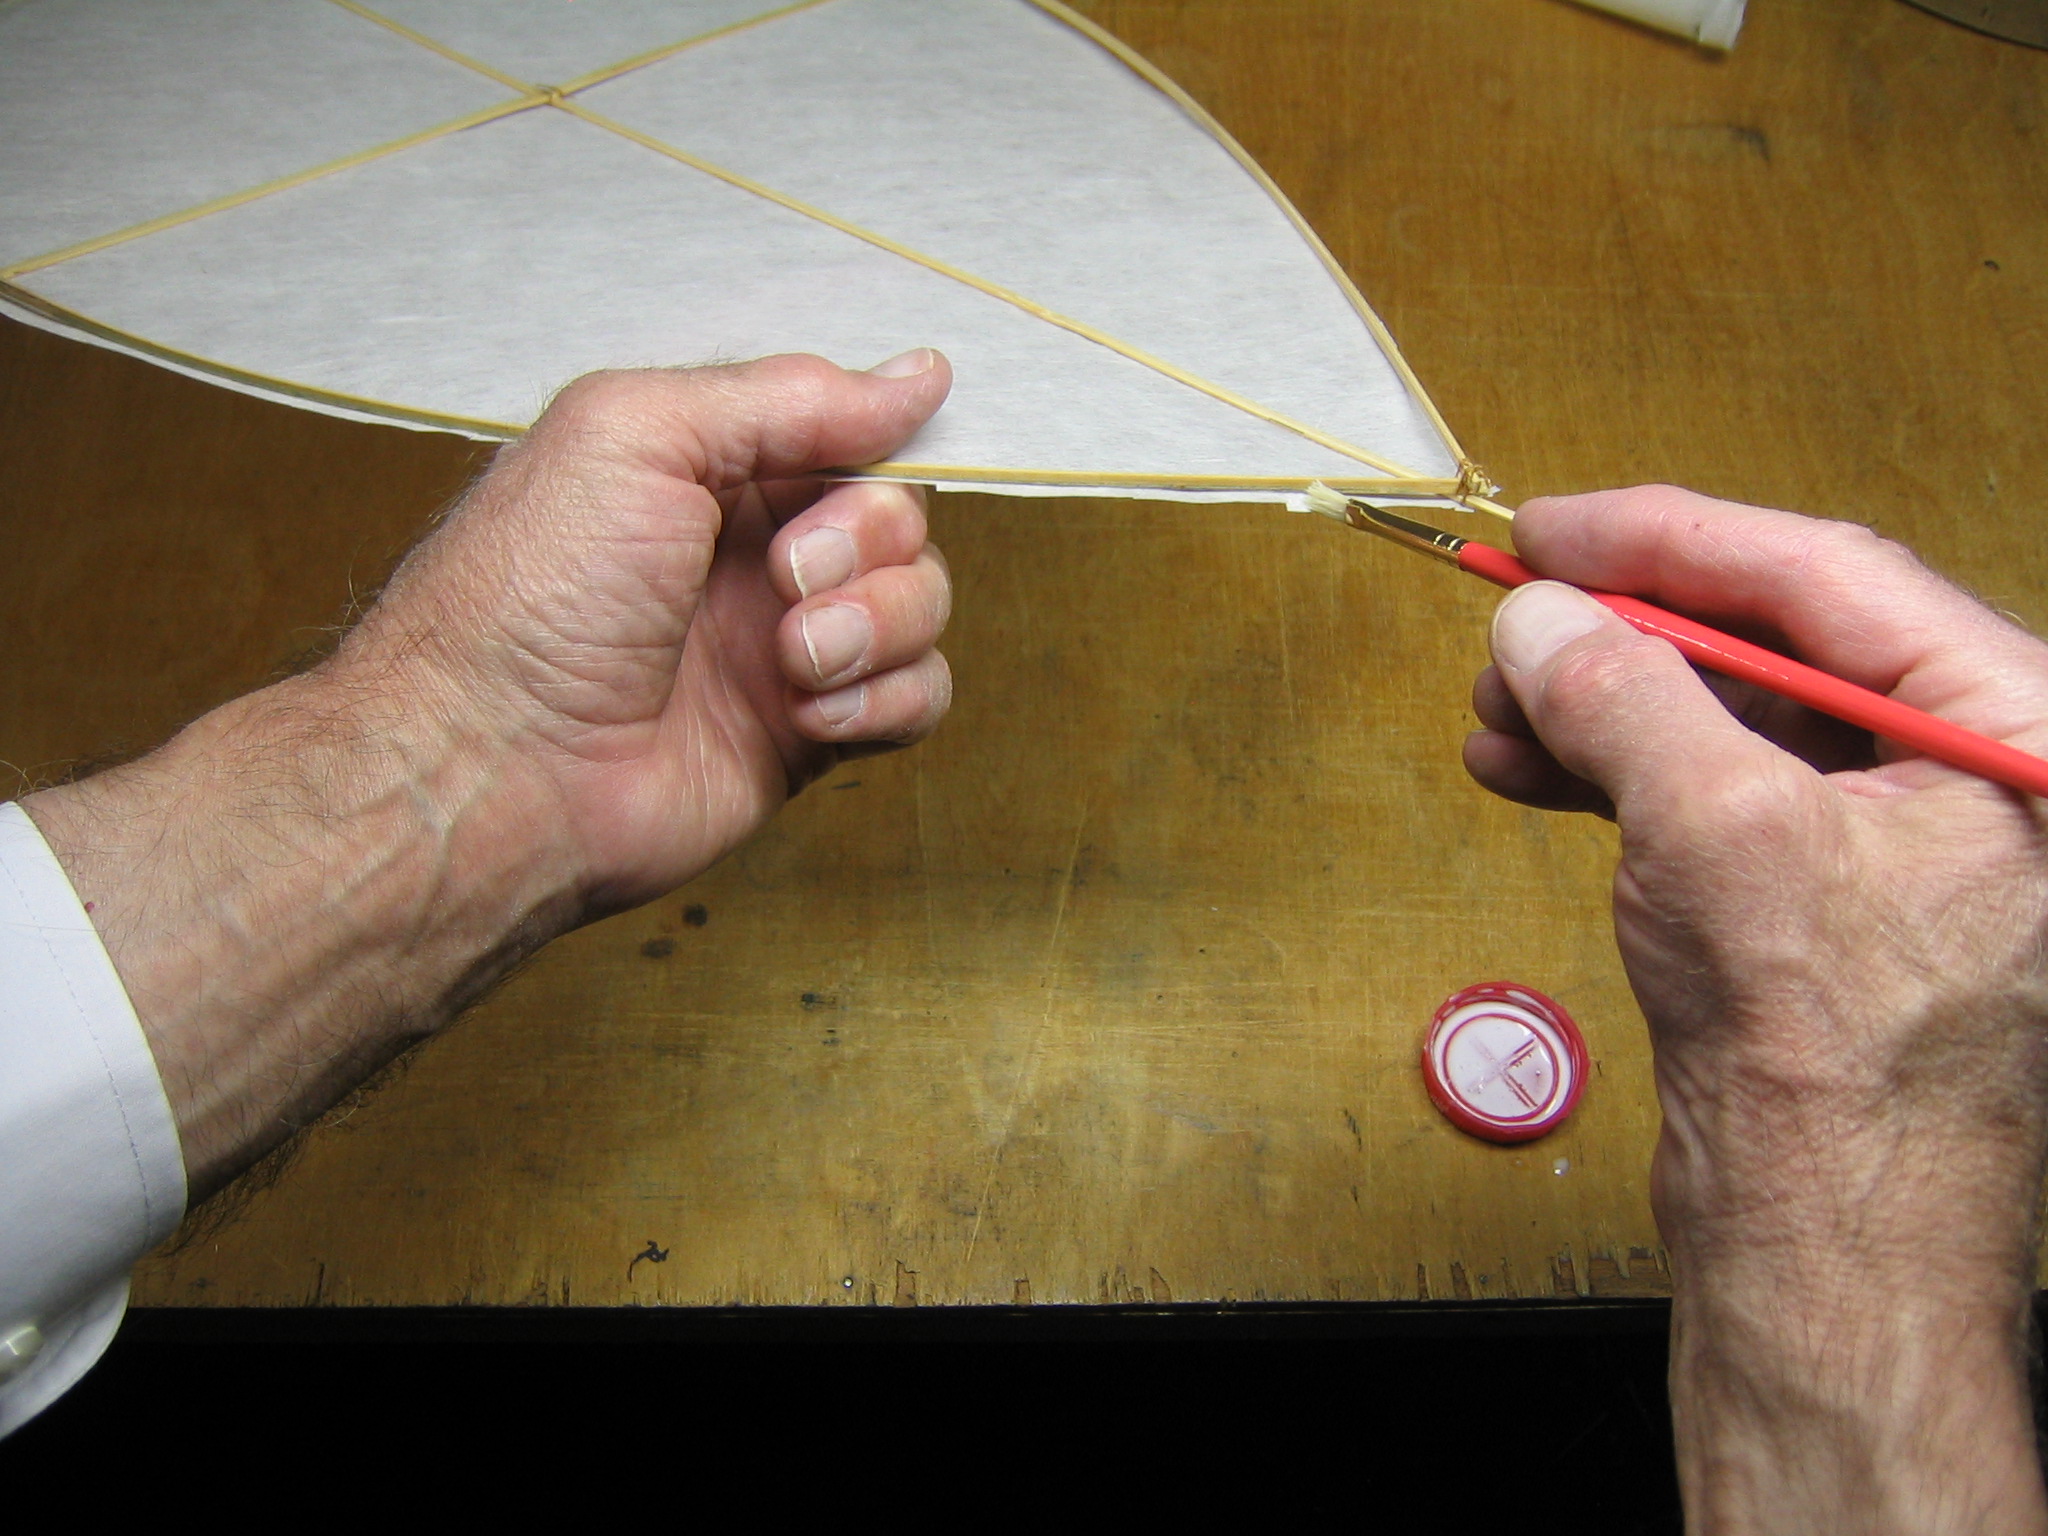
One section at a time, paint this glue onto the stick,
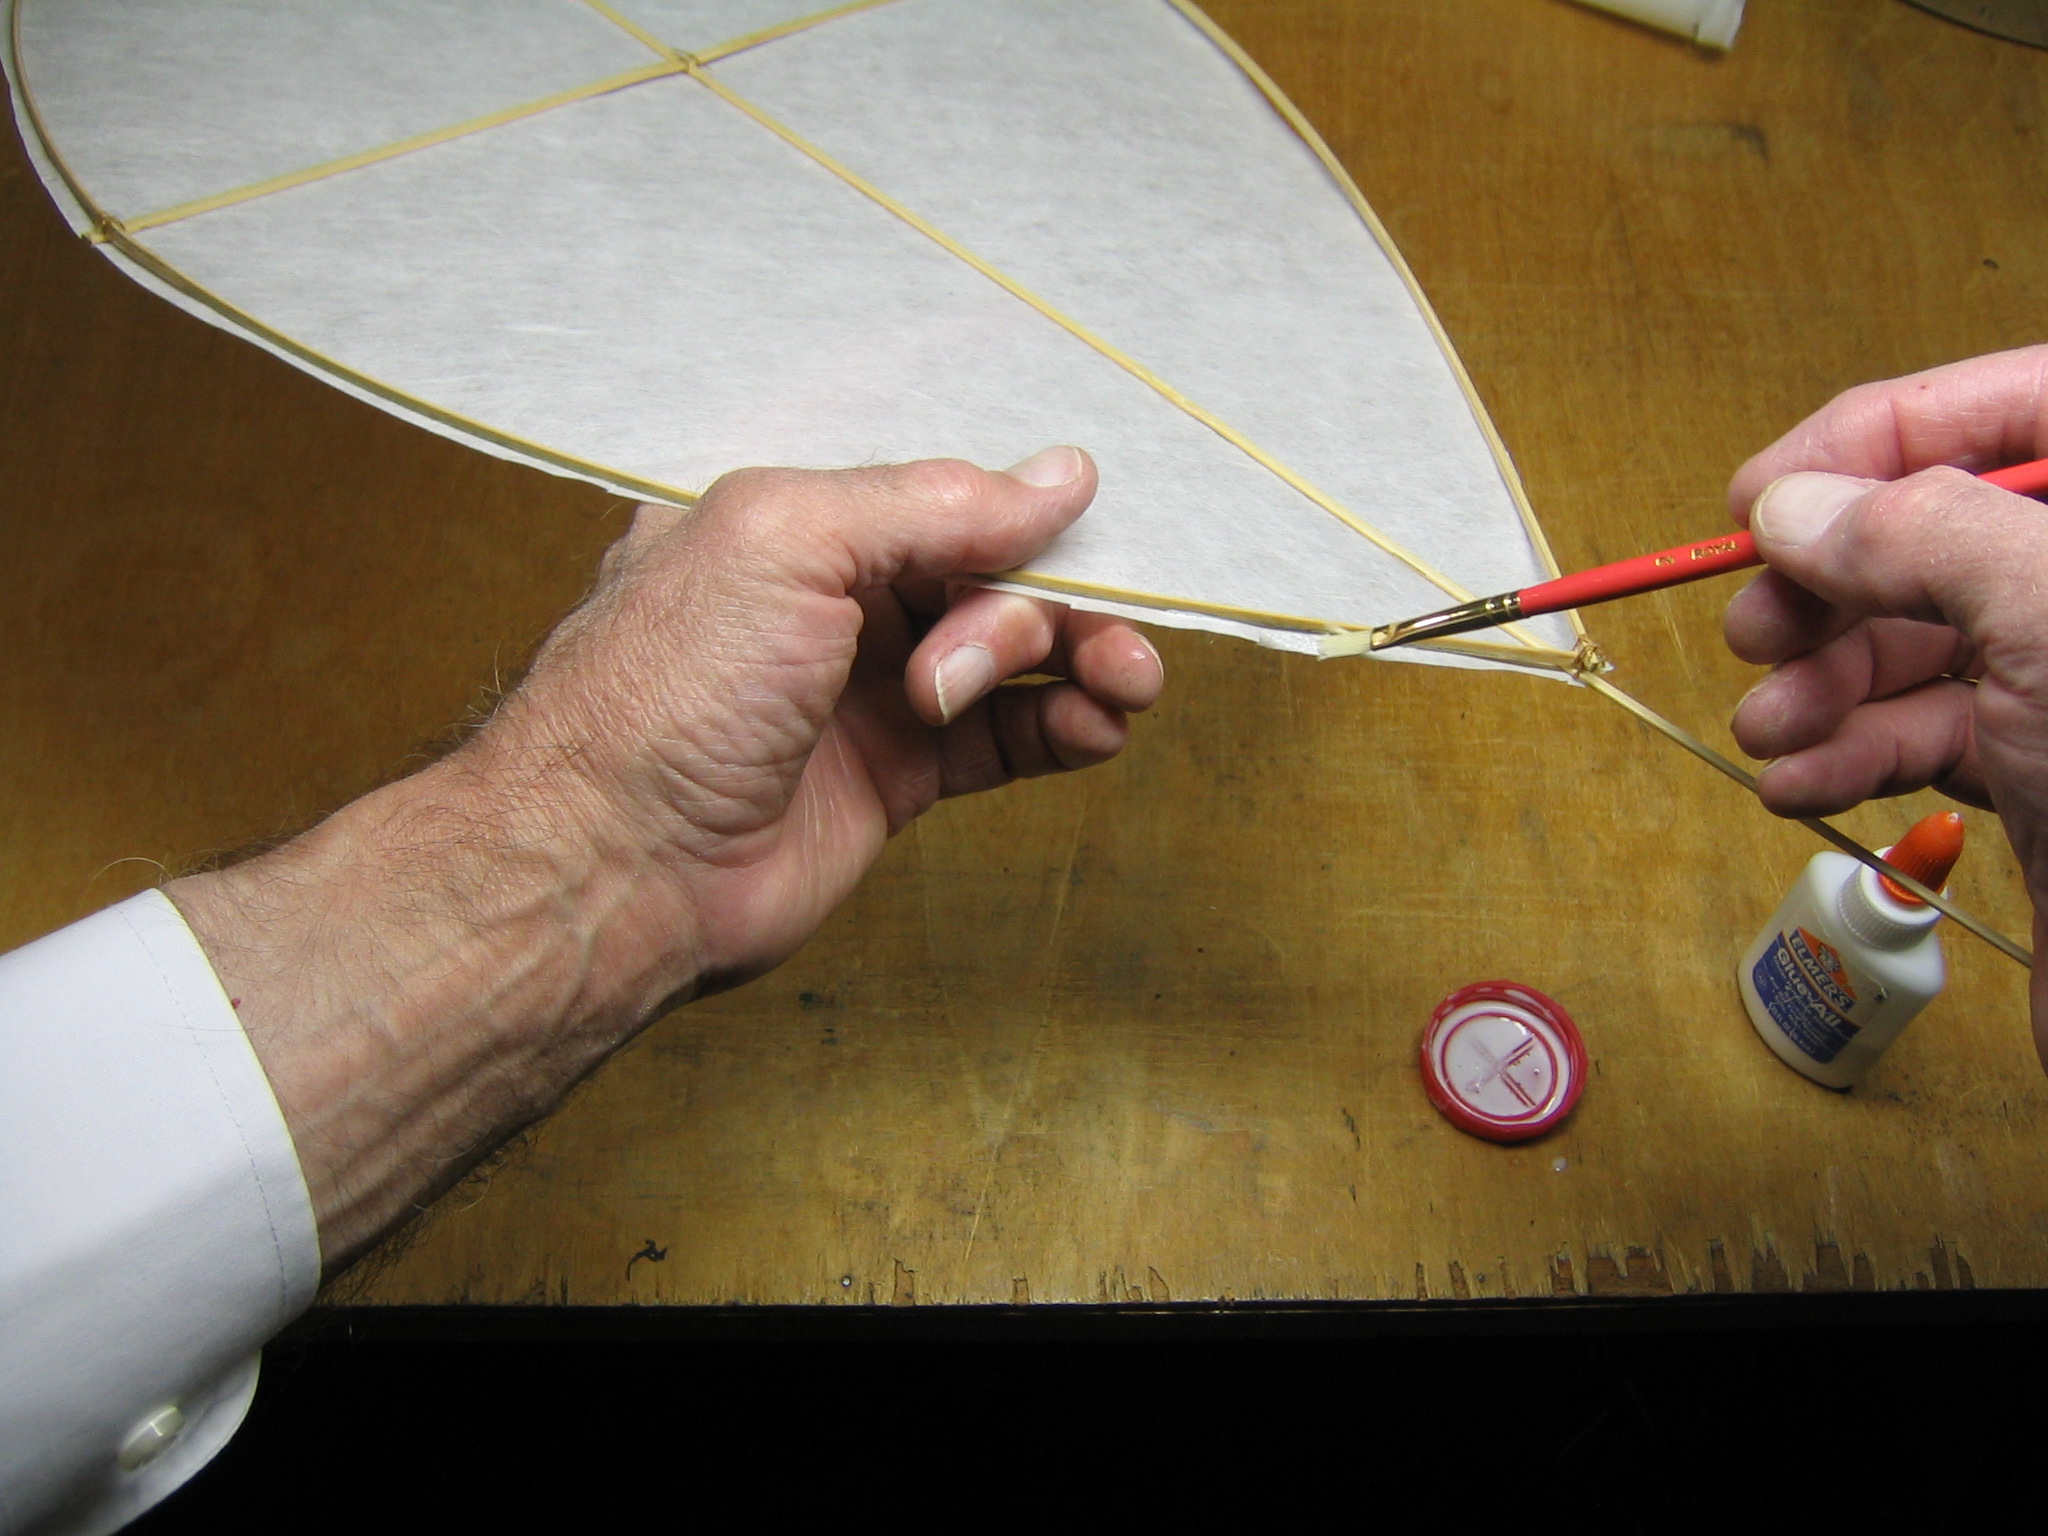
paint it onto the paper,
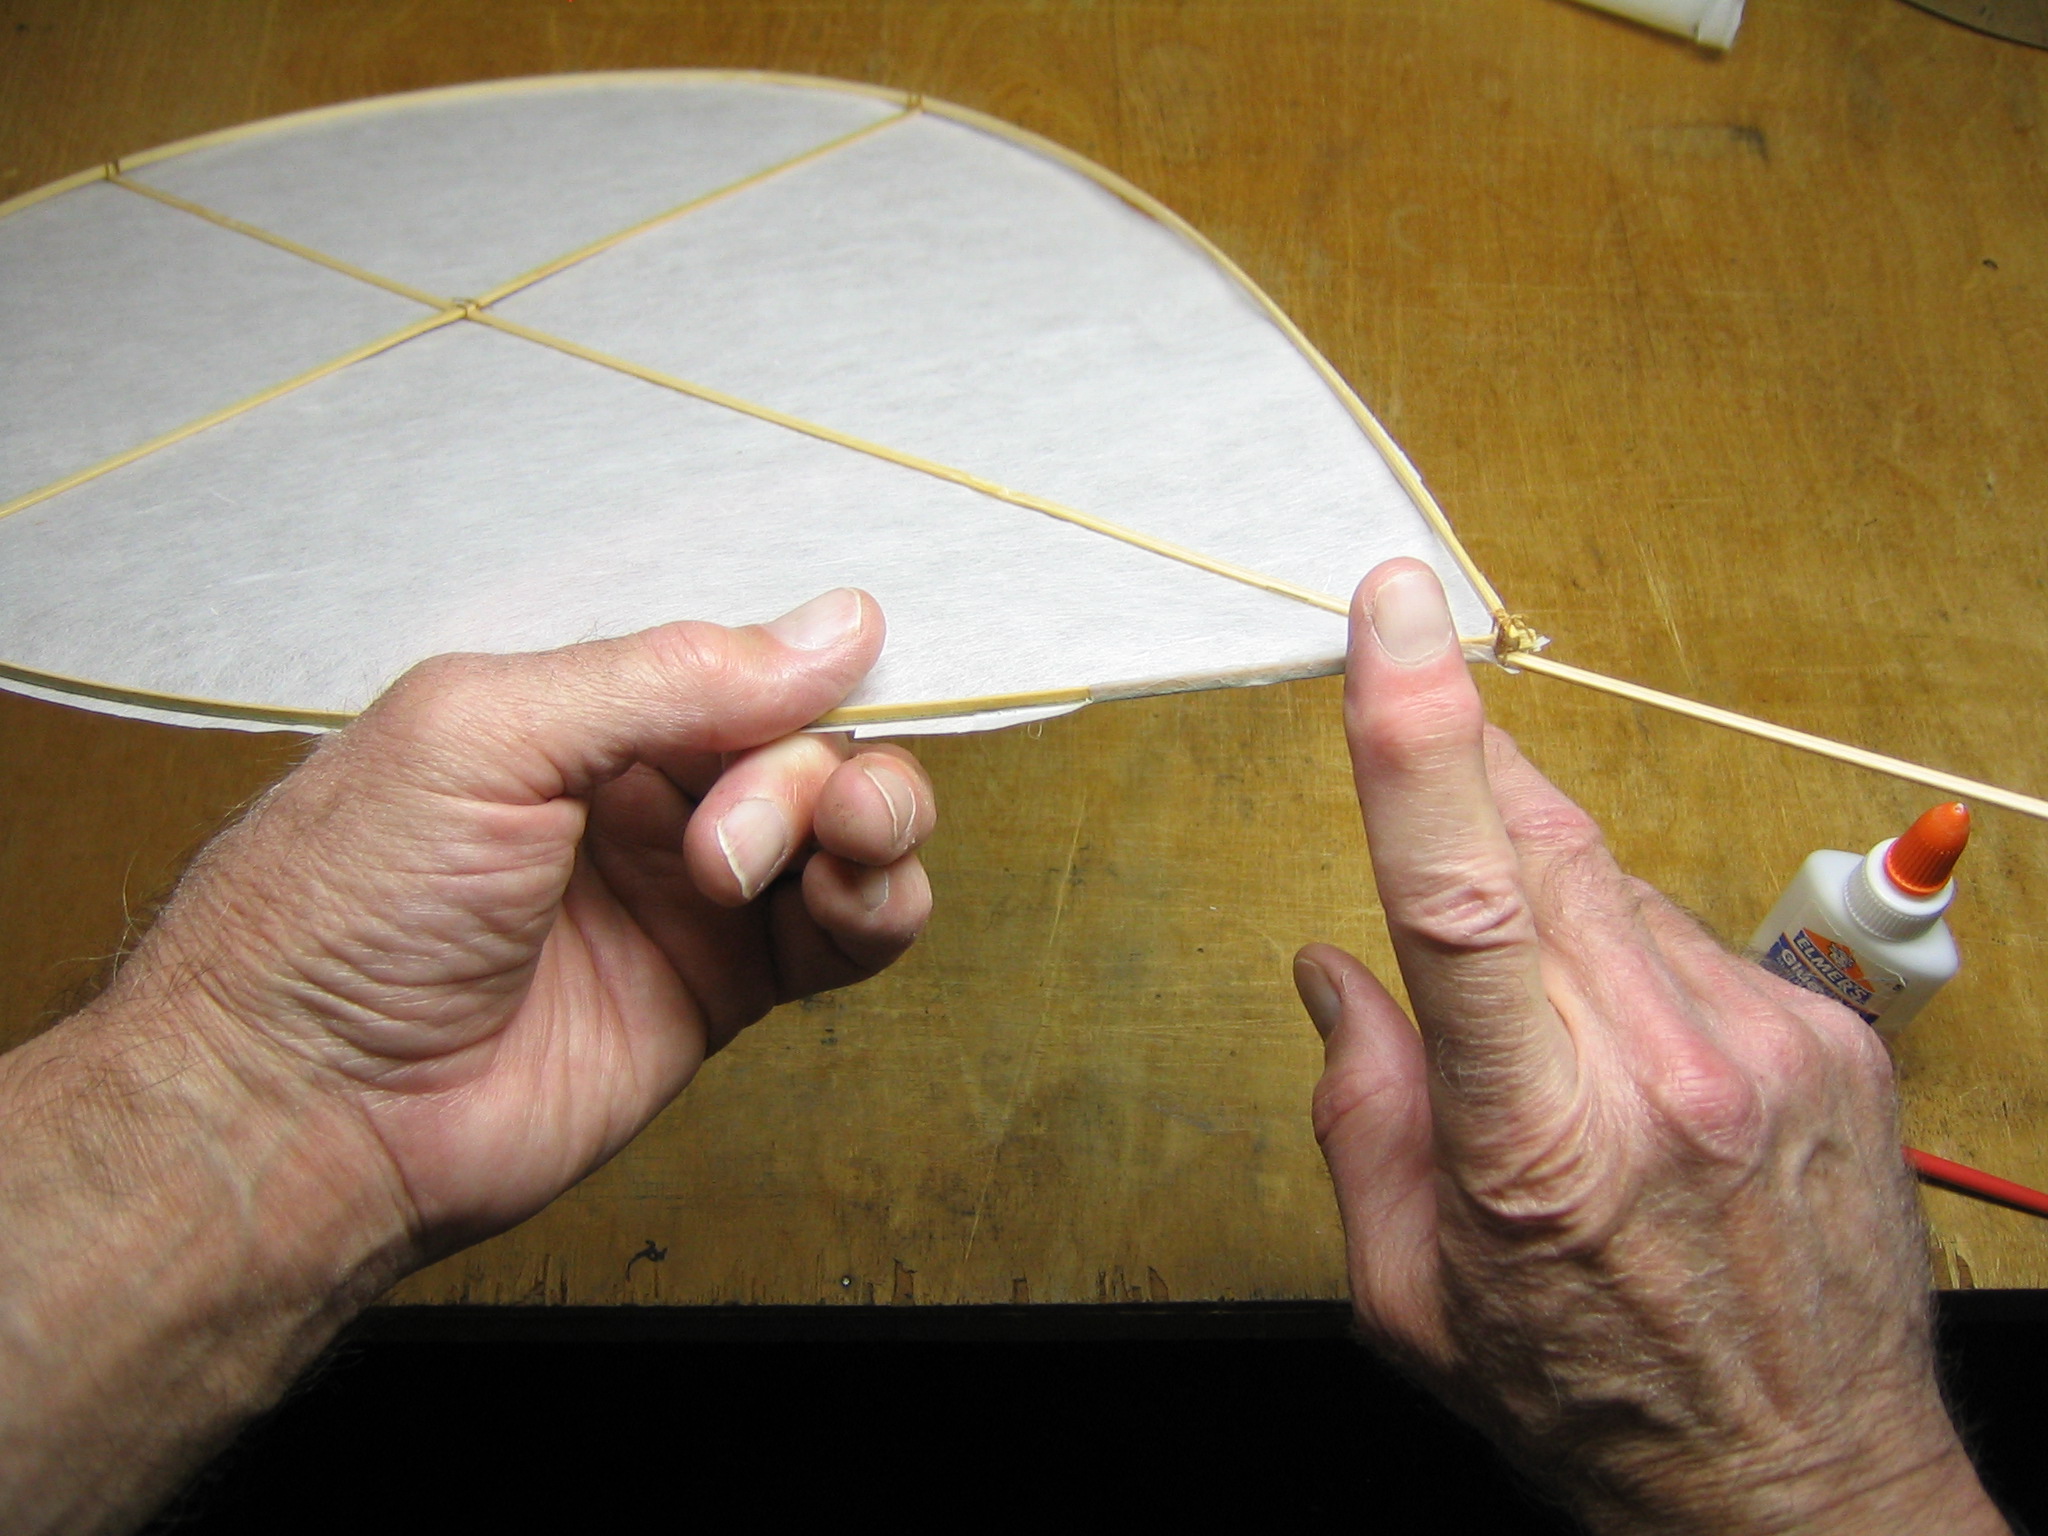
then roll the paper up onto the stick and press it smoothly into place.

Let the glue dry. That finishes the papering of the kite.
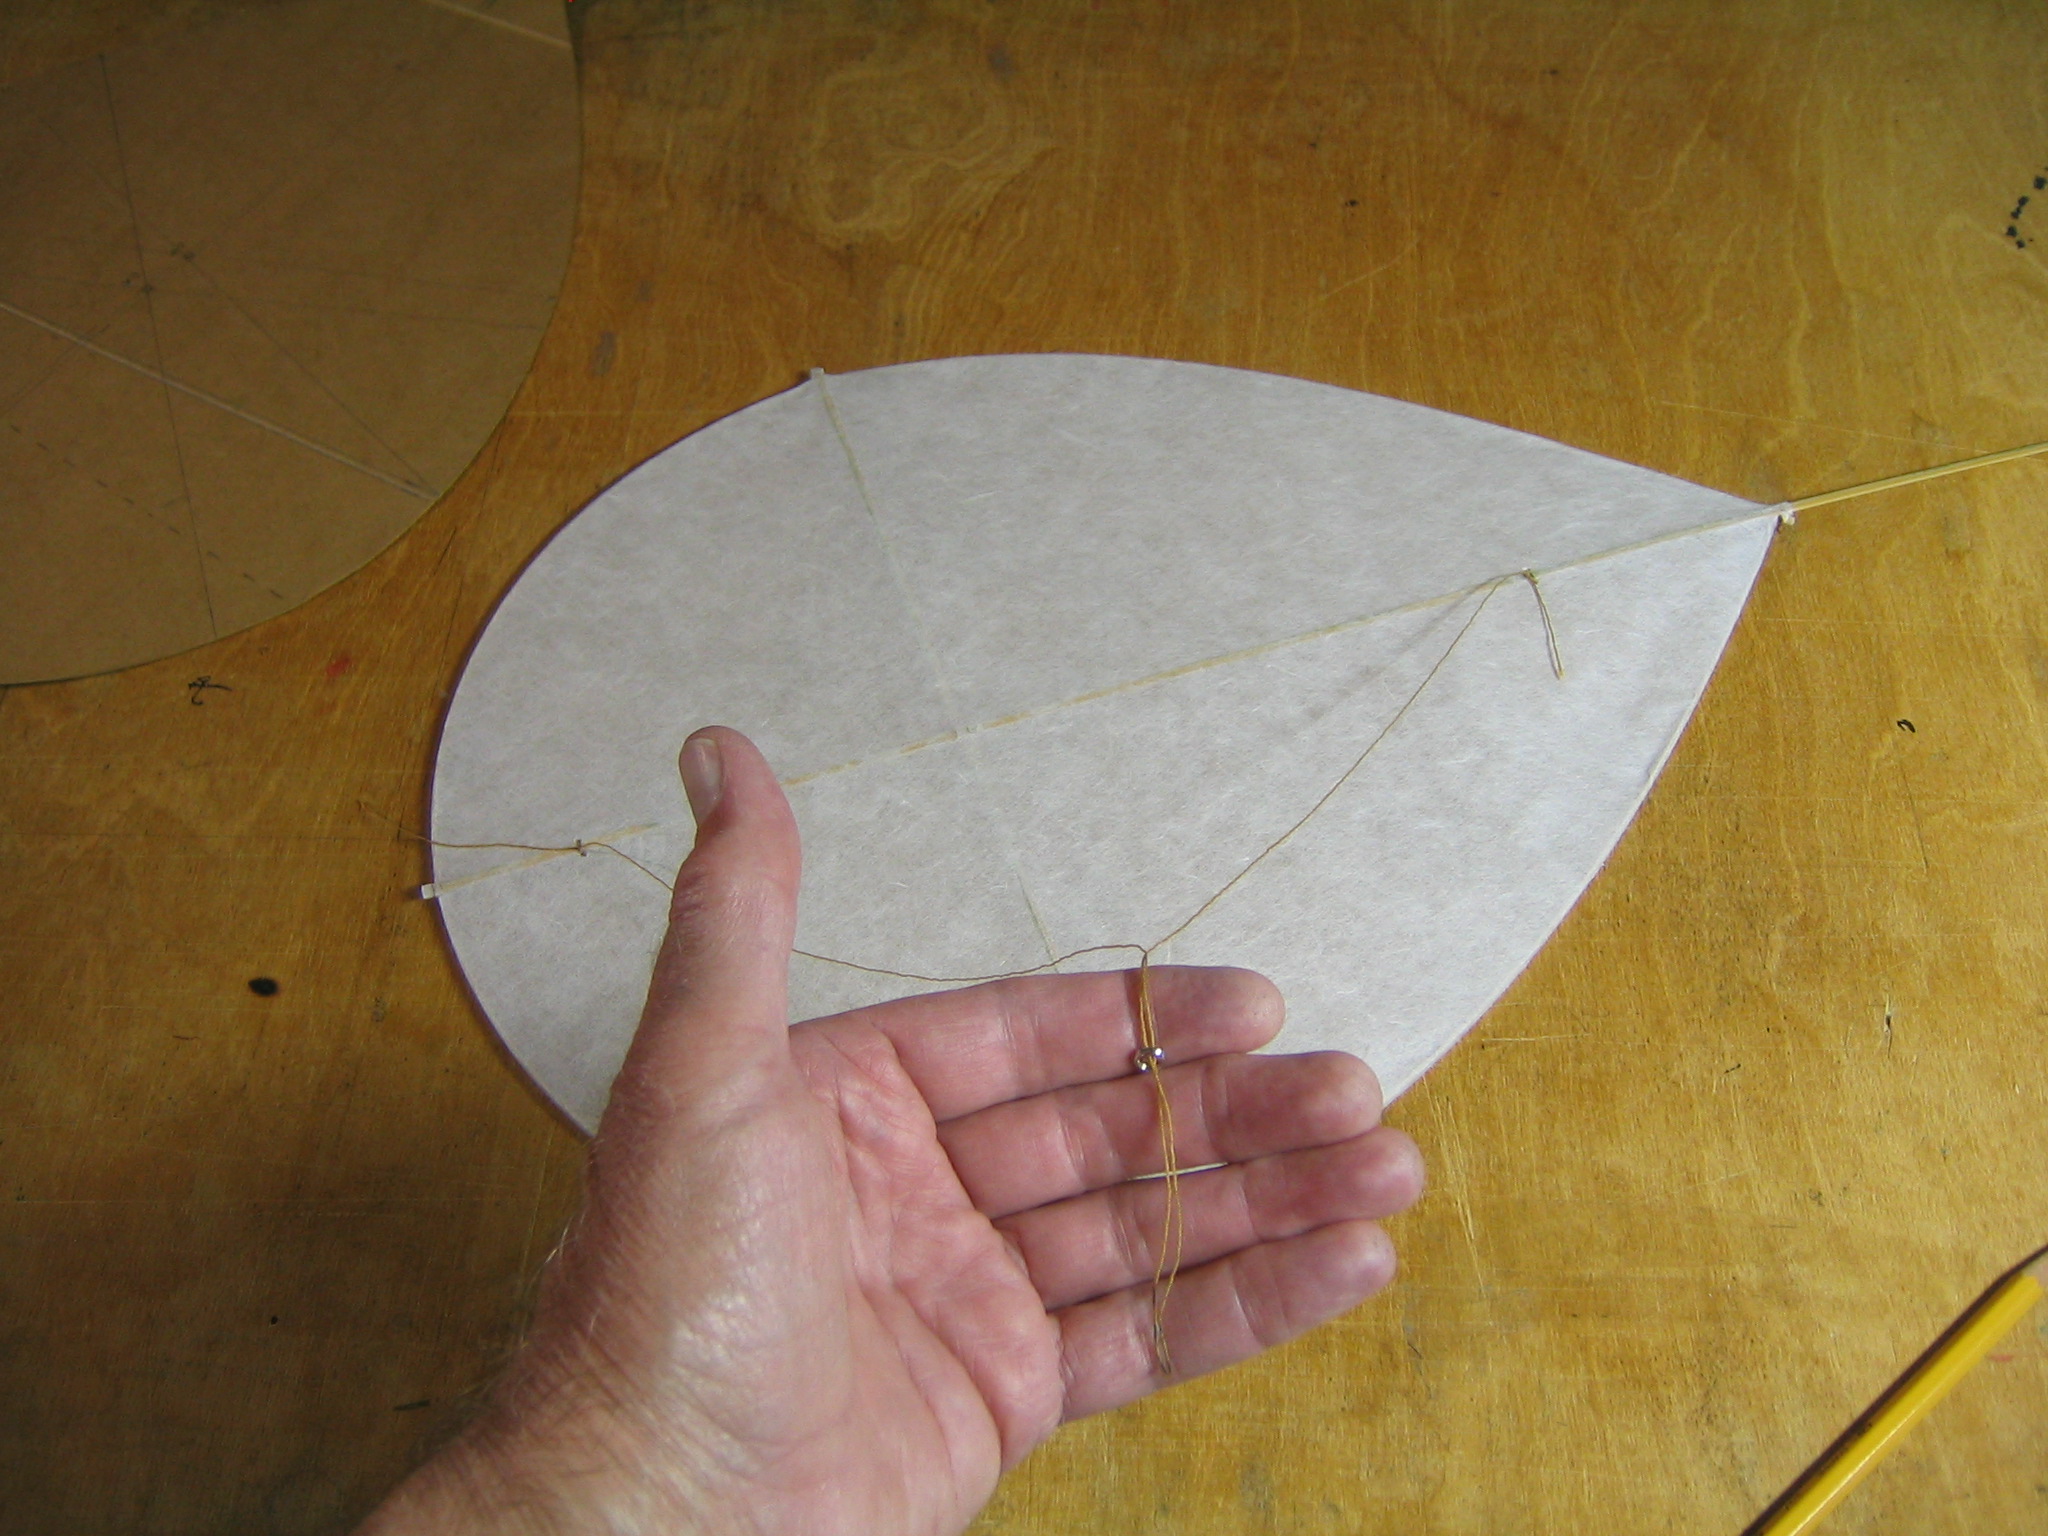
Center of Gravity
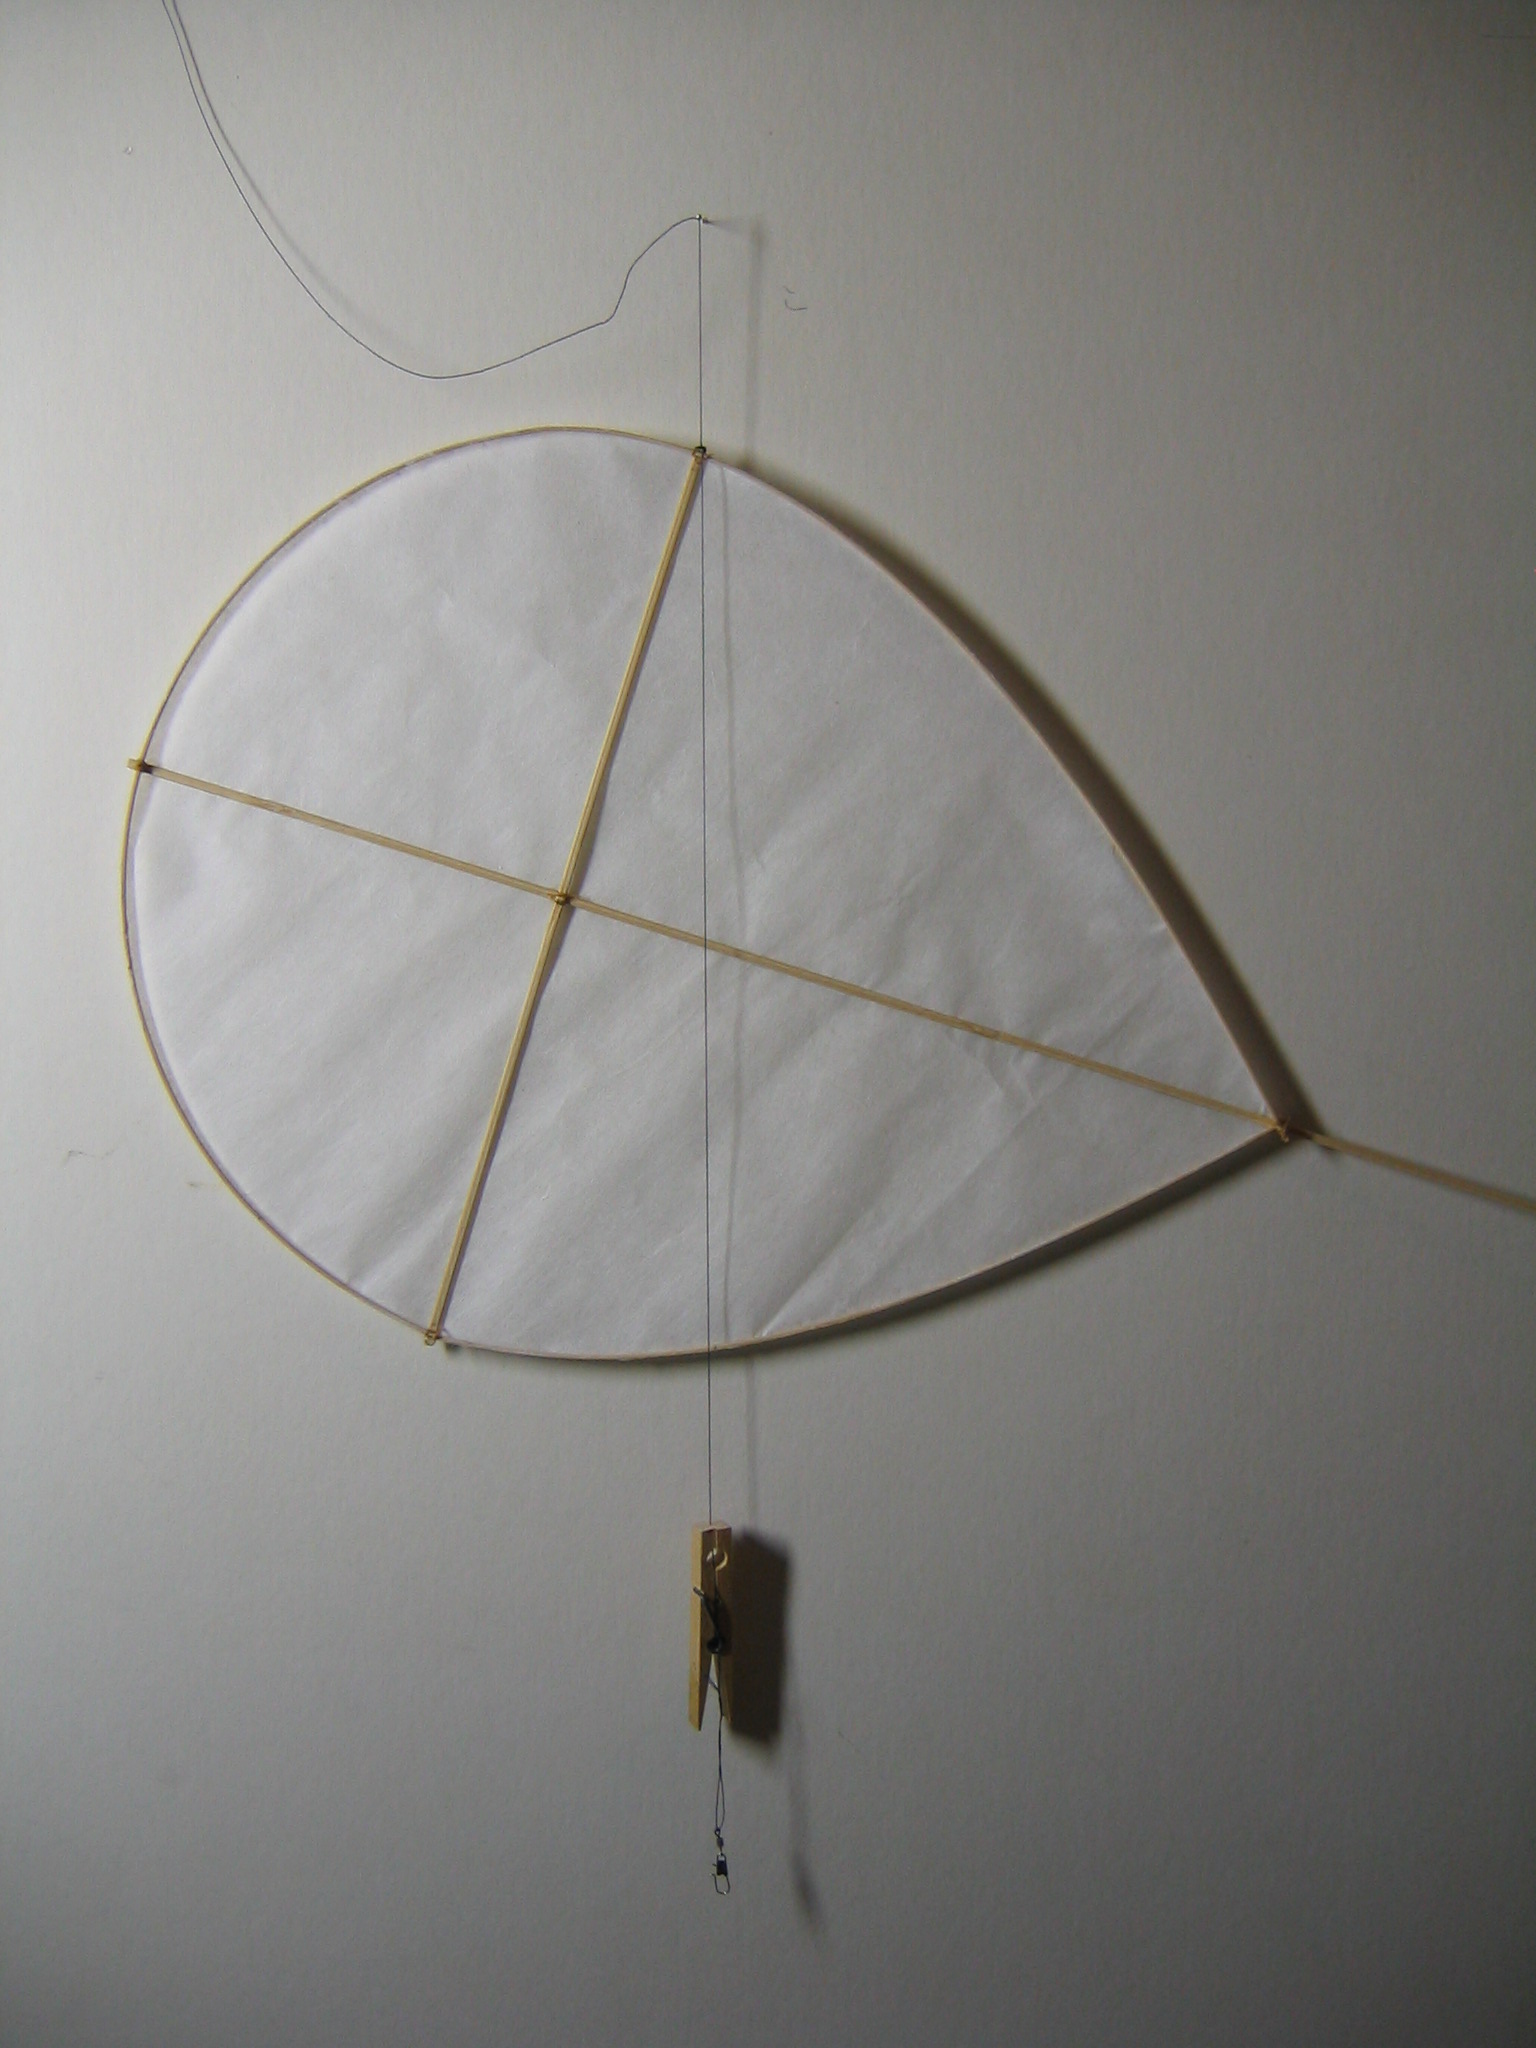
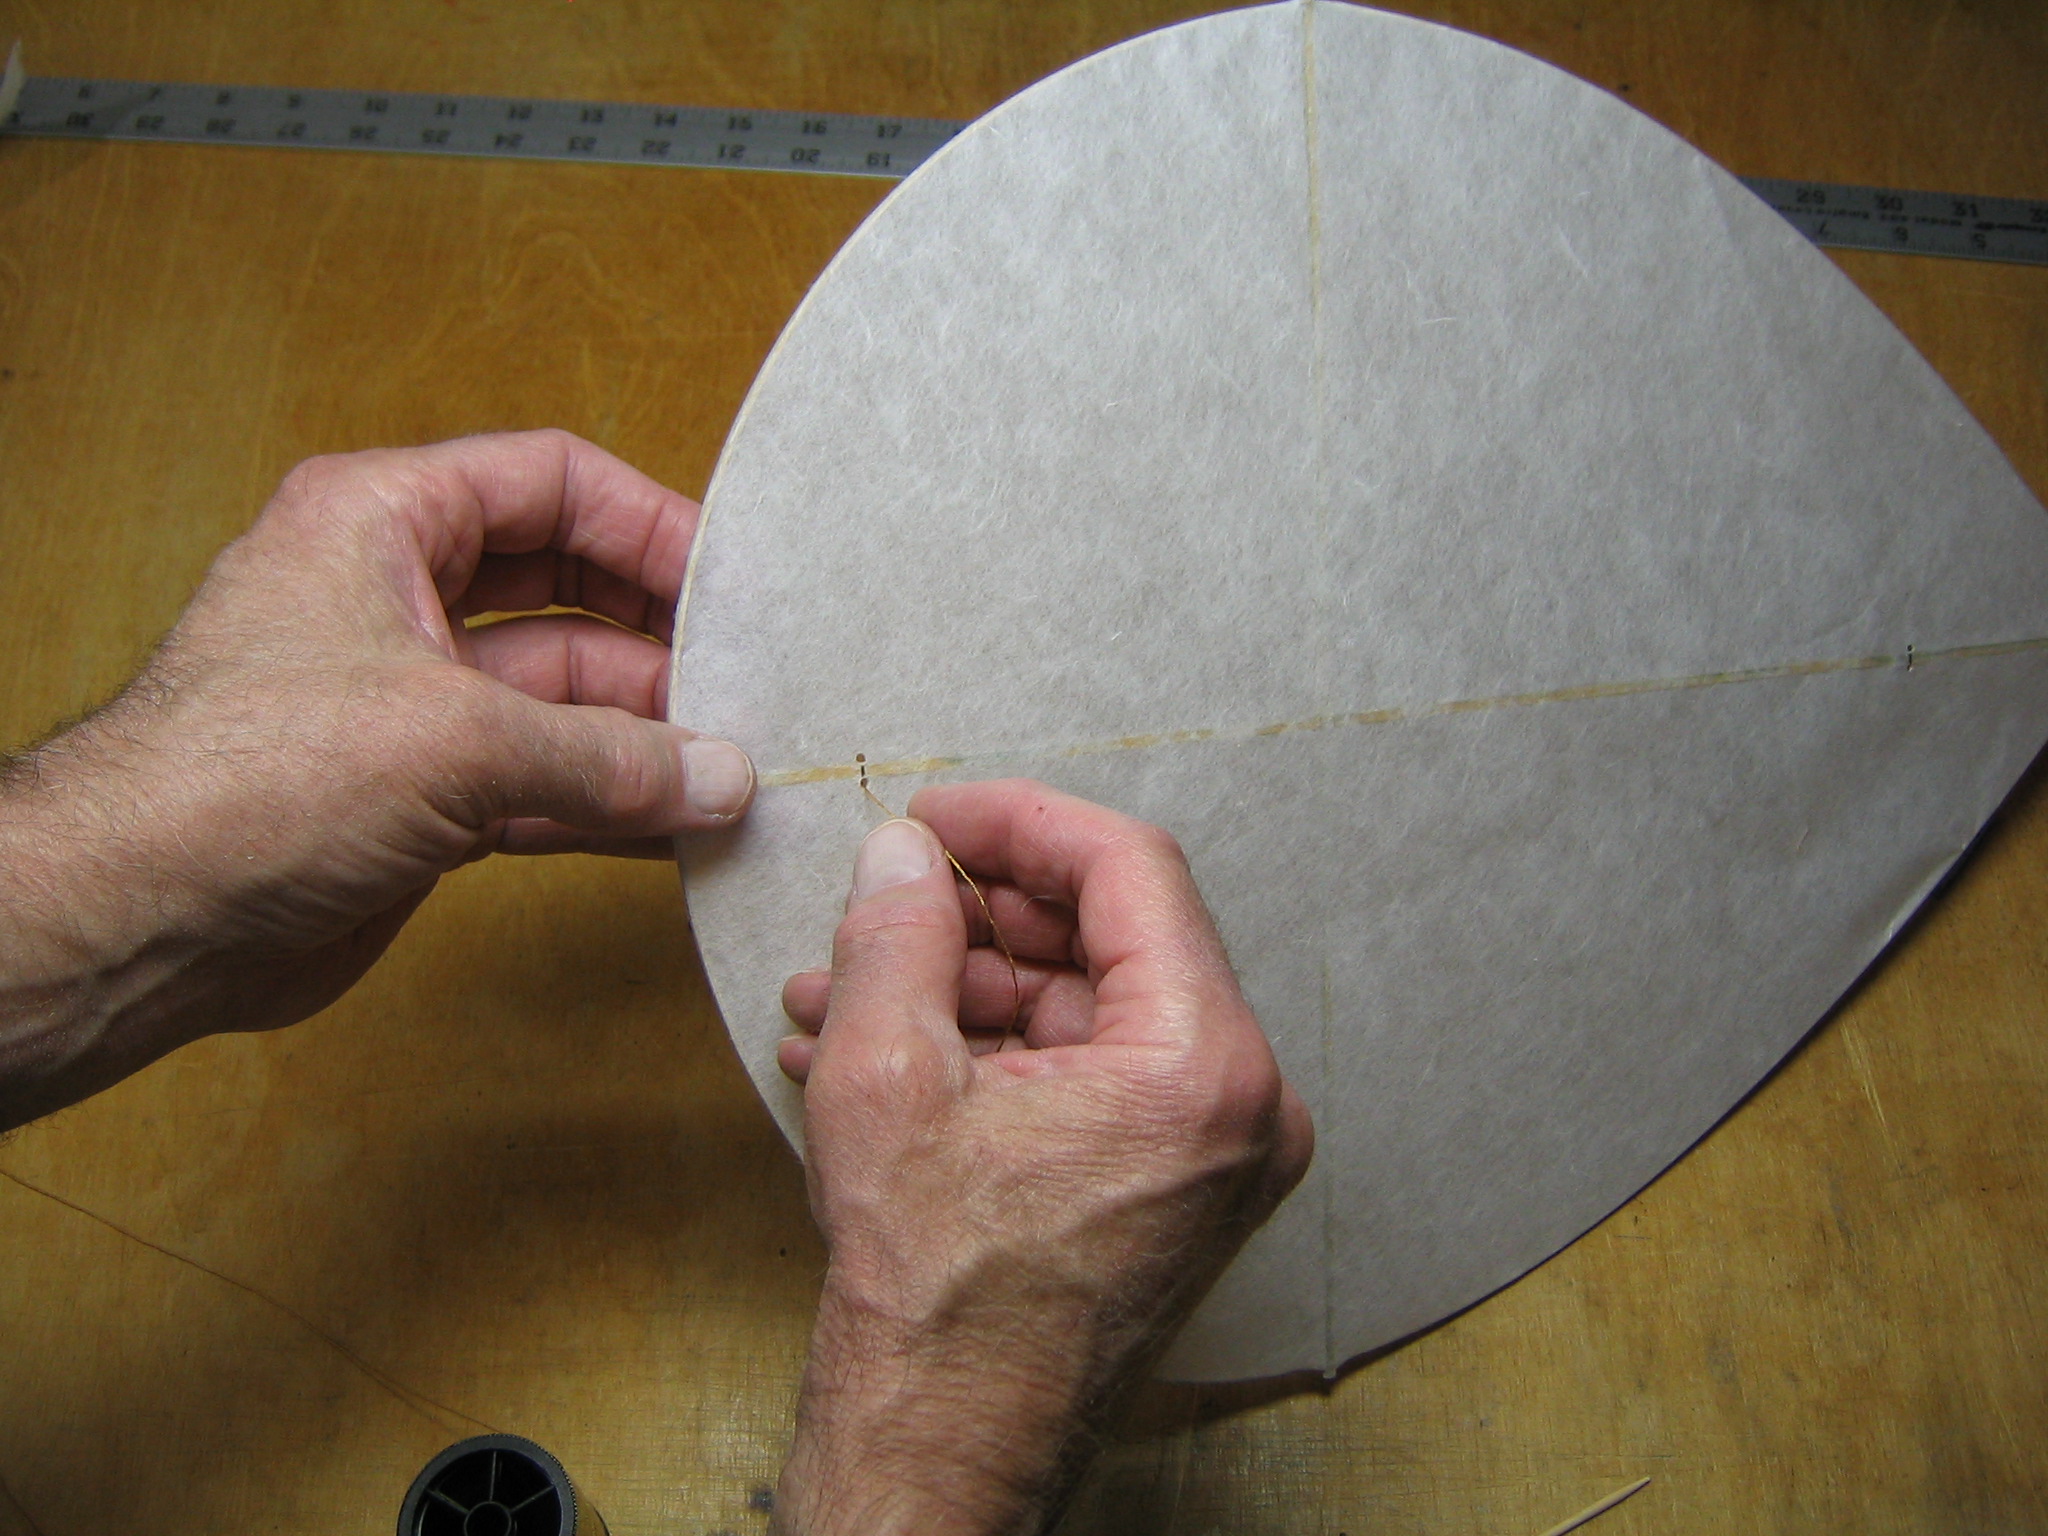
Part of this evaluation program is locating the center of gravity of the kite. The kite is suspended from a thread that is tied around the end of the cross stick. The thread continues across the kite as a plumb line. Again the point of crossing the perimeter is marked.
The kite is placed over the pattern
and the point of crossing is marked on the pattern. The process is repeated from the other side.
The plumb lines are drawn on the pattern. The point where they cross corresponds to the kites center of gravity.
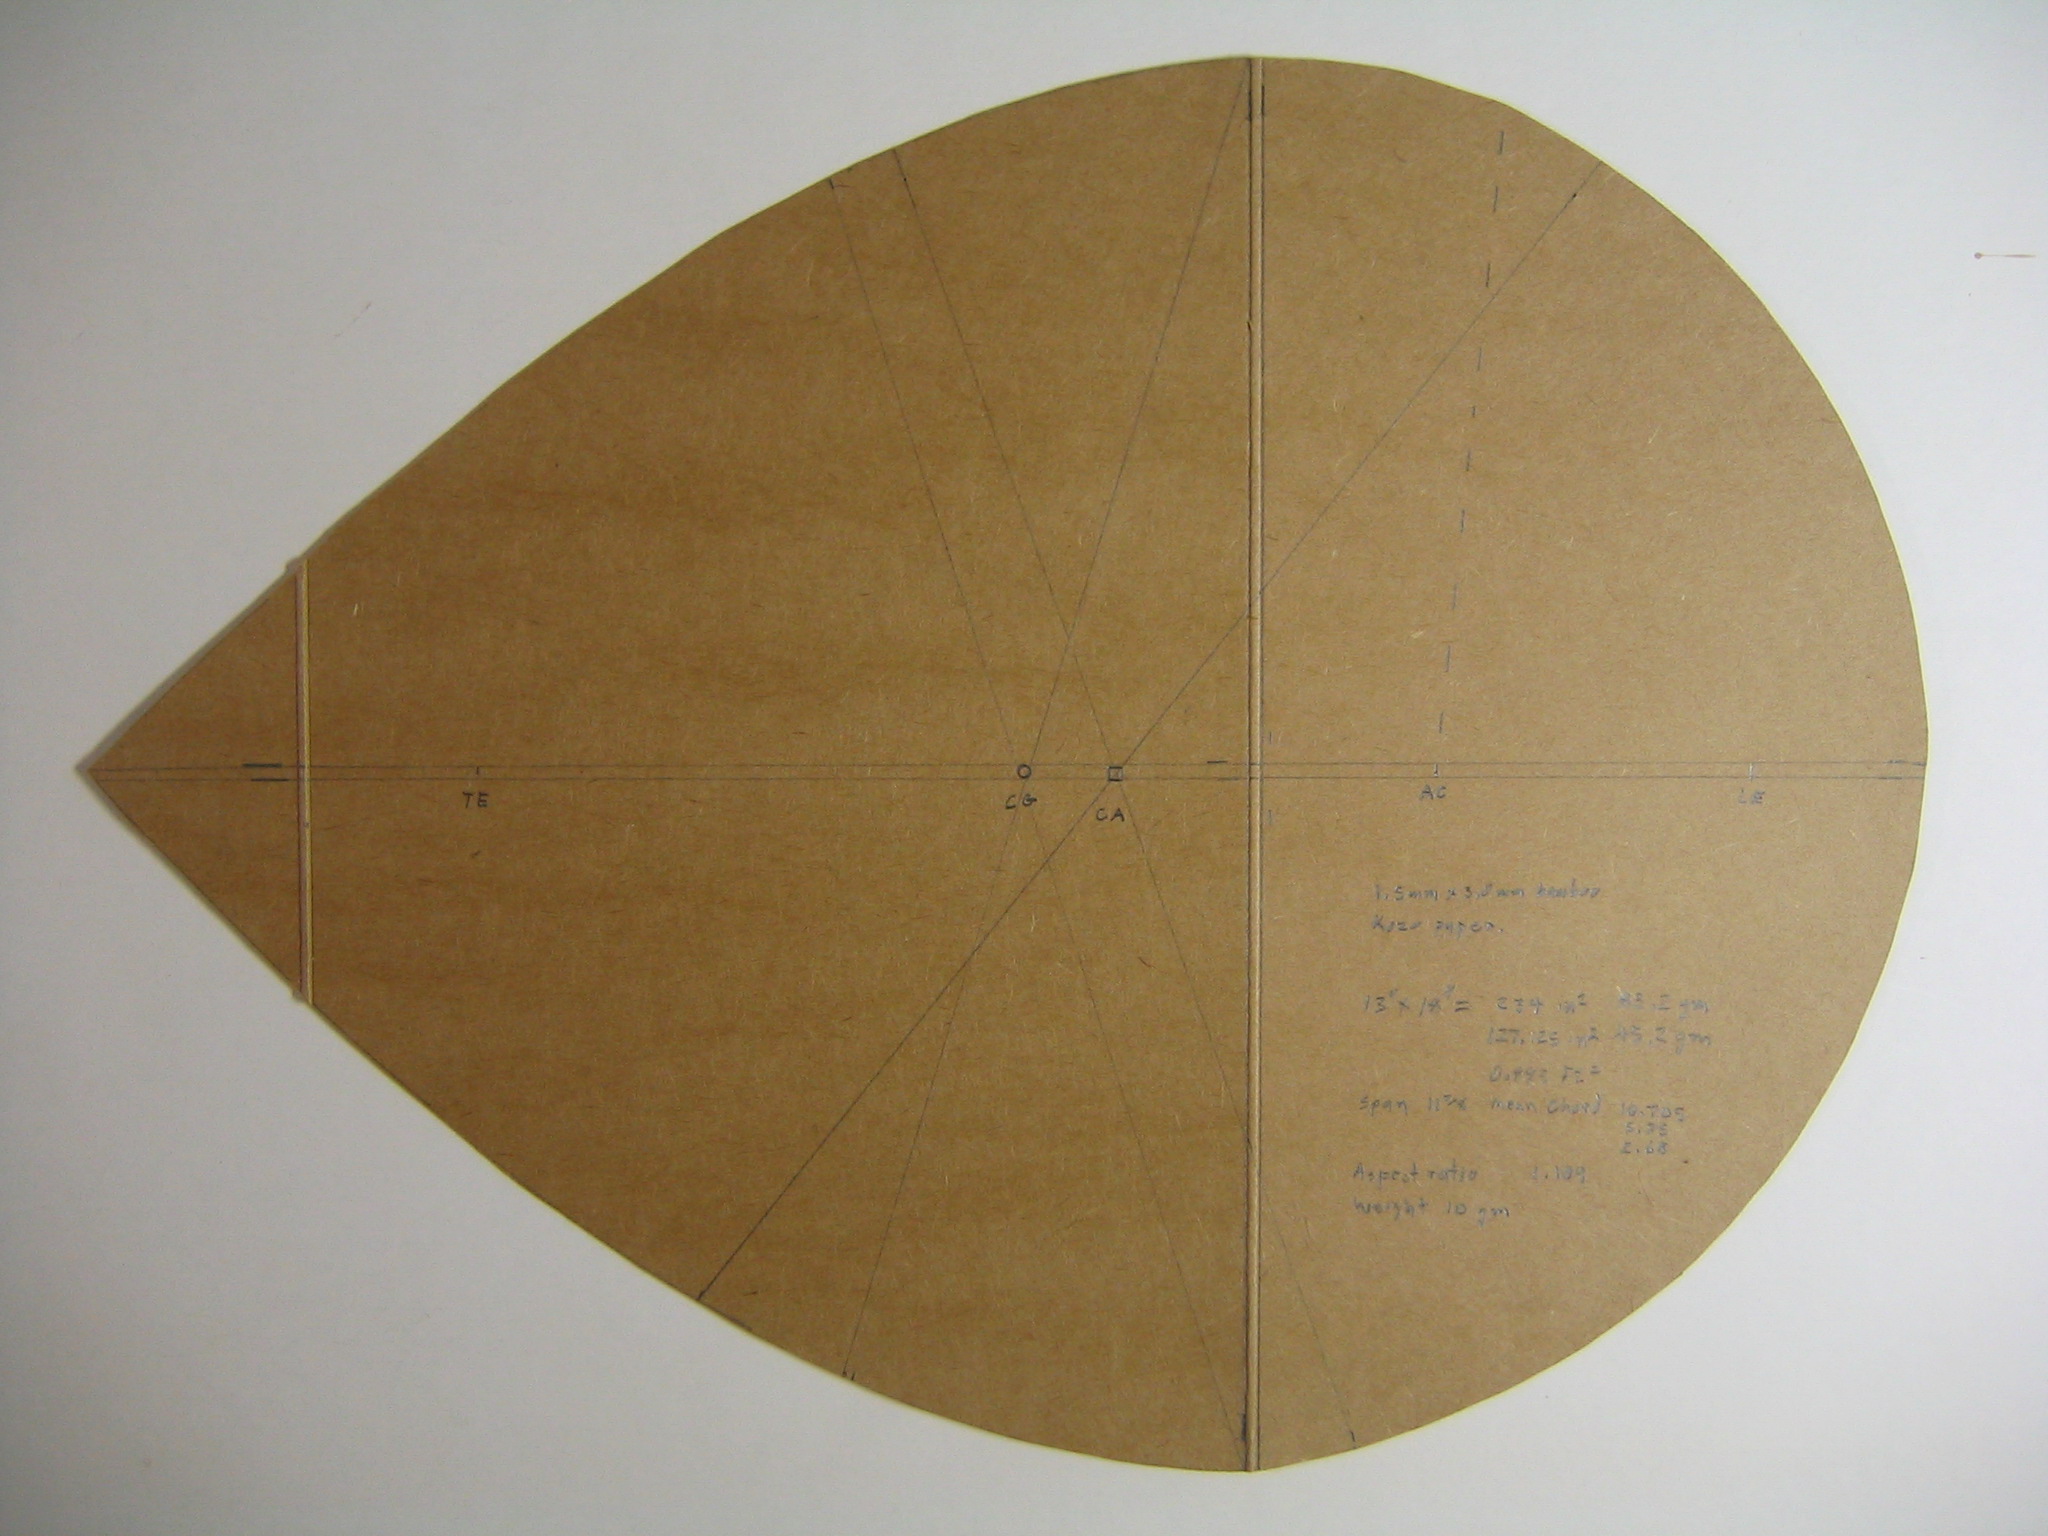
The center of gravity is indicated with a 1/8″ circle labeled CG. The center of gravity will be behind the center of area. This may be a bad omen. A long distance from the bridle point to the CG can spell stability problems. This wing might fly better in the opposite direction, something for future experimentation.
Bridle
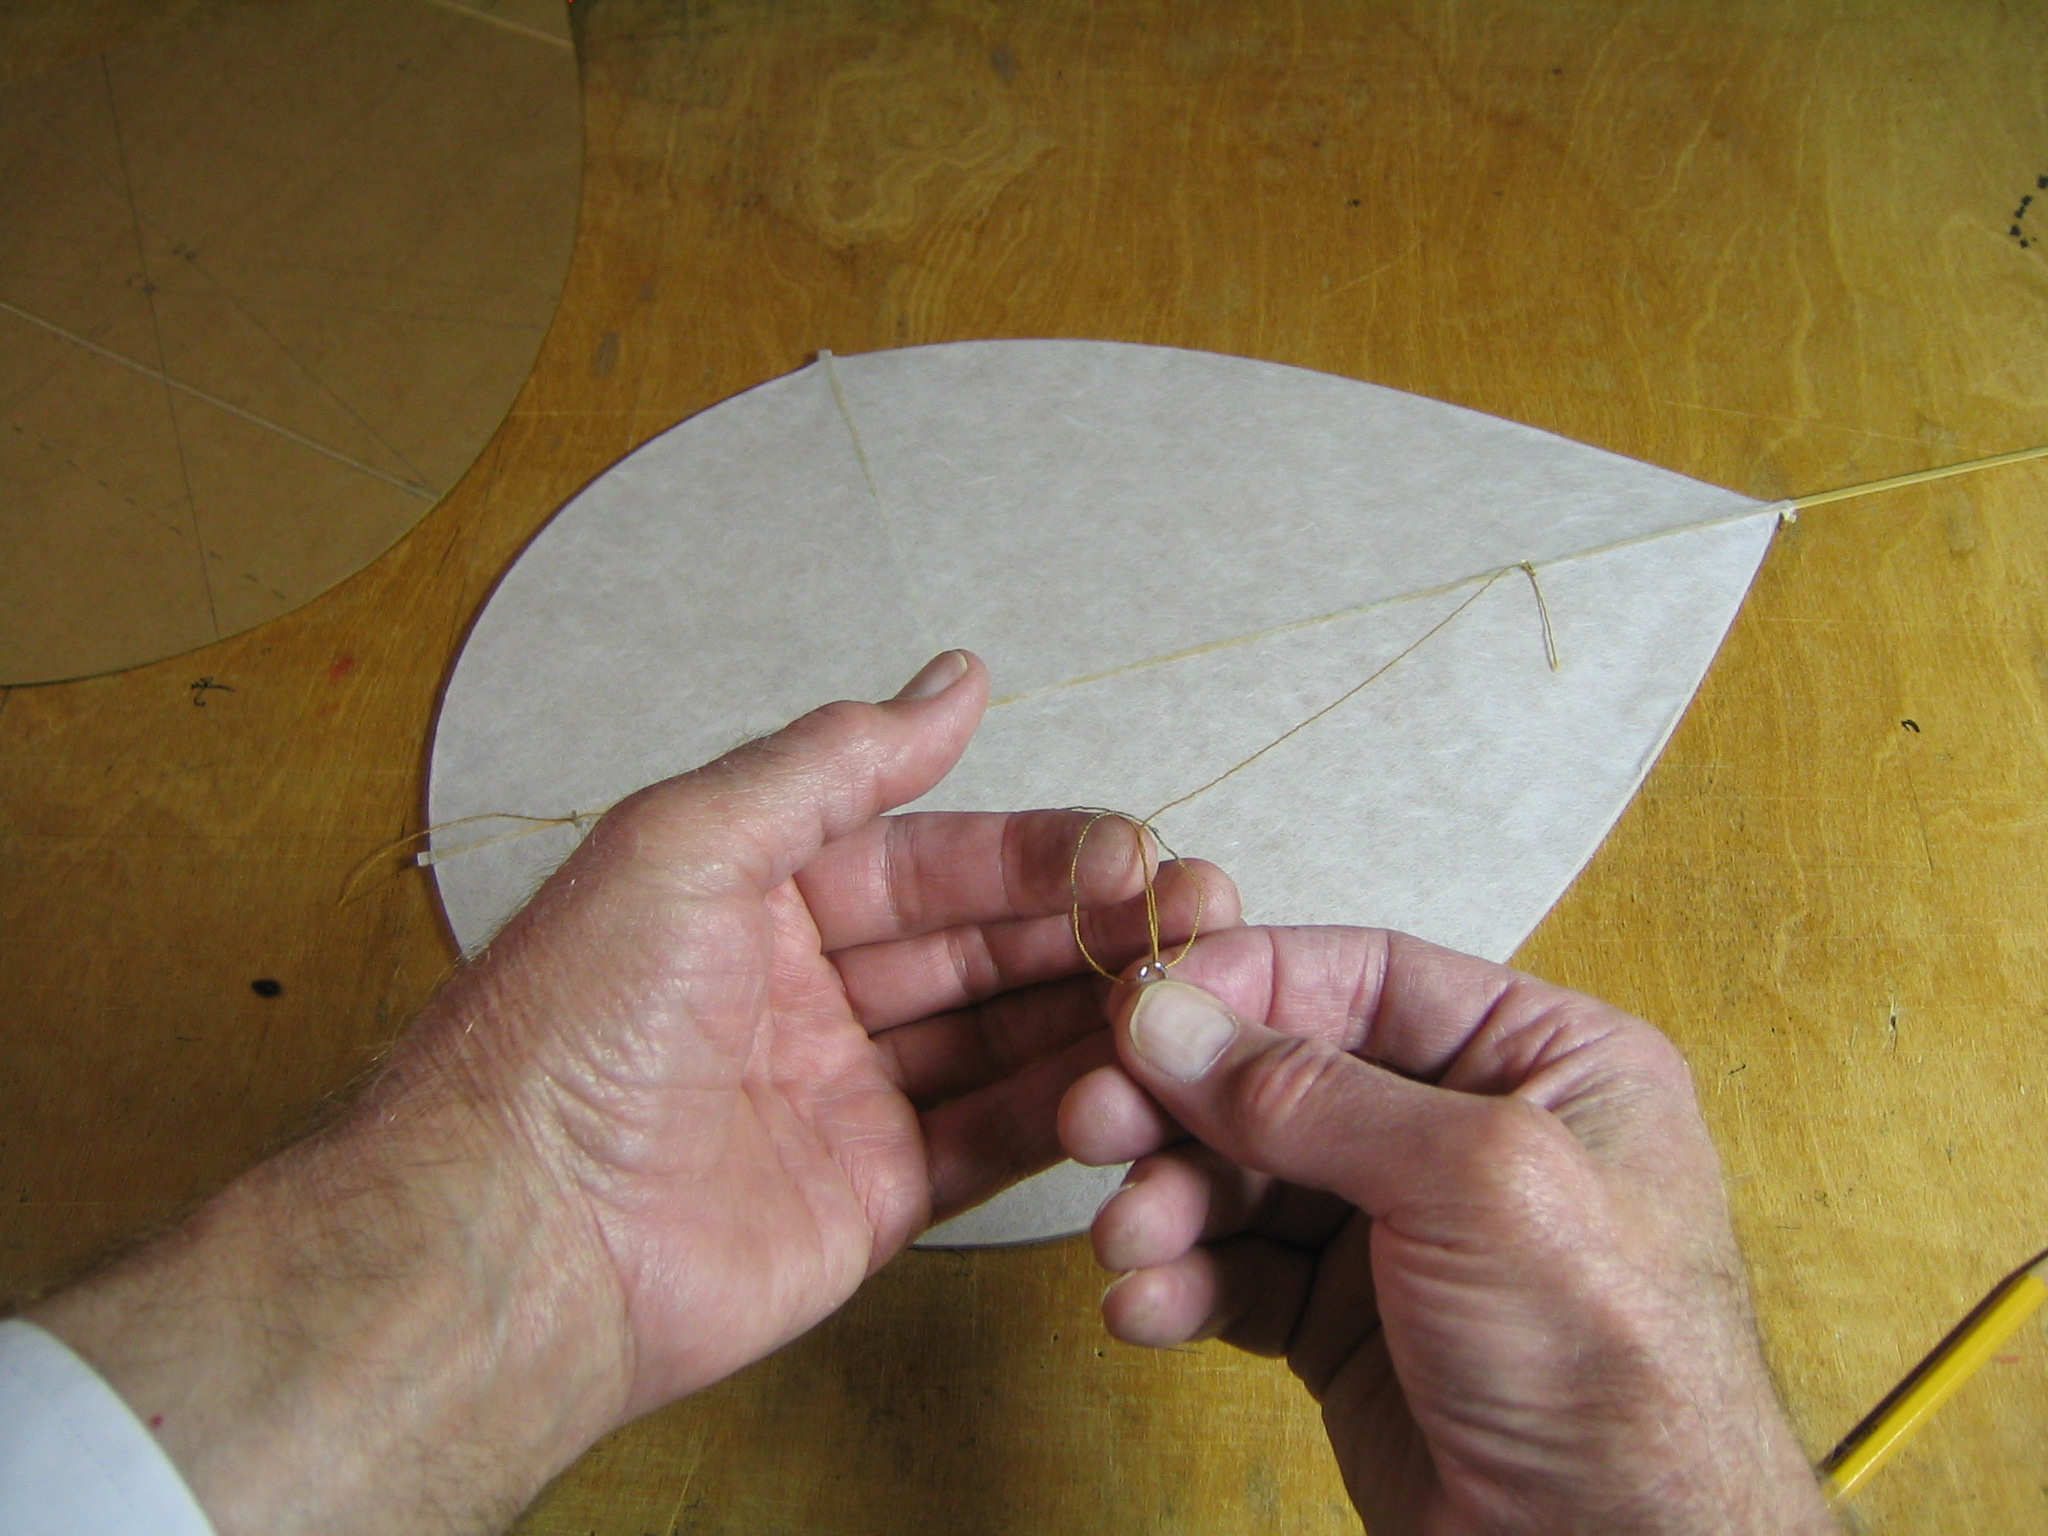
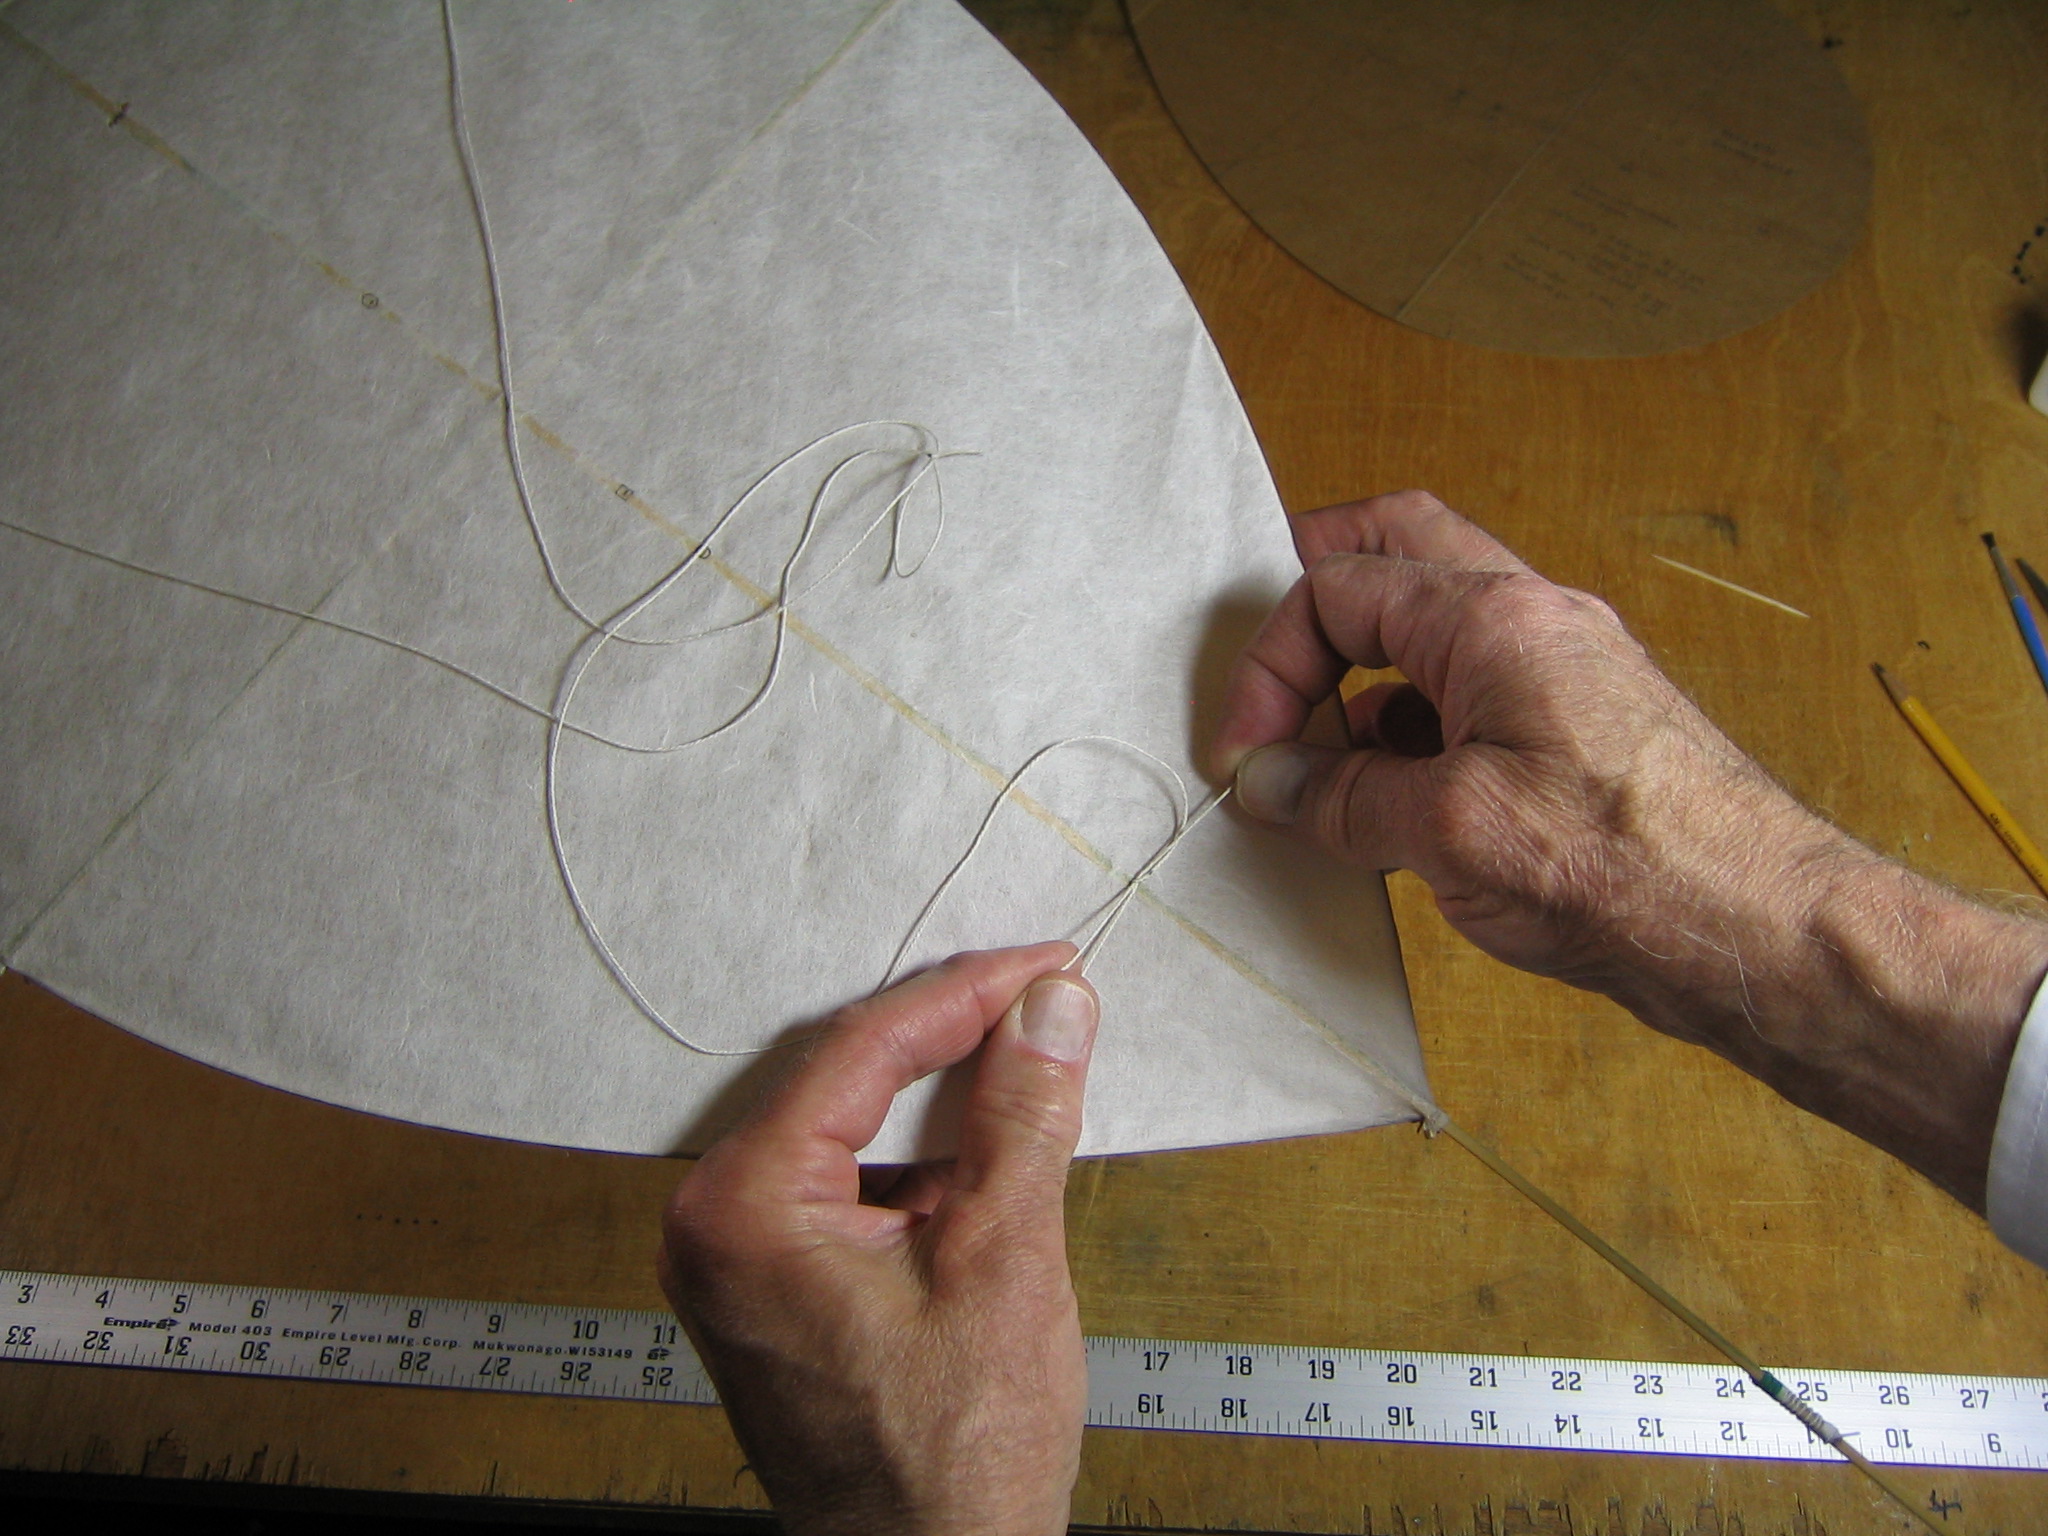
Next we will add the bridle, the loop of string on the front of the kite to which the flying line will be attached. The original kite may have had the flying line tied directly to the spine at a single point. Some contemporary photos show large Honu kites with three bridle legs all attached to the spine in a line. I will start with a bridle loop to facilitate moving the attachment point fore and aft for testing.
(After testing, I changed to a three leg bridle. You may want to build your first kite with that bridle rig. Scroll down to the Three Leg Bridle heading for those instructions.)
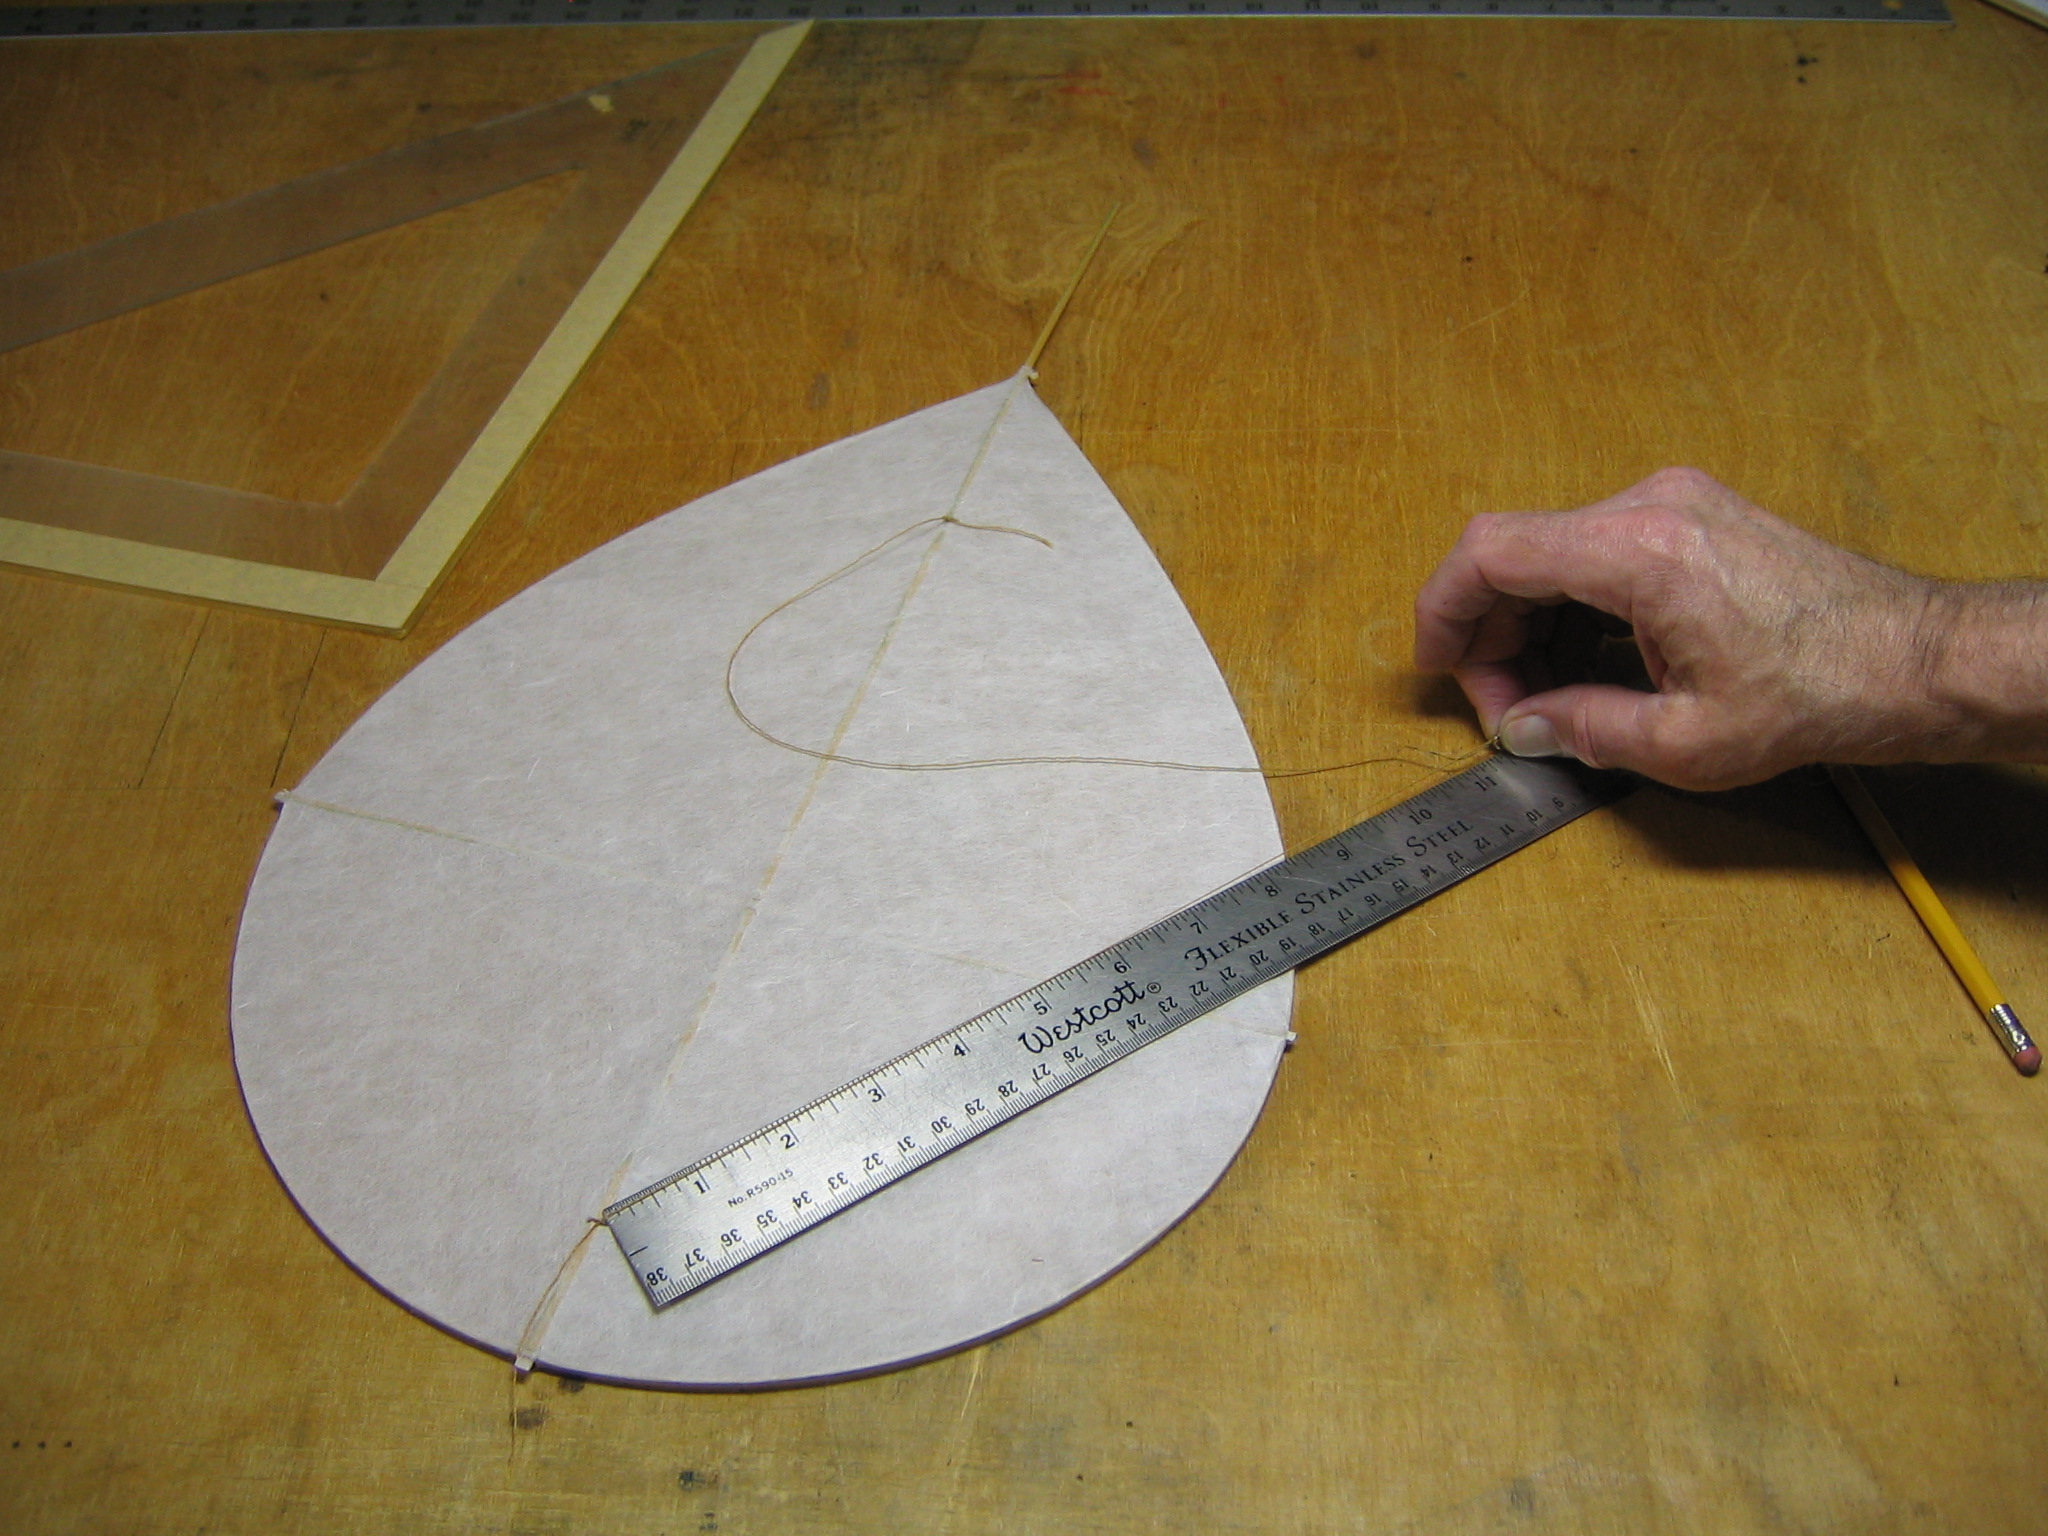
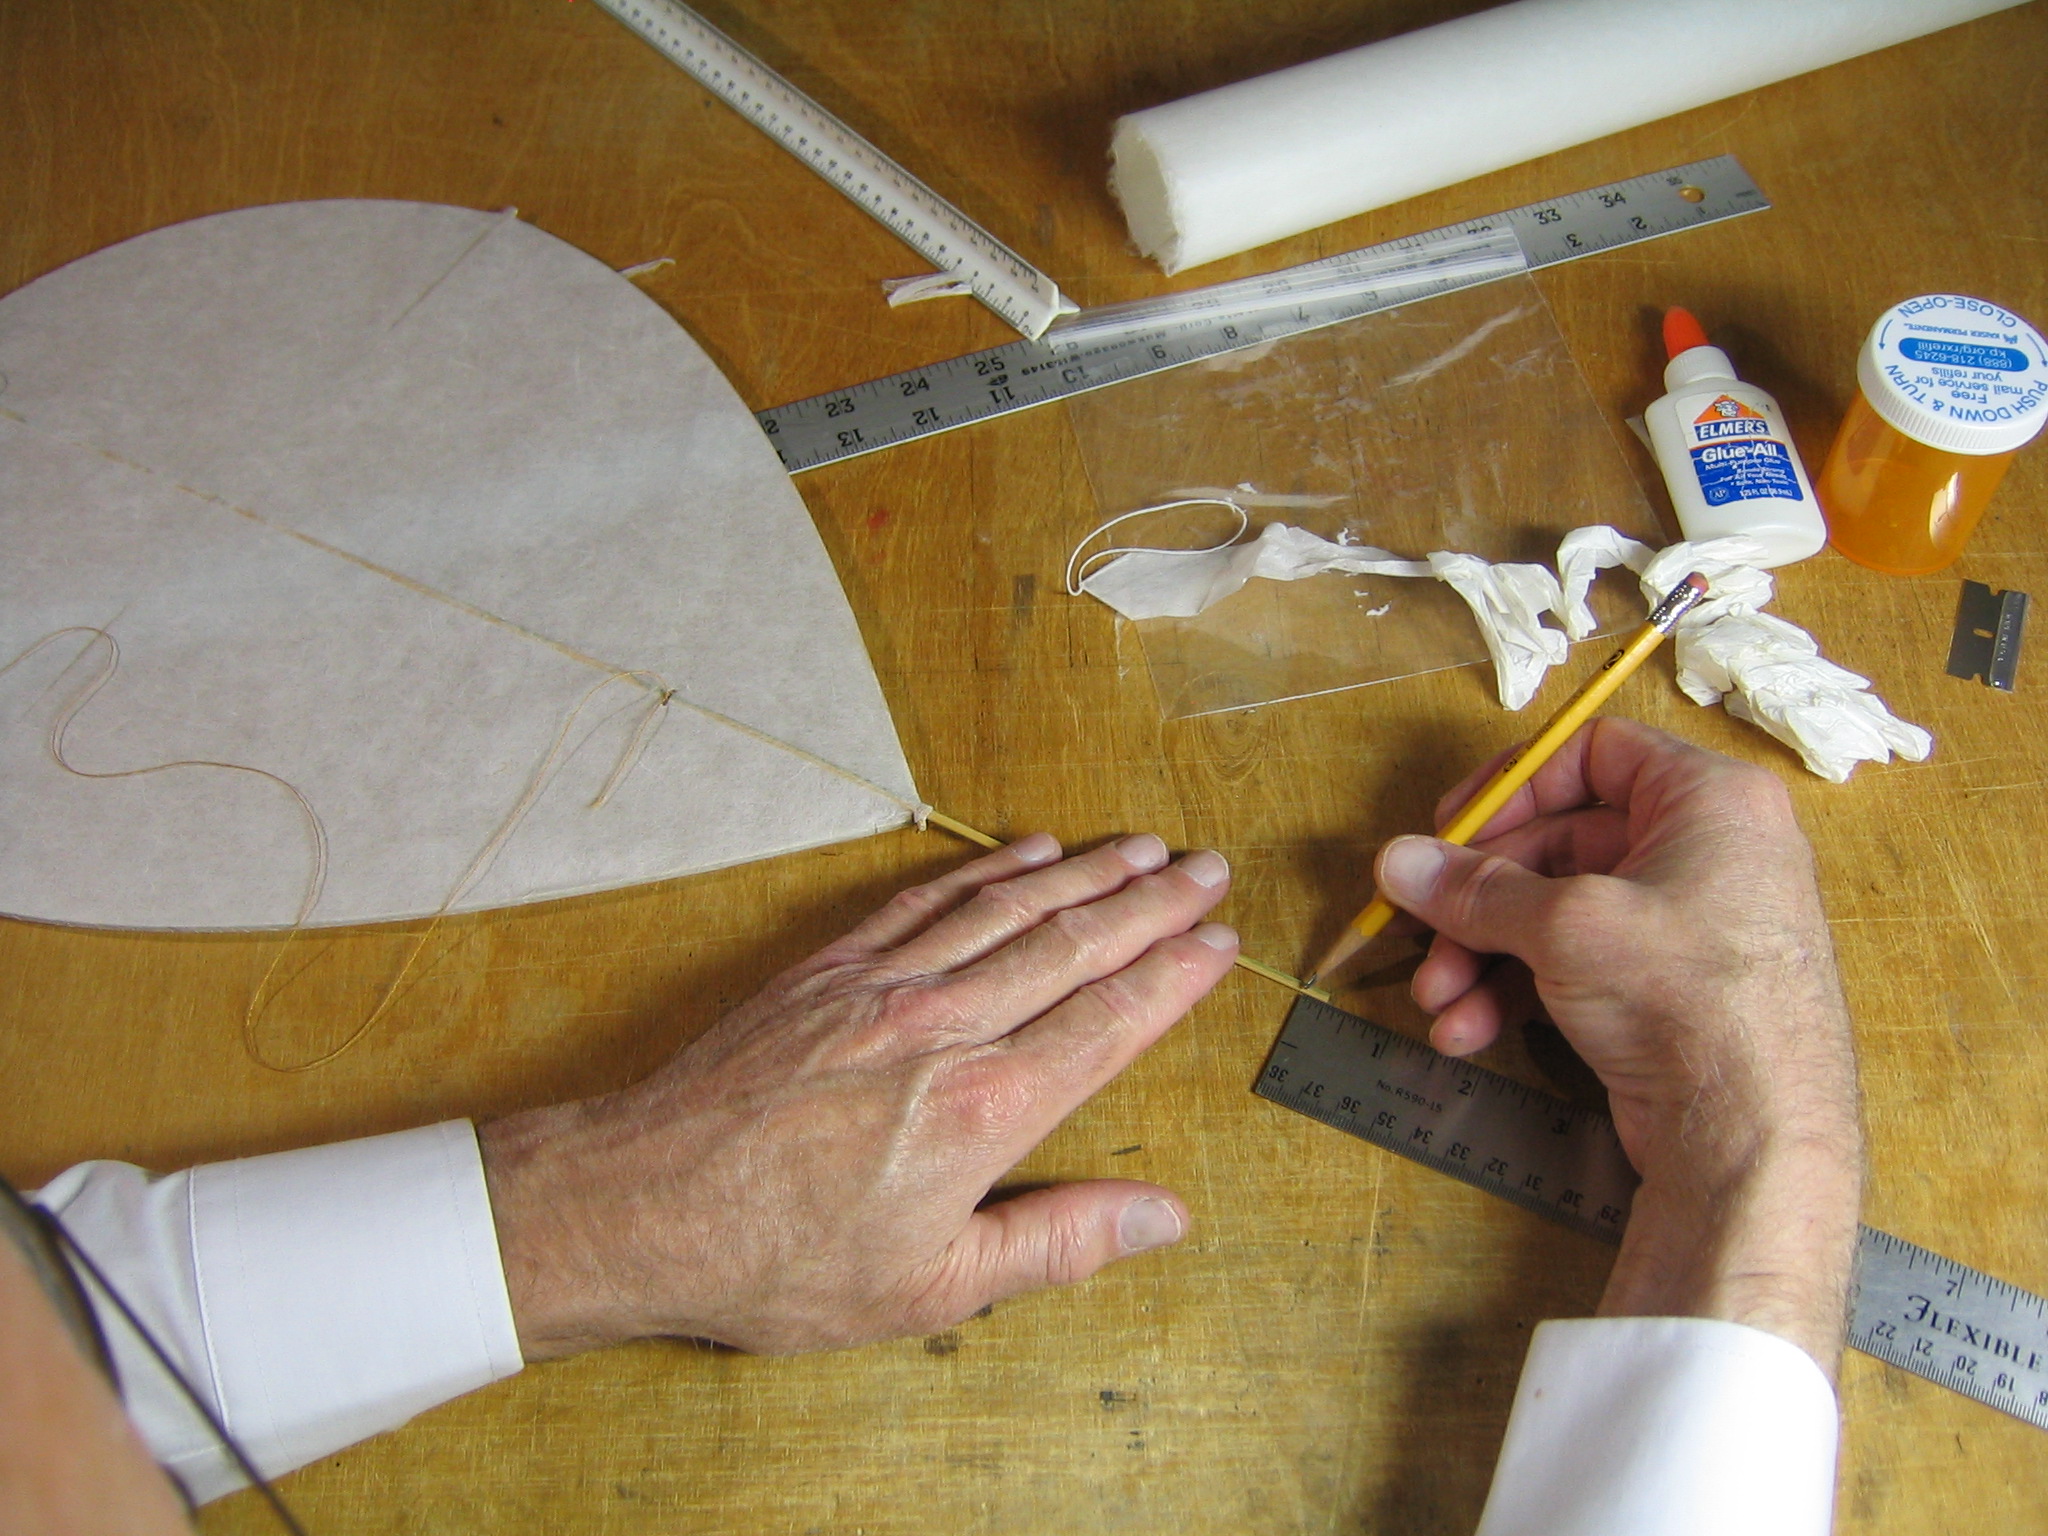
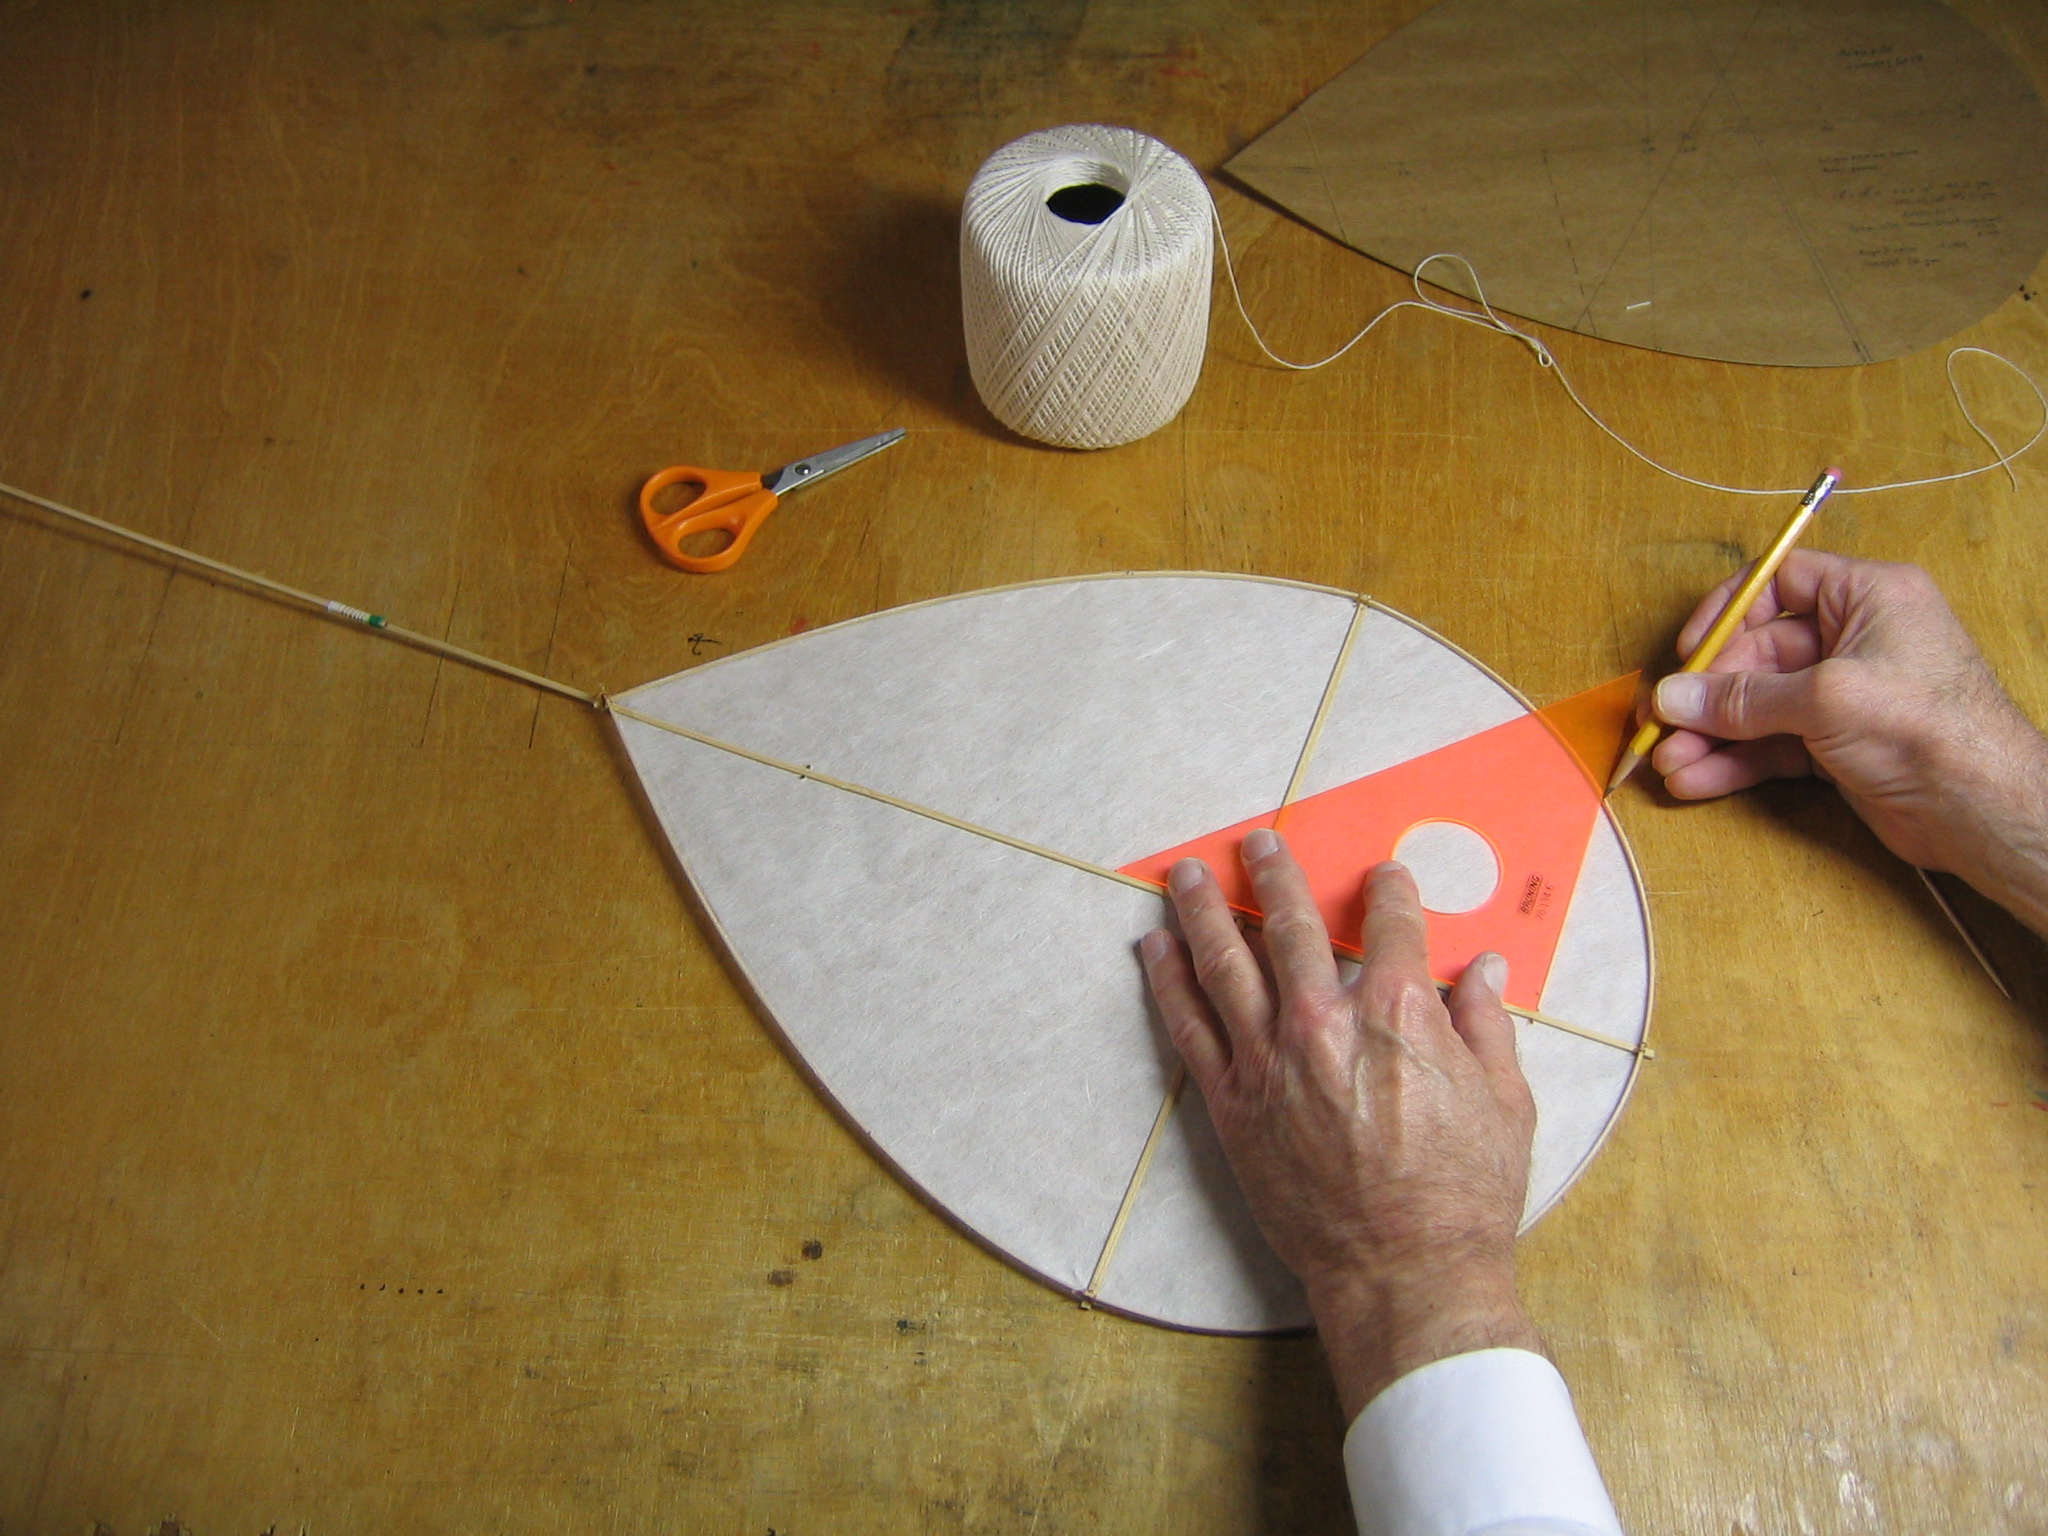
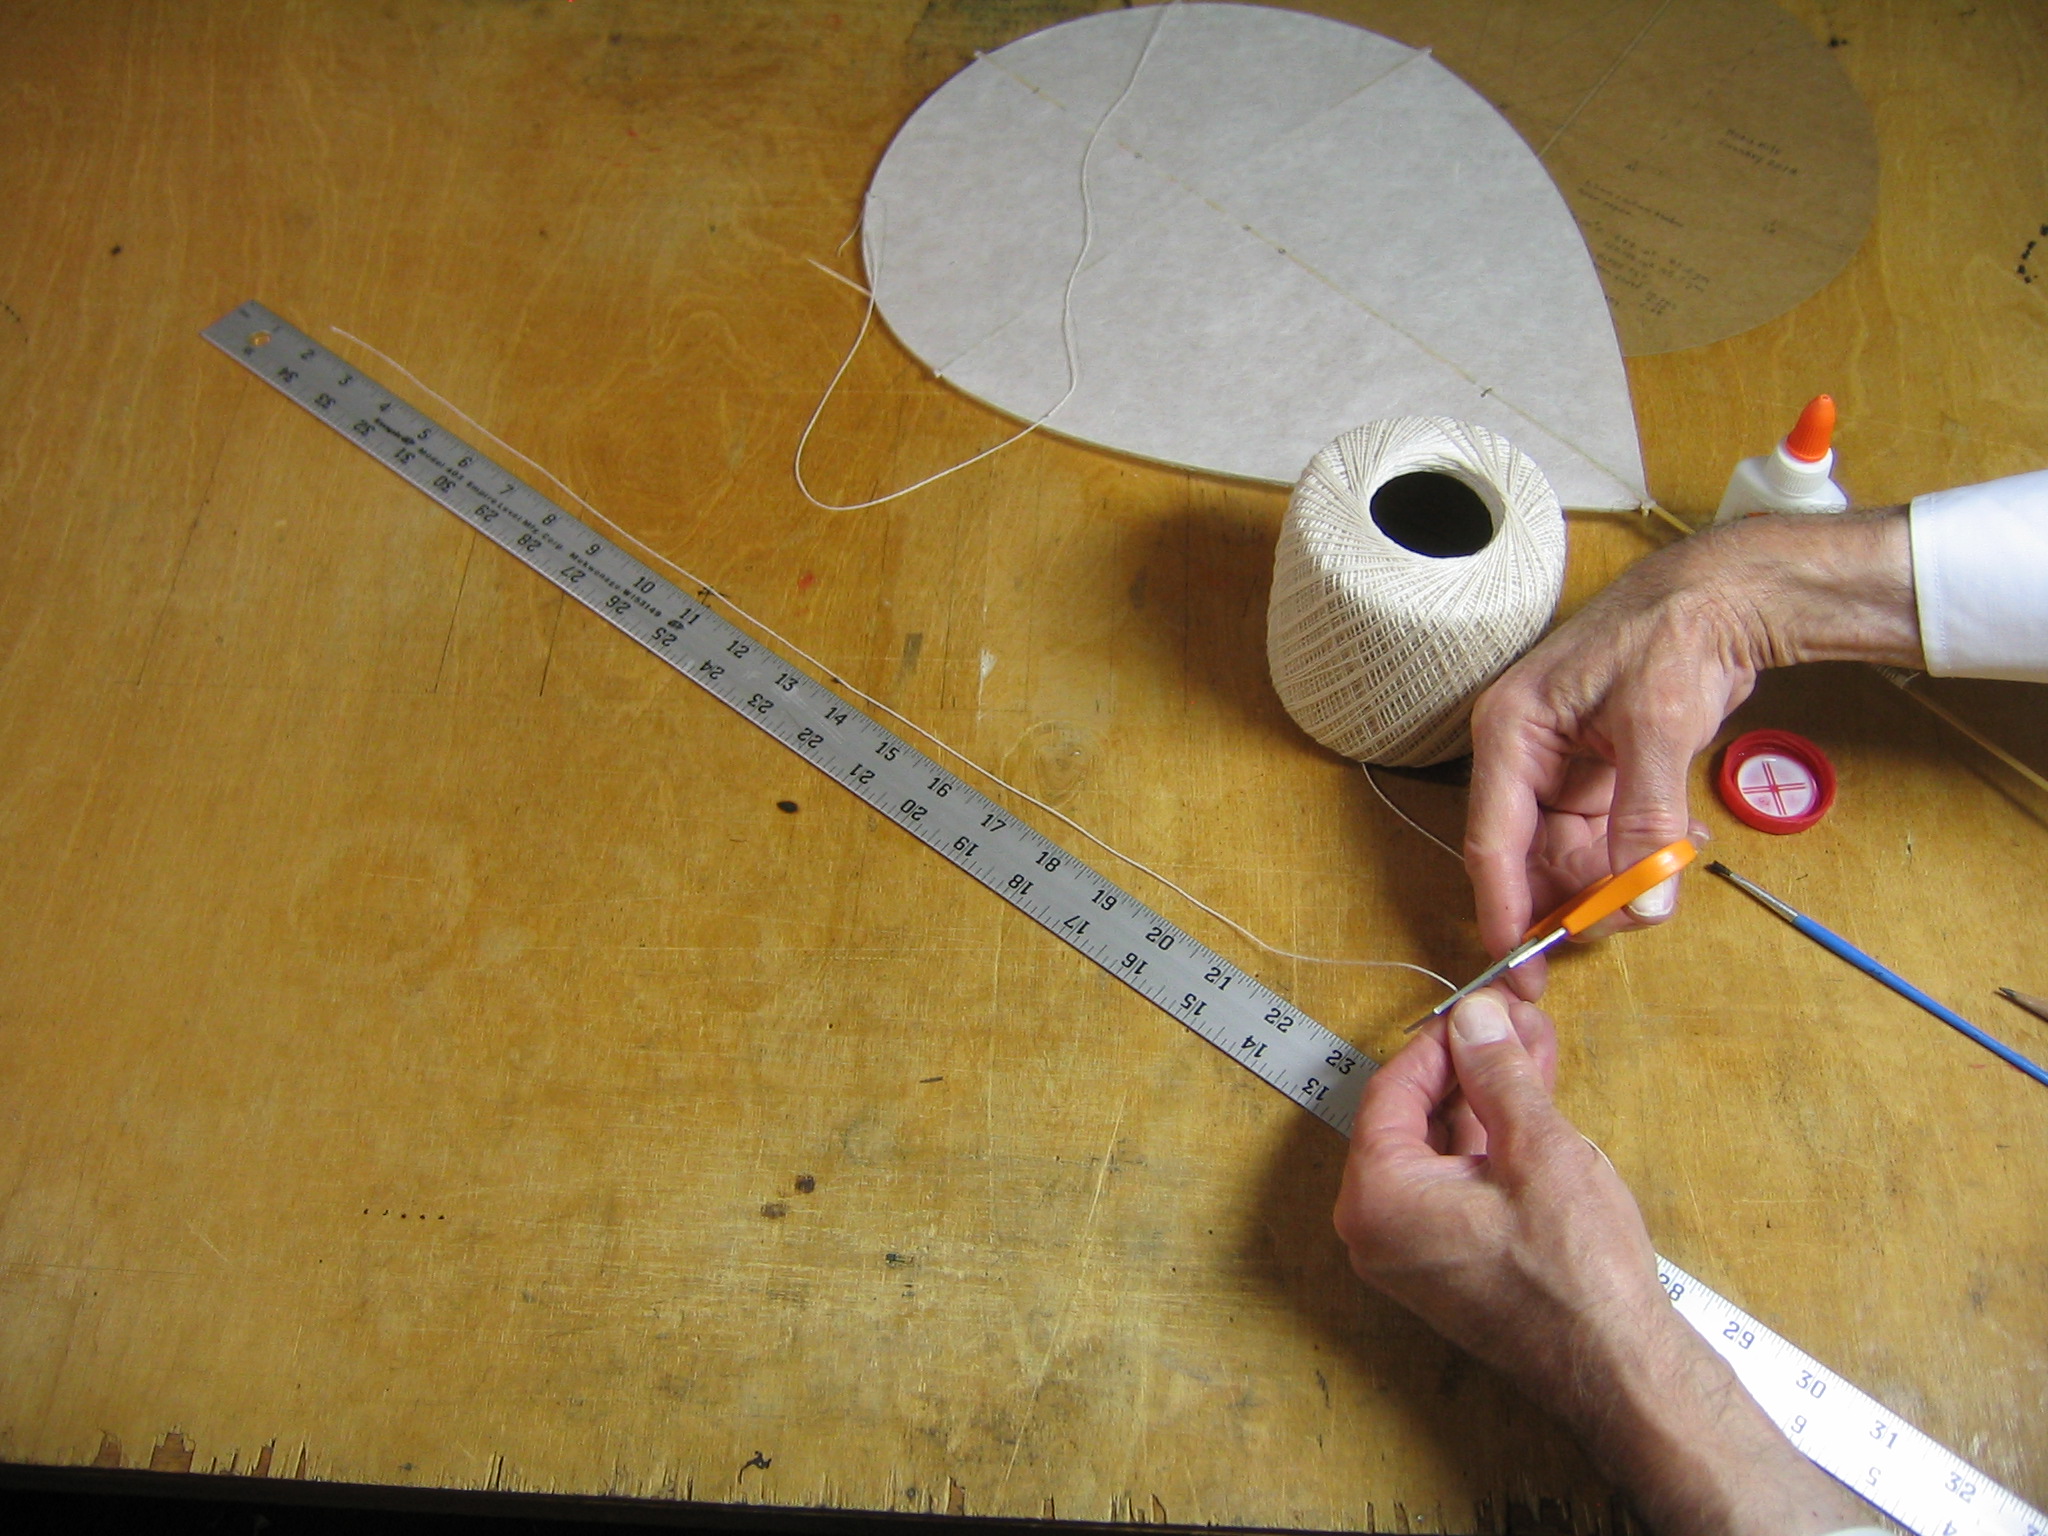
I expect the center of pressure would lie somewhere along the mean chord drawn on the pattern, probably close to the AC. The LE and TE of that mean chord looked like good places to attach the bridle loop. So I measured and marked 1 1/2″ and 12 1/4″ from the leading end of the center line.
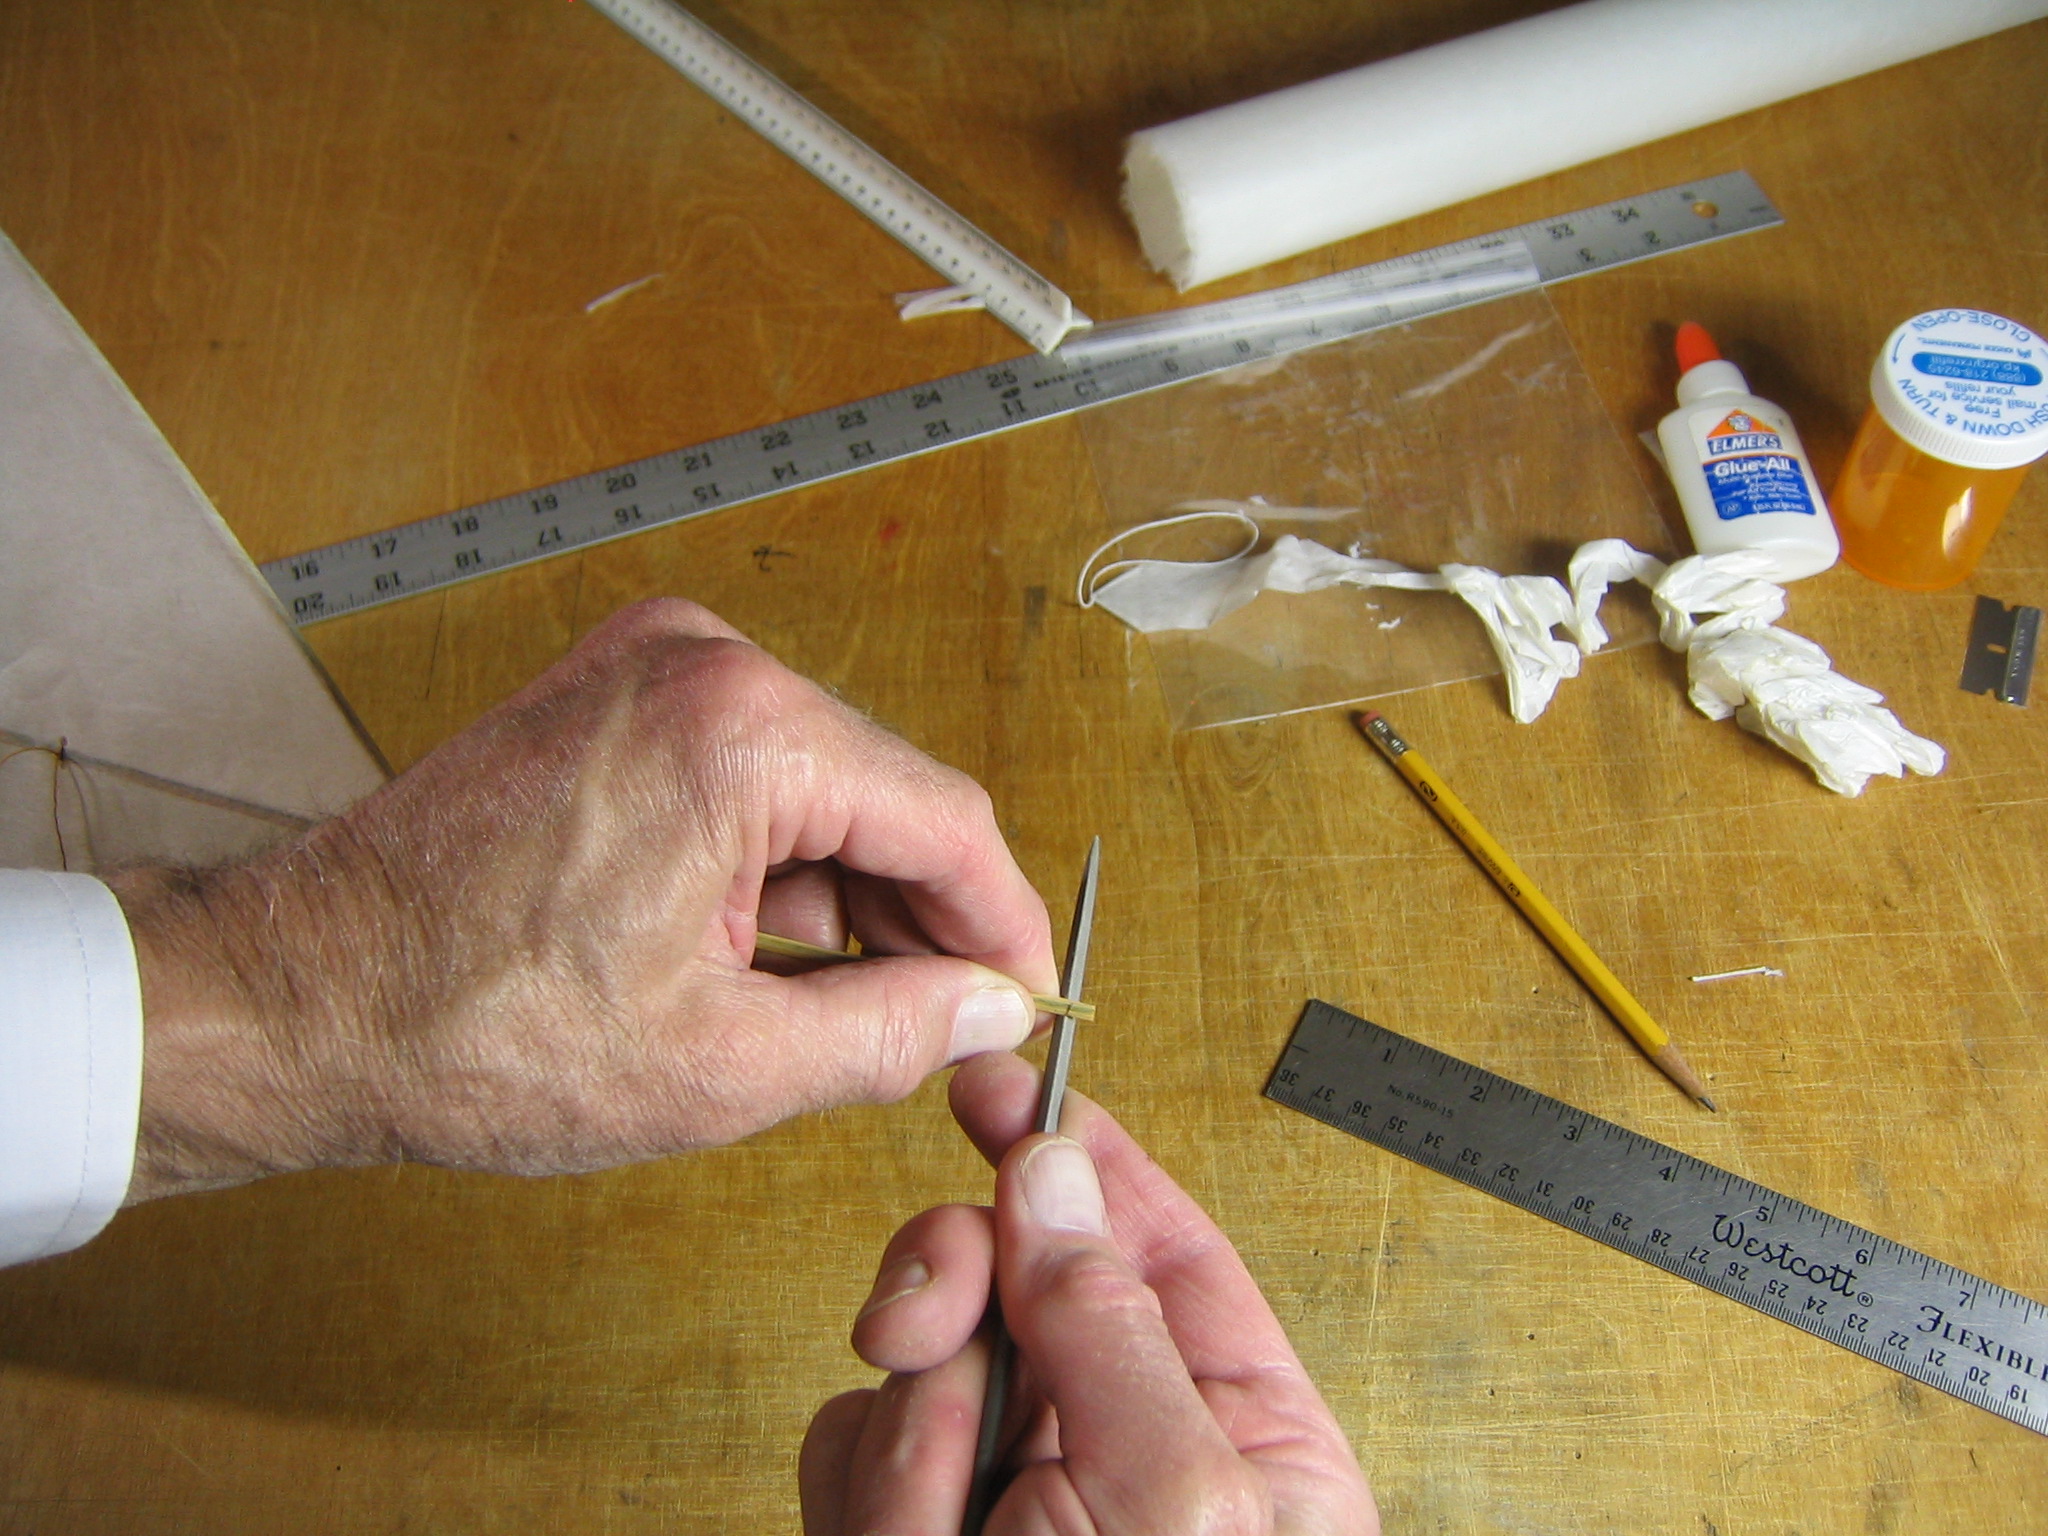
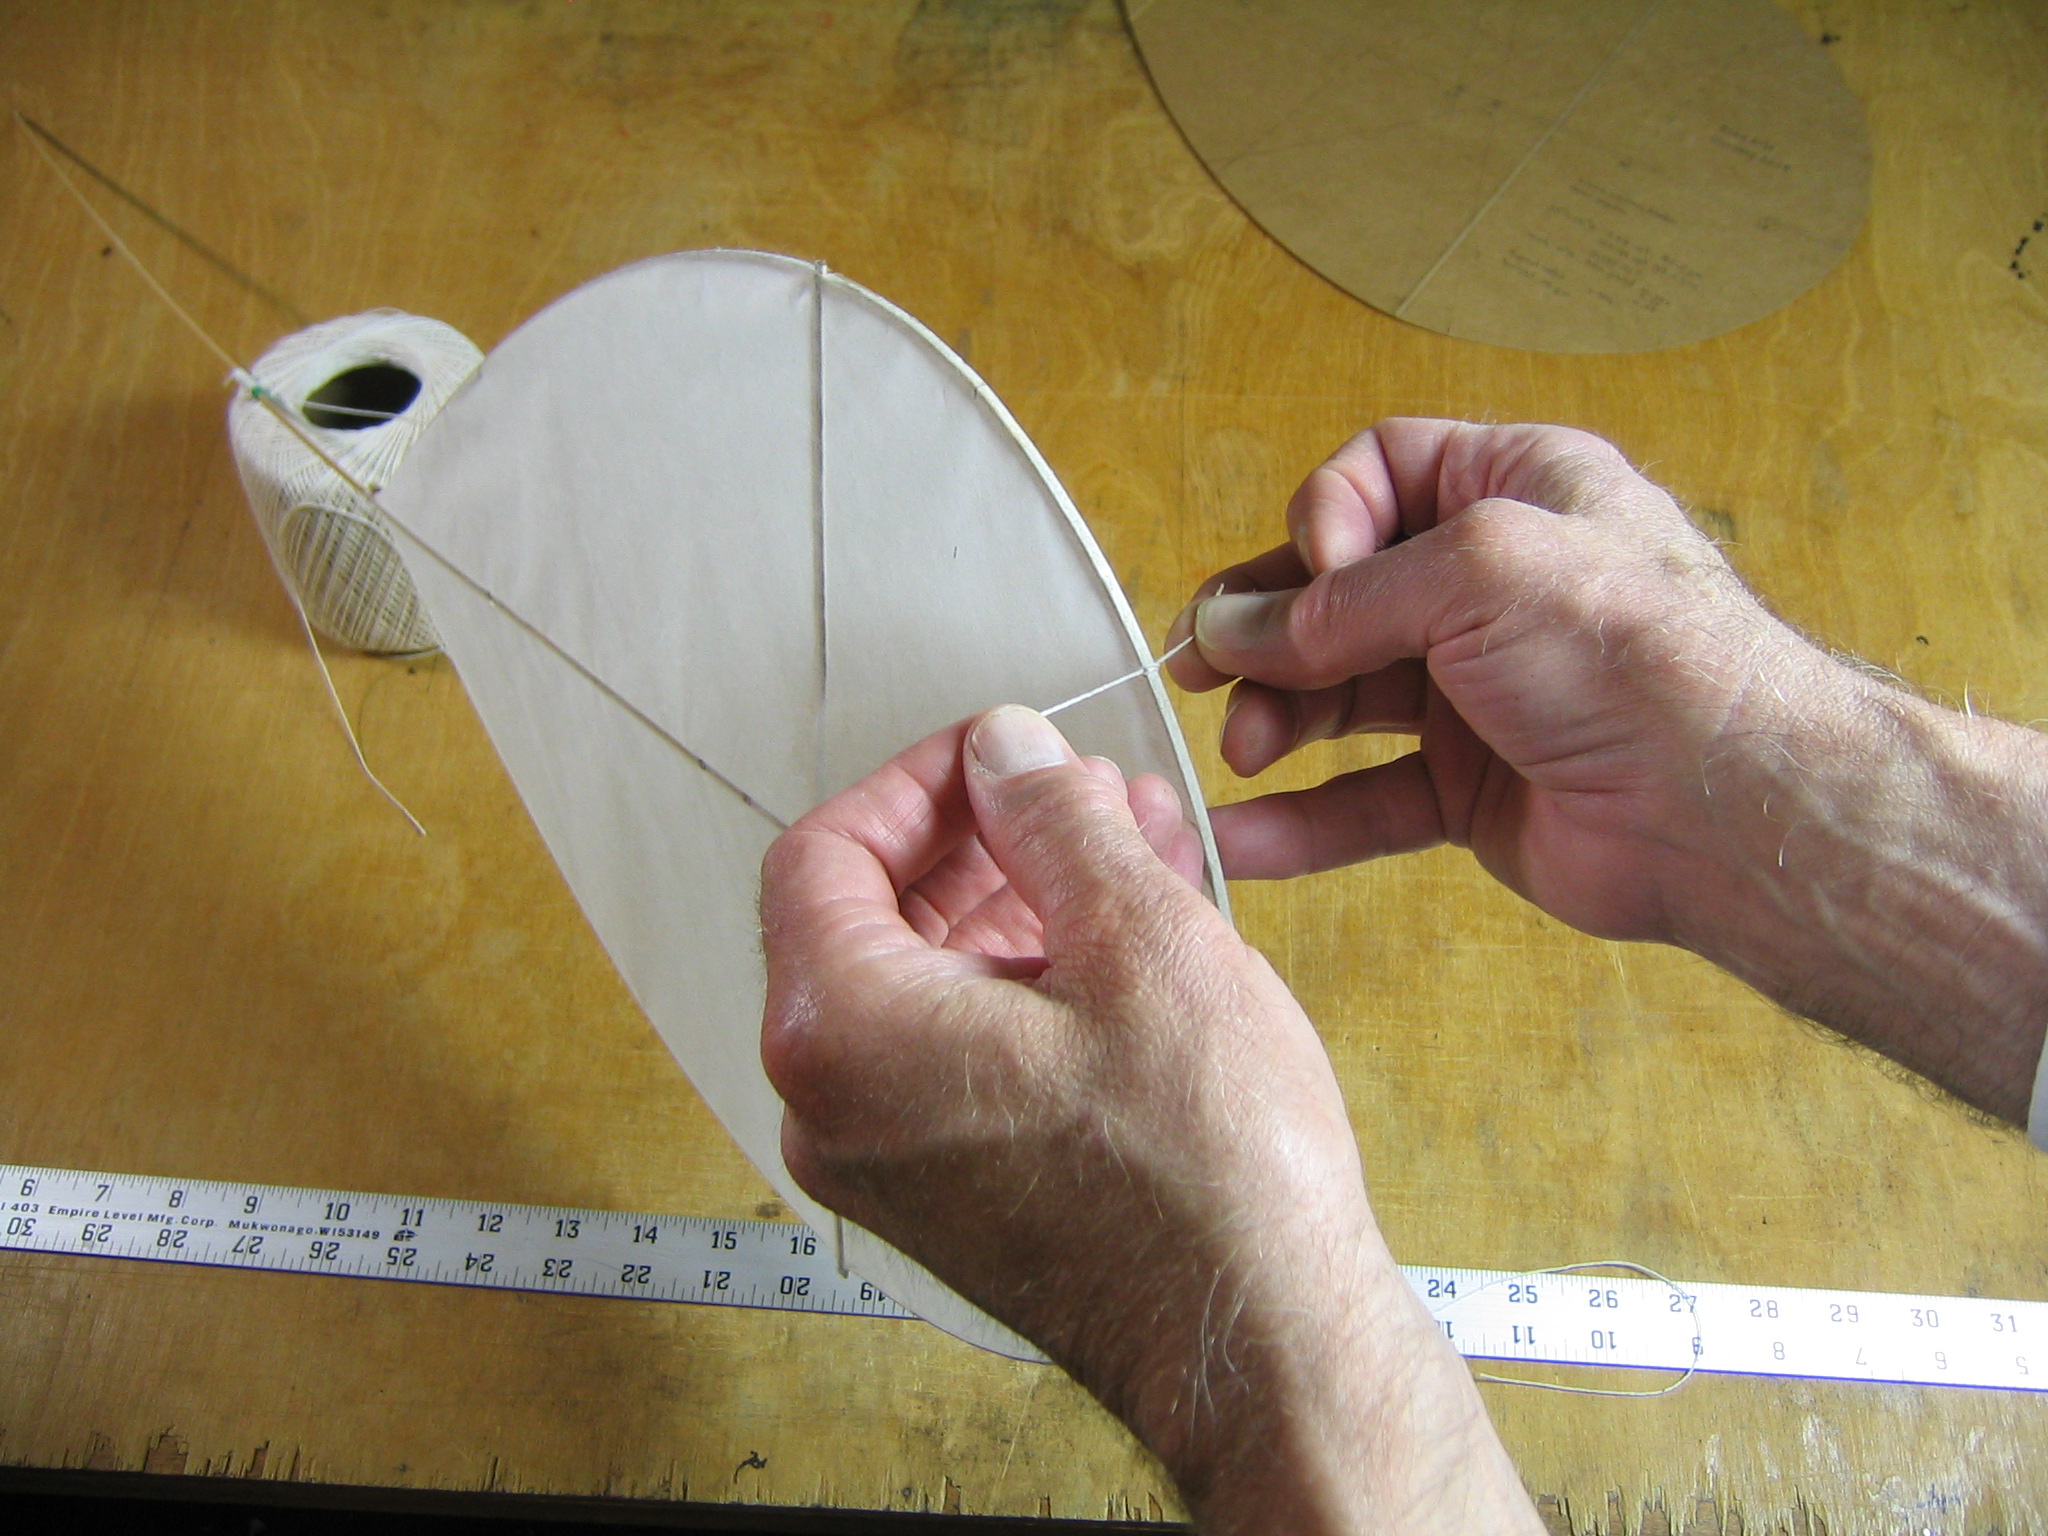
Use a sharp toothpick or similar sharp pointed object to poke 1/16″ holes on both sides of the spine at both marked bridle locations.
Push thread through one hole, around the spine and back out to the front, then tie it in place.
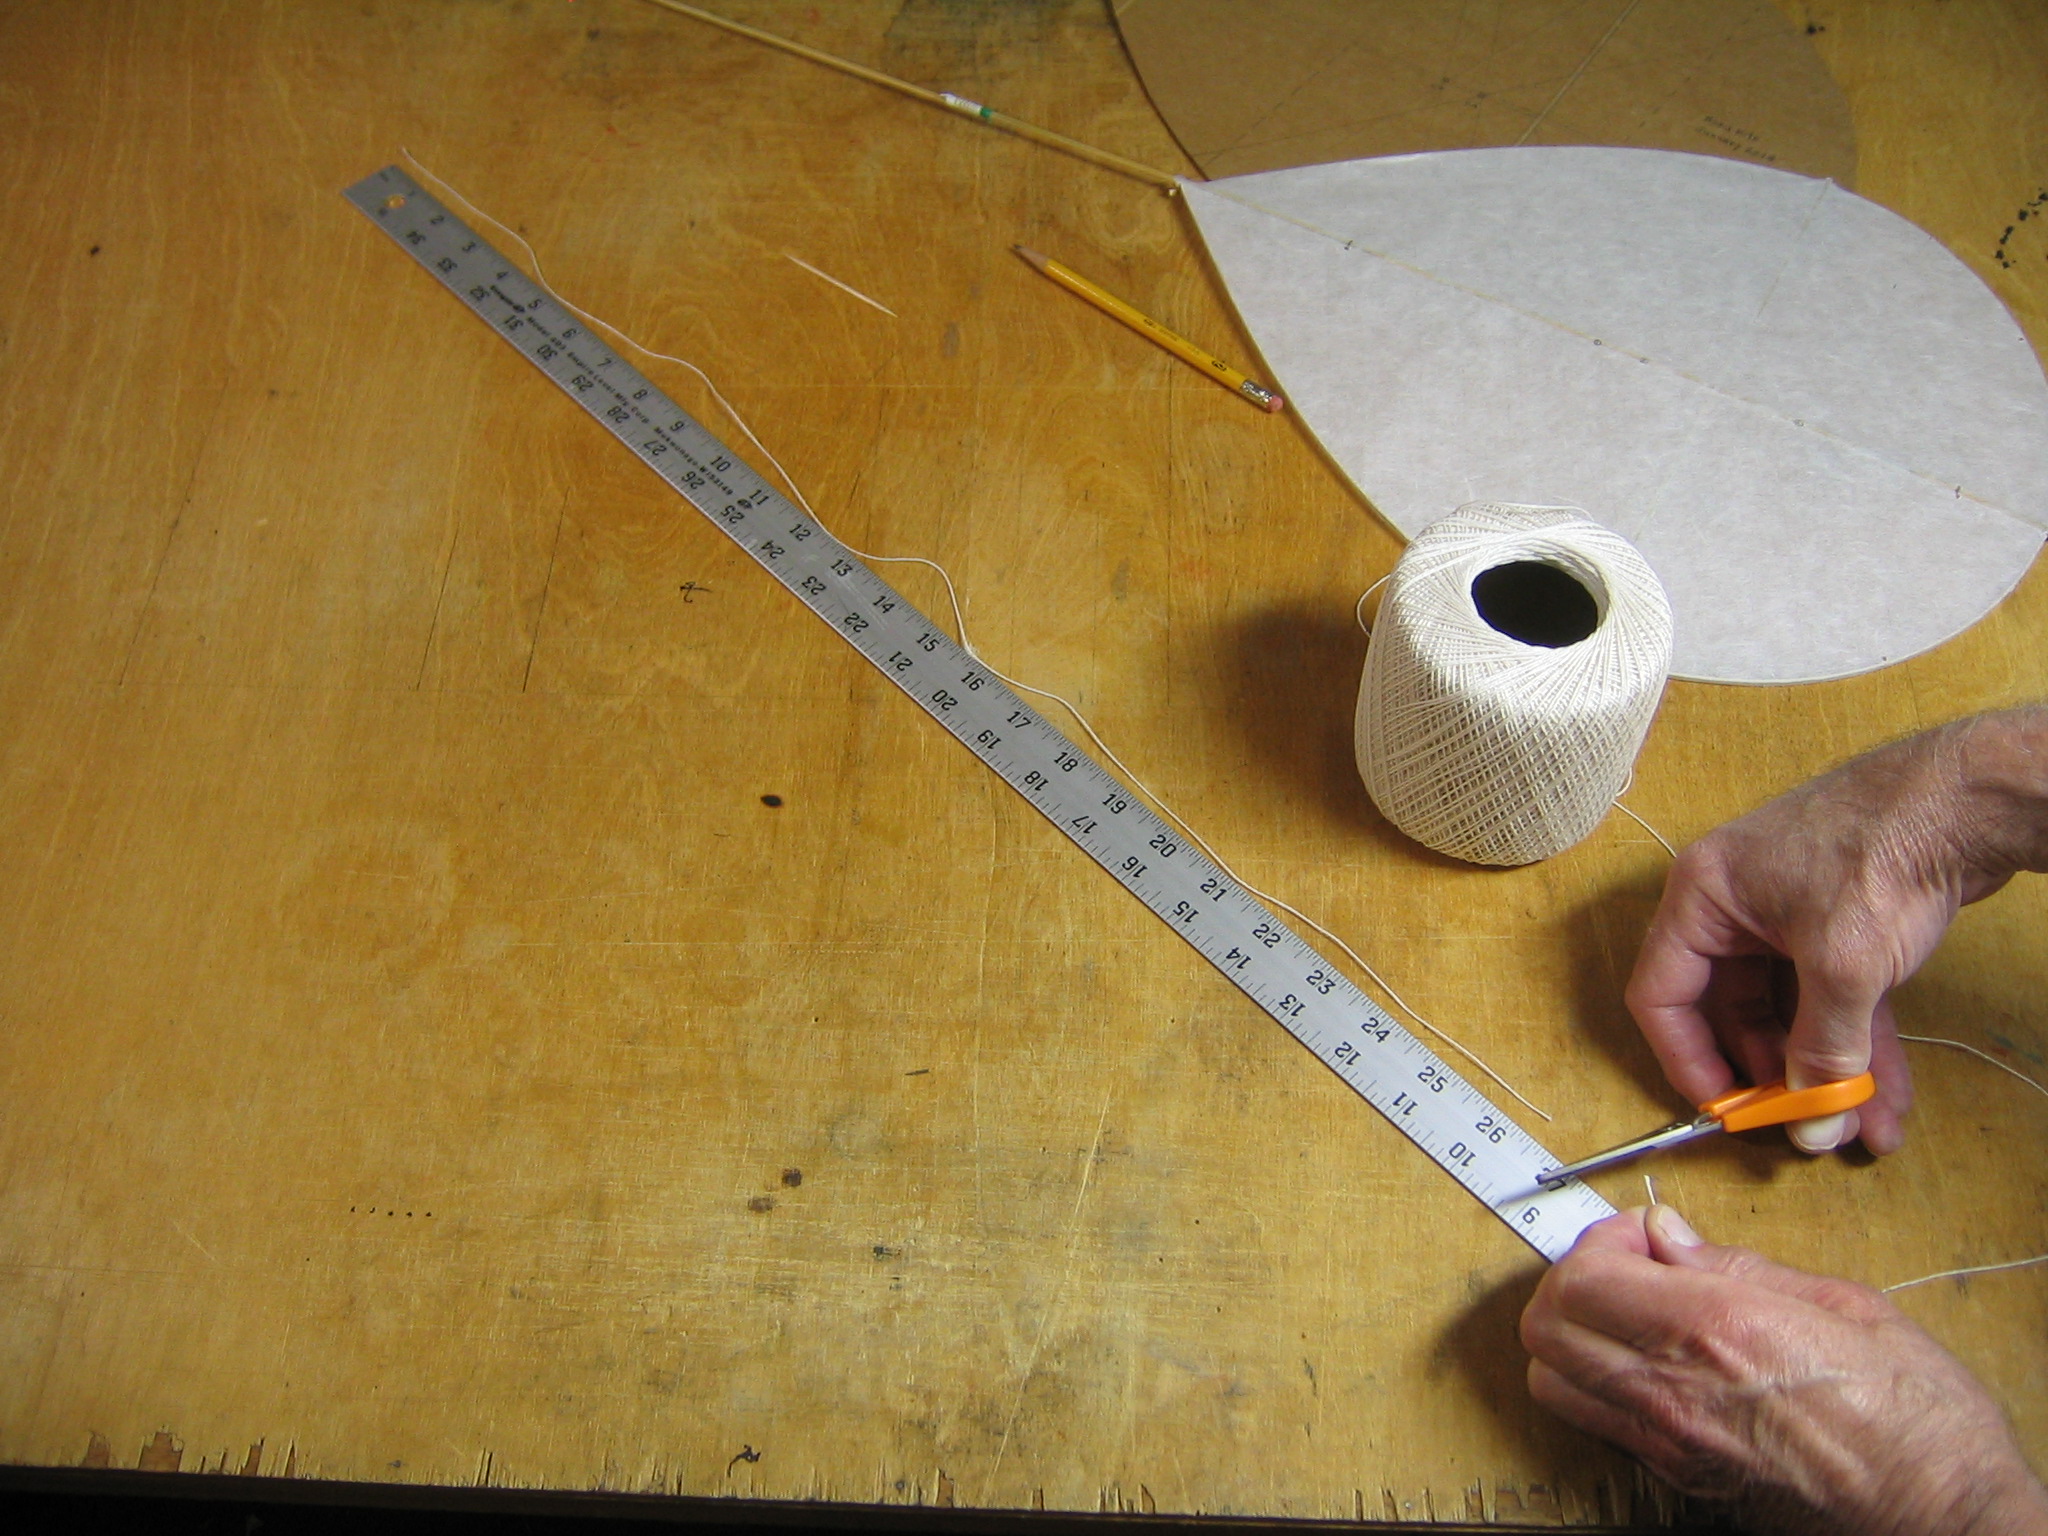
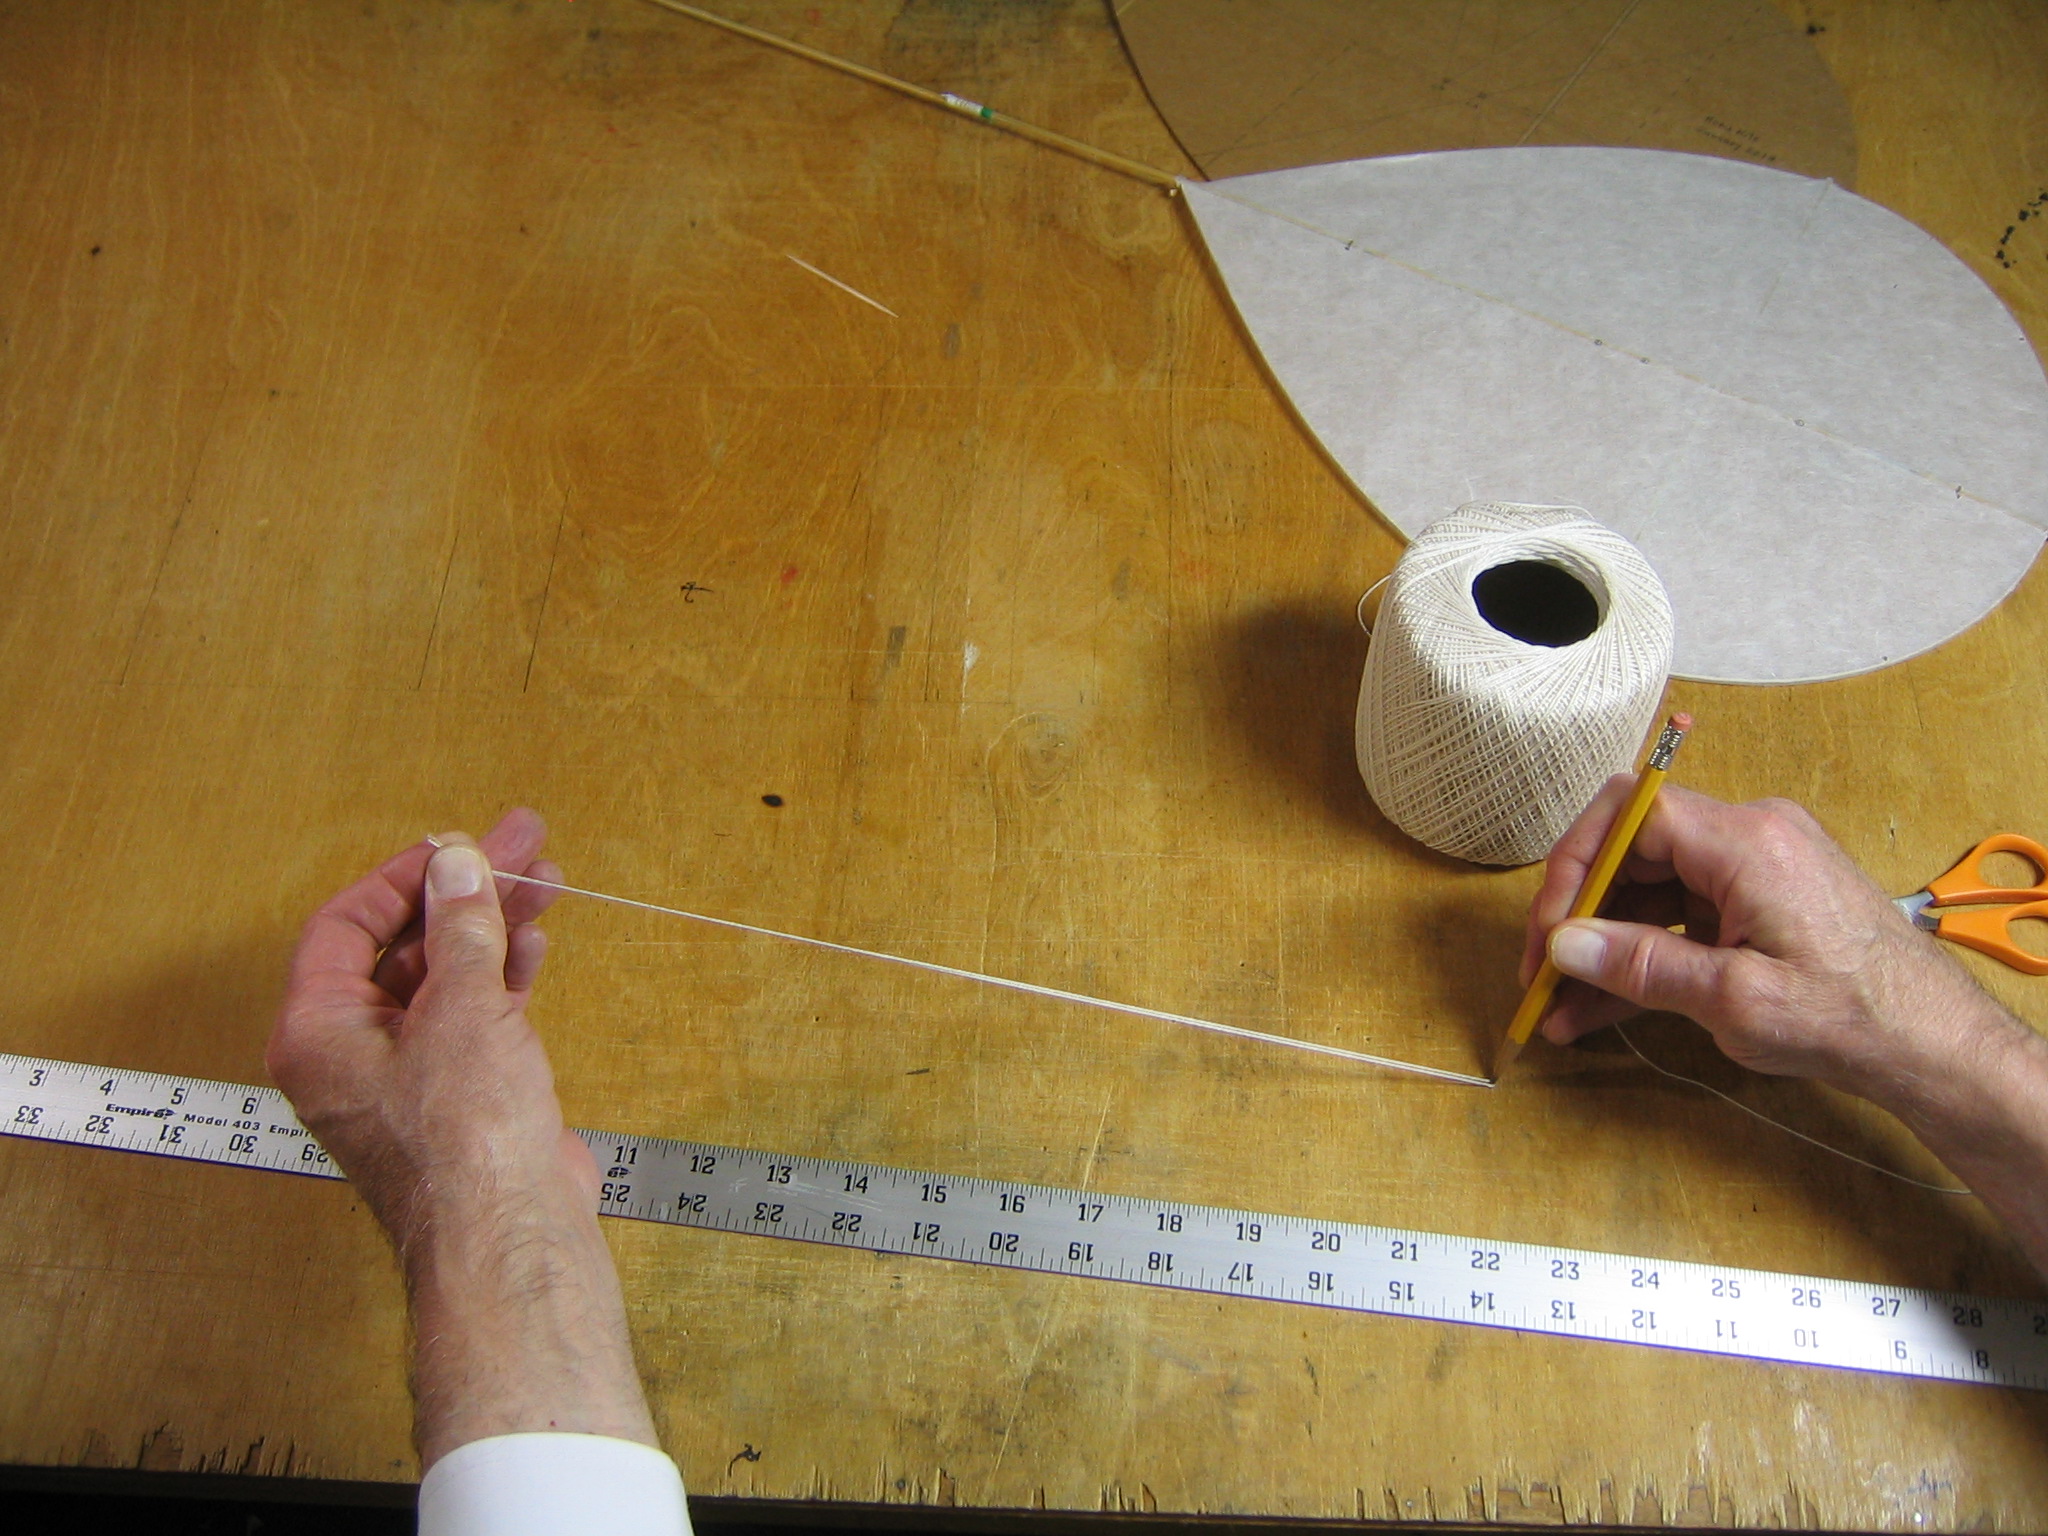
Measure and cut the thread 29″ from the knot. Also pull it out straight and mark it at 26″.
Put the thread through the hole, around the spine, back out through the other hole and tie it in place. Tie it so the bridle loop exits the knot at the 26″ pencil mark.
Glue the thread to the spine and glue the knots.
From past experience with low aspect ratio kites, I chose to initially locate the tow point at an 84 degree forward angle projected out from the AC. This is a good guess for a place to start tests.
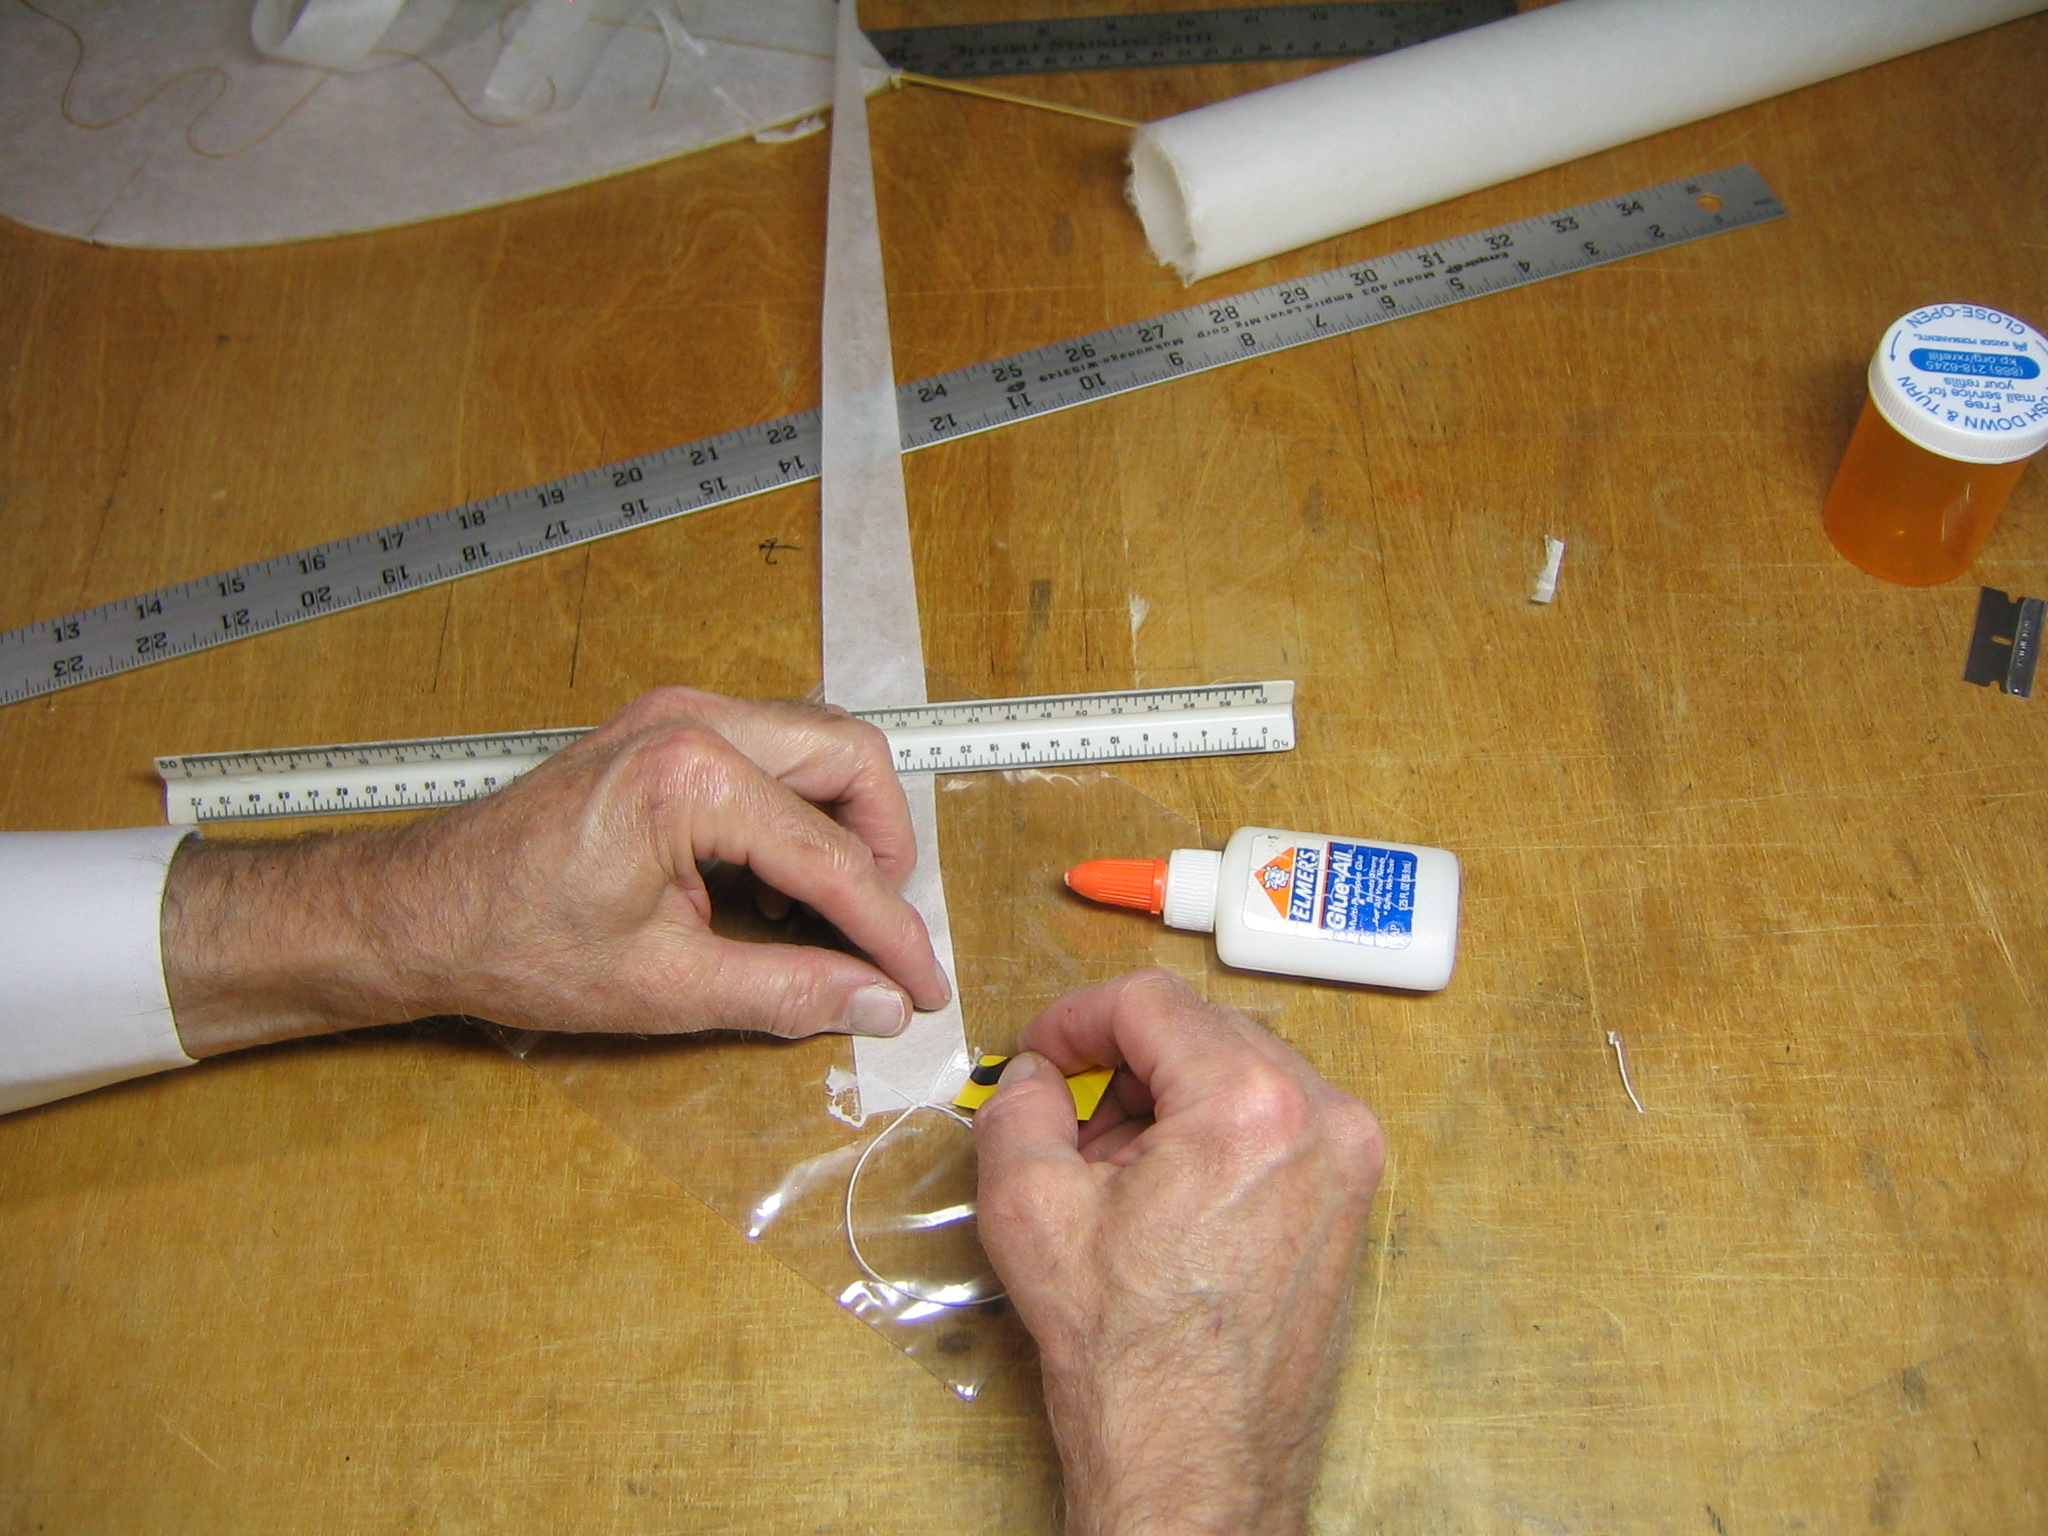
I chose to use a small split ring for the tow point, attached with a Lark’s head knot so it will be easy to adjust. It turned out that the thread got in between the loops of the split ring, making it difficult to loosen the knot. I would recommend a small paperclip instead. Once a final bridle rig is decided, a proper bridle can be rigged with a string loop. I will describe that later, when I show how to make a three leg bridle. (For the final configuration, you may want to skip this bridle construction and go down to the final rig, below.) Pull the bridle loop through the split ring.
Pull the loop back over itself.
Place the pattern over the kite face with a straightedge aligned with the 84 degree tow line. Pull the split ring out gradually along the tow line to tighten the knot. I placed ink marks at 1/4″ intervals along the thread.
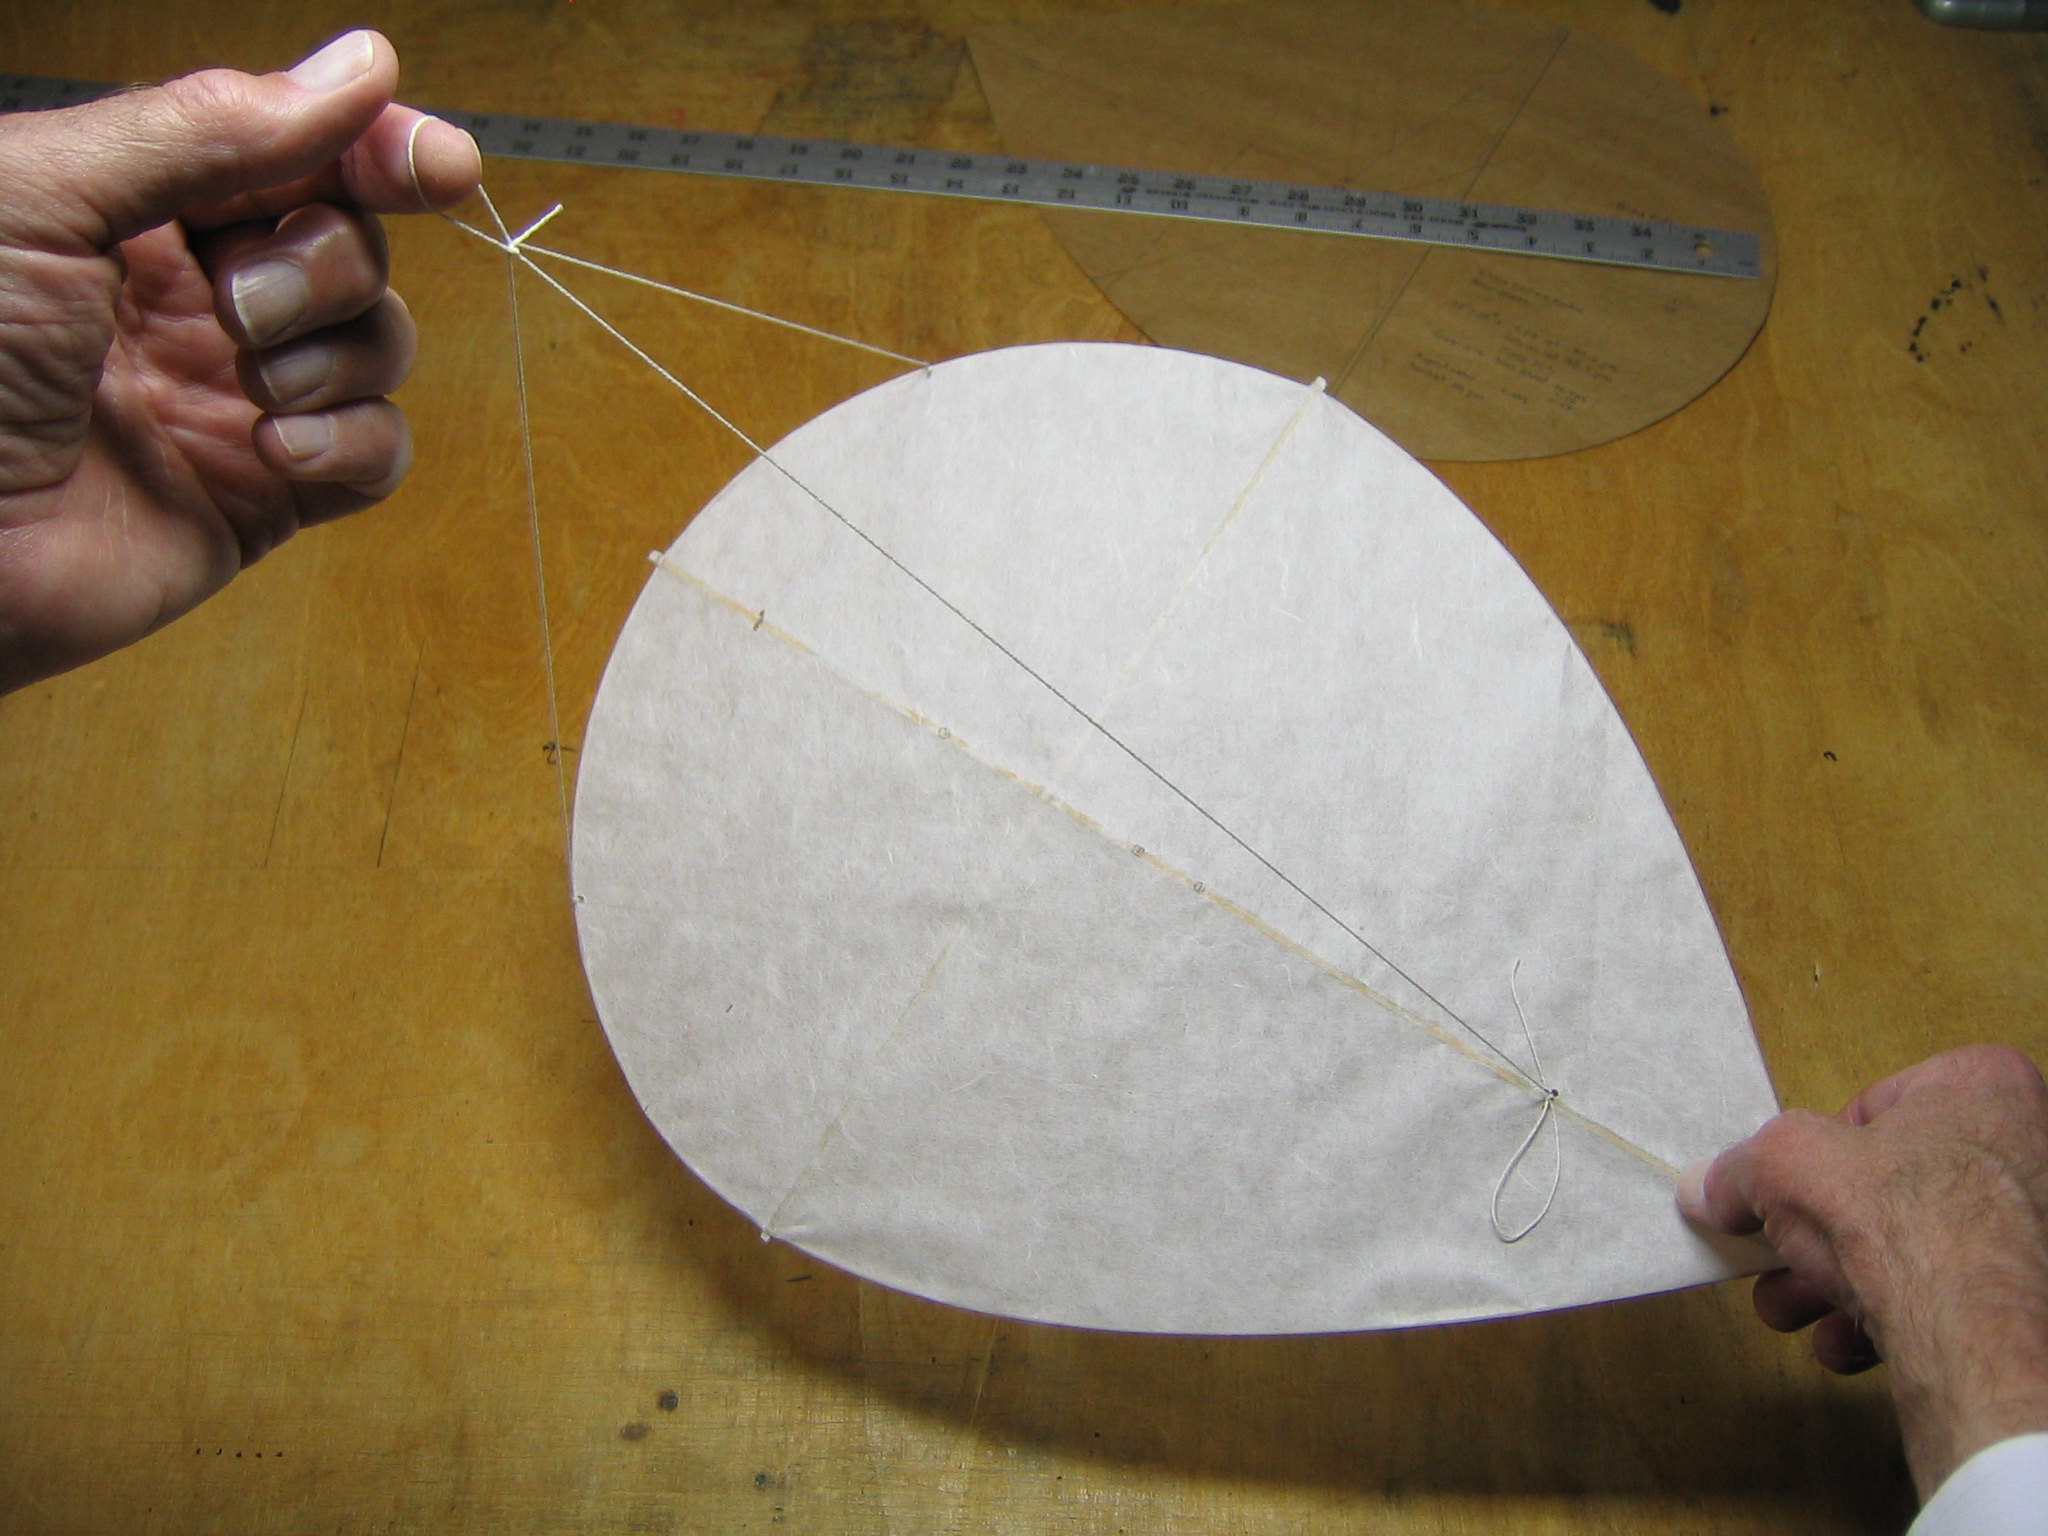
The position of the tow point can also be referenced to its perpendicular projection onto the spine. Here it is 2″ ahead of the cross stick, which puts it 3 3/4″ behind the leading edge of the perimeter and 2 1/4″ behind the LE of the mean chord. In the field, the bridle can be pulled straight out to the side, over the edge of the kite and the position can be judged by eye.
The bridle geometry can also be specified from the lengths of its two legs. Here the forward leg measures 11 1/2″ long.
The aft leg measures 14 1/2″. These measurements are consistent with the 26″ length we measured out when tying the bridle loop to the spine.
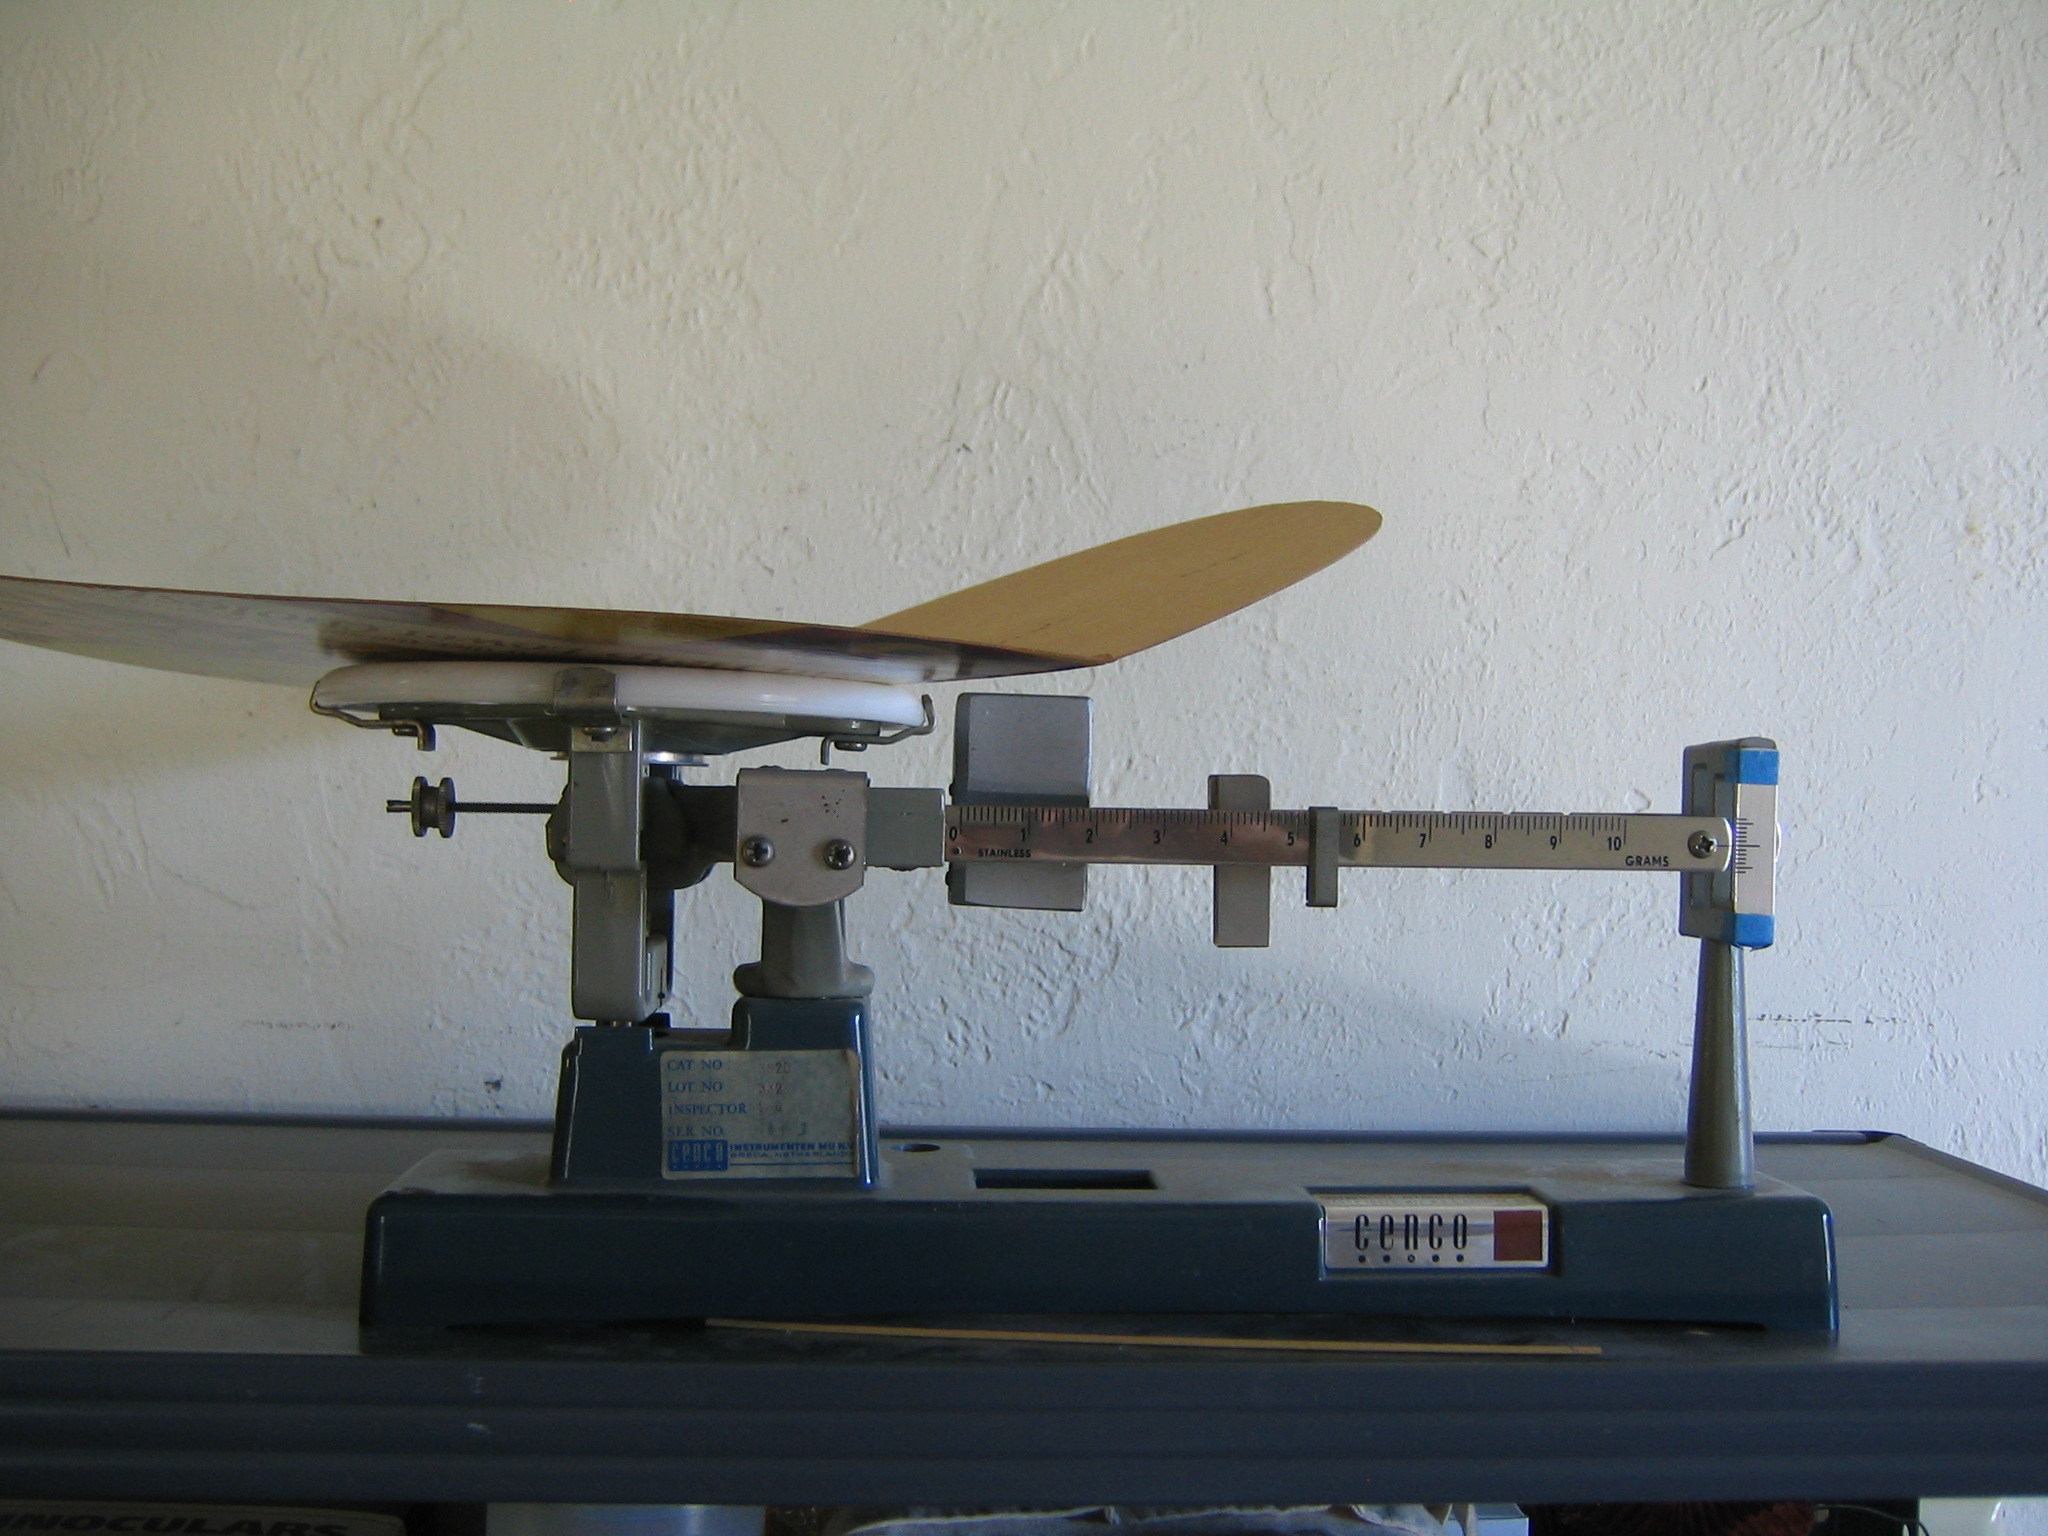
Weighing
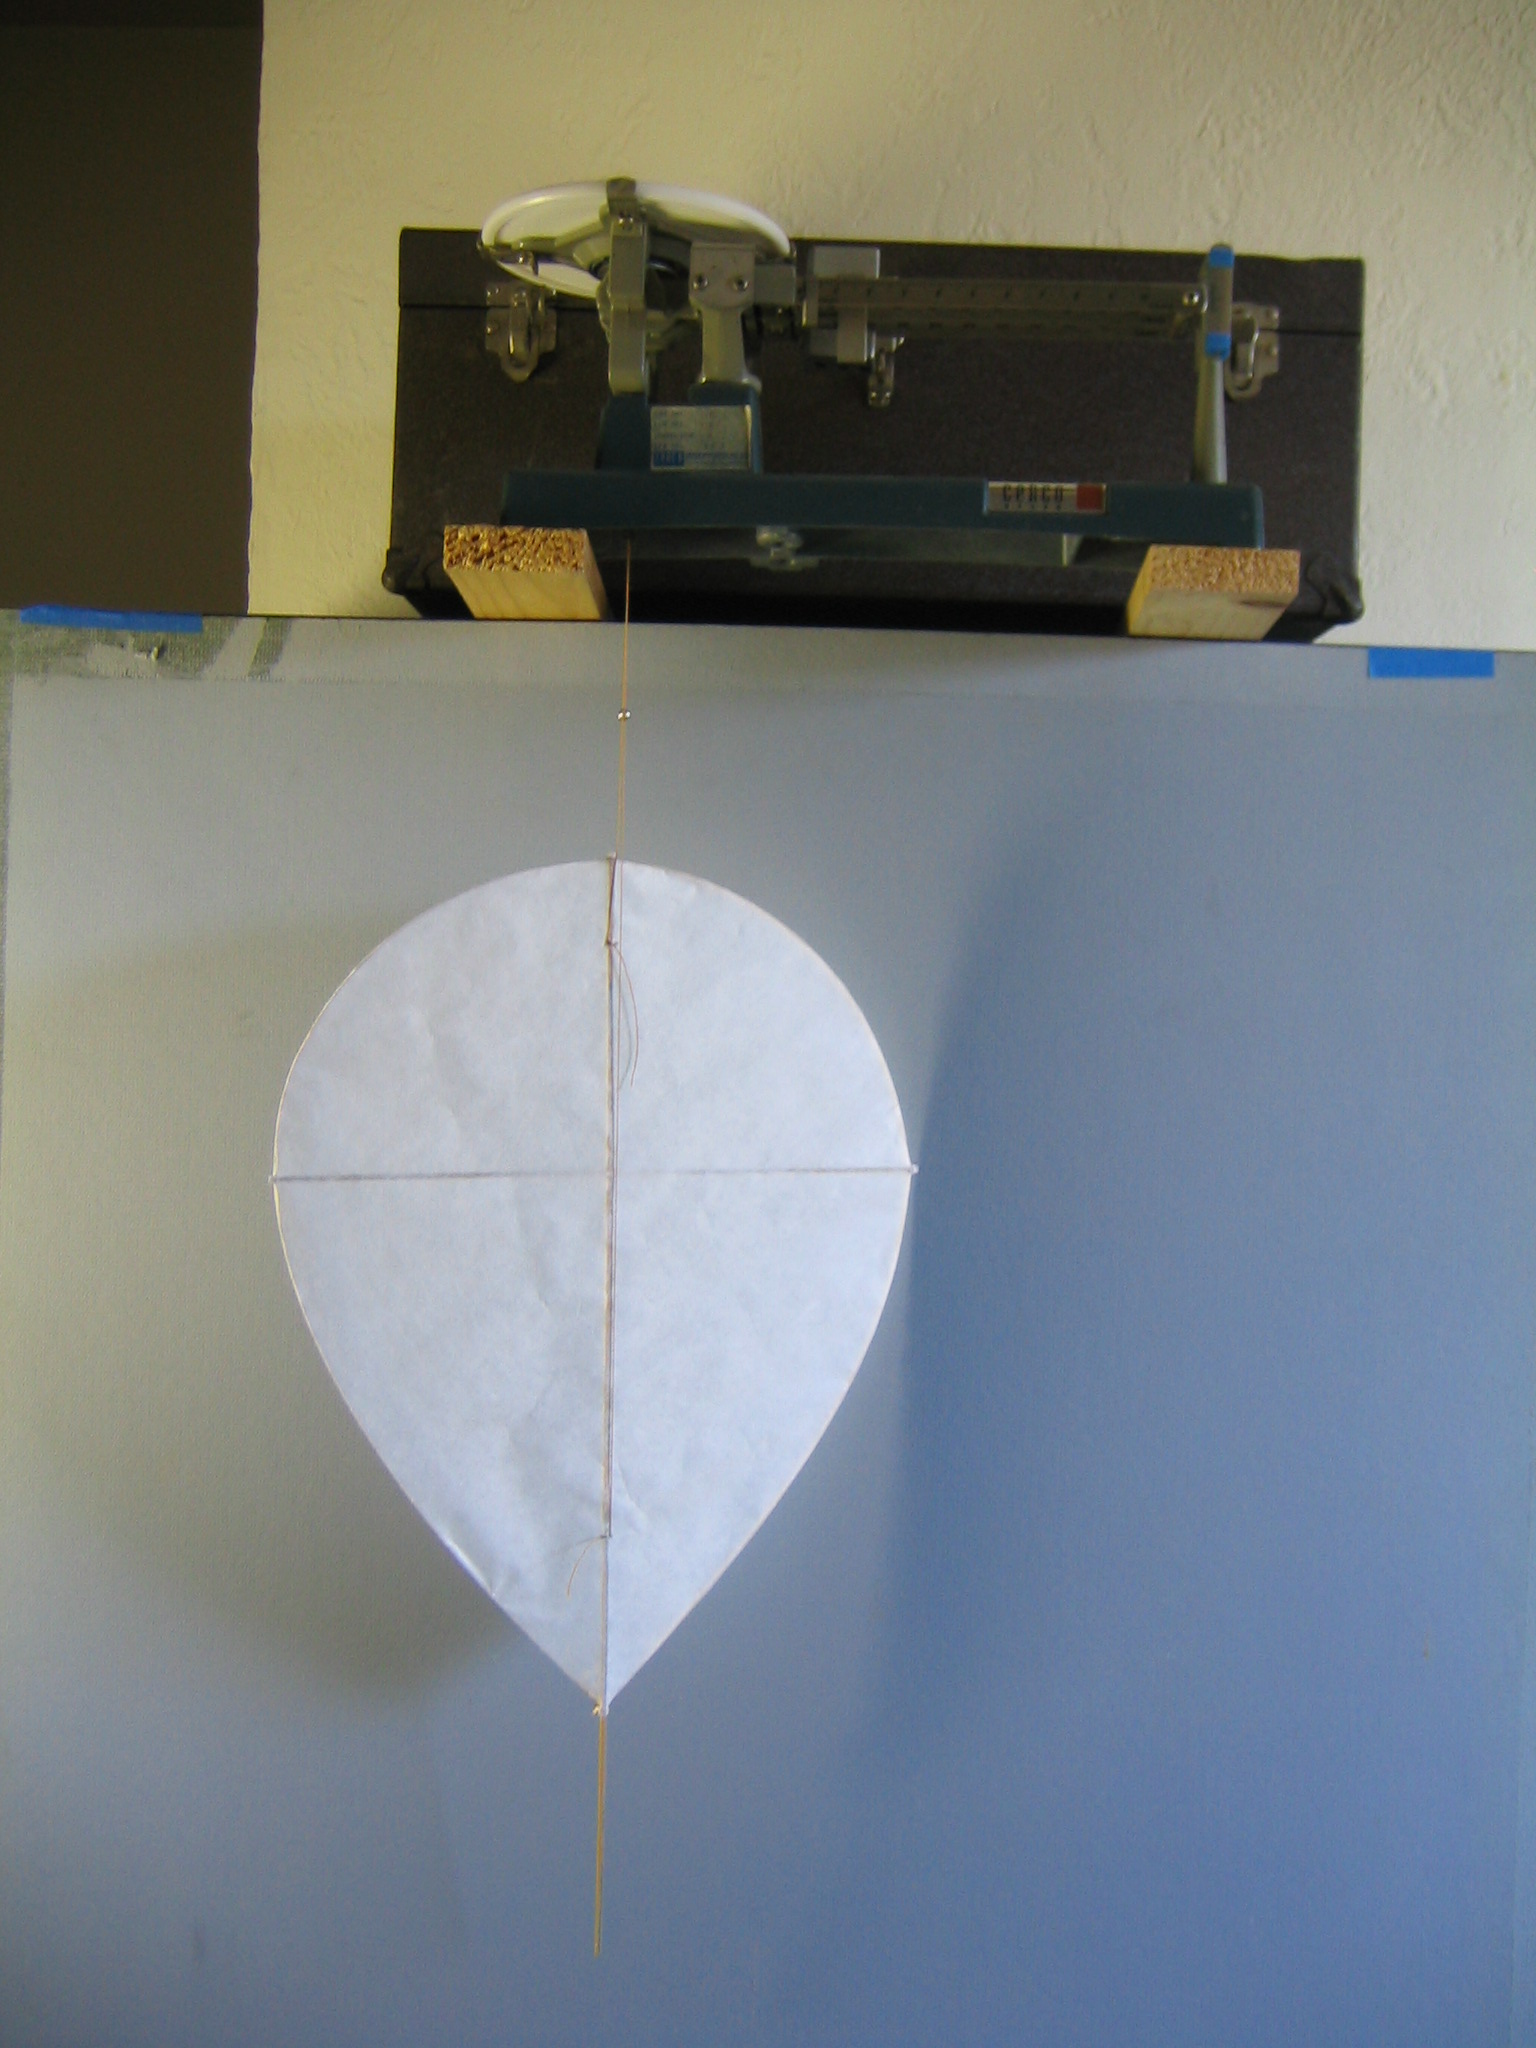
This is a good time to weigh the kite. It weighs 10.0 grams. With a wing area of 127.125 square inches, the wing loading works out to 121.92 grams per square meter.
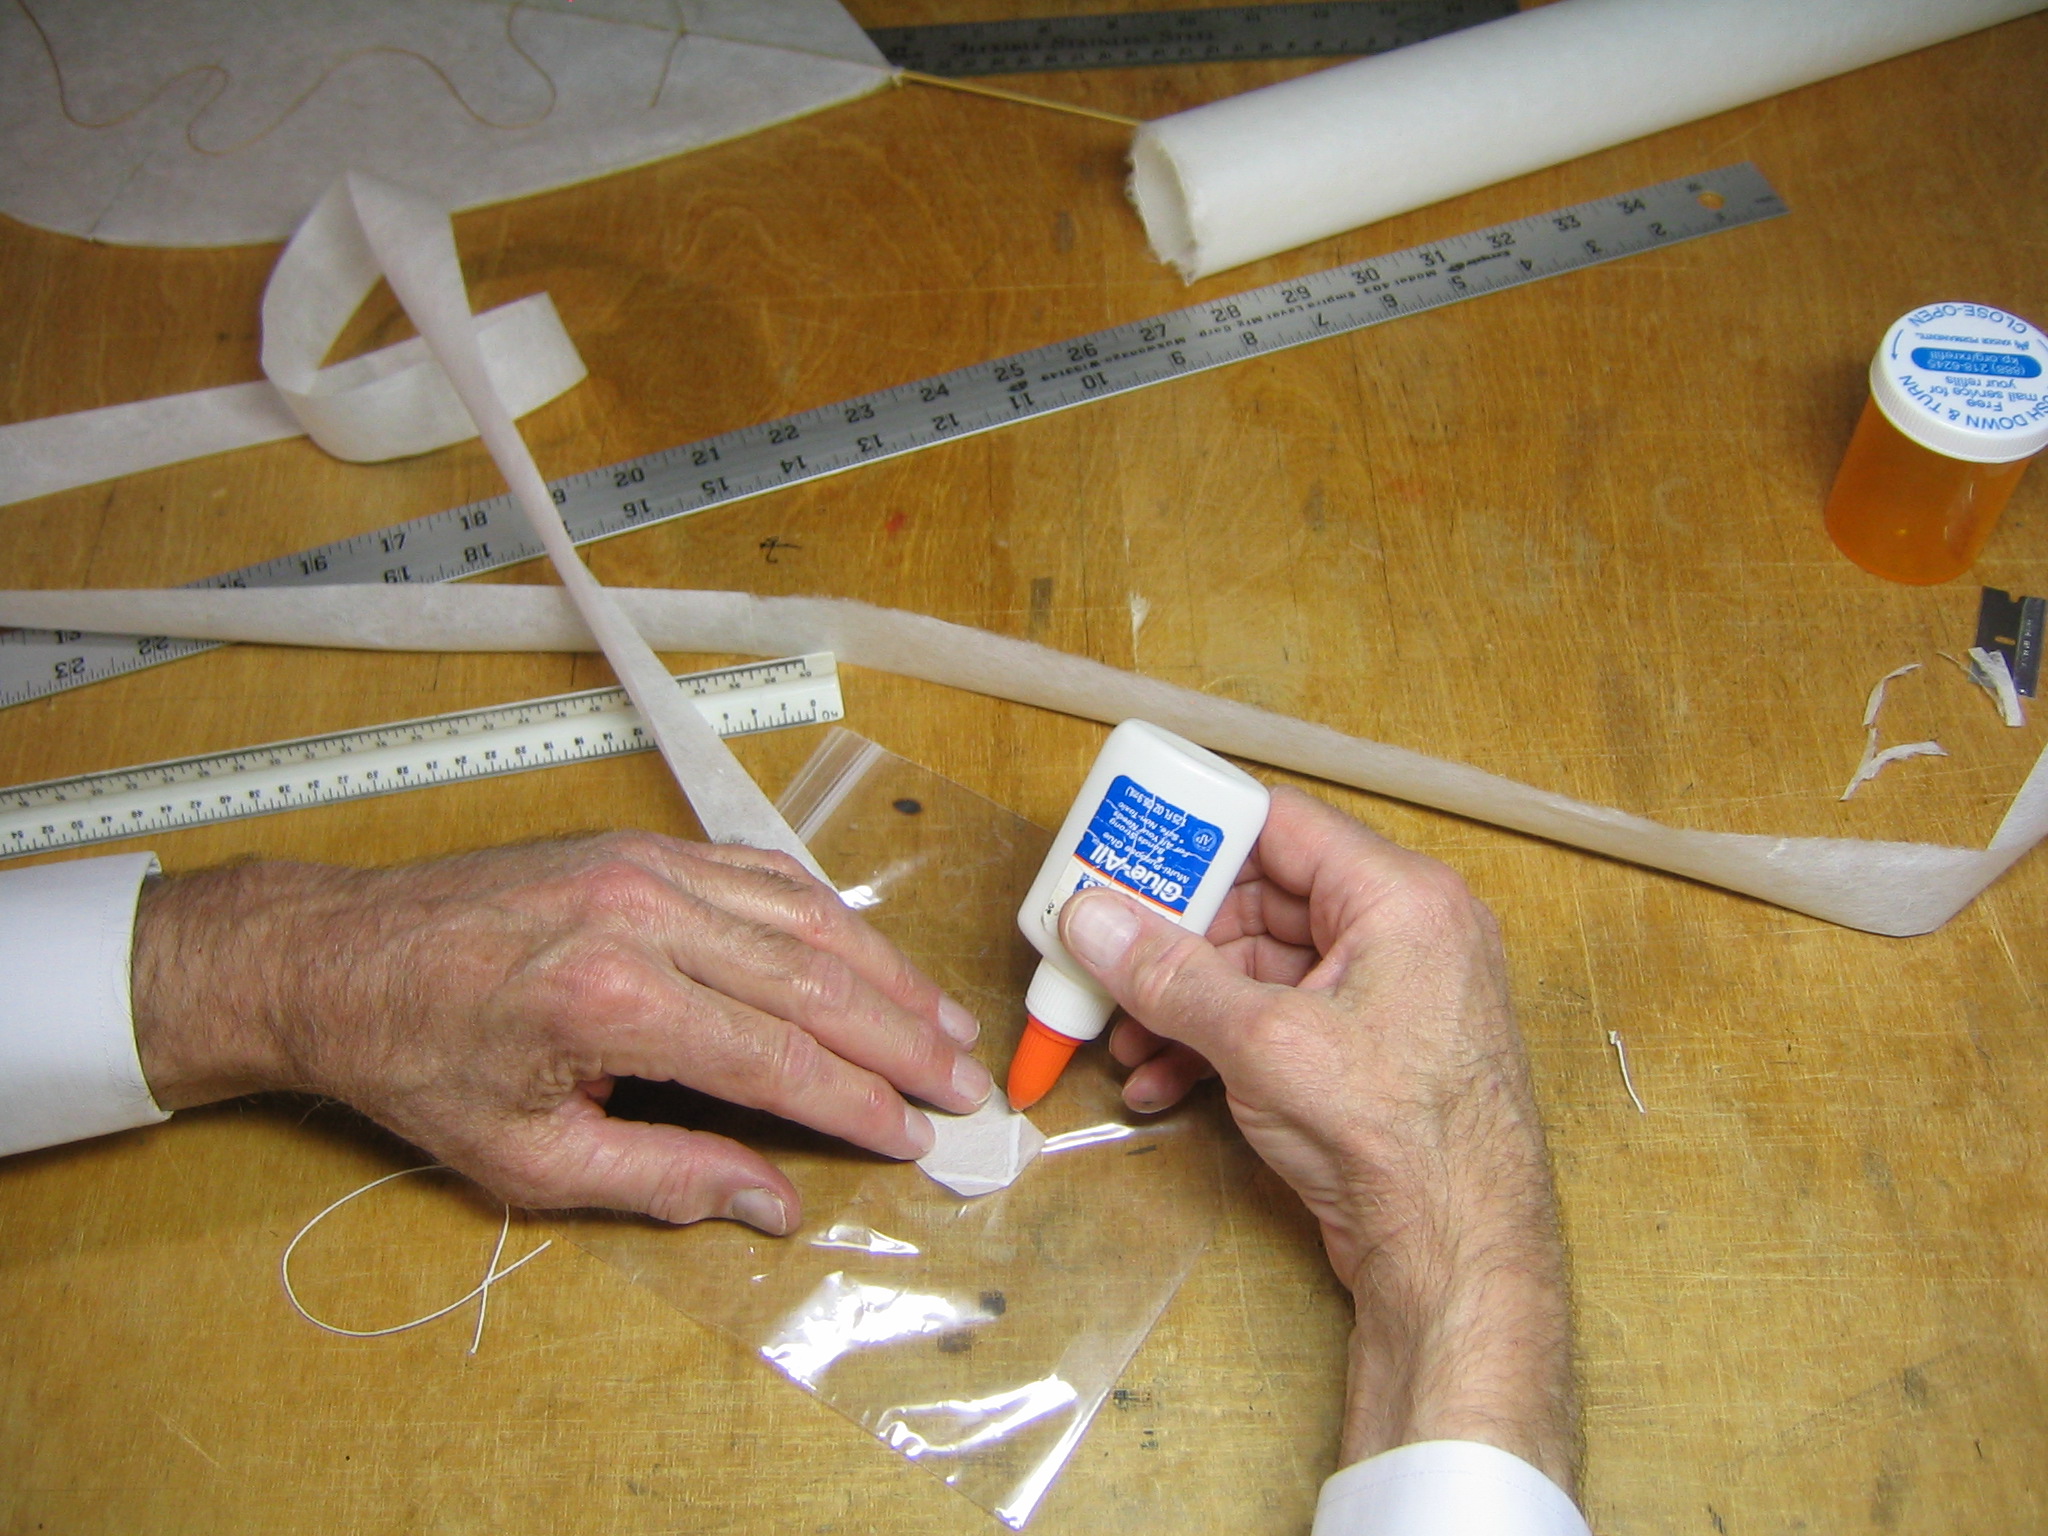
Tails
Now we will make the tails.
I cut strips of paper 1 1/8″ wide and 24 5/8″ long. I used three of these strips in each tail and I made three tails. Testing led eventually to a 1 1/8″ wide and 24 foot long tail with 324 square inches of area.
Run a line of glue across one end of a strip.
Place the end of the next strip on the glue and press in place.
Press it down firmly. Do this again to make it three strips long.
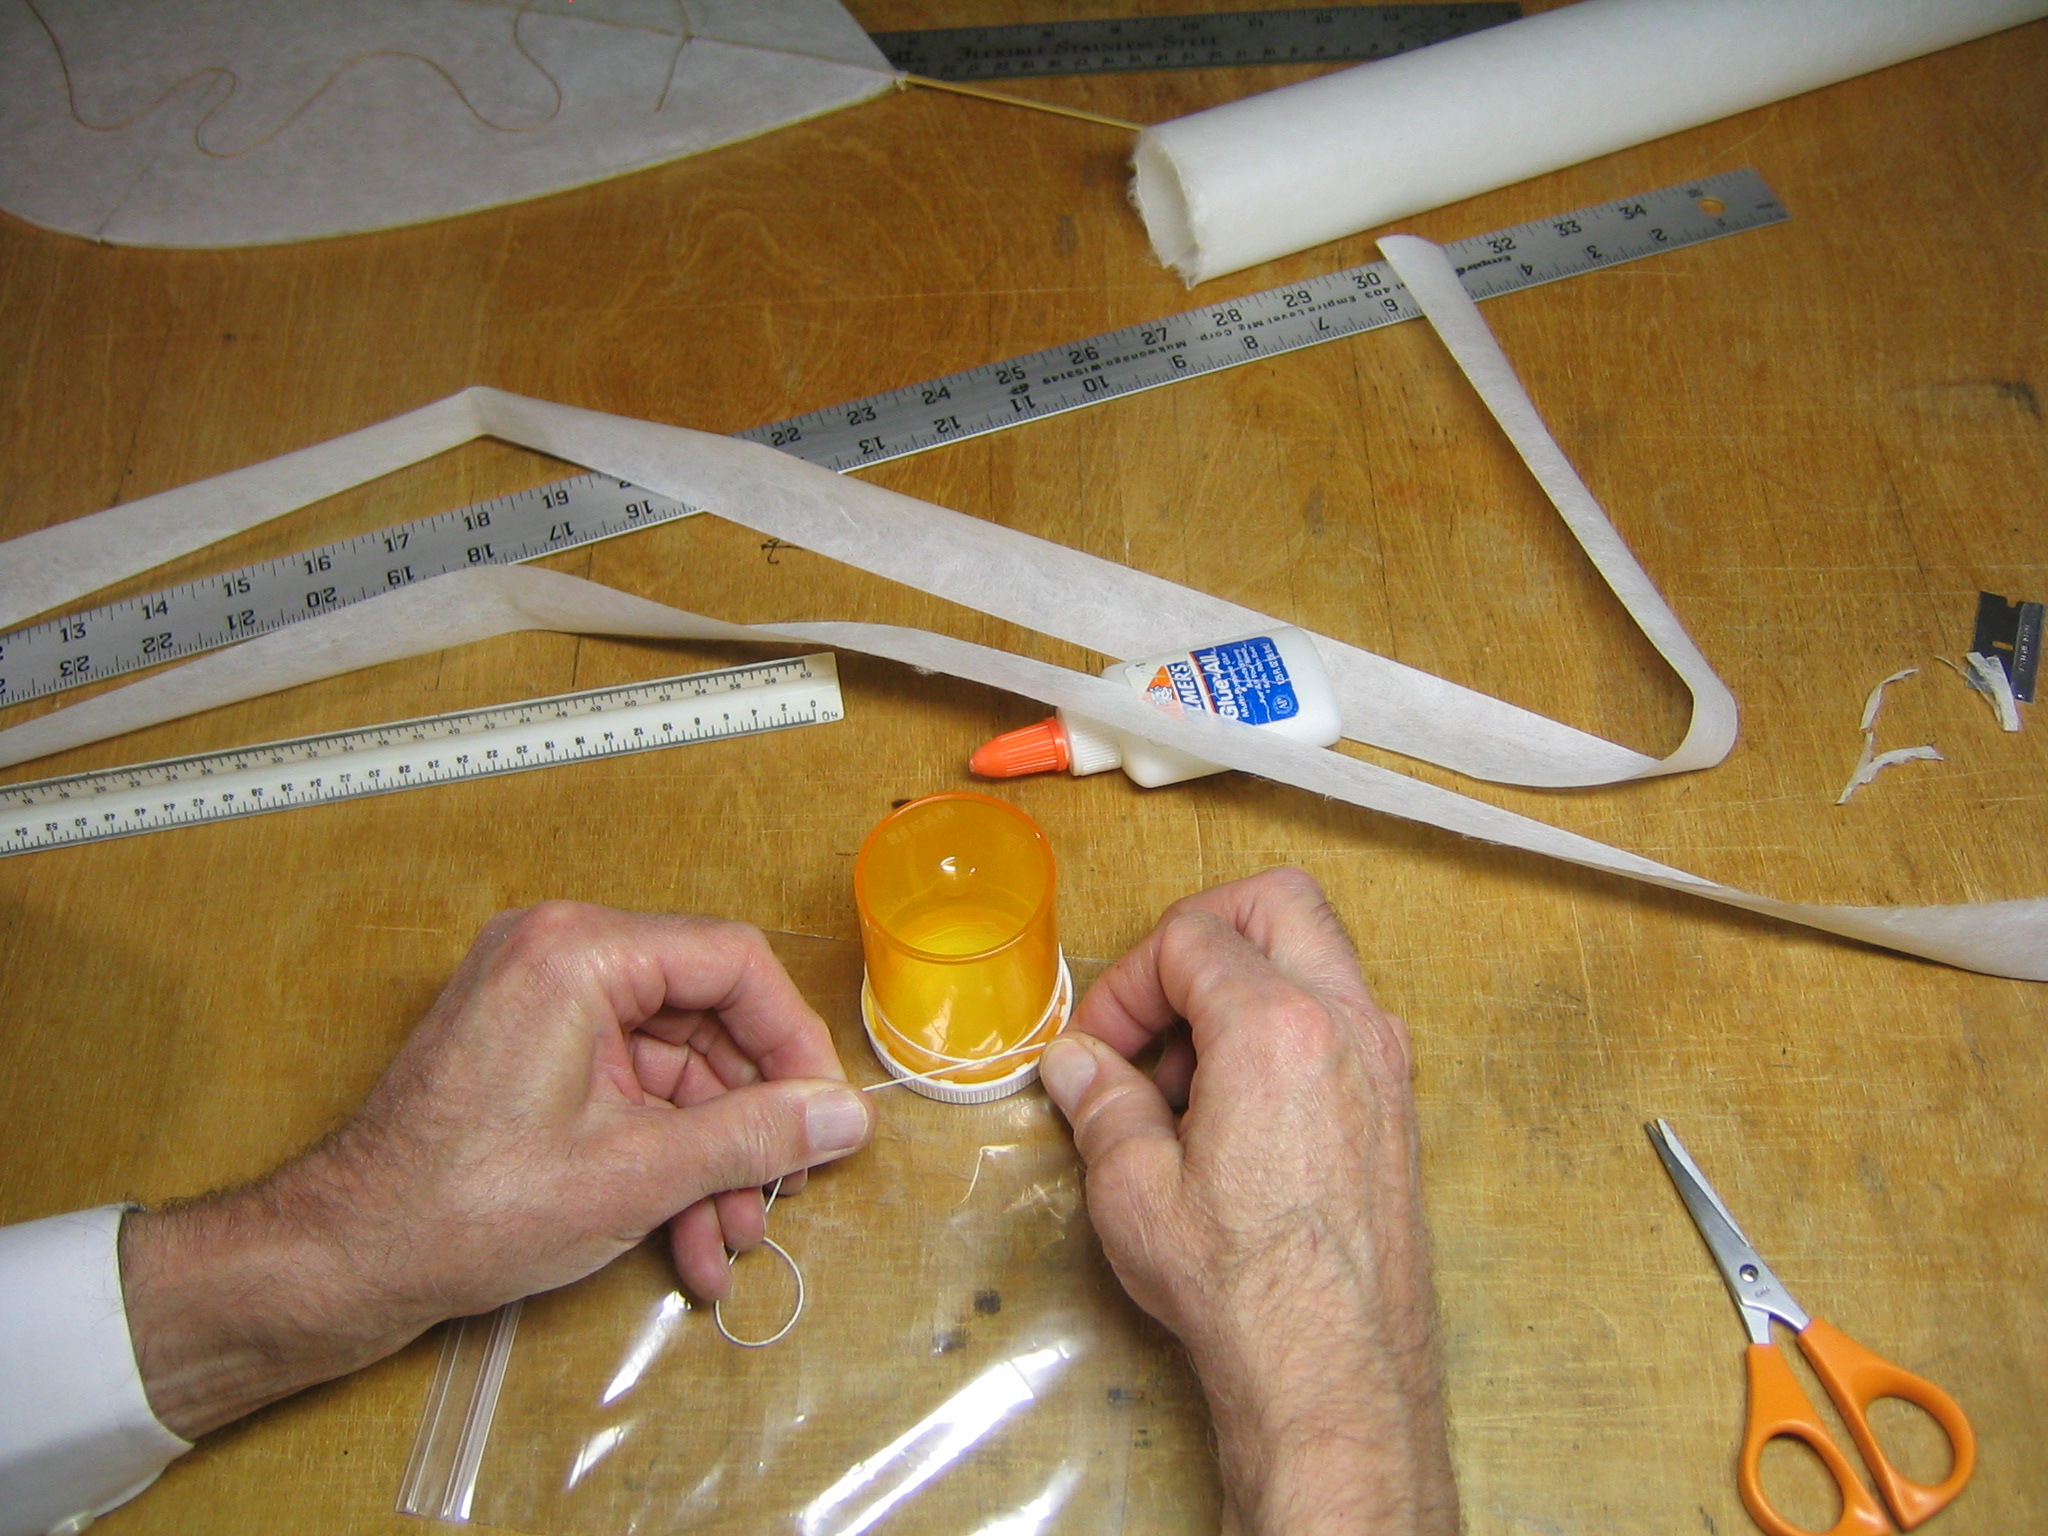
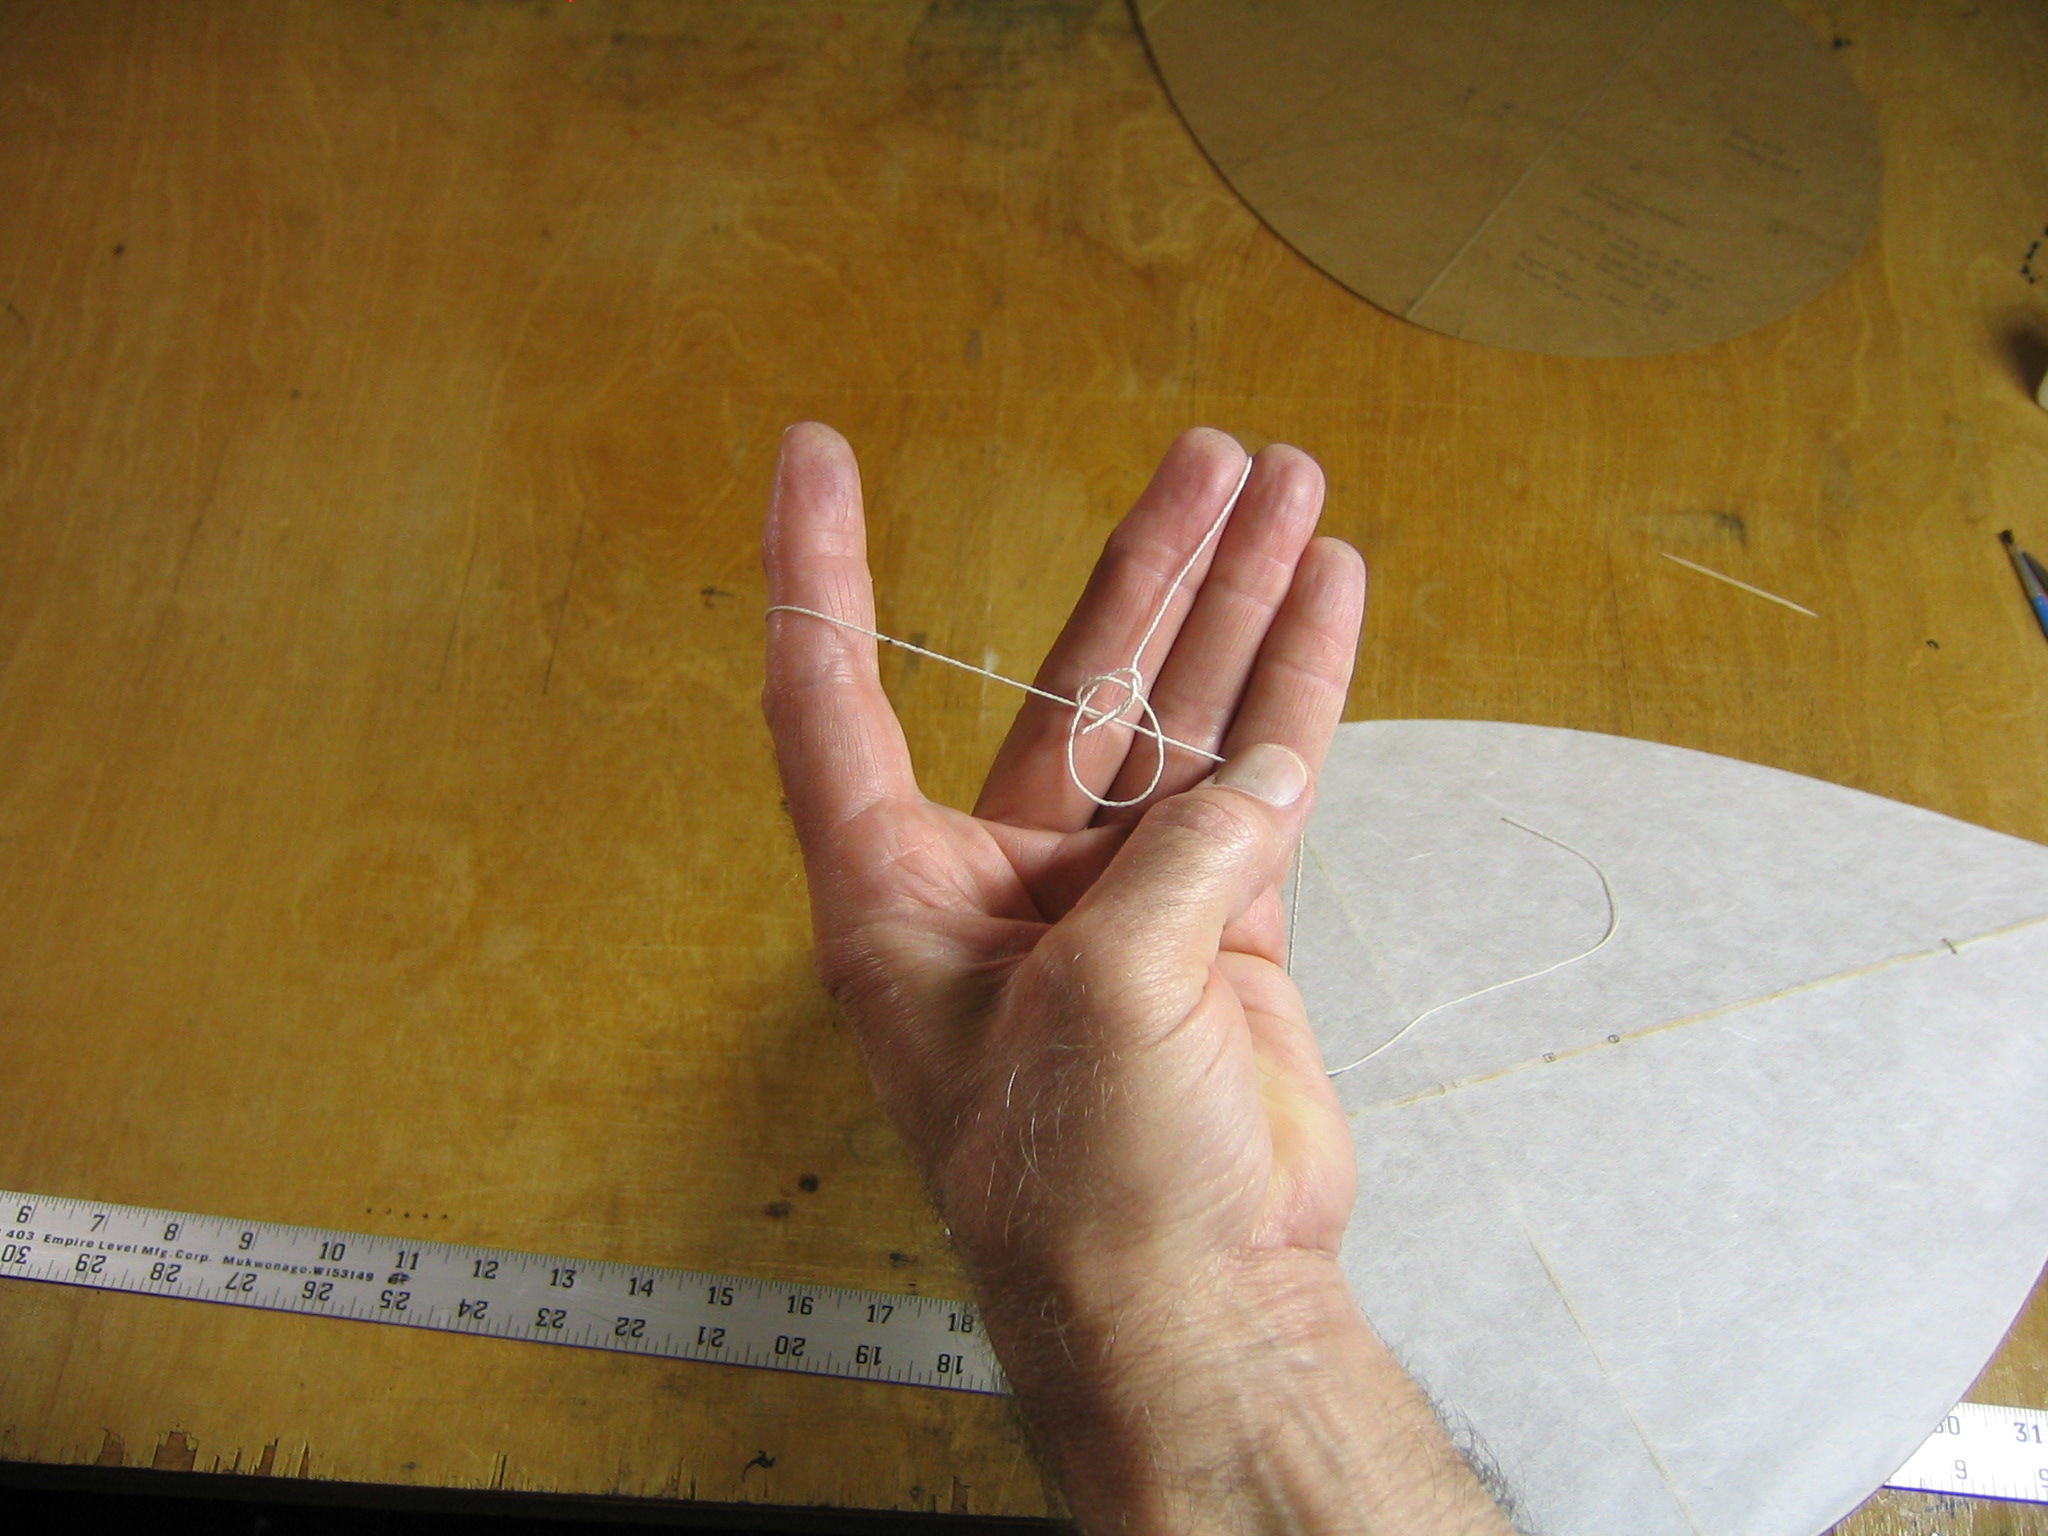
Tie string around something with about a 6″ circumference. A 3″ post card would do.
Cut the string off about 1/2″ away from the knot.
Fold the corners of one end of the tail over to crease, then unfold.
Draw a line of glue on each crease.
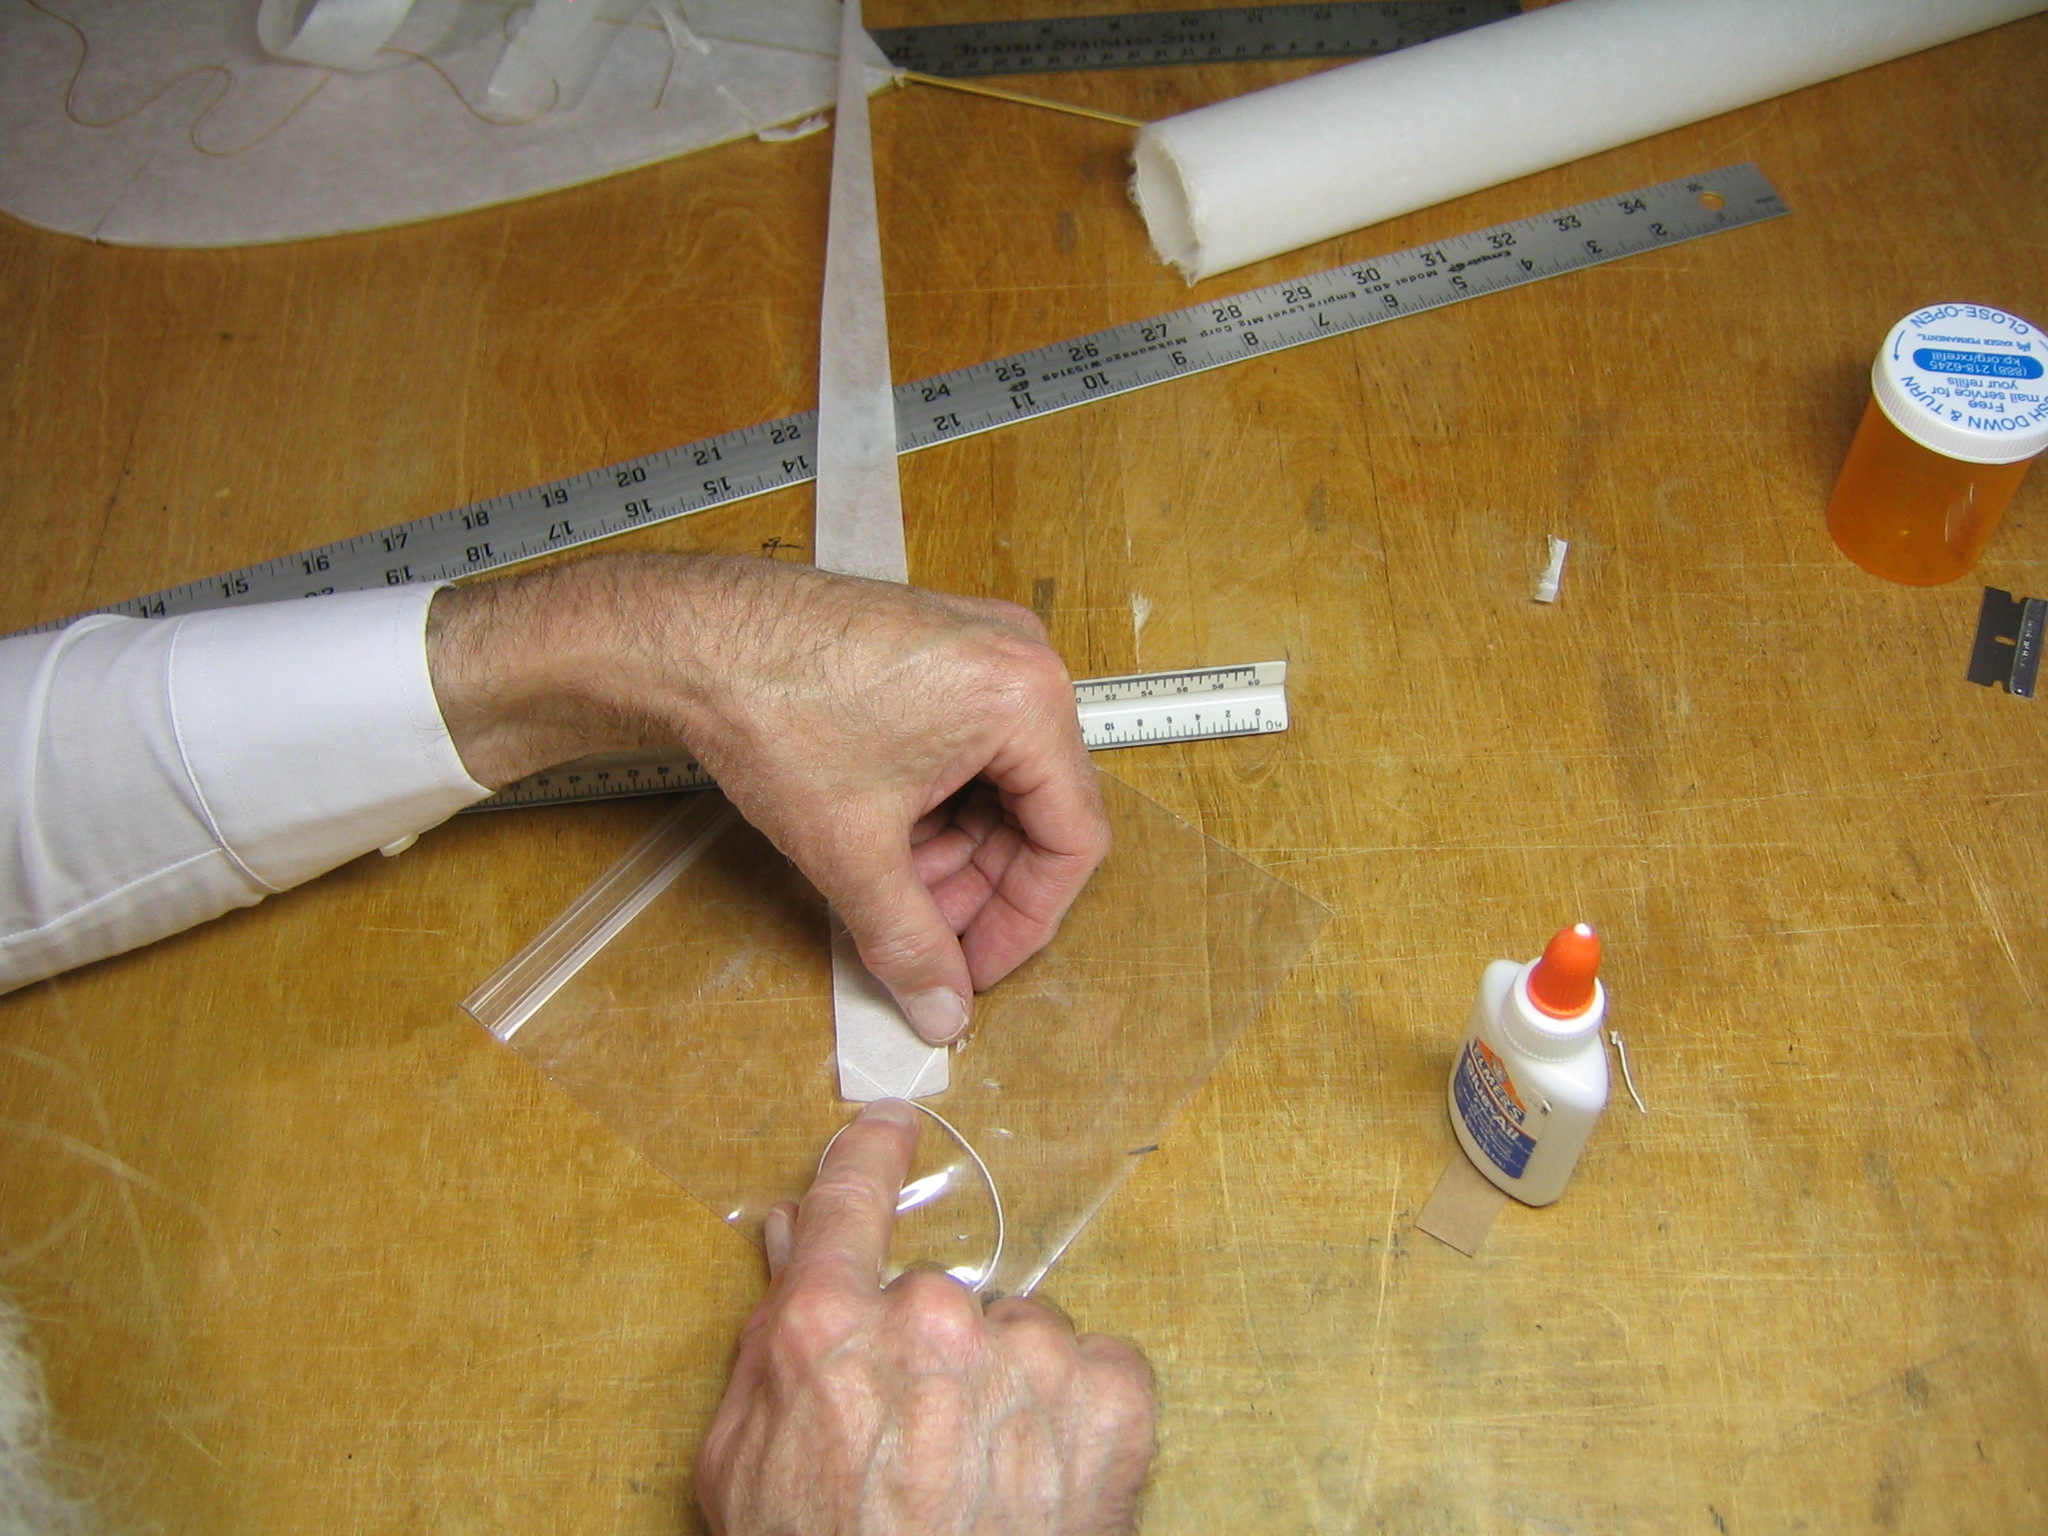
Place the knot at the apex and press the string ends into the glue.
Put glue on the corner flaps.
Spread the glue with a bit of cardboard.

Fold the corners over and press together.

Crumple and crush the tail to make it soft and supple. The tails weighed 1.4 grams each.
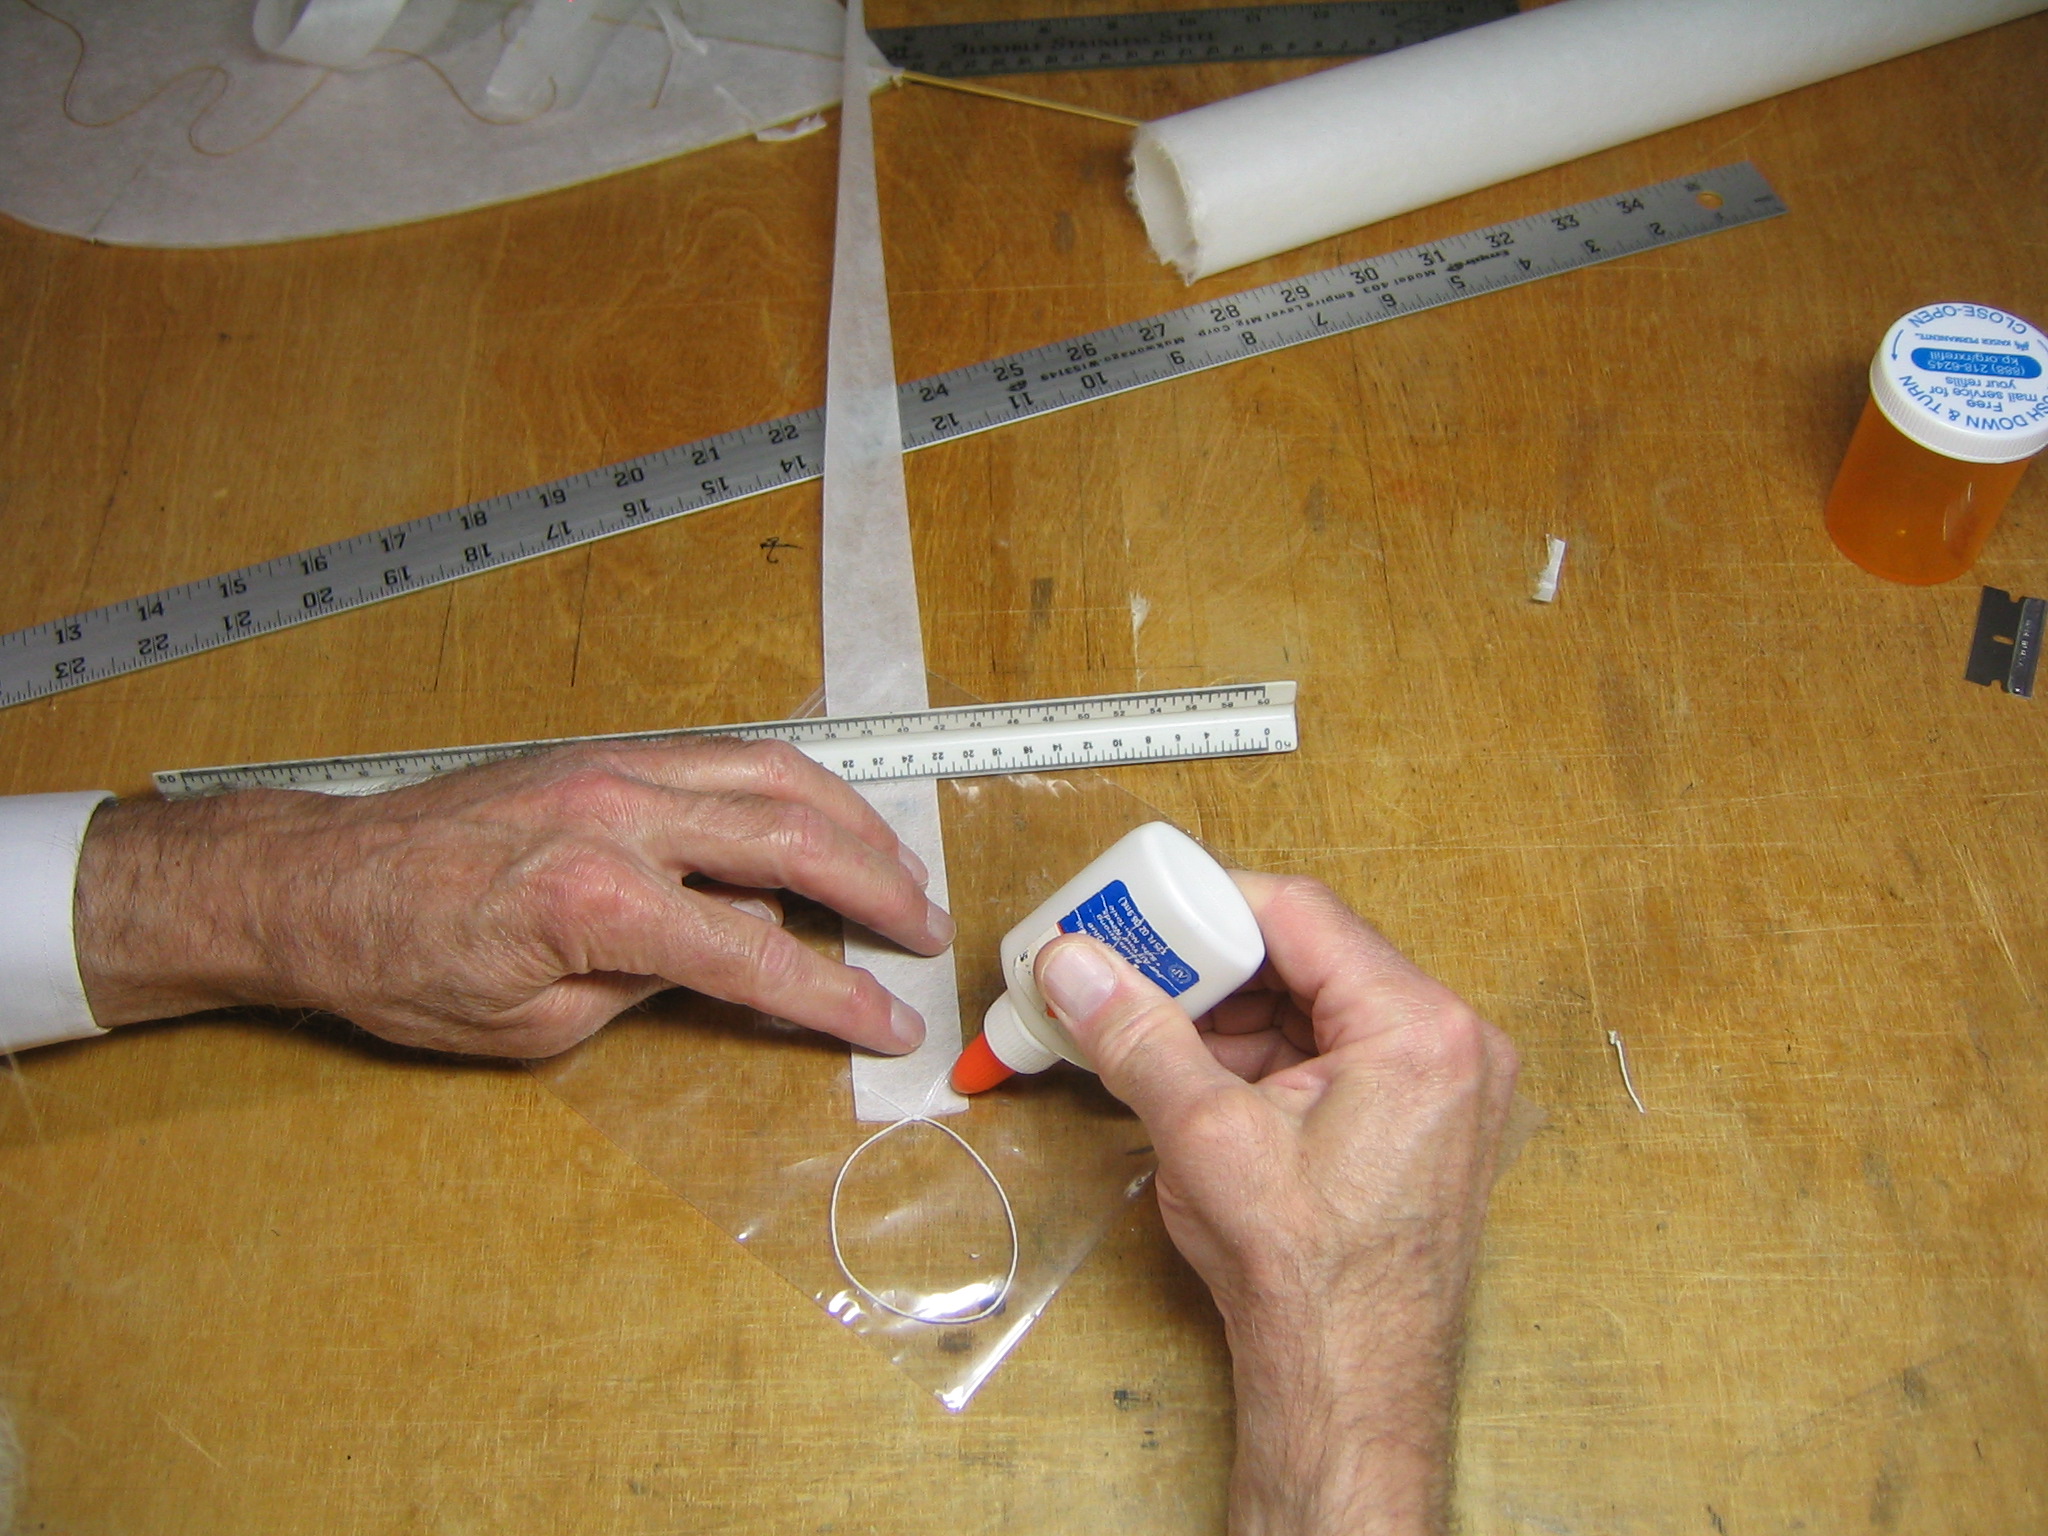
Mark 1/4″ from the end of the sting.
File a notch in the edges of the sting. This sting increases the effectiveness of the tails.
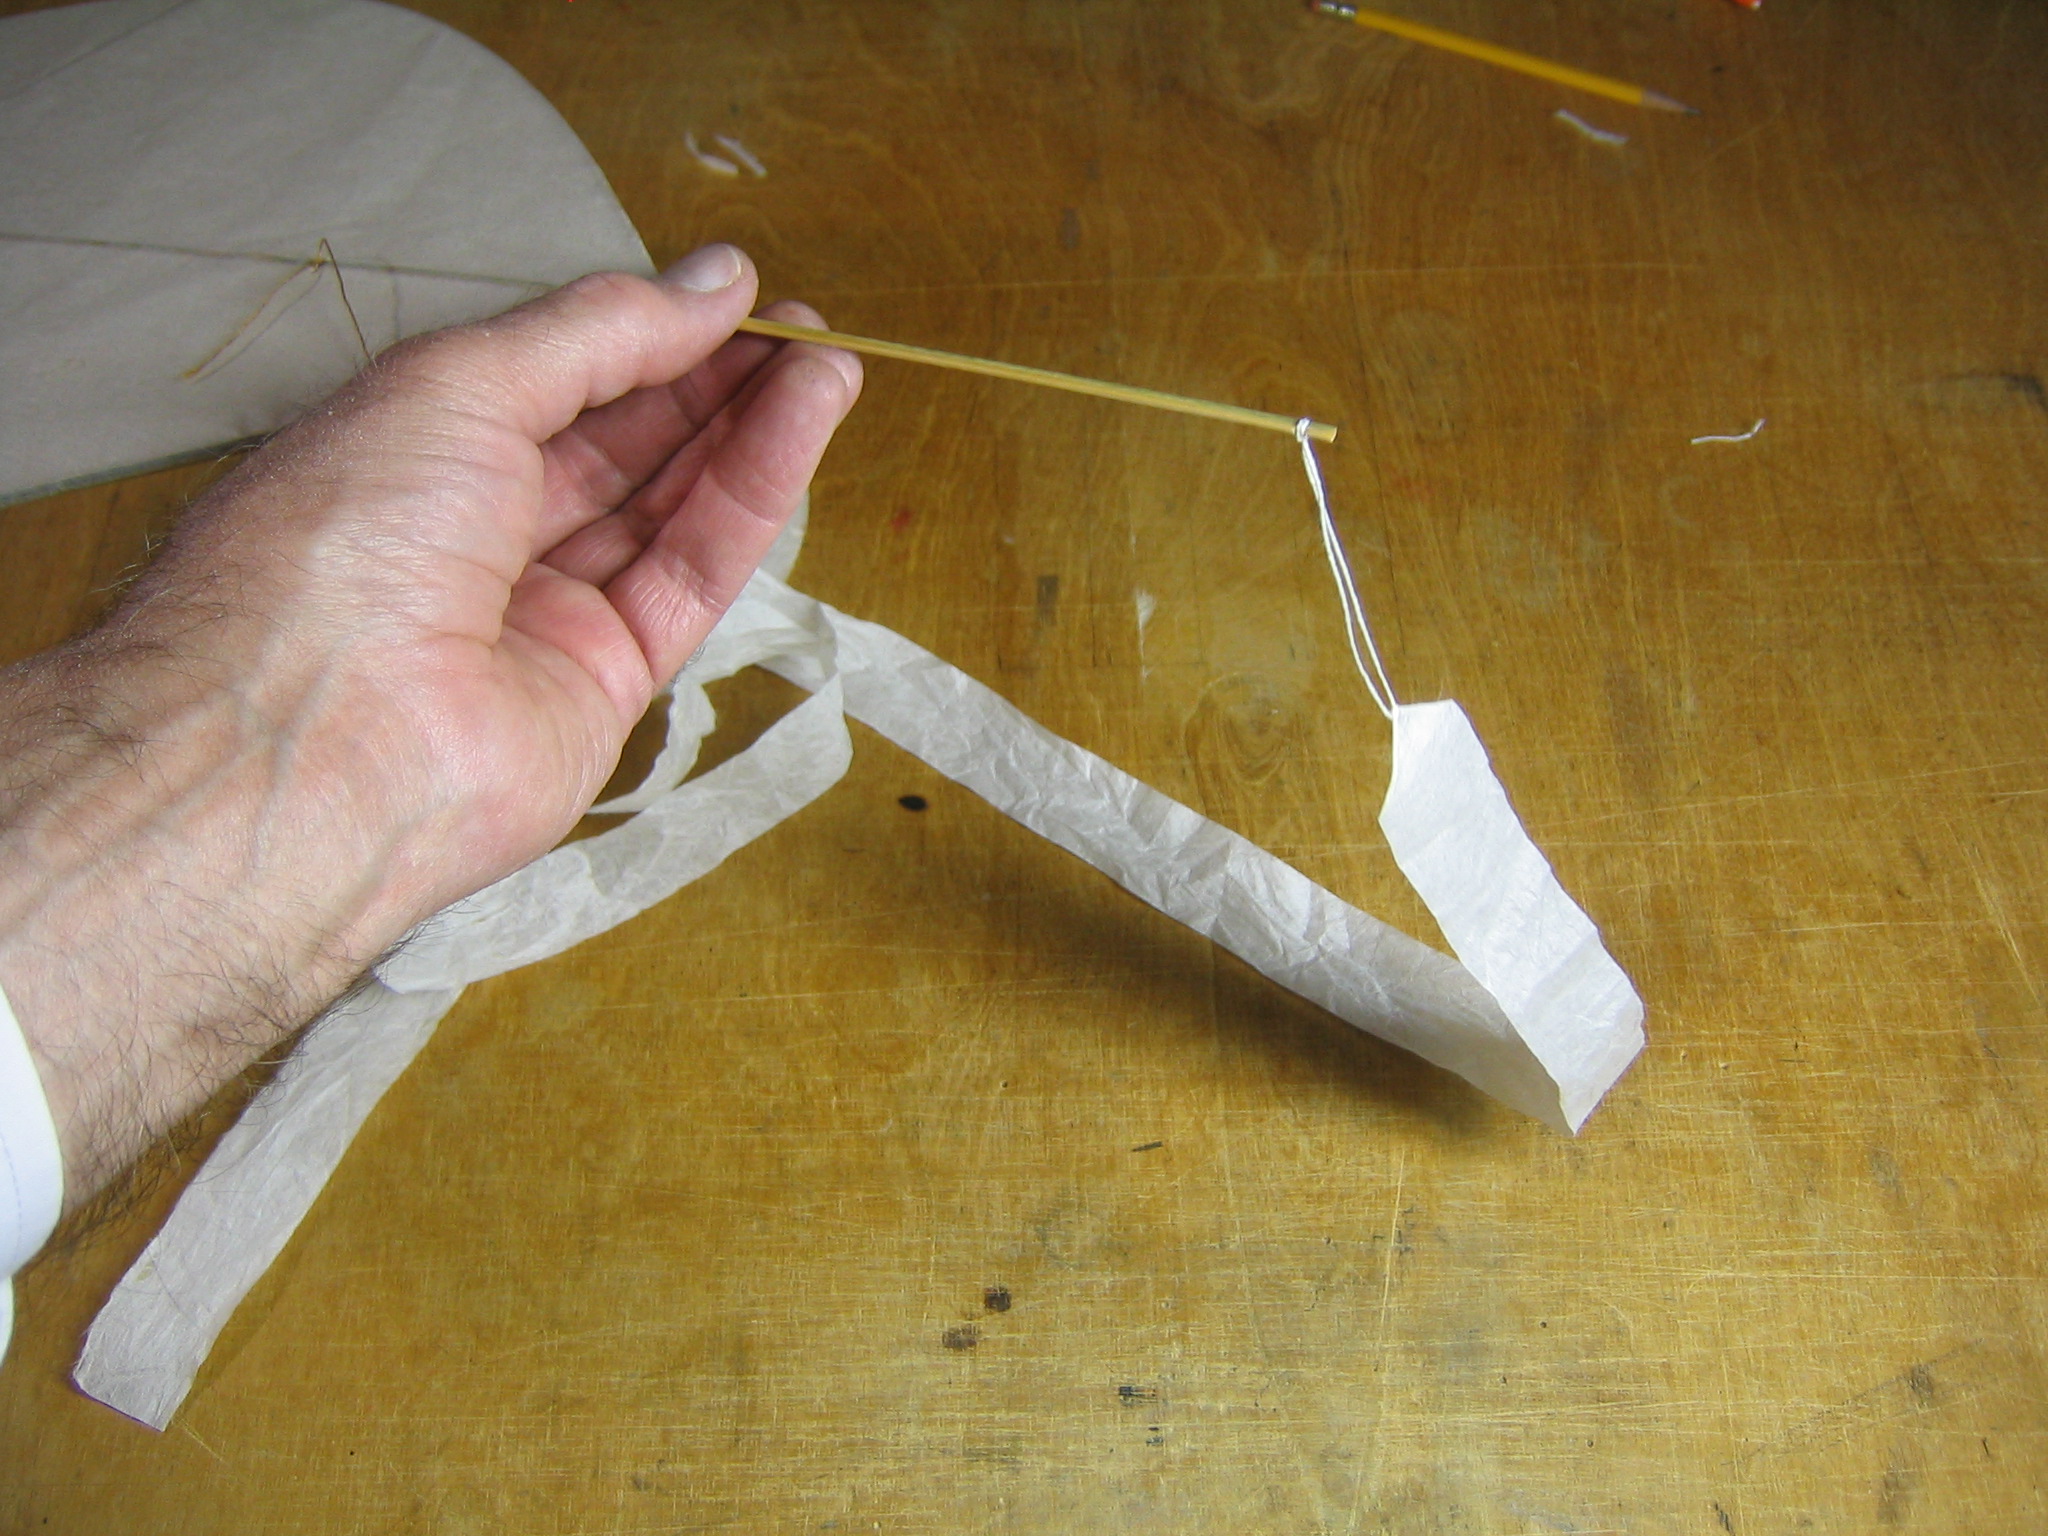
Tie the tail tightly around the notch with a clove hitch. Once the final tail length is found, the knot may be glued in place.
Flight Testing
Much flight testing is required to explore the kites performance with various combinations of bridle, tail, wind speed and line length. As I complete tests, I record them in a pocket notebook.
Bridle position affects both stability and elevation angle. Often the best elevation angle requires a low attack angle and a forward bridle location, but stability may require a more aft bridle location. Achieving a high line elevation requires strong stabilization from tails or other mechanisms. Achieving the highest elevation angle with this kite will require tests of many combinations of tails and bridle rig. The difficulty is that anything done to affect stability can go too far in either direction.
Initial flight testing showed that the kite needed at least two tails and it sometimes flew better with three. I put the first two tails on with the knot around the stick above the notch and put the third tail in the notch. Once the final arrangement has been settled, you may glue the tail strings to the stick.
The kite spun uncontrollably with the forward bridle position and one or two tails. Spinning and the requirement for a lot of tail is common for flat kites. Moving the bridle point aft can control the spin.
With the bridle moved back a little, it could be flown, but would still spin when the wind speed picked up a little. The spin got worse as the kite got closer to the ground. It could be controlled by walking toward the kite to relieve the pressure. It also has a rapid roll oscillation. There are several possible reasons for this and several possible remedies.
With the bridle moved back a little more, to about 1/2″ forward of the cross stick, it was more stable, but could still be made to spin by running into the wind. I had it up to the end of a 100 yard spool of thread. I had to be fairly confident, because there is a row of tall trees about 100 feet downwind at the full width of the lawn.
I tried a bow string with the bow depth 1 1/2″. This didn’t make a significant difference.
I used three tails, one on center line and one at each wing tip. It was flyable, but still had the rapid roll oscillation. This is an interesting effect, but it interferes with lift production.
I added lateral bridle lines to each end of the cross stick. This must be exactly centered. If it is off center to one side, the kite will fly off to that side. This stopped the roll oscillation and flew with two central tails.
With the tow point 3/4″ ahead of the cross stick and three central tails or one central tail and a tail on each wing tip, the kite did not want to go up. It would run along beside me. I tried moving the tow point aft and it got worse. So I moved it forward. With the tow point offset perpendicular to the AC, it wanted to go up, but would spin easily. I took the tails off the wingtips and flew with the single central tail. It showed promise, making a nice climb, but still would occasionally spin. I tied a second tail to the end of the first tail and it flew fine.
I moved the tow point back to the original position. I tied 15″ of 1.5 mm x 3 mm bamboo to the end of the sting with 1″ of overlap. This flew fine with two tails joined end to end. But I had removed the lateral bridle, it was too difficult to adjust, and so the rapid roll oscillation returned.
Three Leg Bridle
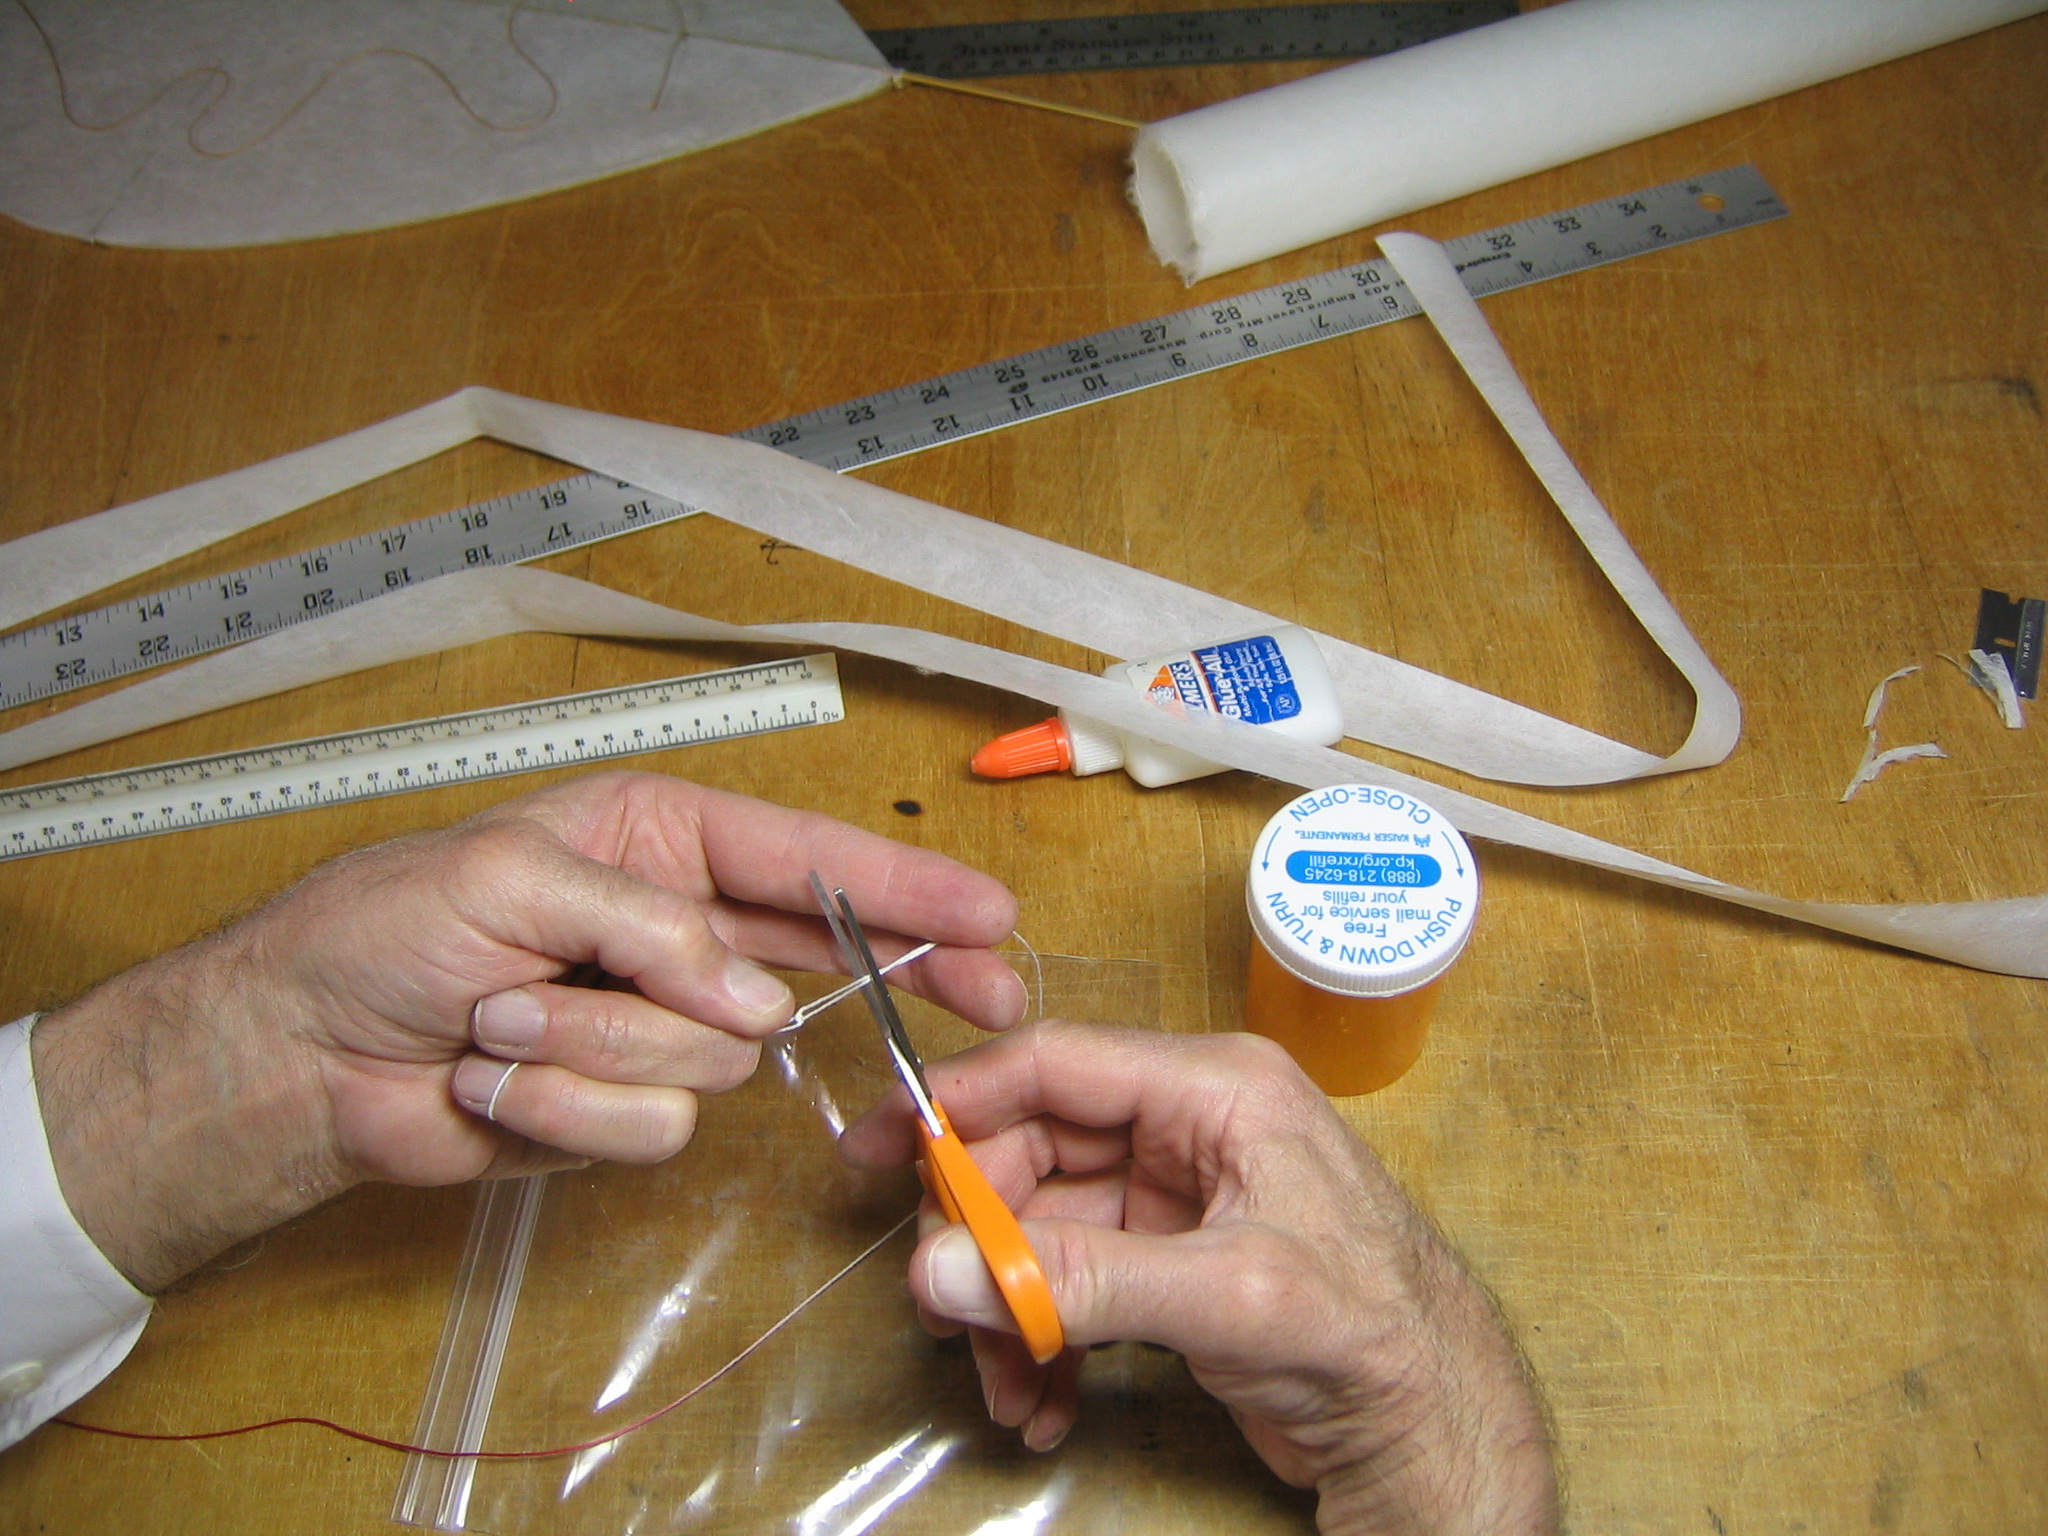
I decided to replace the bridle with a completely new bridle. I will use a three leg bridle, with a lateral loop forward and a longitudinal line running back to the spine aft. This will allow fine adjustment of the lateral and longitudinal position of the tow point. It will also prevent the rapid roll oscillation. The first step was removing the original bridle.
The lateral forward bridle will run side to side in the same location as the LE, where the front end of the original bridle was tied. Mark points on the perimeter perpendicular to the LE, 1 1/2″ behind the front edge. Mark both sides.
With a sharp point, poke holes through the paper about 1/16″ in diameter at each mark.
Cut a 27″ length of string.
Put the ends together, pull out and mark the center.

Mark both 11 5/8″ from the center.
Tie each end around the perimeter so the string exits the knot exactly at the pencil mark. I use a clove hitch.
Paint the knots with dilute glue. We will not be adjusting the length of this loop and we don’t want the knots to slip.
That completes the forward, lateral part of the bridle.
Cut a 22 1/2″ length of string.
Tie a 1″ bowline in the end, so the lateral bridle runs through the knot itself, not through the loop.
Slide the knot to center it on the pencil mark on the lateral bridle.
Pull the knot tight. This will hold, but allows the knot to be slid sideways for adjustments. Once a final position is found, the knot can be glued in place.
You can verify that the knot is centered by pulling it down against the face of the kite. It should lie on the center of the spine. Coincidentally, it aligns with the aft bridle holes.
Mark 14 1/4″ from the knot along the aft bridle line.
Put the aft bridle through the holes in the paper, around the spine and tie with a slip knot so the string emerges from the knot at the pencil mark.
This completes the adjustable three leg bridle. Now it is ready for the flight tests.
Flying
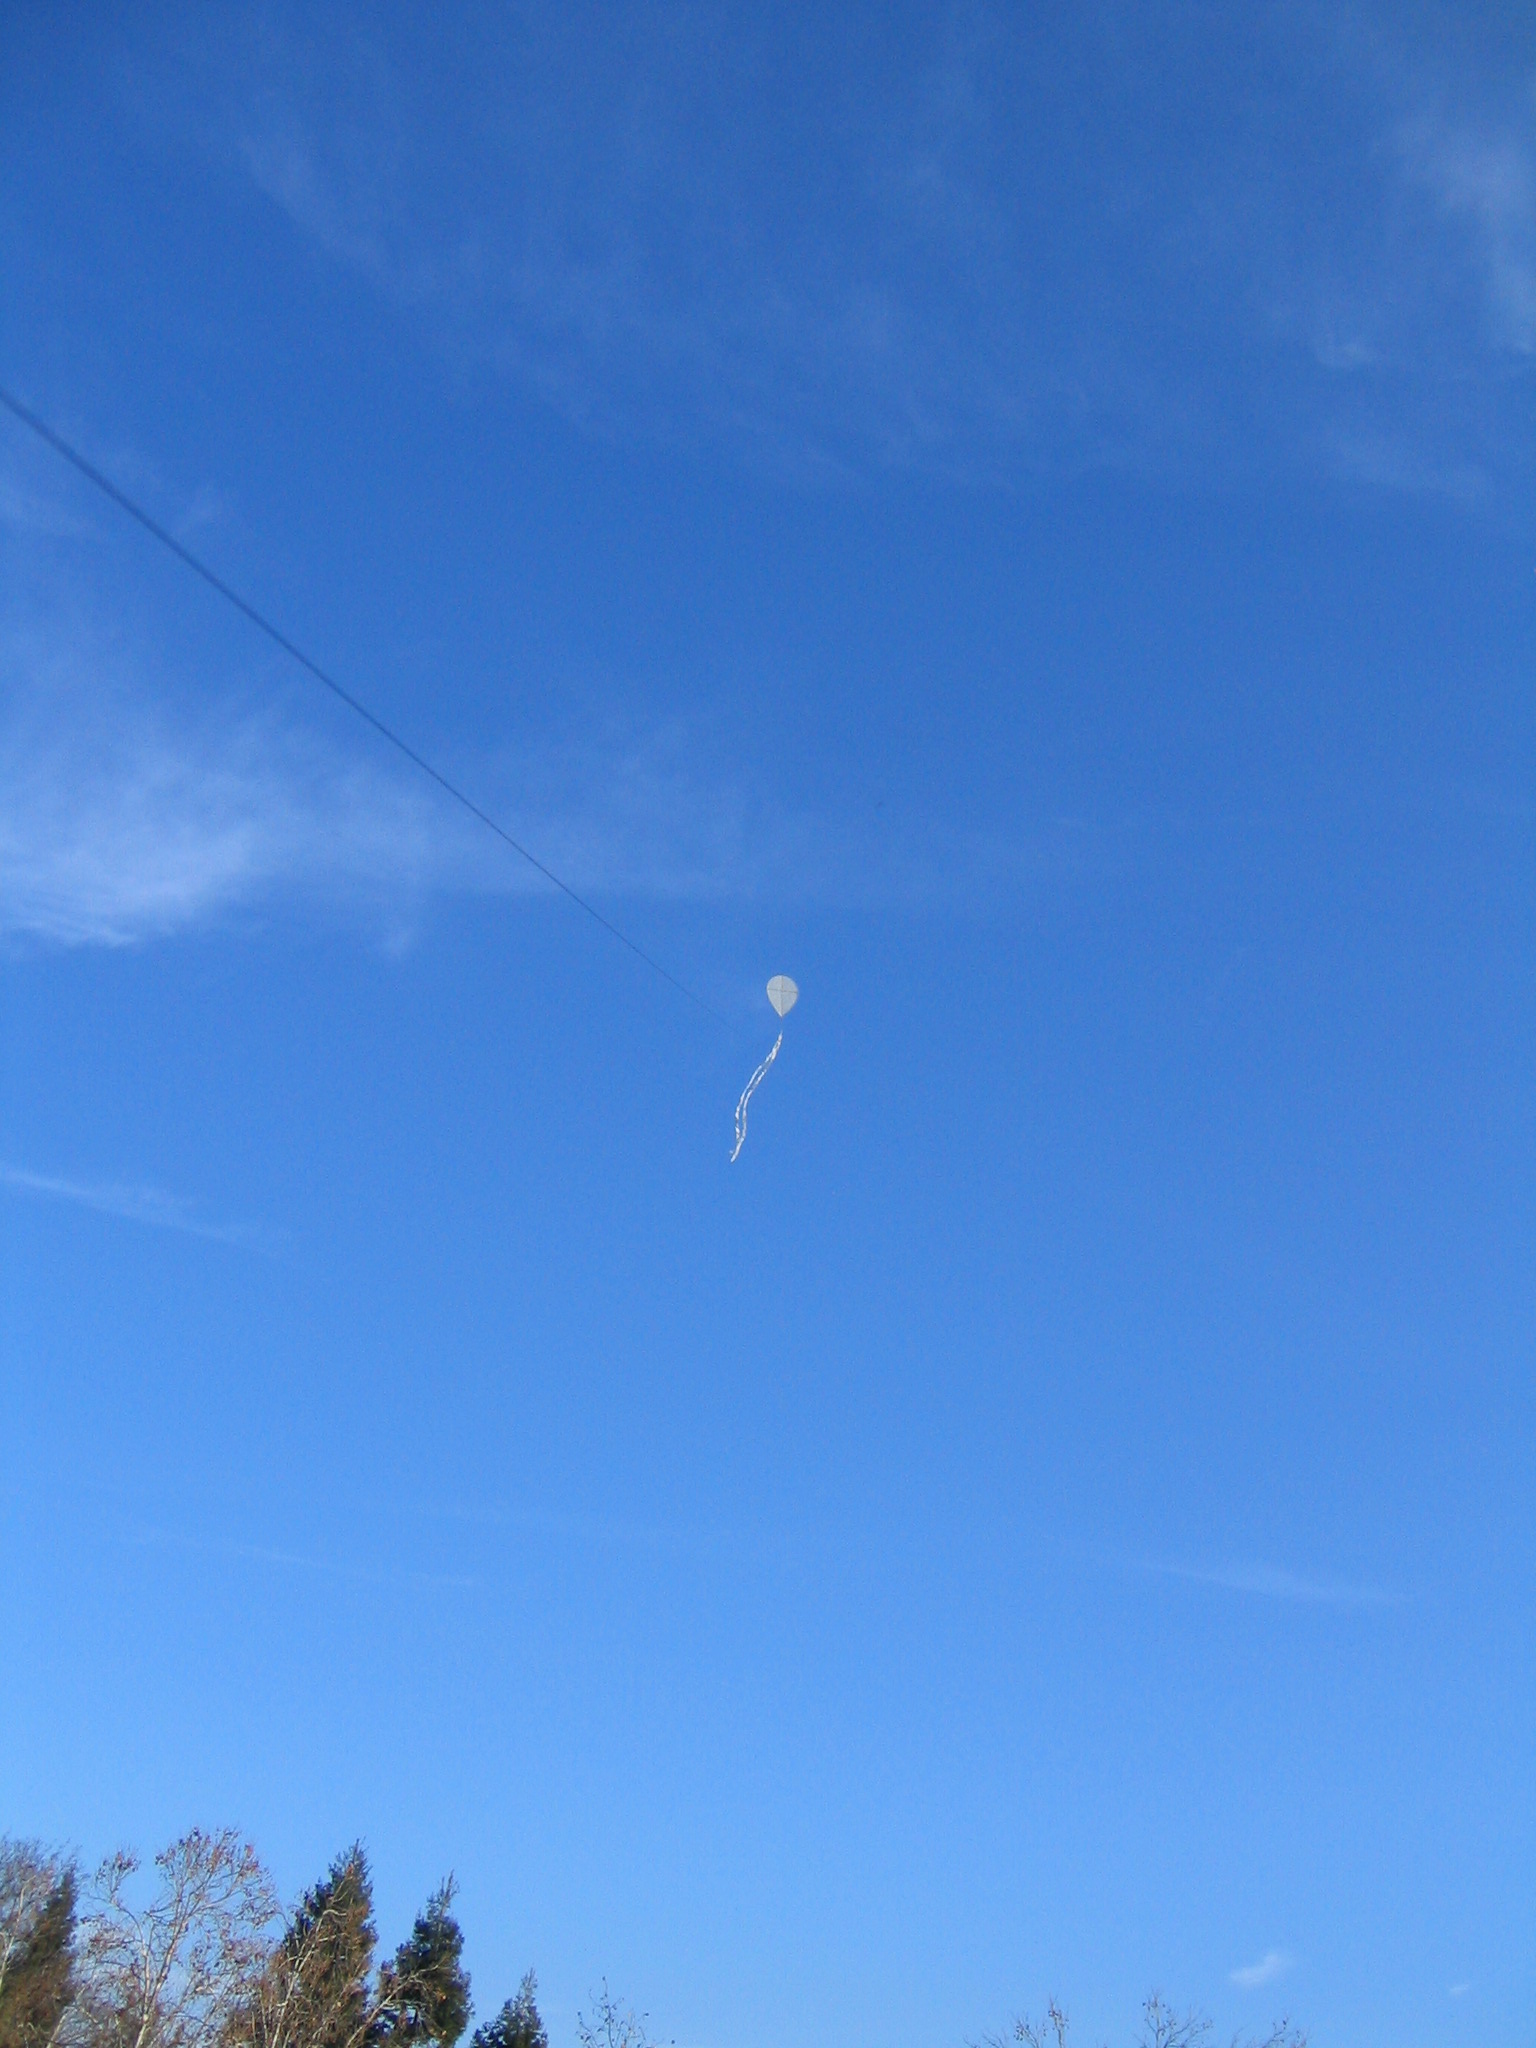
Test flight on 100 feet of thread showed that the adjustments produced a stable, flyable kite. We have overcome the spinning and roll oscillations that were present on early flights.
I let it out to the end of the 300 foot spool of thread. It was steady enough that I could have tied the line to a peg in the ground and left it flying unattended.
I have a new kite to fly, you can see how you can build one, too, and we have learned what unrecorded intellectual technologies must have been practiced by the aboriginal kite flyers of Pacific Oceania.
Lessons learned about flying this type of kite are:
1. The tow point can be located in a position that will allow a high elevation of flight. This can be established by simple trial, or it can be based on rules derived from past experience with similar kites. In this case, I calculated the position of the mean chord and the quarter chord point, then projected a line a bit forward of perpendicular to that point to locate the tow point.
2. A long sting behind the kite improves the effectiveness of the tail.
3. Even with a sting, a flat kite requires quite a bit of tail. In this case, the kite has 127 square inches of lifting surface and requires 160 or more square inches of tail area.
4. Low aspect ratio wings can develop a roll oscillation. That may be eliminated with a lateral bridle. In this case, the perimeter frame was strong enough that the ends of a forward lateral bridle could be tied to it and the longitudinal bridle adjustment could be made with the length of a longitudinal bridle line going aft to a point on the center line. This allows a simple three leg bridle that facilitates easy lateral and longitudinal adjustment.