The famous Baby R.O.G. was designed by Merrill Hamburg and published in the October 1927 American Boy magazine. This differed from the 1927 ROG described elsewhere on this site in that it had 1/32″ square bamboo framing the fin and the semicircular wingtips. Like the 1927 ROG, it had a 12″ span and a 5″ balsa propeller, the tailplane spar was 1/32″ square bamboo, but the perimeter was framed with thread. Merrill Hamburg of the Airplane Model League of America offered a kit at cost, sixty five cents, postpaid.
The Baby R.O.G. was also described in Merrill Hamburg, Beginning to Fly, The Book of Model Airplanes, published by Houghton Mifflin Company in 1928. This includes a McCoy Baby Biplane, a Baby R.O.G. with a second wing attached with N interplane struts.
In October 1929 American Boy published Hamburg’s New Baby R.O.G. That article describes a plane that matches the Wanner’s Model No. 1 described here. It had wire framing the fin and tailplane and an all balsa wing structure. Kits were available from AMLA for fifty cents.
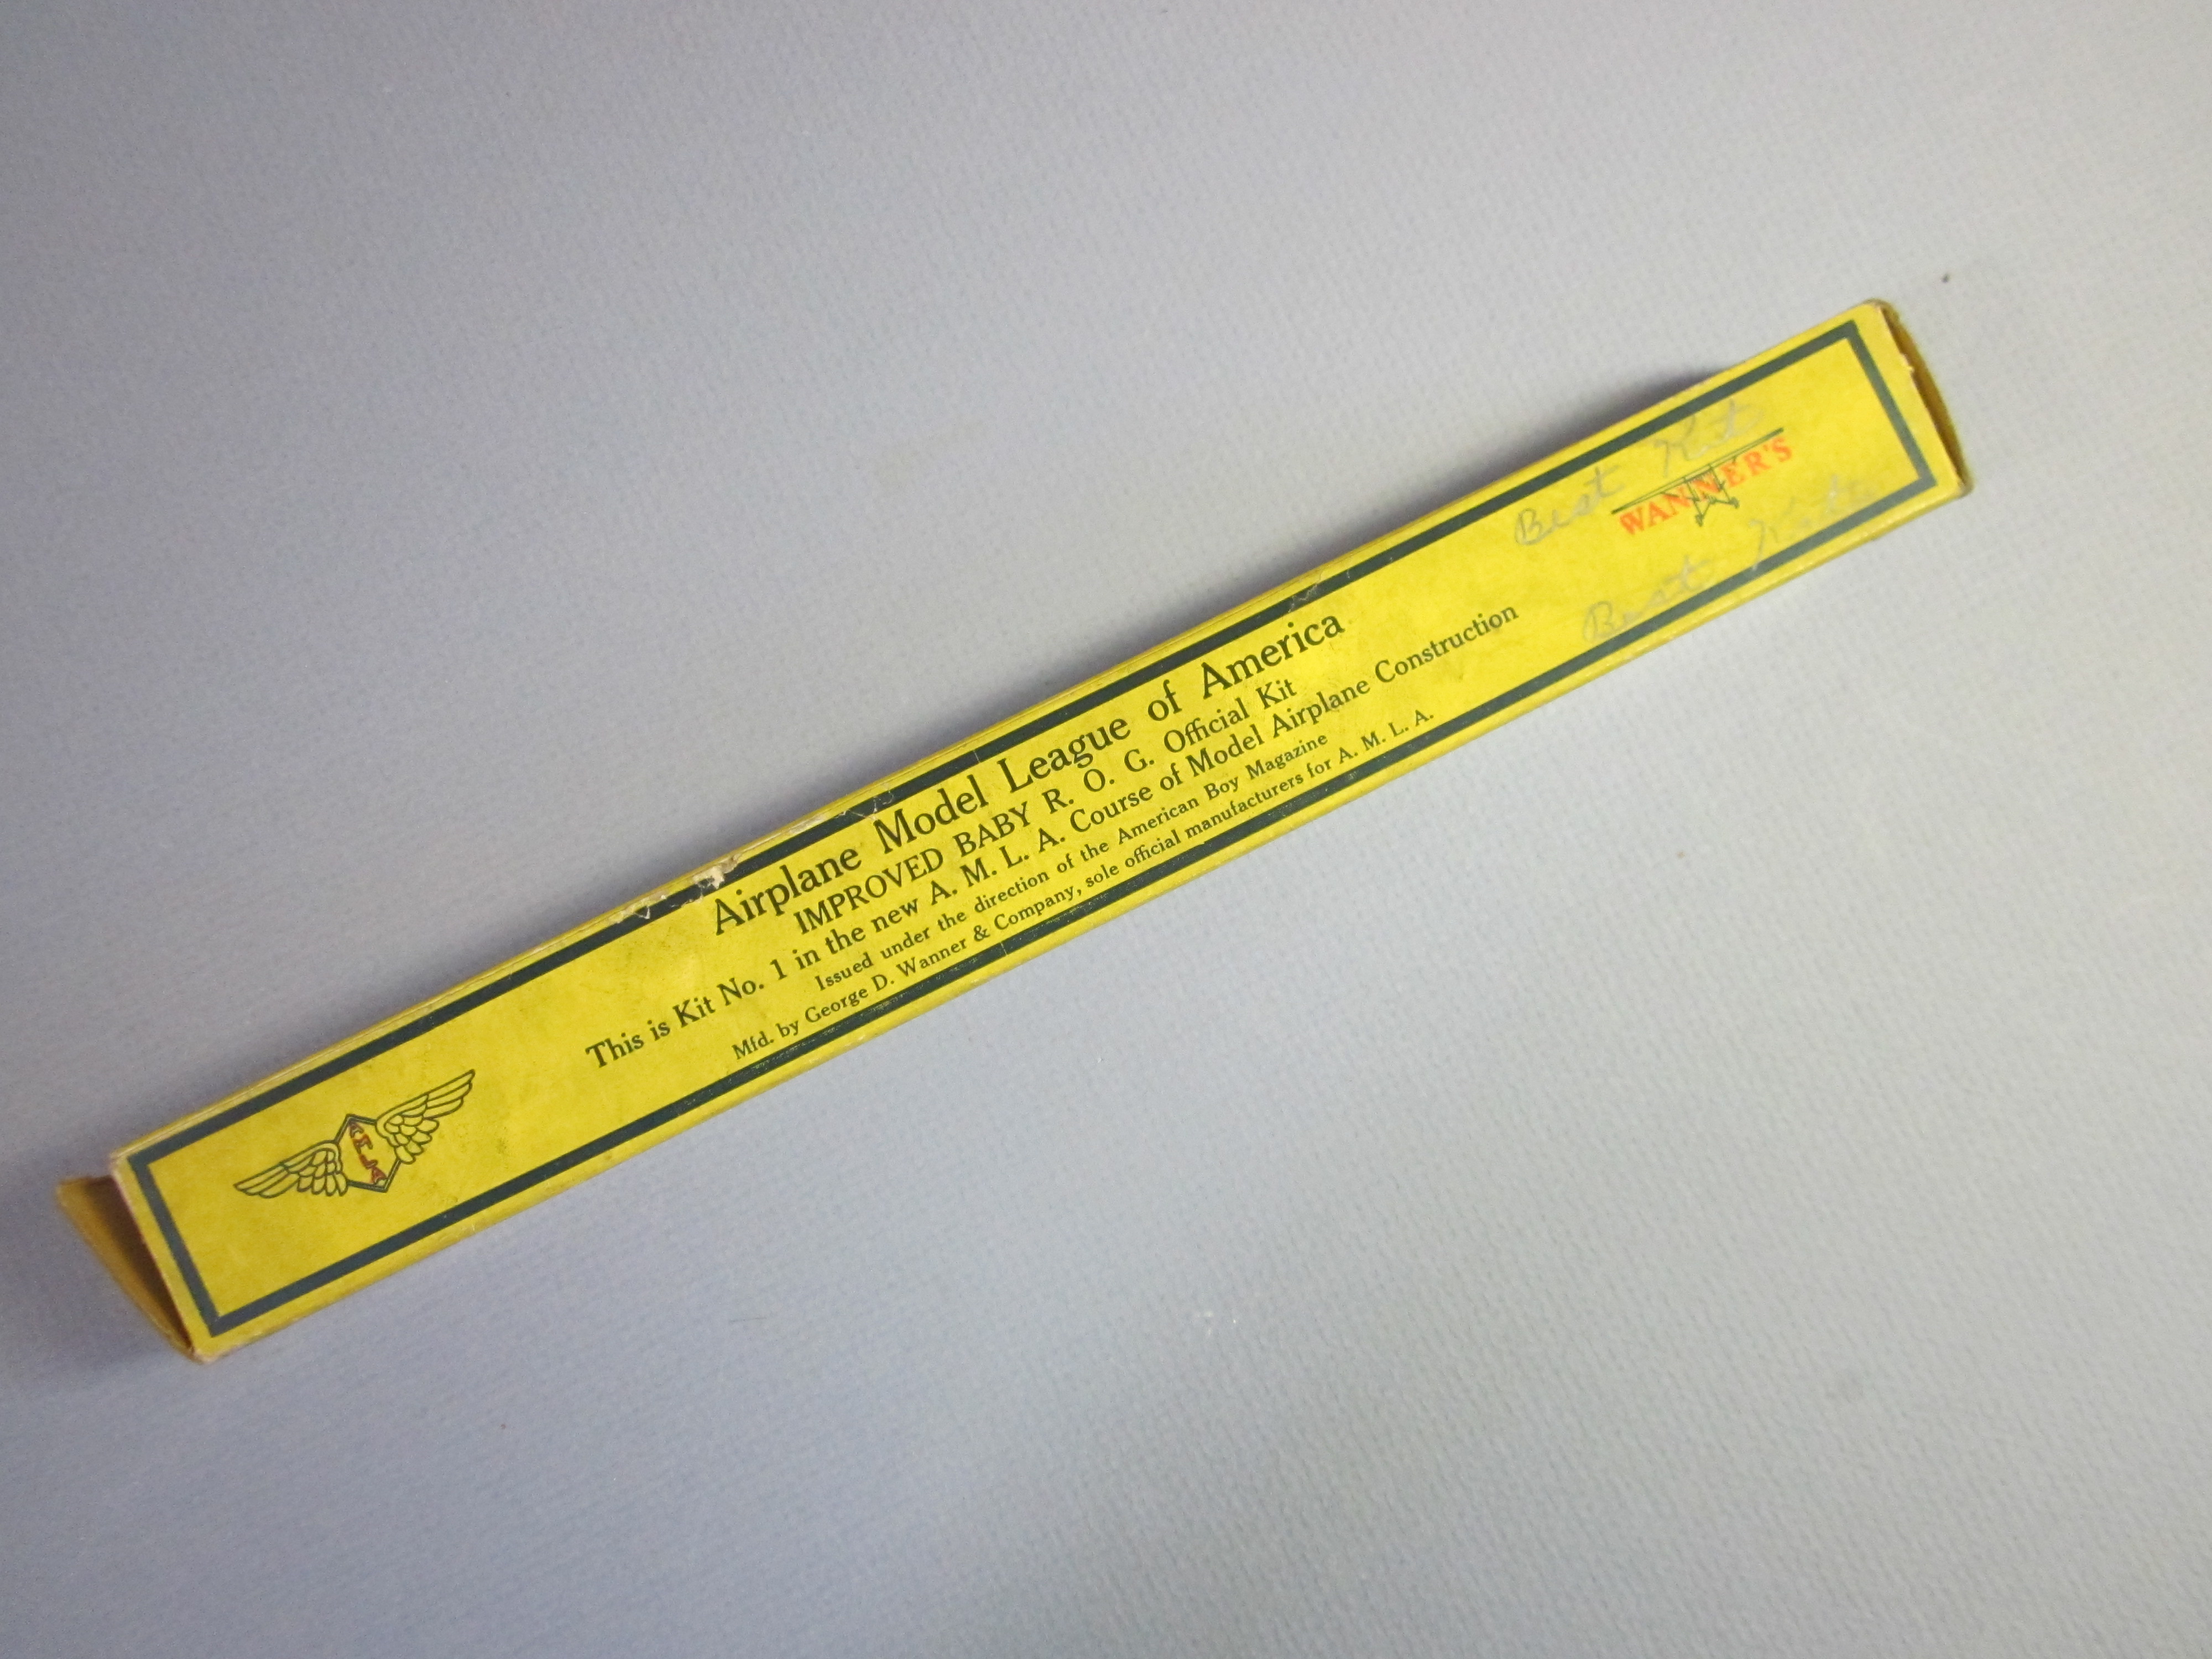
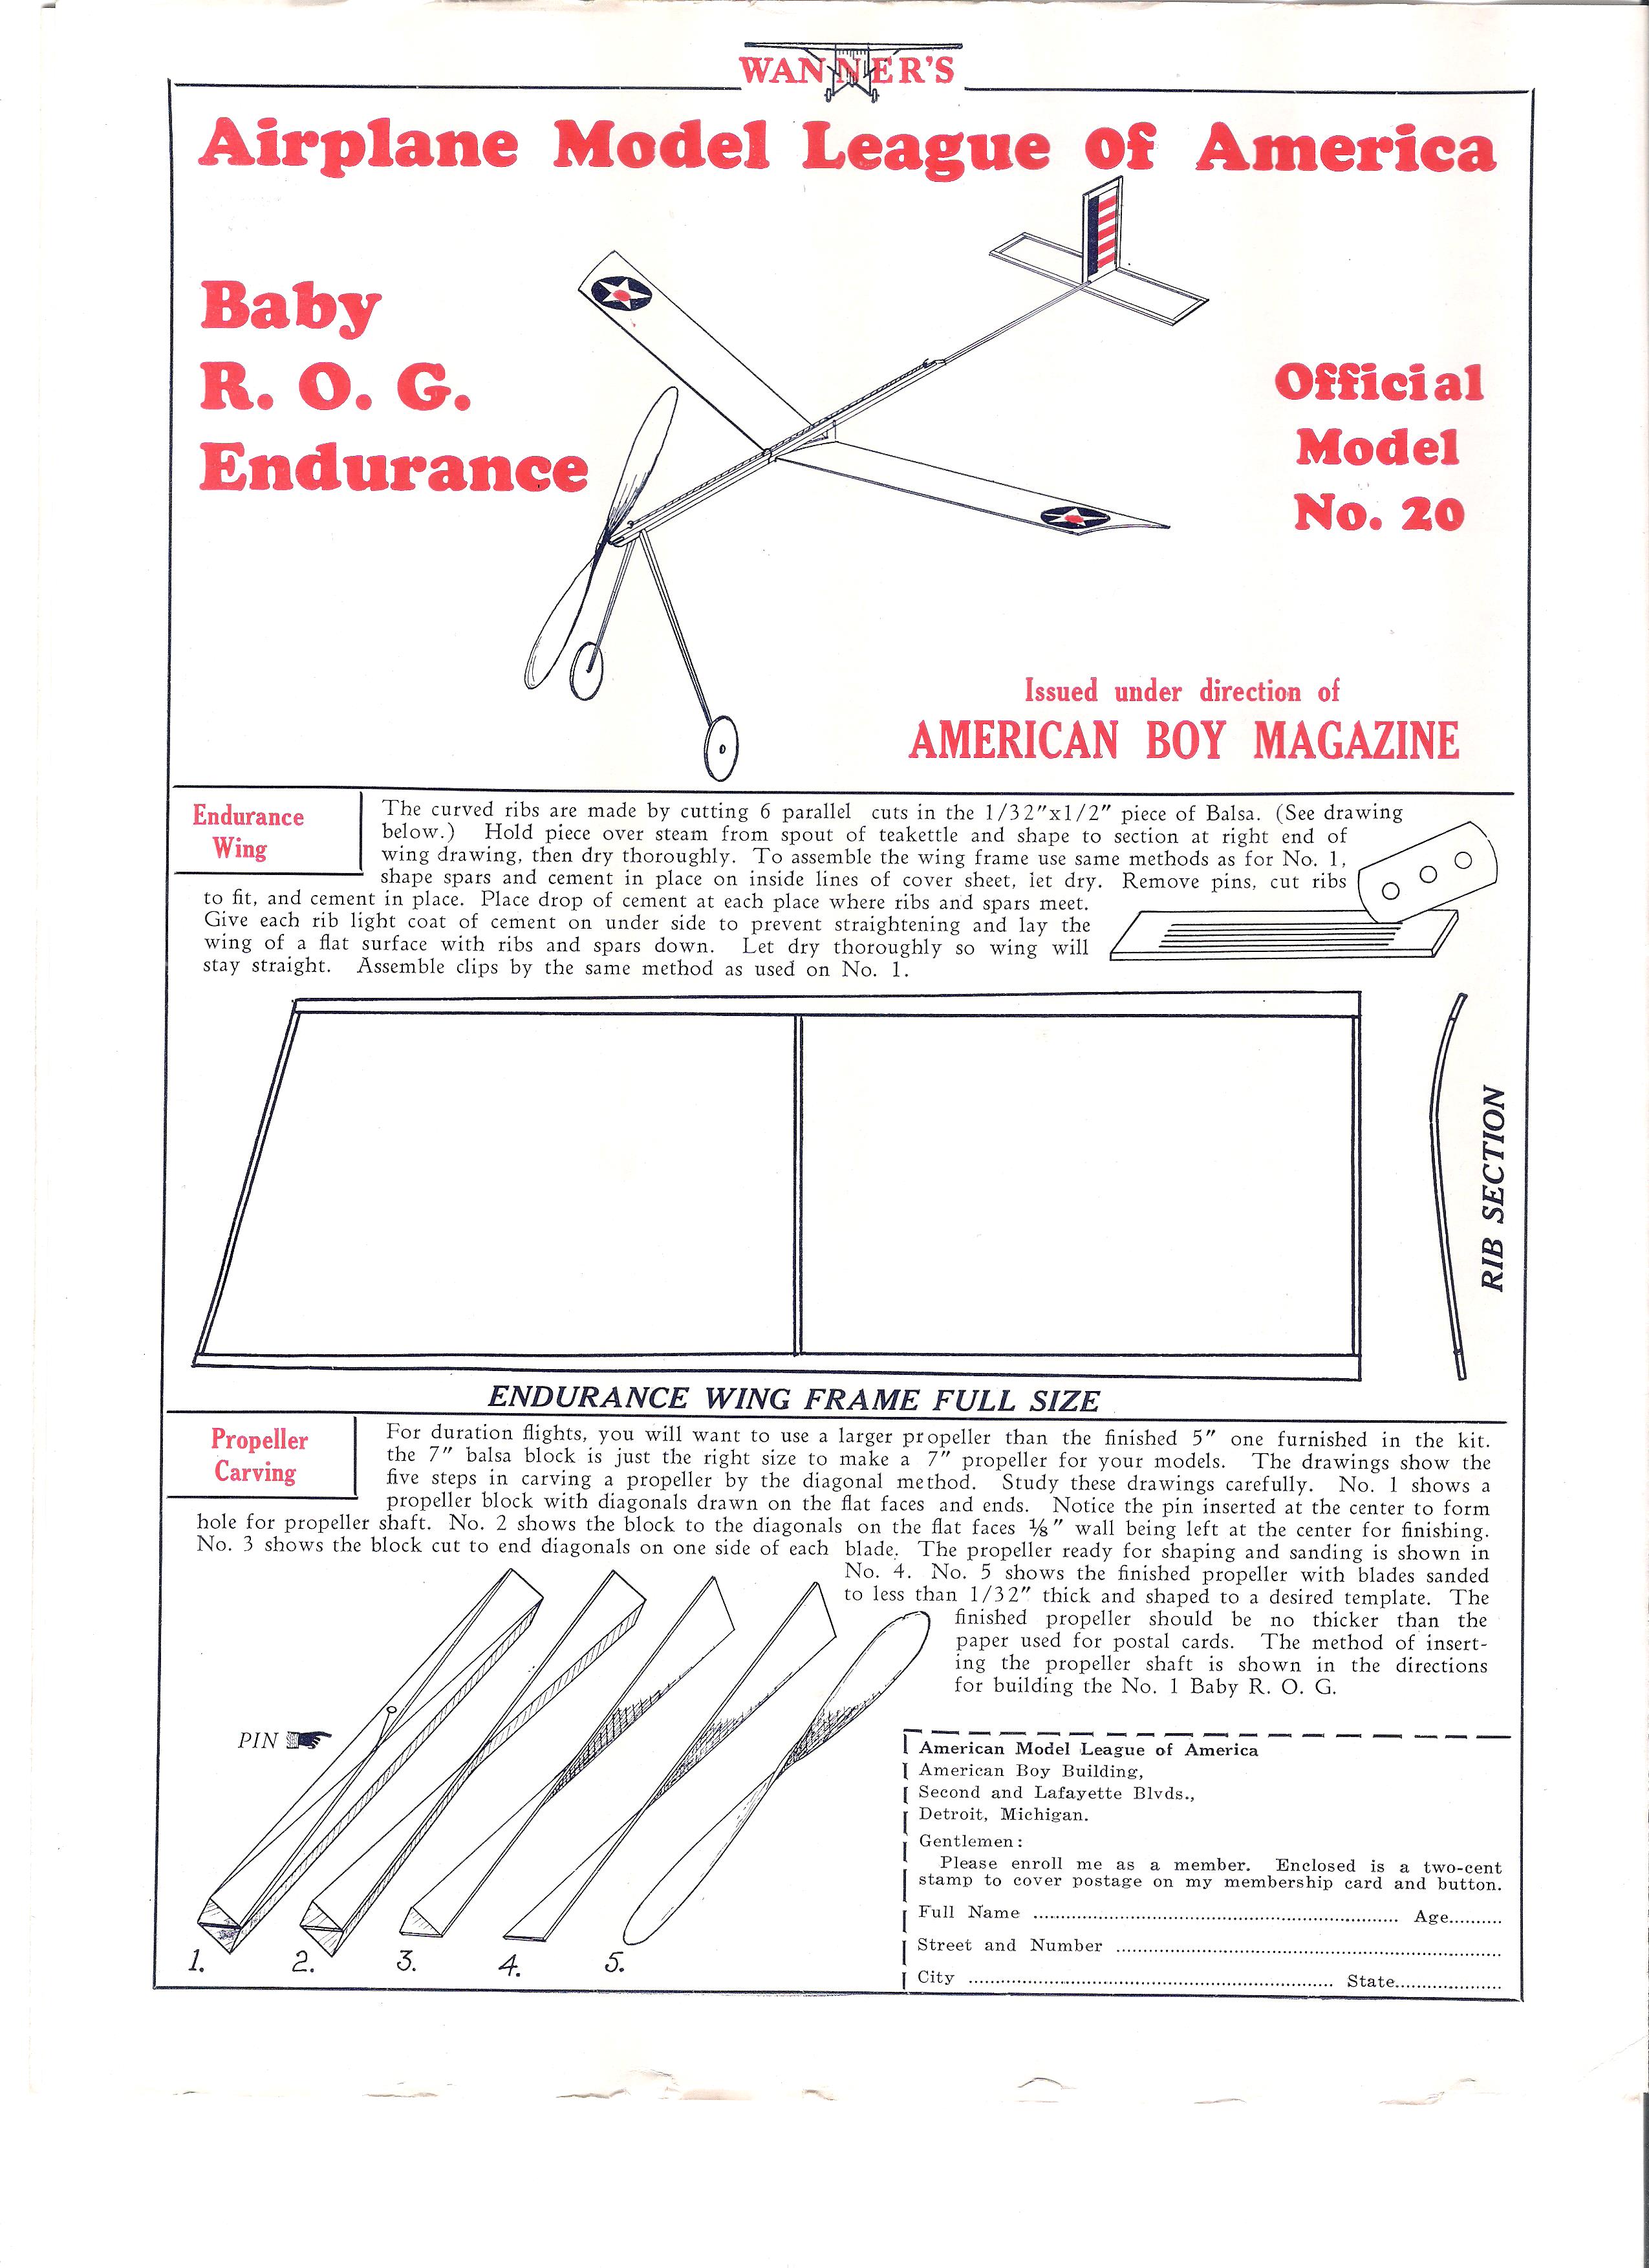
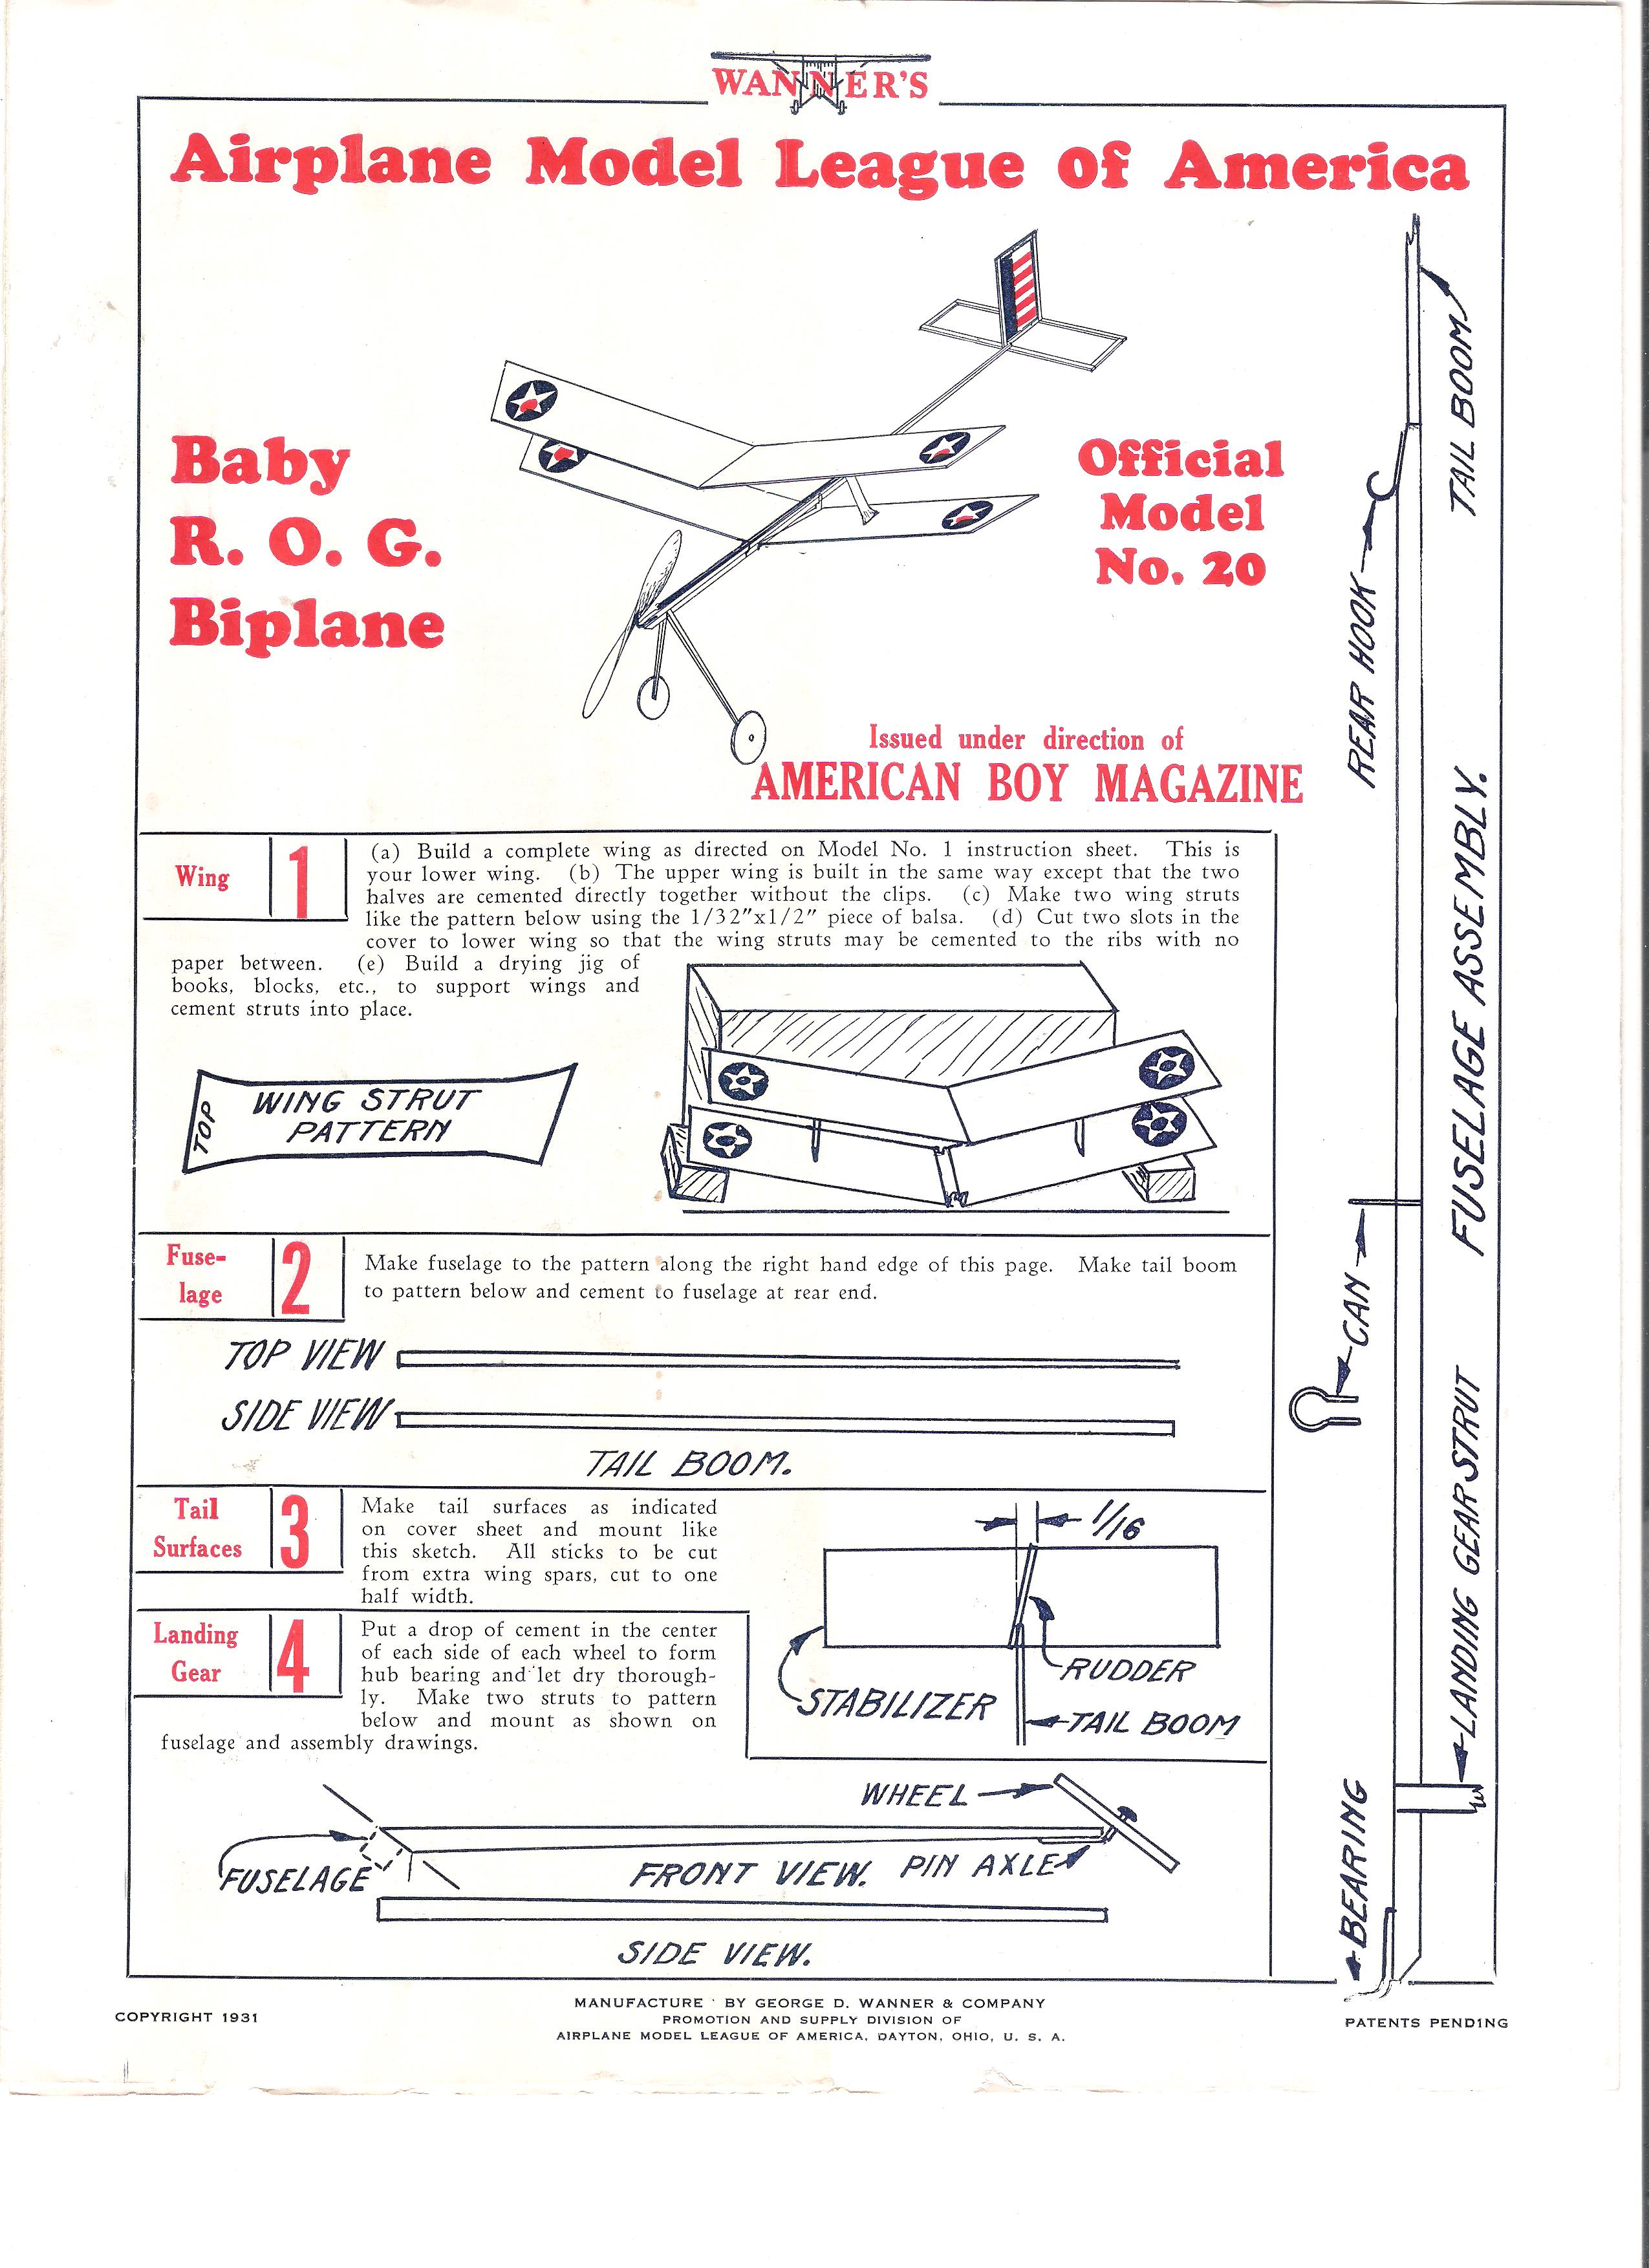
In November 1930 American Boy published an article which describes the three models in this Wanner kit; the Baby R.O.G., the Biplane R.O.G. and the Endurance R.O.G. The Endurance model had balsa framing the fin and tailplane. The AMLA sold the kit, No. 20, from which any of the three models could be built, or all three from two kits, at a cost of fifty cents each.
All of these models have the rubber motor run along the top of the stick. A wire can keeps the motor in place when it goes slack.
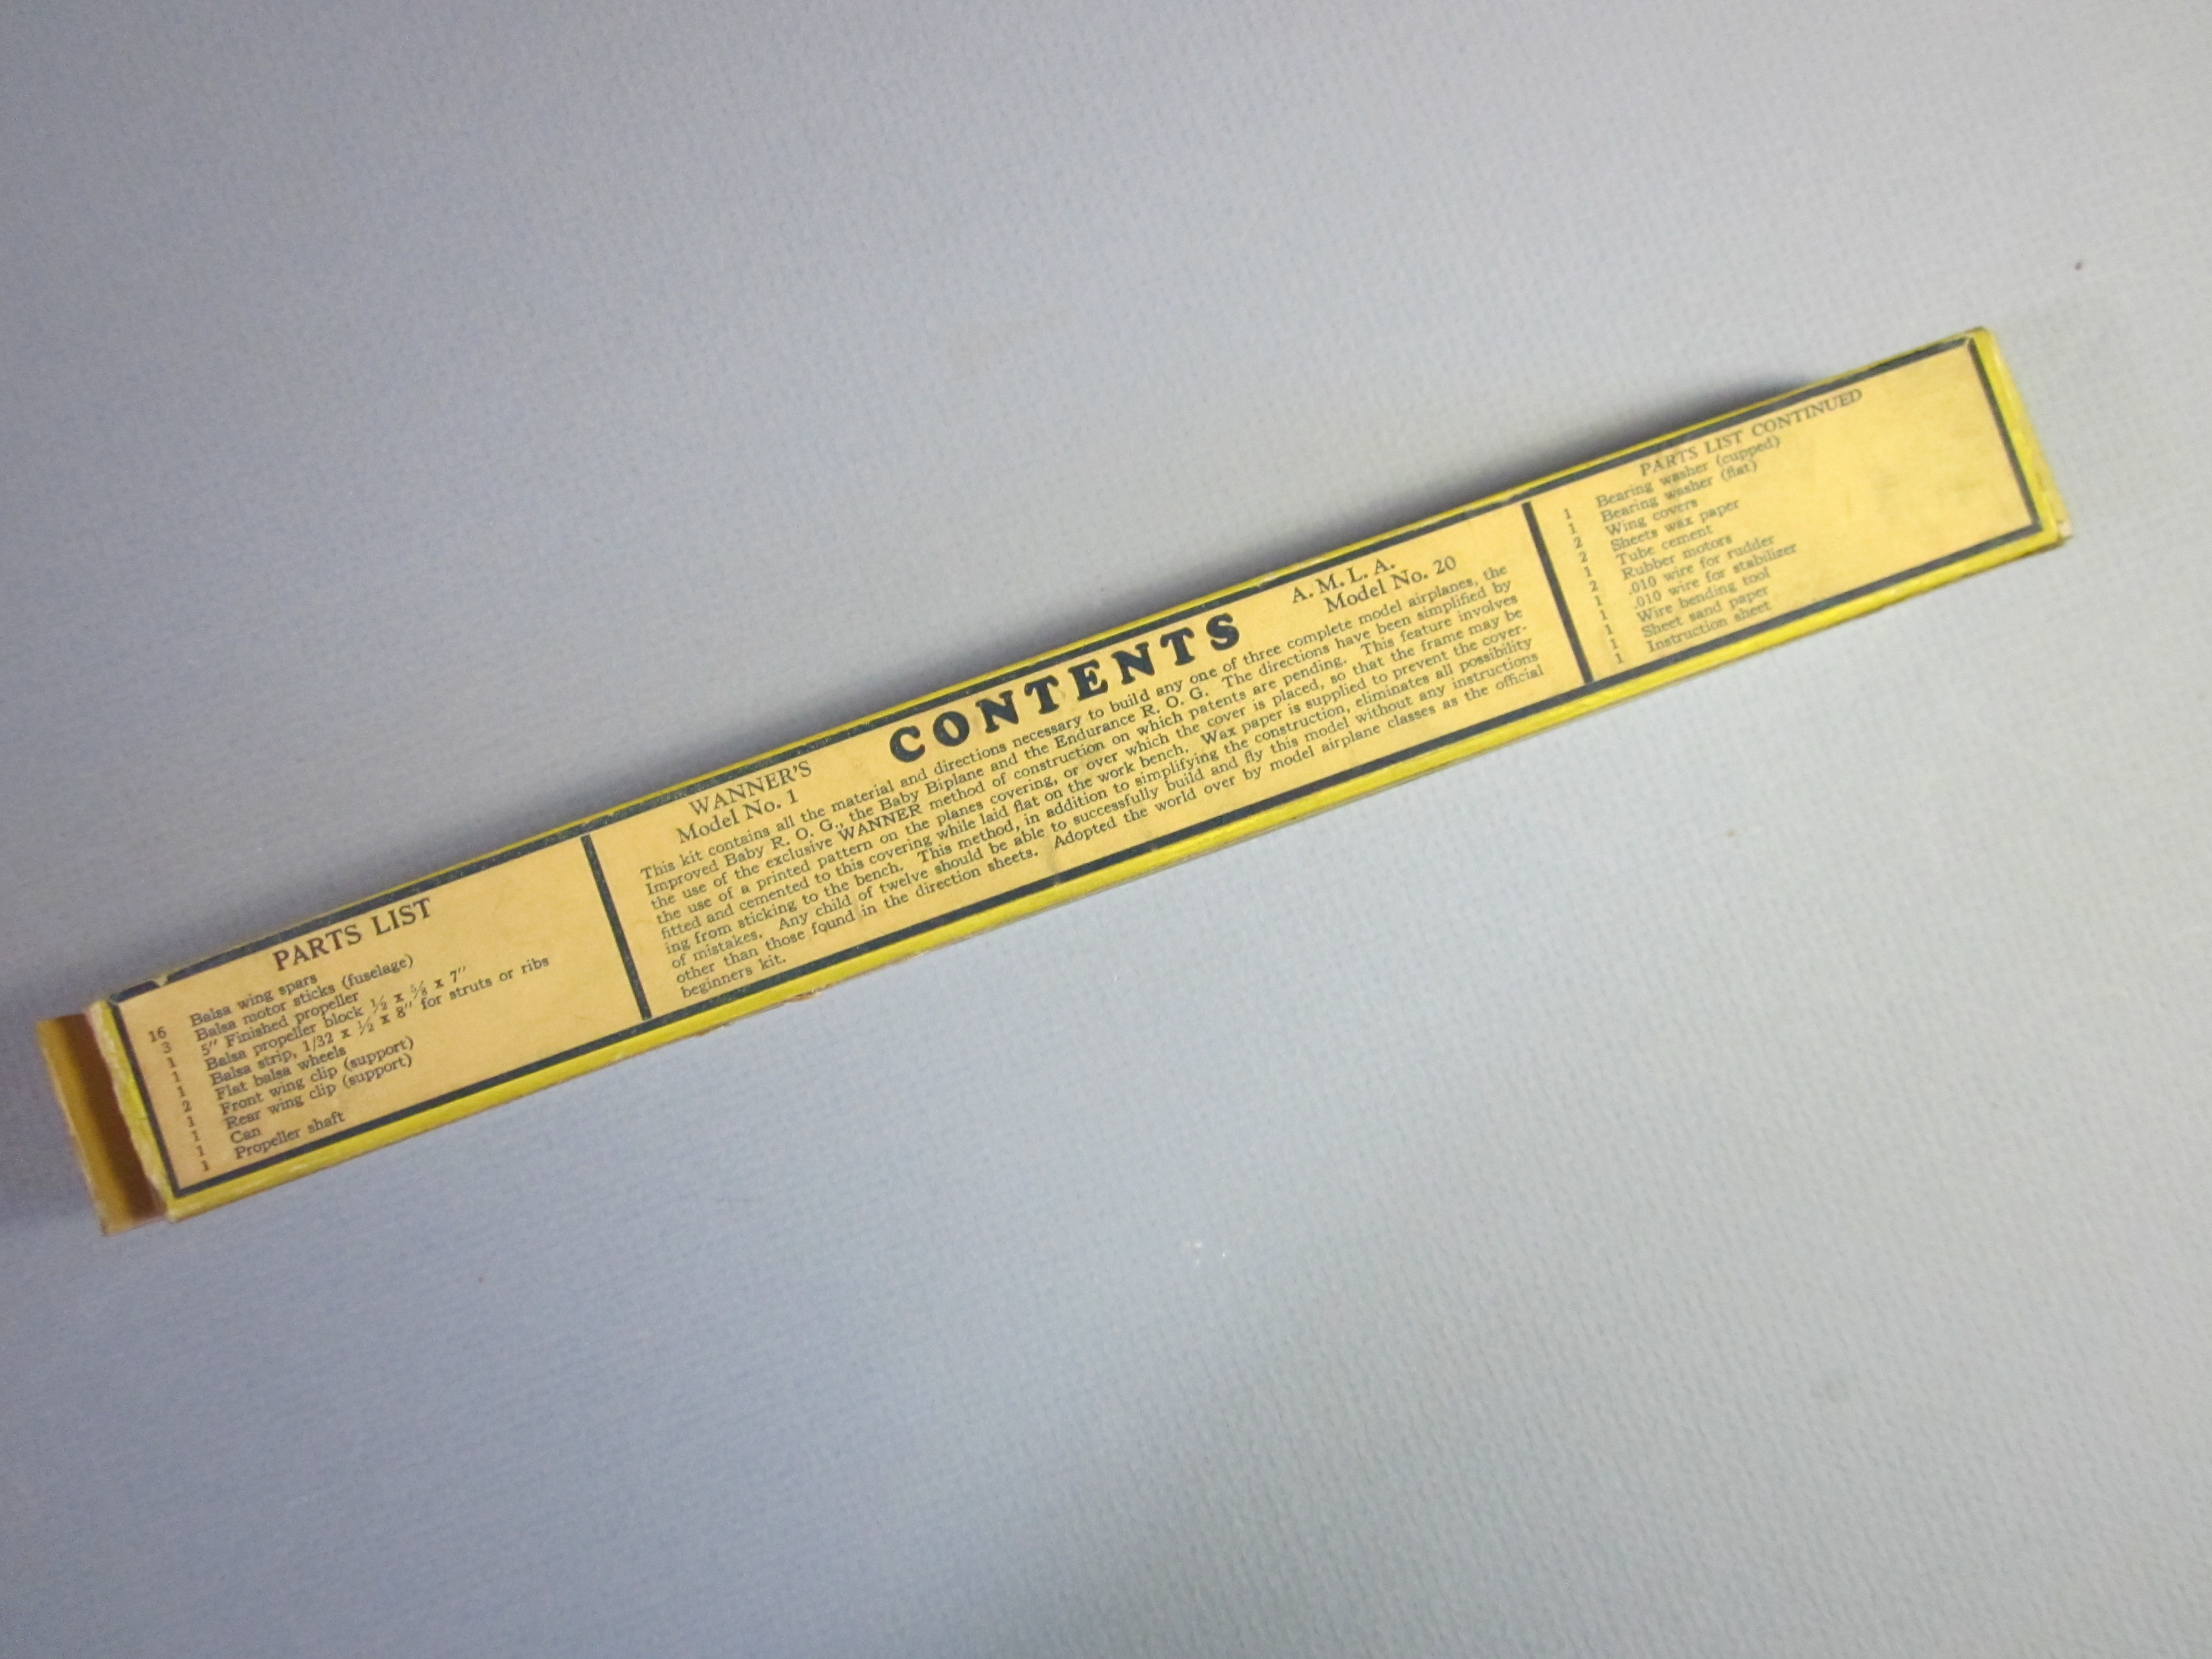
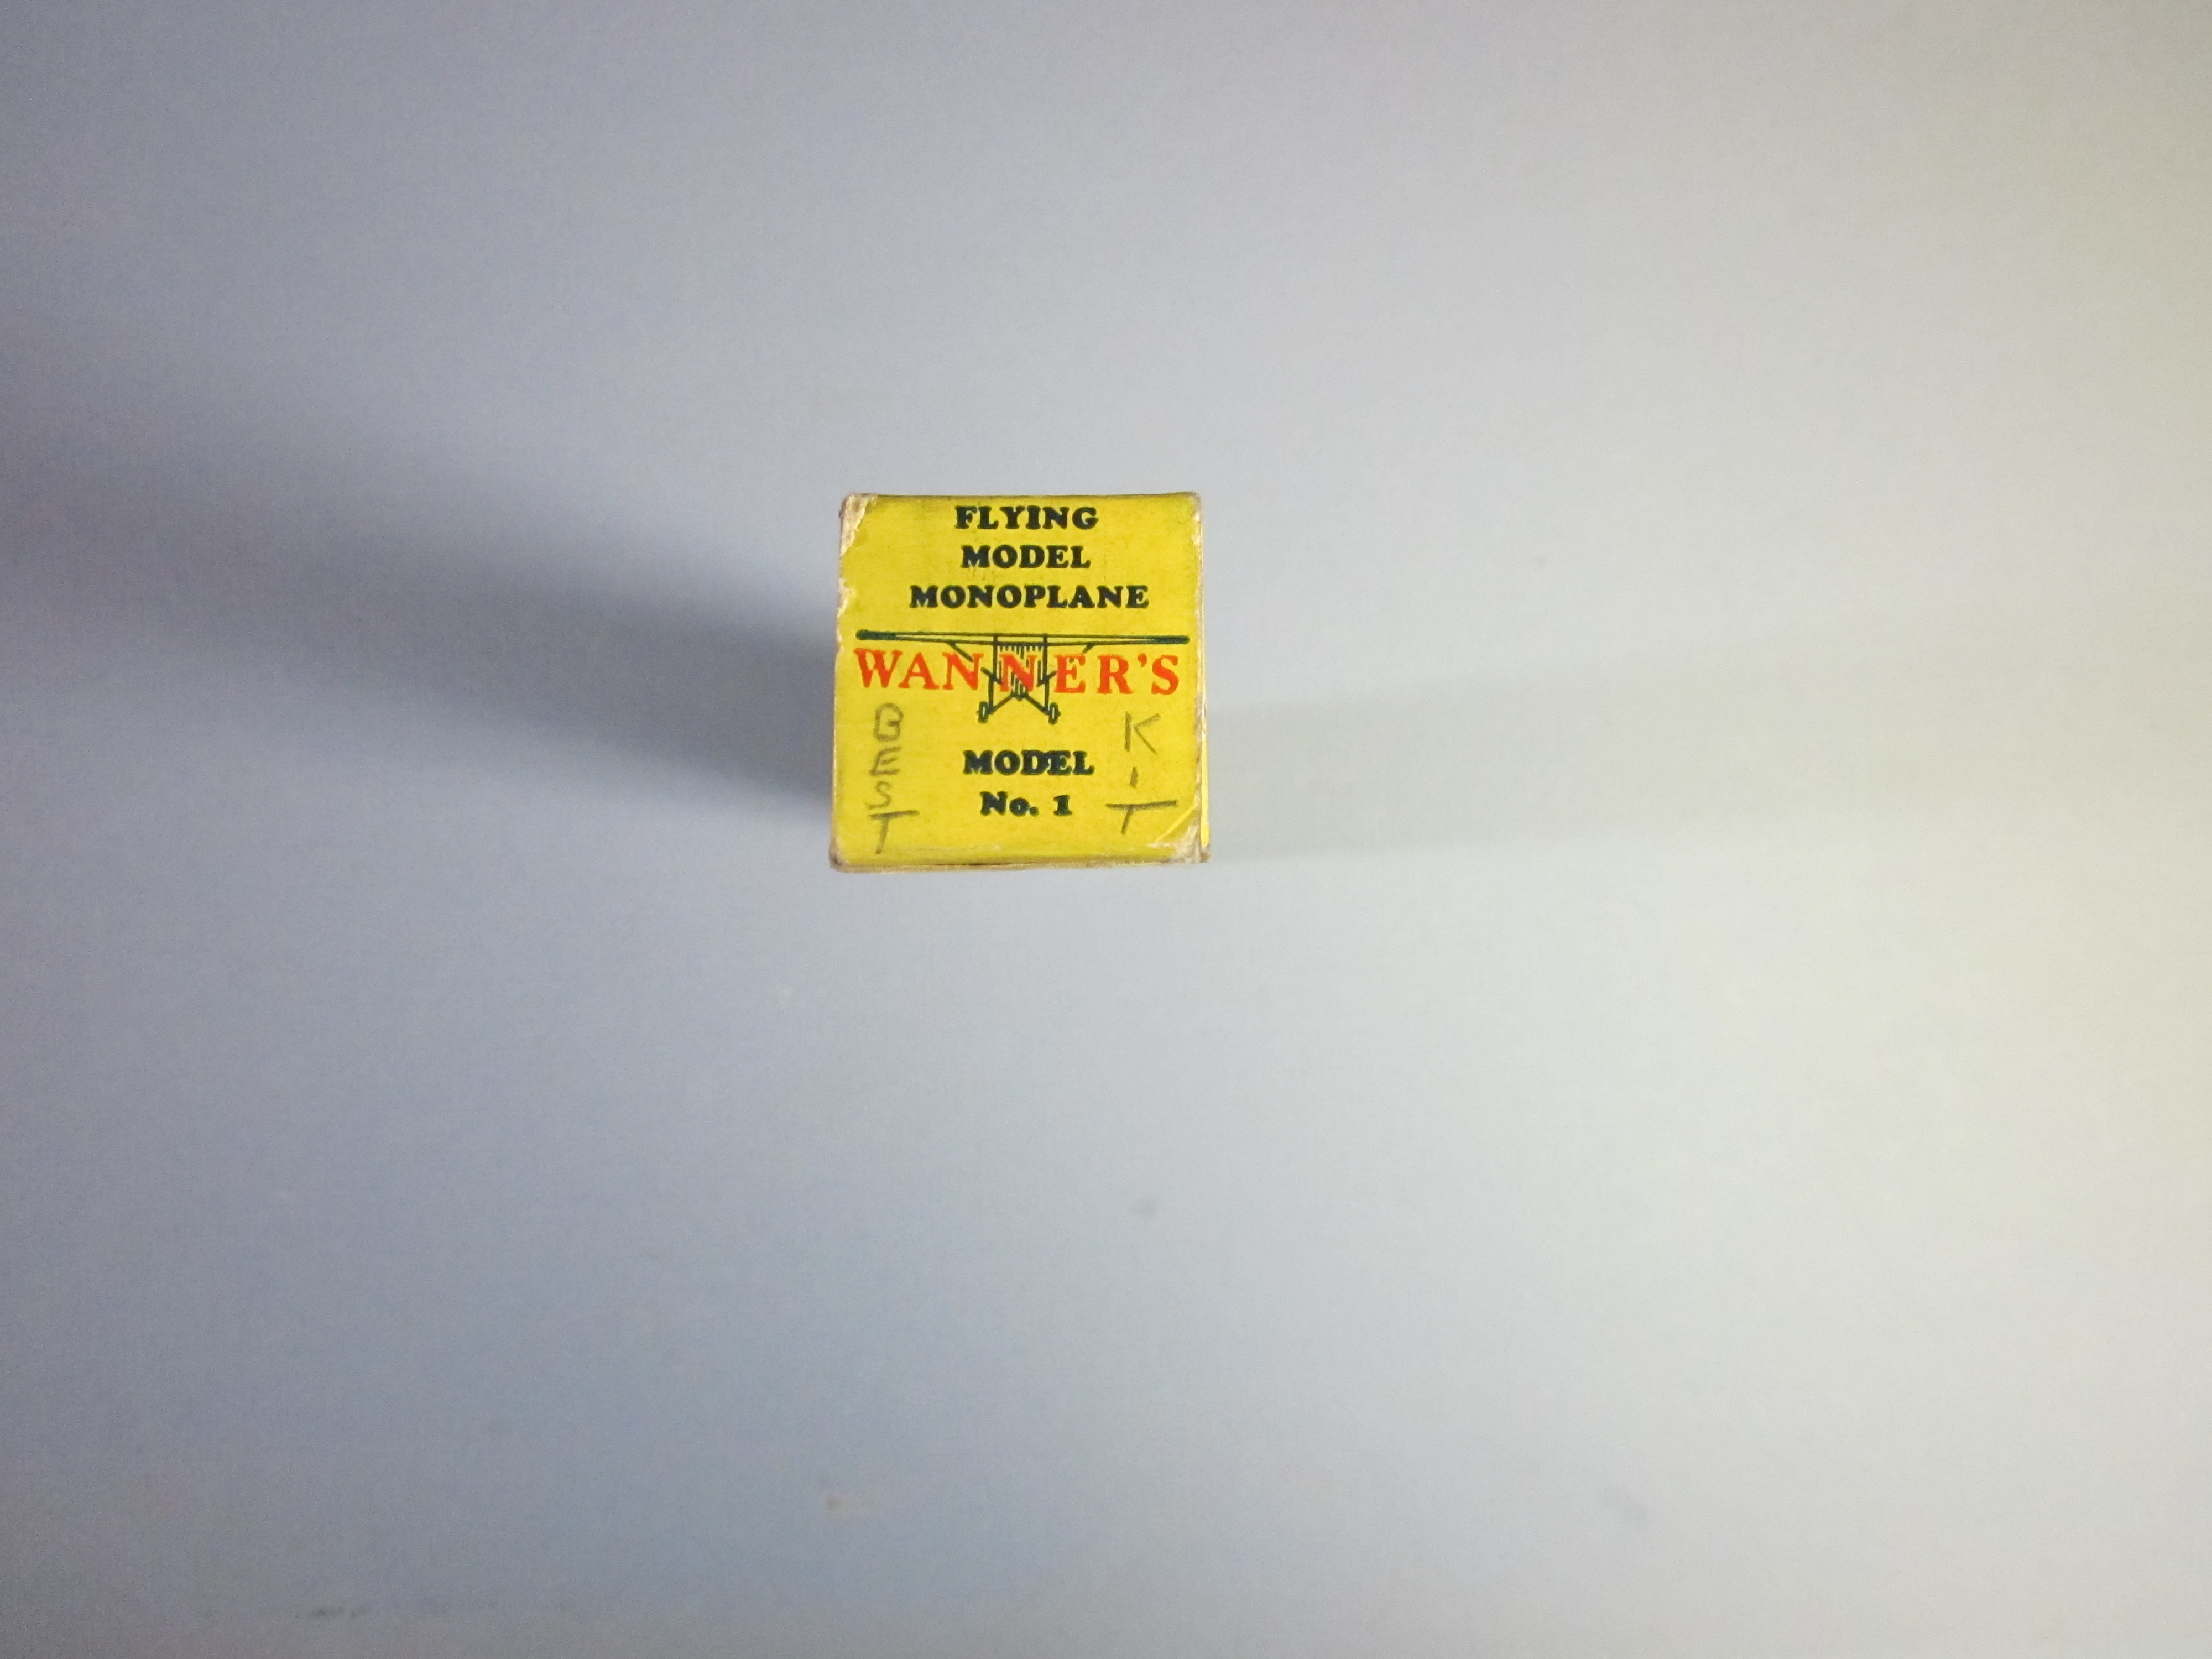
With that introduction, the pictures of the kit almost speak for themselves. There is a great deal of information written on the box. Note in particular the list of contents. (Left click twice on the pictures to enlarge.) Two things were missing from this kit; the rubber strip for motors and the tube of glue.
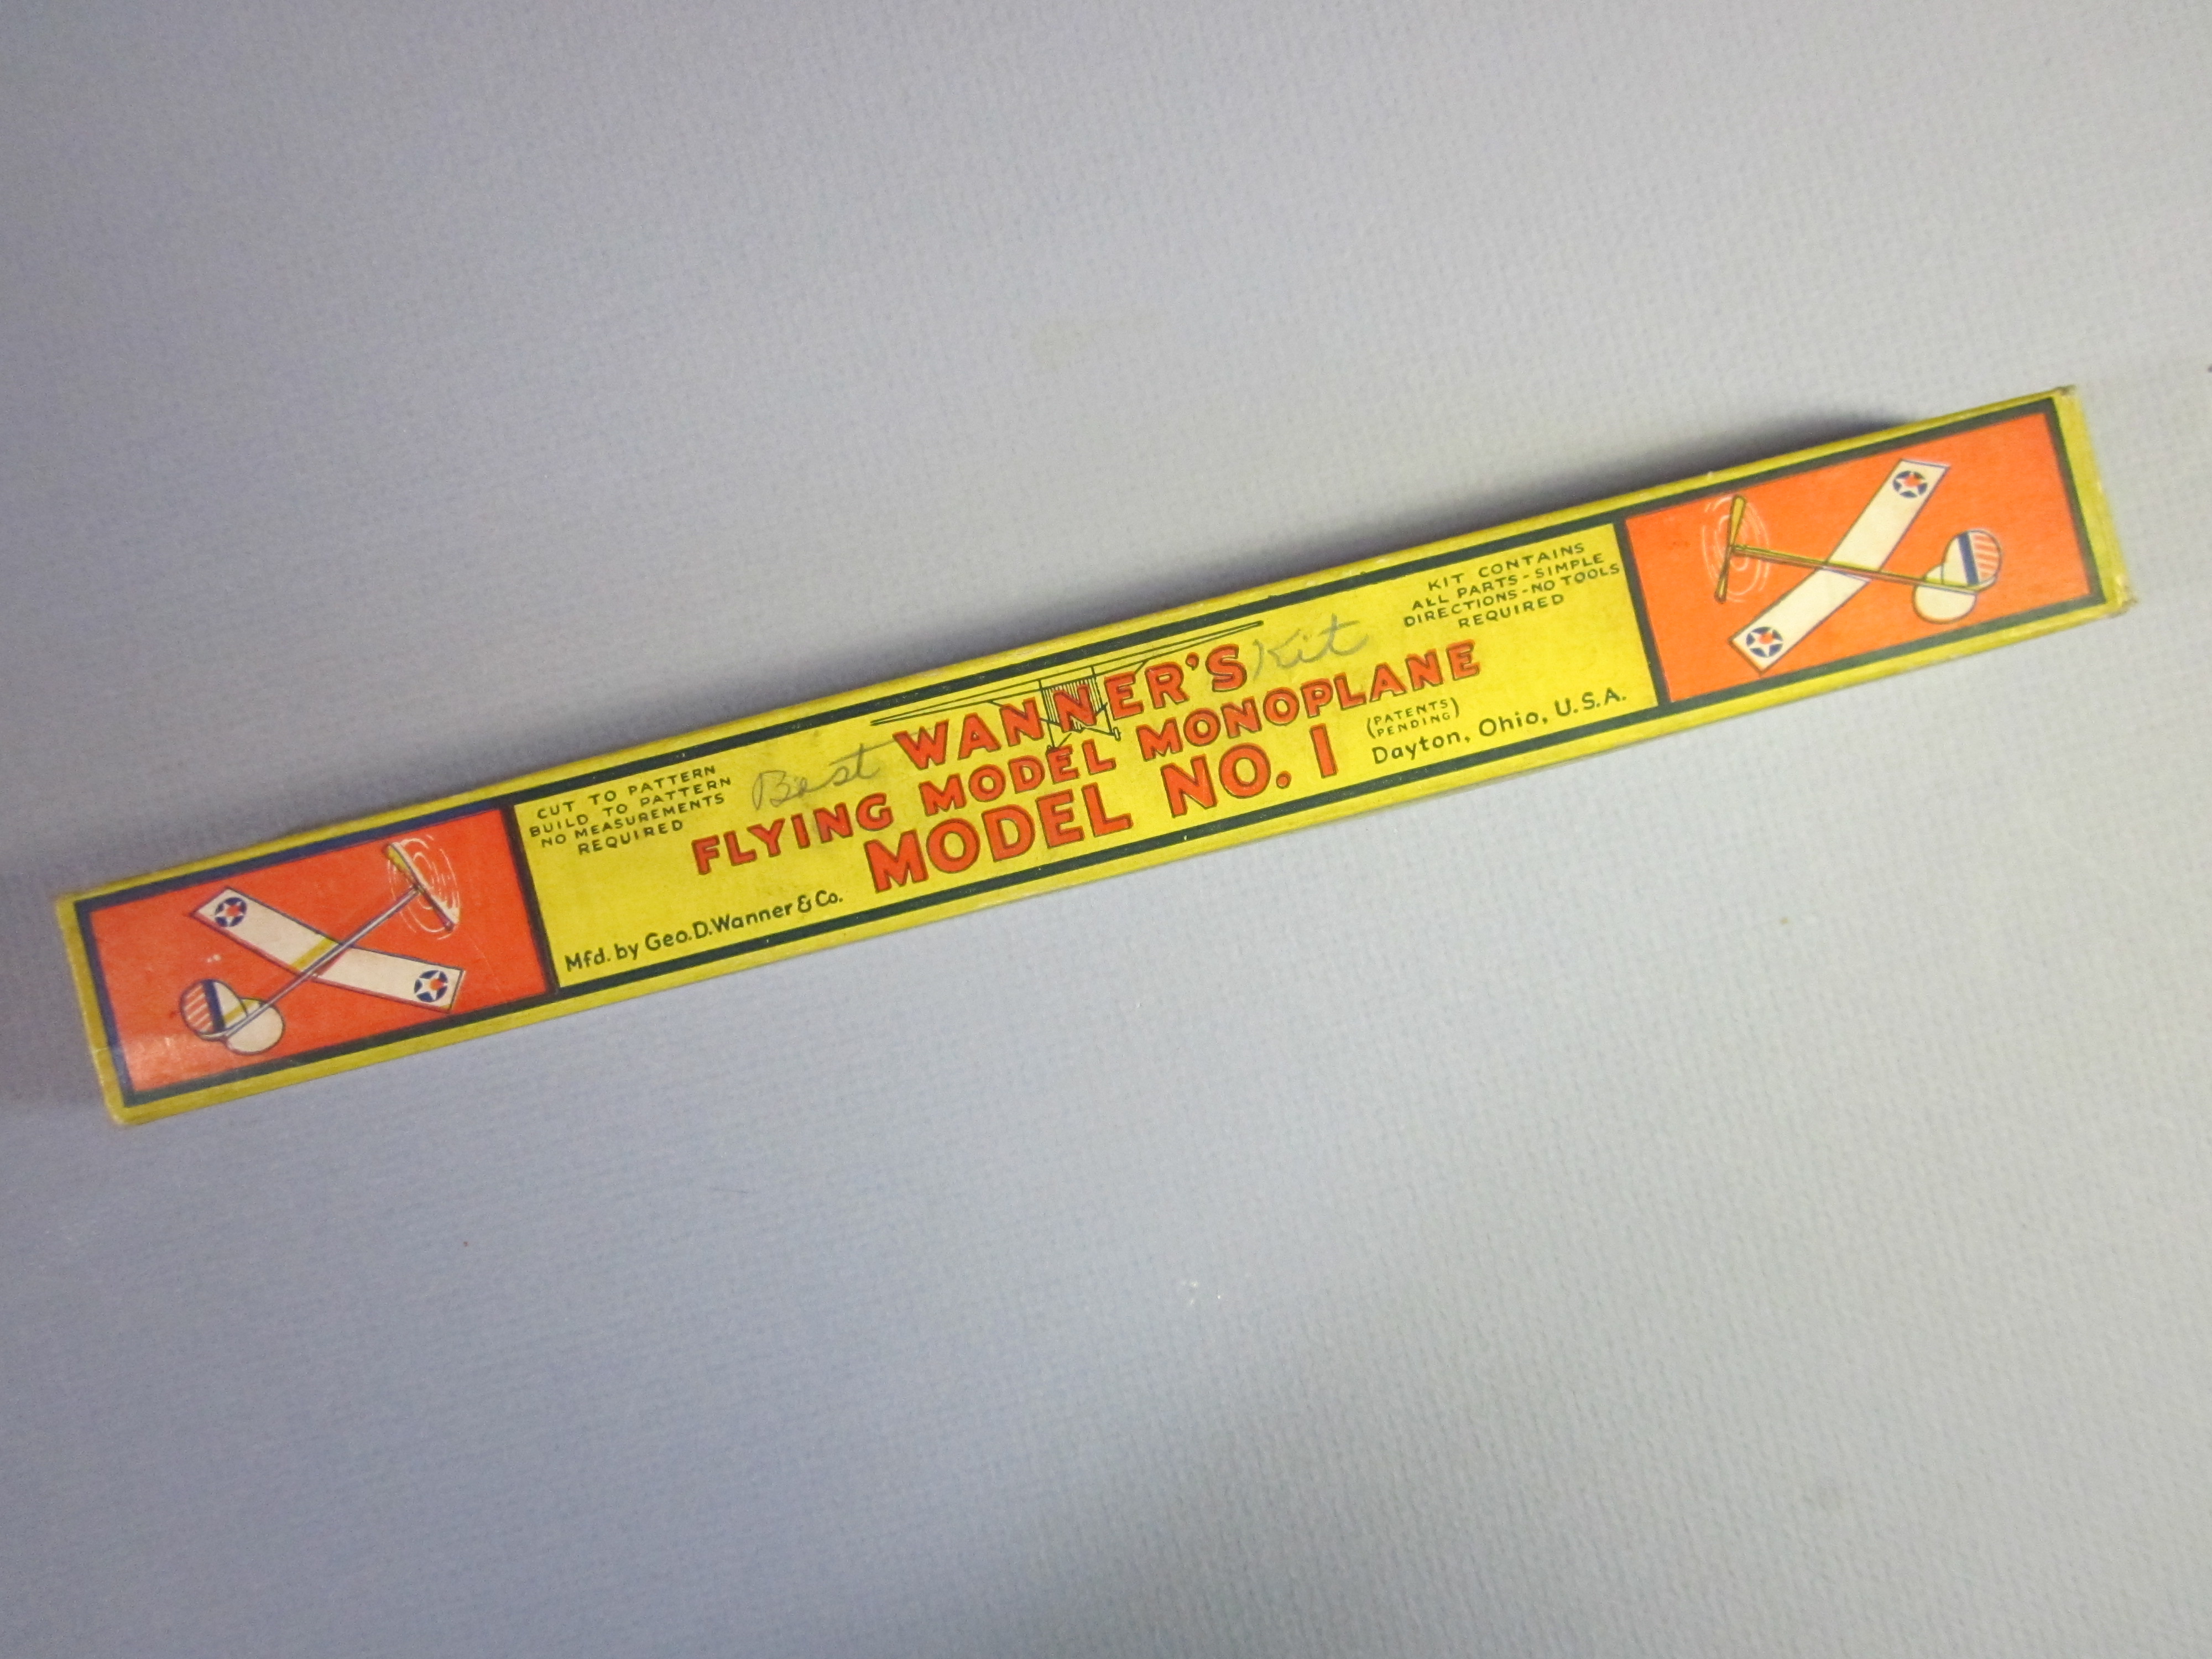
Note that someone has written “Best Kit” in pencil on all faces of the box. The label says “Cut to pattern, build to pattern, no measurements required.” The covering is printed and the wood sticks are glued directly to the paper, just like the AMA Cub today. This was the subject of a pending patent. “No tools required.” is not quite correct, something is required to cut the wood. A razor blade is shown on one of the drawings.
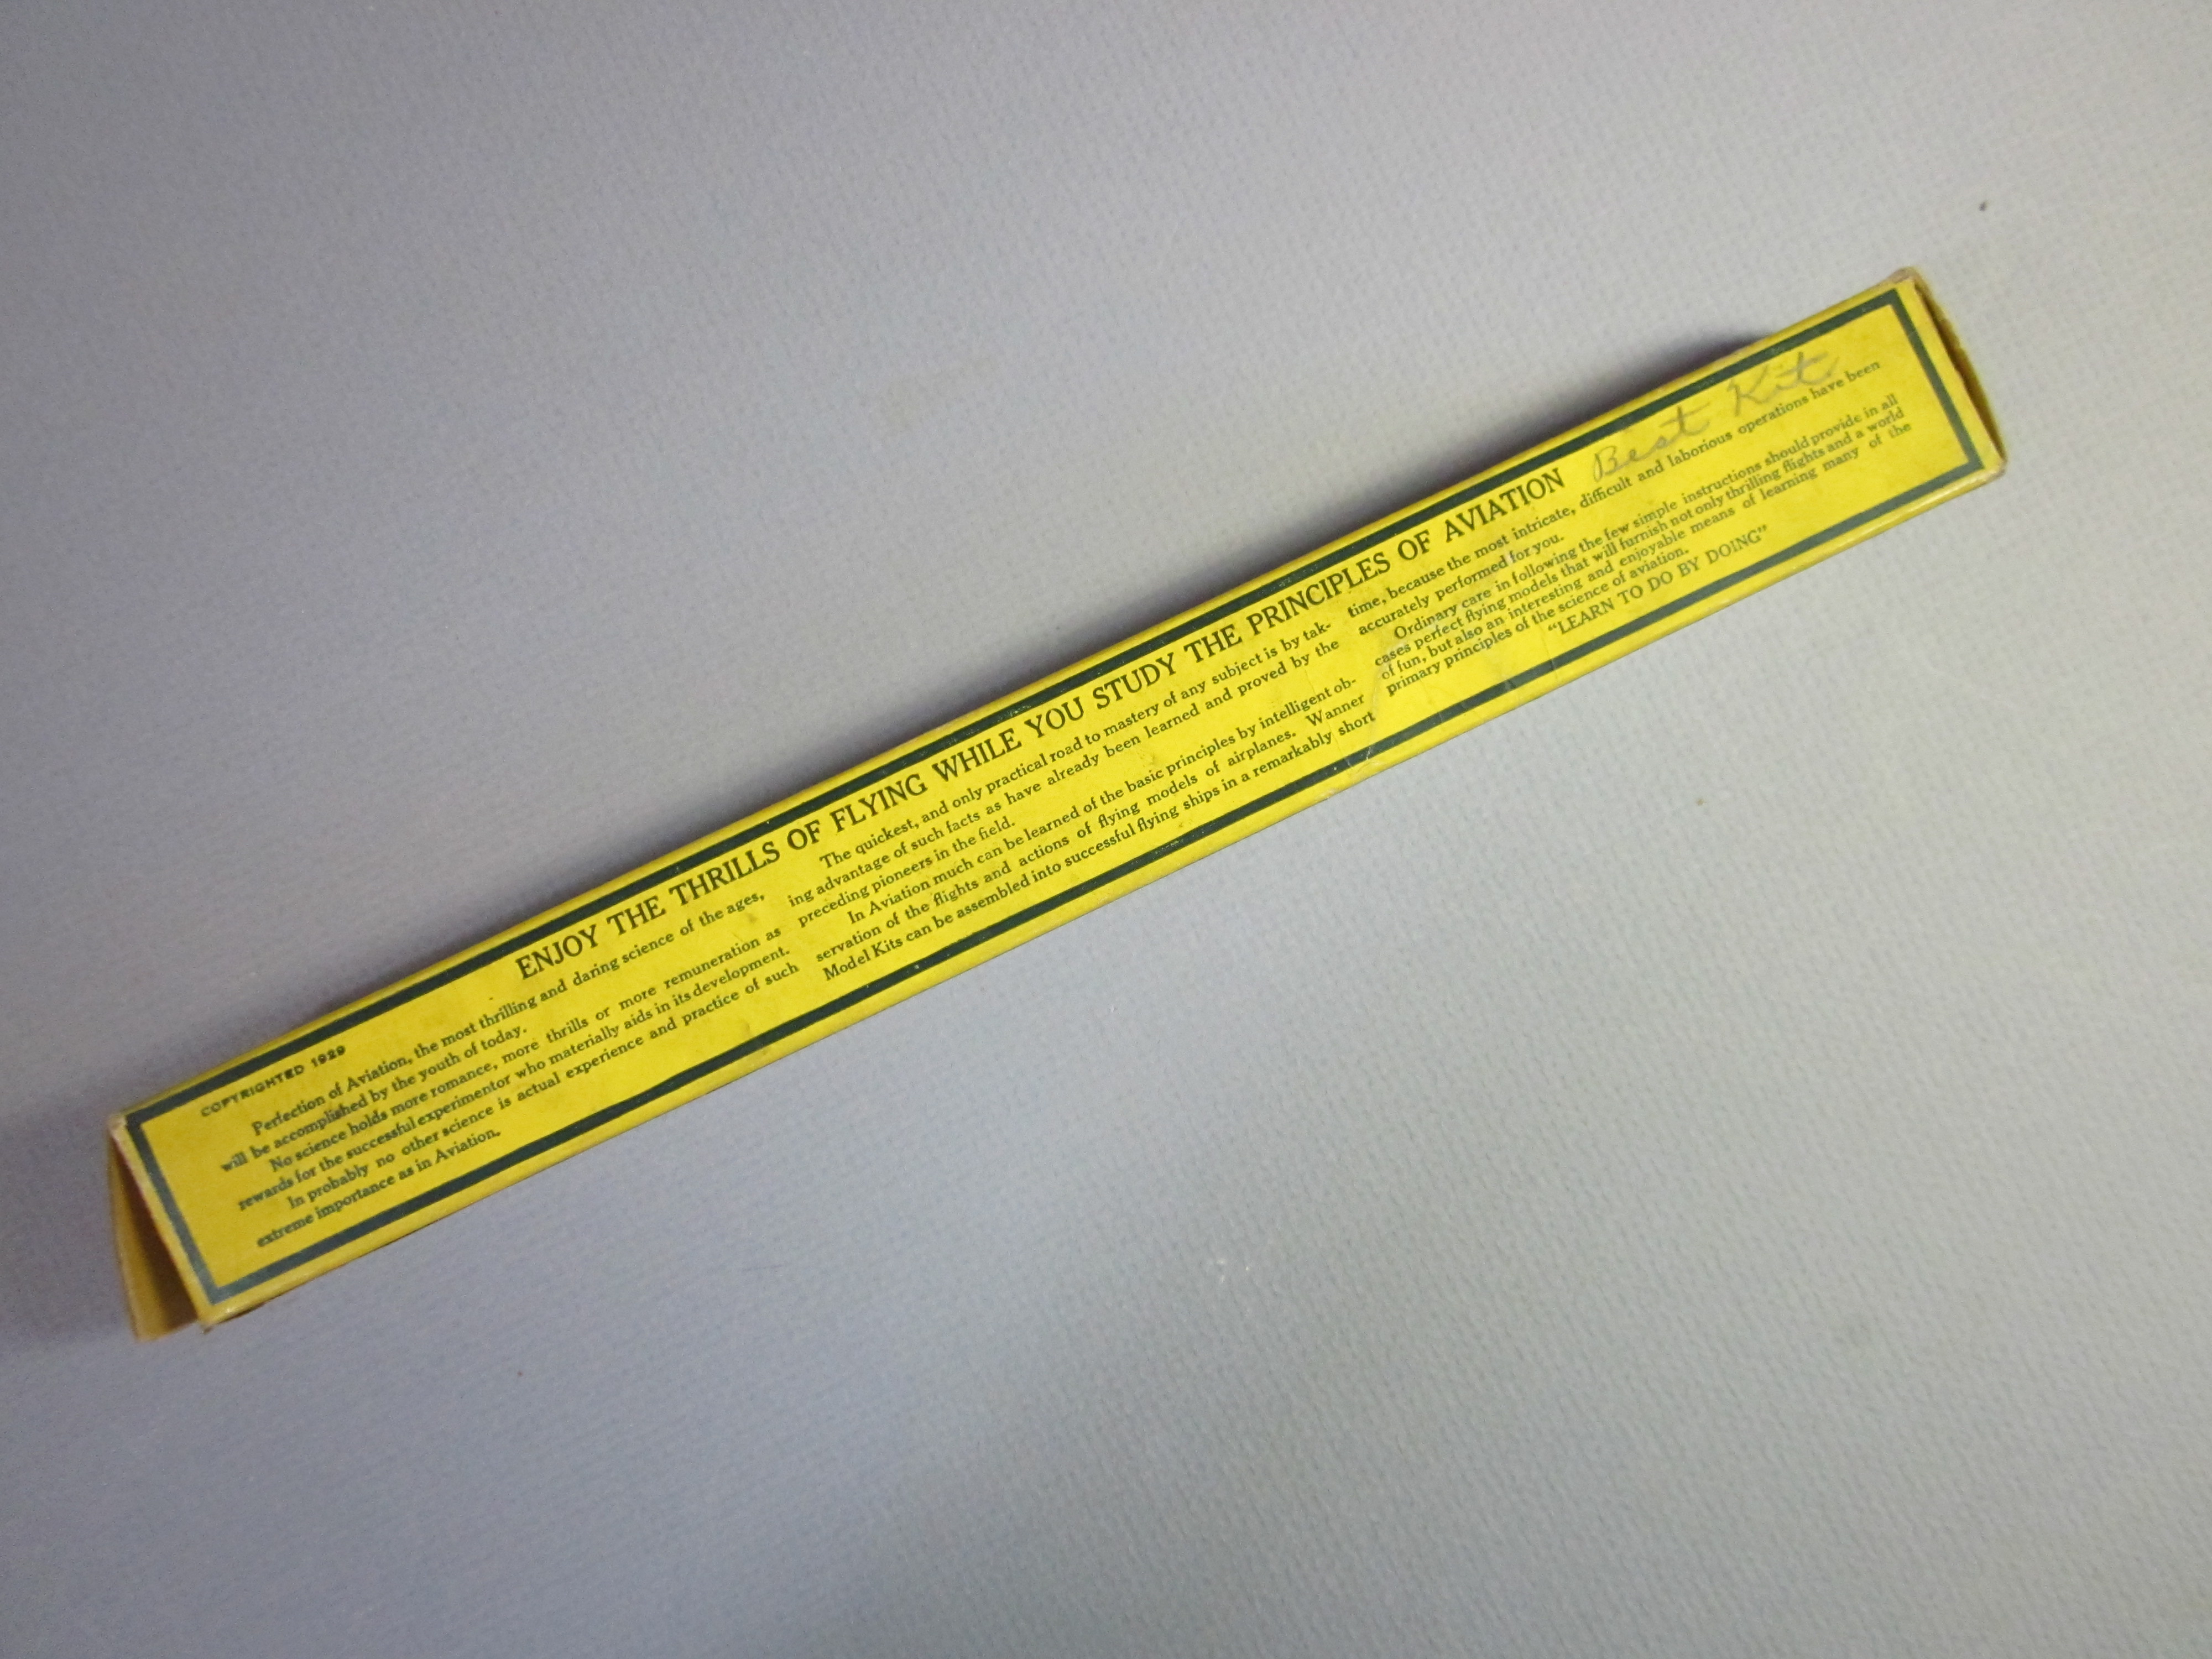
The box has a 1929 copyright date on it.
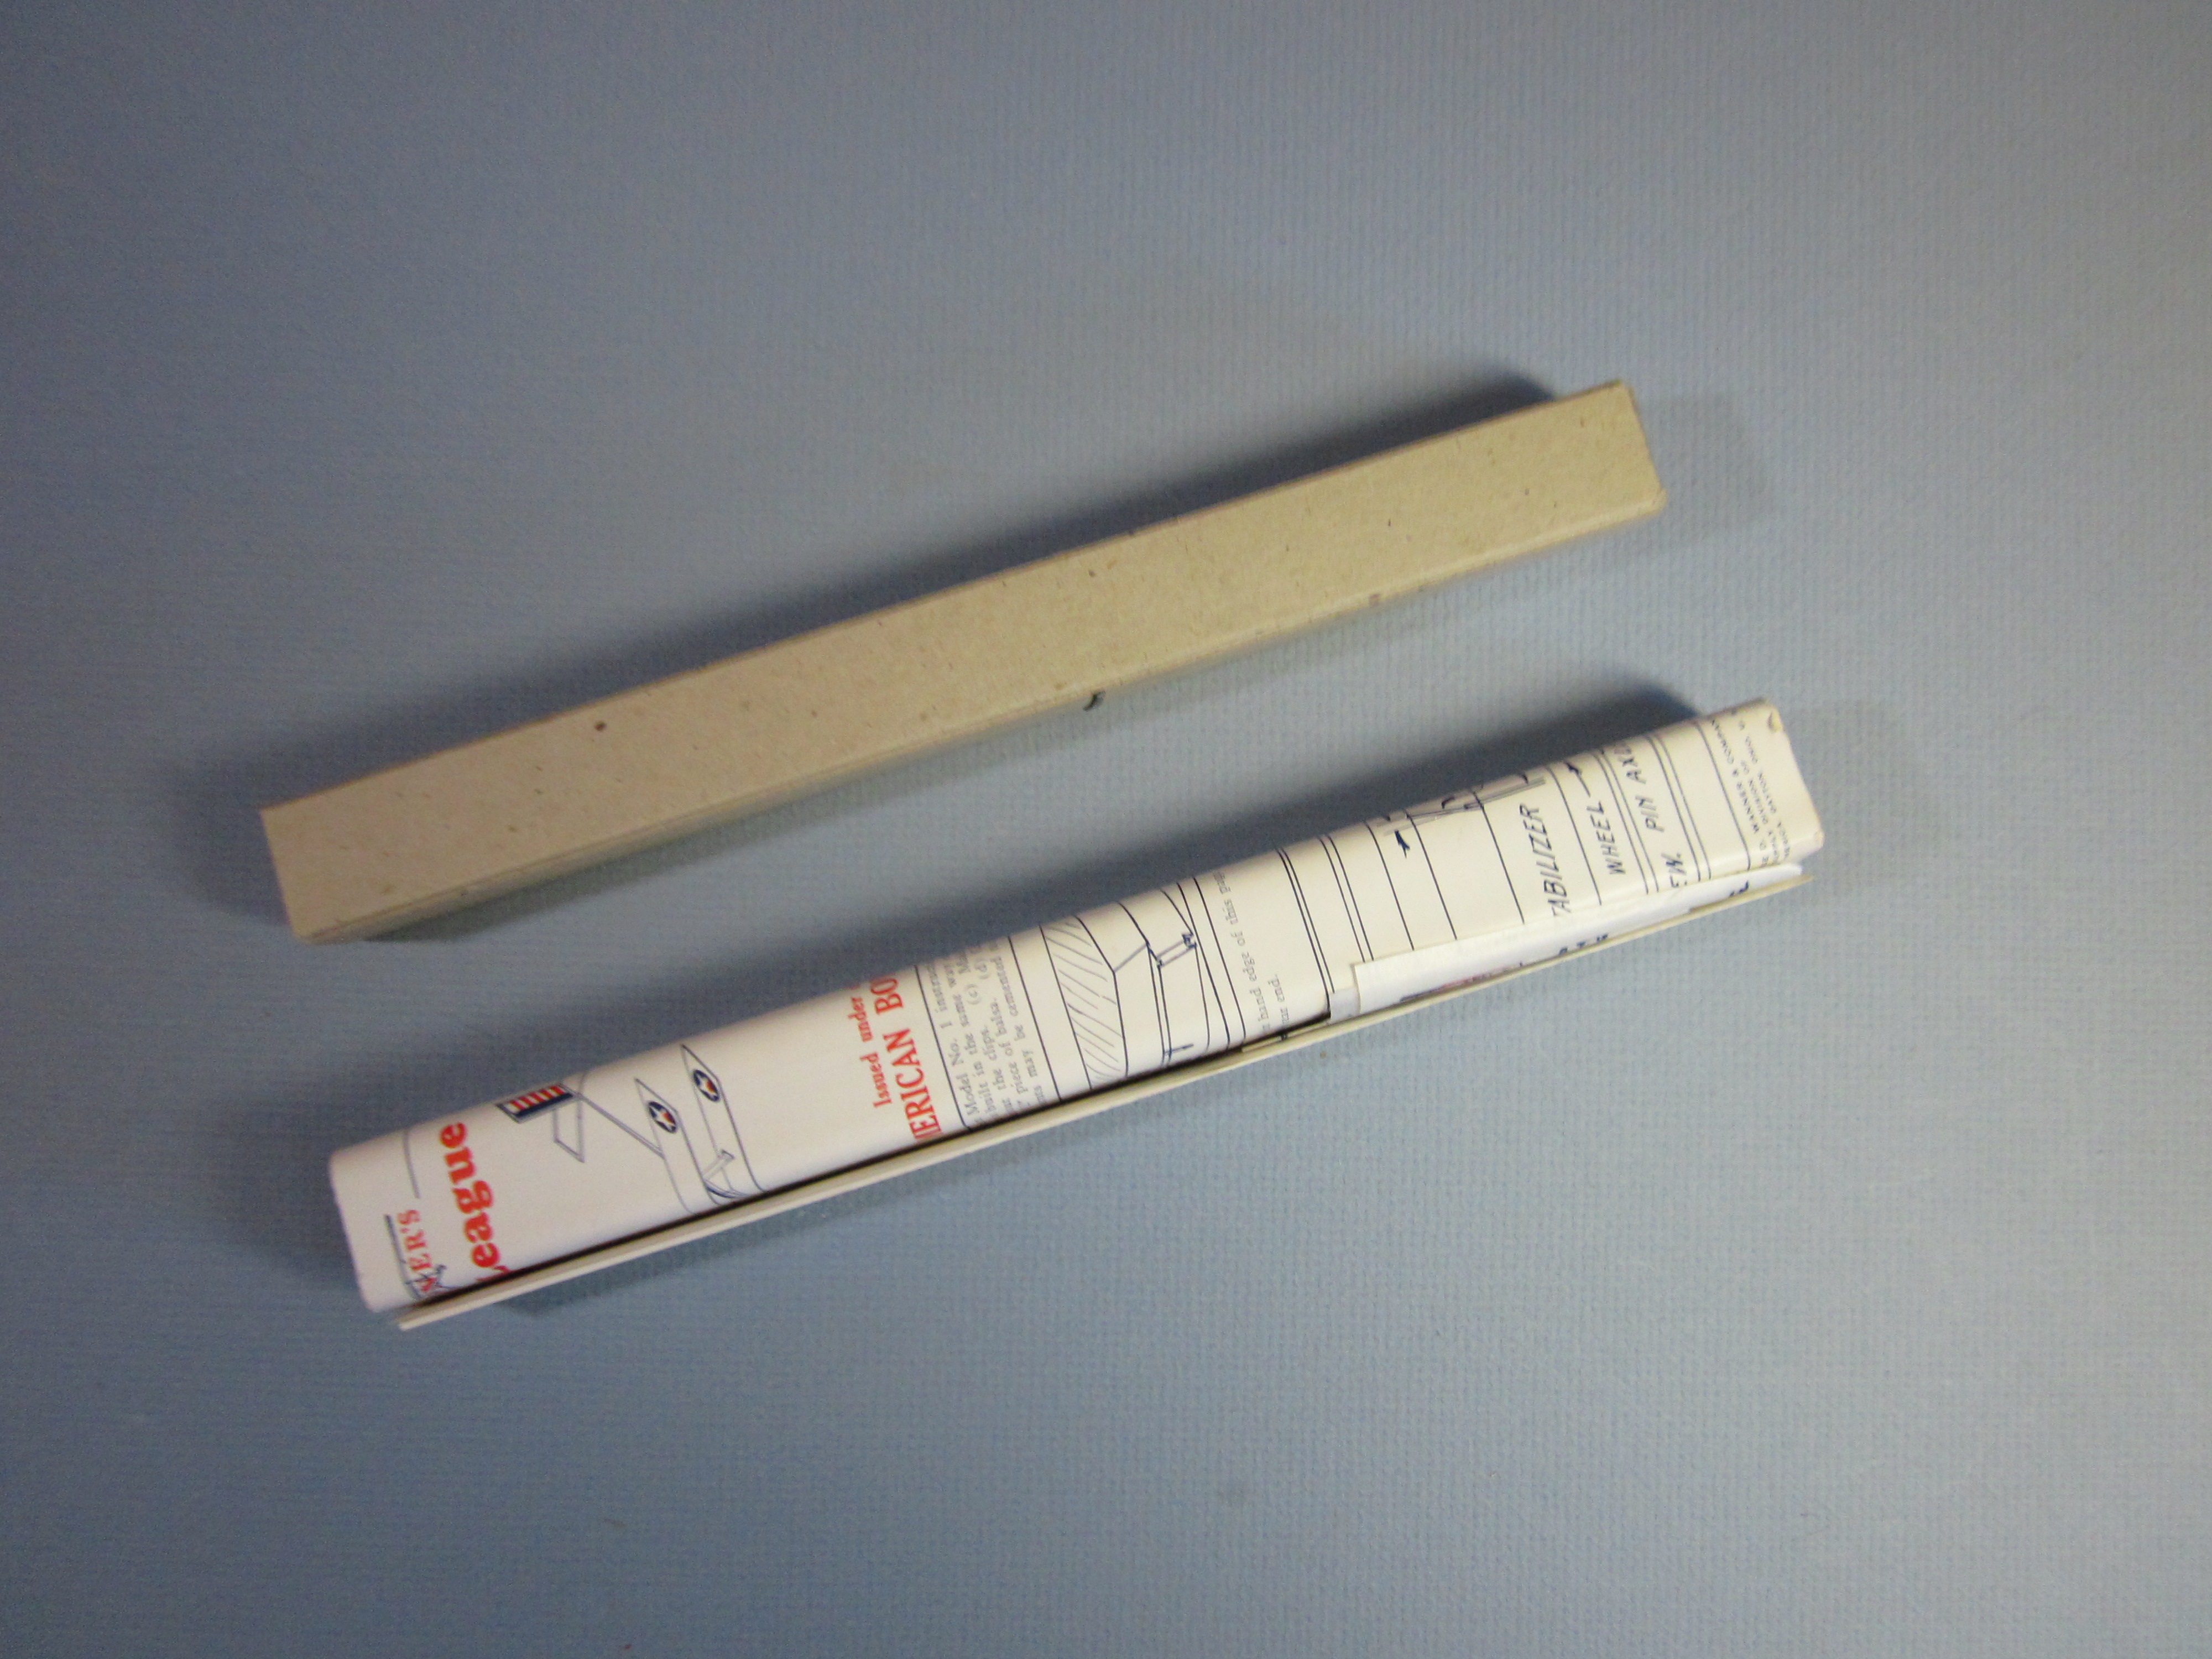
Inside we find the instructions rolled around an inner box.
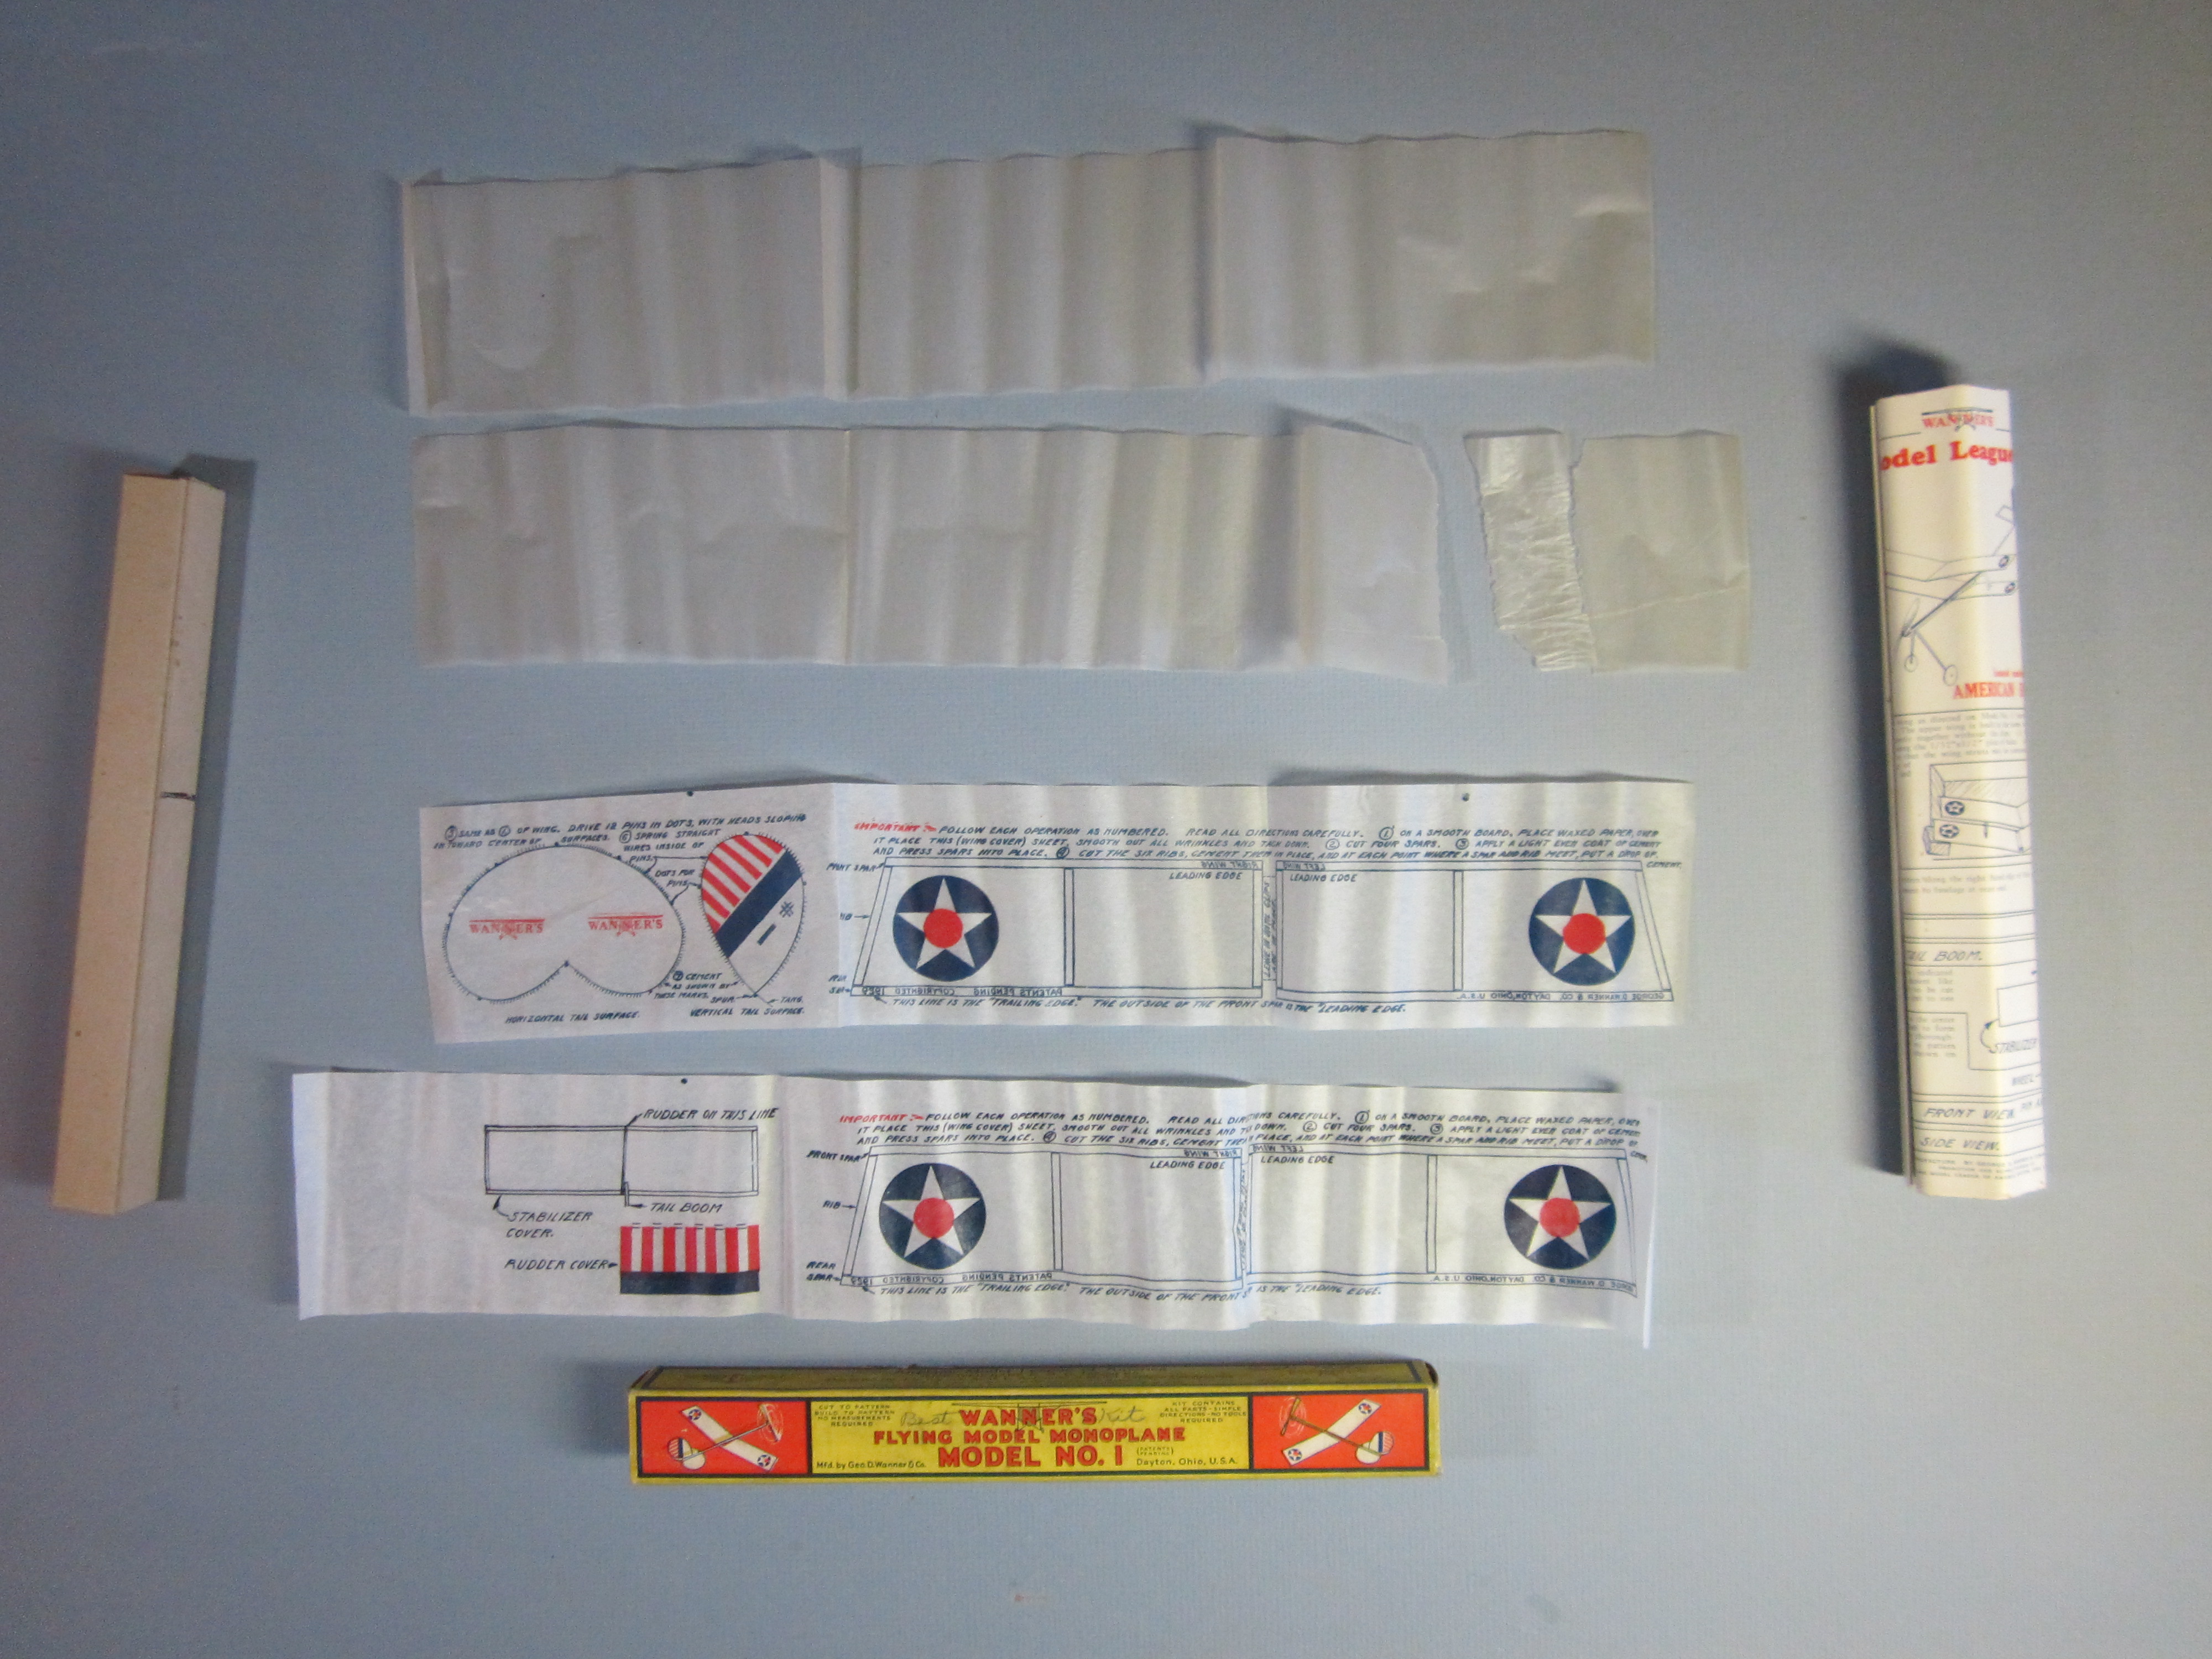
Rolled with the instructions are two pieces of printed tissue paper (3 5/16″ x 21″ and 3 3/8″ x 19 3/16″) and two strips of wax paper (3 5/16″ x 19 1/2″). The printed paper has a 1929 copyright date.

We find in the inside box what was listed on the outside, except for the glue and rubber strip, as noted. Steel wire for the fin and tailplane, sheet balsa for cambered ribs, three balsa fuselage strips, 16 balsa wing strips, two printed wheels, a formed propeller, a small strip of fine sandpaper, a small paper envelope containing the small metal parts and a wire bending tool and a block of balsa for carving a propeller.
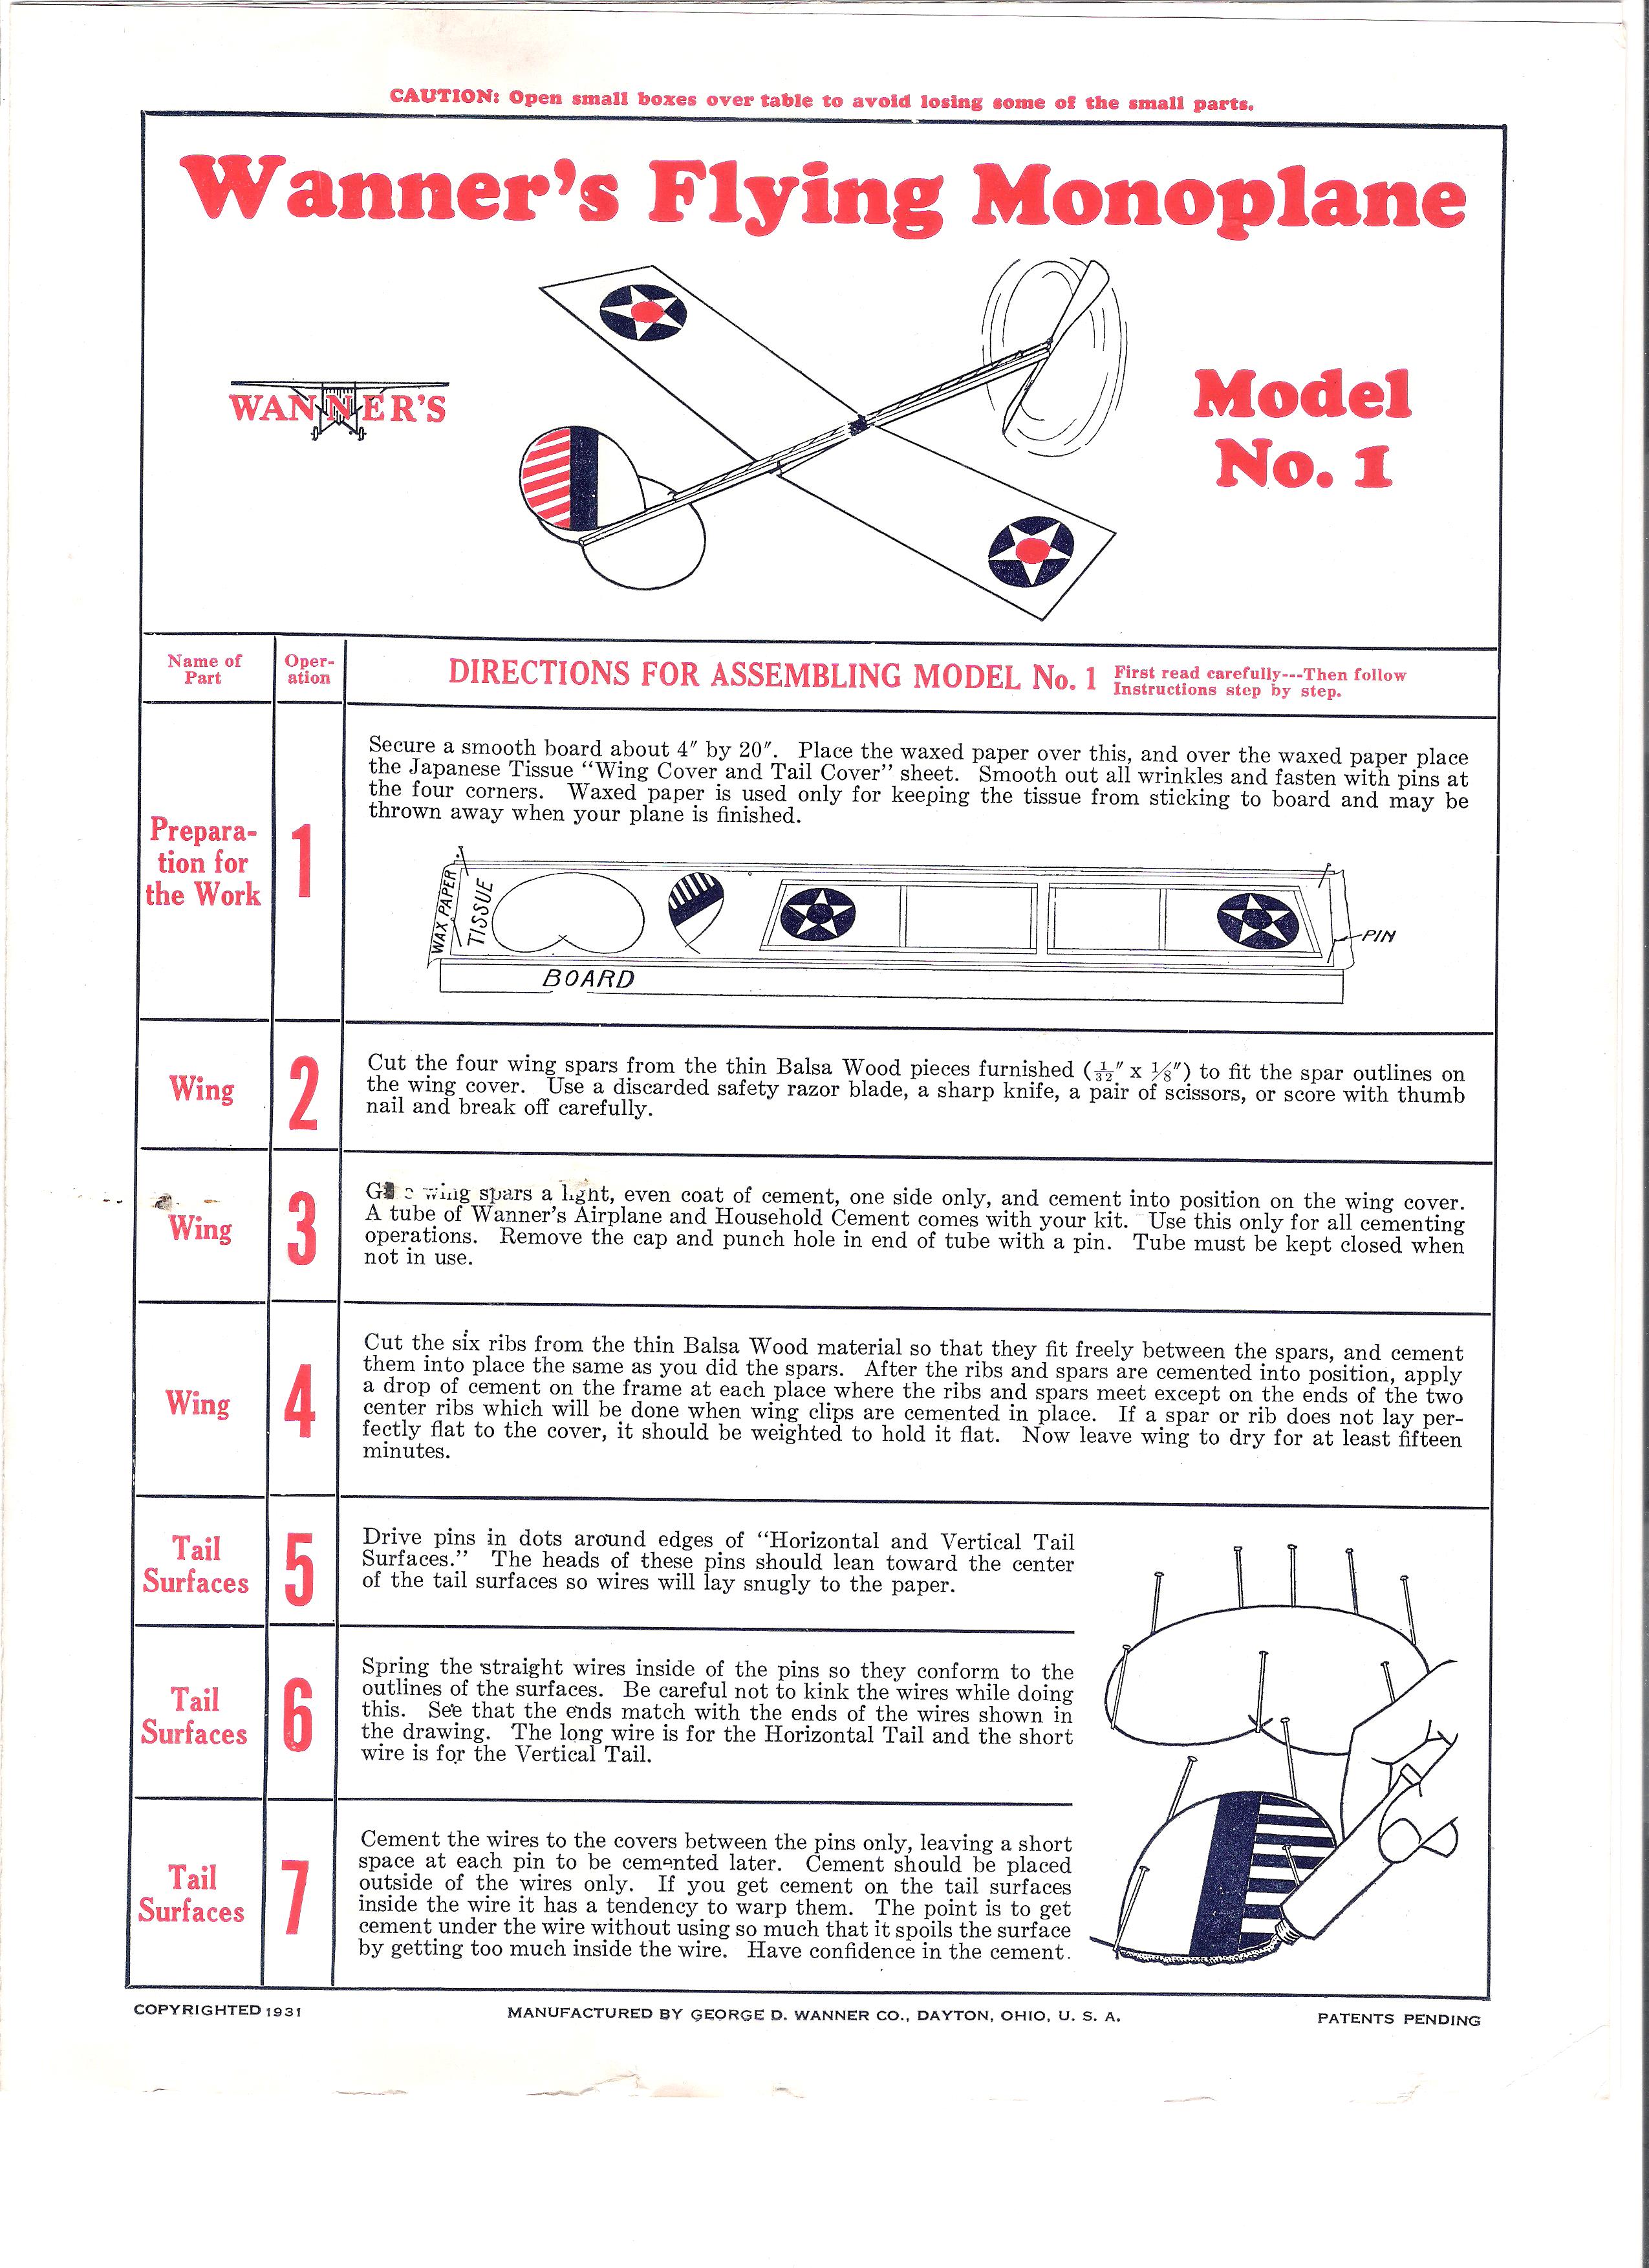
The instructions are a trifold of six pages of heavy paper. The copyright date is 1931. The Wanner’s Flying Monoplane does not show landing gear, although there is material for making it. The struts are balsa, rather than wire or bamboo, as on other, similar models of this time.
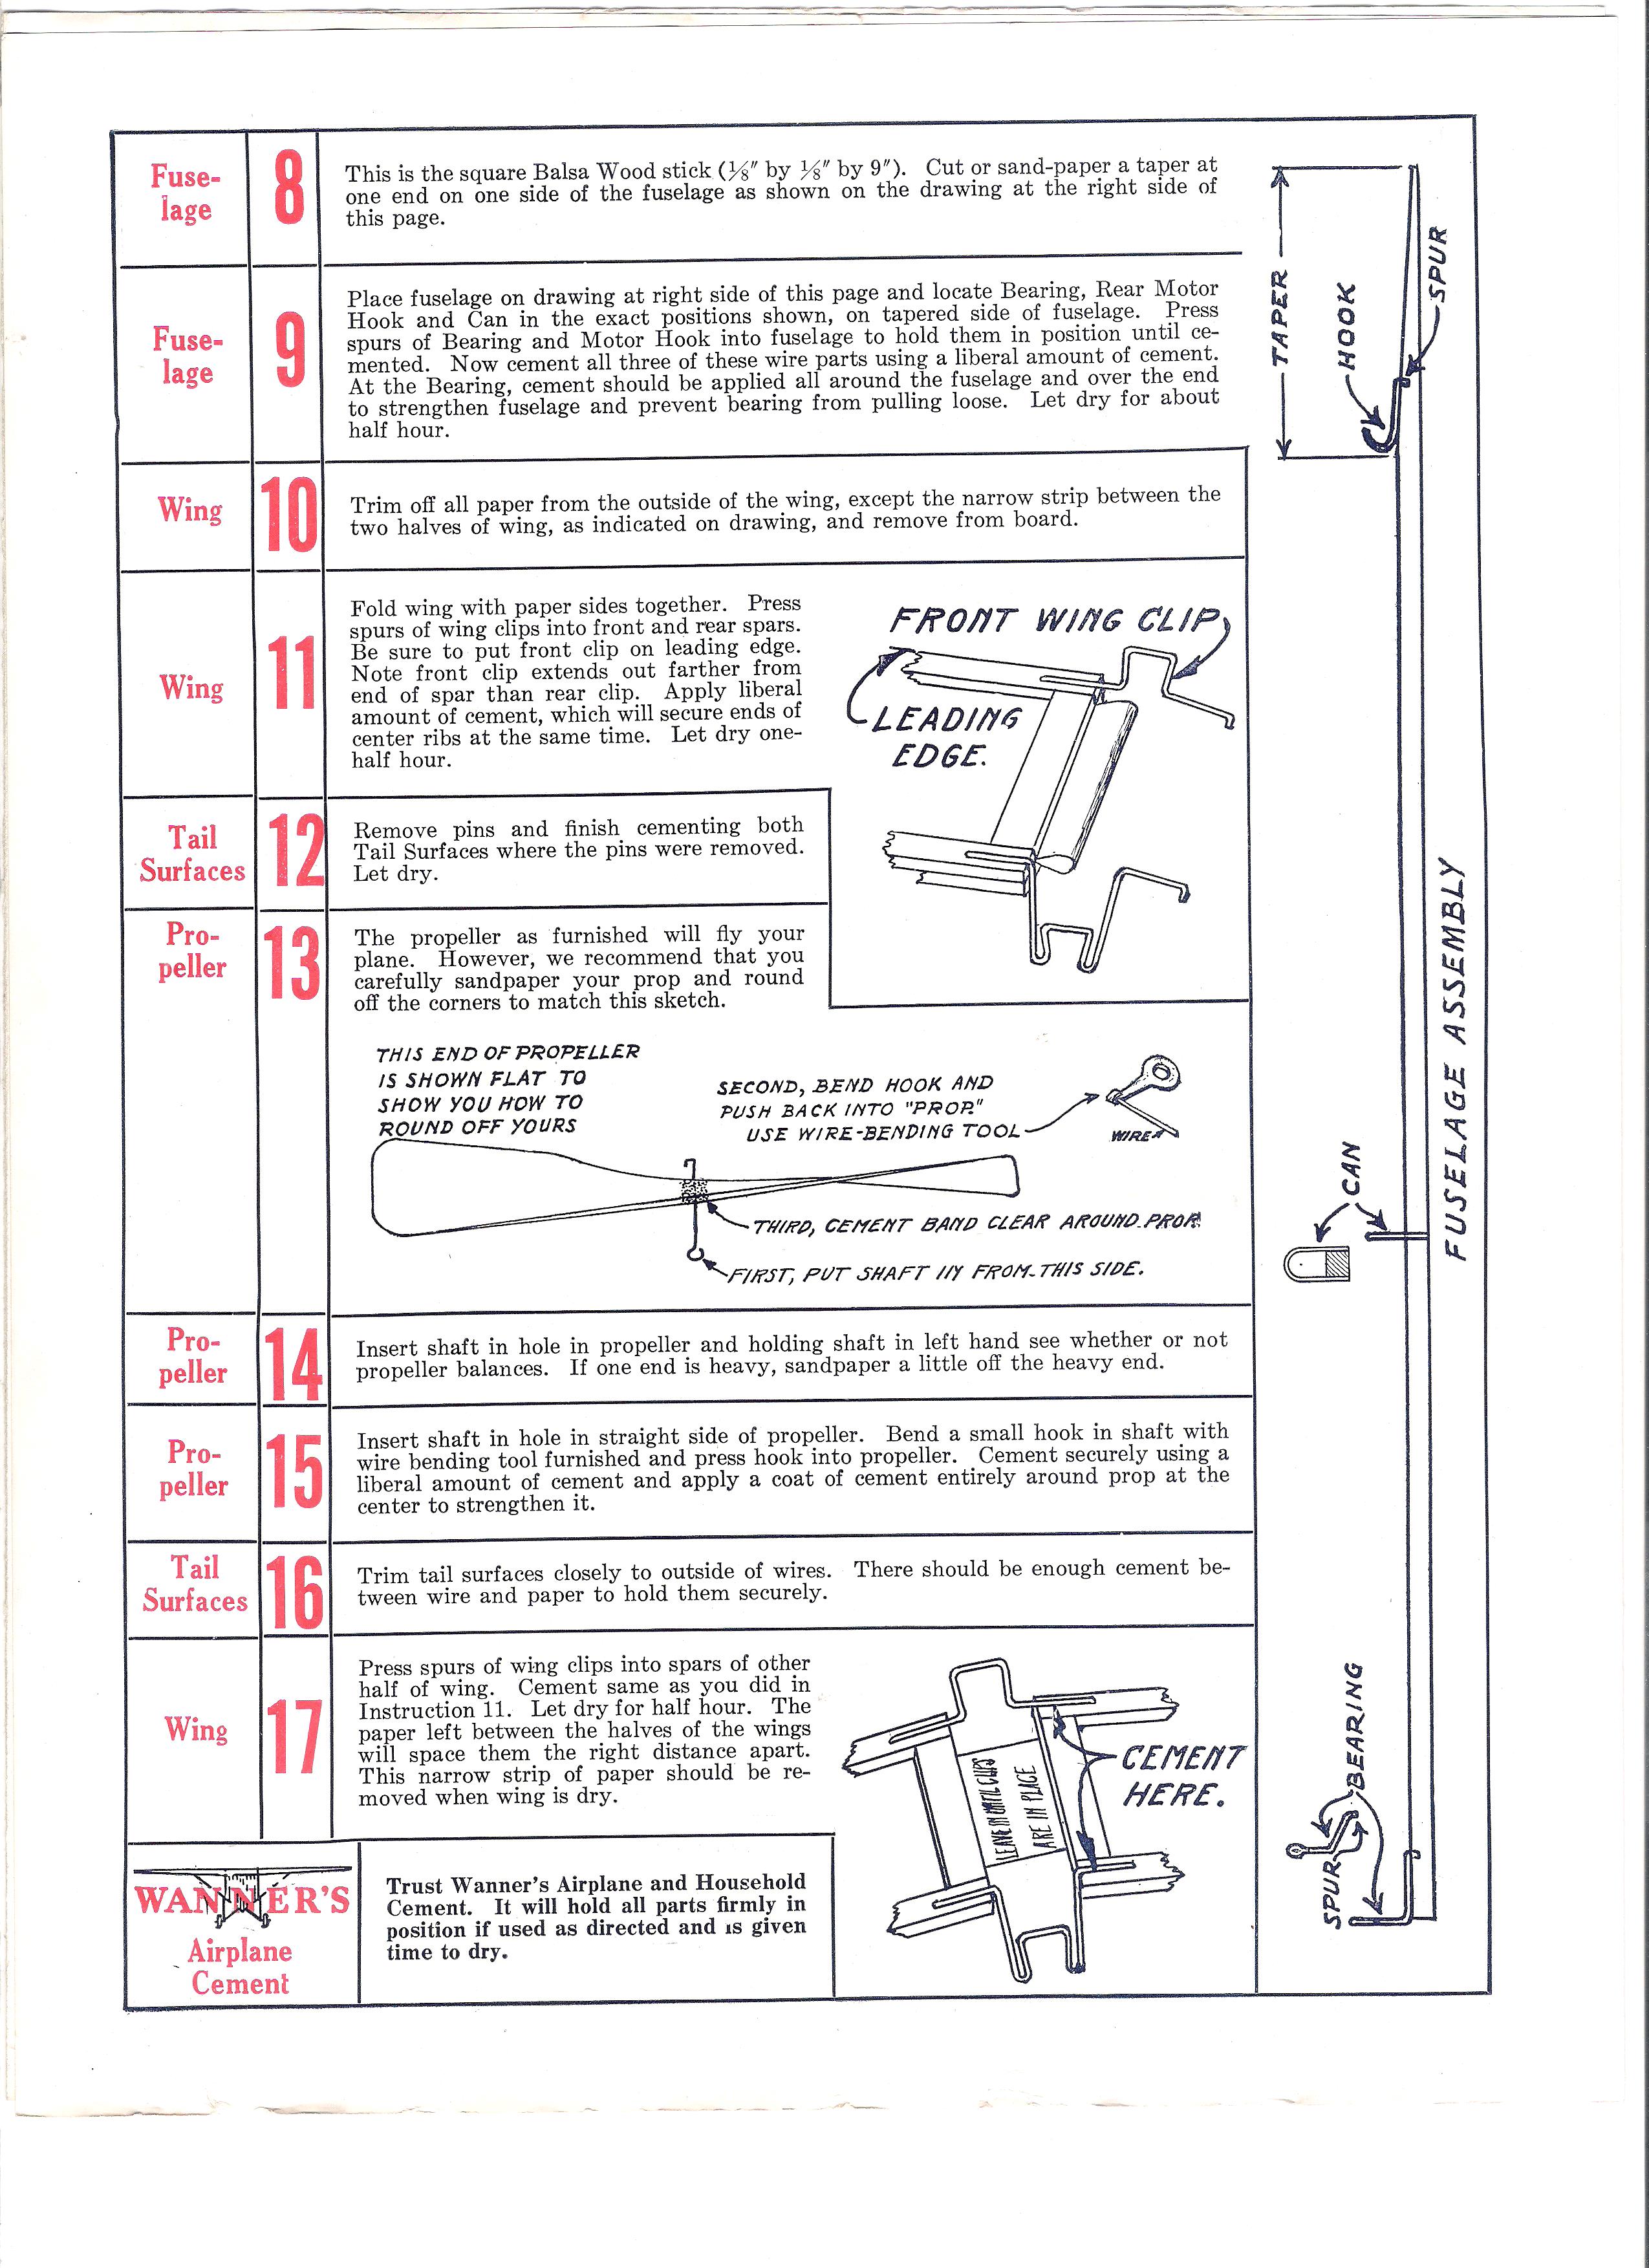
Note that the fuselage stick passes through a gap between the wings.
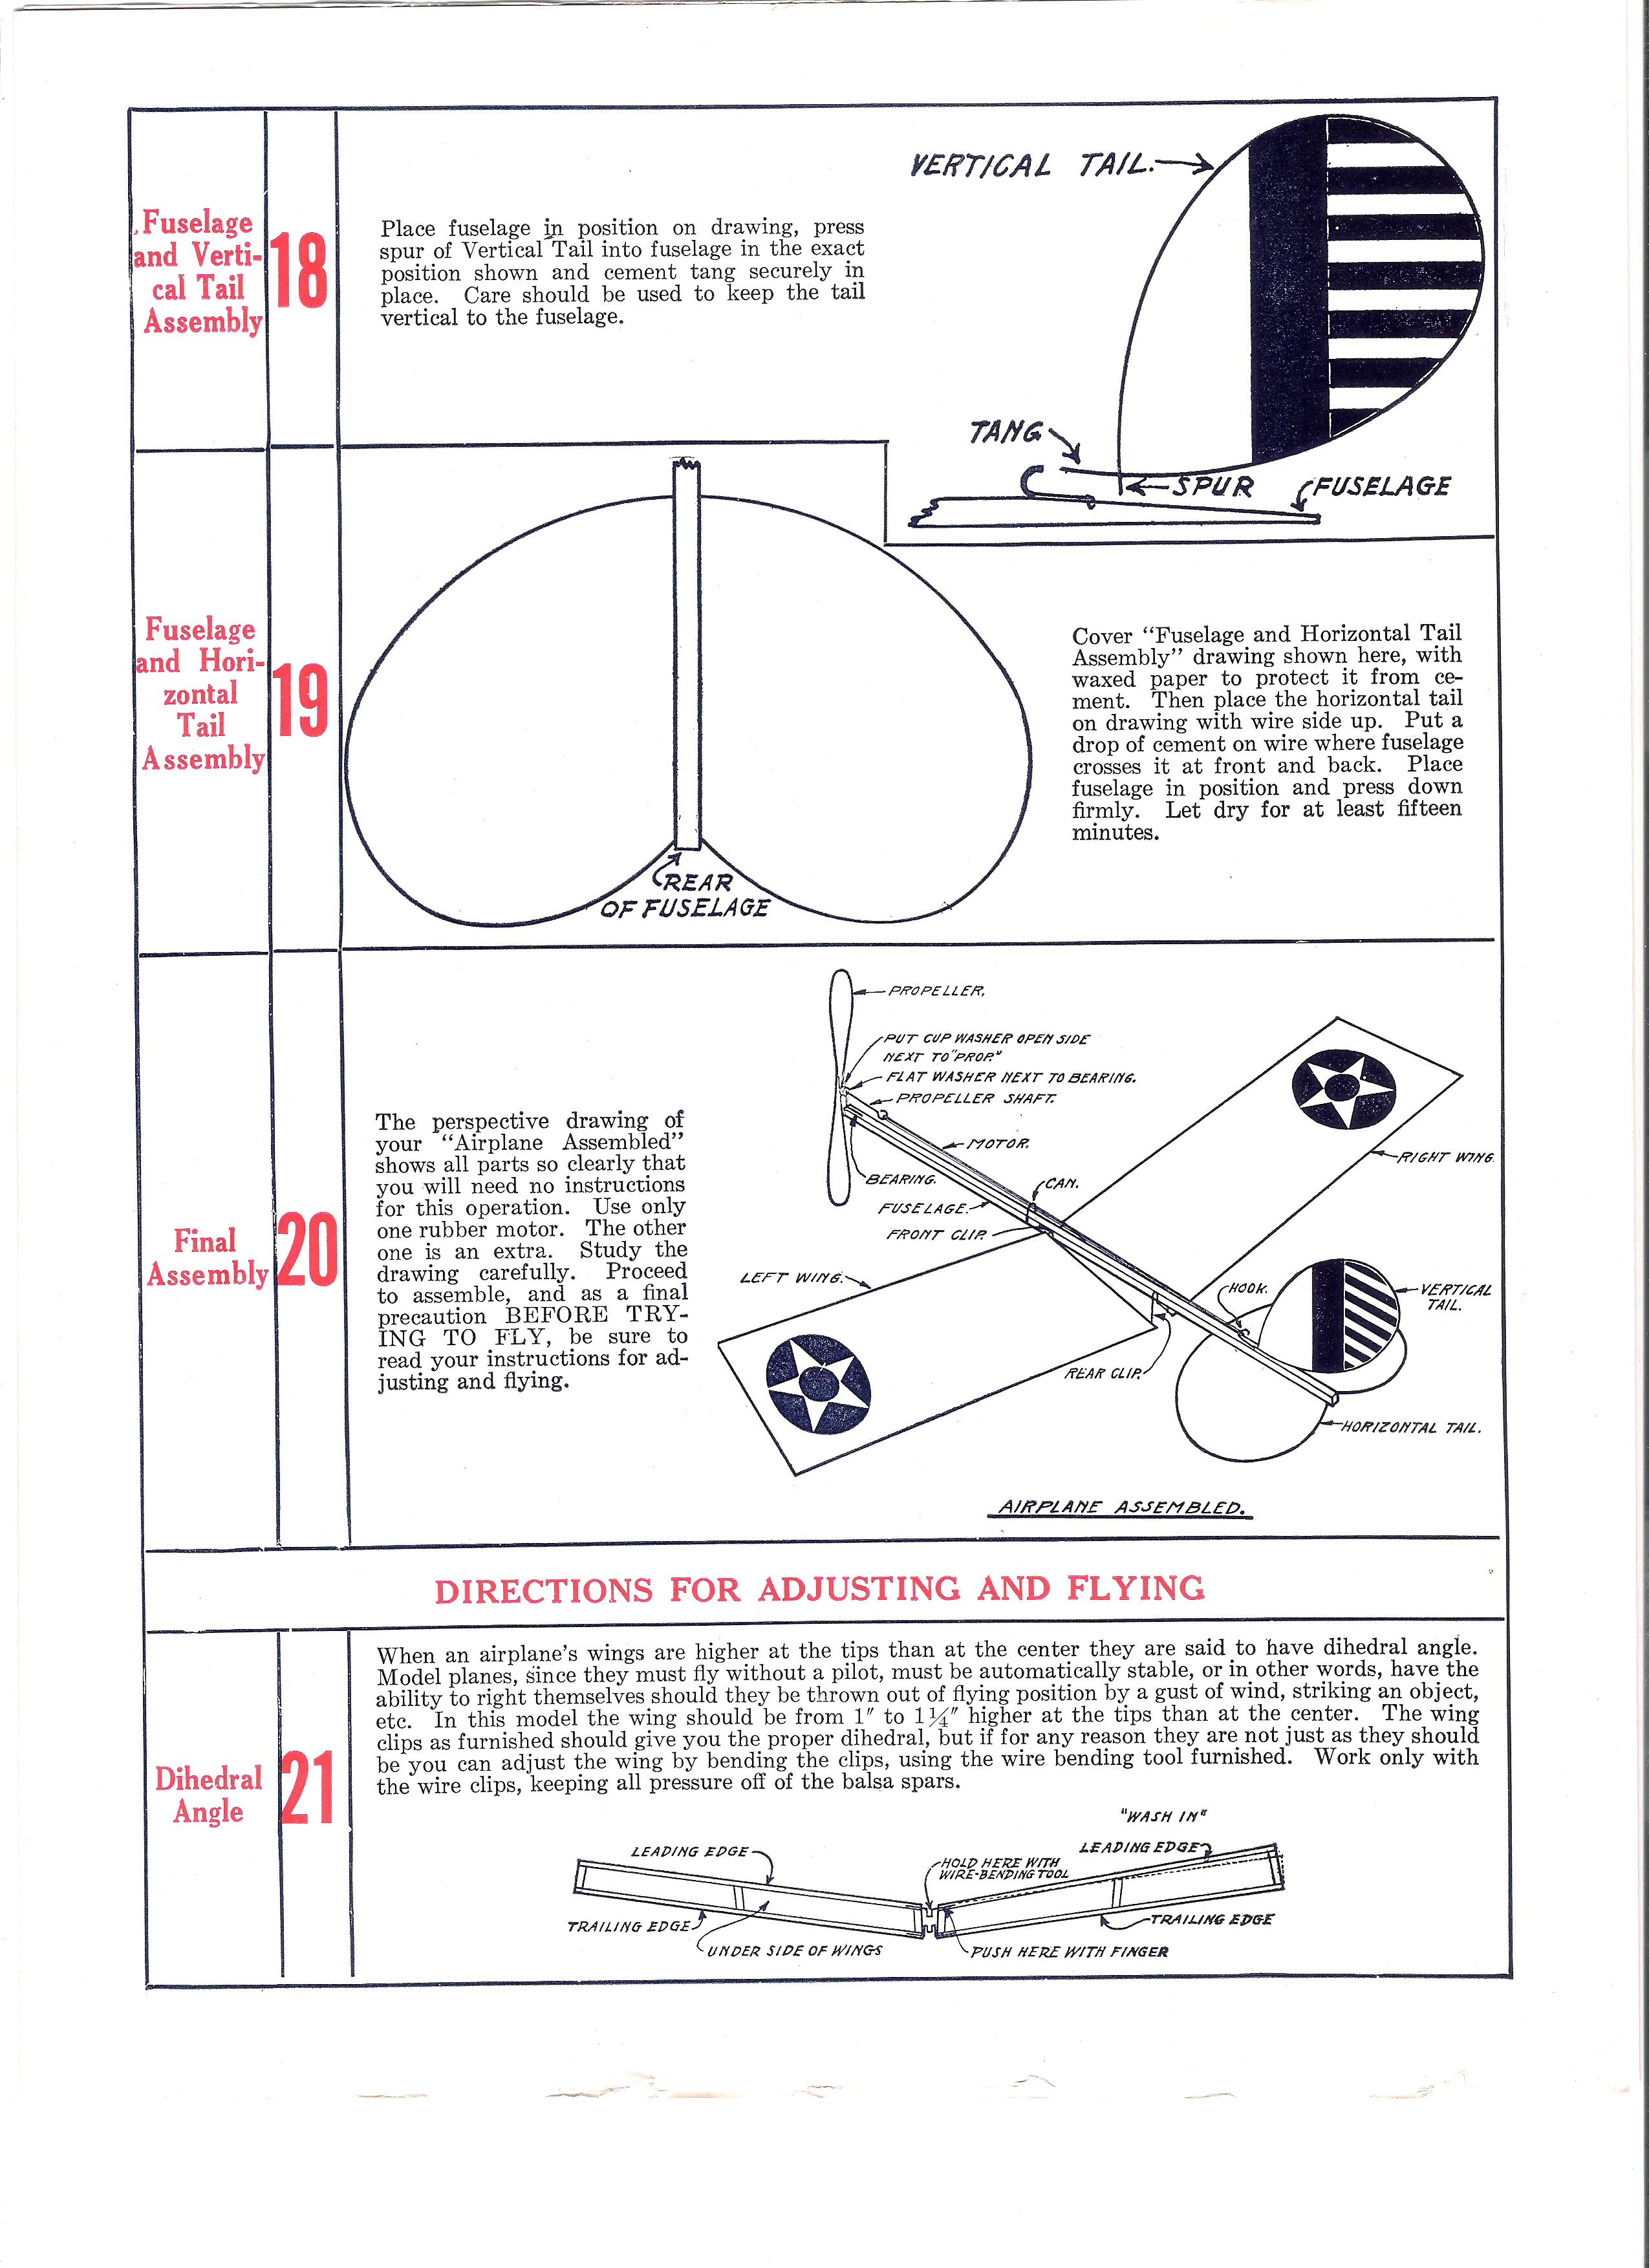
Note that the Monoplane is not shown with landing gear, although material is provided.
The next two pages supplement the basic instruction to modify the Monoplane into a Biplane or Endurance model. They also show landing gear with balsa struts, which could be added to the Monoplane to make it a Baby R.O.G.
The Biplane is based on the Endurance model and has landing gear. Several other variations are possible. You can mix and match components in several different ways.
I scanned the printed tissue in three sections. The scans will print onto 8 1/2″ x 11″ paper. Print them first on paper to verify the dimensions are correct. The longer wing spars are 6″ long. It might be necessary to adjust your printer settings. Then you can put an 8 1/2″ x 11″ piece of tissue against an 8 1/2″ x 11″ piece of heavy paper along the 8 1/2″ edges, tape them together and fold the tissue over the other paper and run it through your printer so the ink prints on the tissue side of the pages. Note that they are “backwards”. This is so the instructions will be legible when you put them face down on your building board and glue the wood to the underside.
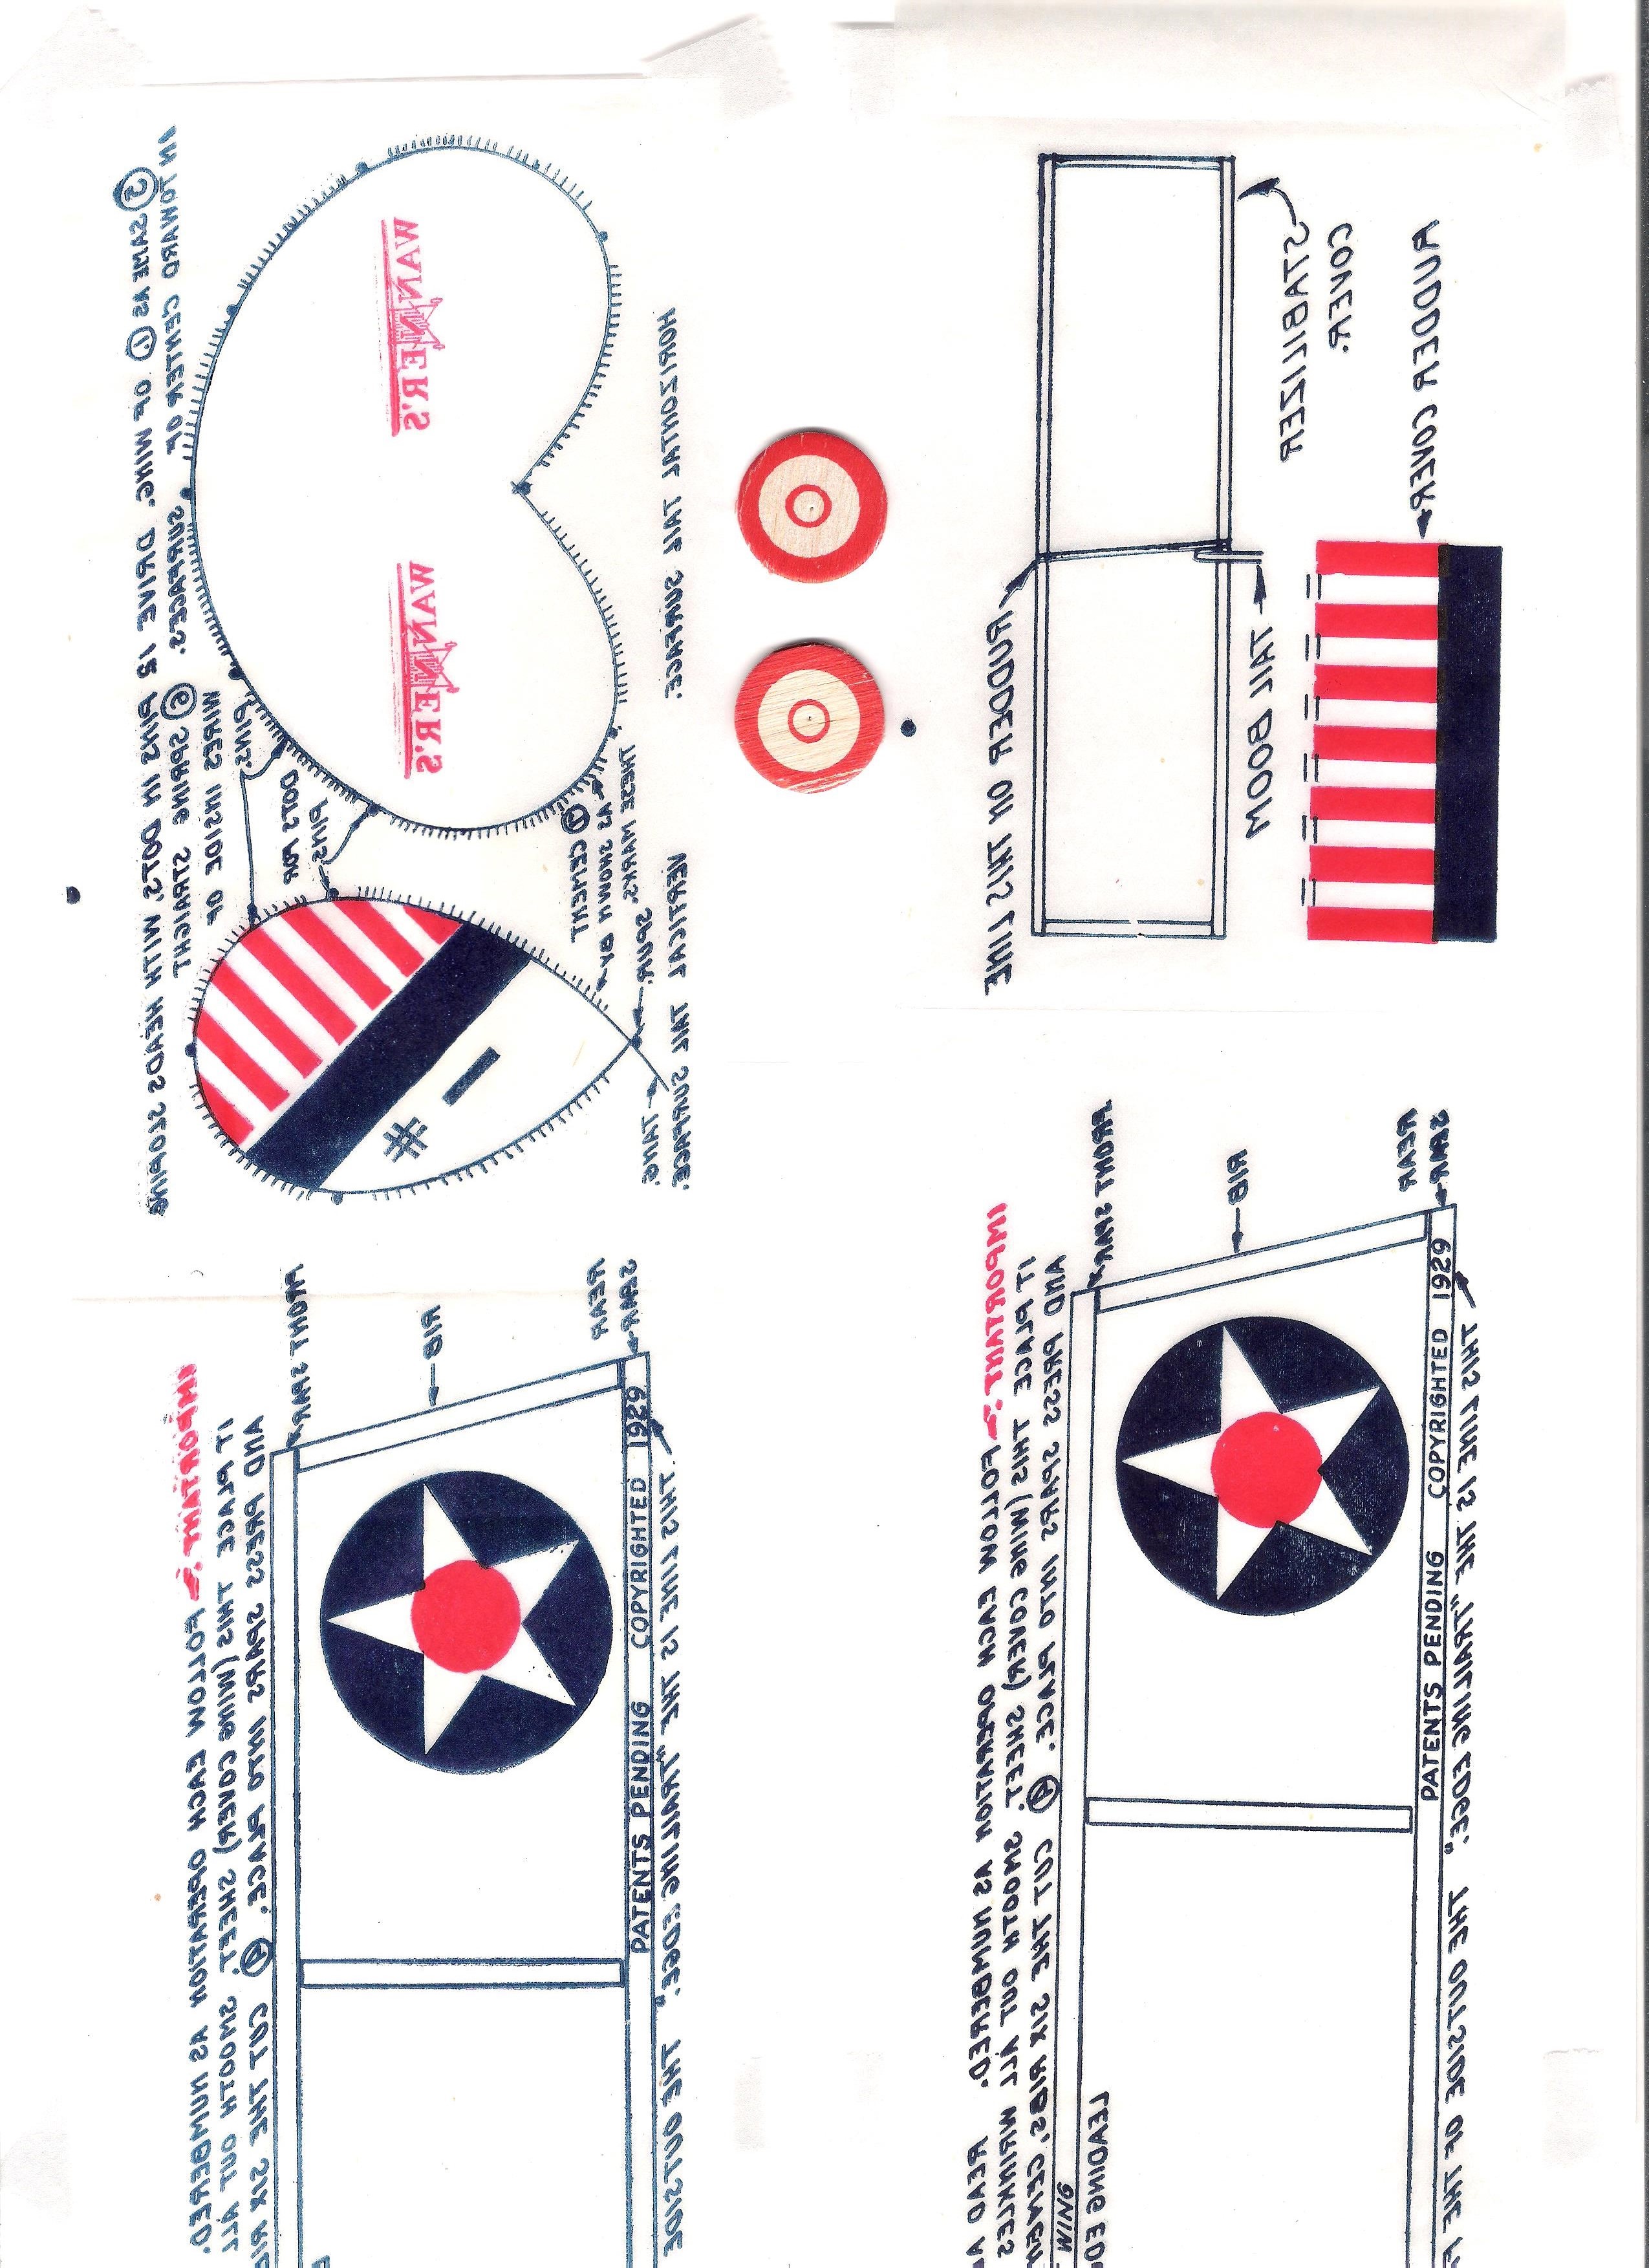
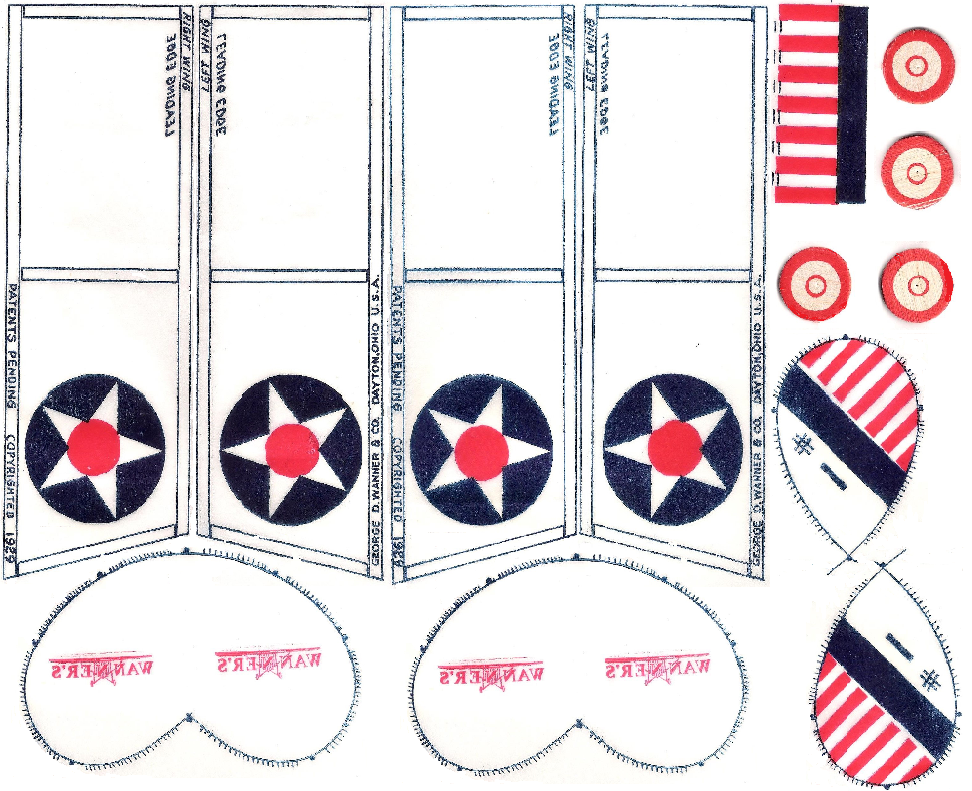
This includes the tail parts. I included the balsa wheels, so you can print them and glue the colored tissue to your balsa wheels.
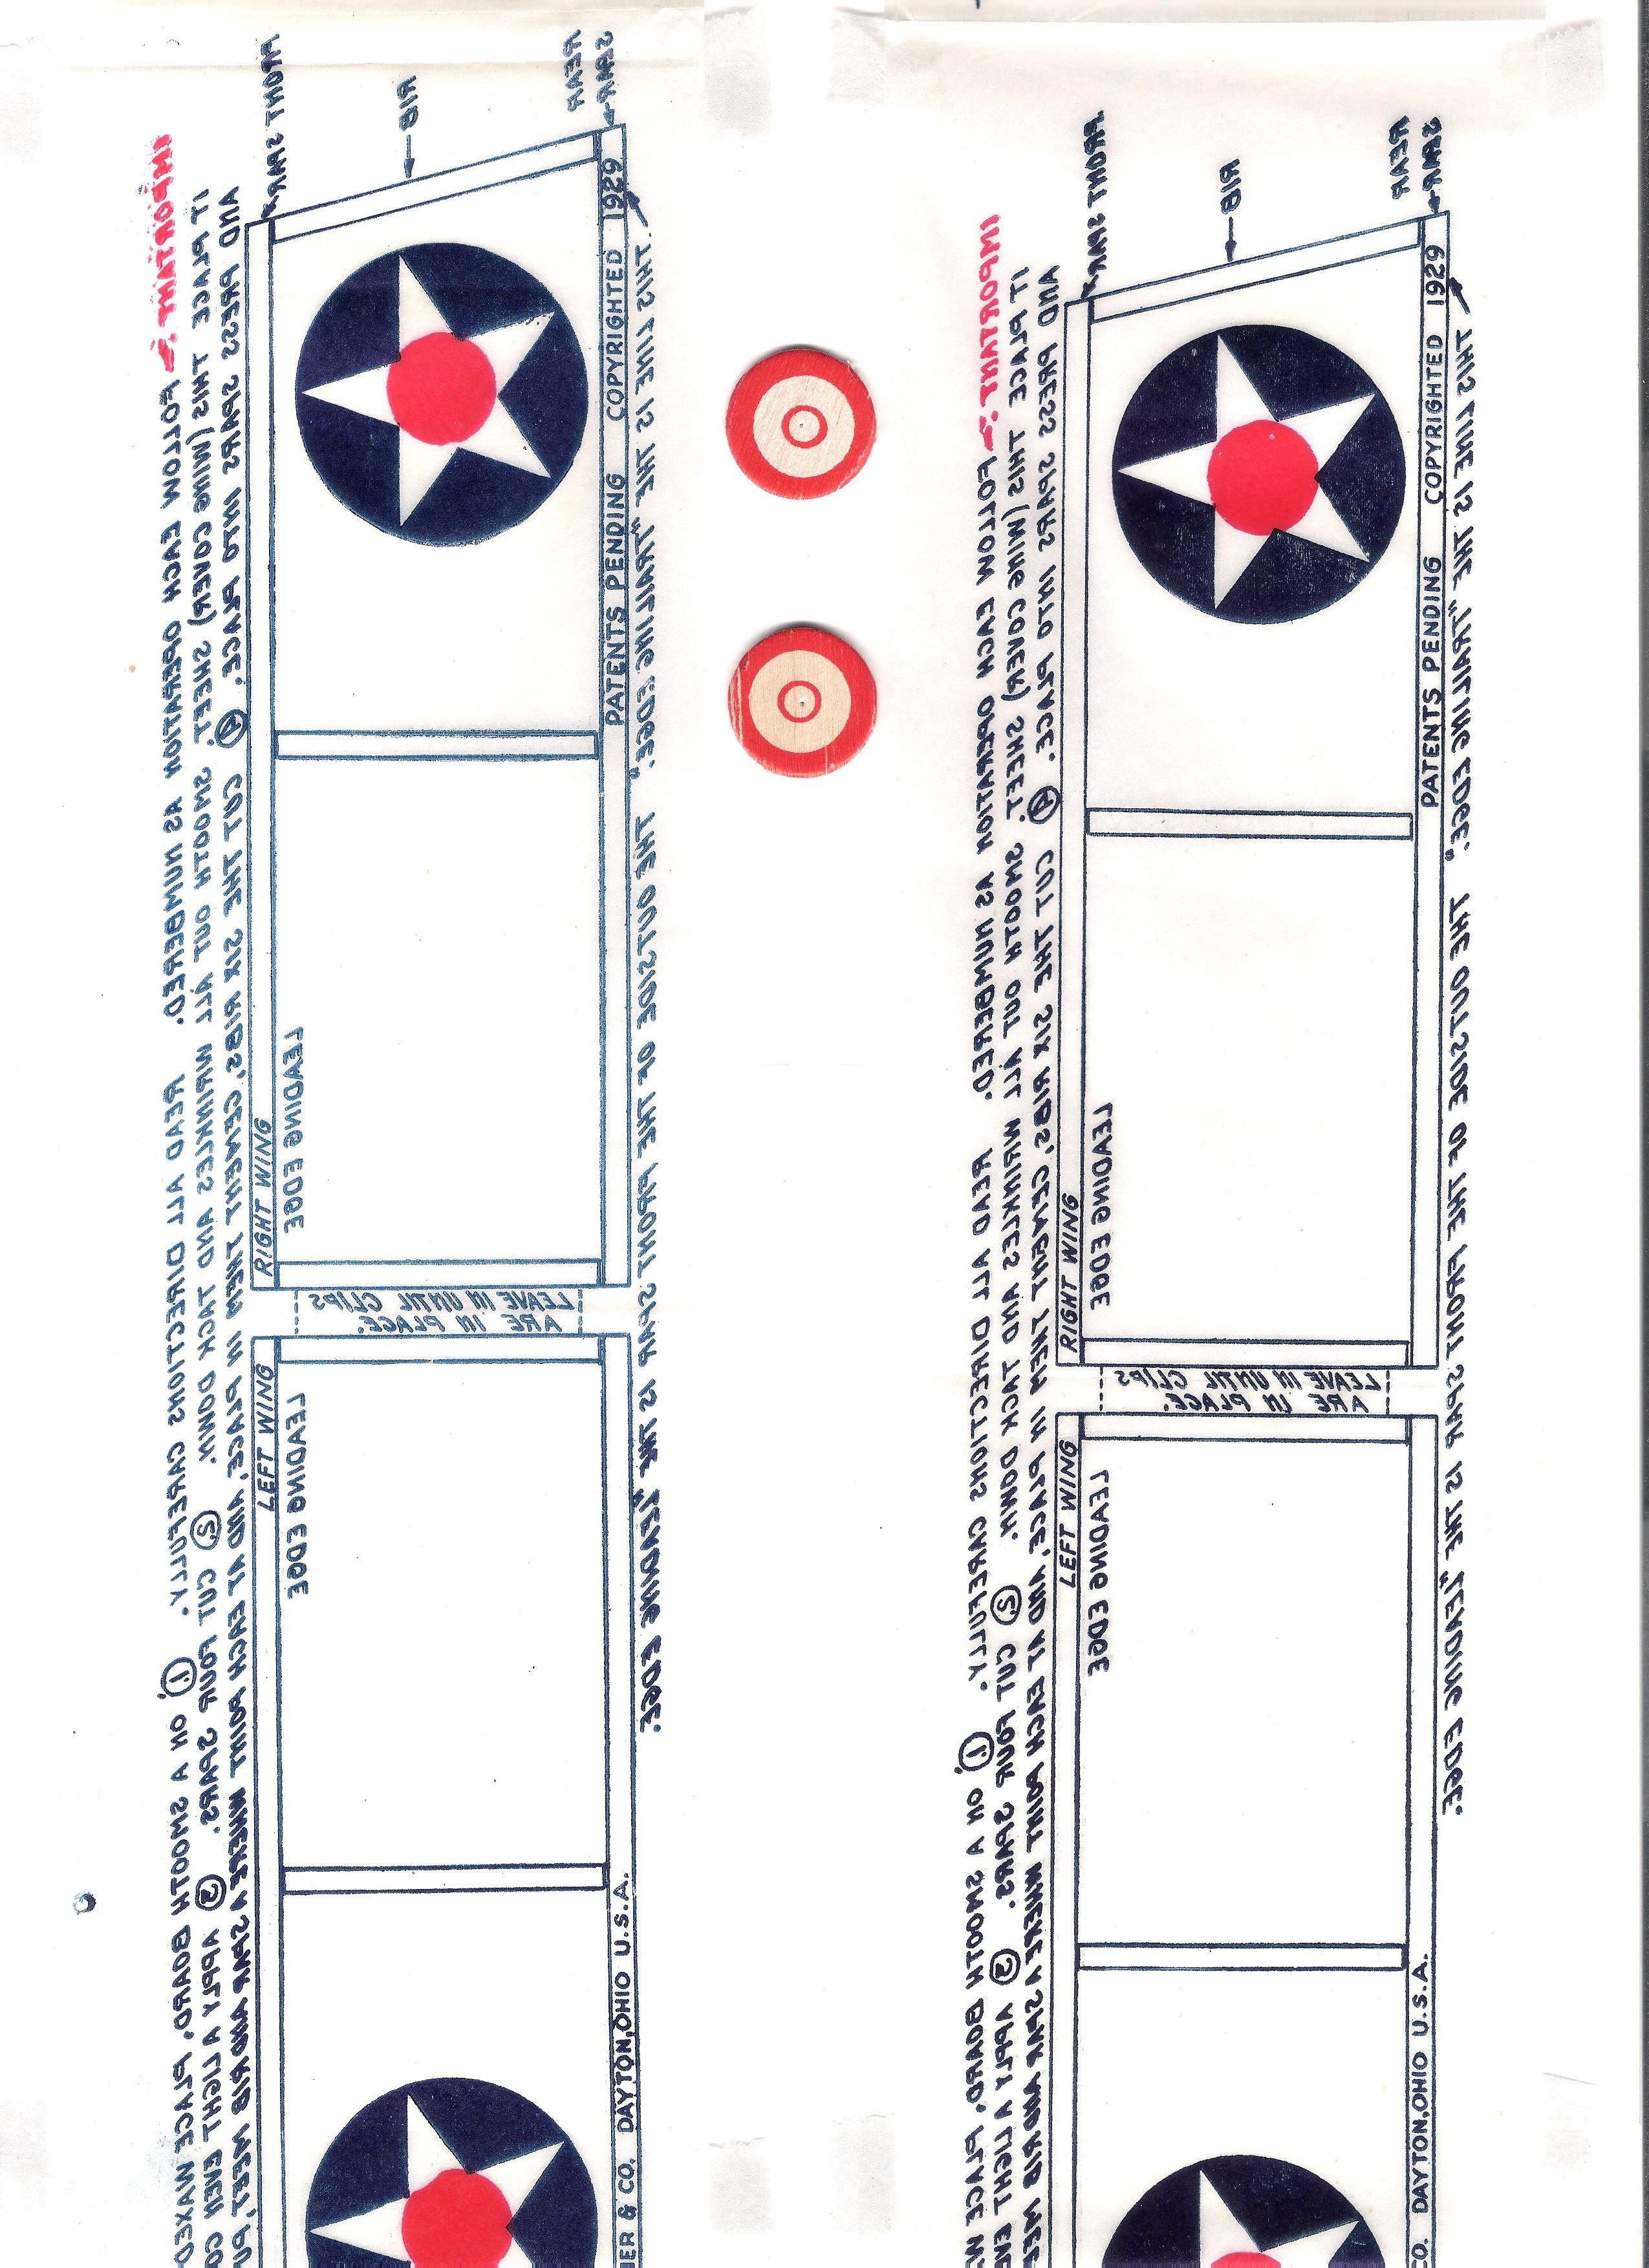
Here are two right wings.

Here are two left wings.
I think this is enough for you to build your very own Wanner’s Flying Monoplane, Baby R.O.G., Baby R.O.G. Biplane and Baby R.O.G. Endurance. That should keep you amused for a while.
I scanned, cut and pasted the tissue print patterns into PC Paint so they would print on an 8 1/2″ x 11″ sheet of paper. That was an arduous task. You can tape an 8 1/2″ x 11″ sheet of tissue to a similar piece of printer paper and run it through your printer so it prints on the tissue side. Print on plain paper first and adjust your printer settings as necessary. The longest wing spars should print 6″ long. Cut the tissue so the grain runs across the 8 1/2″ length, parallel with the wingspans.
There are enough tissue parts to make two Baby ROG planes.
How much was the Comet W1 Baby R.O.G. (1941) inspired by these designs, one wonders.
Actually, going to reply to myself here.
Spending a little time snooping around the Internet has shown me that there were plenty of similarly designed models from that period and onwards. So while the Comet Baby R.O.G may have looked similar, its “bones” weren’t really that unusual. Just a little convergent evolution.
– RRL
Yes, see our post on the 1927 ROG. Frank Zaic reproduced several plans in Model Airplanes and the American Boy, 1927-1934. Our 1927 ROG is essentially the AMLA Baby ROG published by Merrill Hamburg in October 1927. These plans were published in newspapers worldwide.
Here another ser of plans for those interested.
https://outerzone.co.uk/plan_files_07/7258/New_Baby_ROG_oz7258.pdf
Thanks for that link. I contributed that plan to outerzone. I don’t know why I didn’t link it in the article. I guess in the interval between when I contributed it and when it was posted, I had moved on to other things.
Wonderful findings !