Start by collecting everything you will need onto your work table.
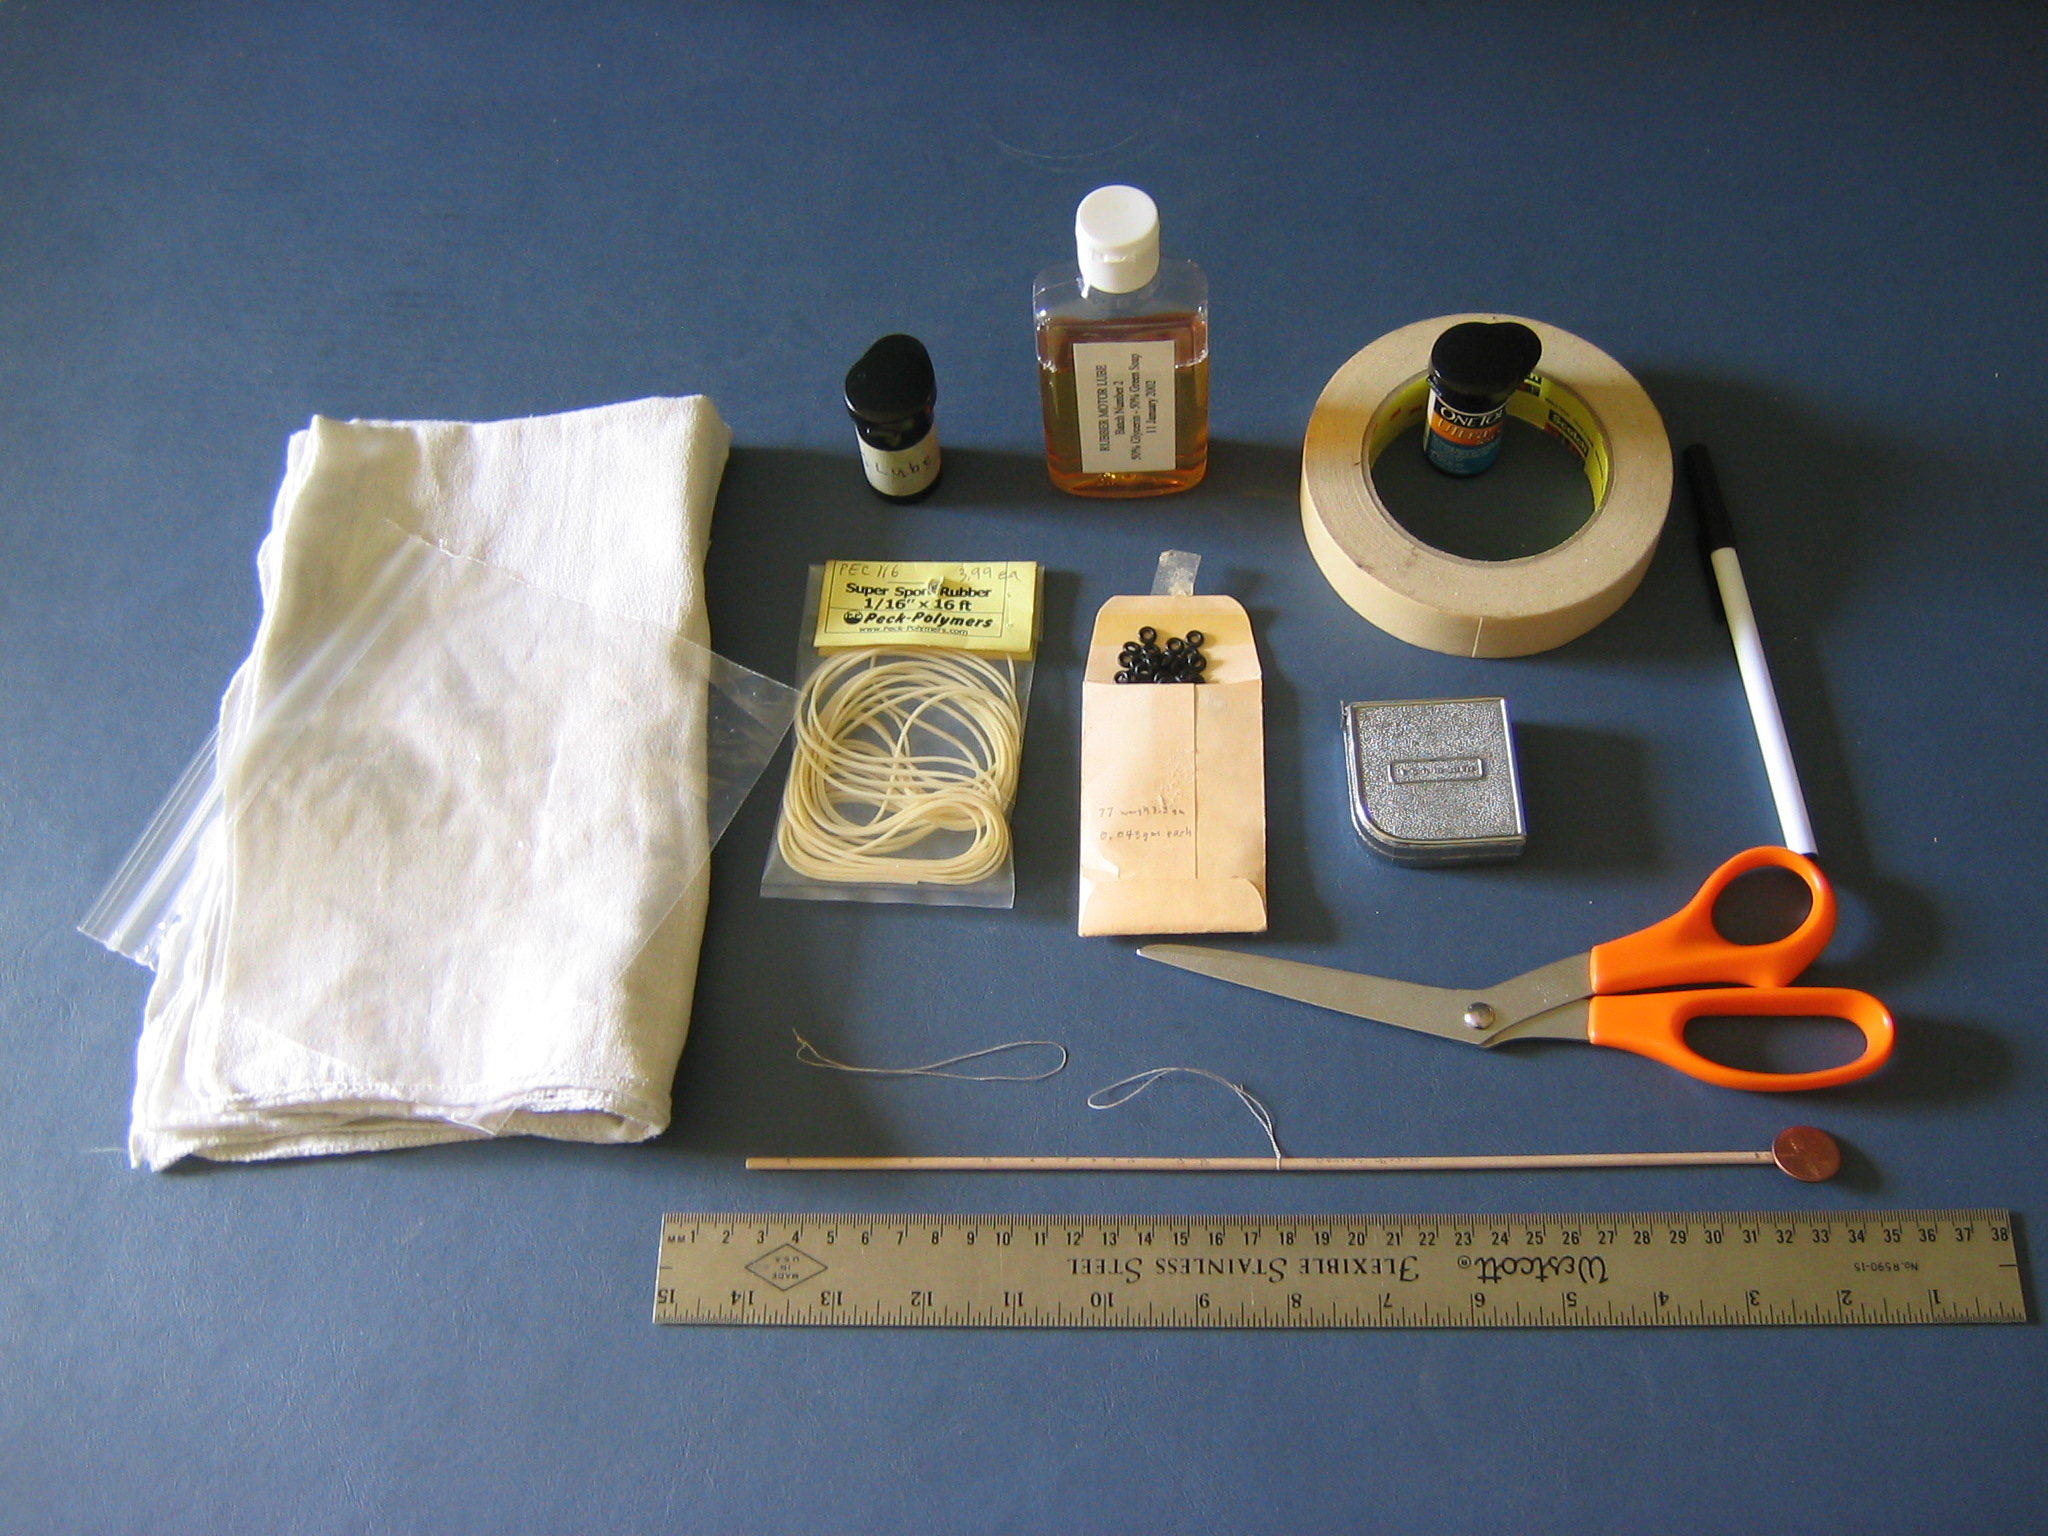
We are going to make a 25″ loop of 1/16″ rubber strip. This requires sufficient 1/16″ rubber strip, a tape measure to measure it, scissors to cut it, a clean diaper to dry it after washing, a 1/8″ O-ring, a vial of 1/2 strength lube, a bottle of motor lube, a Ziploc baggie, a vial to store the motor, masking tape and a pen to make a label and, if you want, a penny balance and centimeter scale or some other means to weigh the finished motor.
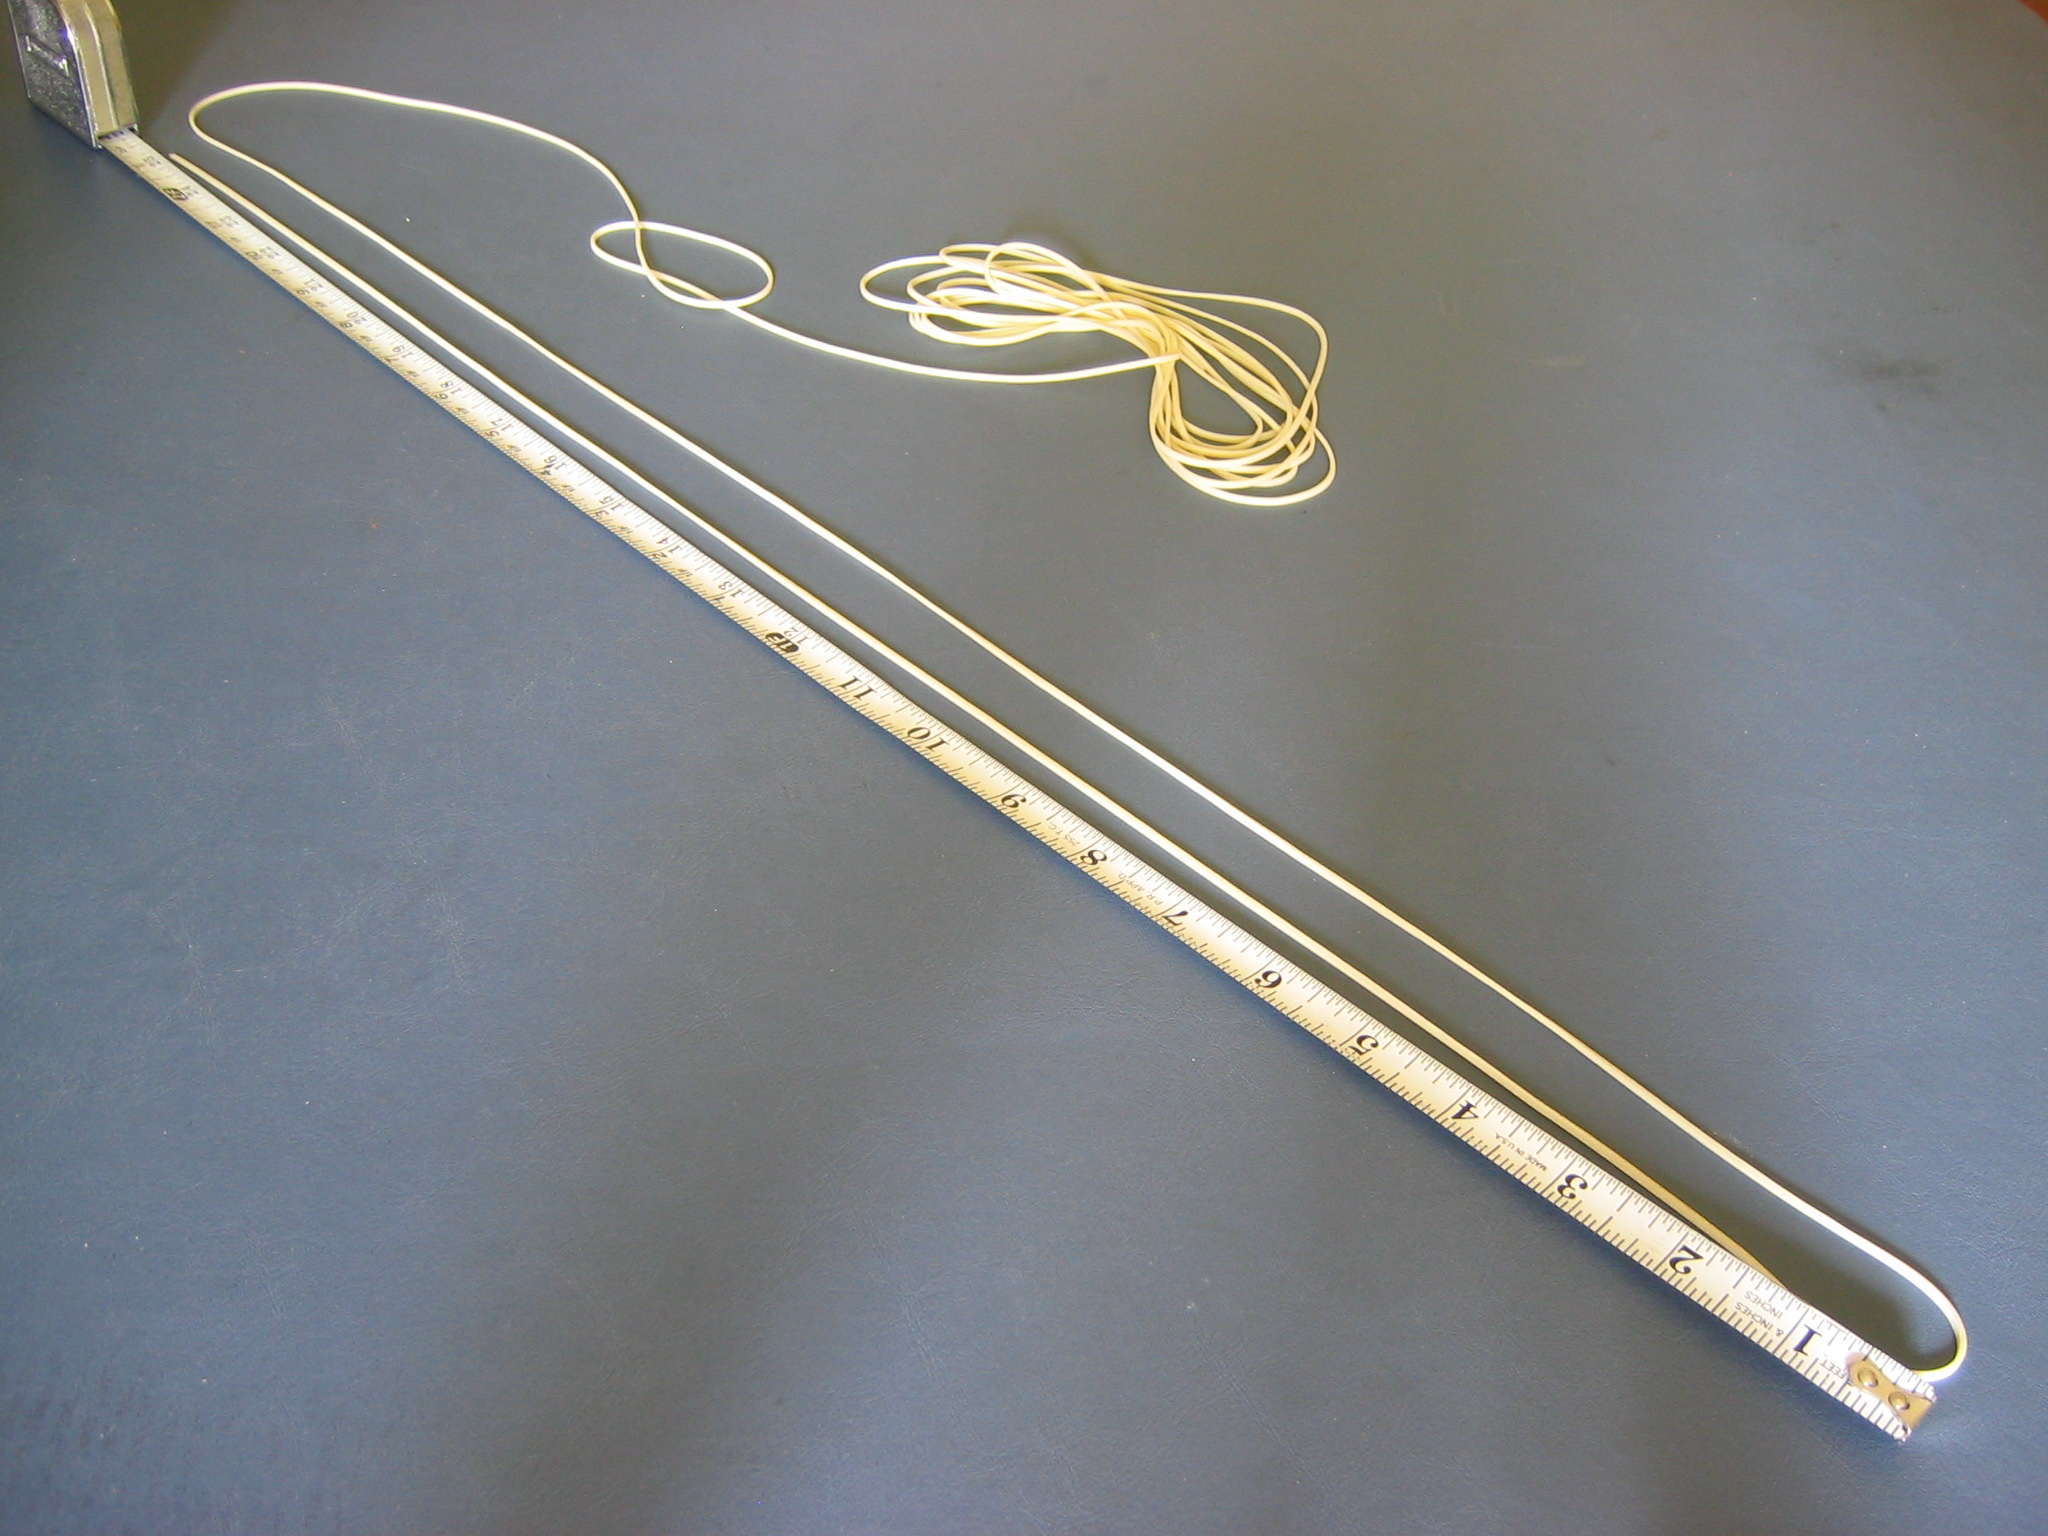
Start by measuring off the required amount of strip. A 25″ long motor will require 50″ of strip, plus 1/4″ extra on each end for the knots, so a total length of 50 1/2″ is required. Usually I lay it out on the kitchen floor in a straight line, but that wouldn’t fit on the table for the picture, so I doubled it over and measured off 25 1/4″.
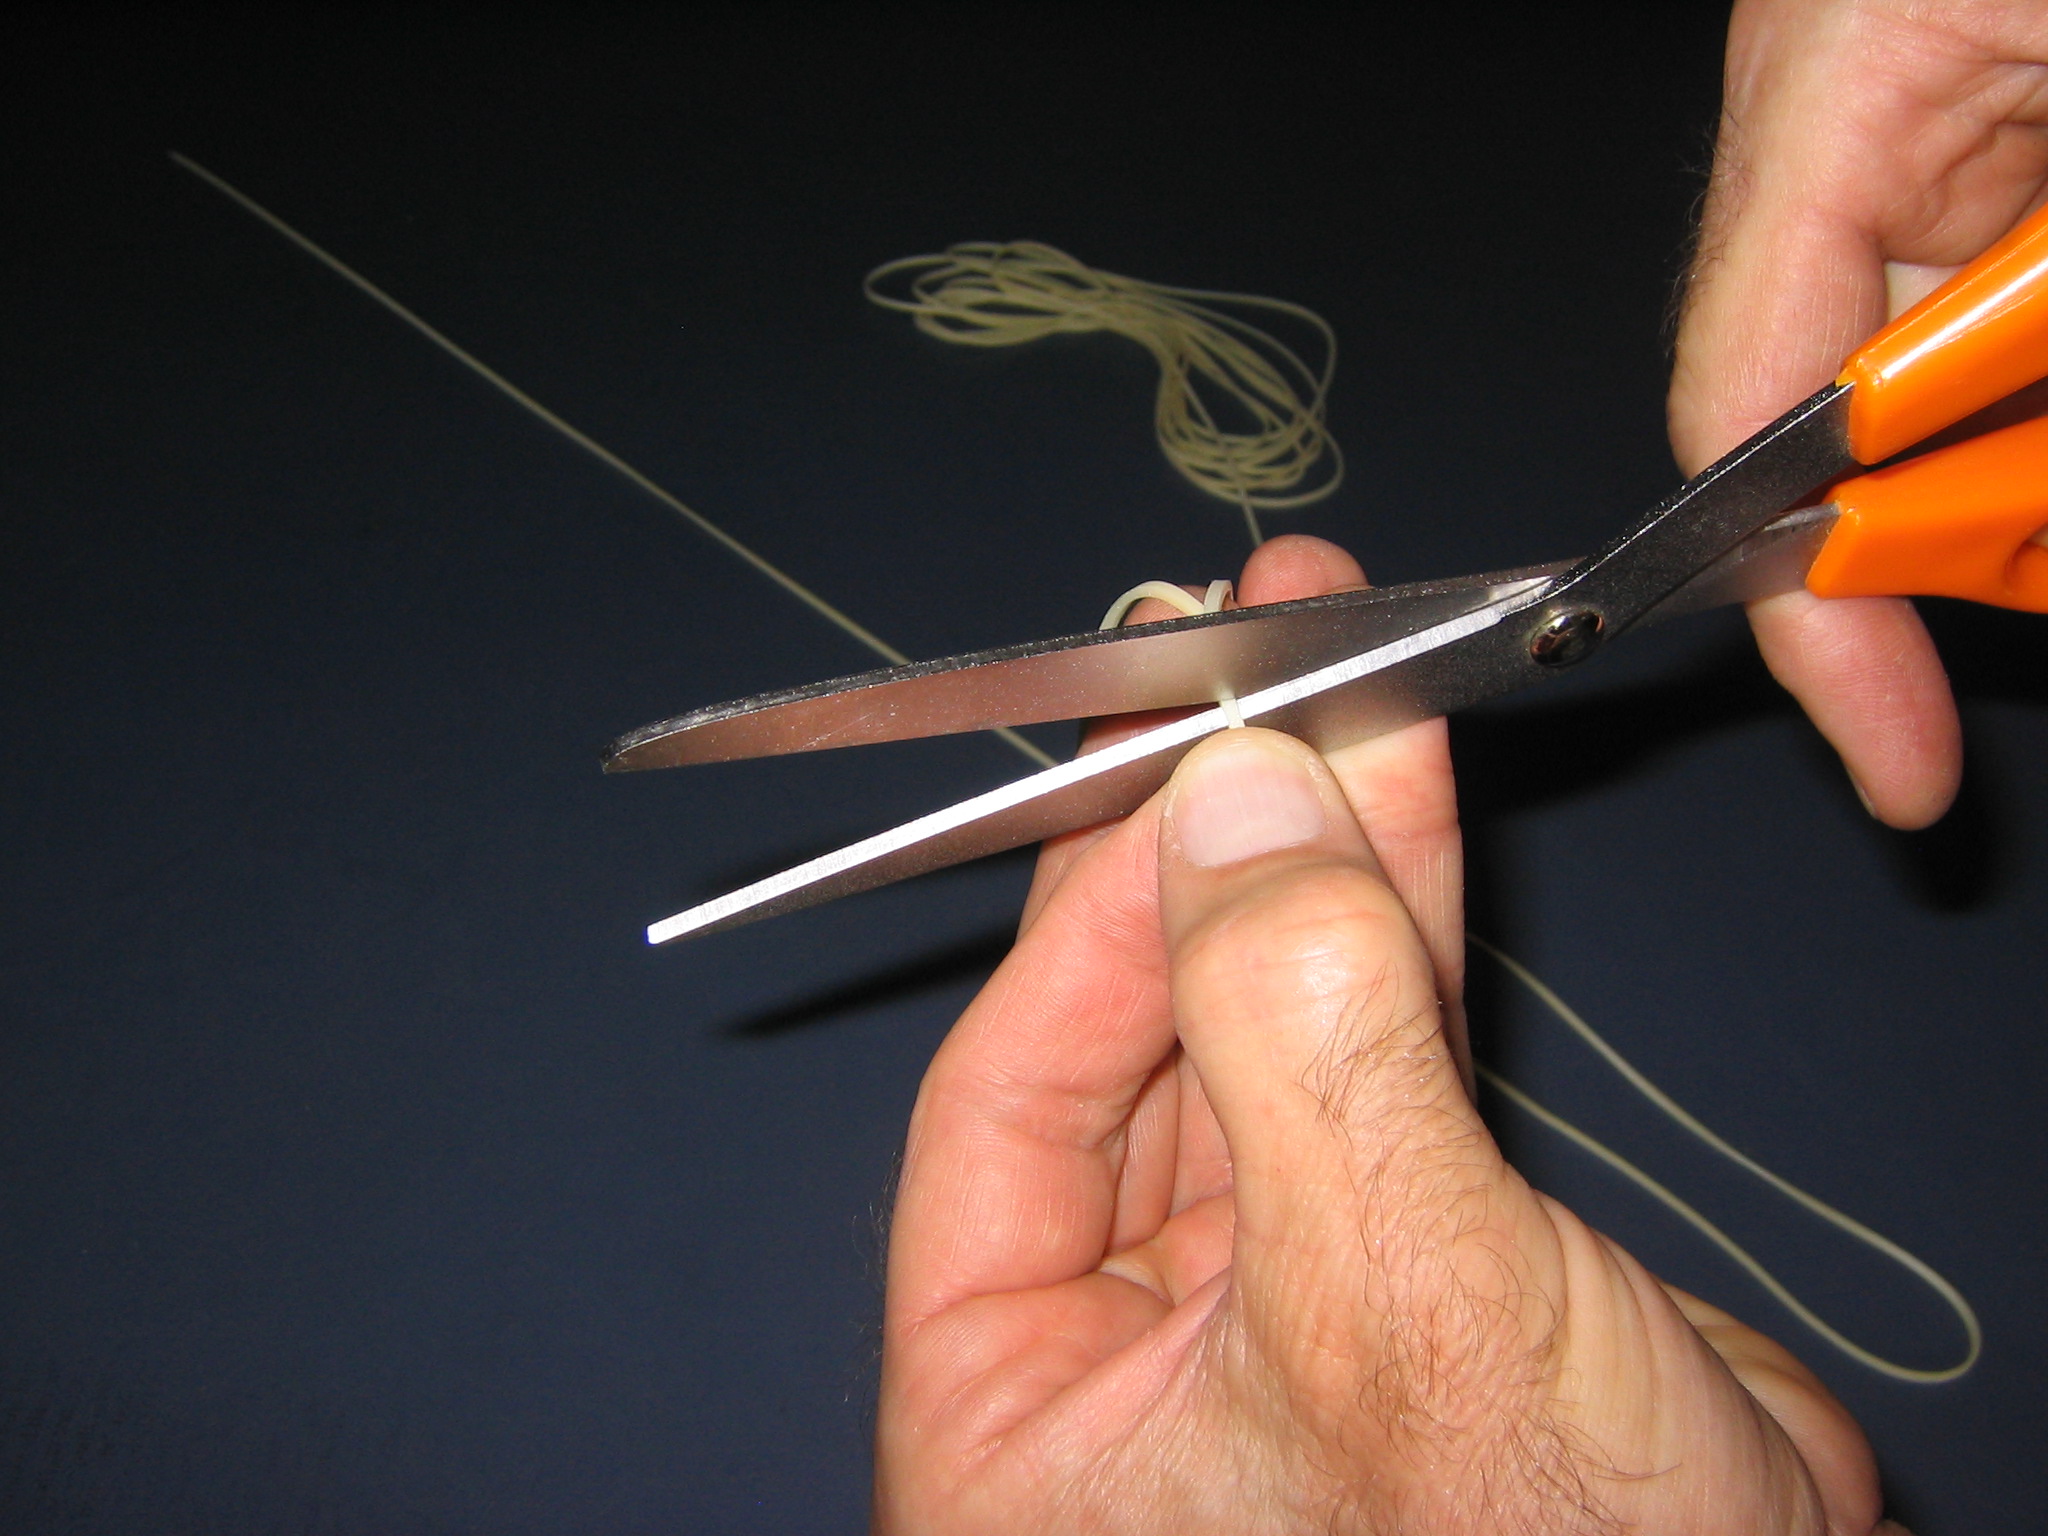
Cut with scissors, sharp razor blade, wire cutters or finger nail clips. Whatever works! You star troopers can use your laser. But don’t burn a hole in your building board!
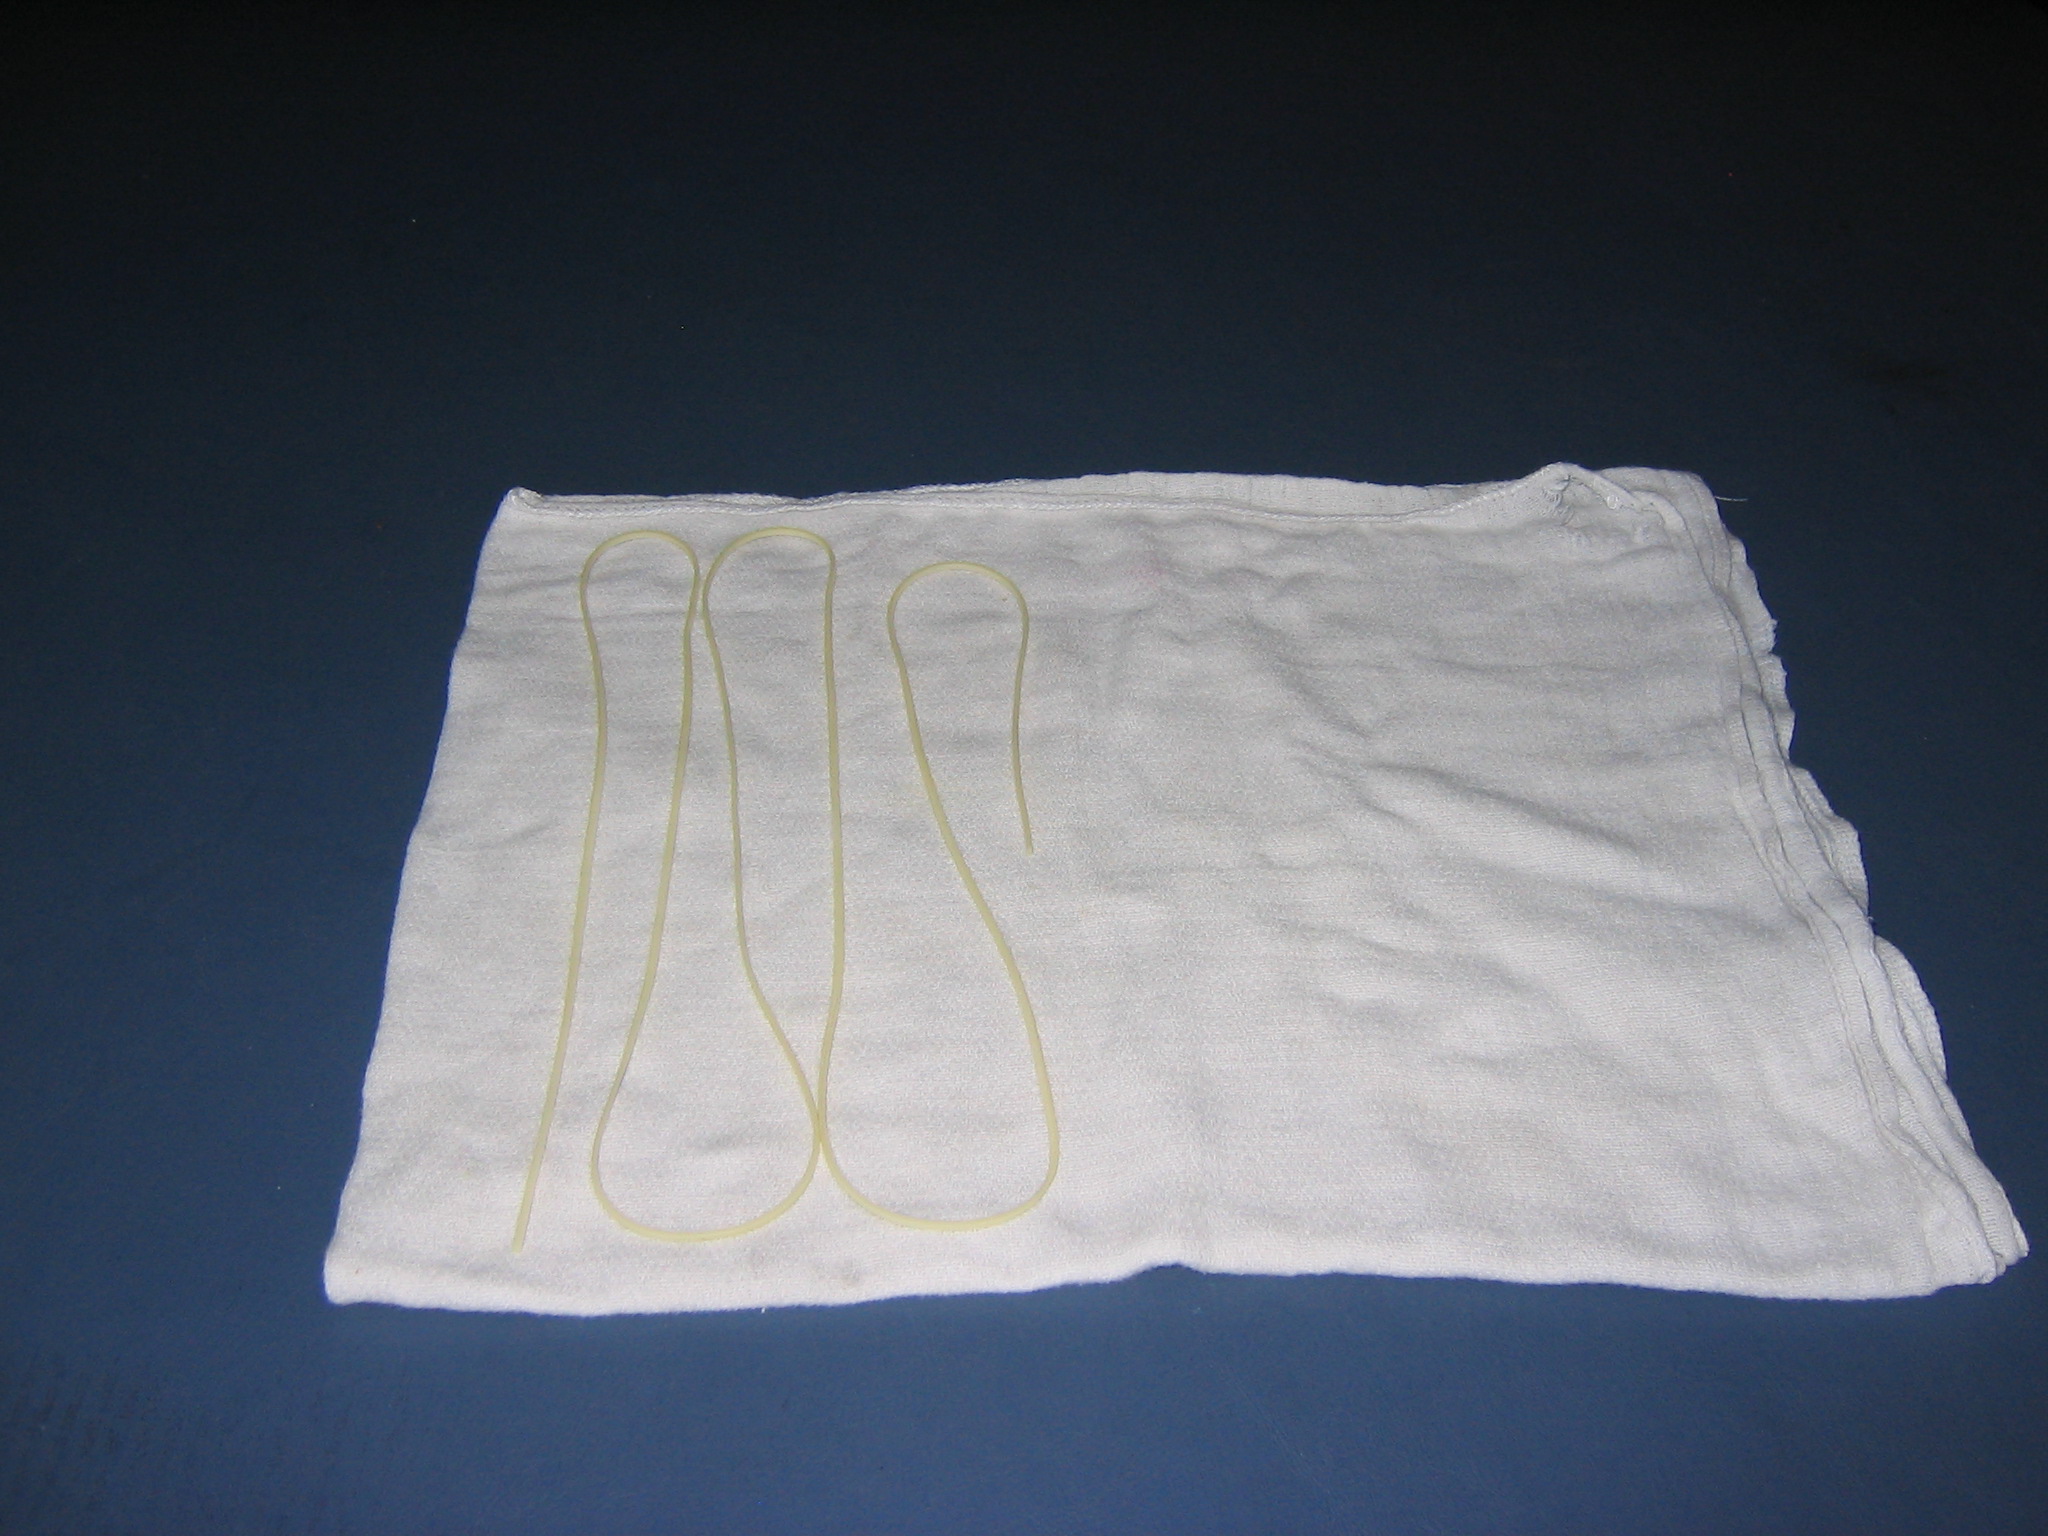
Wash the strip with liquid kitchen detergent and rinse it thoroughly. You don’t know where this rubber has been and you don’t want any hard, sharp grit that can start a tear in tightly wound rubber. This also gets your hands clean.
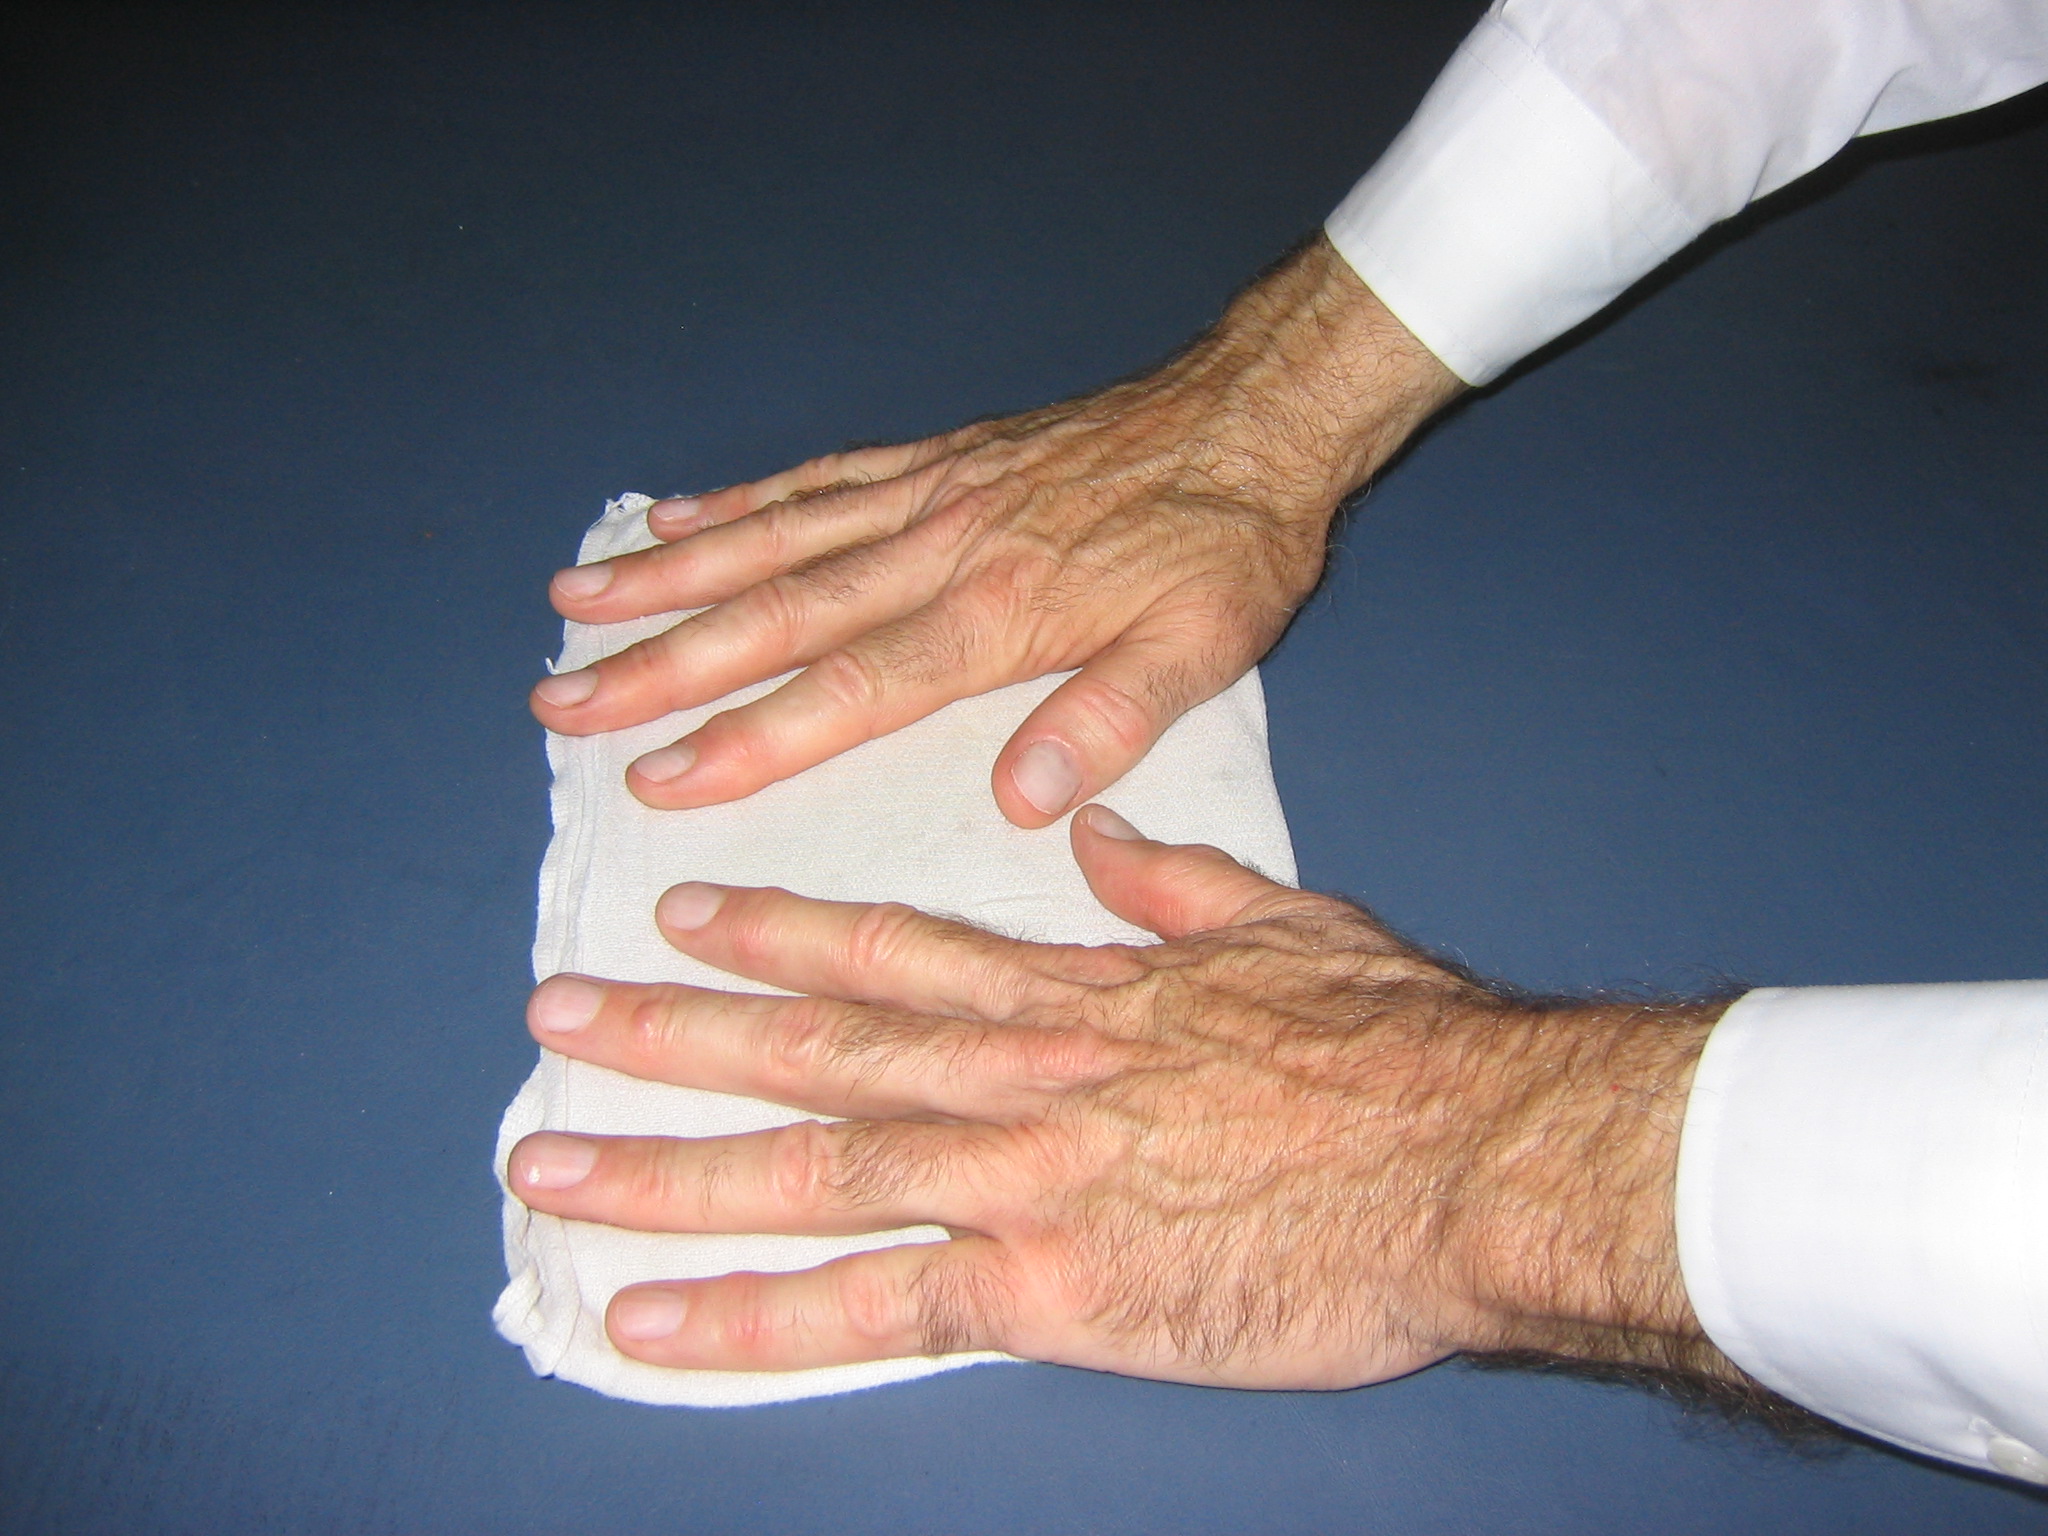
This isn’t really necessary, but I like to blot it dry to keep drops of water falling all over the place and diluting the lube. Just be sure your diapers are clean!

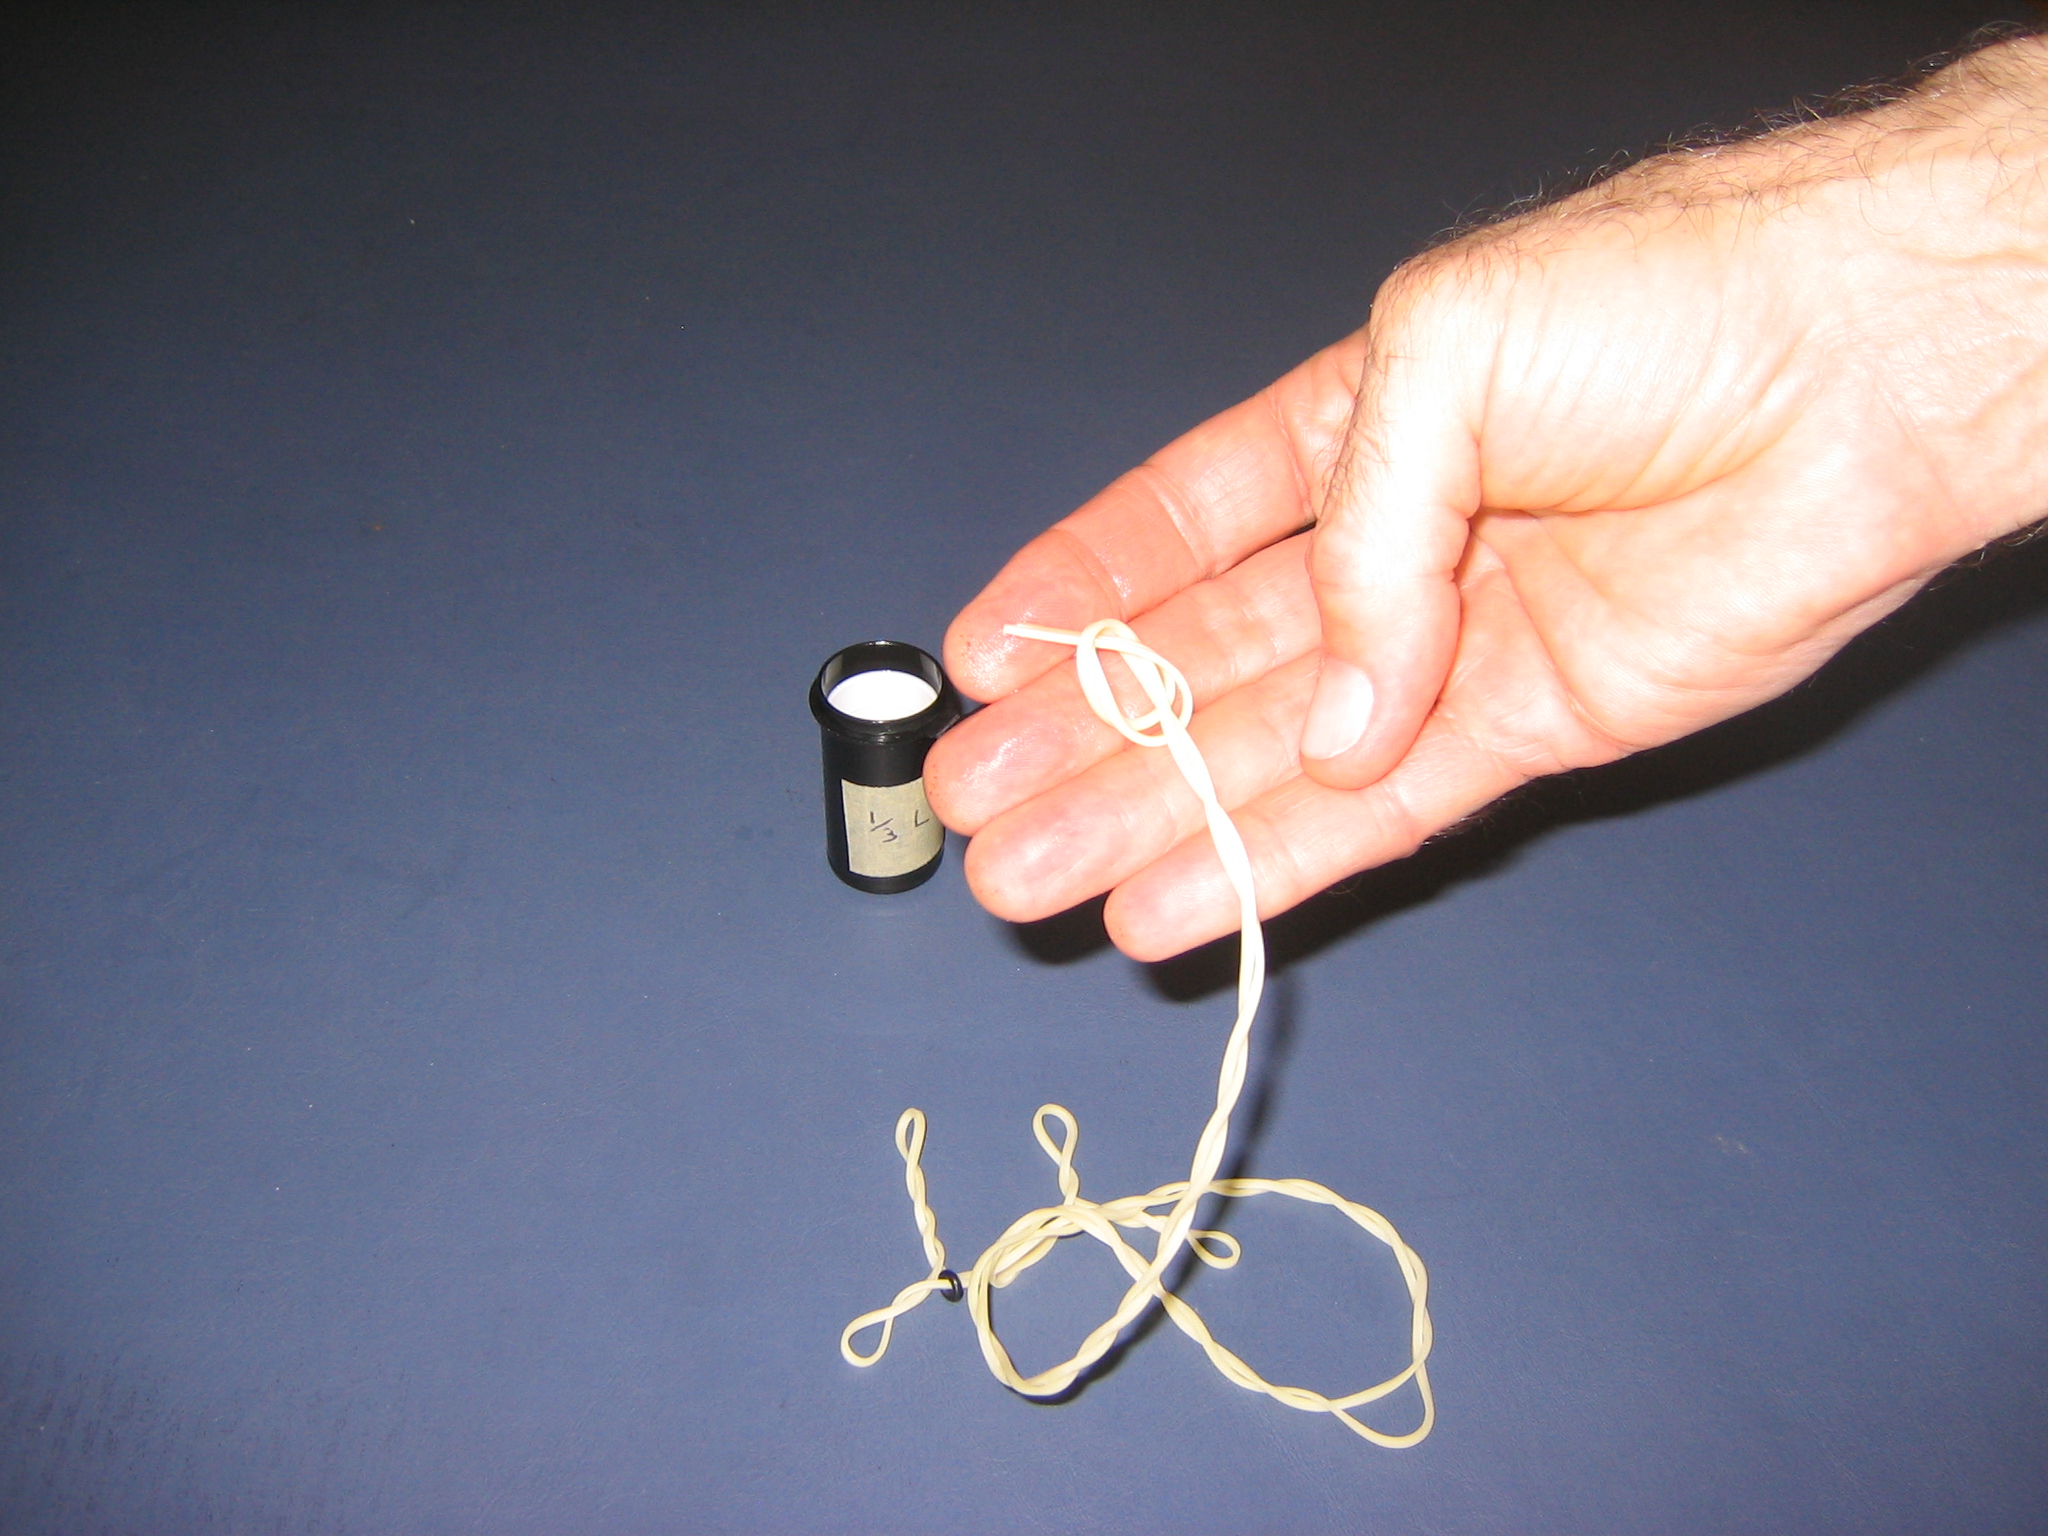
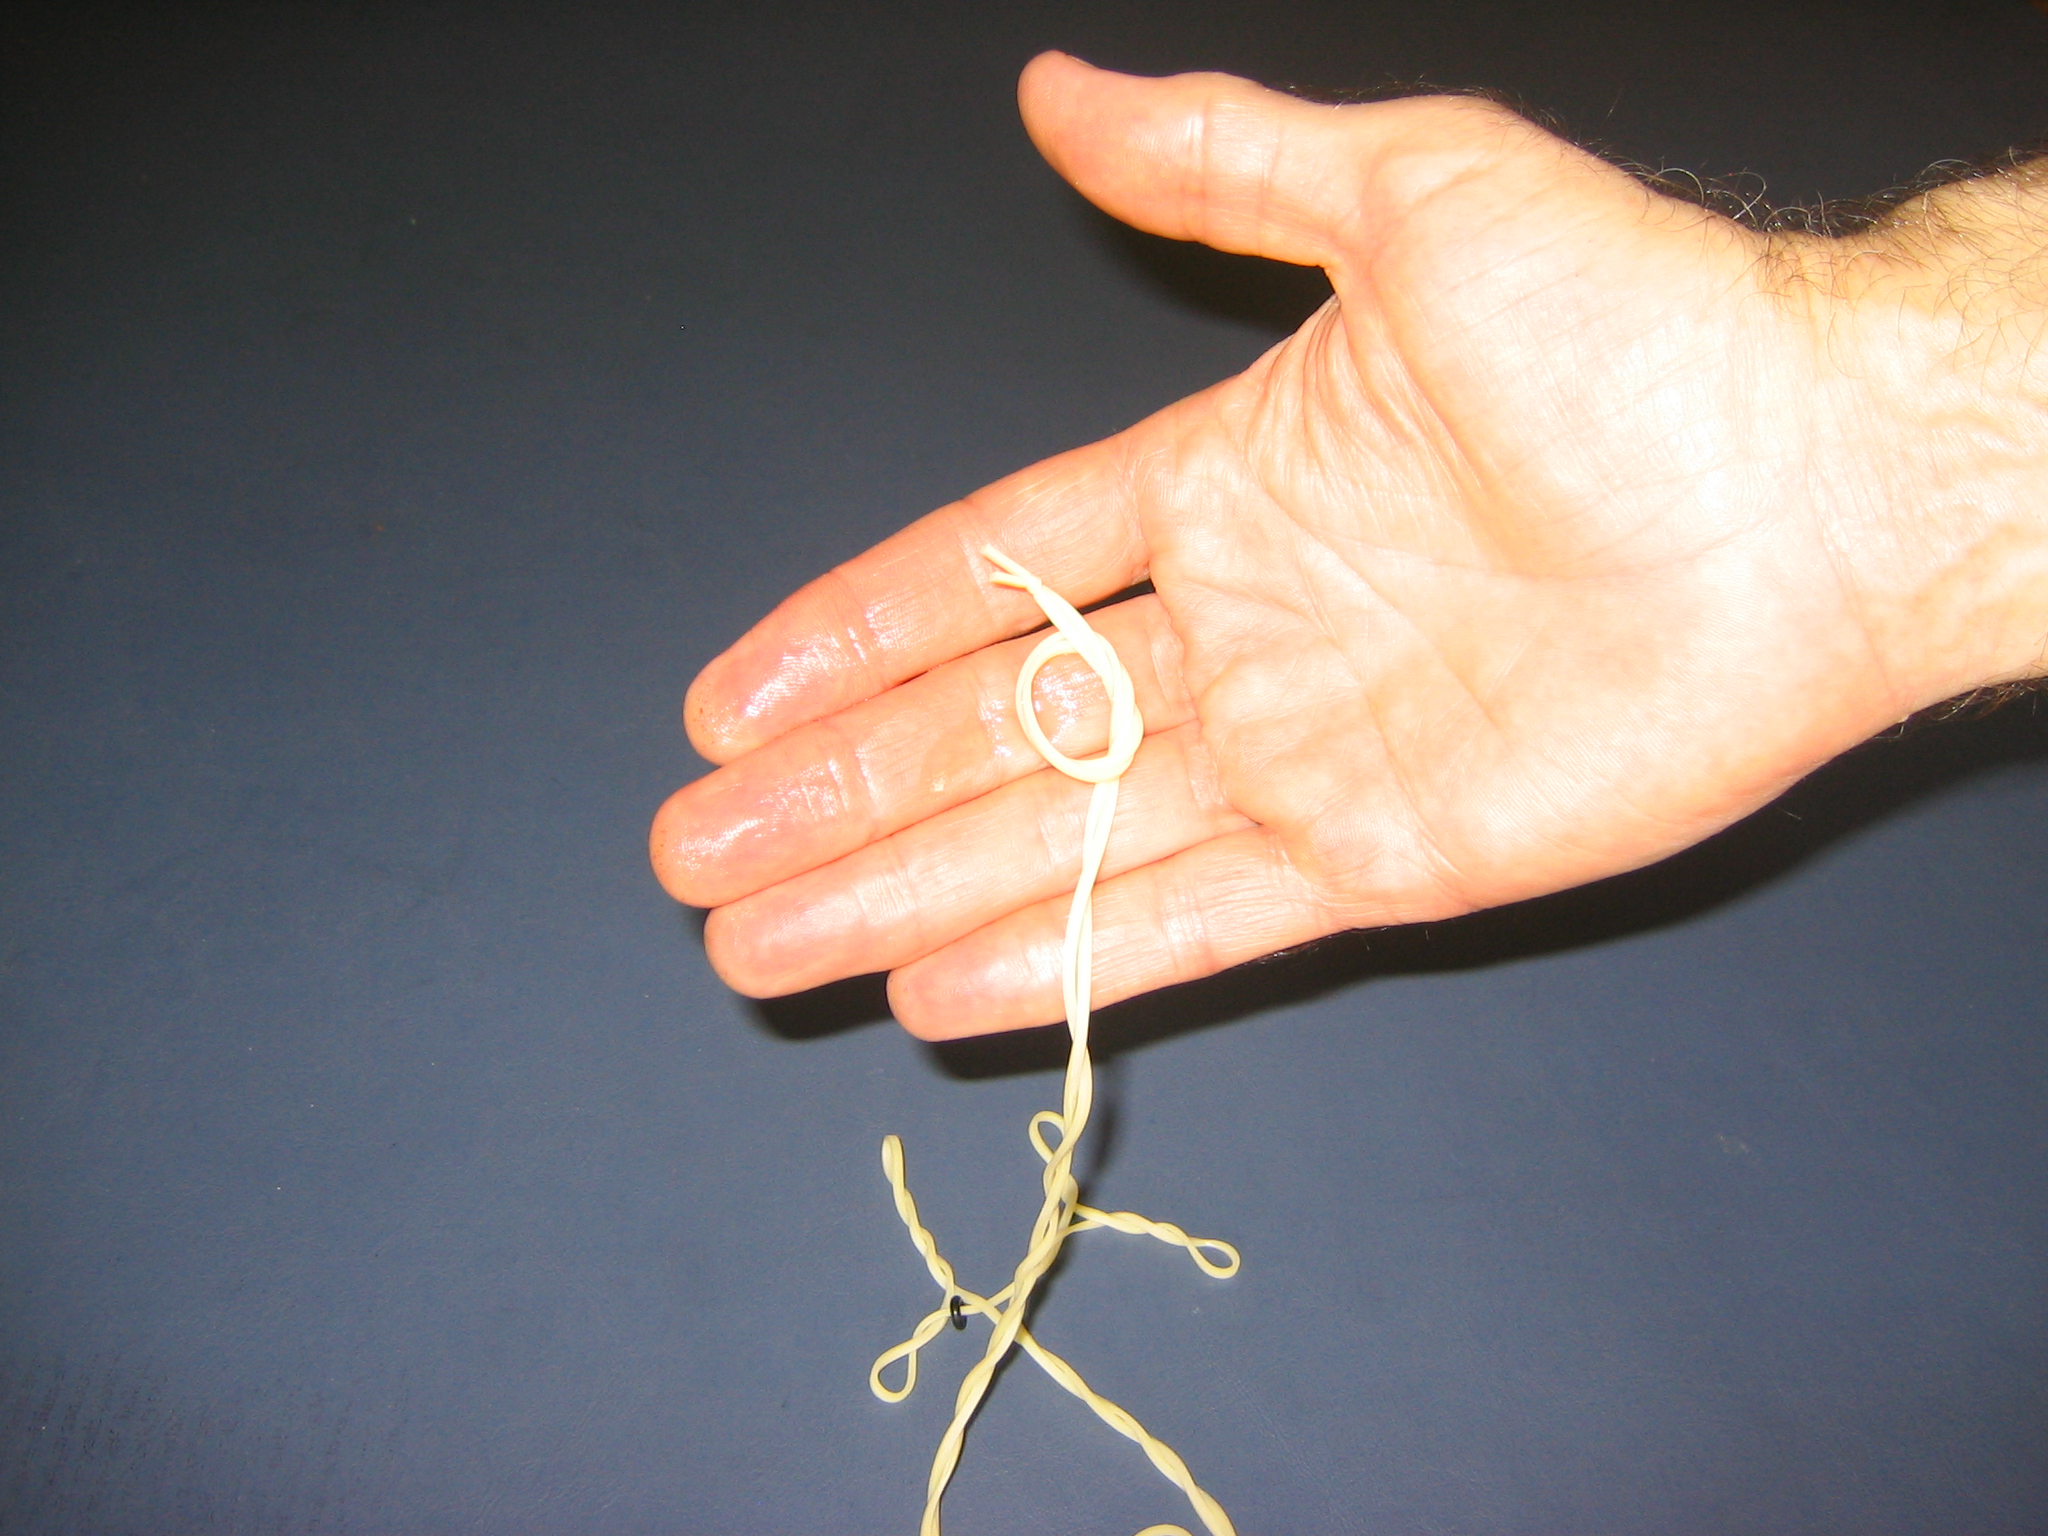
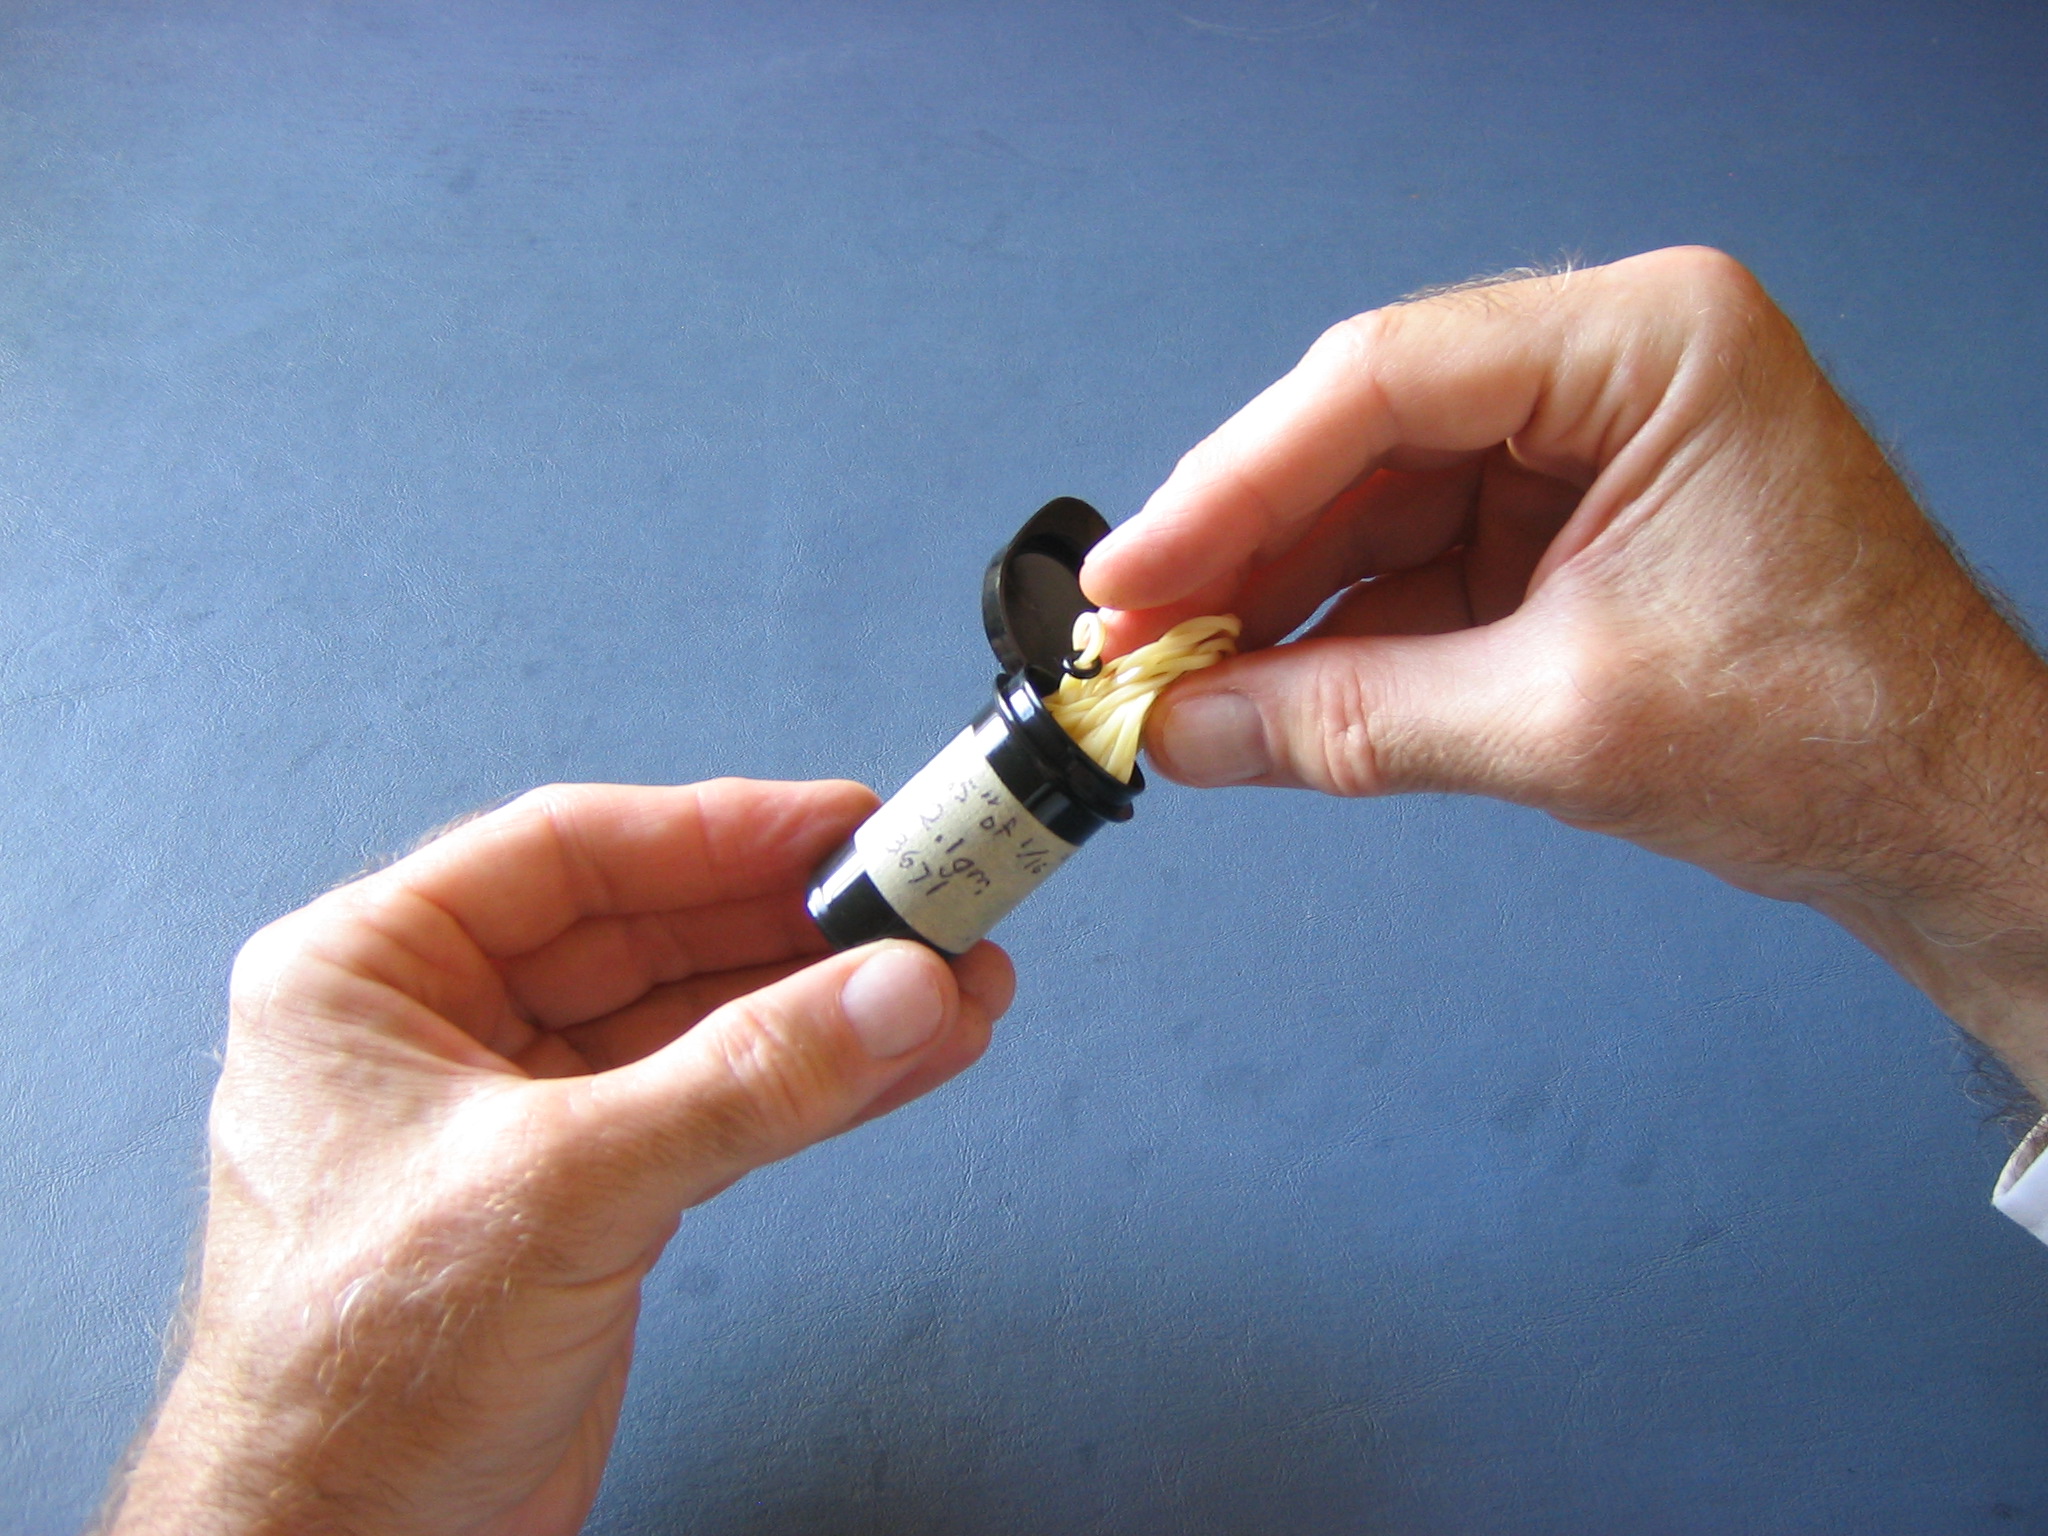
An O-ring makes it so much easier to get the motor onto the prop hook without losing turns or having the slippery motor slip out of your fingers and jam way down inside the fuselage. This one weighs only 0.043 grams and is worth its weight in trouble avoided. Slip the end through the ring and slip the ring to the middle of the strip. This is very easy to forget. Every time you start to tie a knot in rubber, ask yourself “Did I put the O-ring on?”
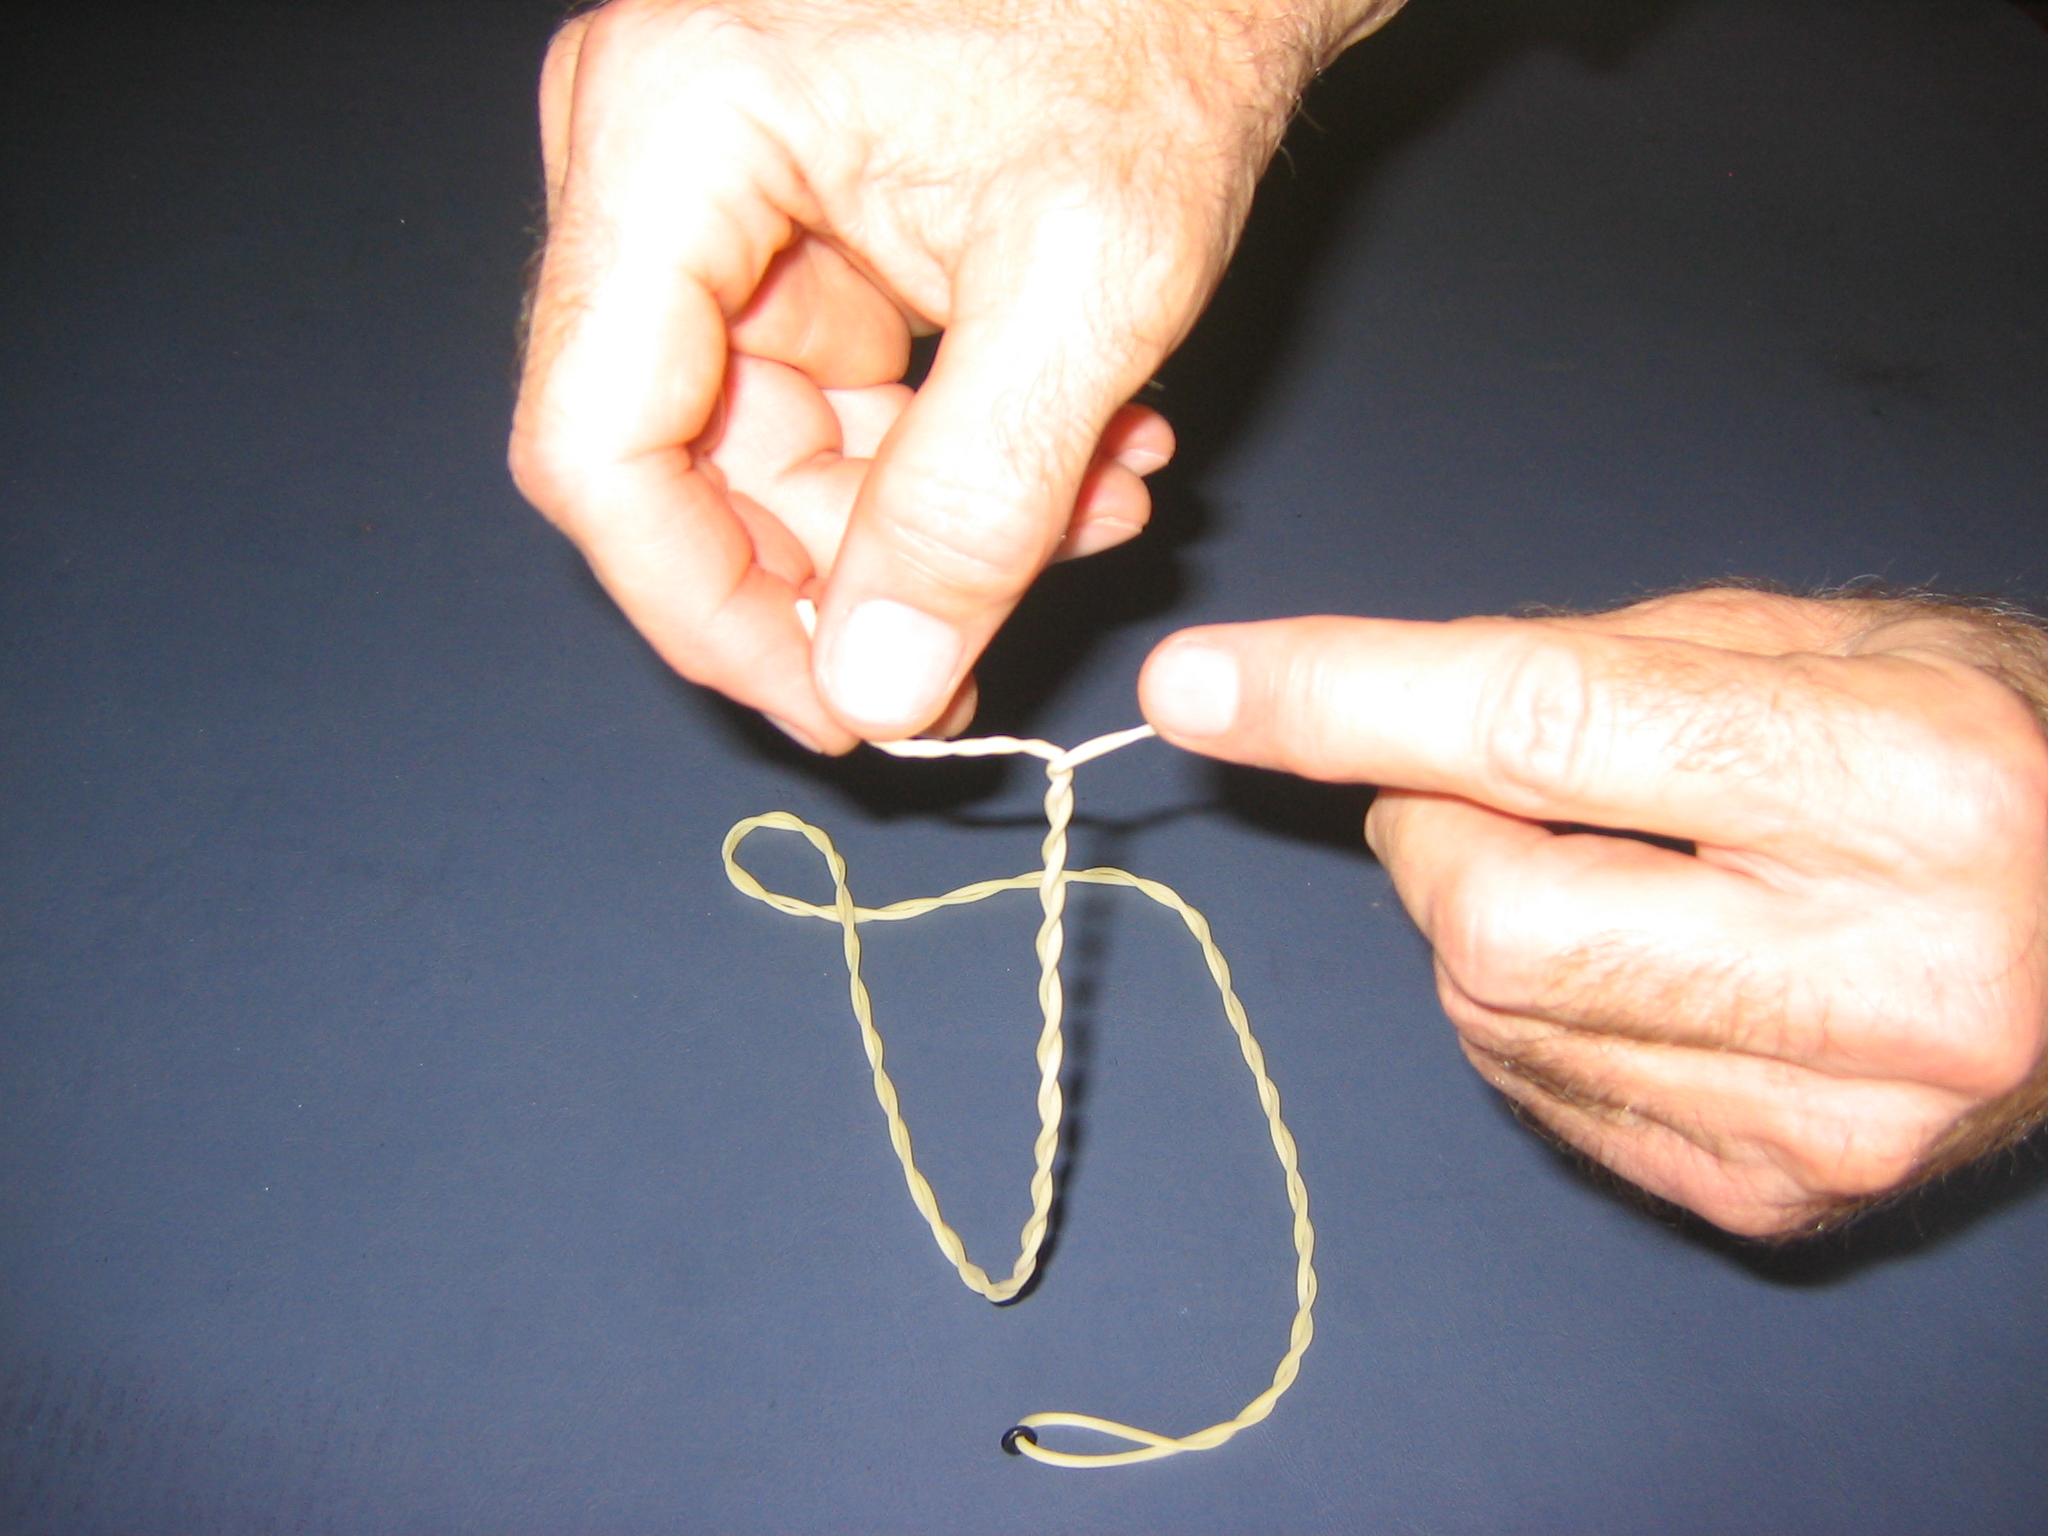
Some people like to “braid” the motor. This is not actually a braid, it is done by twisting the ends of the strip so the two halves twine around each other. This makes the motor a little shorter and stiffer so it doesn’t slop around as much in the fuselage when it runs down. With a motor this long, that might be a good idea, although I’m not expecting this motor to ever run all the way down, since the gym ceiling limits how high the plane can fly and keeps us from using all the turns on the motor. You actually turn each end in the “same” direction, here clockwise. If you turn them in opposite directions, no twist will result. (Because then they actually are turning the same direction.) Try it. You twist just enough so the entire length is twined.
Leave about two inches free on each end and dip them in some diluted lube. If you tie knots on full strength lube, you will be able to watch the knots slowly untie themselves. That’s right, lube makes the rubber slippery! This is even more fun to do than watching glue dry. The straight lube is made of one volume of glycerin and one volume of green soap, both available at the pharmacy. (There are other lubes available, you can buy proprietary mixes in little bottles or you can use silicon lubes, but this stuff works just fine. If green soap is hard to find, try baby shampoo or liquid dish detergent. The glycerin is slippery, but it is in the formula mainly as a moisturizer.) Shake and mix it well. The knot tying lube is one part straight lube mixed with one parts of water. It doesn’t take much, one teaspoon of lube and two teaspoons of water is plenty. You can put it in a pill bottle or a plastic film can. Some people put the ends in their mouth and wet the ends with saliva. OK with me if you want to do it that way, but I find that my saliva isn’t slippery enough to prevent little tears in the rubber during the knot tying.
Smear a little knot lube on both index fingers and thumbs.
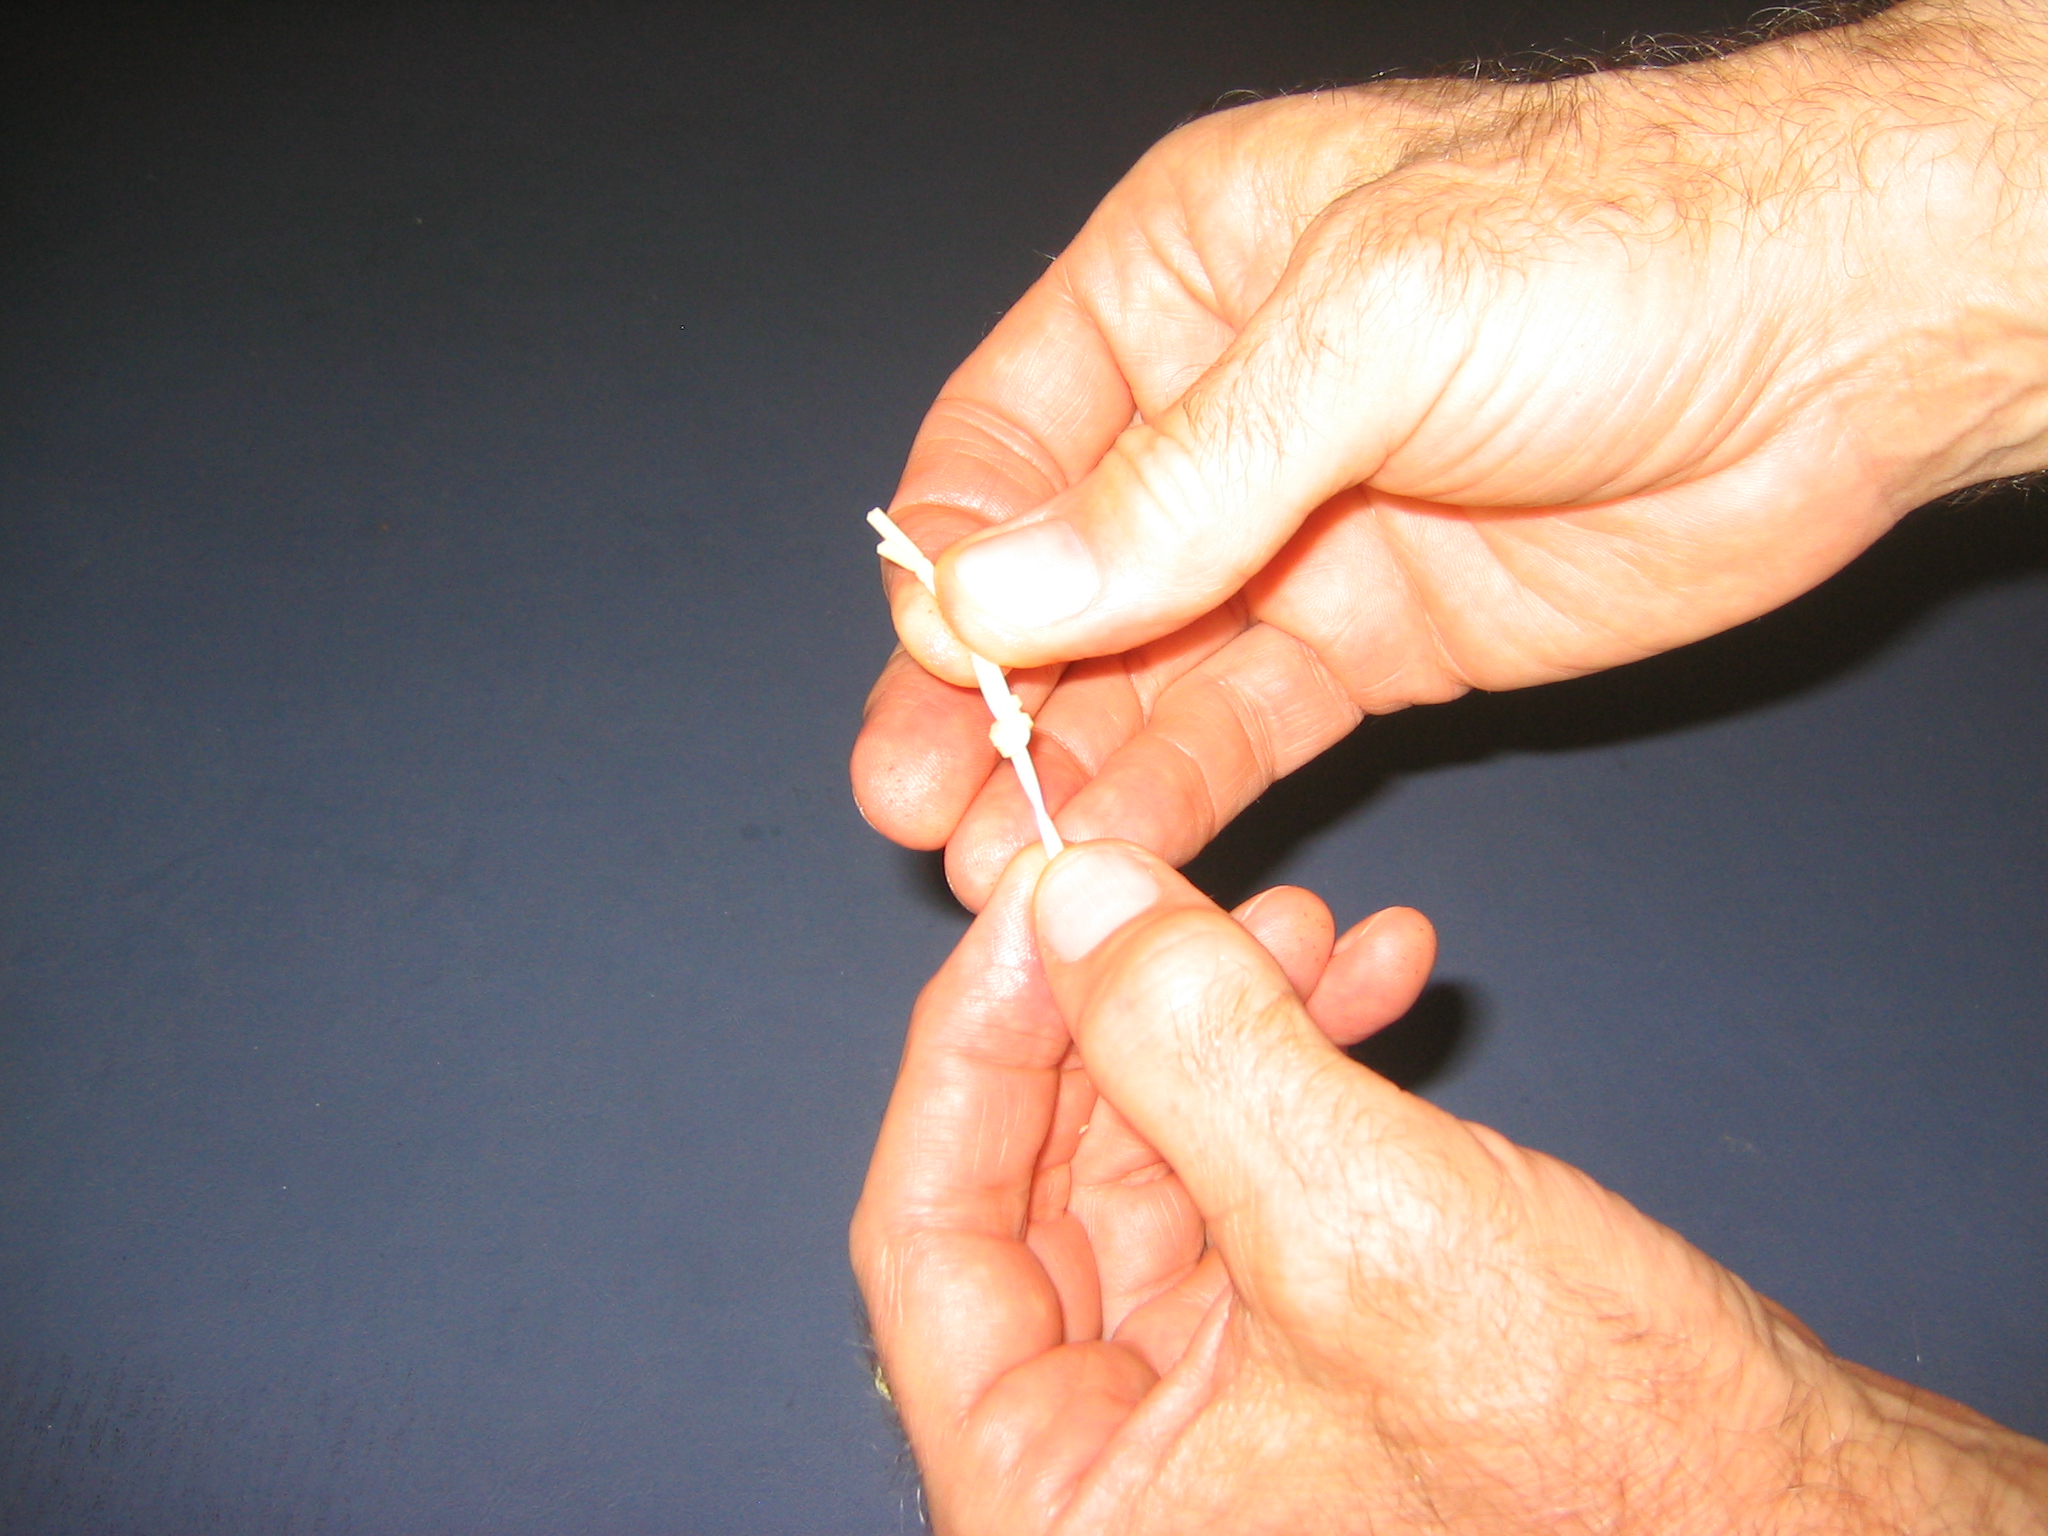
There are many, many kinds of knots. Some are so complicated that it takes an entire crew of sailors to keep track of all the twists and turns. This one is very simple and does the job well. It is just two overhand knots, tied in opposite directions. Start by putting the running end under the standing length and bringing it up over, around and down into the loop. This is about the simplest knot in the world to tie and you already know how to tie it.

Pull the knot up snug, but not tight, a little distance from the ends.
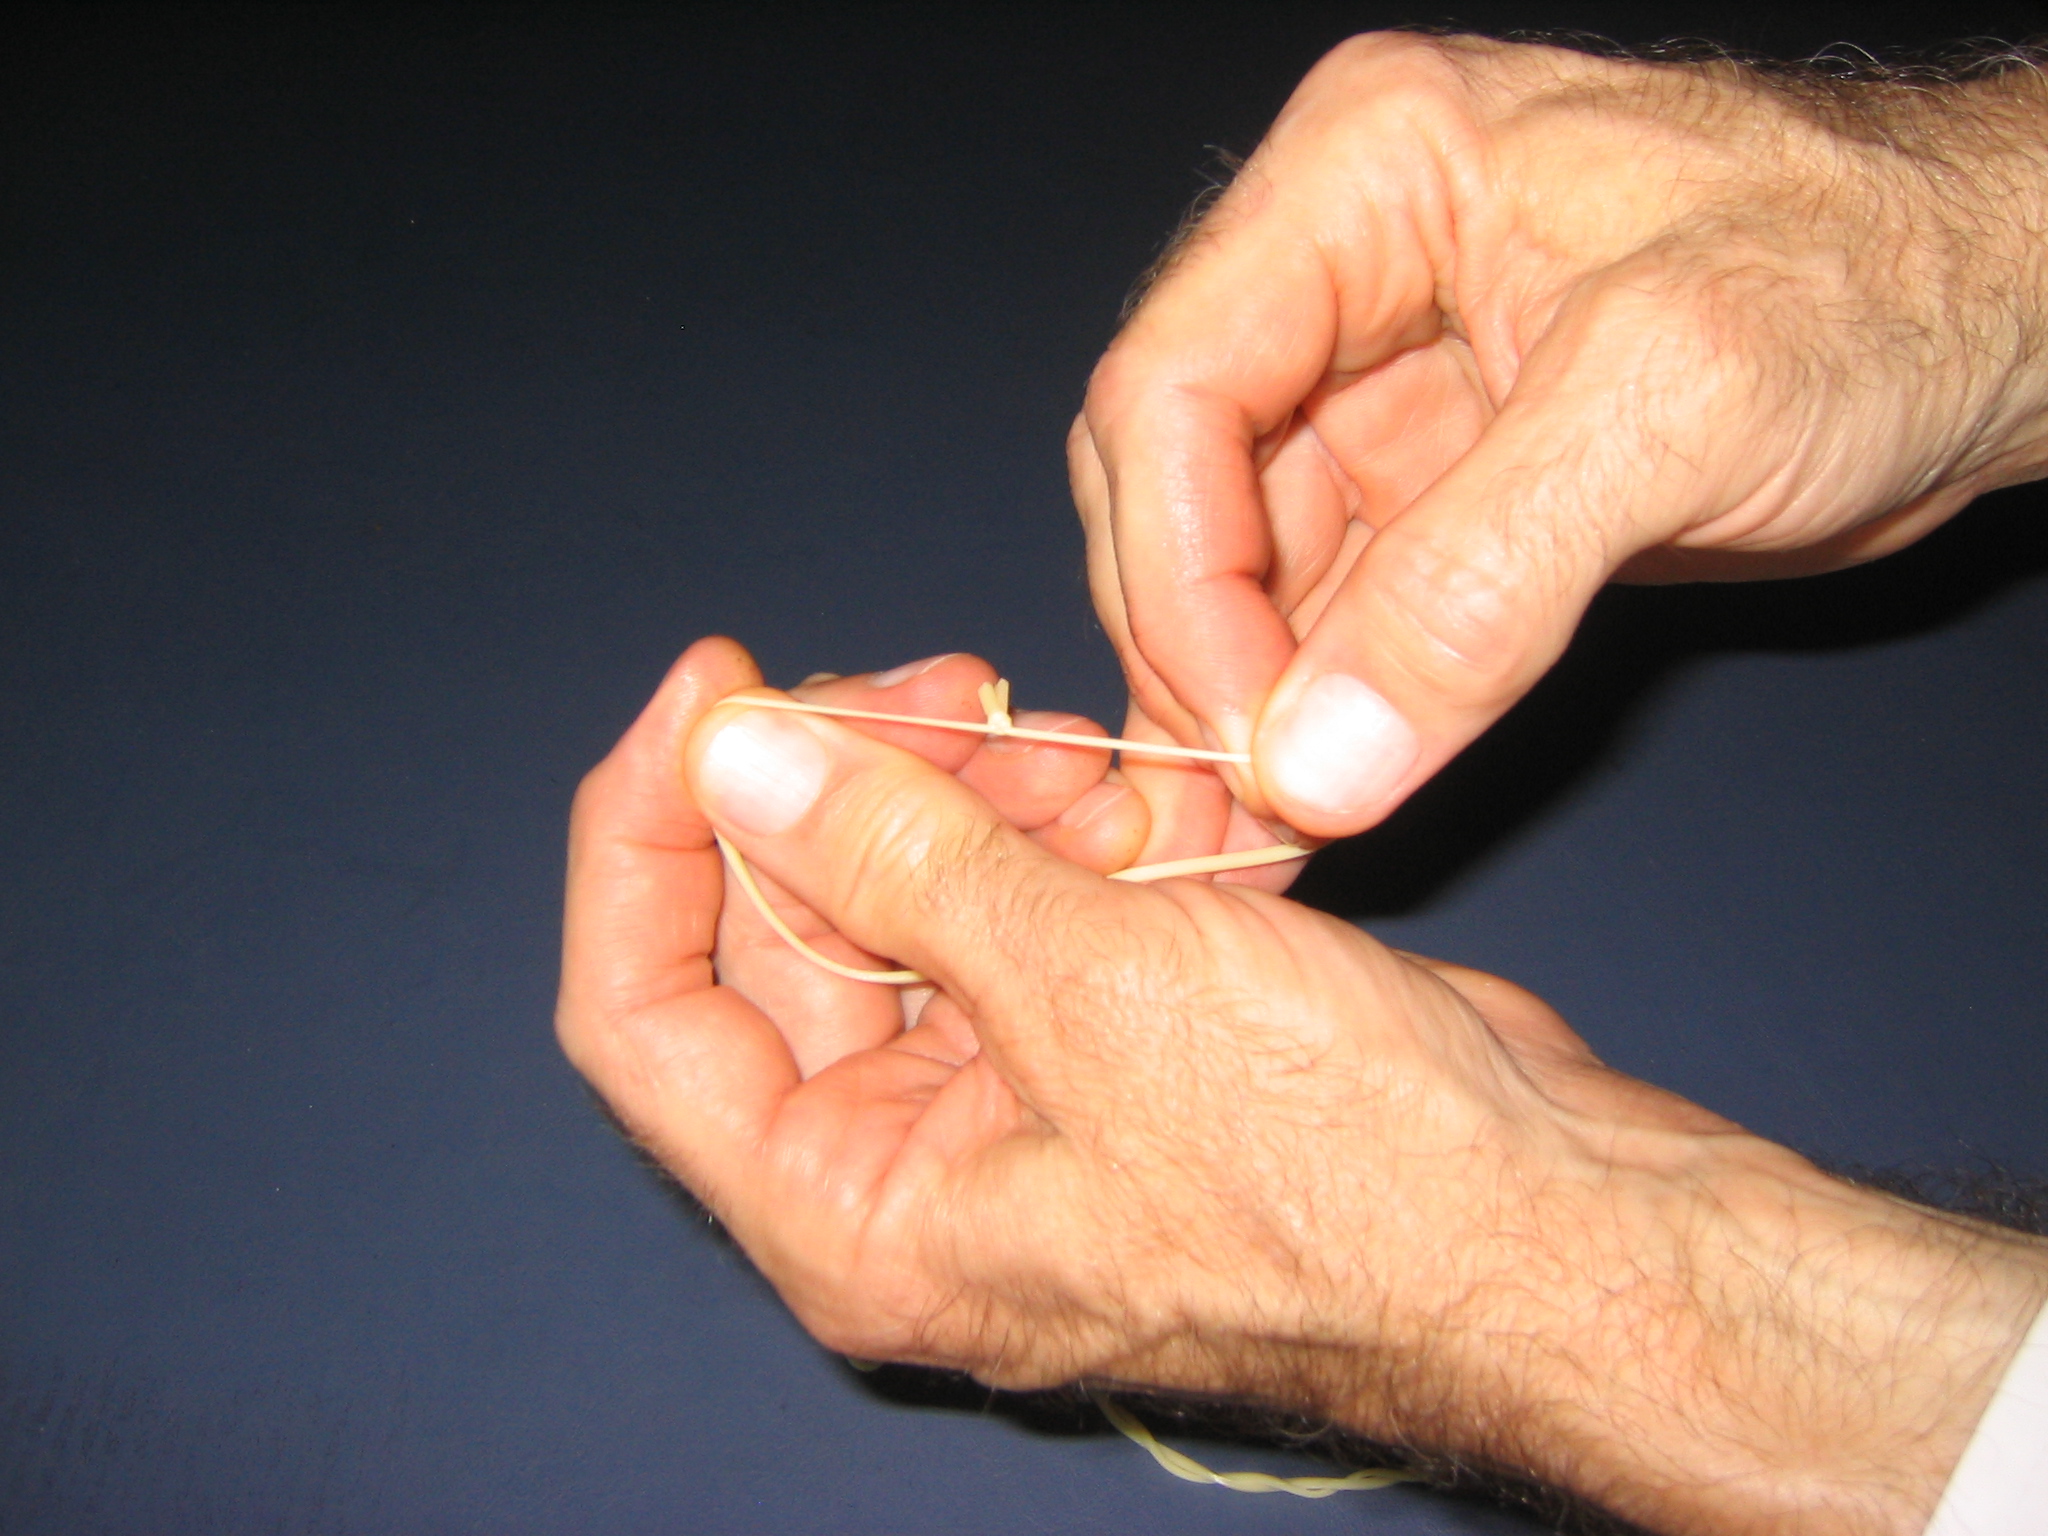
Then pull the two lengths apart to pull the knot up to about 1/8″ from the shortest end.
Grab the two short ends and the long pieces and pull the knot as tight as you can get it. You will feel the rubber hardening as you reach its maximum extension.
Dip the knotted end into the knot lube again.
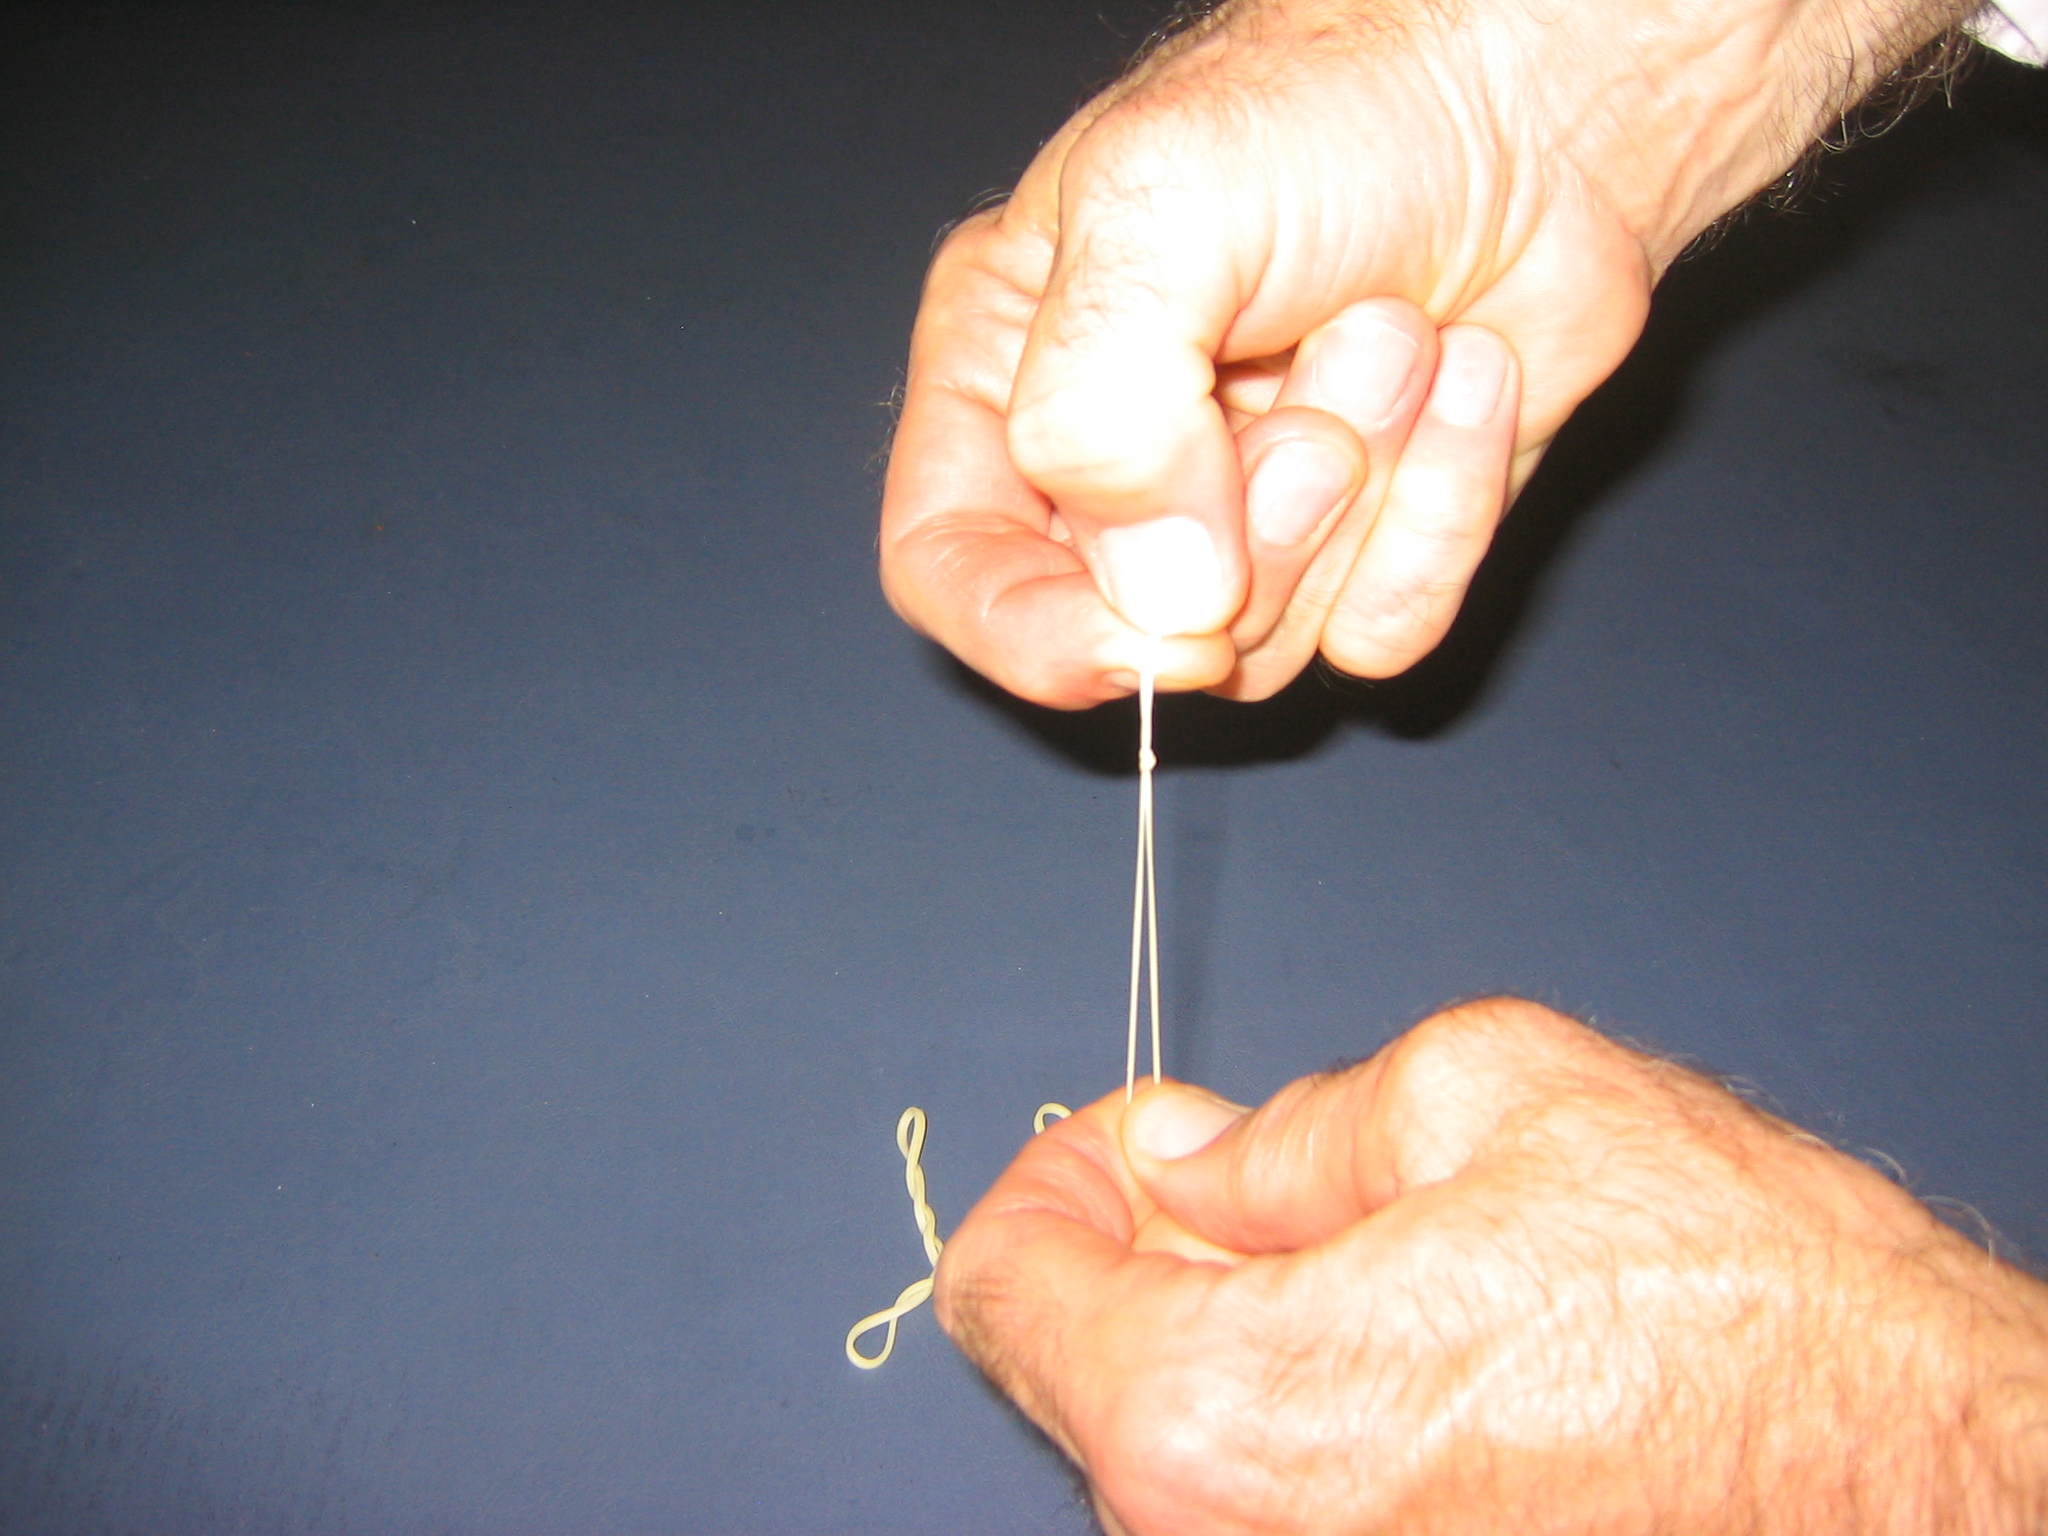
Tie the second knot in the opposite direction from the first one. This time the running end went over the standing length, down under and up through the loop. This is the most difficult knot in the world to tie and will take weeks of intense practice to master. 😉
Pull the knot up snug.
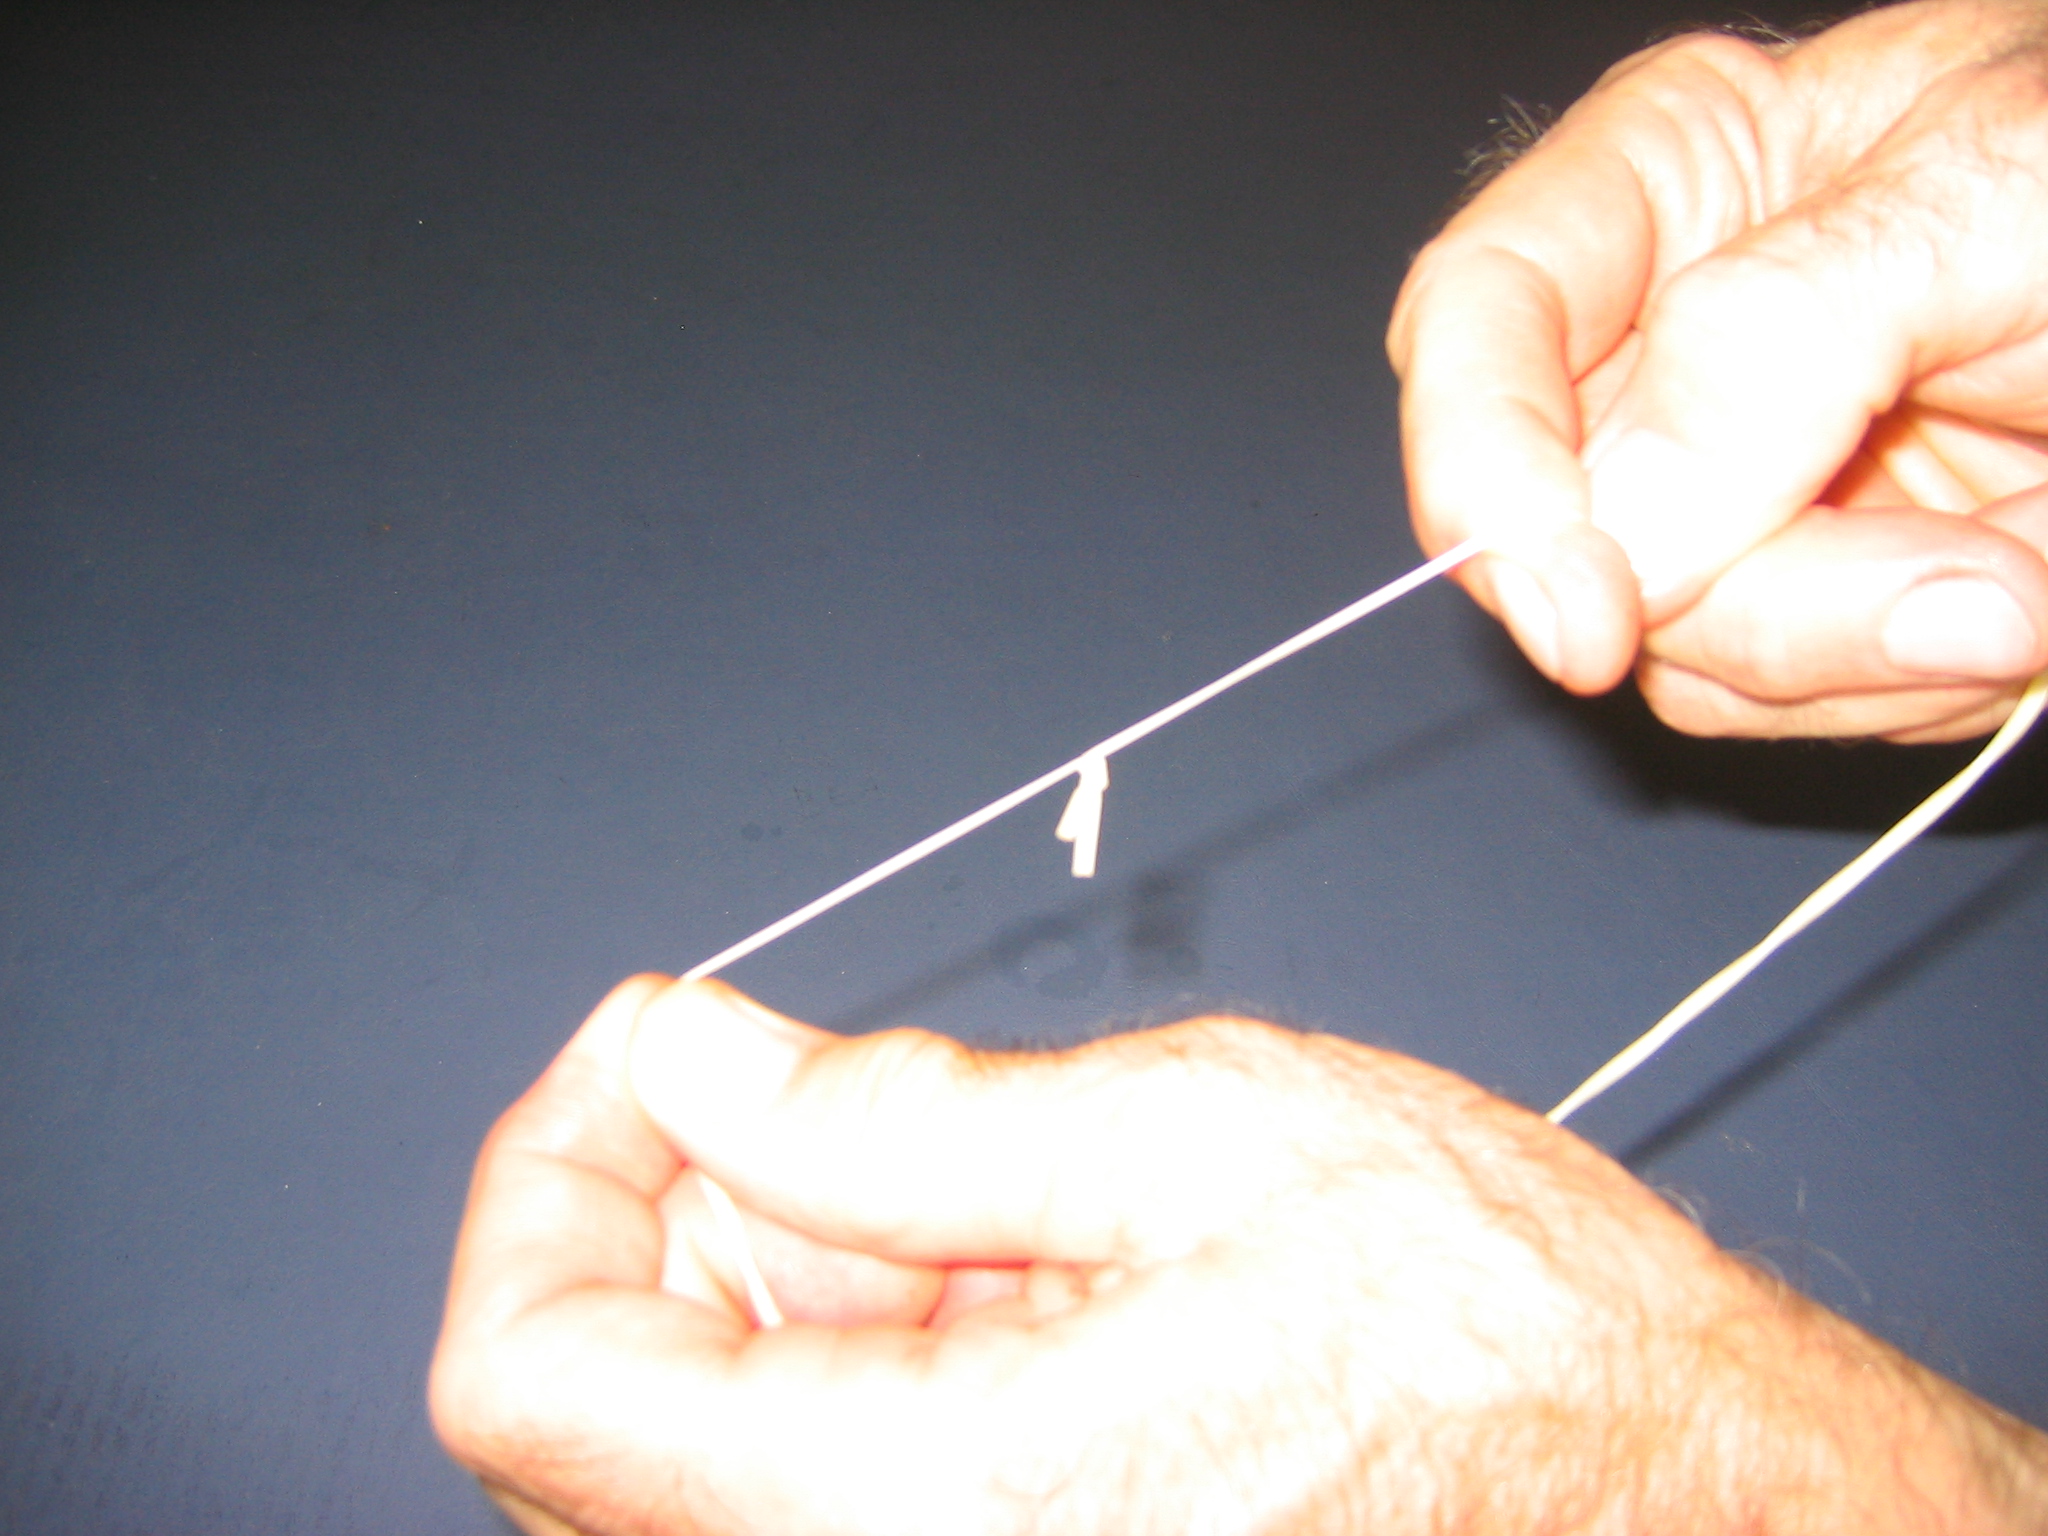
Pull this knot up against the first knot. Pull it pretty tight. You can grab the ends and pull tight again, like you did with the first knot, but finish by pulling the second knot tight up against the first knot.

At this point you may want to weigh the motor. This one weighed 2.13 grams, dry.
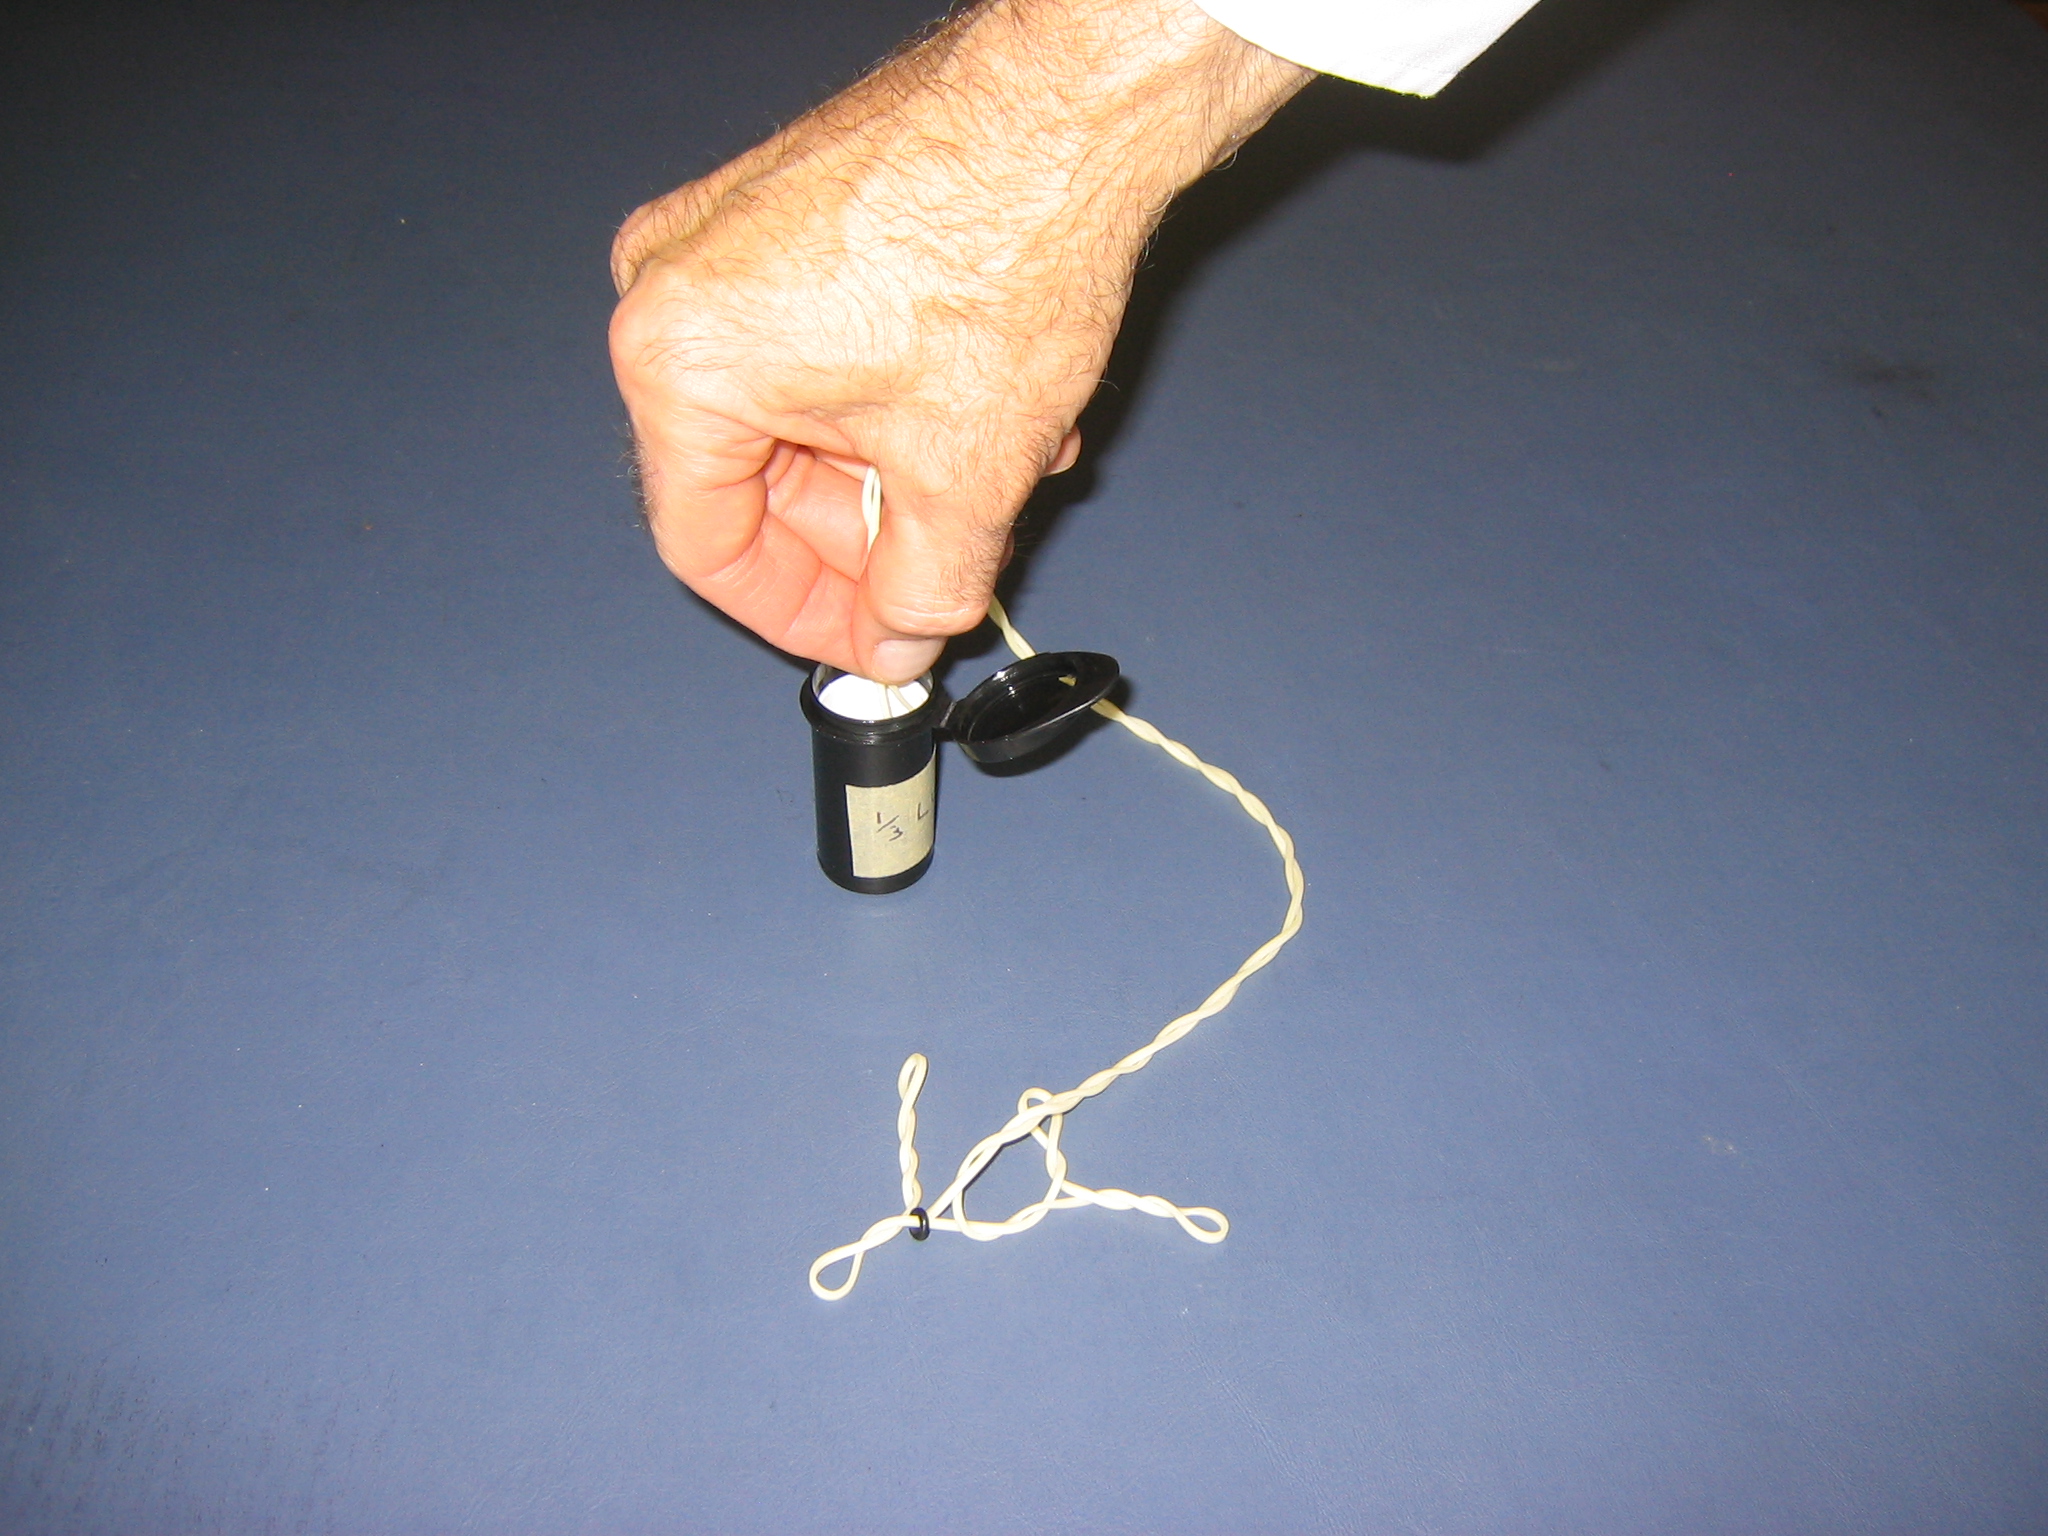
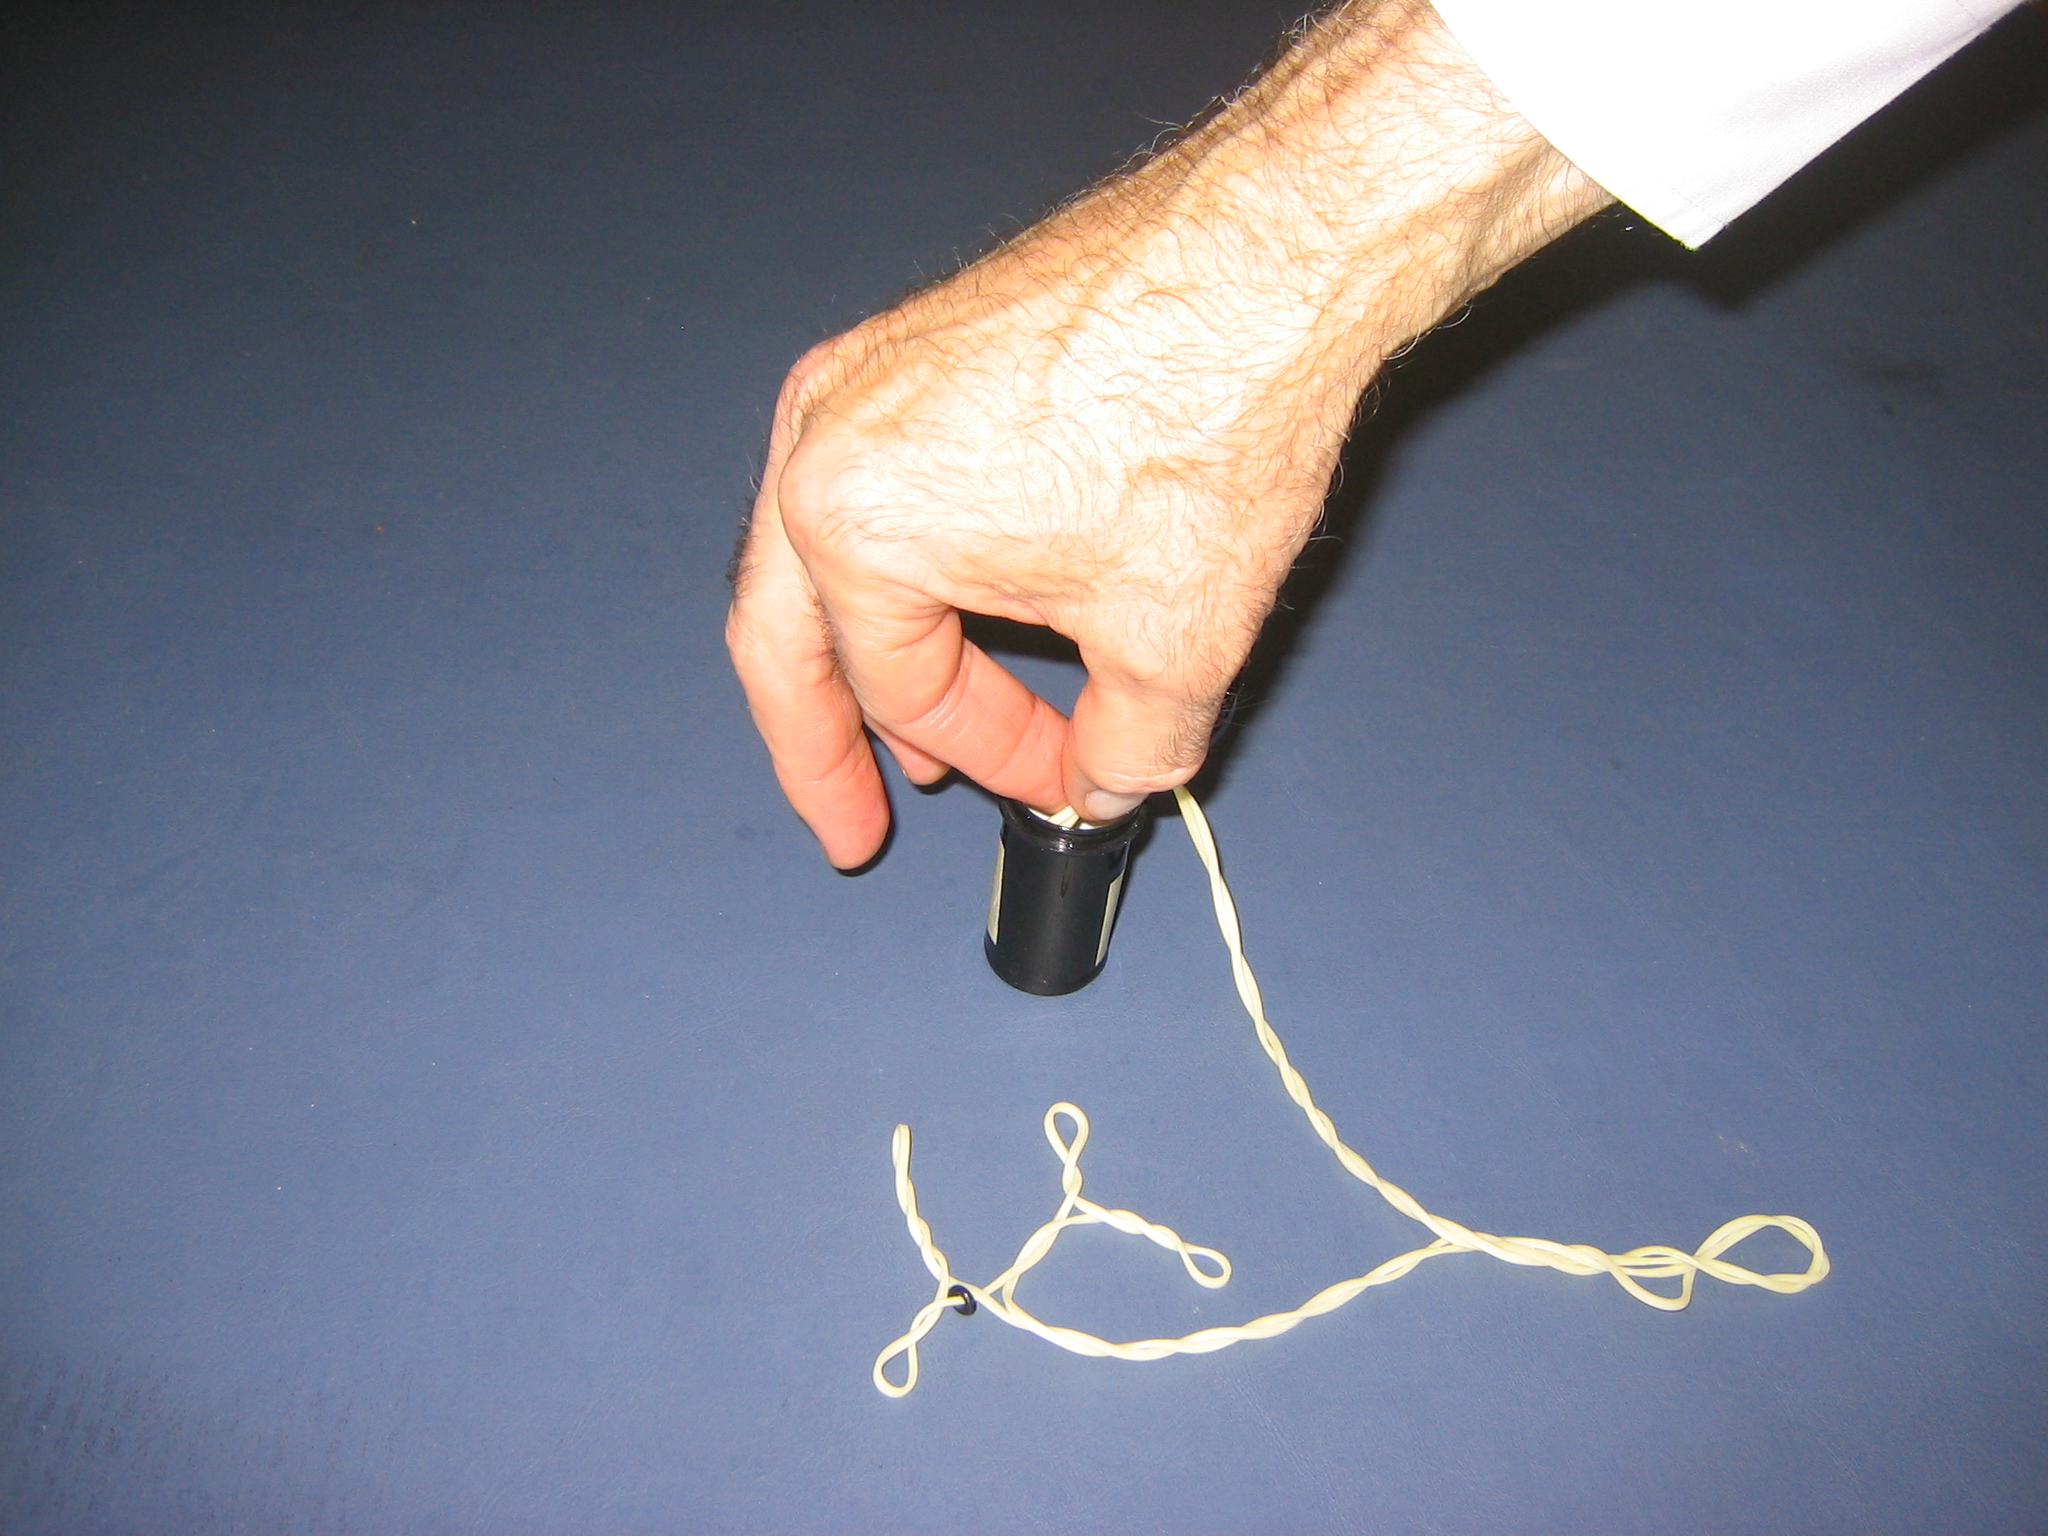
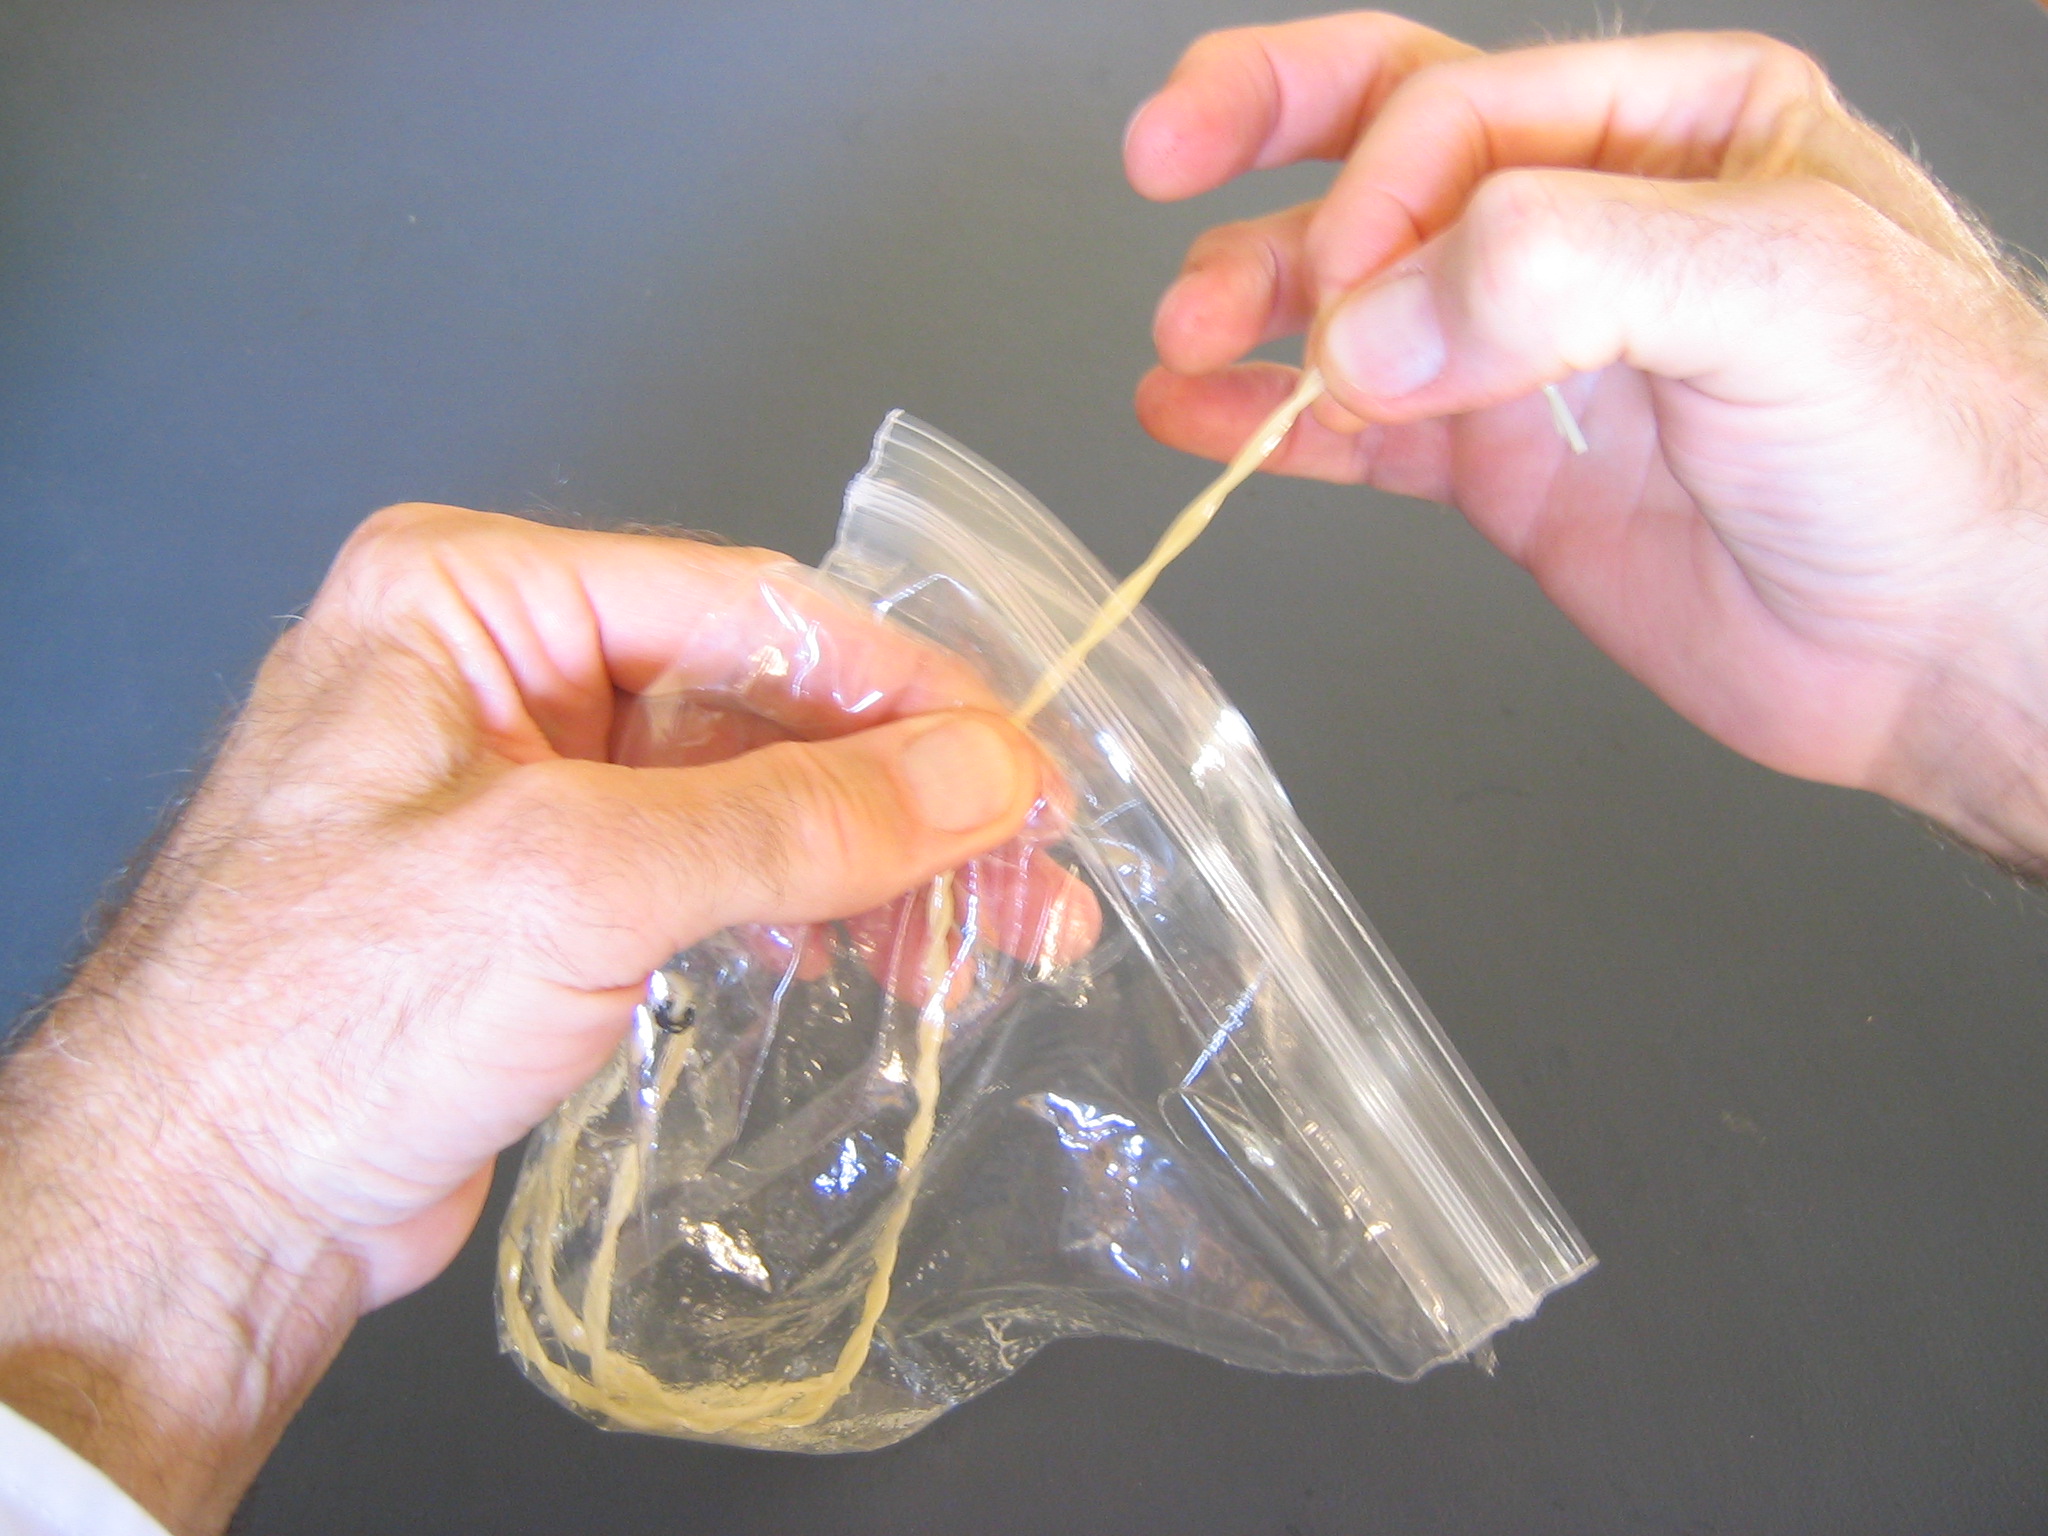
You will need a clean, dark place to store your motor. Keeping them inside a Ziploc bag inside a dark can or box will work. The main thing is to protect them from sunlight. Some people insist on storing their rubber in a refrigerator, but that does not seem to make much difference. You can use a black plastic film can. I am using the vial my blood glucose test strips come in. After peeling off the label and washing the vial, I put on a piece of masking tape so I can relabel it.

I wrote the length, width, weight and estimated maximum turns on the label. You can also write the rubber batch, airplane name and make a check every time you use the motor.
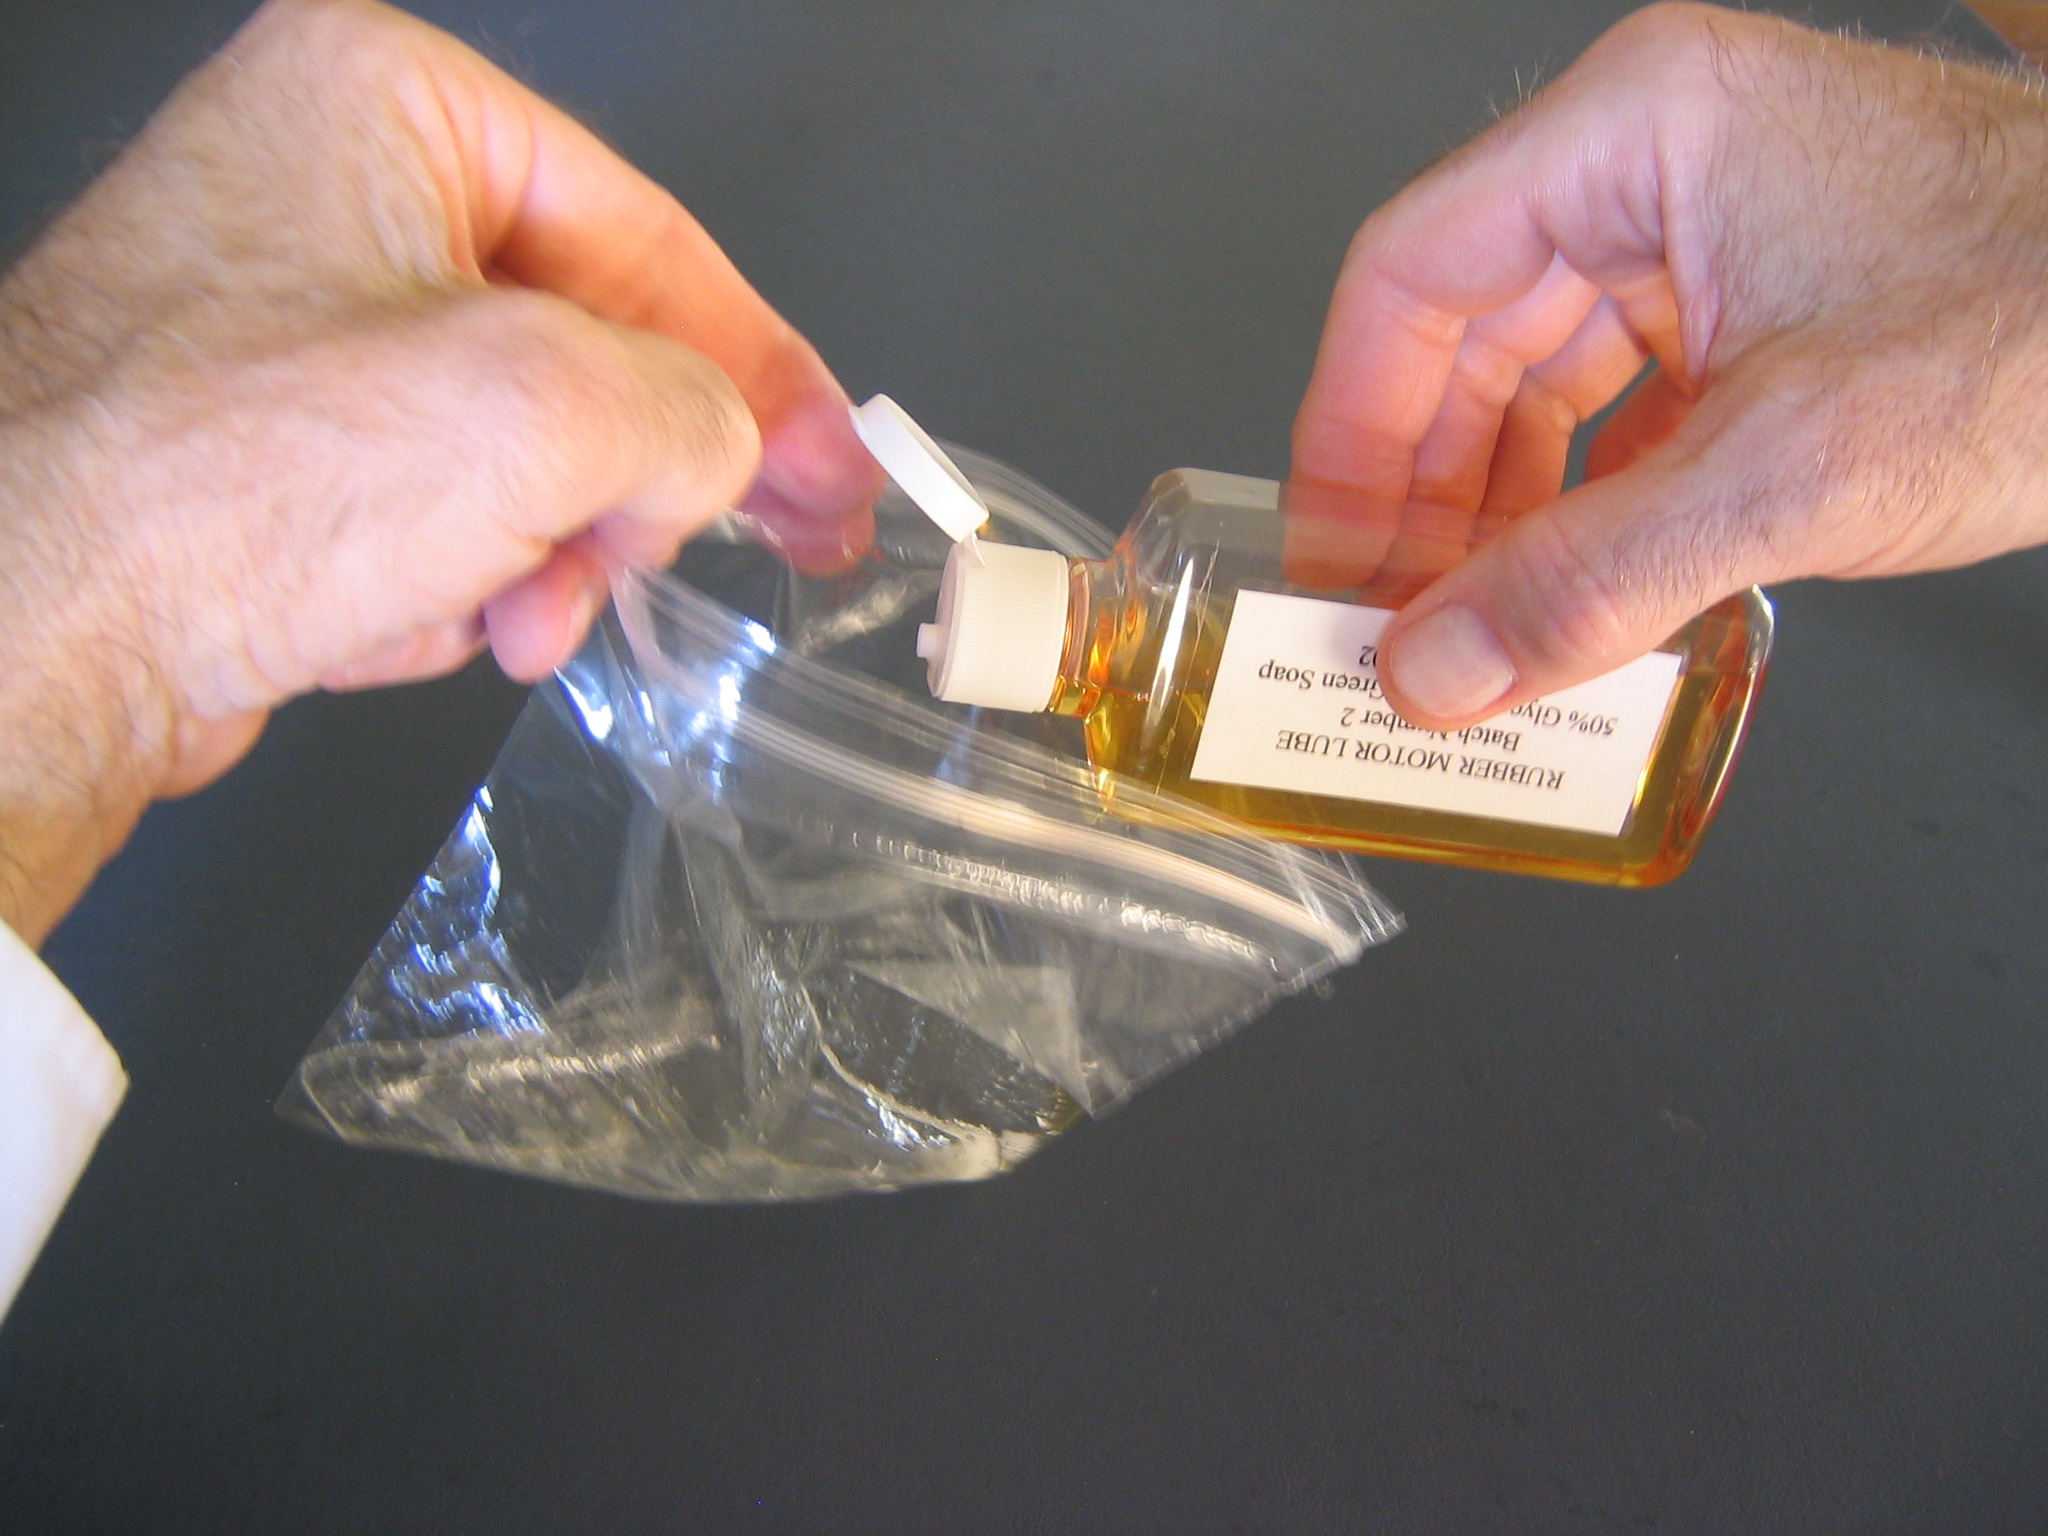
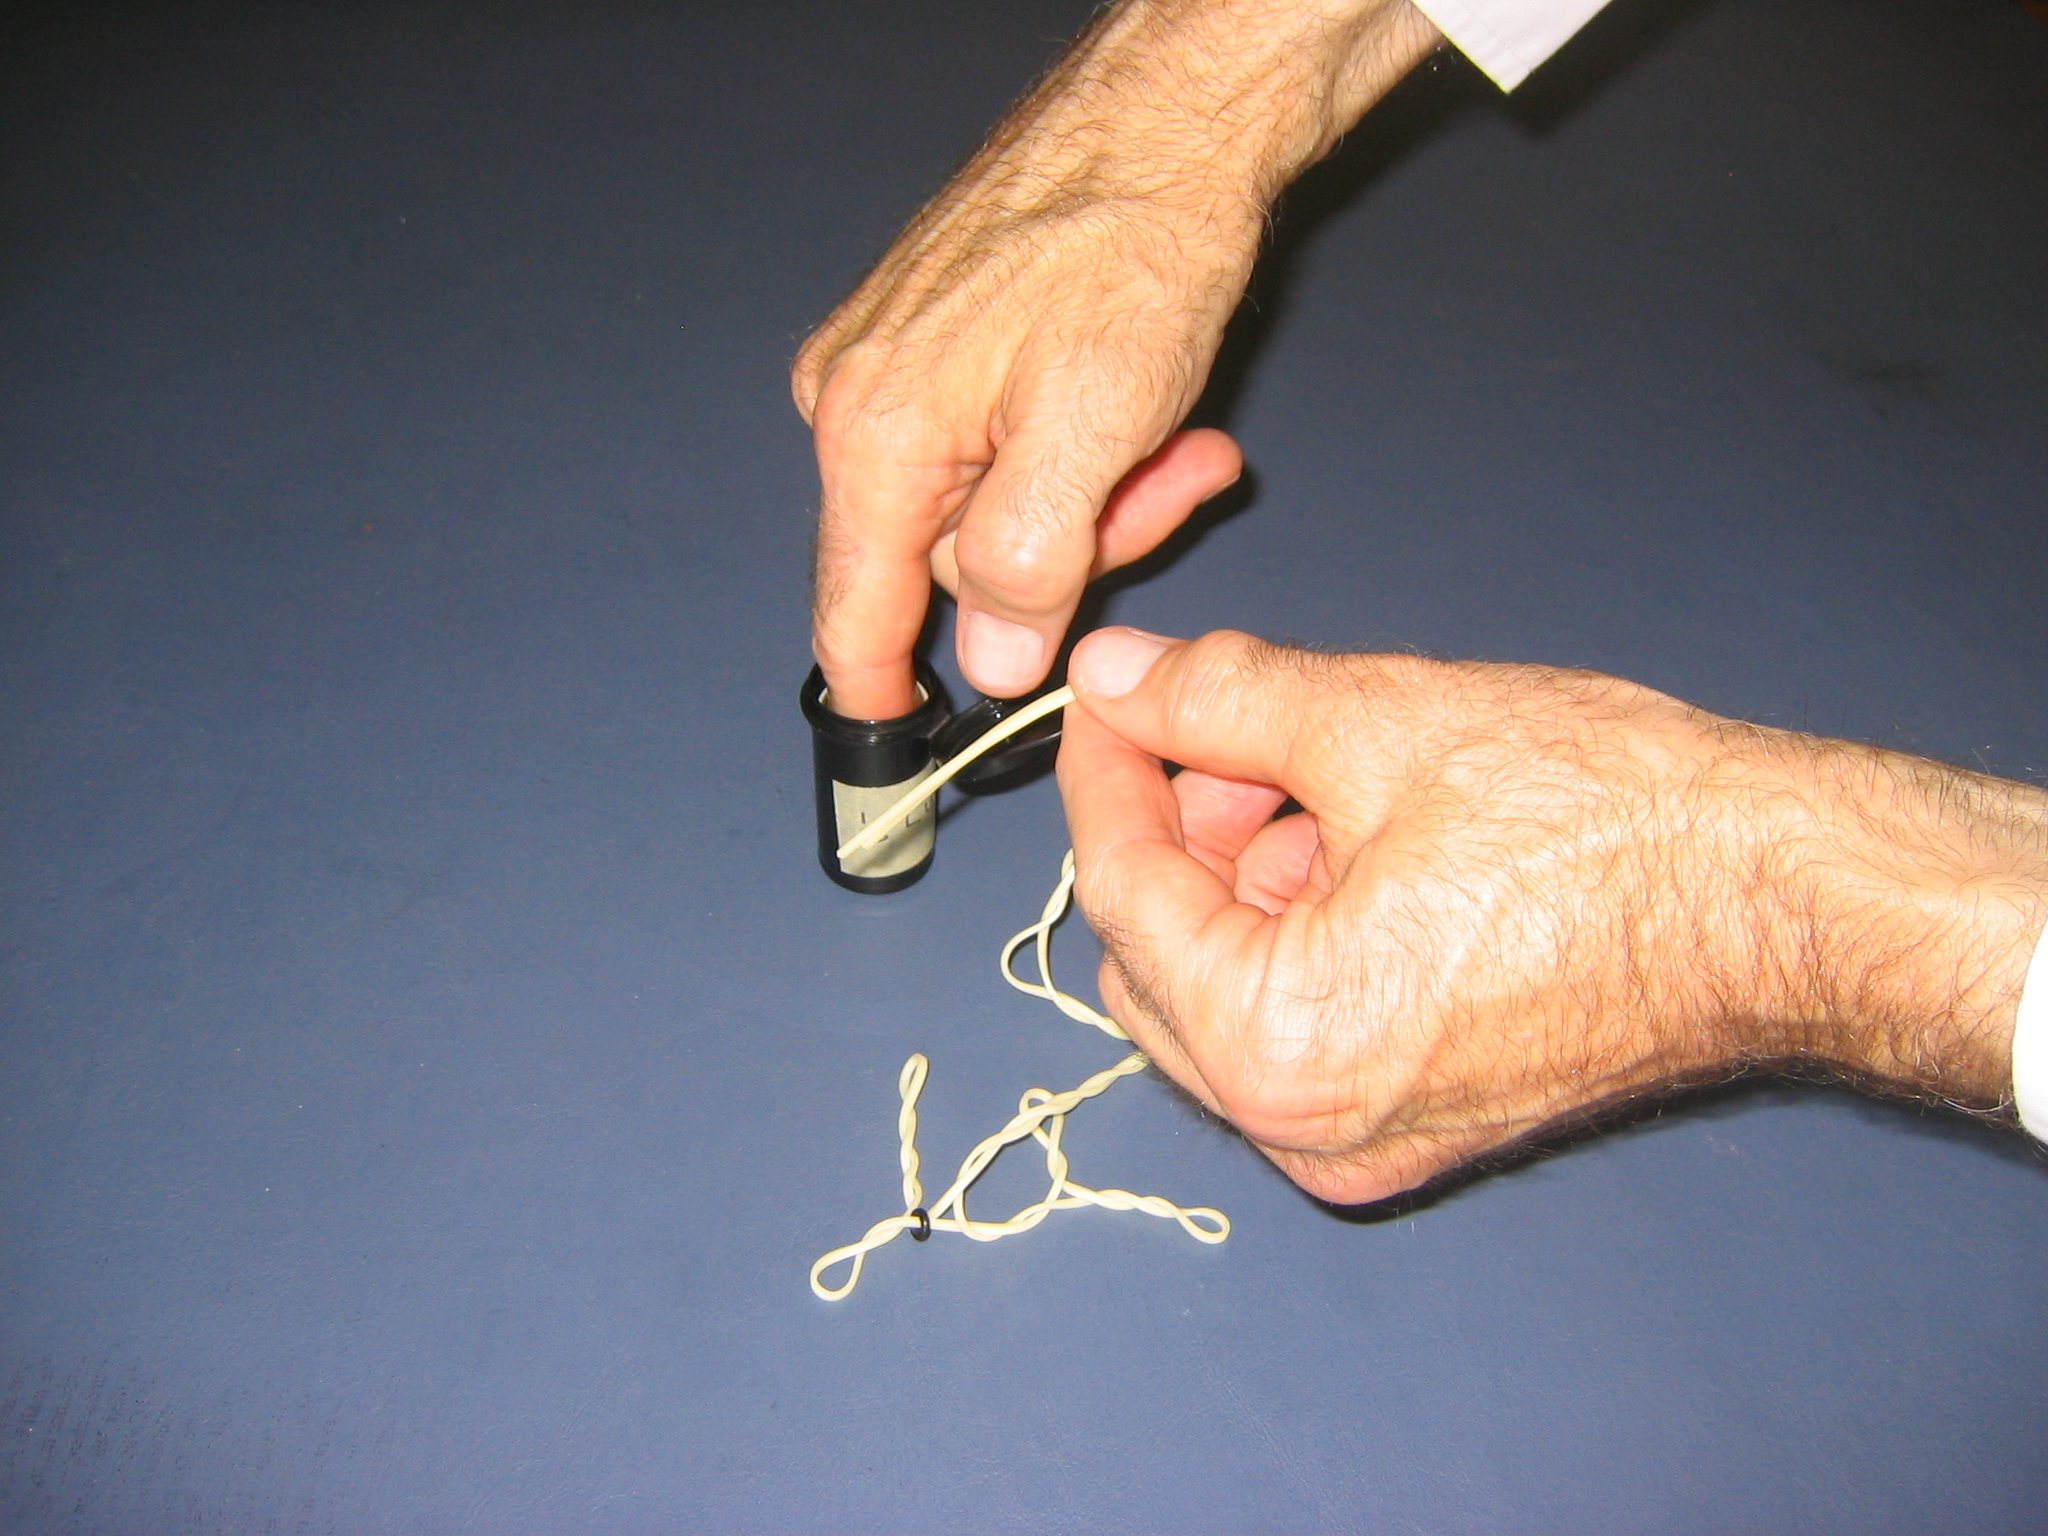
Pour about a teaspoonful of lube into the Ziploc bag.
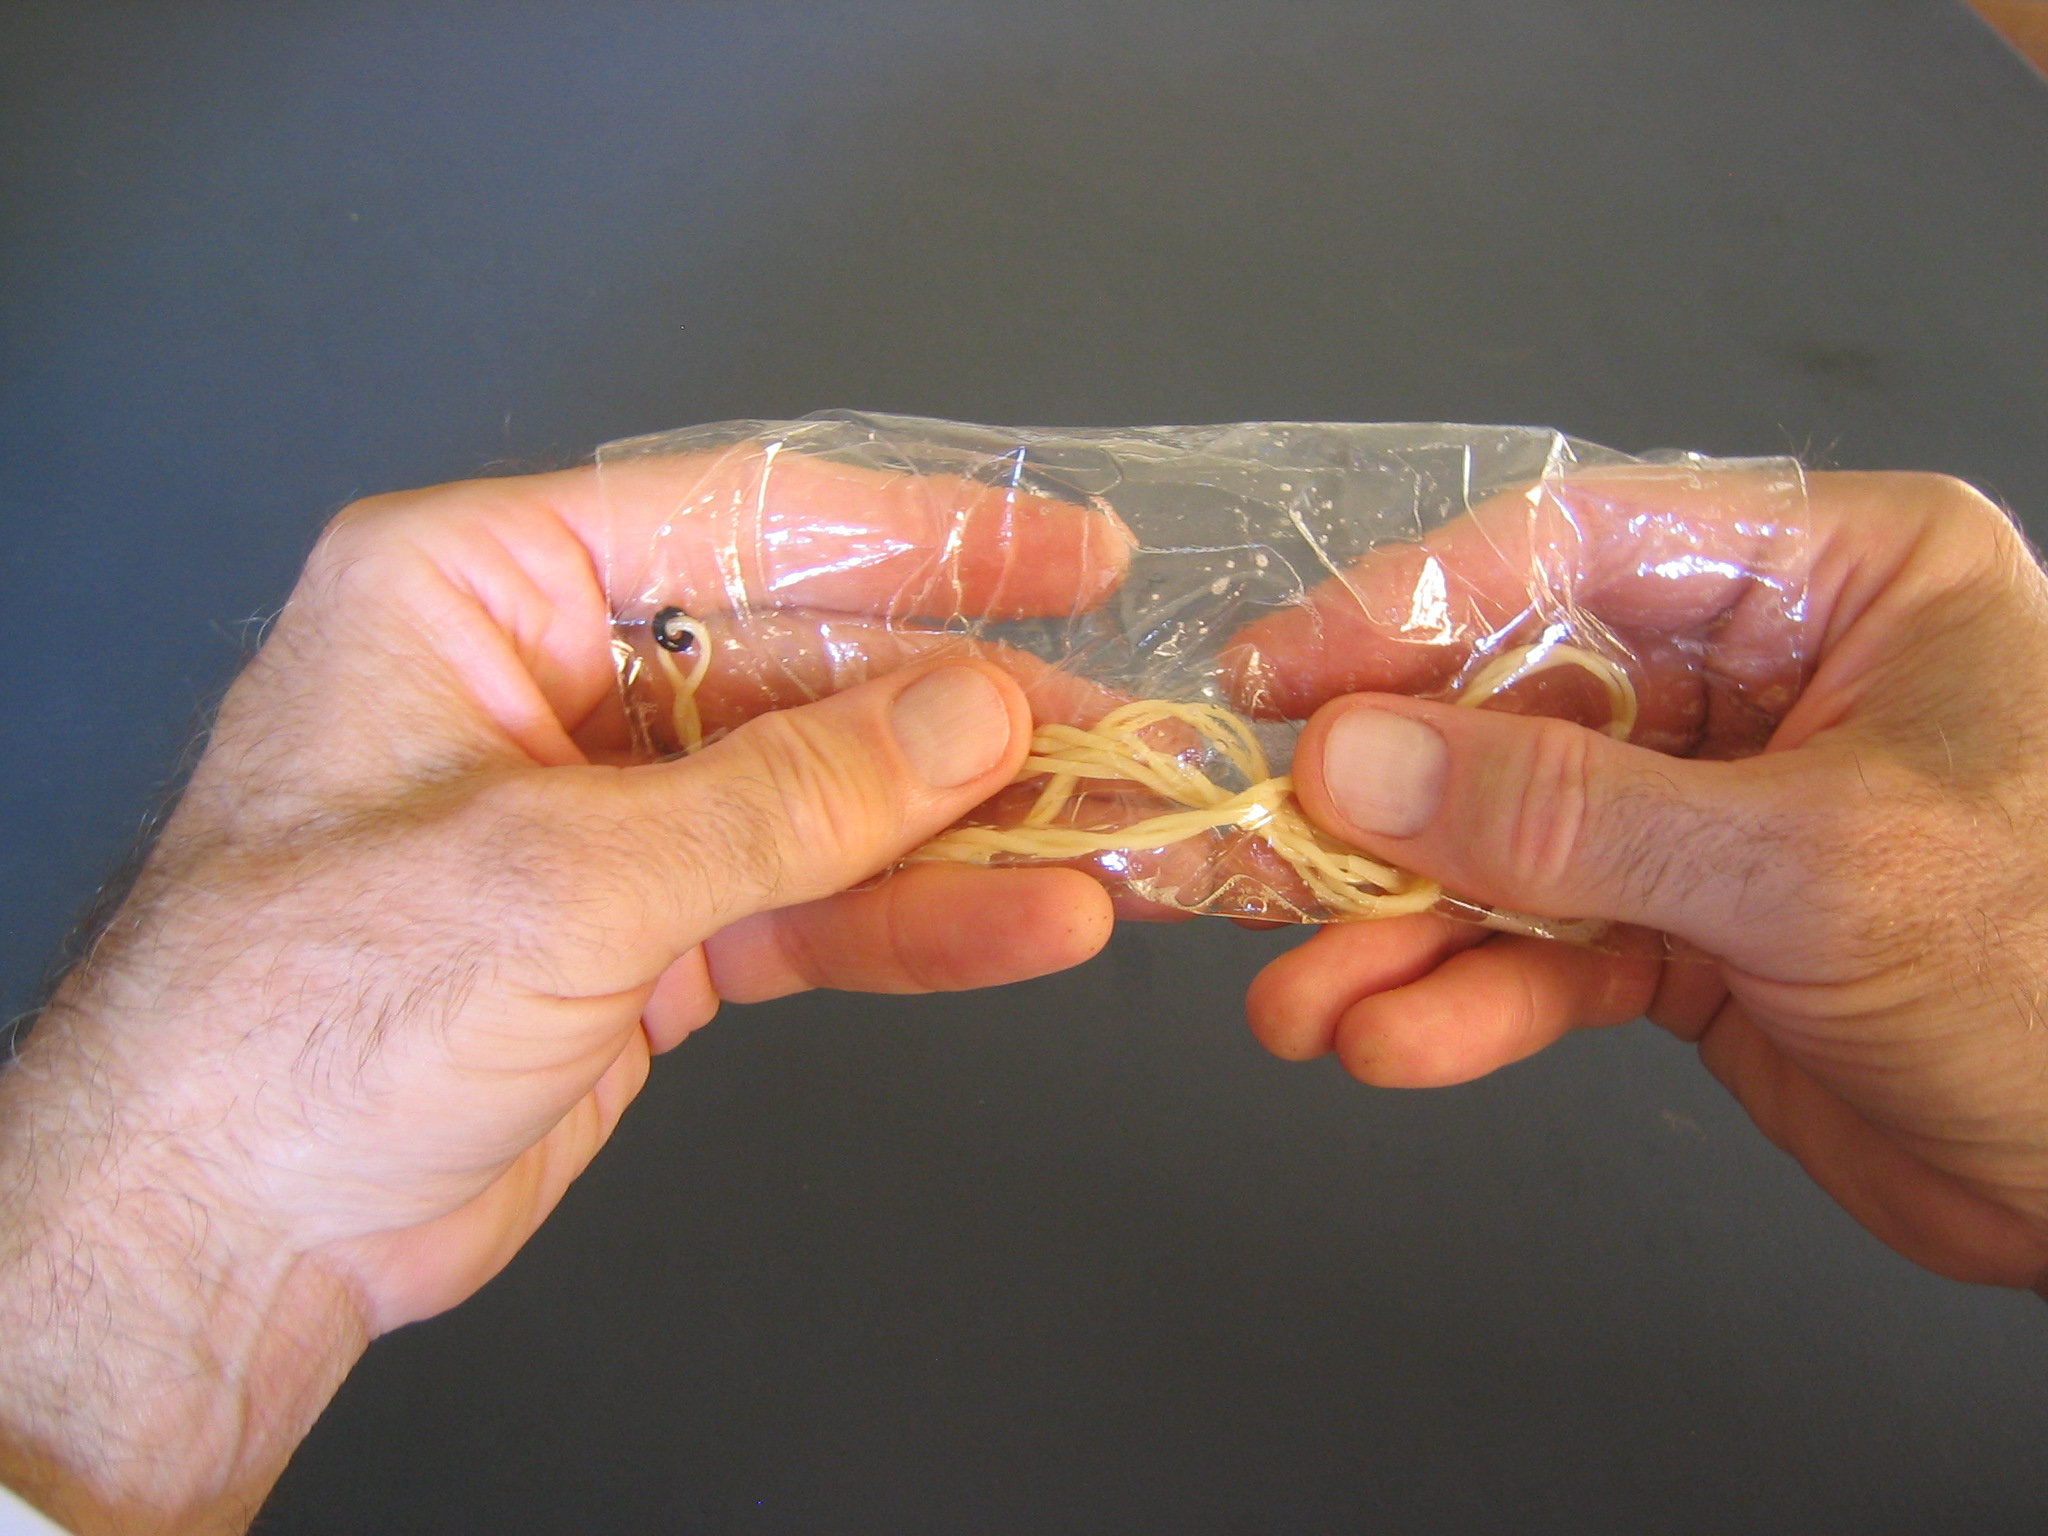
Put the motor into the bag and massage it until the entire surface is coated with lube. The bag makes it unnecessary for you to take a bath after lubing your motor. You will get only a little on your fingertips that you can wipe off on the diaper.
Grab one end and pull the motor out between two fingers to squeeze off excess lube. You may want to weight it again. Mine weighed 2.30 grams wet, meaning that the lube weighed 0.17 grams. Hmm, maybe I will wipe it again.
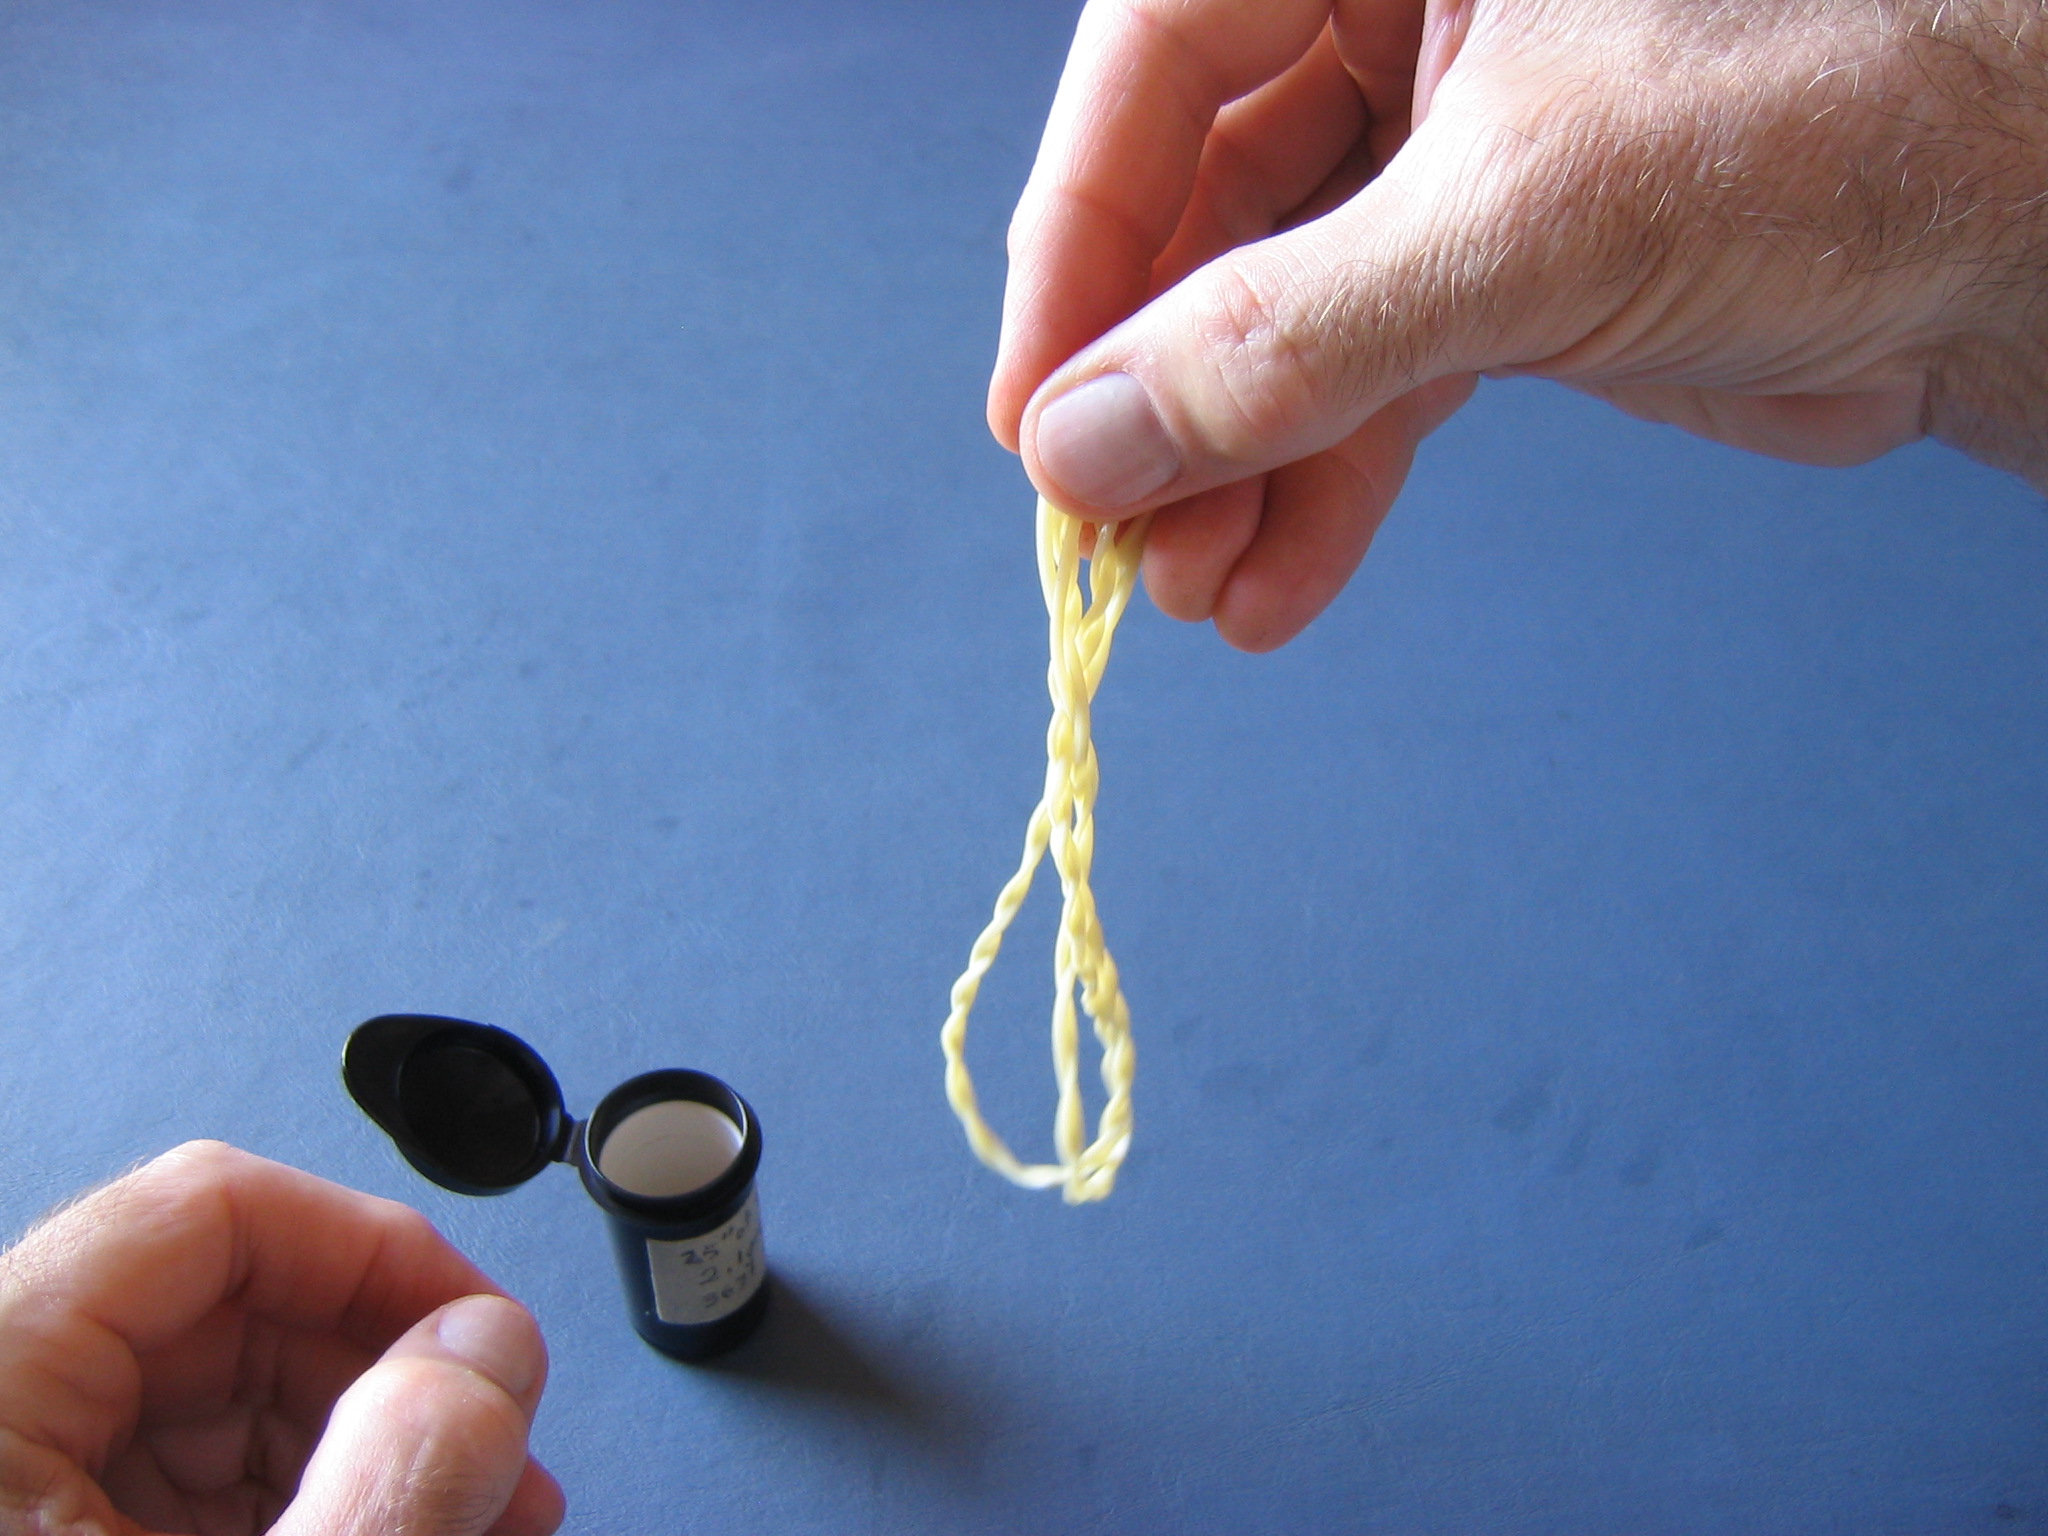
Loop and gently twist the skein…
…twisting and folding it until it will fit into the can. Put it in your flight kit and go flying.
Gary Hinze
Yeah, Hi. I’m looking for the amount of stands of rubber used for a contest winding. Is there a limit, and, say, you had a Comet Gull, and it would stand any normal wind? How many strands would be appropriate for a contest? What size strands, and where would I get it? Braid, or just get it on there somehow? Anything you can give would be helpful.
Answering your question exactly requires a great deal of information. The plan makes a recommendation and the kit will include a strip of rubber, but these are not necessarily the best size. The quickest answer is to ask “What are other people using?” SAM publishes a list of recommended motor sizes.
Presumably someone has flown these models with these motors, so this might at least be a good place to start your own testing. Looking down this list, we sometimes see the same model listed with two entirely different motors, leading us to doubt the general applicability of these recommendations. Also, the motor recommended for the Cloud Tramp is nowhere near what I find works best. There can be differences due to weight, trim or personal flying style.
The Comet Gull is not on this list. Also, there are two versions of the Comet Gull, a 30″ and a 42″. The Comet Gull is a pretty standard cabin high wing monoplane, so you might search this list for similar designs and see whether there is some consistency in the results. I suggest looking for motors about twice the available distance, since longer motors become difficult to manage.
Motor size shows a sharp falloff in performance on either side of the optimum, so a “rough guess” will not do. See our article on Motor size and Performance.
Motor size is connected to many things, all of which must work together. I have written about matching the motor to the airplane and propeller. This briefly describes my method of testing airplane and propeller performance to determine motor size. There is a worked example in the comments to this article. If you send me the empty weight of your airplane and the length available for the motor, I will run a motor sizing calculation with some plausible estimates for the other parameters. This won’t be as good as a full test protocol, but it will give you a reasonable guess that will be a pretty good place to start testing. You then proceed to trim the plane for glide and powered circle. As you approach maximum turns on your trial motor, you can decide whether the motor size should be adjusted. If it runs out of turns in the air, you try a thinner, longer motor. If it lands with many turns remaining, you try a thicker, shorter motor.
An additional consideration is the effect of motor weight on CG. If the wing can be slid back and forth, as on the Cloud Tramp, you can accommodate different motor weights by sliding the wing to get proper trim CG. On a fixed wing design, such as the Comet Gull, the required trim CG pretty much defines the weight of the motor. It might even be necessary to add ballast.
Motor sizing also depends on preferences in style in flying. Maximum duration requires a long, slow climb, long cruise and long slow descent. Some people prefer a rocket like climb. In competition, flights are made high to seek thermals and are flown to a max with DT.
Sources of rubber are listed in our Suppliers List. The primary source of rubber is FAI Model Supply.
Hi Gary. A couple very basic questions. One is about attaching the motor to the rear peg. Is it as simple as sliding the peg thru the motor? I can’t find info on that. Also rubber for attaching the wings to the fuselage. My house hold ones are too strong. Plus none came with the kit. Do you have a recommendation? I’m building a Easy Built Baby Commercial. The wings are 3 Inches from leading edge to trailing.
Hi Fred,
The knotted end of the rubber goes around the rear peg. For enclosed motors, you use a stuffer stick to push the motor loop down through the fuselage to the peg location. There are many kinds of stuffer sticks, but all have in common a pair of Ys that support the end of the rubber loop and are spaced apart enough to clear the peg being pushed through under the rubber, between the Ys. You include a couple cross pieces in the underside of the fuselage to leave a gap in the tissue, so you have a window through which you can watch the end of the stick and the peg as you put the peg through.
For example, I have been using a stuffer stick to load the motor into my CHOVITA. The stick is 1/8″ x 3/16″ x 12 1/2″ hard balsa. The two Y plates are 1/16″ ply, 1/4″ x 5/8″, glued to opposite 3/16″ faces of the stick, overlapping 3/8″. Each plate has a notch filed in the 1/4″ wide end, 1/16″ wide and 3/32″ deep. The knotted end of the rubber is looped across between these notches. The 1/16″ motor peg fits between the plates, under the motor.
I put the knot over the Ys and draw the motor back under slight tension, grabbing it and the stick with my left hand and holding while inserting the stick through the nose opening of the airplane. I turn the fuselage so I can see the Y box through the window and turn it so the opening under the motor aligns with the holes in the peg plates. The peg has been sanded to a slight taper on its end so it goes easily into the hole in the peg plate. The peg is fed through the Y box under the motor loop and out the opposite peg plate. Getting it through the Y box can be a bit fiddly. Pull back on the stuffer and motor to make sure the motor has been captured by the peg. If not,try again. The stuffer stick is then removed.
You will want to get the right size rubber bands to hold the wing on. They need to be tight enough to hold the fuselage securely to the wing, but not so tight that they cut into the balsa. It is better to have a thicker rubber band than use a thinner band that is too tight. The bands need to be stretched, but not too much. Before you put the band on, you can pull it to stretch it to soften it slightly. I think 1/8″ x 2 1/2″ size would be good, #31 rubber bands.
Gary
Thank you so much. This is very helpful!
Hello, i’ve just starded into this hobby with a Guillows FW-190 500 series. It came with 2 loops of blue rubber (https://www.guillow.com/7rubberbands.aspx) but i also have 4 meters of 3x1mm rubber strip (https://www.pelikandaniel.com/?sec=product&id=3671&lng=en). Can i use this strip for making a motor for the FW or should i get a different dimension or different section? What kind of motor – long flights and/or fast climb – do you recommend for this model? If 3x1mm is ok, can you please give some “how to” details about it – what lenght, how many strands, etc.? E.G. – You mentioned that the lenght of the motor is double the distance between the hooks. For the type of motor that you build in the article above, by “the lenght of the motor is double the distance” you mean the finished loop or the string that you start with? Many thanks, Eduard.
Gary, thanks for the info. The distance from the peg to nose tip is about 16″. Approx how long should the single loop be to start with.
That depends on what you want to do with it. Are you still talking about braiding a four strand motor? Do you want a fast, high power climb or a long flight? What effect will motor weight haven CG and what will you do to trim it?
For my usual simple stick models, flown for longest time, I use a motor twice the distance between the hooks, with a cross section that will have torque about in the middle of the turns equal to the torque required to fly level. That way we have the spike to climb to altitude, long middle portion for cruise and still have power to slow the descent all the way to the ground. No freewheeling. CG can be accommodated by moving the wing as necessary.
I am trying to braid a 4 strand rubber motor. Can you send me your description on how to do this. I need more simplified instructions eg. Dumb down steps that are consice and easy to understand by a new builder.
Thanks
The National Free Flight Society Technical Library lists four articles on braiding rubber motors.
https://freeflight.org/library/technical-library/#R
There are various recommendations for how many braiding turns to use. I don’t see any general formula. My recommendation is to put just enough turns in to twine the entire length, and no more.
Gary, can you please mention the dimensions of O Ring that you use along with a link to the product page to check online?
McMaster Carr Supply
https://www.mcmaster.com/5308t115
Some of the model airplane suppliers have O-rings, too. See our Suppliers page.
I found the Glycerin and Green Soap. The Green soap has 30 percent alcohol, do you simmer the green soap first? I mixed 50/50 Glycerin/Green soap straight, simmered until no alcohol and let cool. This made for a pretty thick lube, much thicker than the old Peck Lube.
Green soap is soap made from plant oils rather than animal fat. Green soap comes in several forms. There are solid bars, soap dissolved with water and a tincture in alcohol. I buy the water solution. Heating the tincture to drive off the flammable alcohol over a gas flame could be a fire hazard. I would add water to the heated soap until it is about the same consistency as the glycerin. The goal is to get an even, thin coating all over the rubber. You don’t want it to splatter all over the inside of your airplane. You don’t want it to dry out too fast. The glycerin helps keep it moist, but you can tell when the lube has dried out in the air, it gets harder to put maximum turns into the motor. Time to refresh the lube. Keep your lube in a bottle with a secure cap to keep it from drying out in the bottle.
Gary, I looked on the internet and cannot find the Green Soap in Water, can you recommend a soap to use? thank you. David
I have a bottle of lube dated 18 May ’78 and another dated 11 June 2002. I don’t have the empty bottles of green soap, so can’t quote the labels. In 2002 I had to special order the green soap at Longs Drugs. For the Klutz book project, I used Johnson’s baby shampoo. I have used bubble soap without glycerin. It works, but dries out quickly. I think it would work well mixed with glycerin. I got it to show wind direction on the field. A mix of Joy dish soap and glycerin is used for bubble soap. Maybe that would work for lube, too.
Hi Gary
I’ve recently picked up my old hobby and I’ve got a knack for vintage stick & tissue models (found a whole bunch of plans from the 50ies & 60ies in my dad’s cabinet).
Where can you buy the O-rings you mention in your article? I take it that the O-ring in the the above article is for smaller (indoor) planes? What type should I take for larger outdoor planes (wingspan 30″ and above)?
regards
K-J
Hi Karel-Jan,
O-rings may be bought in bulk from industrial suppliers, but most modelers buy them in smaller quantities from one of the model suppliers. These sites list many other things that may interest you, too.
http://www.faimodelsupply.com/
http://www.indoormodelsupply.com/
https://www.a2zcorp.us/store/
http://www.campbellscustomkits.com/
Larger models use metal rings or hooks. You will find those described in the above catalogs.
You may prefer to buy from a European source.
http://www.samsmodels.com/index.html
http://www.freeflightsupplies.co.uk/
Gary
Where did you get the rubber strips? I seem to have little luck finding any on the internet. If you have a recommendation, I would greatly appreciate it. Thanks!
The primary source of rubber strip for model airplane motors is FAI Model Supply. It is called Tan Super Sport. It is very stretchy and stores a great deal of energy.
https://www.faimodelsupply.com/?product_cat=tan-super-sport-rubber
Most suppliers of model kits and supplies also sell packs of rubber strip. Some cut it to nonstandard widths for special purposes. You can get a rubber stripper to cut to custom widths yourself.
On a related matter, I can find no article discussing when you use a motor of 1/8 or of 3/16. For example, for the Gollywock, I know a number of flyers who swear by using a 3/16 rubber size for their model. I also know a similar group of Gollywock fliers who swear by using 1/8. How does one know what size motor to use on a flying model?? Thanks for any help you can give me…………………Rick Isaacson
Rick,
The size of a motor is determined by its length and its cross section. The cross section is the area of a single strand times the number of strands. Your question relates to the width of a single strand. The width of the individual strand is not important, as long as you can get the cross section required to develop the torque to fly.
There are those of the opinion that a few wide strands will provide more turns, torque and energy than many narrow strands, made up into motors of equal total cross section. There are those of the opposite opinion. That tells me the difference is not very strong. My analysis of 20 motors with 2 to 12 strands found a very weak negative correlation between number of strands and turns and torque over the whole range. The weak relationship also was not statistically significant. Given the closeness of 1/8″ and 3/16″ width, the numbers of strands would not differ by much, making any difference in turns and torque proportionally small. In other words, the width and number of strands is not important. Use whatever width you have to make the required cross section and weight.
A strand of 3/16″ has 1.5 times the cross section of a strand of 1/8″. Two strands of 3/16″ is equivalent to three strands of 1/8″ in cross section. However, we make motors using loops containing even numbers of strands, because the ends must come together to be tied. If you needed to make a motor with this cross section, you would chose the 3/16″ strip.
In competition, motor weight is often limited in the rules. Weight is the product of motor volume and rubber density. (Our Tan rubber has a density of around 0.93 grams per cubic centimeter. Add a little for lube.) Volume is the product of length and cross section. A weight specification thus defines a relationship between length and cross section. Typically a modeler will decide on the length, work out the cross section, and figure out the number of strands to make that cross section. (Modelers often assume a weight of 1 gram per foot of 1/8″ lubed rubber. He can multiply that by the length they want and the number of strands to see whether it comes in under the minimum weight.) If the numbers don’t work out, he can adjust the length or he can use a different strand width.
Gary
Great explanation!!!