Meet the Snowflake
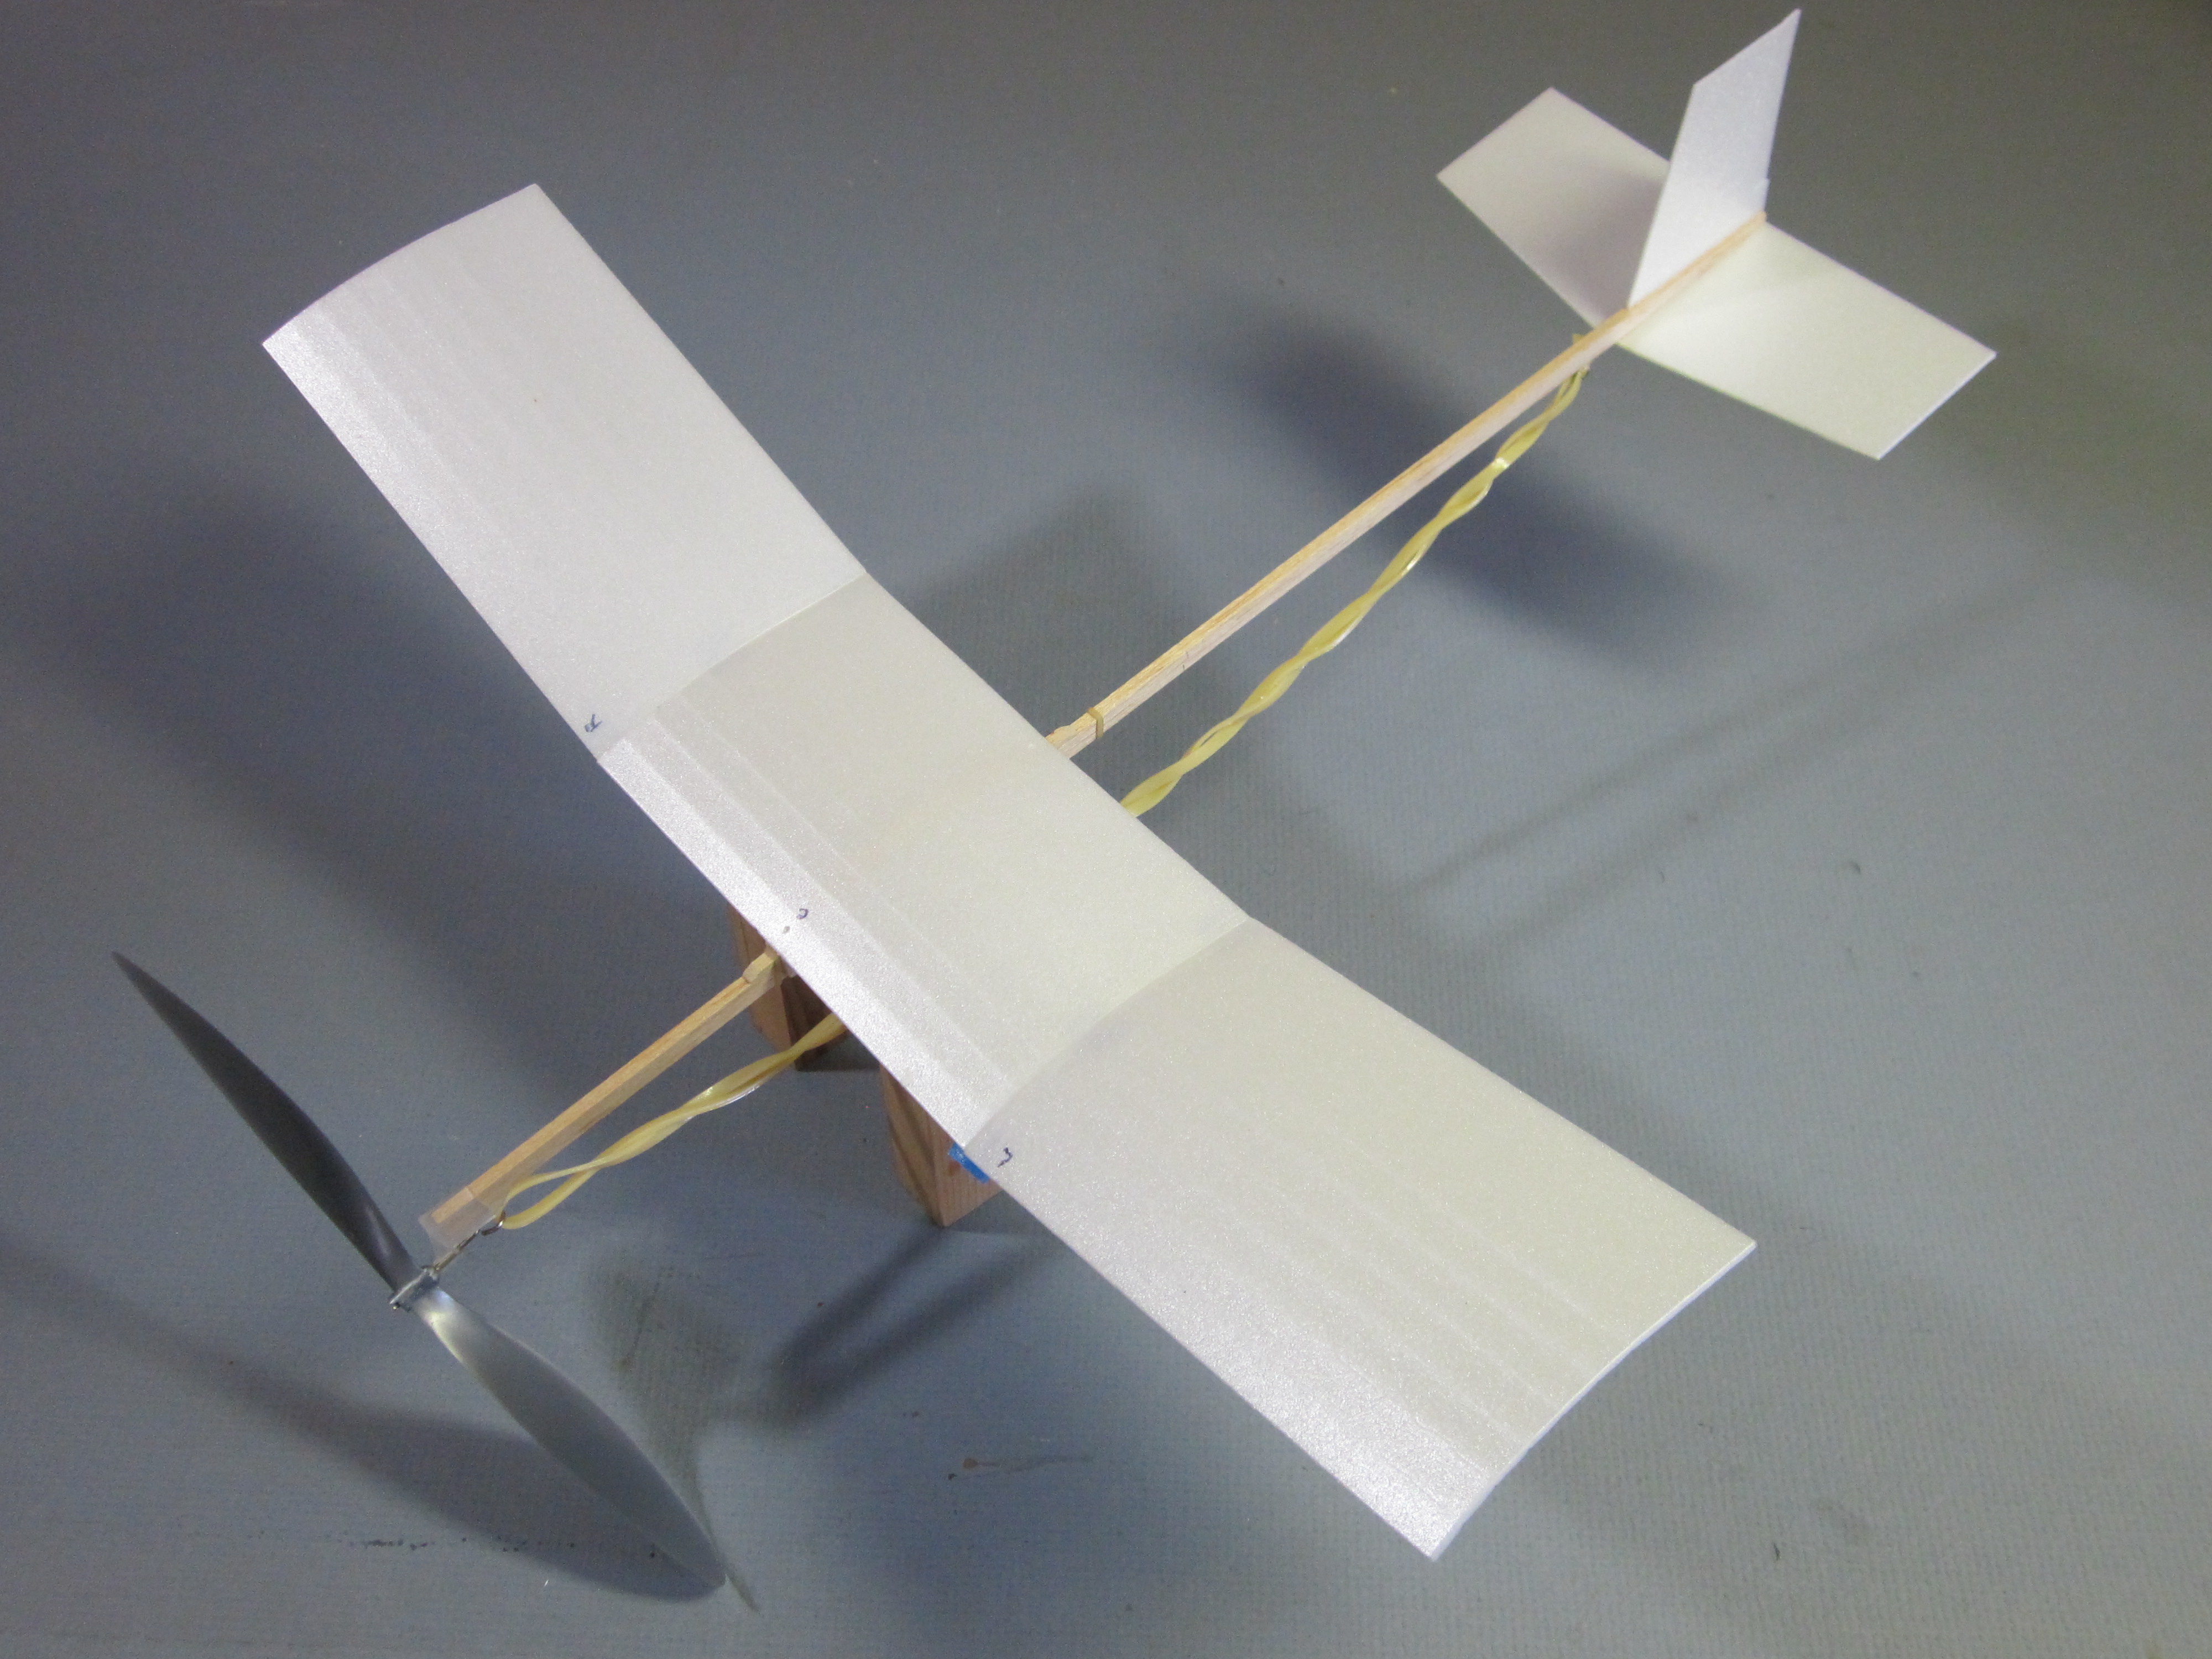
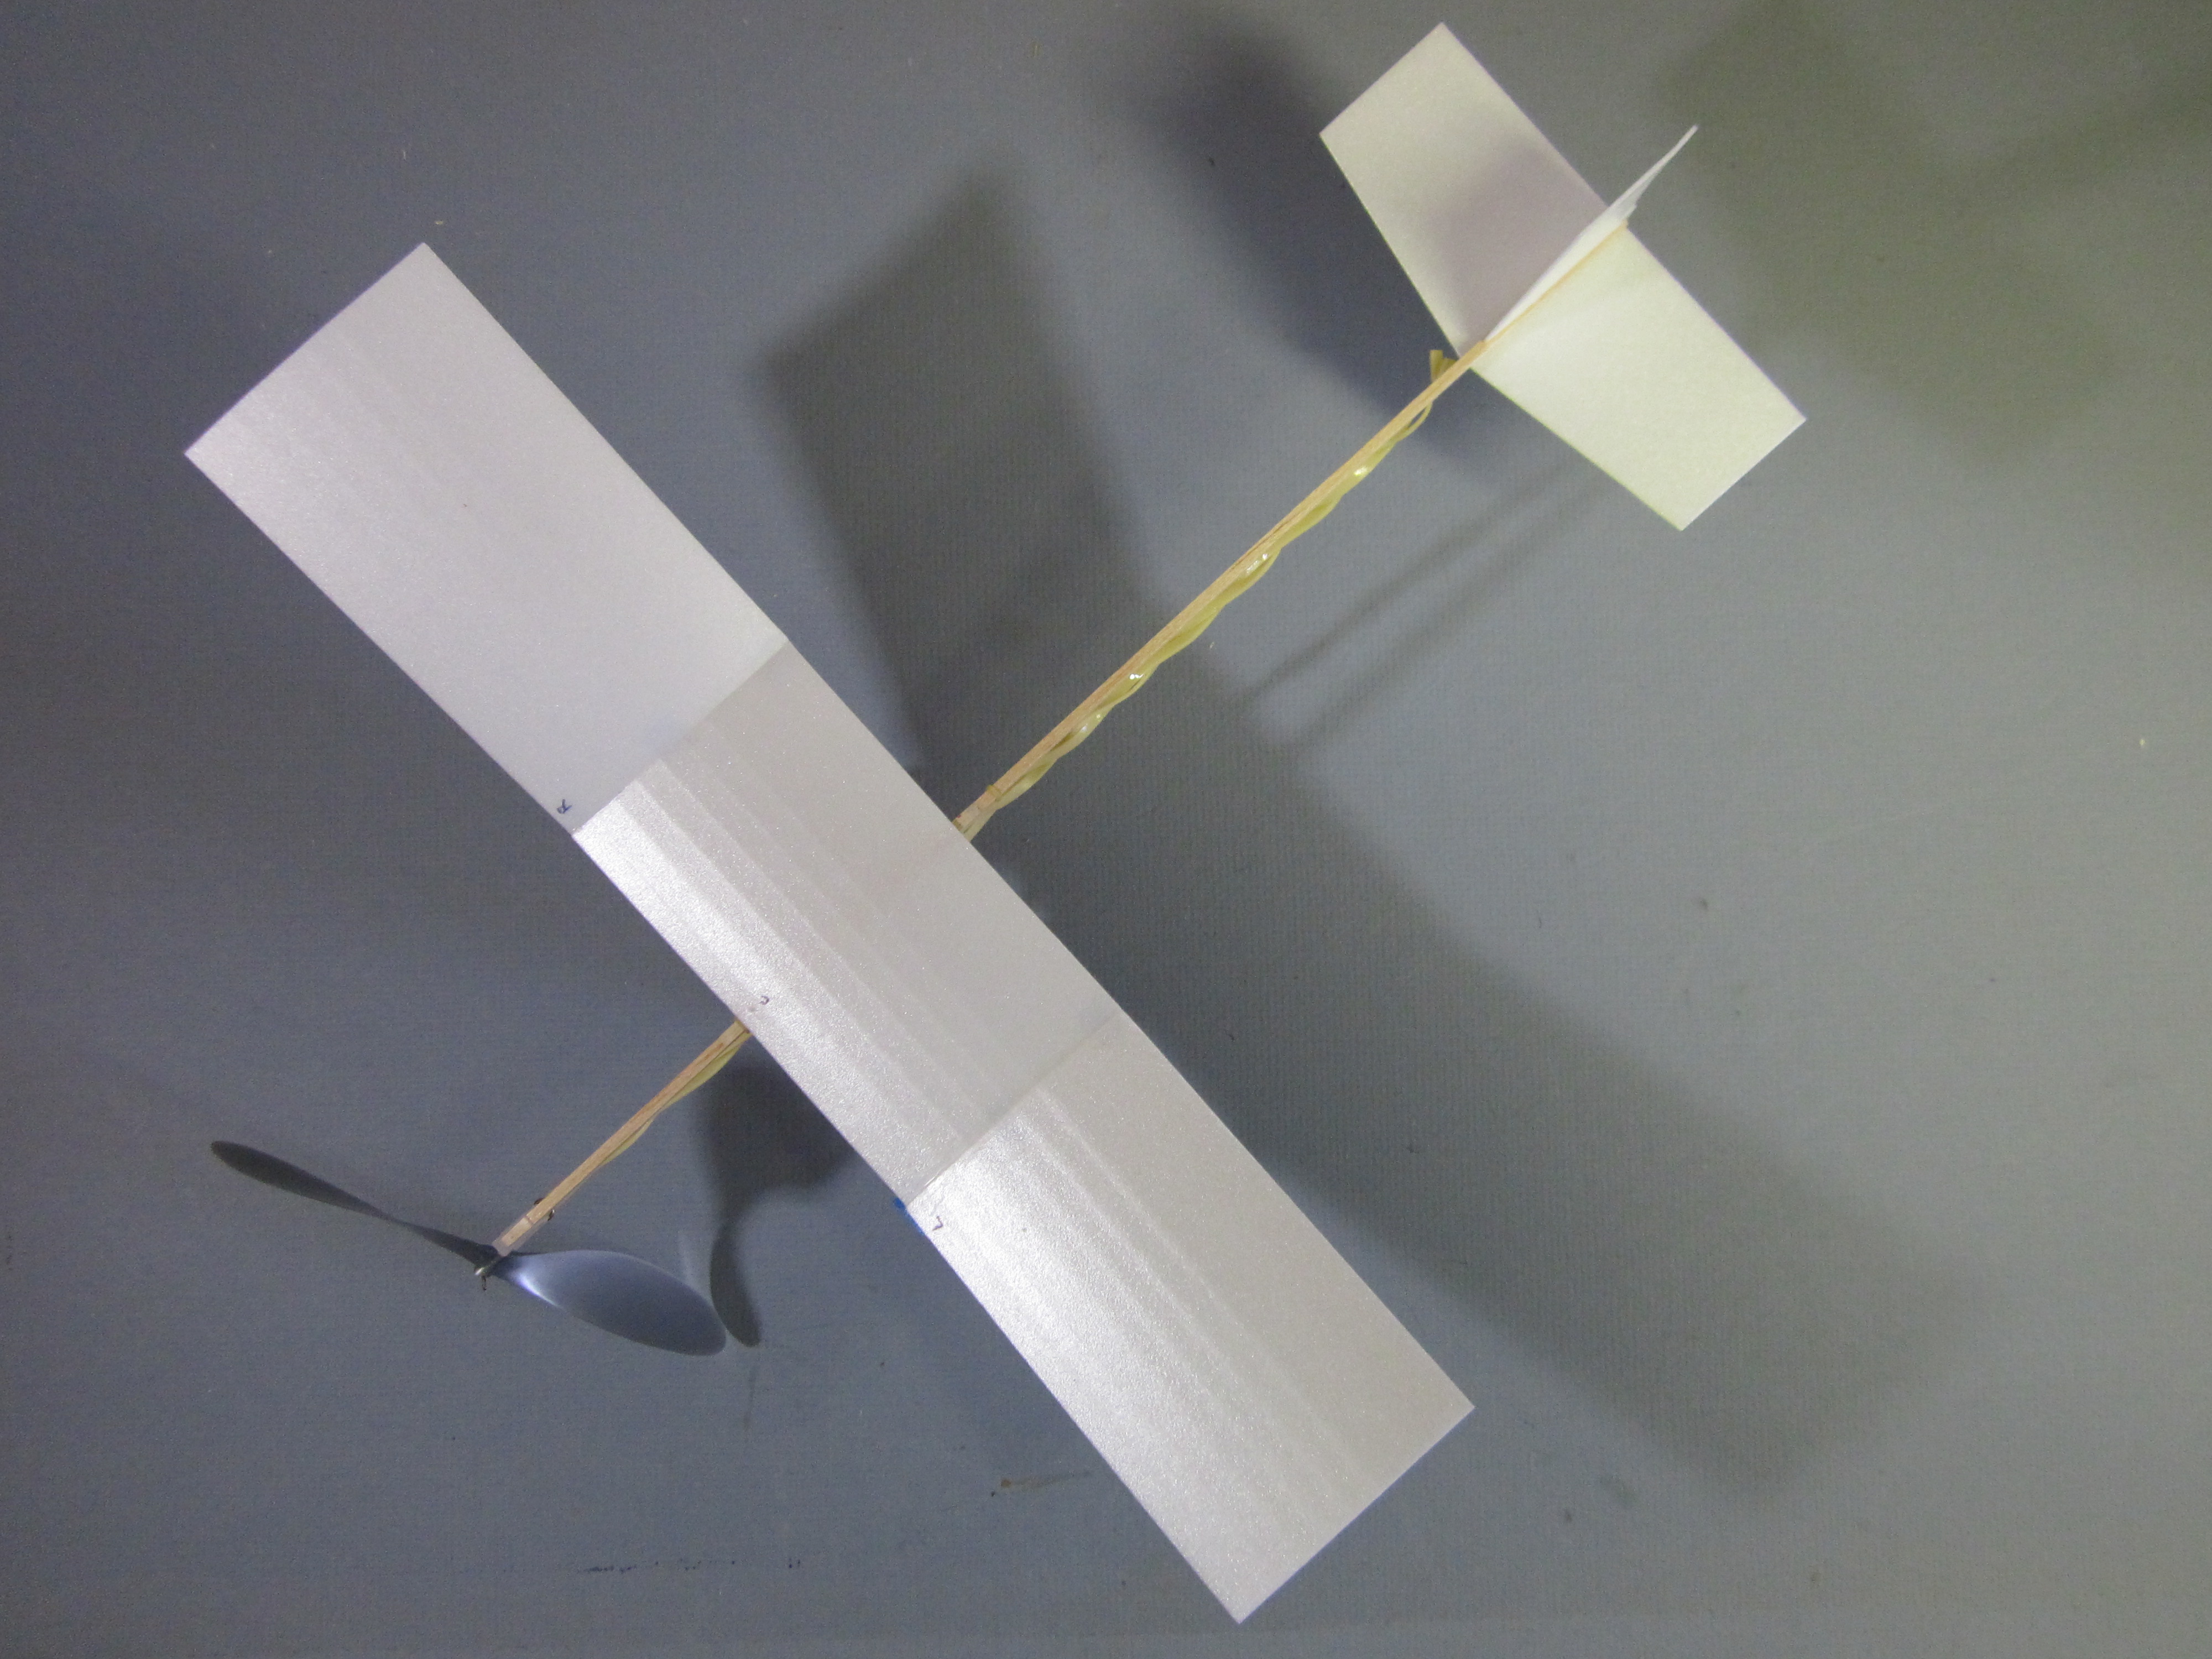
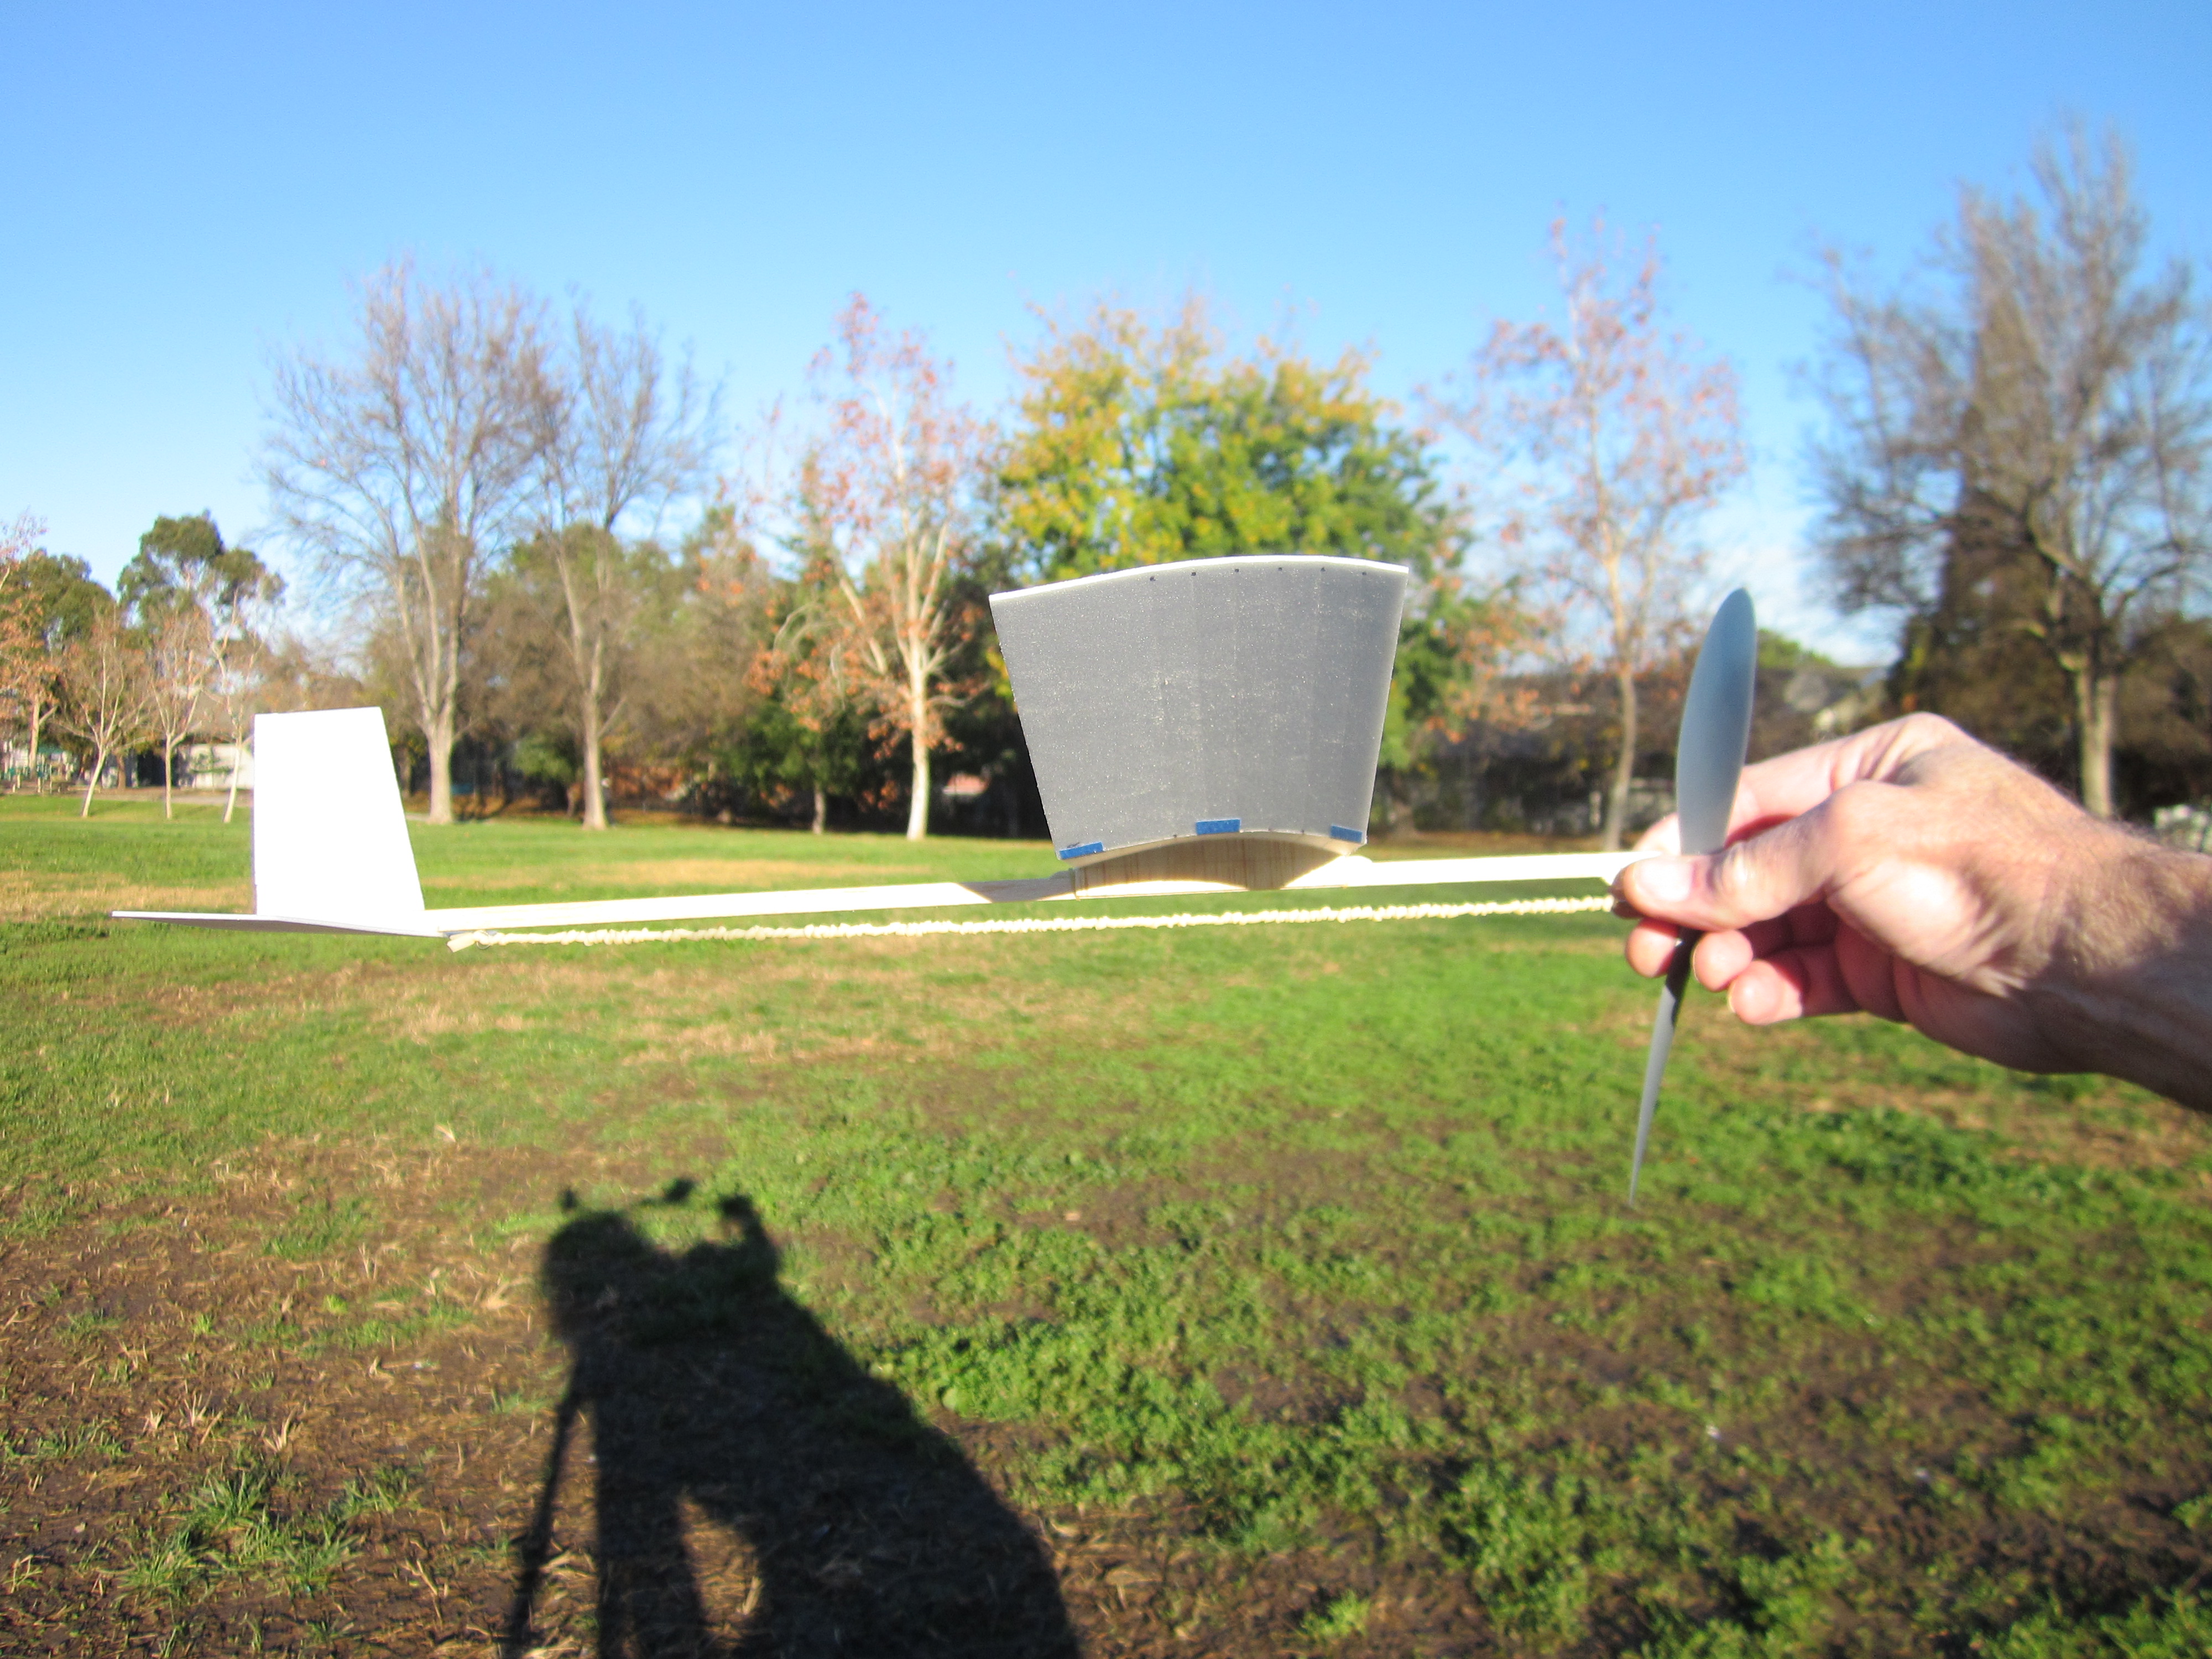
My new plane with flight surfaces made from 9″ foam plates. If it looks like a Sierra Nevada Special, that is because that is what it is, but with three wing panels instead of two. Best way to get the span and dihedral without a complicated V bevel joint at the wing saddle.
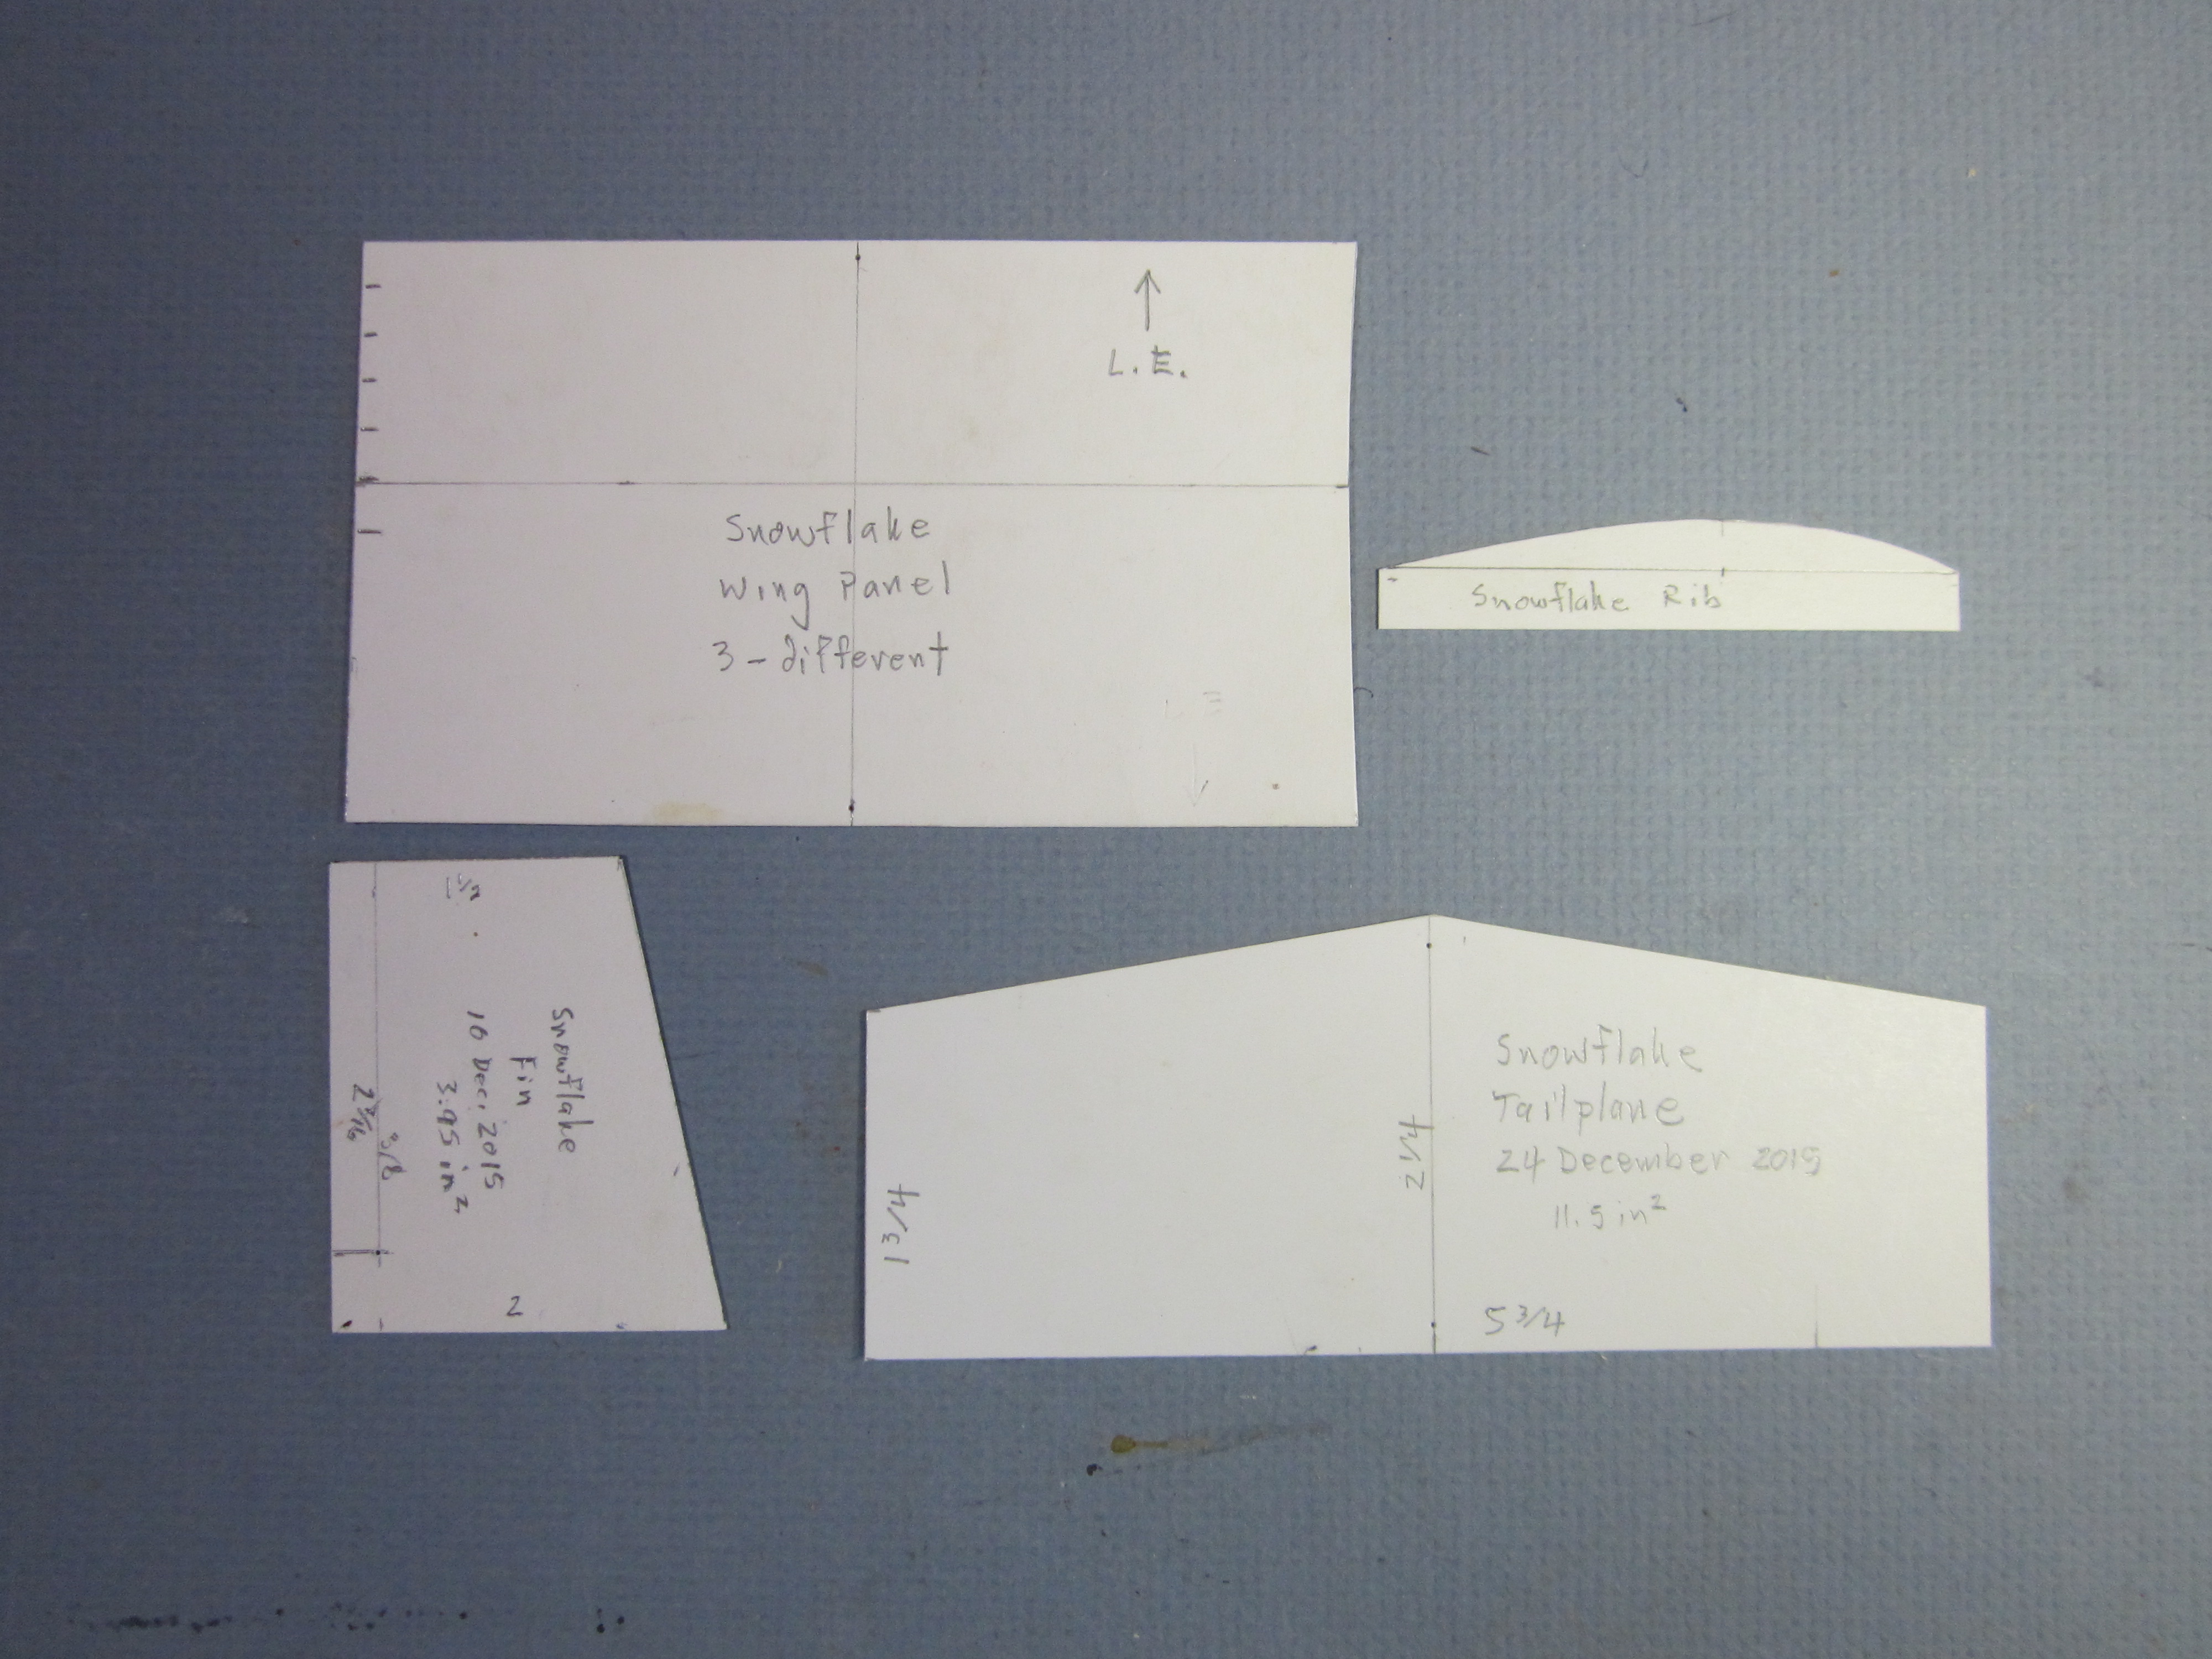
The limitation was making parts from the 6″ diameter flat disk in the center of the 9″ foam plate. The foam wing panels are 3 1/16″ x 5 3/16″. Dihedral gore is 1/32″ deep at 1 1/4″ from leading edge. This produces 1 1/2″ dihedral at the tip. Maximum camber is 1/4″, also at 1 1/4″, no incidence. Camber is formed by creasing along six lines spaced 1/4″ apart. Tailplane is 5 3/4″ span, 1 3/4″ tip chord, 2 1/4″ root chord. Fin is 2 3/8″ span, 1 1/2″ tip chord and 2″ root chord, with creased 1/4″ wide rudder panel. The 47.4 square inch wing area is asking for a 7″ to 10″ diameter prop. I used a 7″ Peck-Polymers plastic prop, Midwest bearing and shaft. Standard right handed pigtail rear hook made from a straight pin. Stick is 1/8″ x 1/4″ x 16″ with 1/8″ square nose block. Tailplane taper is 3/16″ in 2 1/4″. It weighs 10.3 grams empty. Motor shown is a 14″ loop of 1/8″, which is good for test flights. This will get it up in the air and run out of turns high enough up that turning circle and descent rate can be checked. Some right thrust will be required under power, right rudder for right descent. Test flights will tell me what motor cross section to use when I go to a double length, thinner motor for maximum turns and longest flight.
This would be a good plane for the forthcoming Foam Plate Airplane Contest.
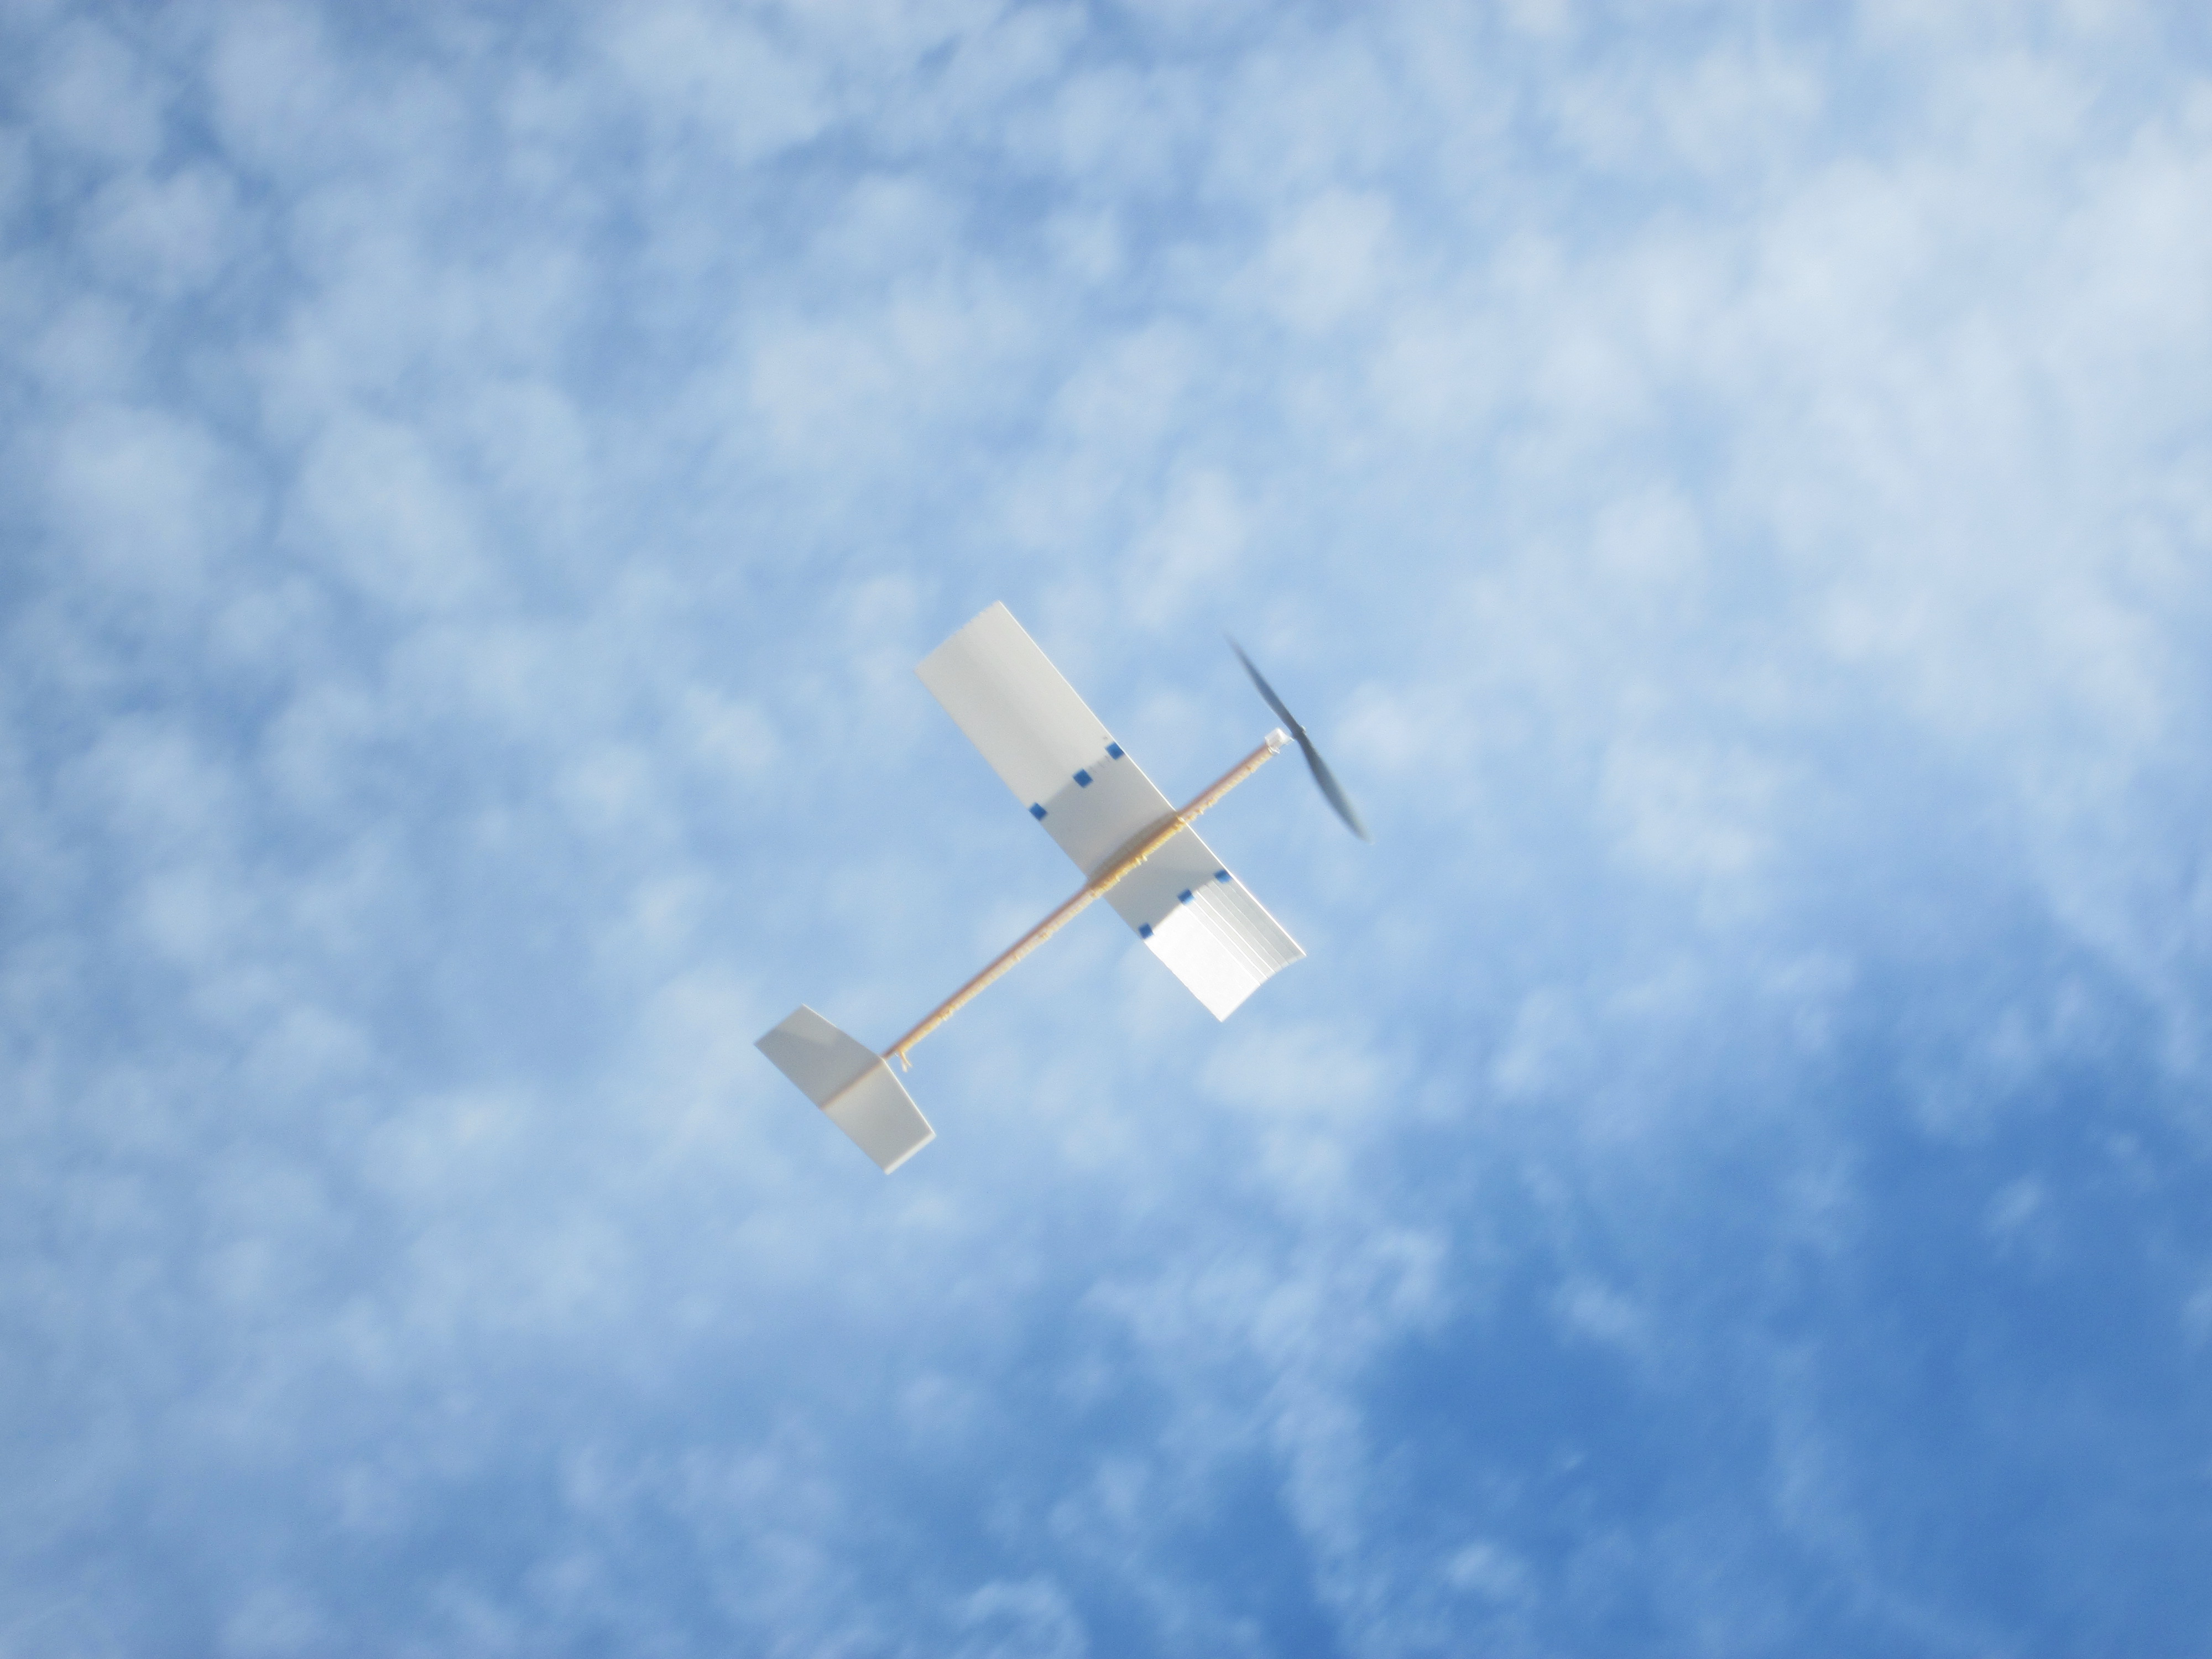
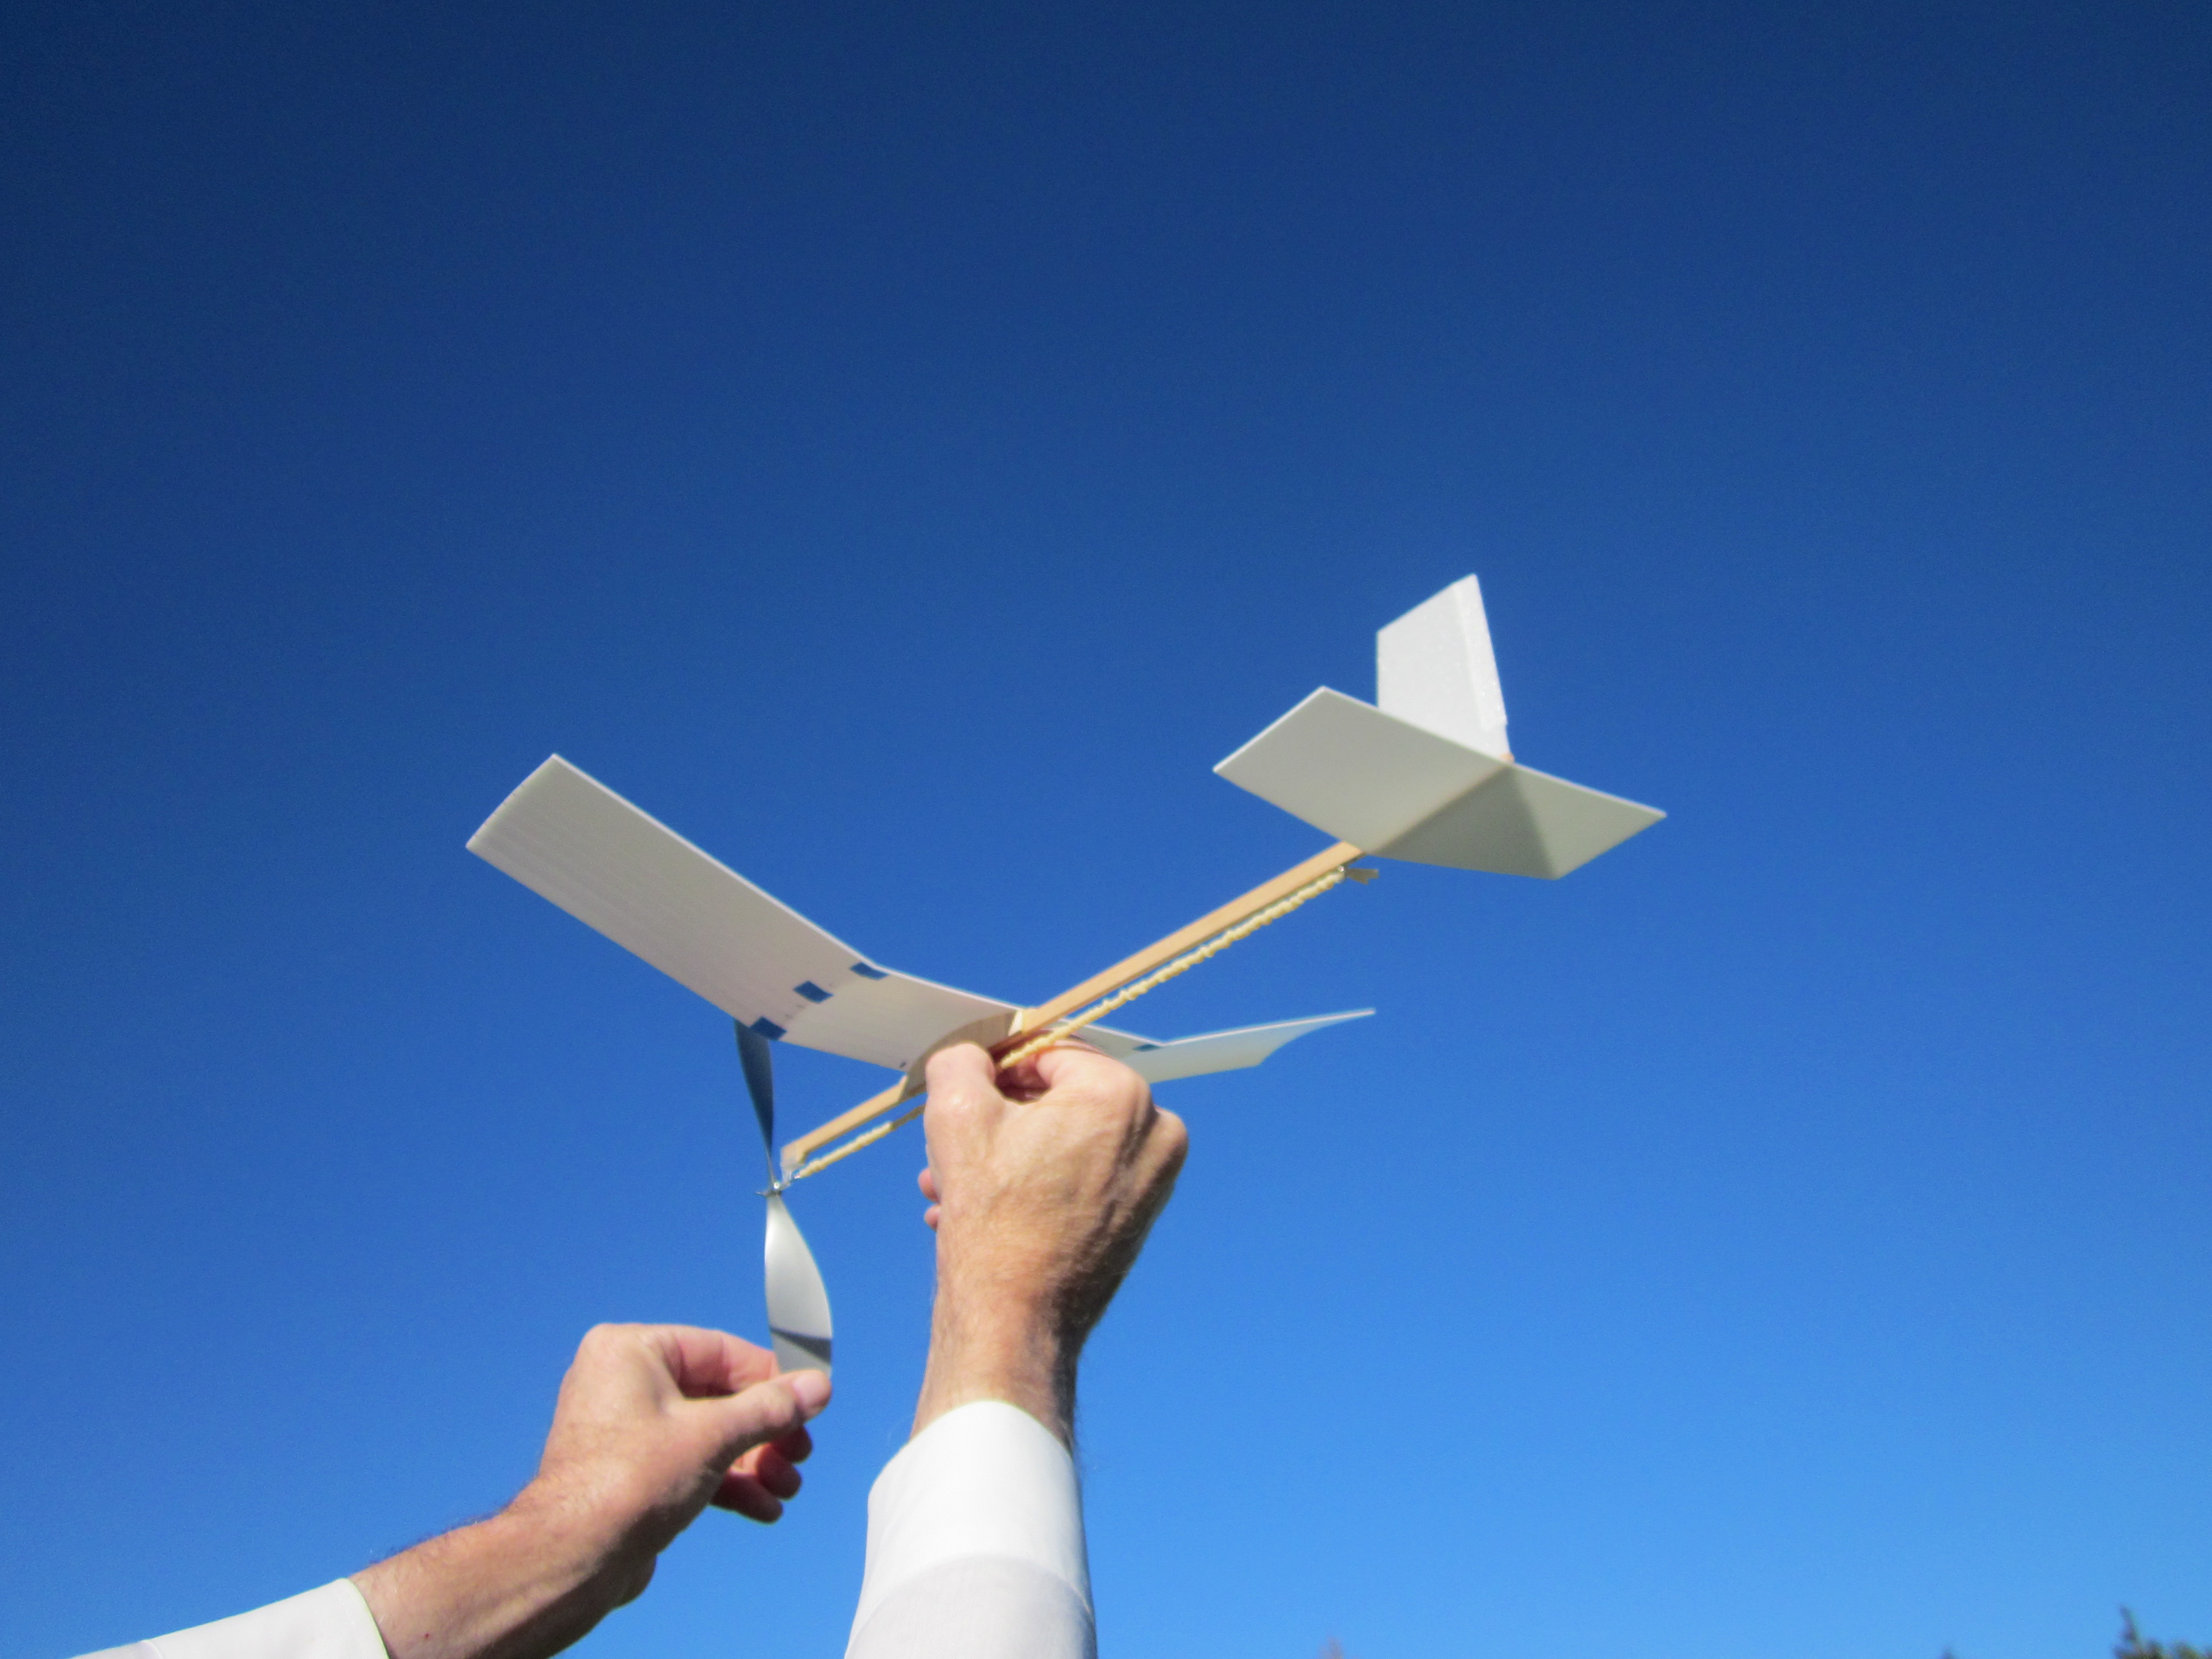
Snowflake got 2 minutes on its first outing. Like its namesake, it comes down slowly. Here is a 2 minute flight video:
There was frost on the ground. At first my fingers were burning from the cold, but they soon went numb. It was difficult to get the O-ring at the end of the tightly wound, lubricated rubber motor onto the wire hook without being able to feel anything. I lost it once, had to make up lost turns with finger turns. Two minutes is about the best I could get on this field. I might get a few more turns into the motor. It had few left when I picked it up. I put in 2,400 out of an estimated 2,690 maximum turns, 89%. I used a 22 1/4″ loop of 0.045″ x 0.086″. If you don’t want to strip rubber, stock 3/32″ is the closest. That will get a good climb without having to wind to 90% of capacity. A longer motor might get more time.
The seagulls were on the ground. When they saw the plane going up, they made a run for the expected thermal. A bunch of them came right toward the plane when it turned into the group. They scattered to both sides. They continued searching for lift, flying around the plane, but eventually settled back to the ground. I’ve had the same thing happen with hawks in another location.
There is no plan. It isn’t necessary to have a plan, as everything is rectangular or trapezoidal. All the necessary dimensions are given above. Anyone who is in a hurry can build one from that information. The build is essentially similar to the Sierra Nevada Special.
Just got back from some photo flying. Got a good one of it flying overhead.
I made a second one. Couldn’t get it to fly right in the descent. More right rudder, twist wings, nothing. Got it to go straight, but not turn. Not something you want when flying from a small park. Finally I tried twisting the stick to tilt the tailplane. Made it worse. So I tilted it the other way. Now it flys OK. The tail must have negative lift on it. A tilted tailplane produces a side force that turns the plane.
Build Your Own Snowflake
This complete, illustrated tutorial will guide you step by step through the process of building your own Snowflake. This may be used by individuals or groups like scouts, school classes, senior centers or recreation programs. There are a lot of steps, but none of them are especially difficult. Be patient and take your time.
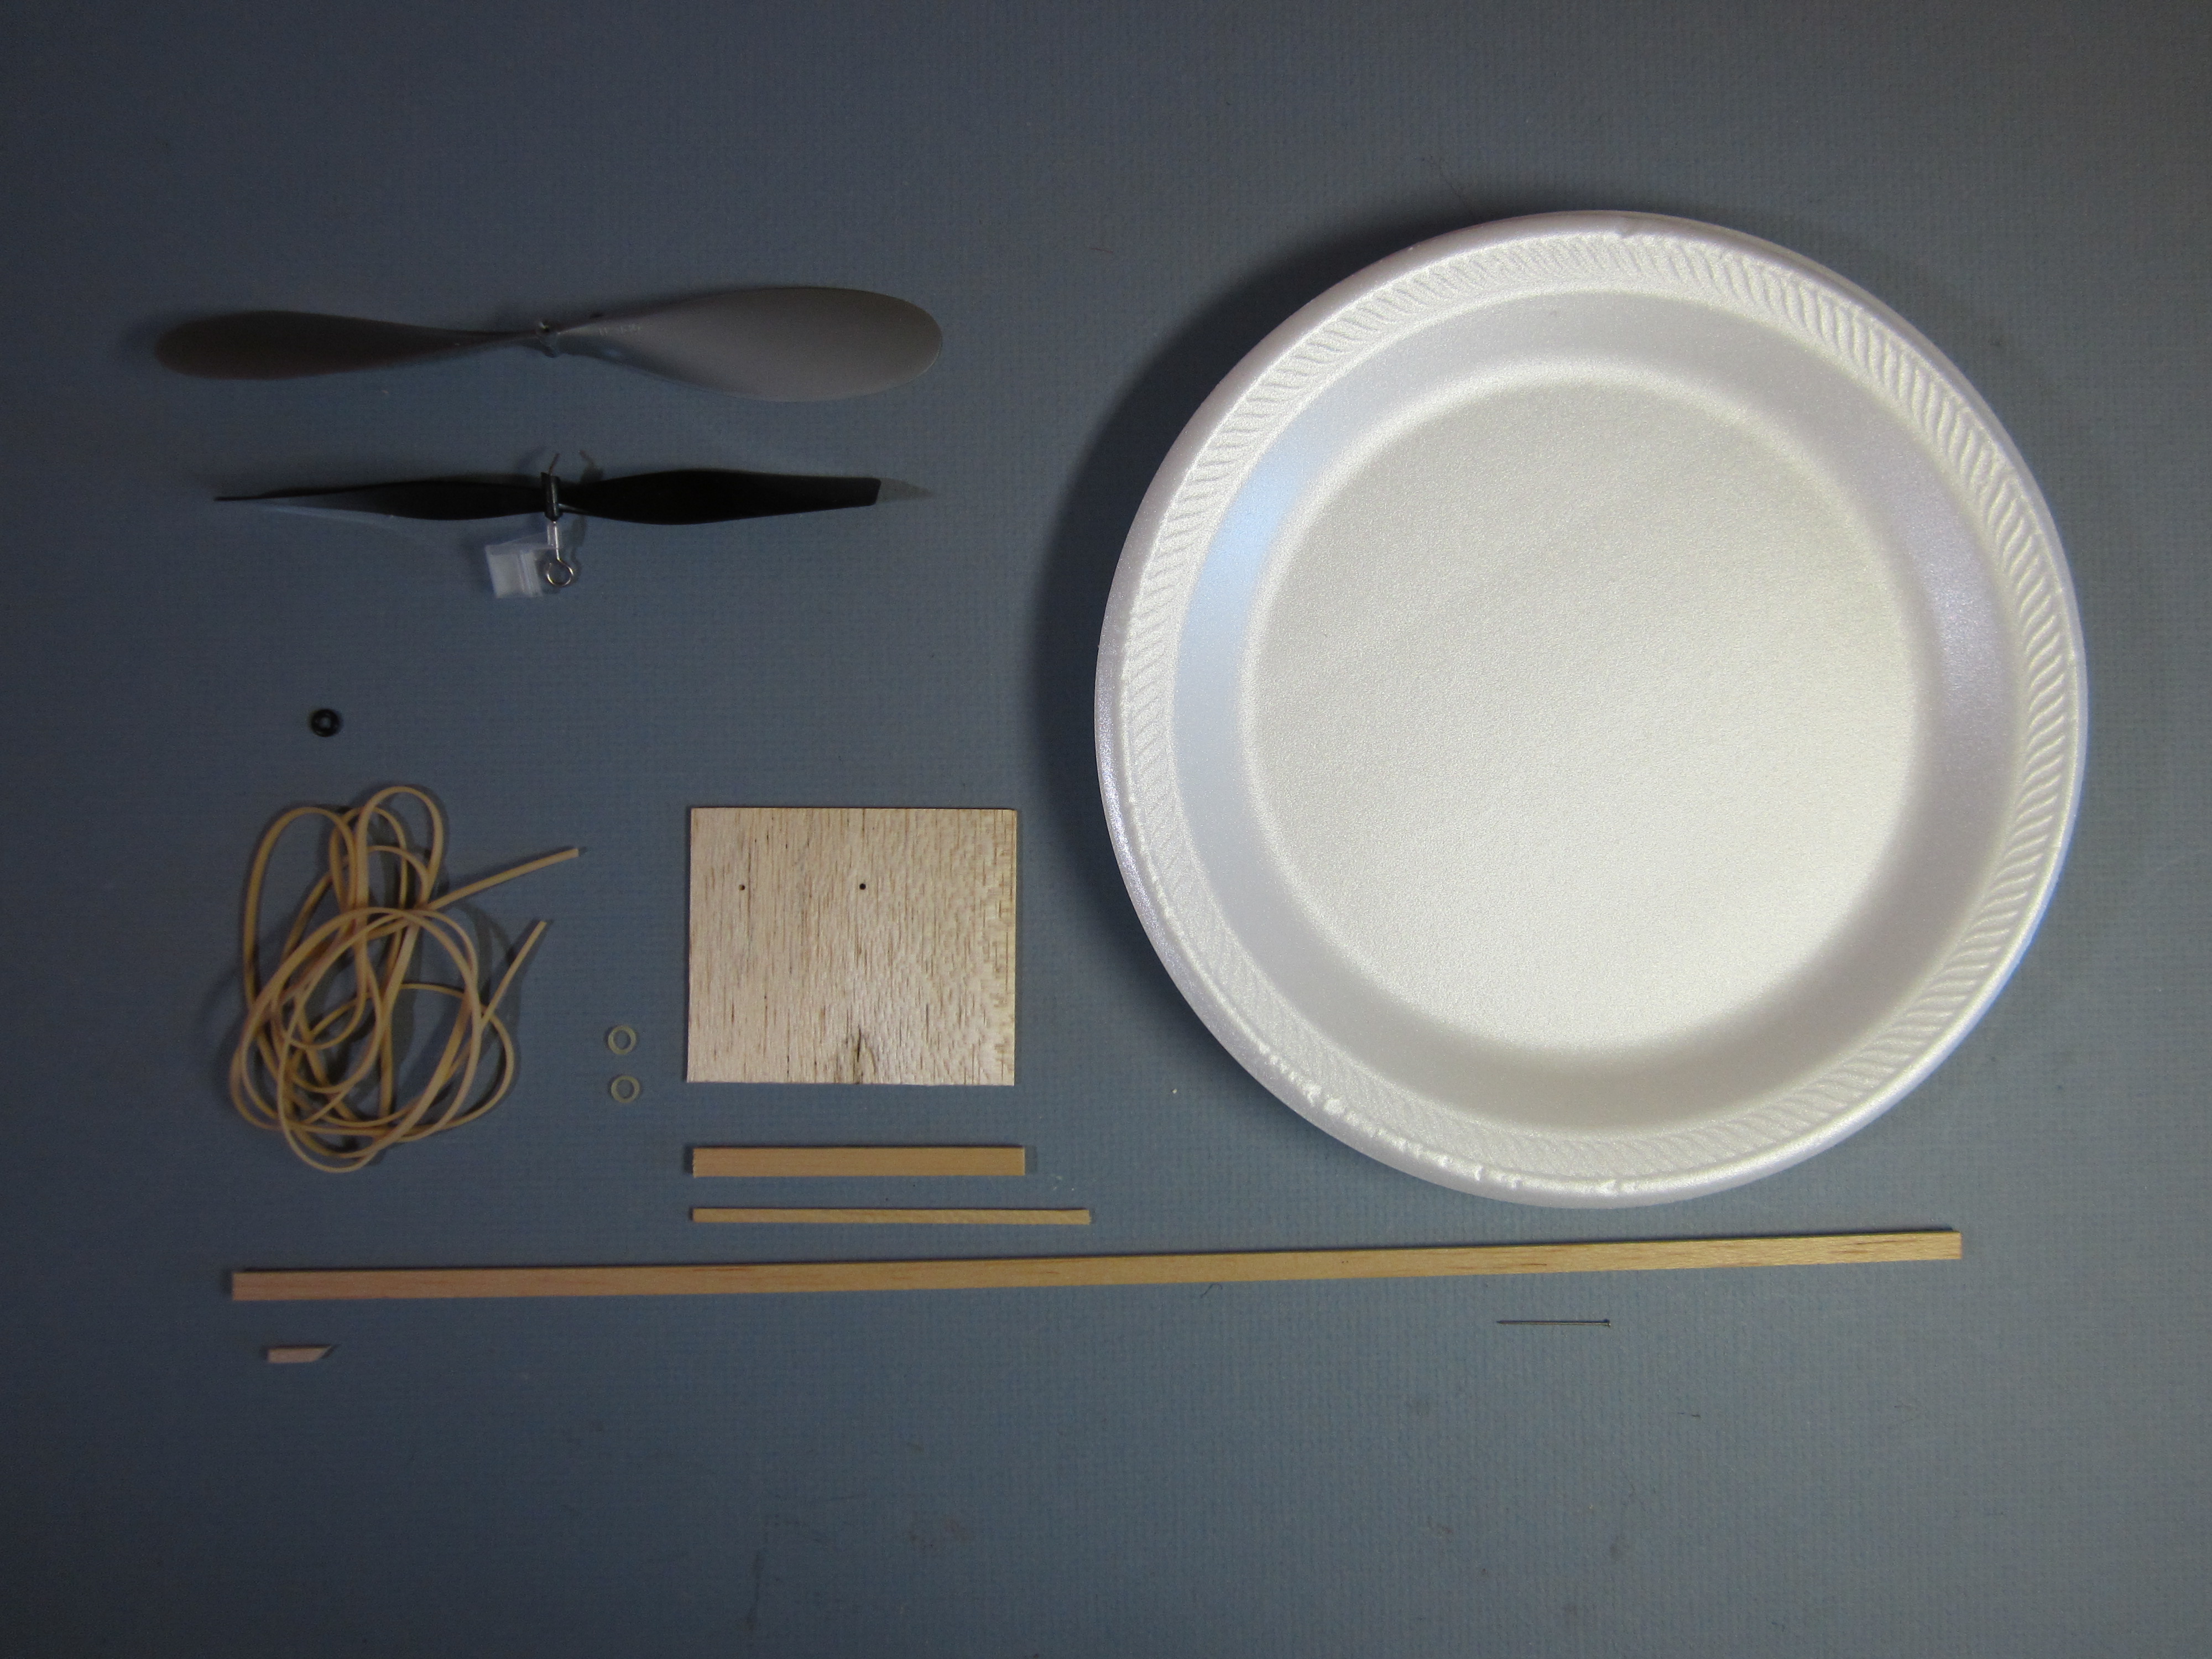
 This picture shows the parts you will make. There are only 18 parts in this airplane and 6 of them are preformed. The plastic prop, prop bearing/hanger and steel prop shaft will be bought. The rubber motor is cut from a length of strip and tied into a loop. The motor is looped around a hook on the back of the prop shaft and a wire hook attached to the back end of the fuselage stick. The wing mounts to a saddle made of balsa parts and held to the stick by two dental rubber bands. The flight surfaces are cut from foam plates. The wing is creased to form a cambered airfoil shape. This curve improves both the aerodynamics and the strength of the wing compared with a flat plate.
Gather Materials
 Here is what you will need to build your own Snowflake.
A 7″ Peck Polymers plastic propeller.
You can use the bearing and shaft from a 6″ propeller assembly, as I did, or you can order the Prop Hanger and Shaft separately. You can make your own shaft from 0.039″ steel wire, which matches the diameter of the wire on the 6″ propeller assembly.
The stock rubber motor is 52 1/2″ of 3/32″ rubber strip. This will make a 26″ loop, with an estimated maximum turn count of around 3,000 turns.
While you are there, get a winder.
You can put more turns into a motor with less chance of breaking if you use motor lube. You can make your own lube by mixing together equal volumes of green soap and glycerin. The green soap is slippery and the glycerin is a moisturizer.
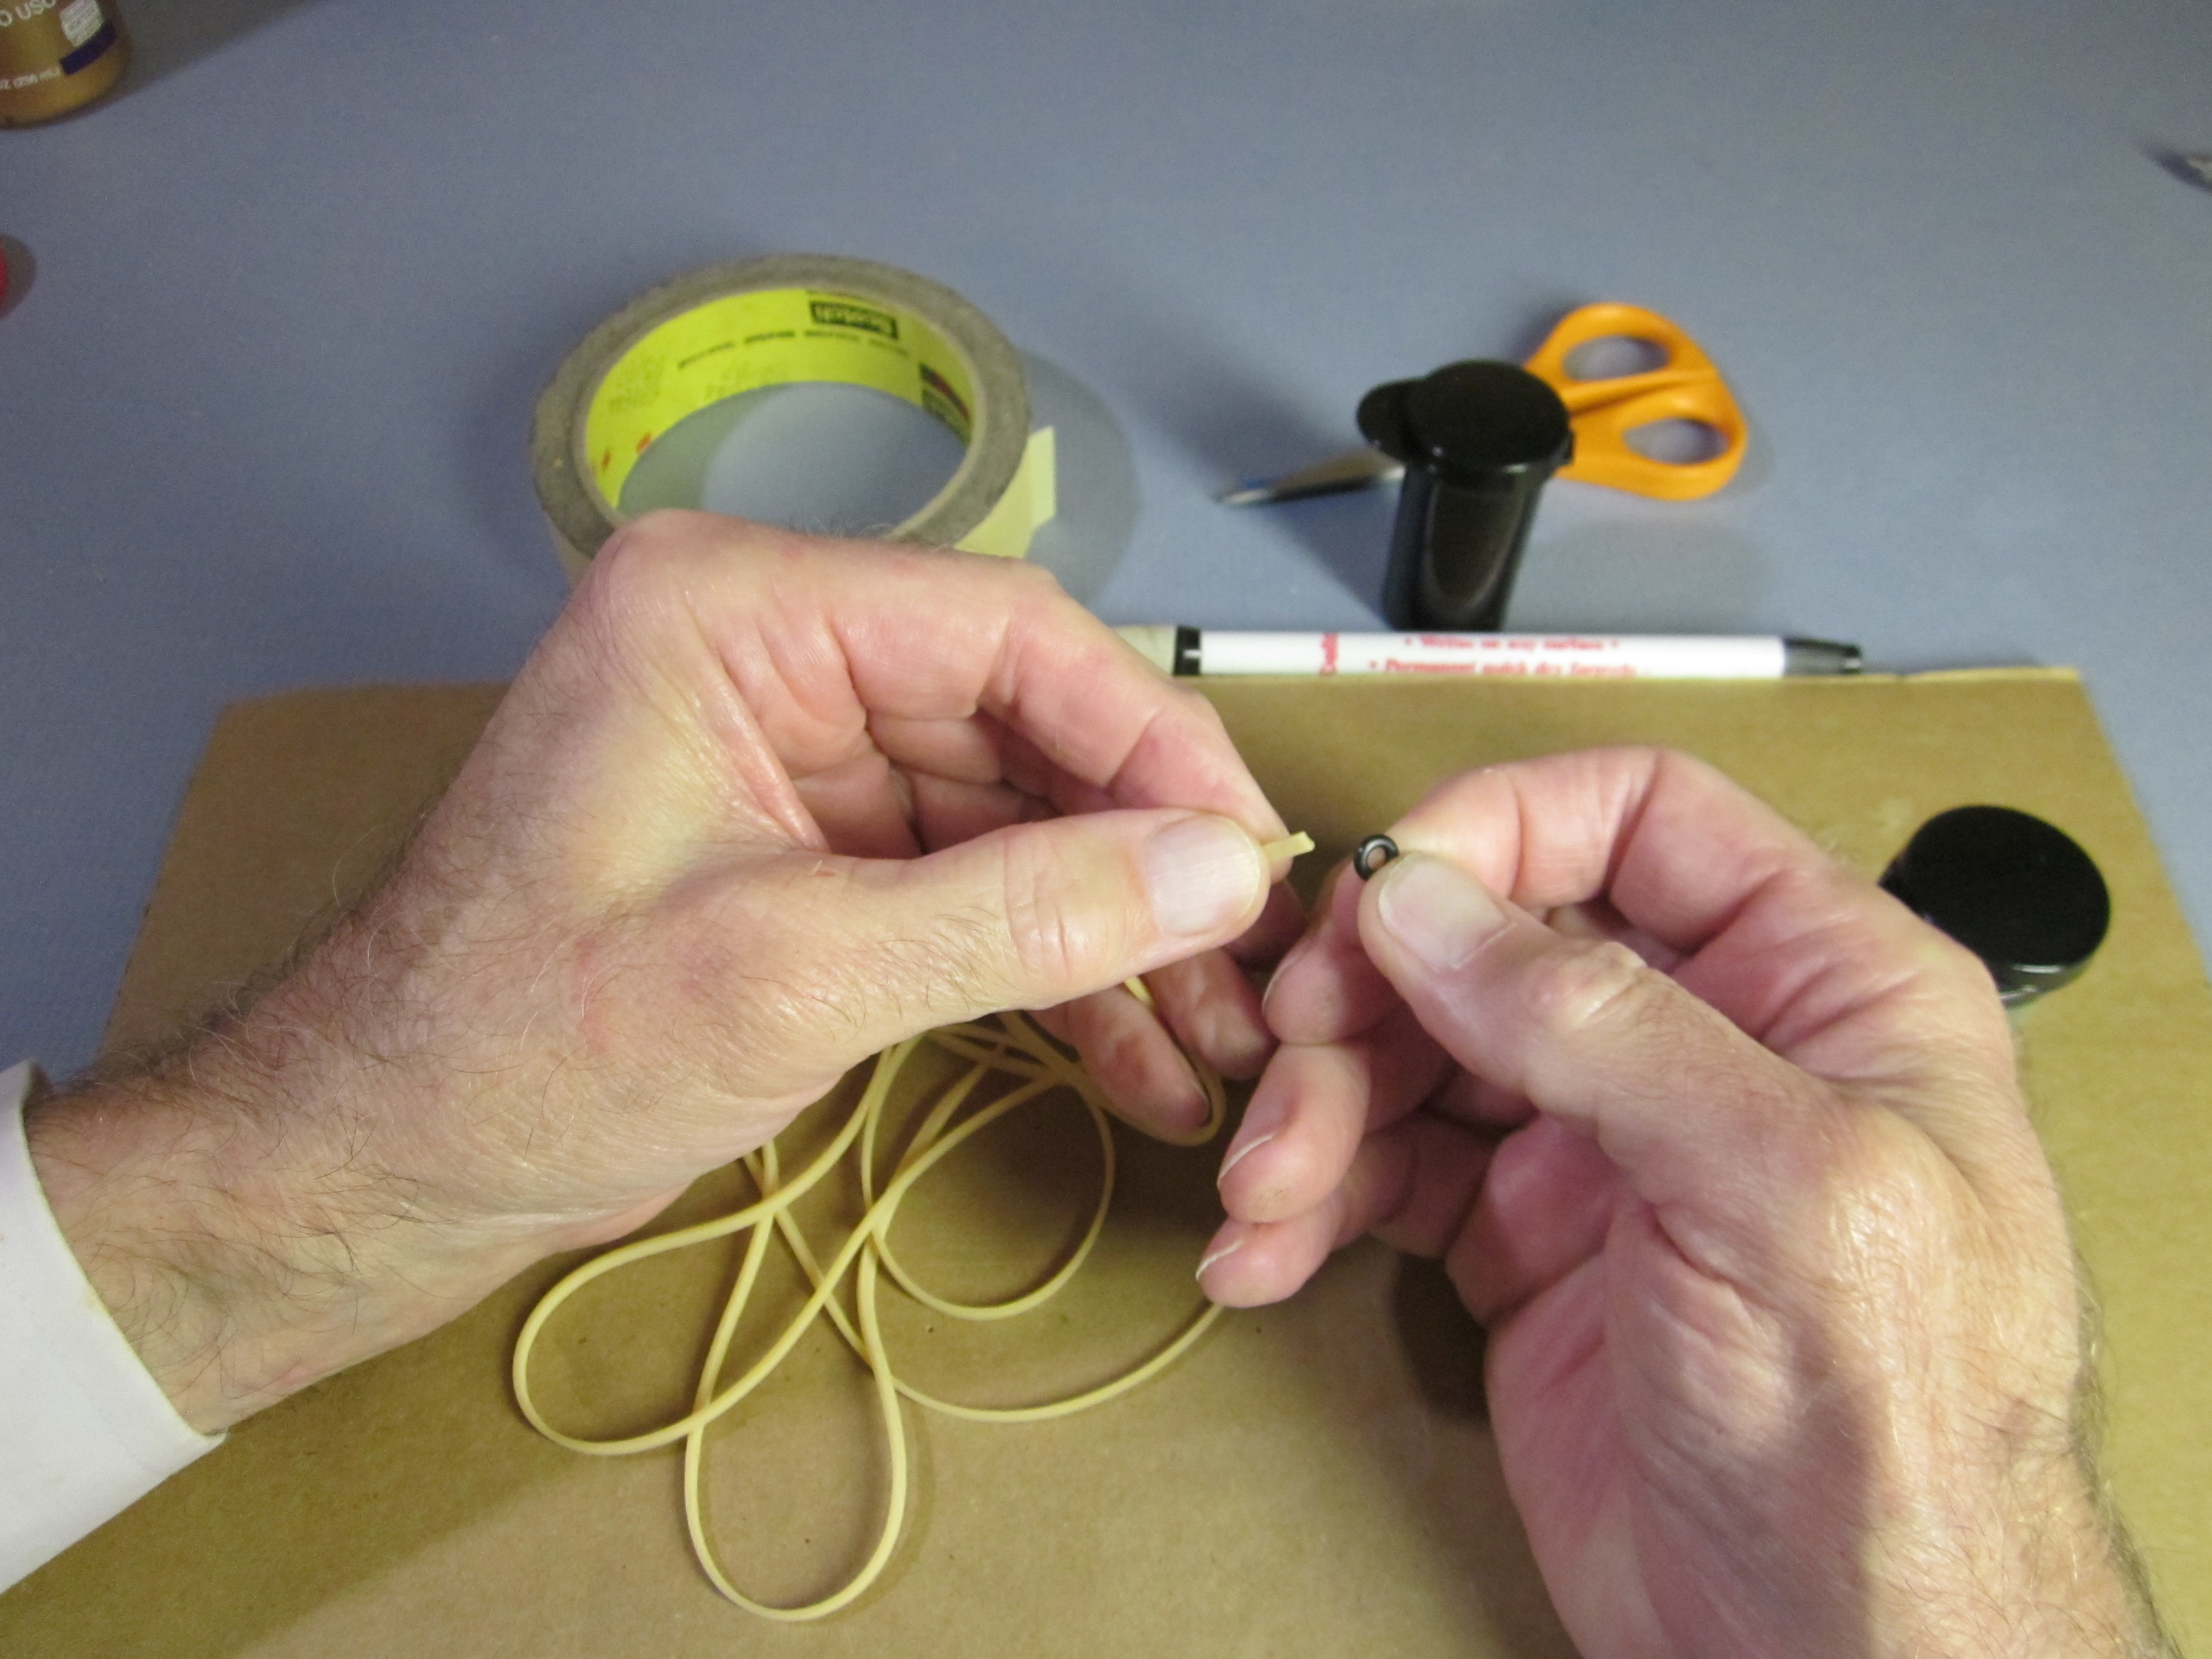
It is easier to get the tightly wound motor onto the hook if it has an O-Ring at the back end.
Heavy 3/16″ dental bands are used to hold the wing on.
You will need several sizes of balsa wood, which you can find at local hobby, hardware, art and craft stores, or you can order from Sig or Midwest. Experienced builders can use lighter wood. Inexperienced builders may be safer with harder wood, especially for the fuselage.
The fuselage stick is a 16″ length of 1/8″ x 1/4″. (If you make it 15″, you can get two fuselages and two rib pieces from the standard 36″ stick. This would work well for a group build.)
The nose block is 1/2″ of 1/8″ square. This should be medium to hard wood.
The rib block is a 3″ length of 1/8″ x 1/4″. It can be light wood, or it can come from the same stock as the fuselage stick.
The hold down stick is 3 5/8″ of 1/16″ x 1/8″. It should be medium to hard wood.
The wing saddle face plates are made from 1/16″ x 3″ sheet balsa. Each plane will need about a 1 1/4″ length. The grain goes vertical.
Each plane needs a rear motor hook. These are easy to make from a straight sewing pin, 0.020″ steel wire or you can buy them.
Each plane will require four foam plates. We have been calling these 9″ plates, although the package says they are 8 7/8″ diameter. Make sure there is at least a 6″ diameter flat circle in the center. Some 8 7/8″ plates have only 5 1/2″ of flat area. You can use 1 mm Depron foam if you prefer, but planes made for the Foam Plate Airplane Contest must be made from plates.
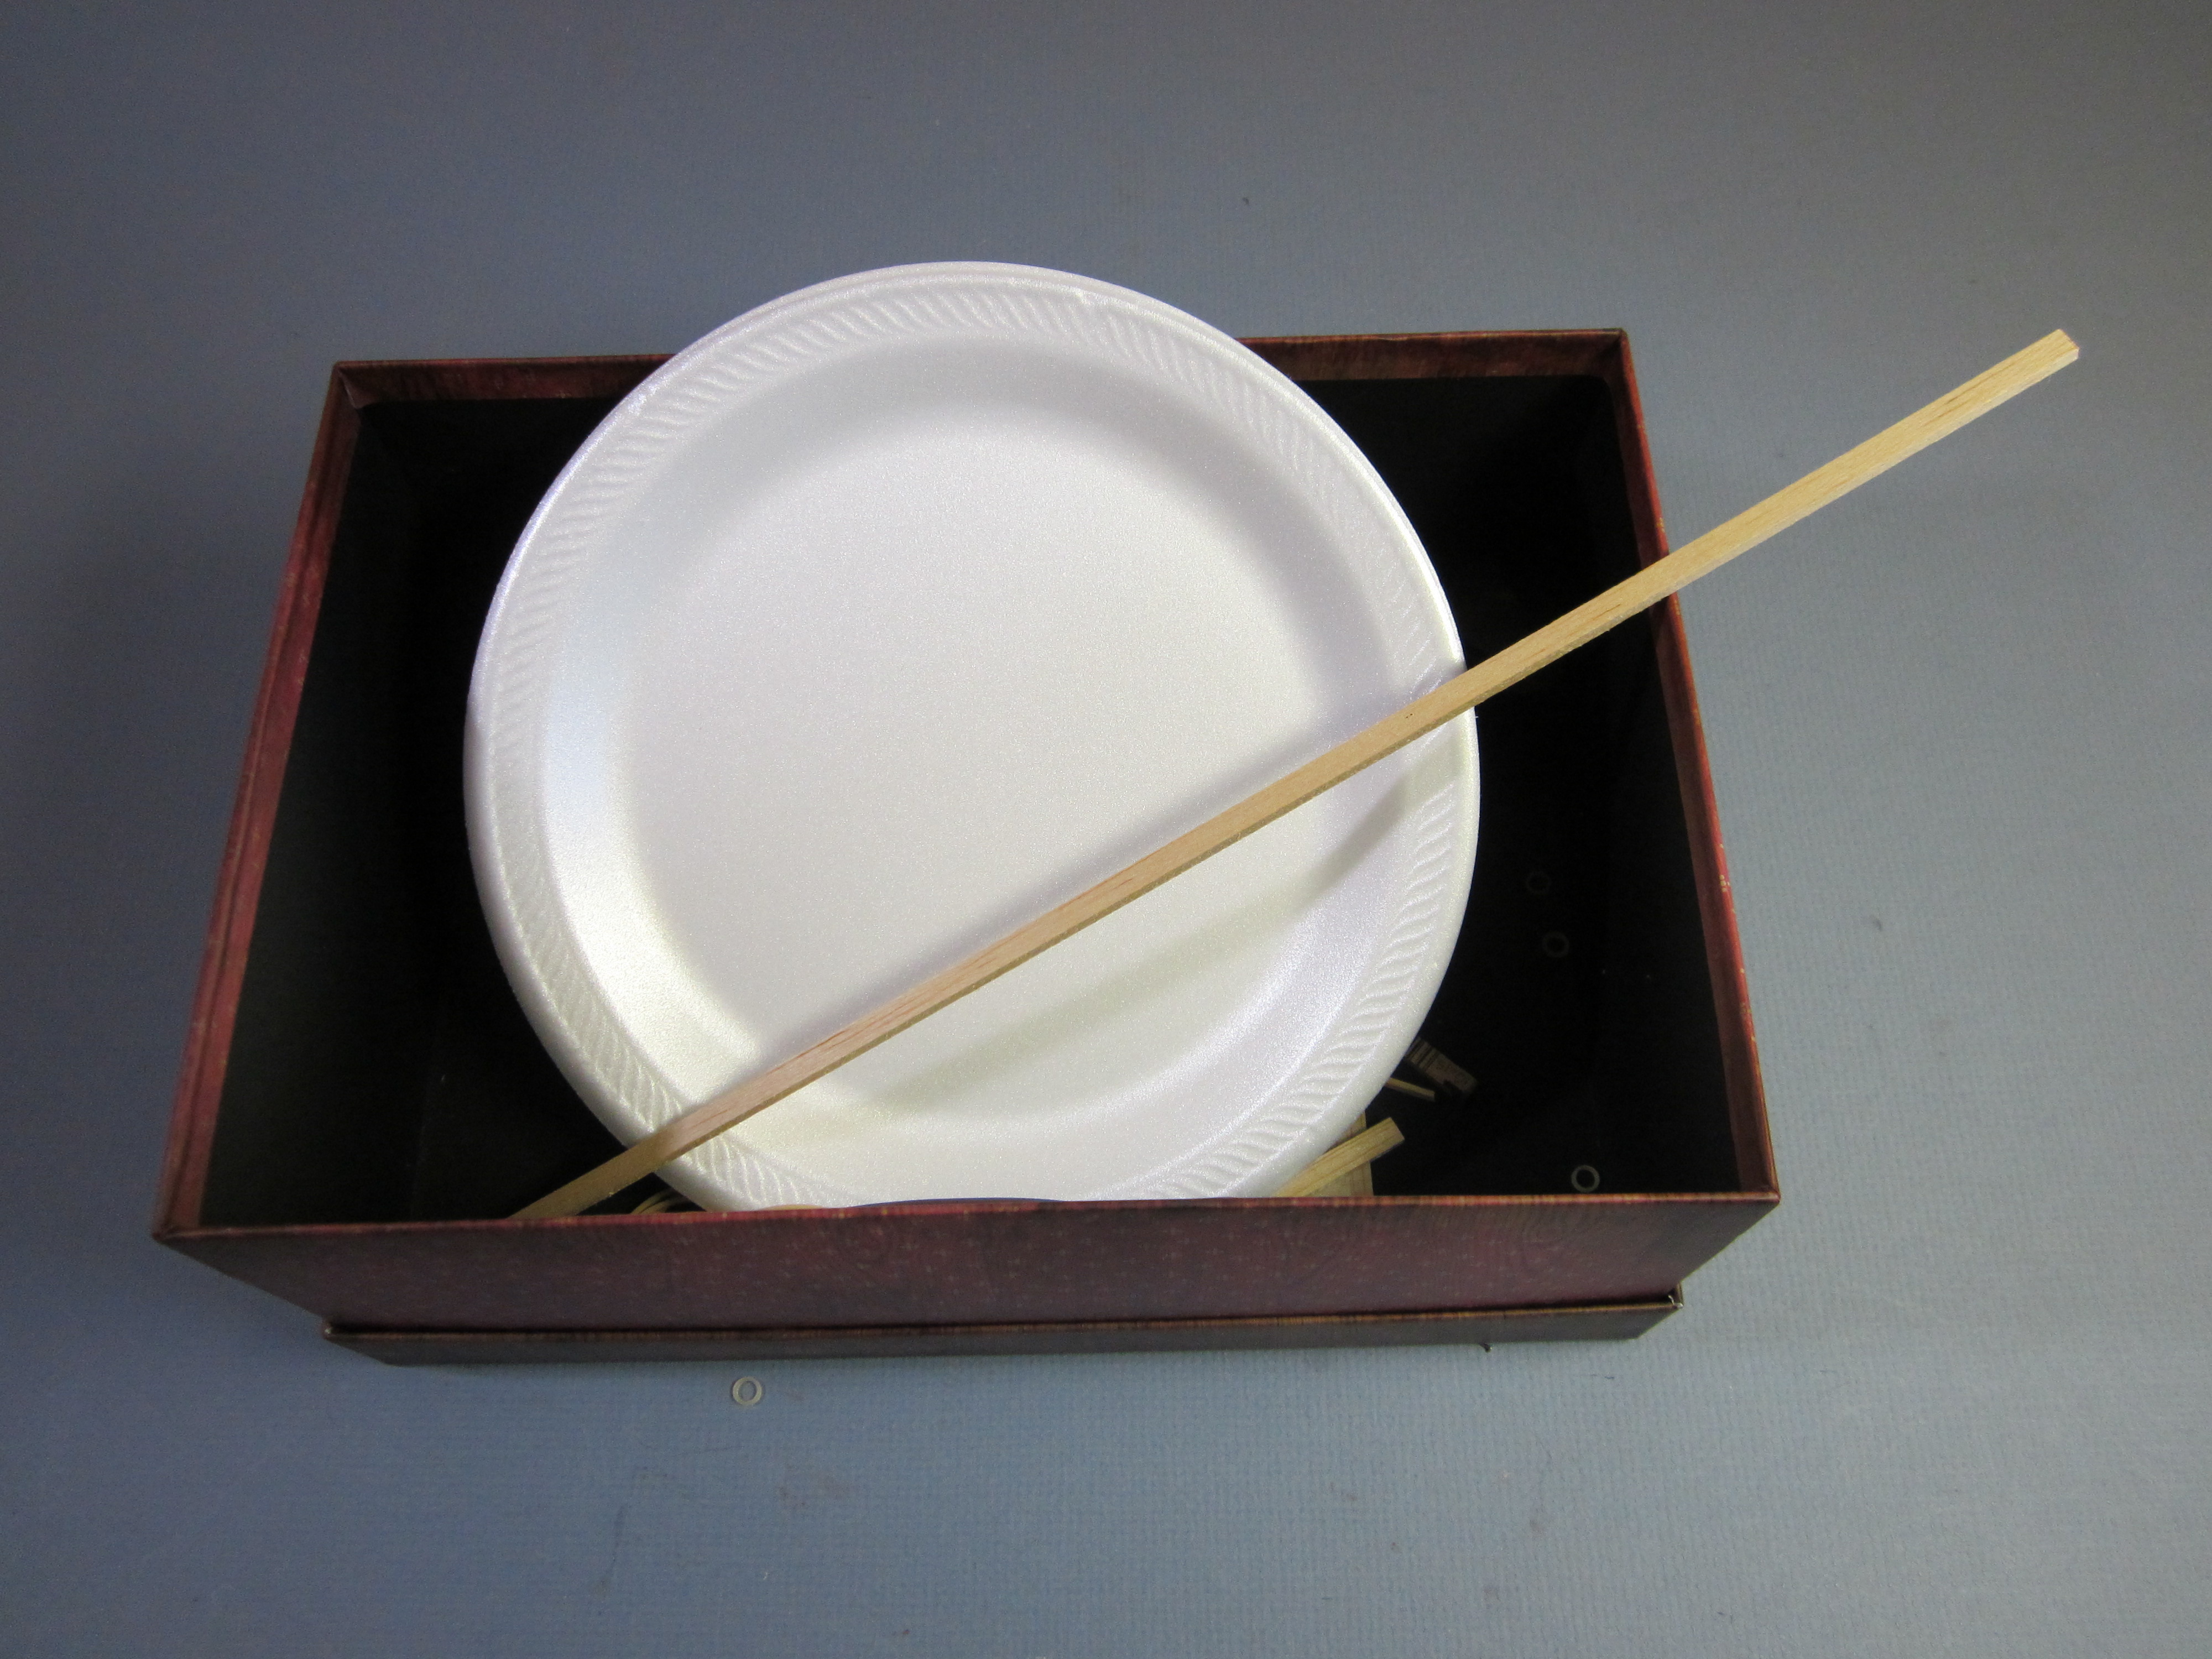 I find it is helpful to have a box in which to keep all the small parts and subassemblies, to keep things from wandering off and getting lost or broken.
Workplace and tools
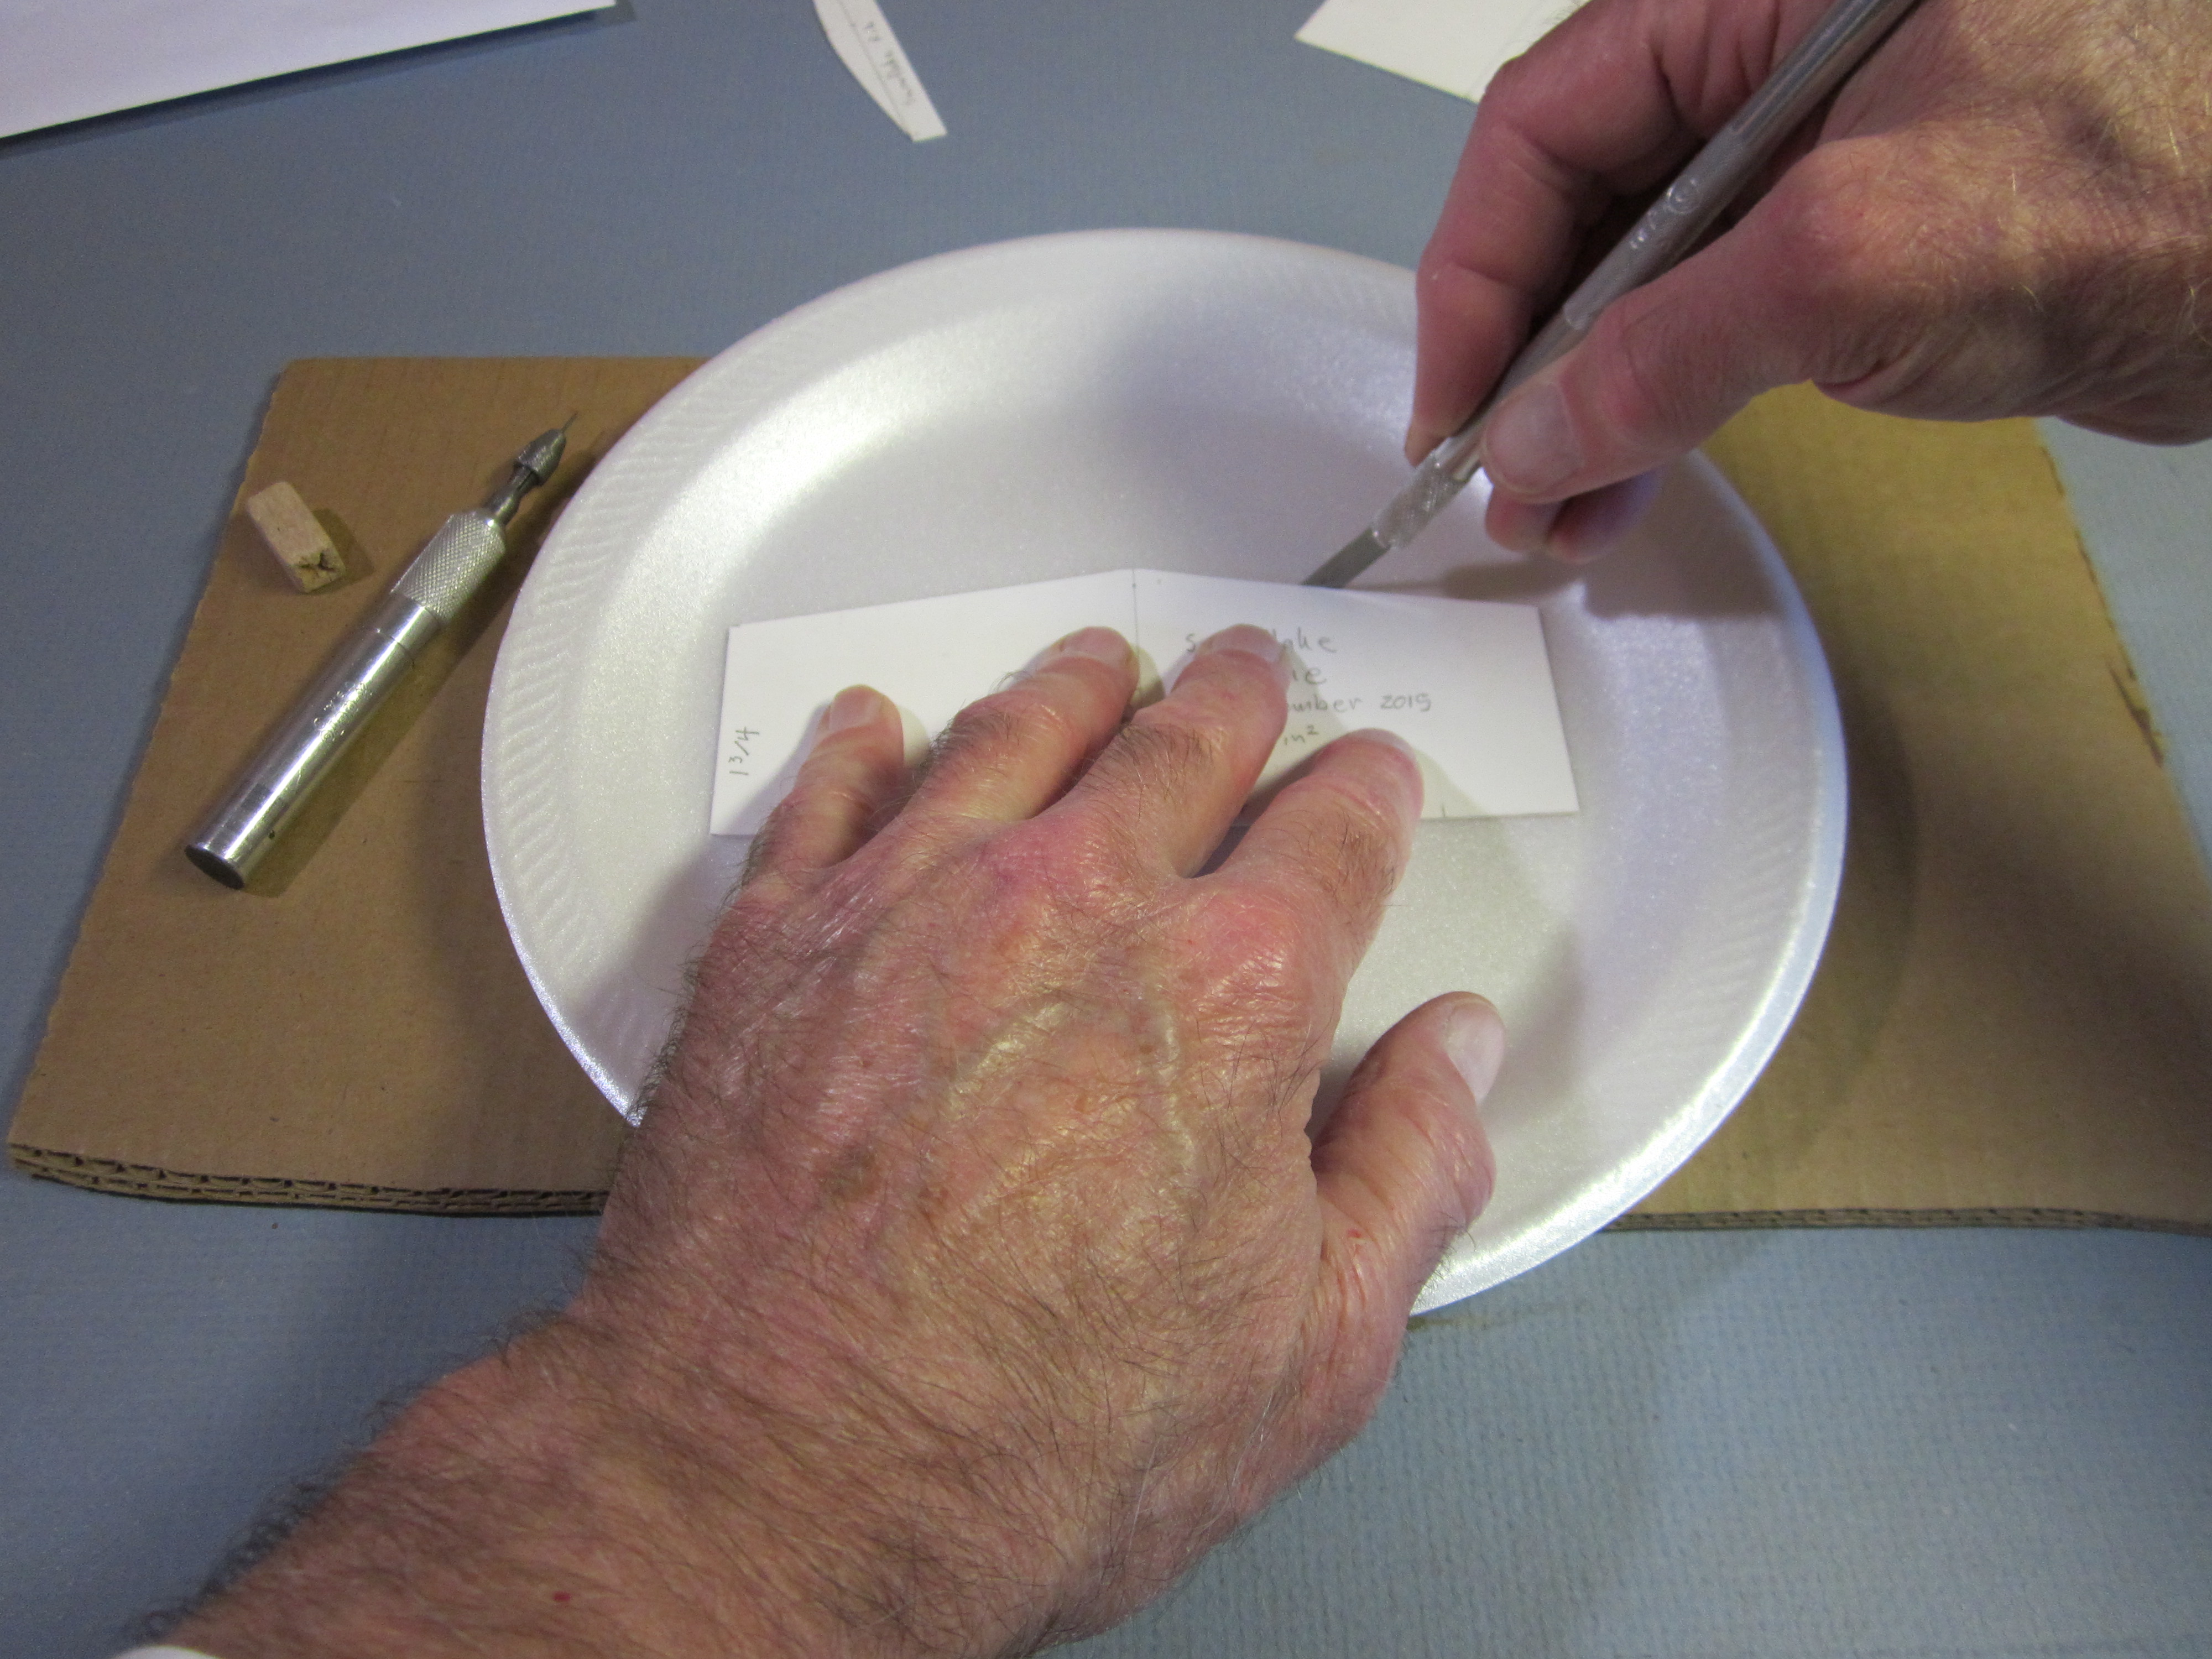
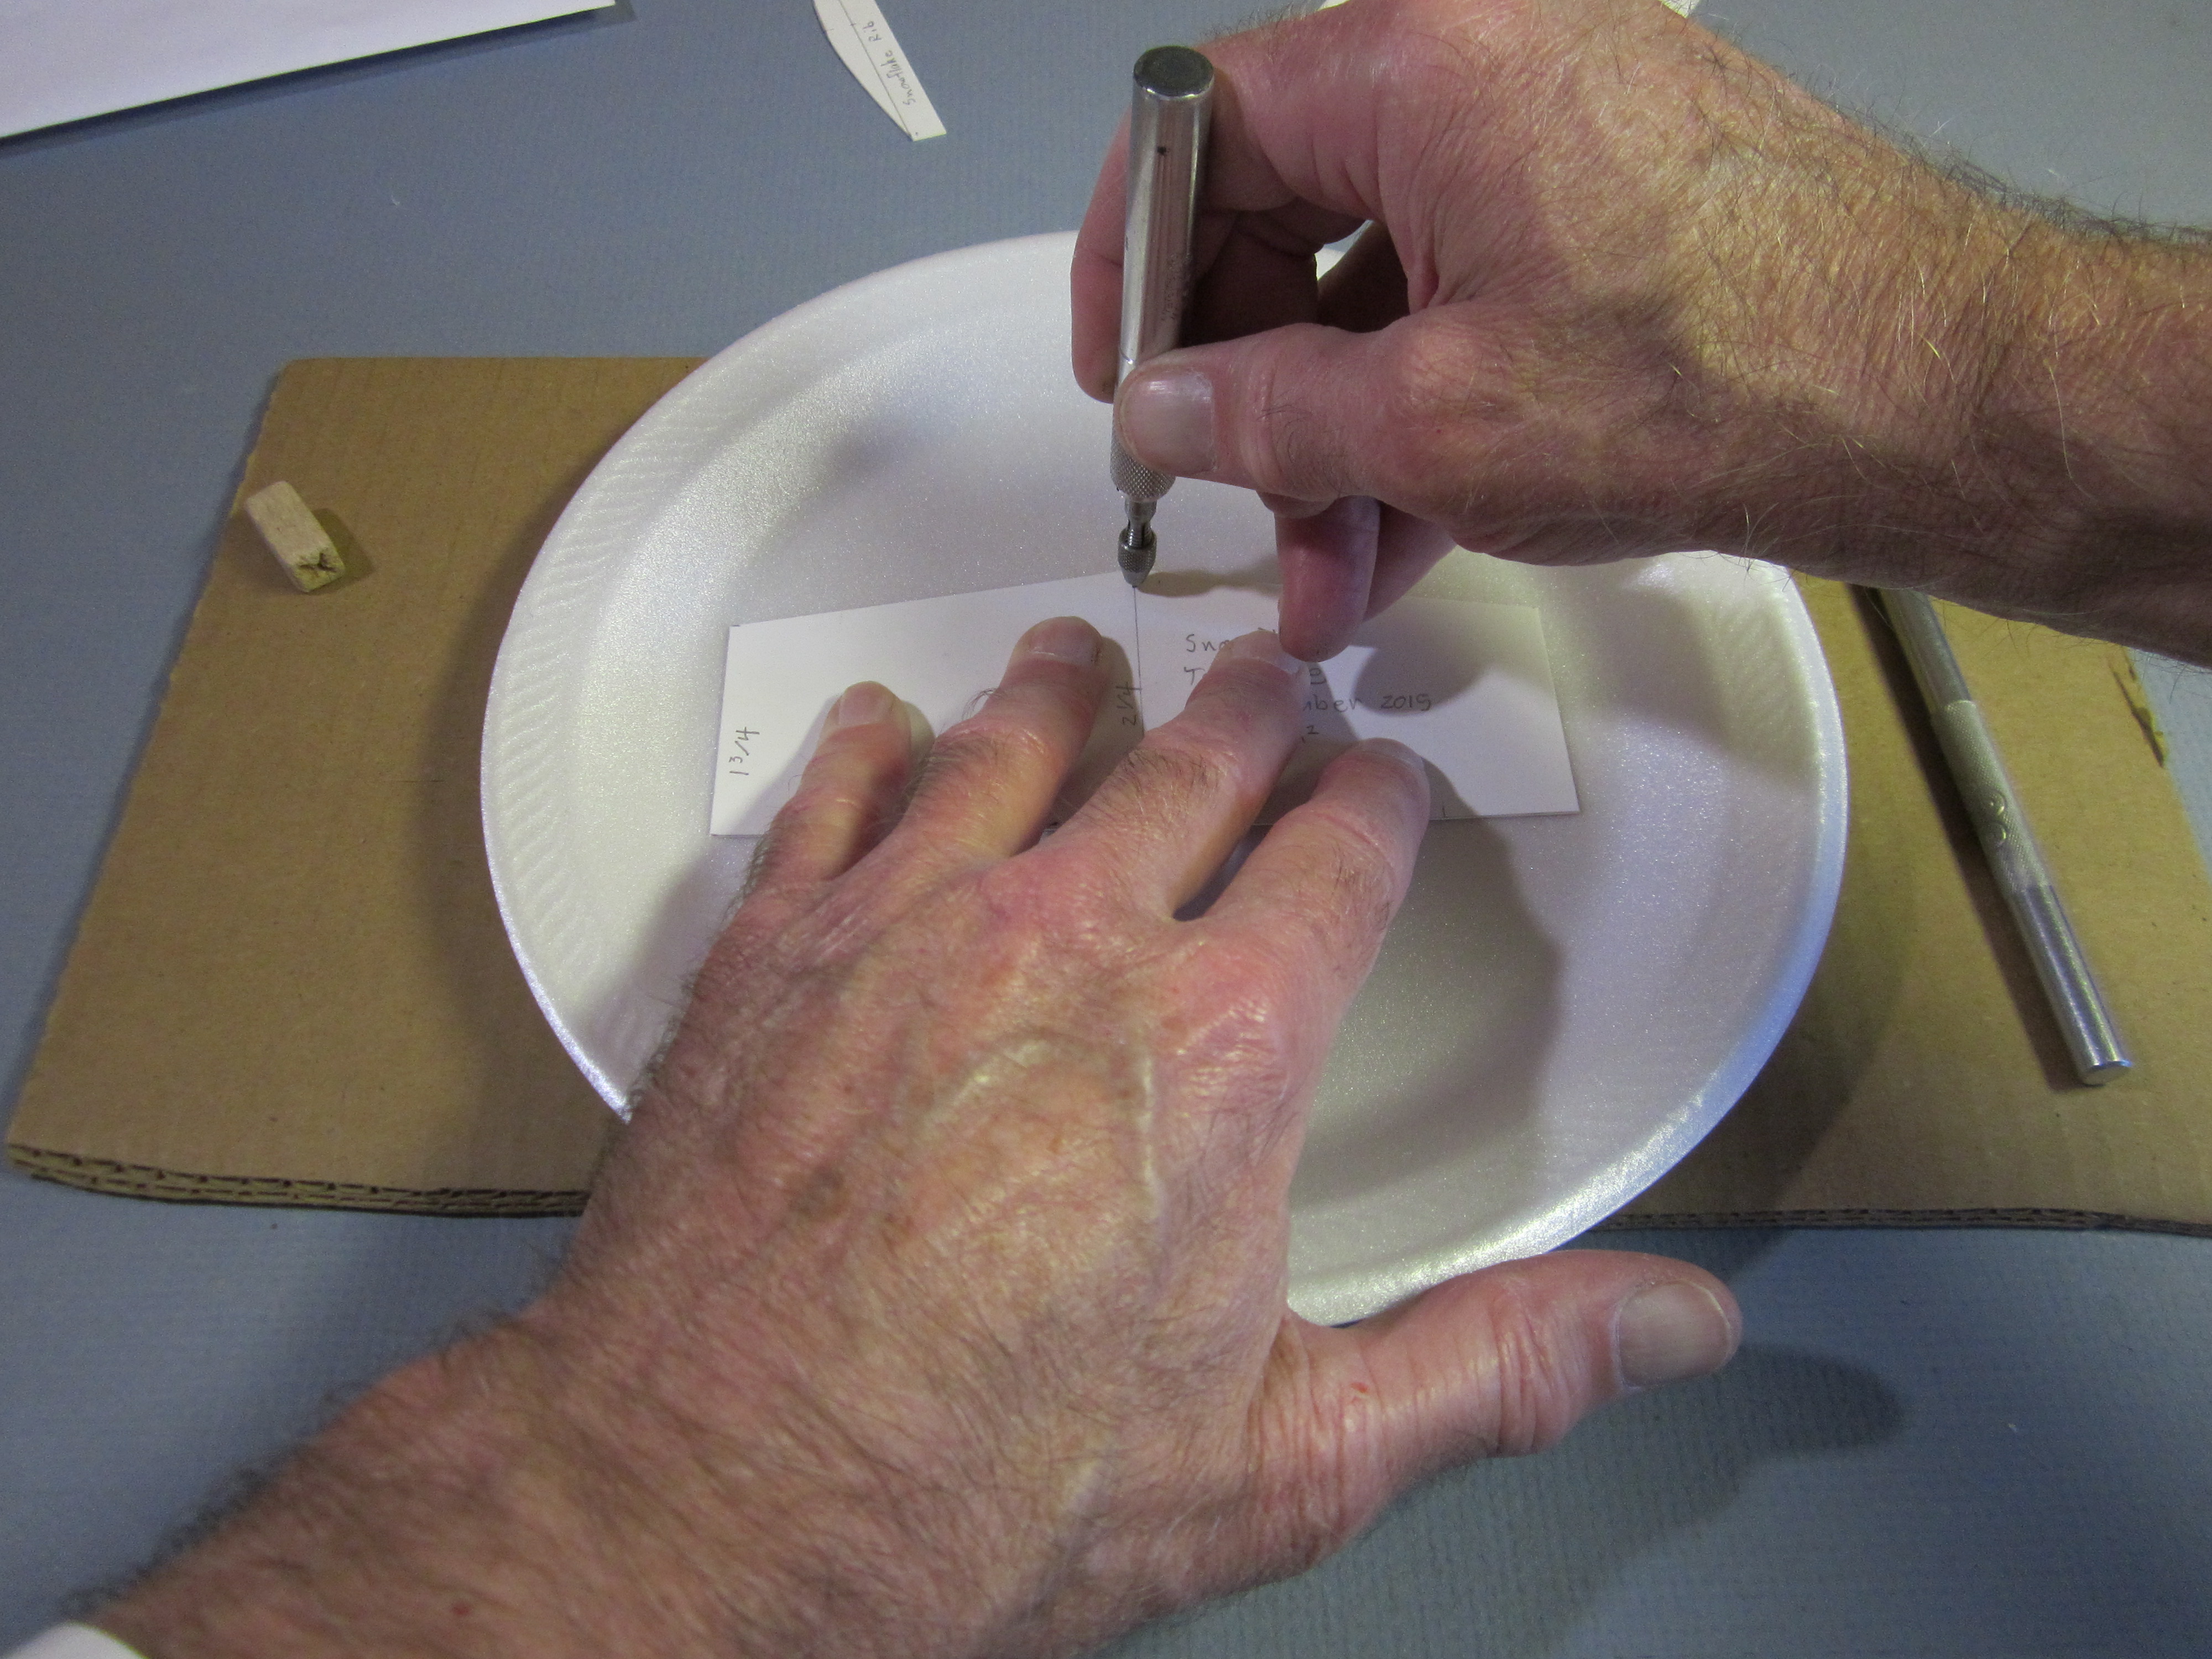
You will need a well lighted, flat surface to work on. You may want to protect the surface with a work board or several layers of newspaper. Cutting is done on a piece of corrugated box cardboard, to prevent cutting into the surface of the table.
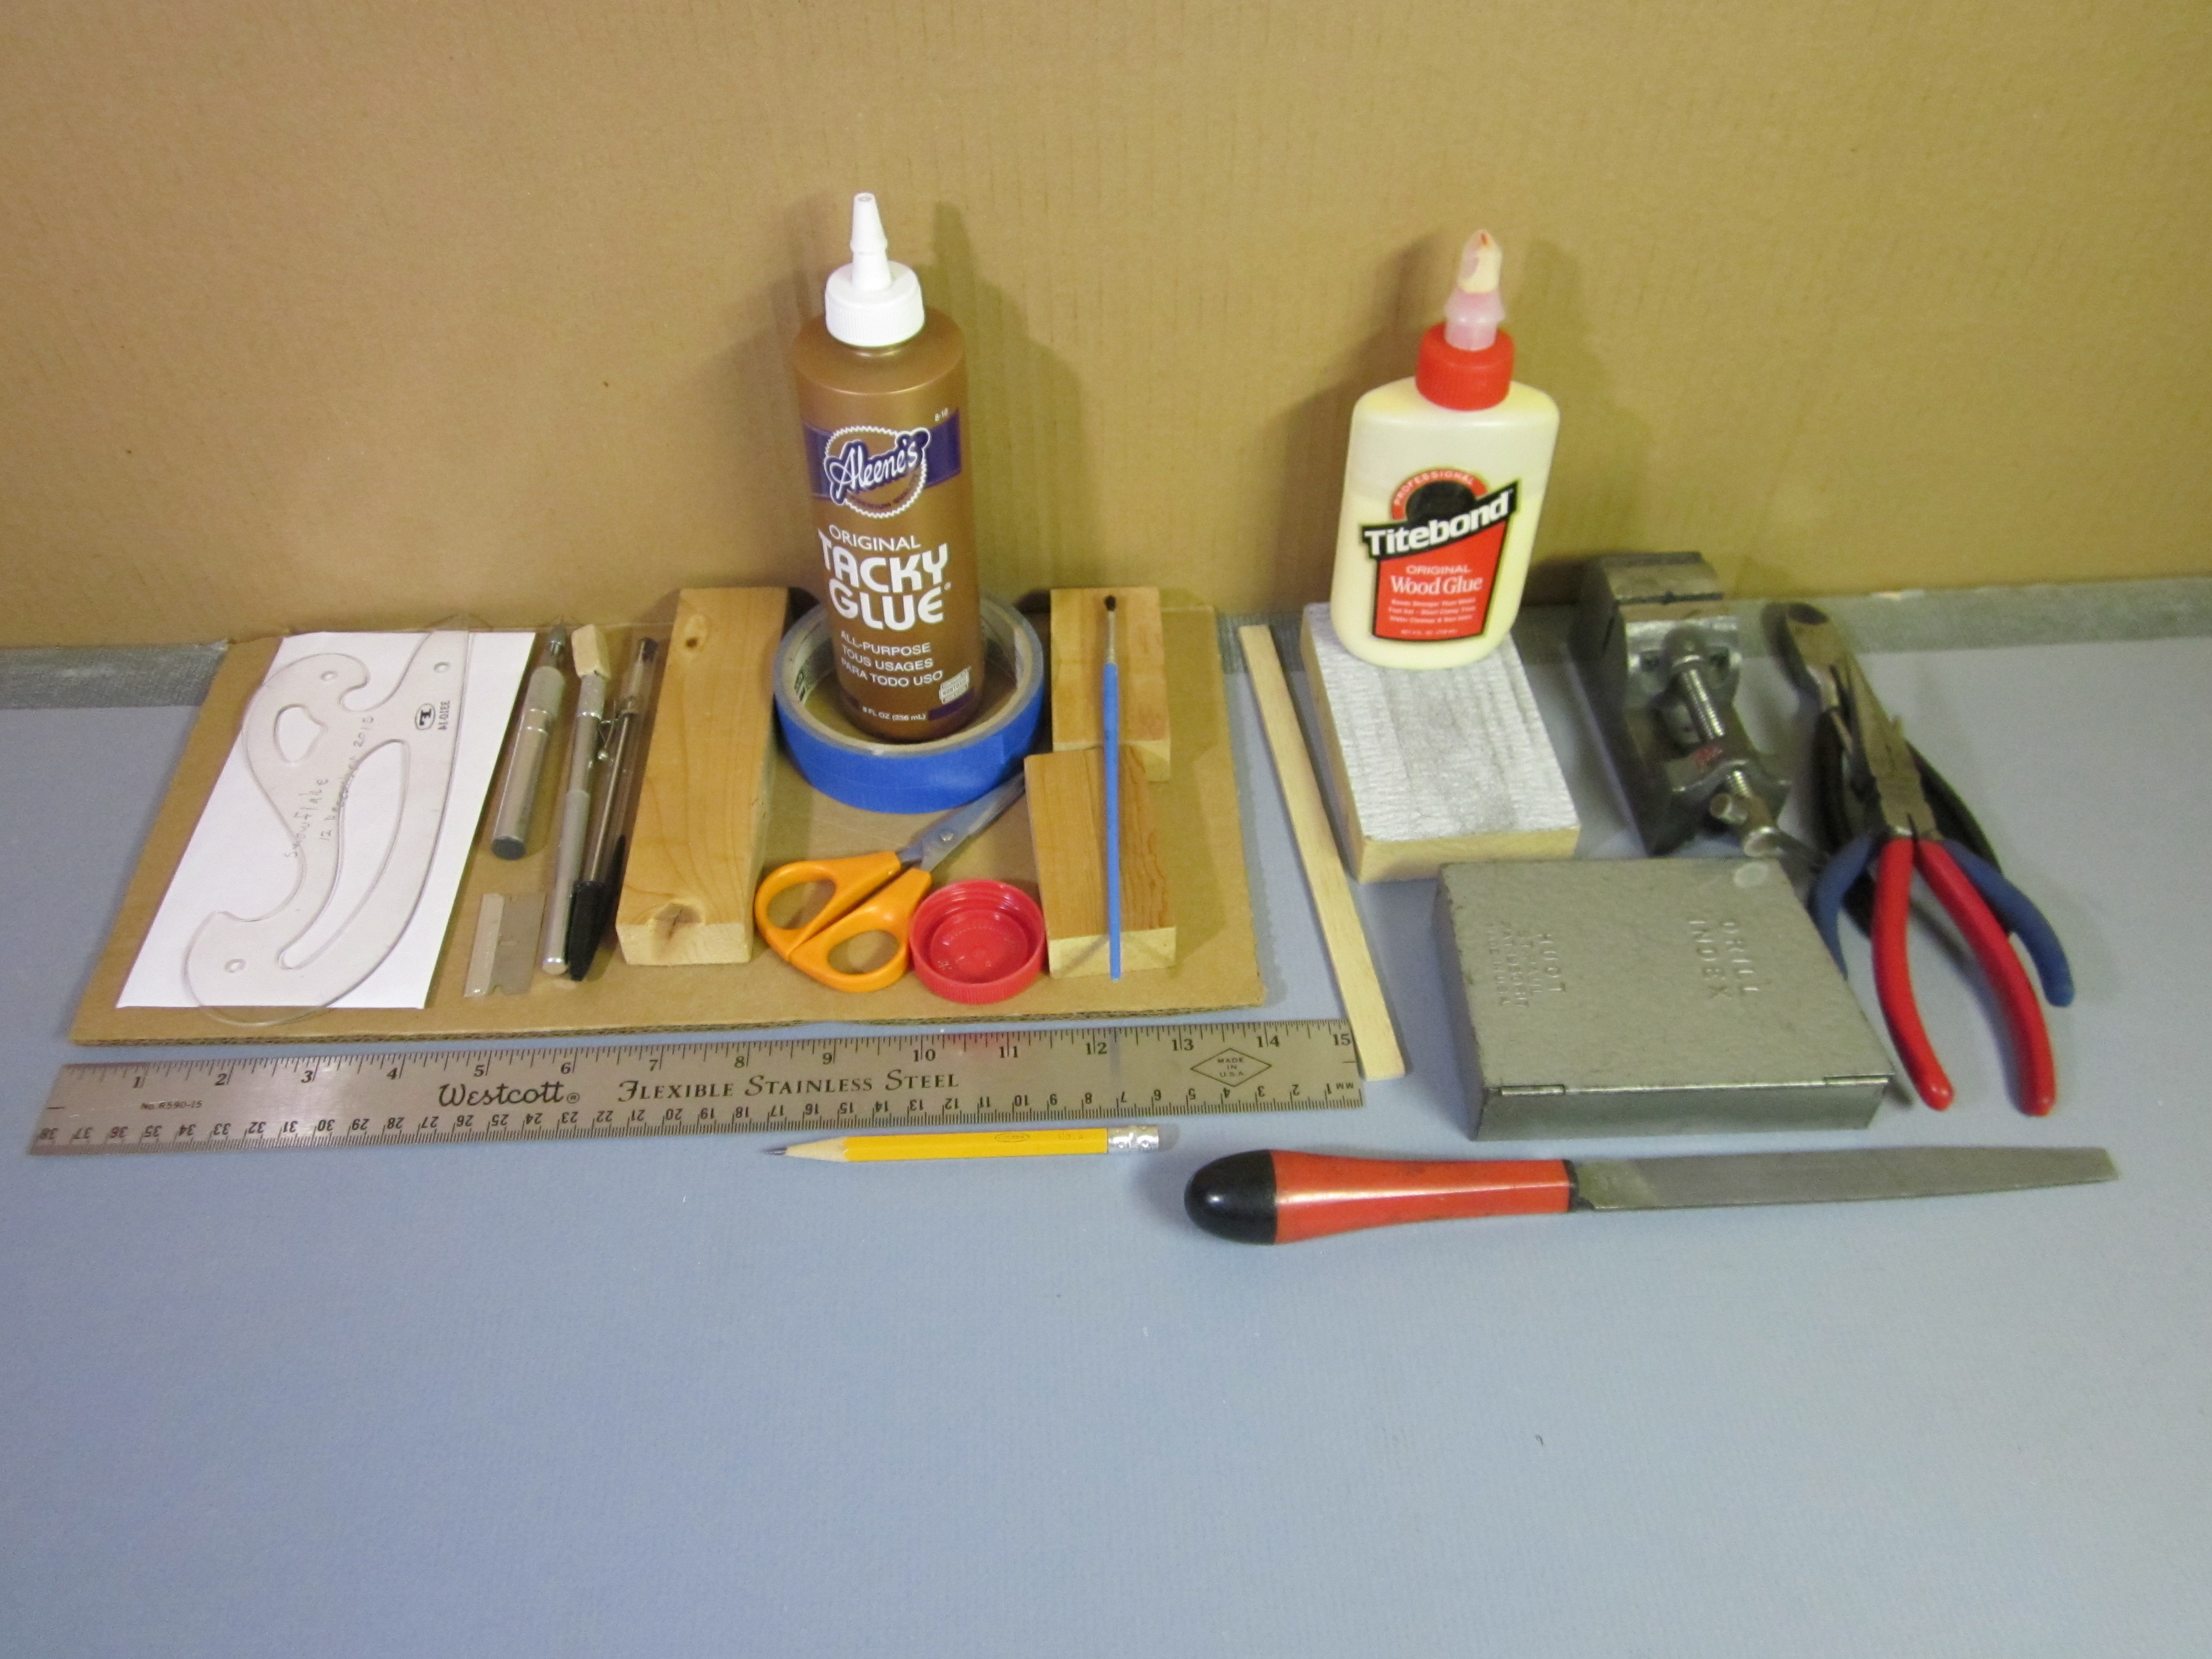 I keep my tools in a box, but I get tired of pawing through a jumble of tools looking for just the one I want. For a given project, I will need only certain ones. It is convenient to lay them out in plain sight across the back of my work table in roughly the order in which they will be needed.
Make Templates
The foam parts are made by cutting around cardboard patterns or templates. We must make the templates first.
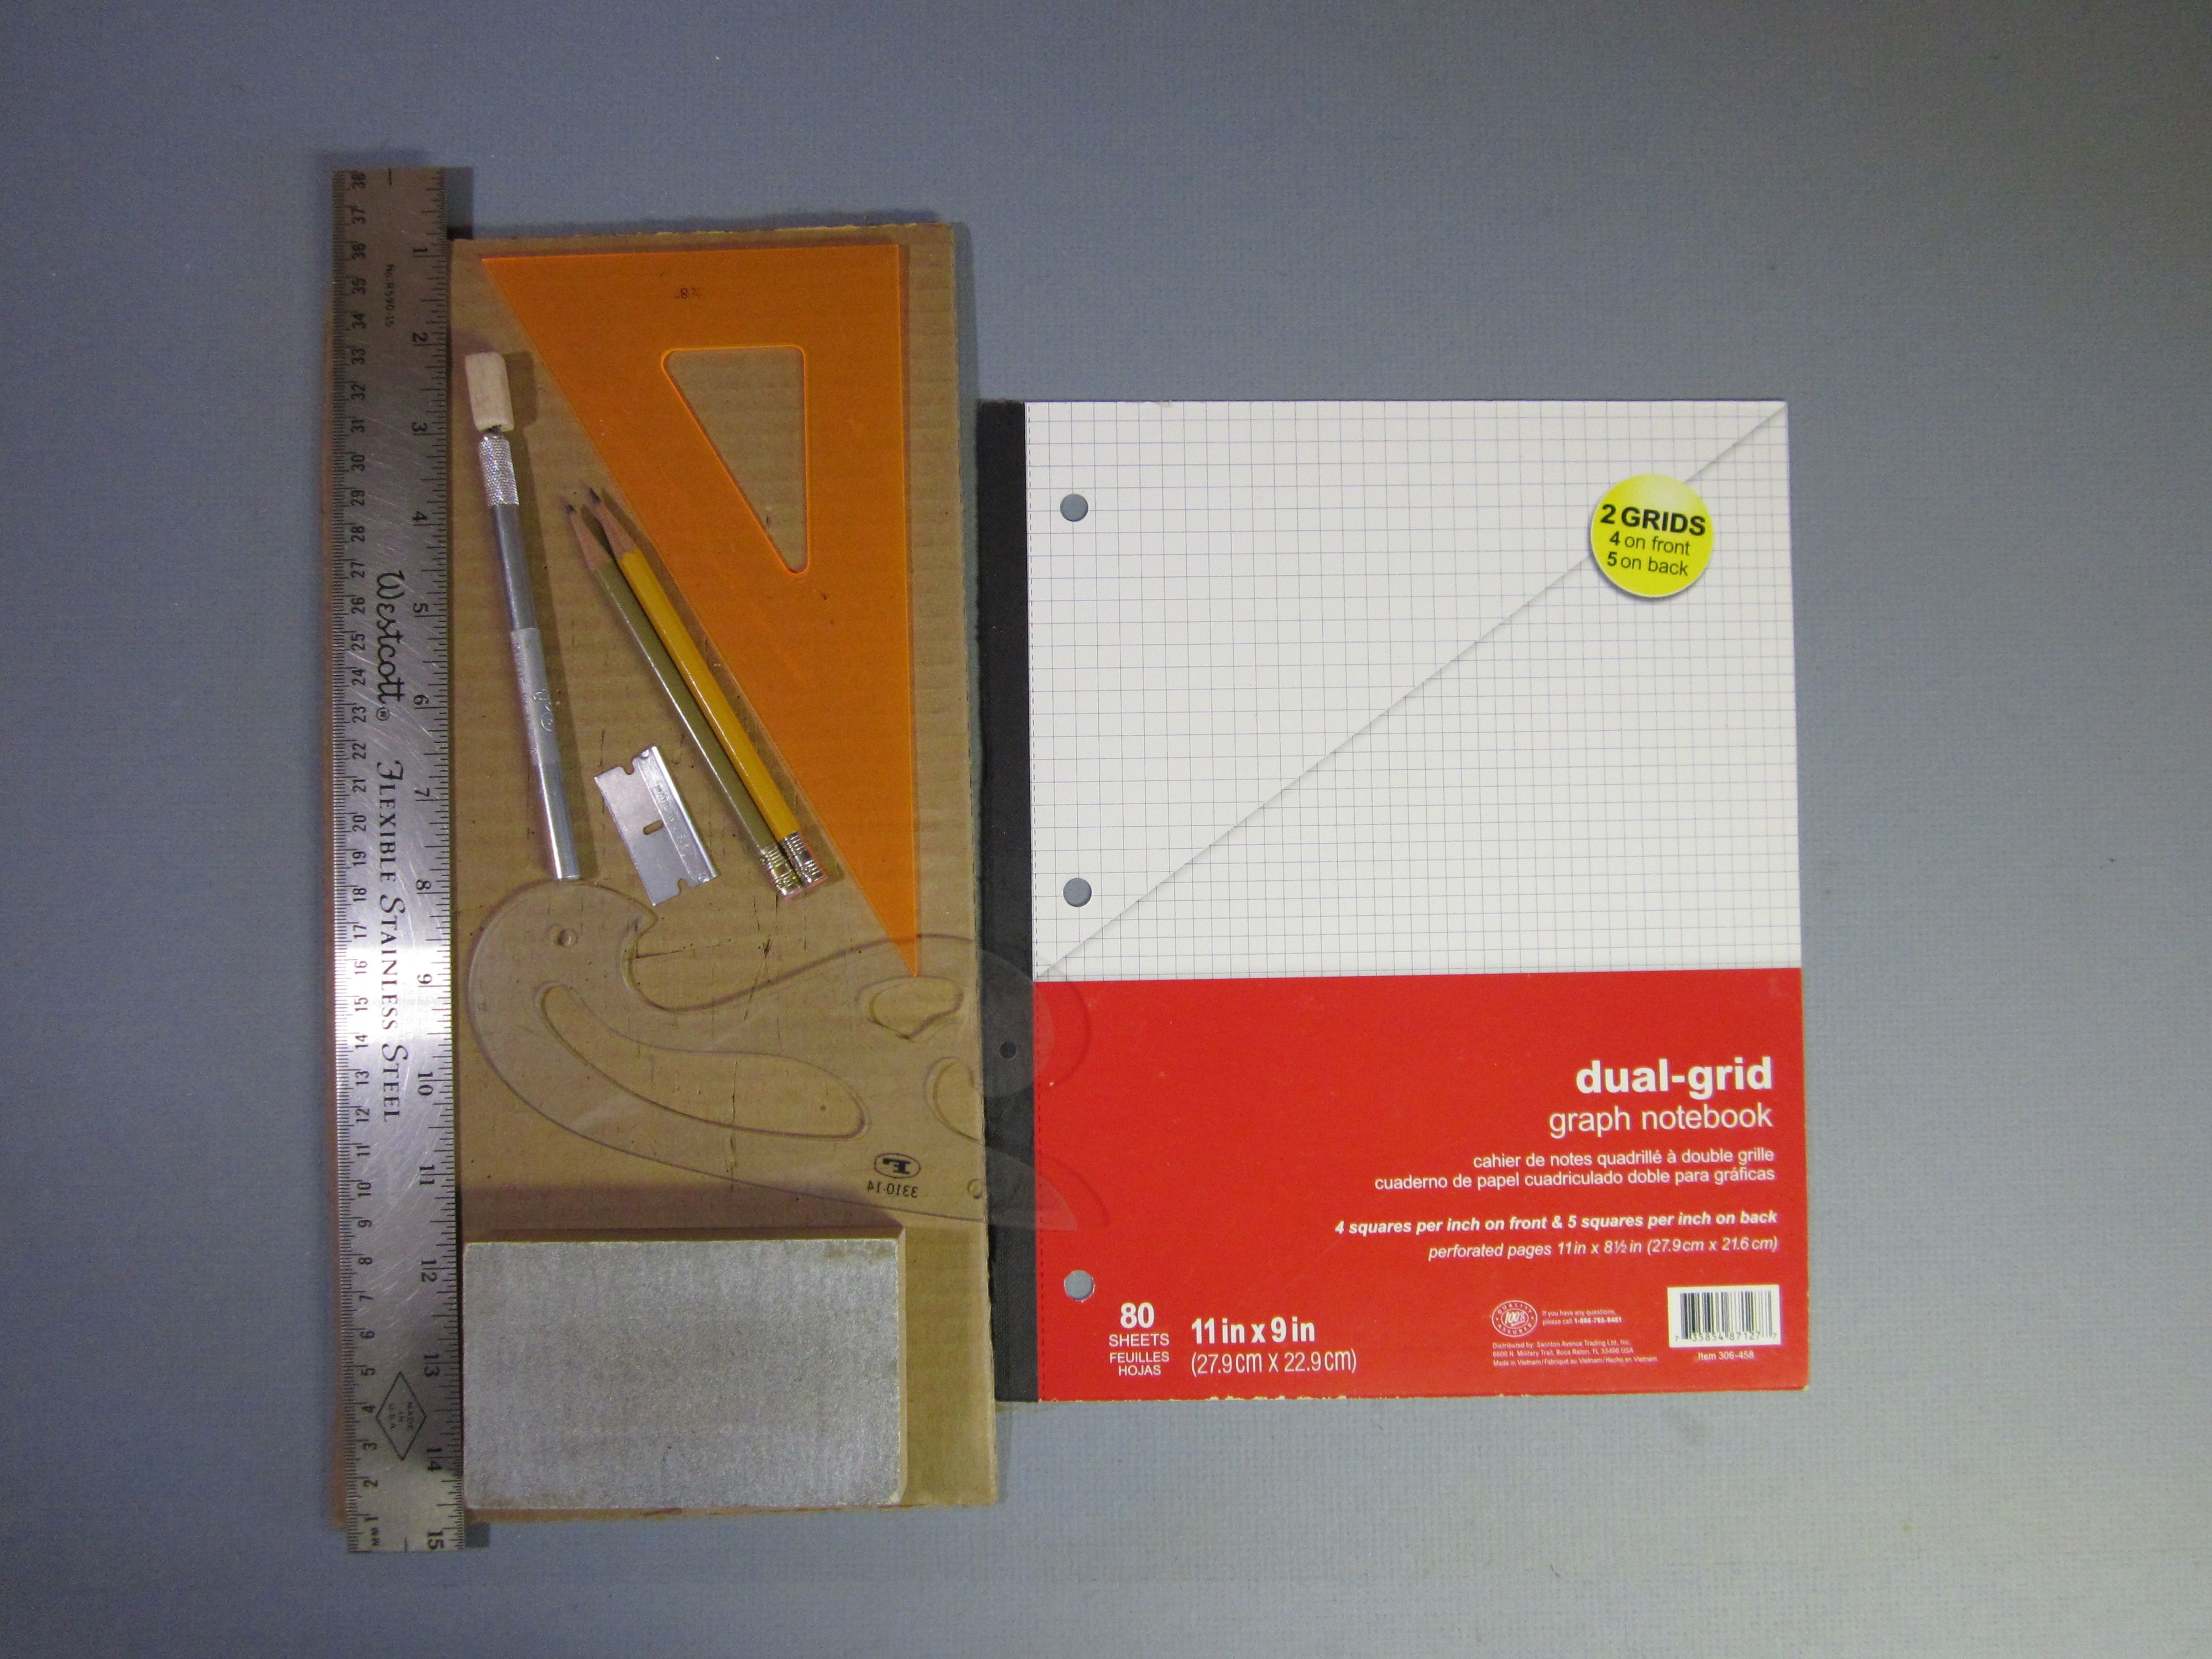 The templates are made from thin cardboard. In this case, I used the cover of a graph paper notebook. Cereal, cake or cracker boxes make good template material.
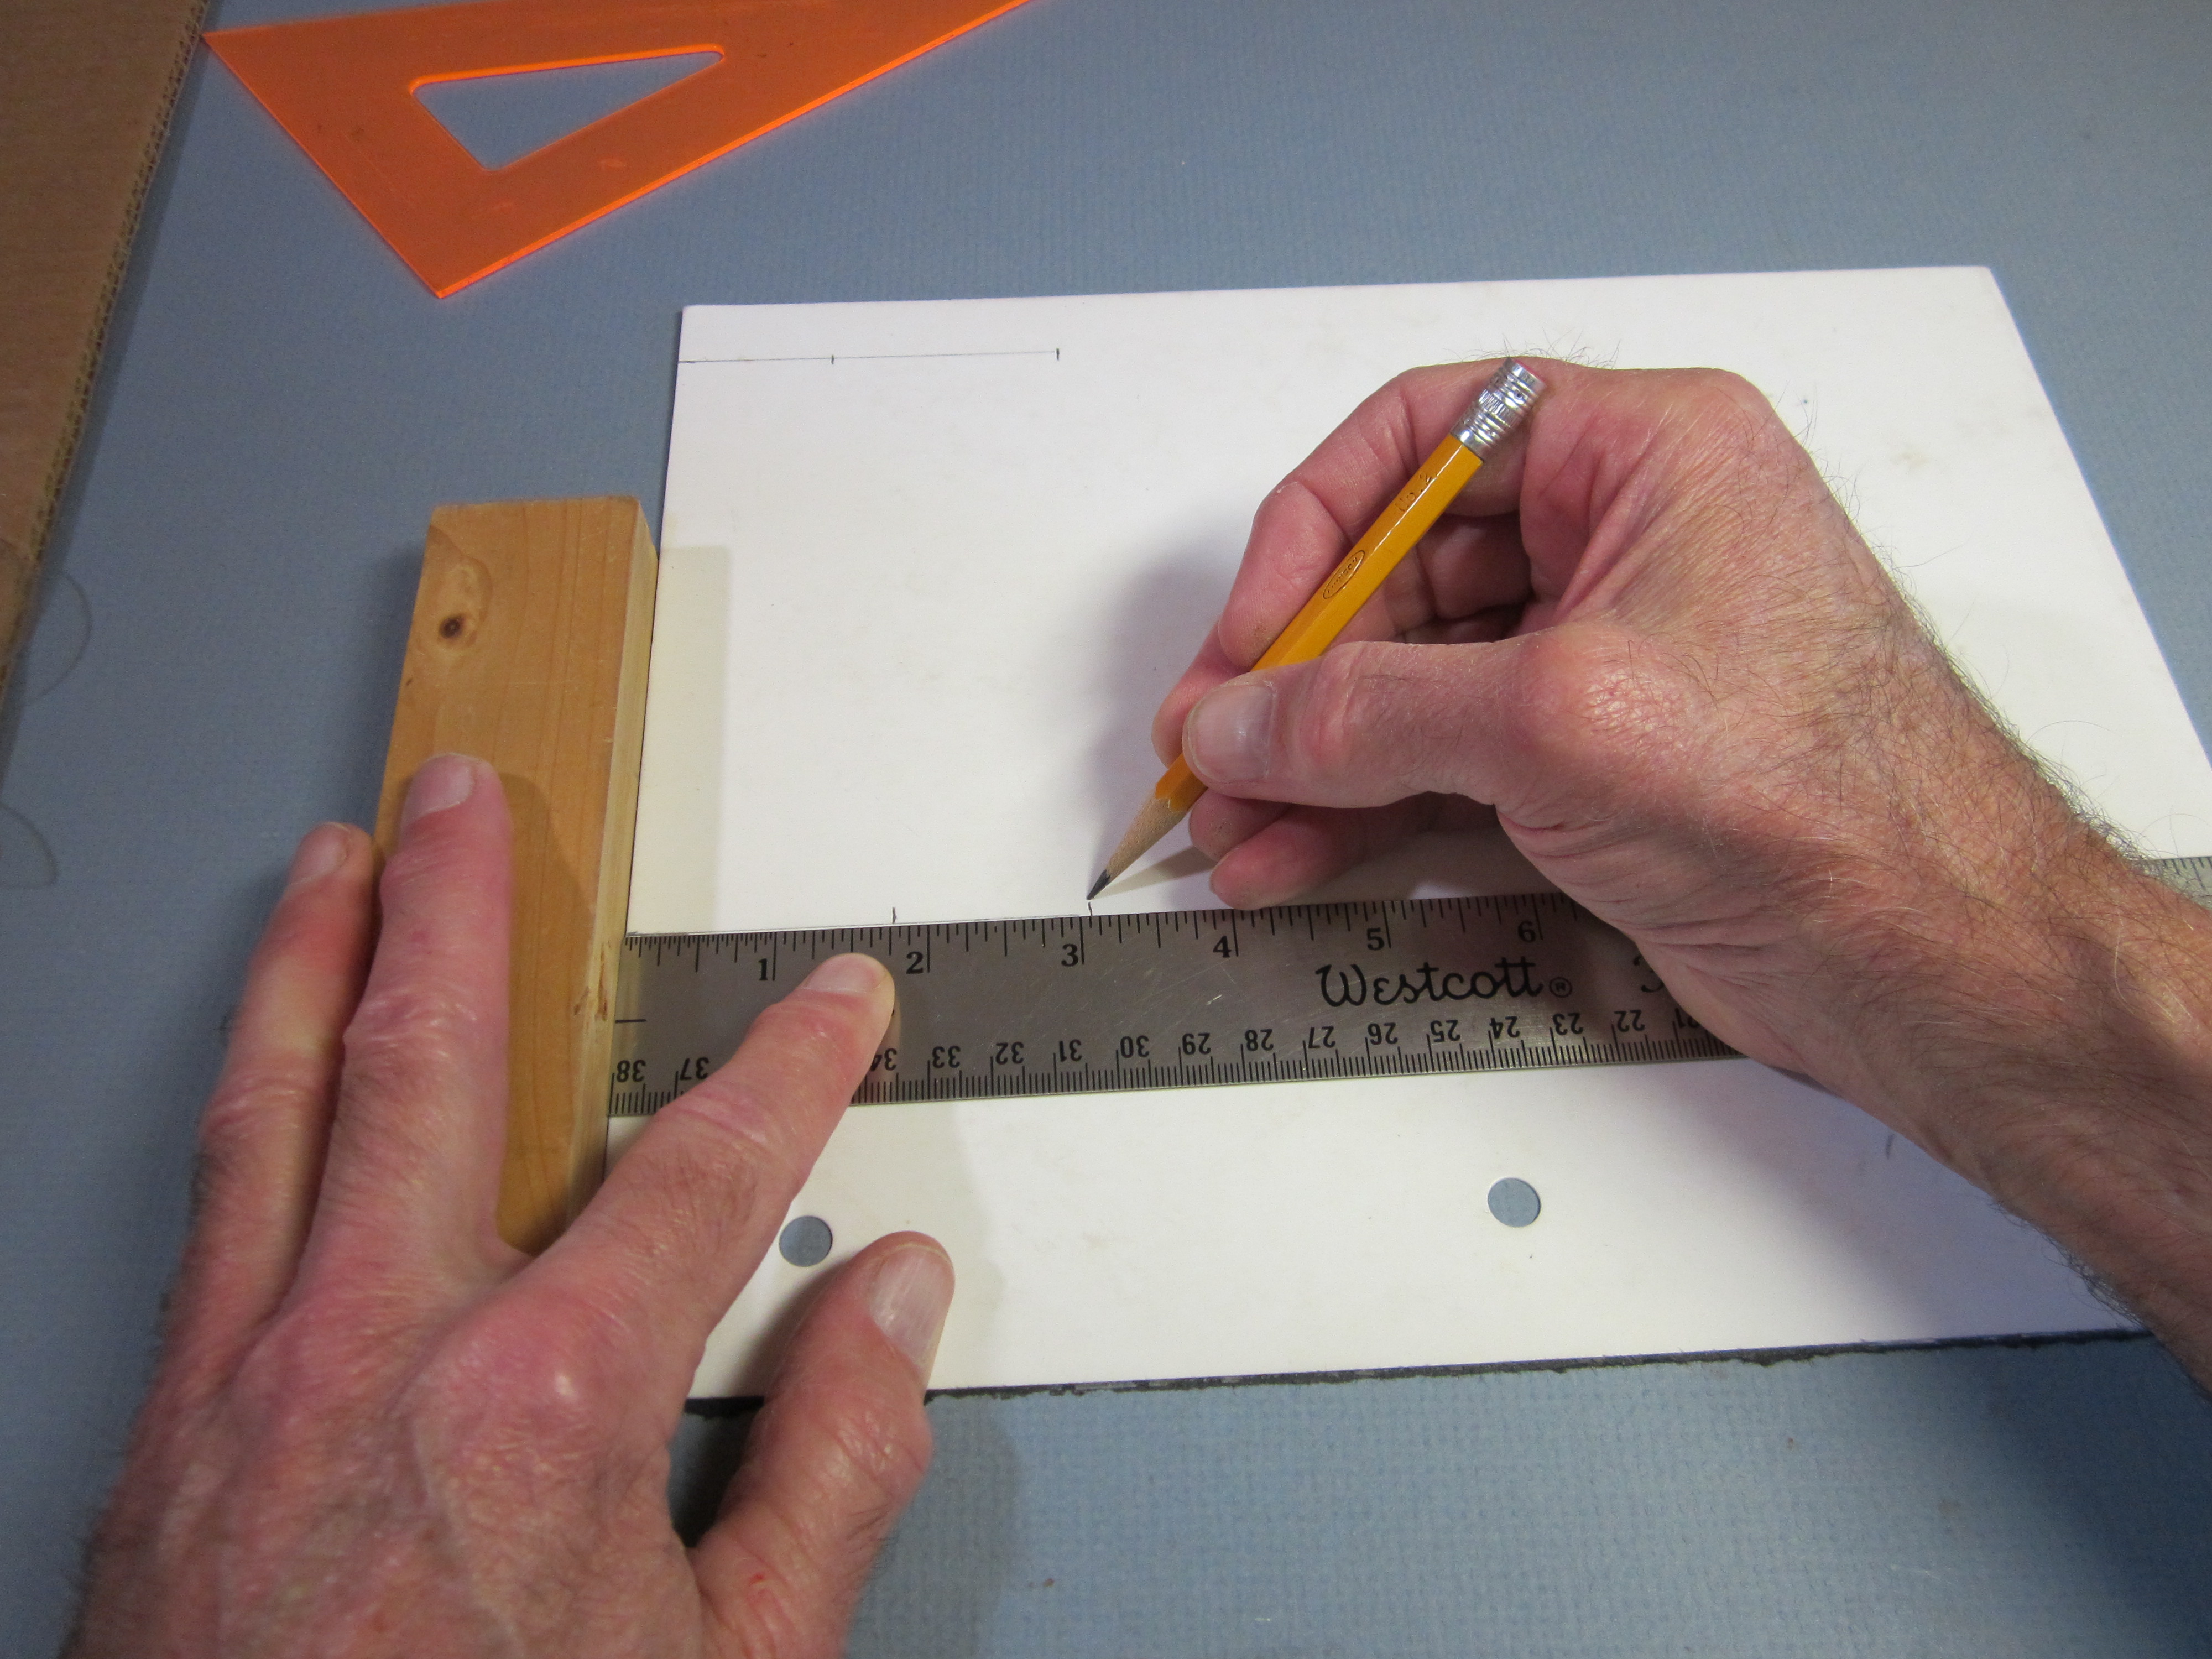
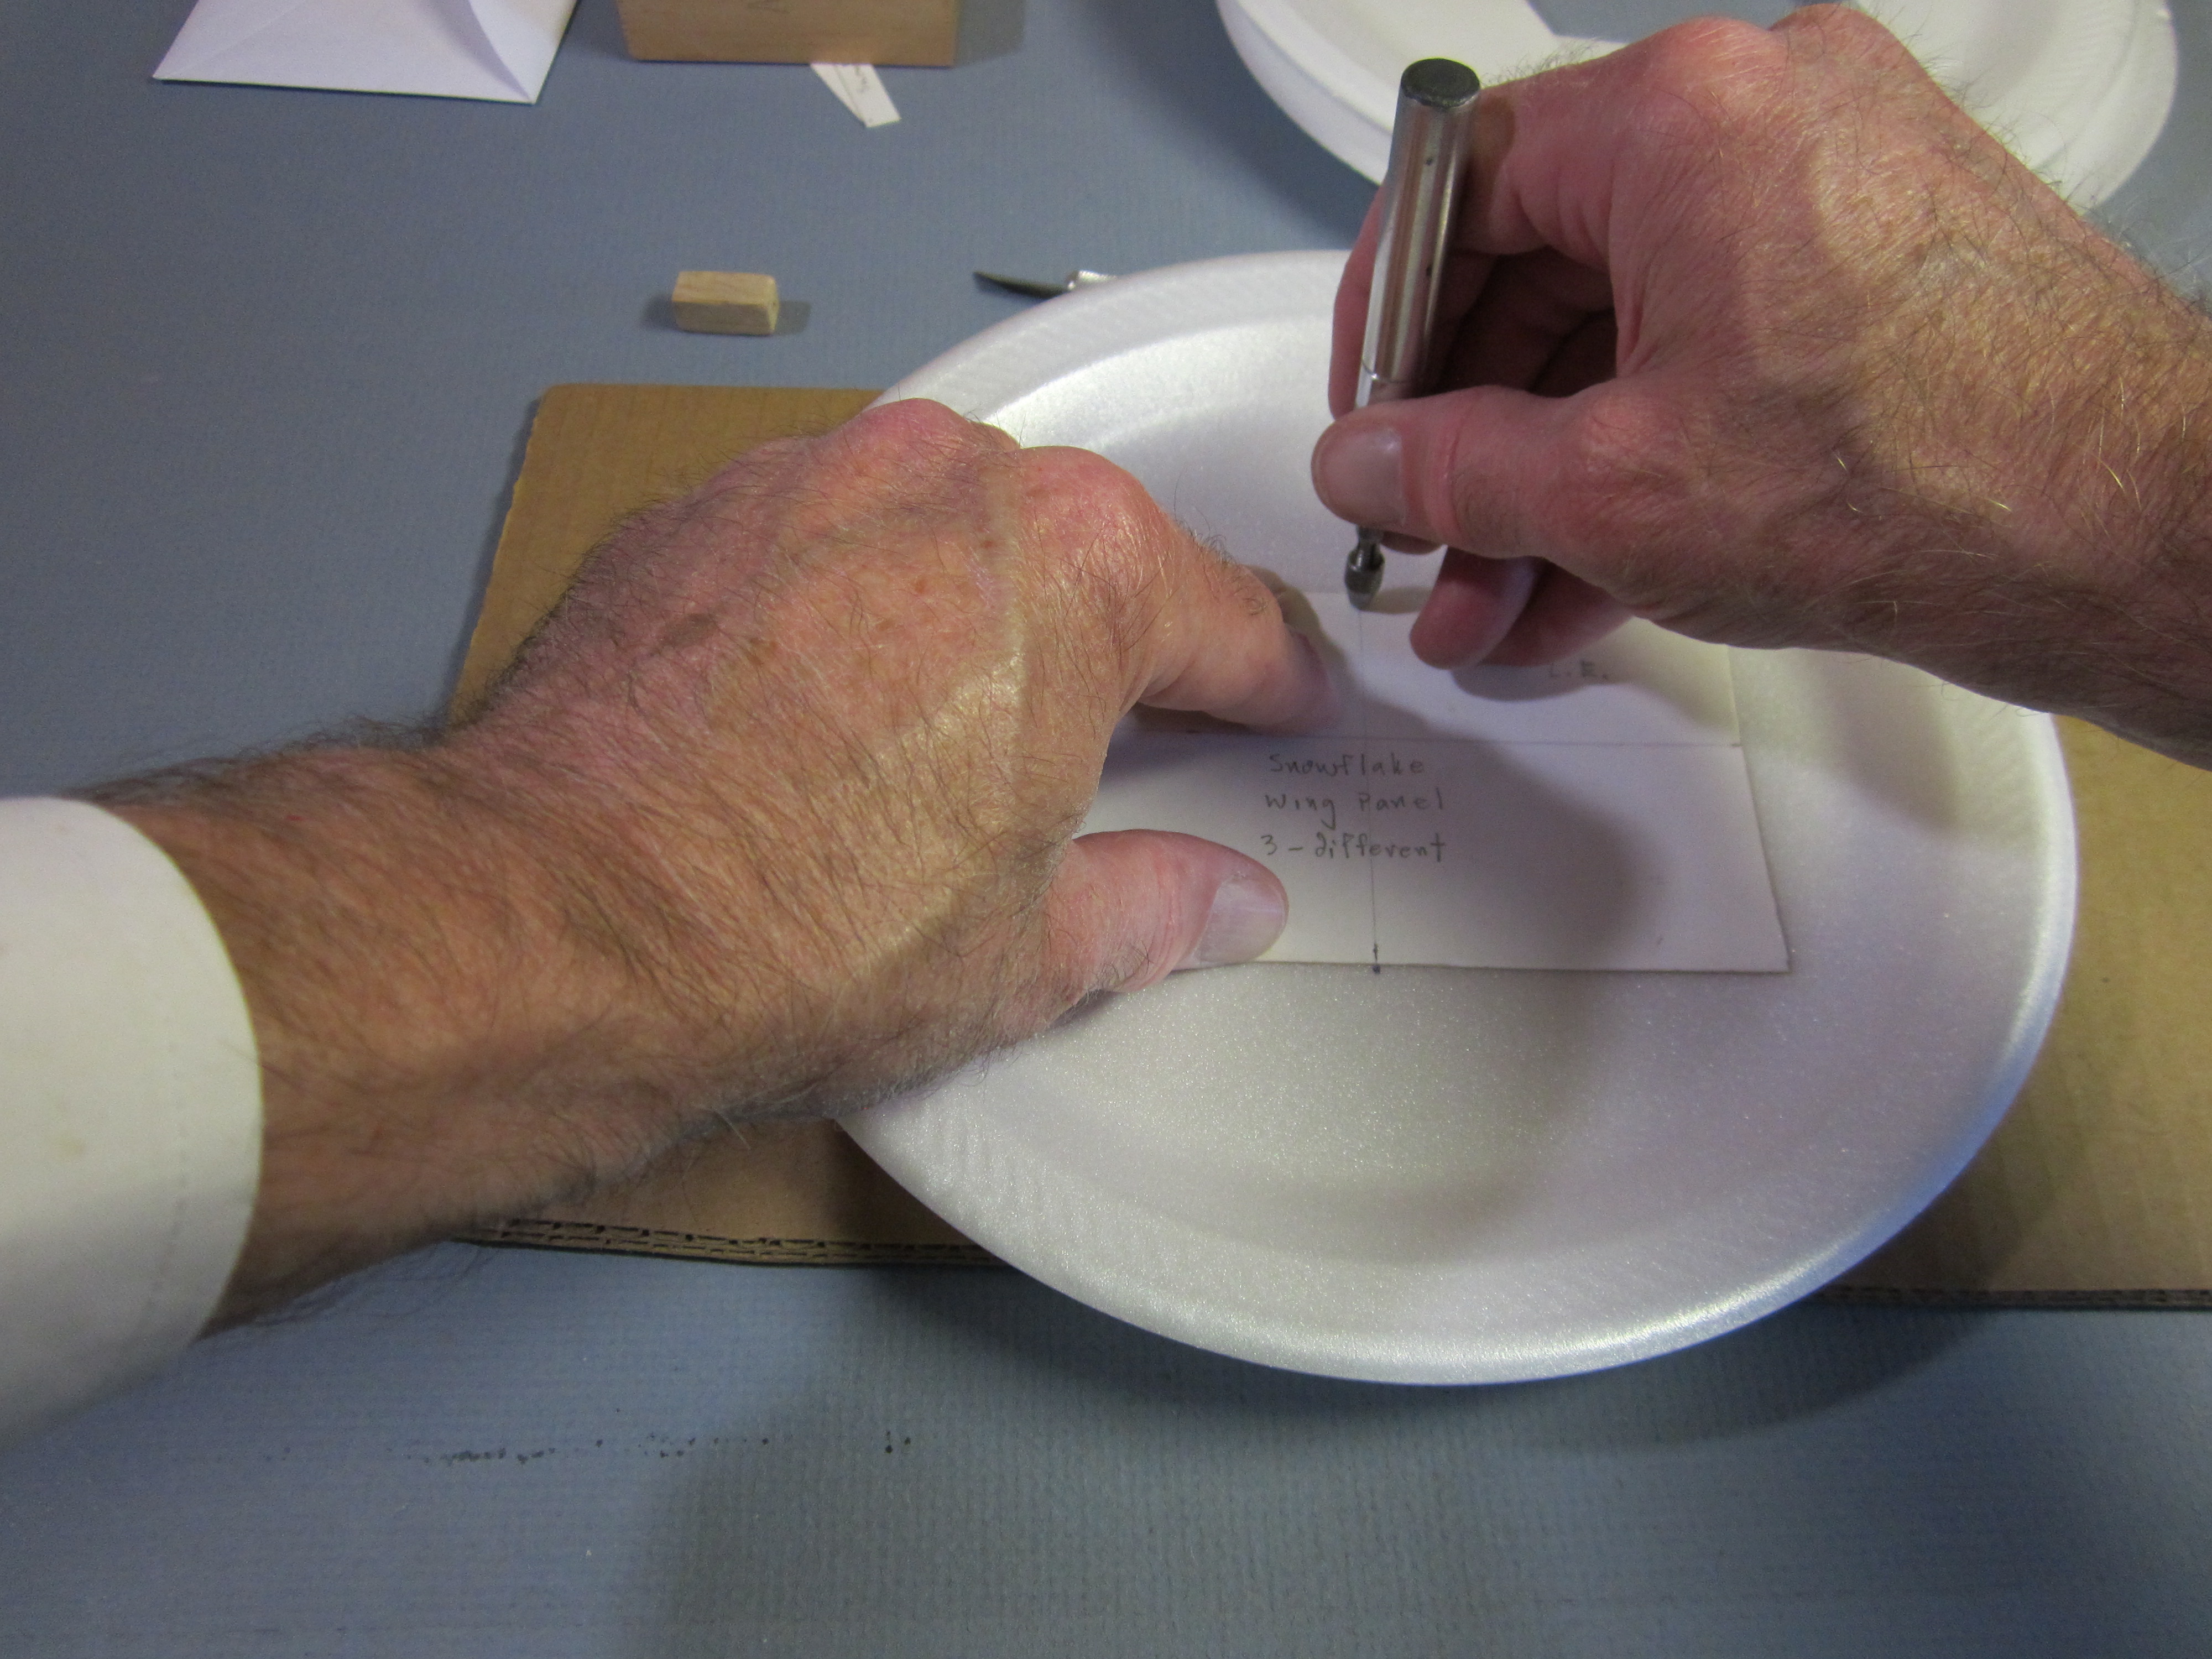
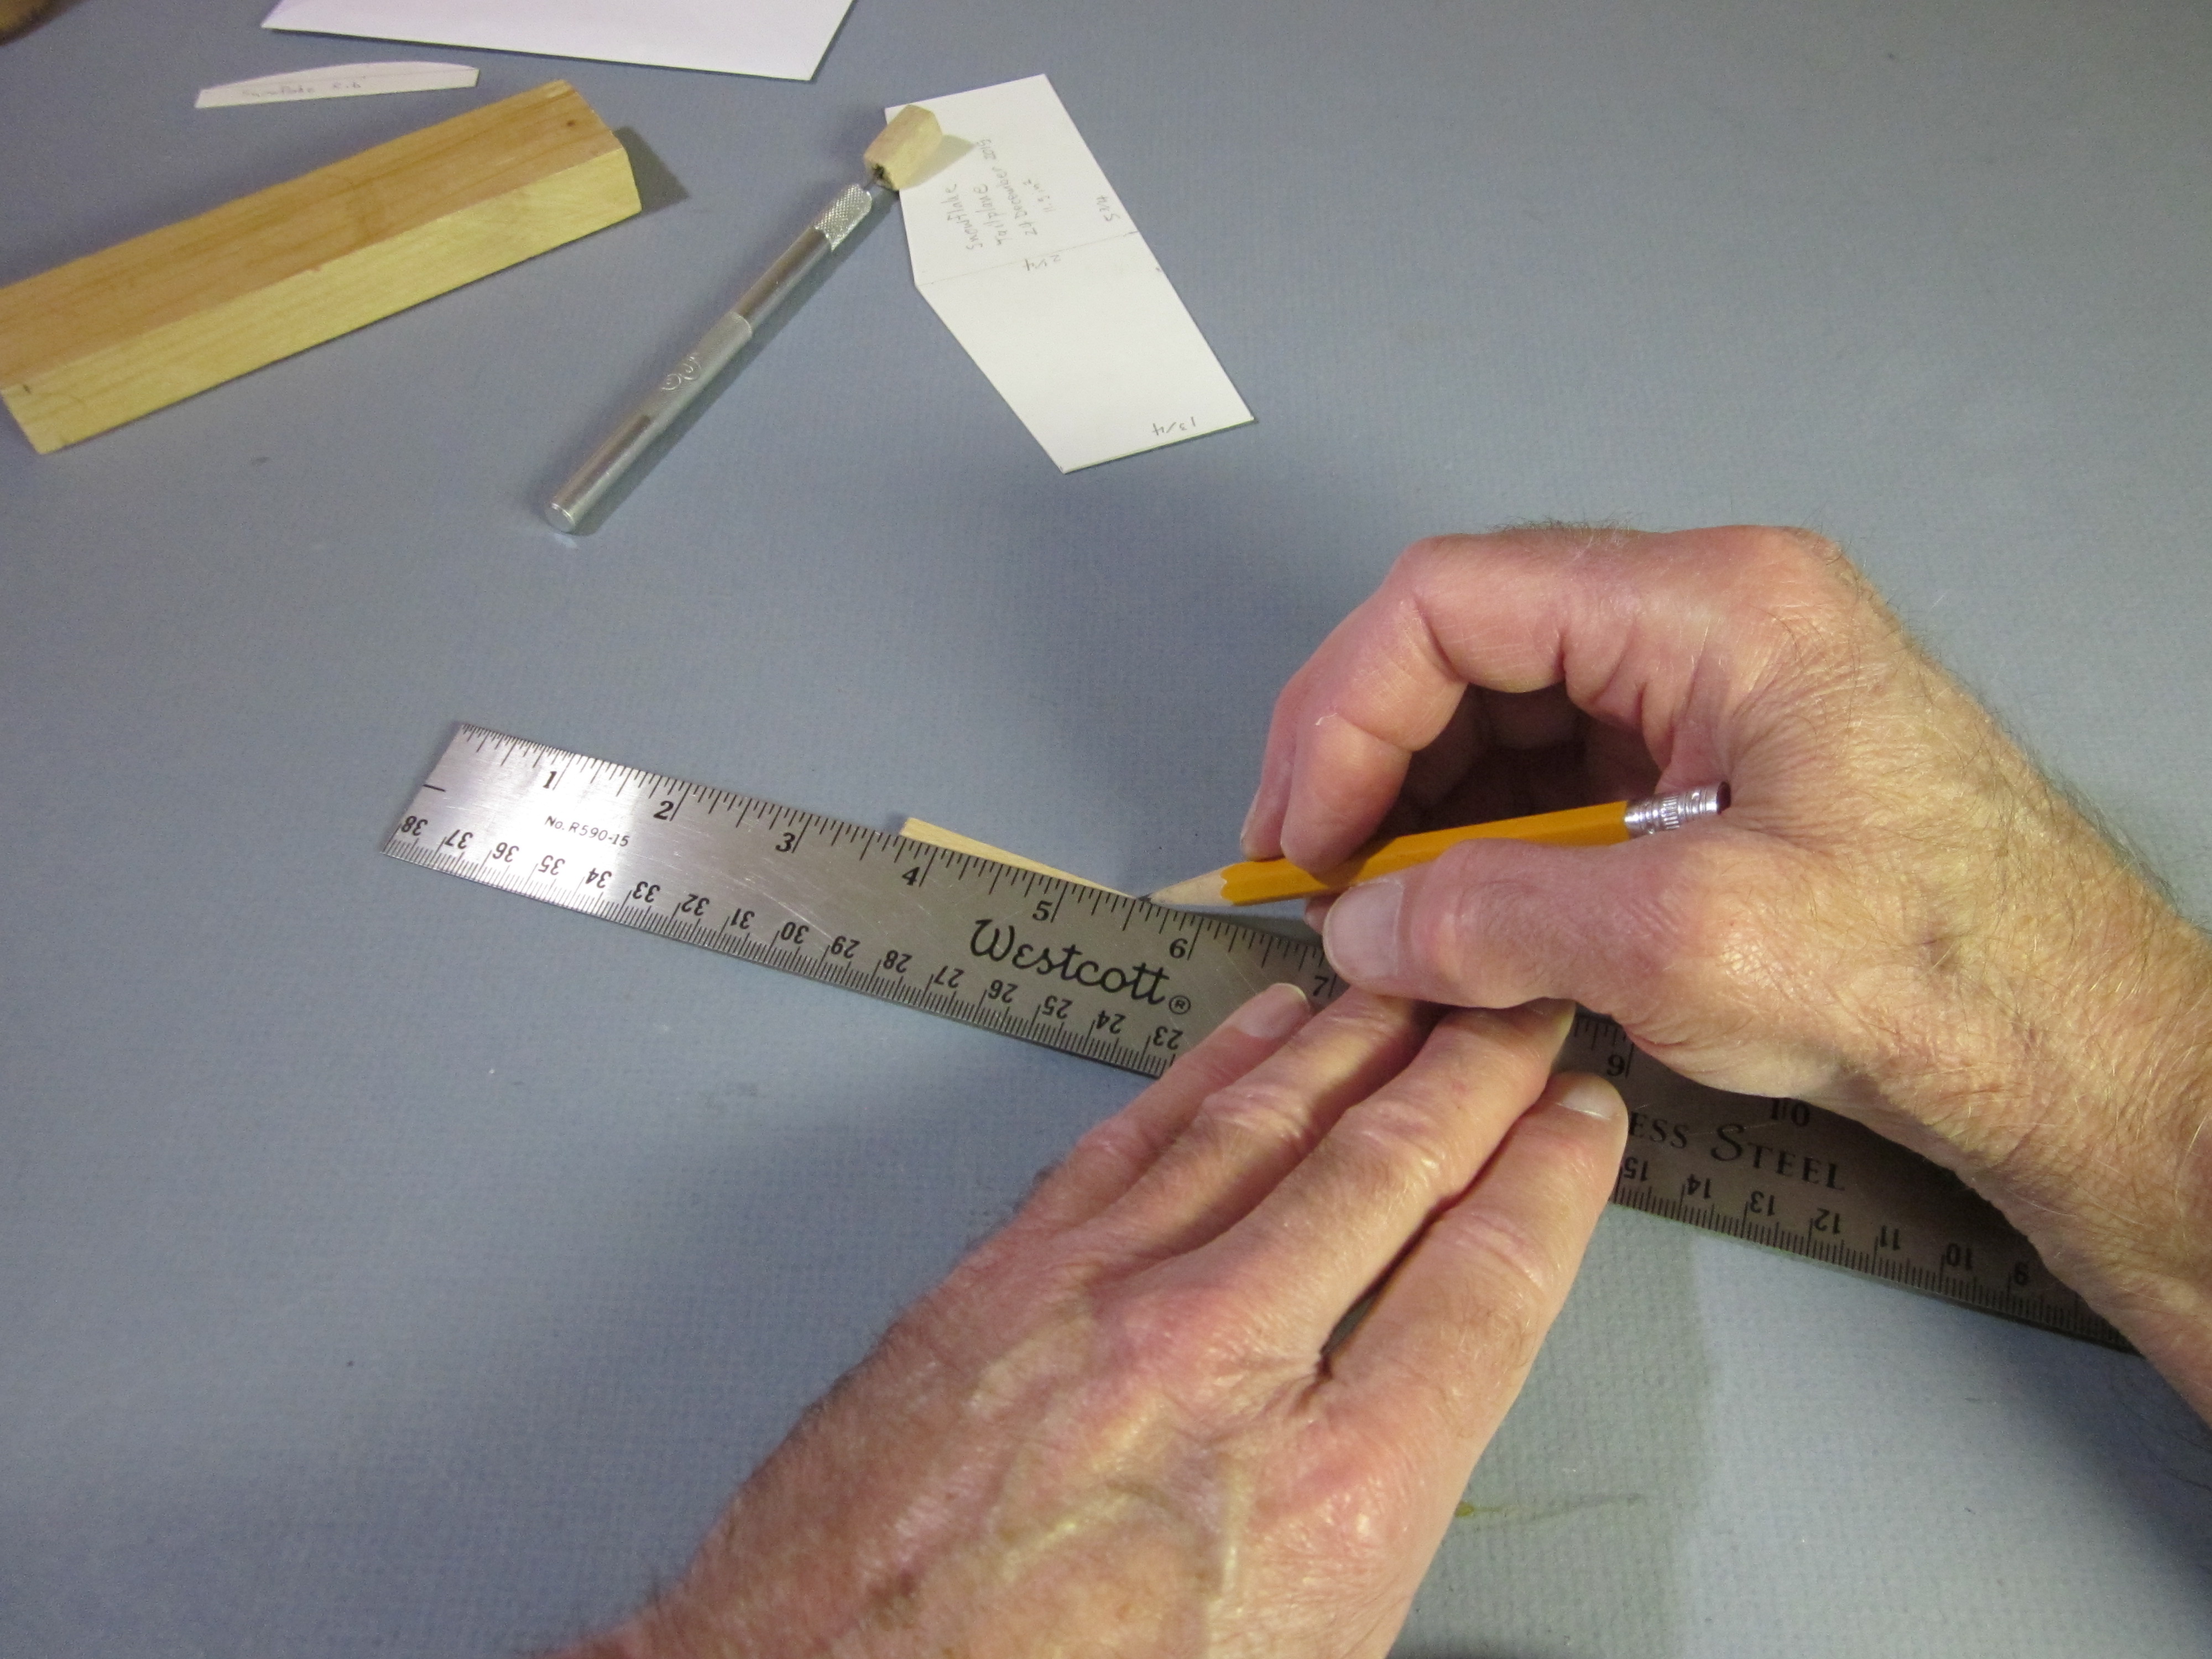
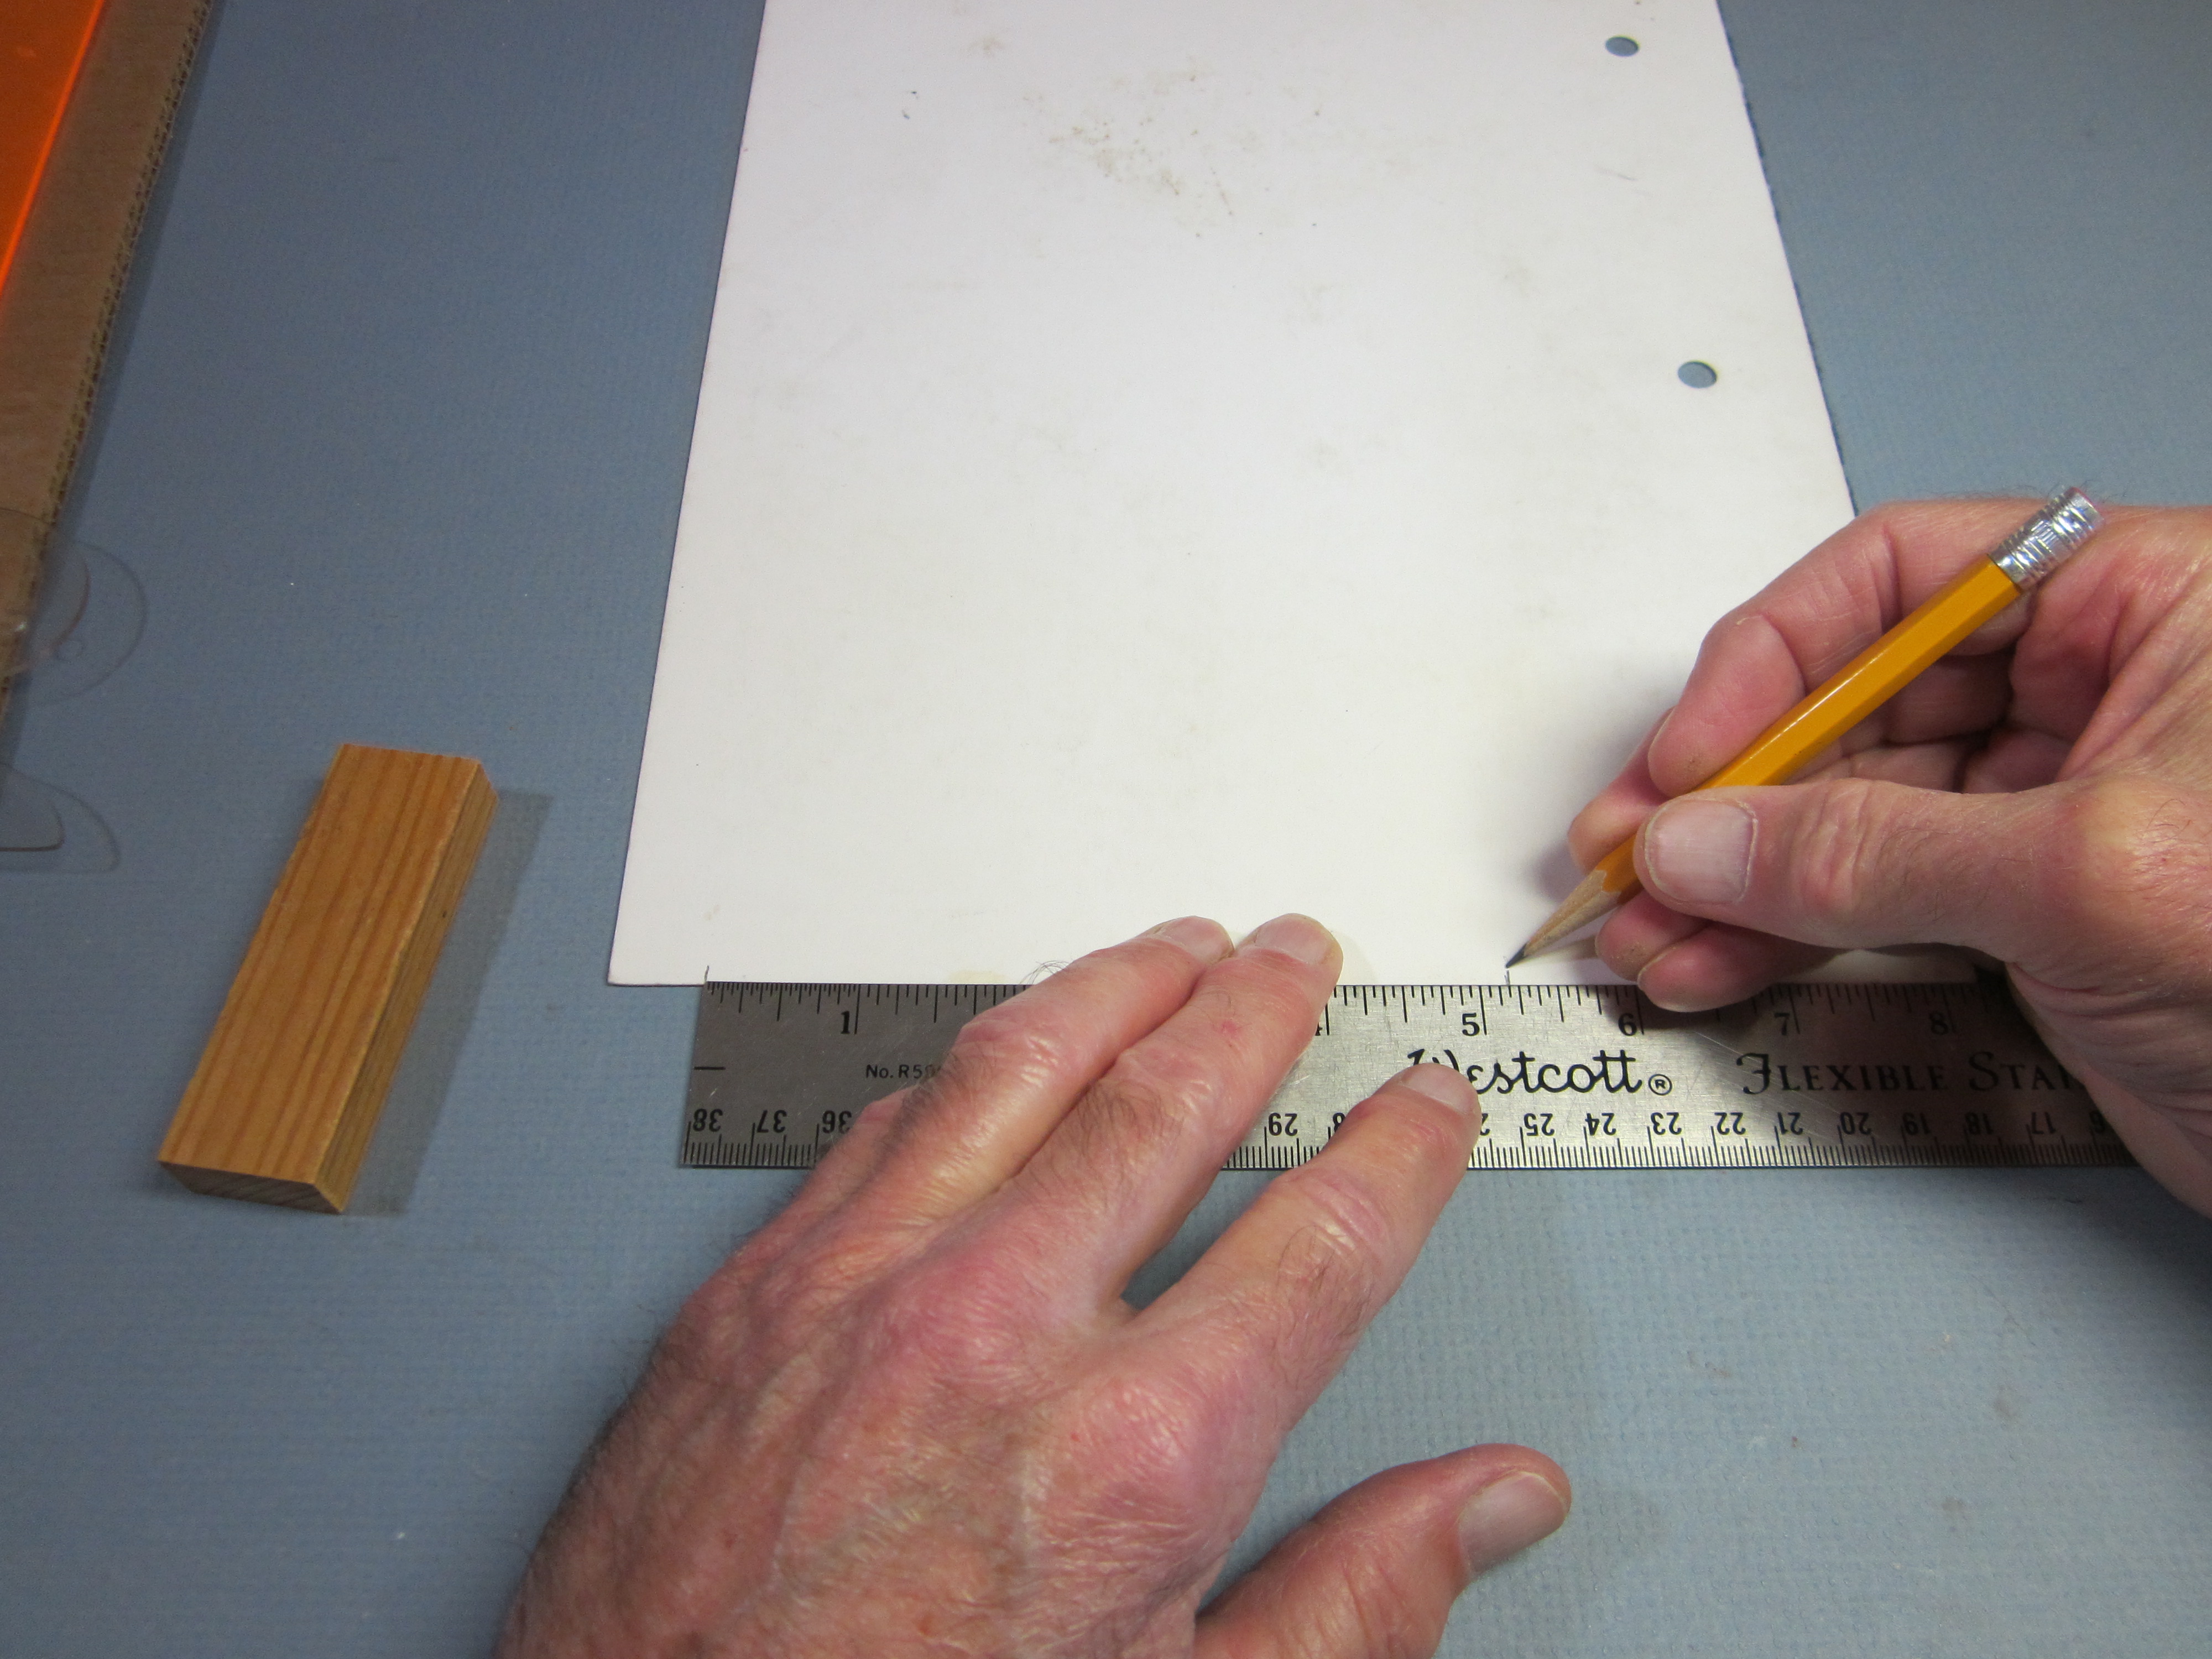 Make the wing pattern. Start by making two marks 5 3/16″ apart along one of the straight edges of the cardboard.
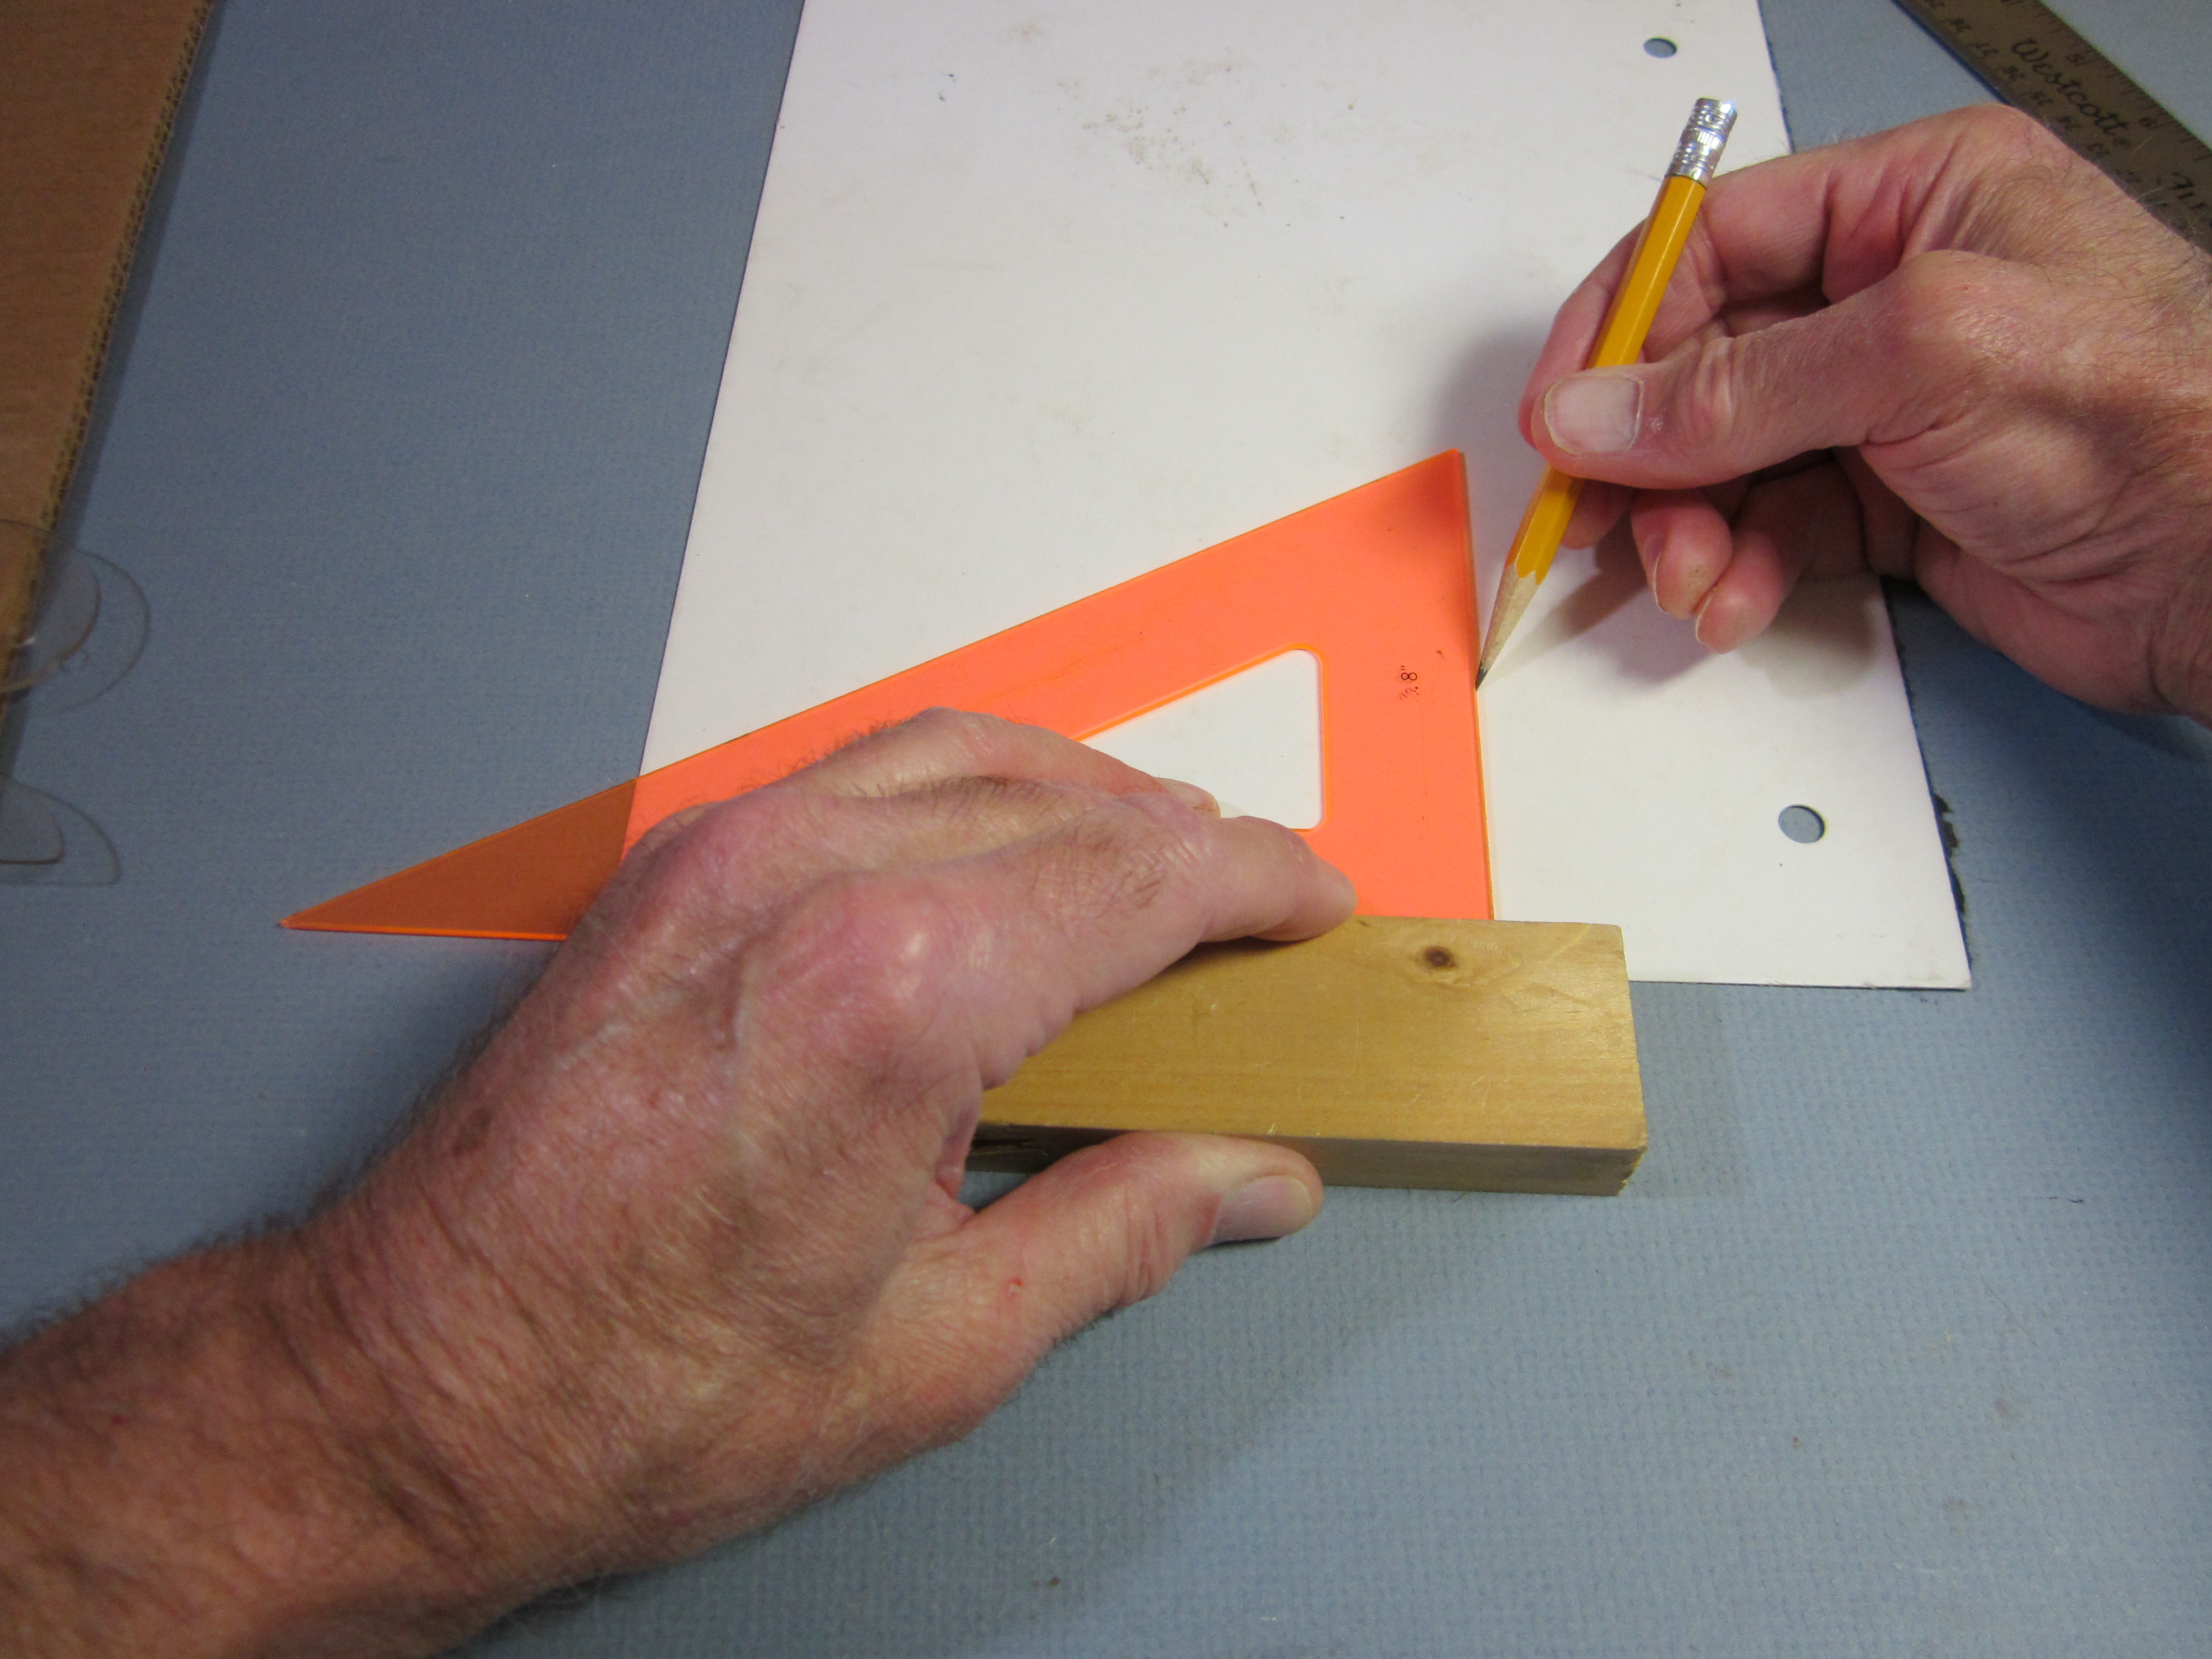 Draw perpendiculars to the edge at both marks.
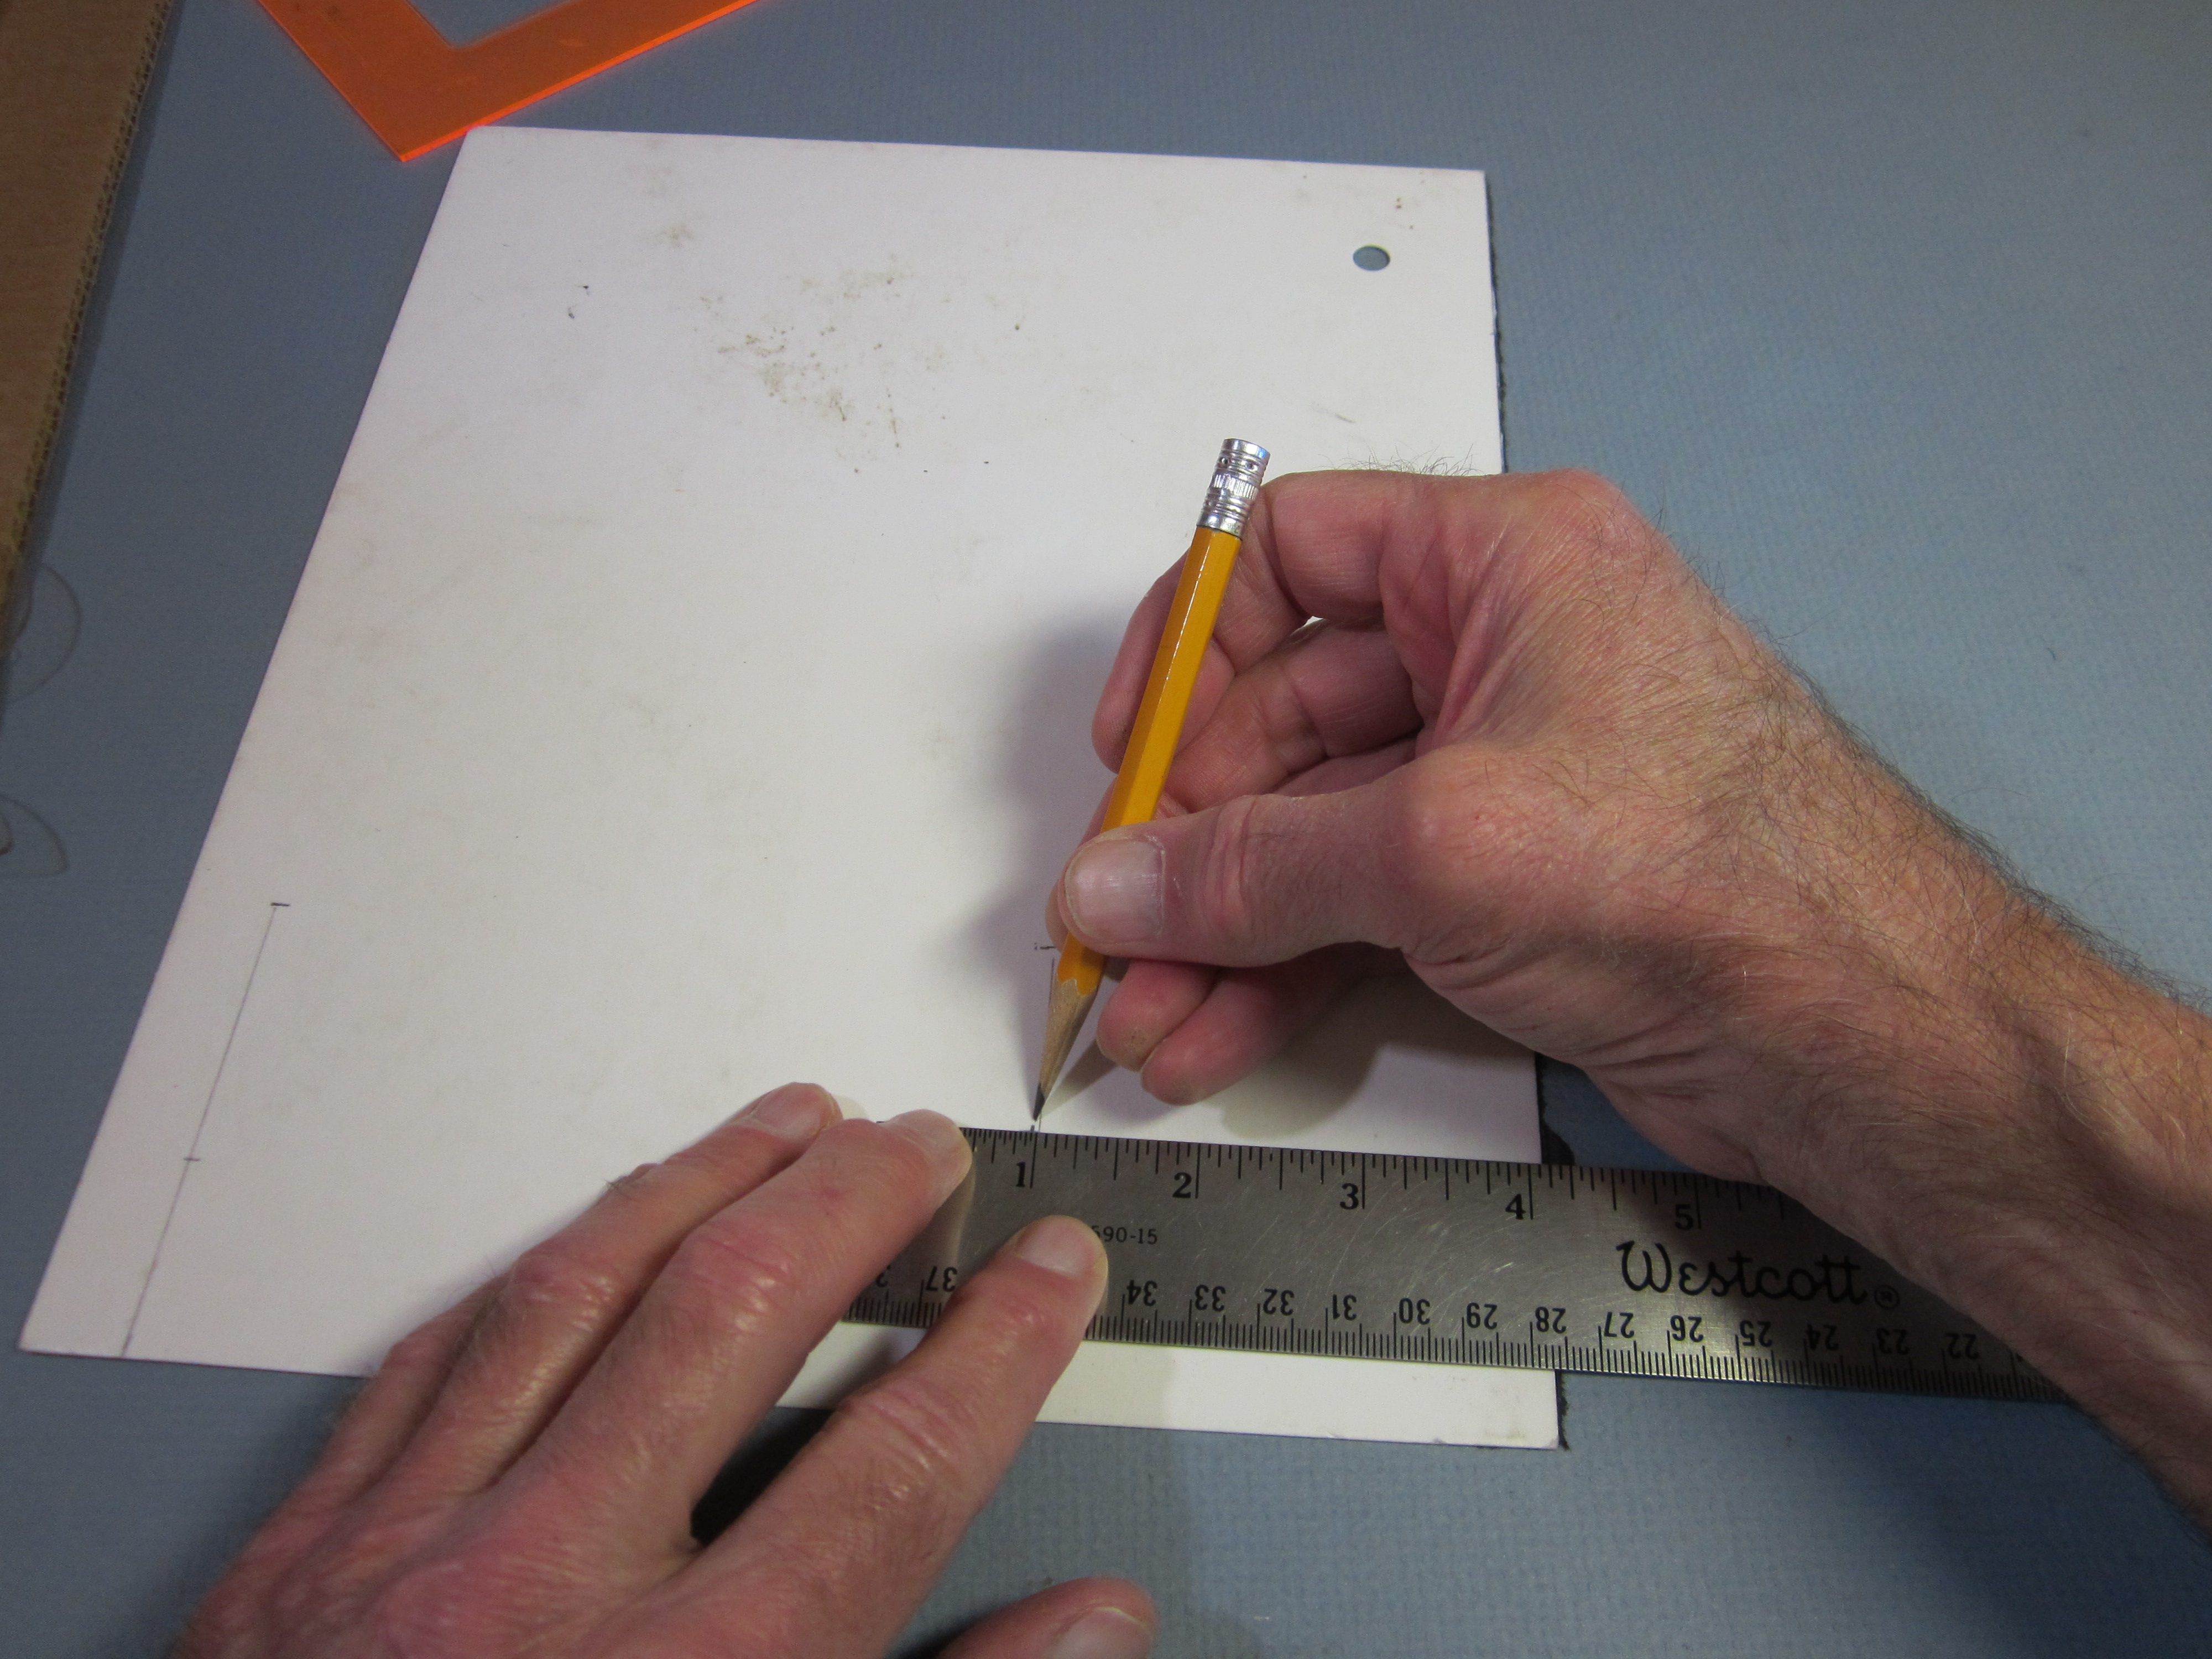
 Put marks at 1 1/4″ and 3 1/16″ from the edge on each perpendicular. (Note that I made a mistake on the one along the ruler, I marked at 1 3/4″. That had to be corrected. Both mark locations must be measured from the same edge.)
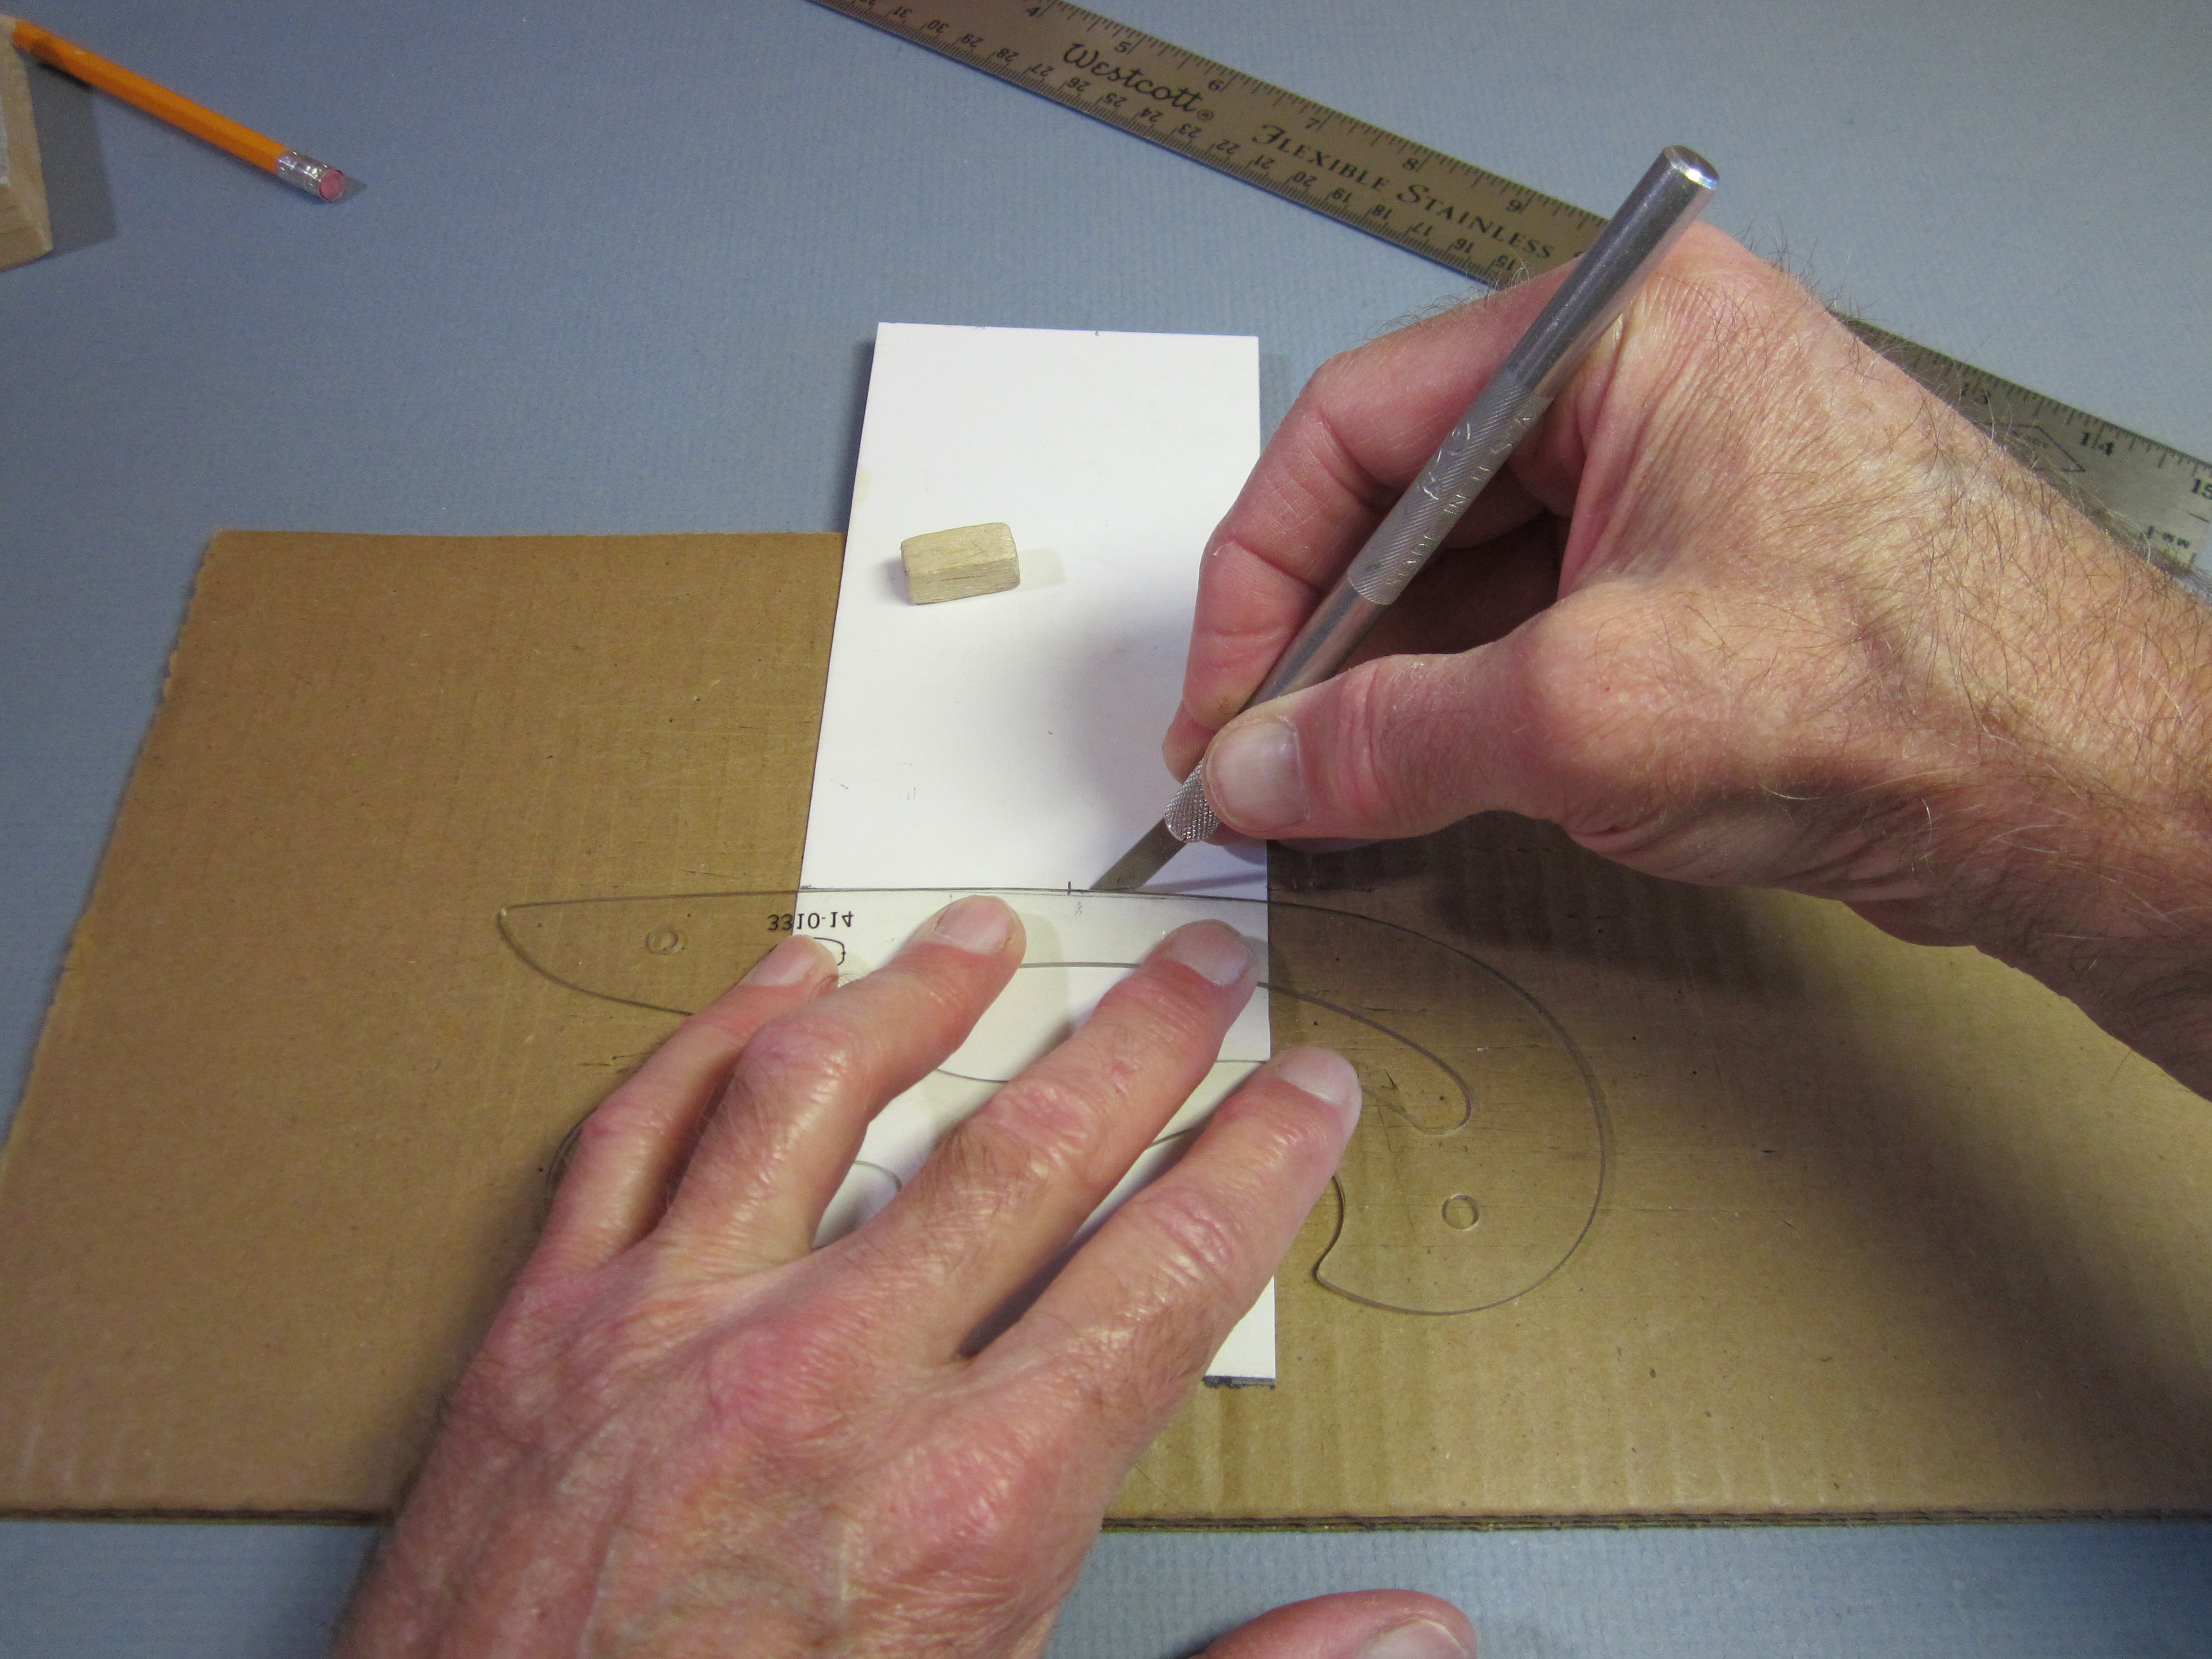
 One edge must be cut on a curve so the cambered wings will fit together with a dihedral angle between them. (This will become clear later when you see how the wing panels fit together.) At the 1 1/4″ mark along one edge, put a mark 1/32″ inside the edge. This will be the high point of the curve.
 Draw a smooth curve through the three points; the leading edge, the high point and the trailing edge. The tangent to the curve at the high point should be parallel with the base line. You may need to move the curve and do it in two arcs.
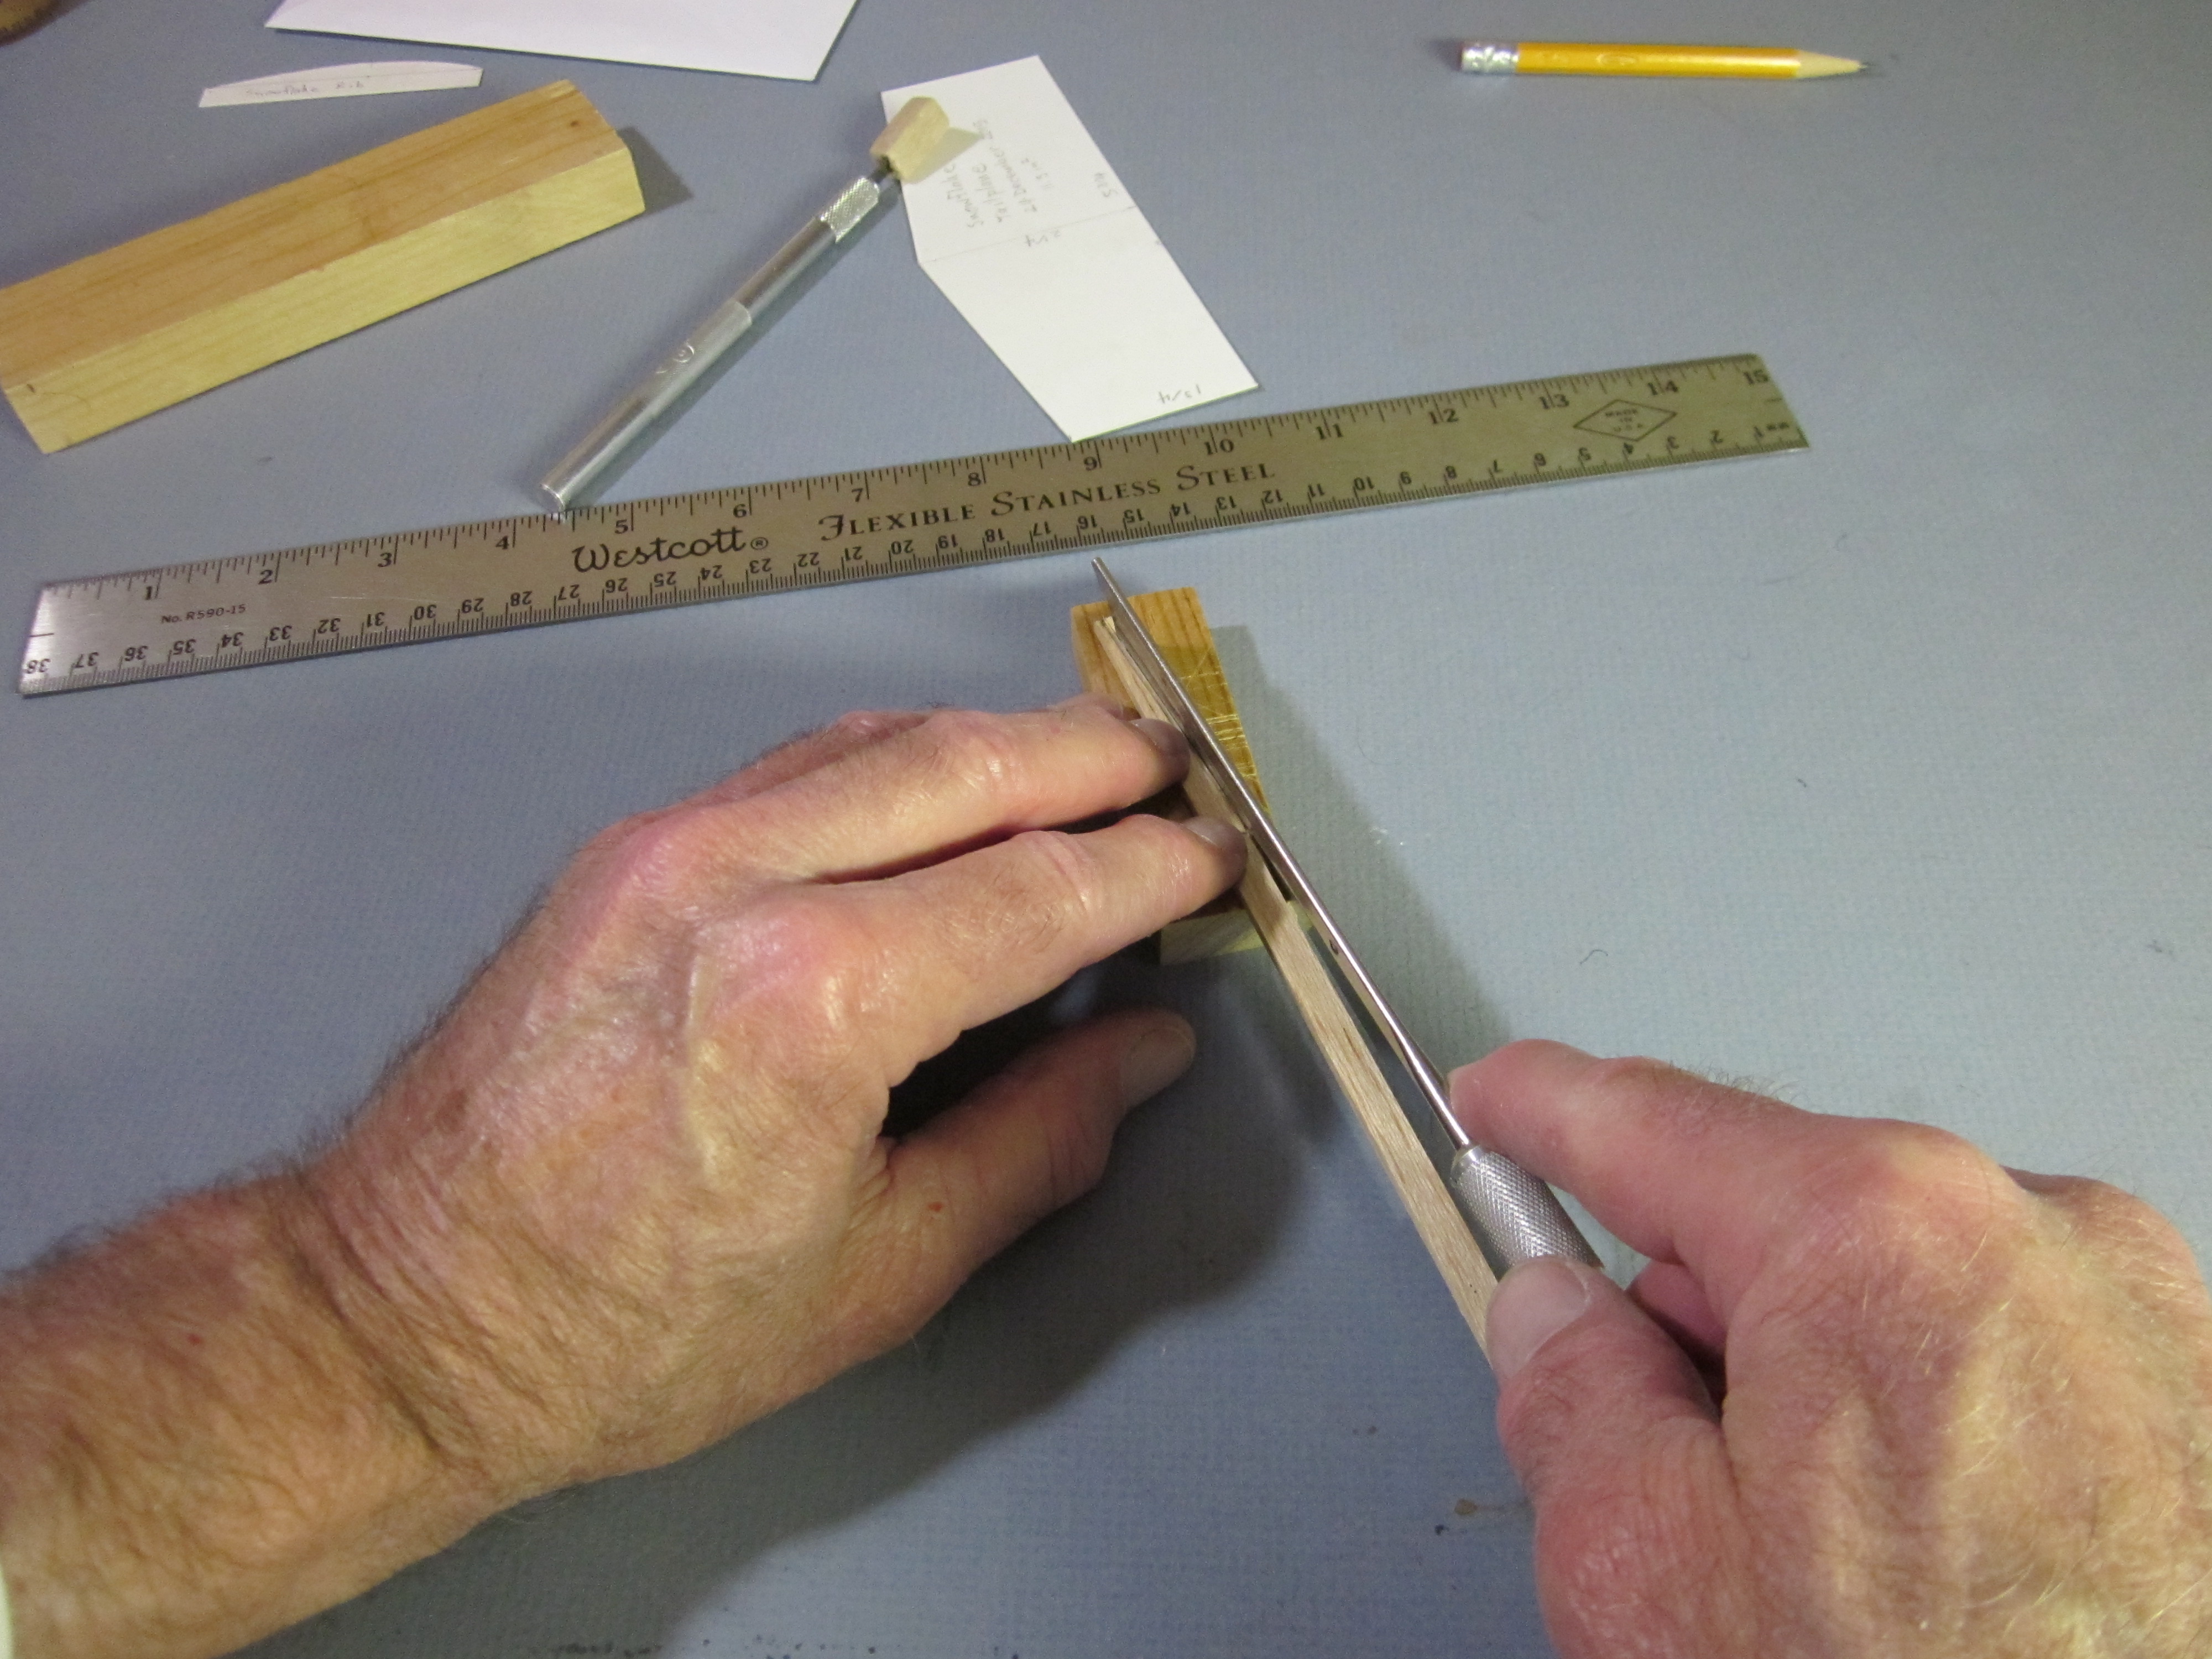
 Cut out the wing panel along the straight edges with a steel straight edge and razor.
 Use the curve to guide the pointed knife in cutting the curved edge. Make several shallow cuts, rather than trying to cut through in one pass. It is easier to make precise cuts with gentle pressure. The blade is kept tangent to the curve, so it will not cut into the curve. You will need to move the curve and make the cut in two arcs.
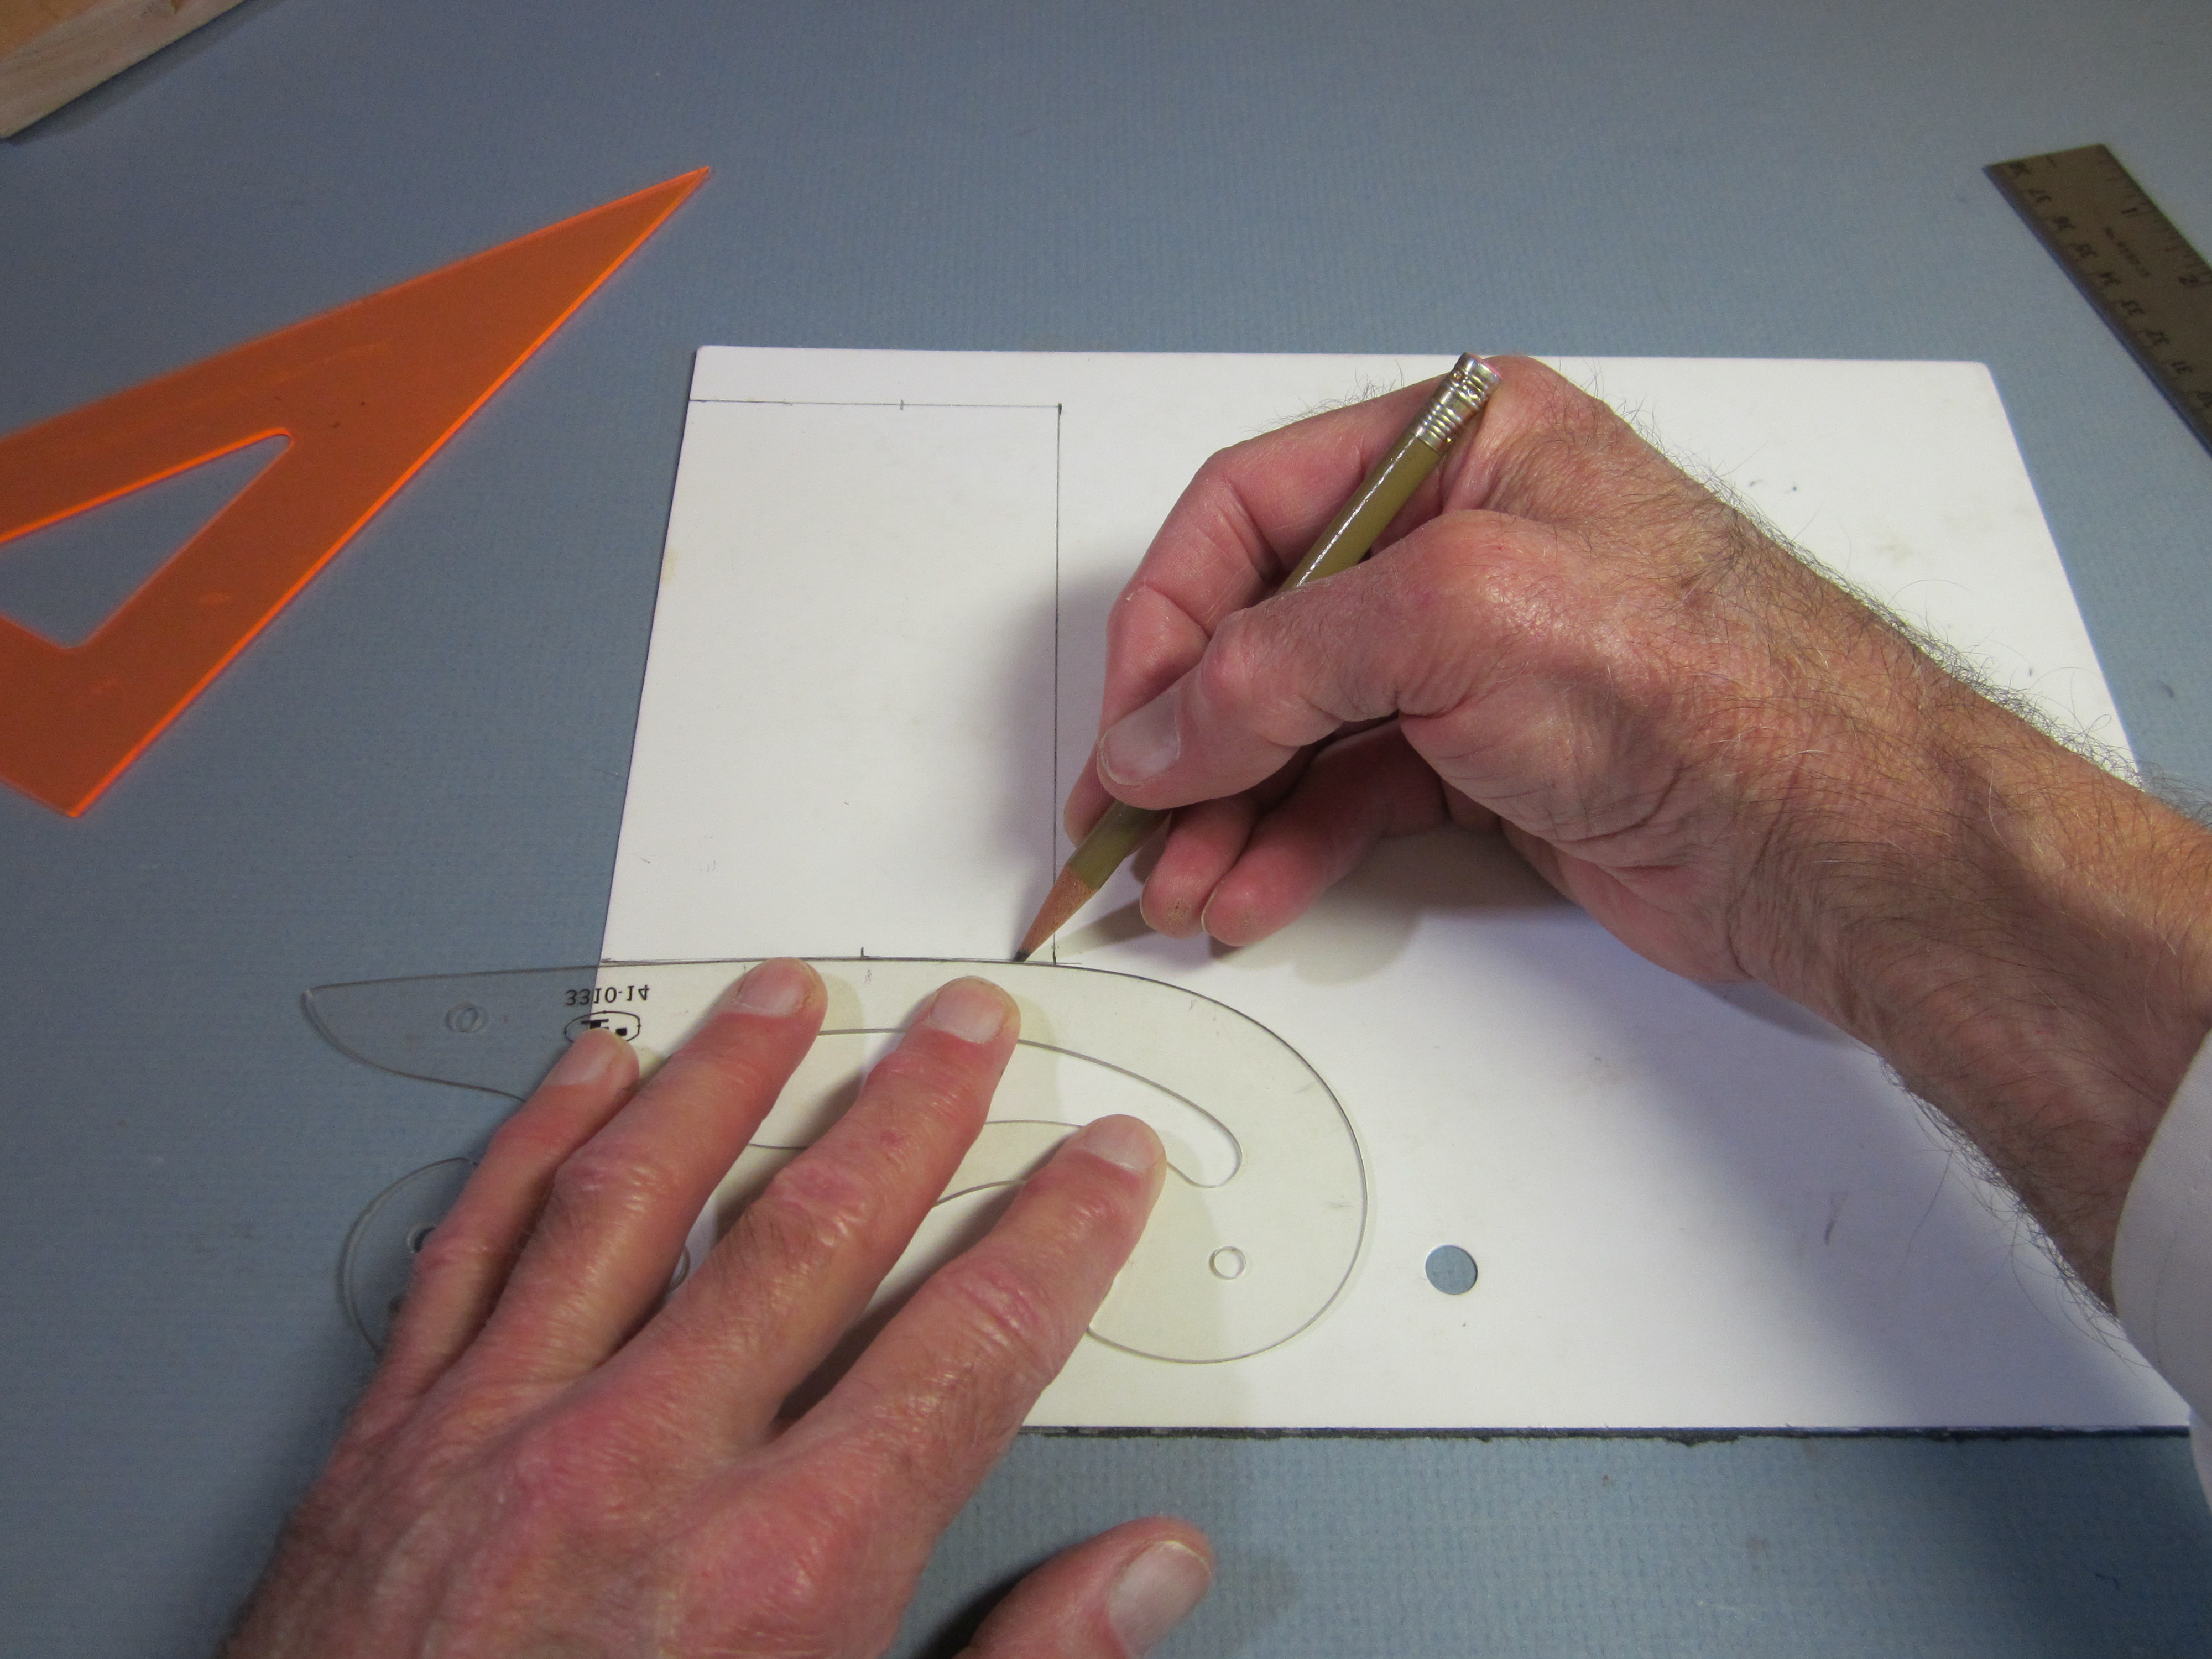
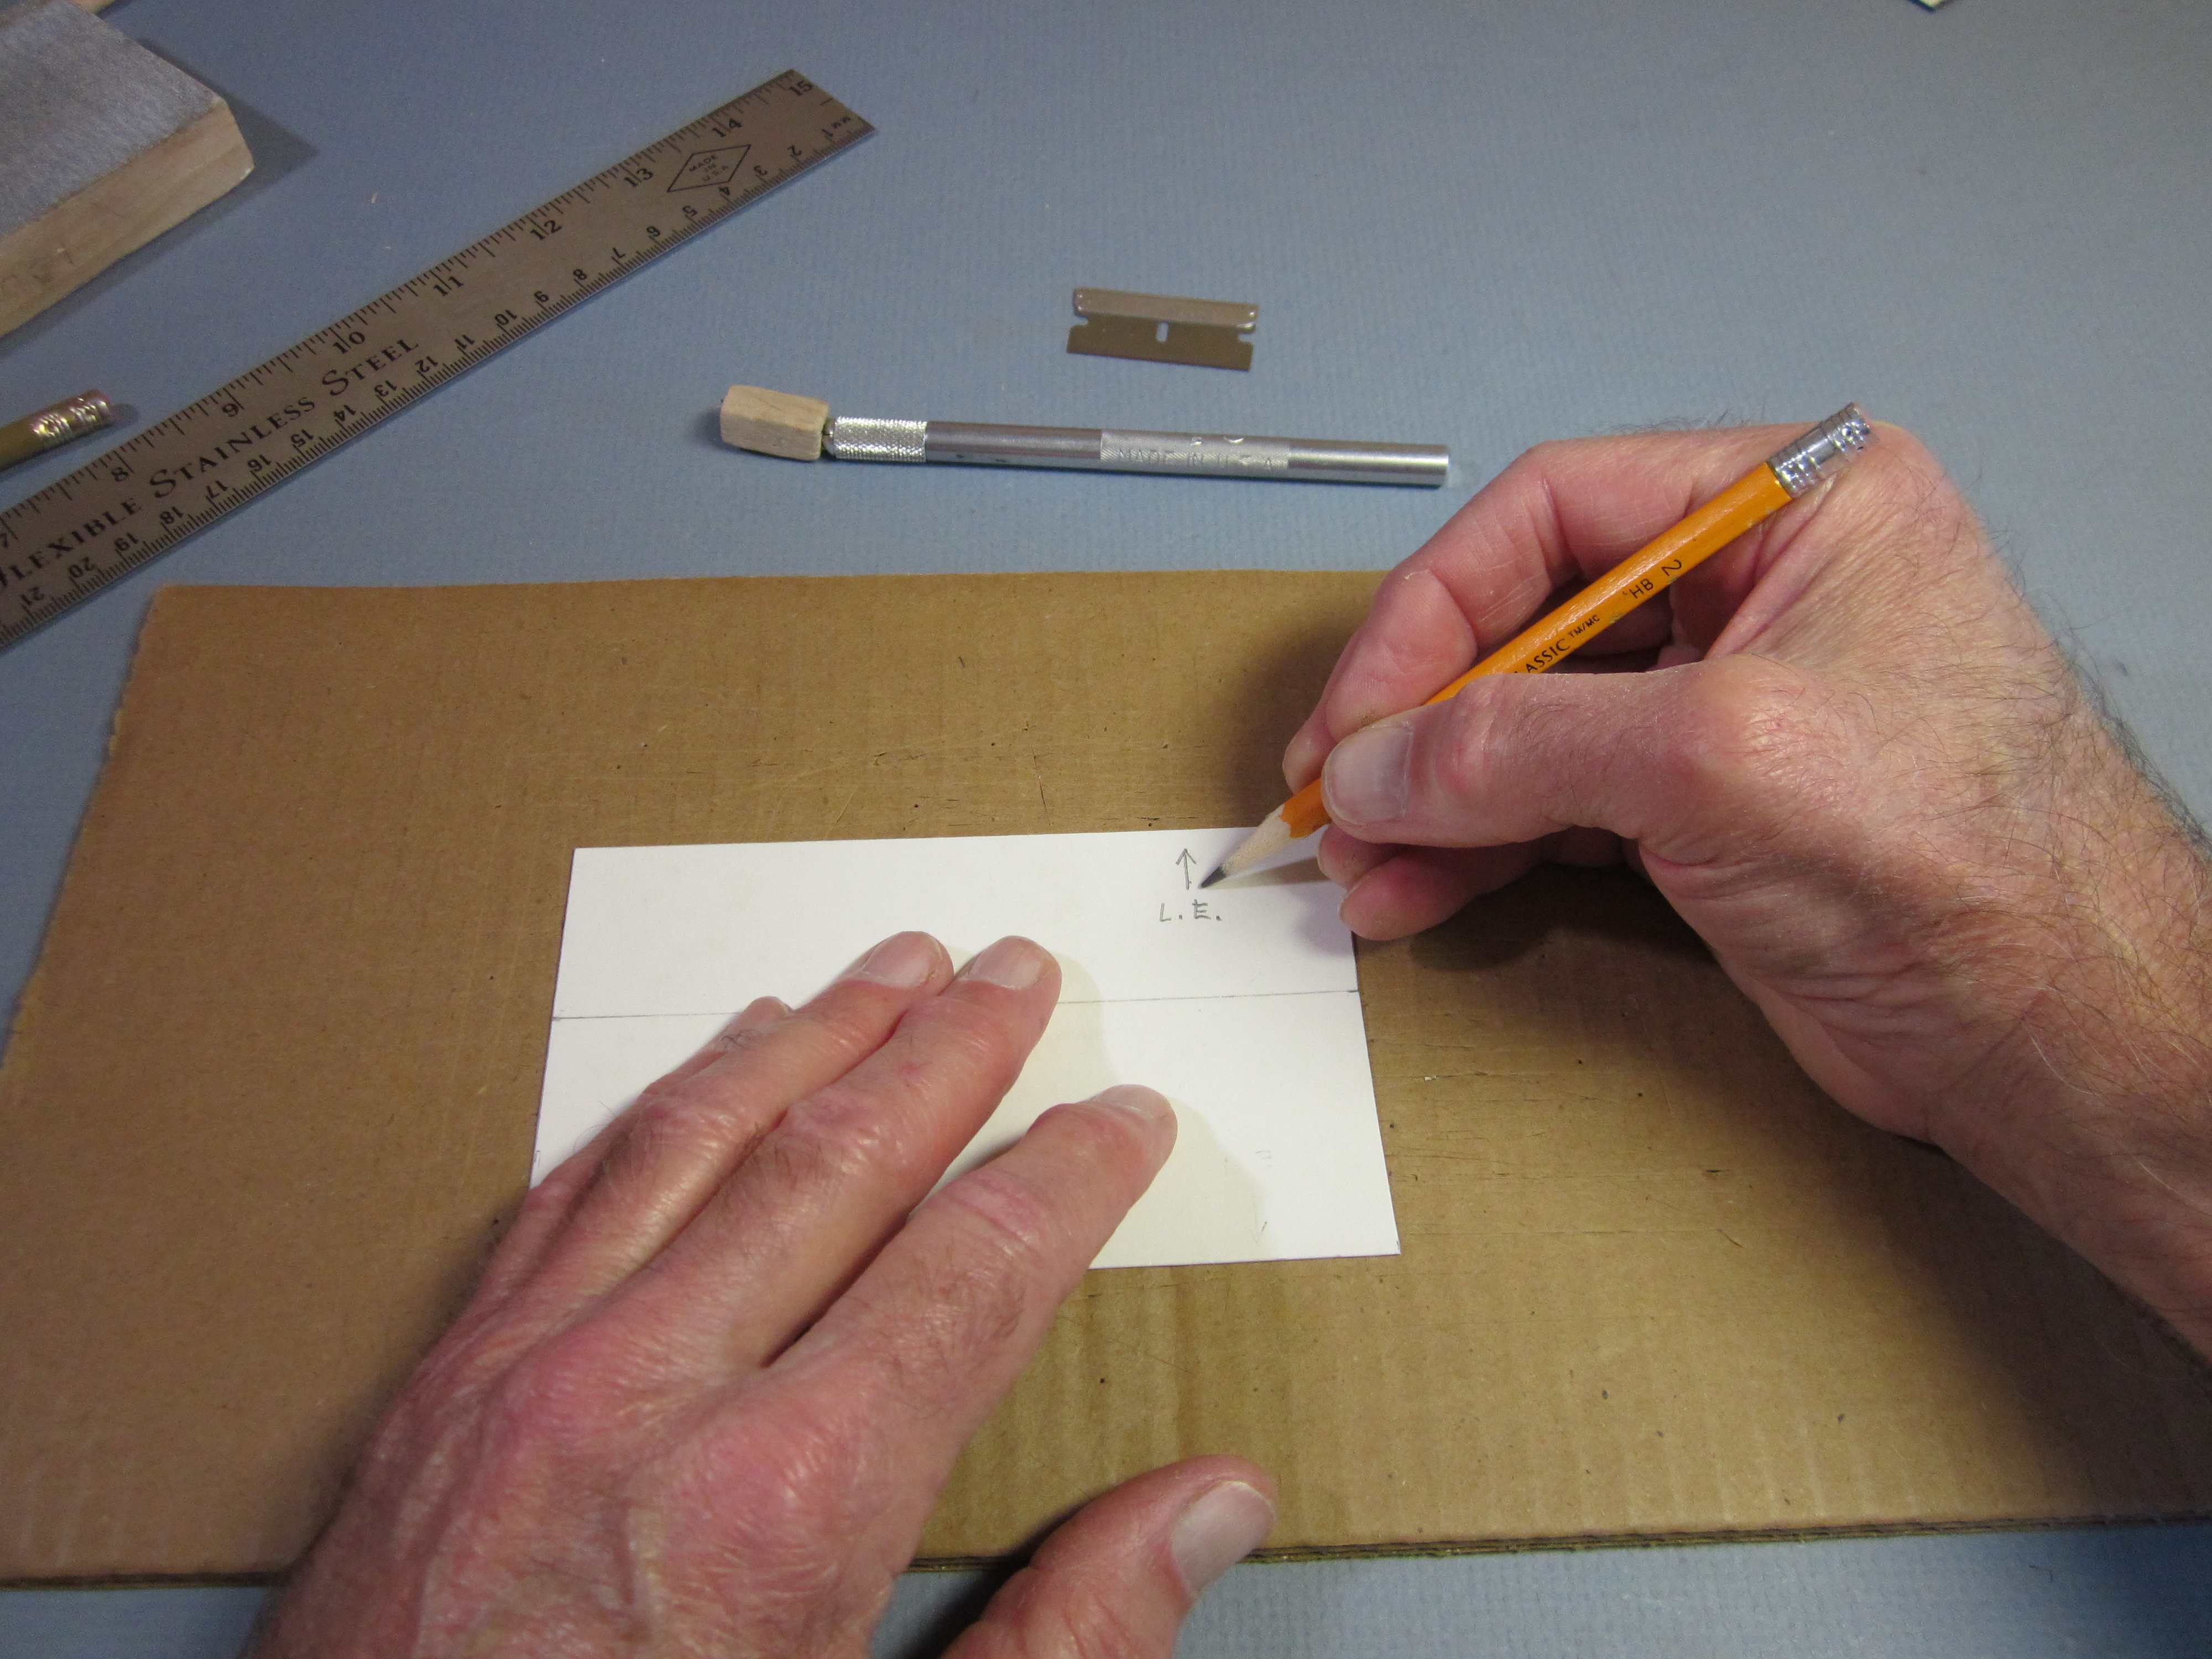 Make an arrow to point toward the leading edge of the wing. This is the edge that is 1 1/4″ away from the high point of camber.
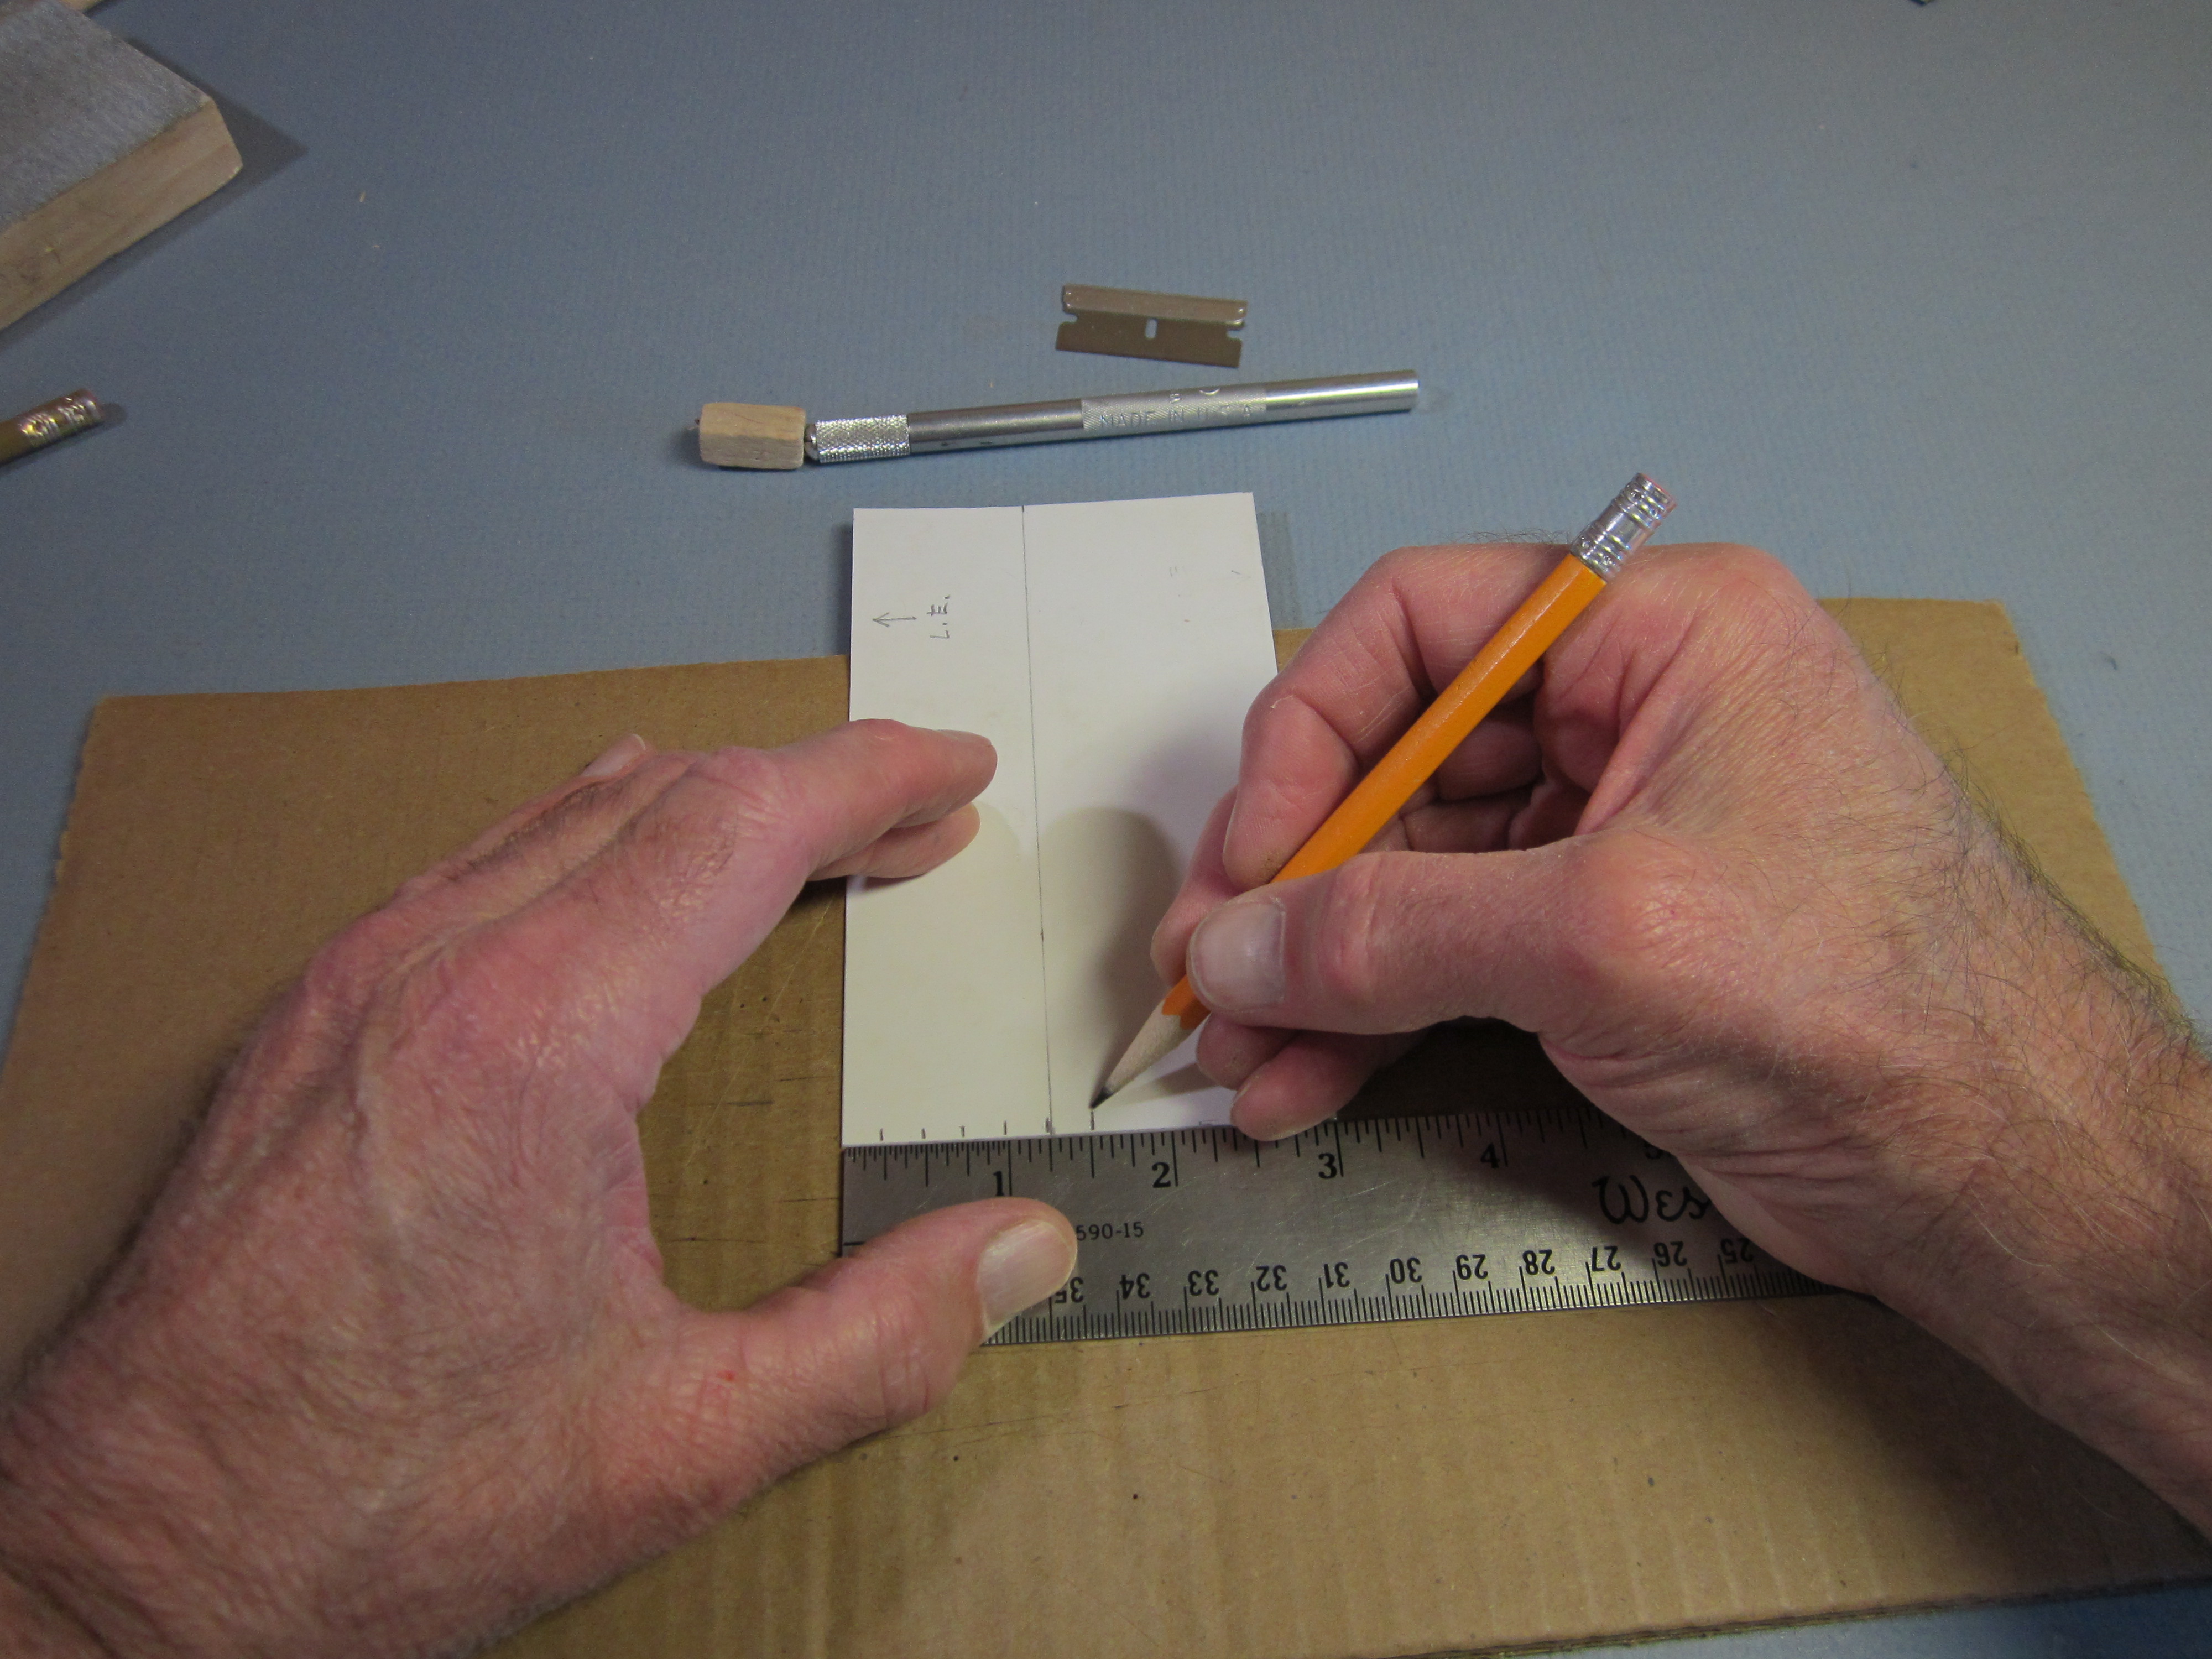 Along the straight edge, make 6 marks at 1/4″ intervals, starting from the leading edge. These mark the positions of the camber creases. (I now suggest making a seventh crease, 1/2″ beyond the sixth.)
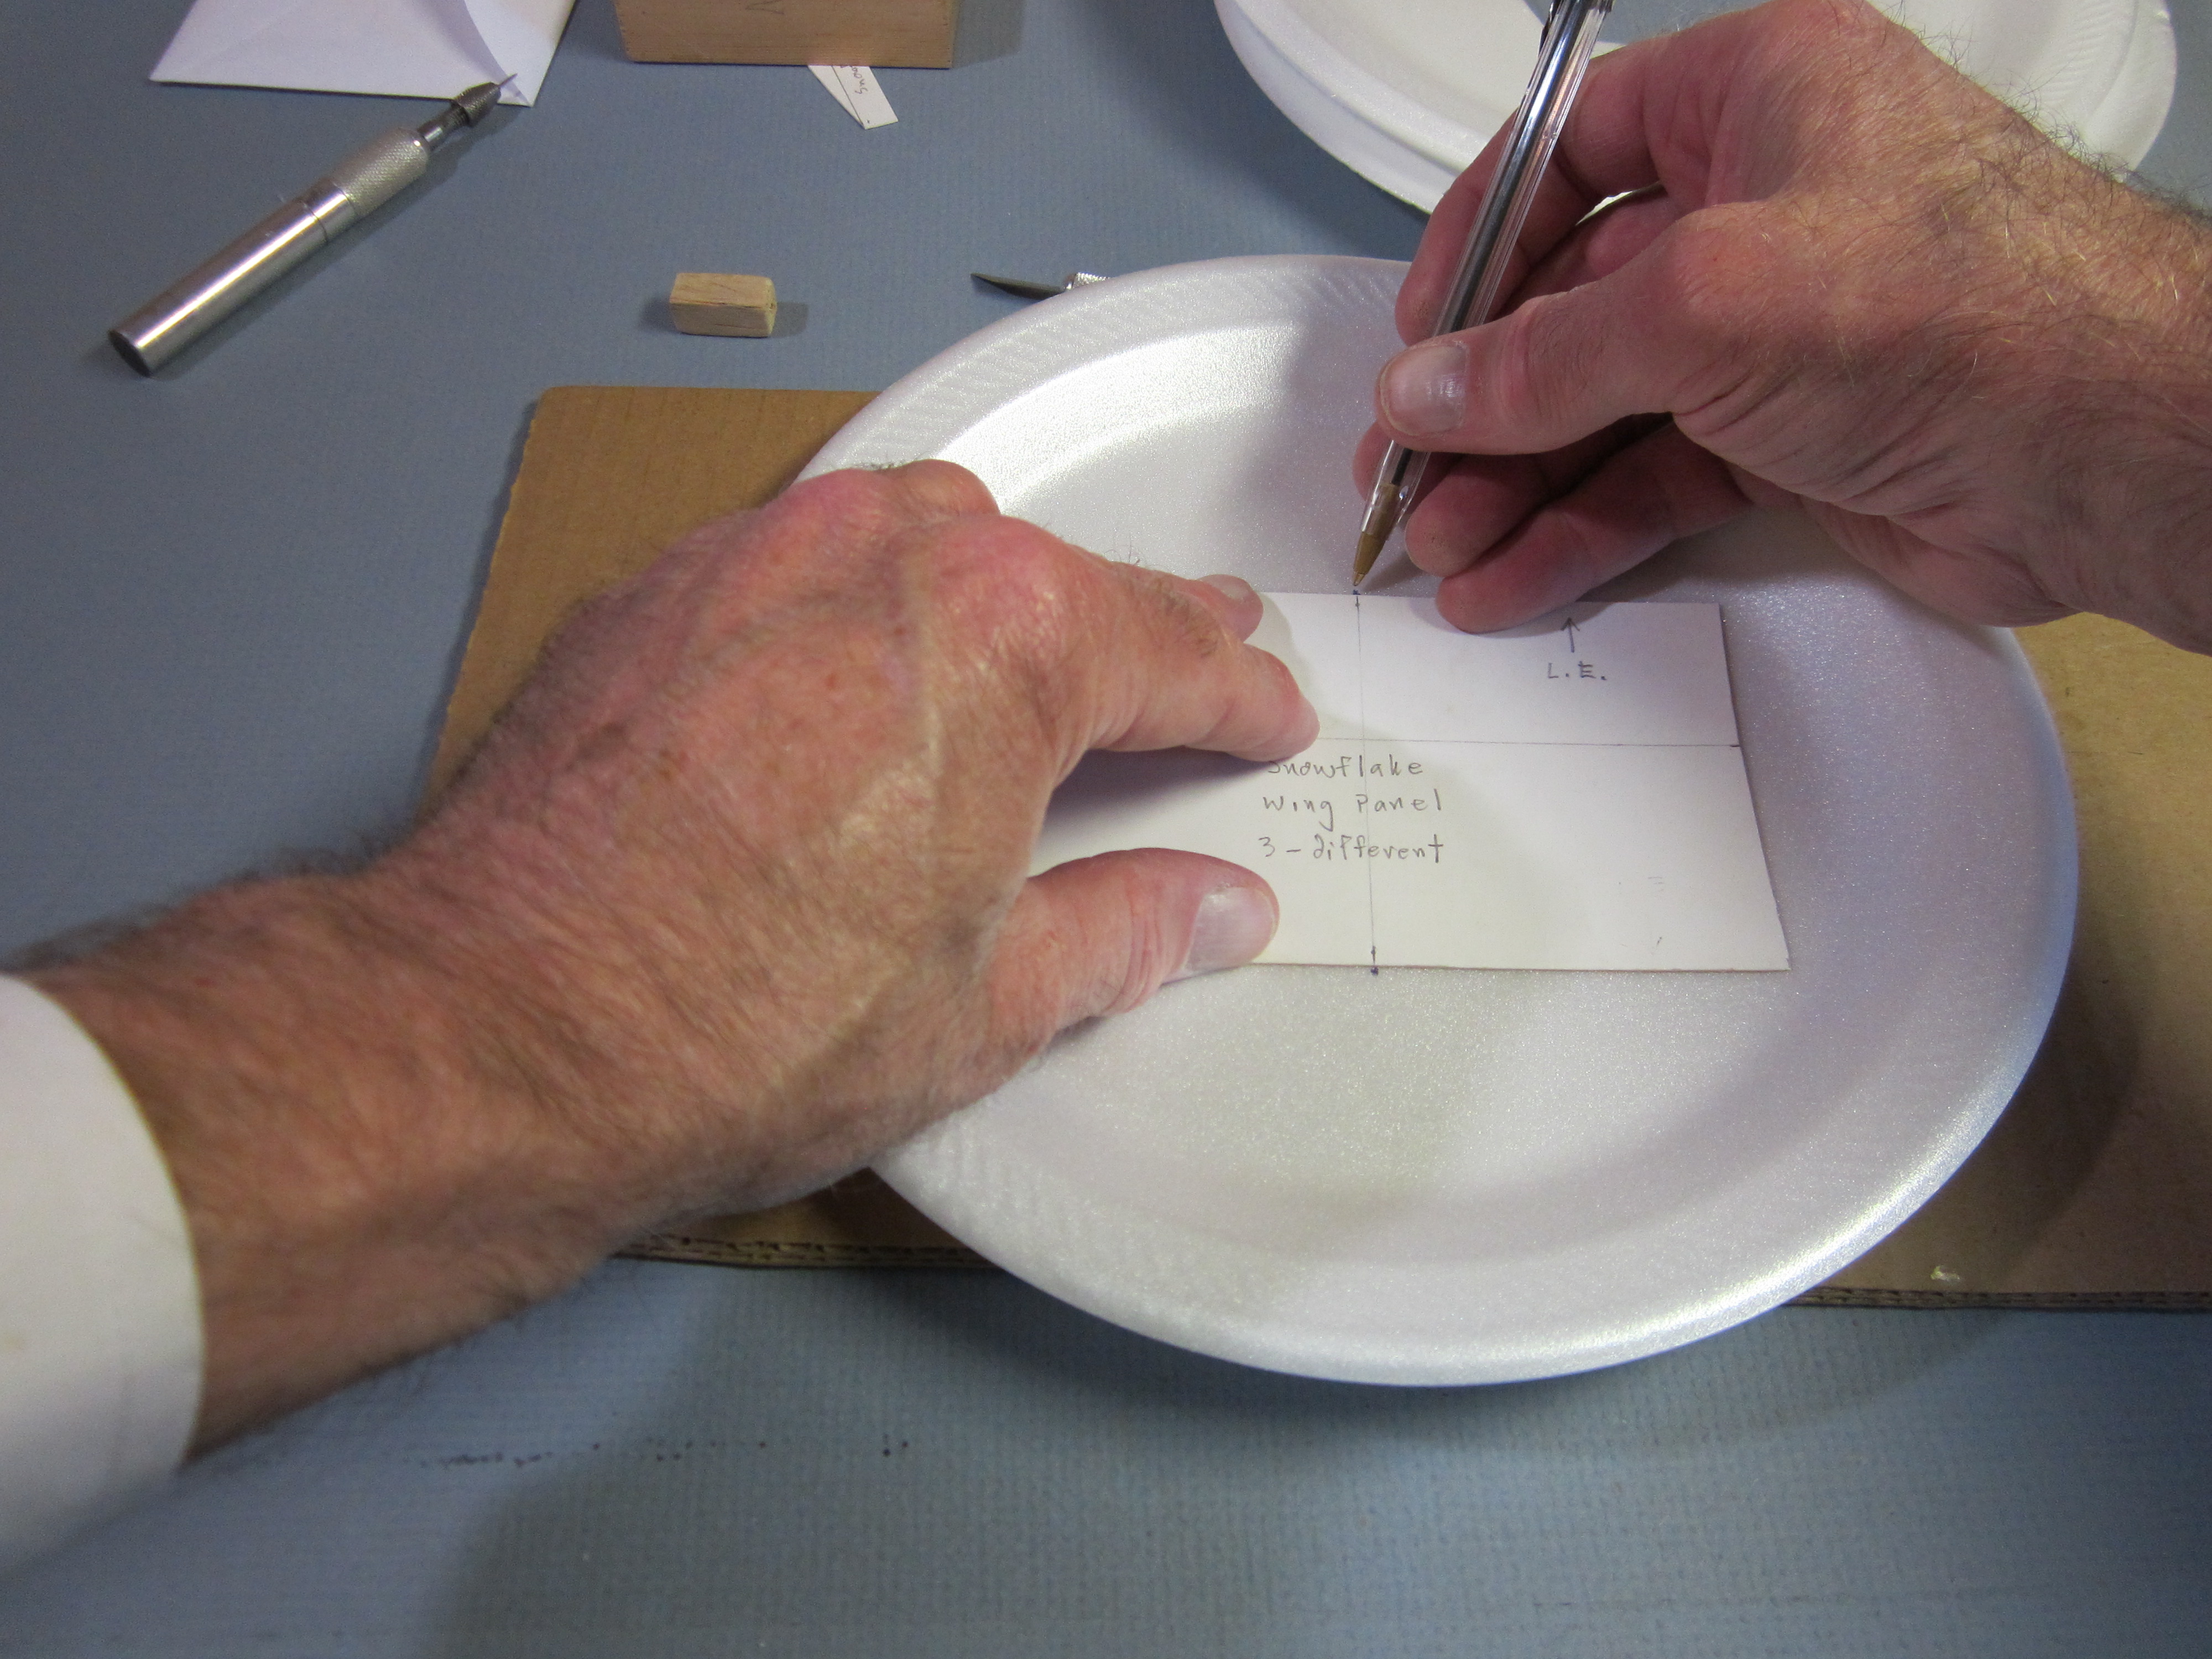
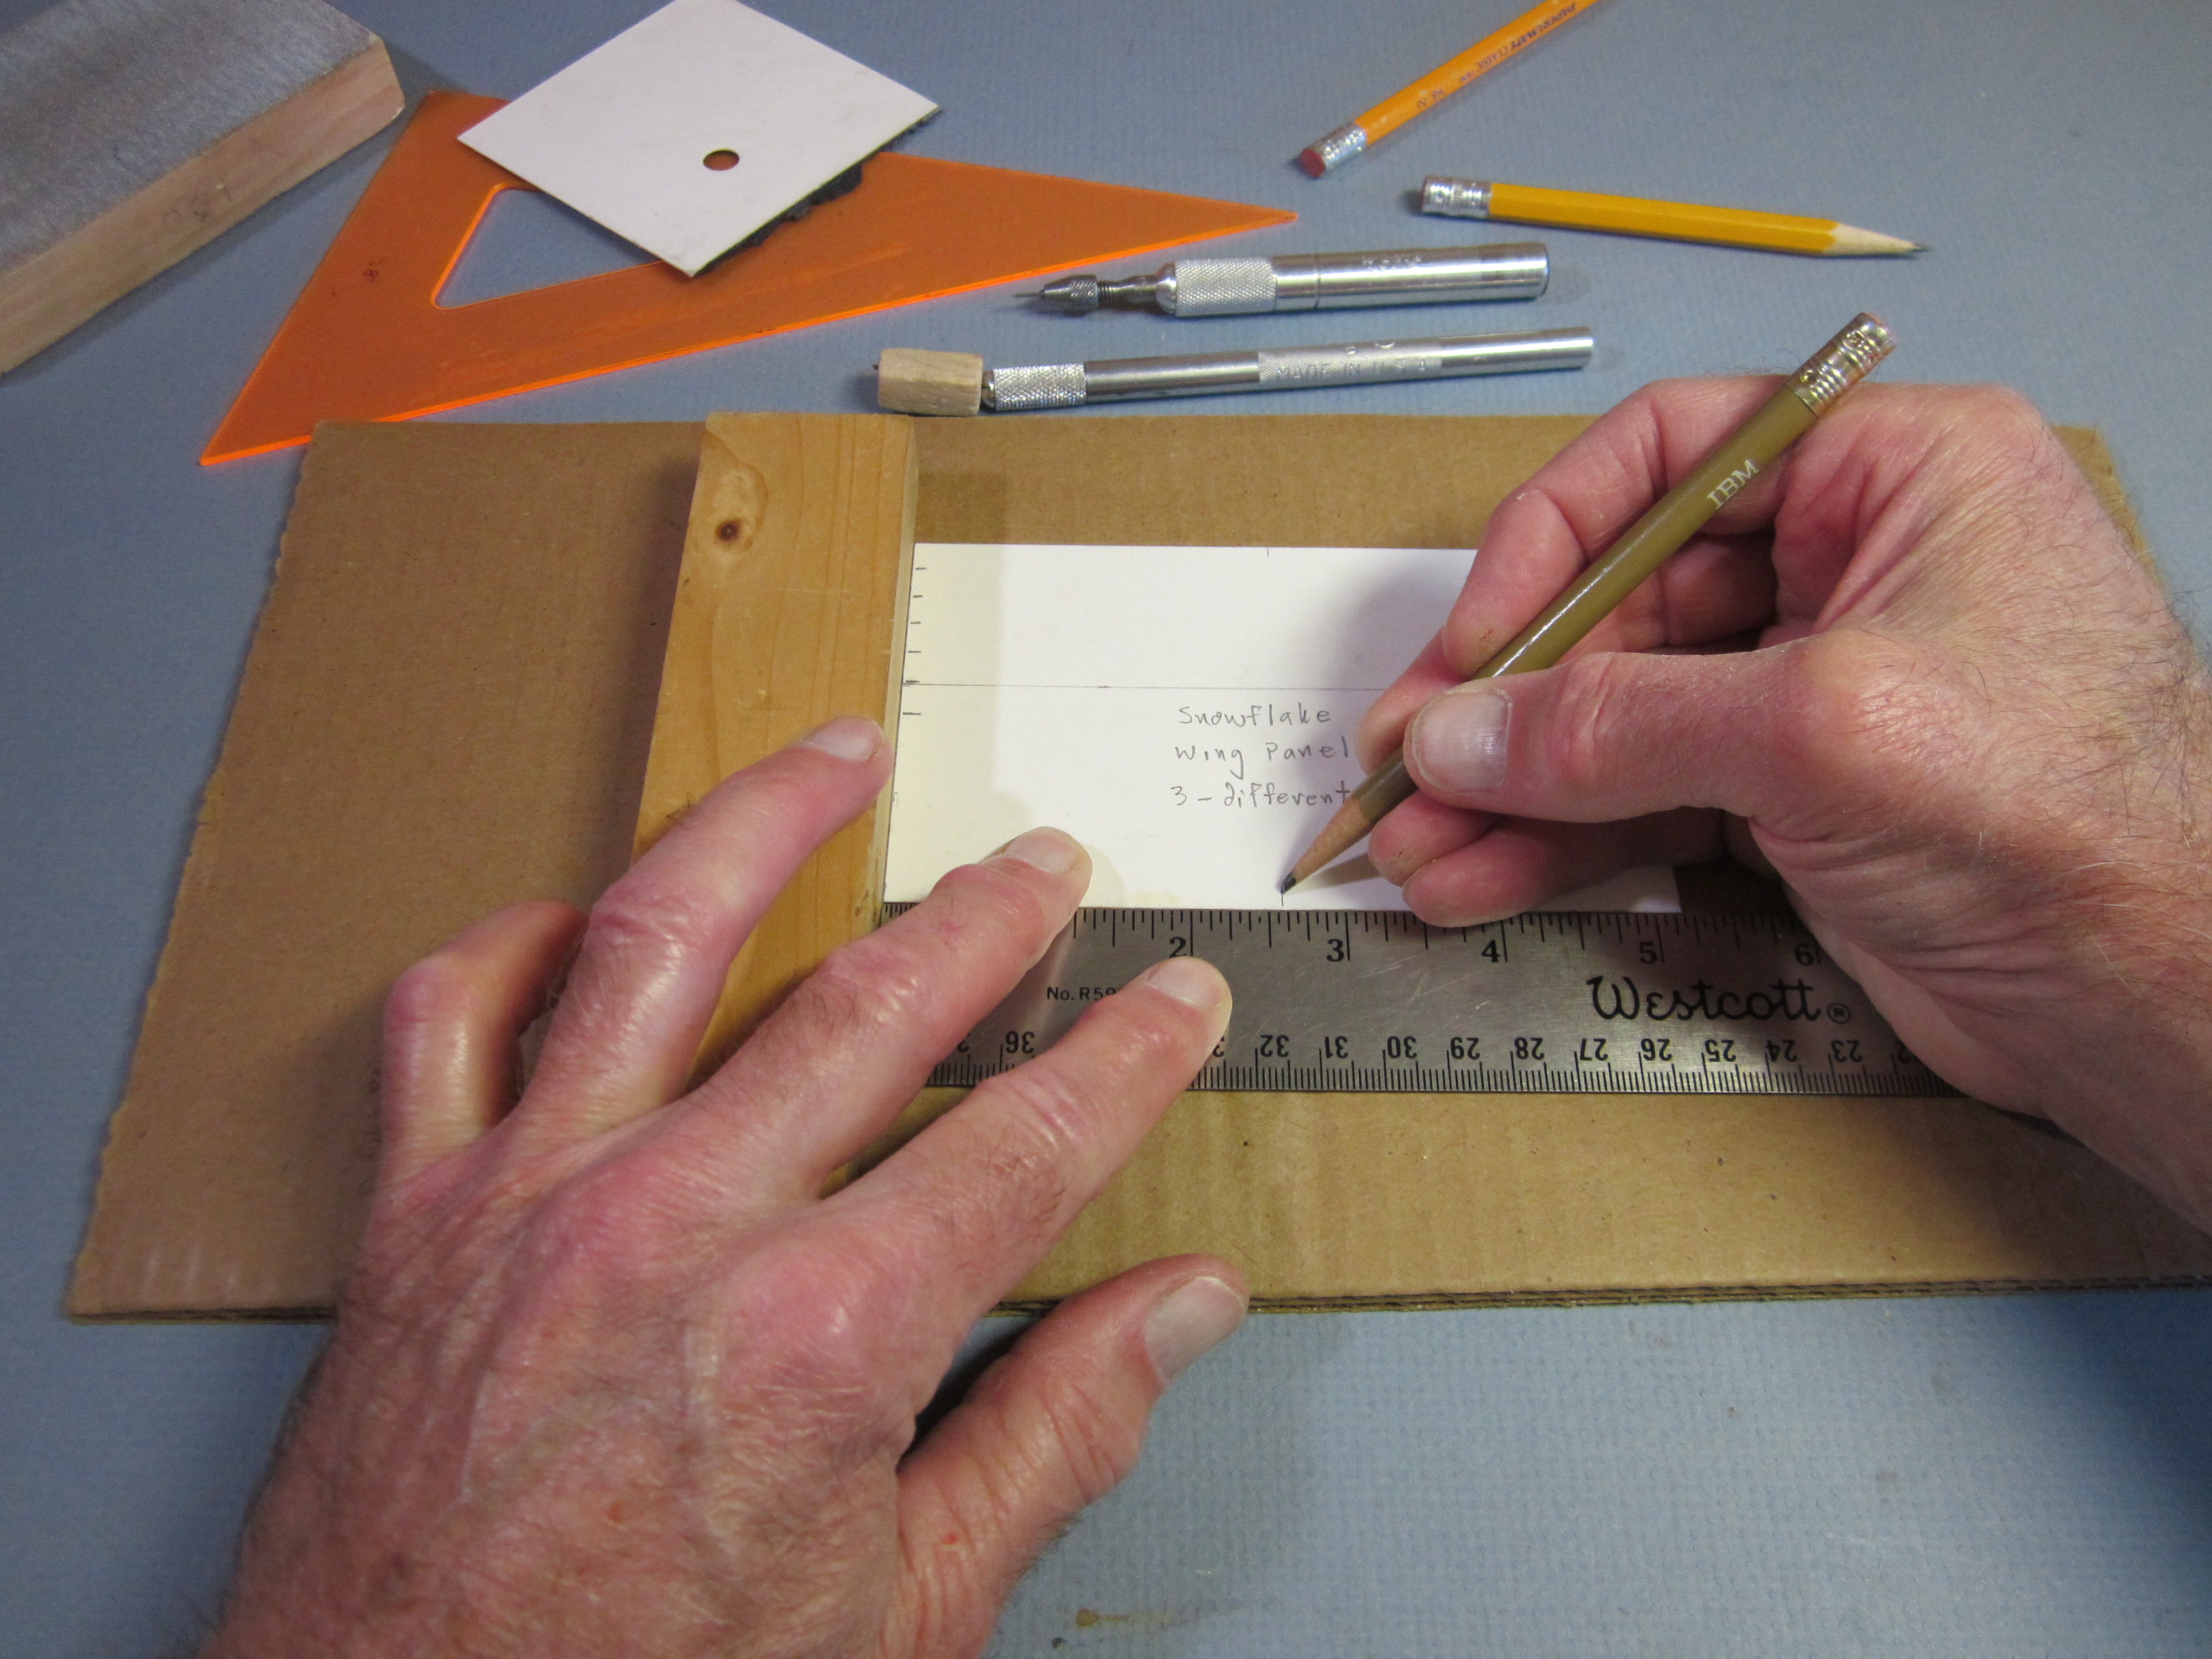 Mark a point halfway along the leading and trailing edges, 2 19/32″ from the ends. These mark the center line of the center wing panel. This template will be used to make all three wing panels. Note that I have written a label on the template so it can be identified later.
 Punch holes on the centerline about 3/32″ in from both edges. These holes will be transferred to the foam center wing panel to locate it on the center rib.
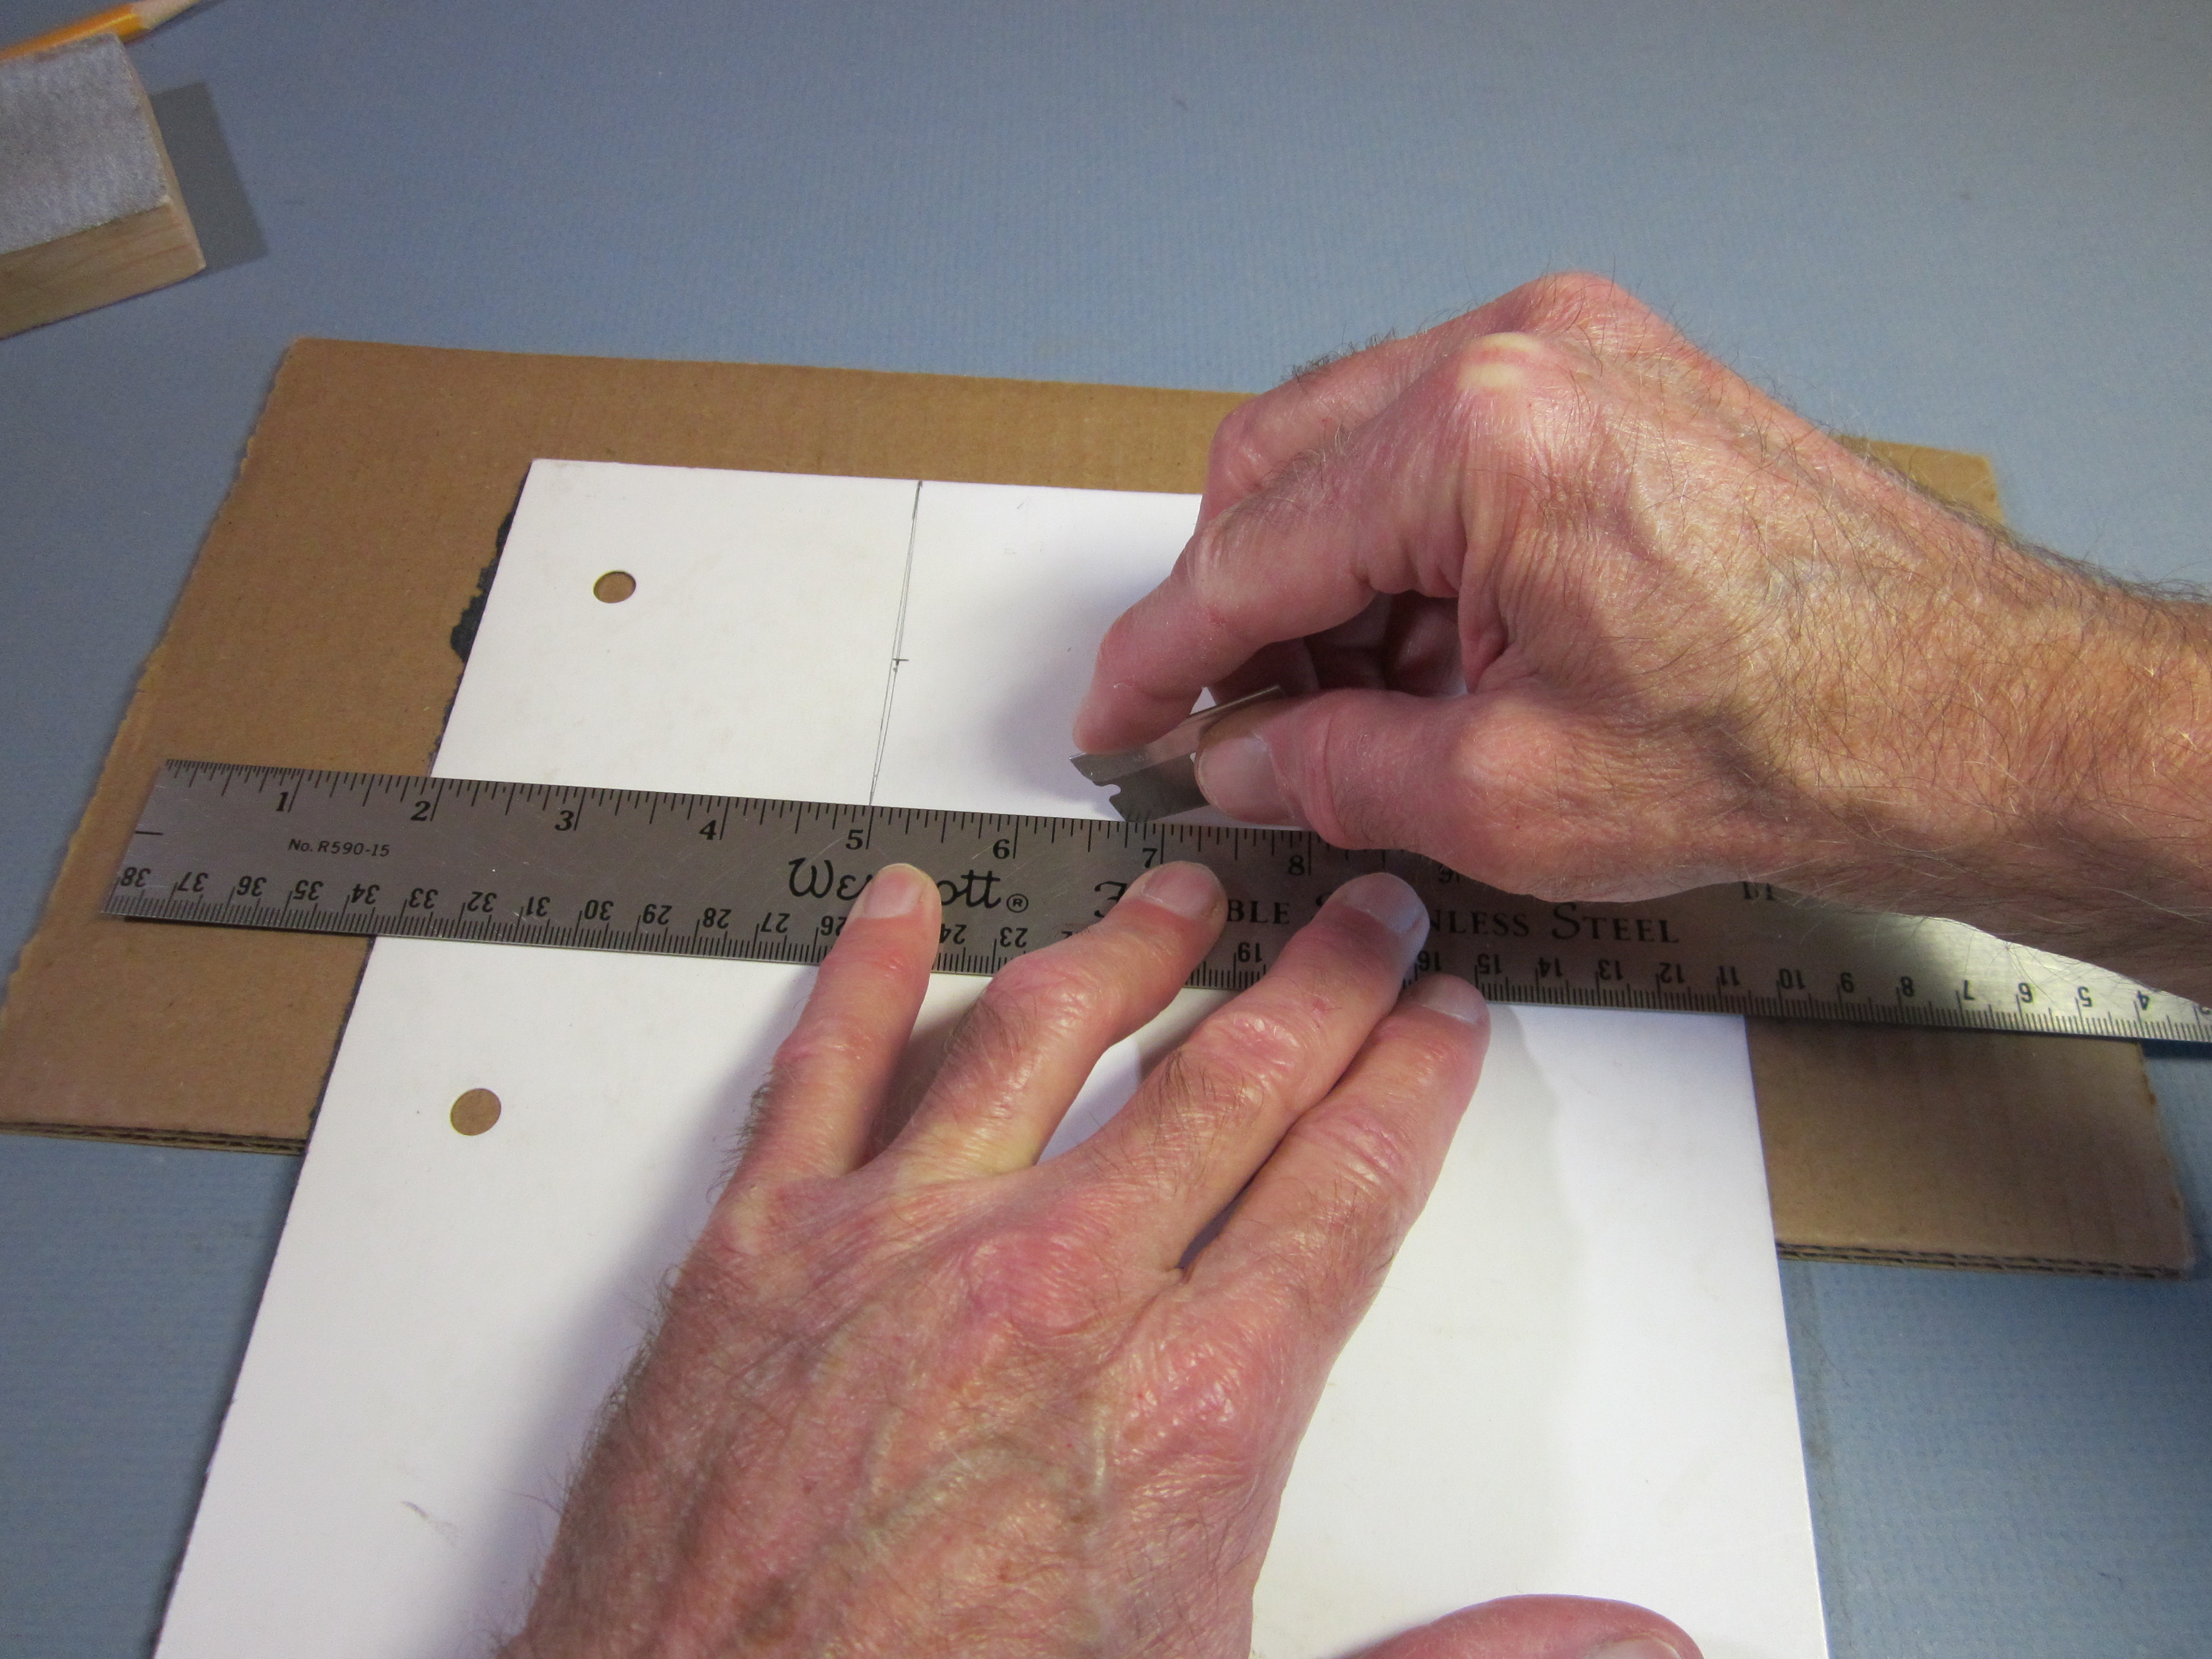
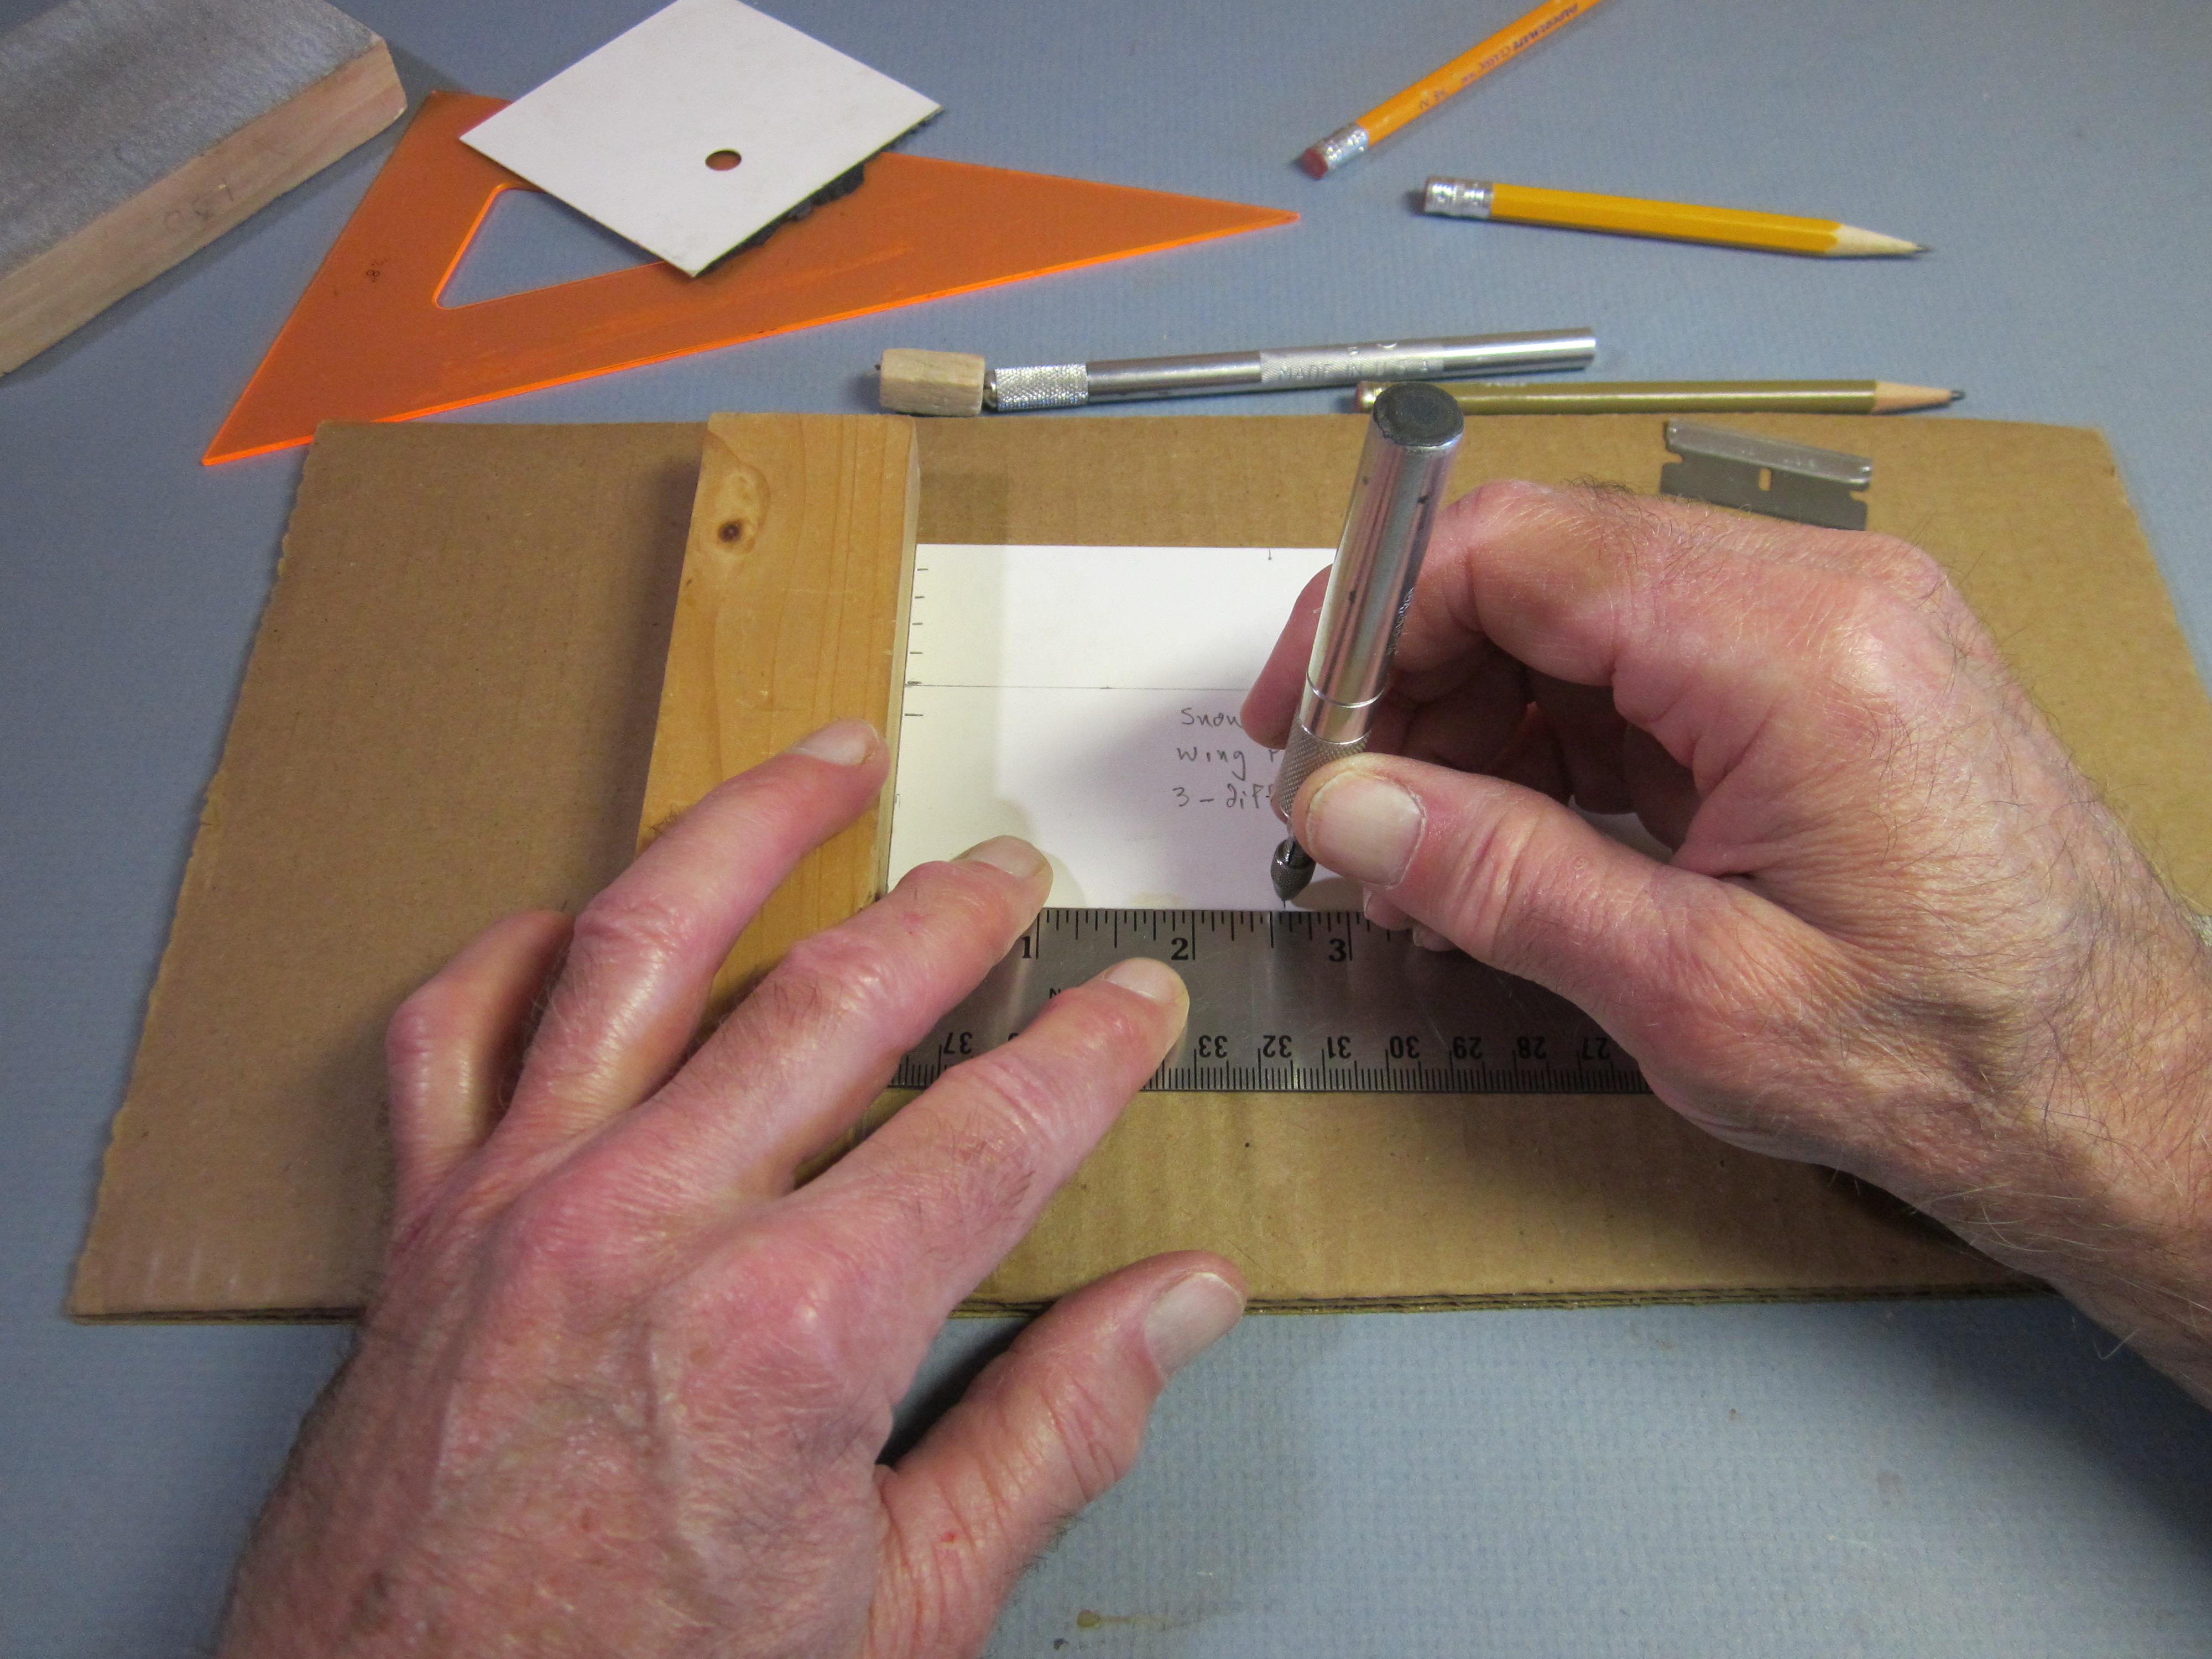
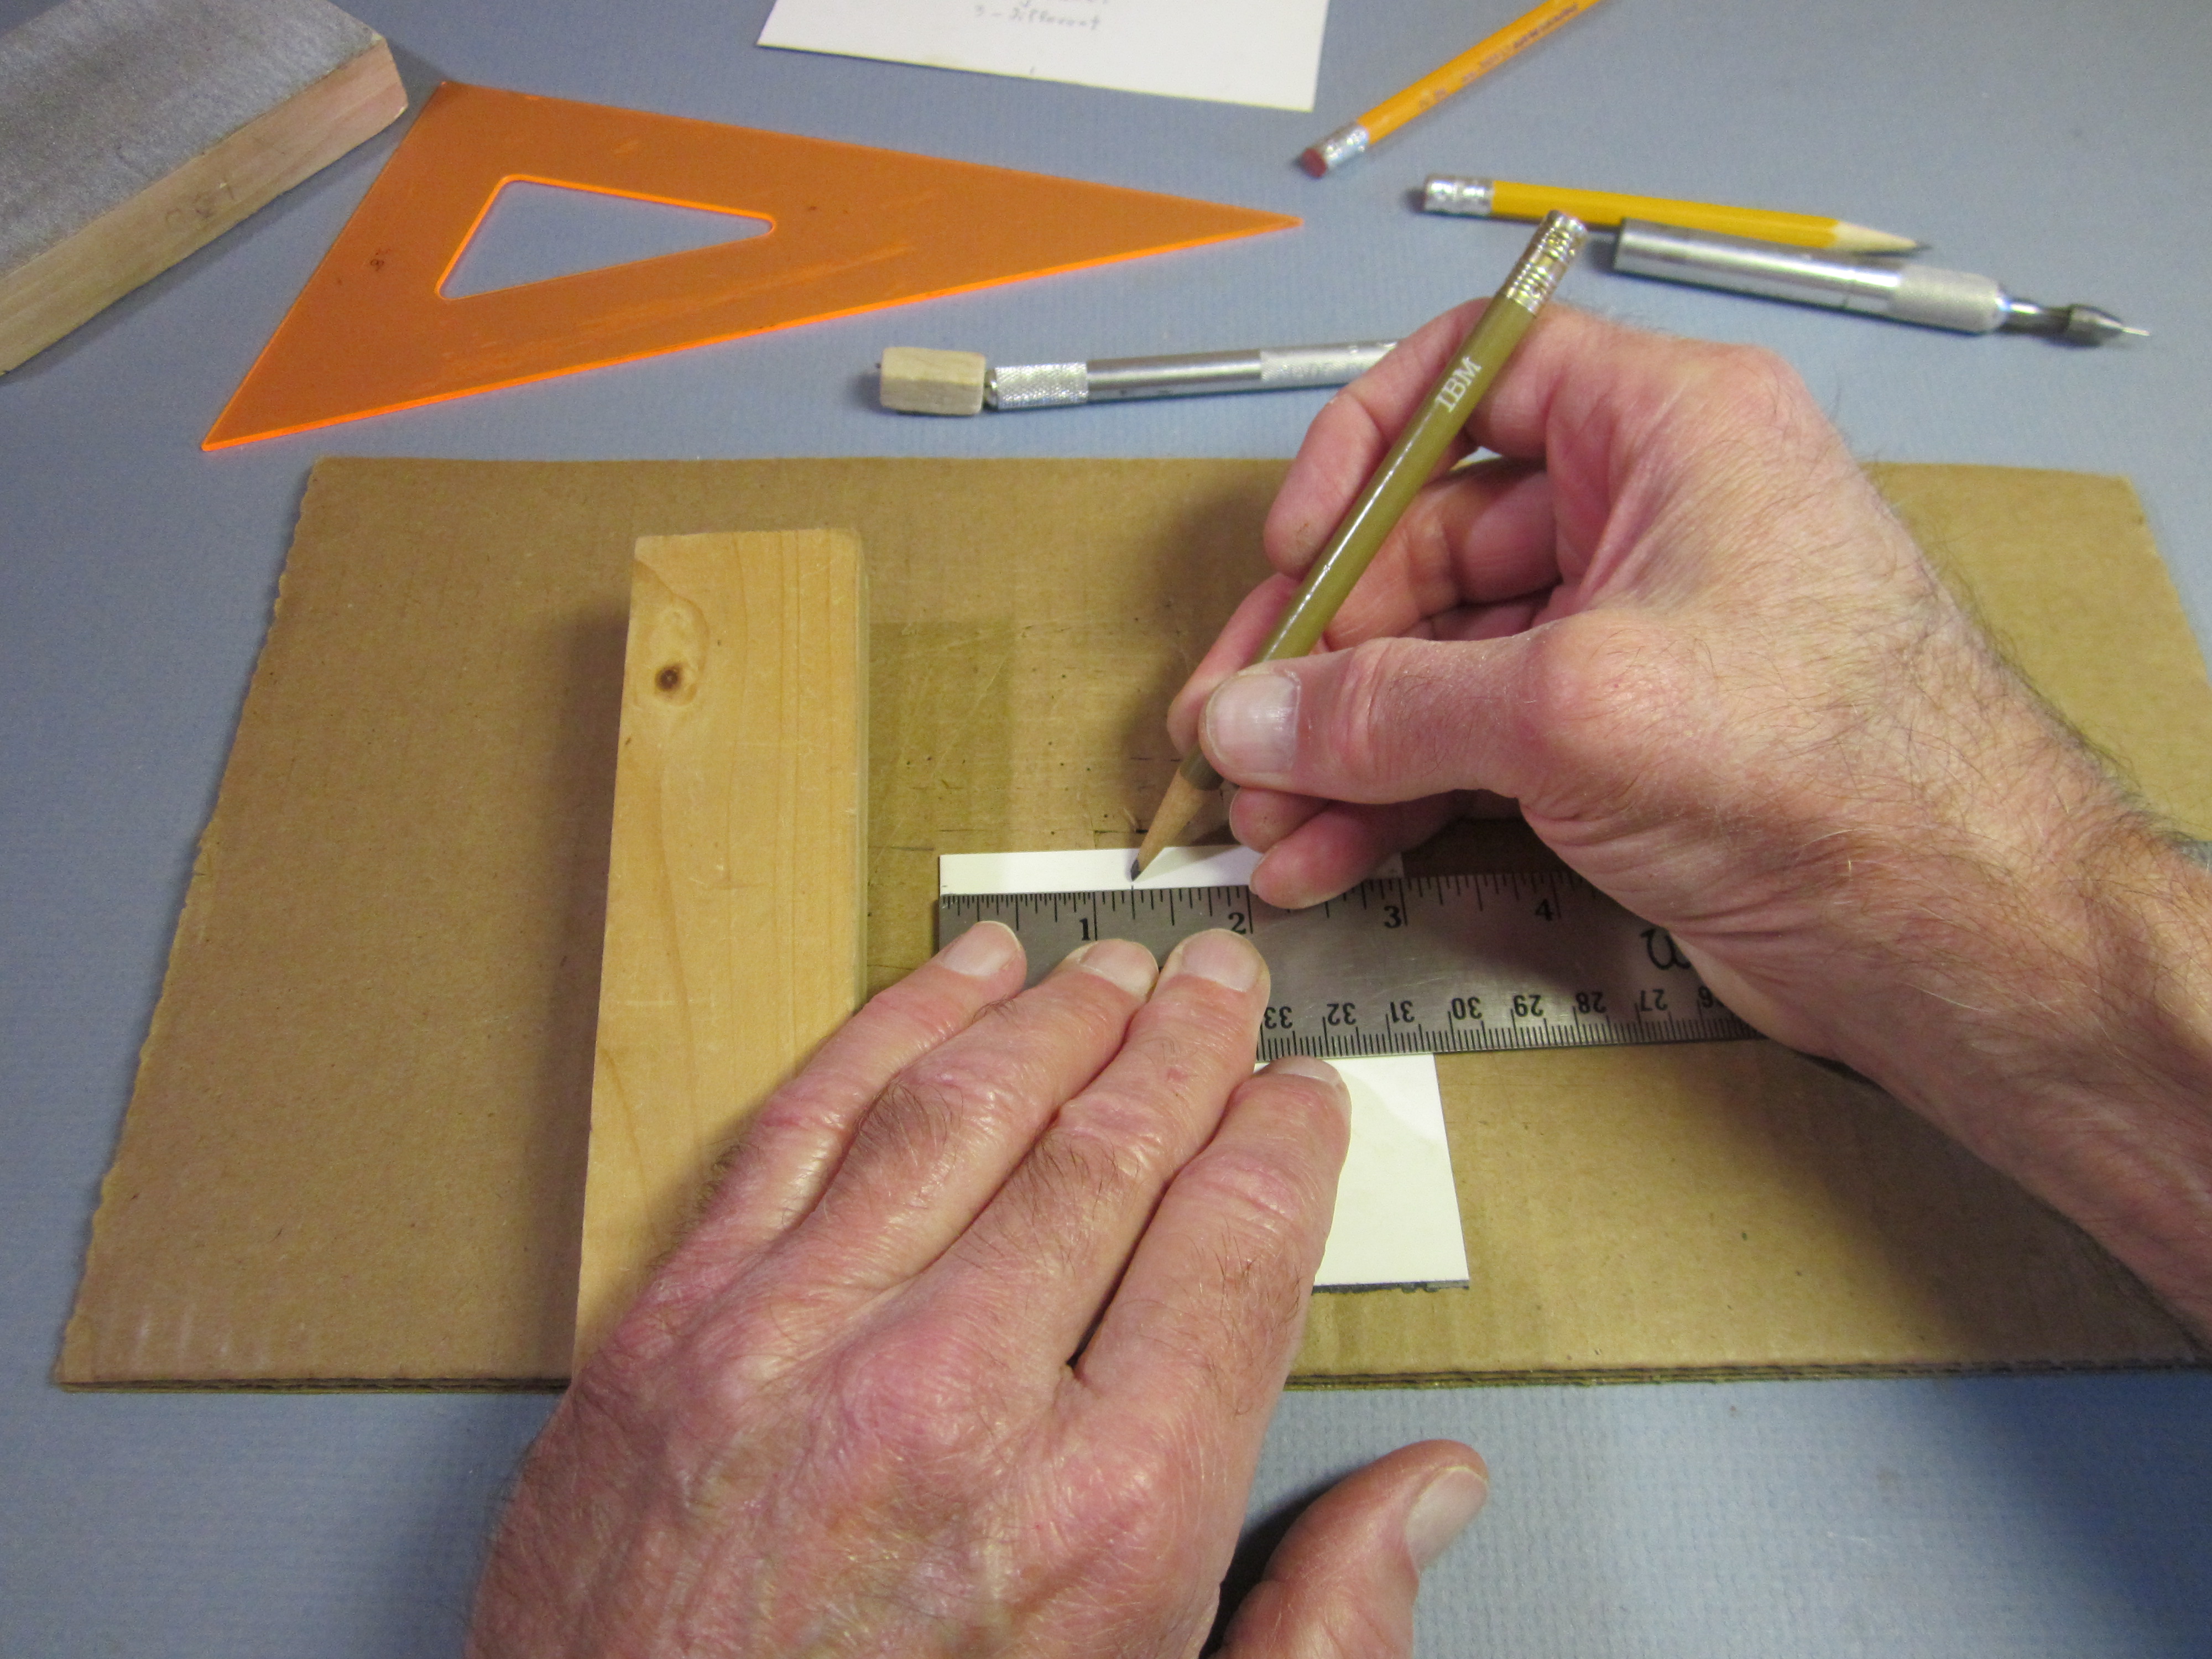
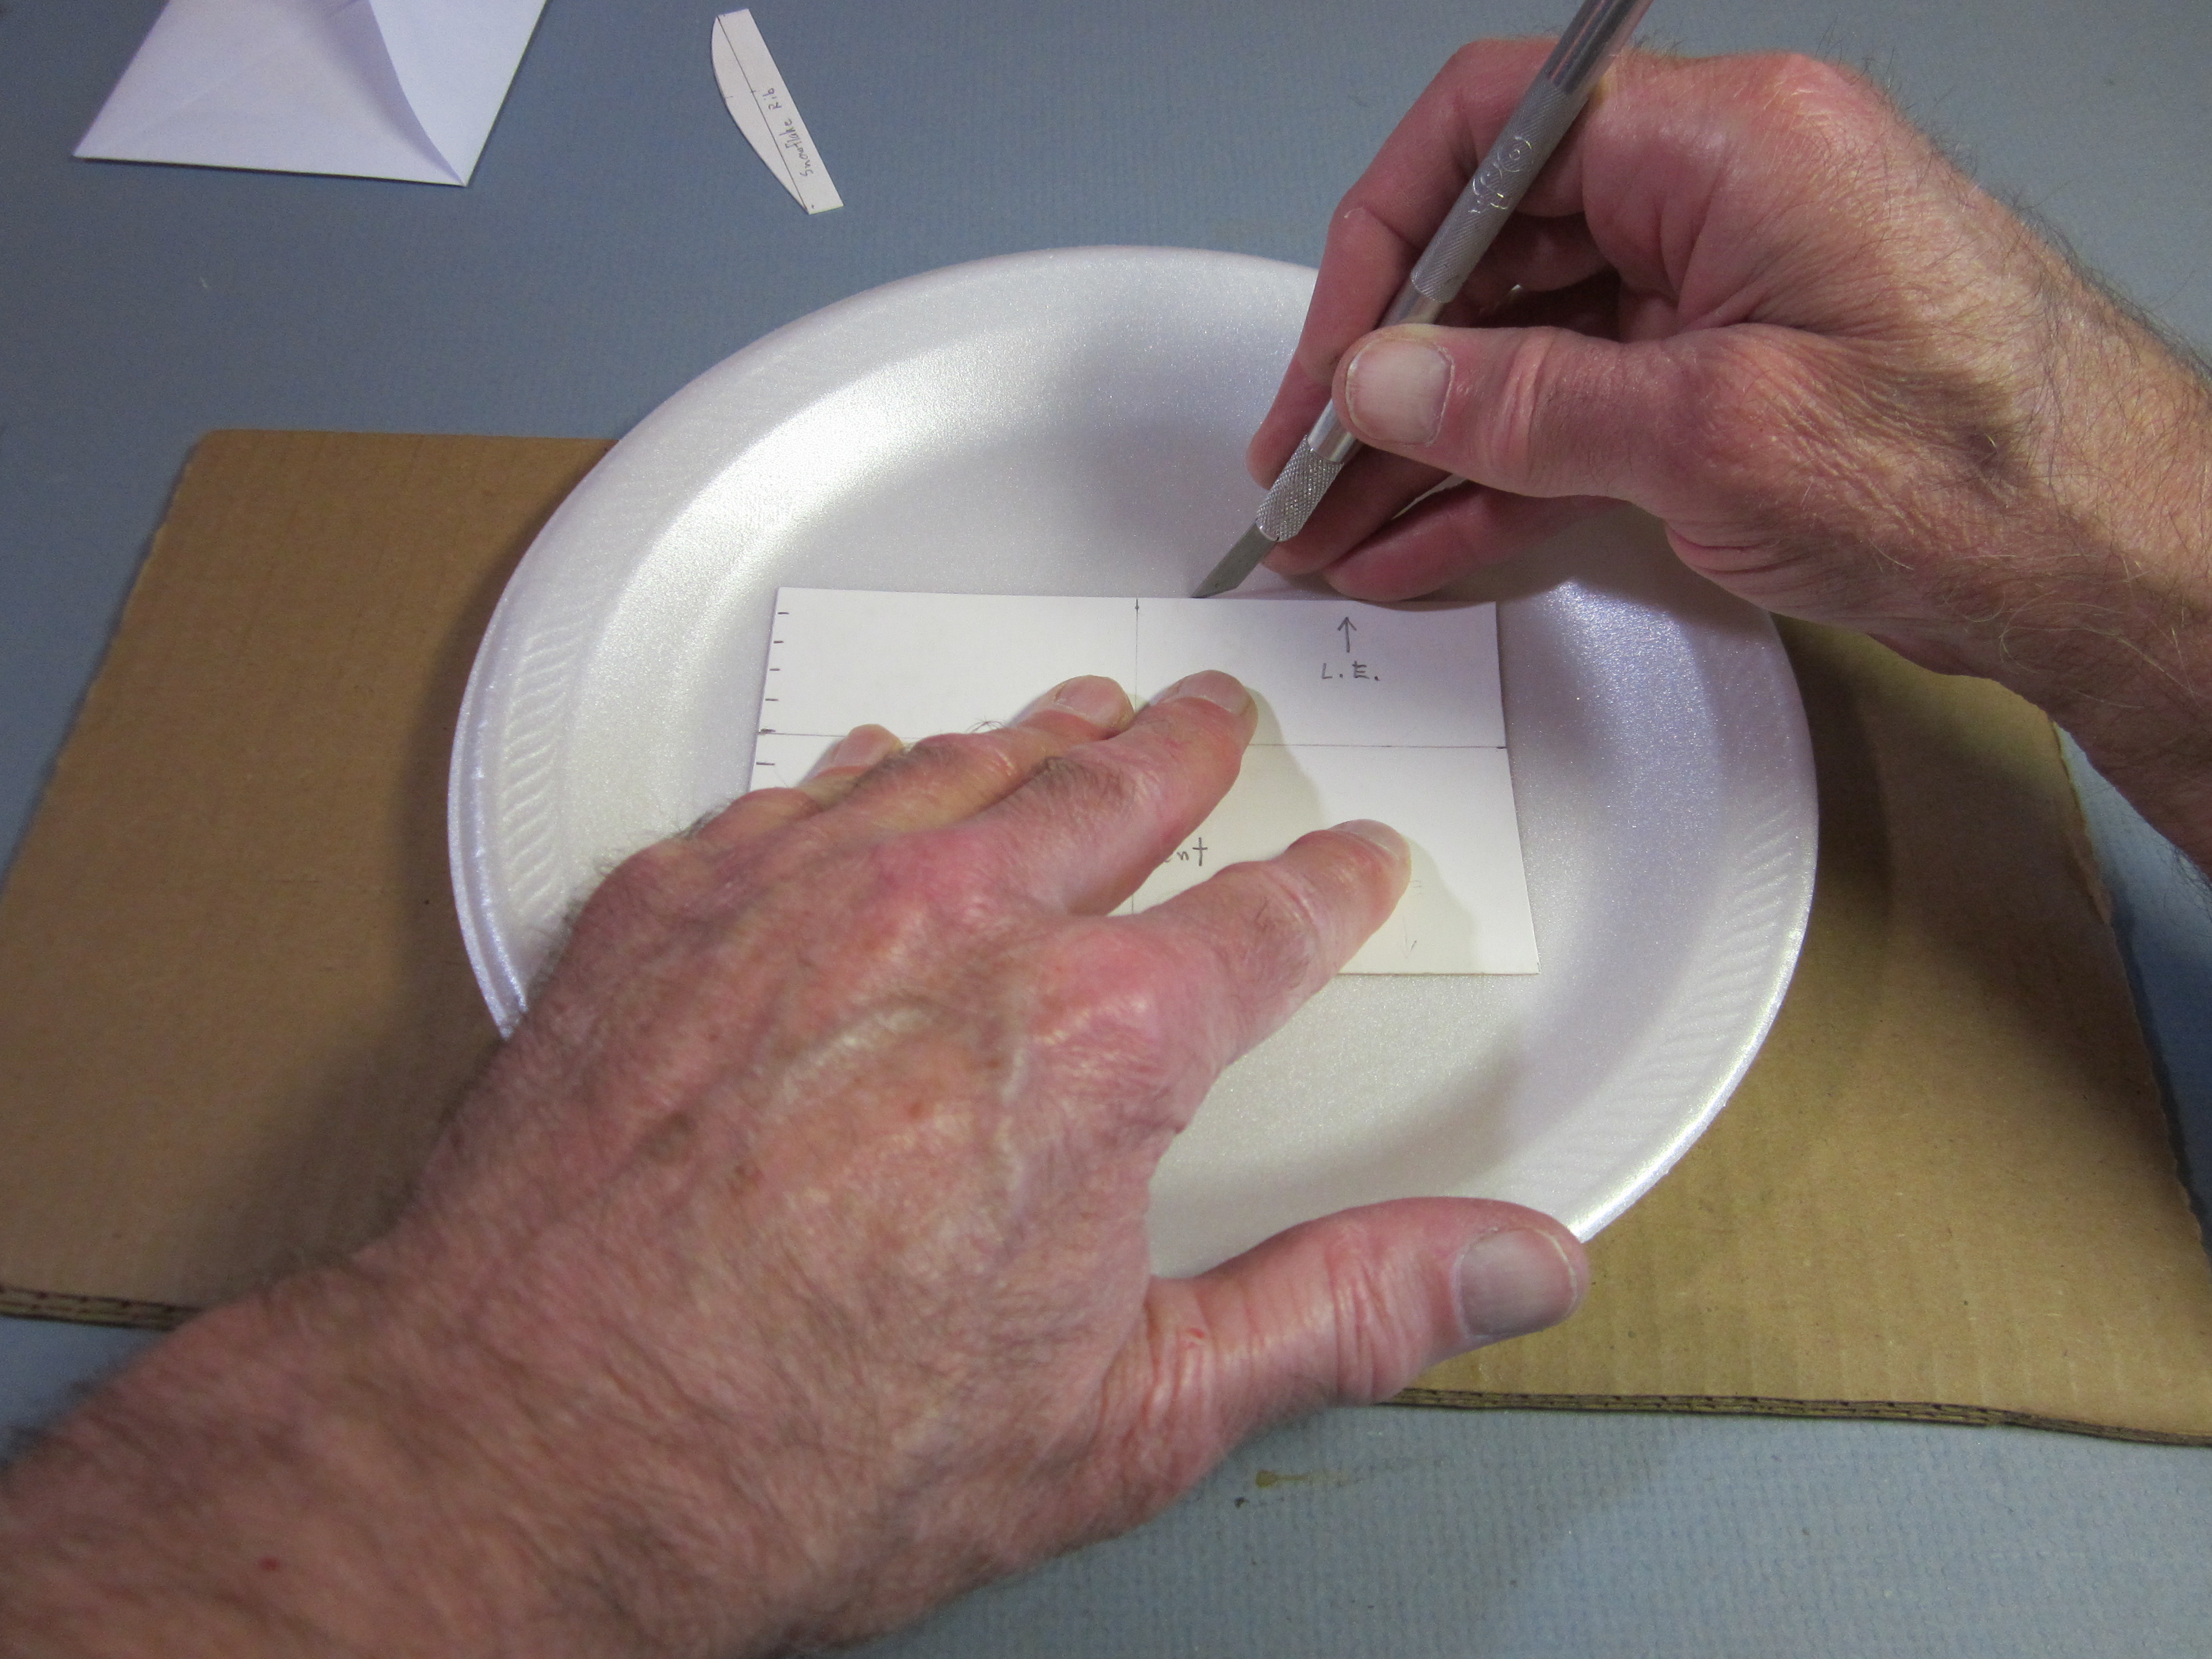
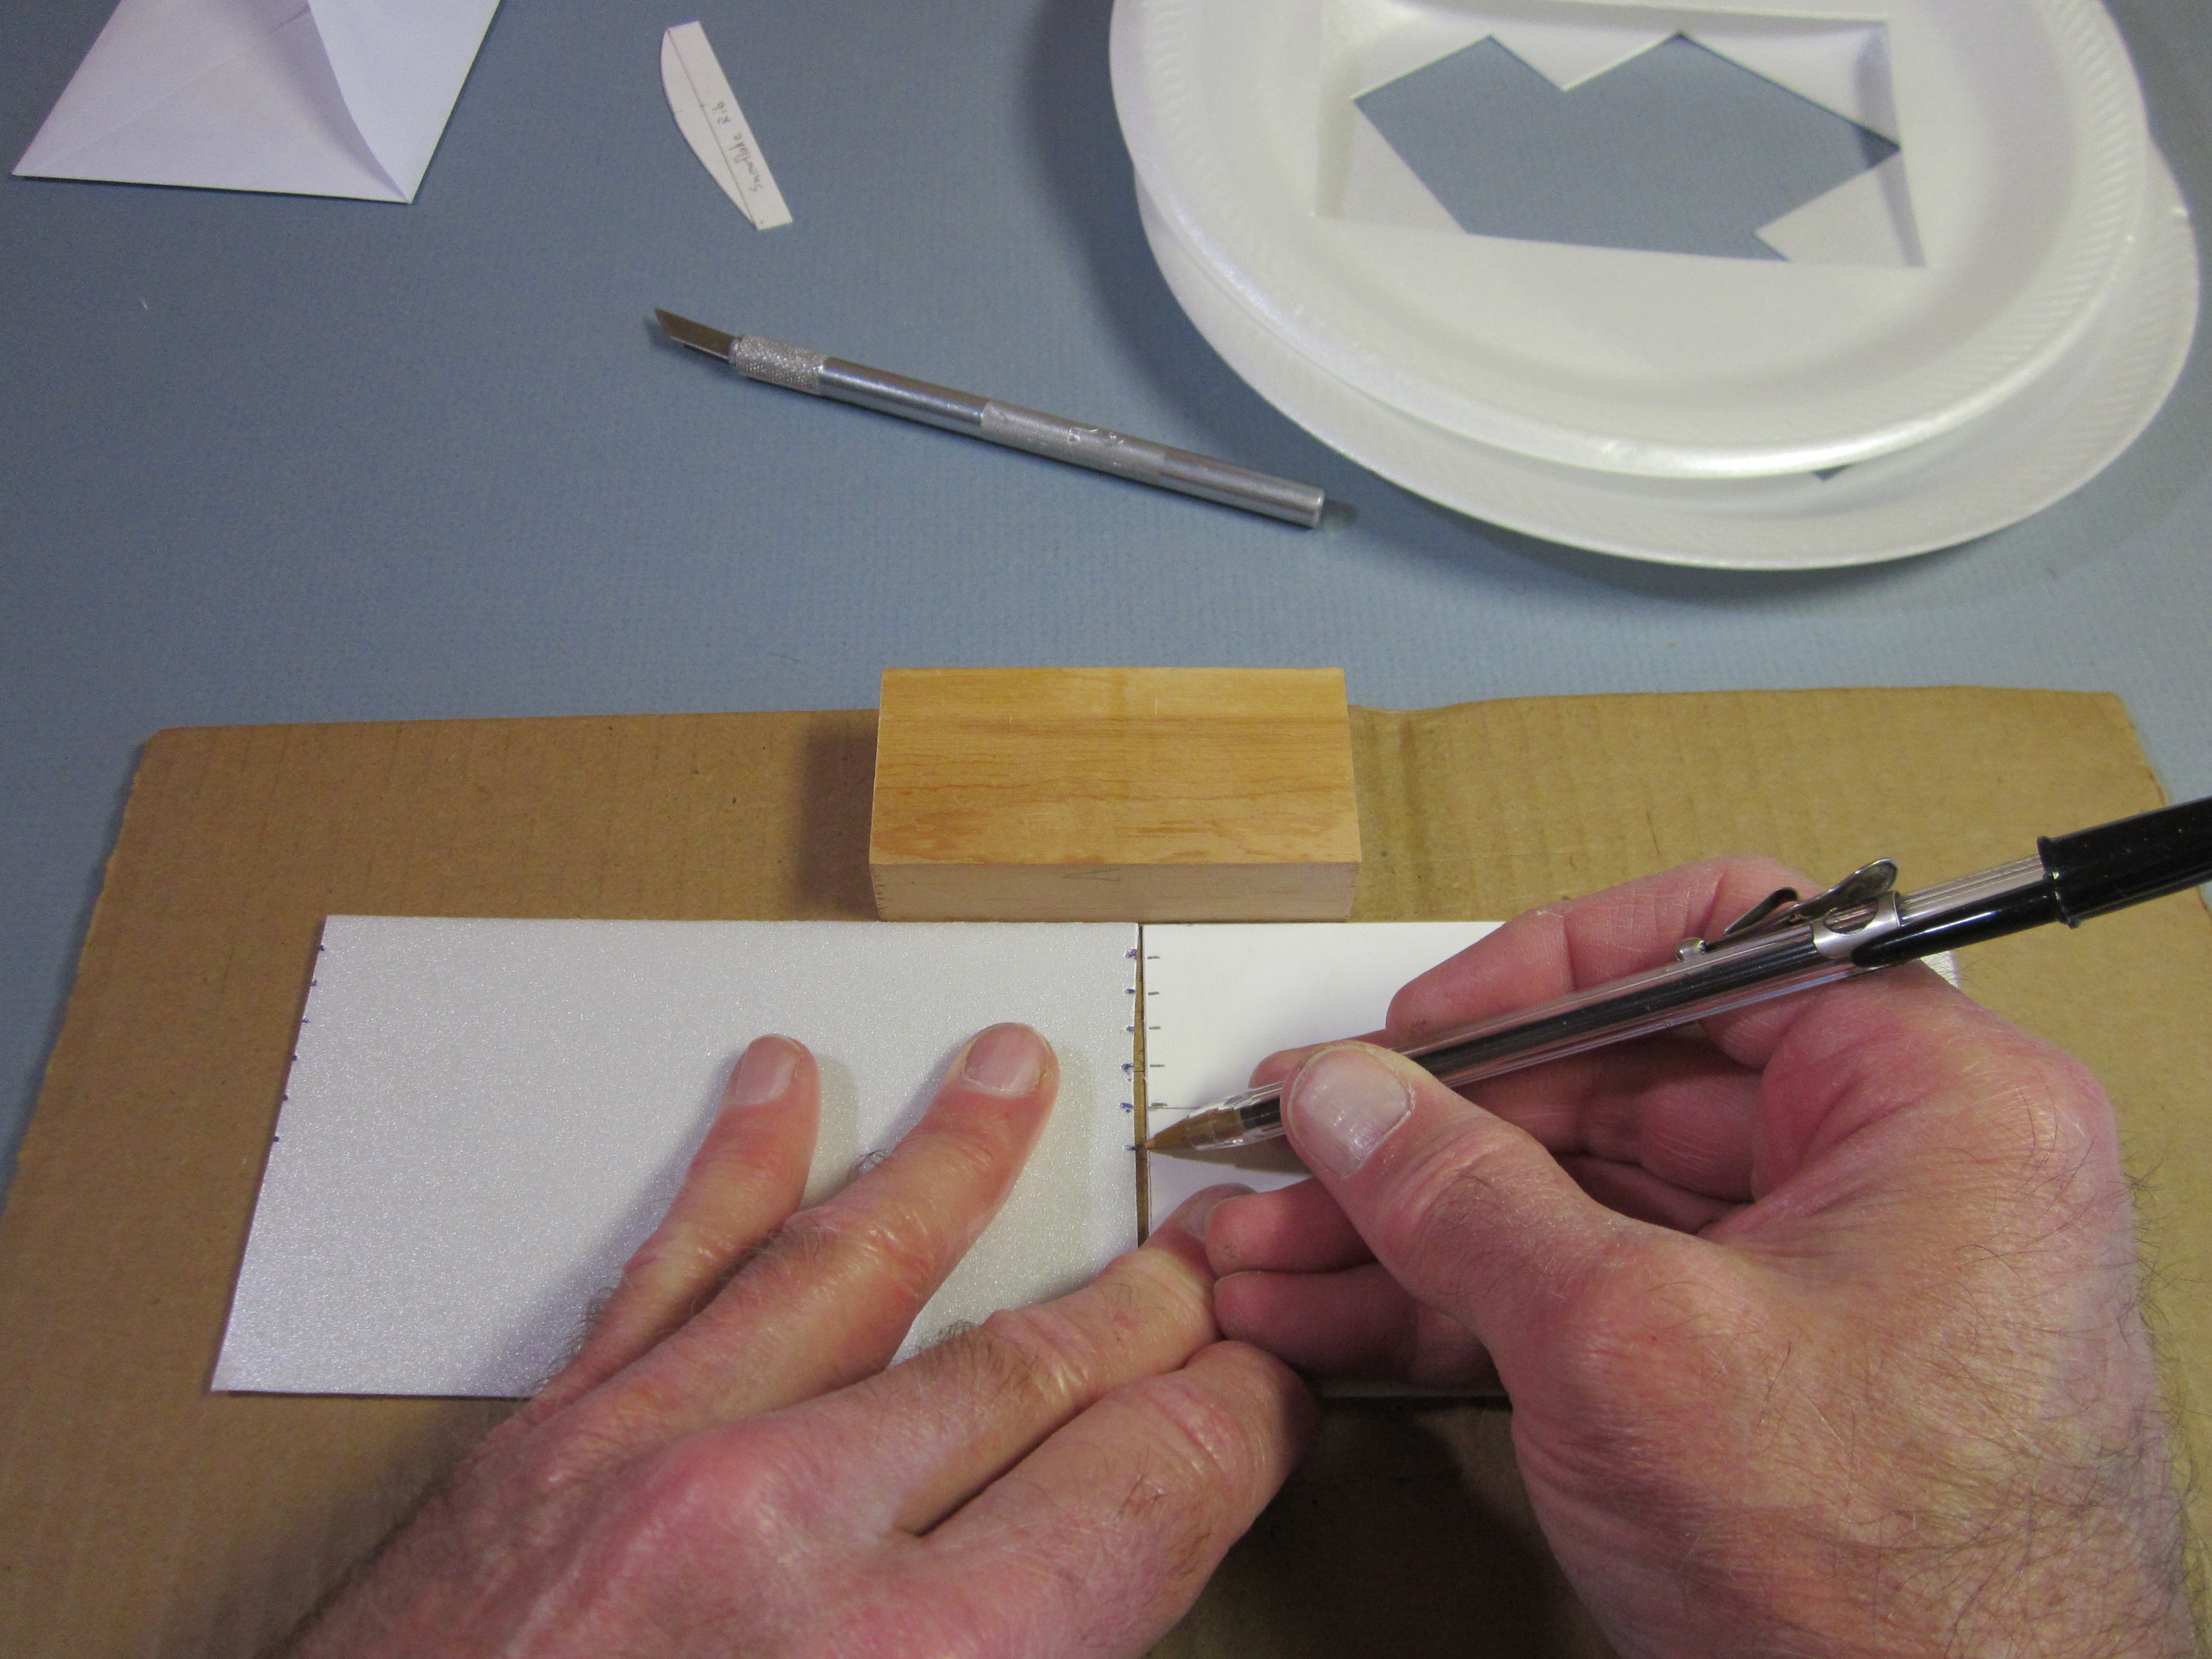
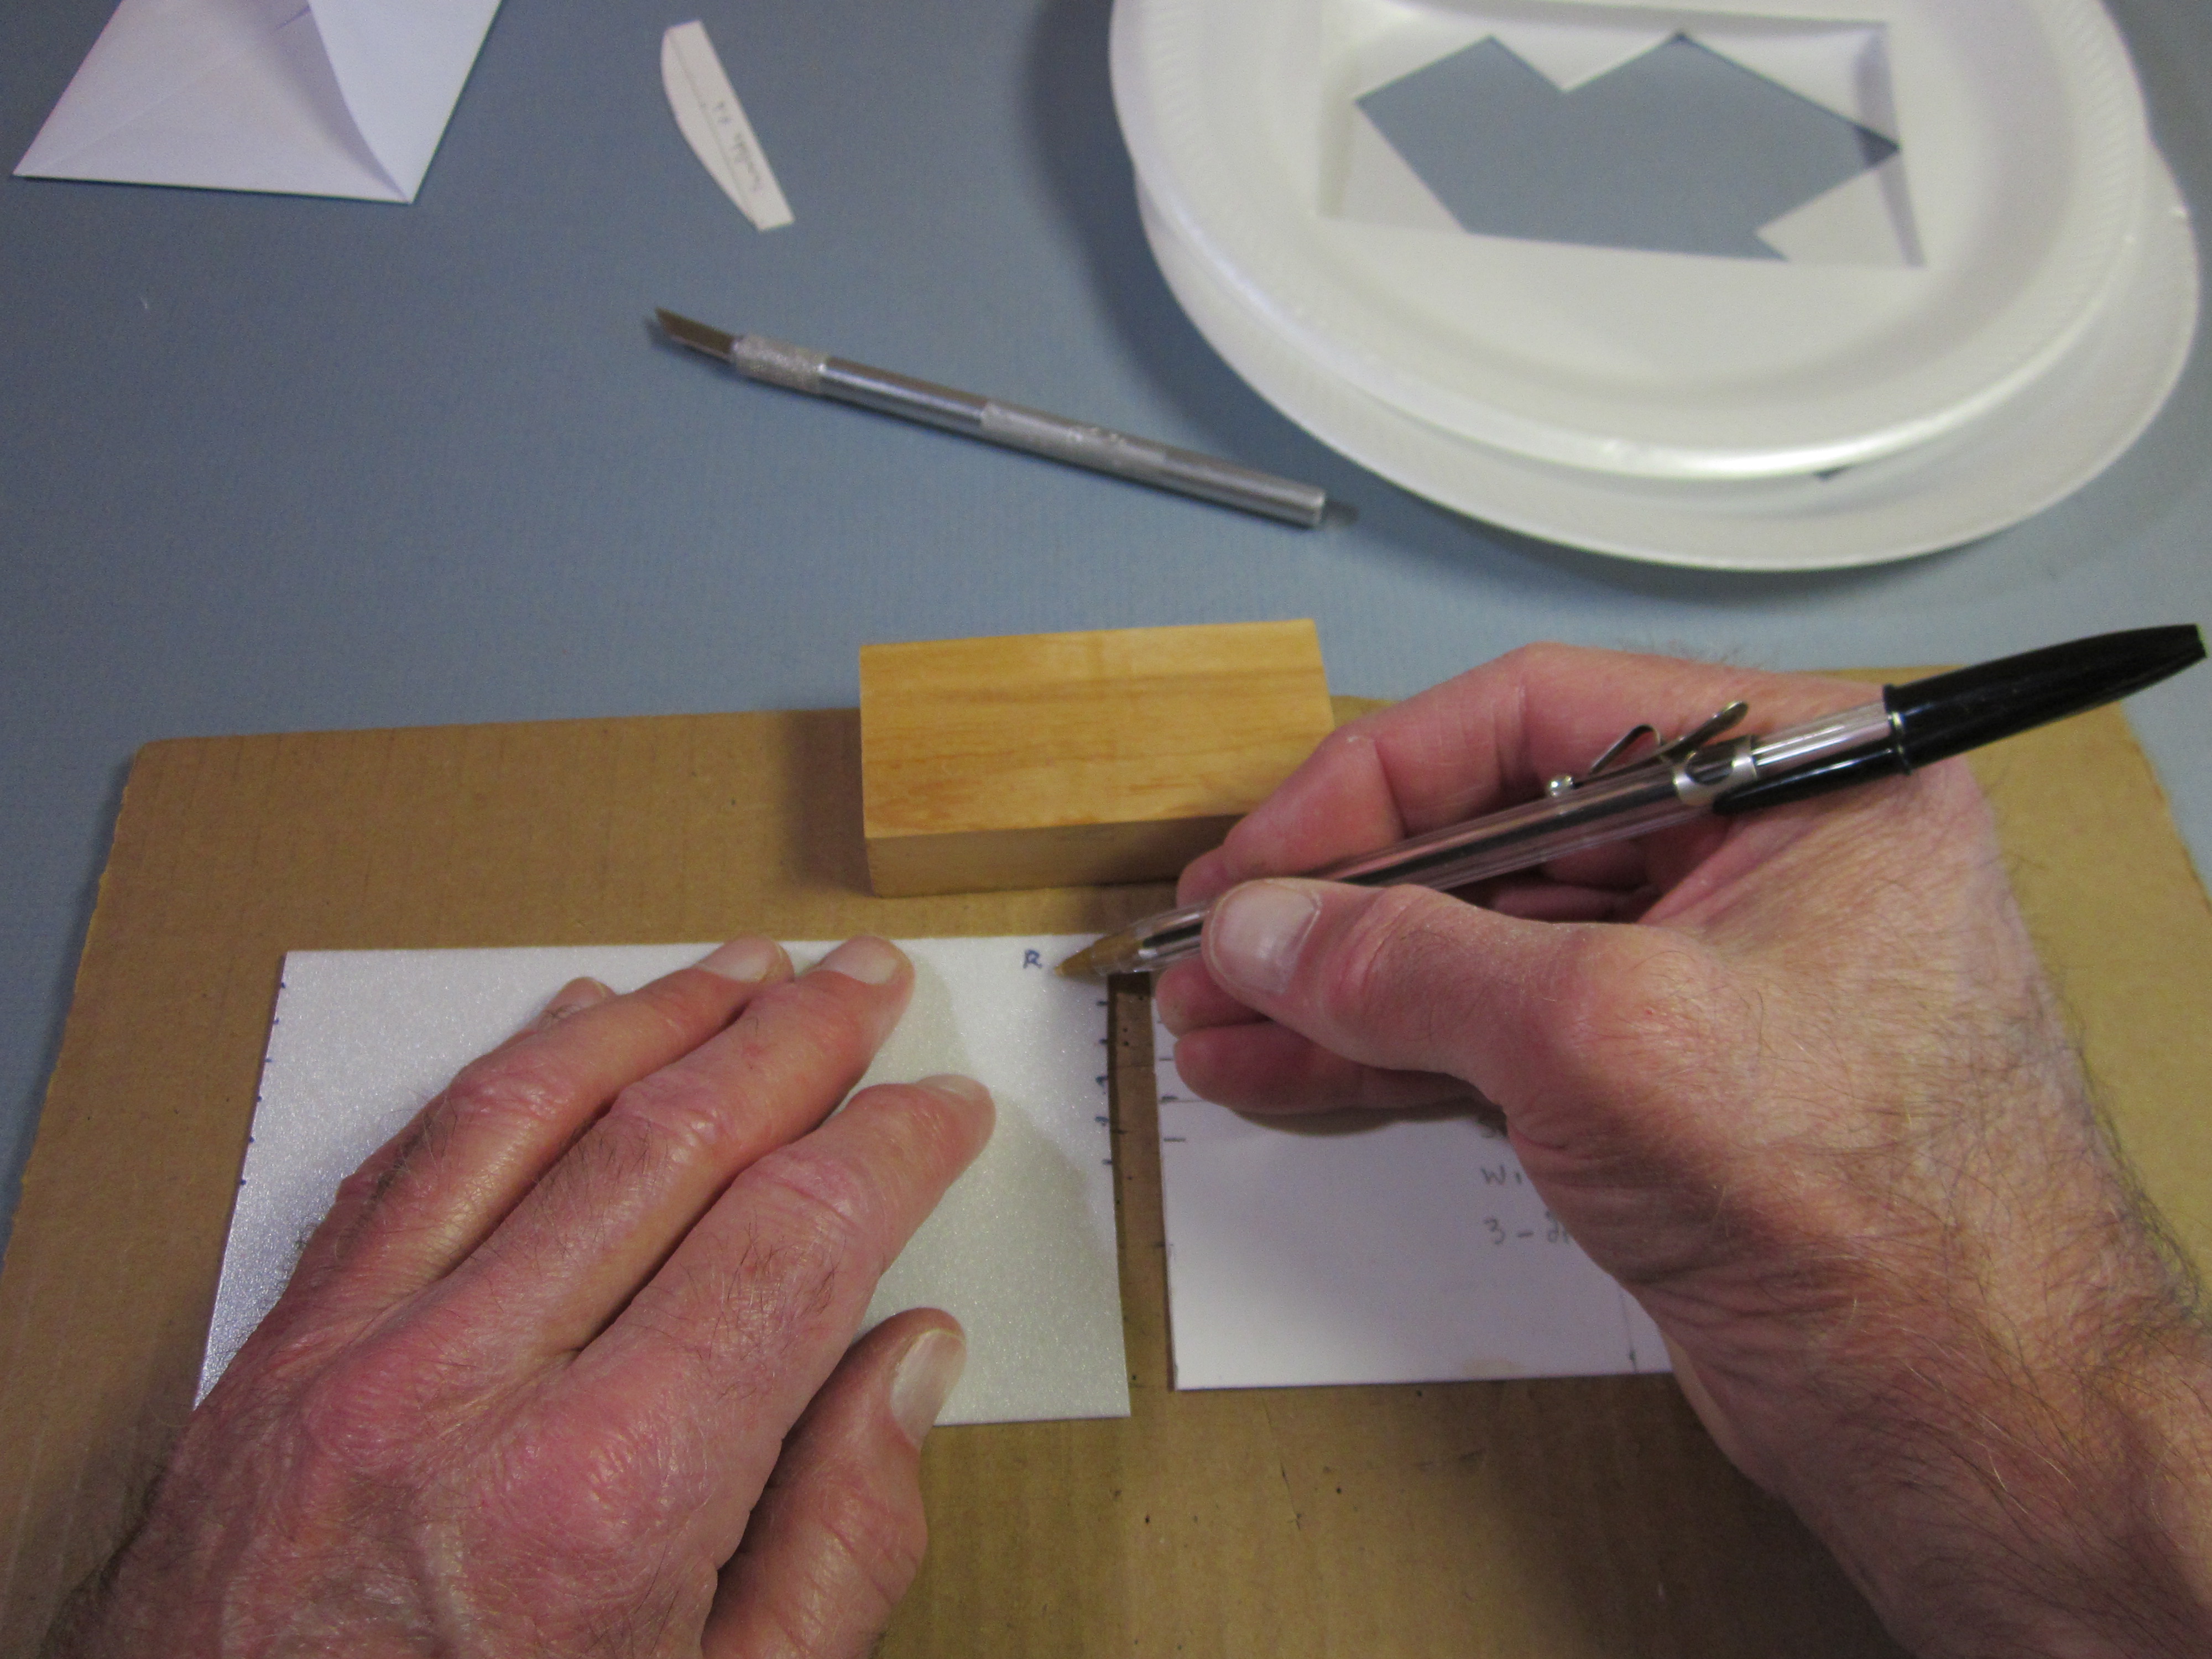
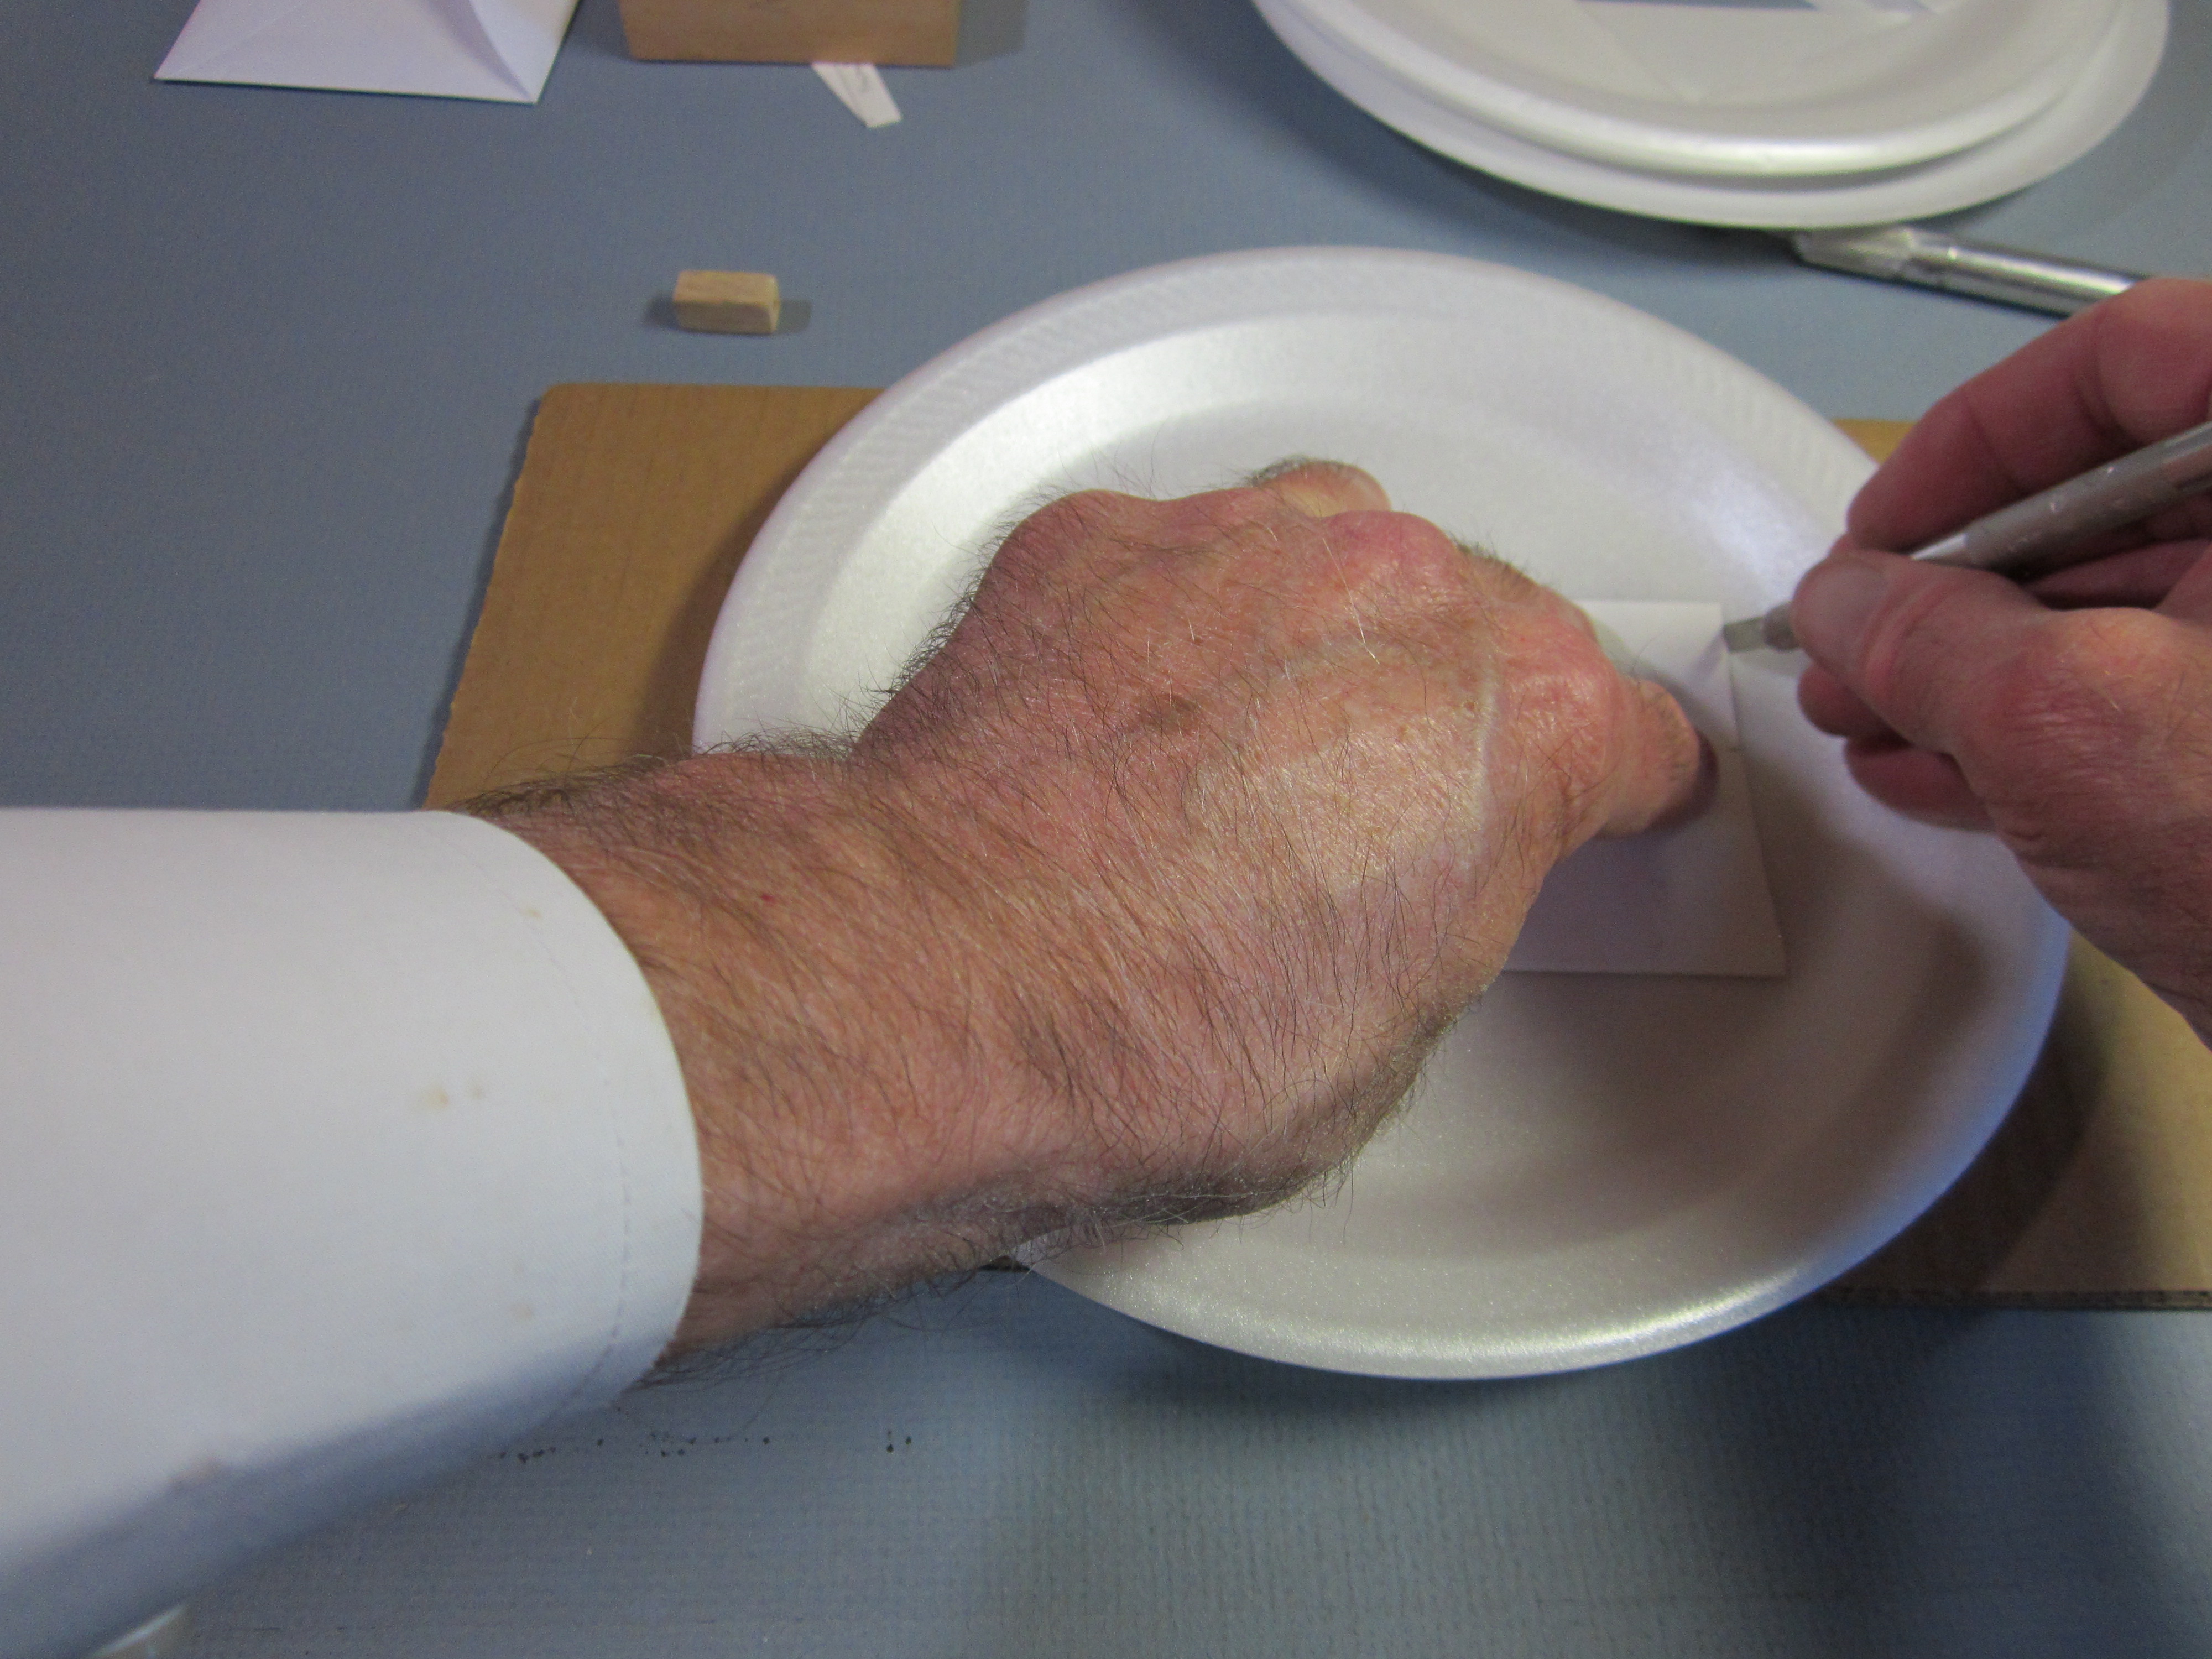
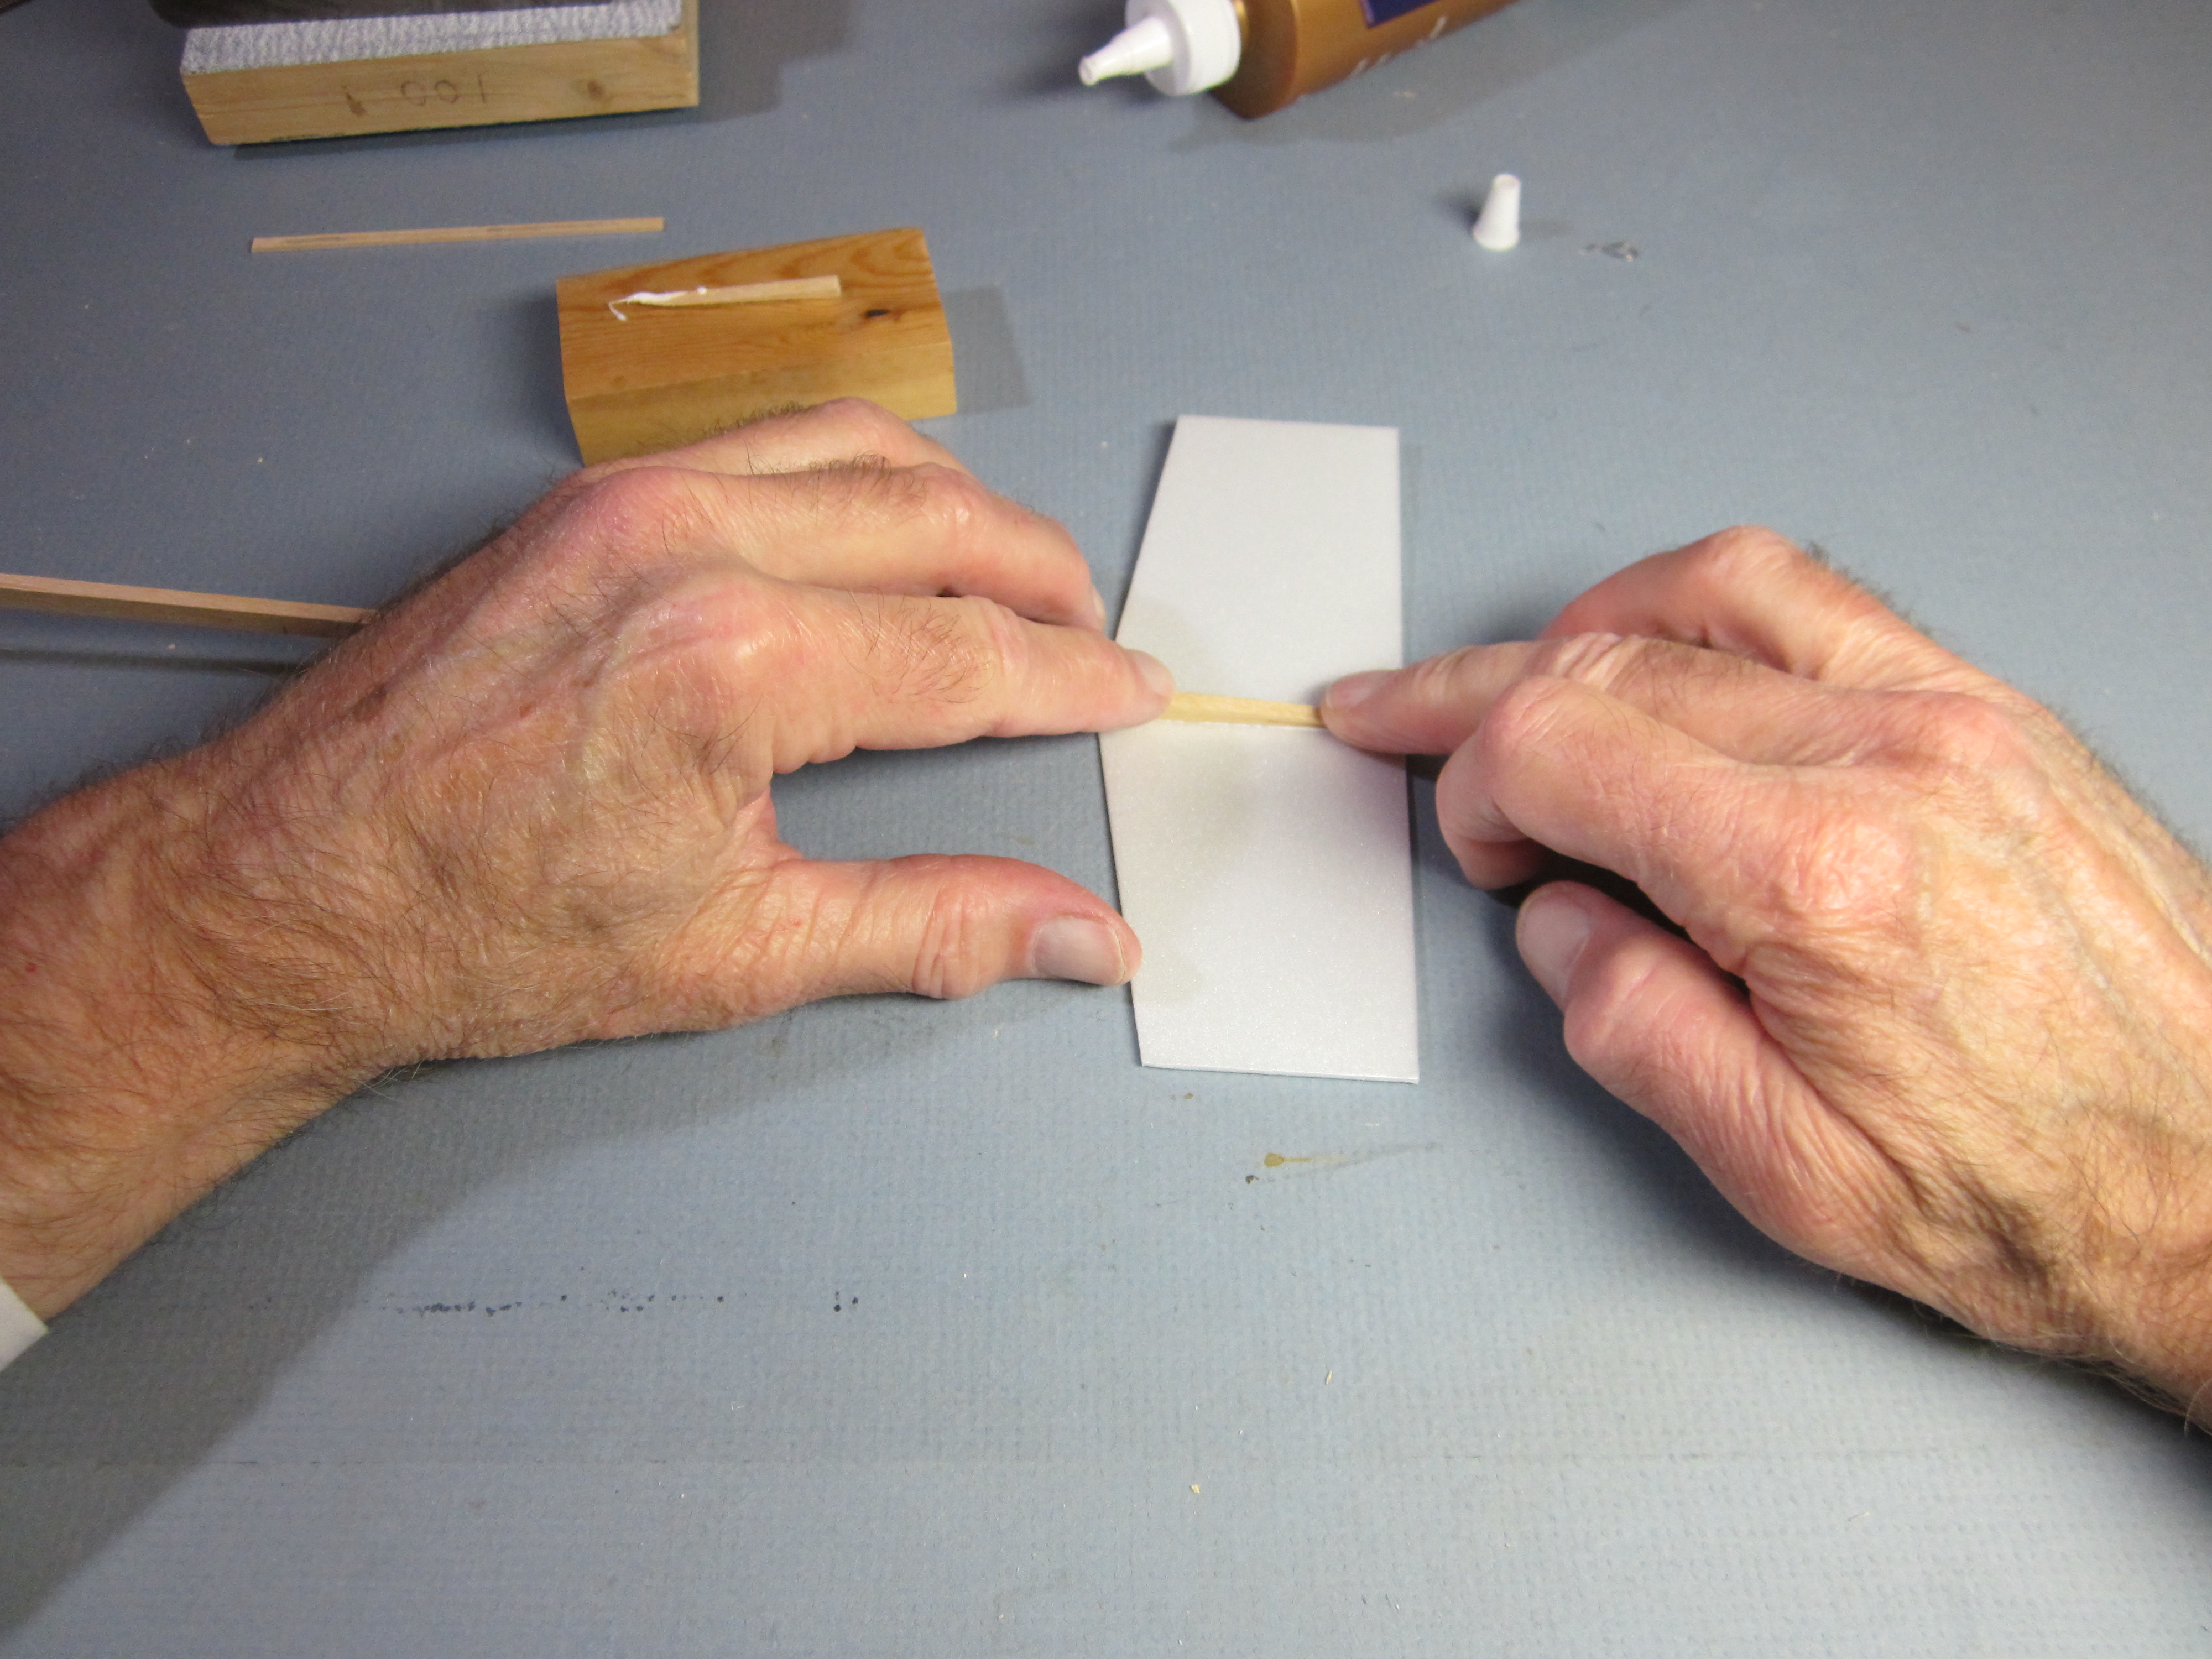
 Now we will make the template for the wing saddle side plates. Cut a 3″ wide rectangle from your cardboard. Mark both perpendicular edges 5/16″ out from the 3″ side.
 Draw a line connecting those two points.
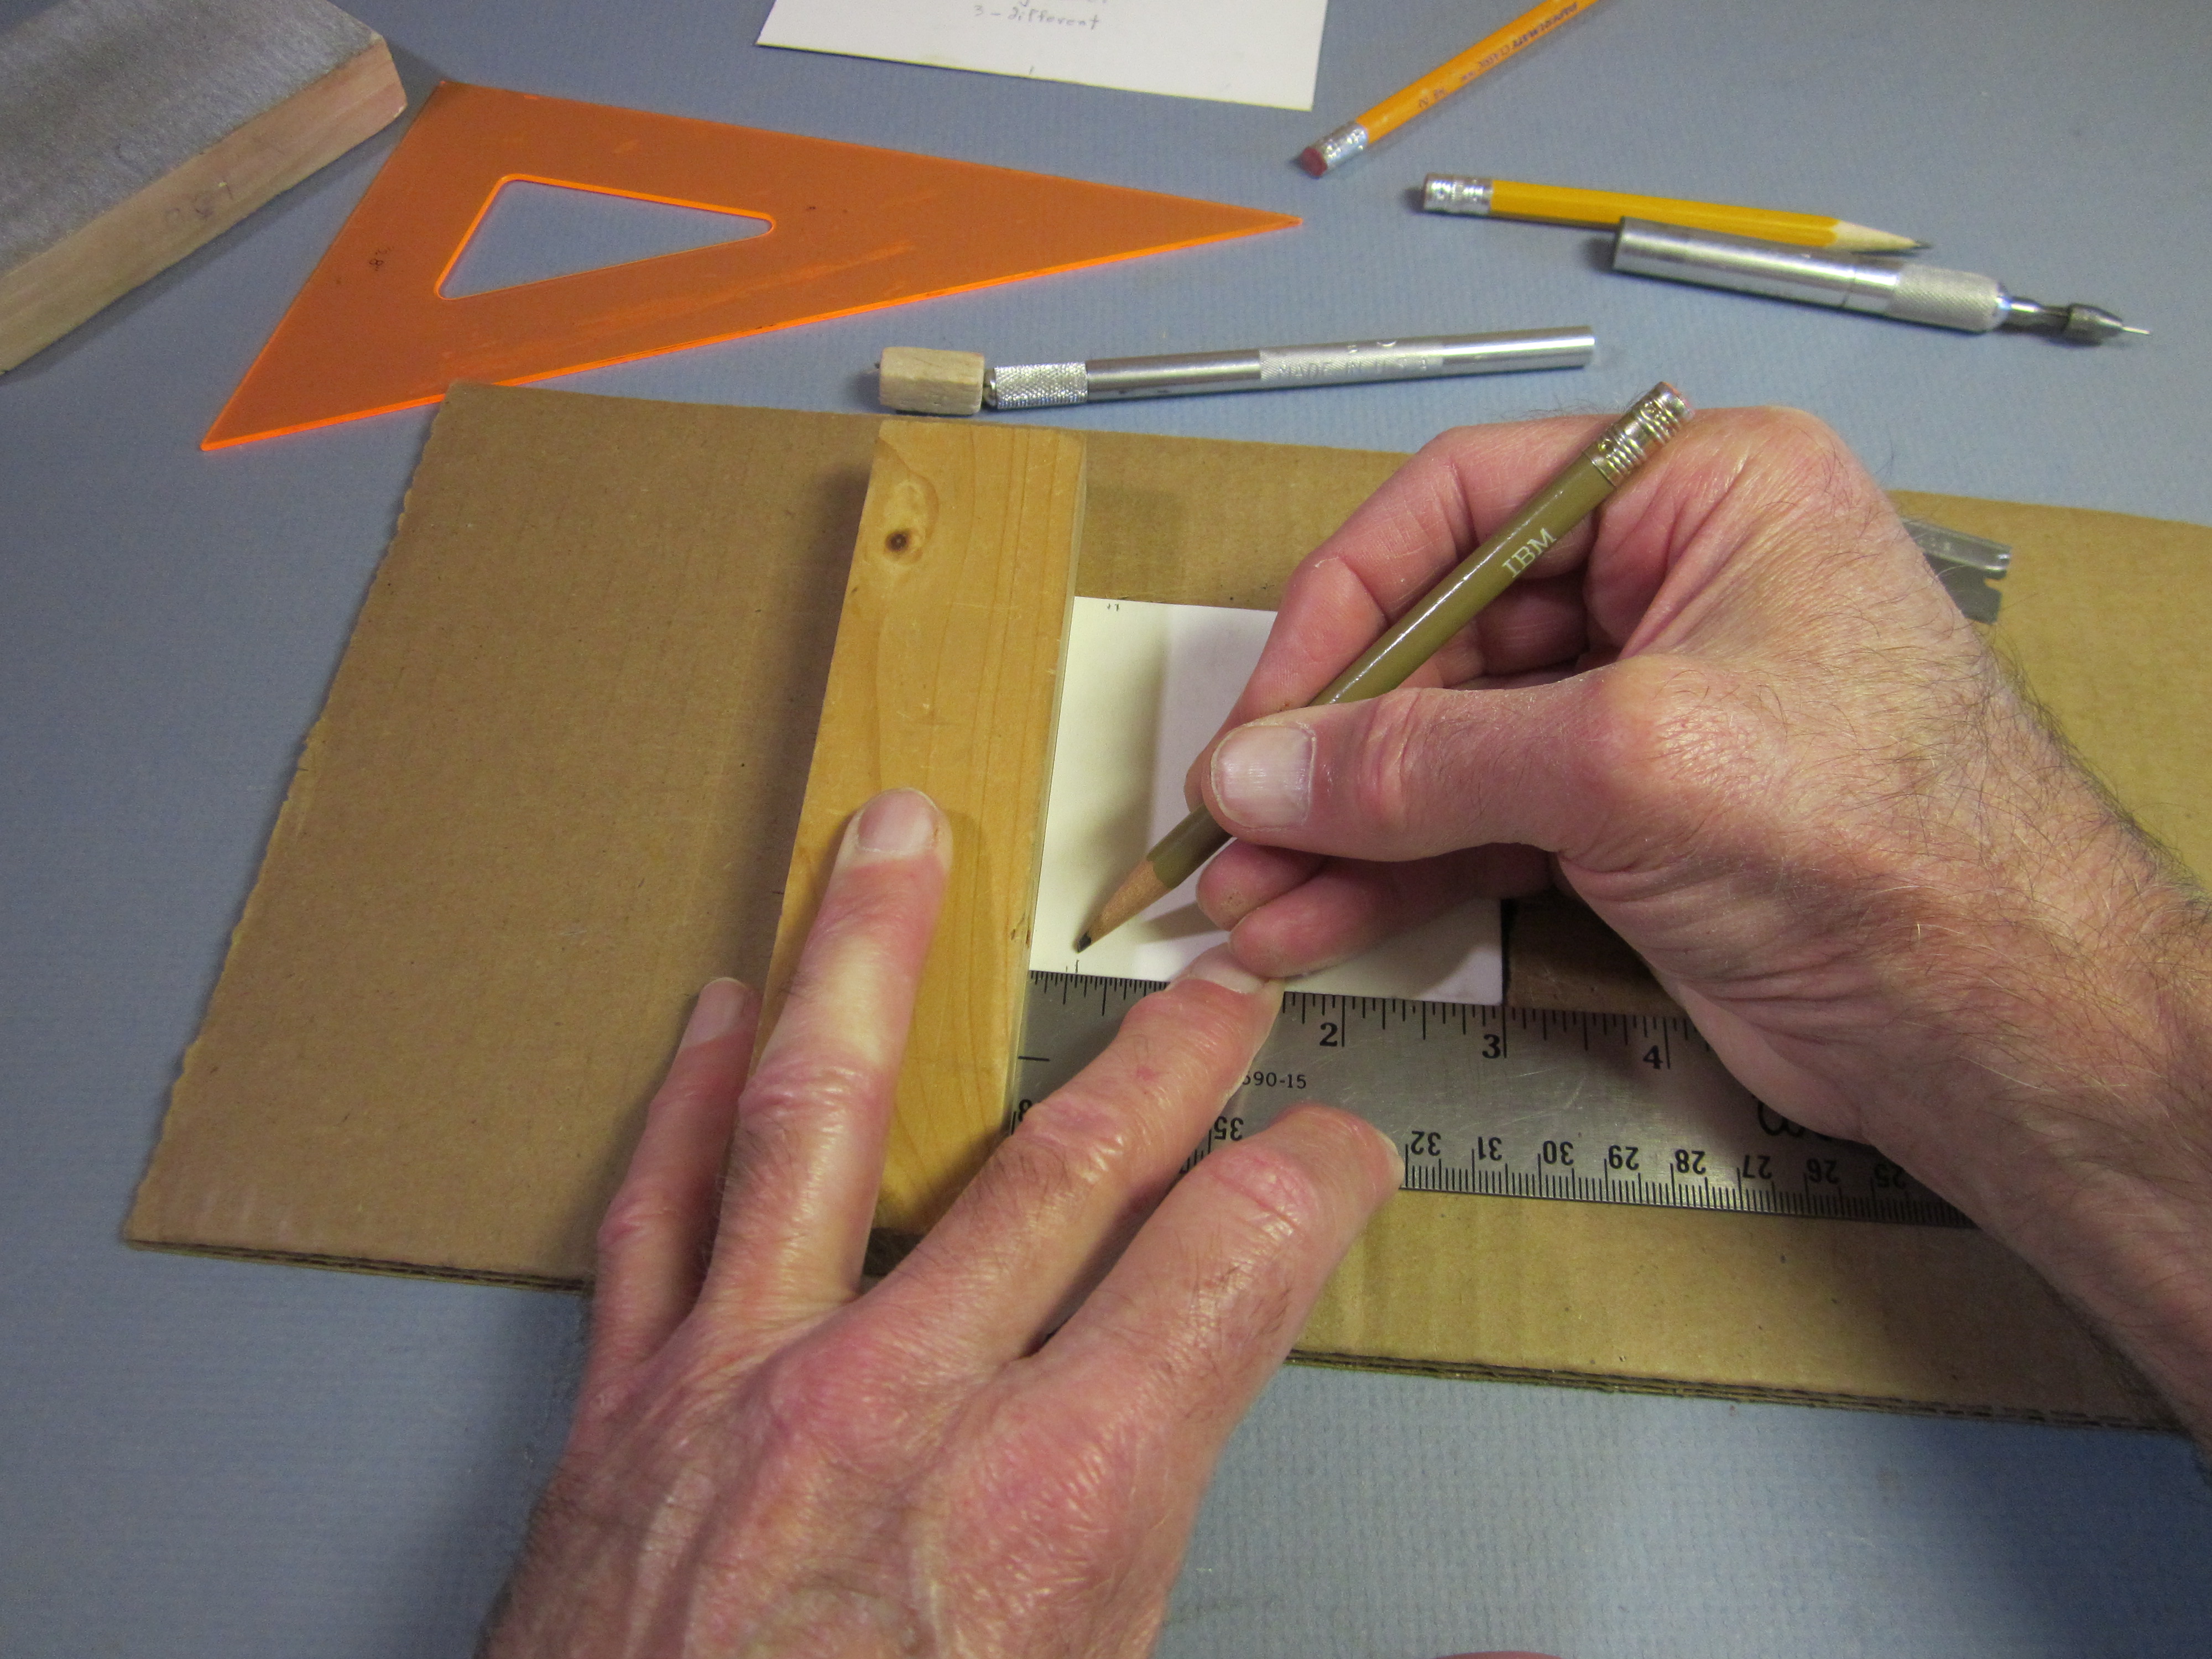
 Make a mark 1 1/4″ from one end of the 3″ pencil line.
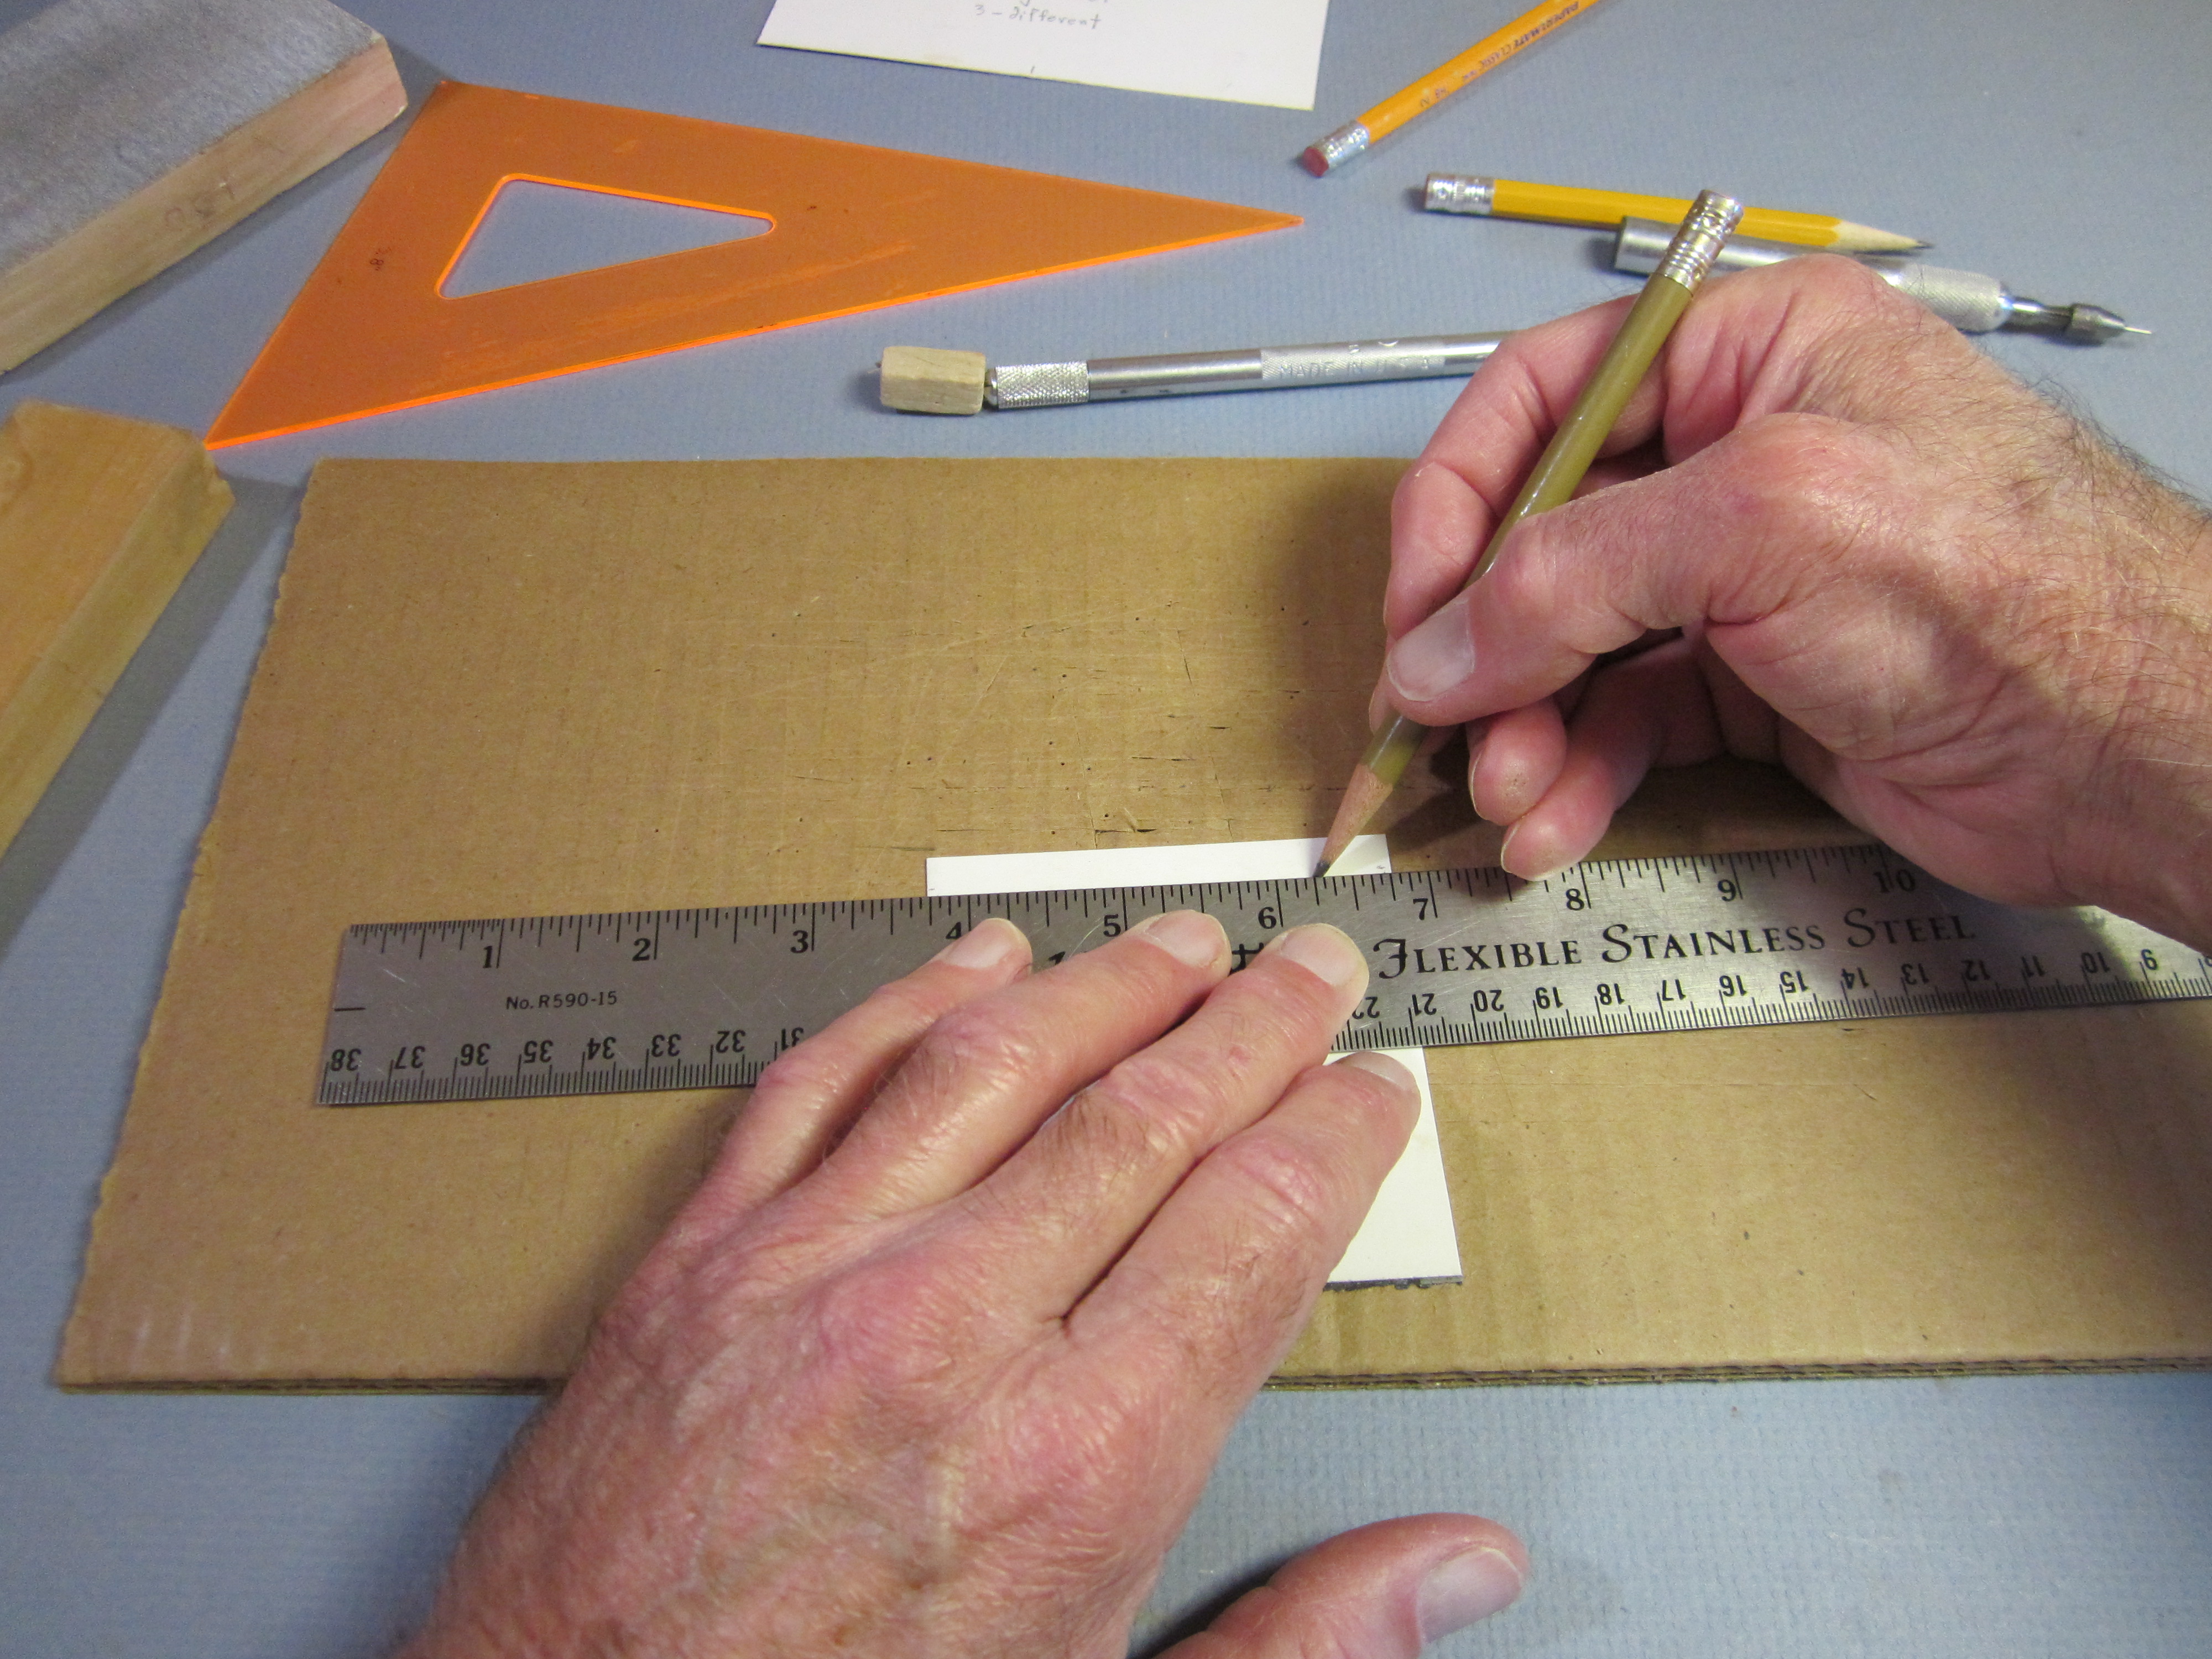
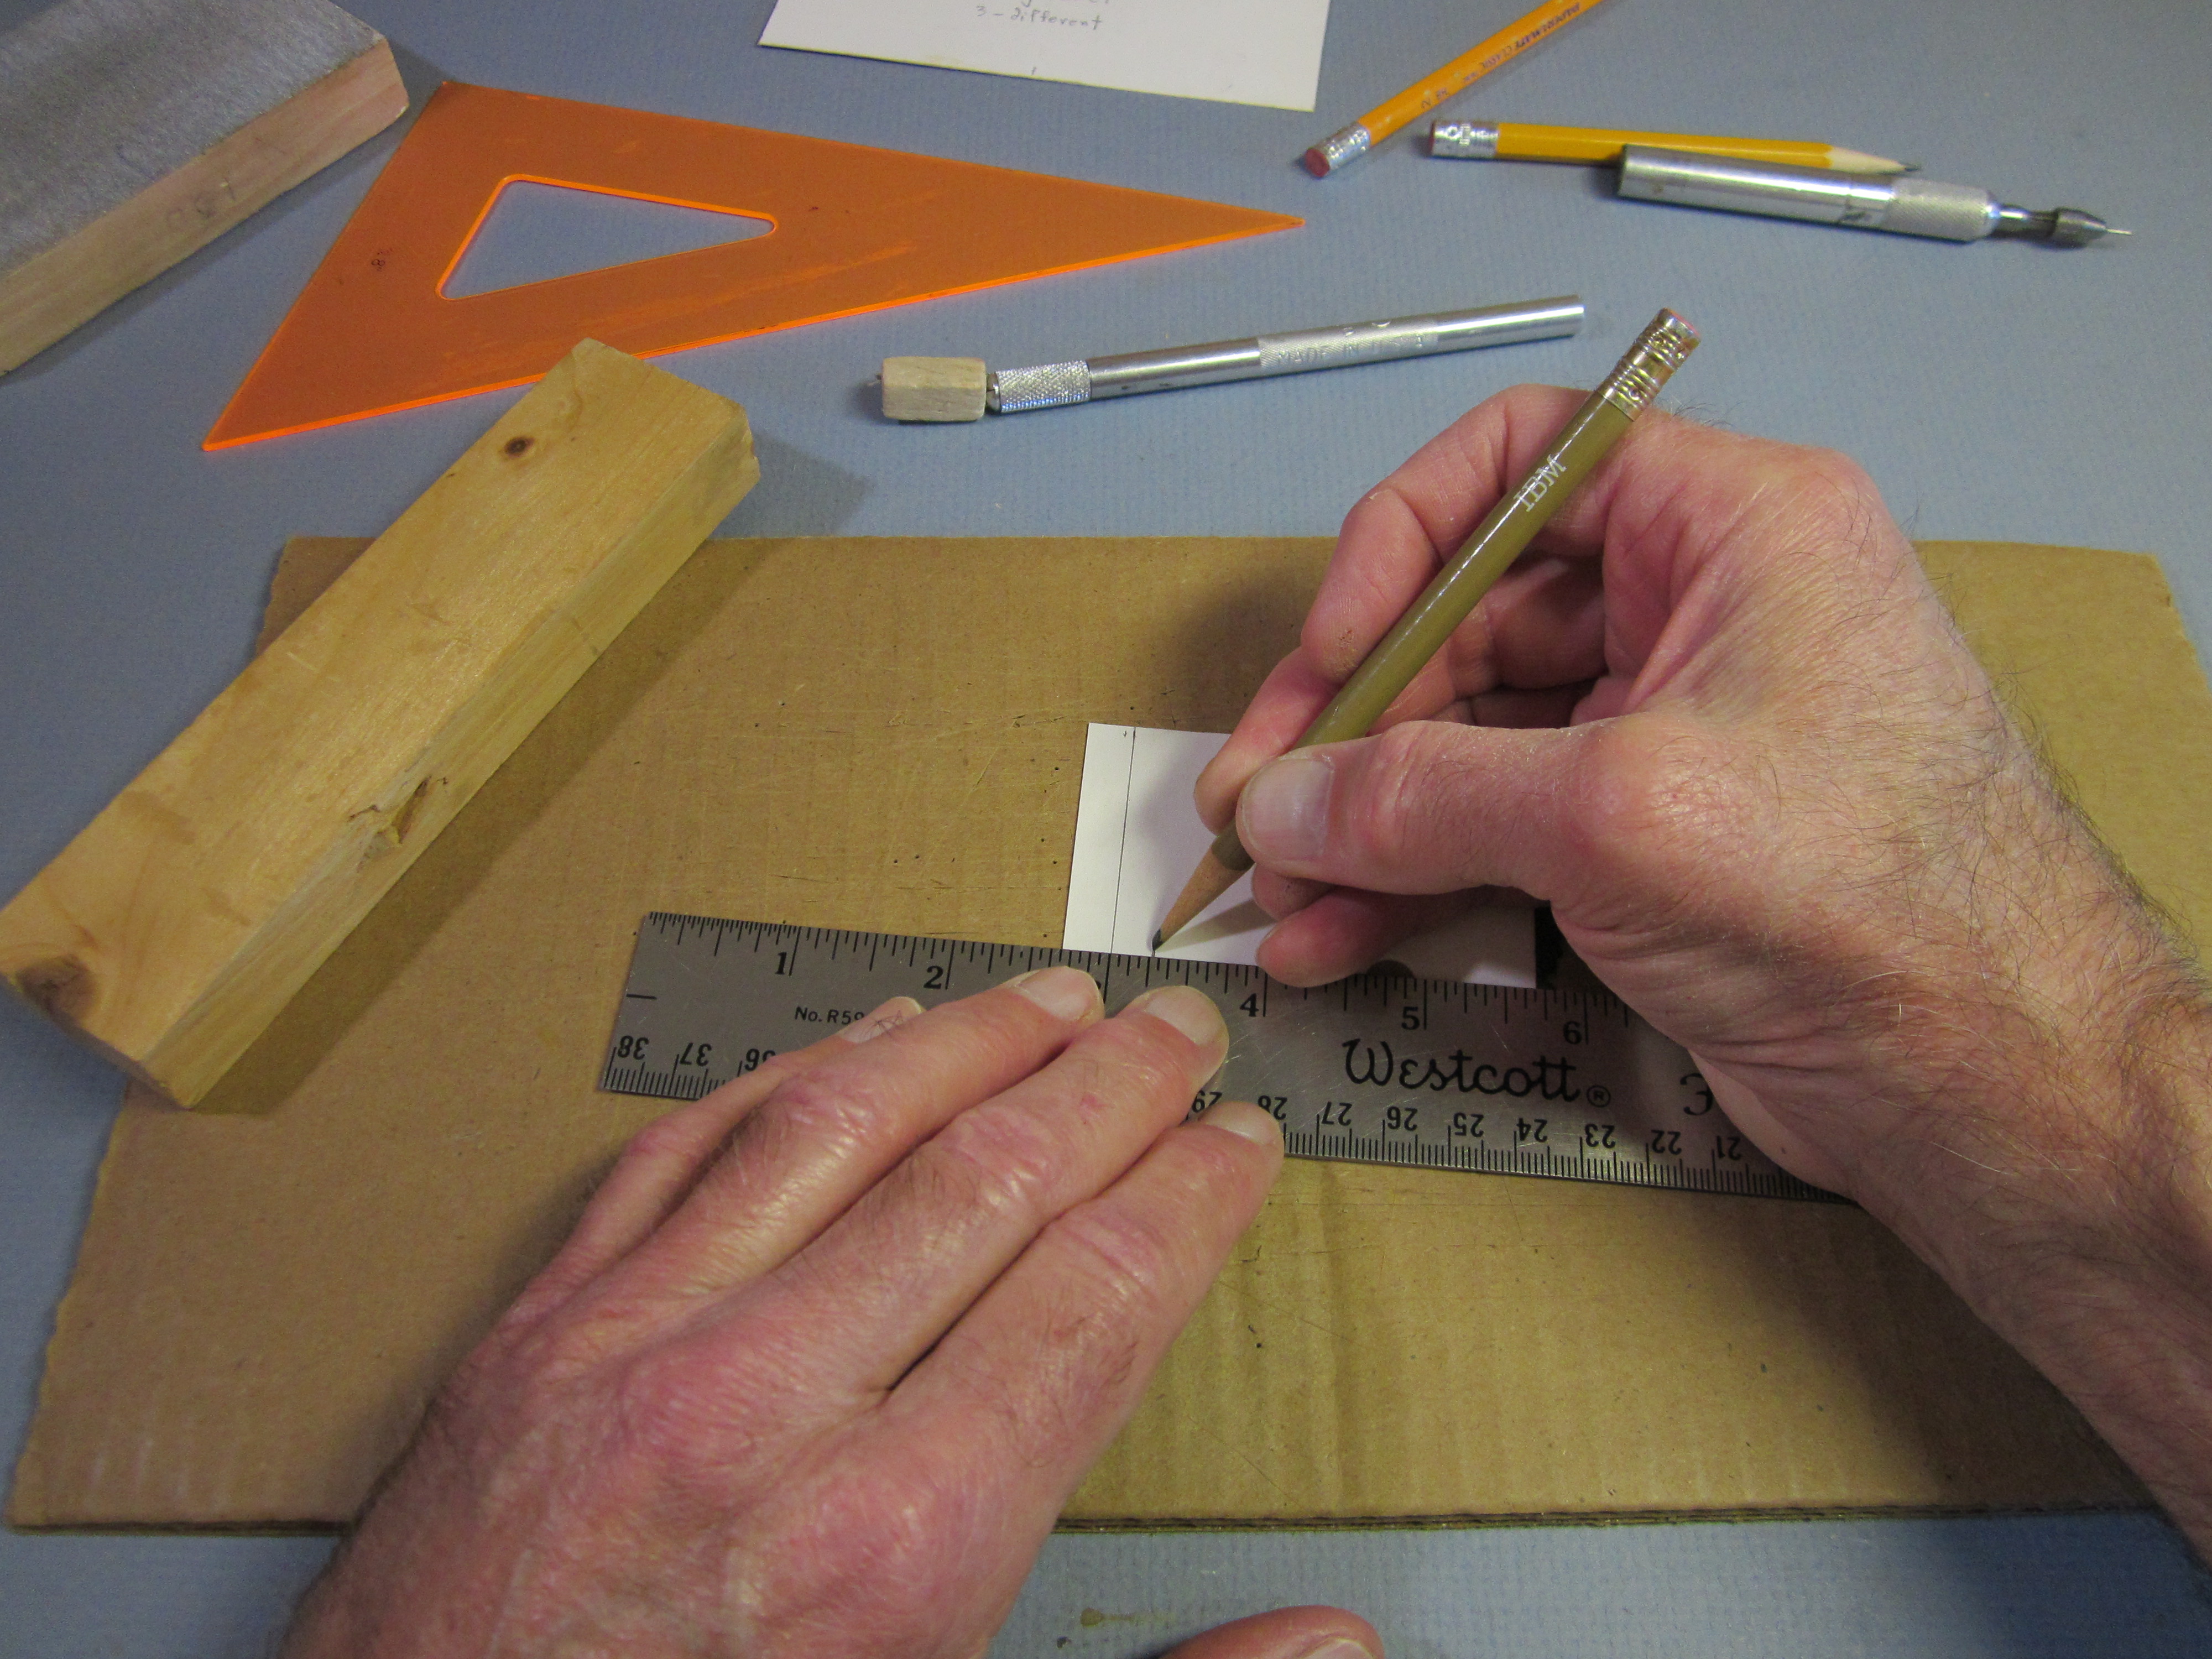 Mark a little cross 1/4″ out from the previous mark.
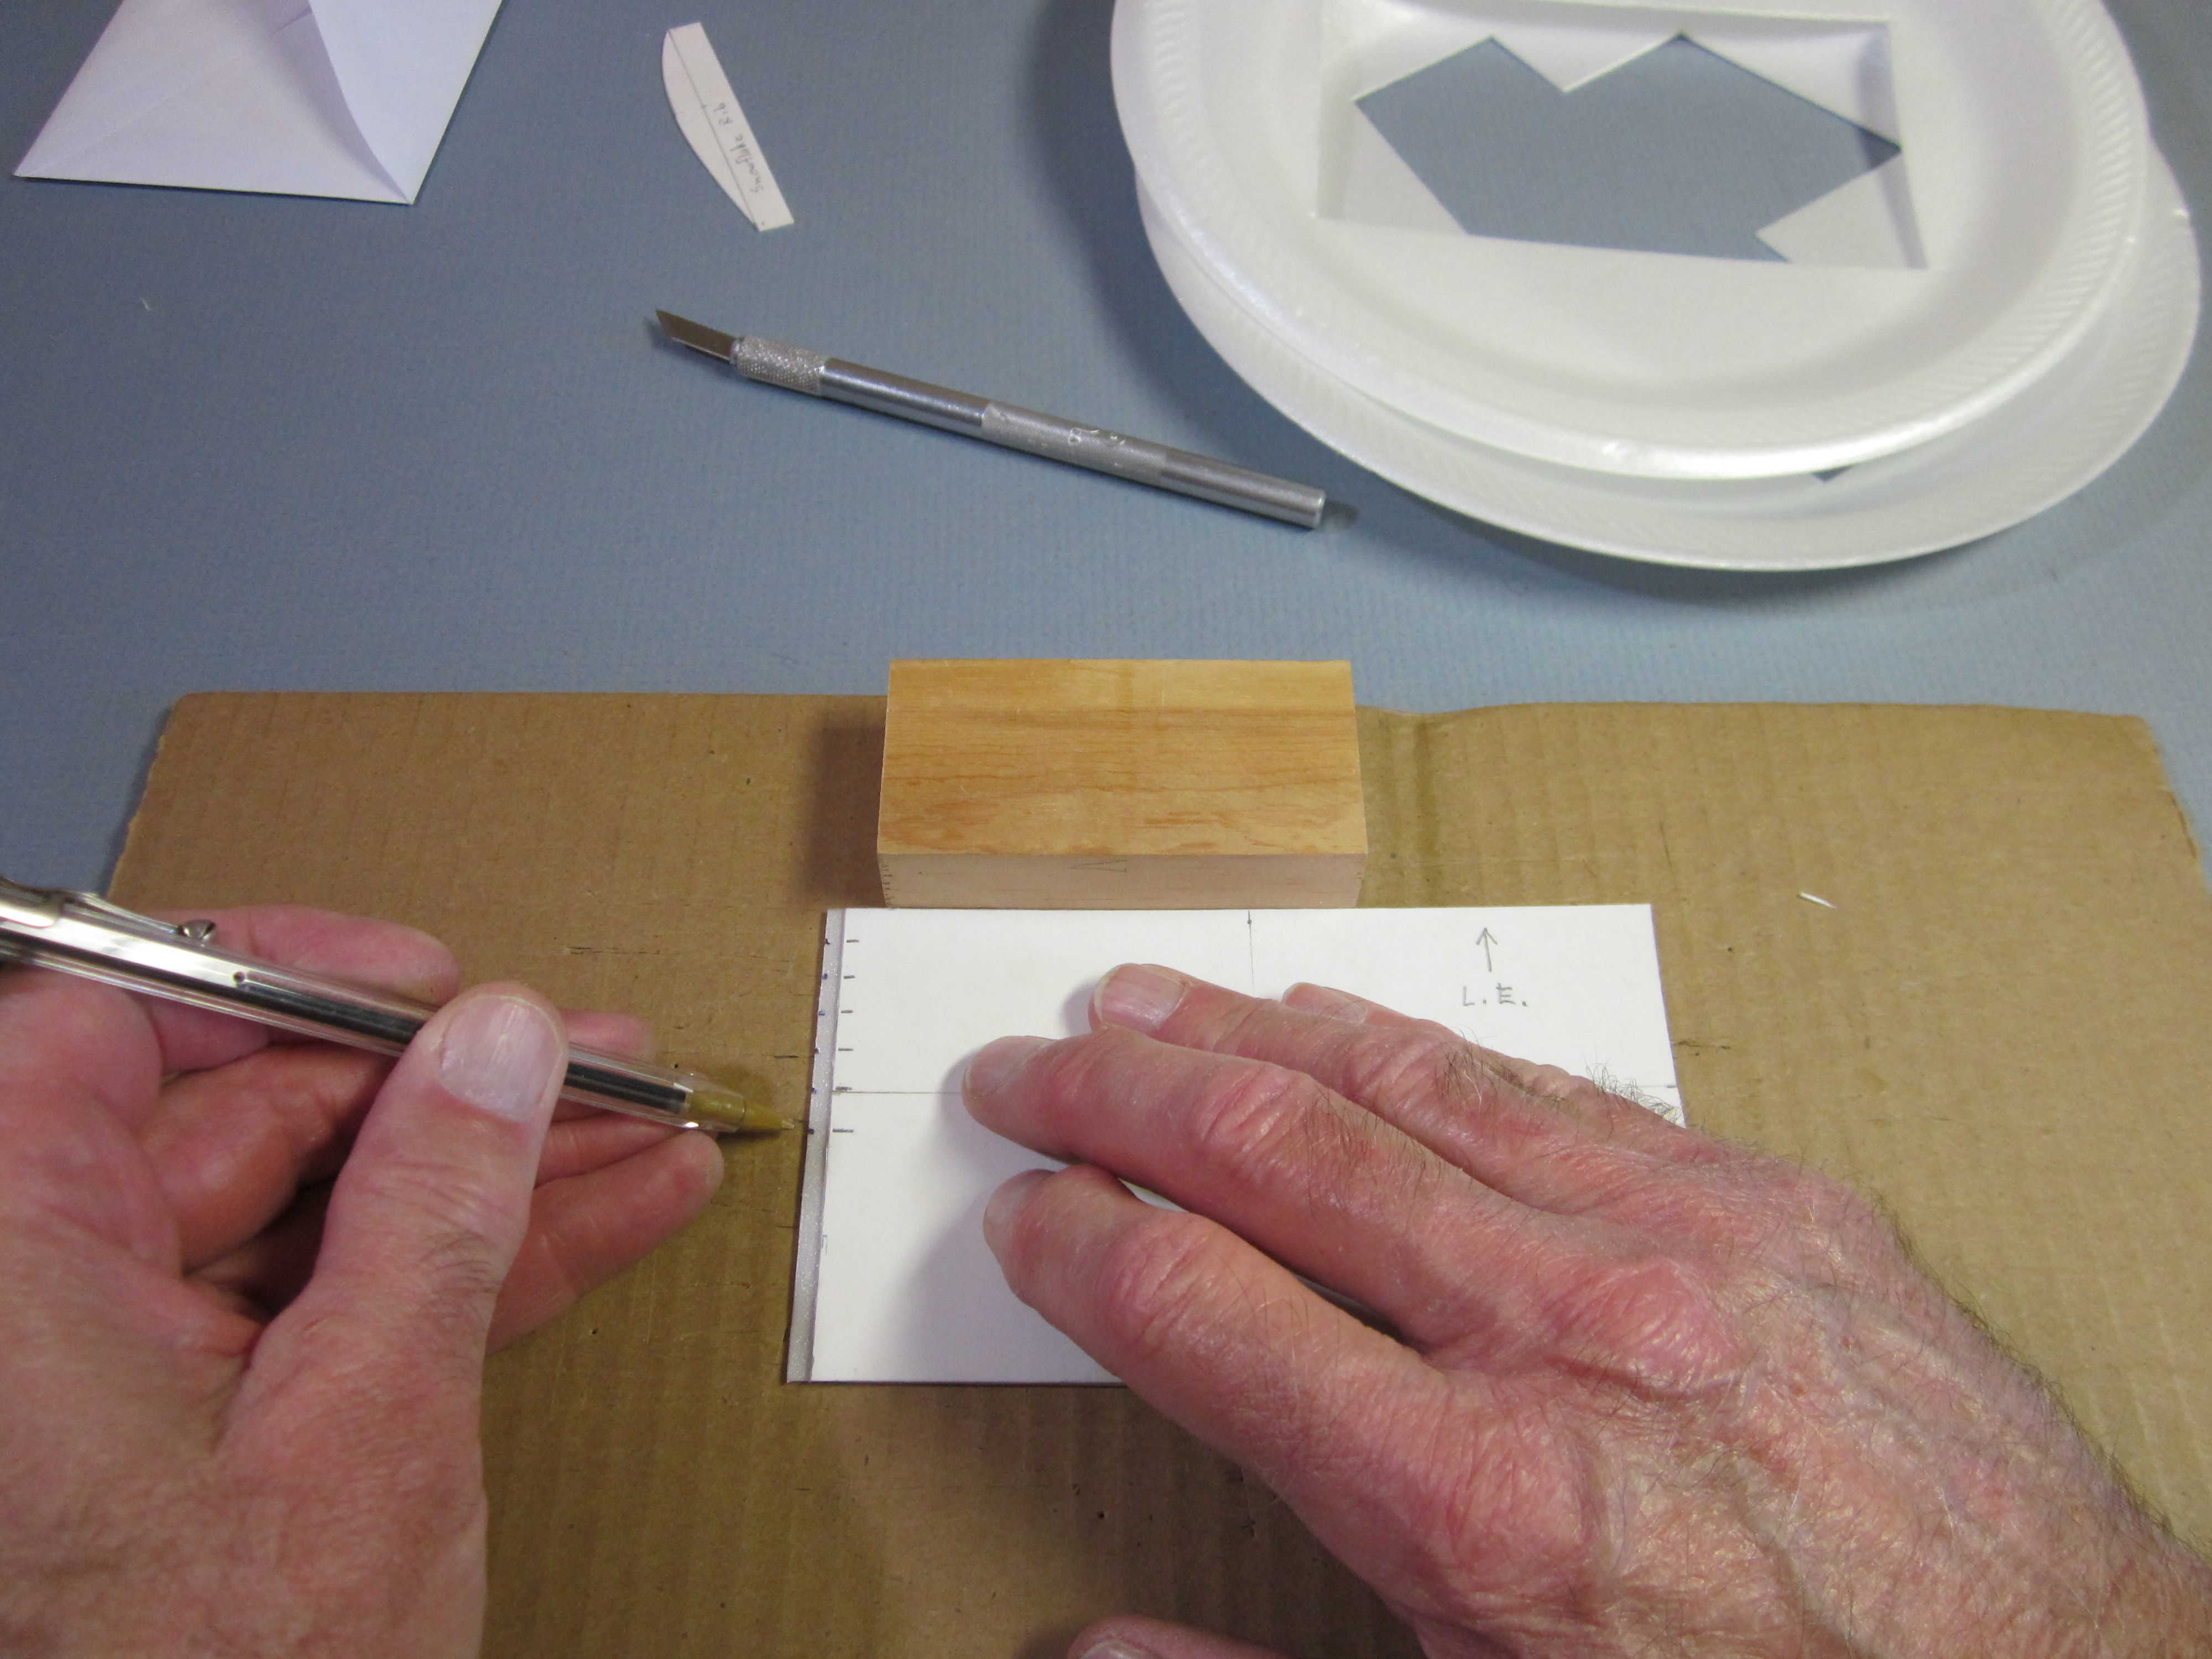
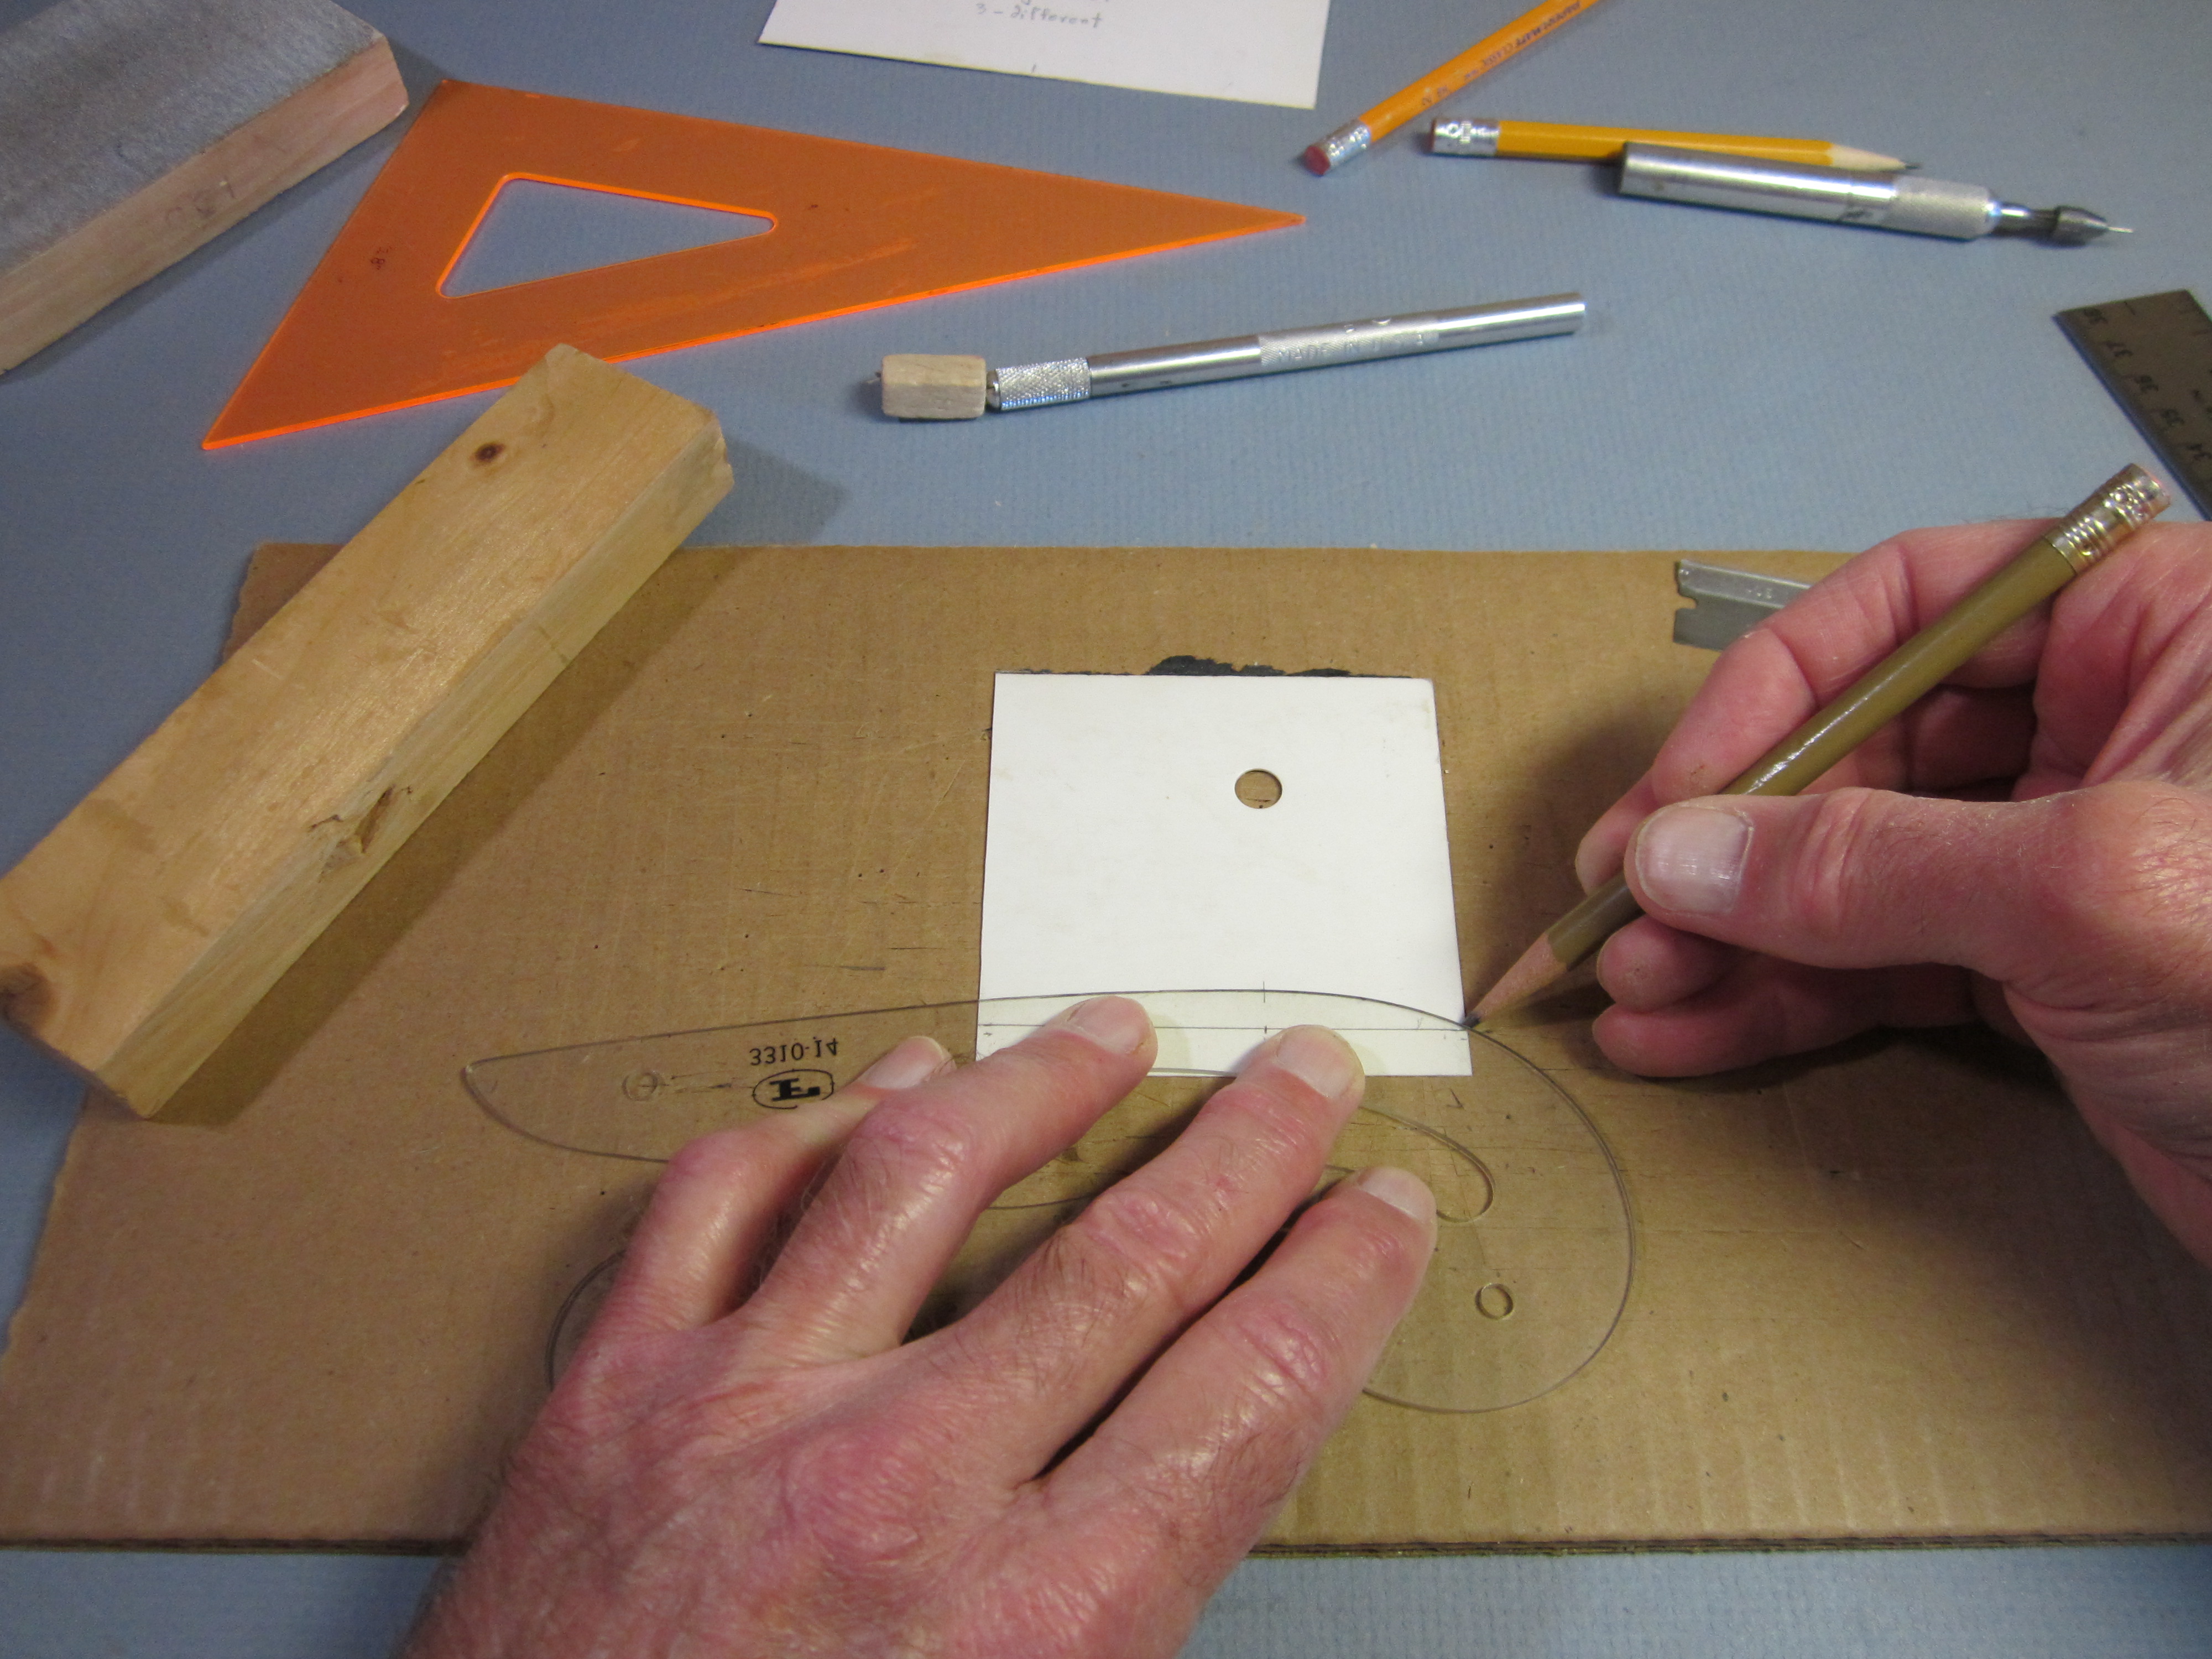 Use the curve to draw the airfoil shape. The curve must pass through the leading edge, the high point and the trailing edge, and the tangent at the high point must be parallel with the baseline.
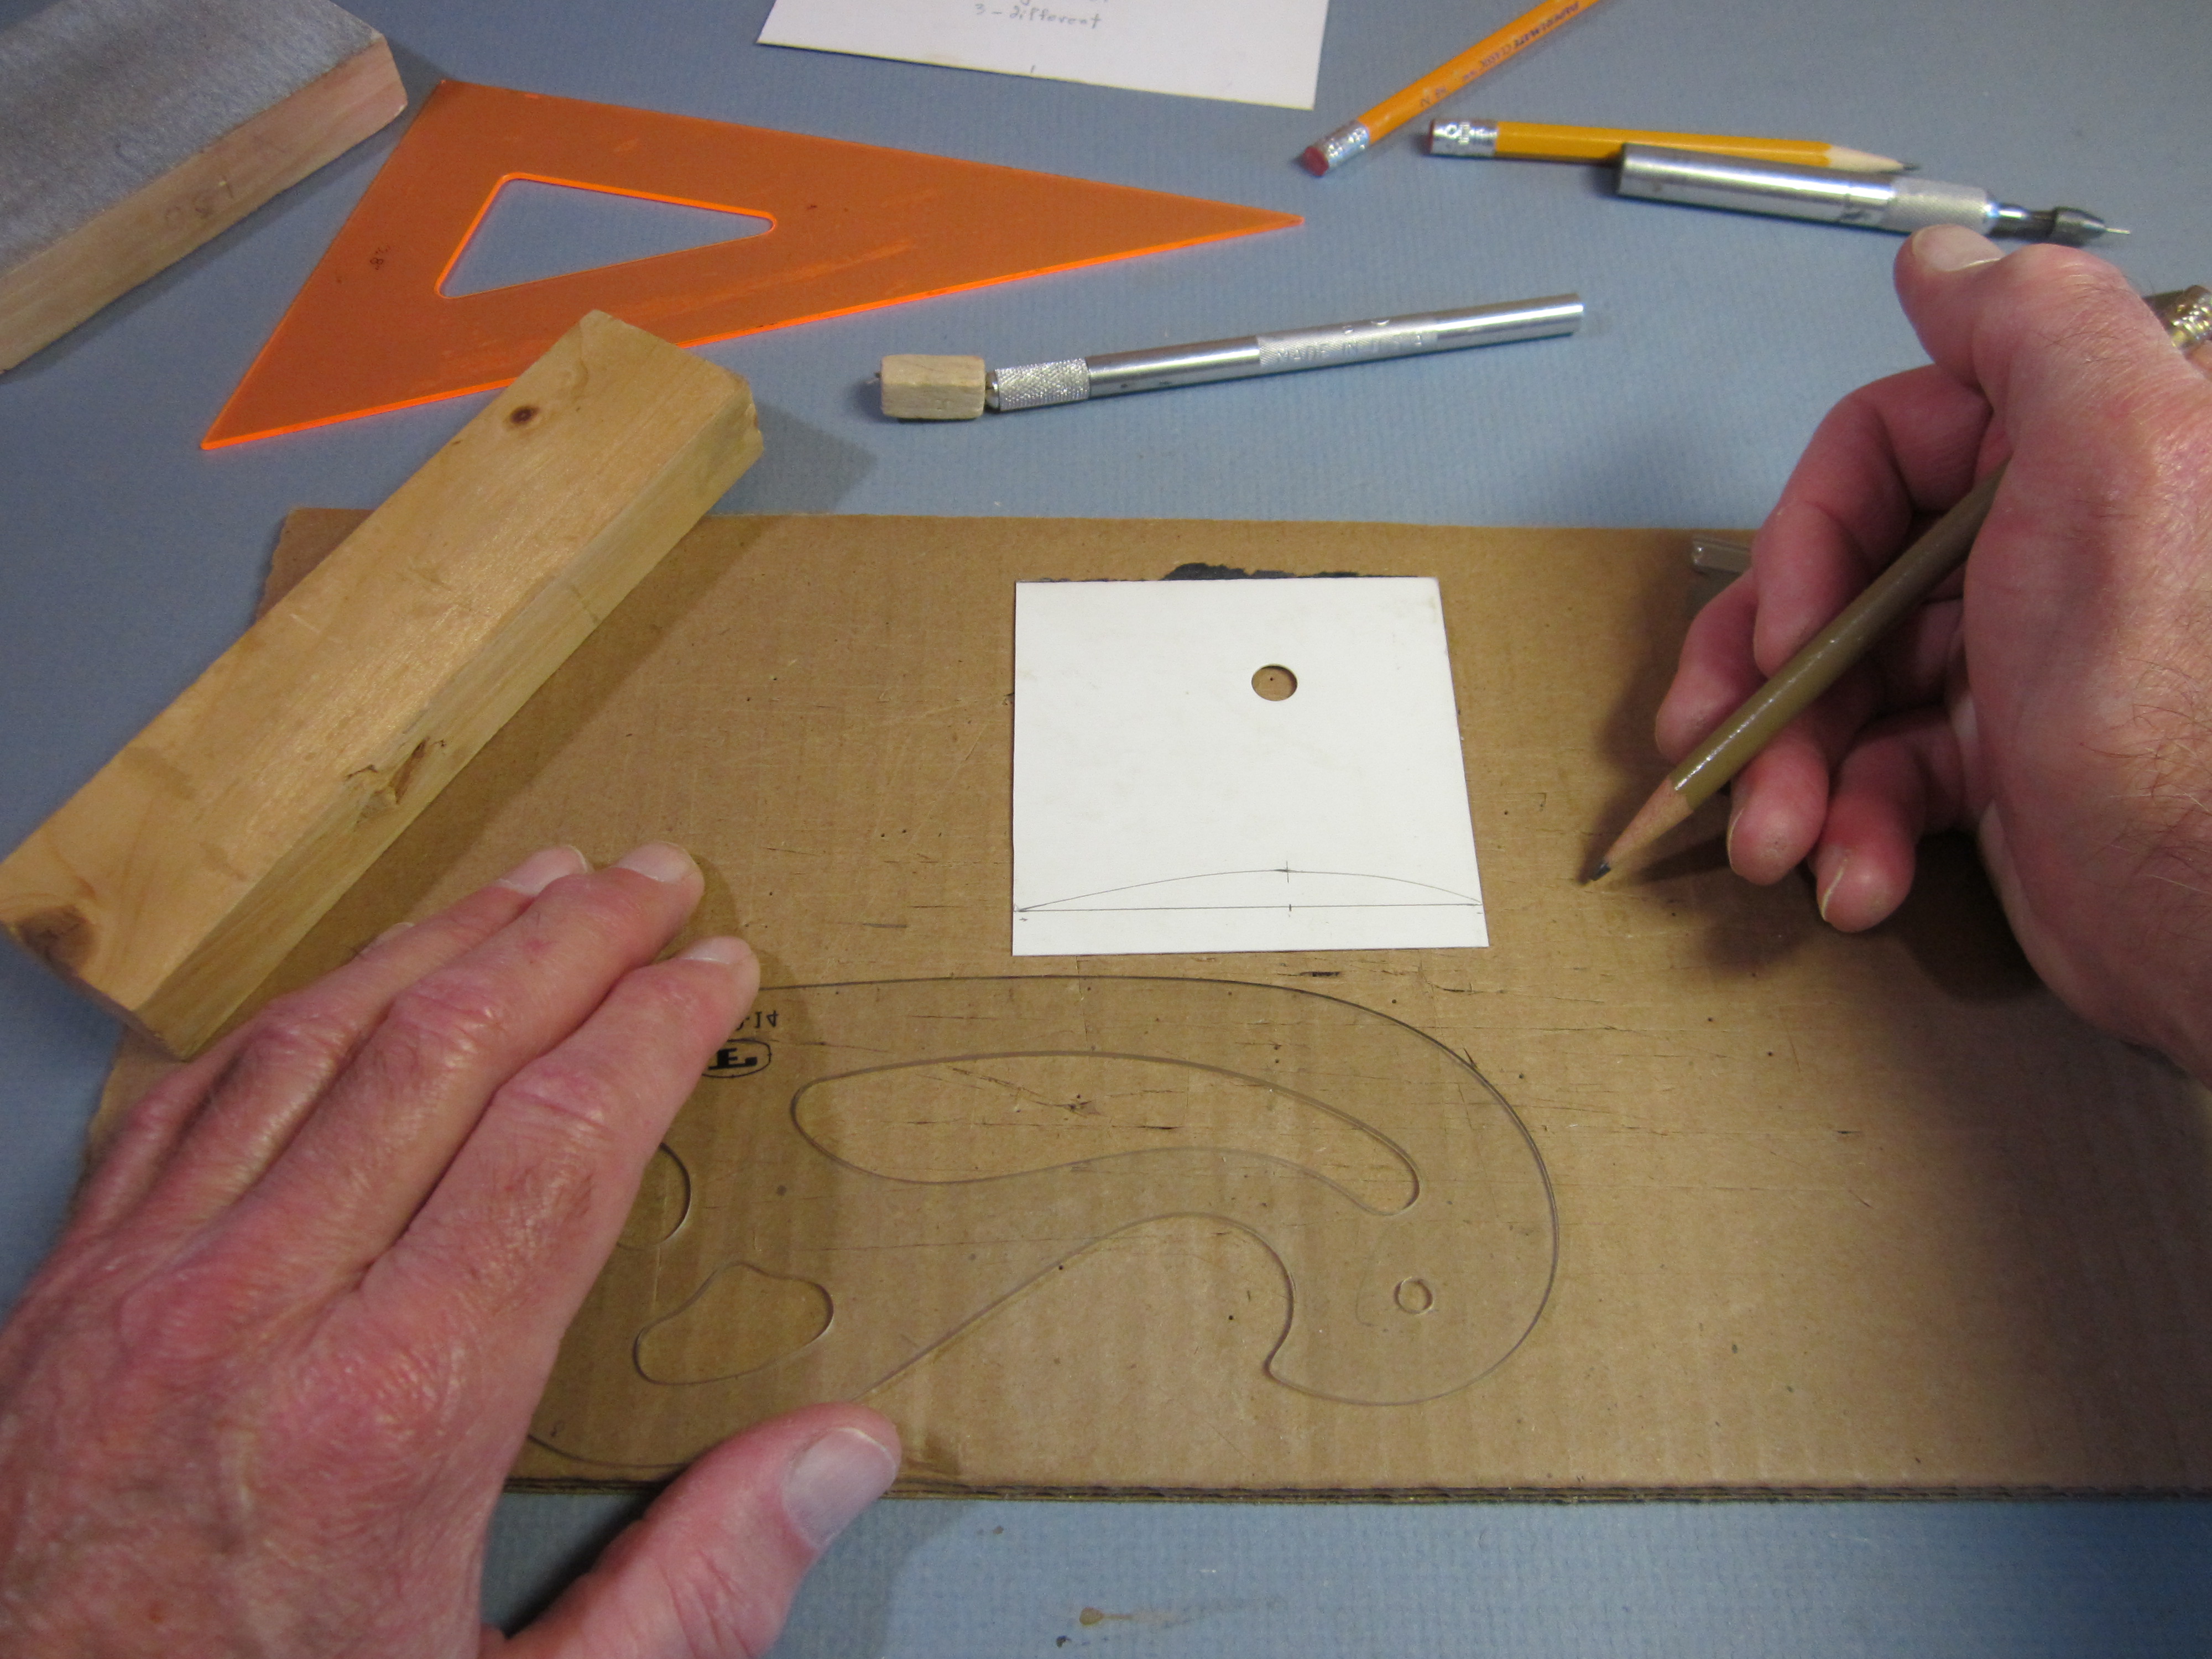 Like that.
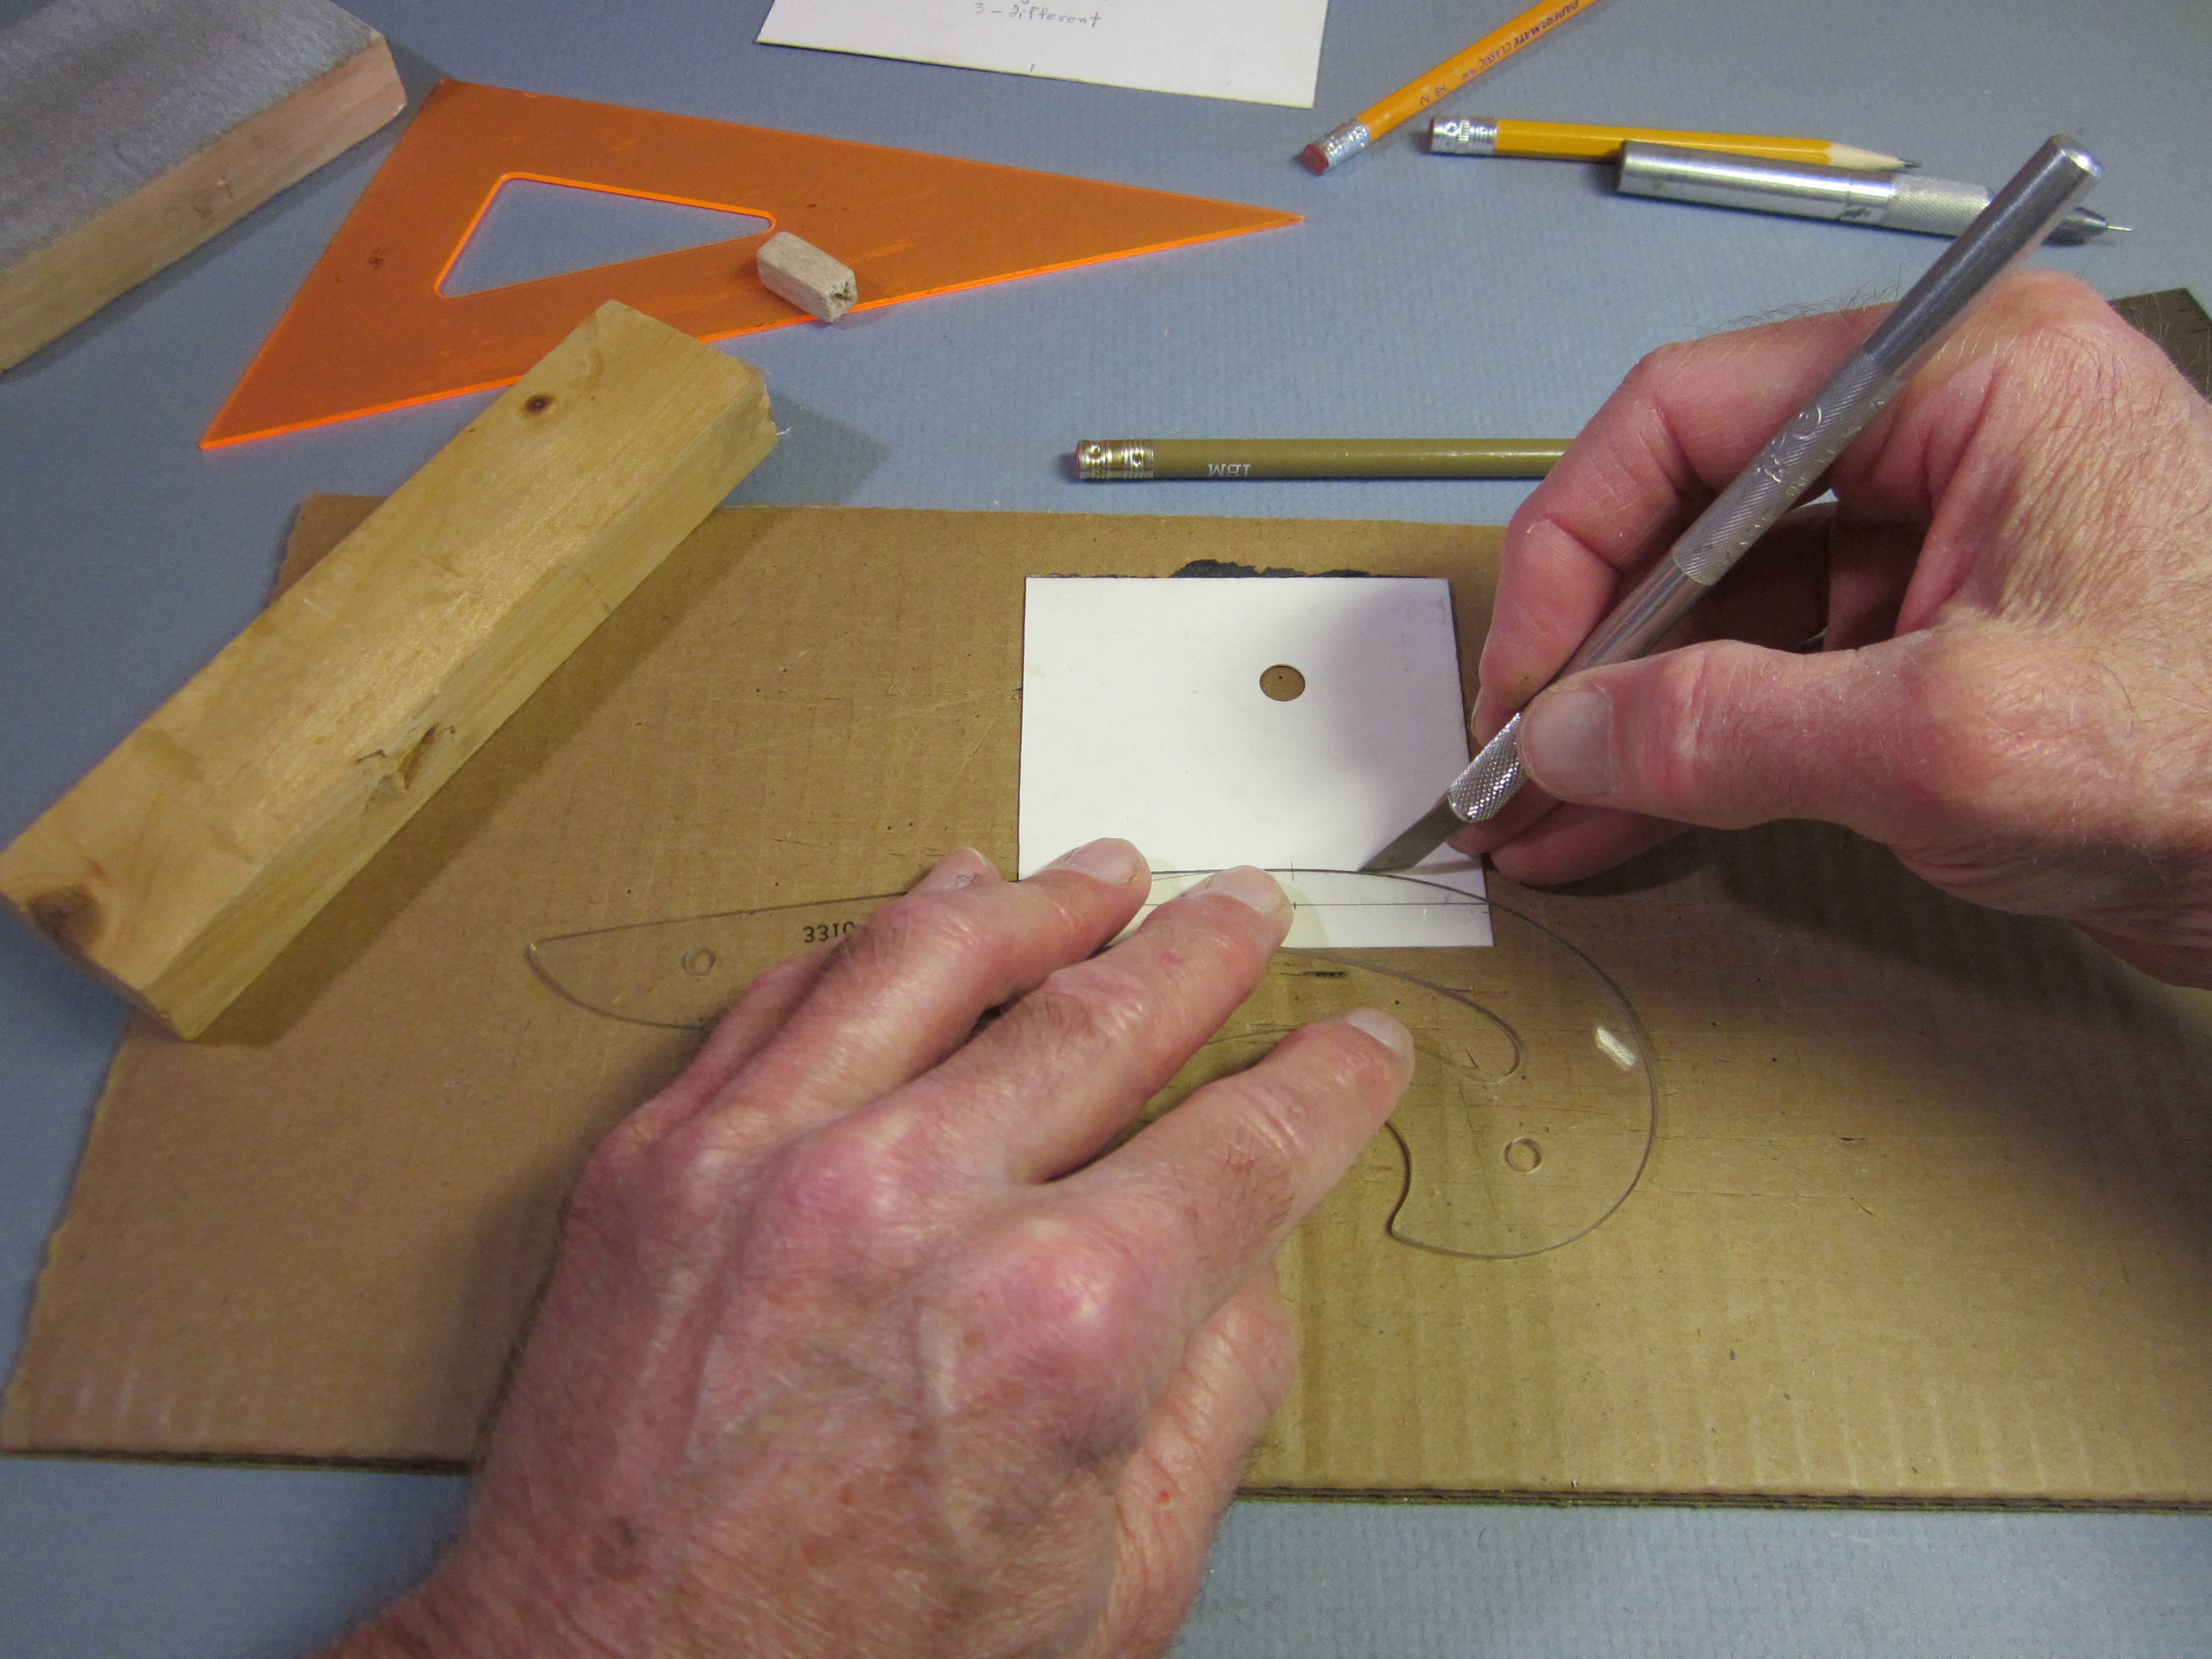 Use the knife and the curve to cut along the airfoil. Make several shallow cuts, rather than trying to cut through in one pass. It is easier to make precise cuts with gentle pressure. The blade is kept tangent to the curve, so it will not cut into the curve. You will need to move the curve and make the cut in two arcs.
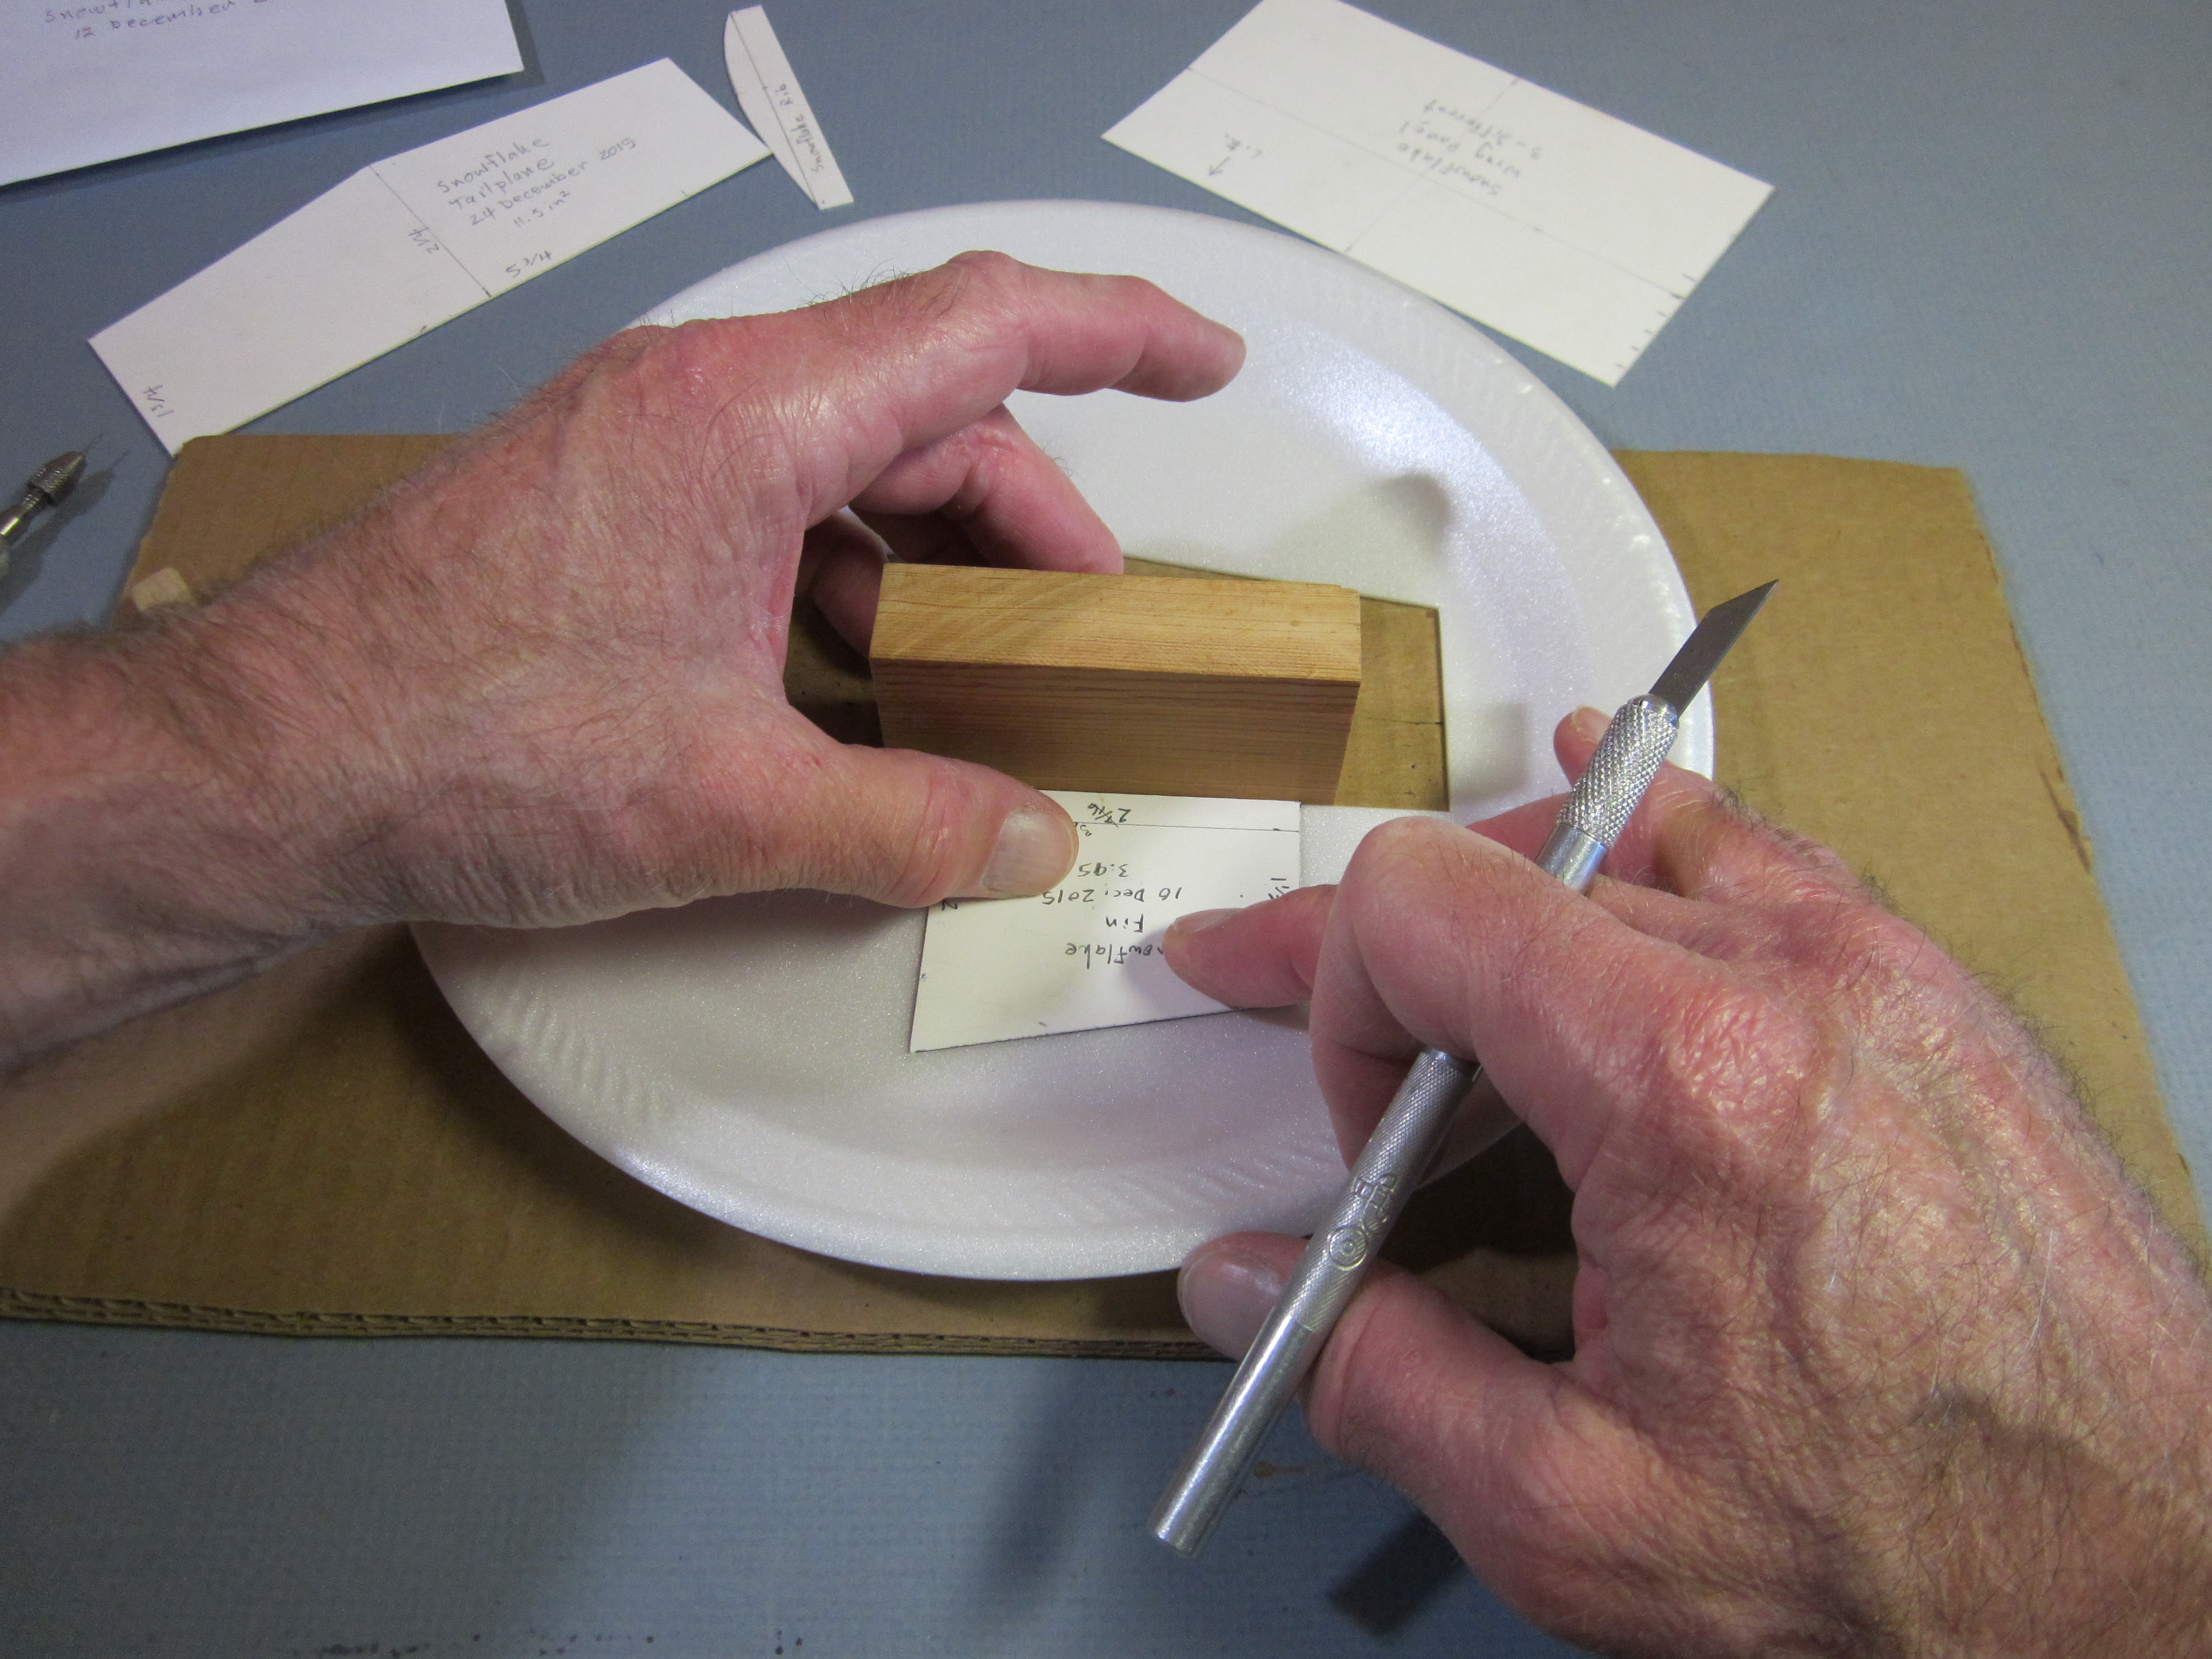
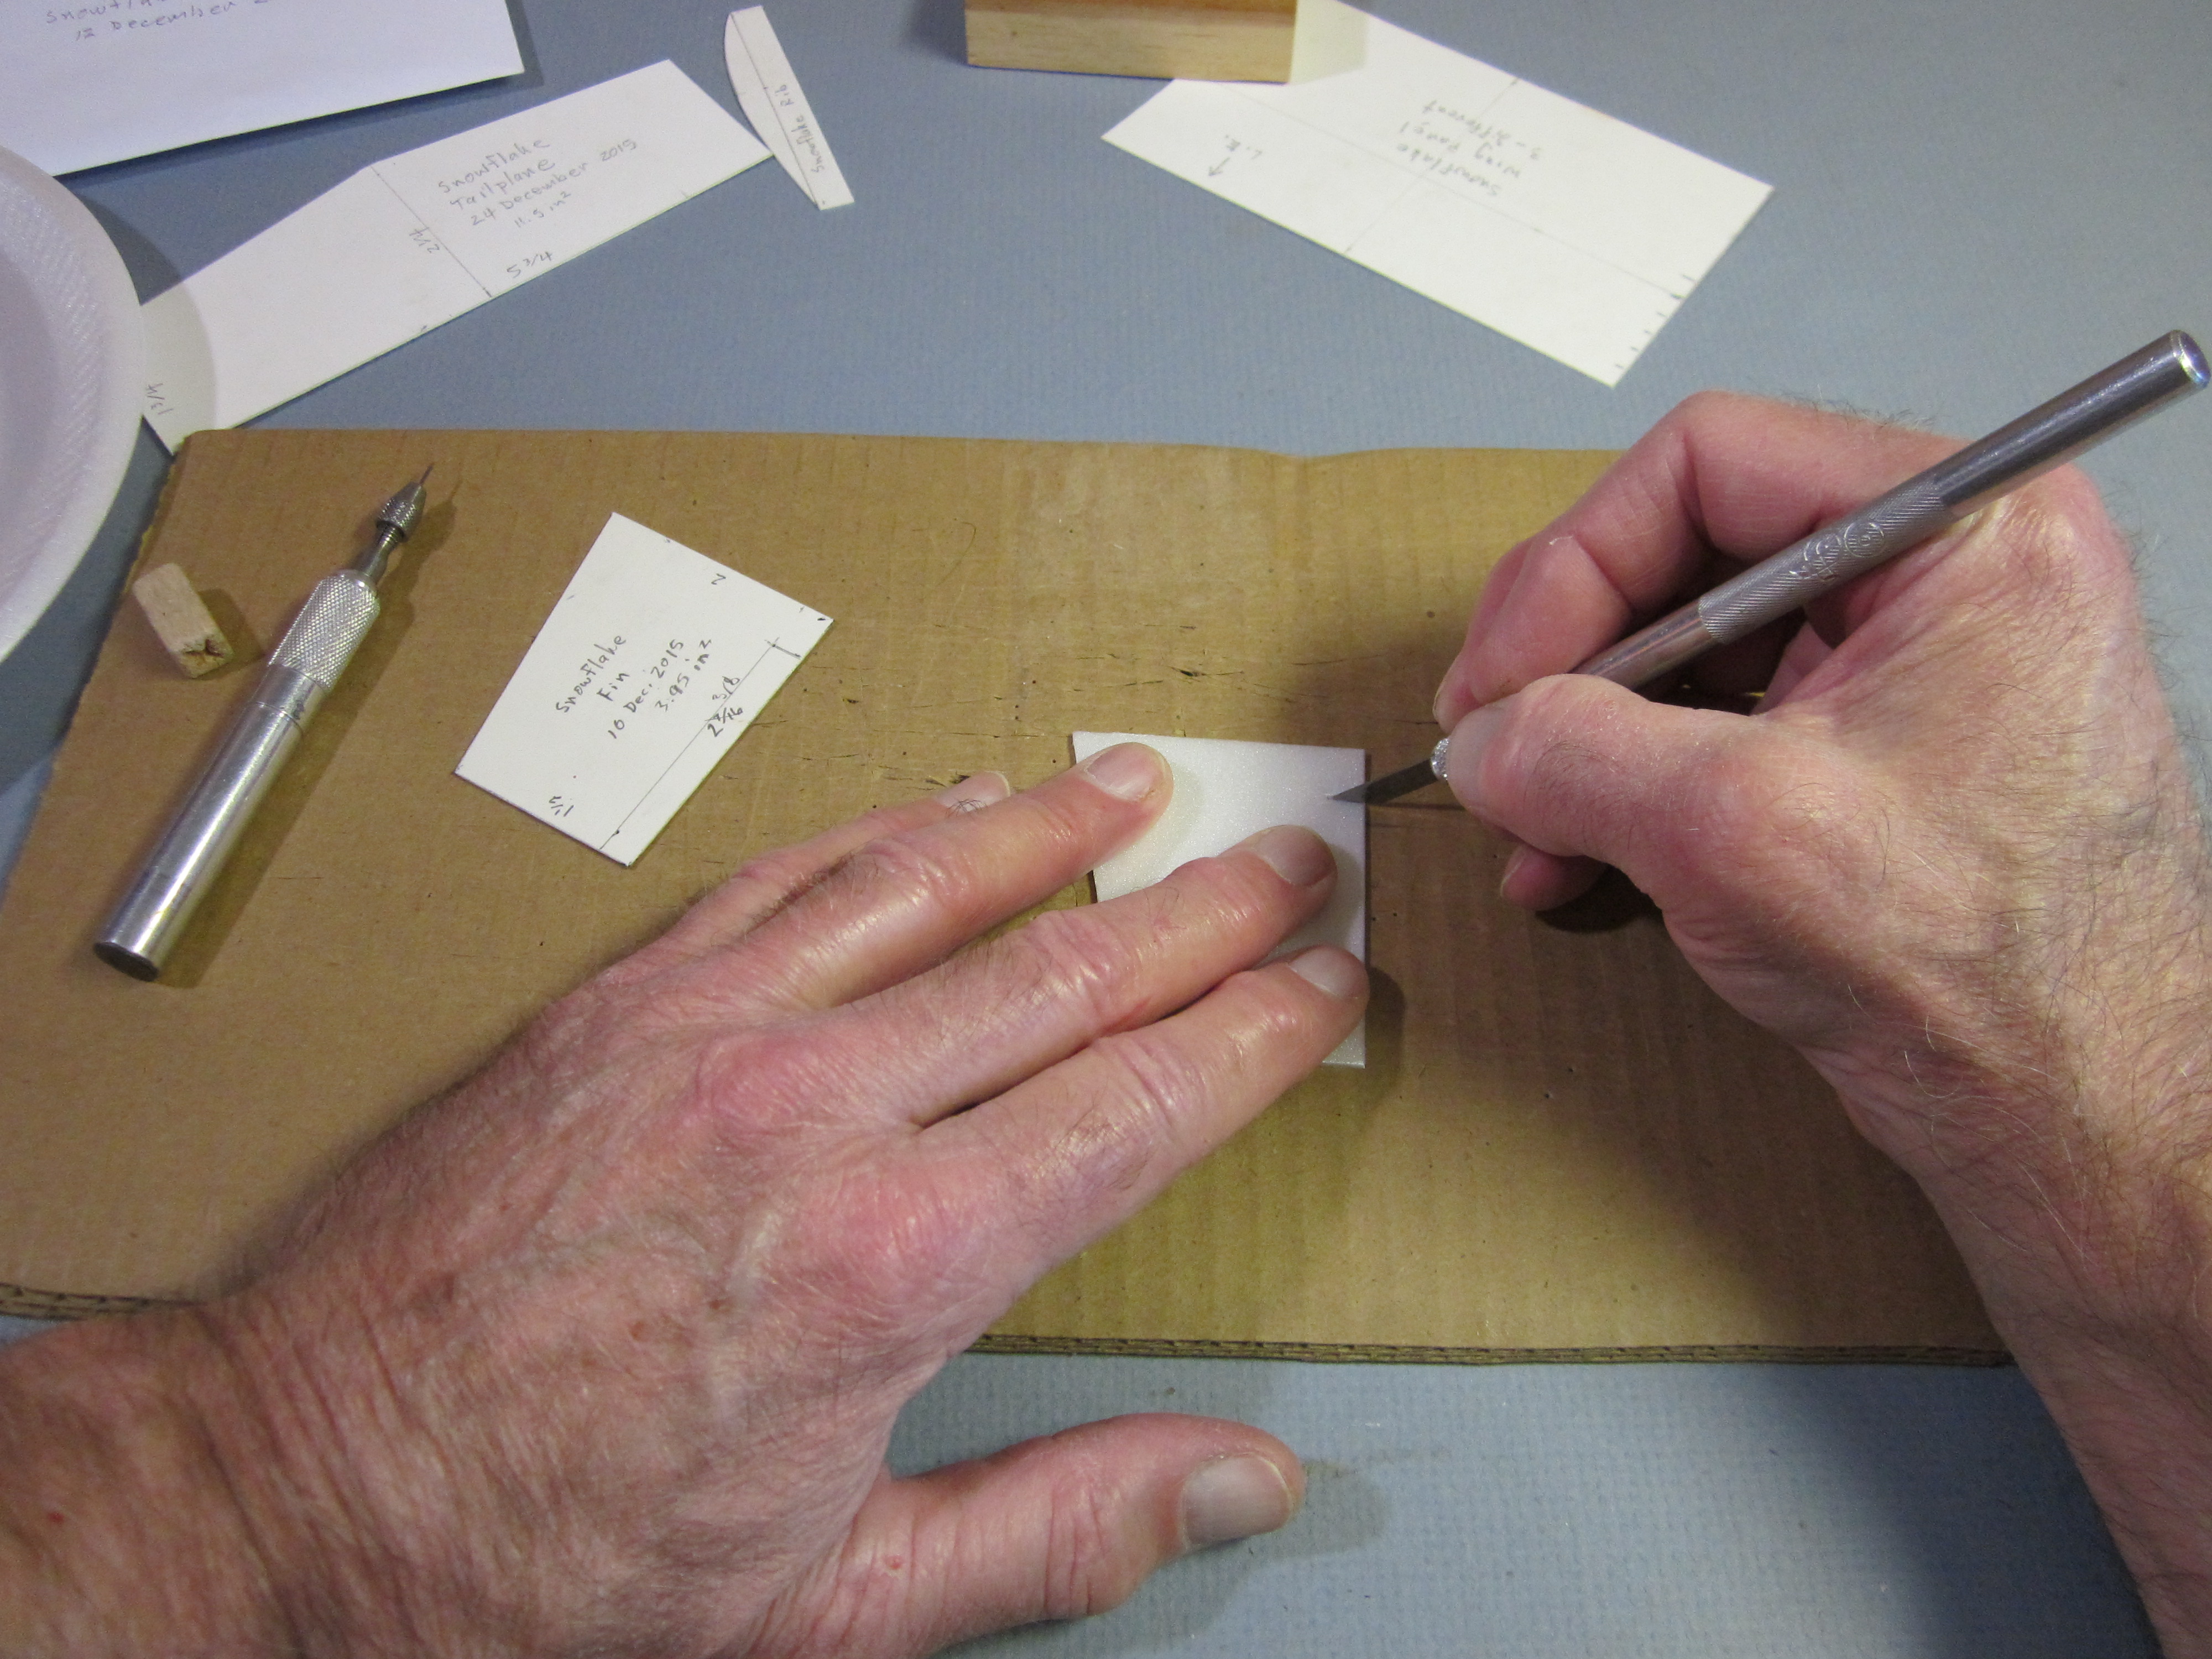
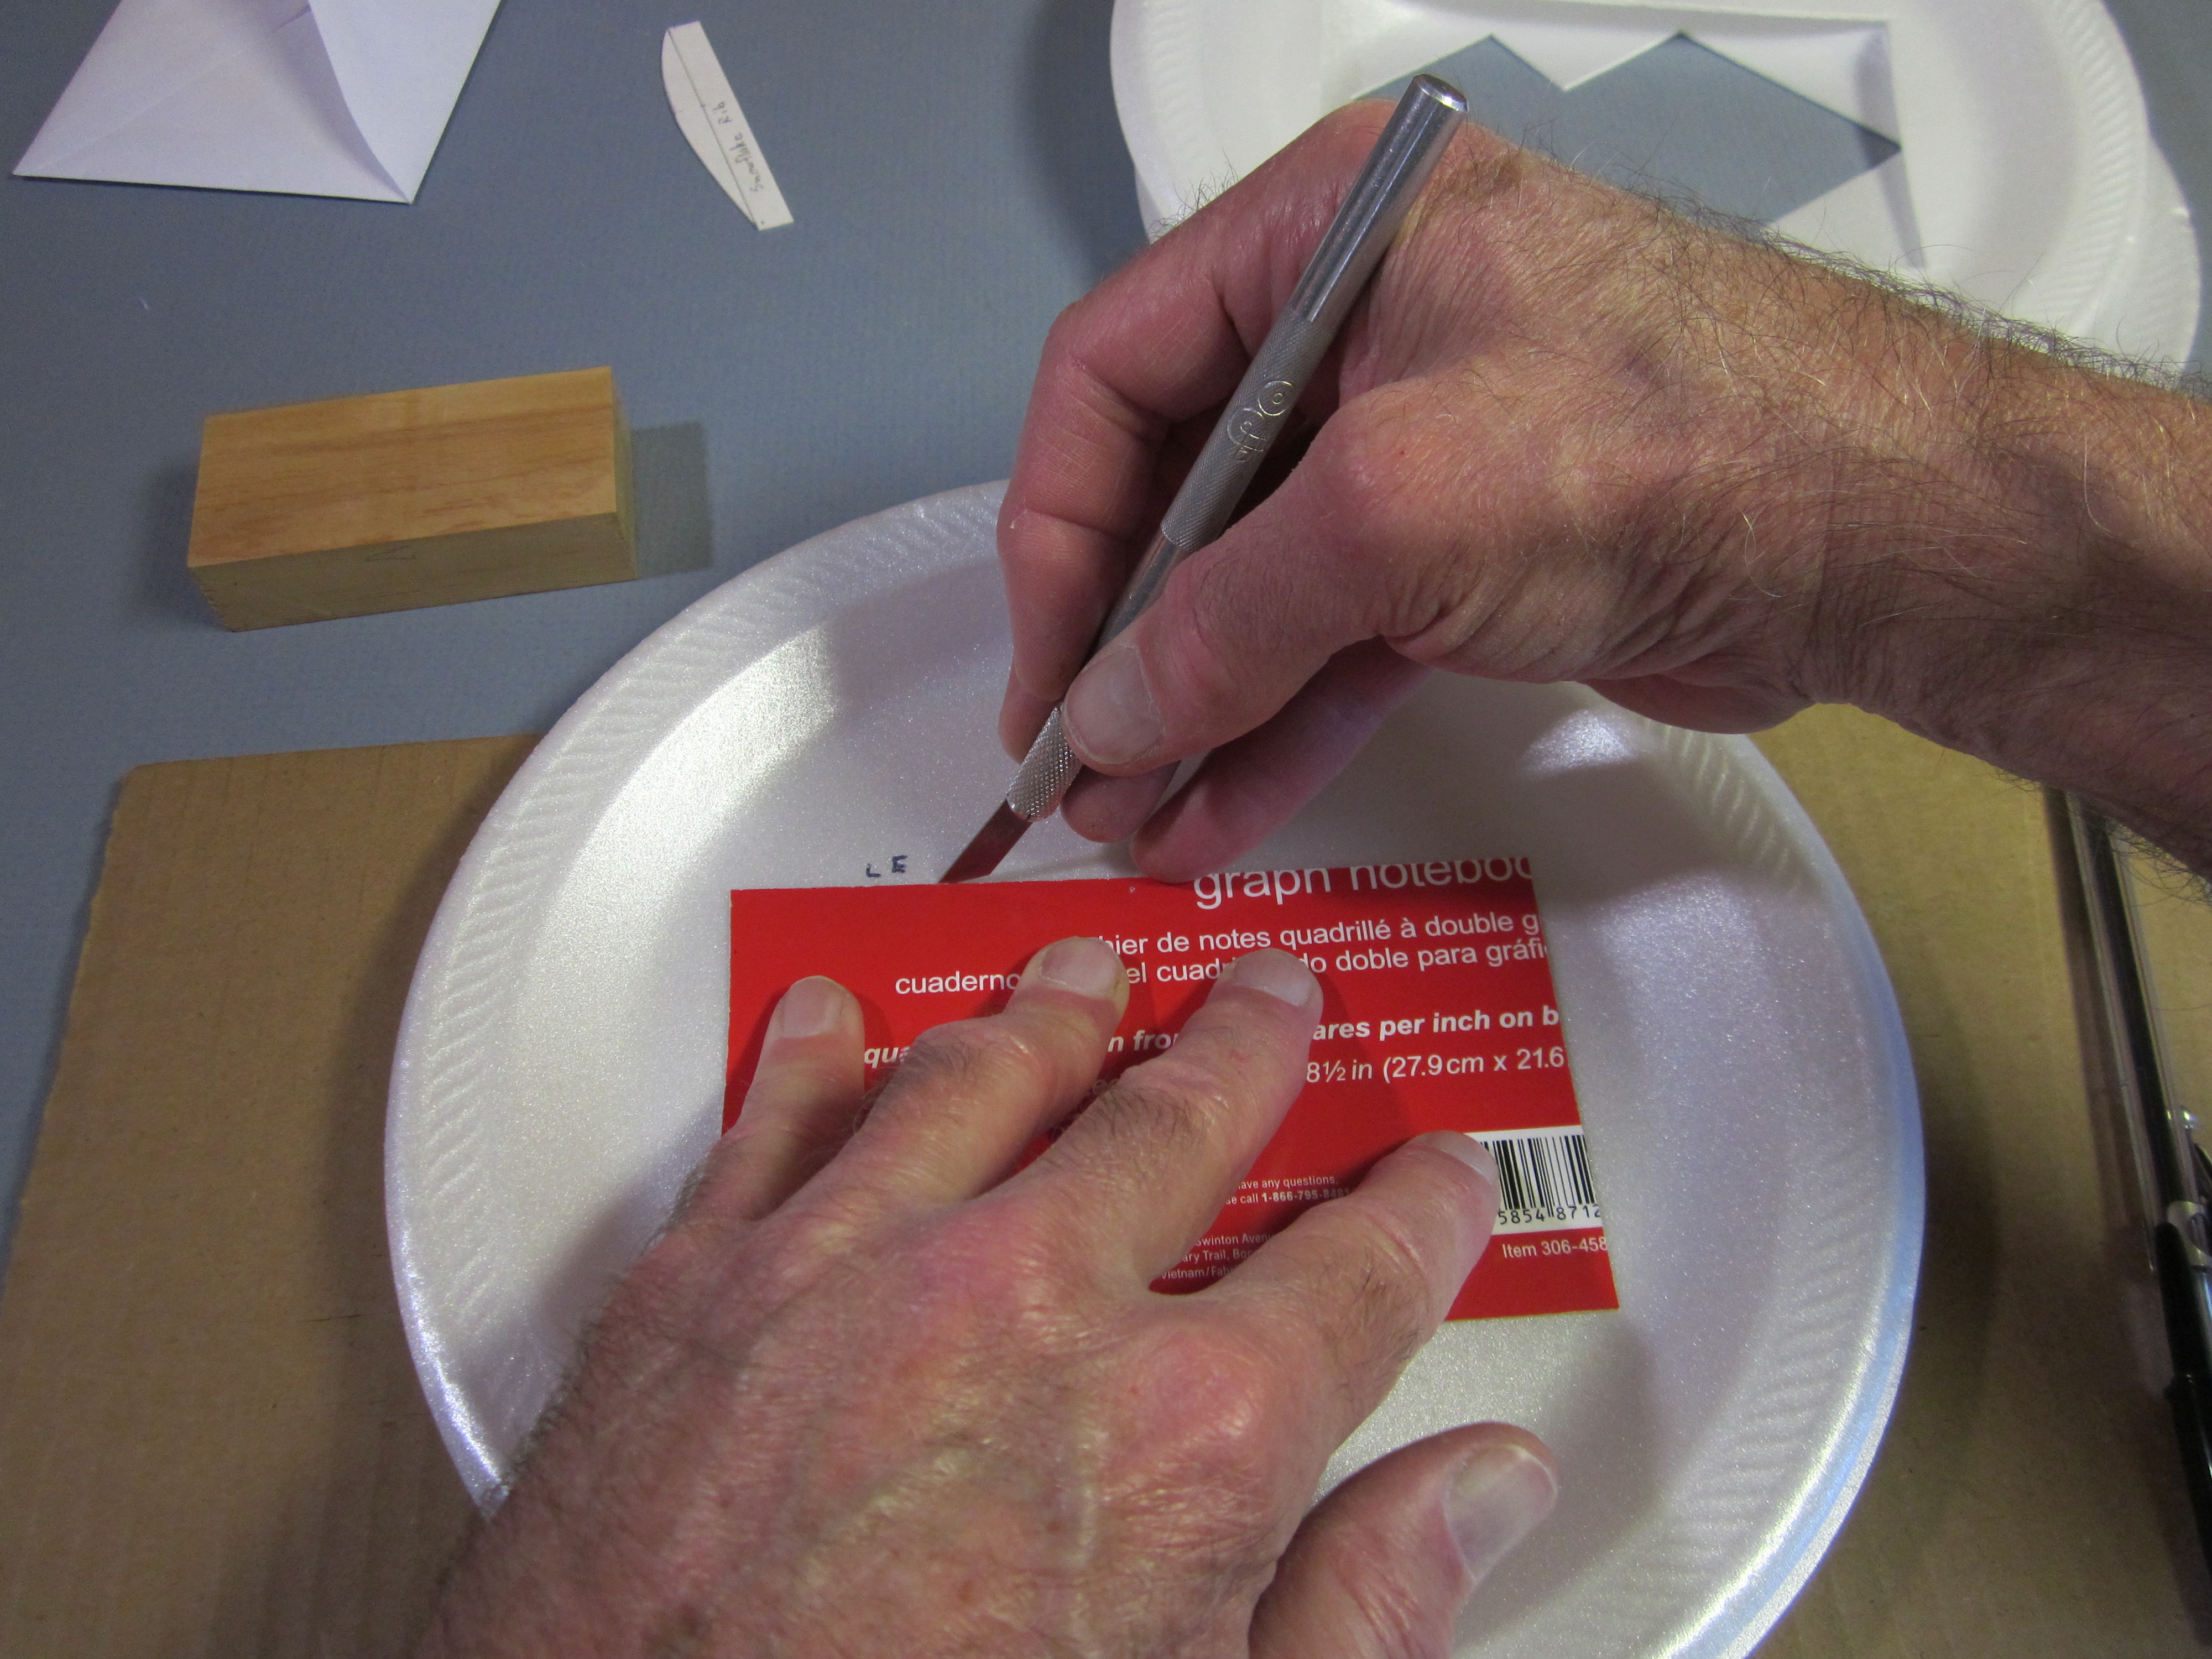
 These are the four templates you will need to cut out the sheet parts. Make the fin and tailplane according to the dimensions given. Mark the centerline on the tailplane and punch pin holes 3/32″ in from each end on the centerline. Mark a rudder hinge line 1/4″ forward of the fin trailing edge. It starts 3/8″ up from the base. Poke pin holes 3/32″ down from the top of the hinge line and at the bottom corner of the rudder.
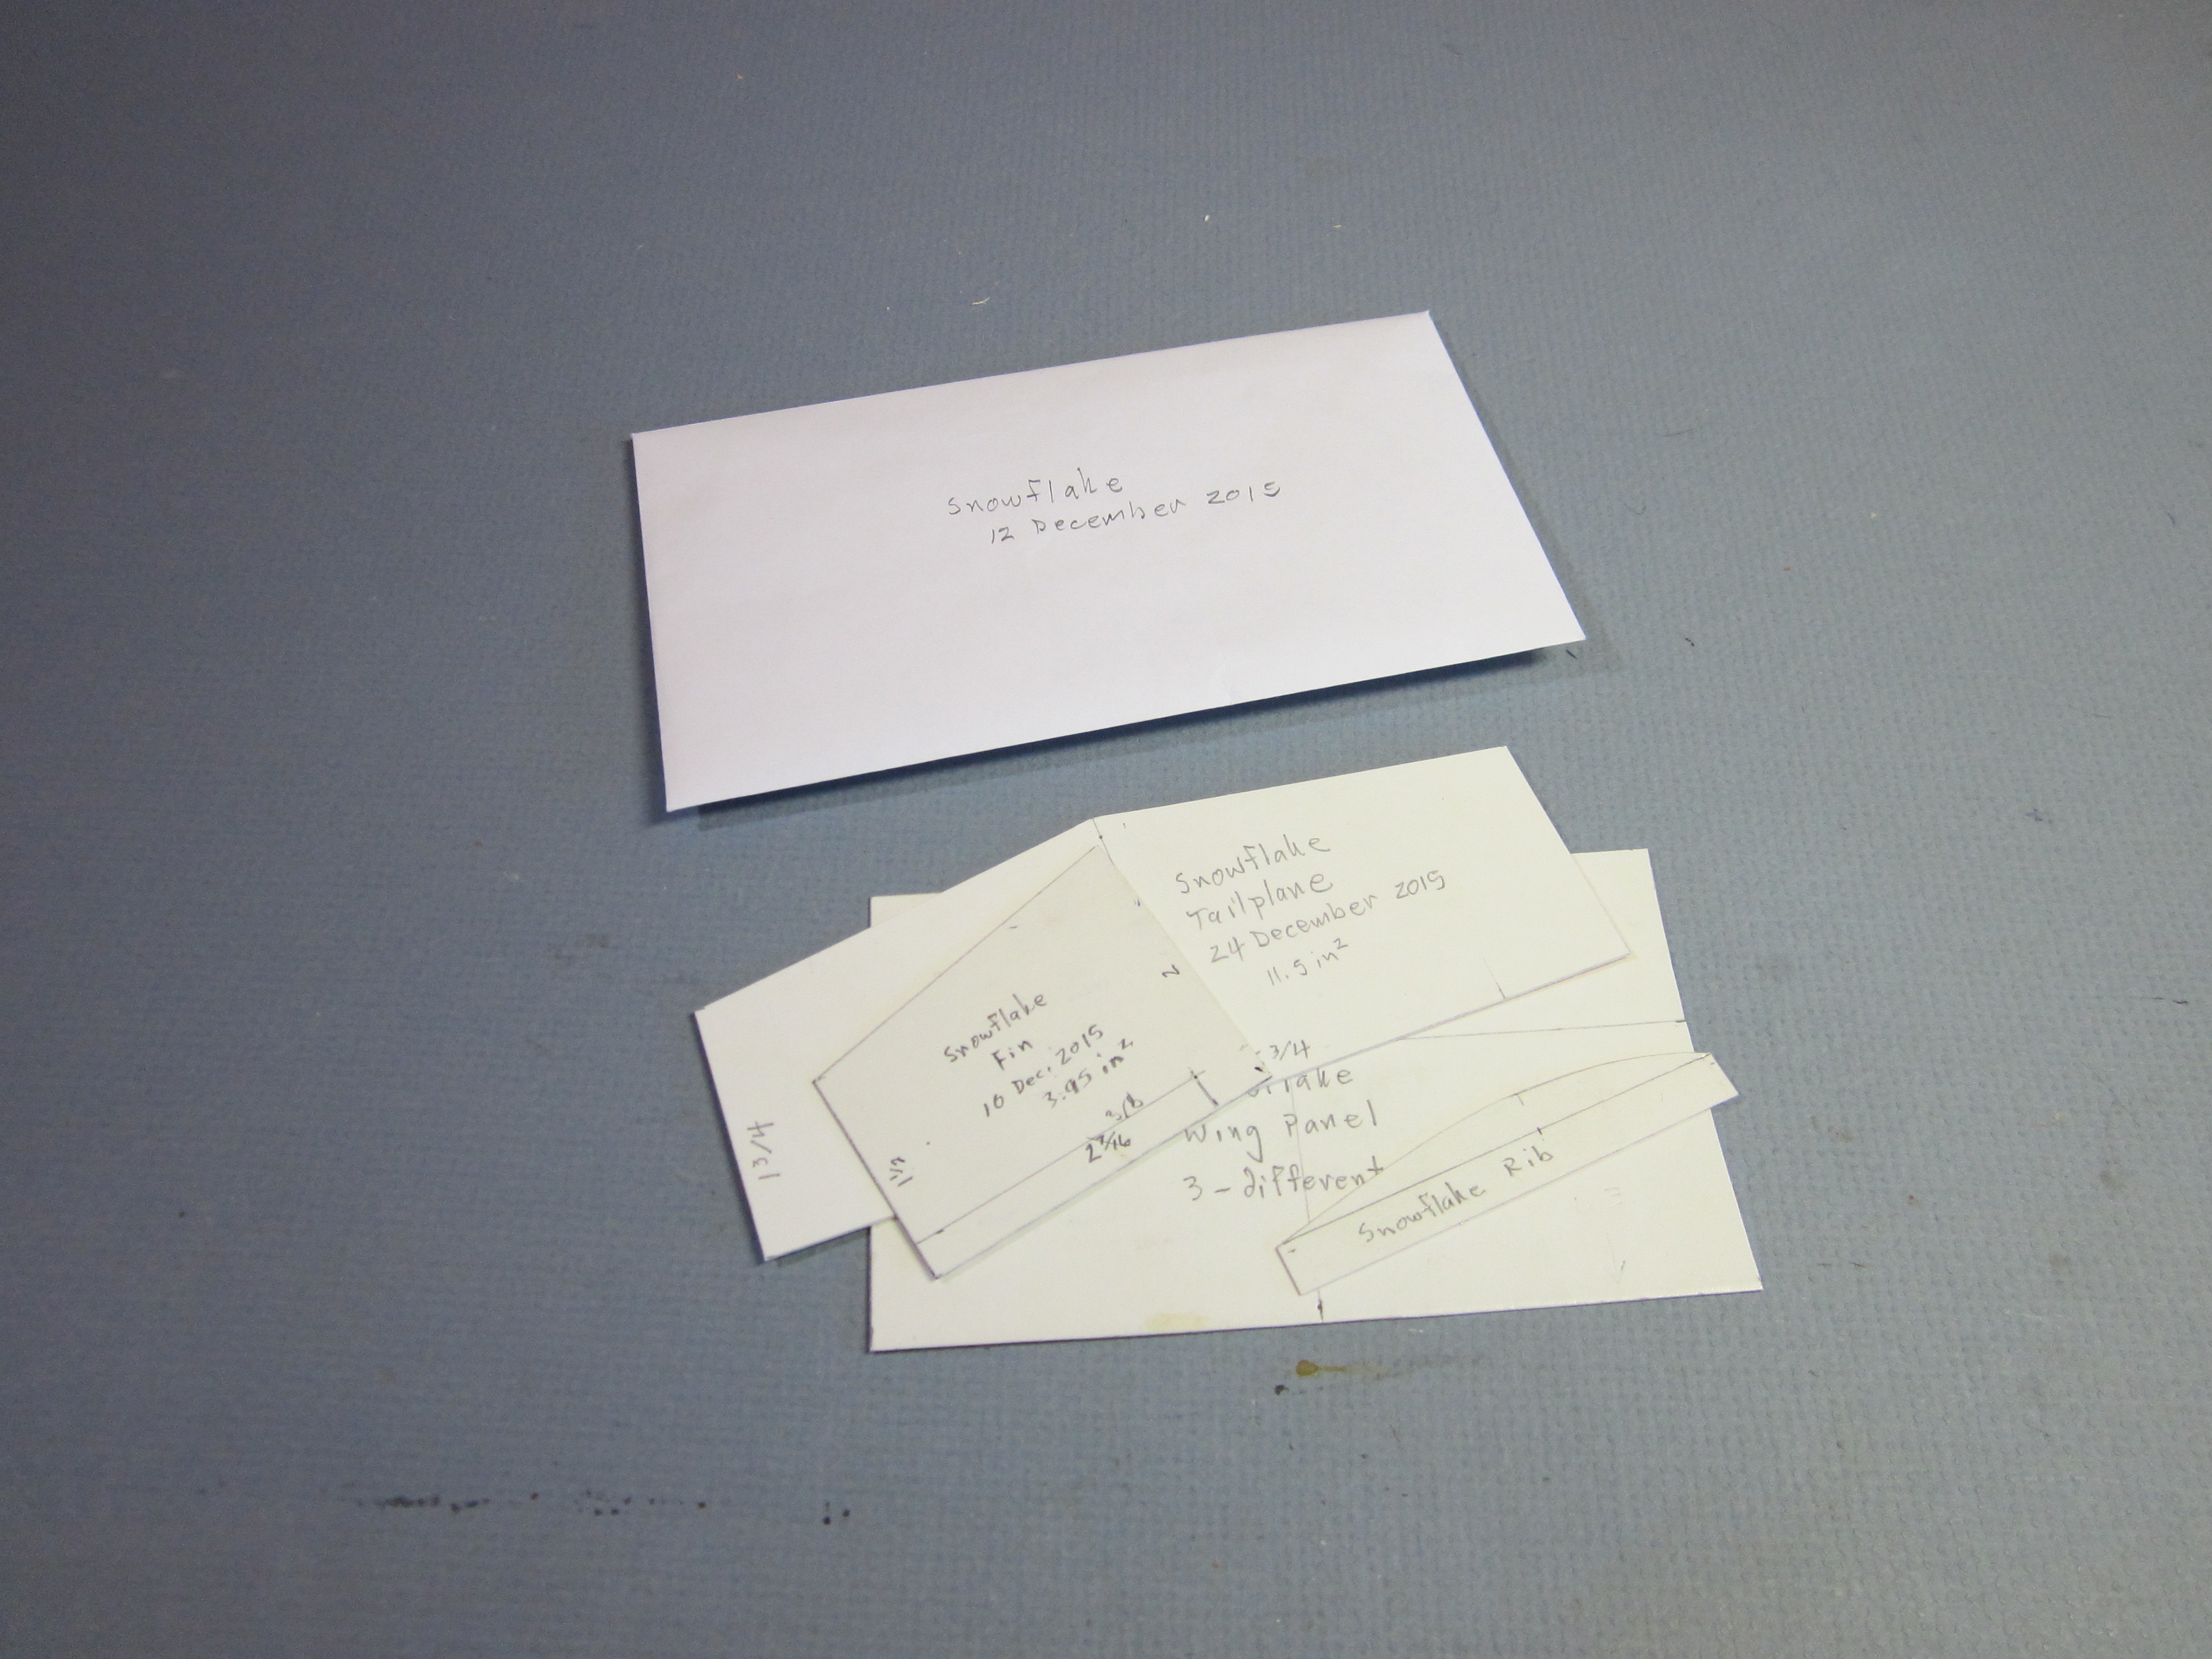 It is a good idea to store the templates in a labeled envelope, so they don’t get misplaced.
Cut Out the Foam parts
 Place a plate over the cutting board, locate the tailplane template in the flat area of the plate and cut around the template. The foam is soft, little pressure is required to cut through it. Keep the face of the blade flat on the edge of the template and draw the knife slowly, just like drawing a line with a pencil.
 Push a pin through the holes which mark the ends of the centerline to make holes through the tailplane. These holes will help align the tailplane with the center of the stick.
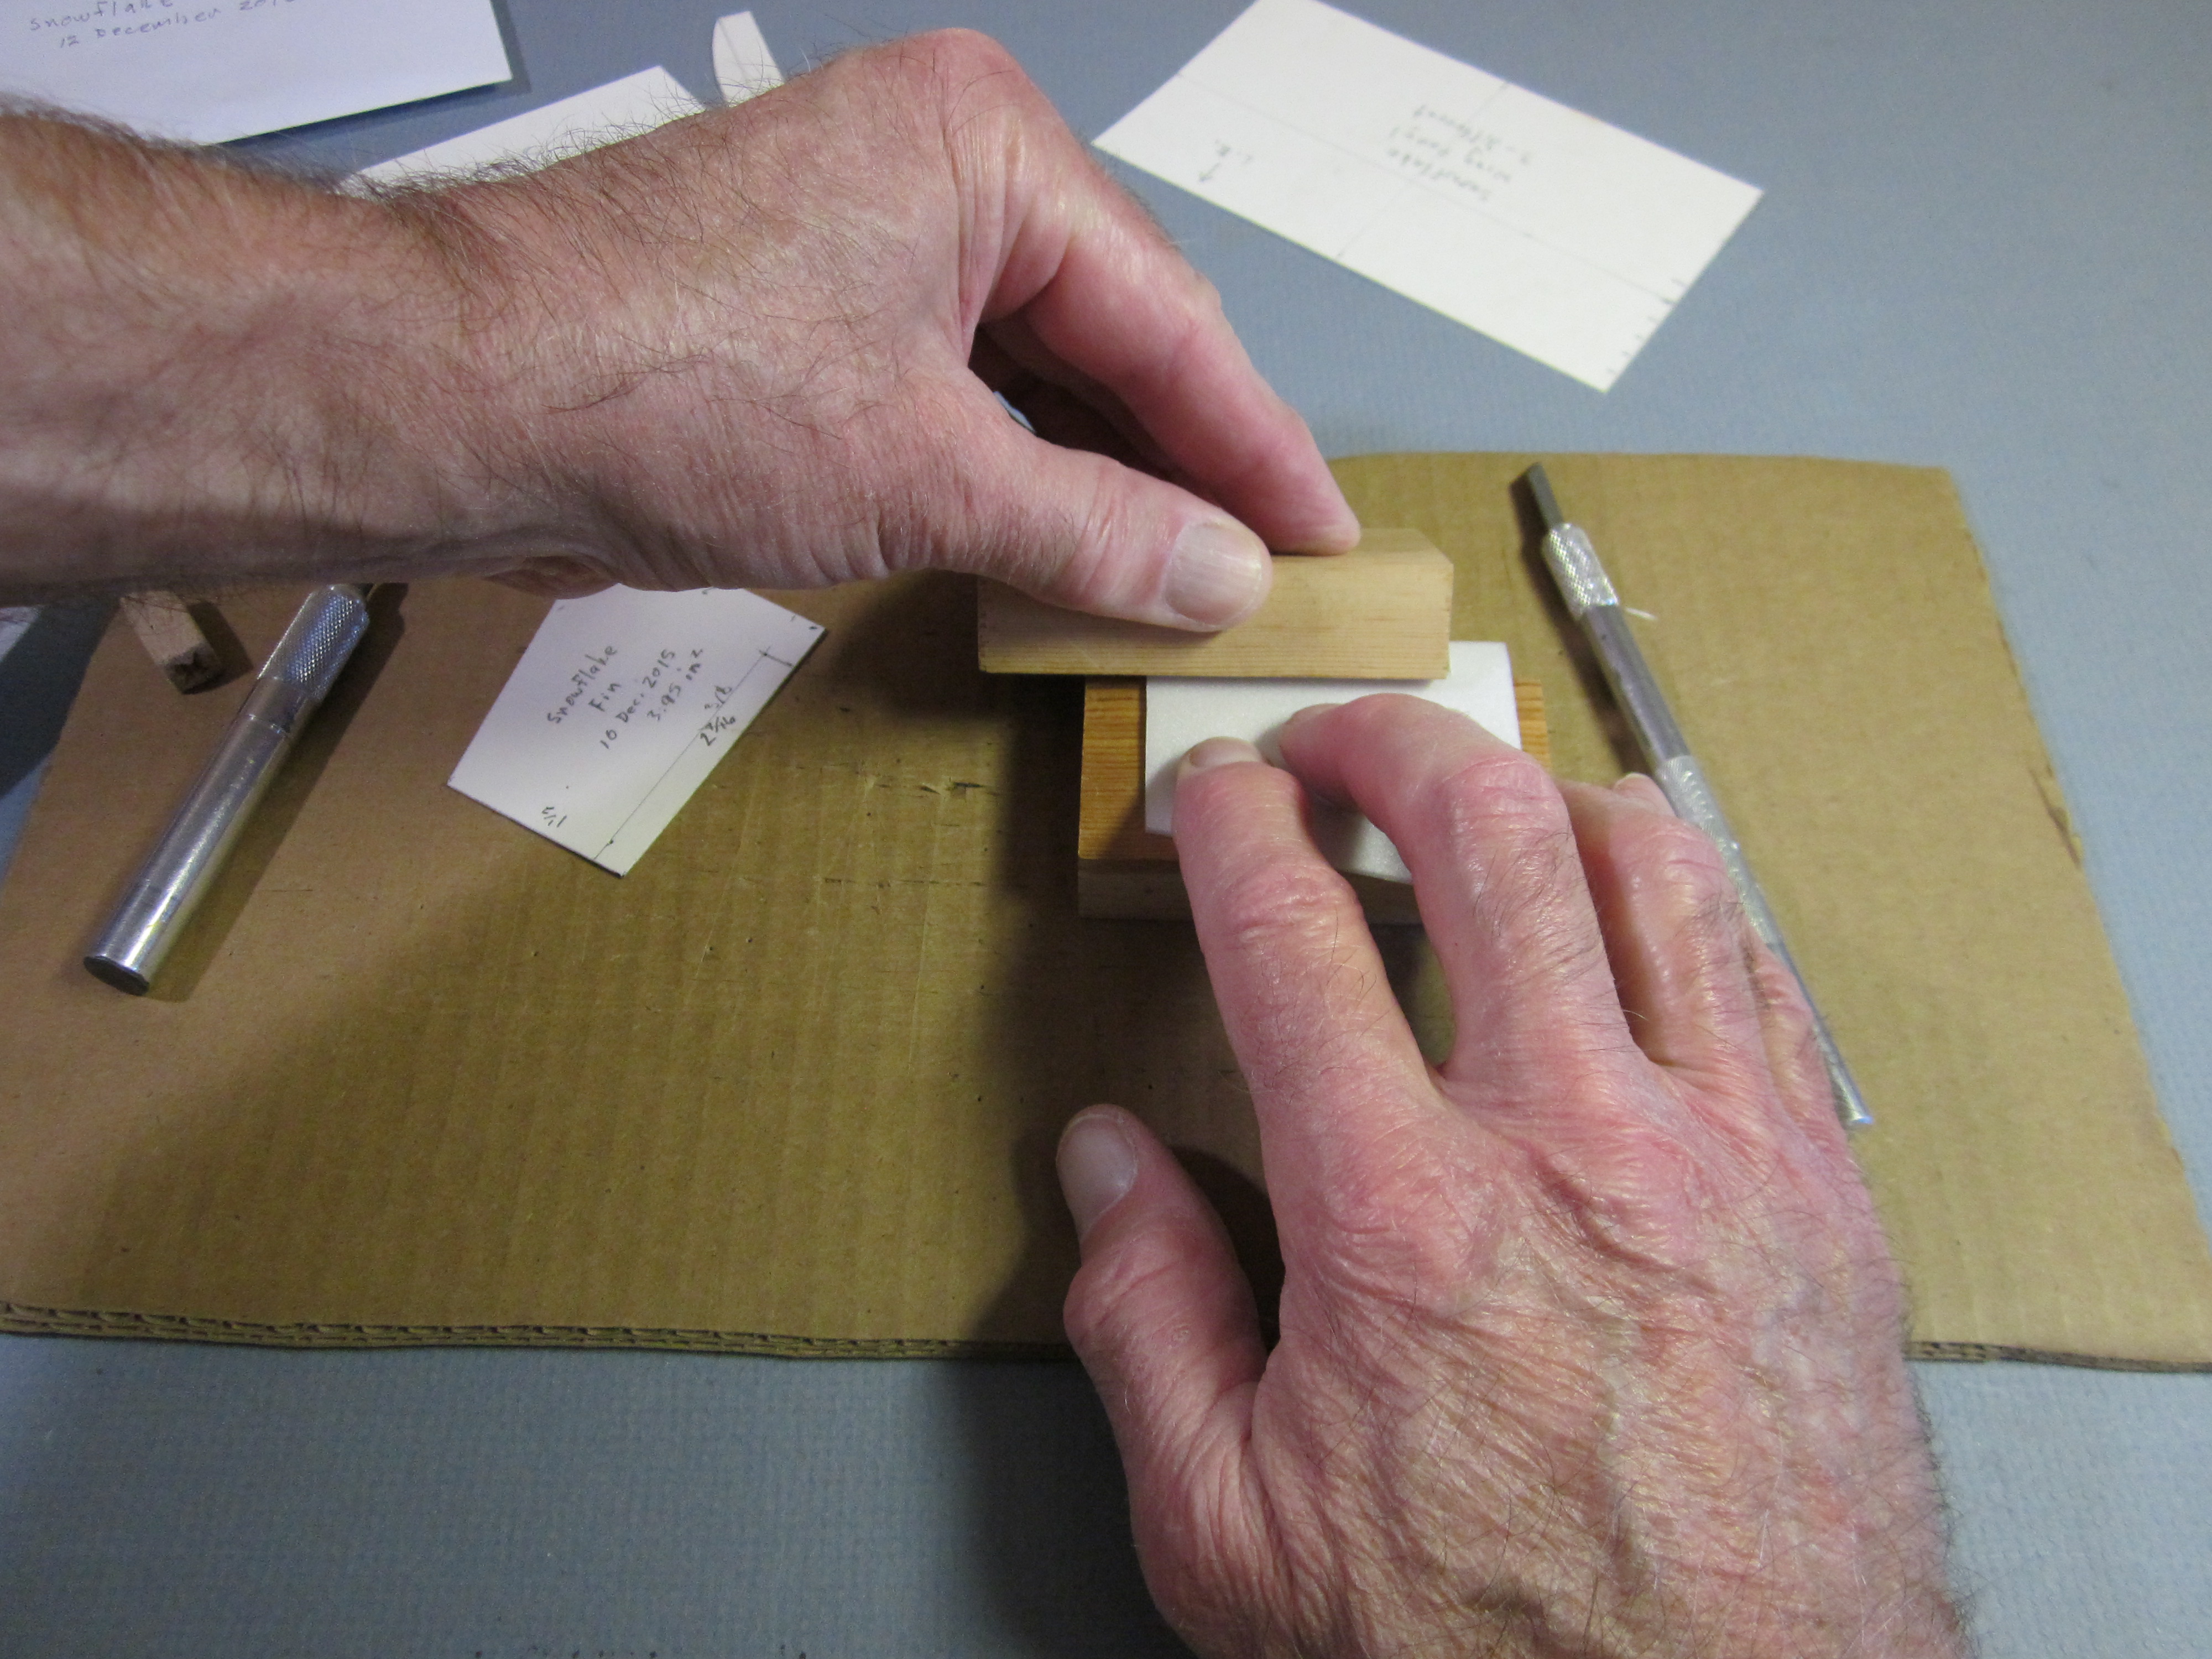
 Place the fin template on the remaining flat area of the plate with its trailing edge aligned along the cut of the tailplane trailing edge. Cut around the fin template. You get two parts from one plate.
 When the fin is free from the surrounding foam, punch the two holes that mark the rudder hinge line.
 Cut the bottom edge of the rudder.
 Place the fin on a block with the holes marking the rudder hinge line aligned over the edge. Press the rudder down, forming a crease on the rudder hinge line. The rudder should be bent toward the right side of the fin.
 Like this. We will adjust the exact amount of rudder deflection in the field during flight tests.
 Now place the wing panel template in the flat part of another plate and cut around it, as before. This will be a wing tip, with one straight edge and one curved edge. The straight edge will be the outer tip, the curved edge will be where this tip panel joins the center wing panel. This curve must be cut very precisely. We must be careful to keep track of the orientation of these panels; leading edge/trailing edge, upper surface/lower surface. They must be properly oriented when they go together to form the wing.
 Align the leading edges of the template and the wing panel, with the template offset a bit to the inside of the wing tip, and transfer the marks for the positions of the creases onto the wing panel.
 Do the same along the curved edge.
 The crease marks are on the under surface of the wing. That and the position of the curved edge tells us that this is going to be the right wing tip. Put an ‘R’ in the corner near the leading edge and the curved end.
 Flip the template over, place it in the flat part of another plate and repeat the process of cutting out a wing panel. Pay attention to which edge is the leading edge. I marked it on the plate before cutting it out.
 Repeat the process of marking crease locations on both edges and put an ‘L’ in the corner near the leading edge and the curved end.
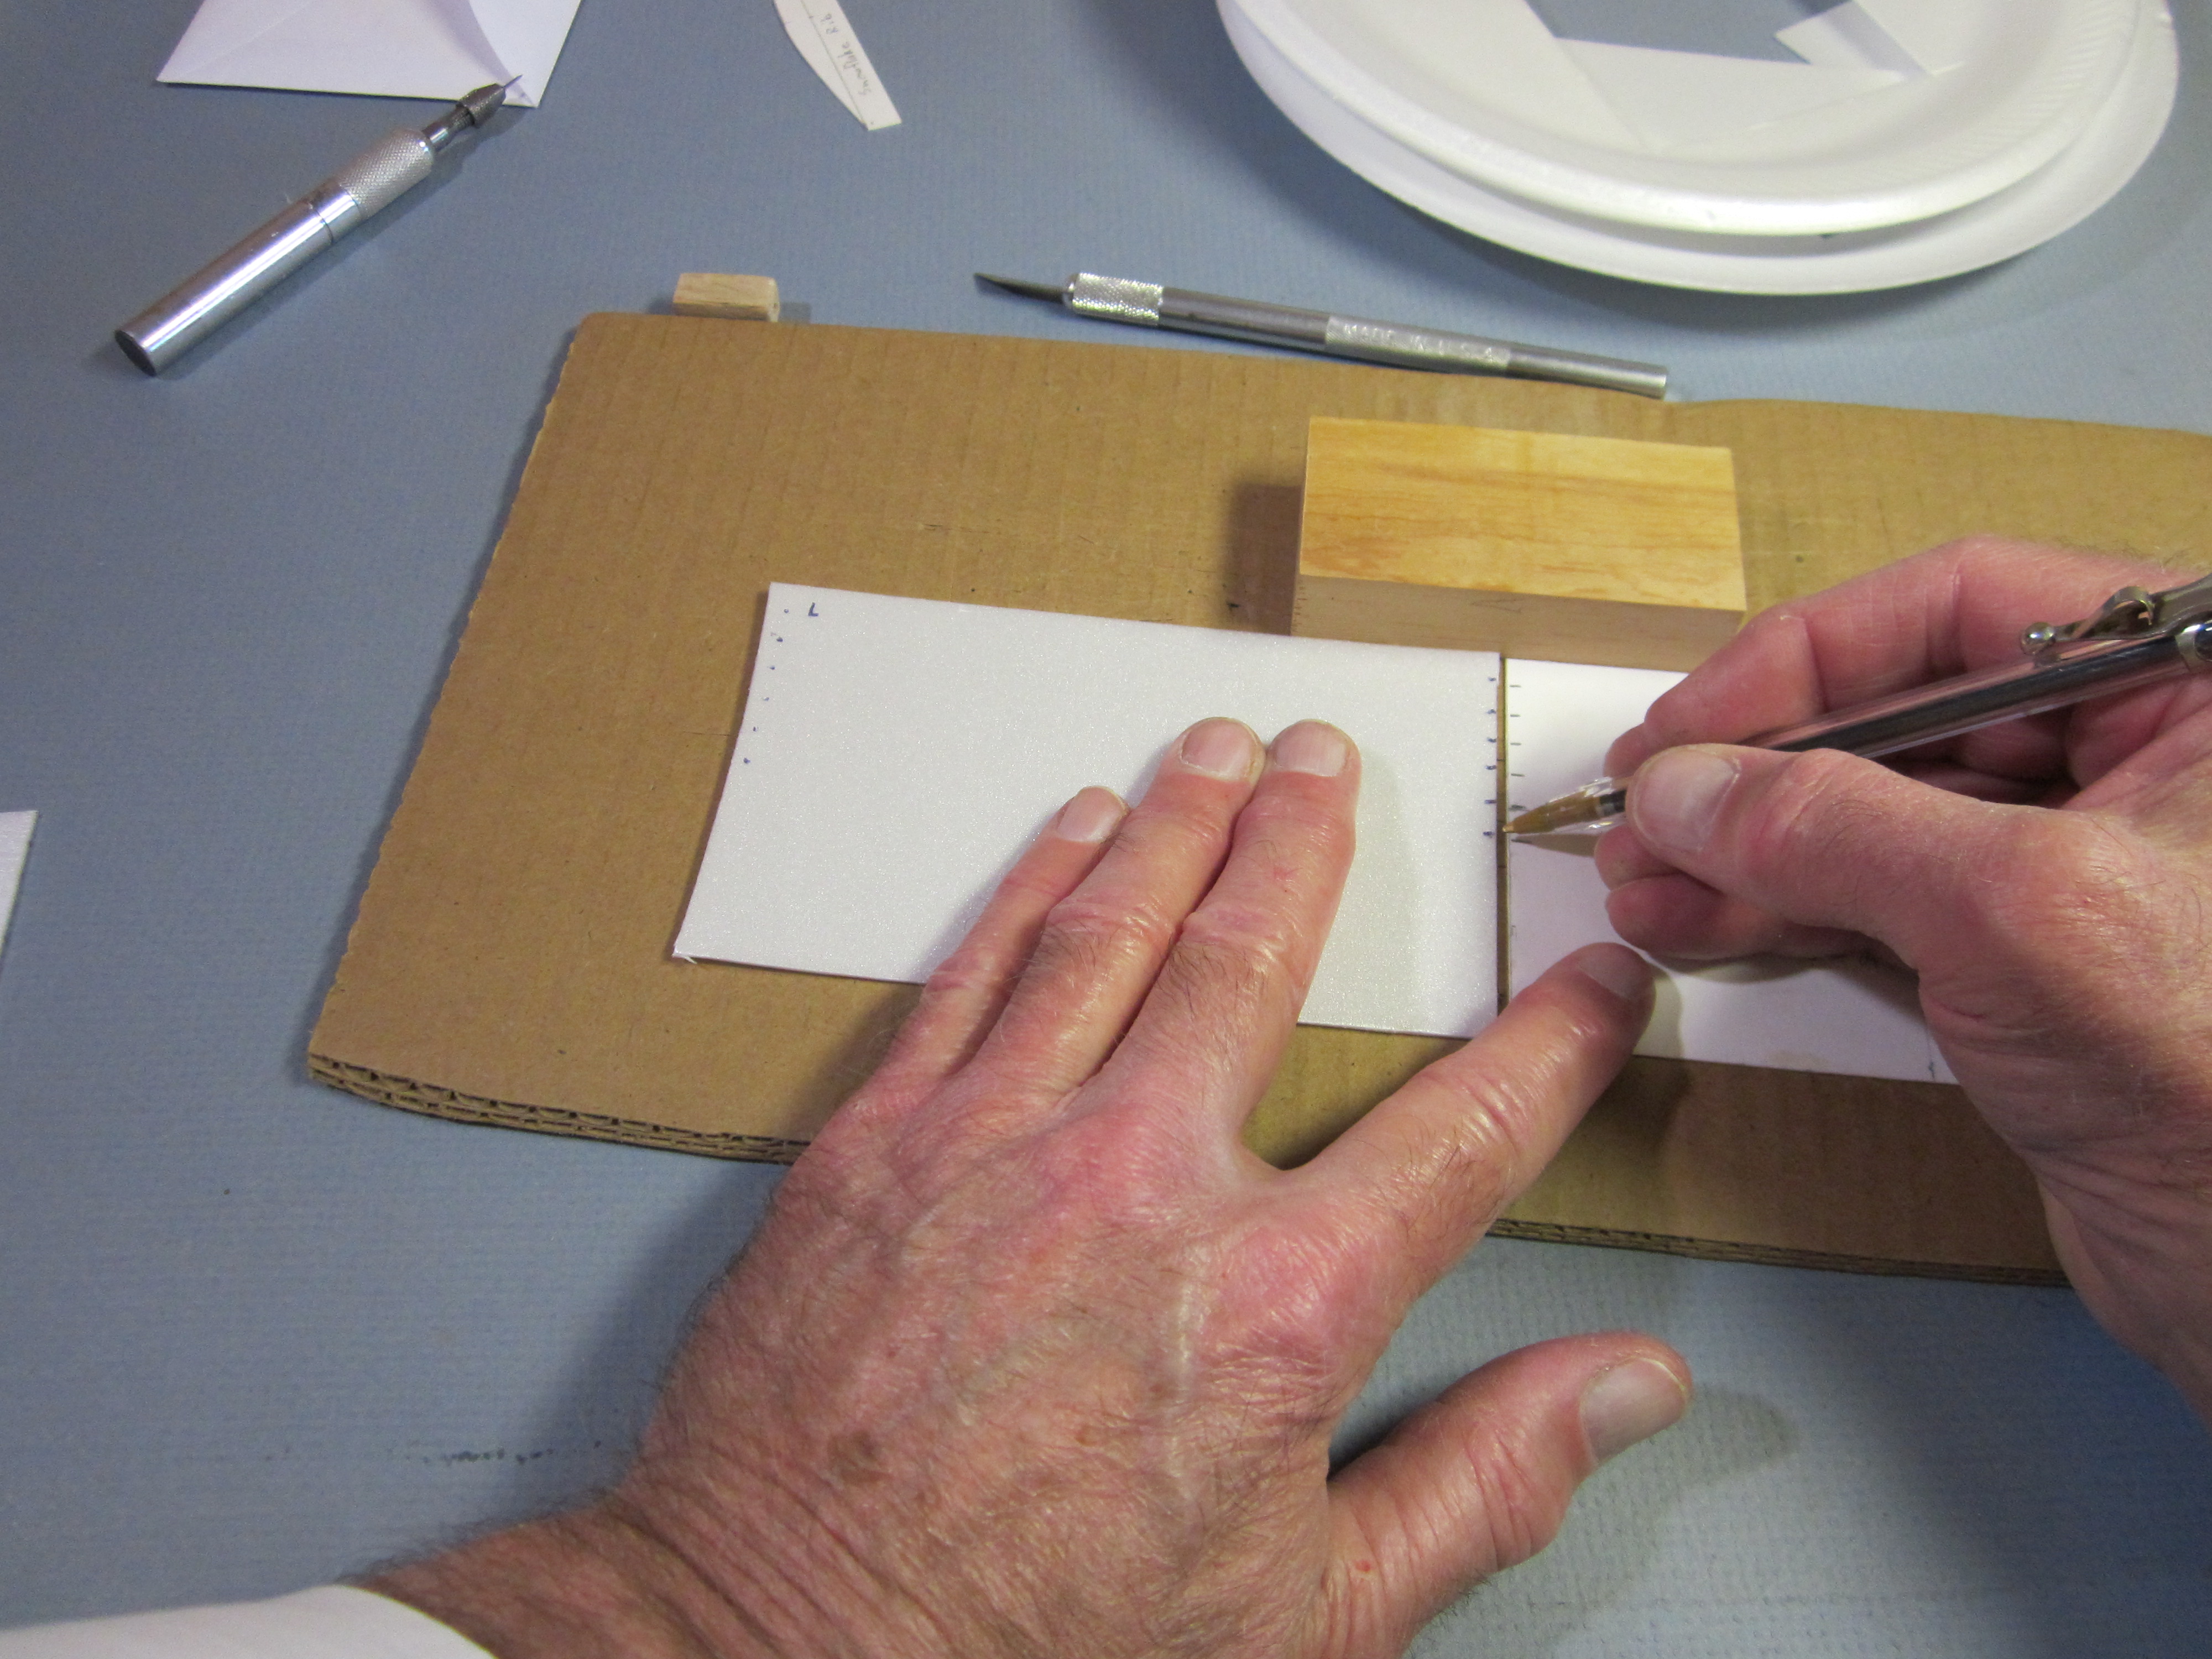
 The center panel is next. This requires curved edges on both ends. Place the template in the center of another plate and mark the centerline position on the plate.
 Punch holes through the foam to mark the centerline on the foam wing.
 Cut along the leading edge, the curved end and the trailing edge, but do not cut along the straight end.
 Flip the pattern over, aligning the leading and trailing edges of the template with the leading and trailing edges of the wing panel, and aligning the centerline holes in the template with the centerline marks on the plate, and cut along the curved end. Be sure the curves are oriented in the same way, so the leading edges of both ends correspond.
 Mark the crease locations on both ends of the center panel.
That completes the cutting out of the foam parts.
forming the wing camber and joining the panels
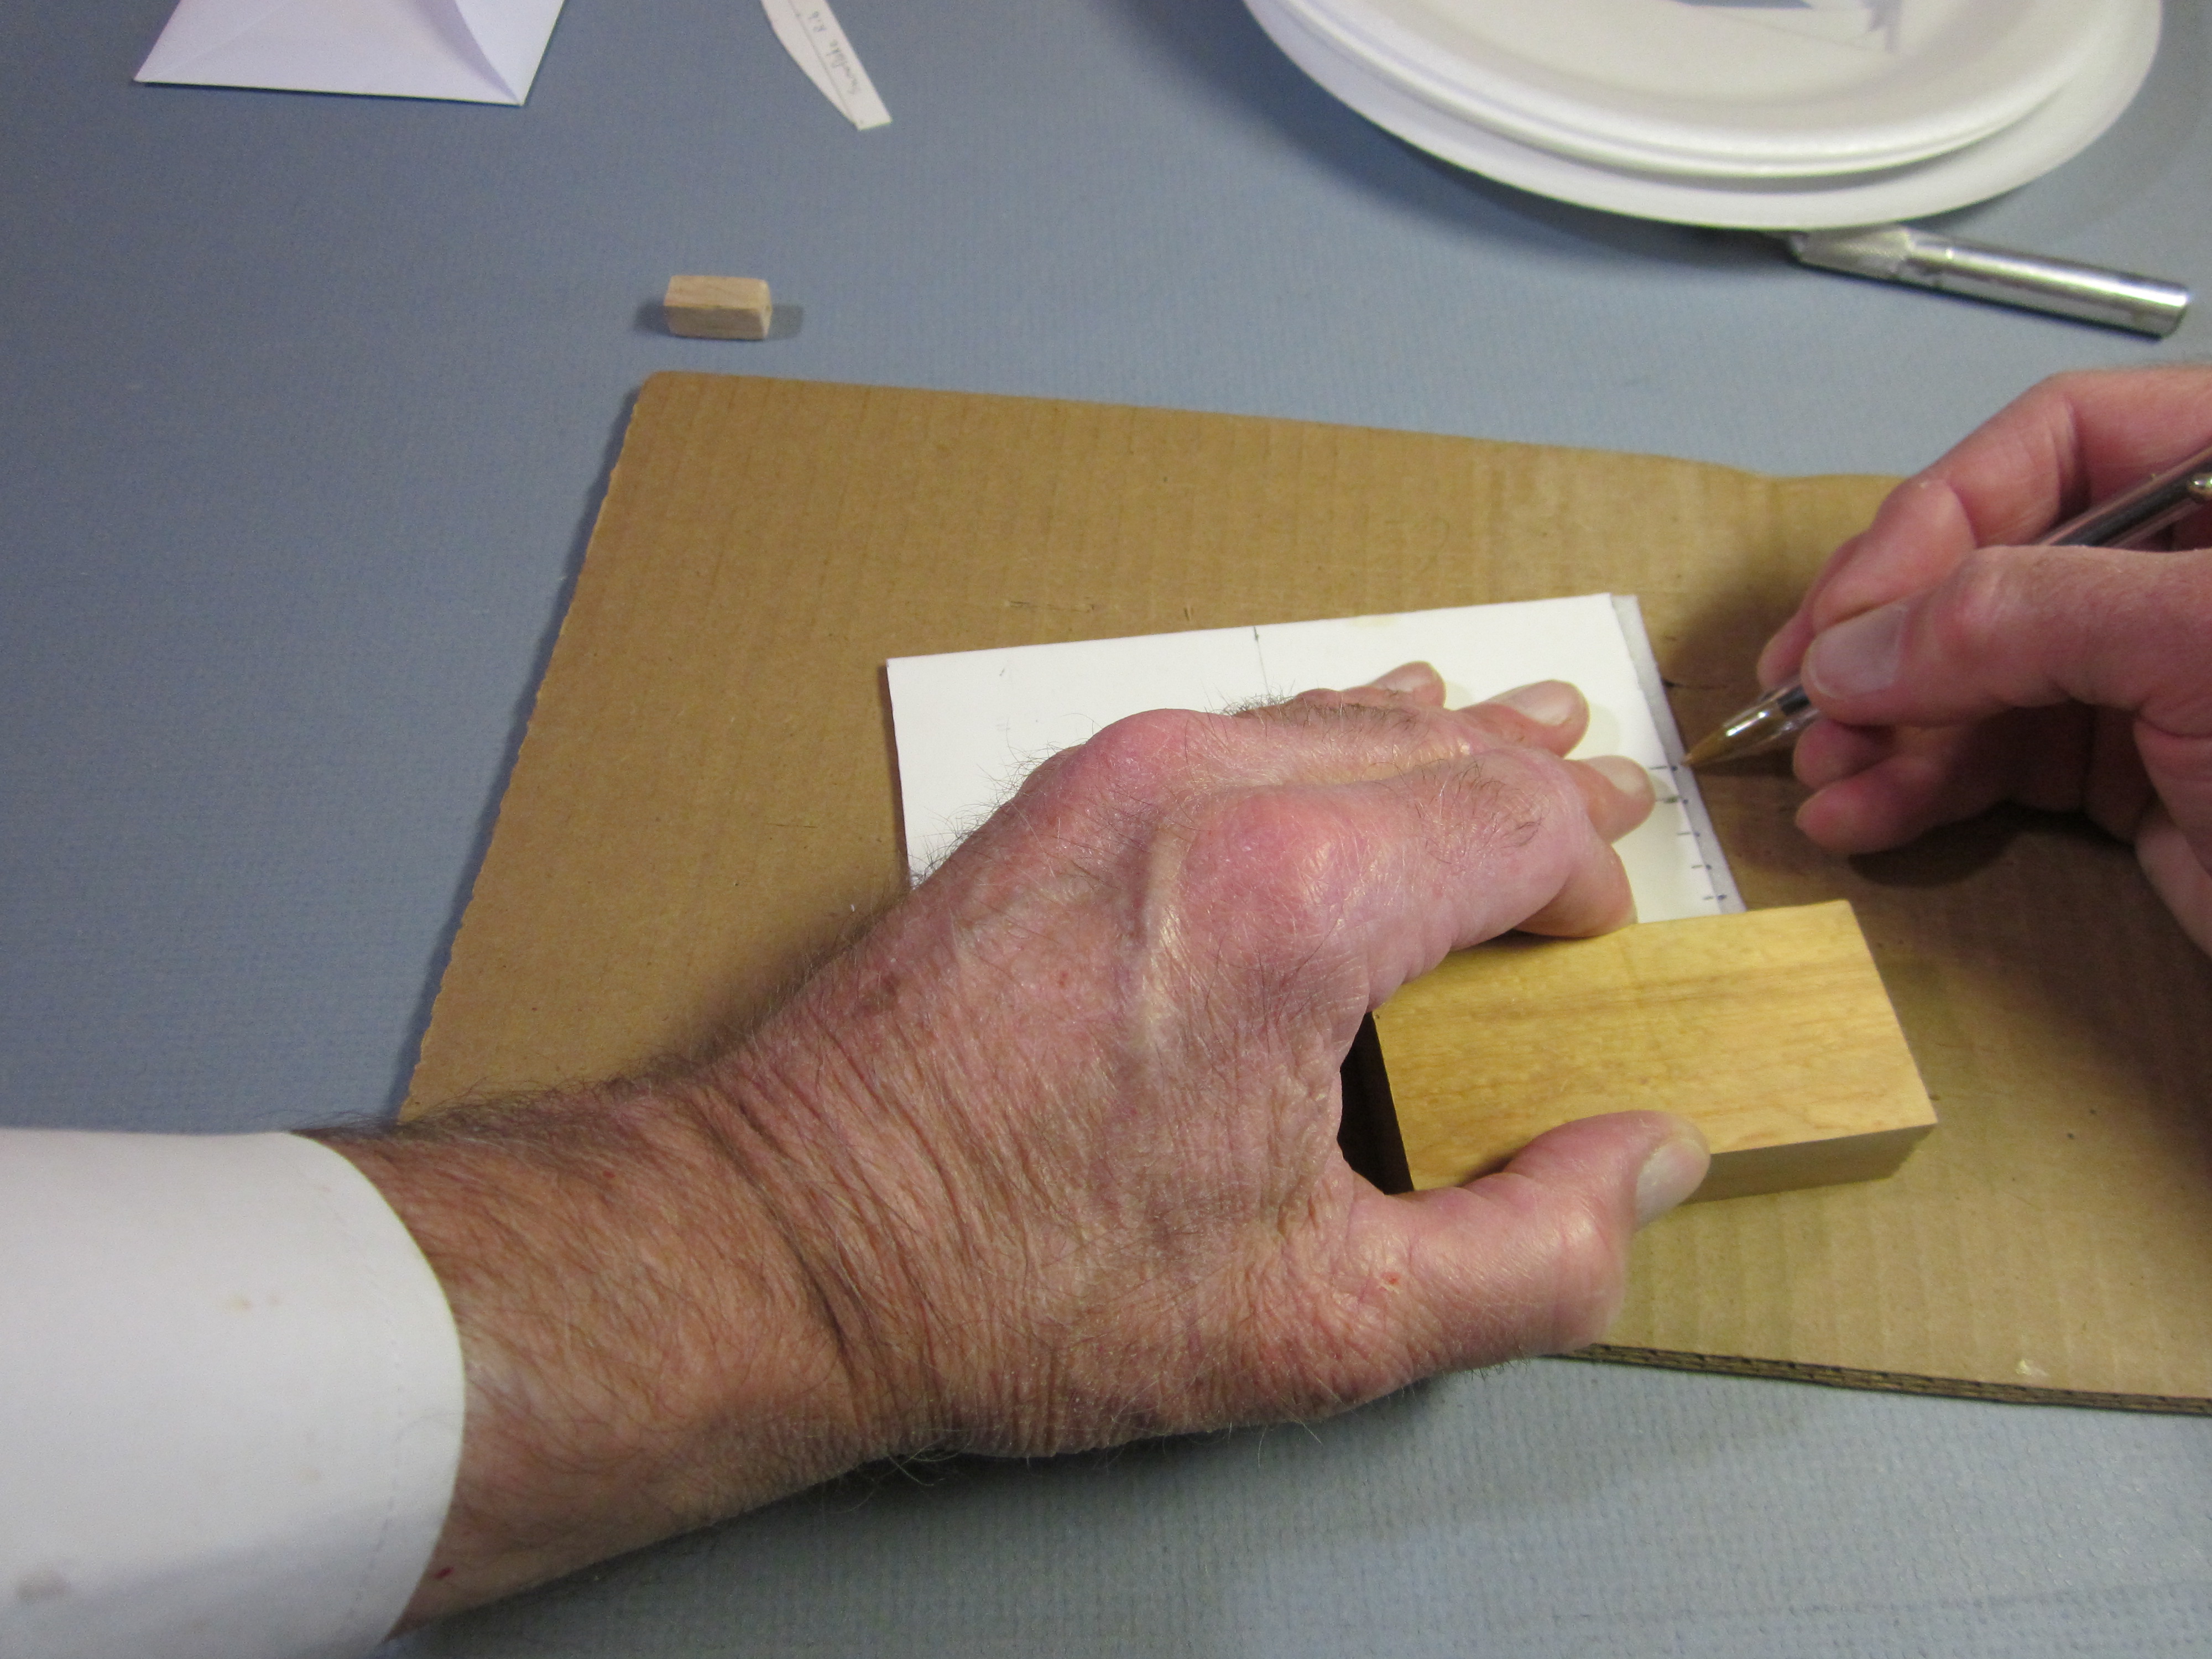
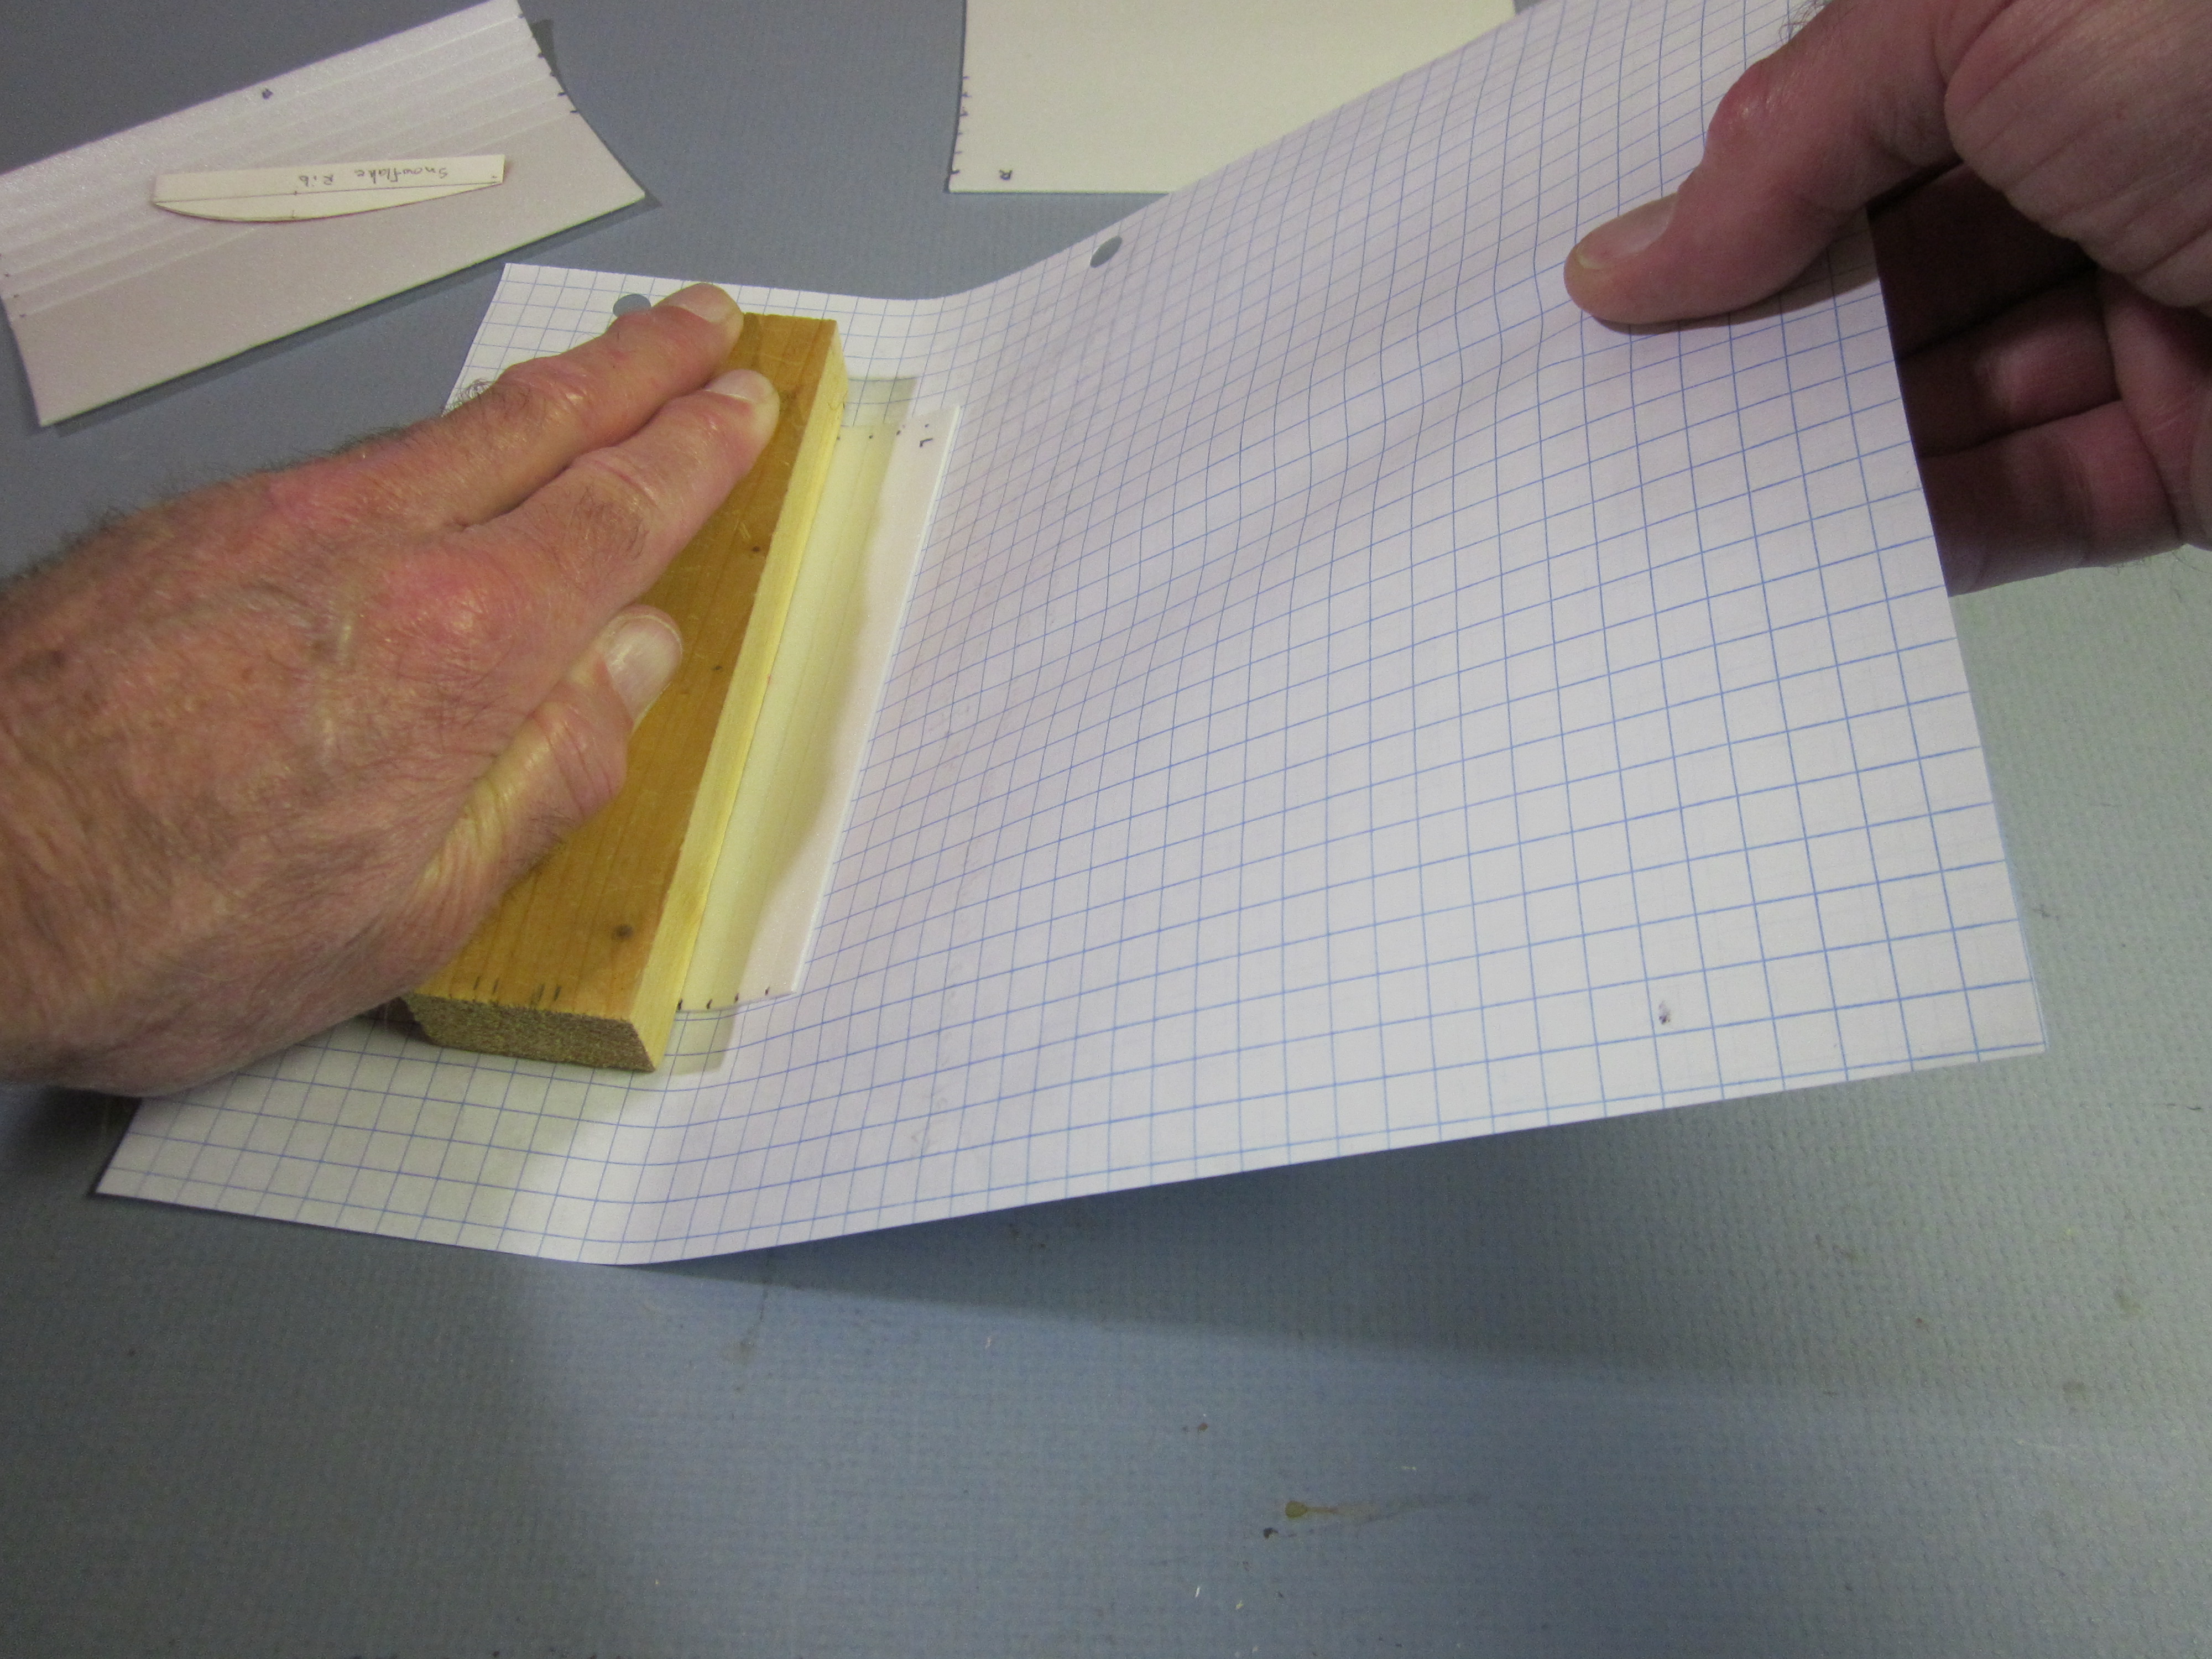
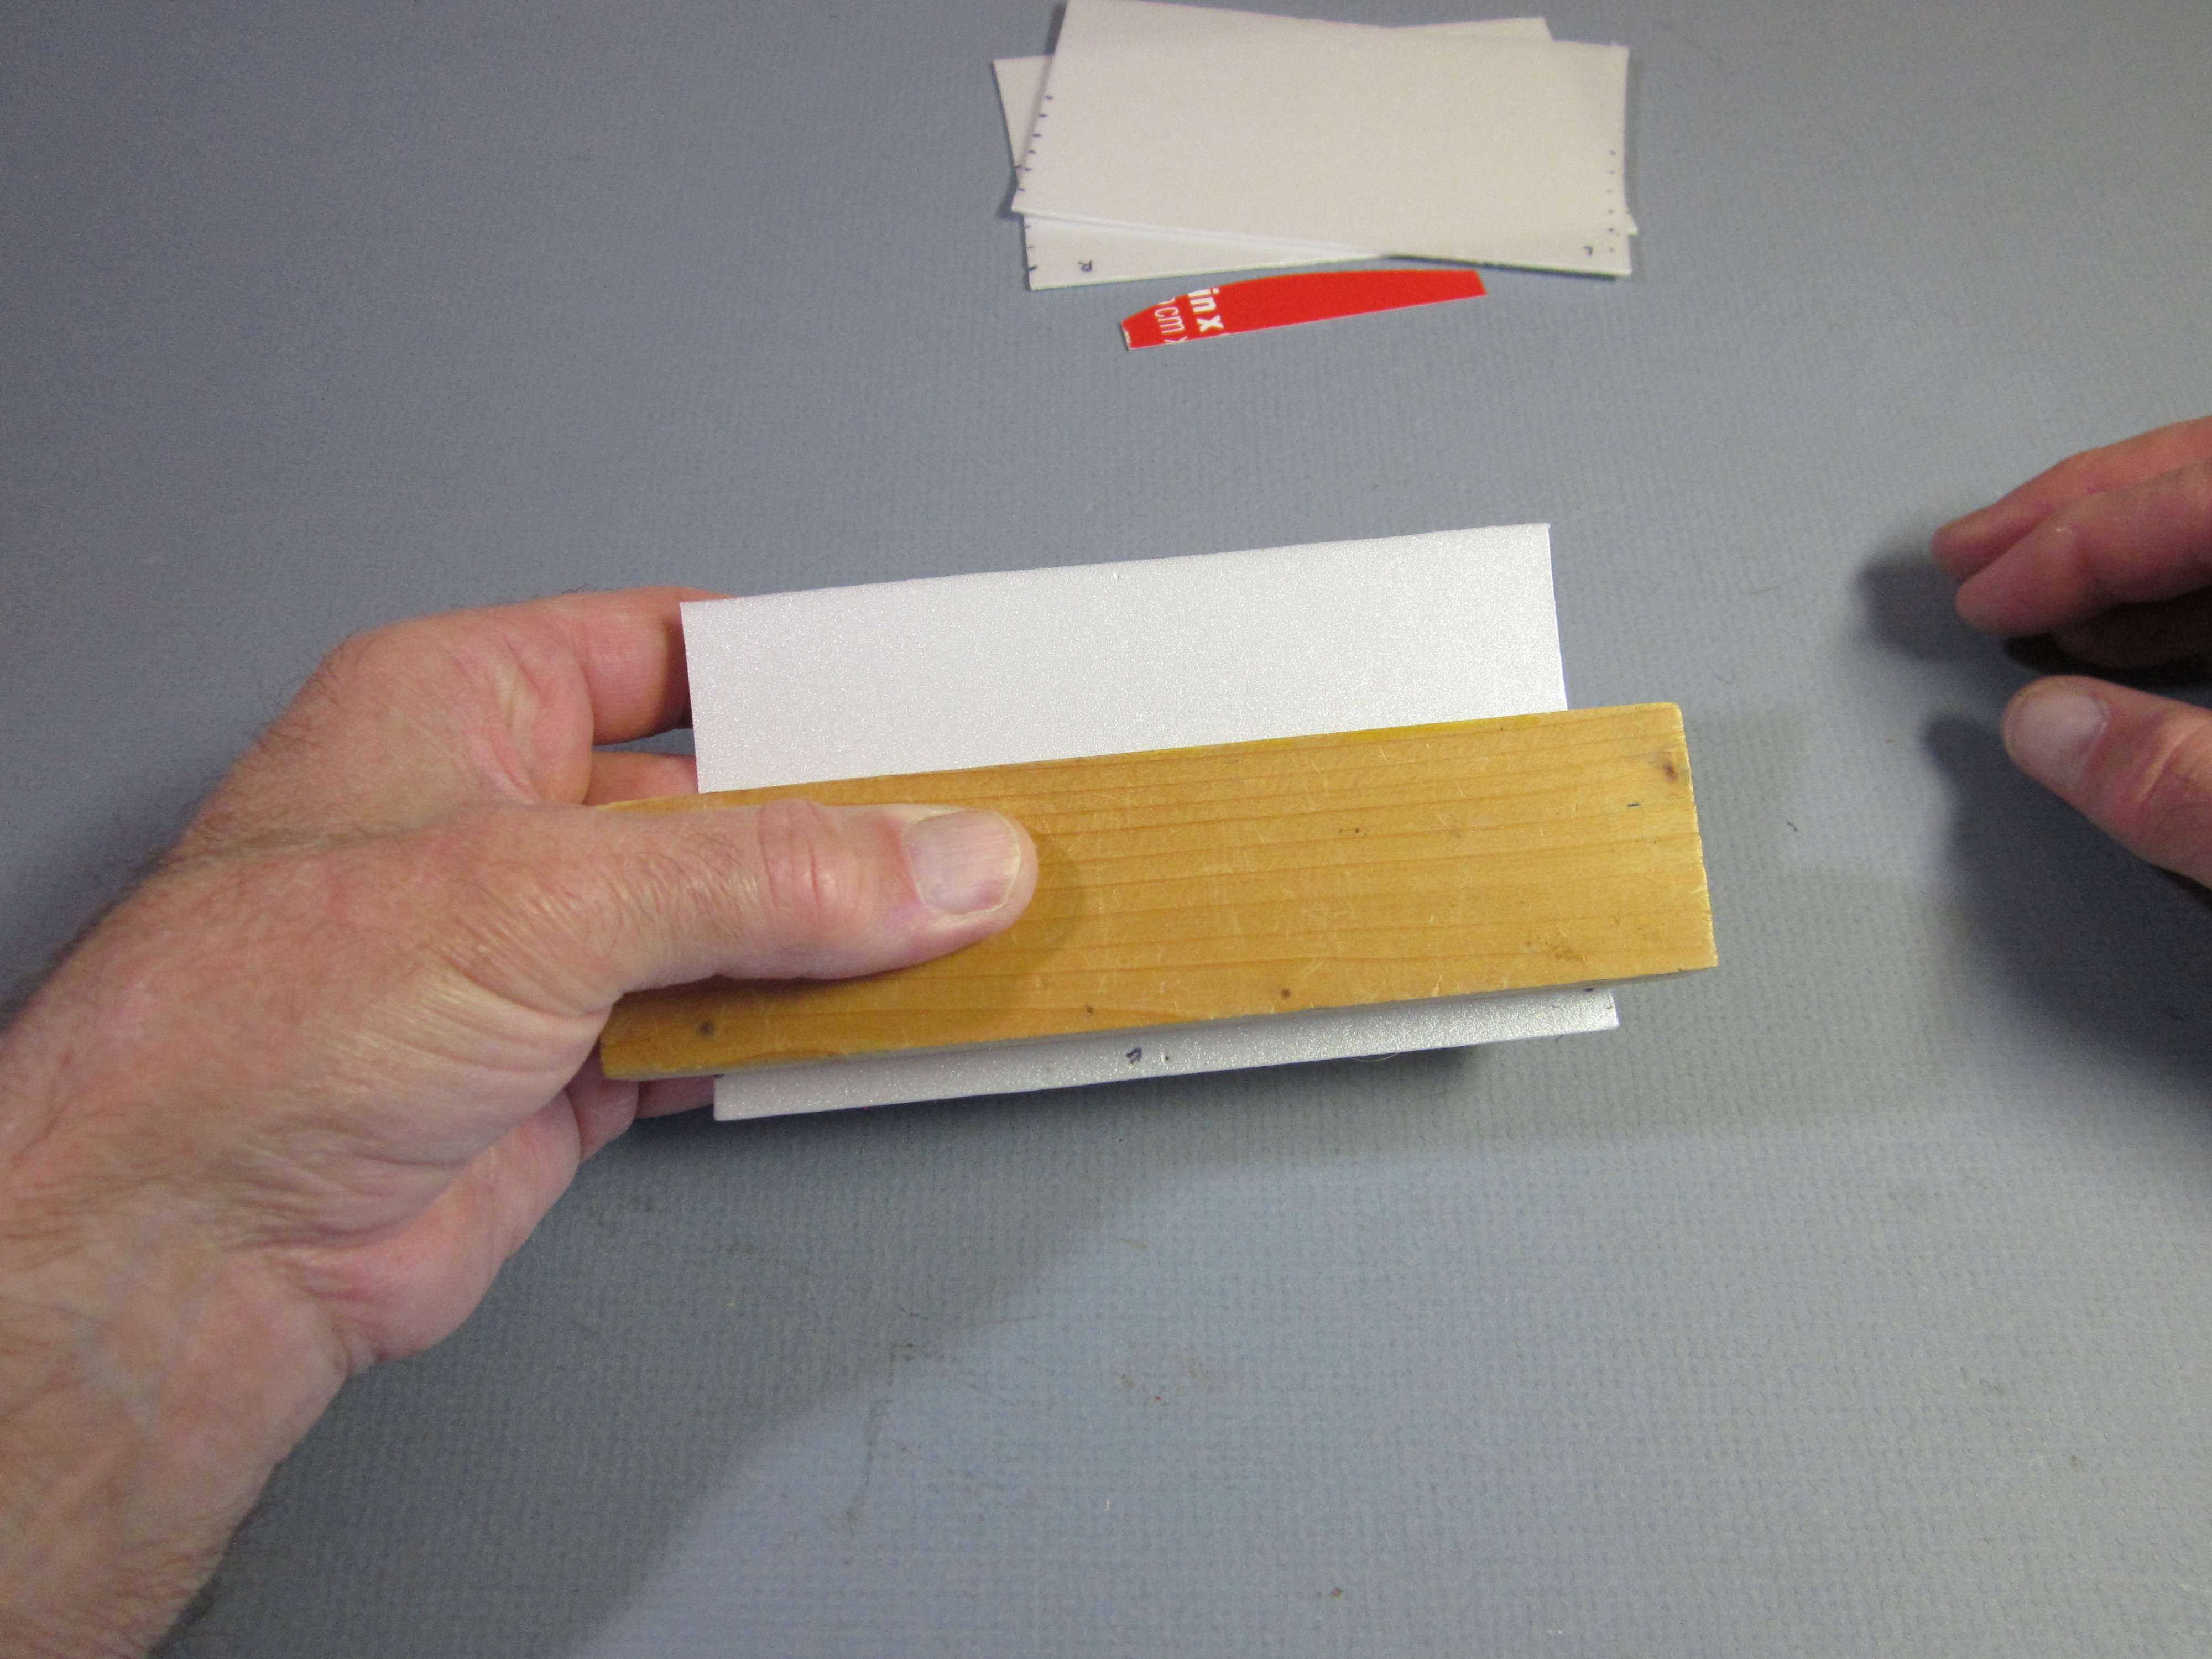 Place a block of wood (or a stiff ruler) on the wing panel, with an edge aligned with corresponding crease marks.
 Press the edge of the block against the table, creasing the foam. Be careful to not crease the foam along the other edge of the block.
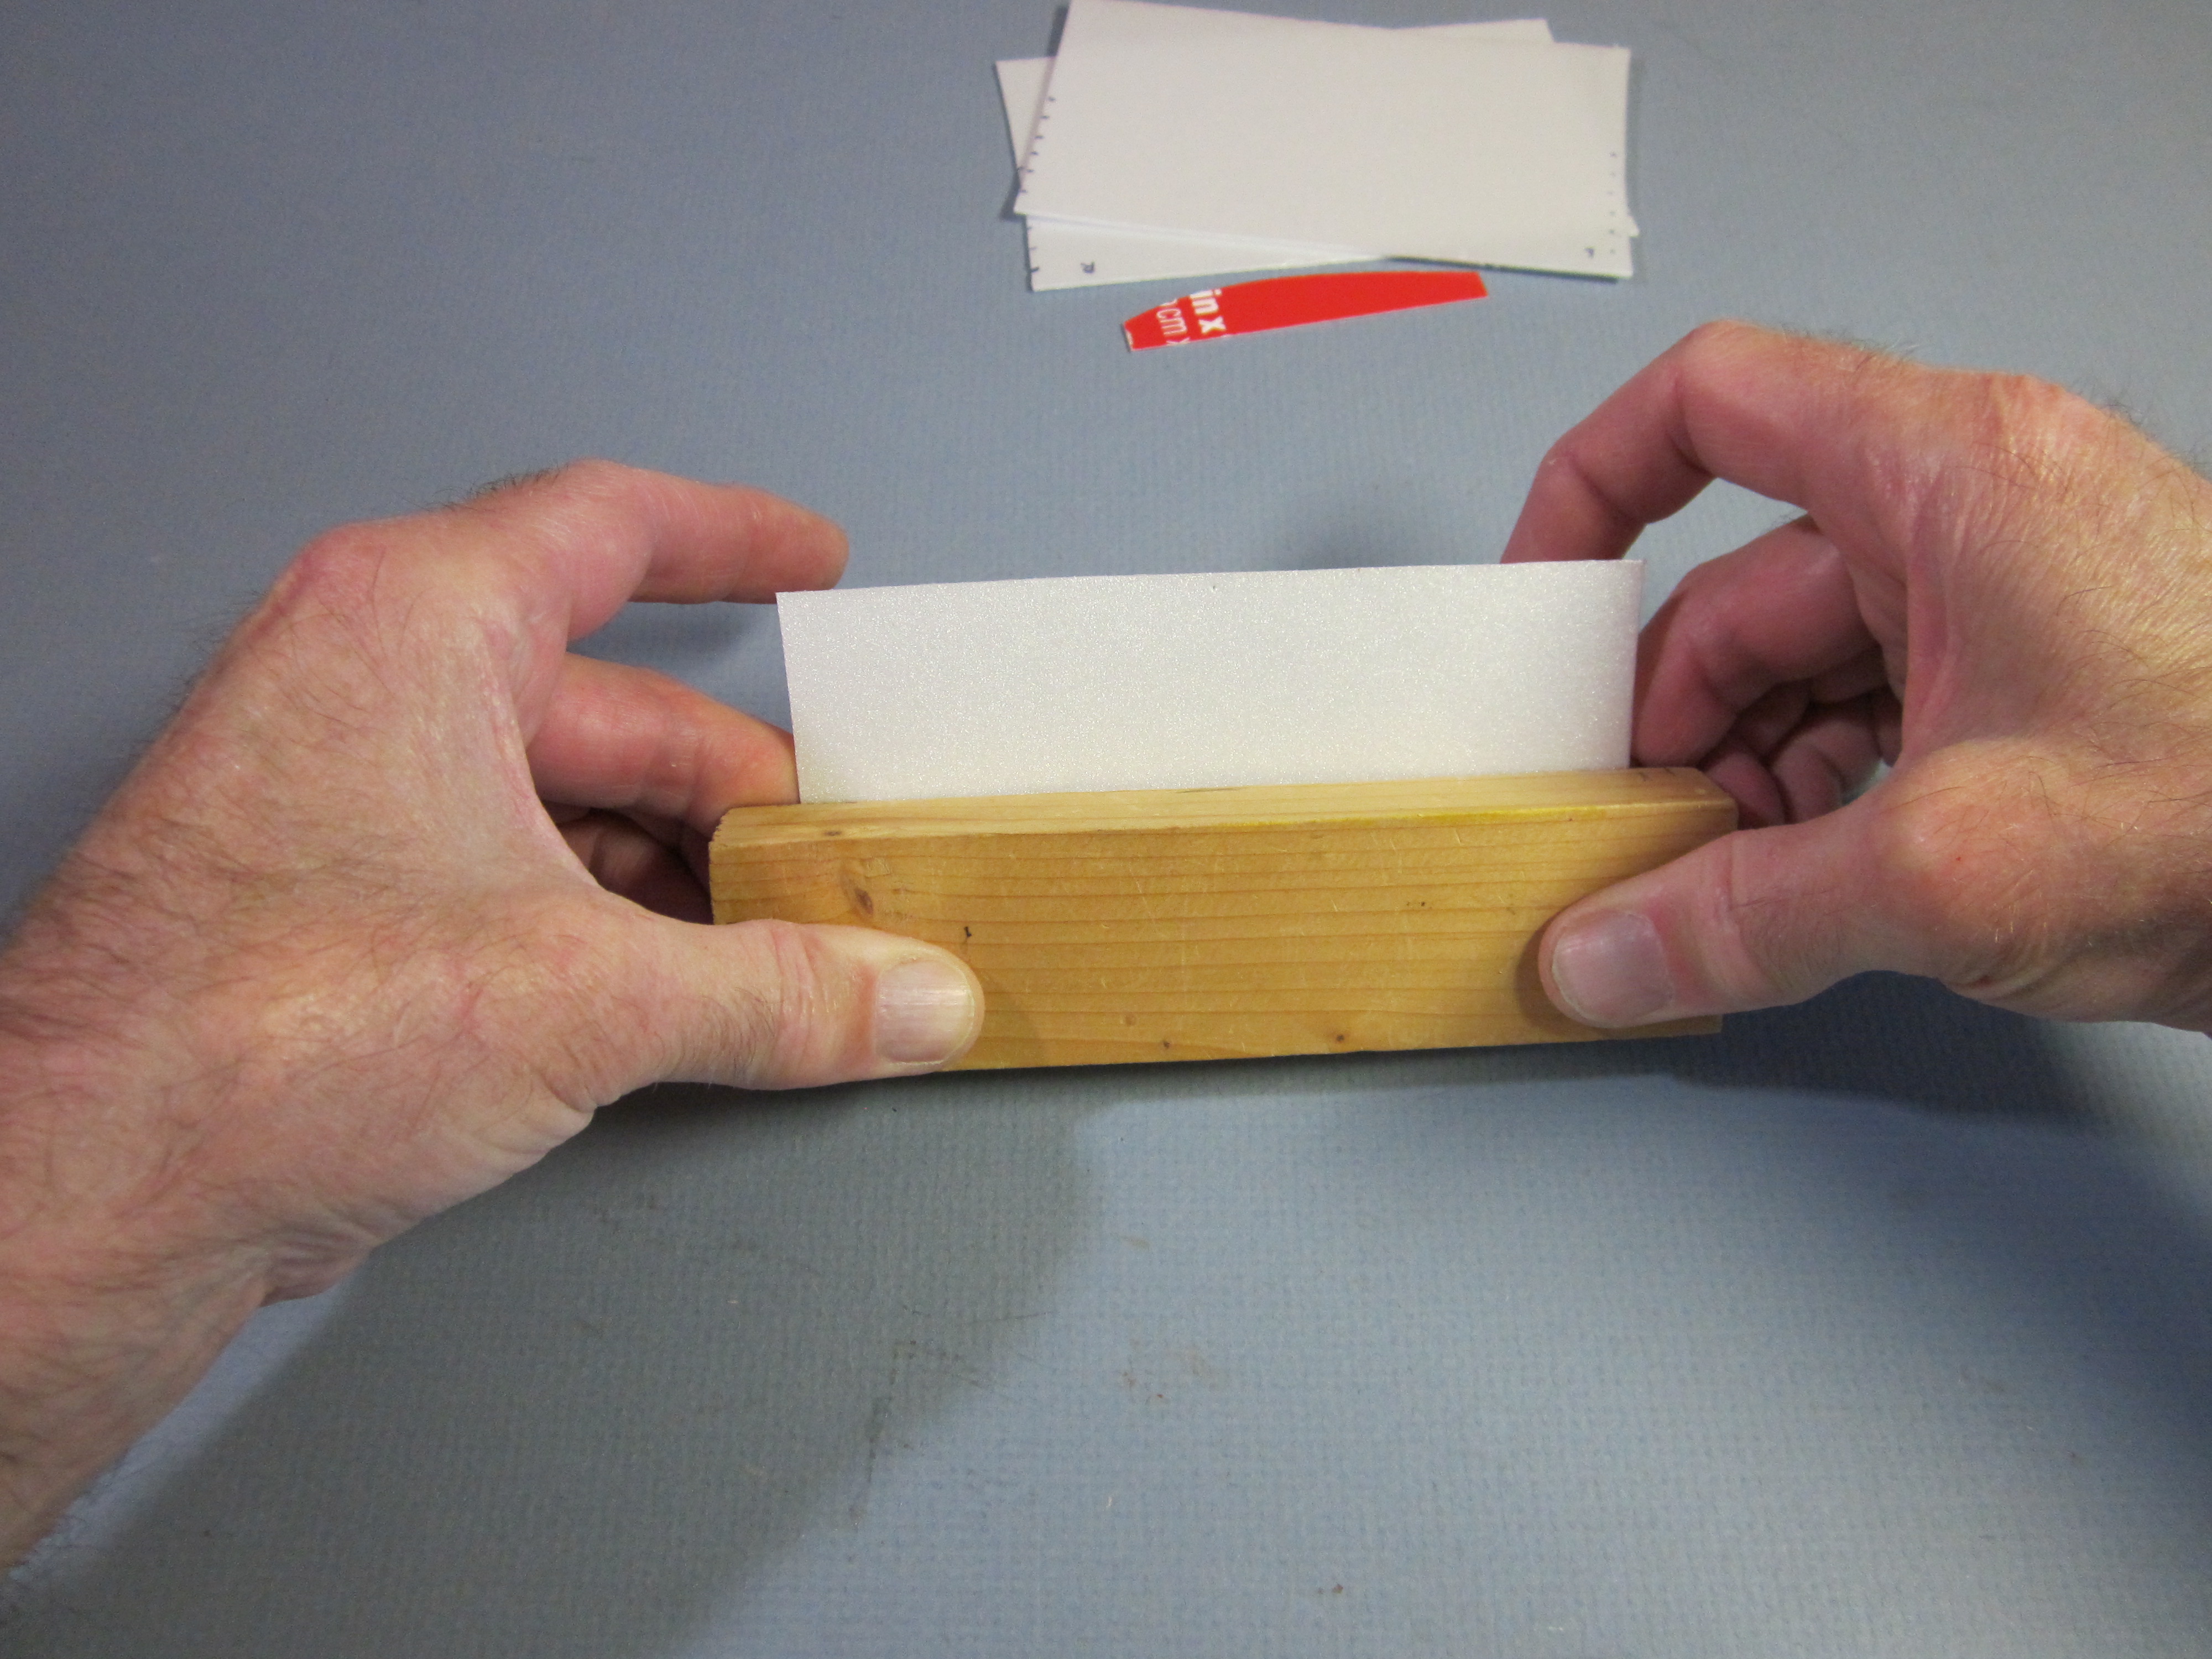
 Make creases between all six pairs of marks.
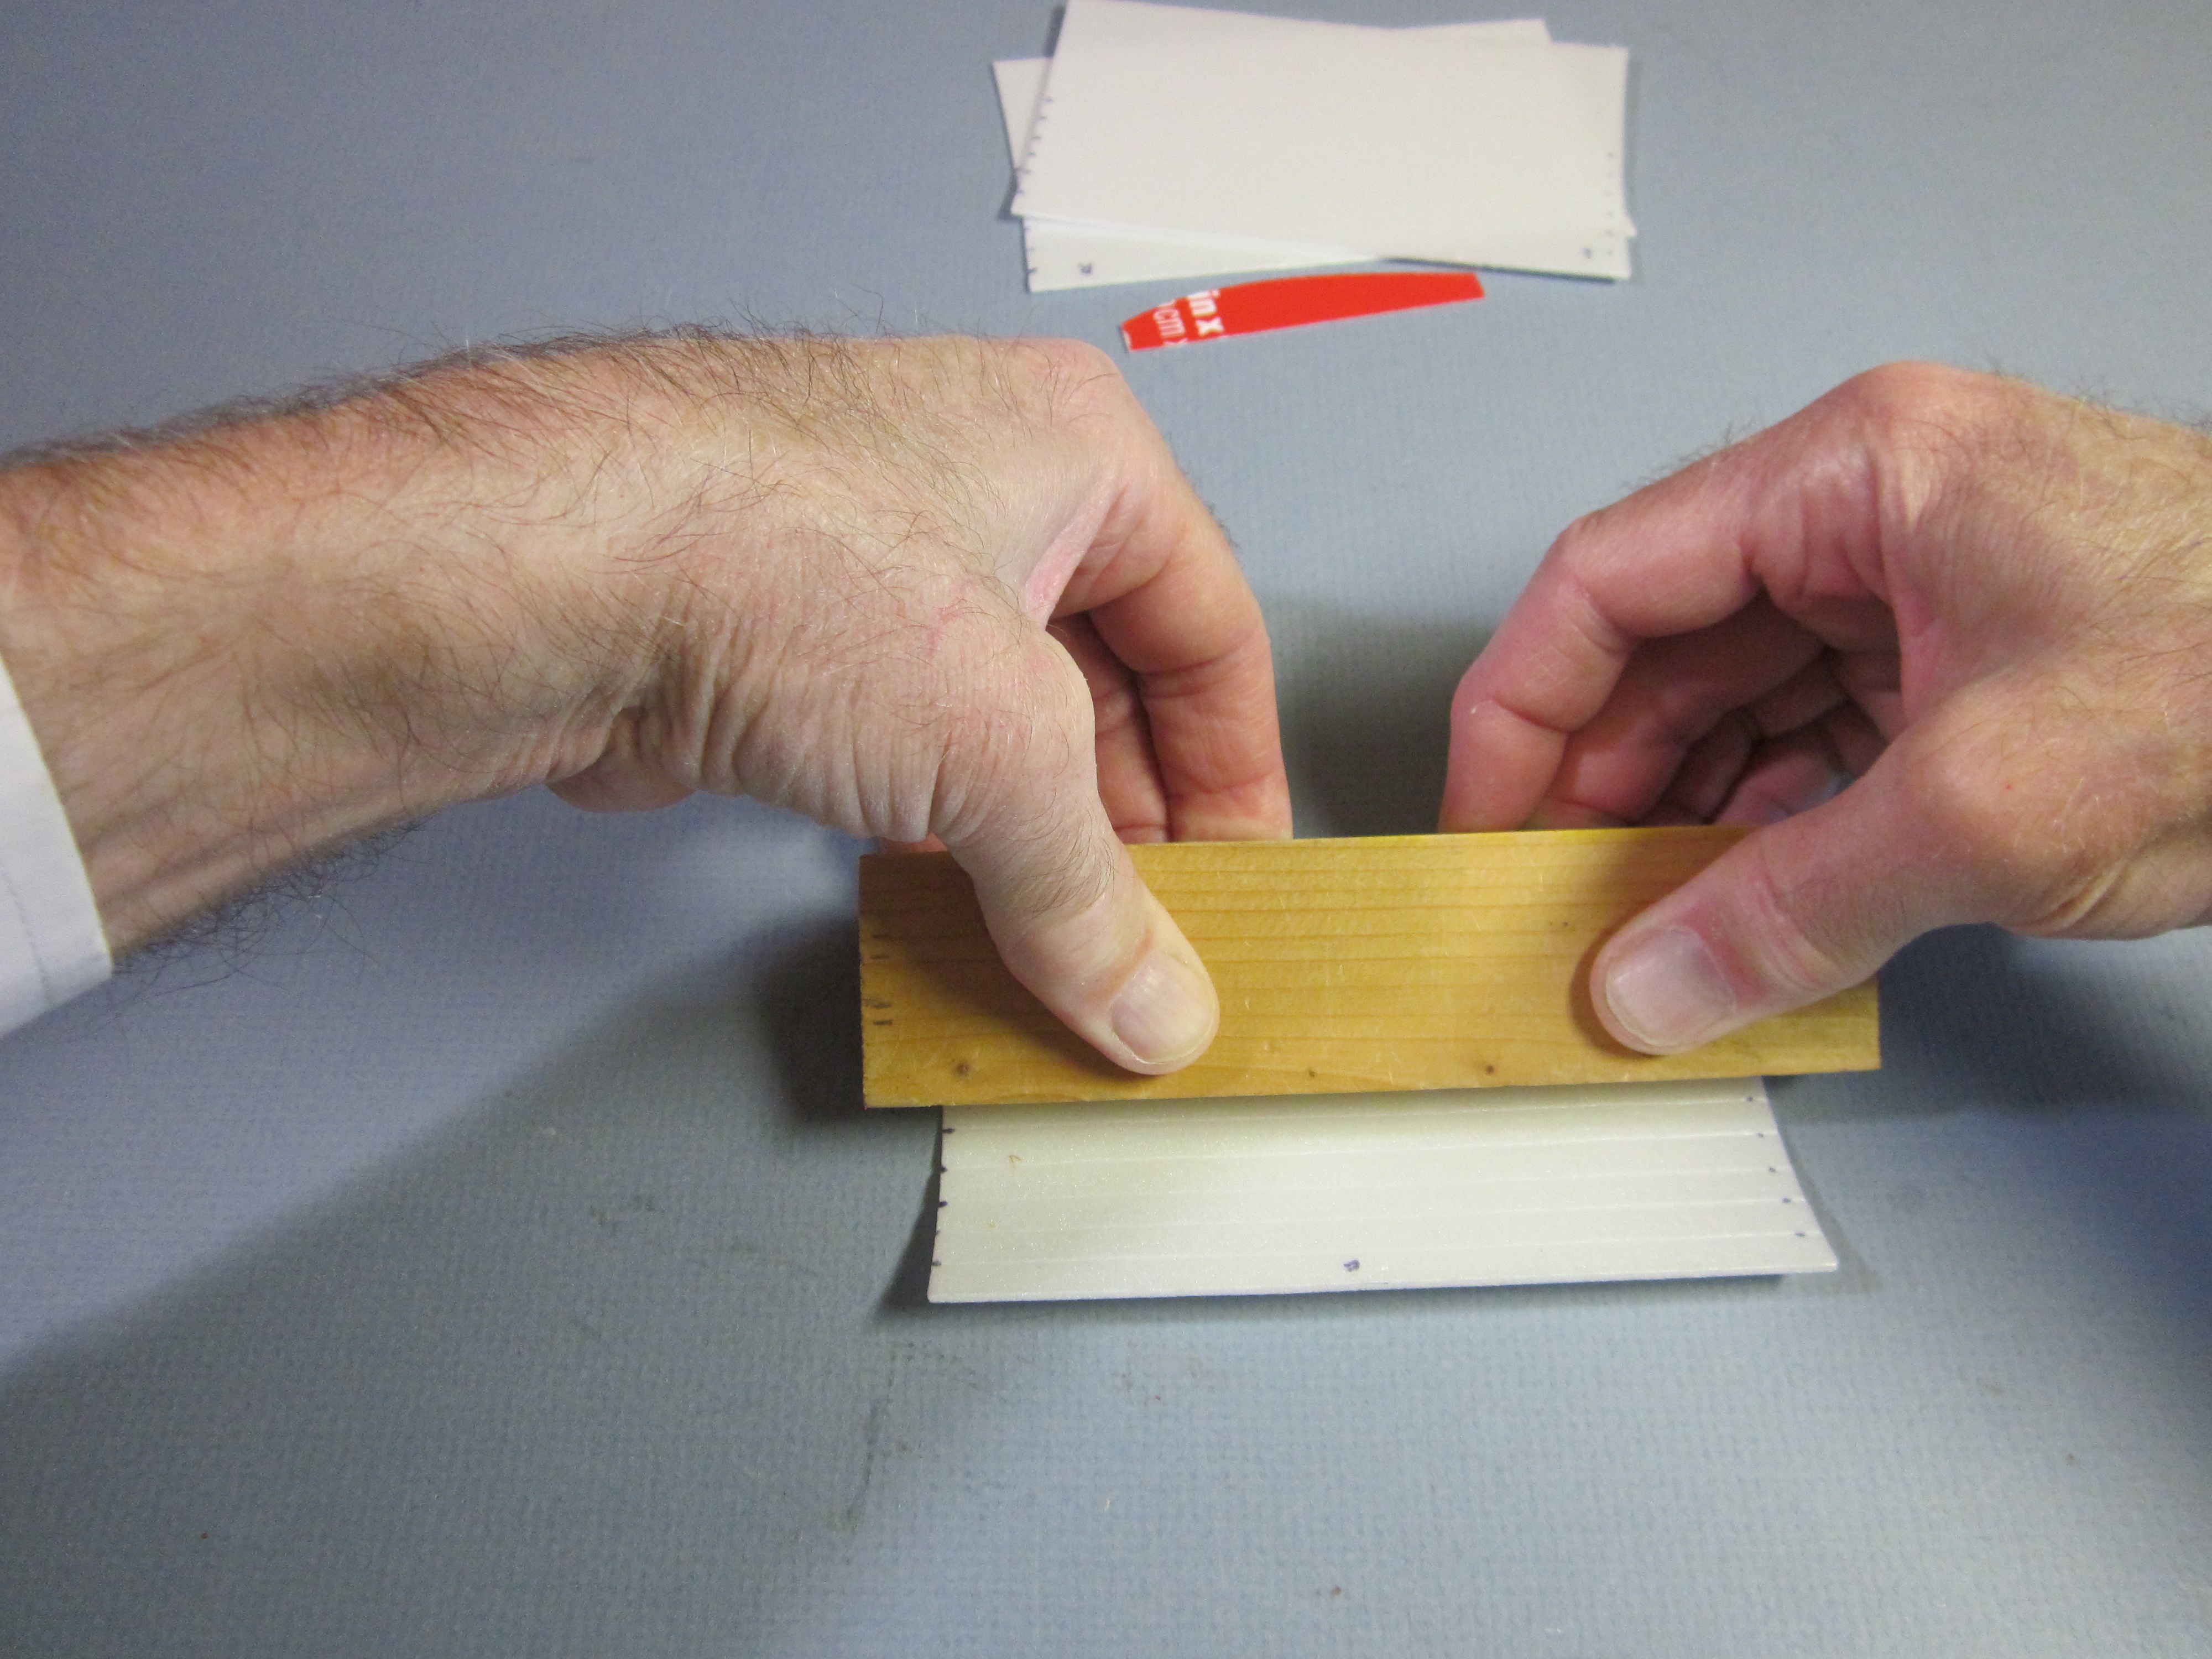
 Shape the curve with your fingers until it fits the rib pattern. (This is where that seventh crease helps the aft portion conform to the rib curve.)
 Another way to do this is to place the wing panel on a piece of paper, align the edge of a block or ruler with the corresponding crease marks, and pull the paper up. You must press down firmly on the block to keep the paper from slipping out.
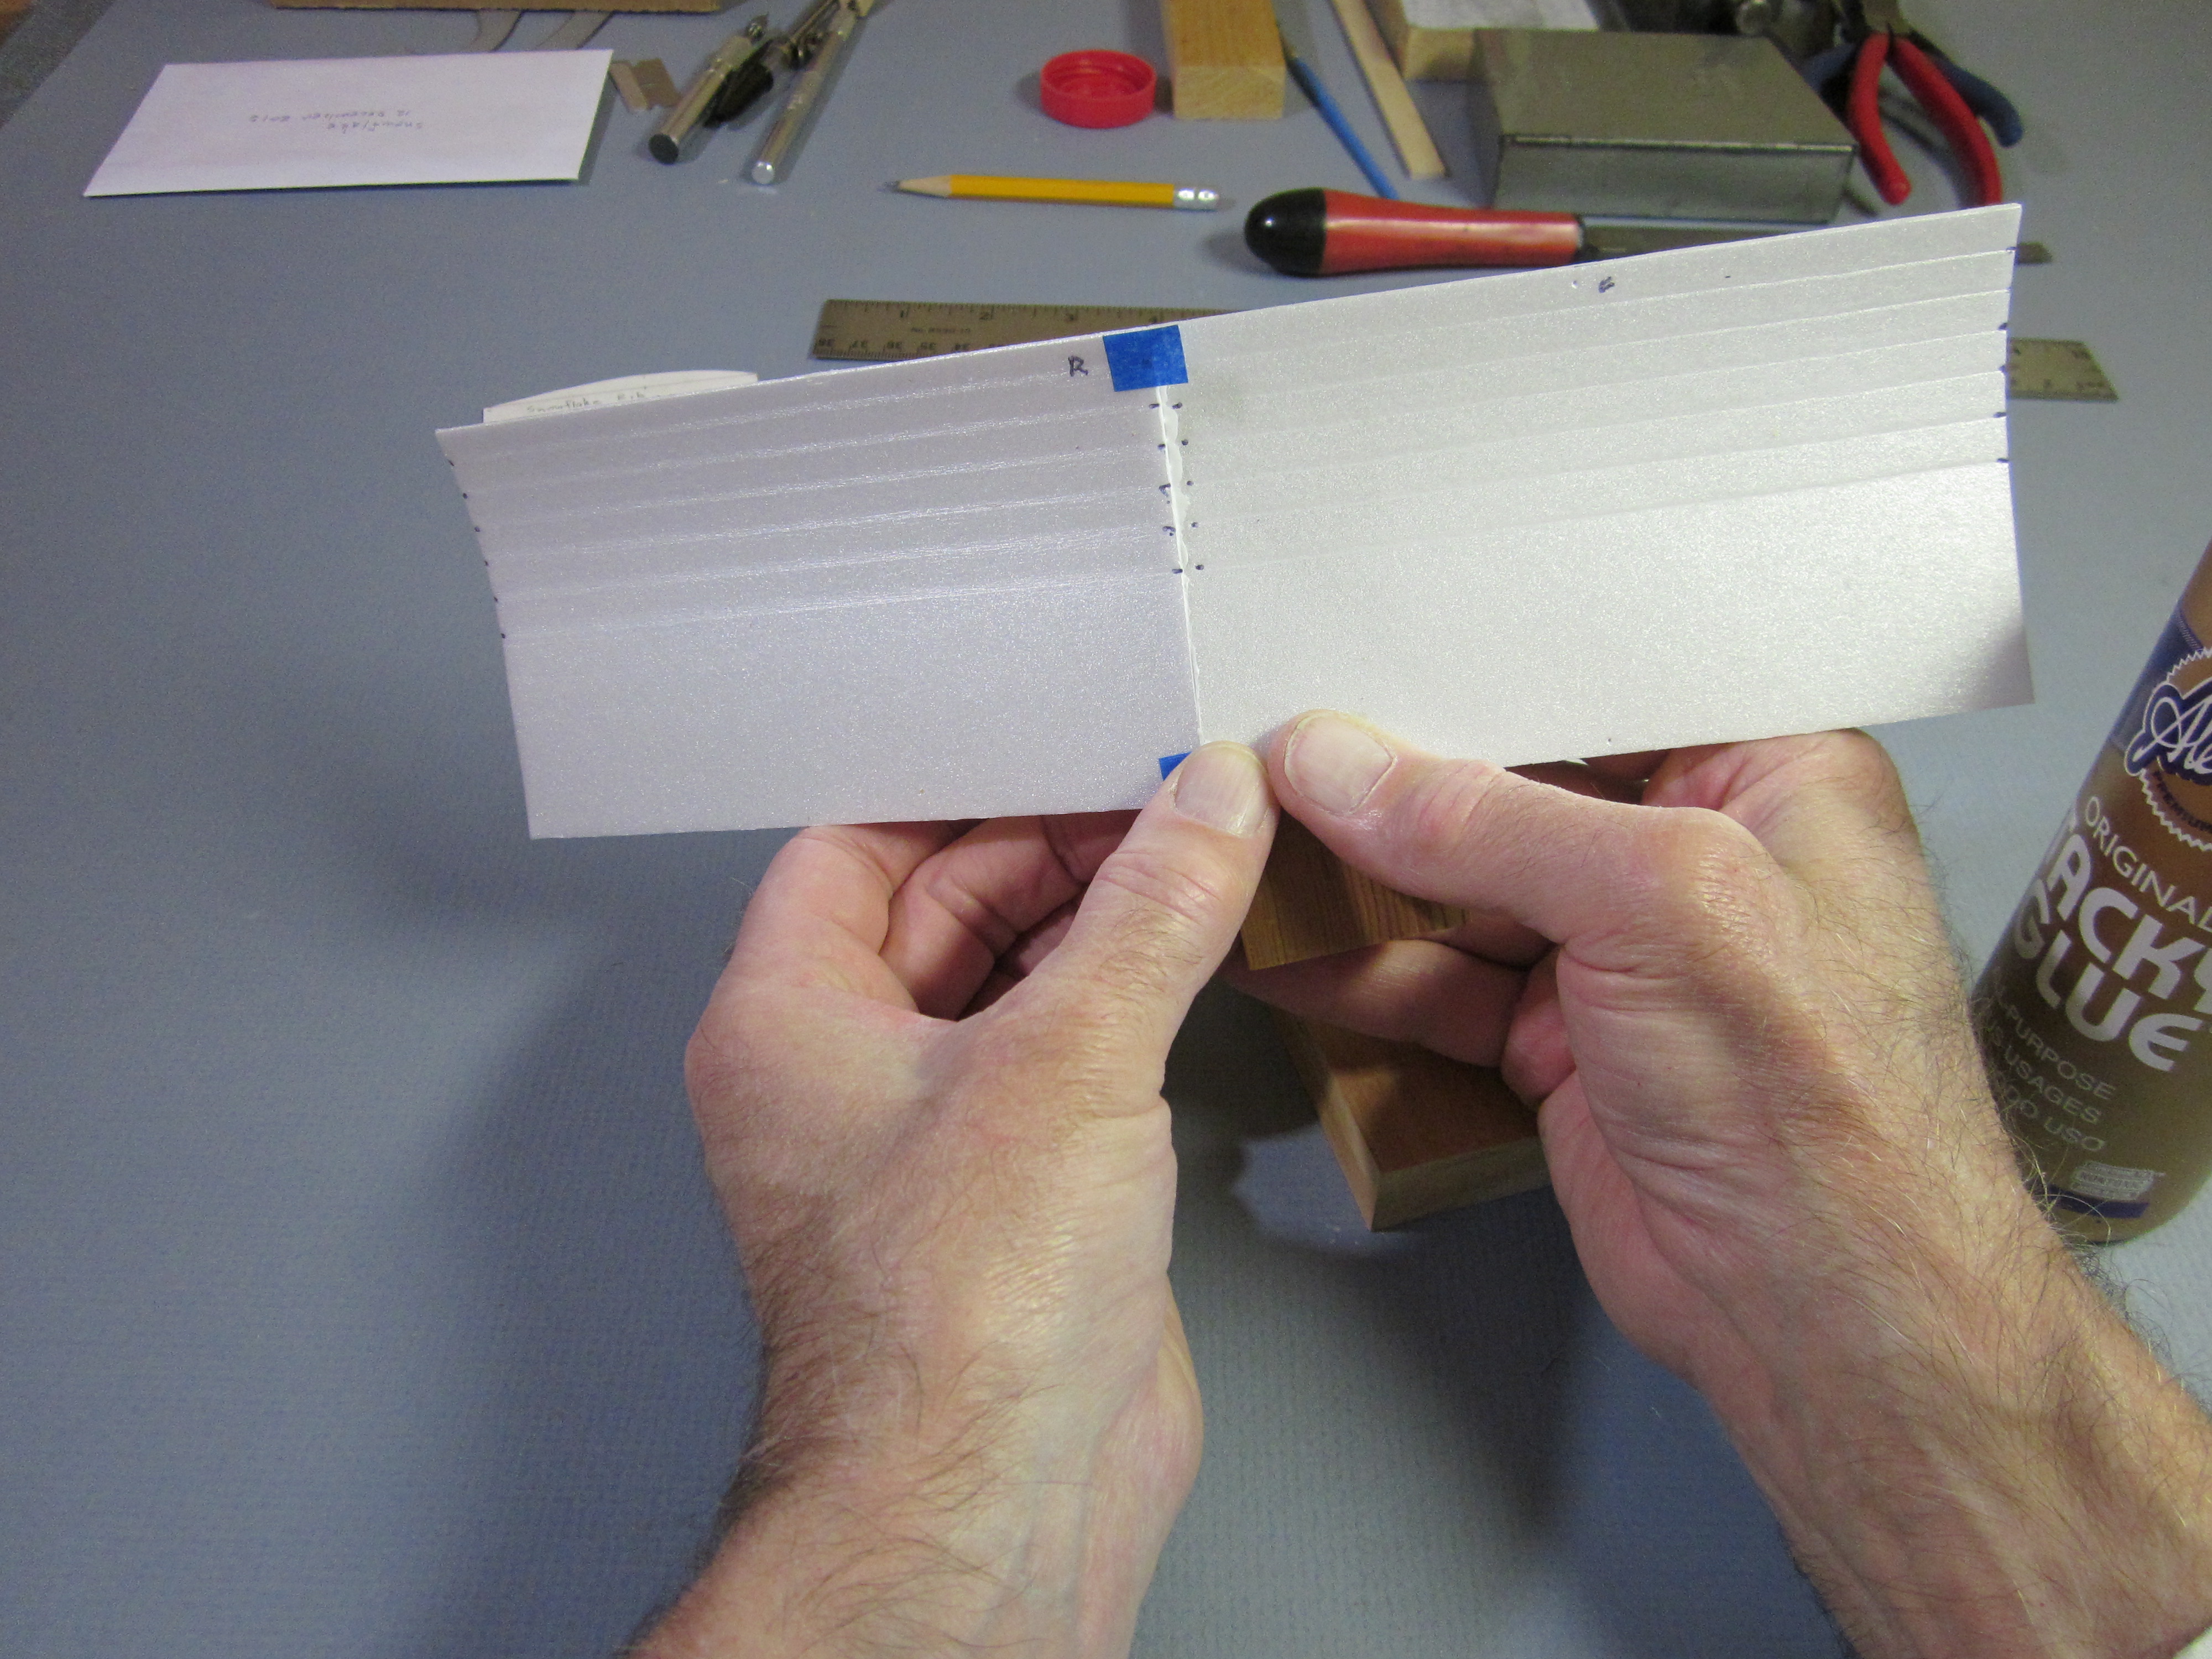
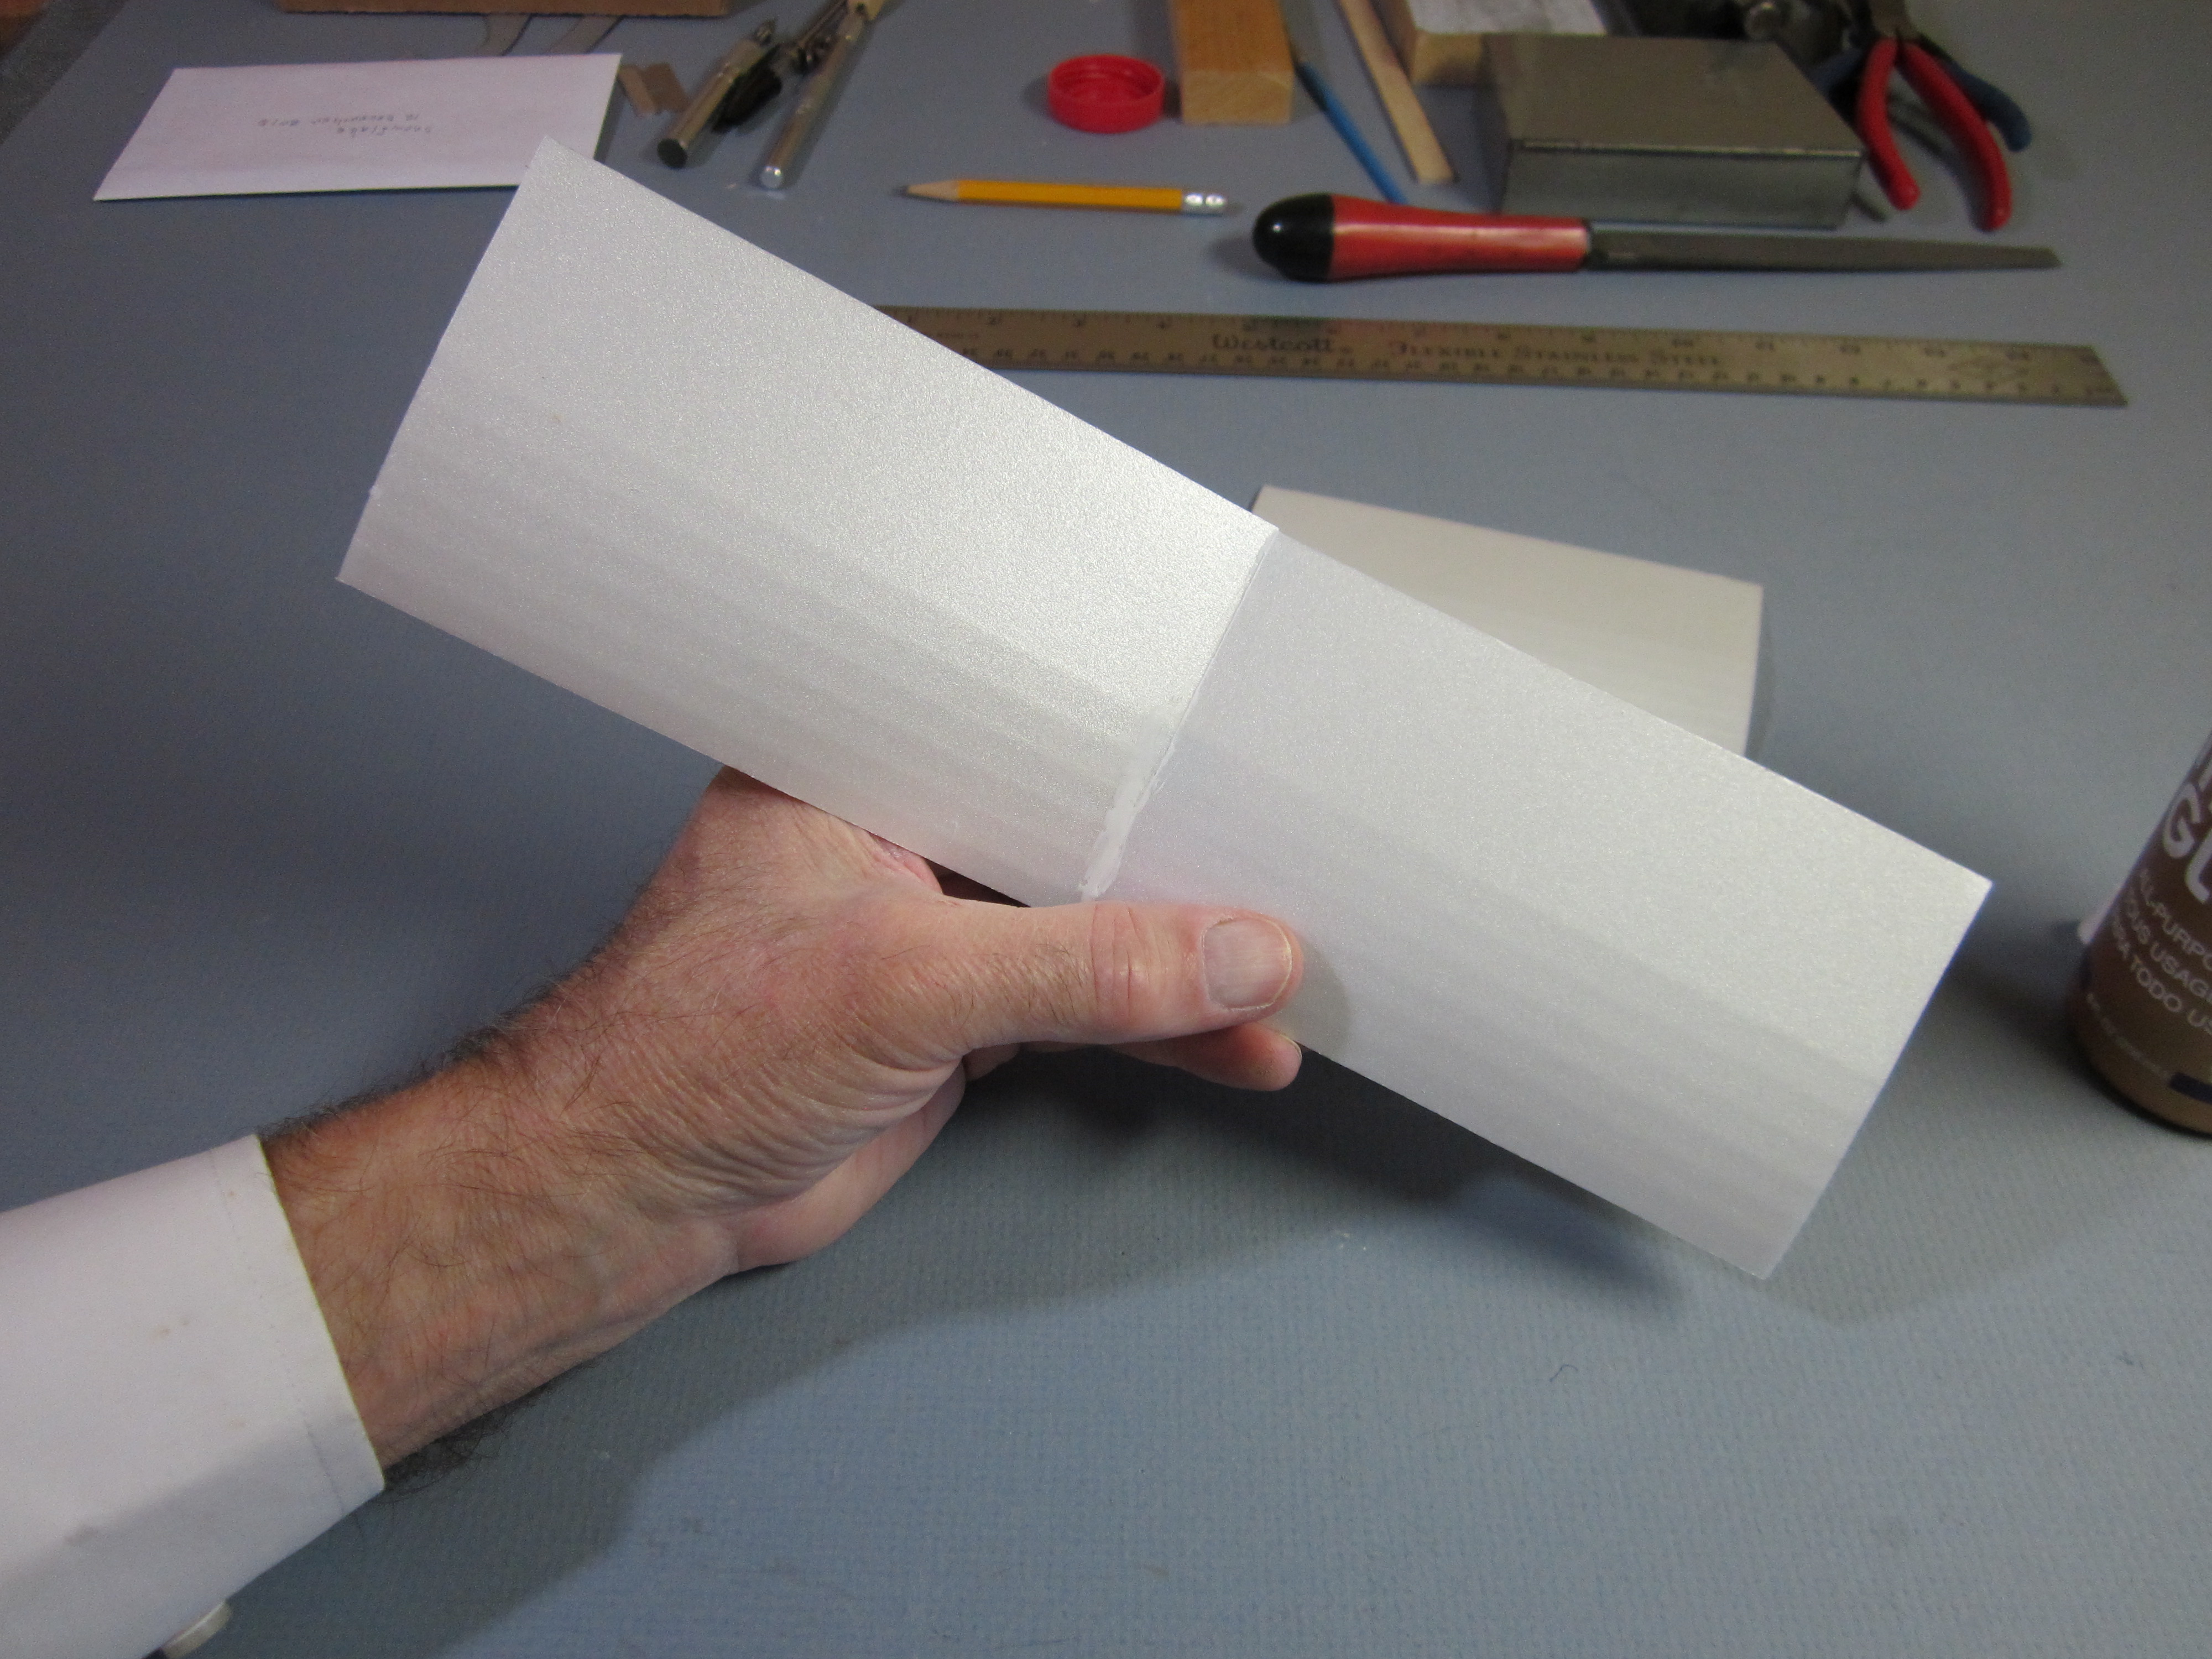
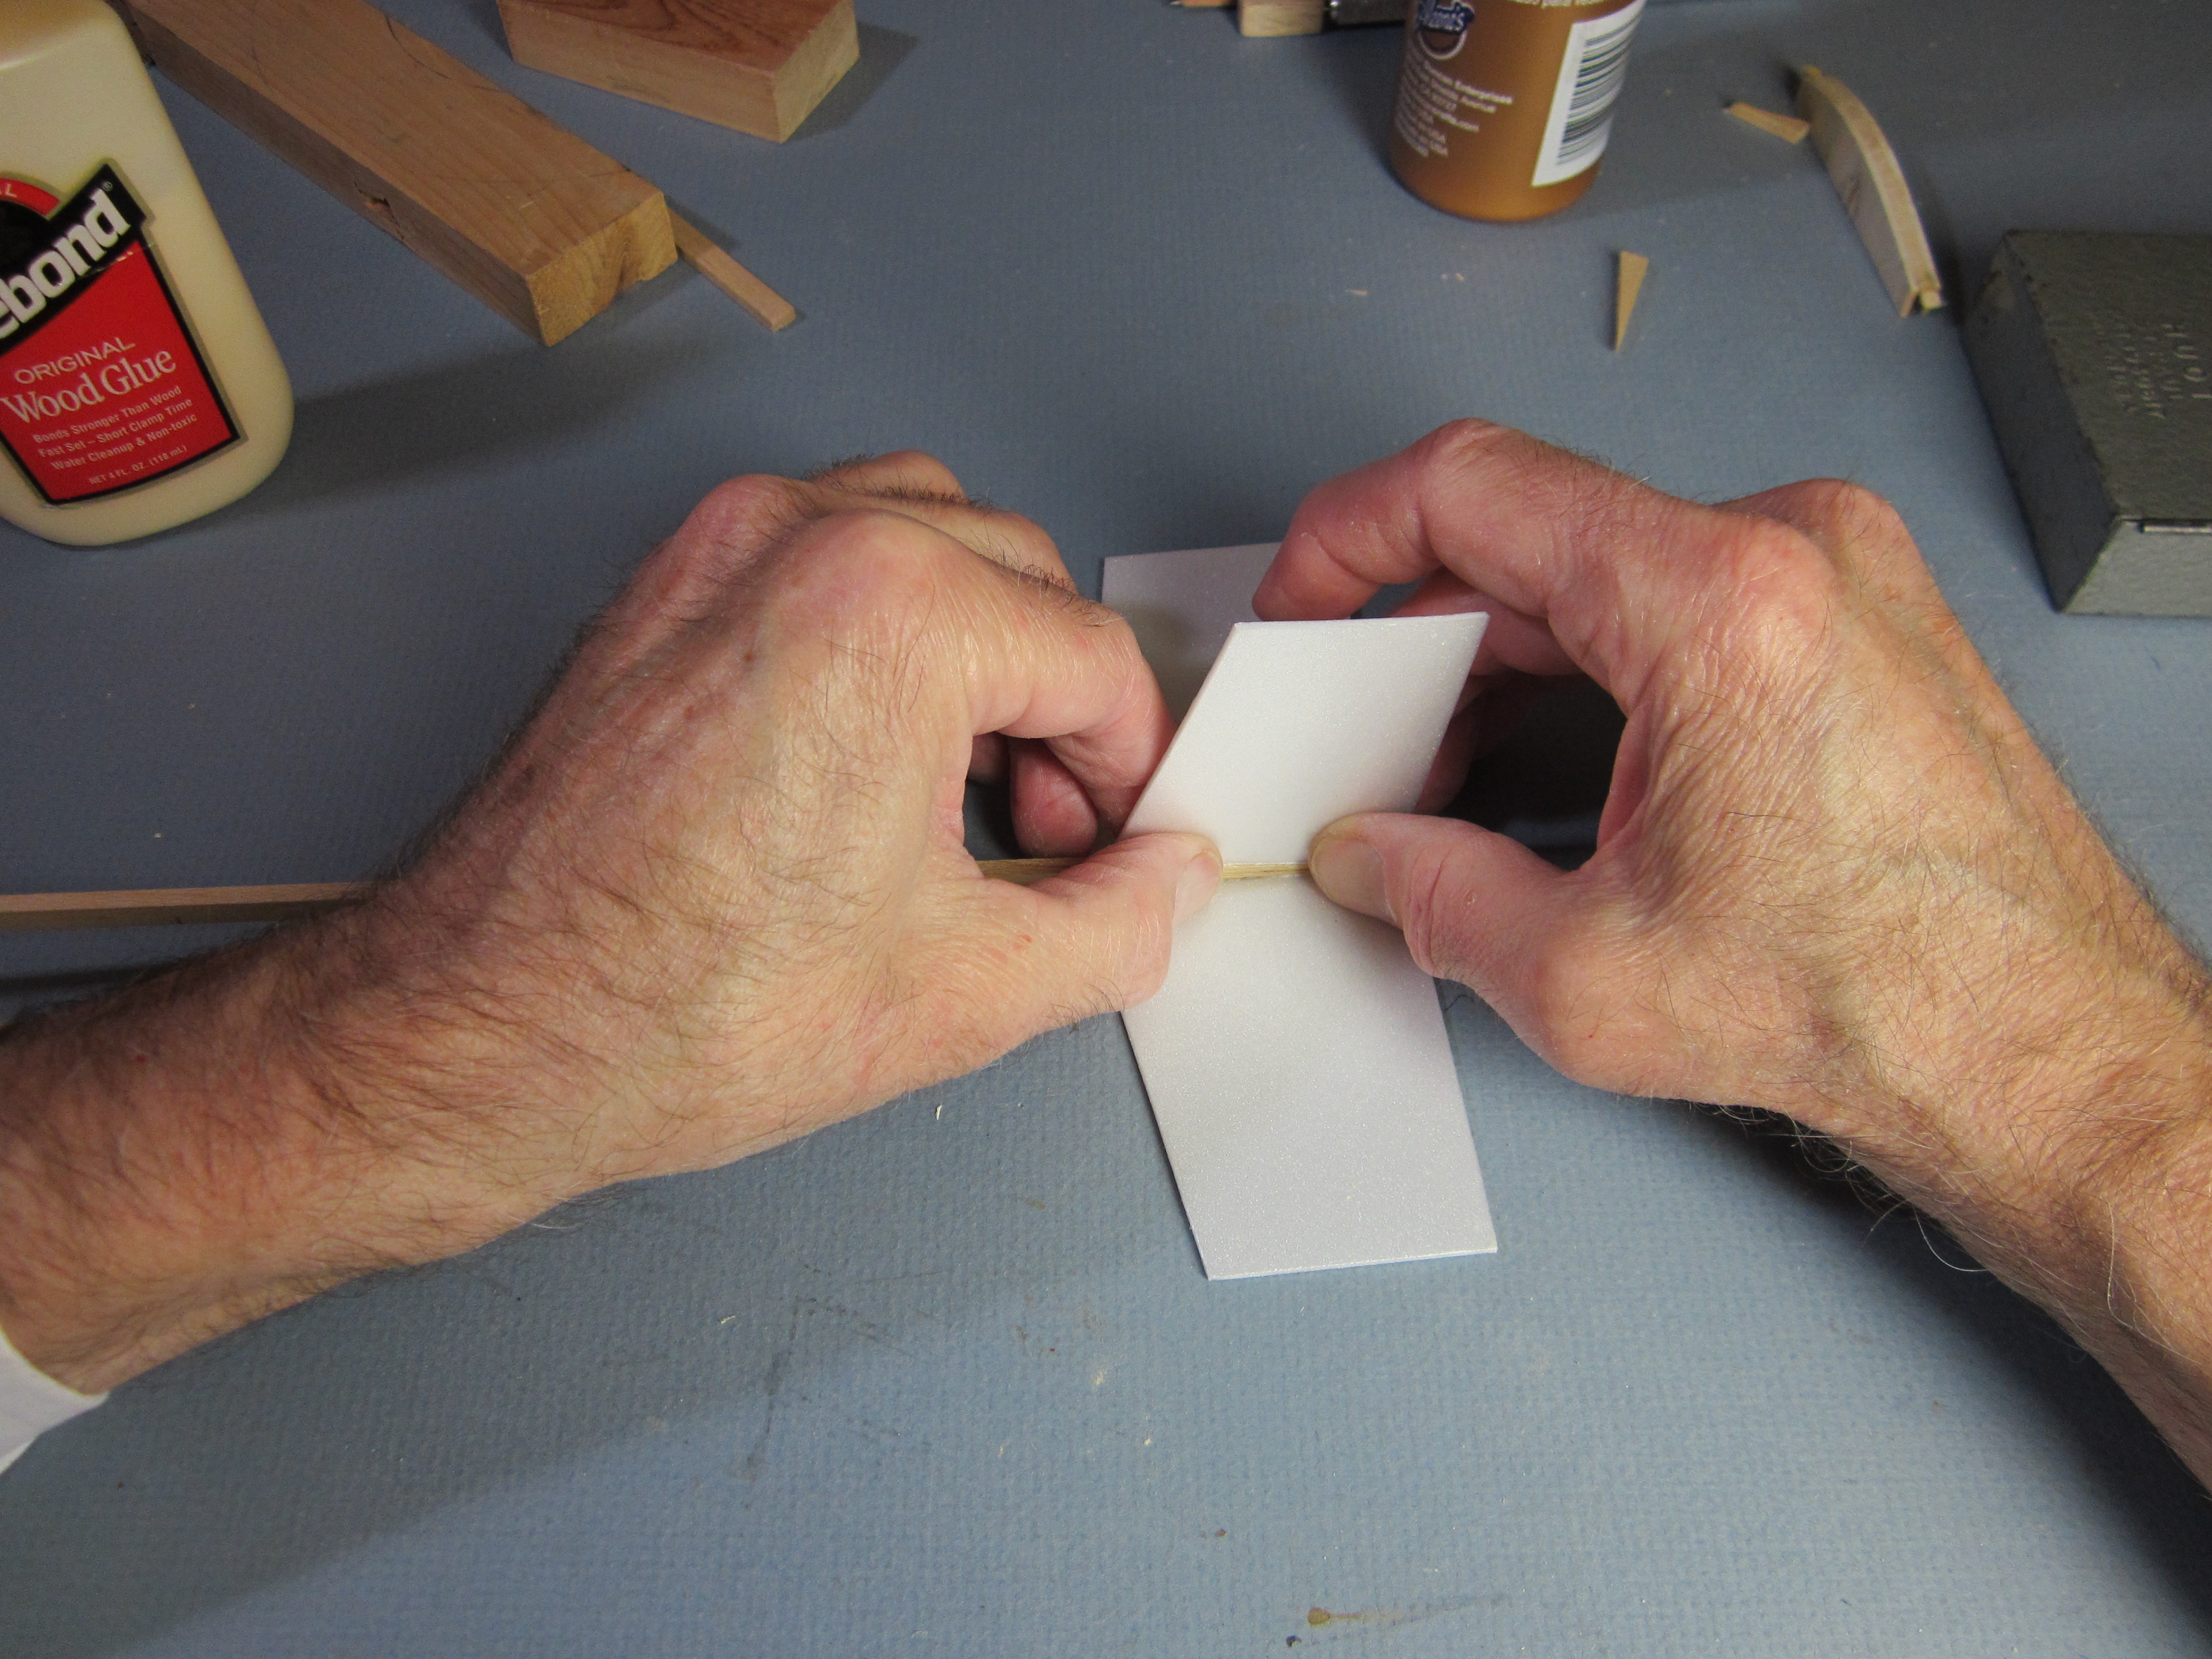
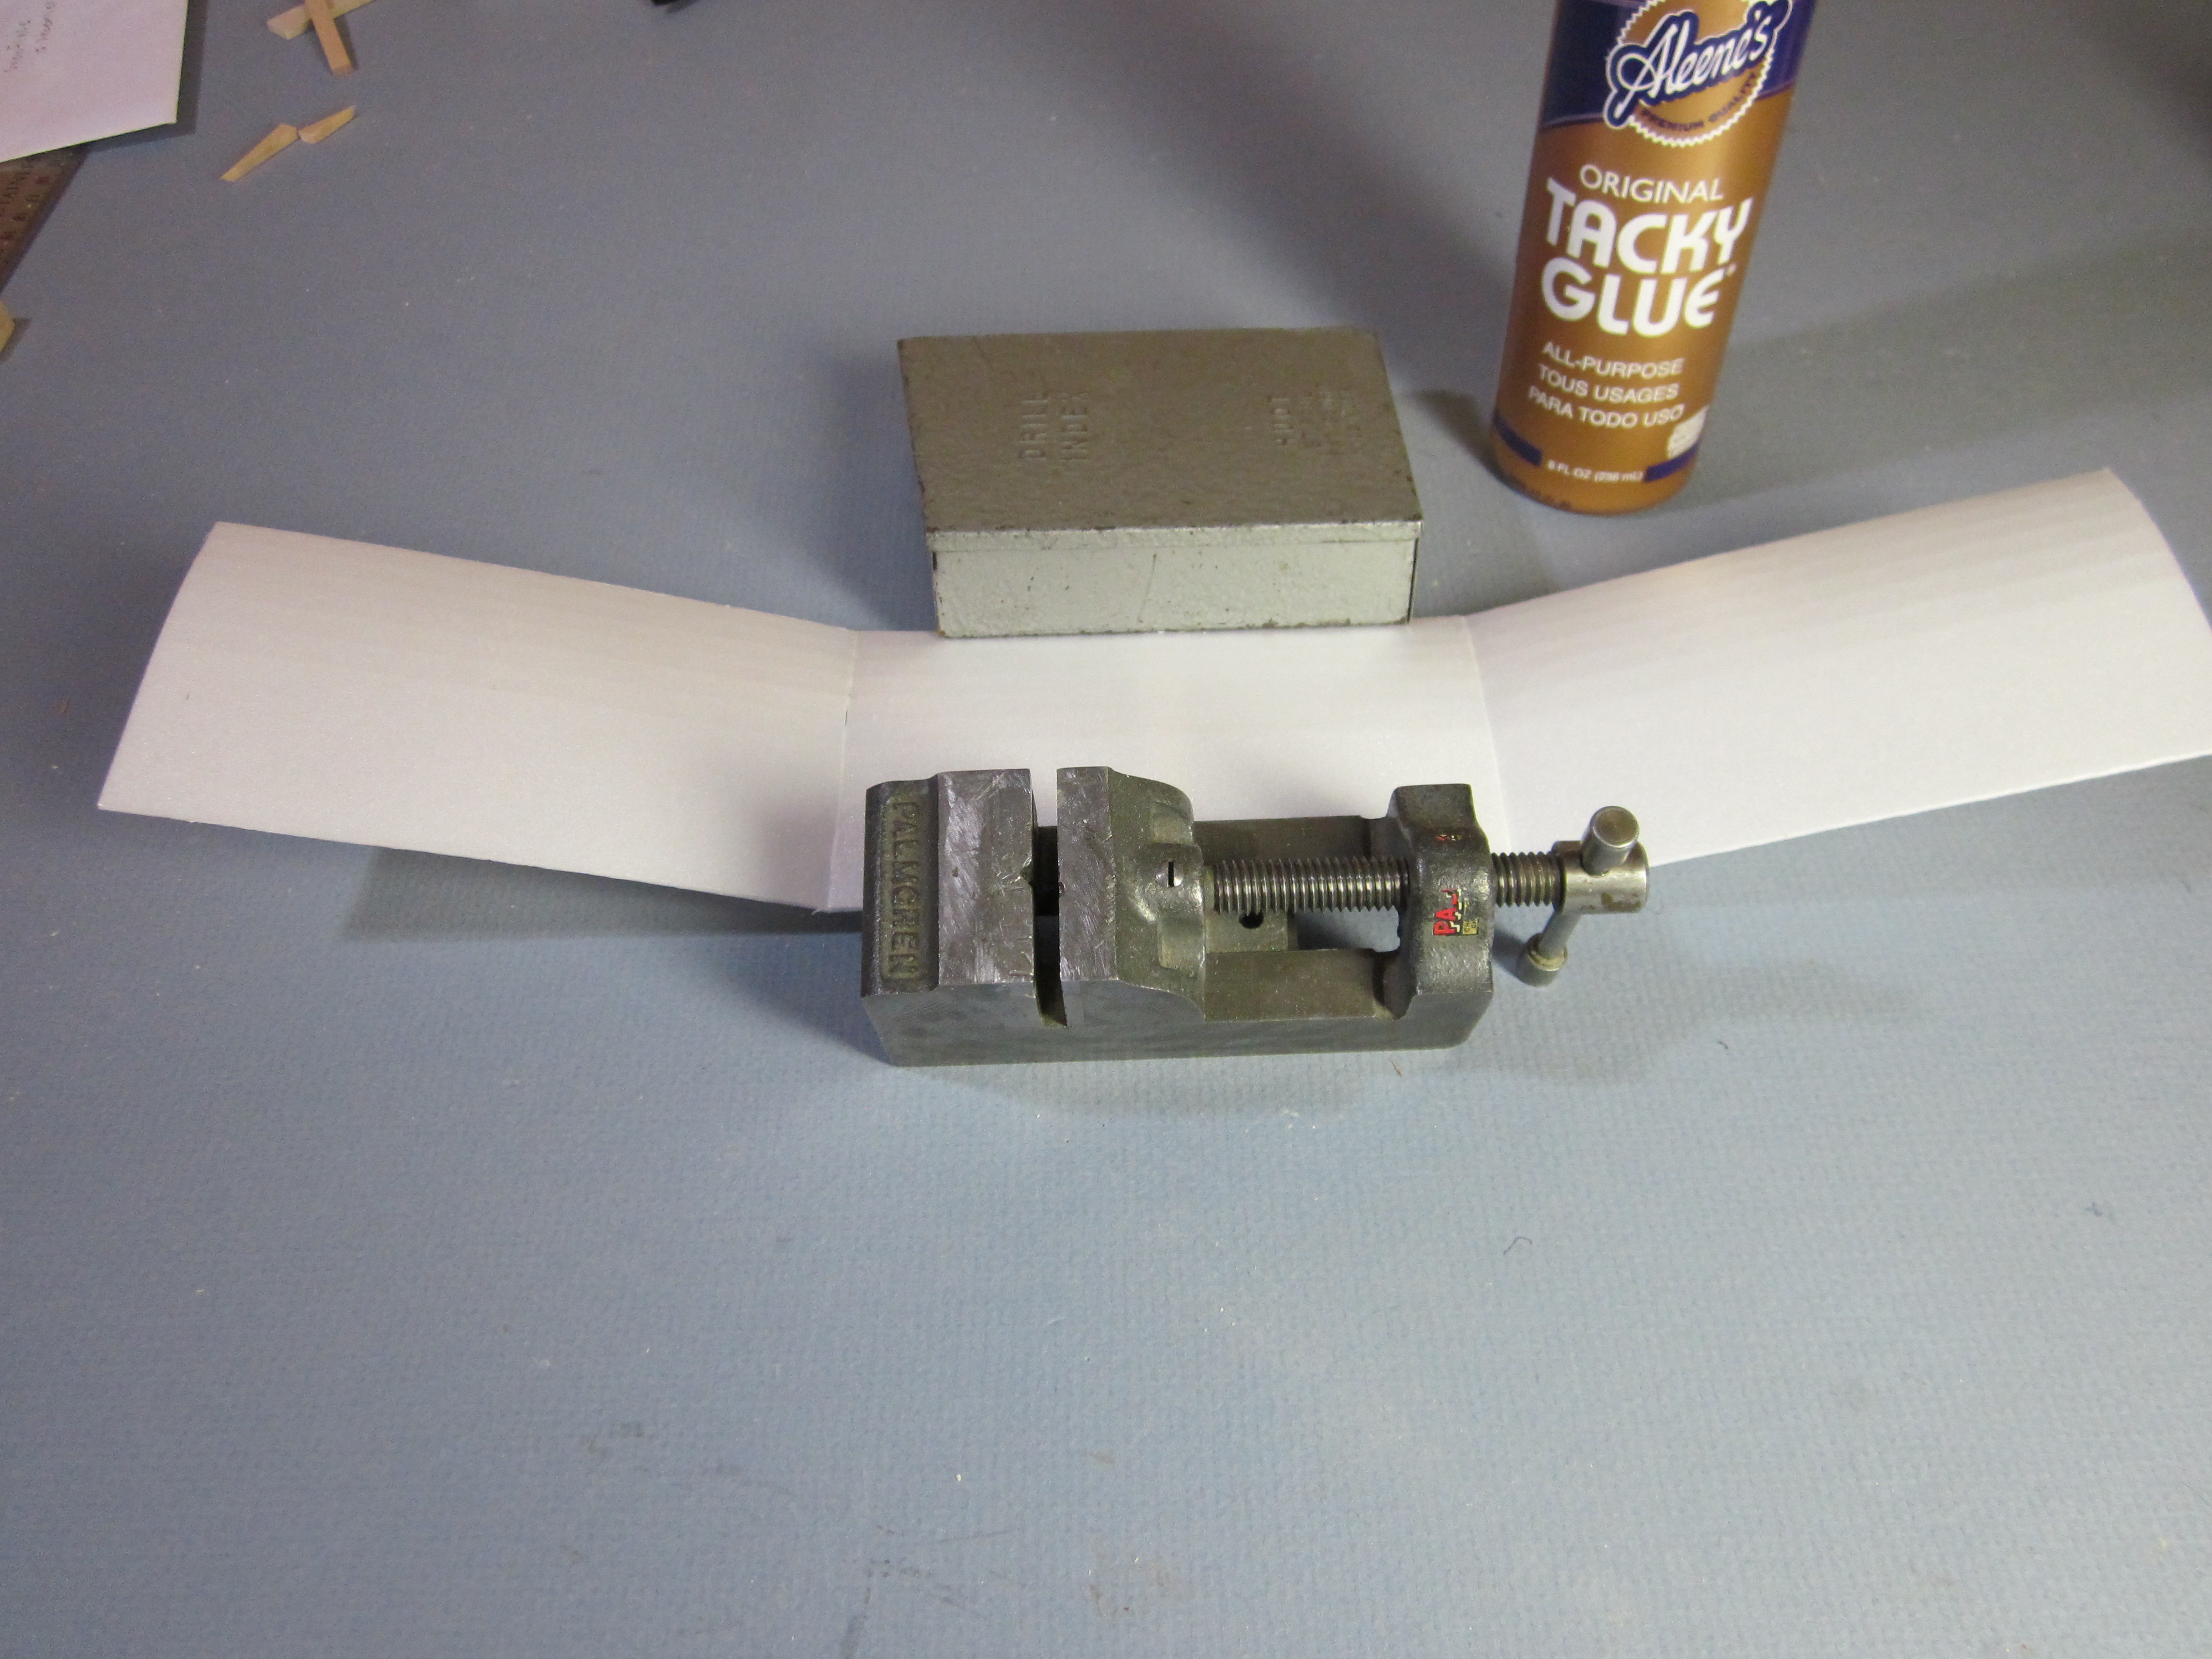
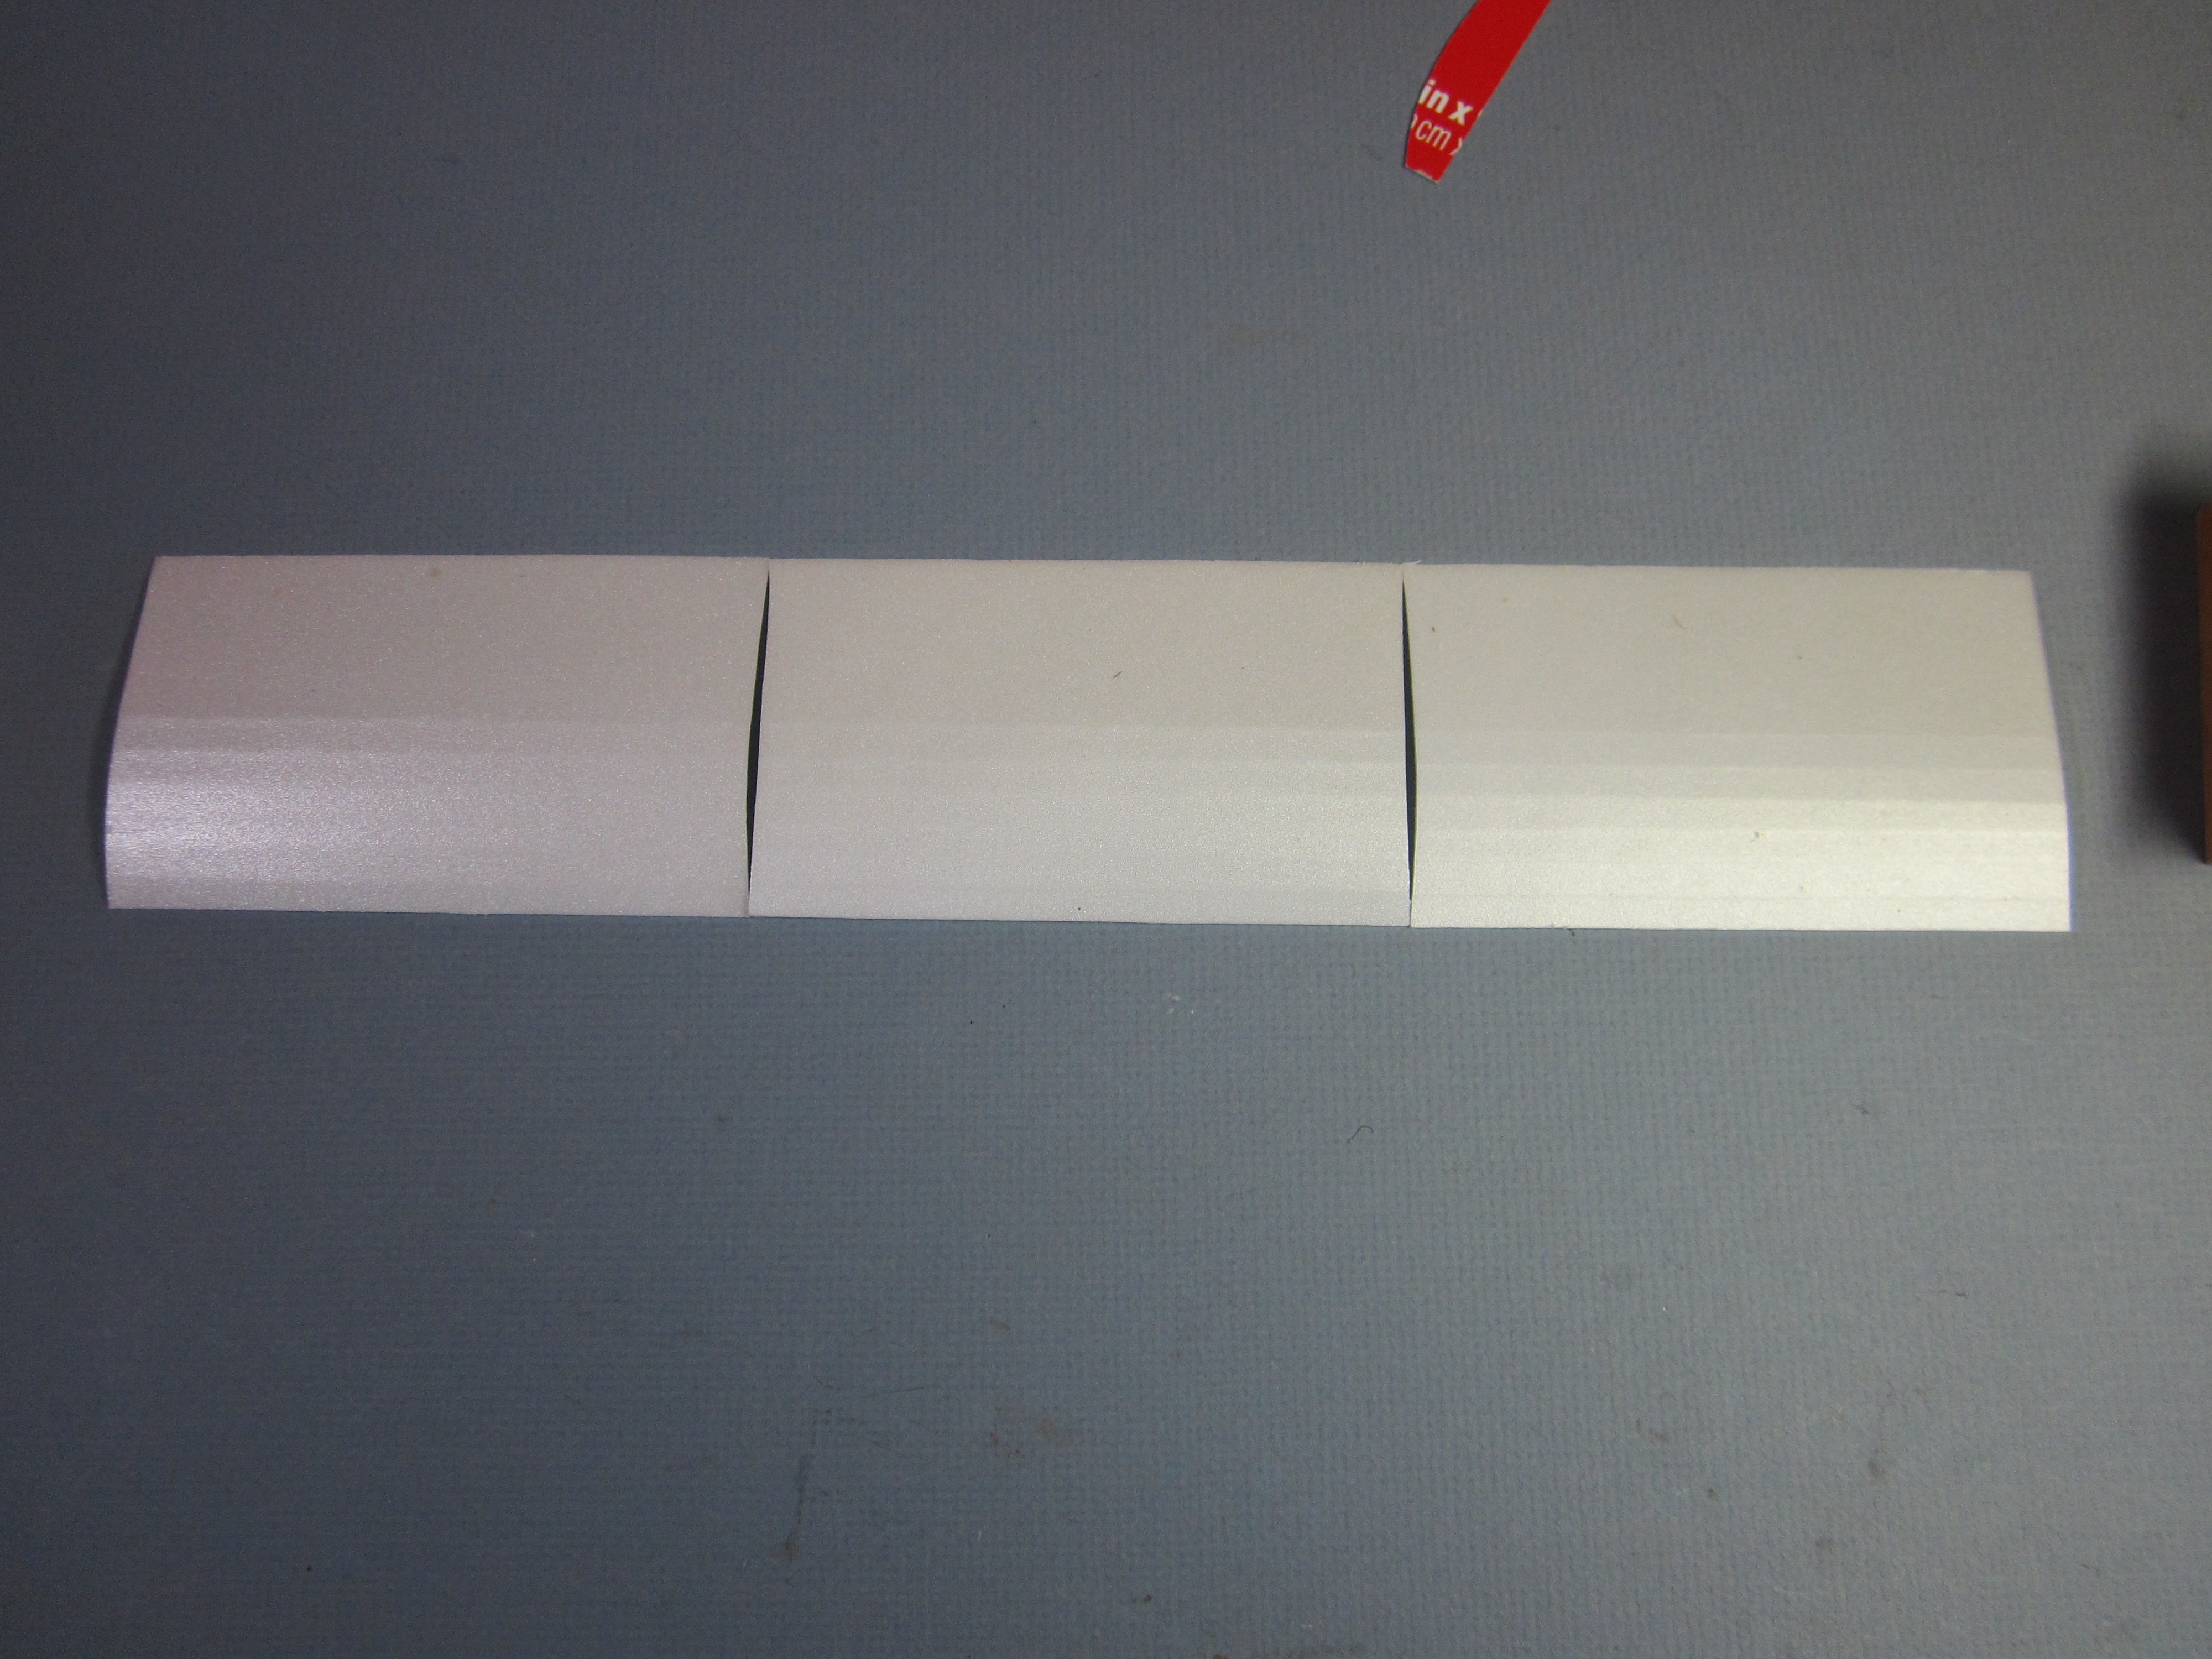 With the wing panels aligned side to side, we see that there is a tapered gap between them.
 This curved gore allows the tip panels to be raised up, forming the dihedral angles in the wing. Raising the tips closes the gaps so the panels may be glued together.
If you are a hero, you can spread glue on the edge of one panel, bring the leading and trailing edges of adjacent panels together, bring the high points together and hold the panels in place as the glue dries. Watching glue dry is not one of the more exciting things to do in life.
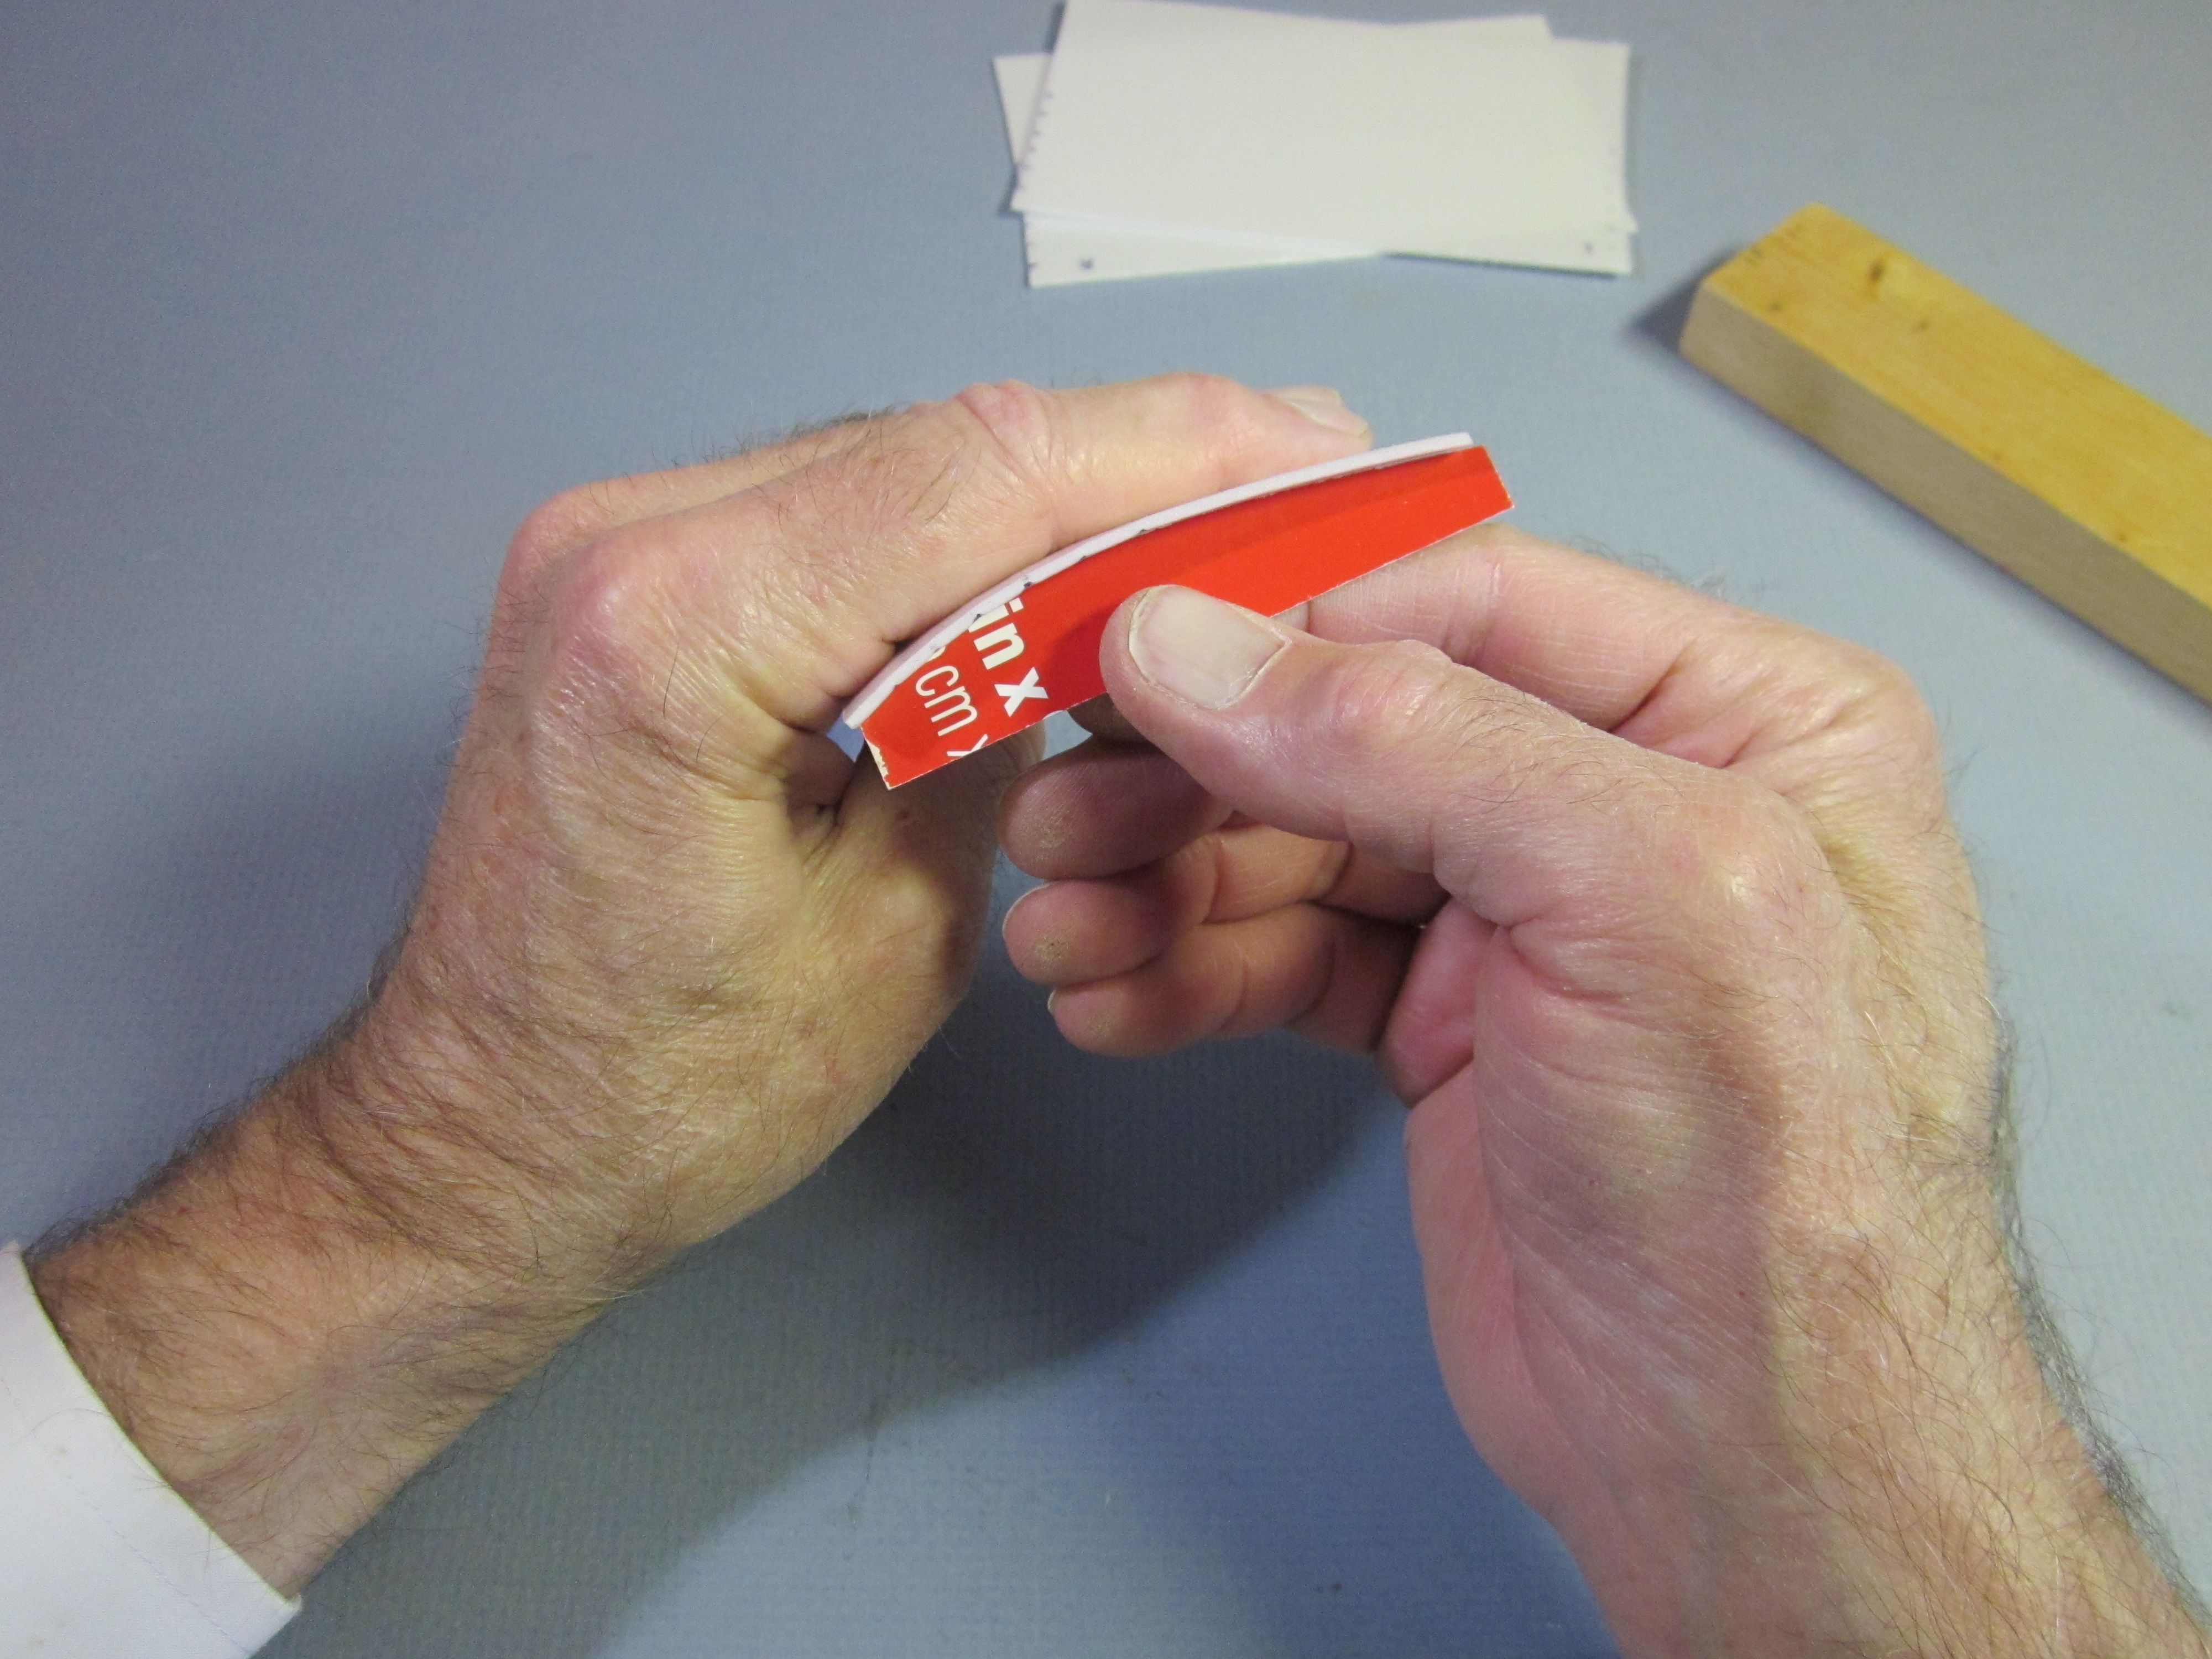
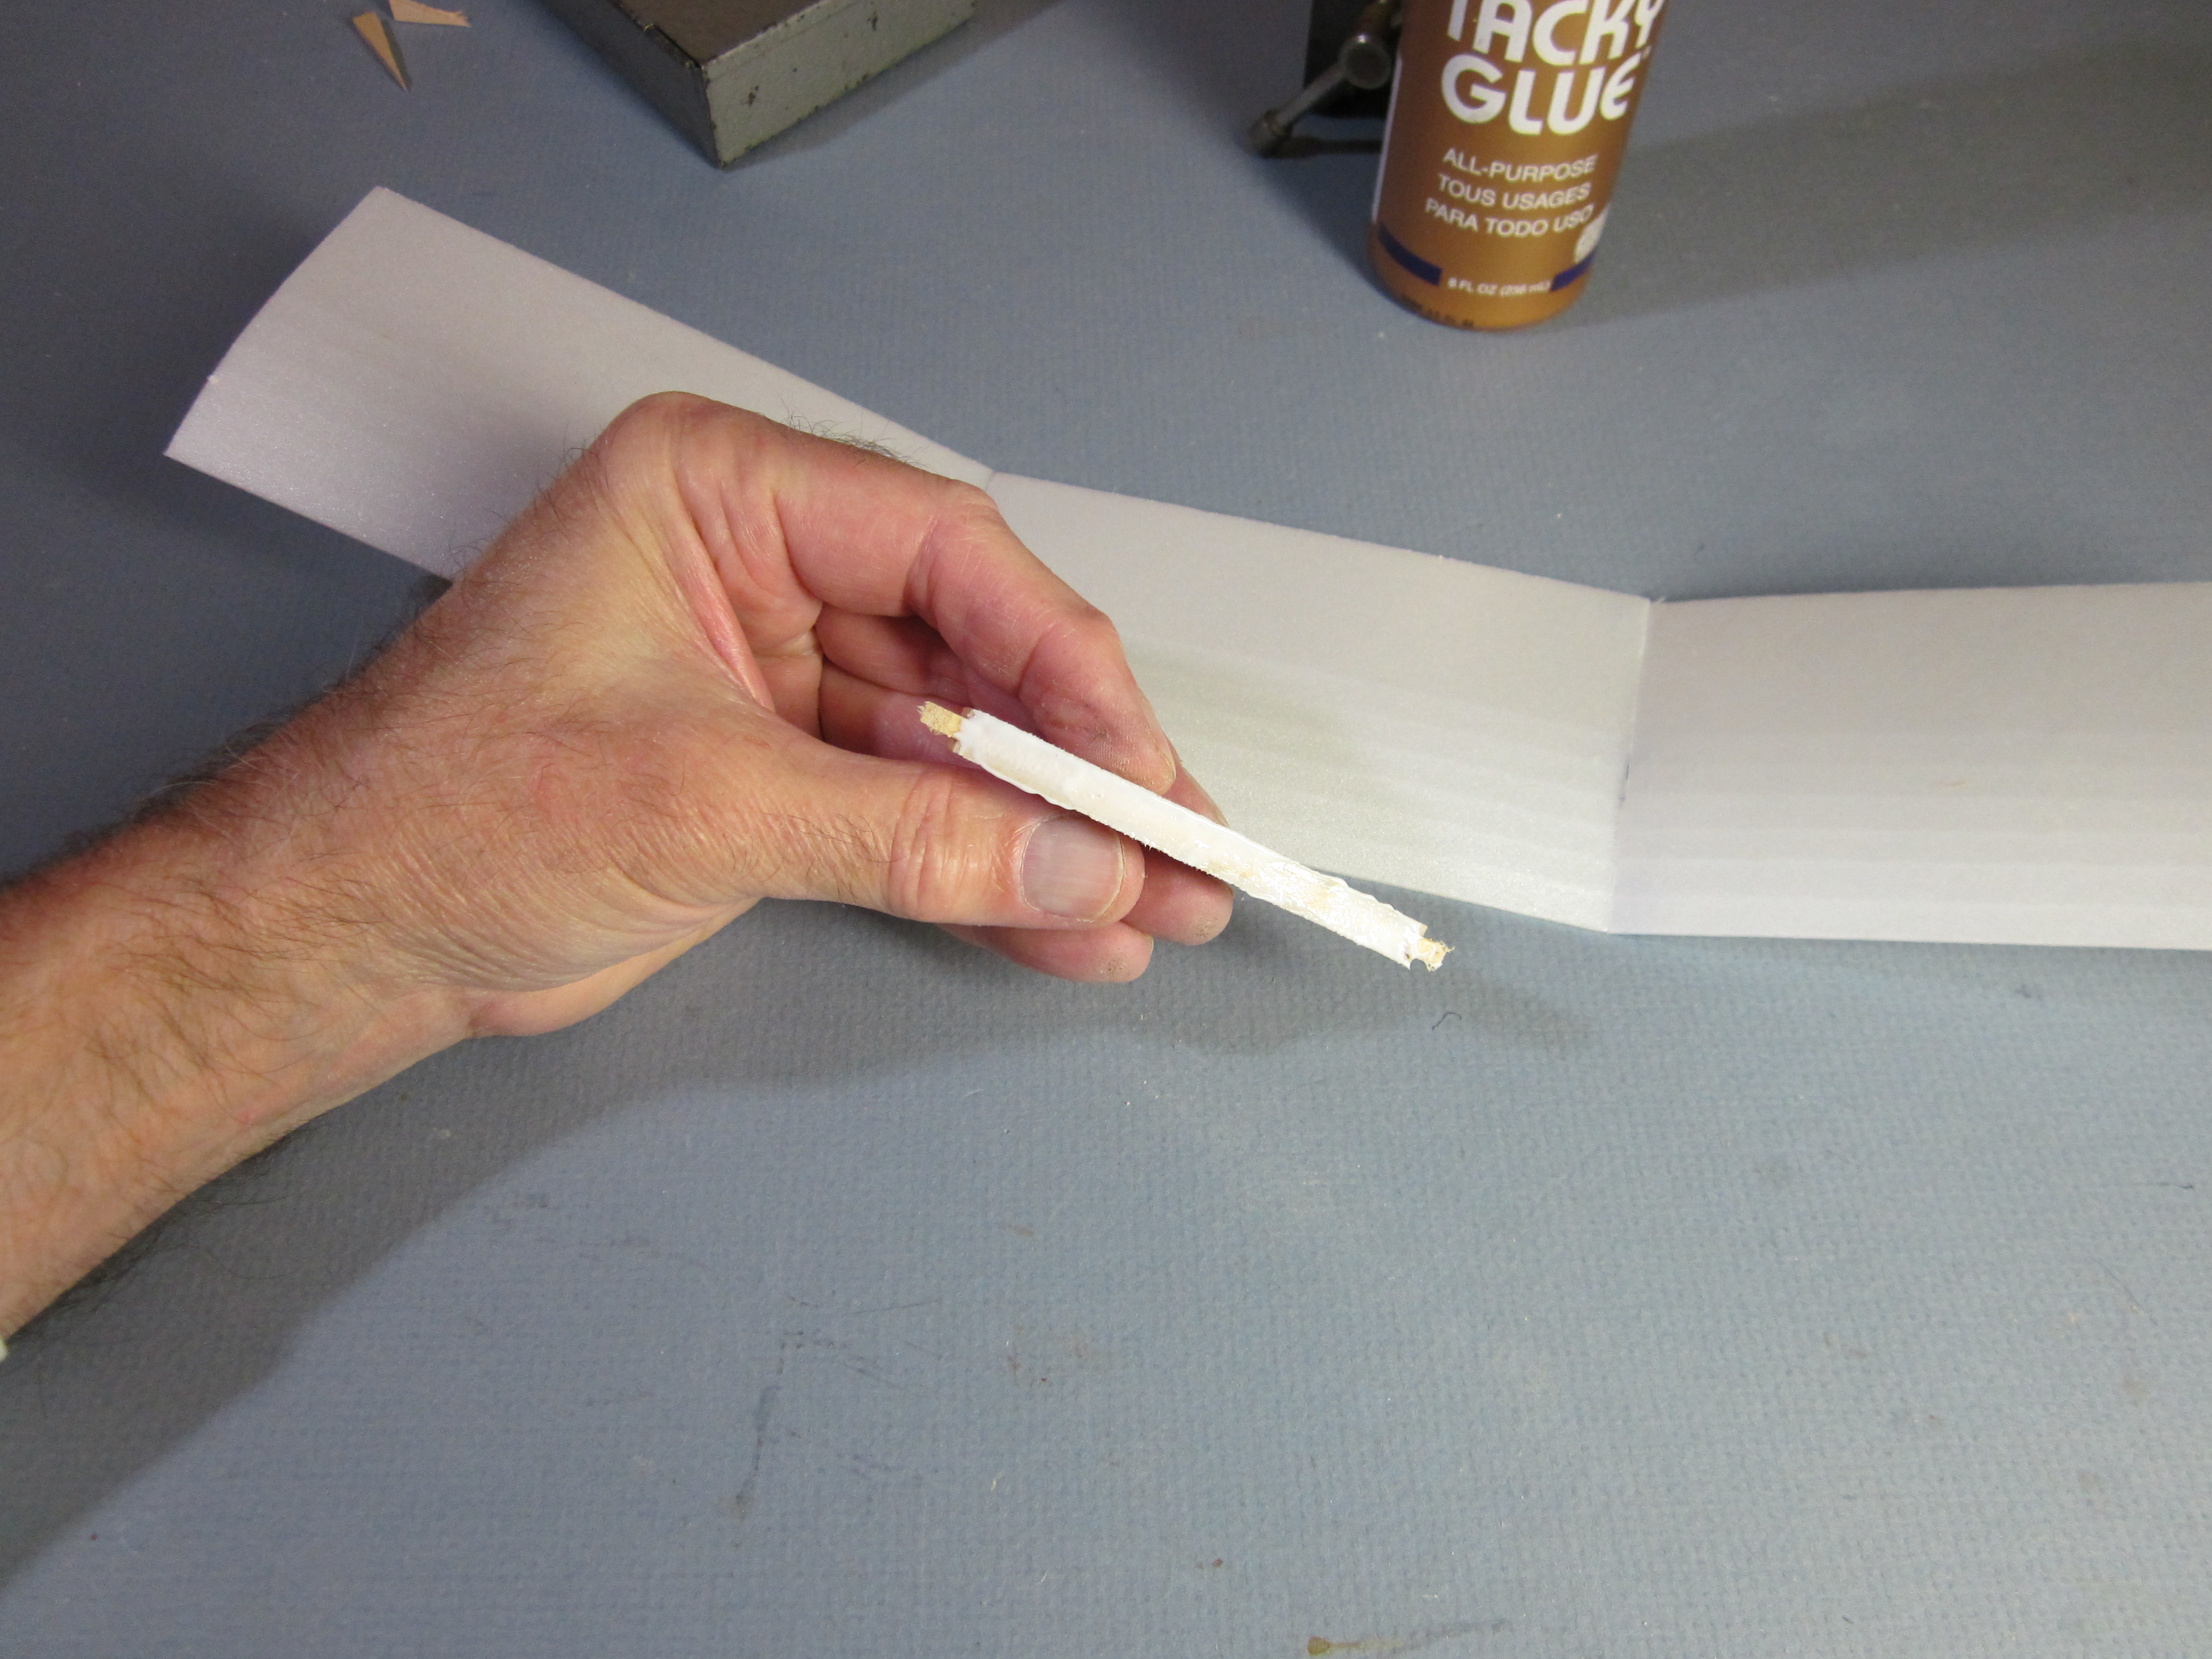
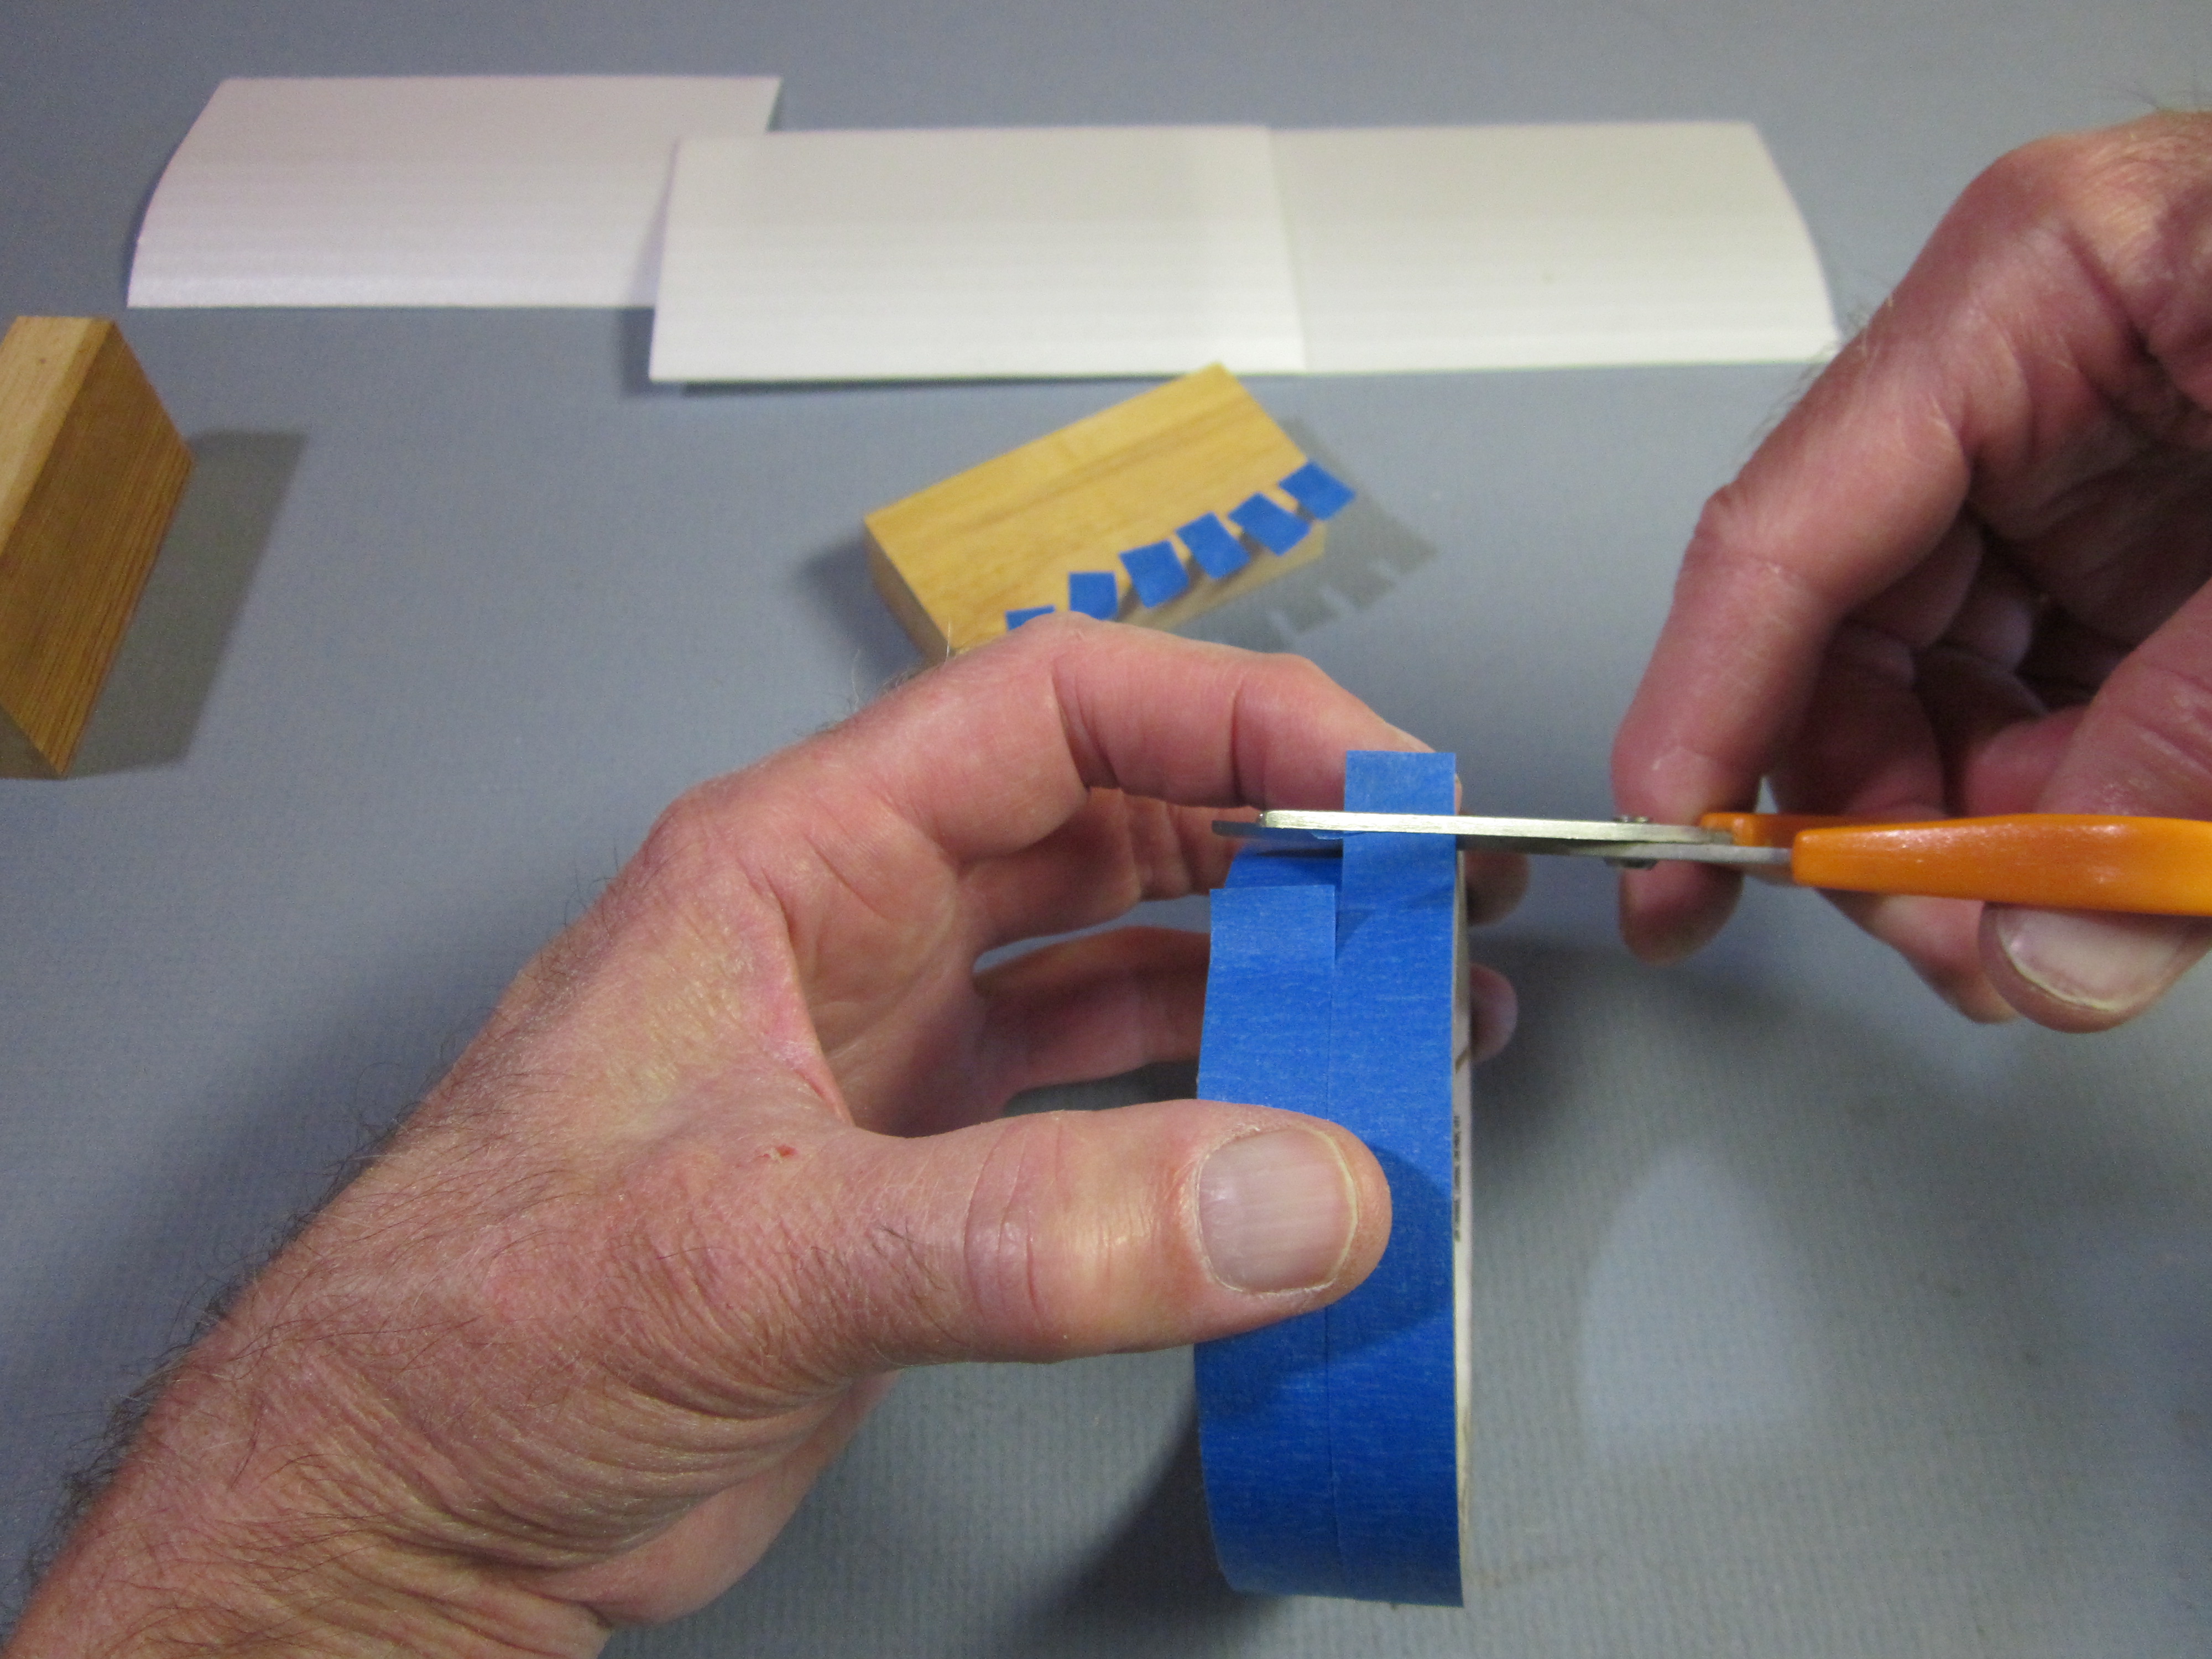 Cut out six, plus a couple extra, pieces of tape, 1/4″ x 1/2″. The roll of tape is divided by placing a razor blade on top of a 1/2″ high spacer and rotating the roll against the point of the blade.
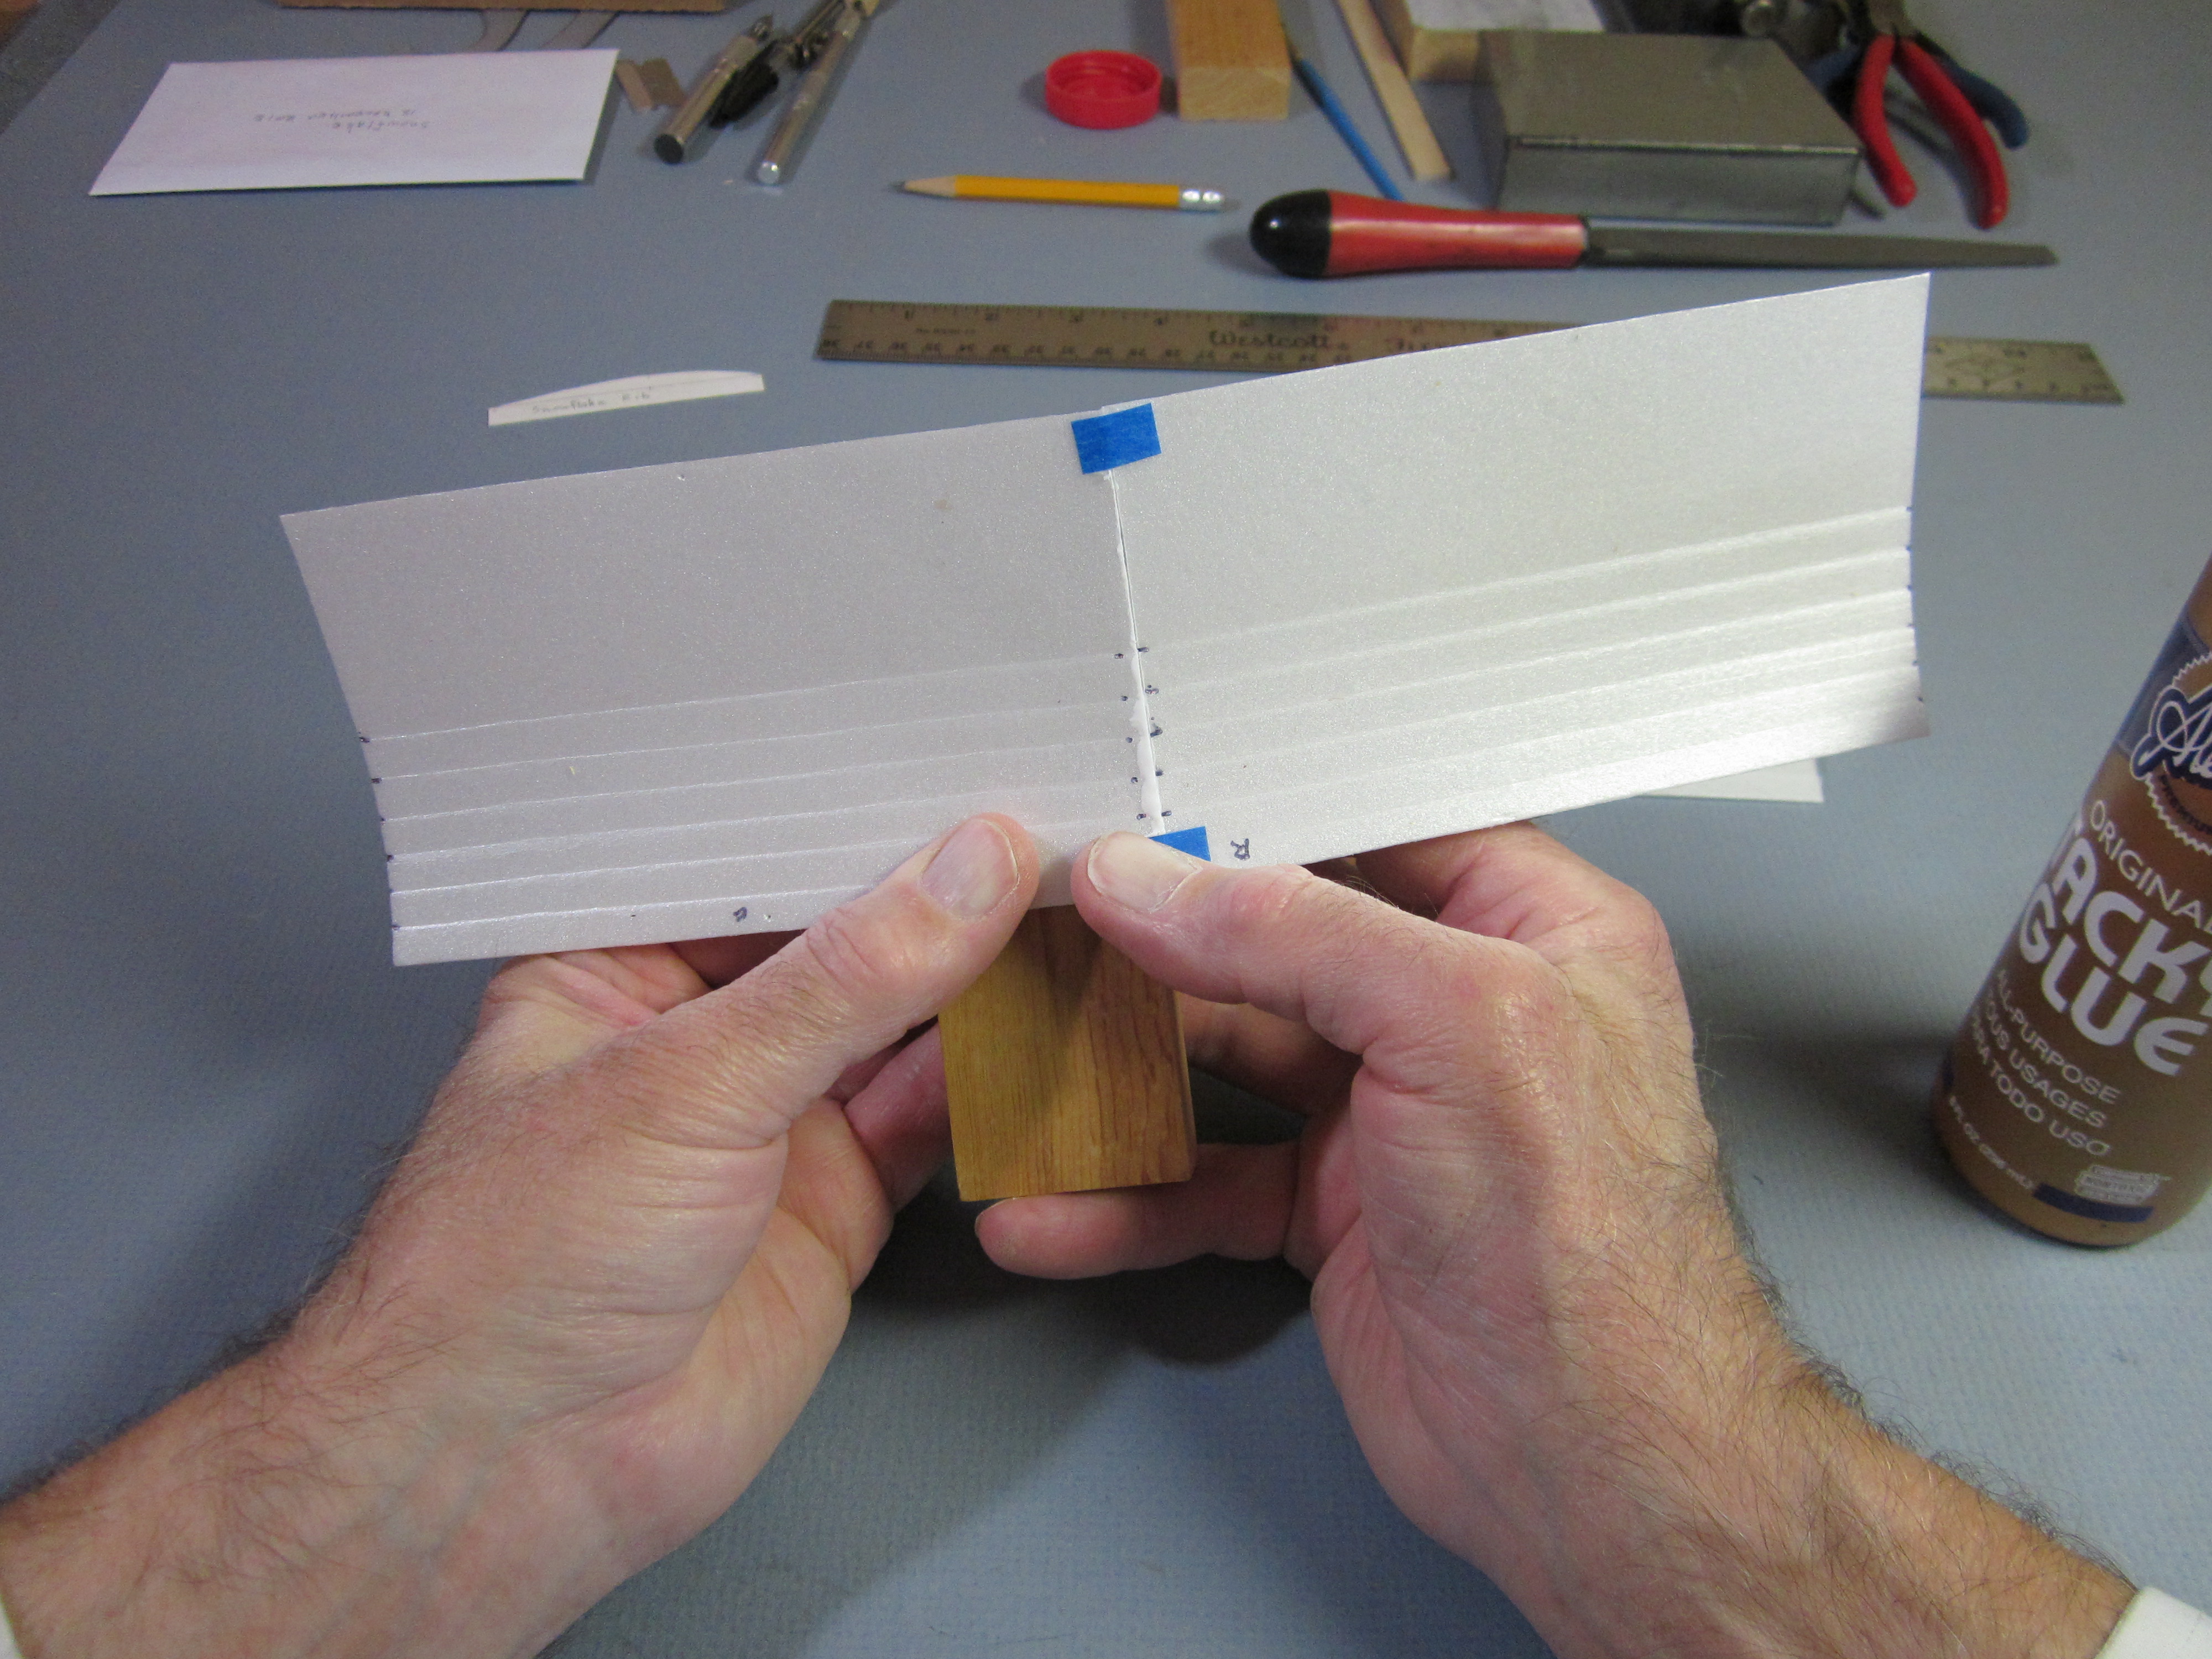
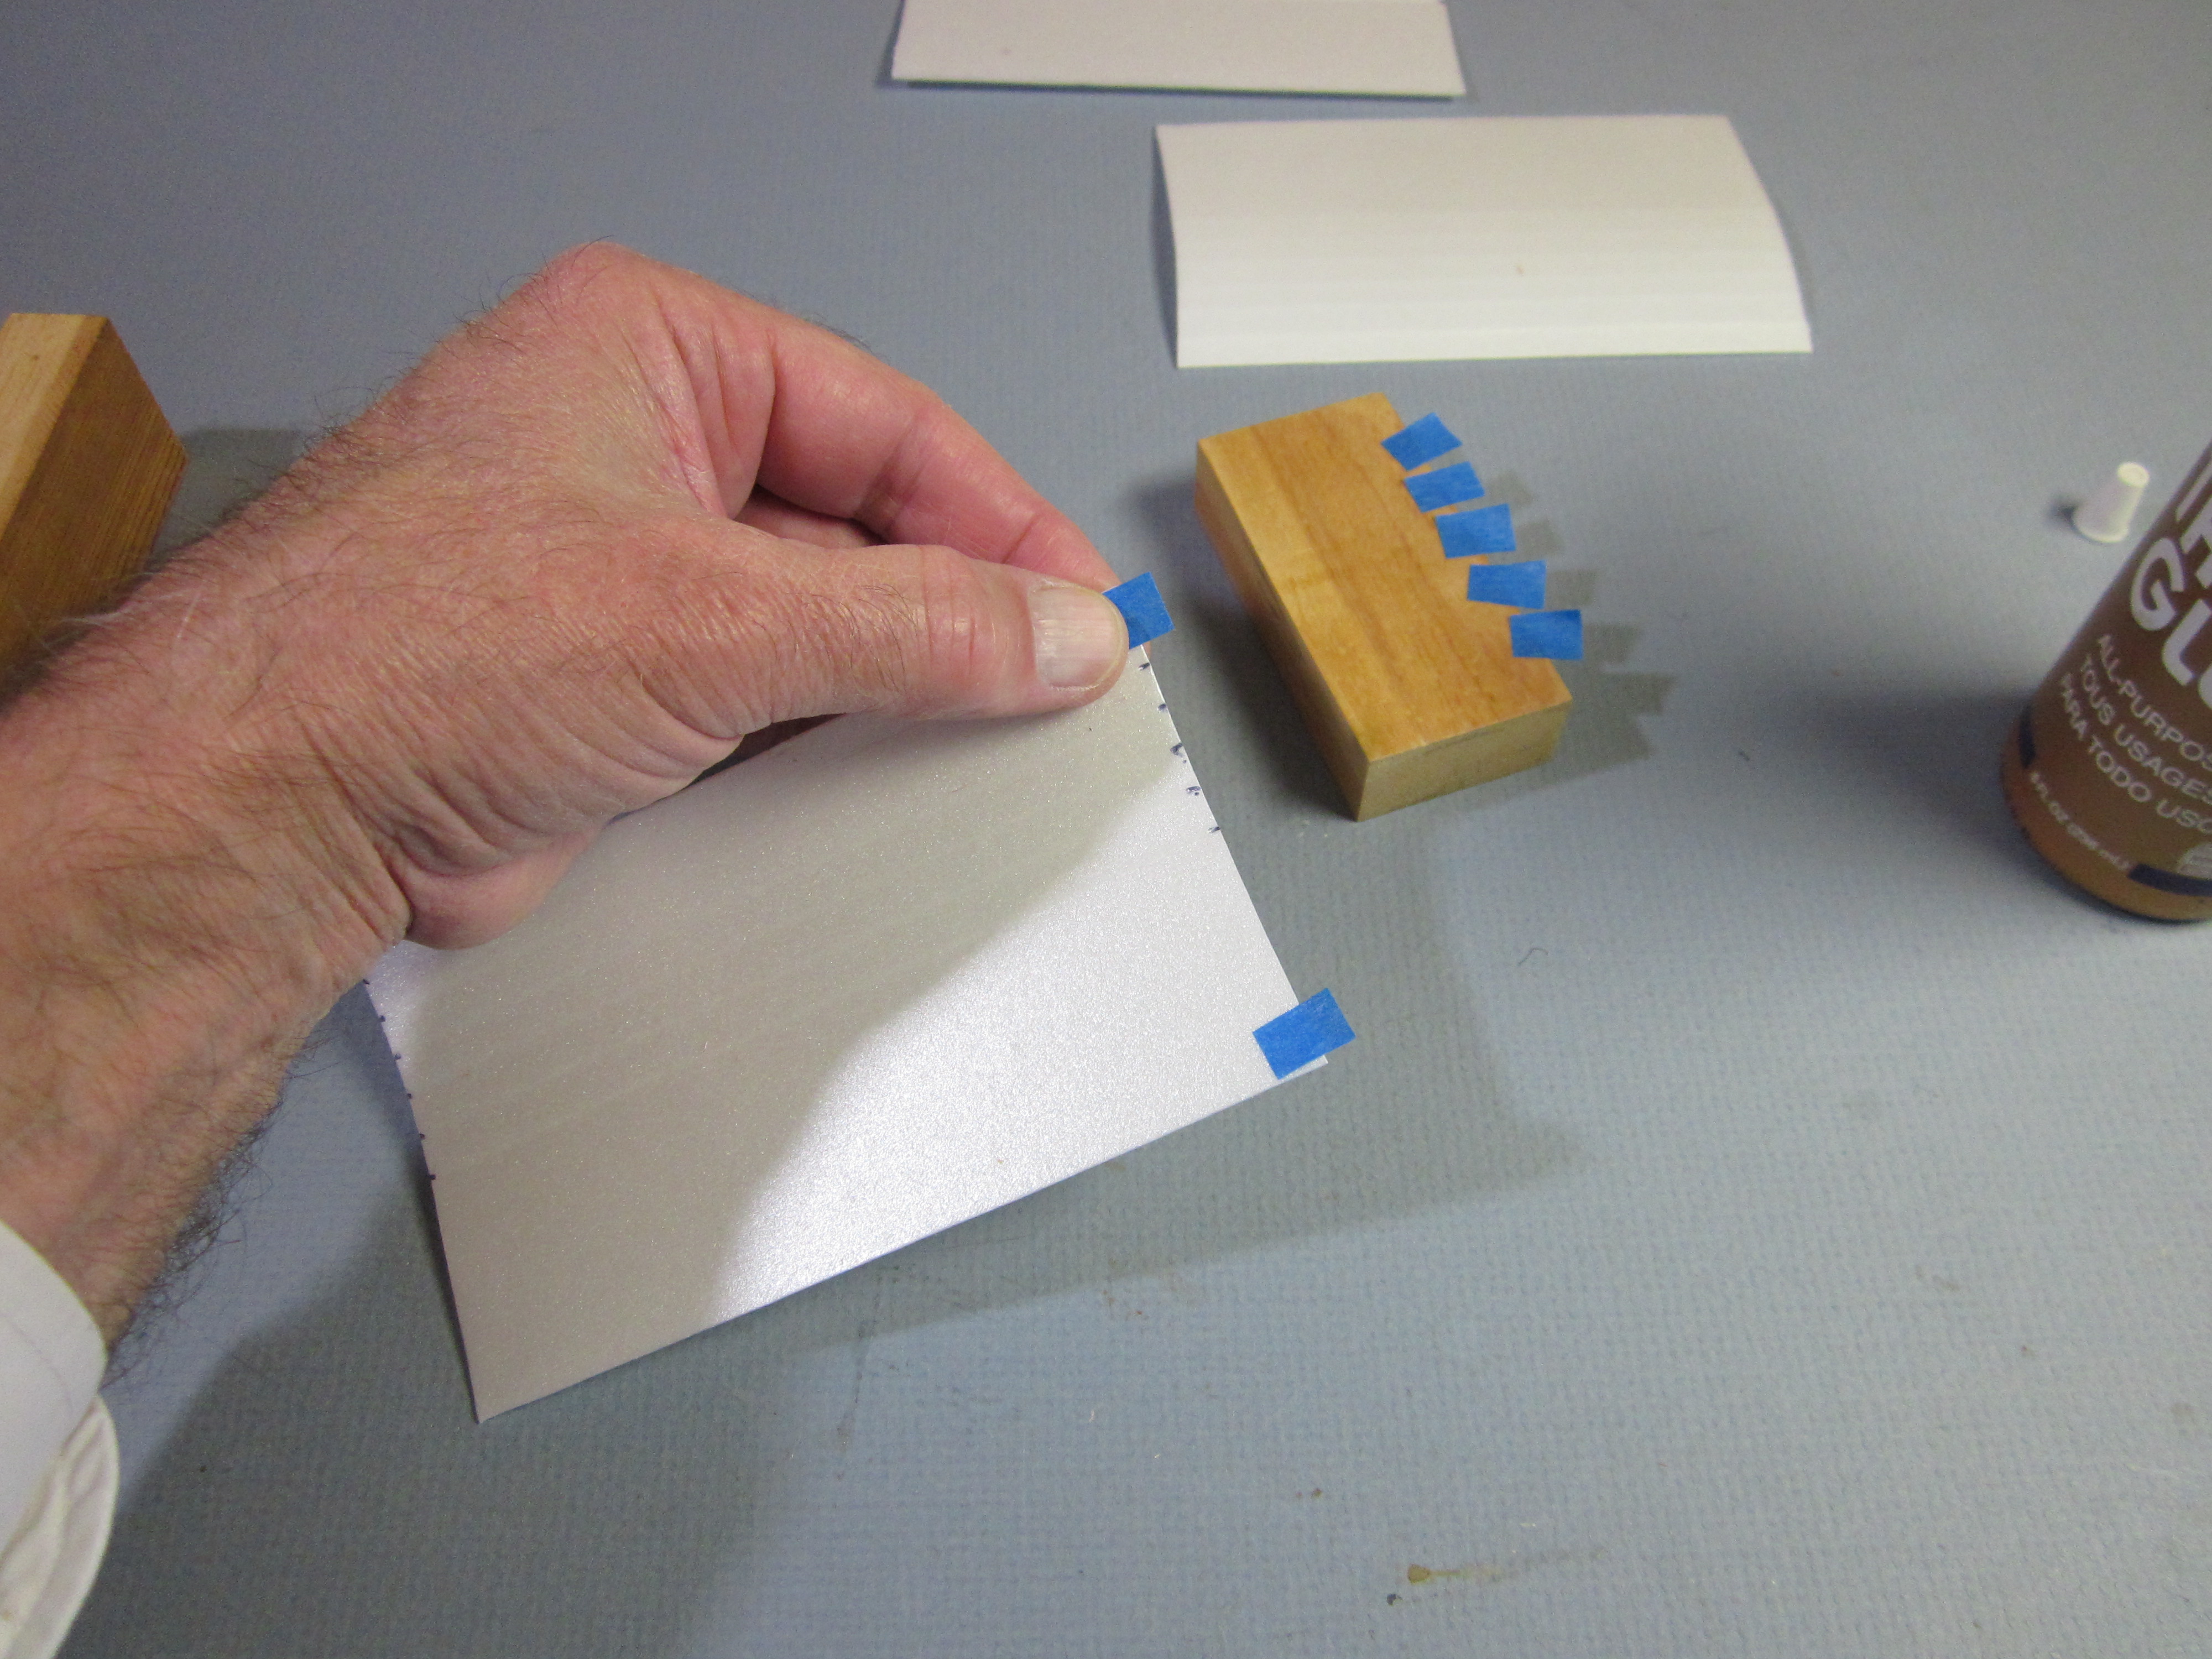 Place bits of tape extending off a curved end at the leading and trailing edges. Press the tape down firmly.
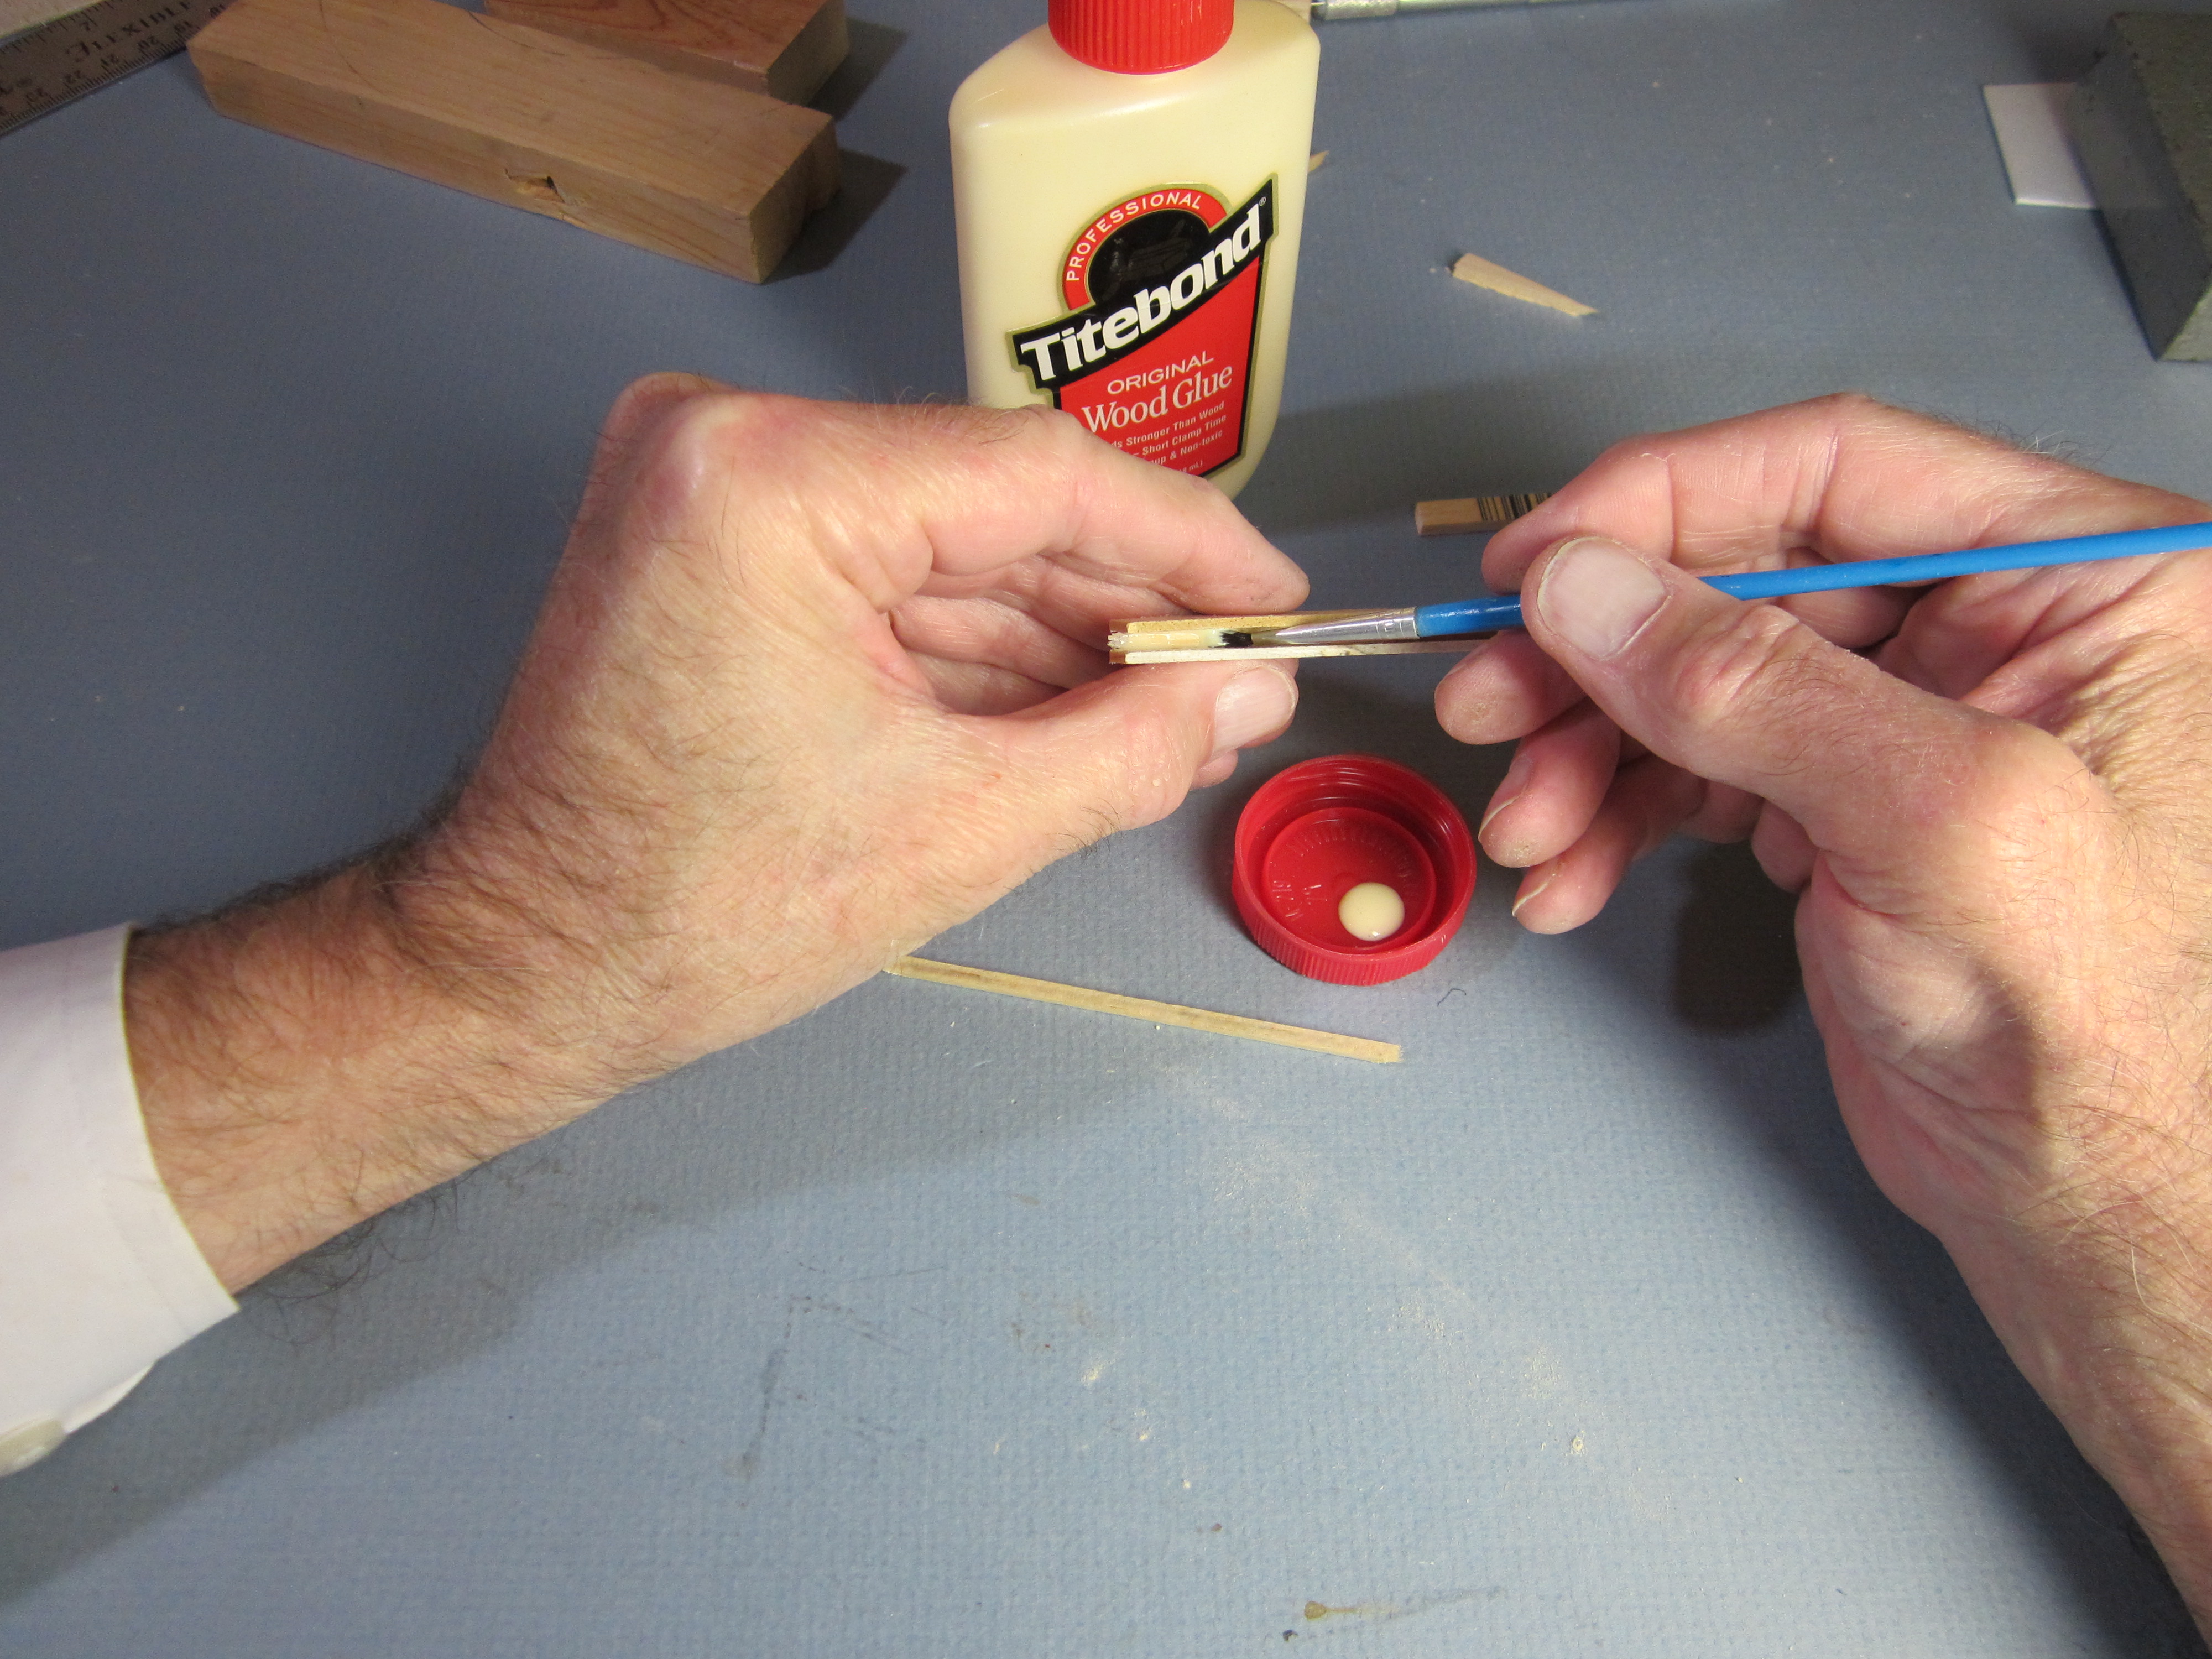
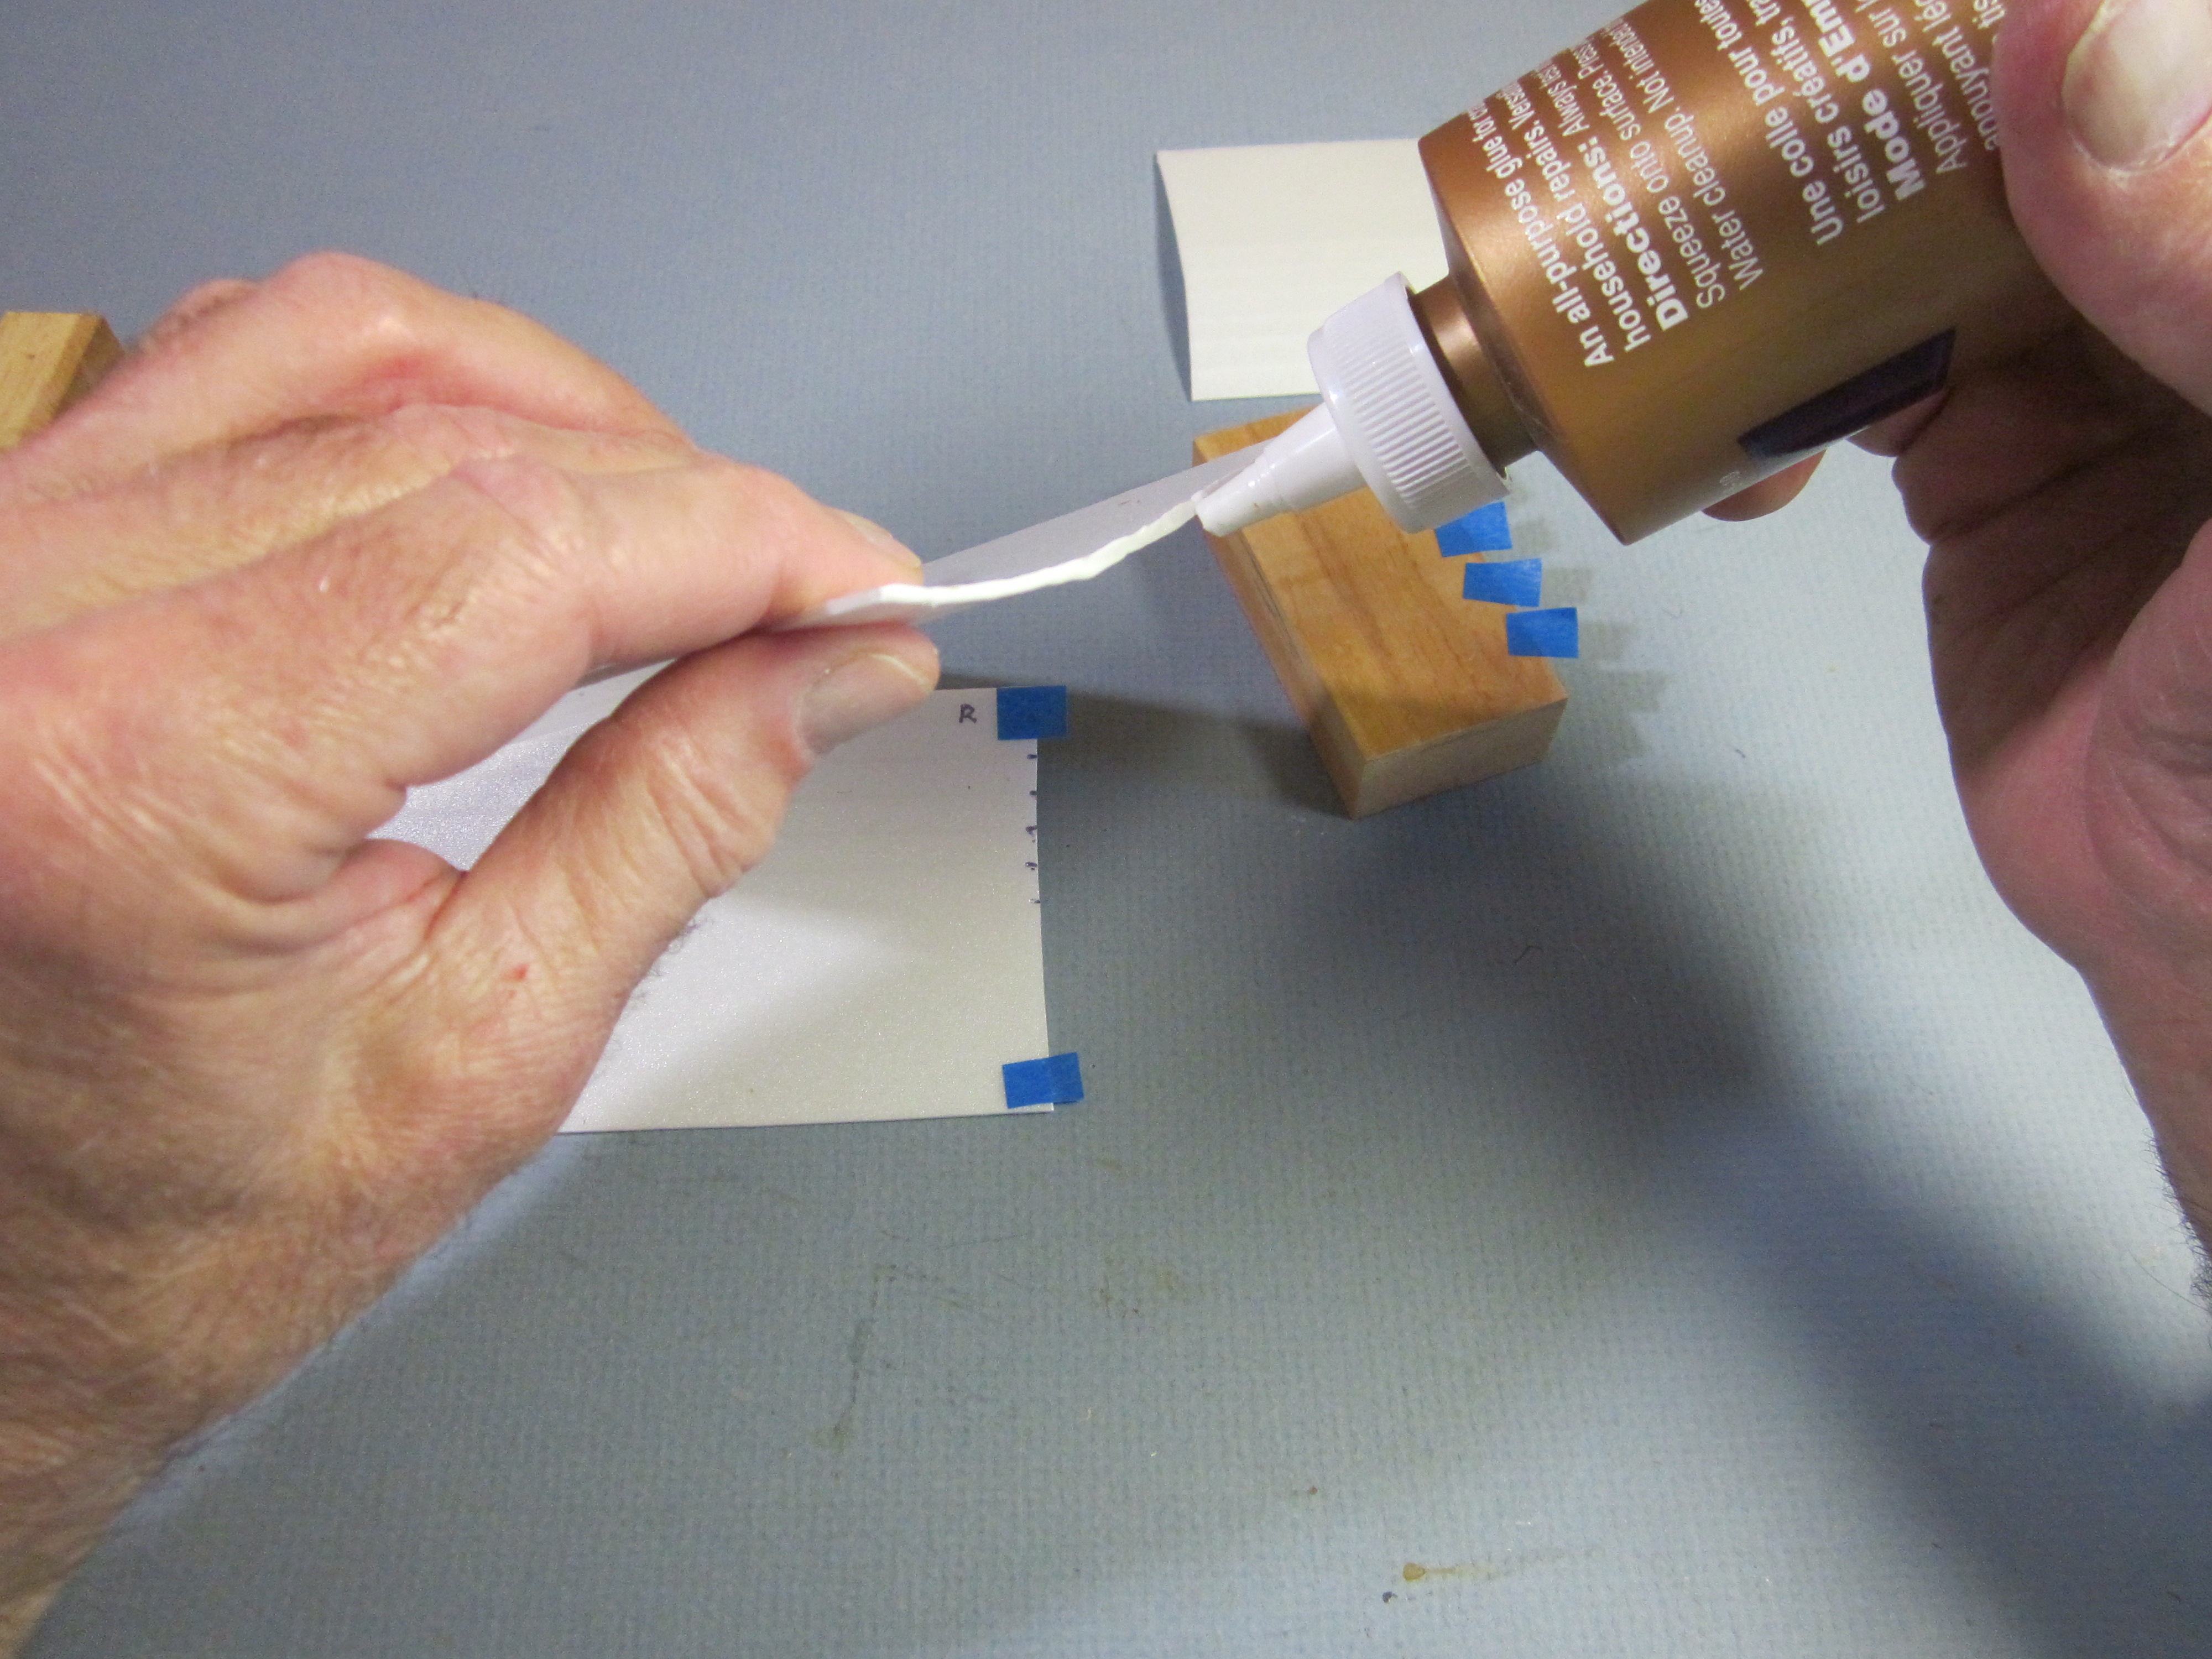 Spread a bead of glue along the curved edge of the adjoining wing panel.
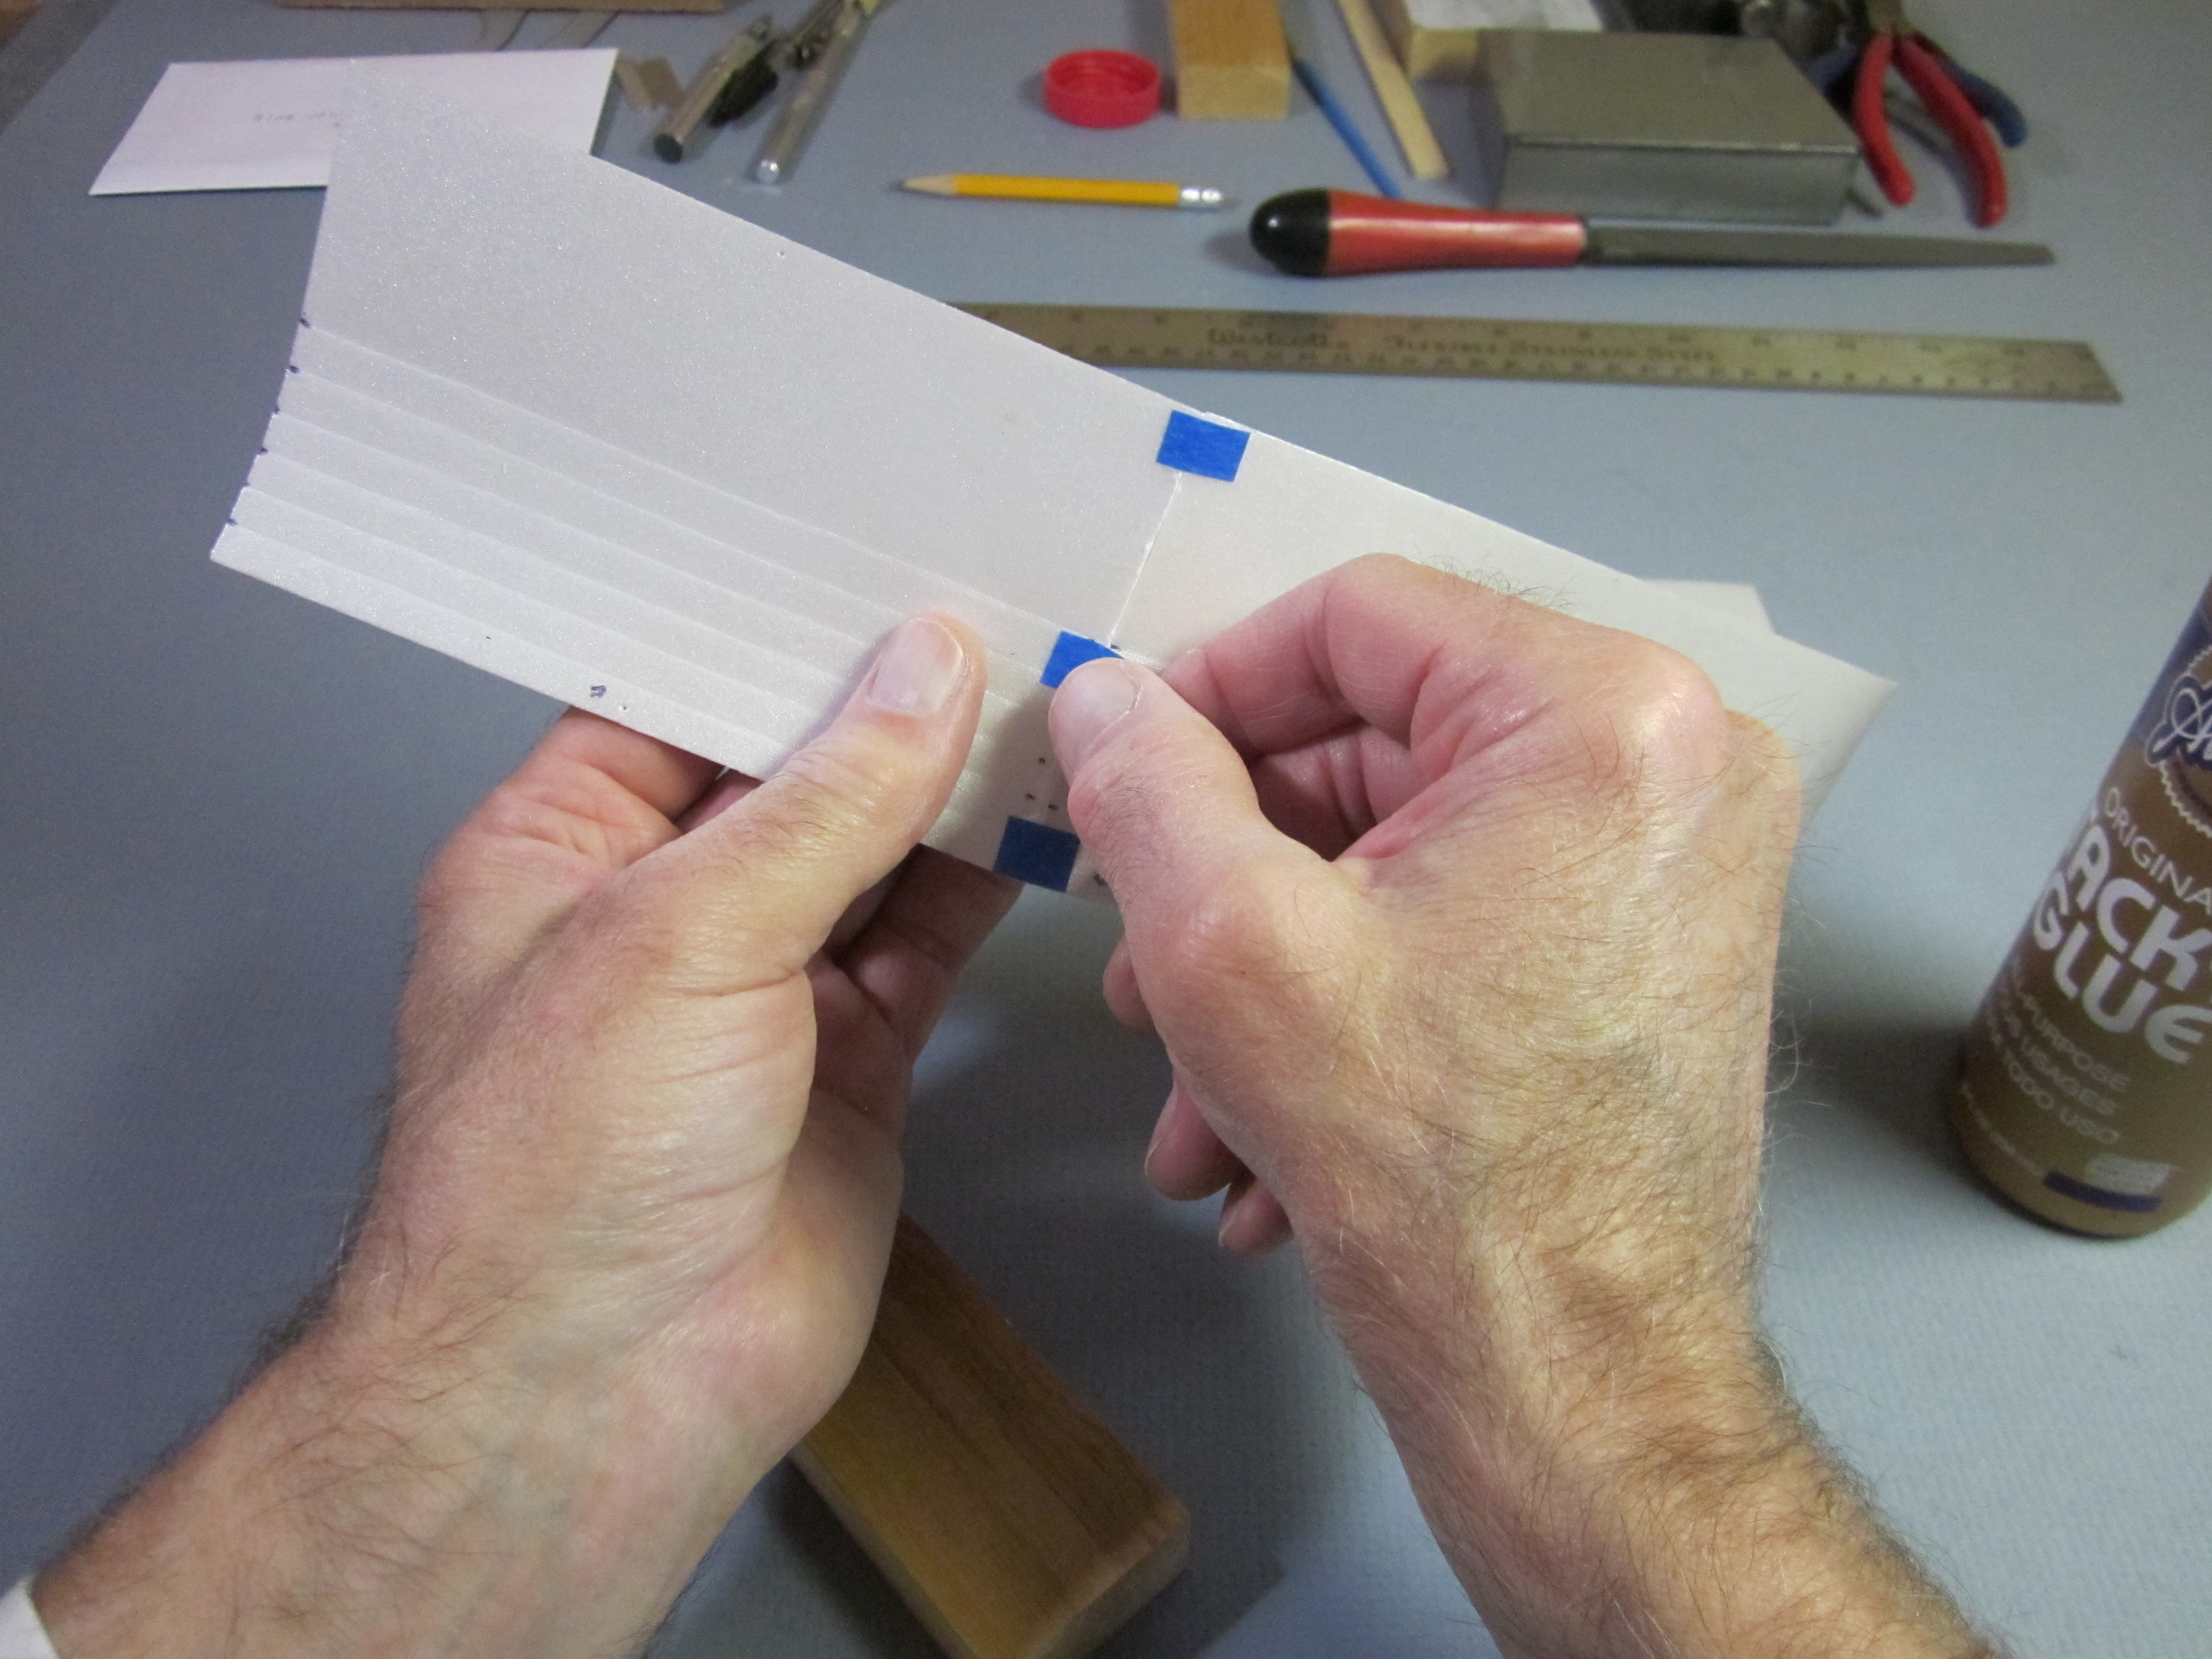
 Bring the two edges together and slide them back and forth to spread glue uniformly over both pieces.
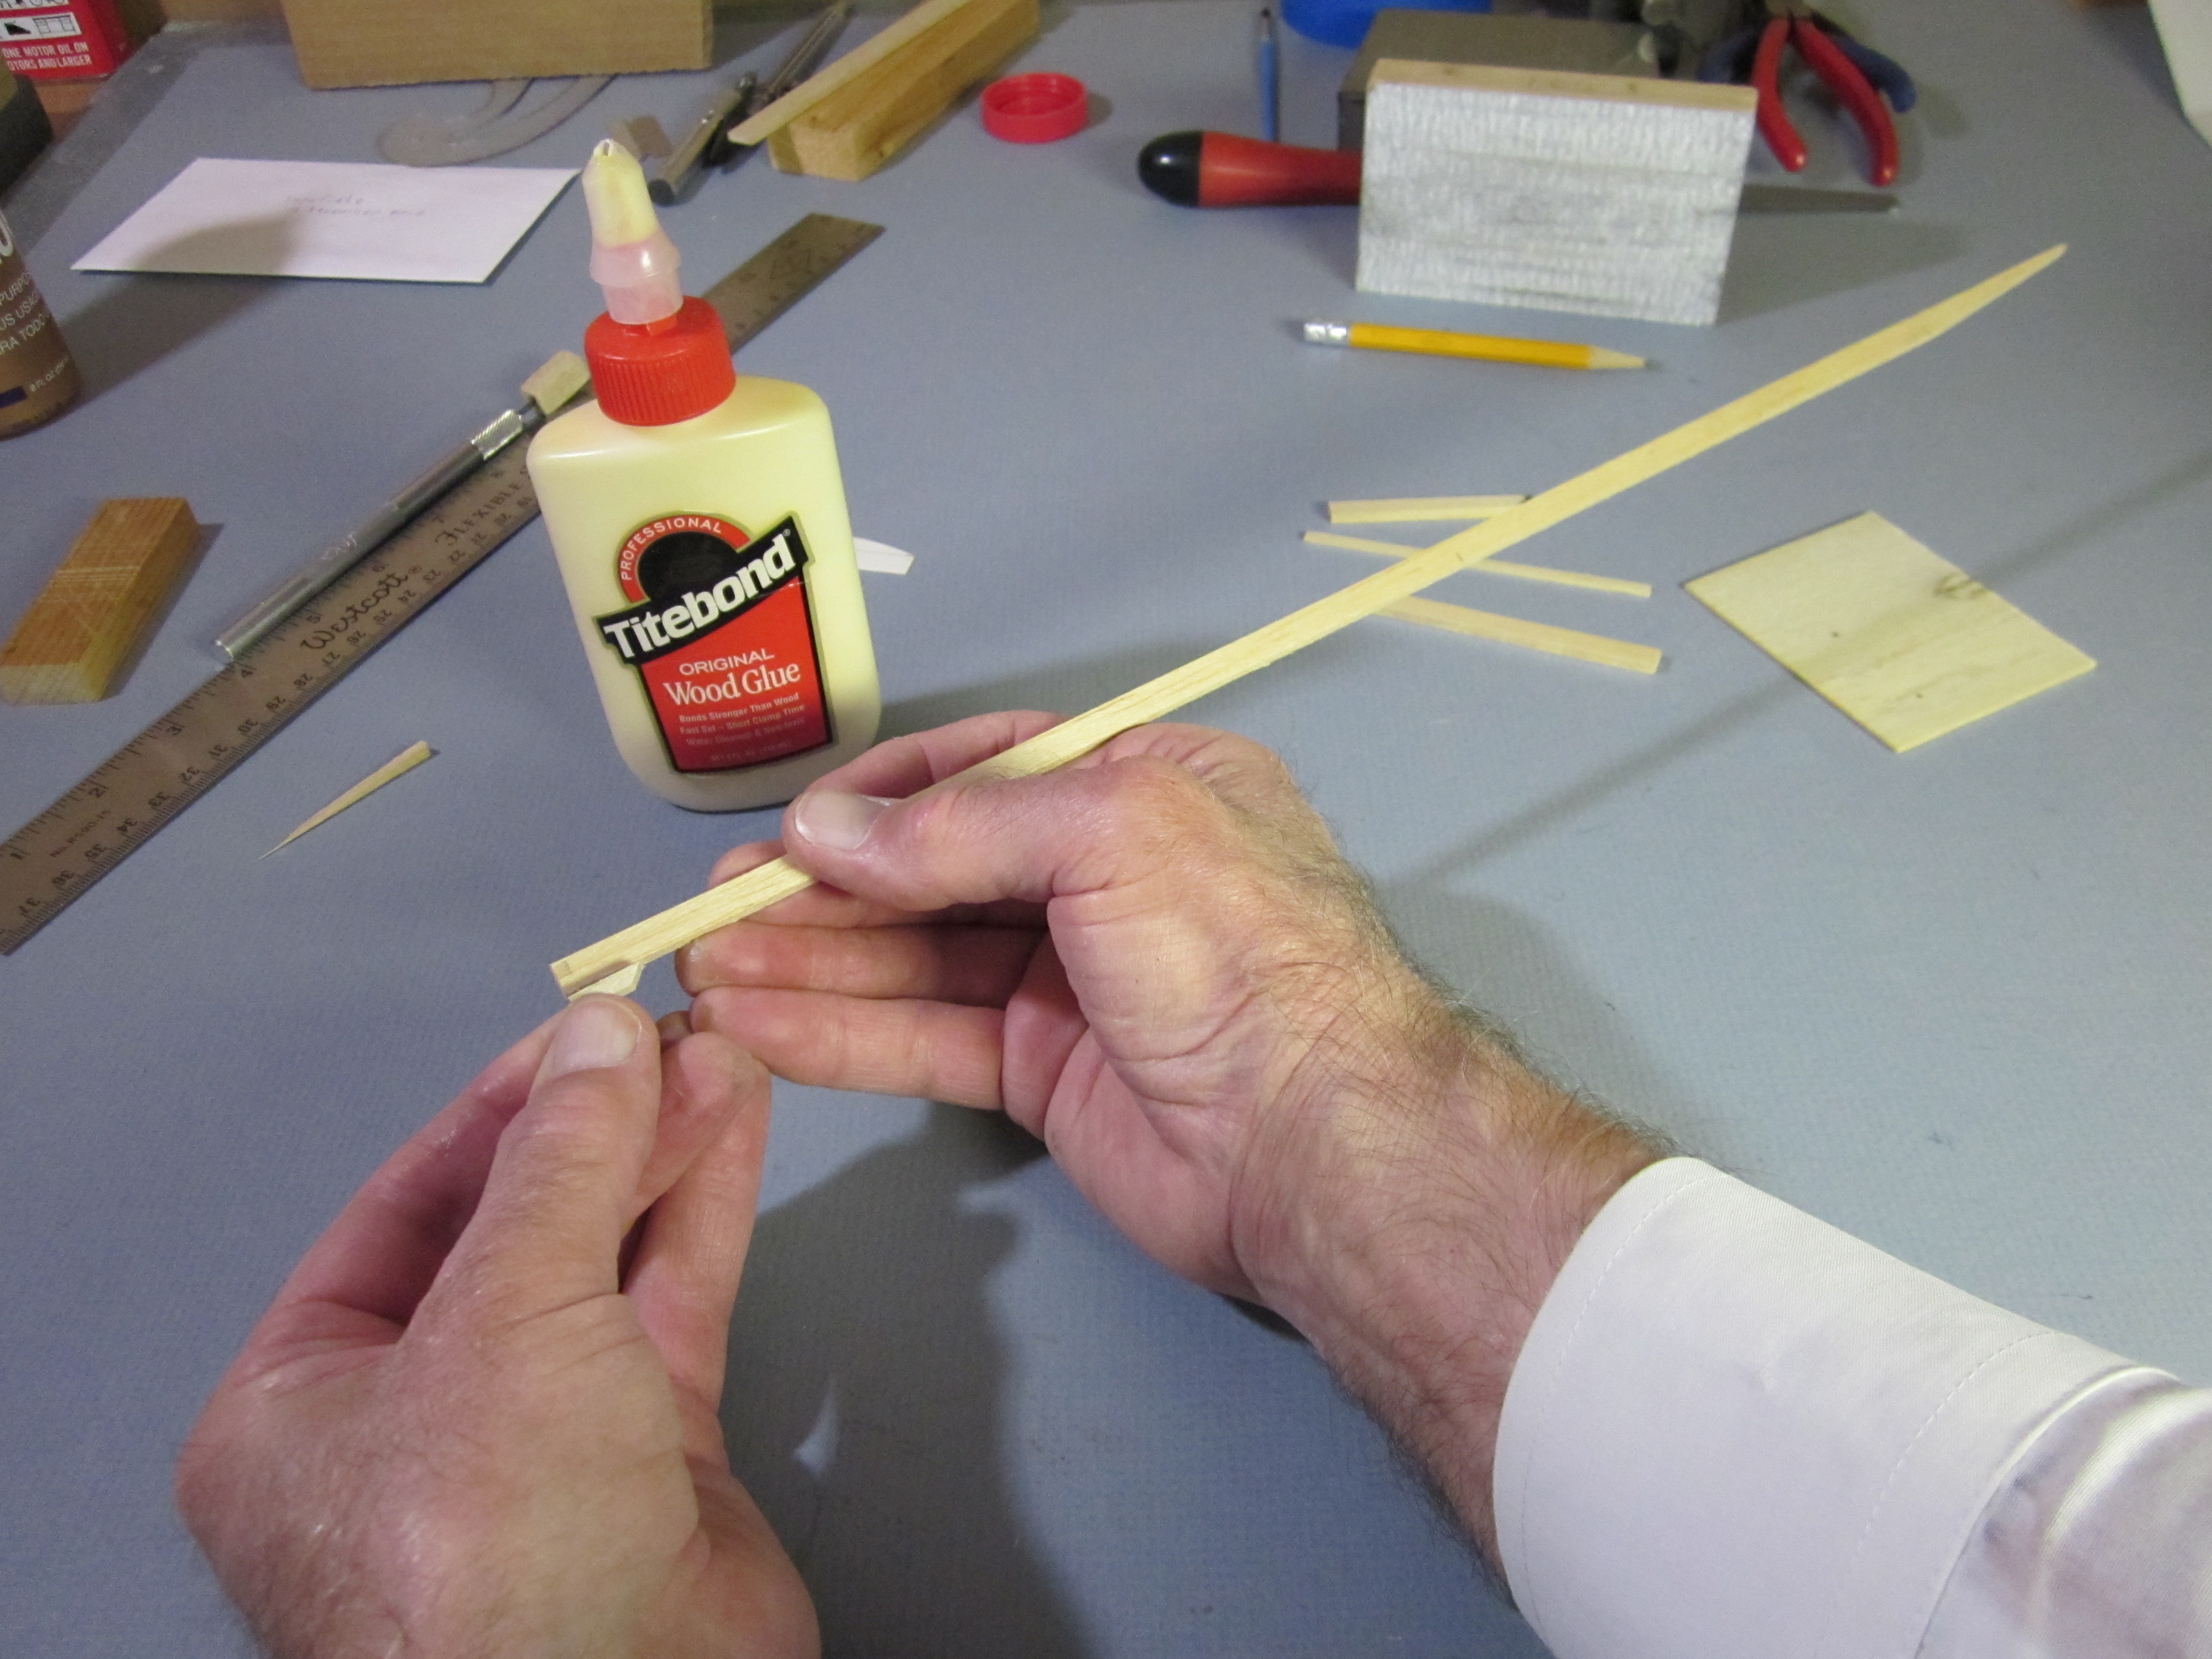
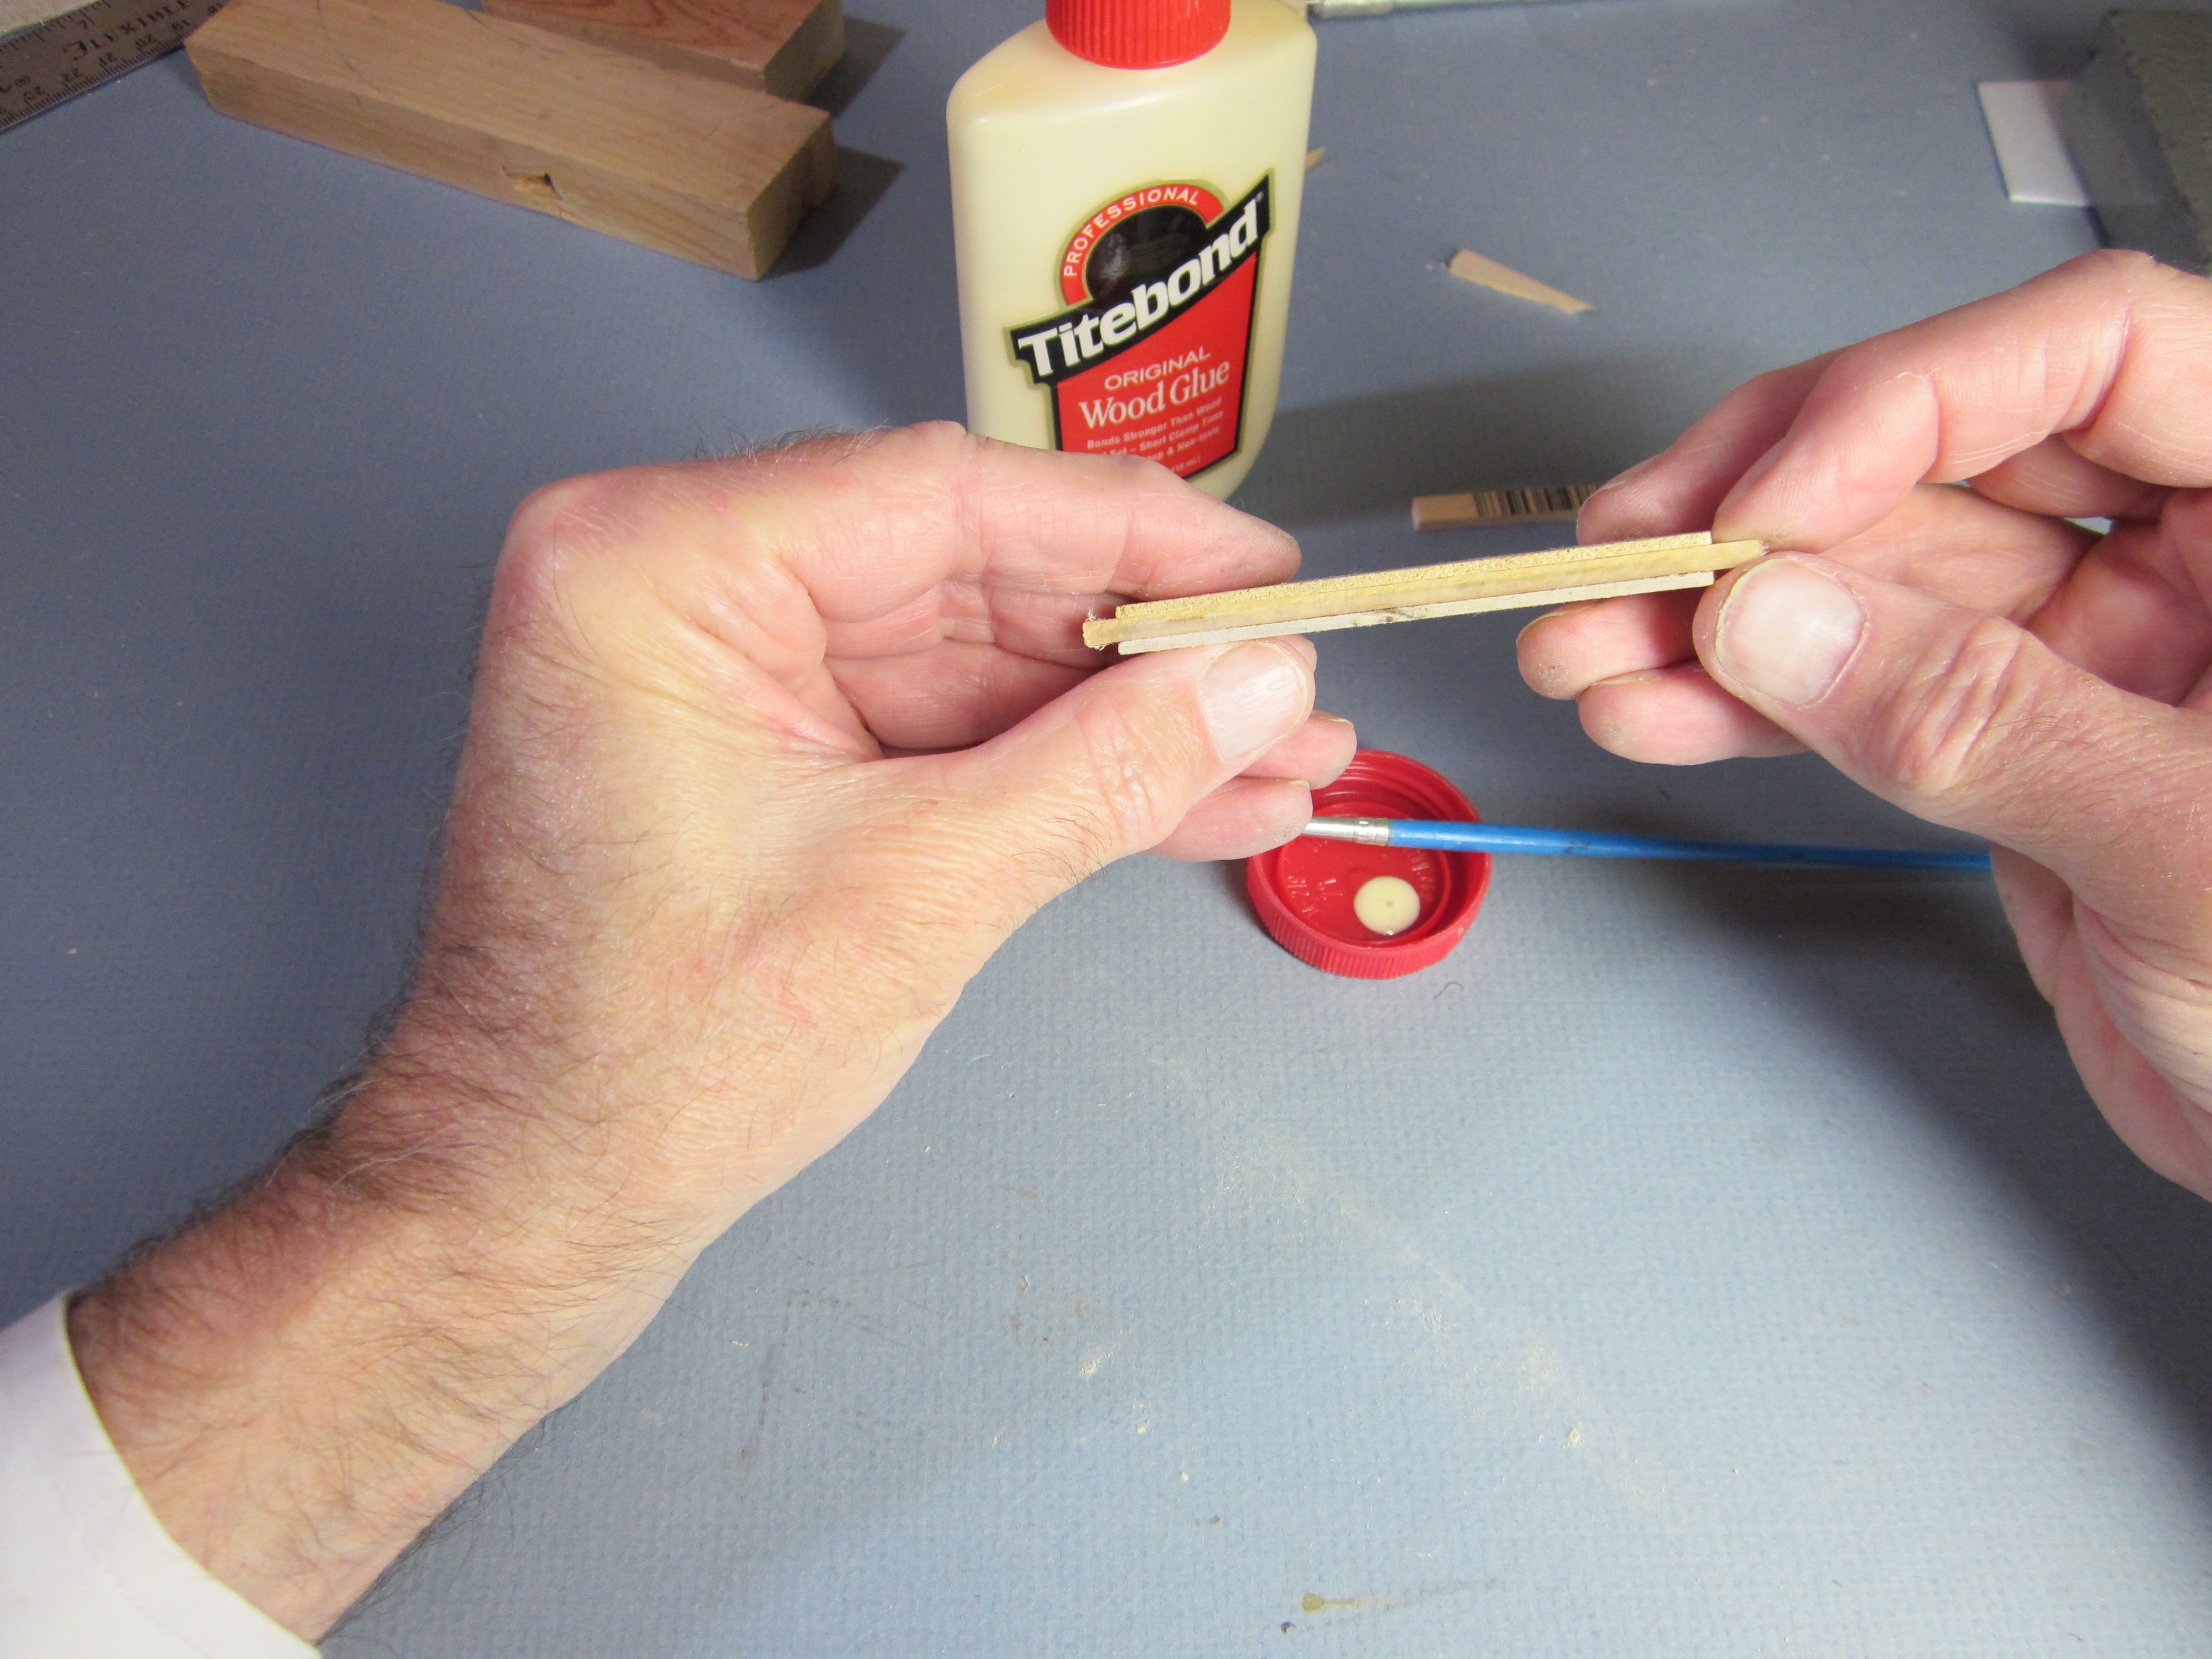
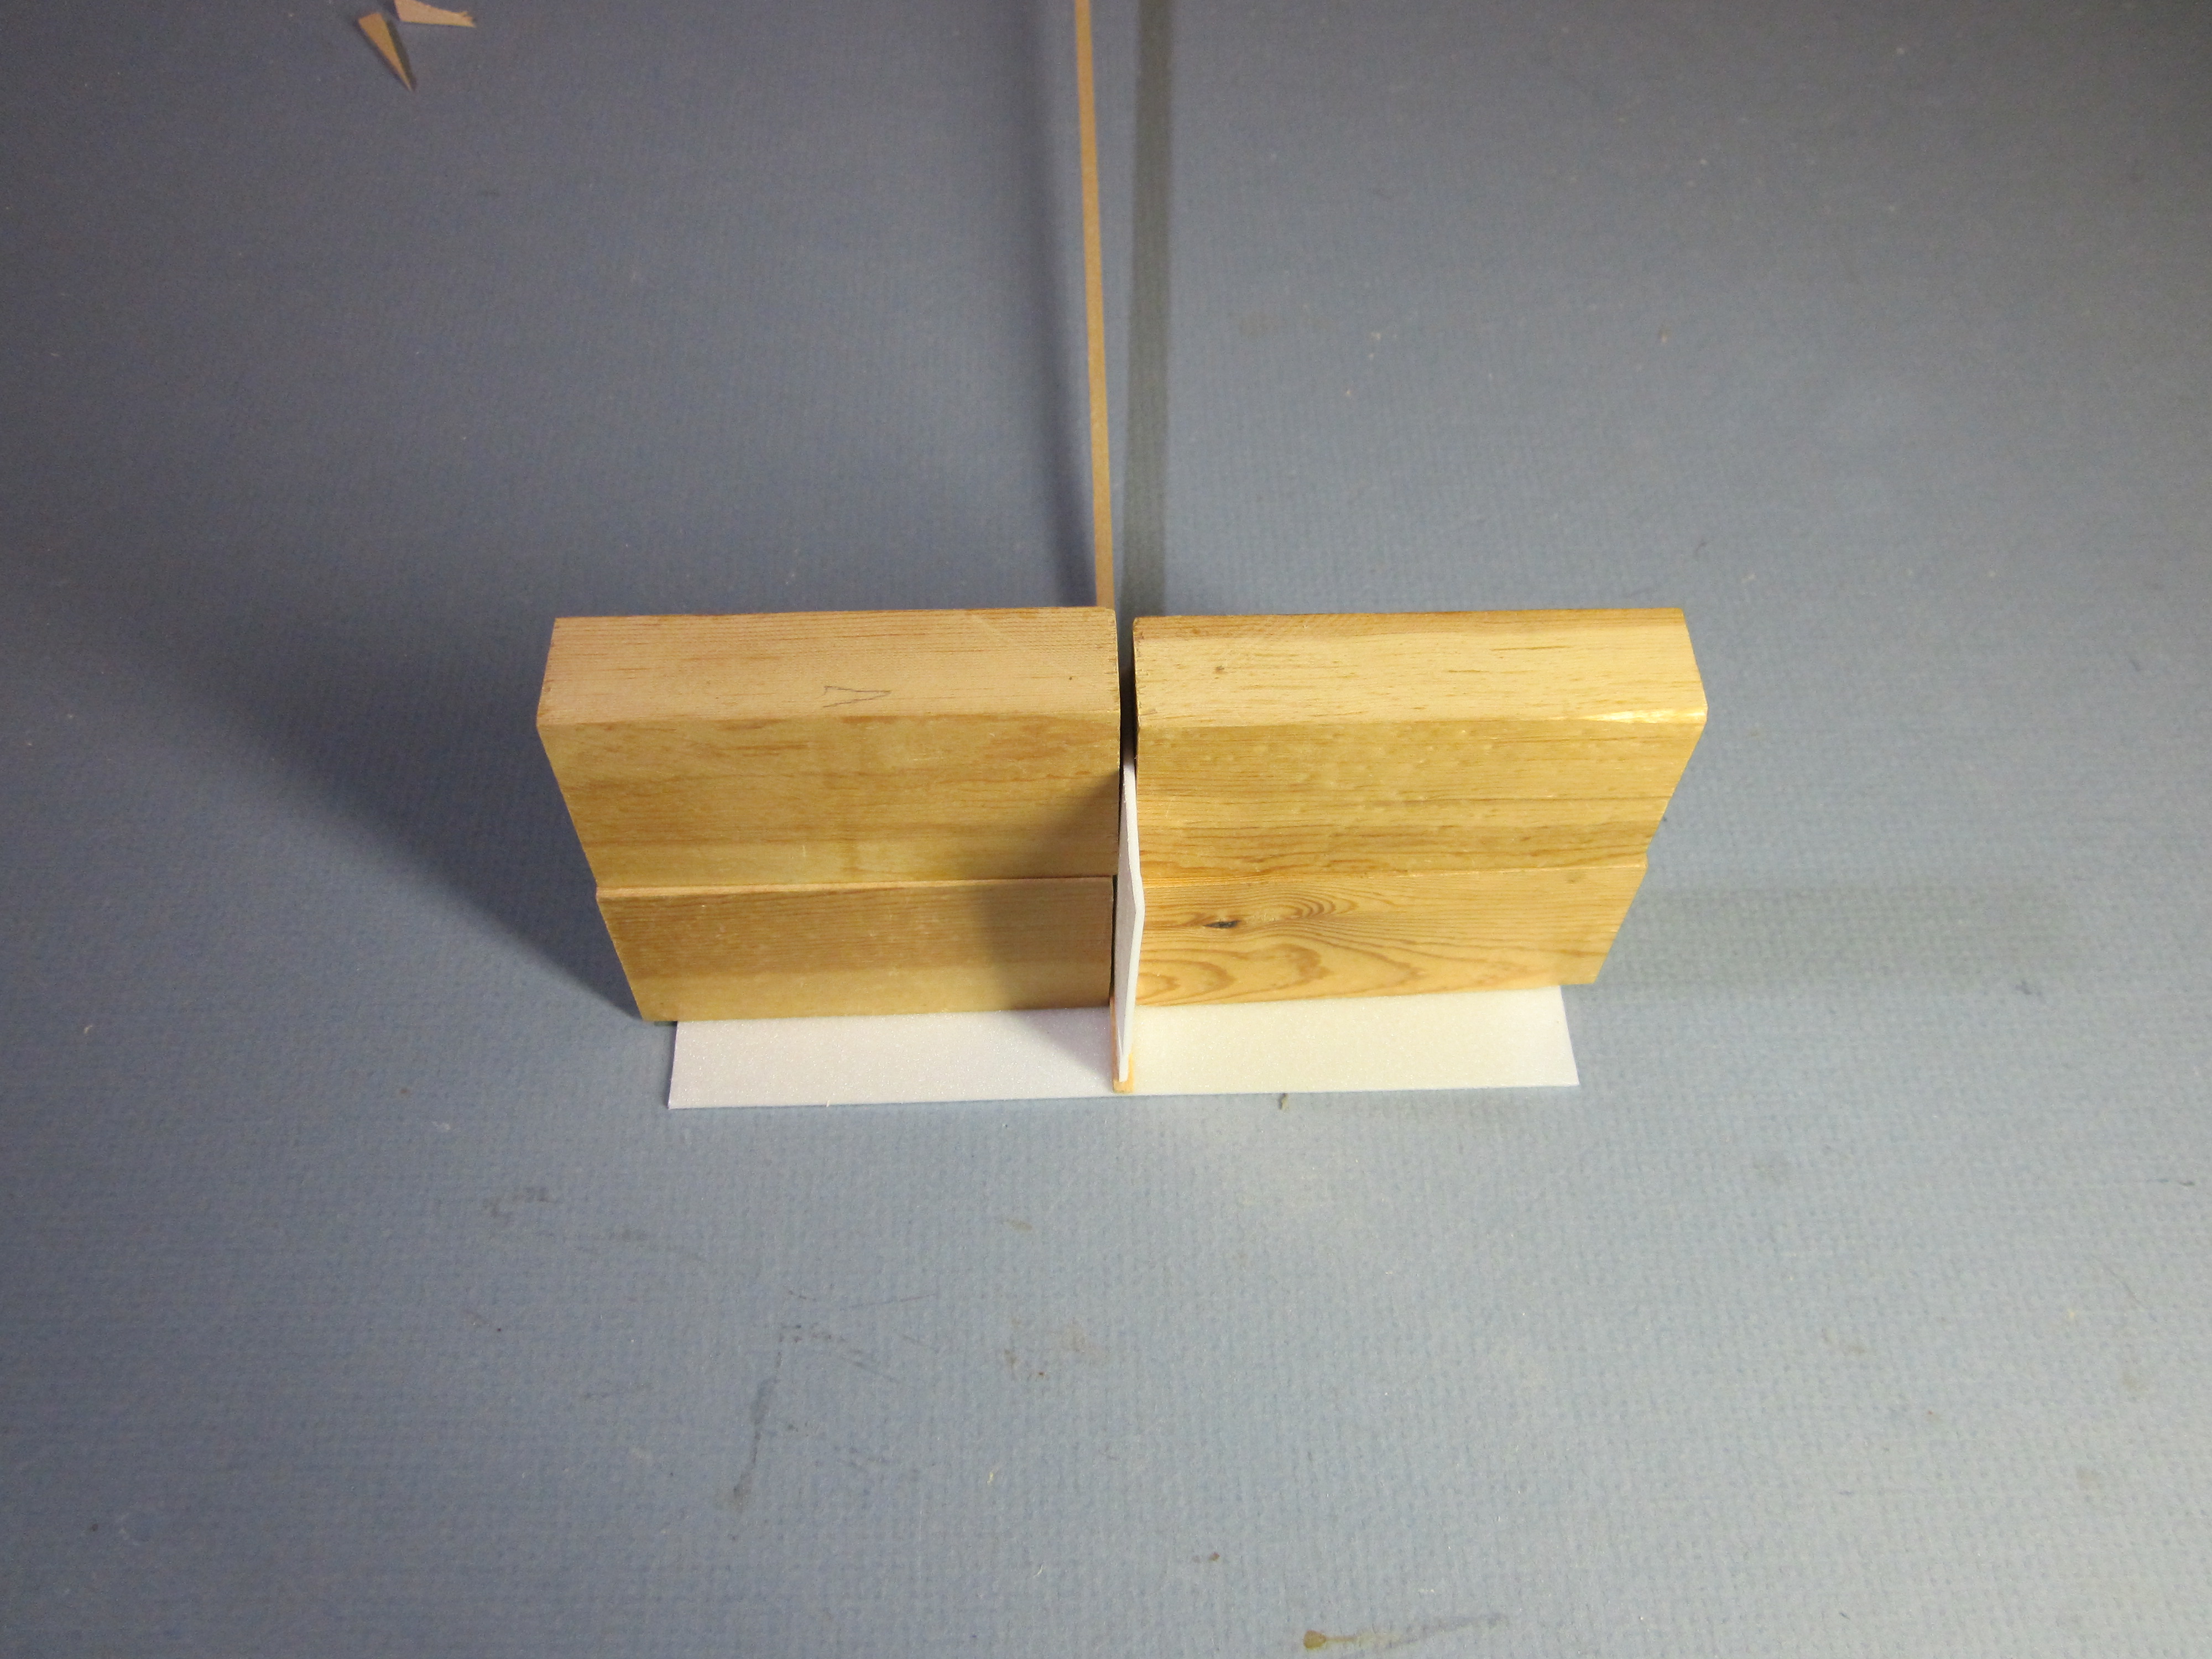
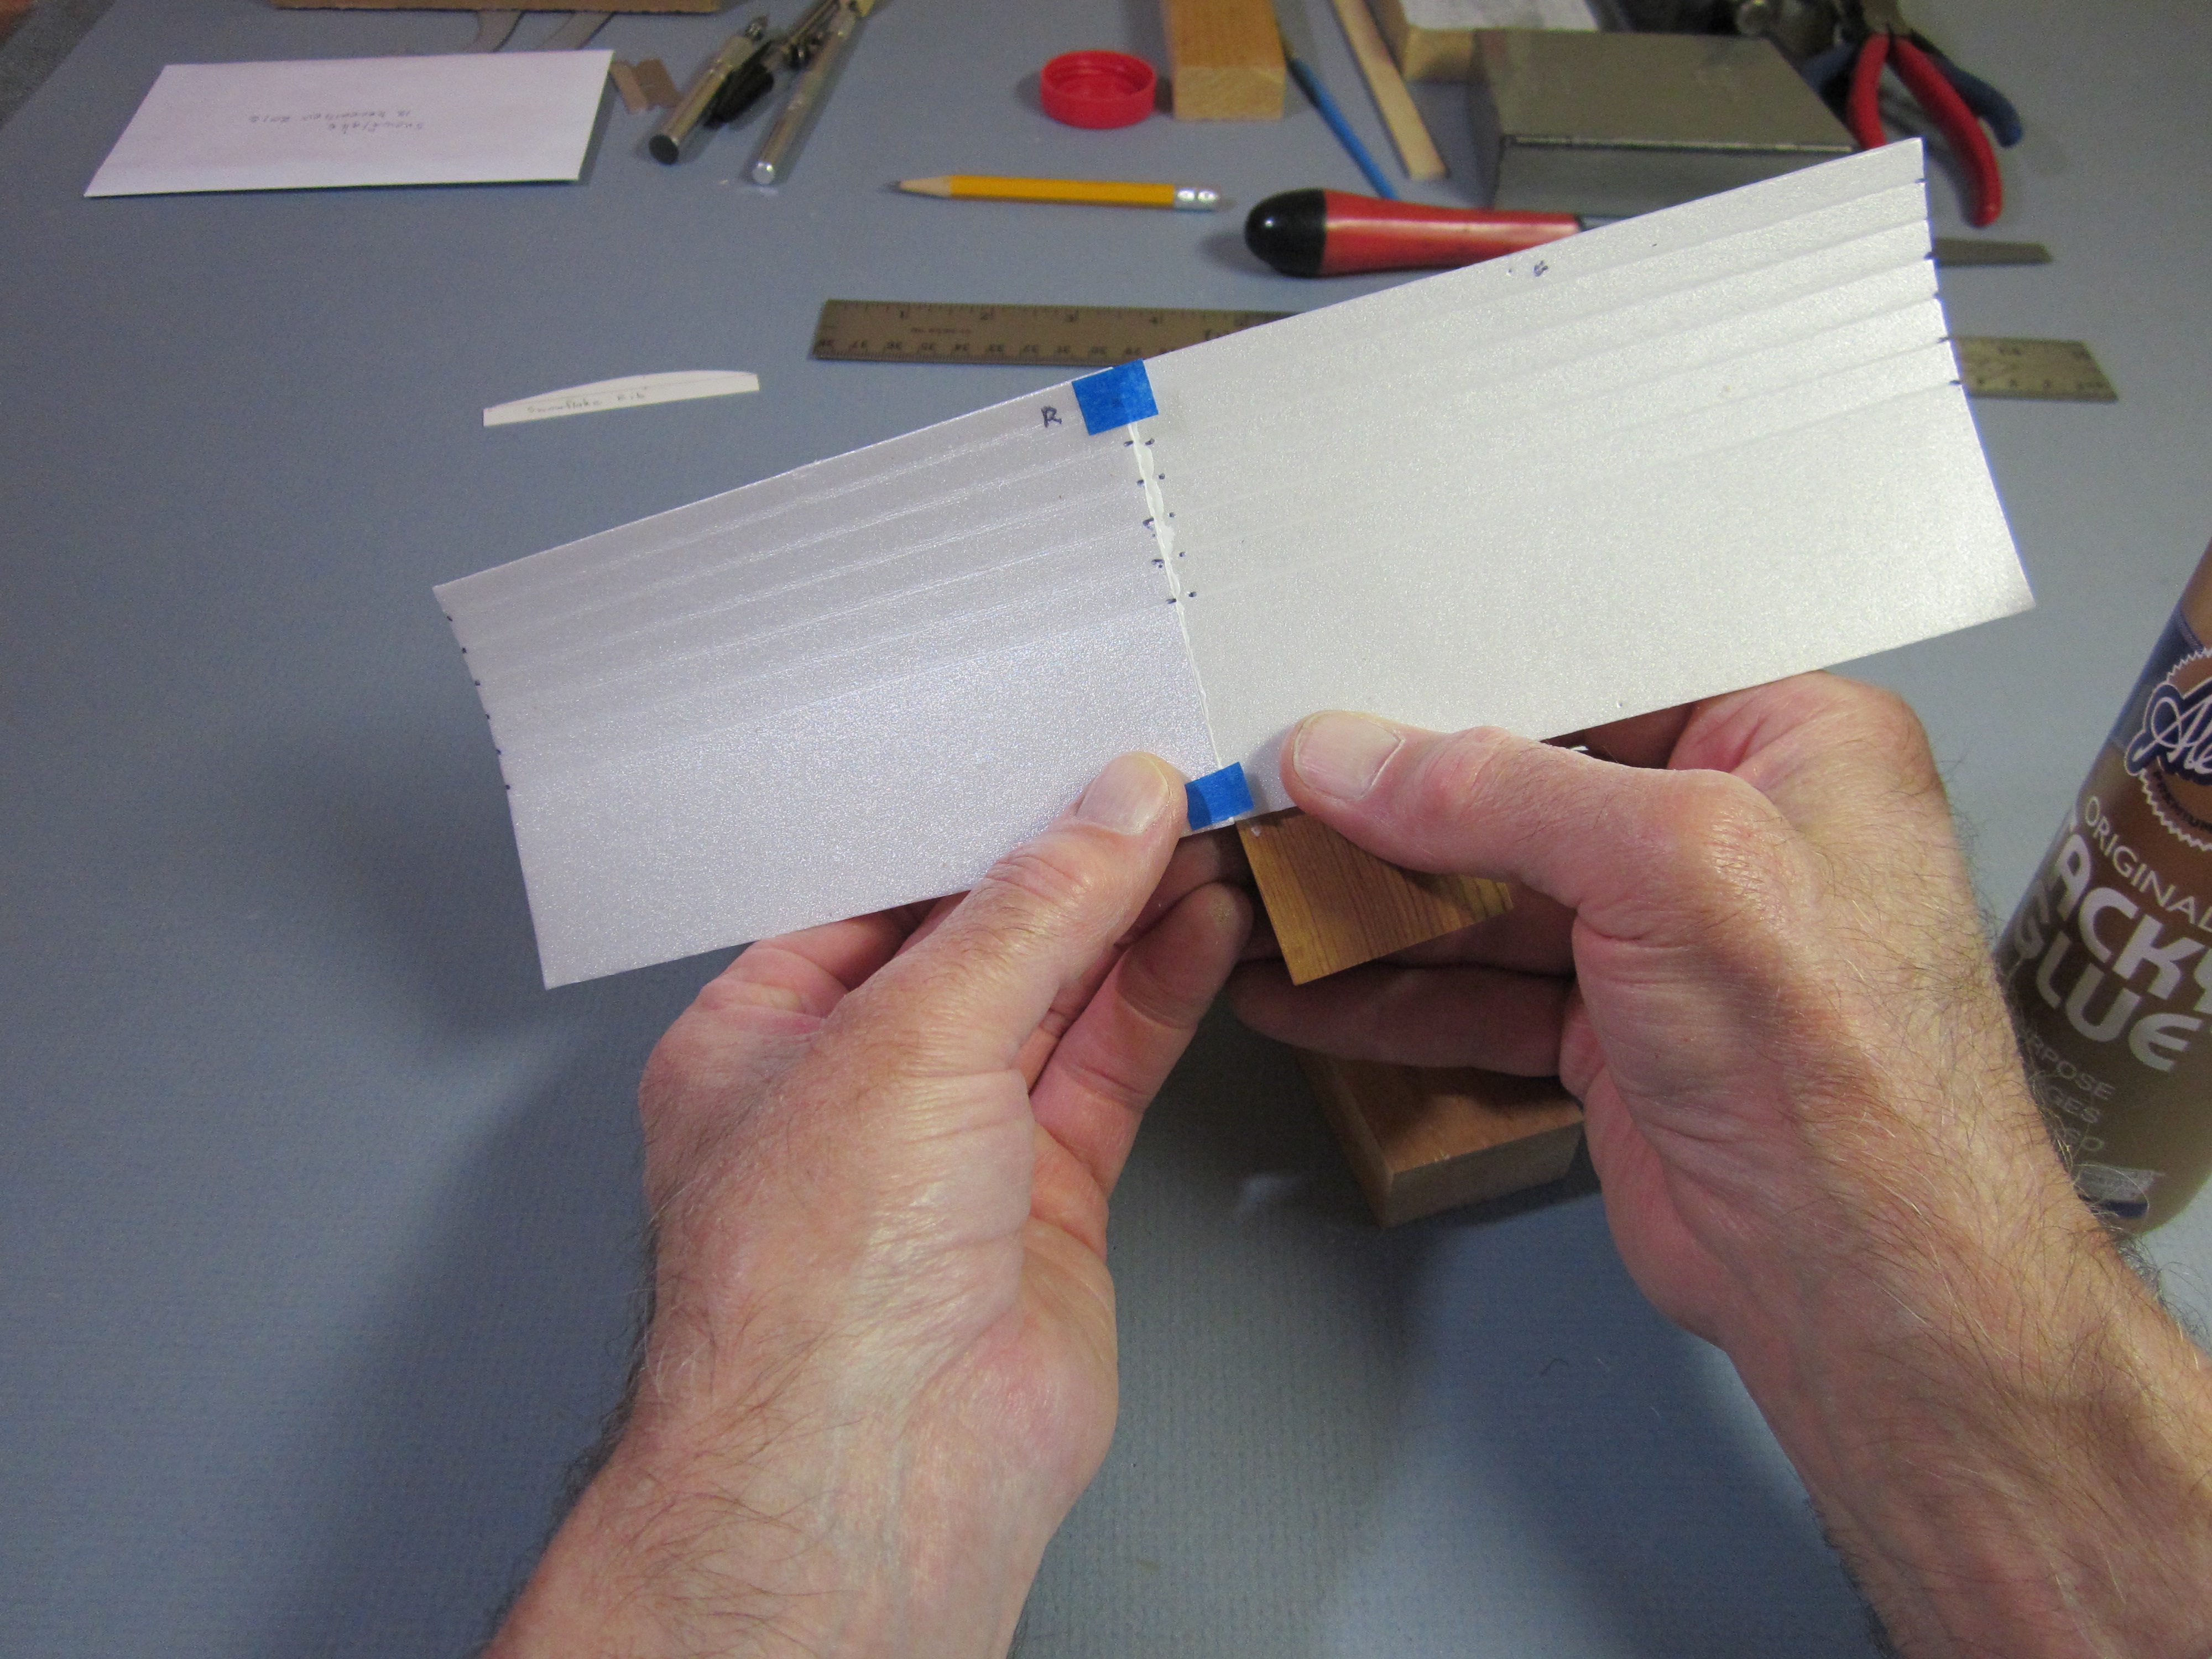 Carefully align the trailing edges, butt the ends firmly against each other and back up the second panel with a block of wood.
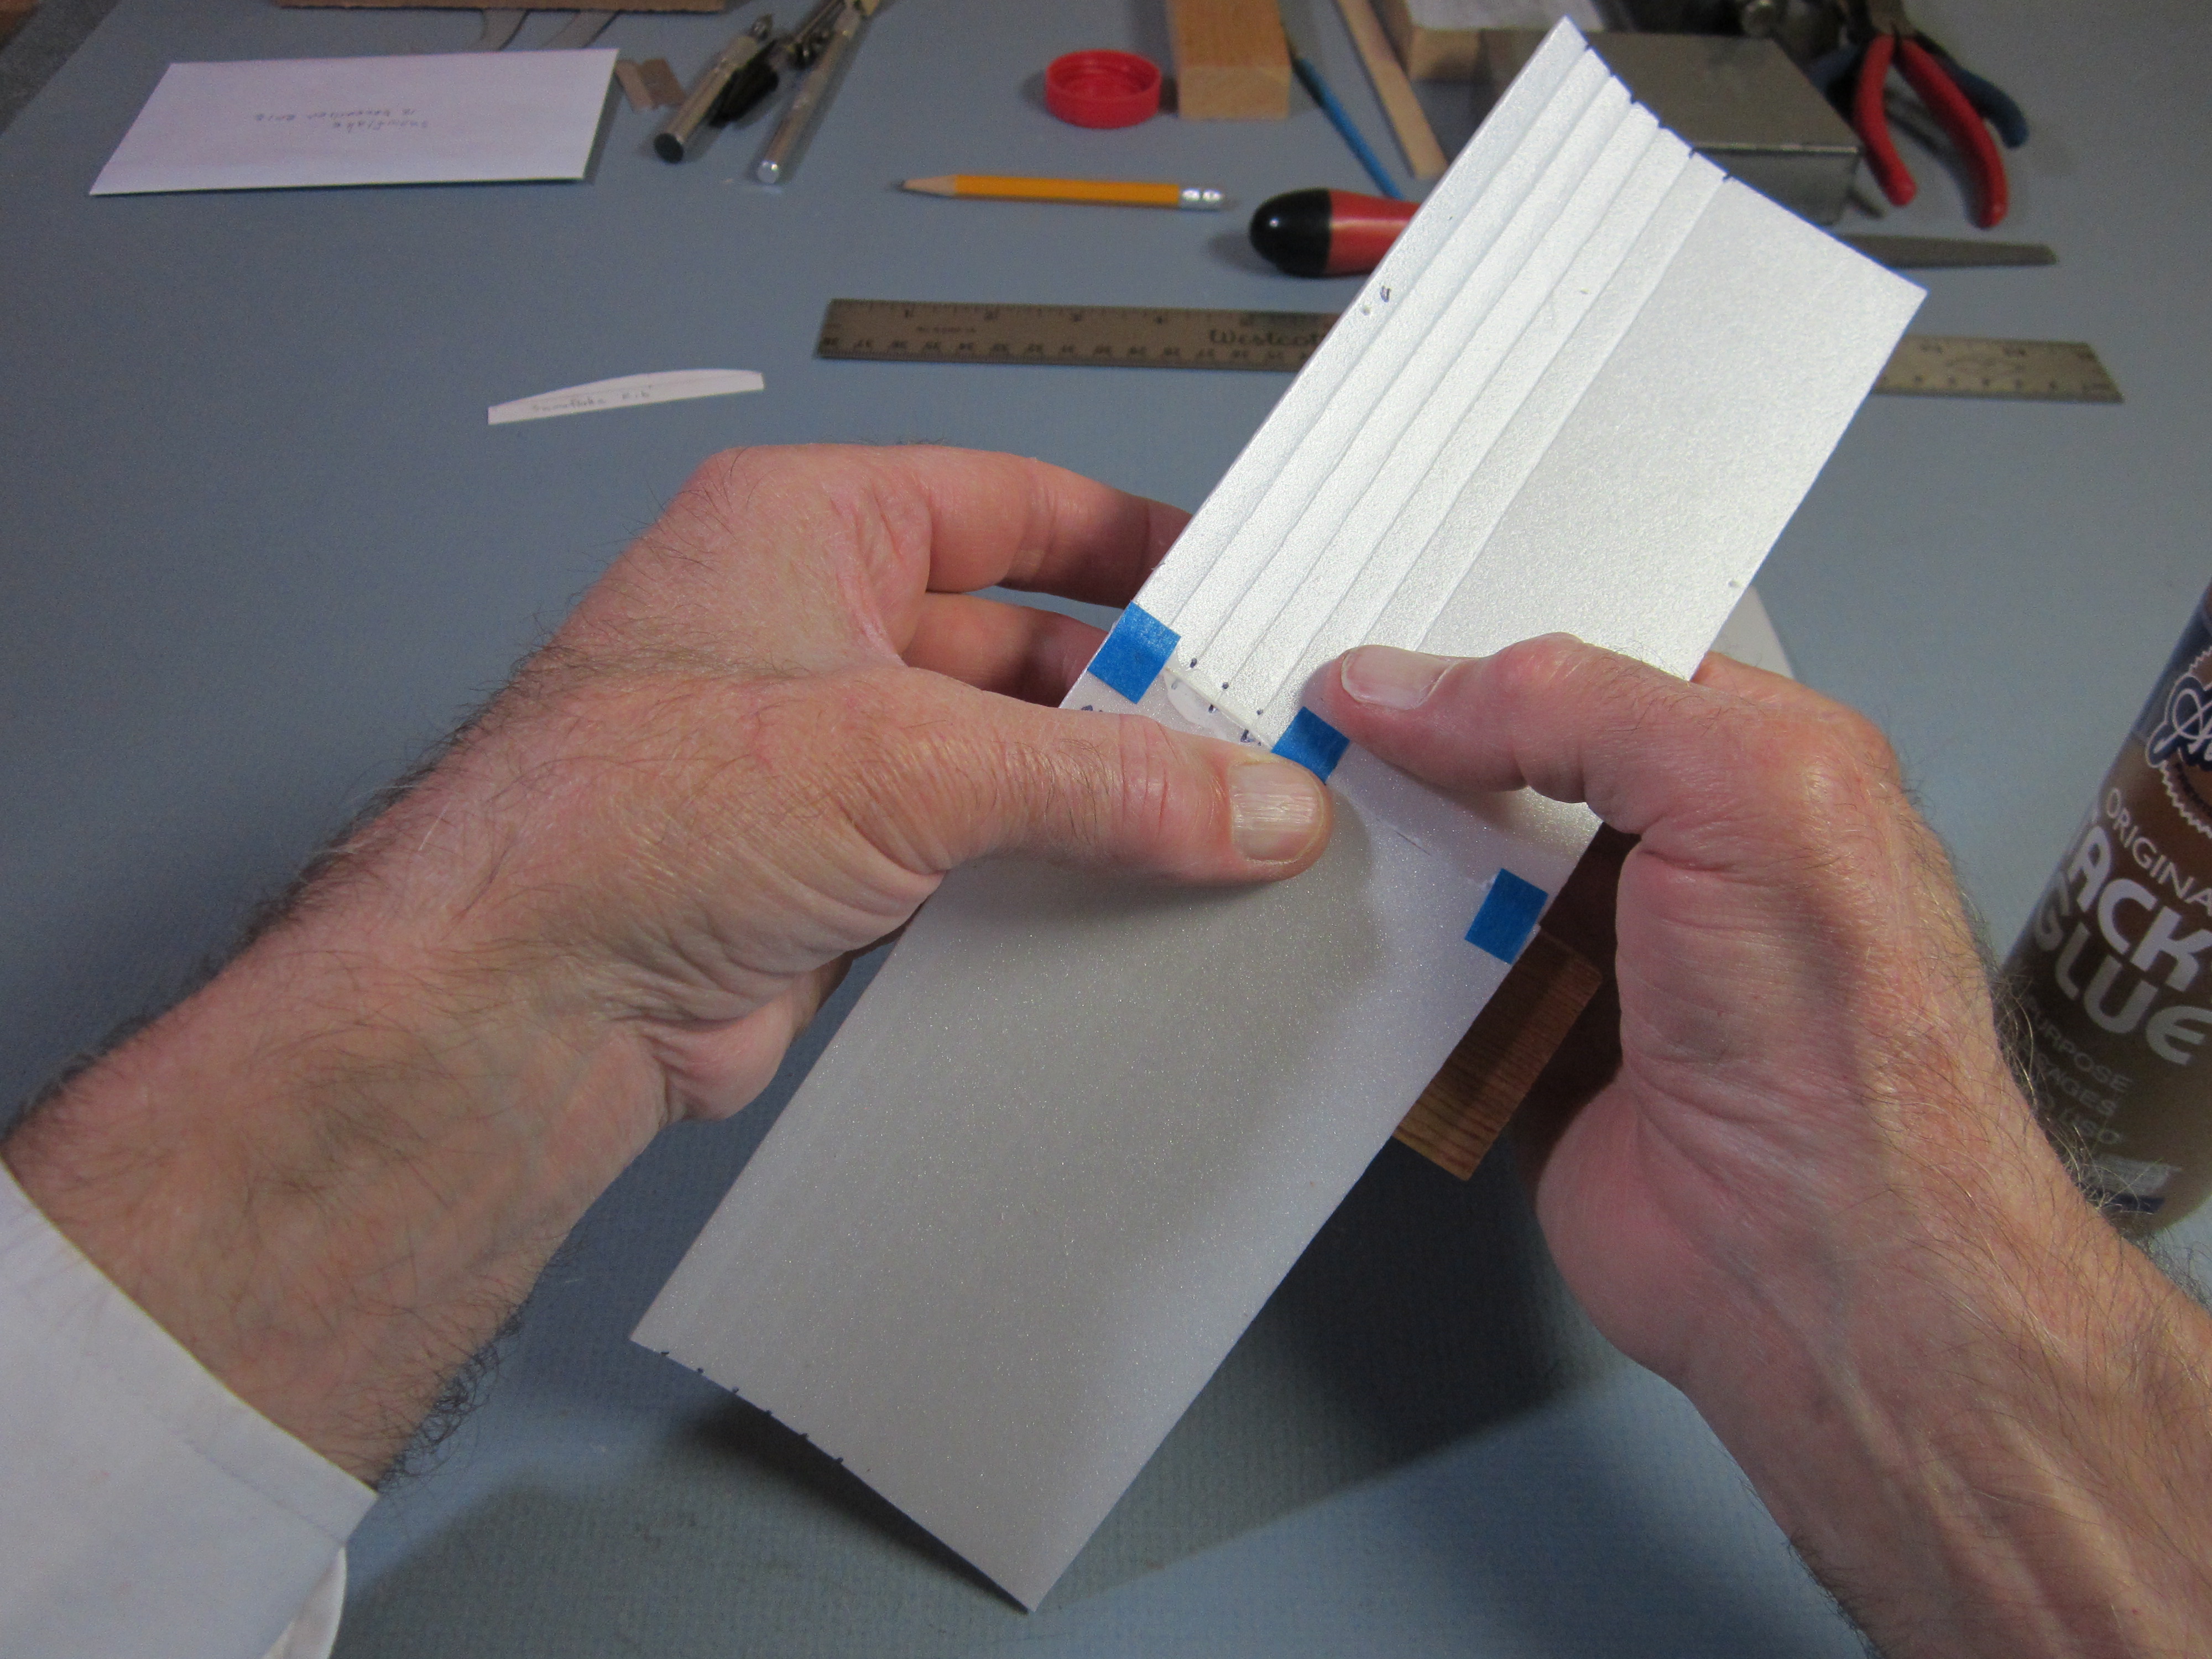
 Push the tape across the join and press it firmly onto the other panel, against the block of wood.
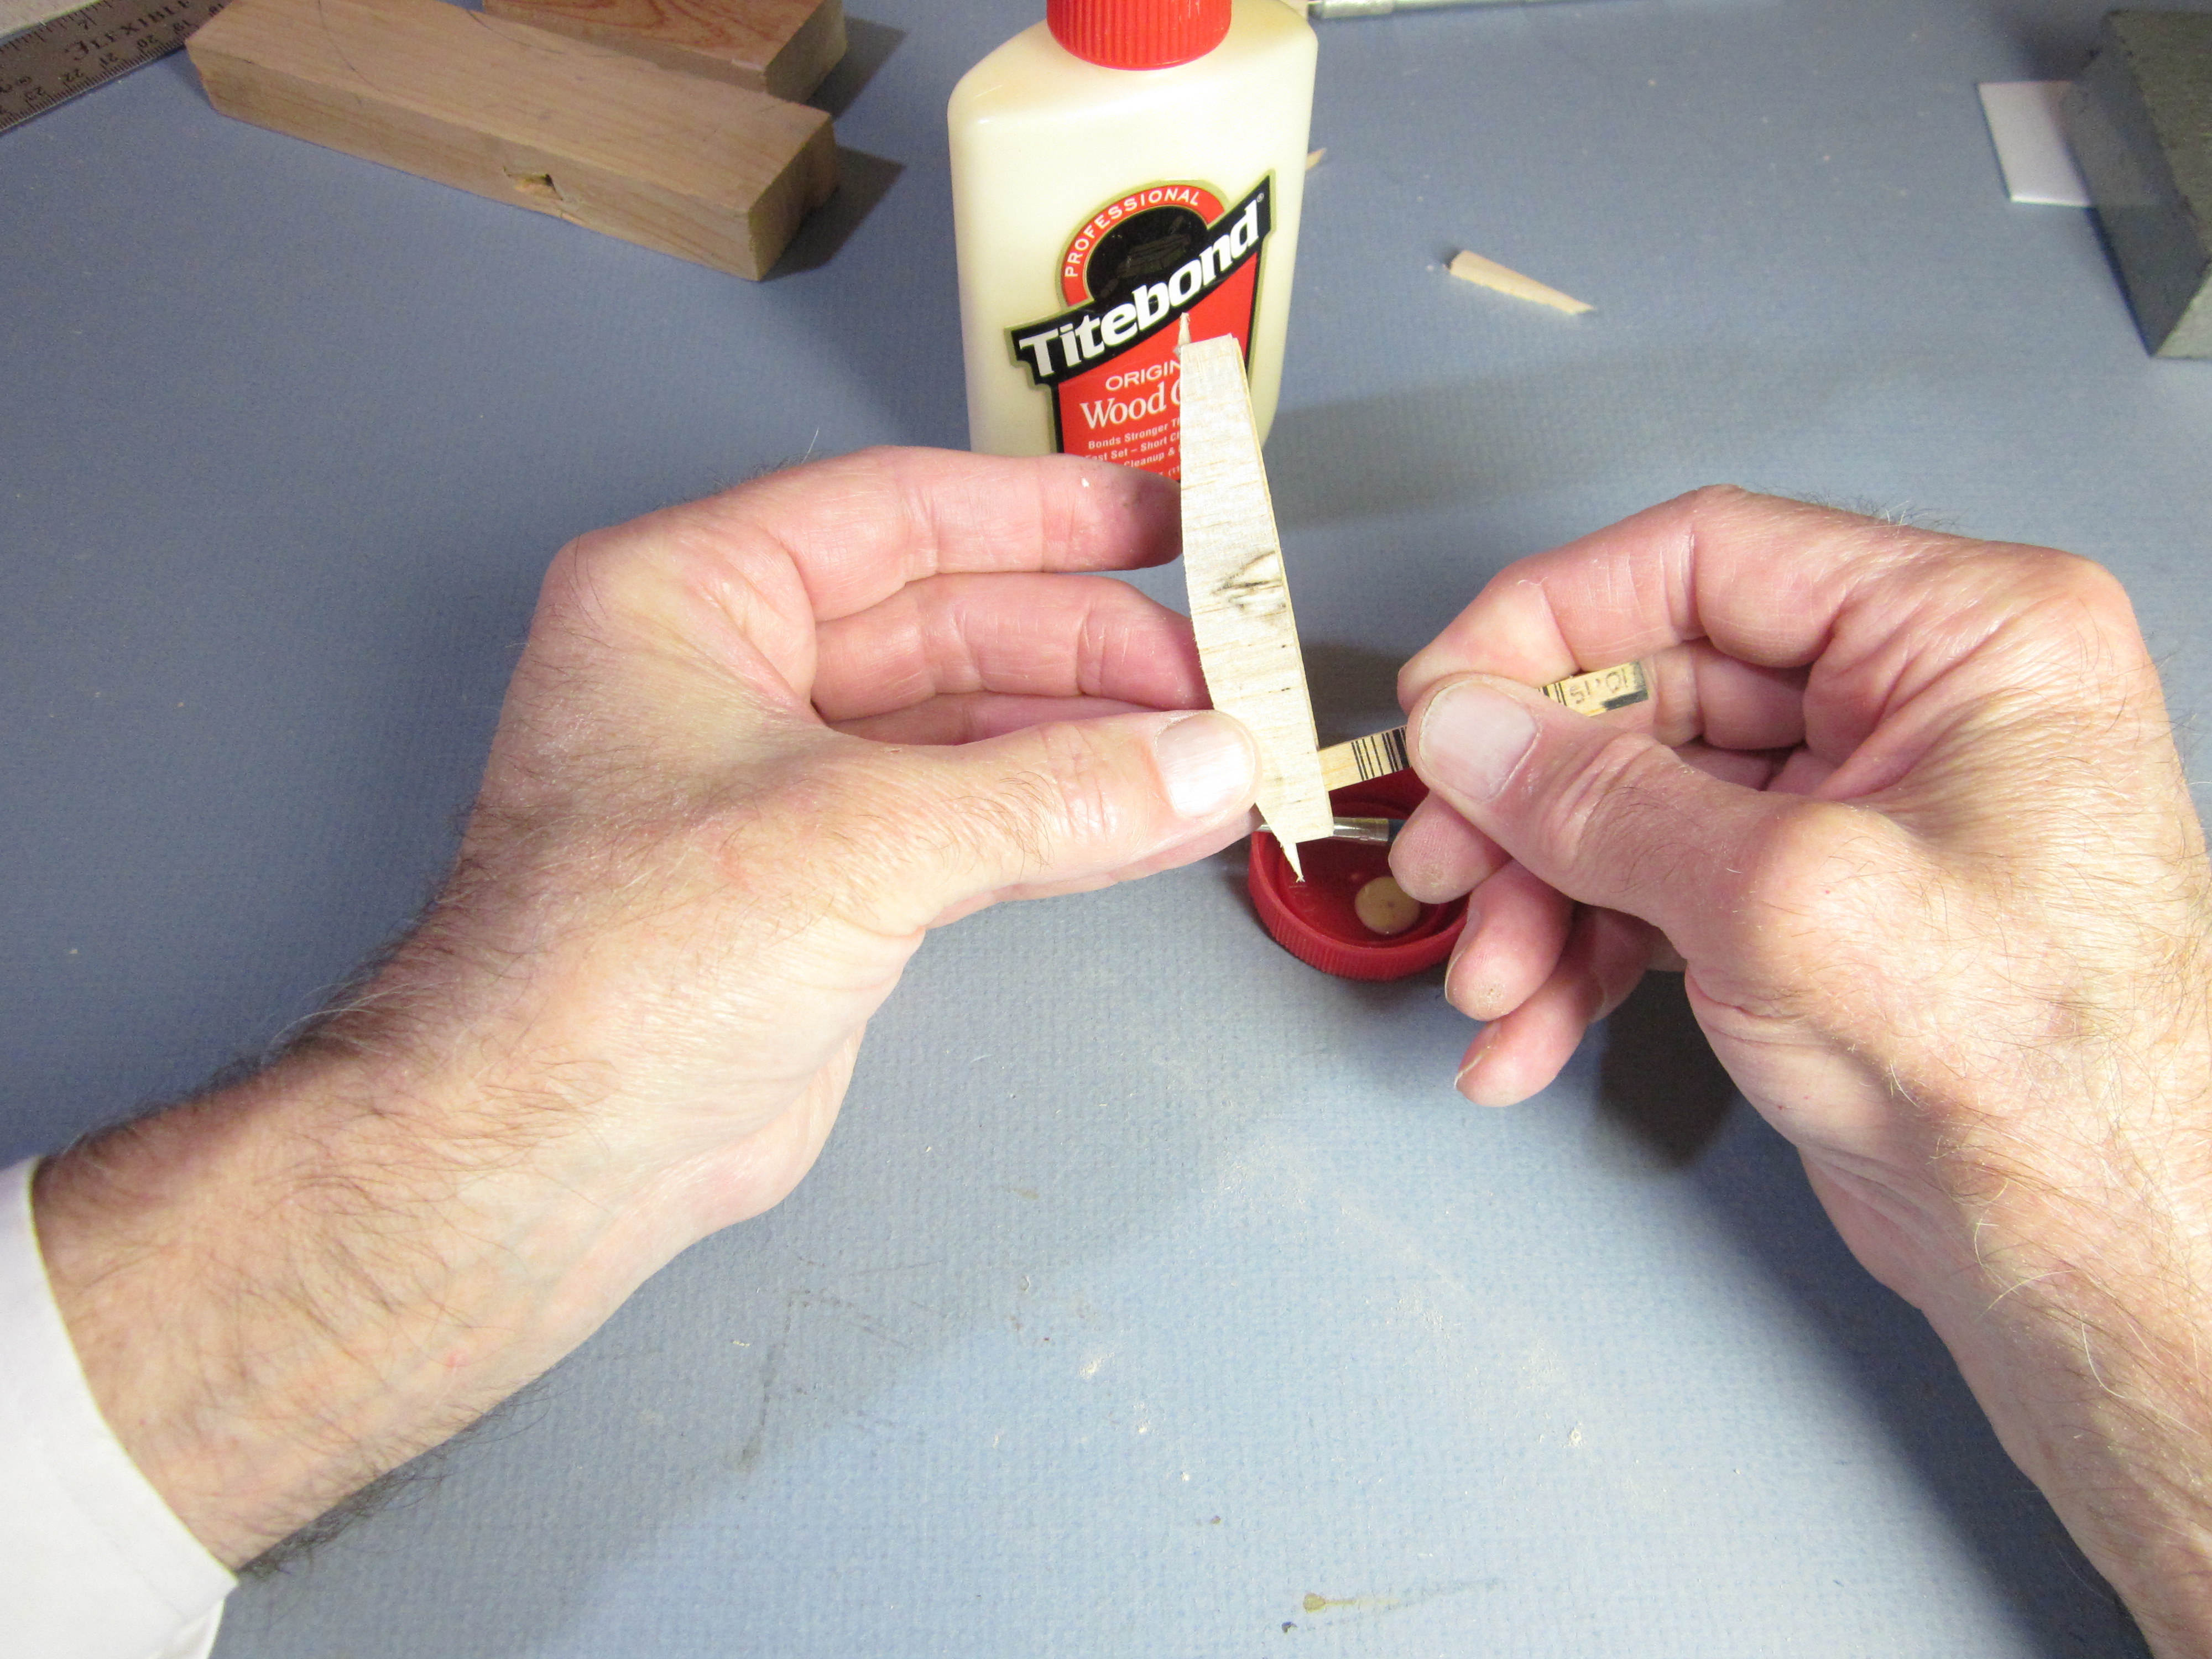
 Do the same at the leading edge.
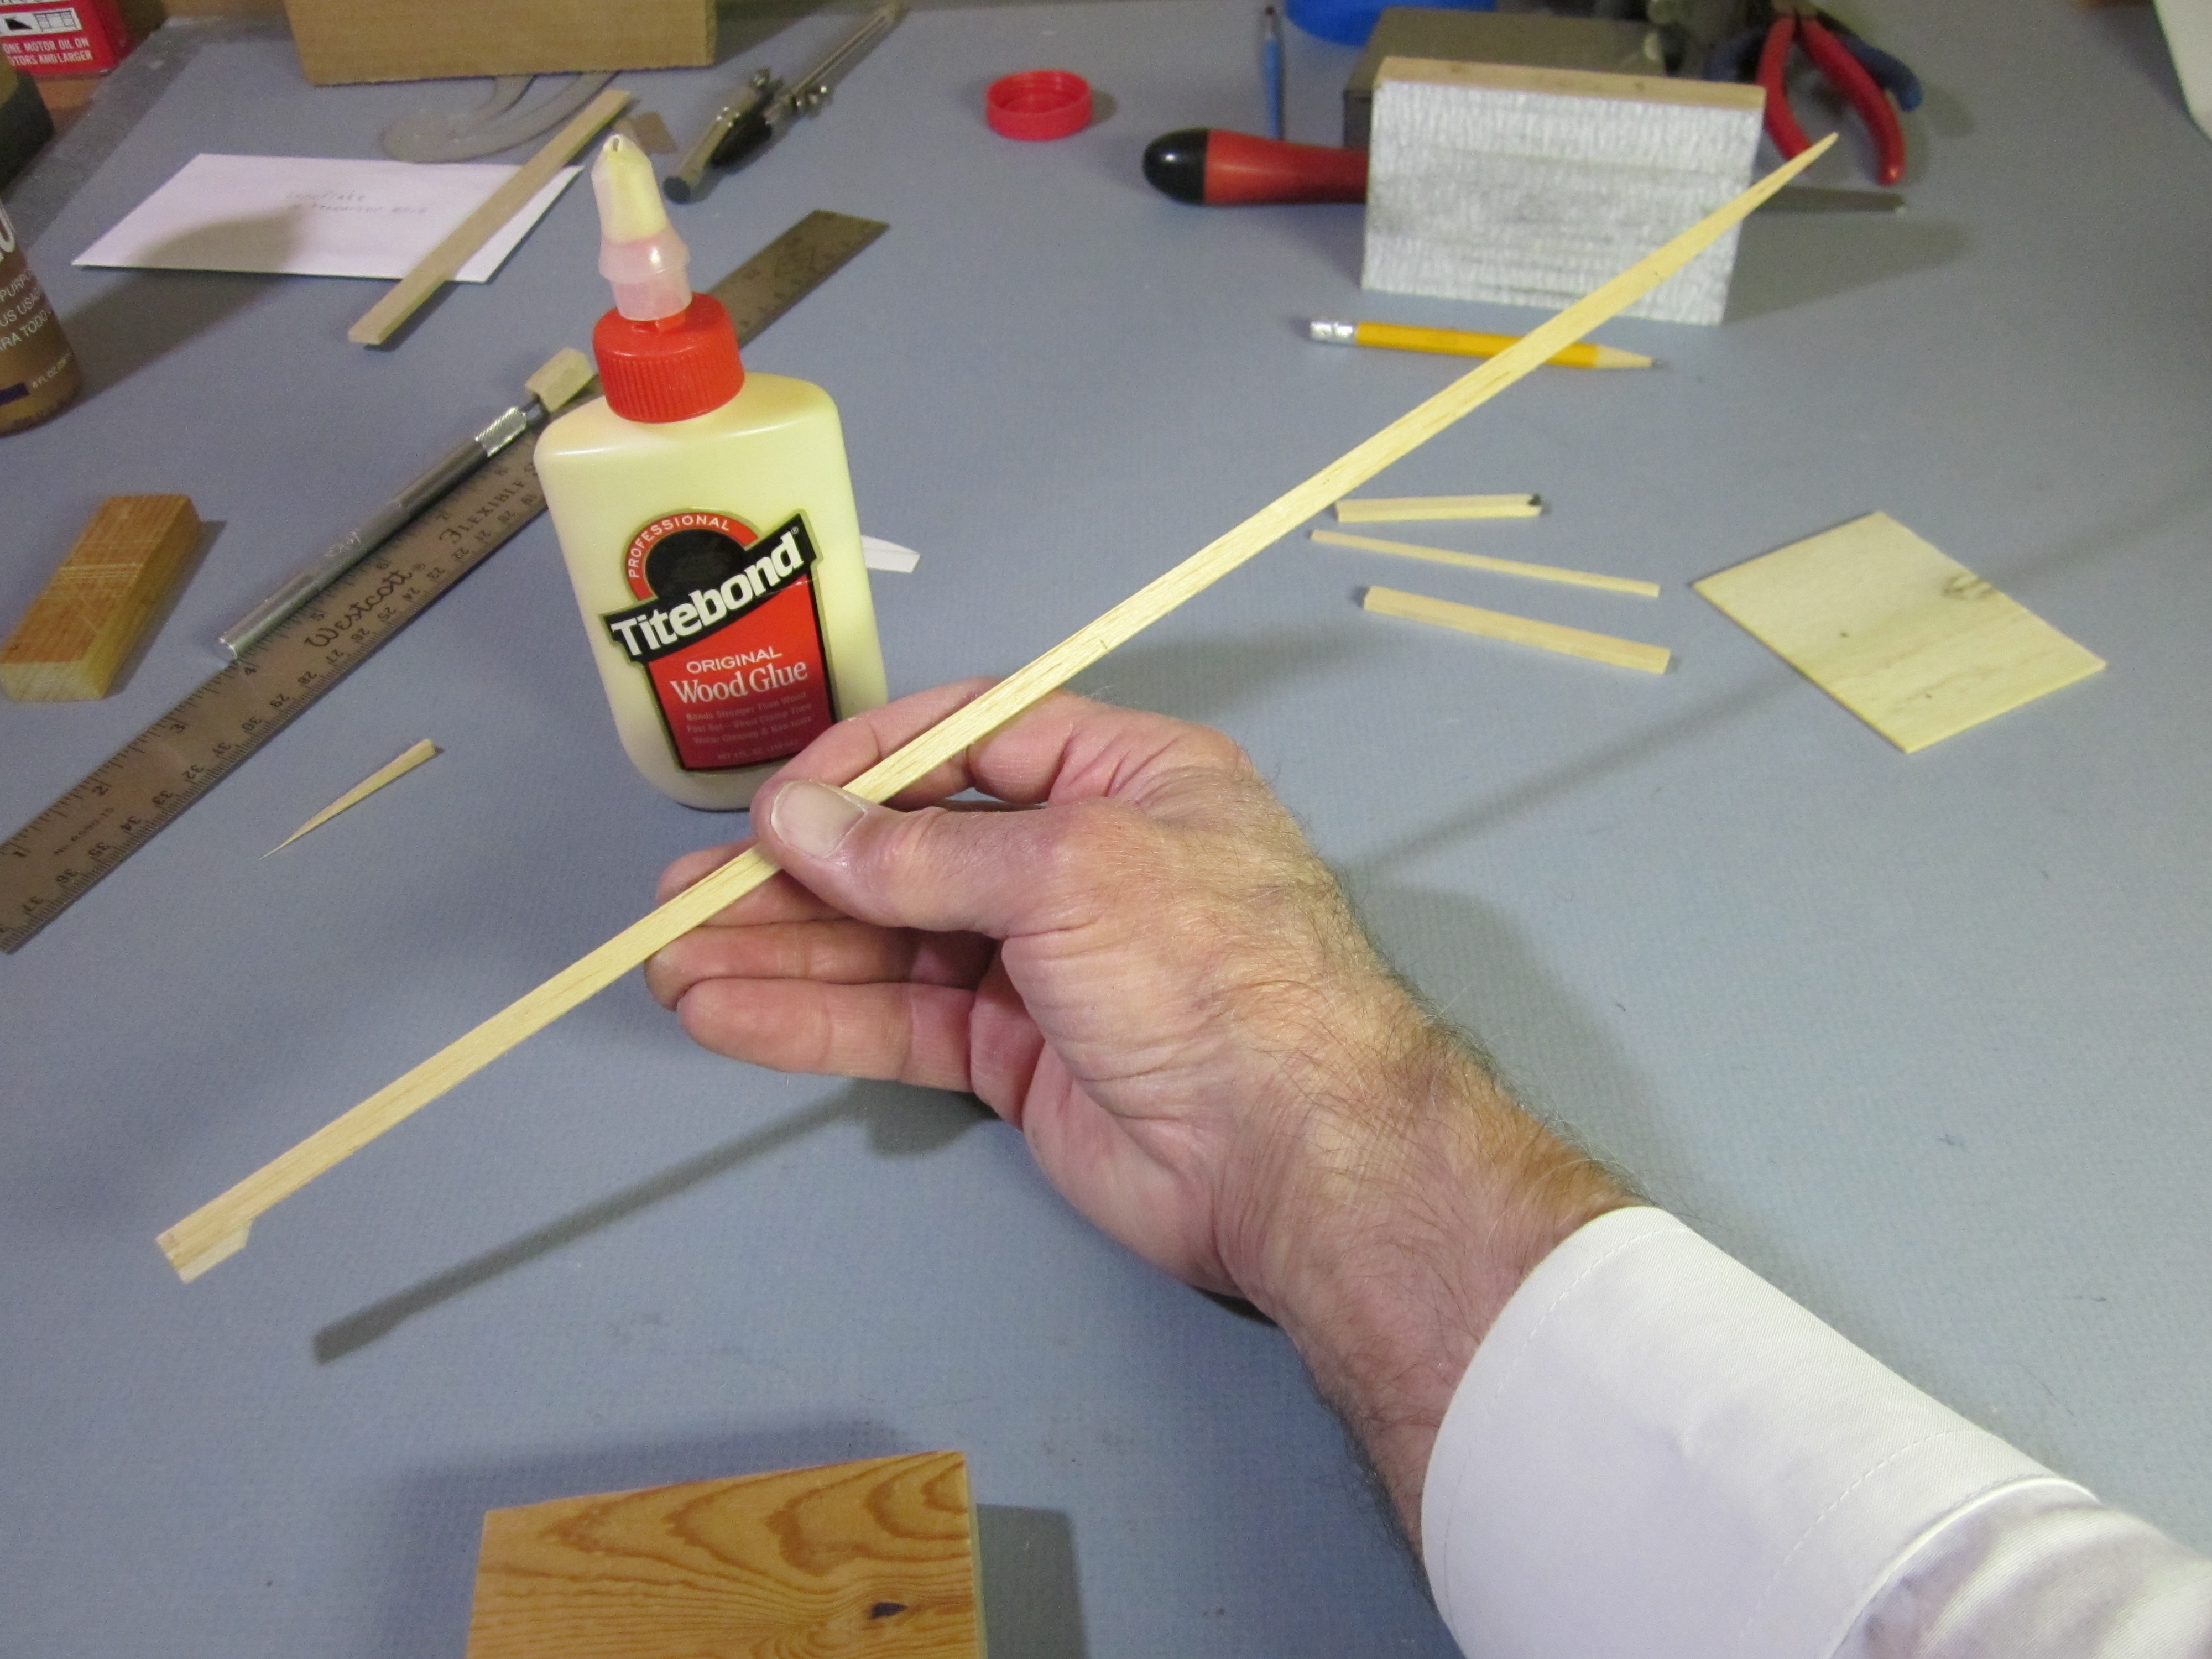
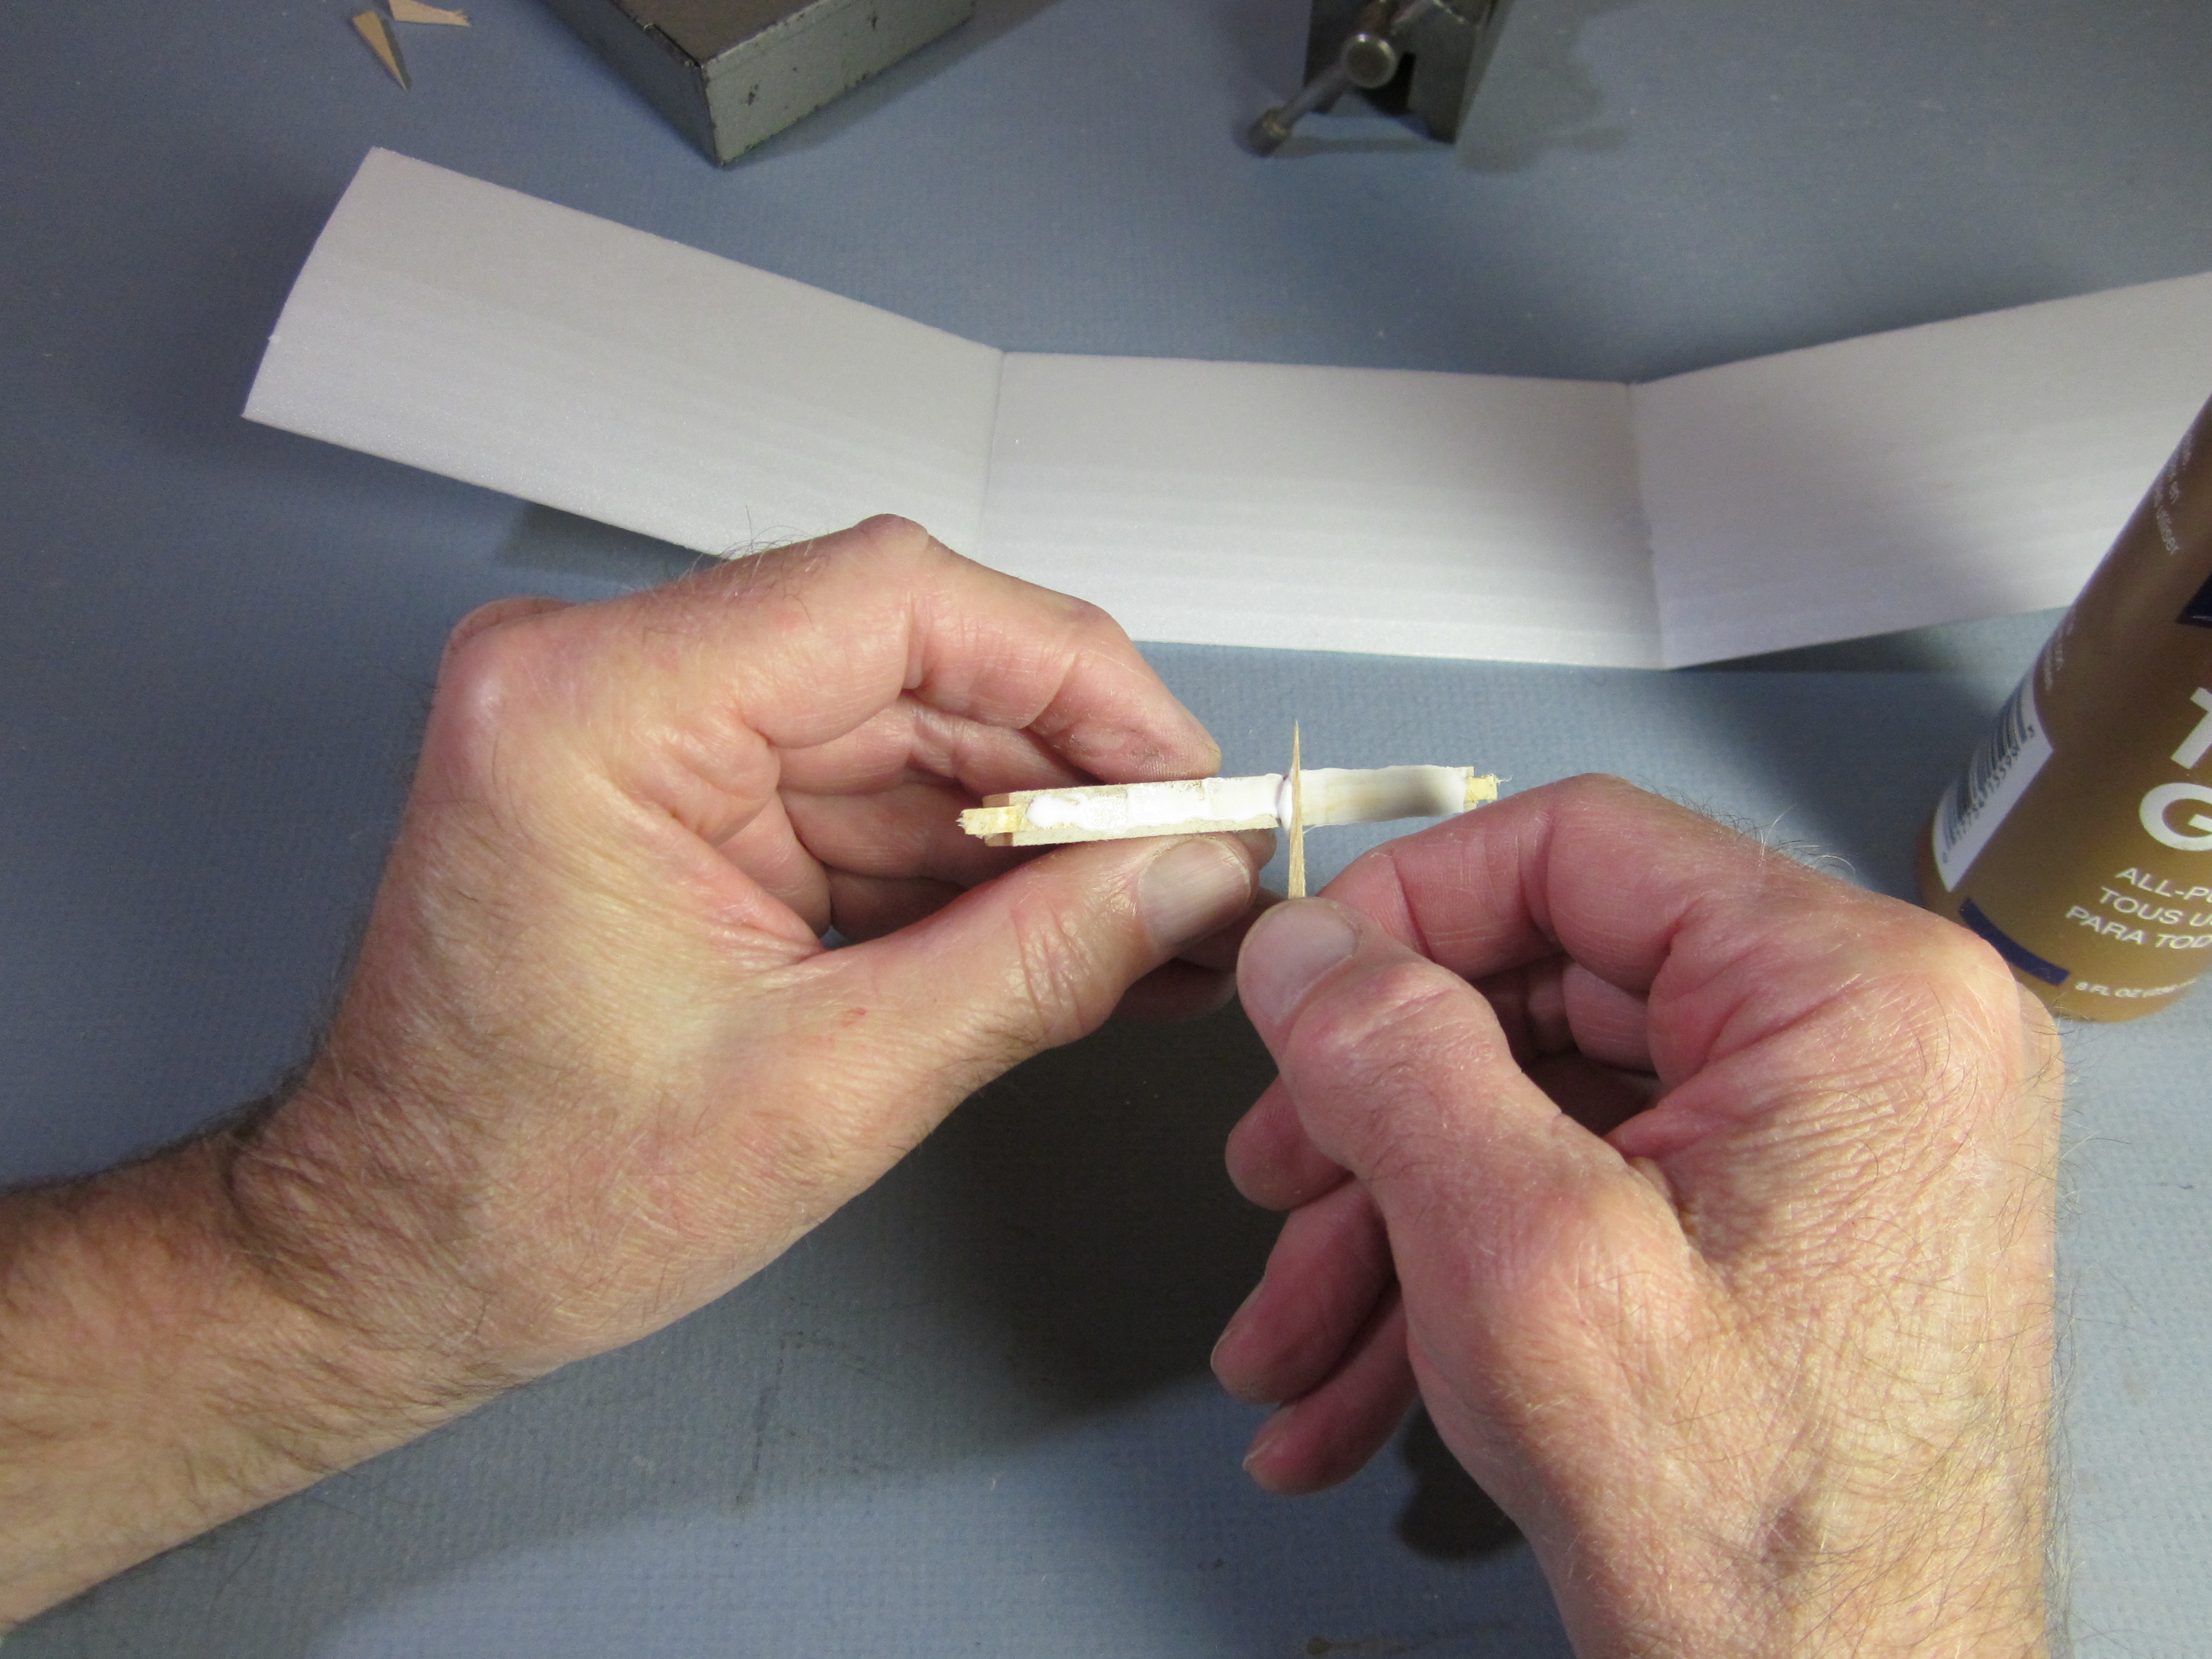
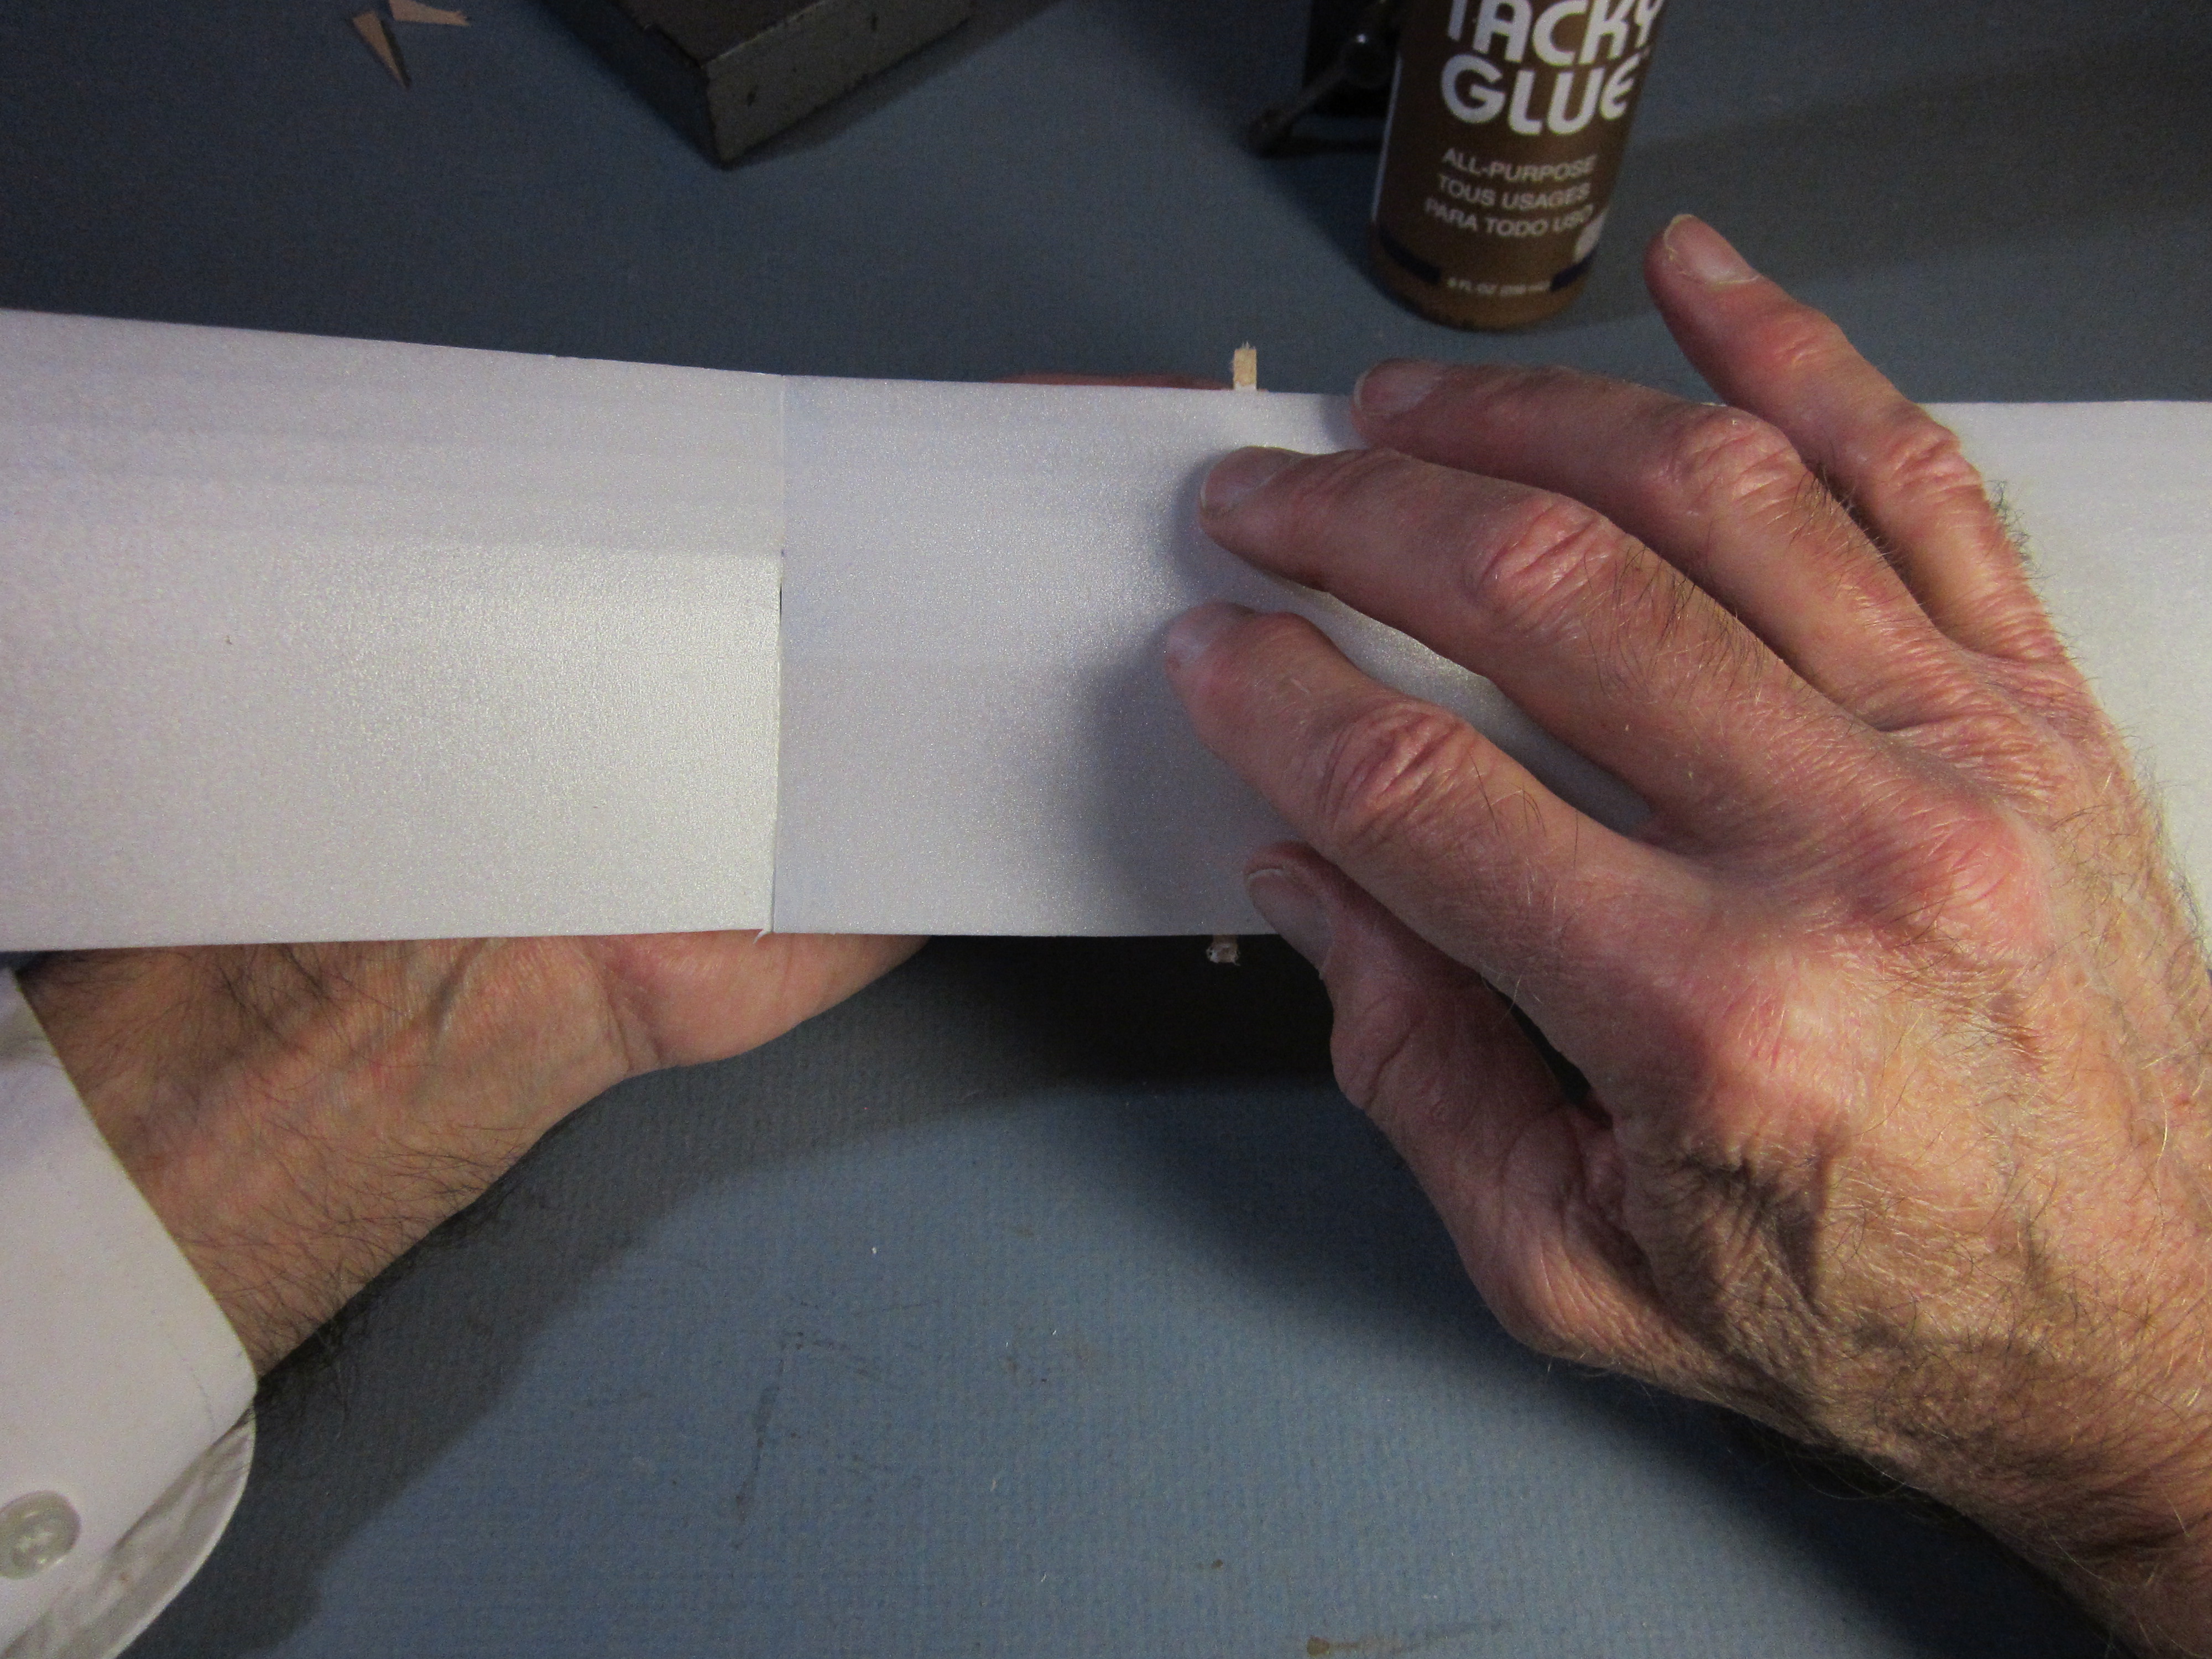
 Press a piece of tape firmly to one panel between the 50% and 60% marks.
 Carefully align all the intermediate panels so their edges are firmly butted against each other. Put a block behind the other panel, push the tape across the joint and press it firmly in place on the other panel.
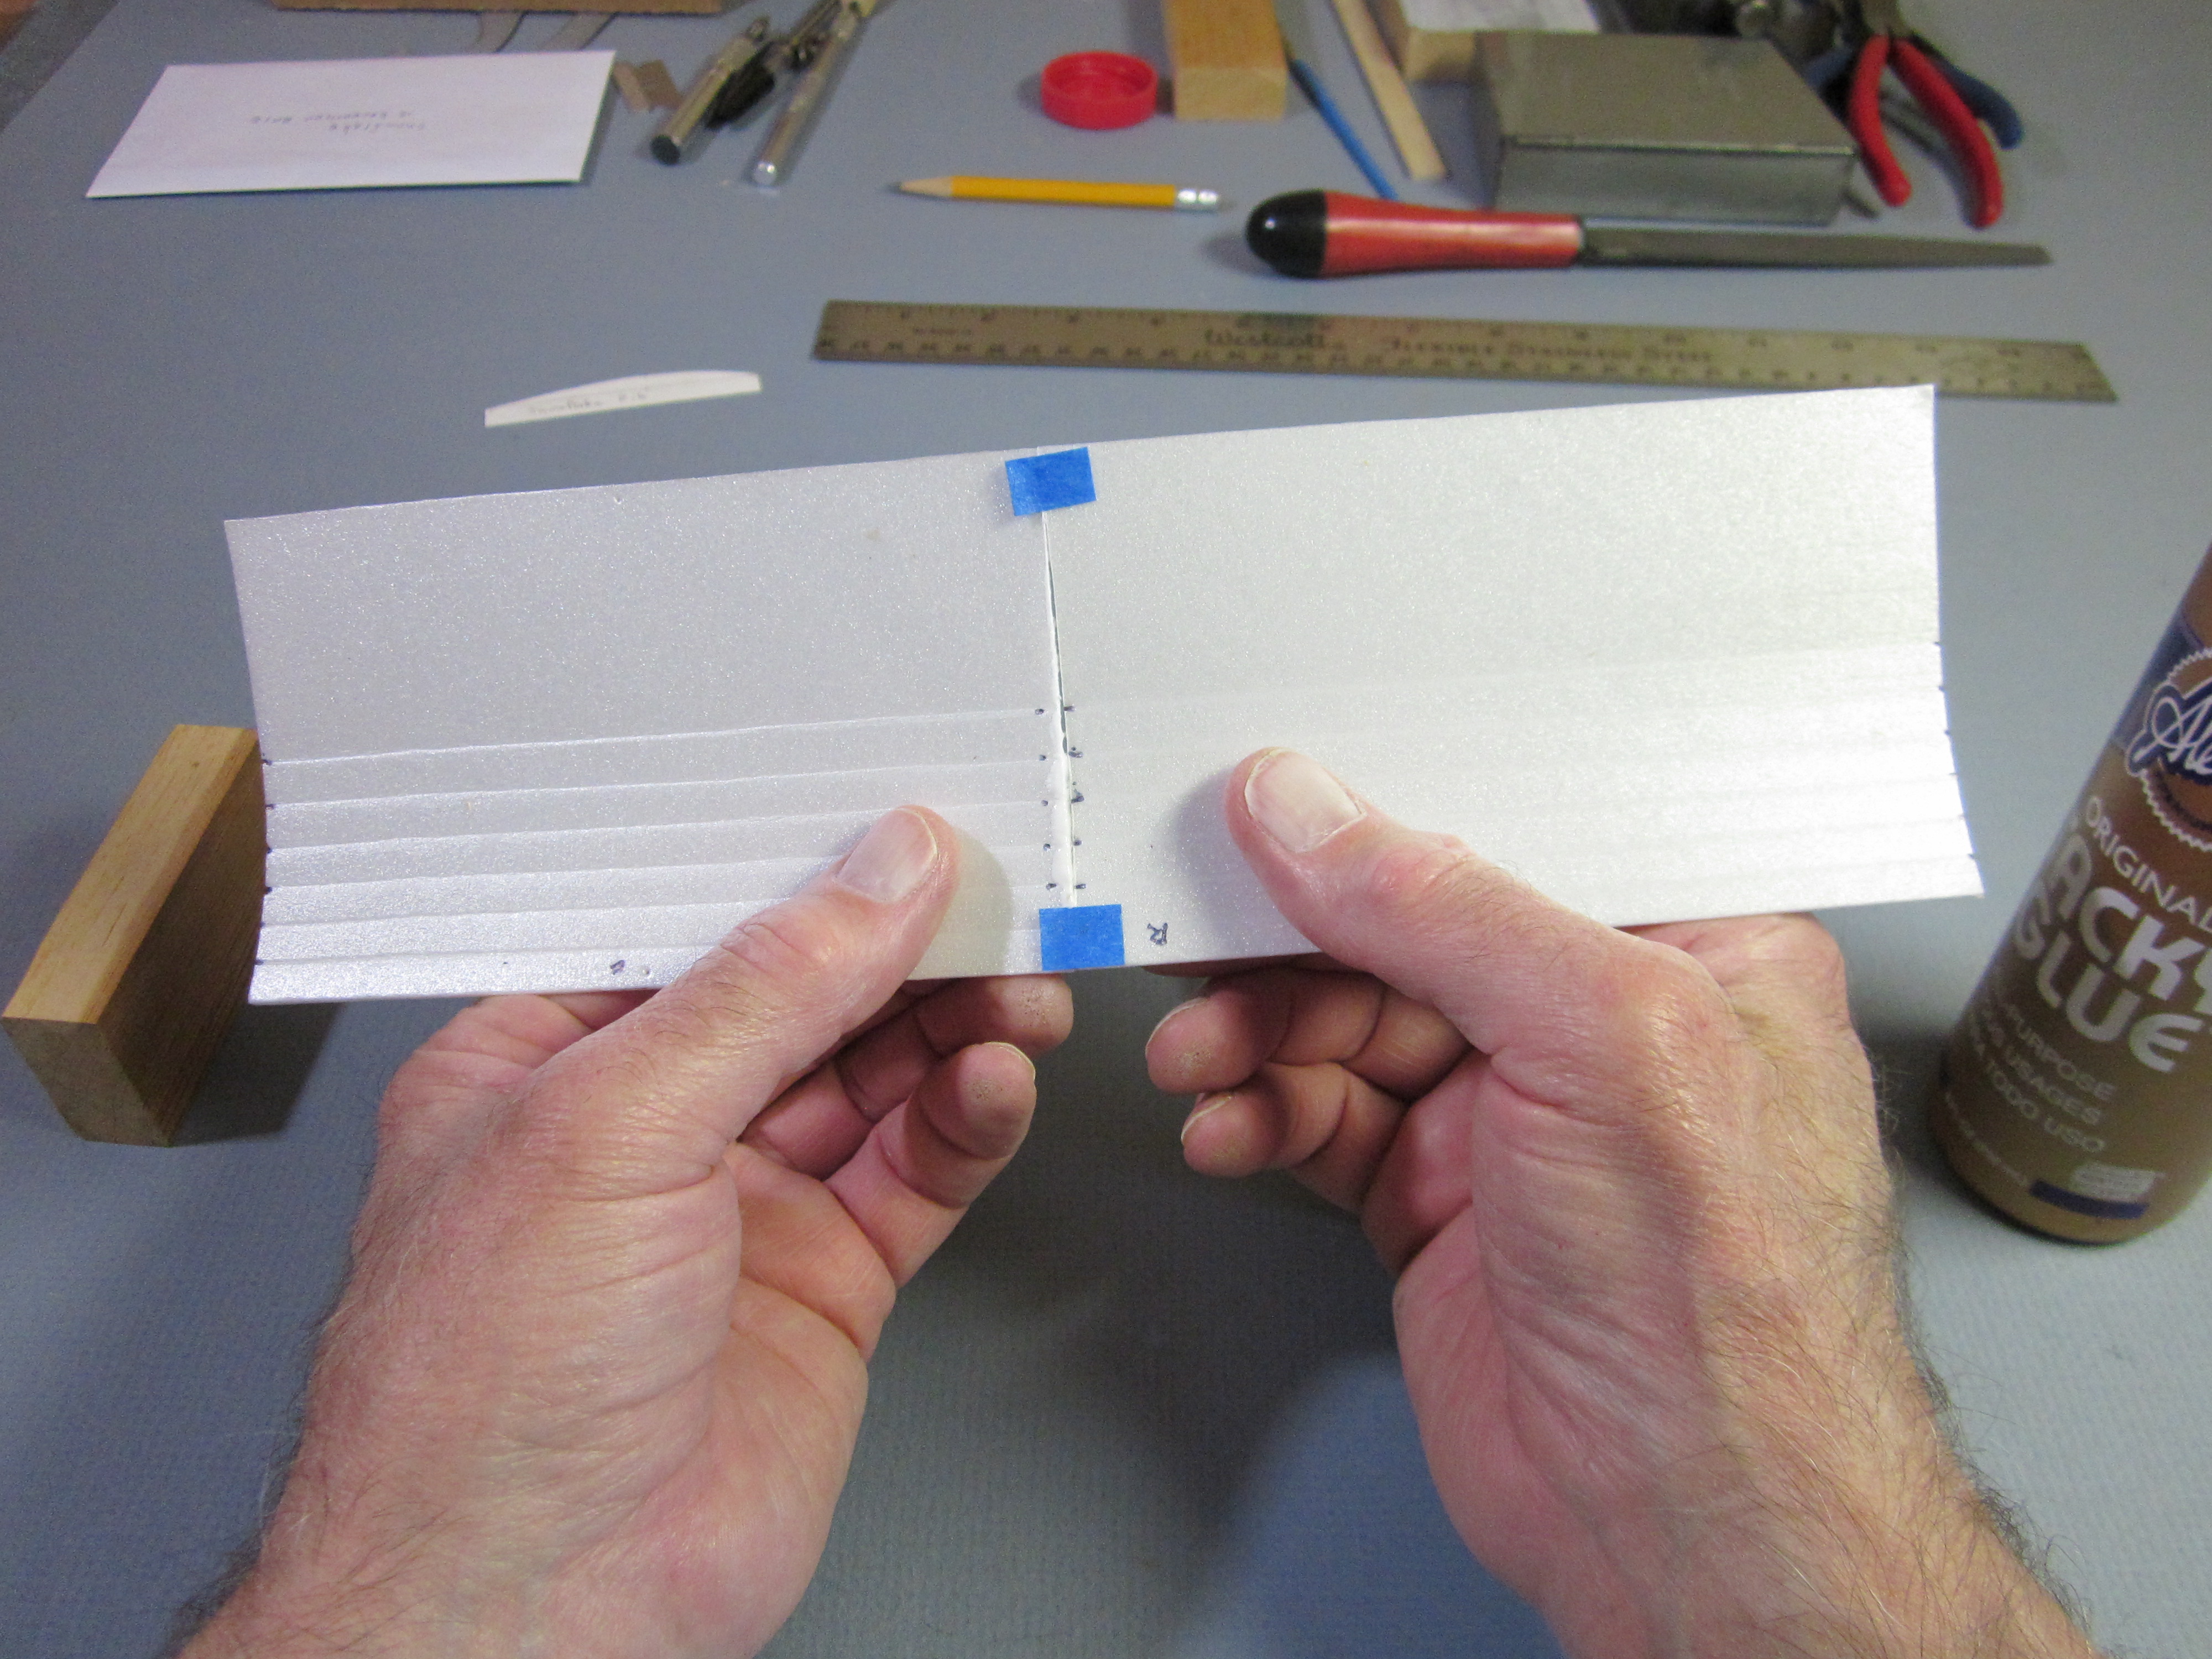
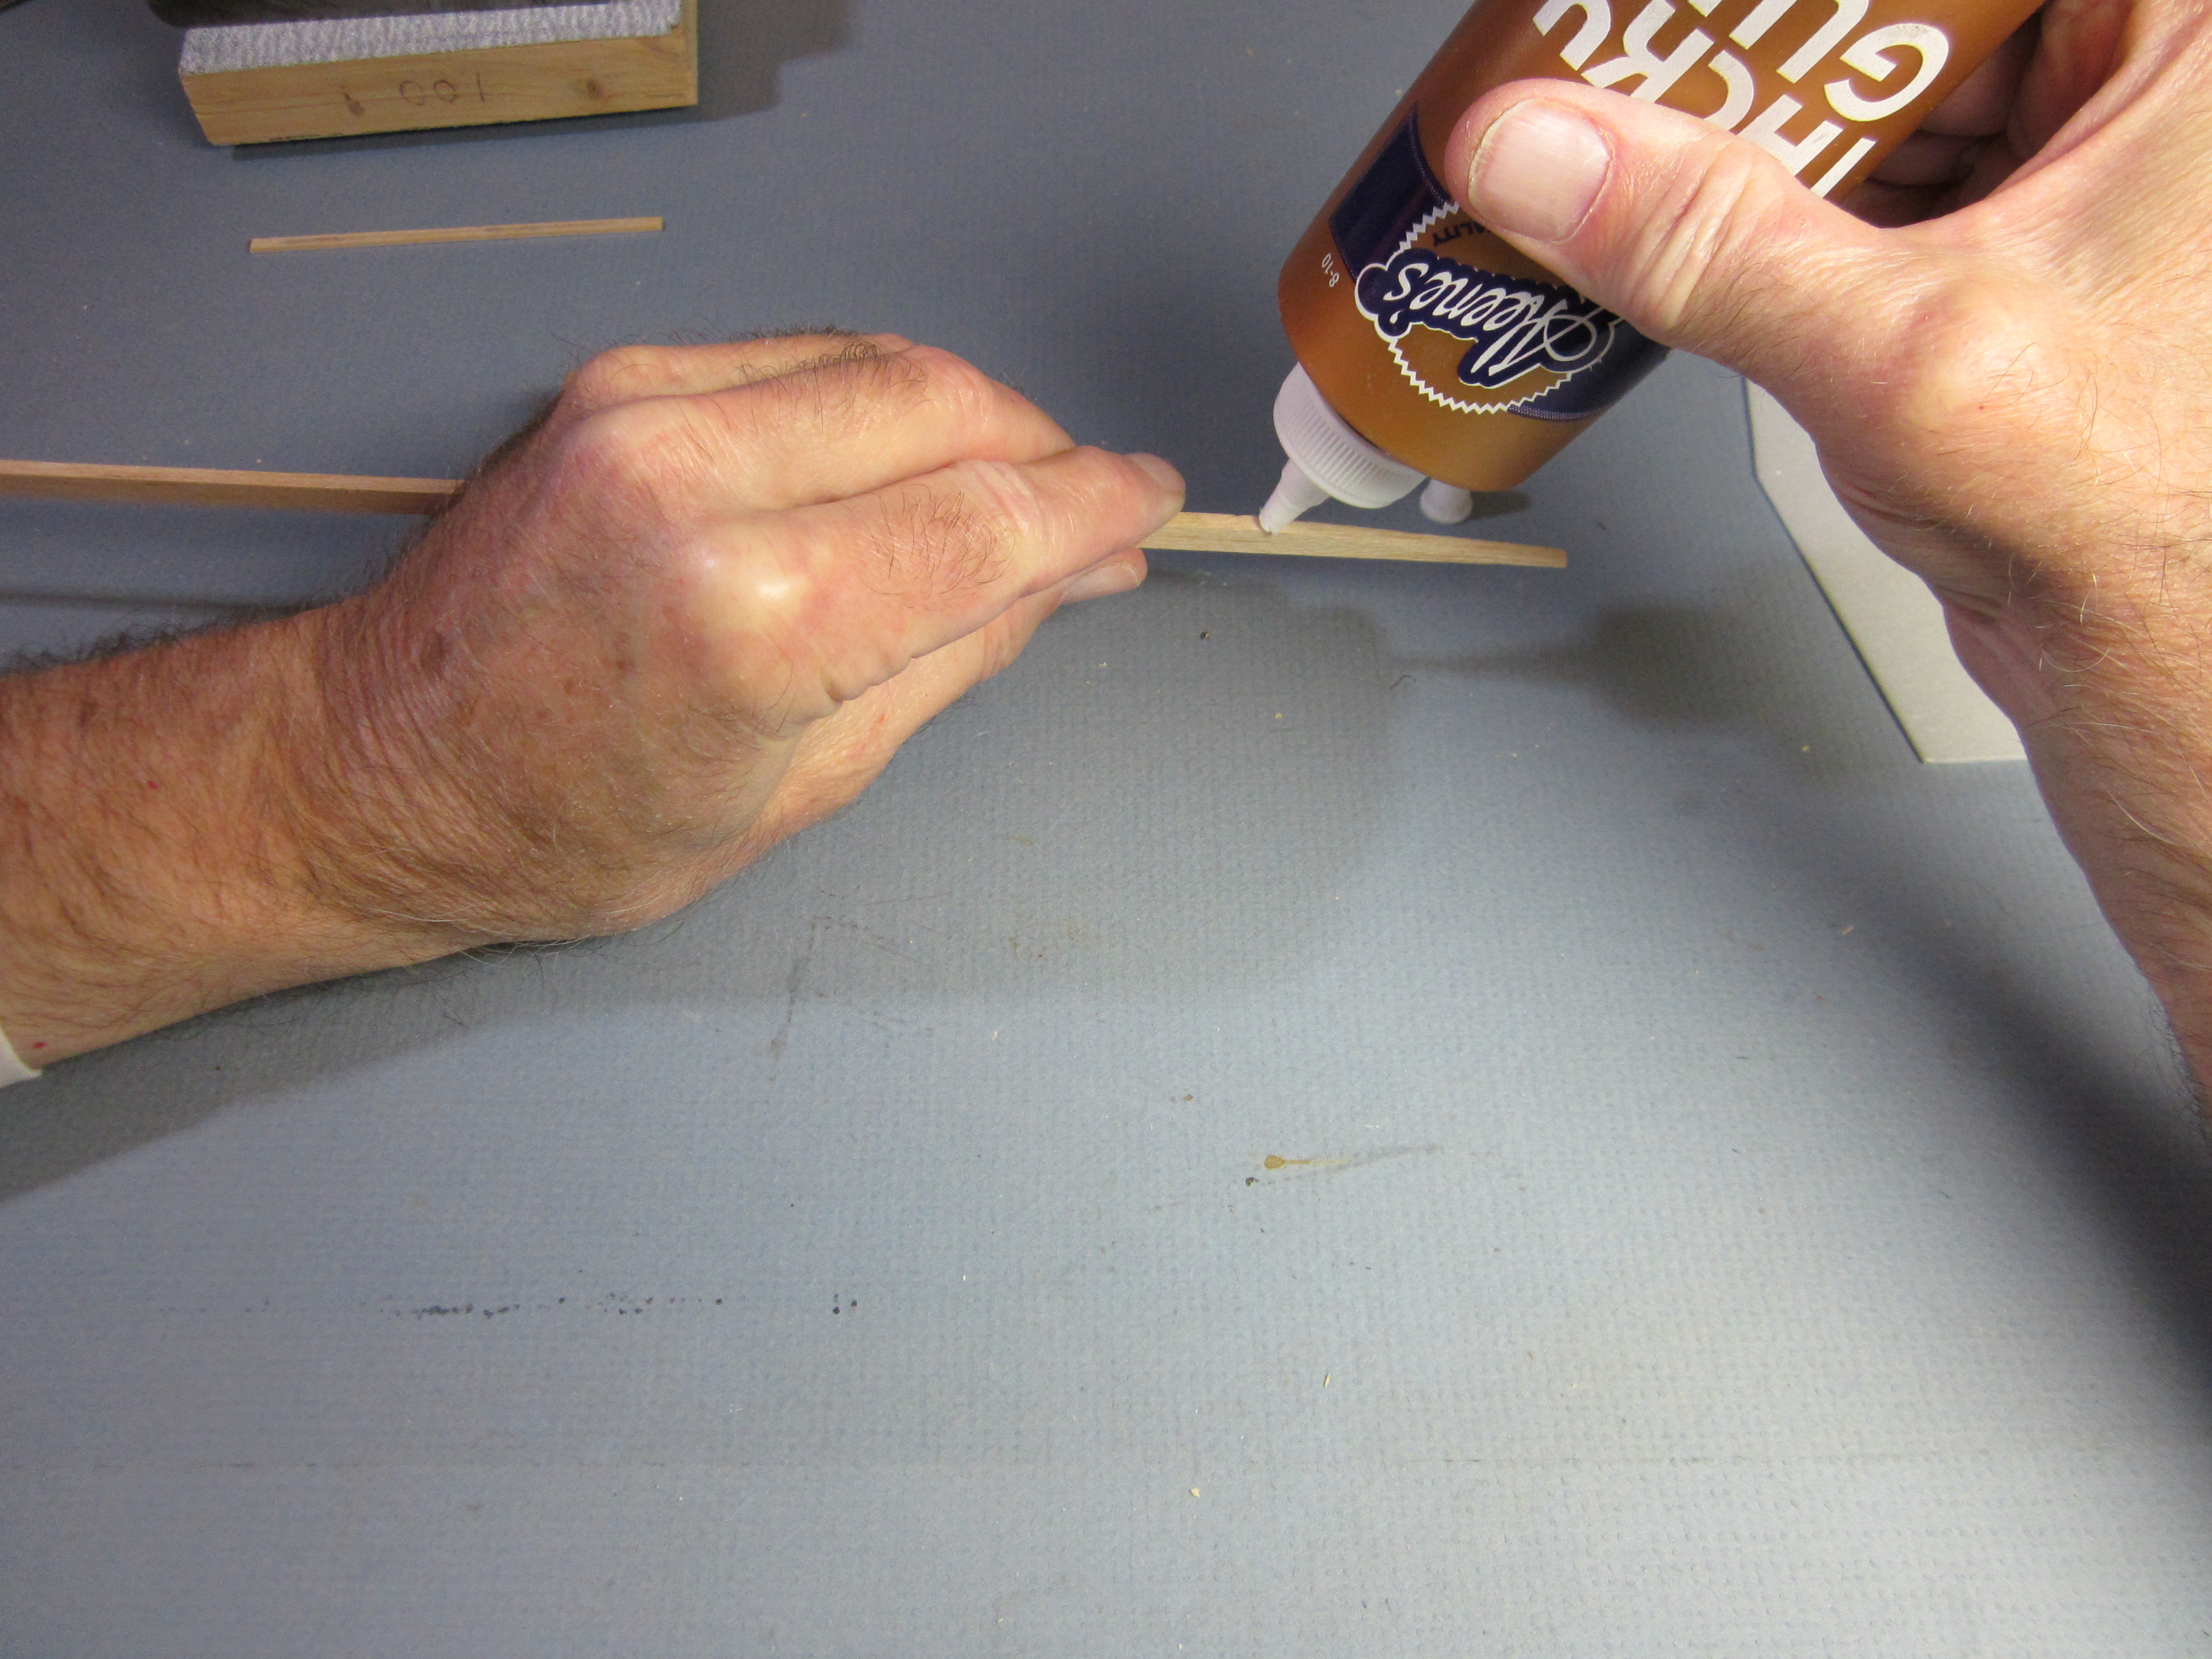
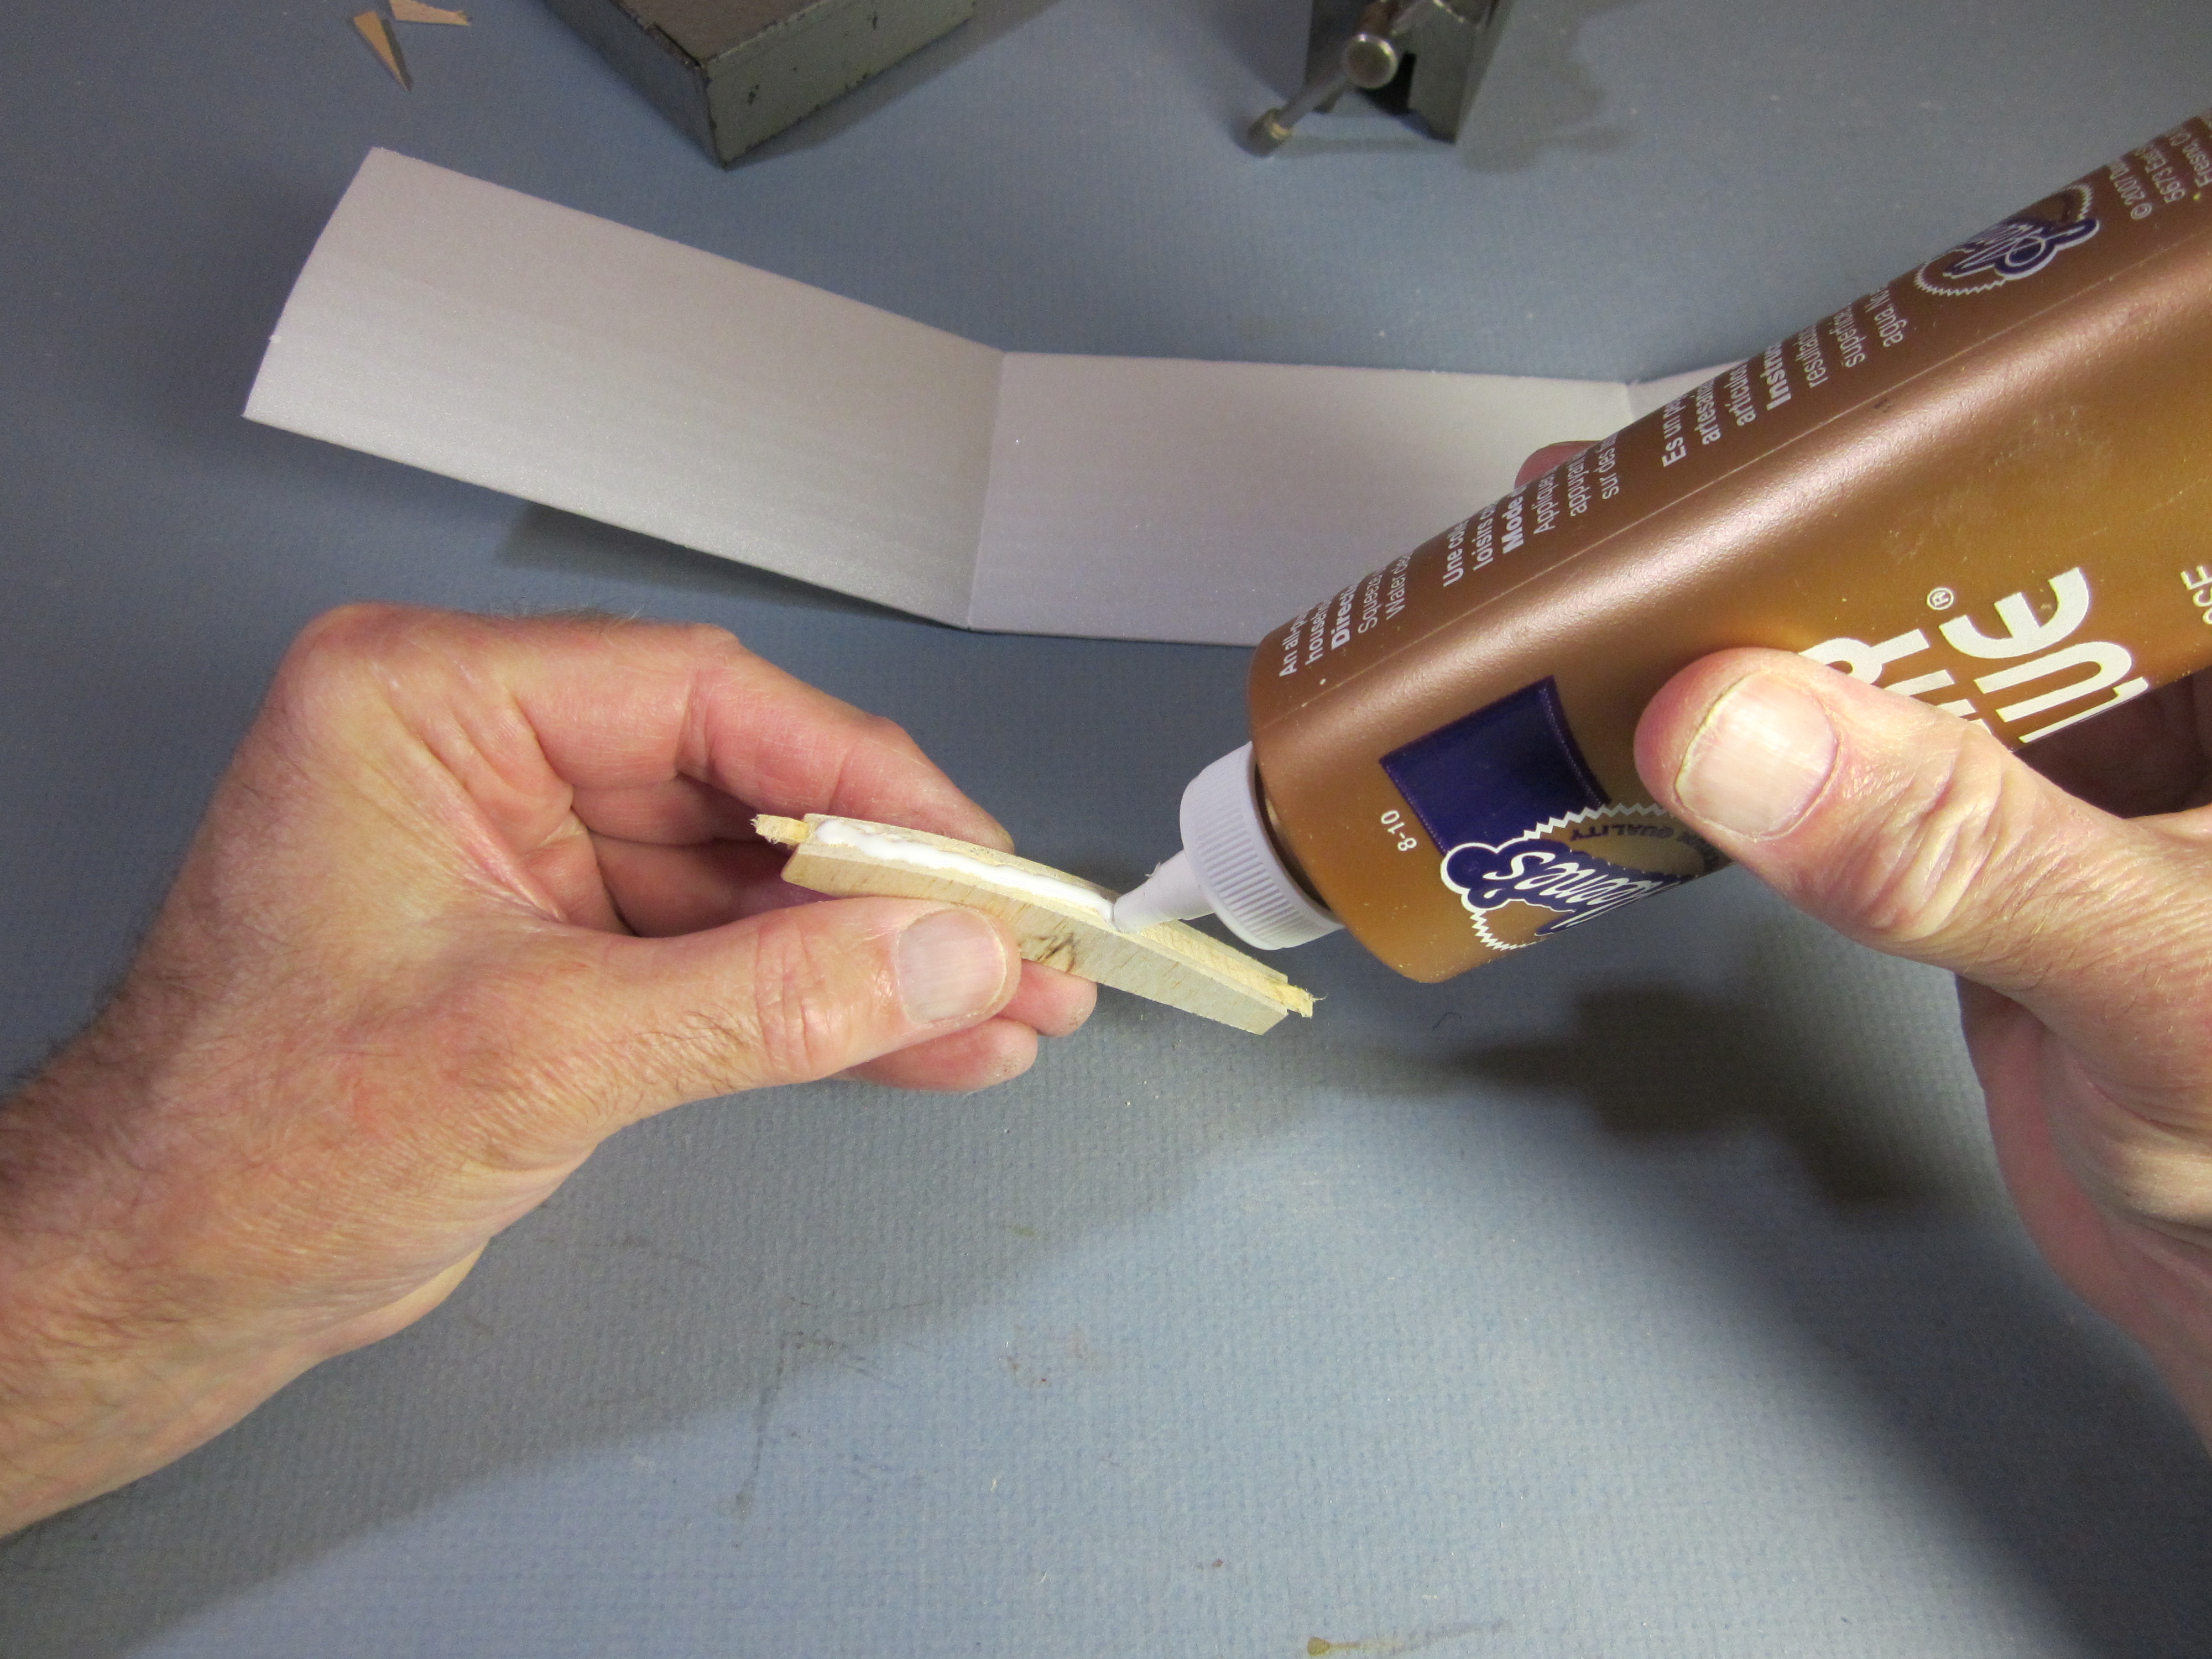
 A bead of glue is run along the top of the joint and smoothed out with a wet finger tip. Gaps in the underside of the joint can be filled by wiping glue across the joint.
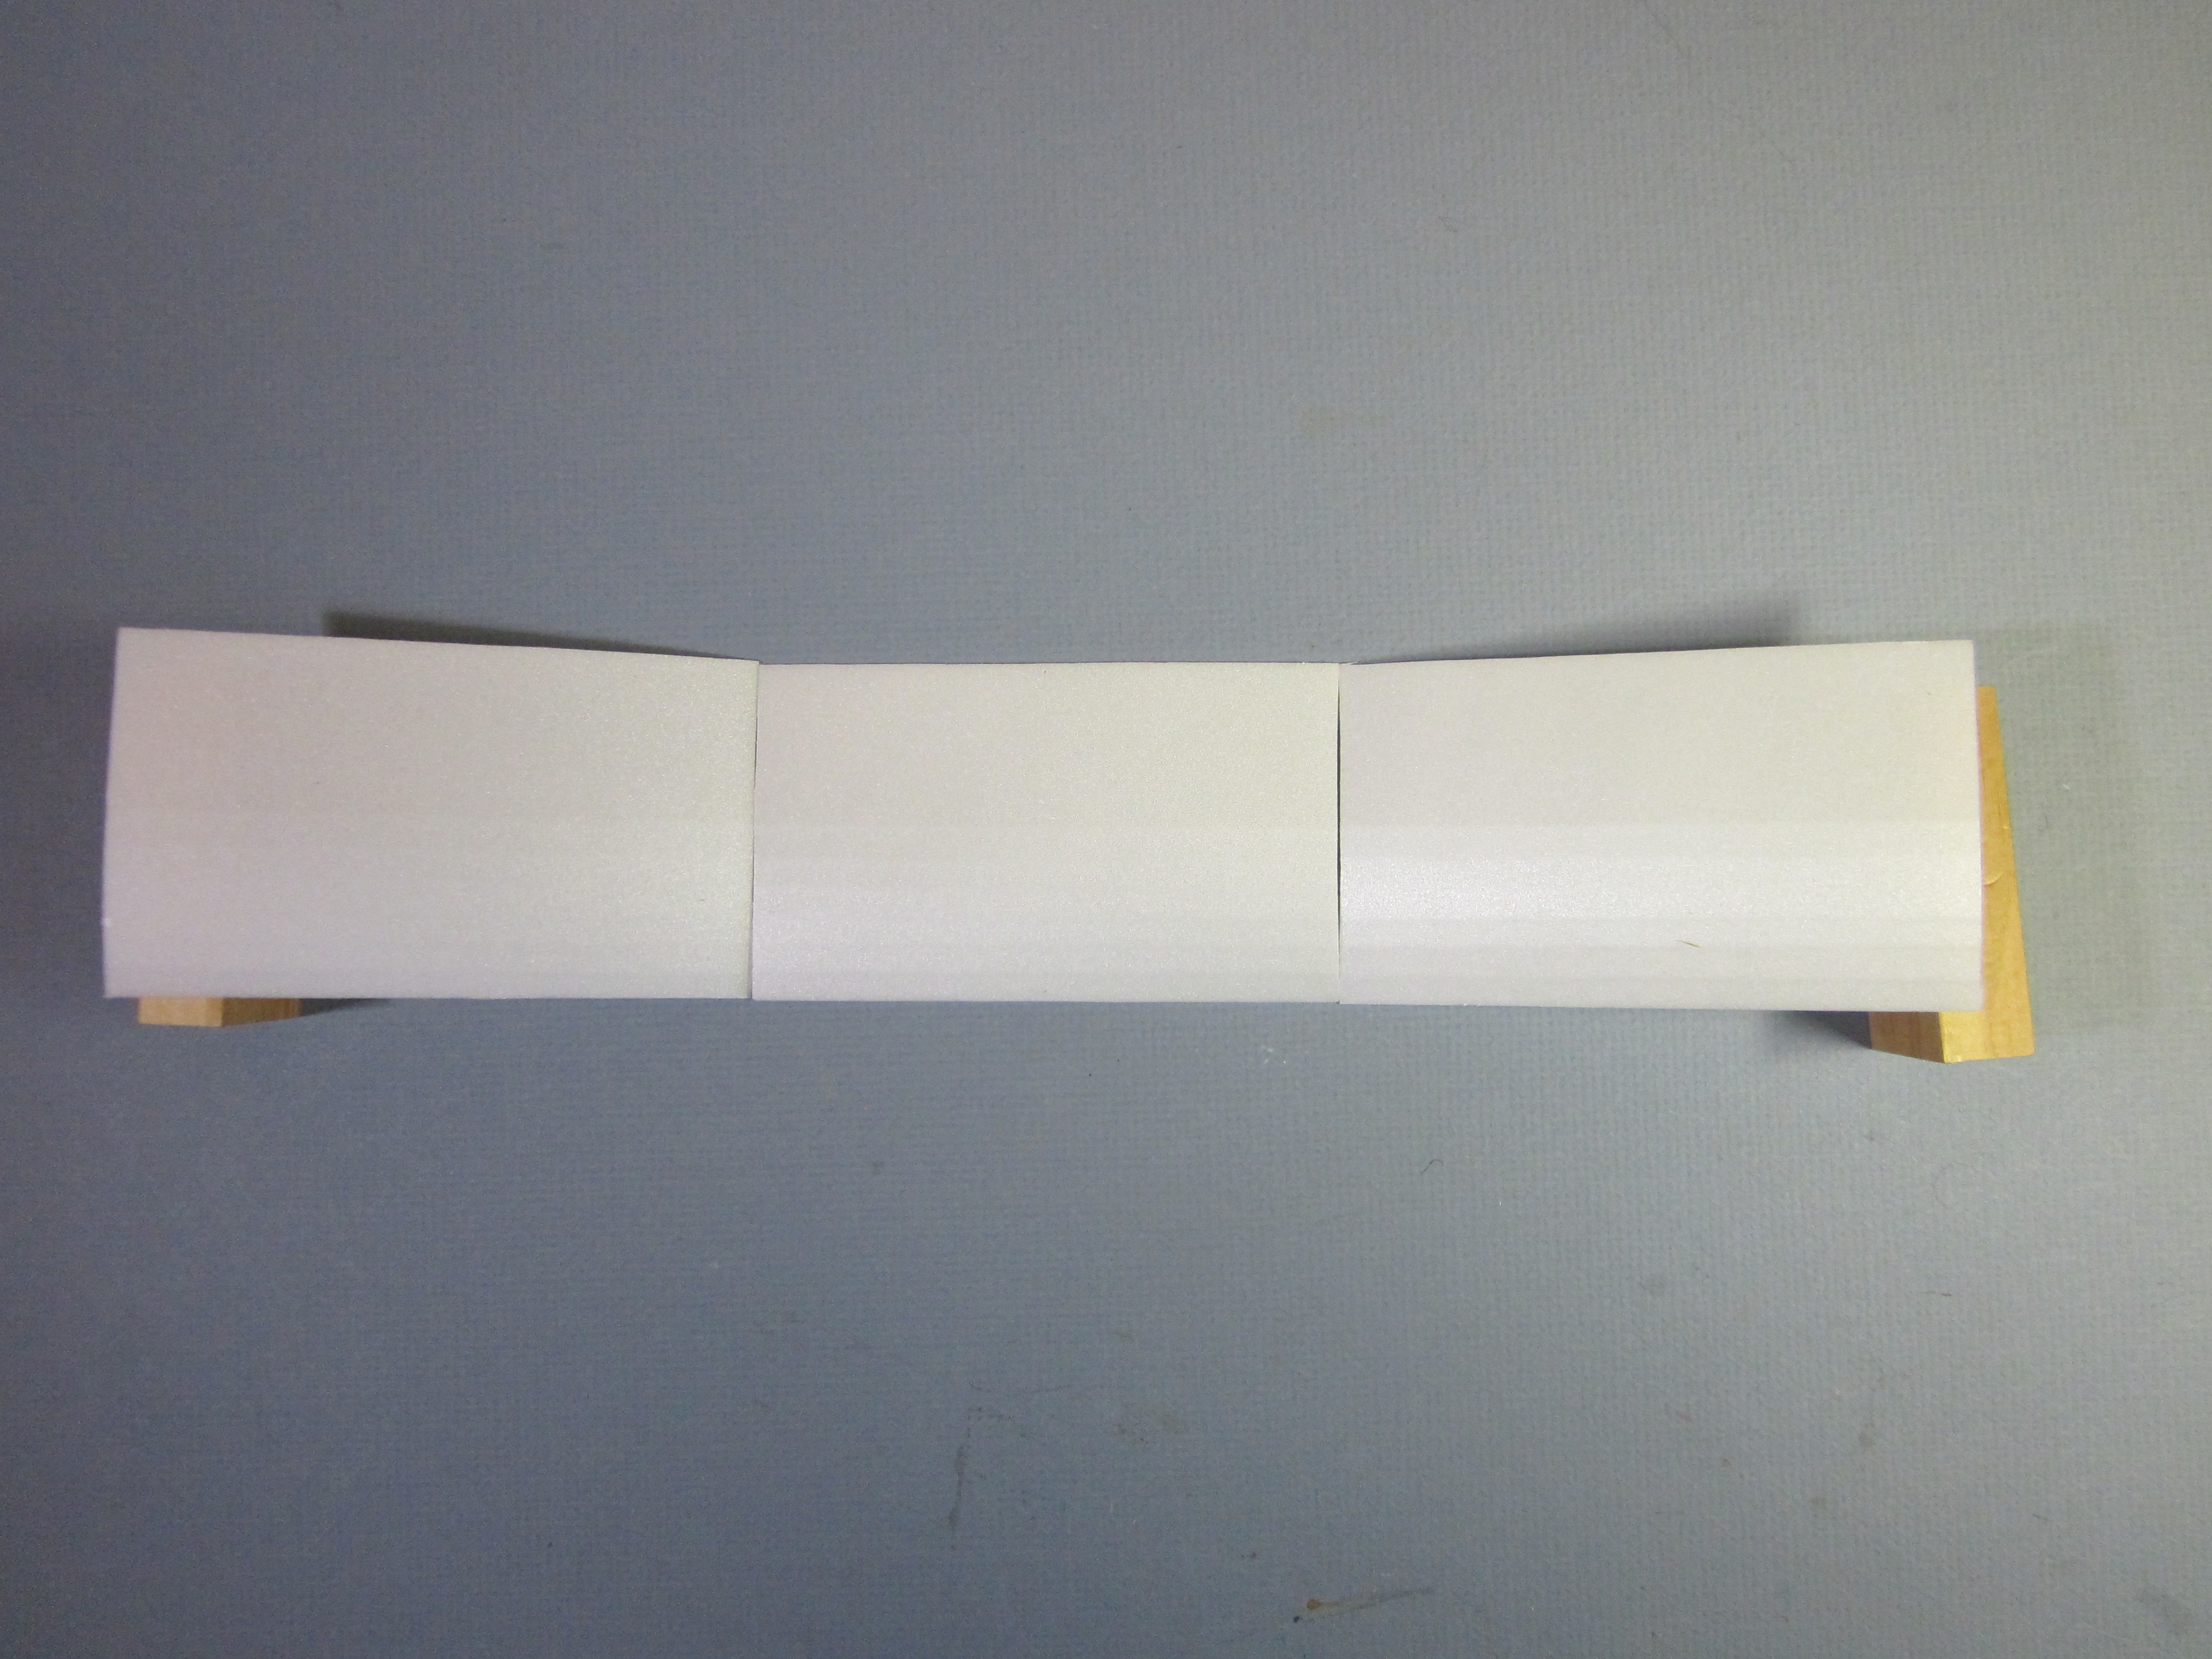
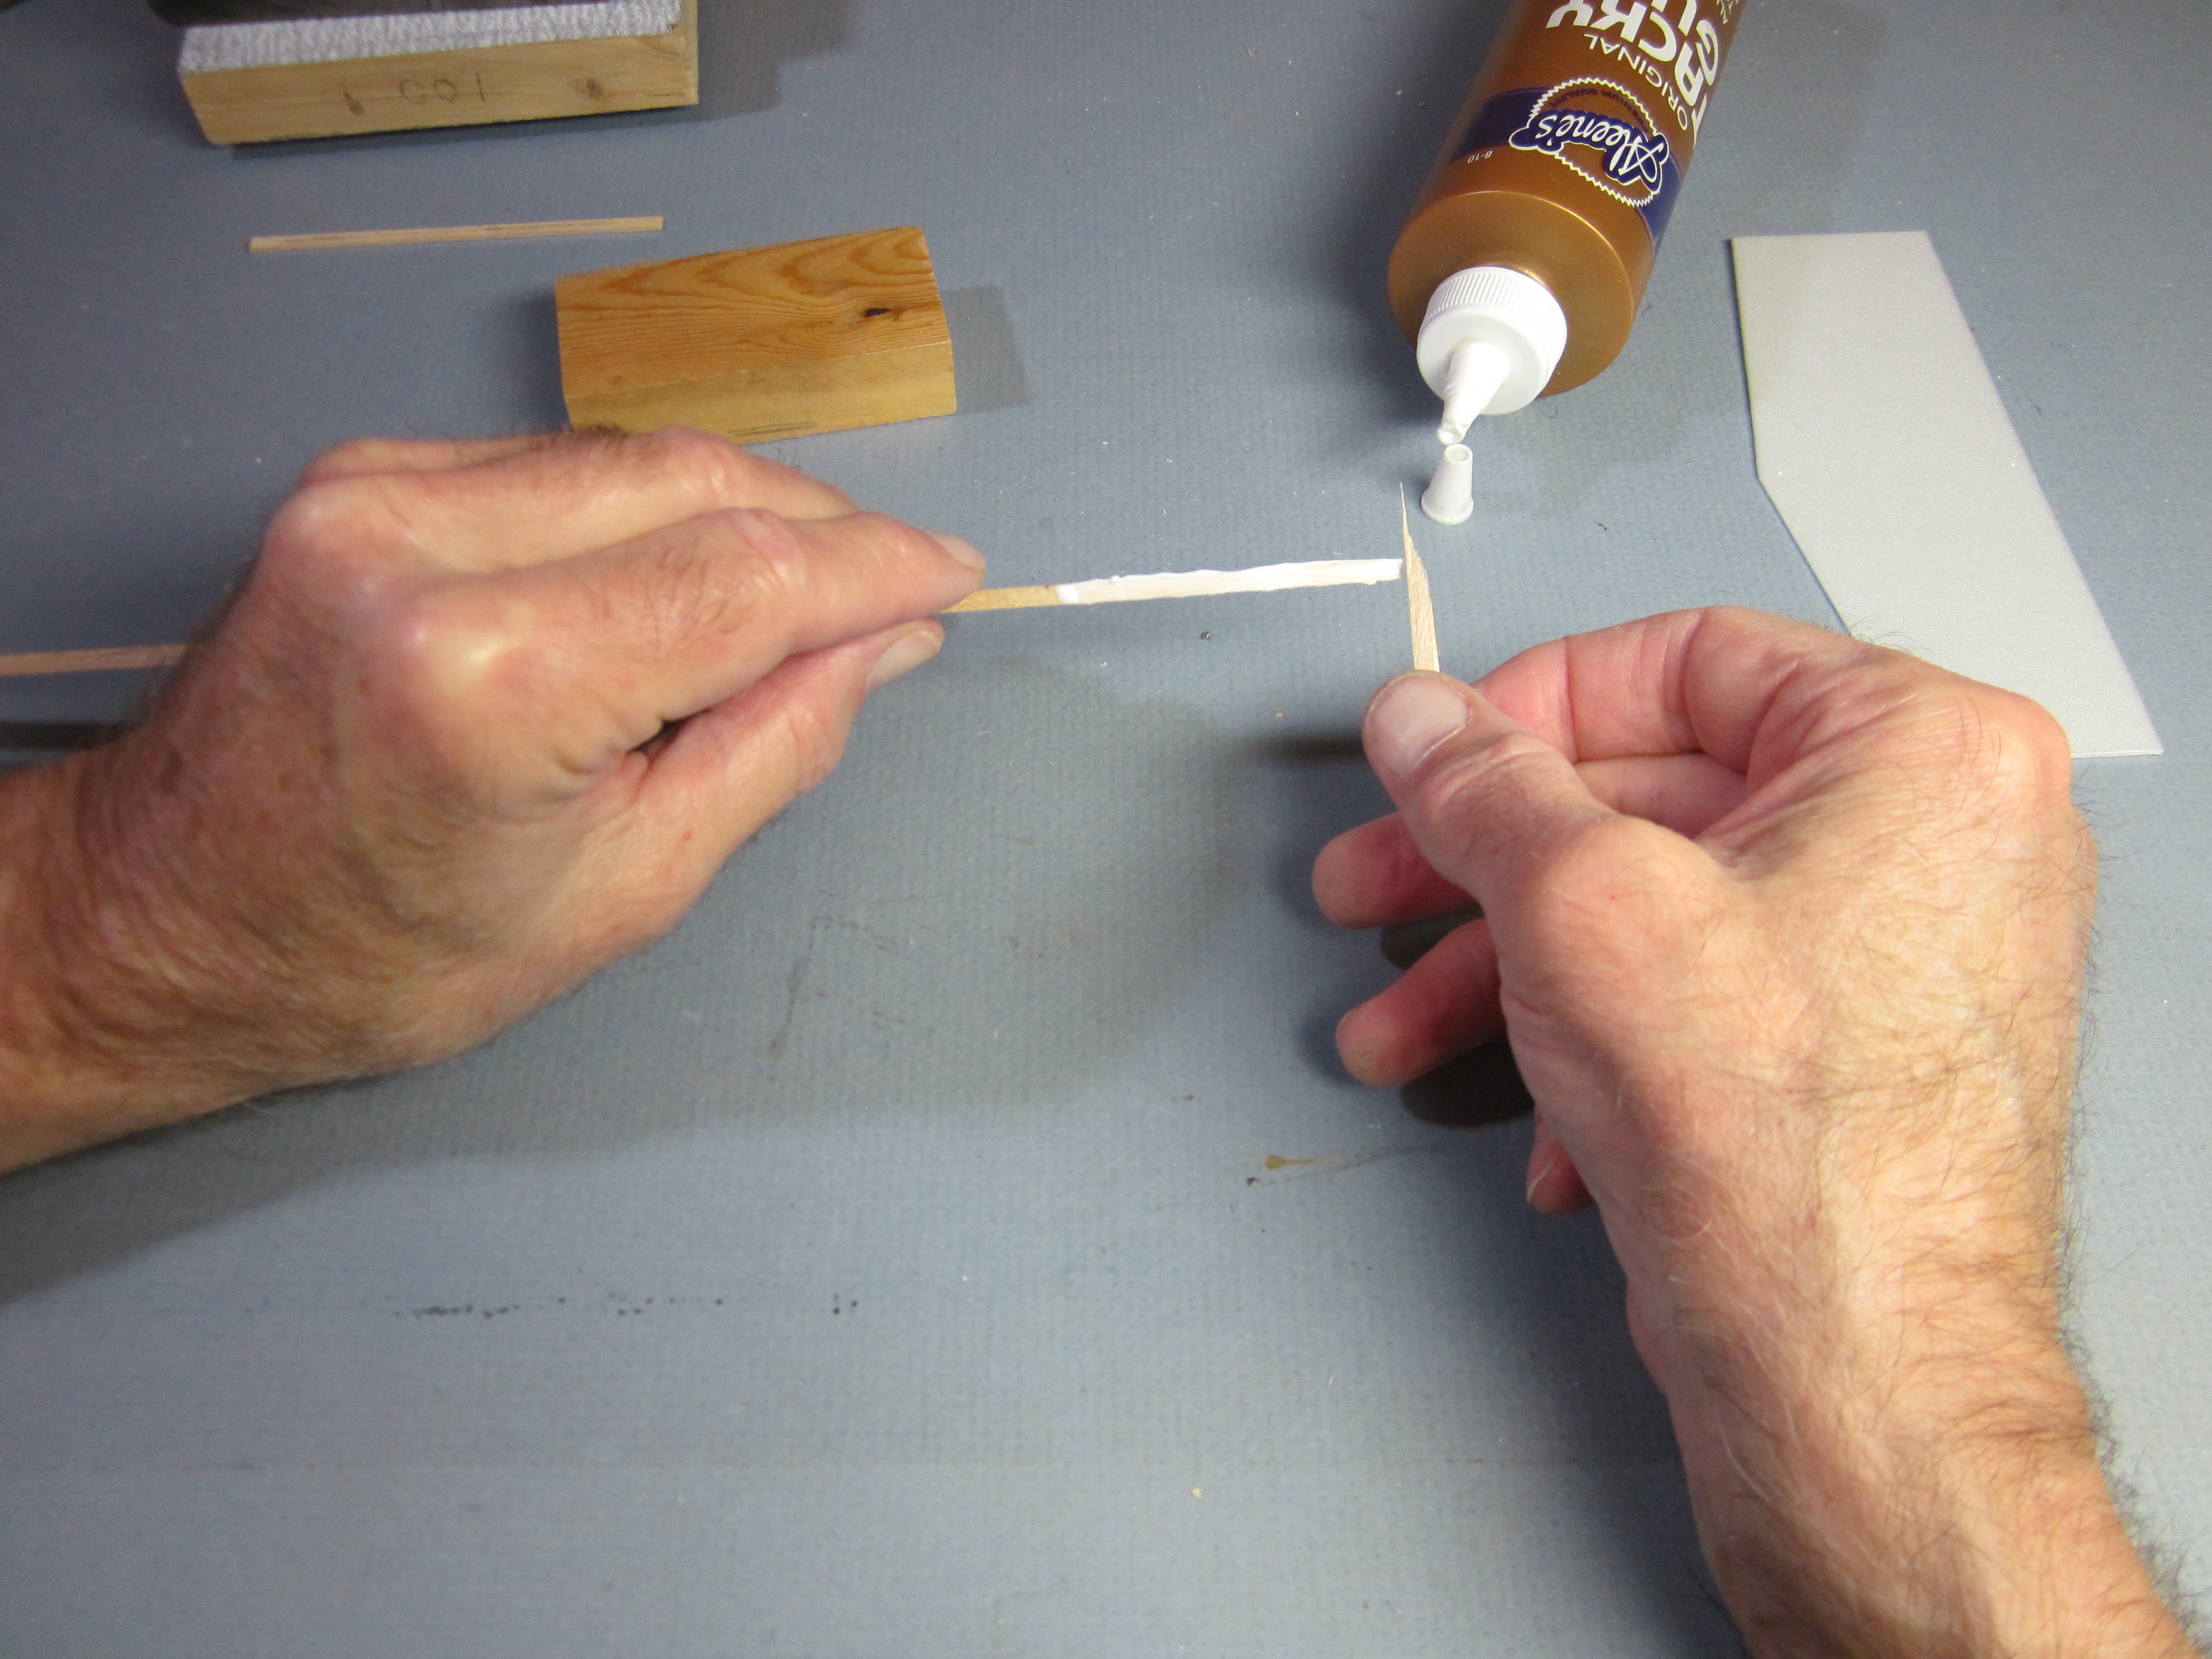
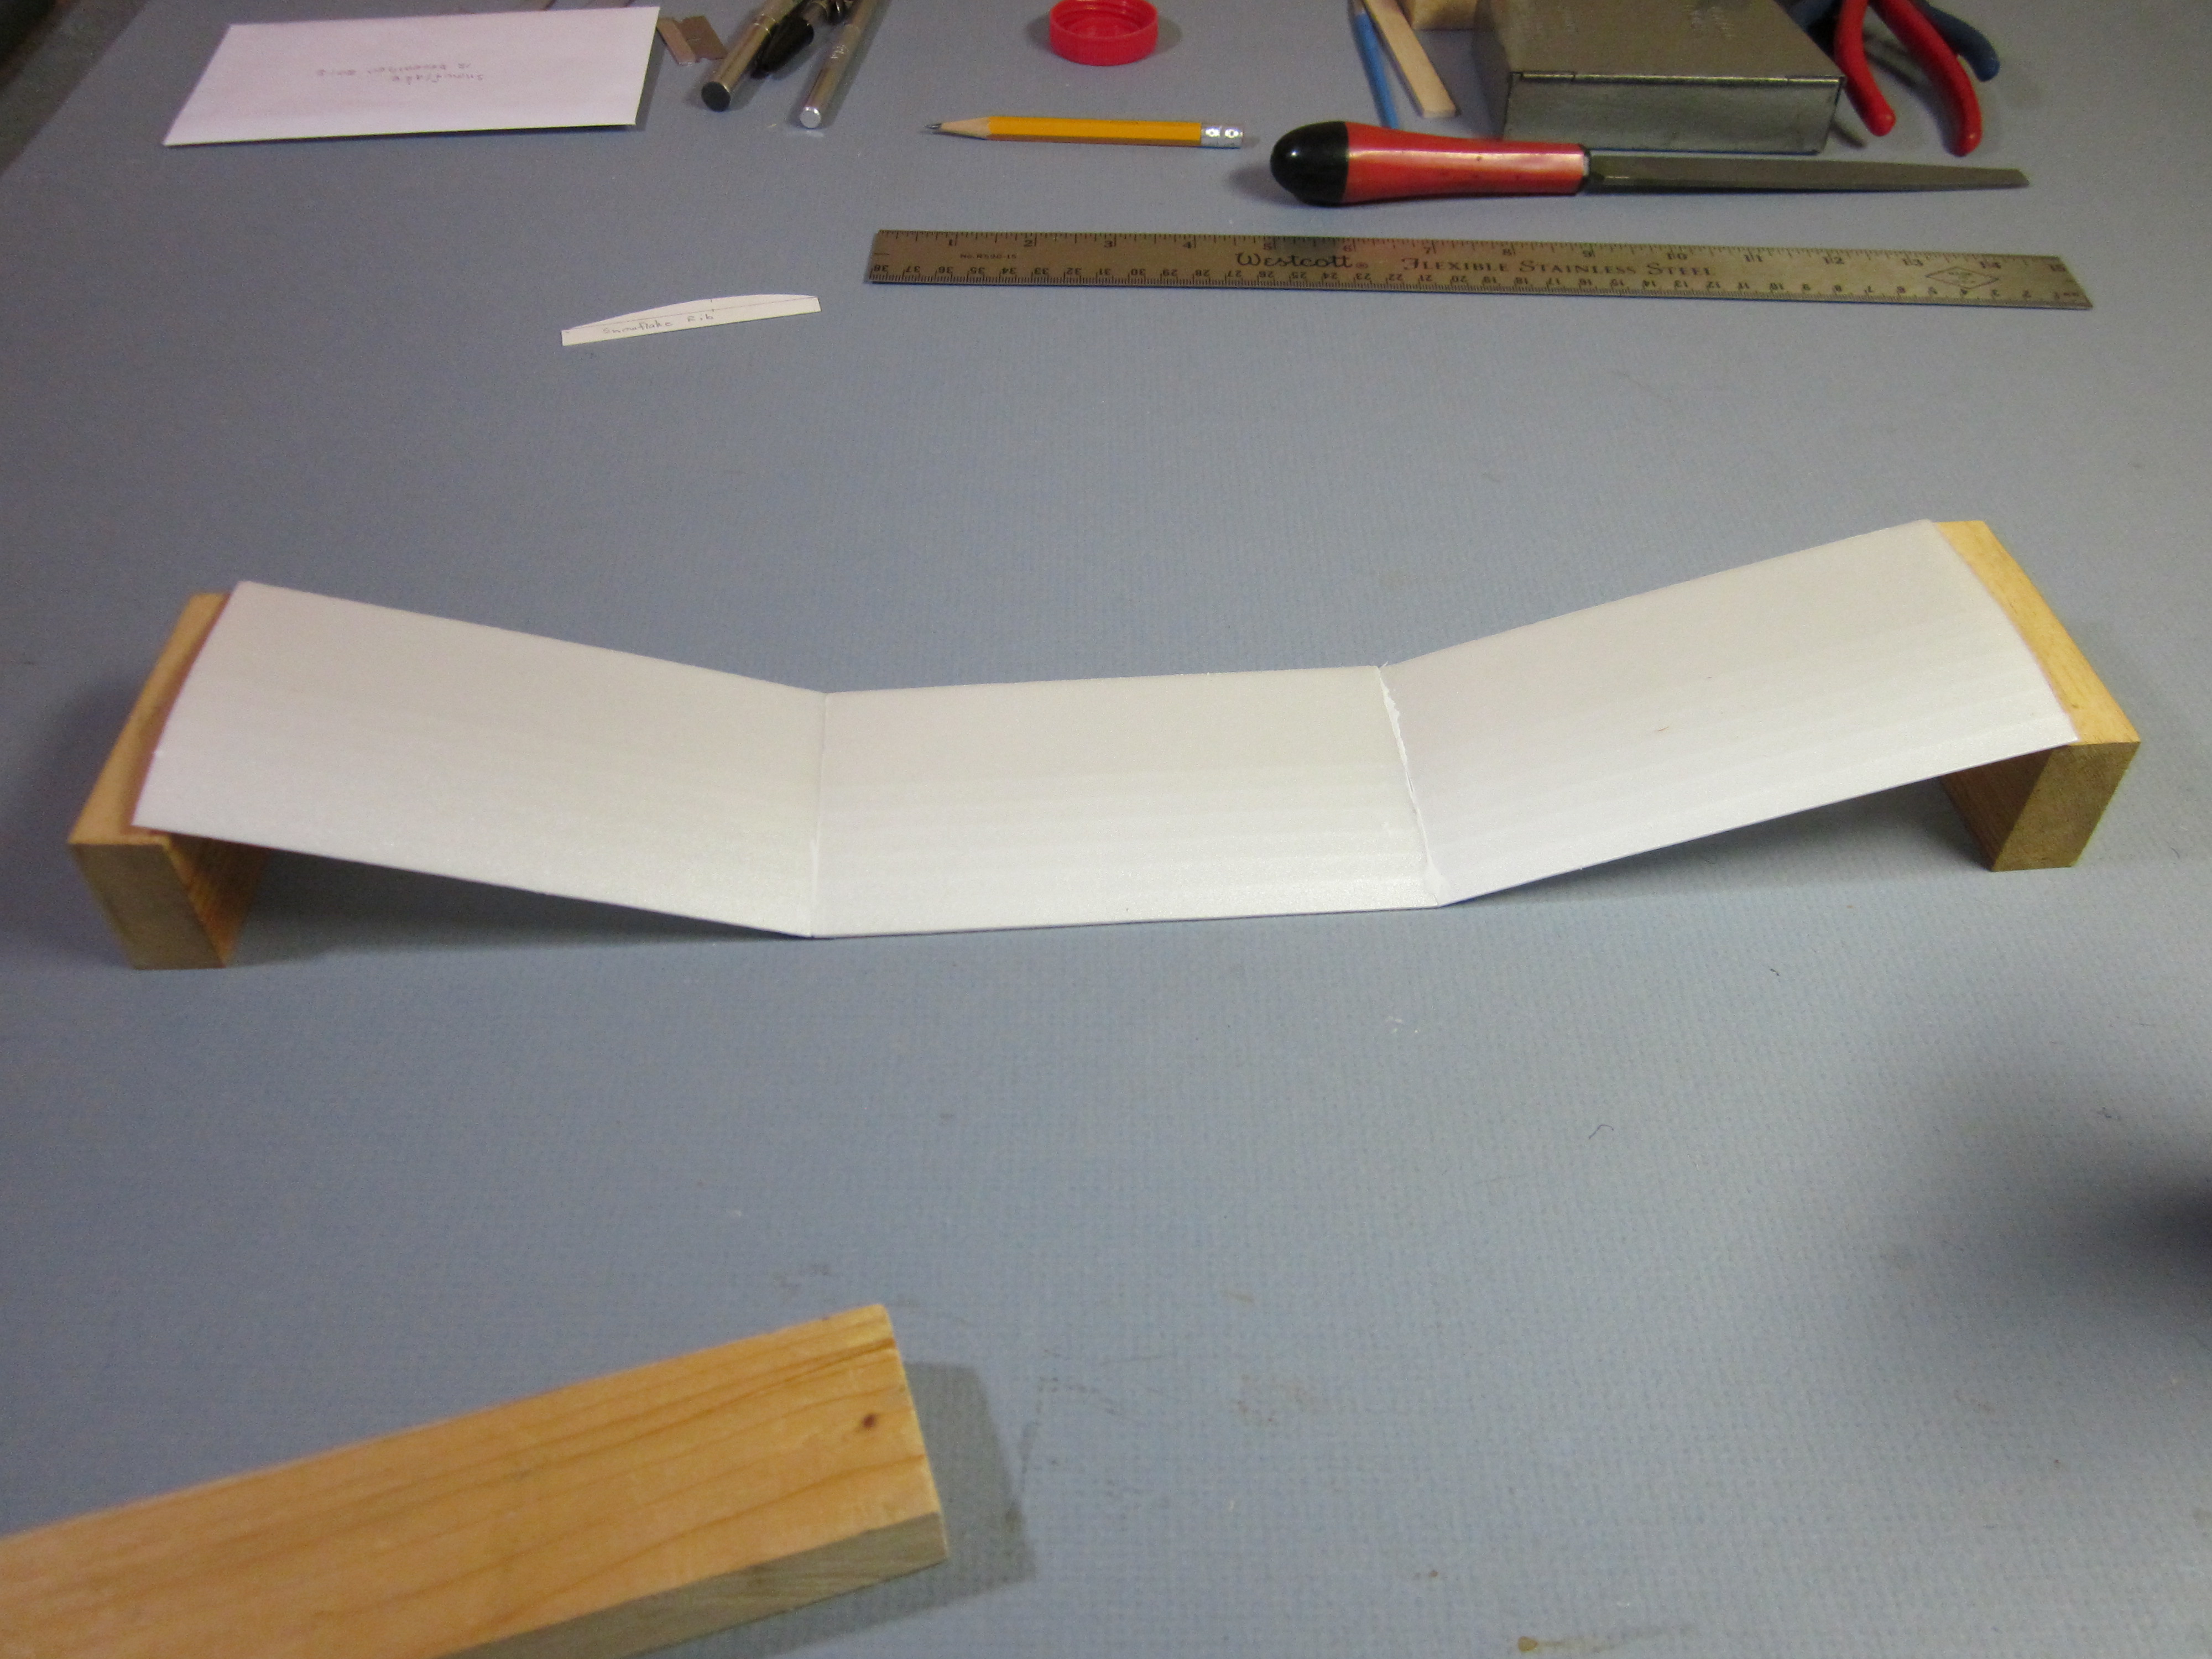 Do the same with the other wing panel. Set the wing on blocks in an out of the way place and let the glue dry.
Make the fuselage
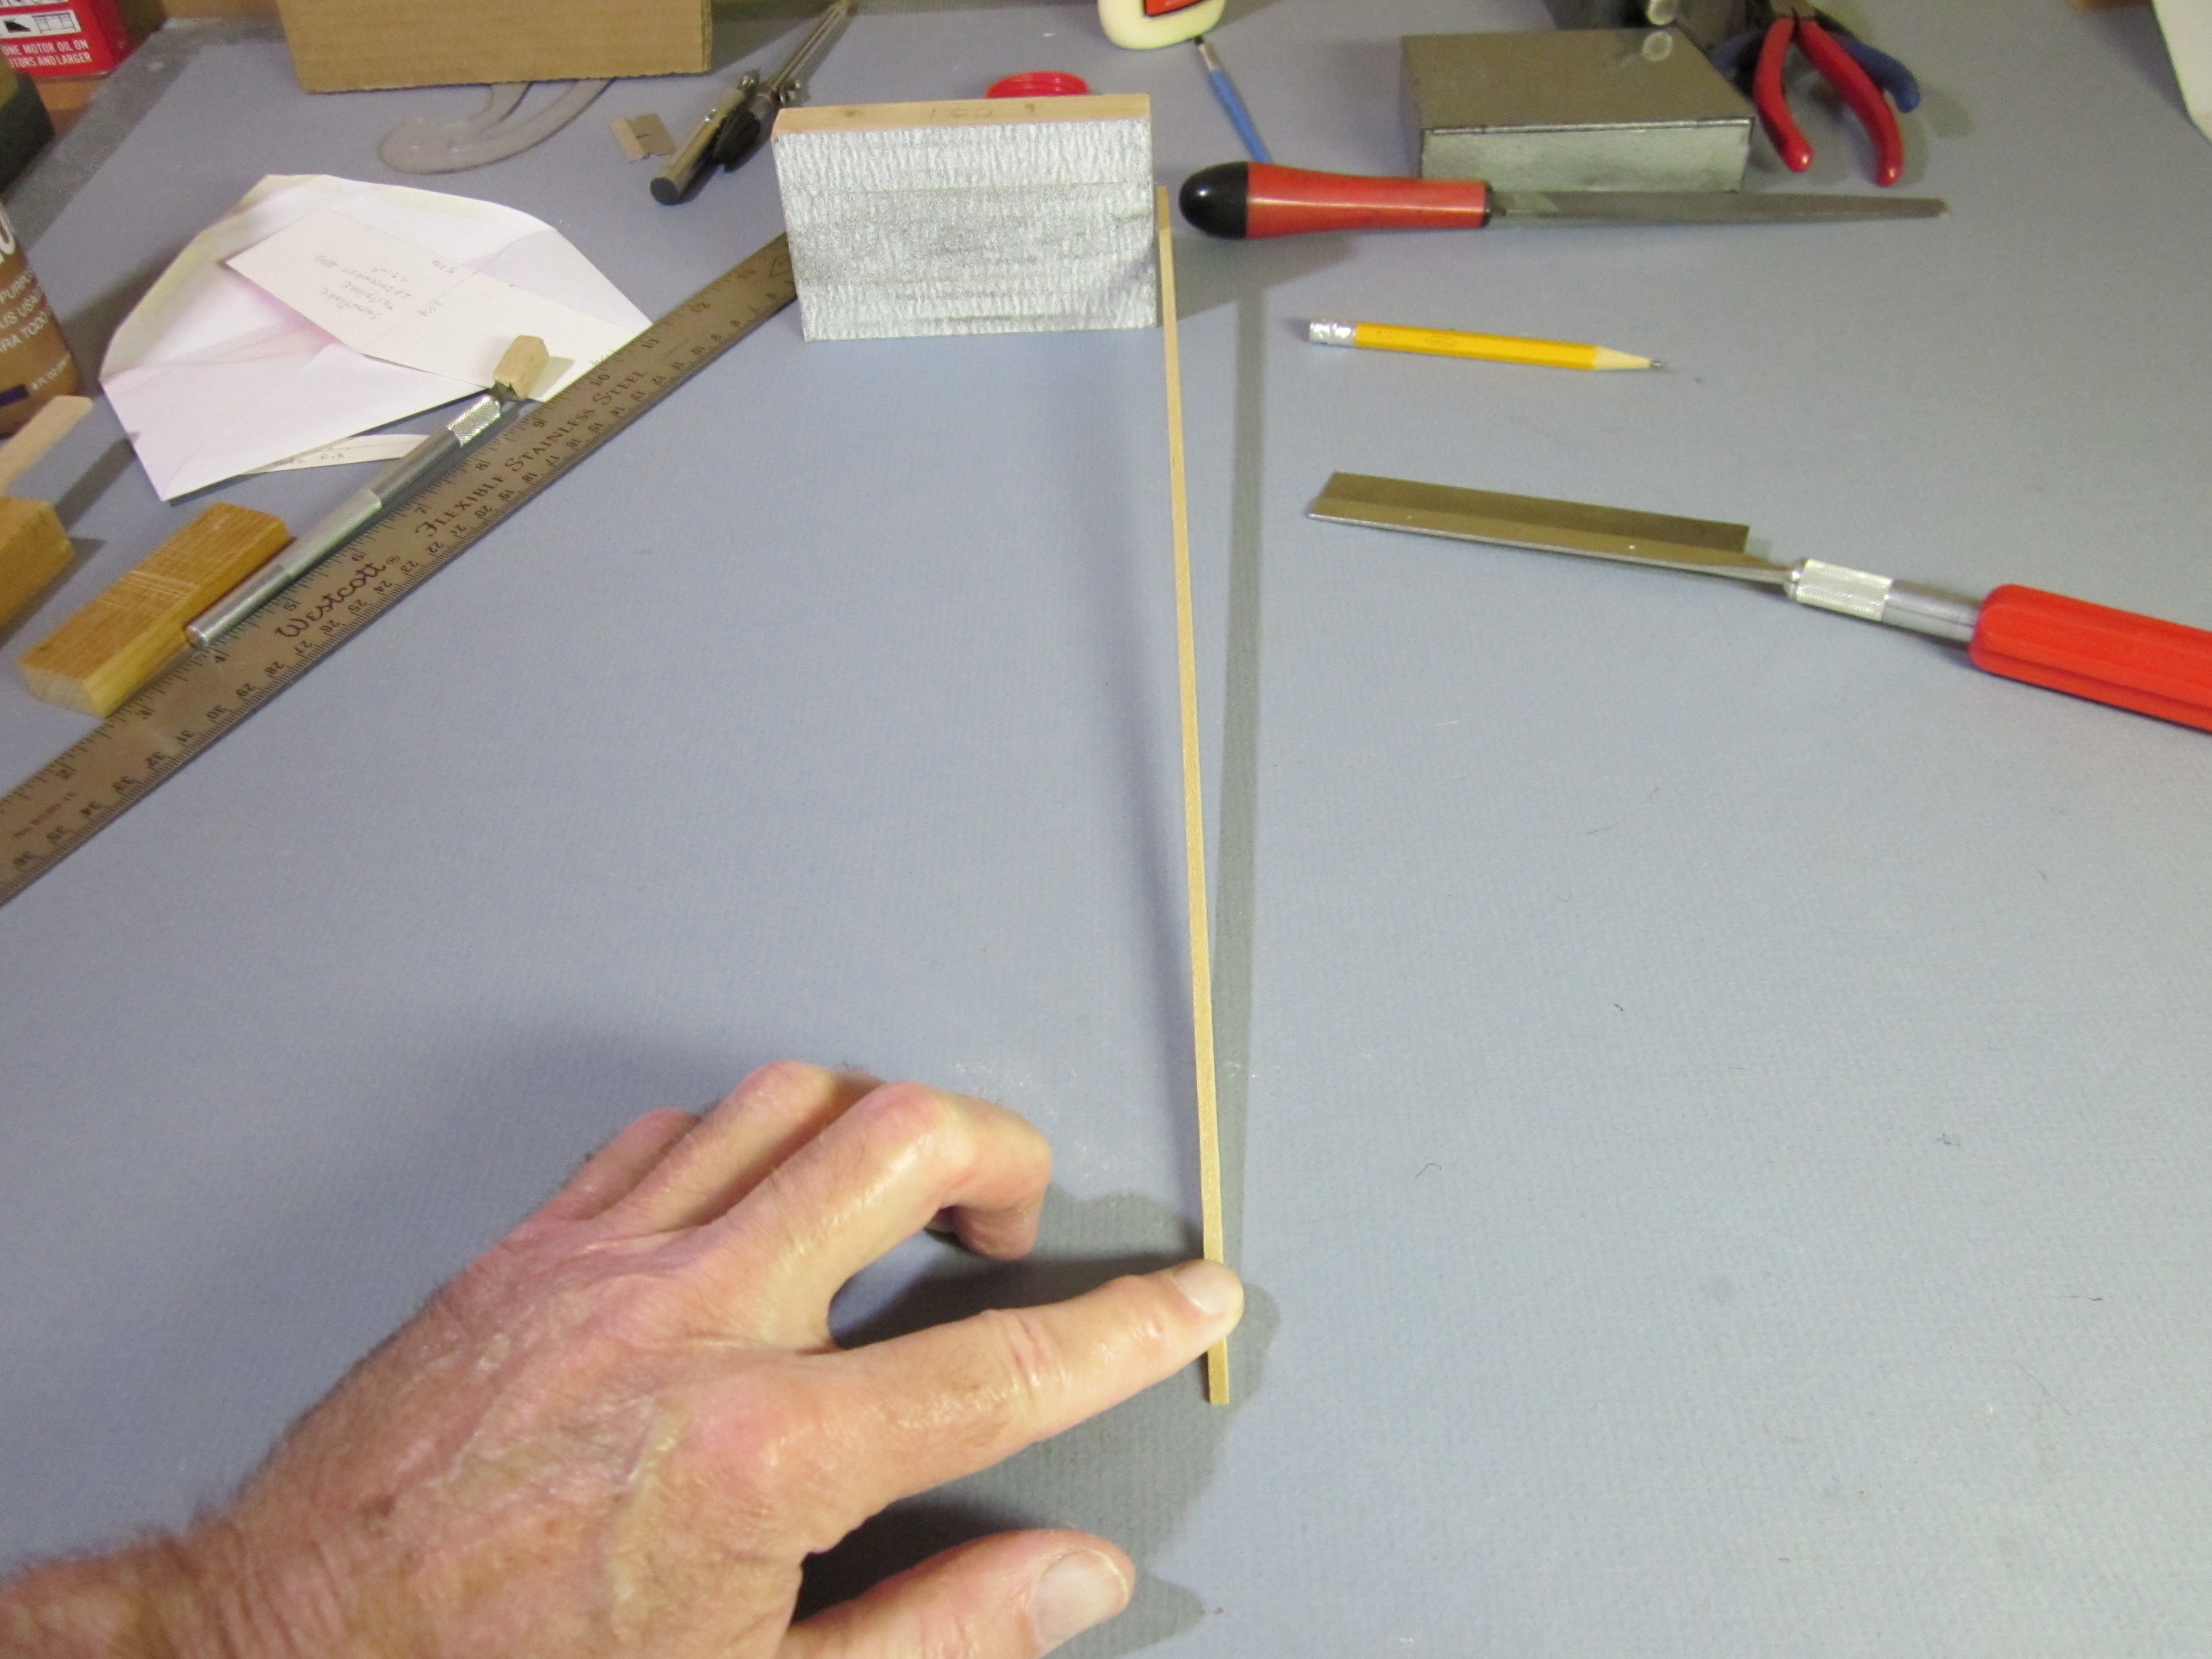
 I had already cut all the sticks to length. Measure, mark and cut in the miter box with the razor saw. If you are planing to do a group build, you might want to cut parts in bulk.
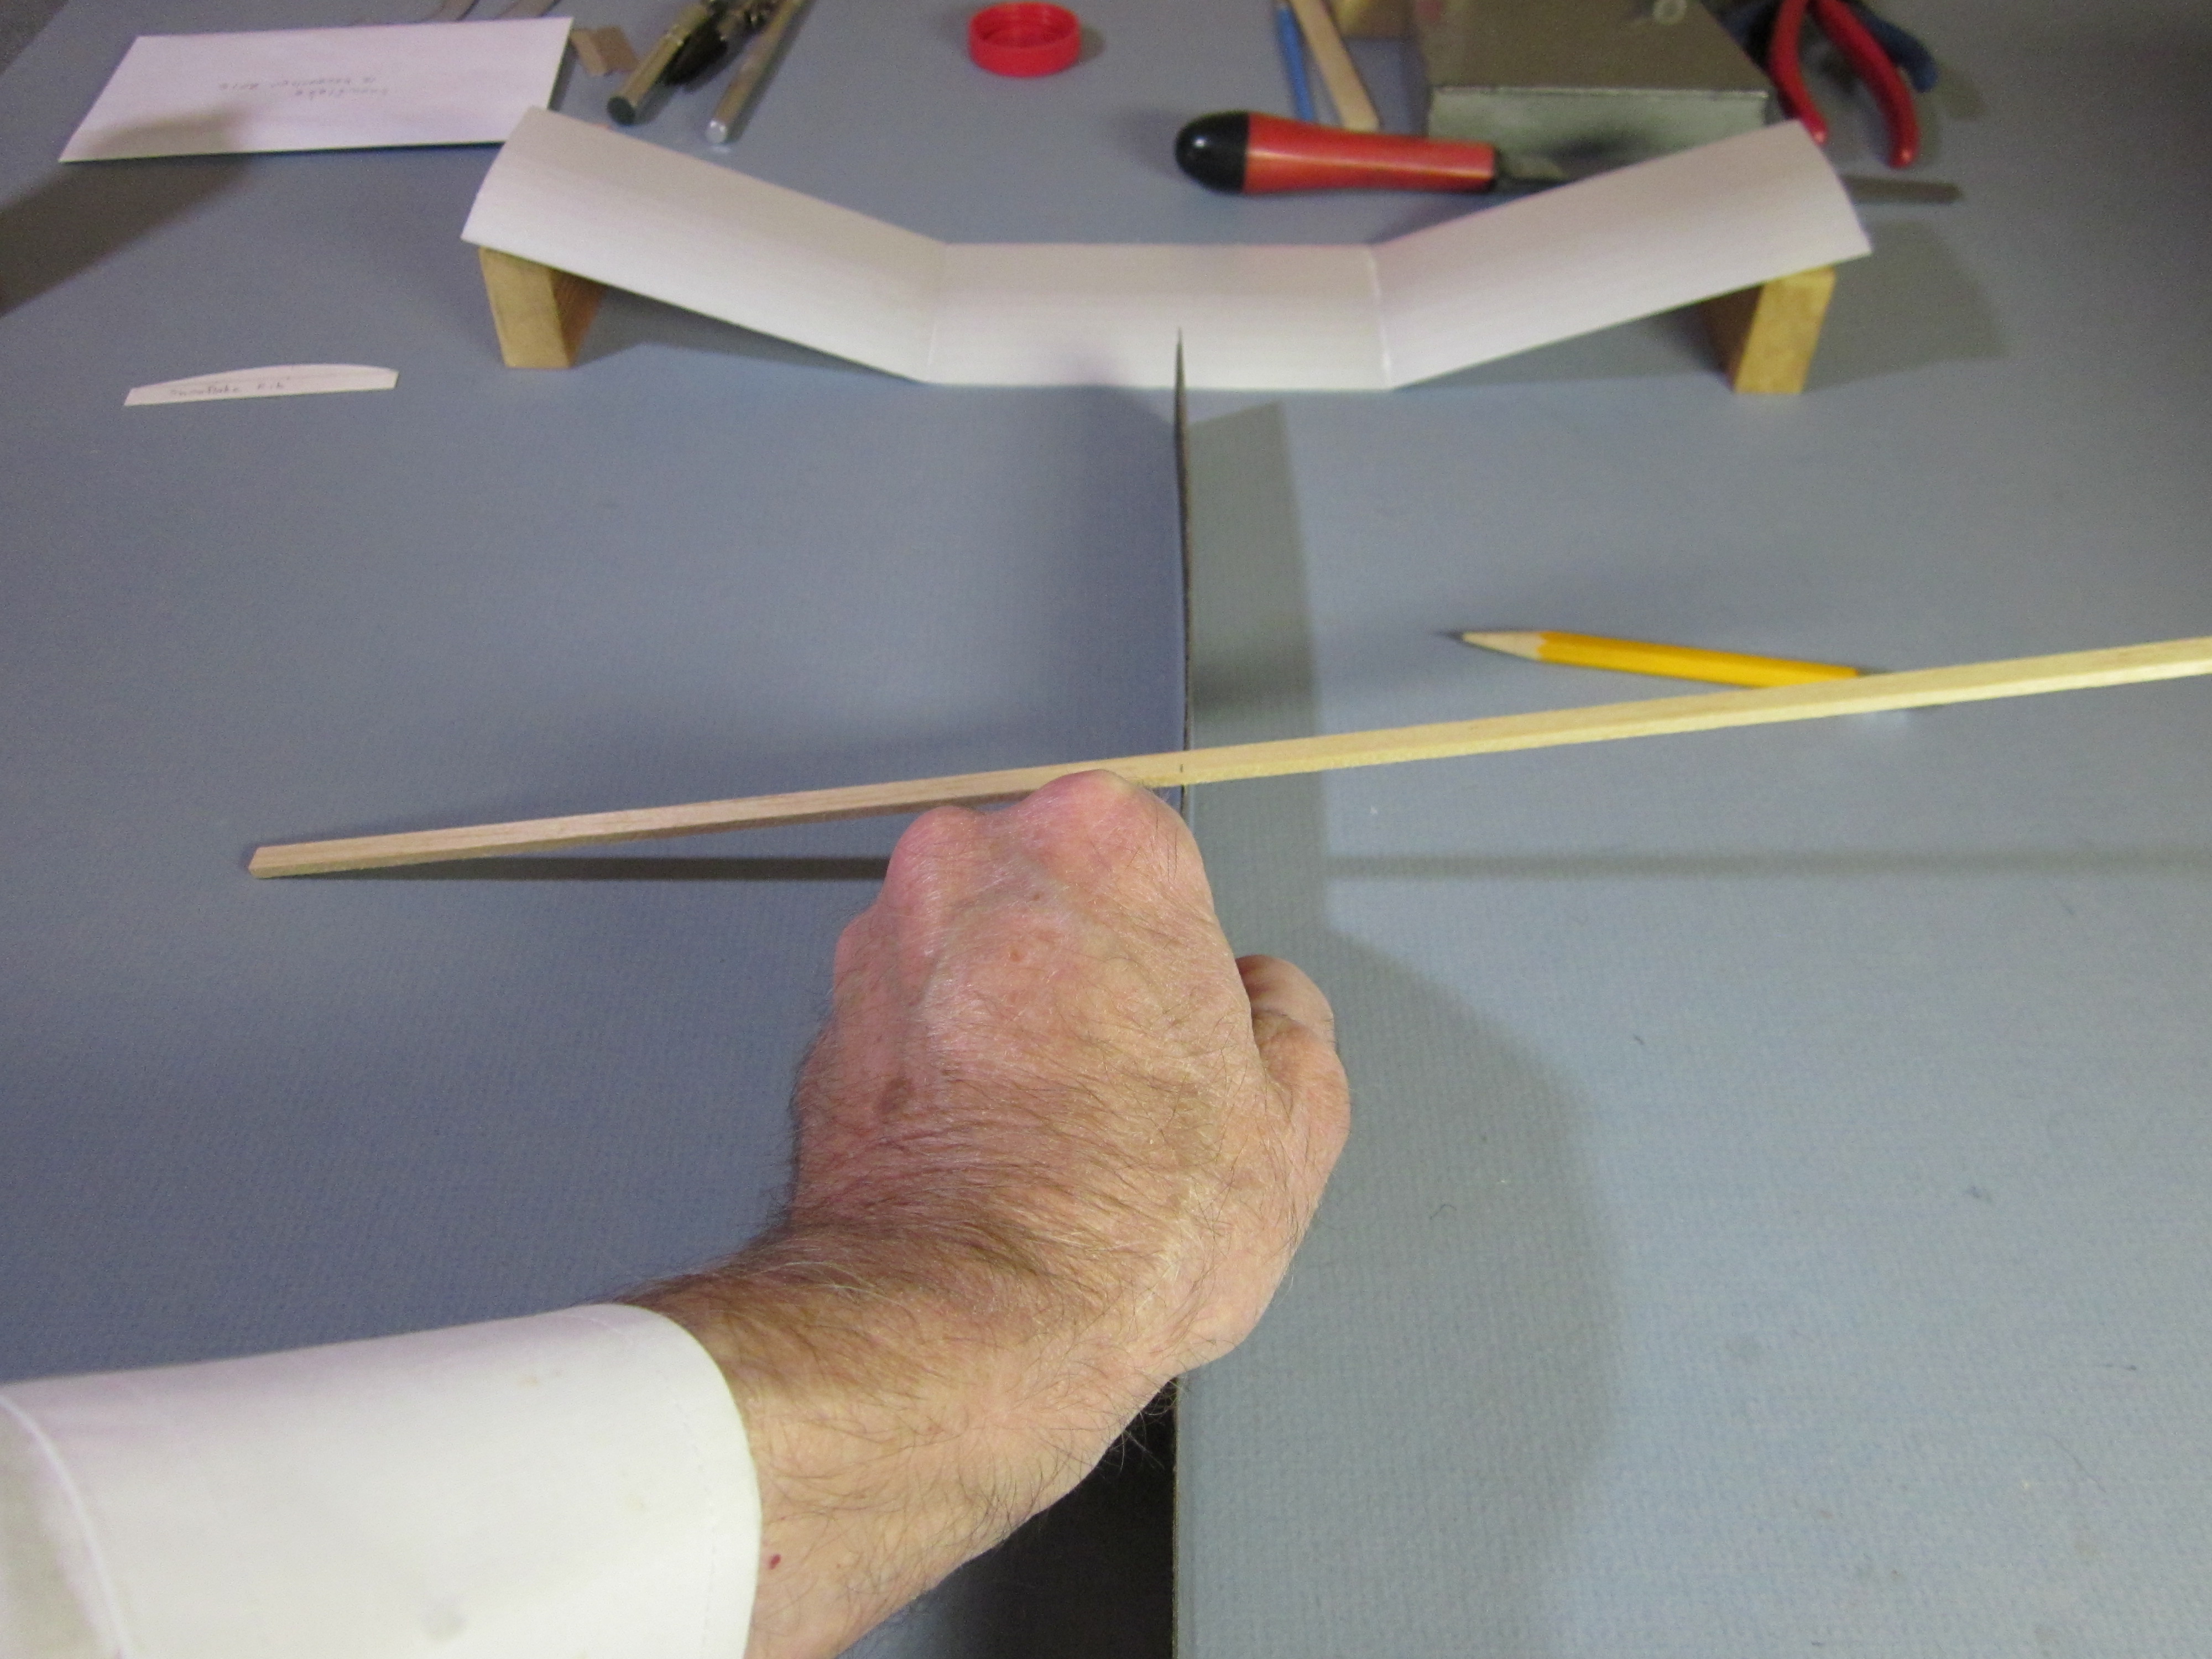
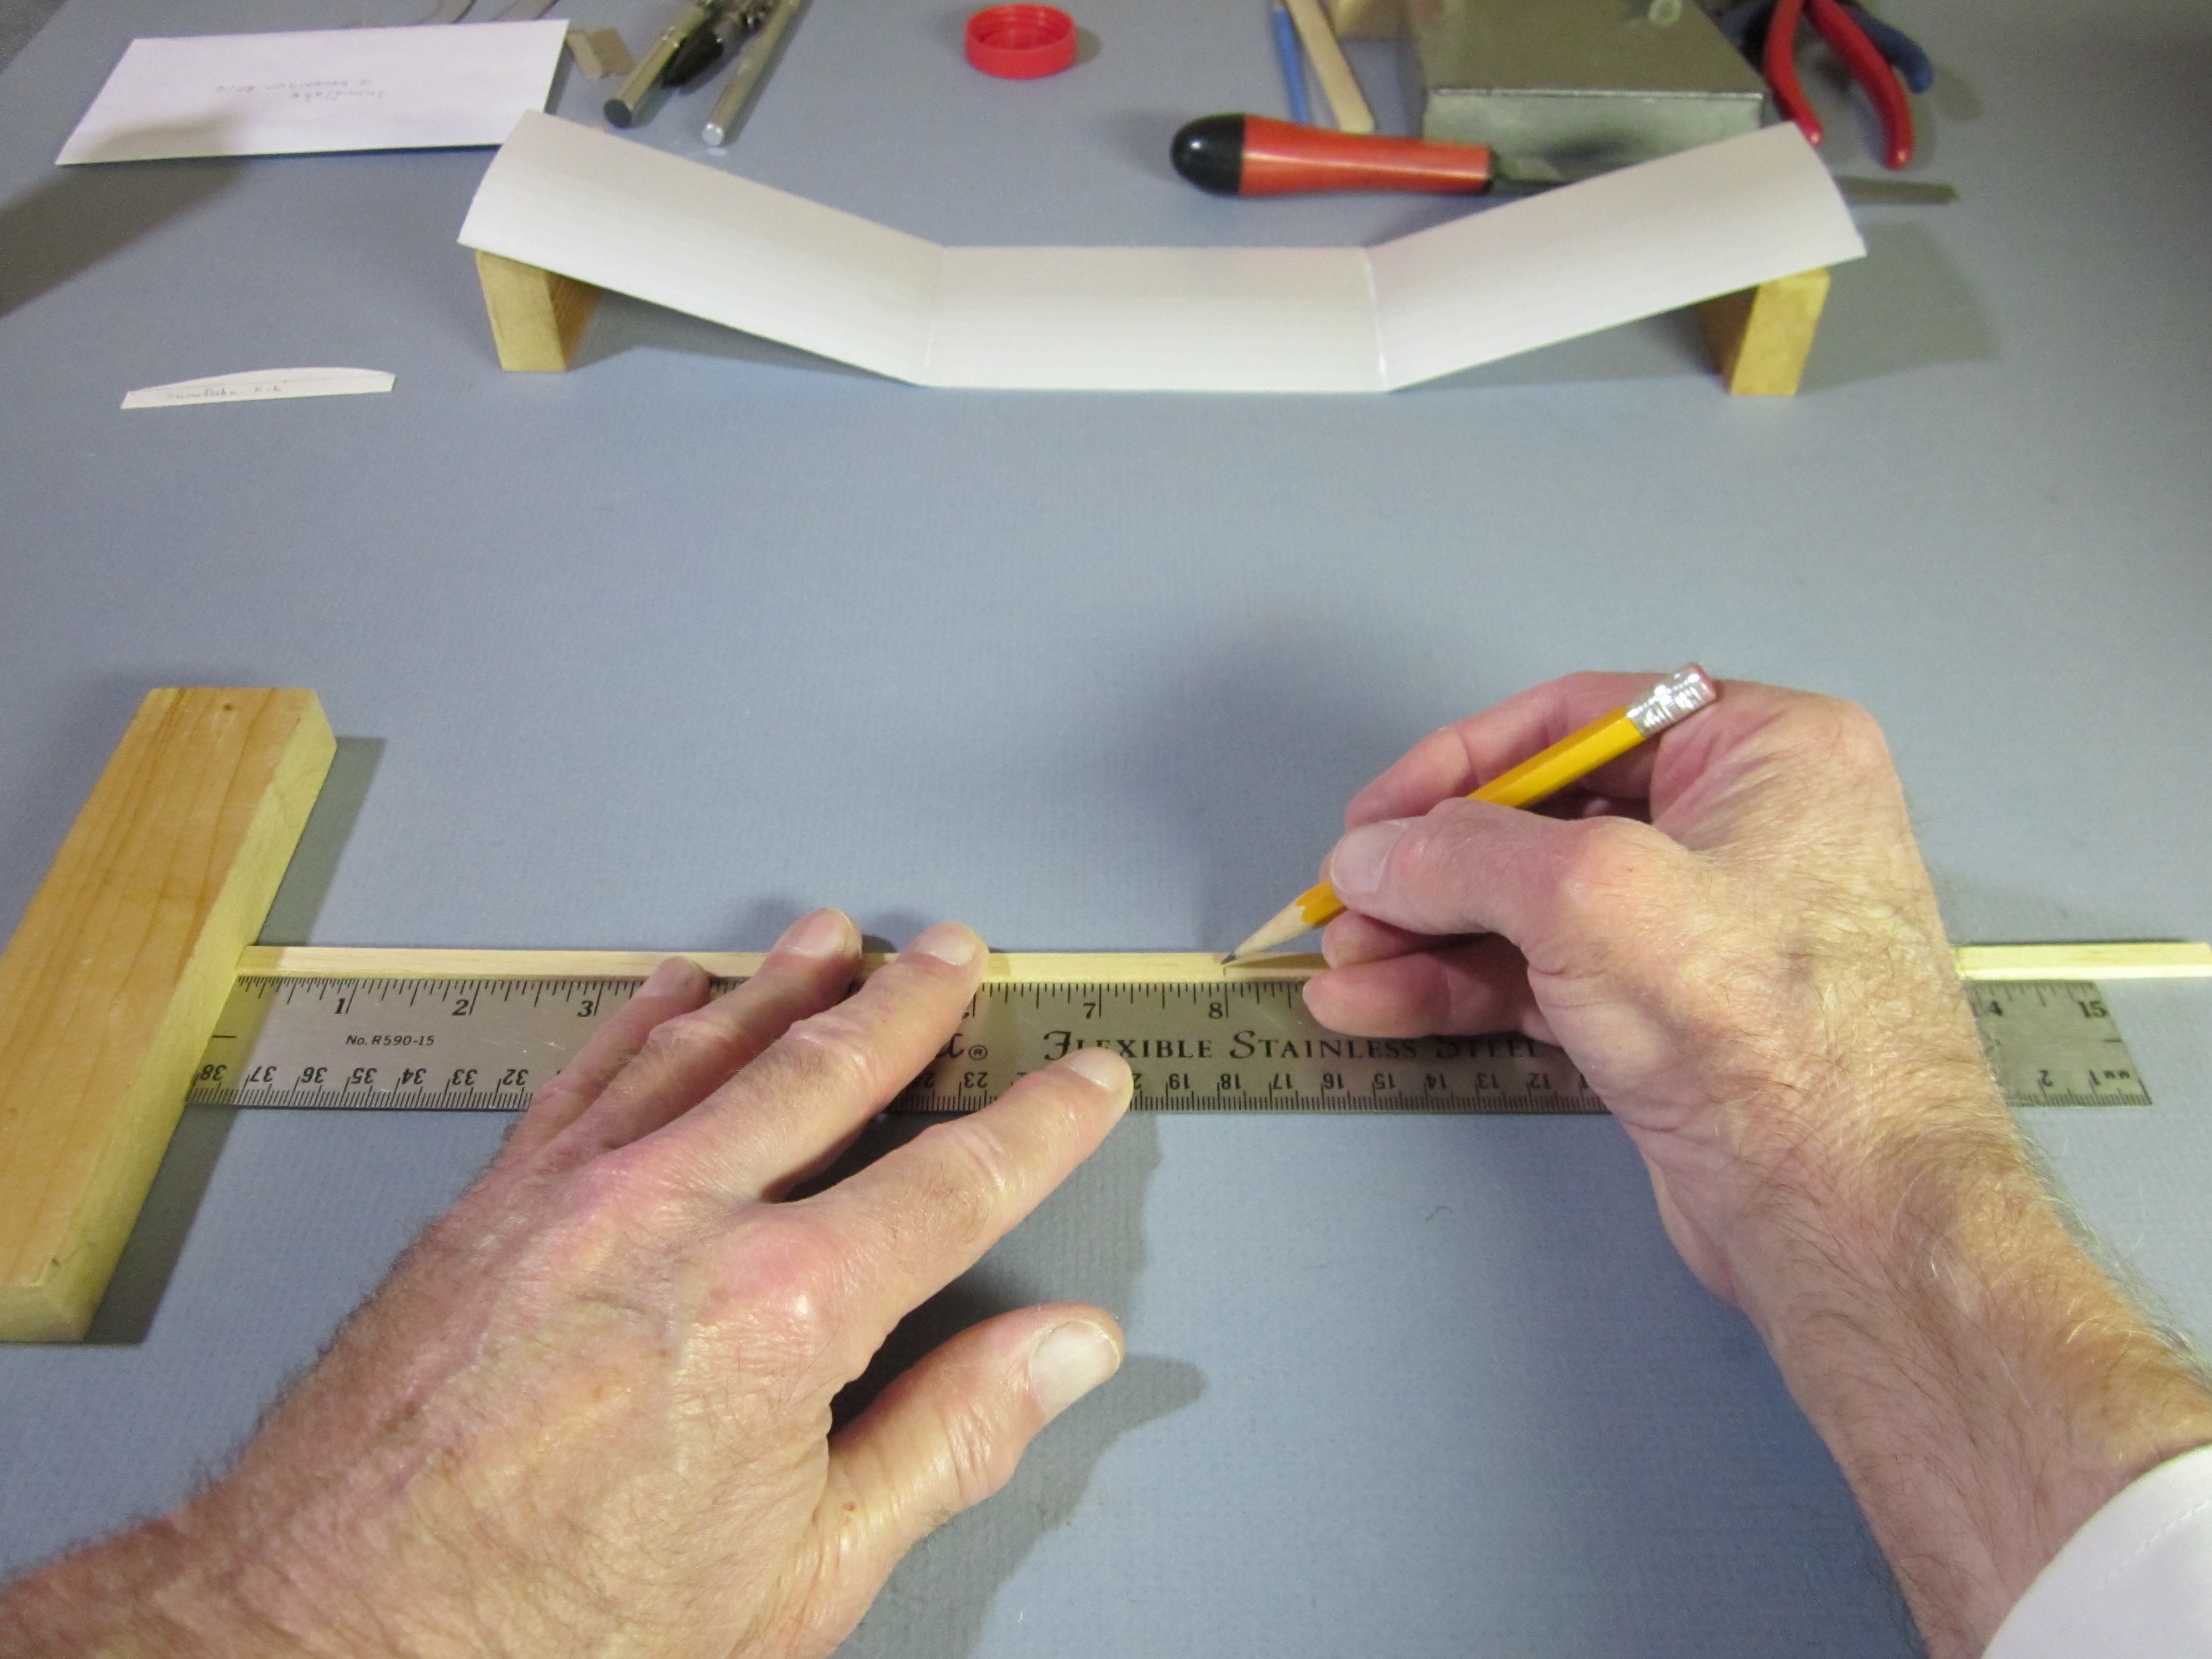 Weight and balance are critical considerations with airplanes. We want the weight forward. Mark the midpoint 8″ along the 16″ length of the stick. (7 1/2″ if you use a 15″ stick.)
 Balance the stick at its midpoint on the edge of the ruler. The heavy end will go down.
 Mark the heavy end. This will be the front end where the propeller goes. The tail goes on the back end. The stick has a front end and a back end. It has a top and a bottom. The wing and fin go on top, the propeller bearing, tailplane and rear motor hook go on the bottom.
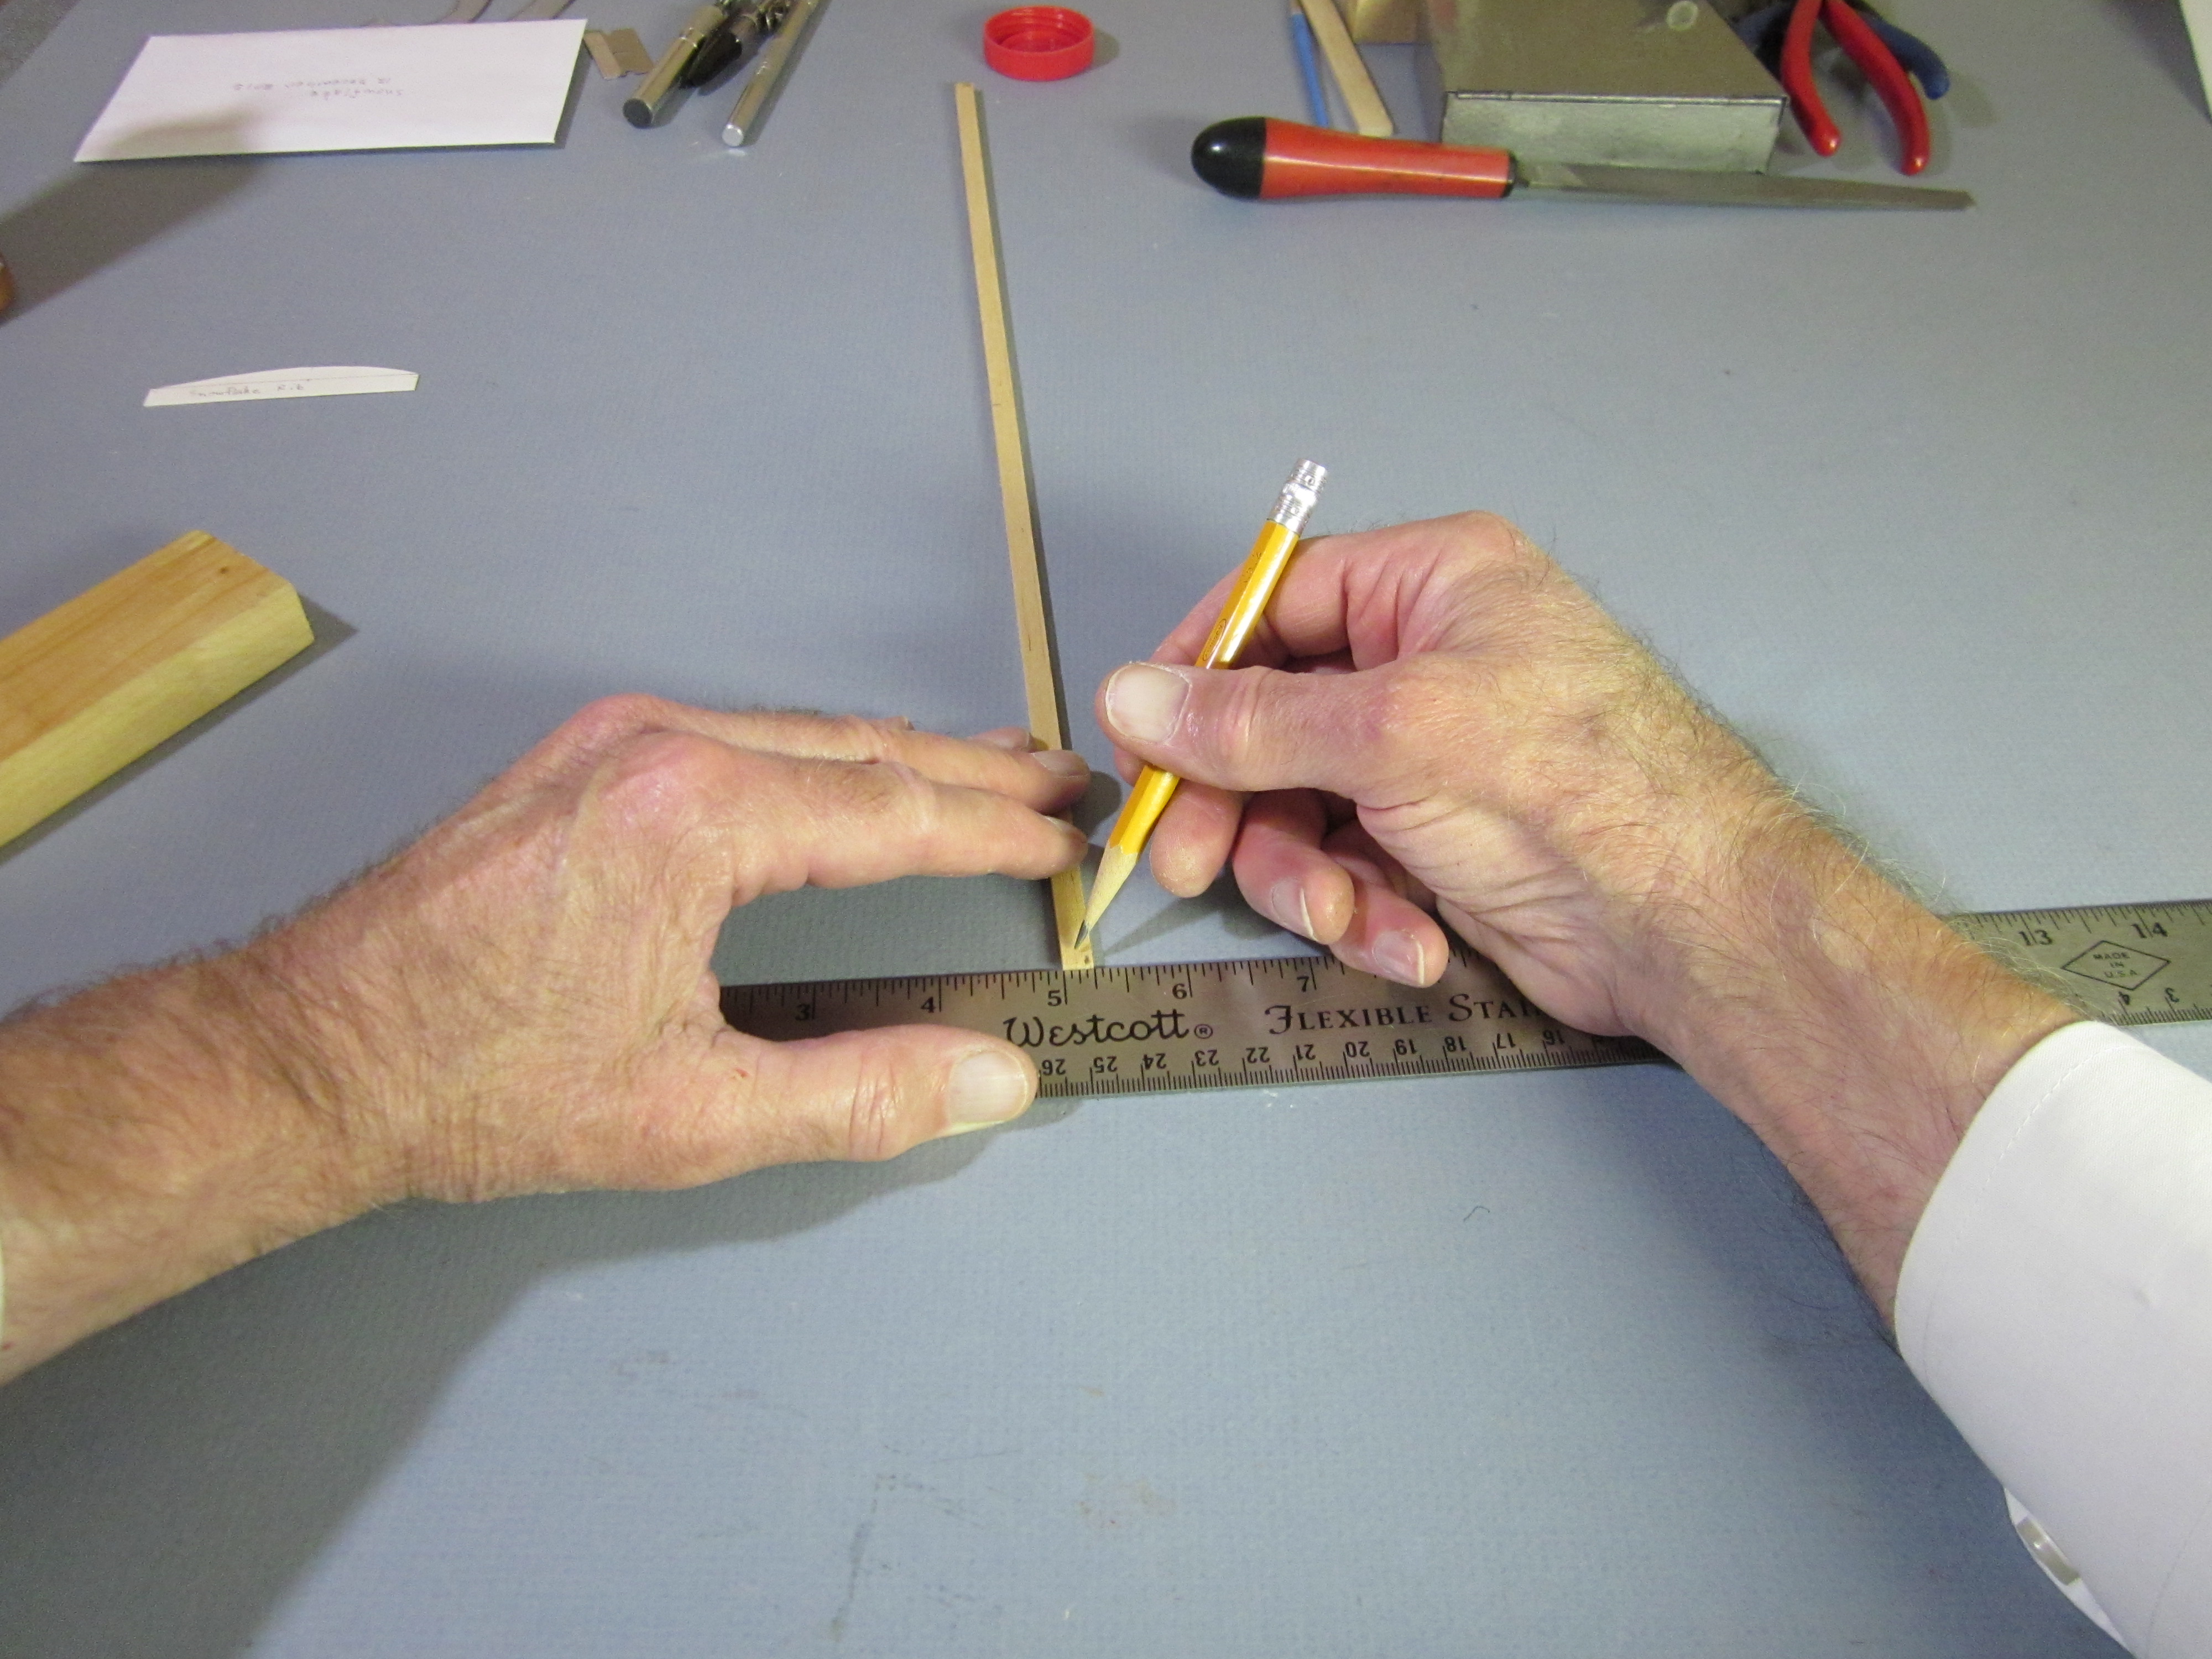 Mark 3/16″ up from the bottom surface at the tail end of the 1/4″ wide stick.
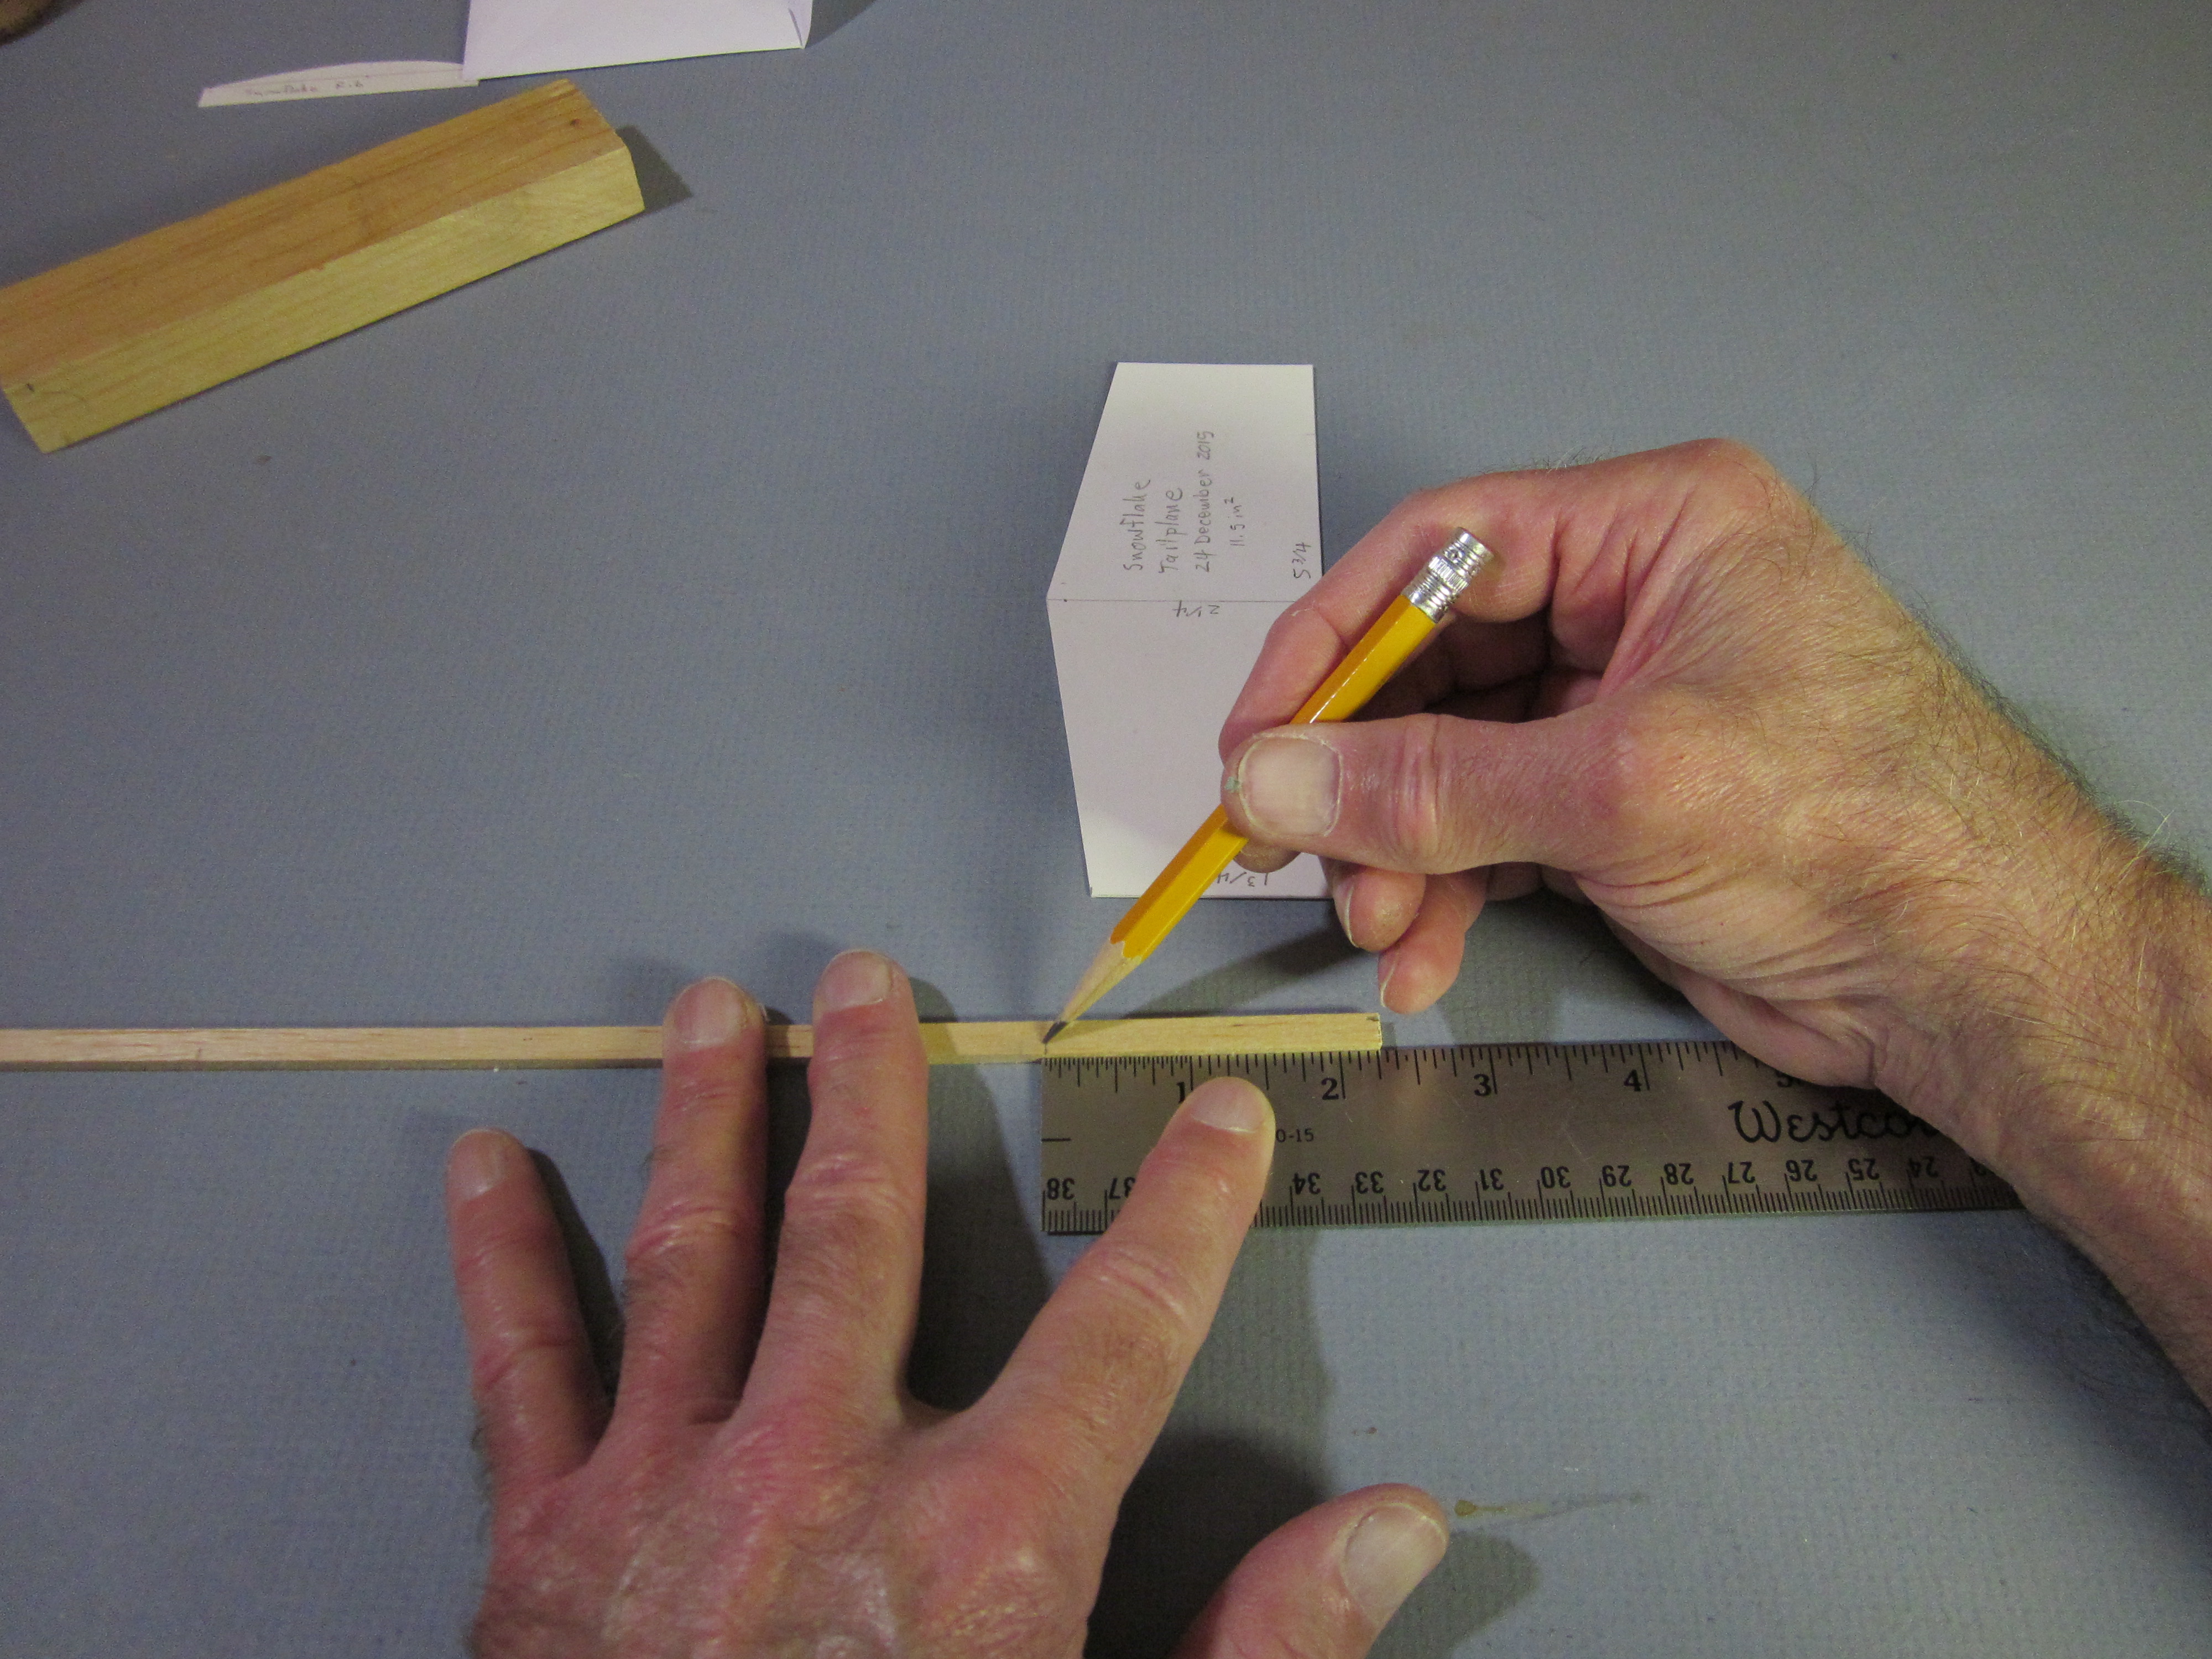 Mark 2 1/4″ from the tail end along the under side of the stick.
 Draw a line between these two marks.
 Cut the 3/16″ x 2 1/4″ triangle off. This is waste. Cut into the waste, rather than into the stick. This cut will be finished with sandpaper, so leaving a little waste is better than cutting into the final part.
 Place the stick on top of a block with the surface to be sanded extended a little over the edge. Back it up with a piece of hard 1/8″ x 1/2″ or similar. Place the edge of the sanding block flat on the table and gently sand down to the line. The sides of the stick are parallel with the table top, the sandpaper is perpendicular to the table top, so the sanded surface will be perpendicular to the side surfaces of the stick.
 You can press the sanded surface to the table top to check that it is perpendicular.
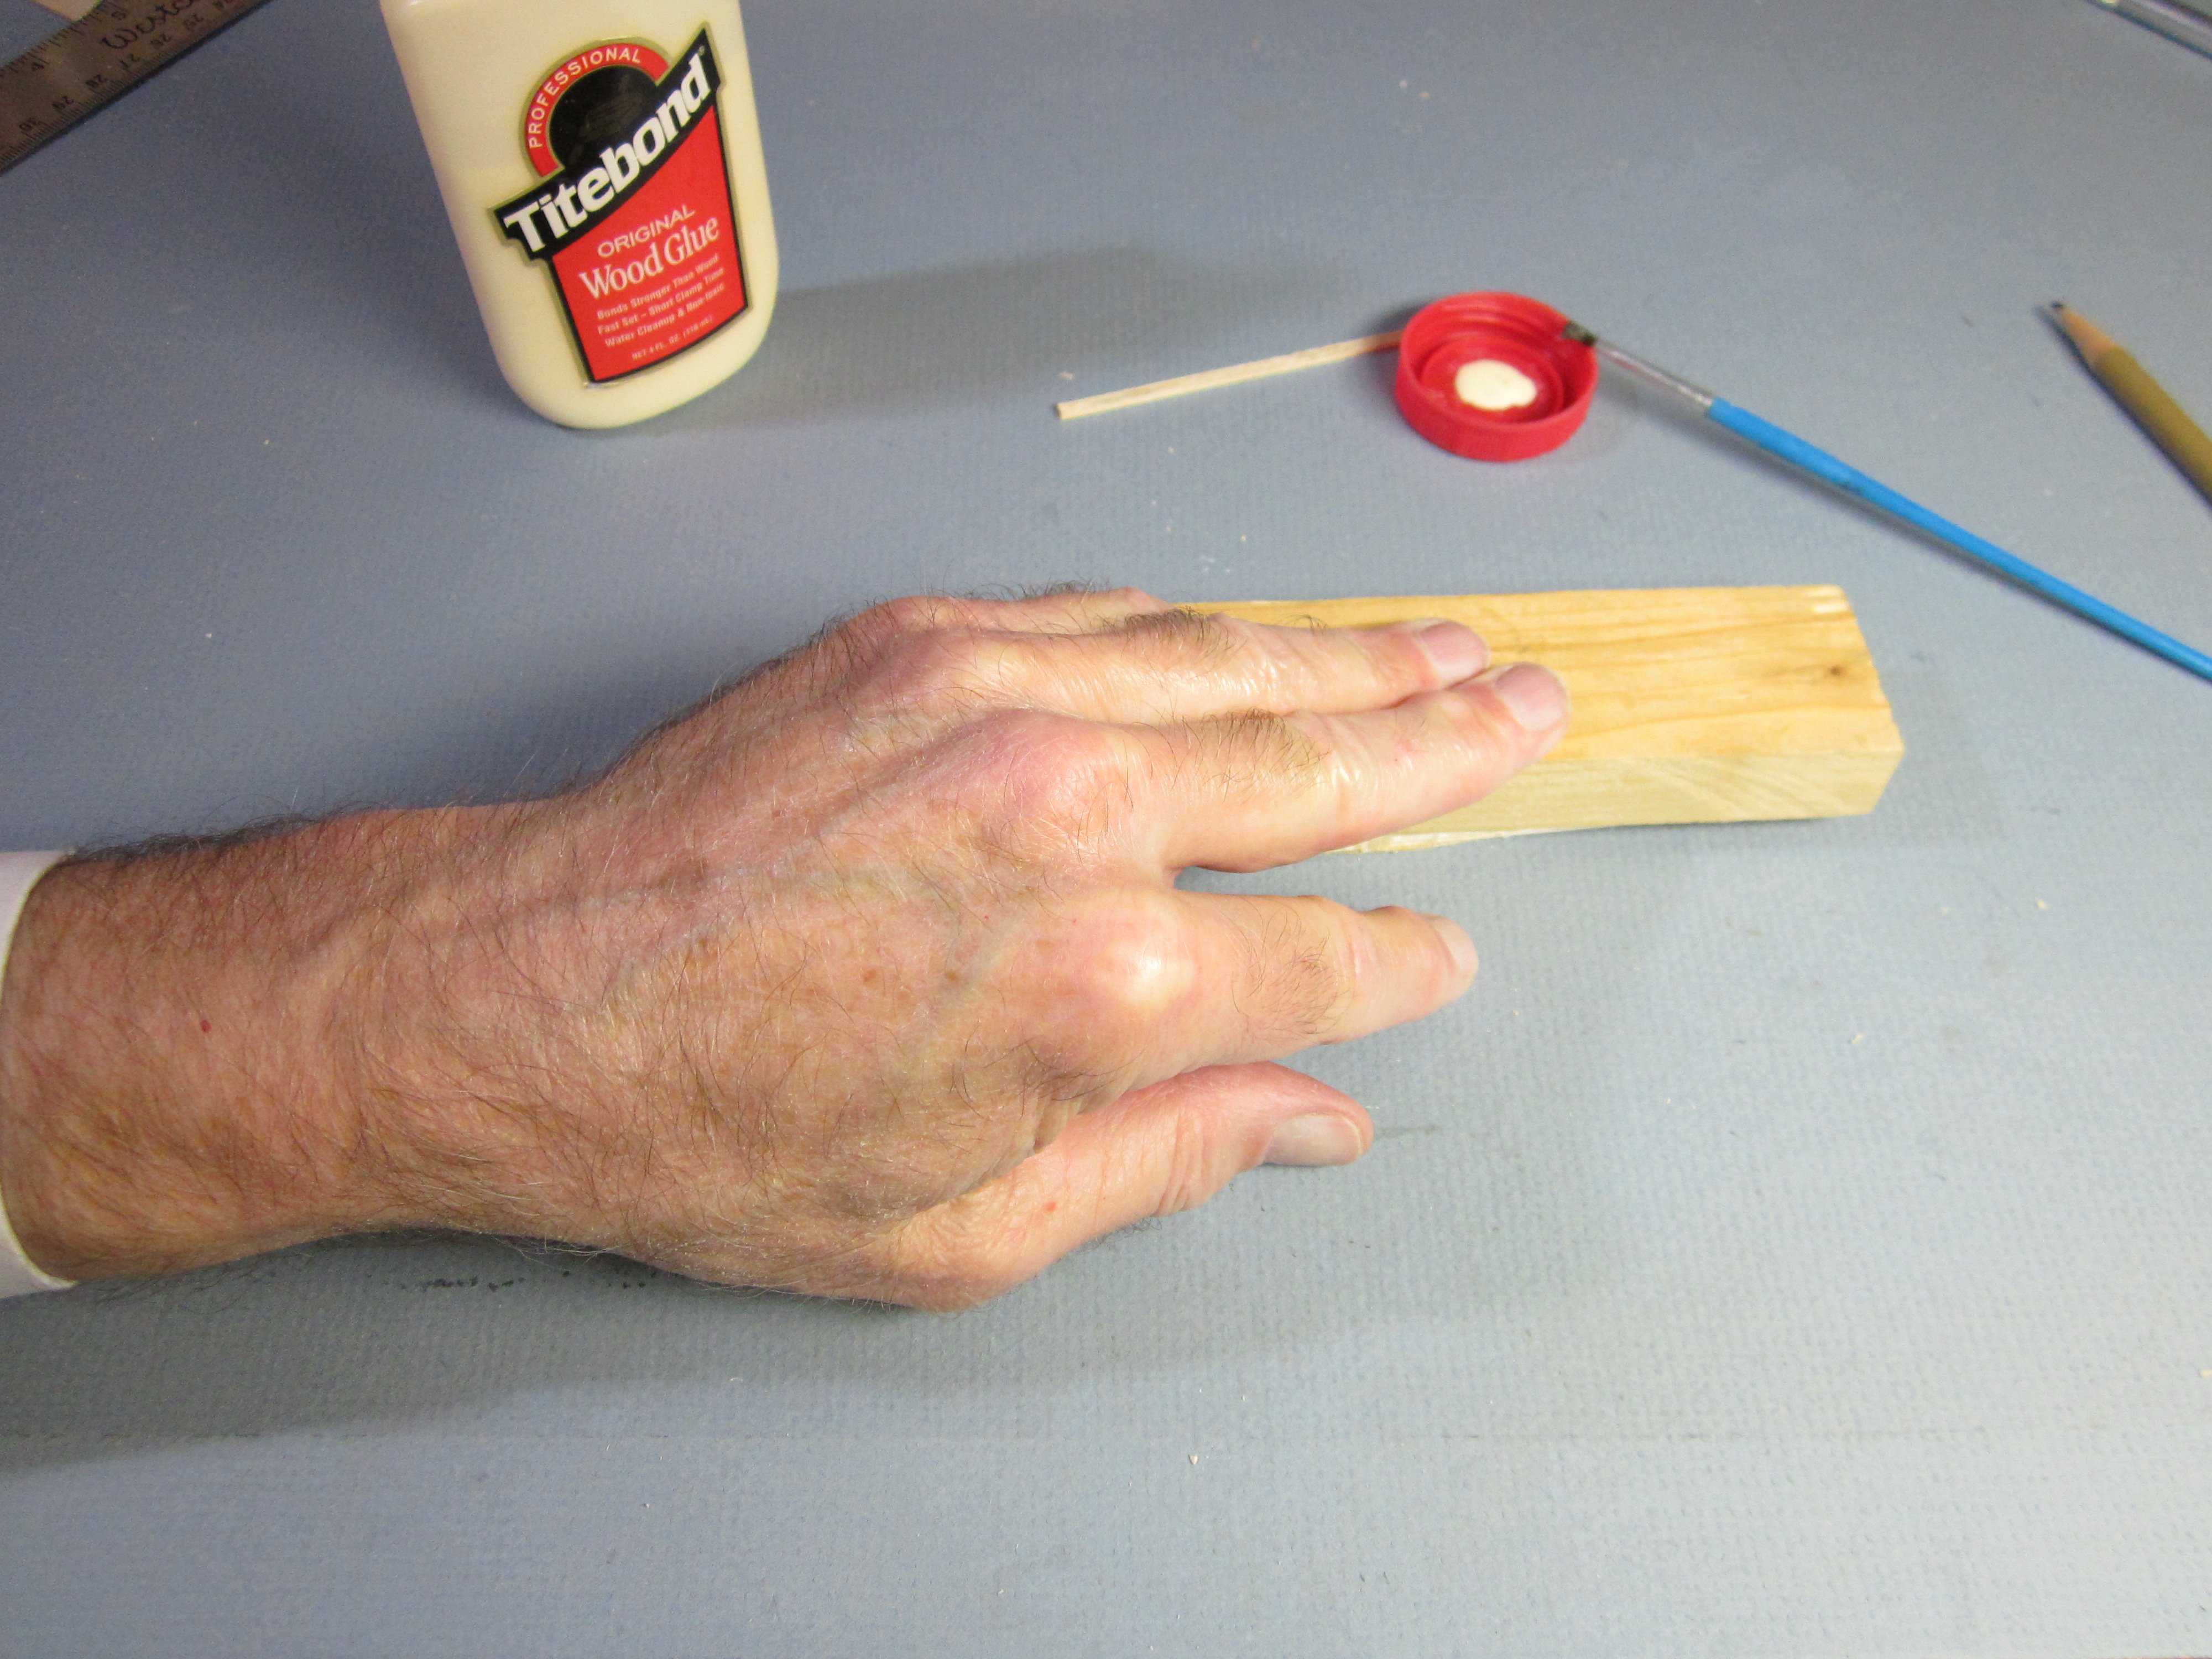
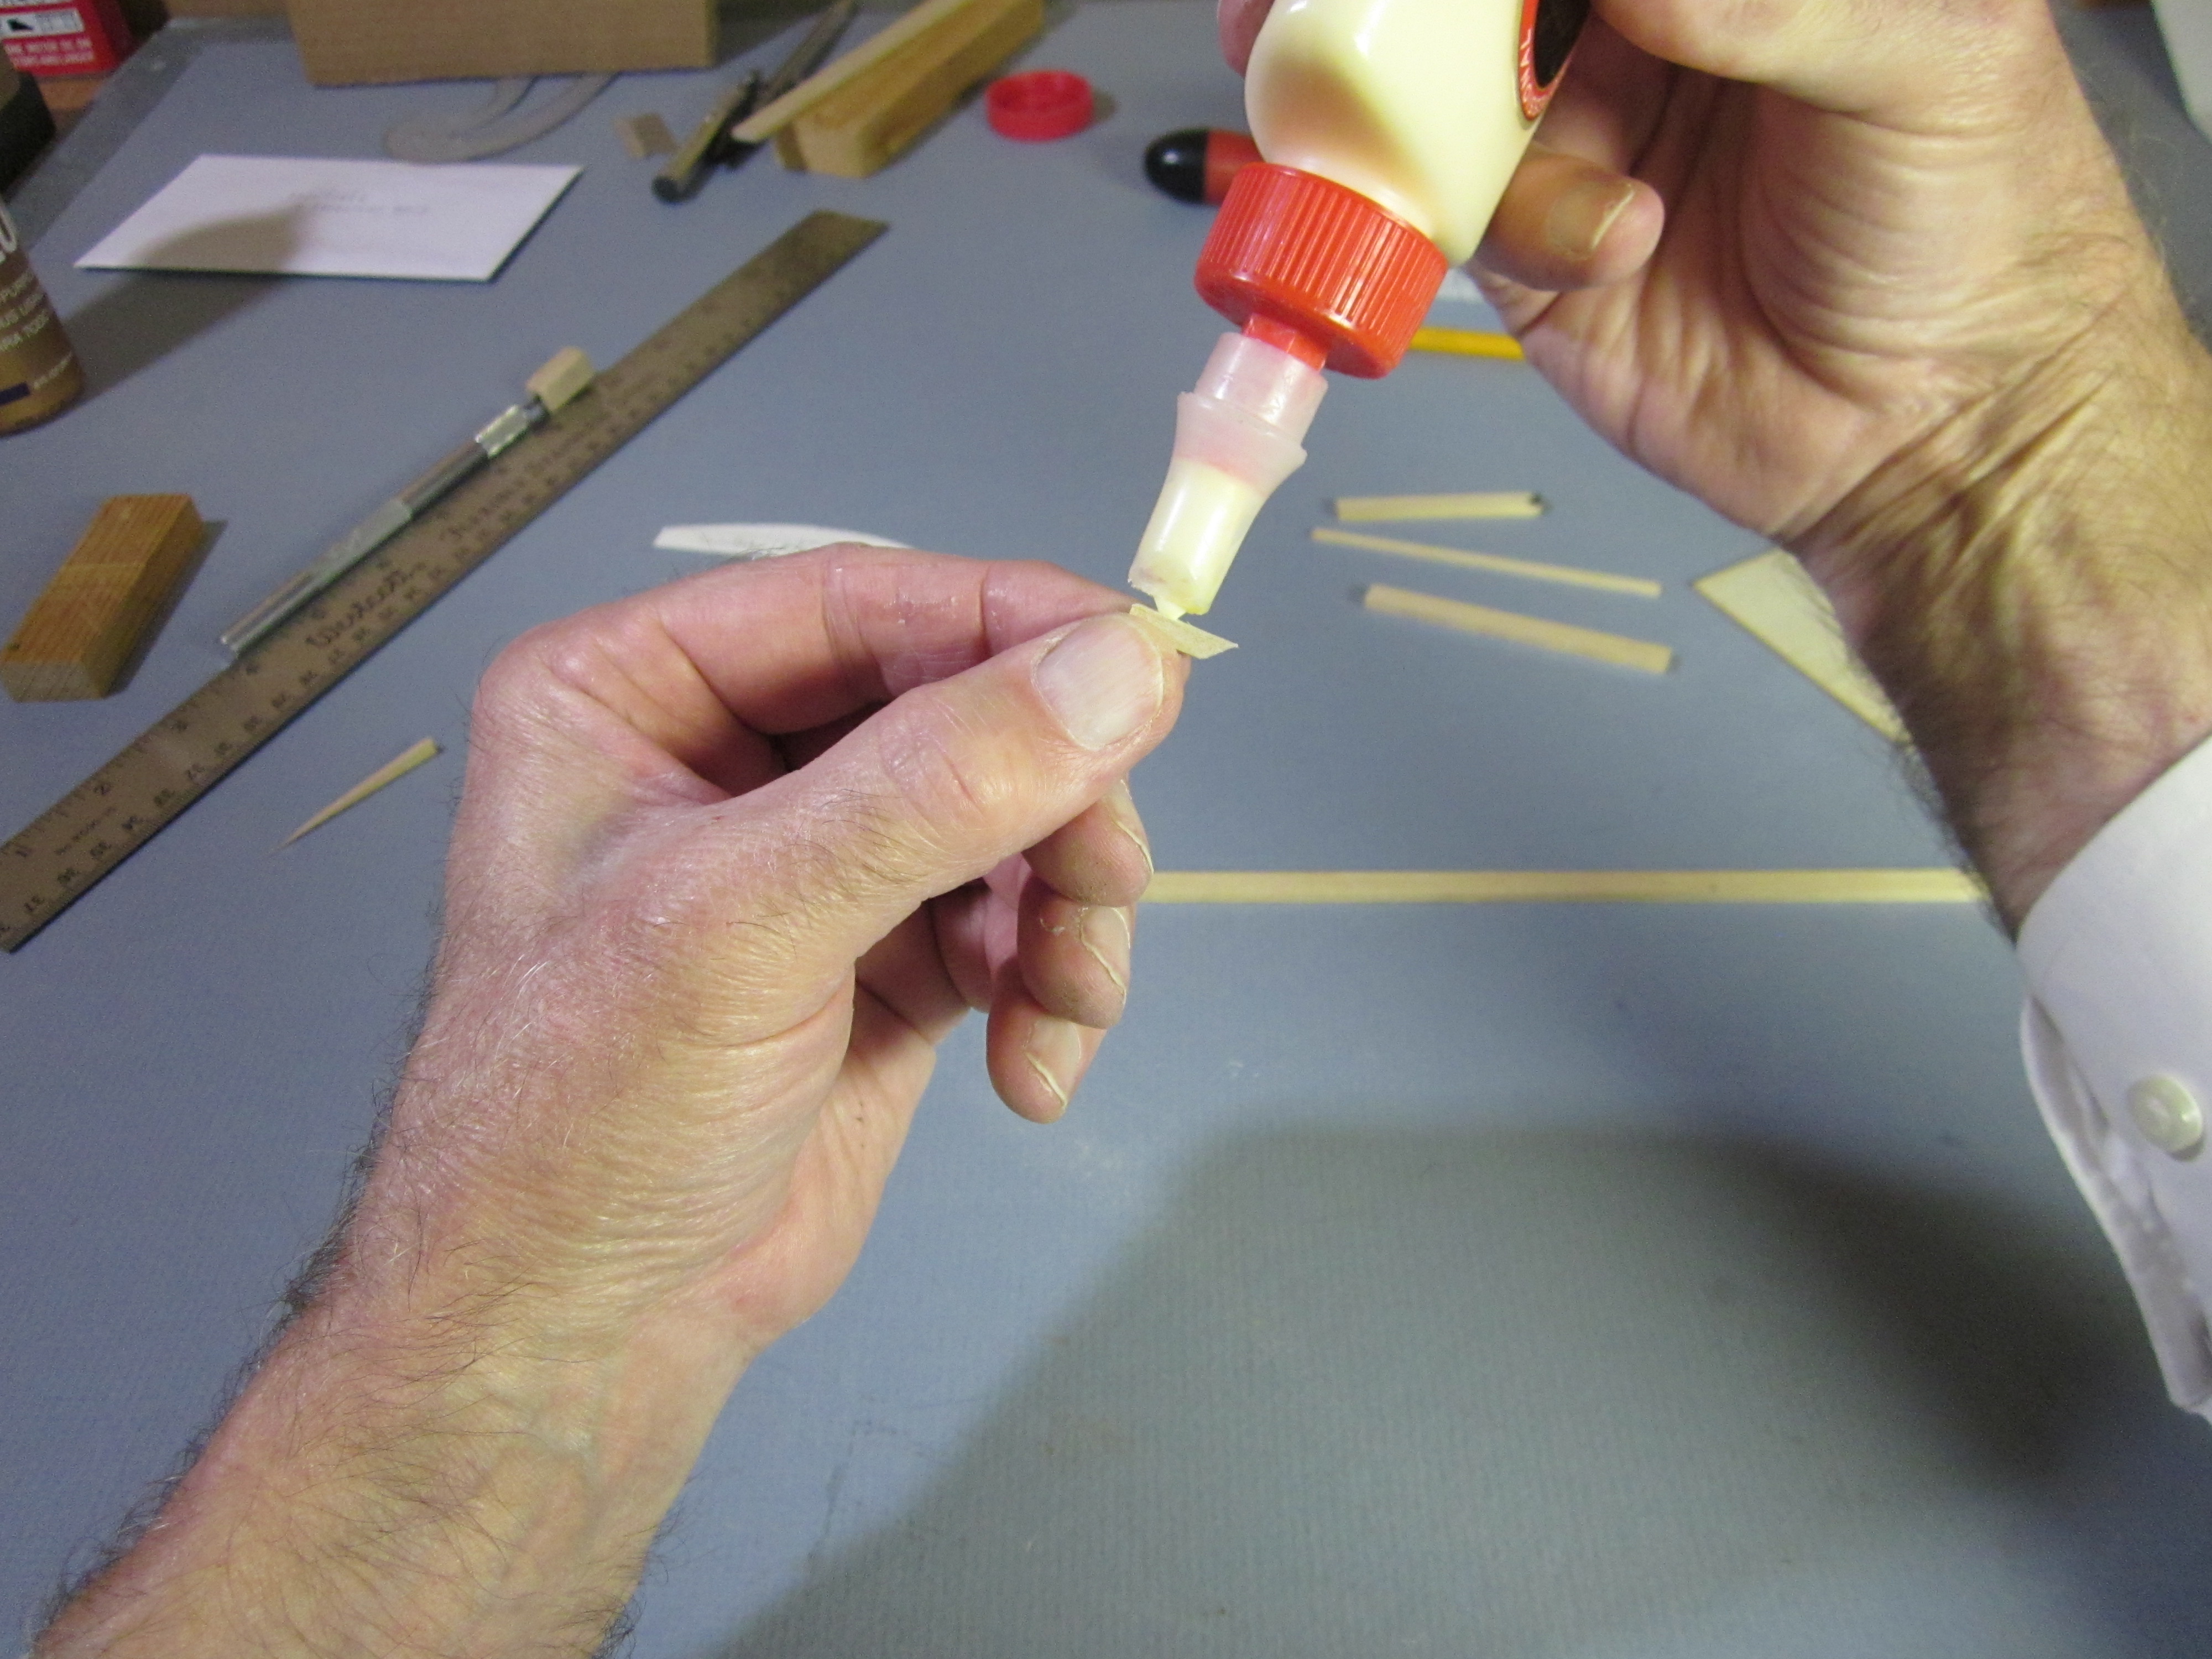 Spread glue on the top of the nose bock. Just enough glue so the surface is shiny, but you can still see wood through it is right. I use wood glue for the wood joints.
 Press the nose block to the under surface of the stick at the nose end. Align it carefully with the end and sides of the stick.
 Check that the nose block and the tailplane taper are both on the same side of the stick.
GLUE TAILPLANE TO STICK
 Run a bead of glue along the tailplane taper.
 Spread the glue uniformly across the entire surface.
 Align the pinholes in the tailplane with the centerline of the stick and press it into place.
 Press it in place. Set it aside in a safe place with a weight holding it down while the glue dries.
make the wing saddle
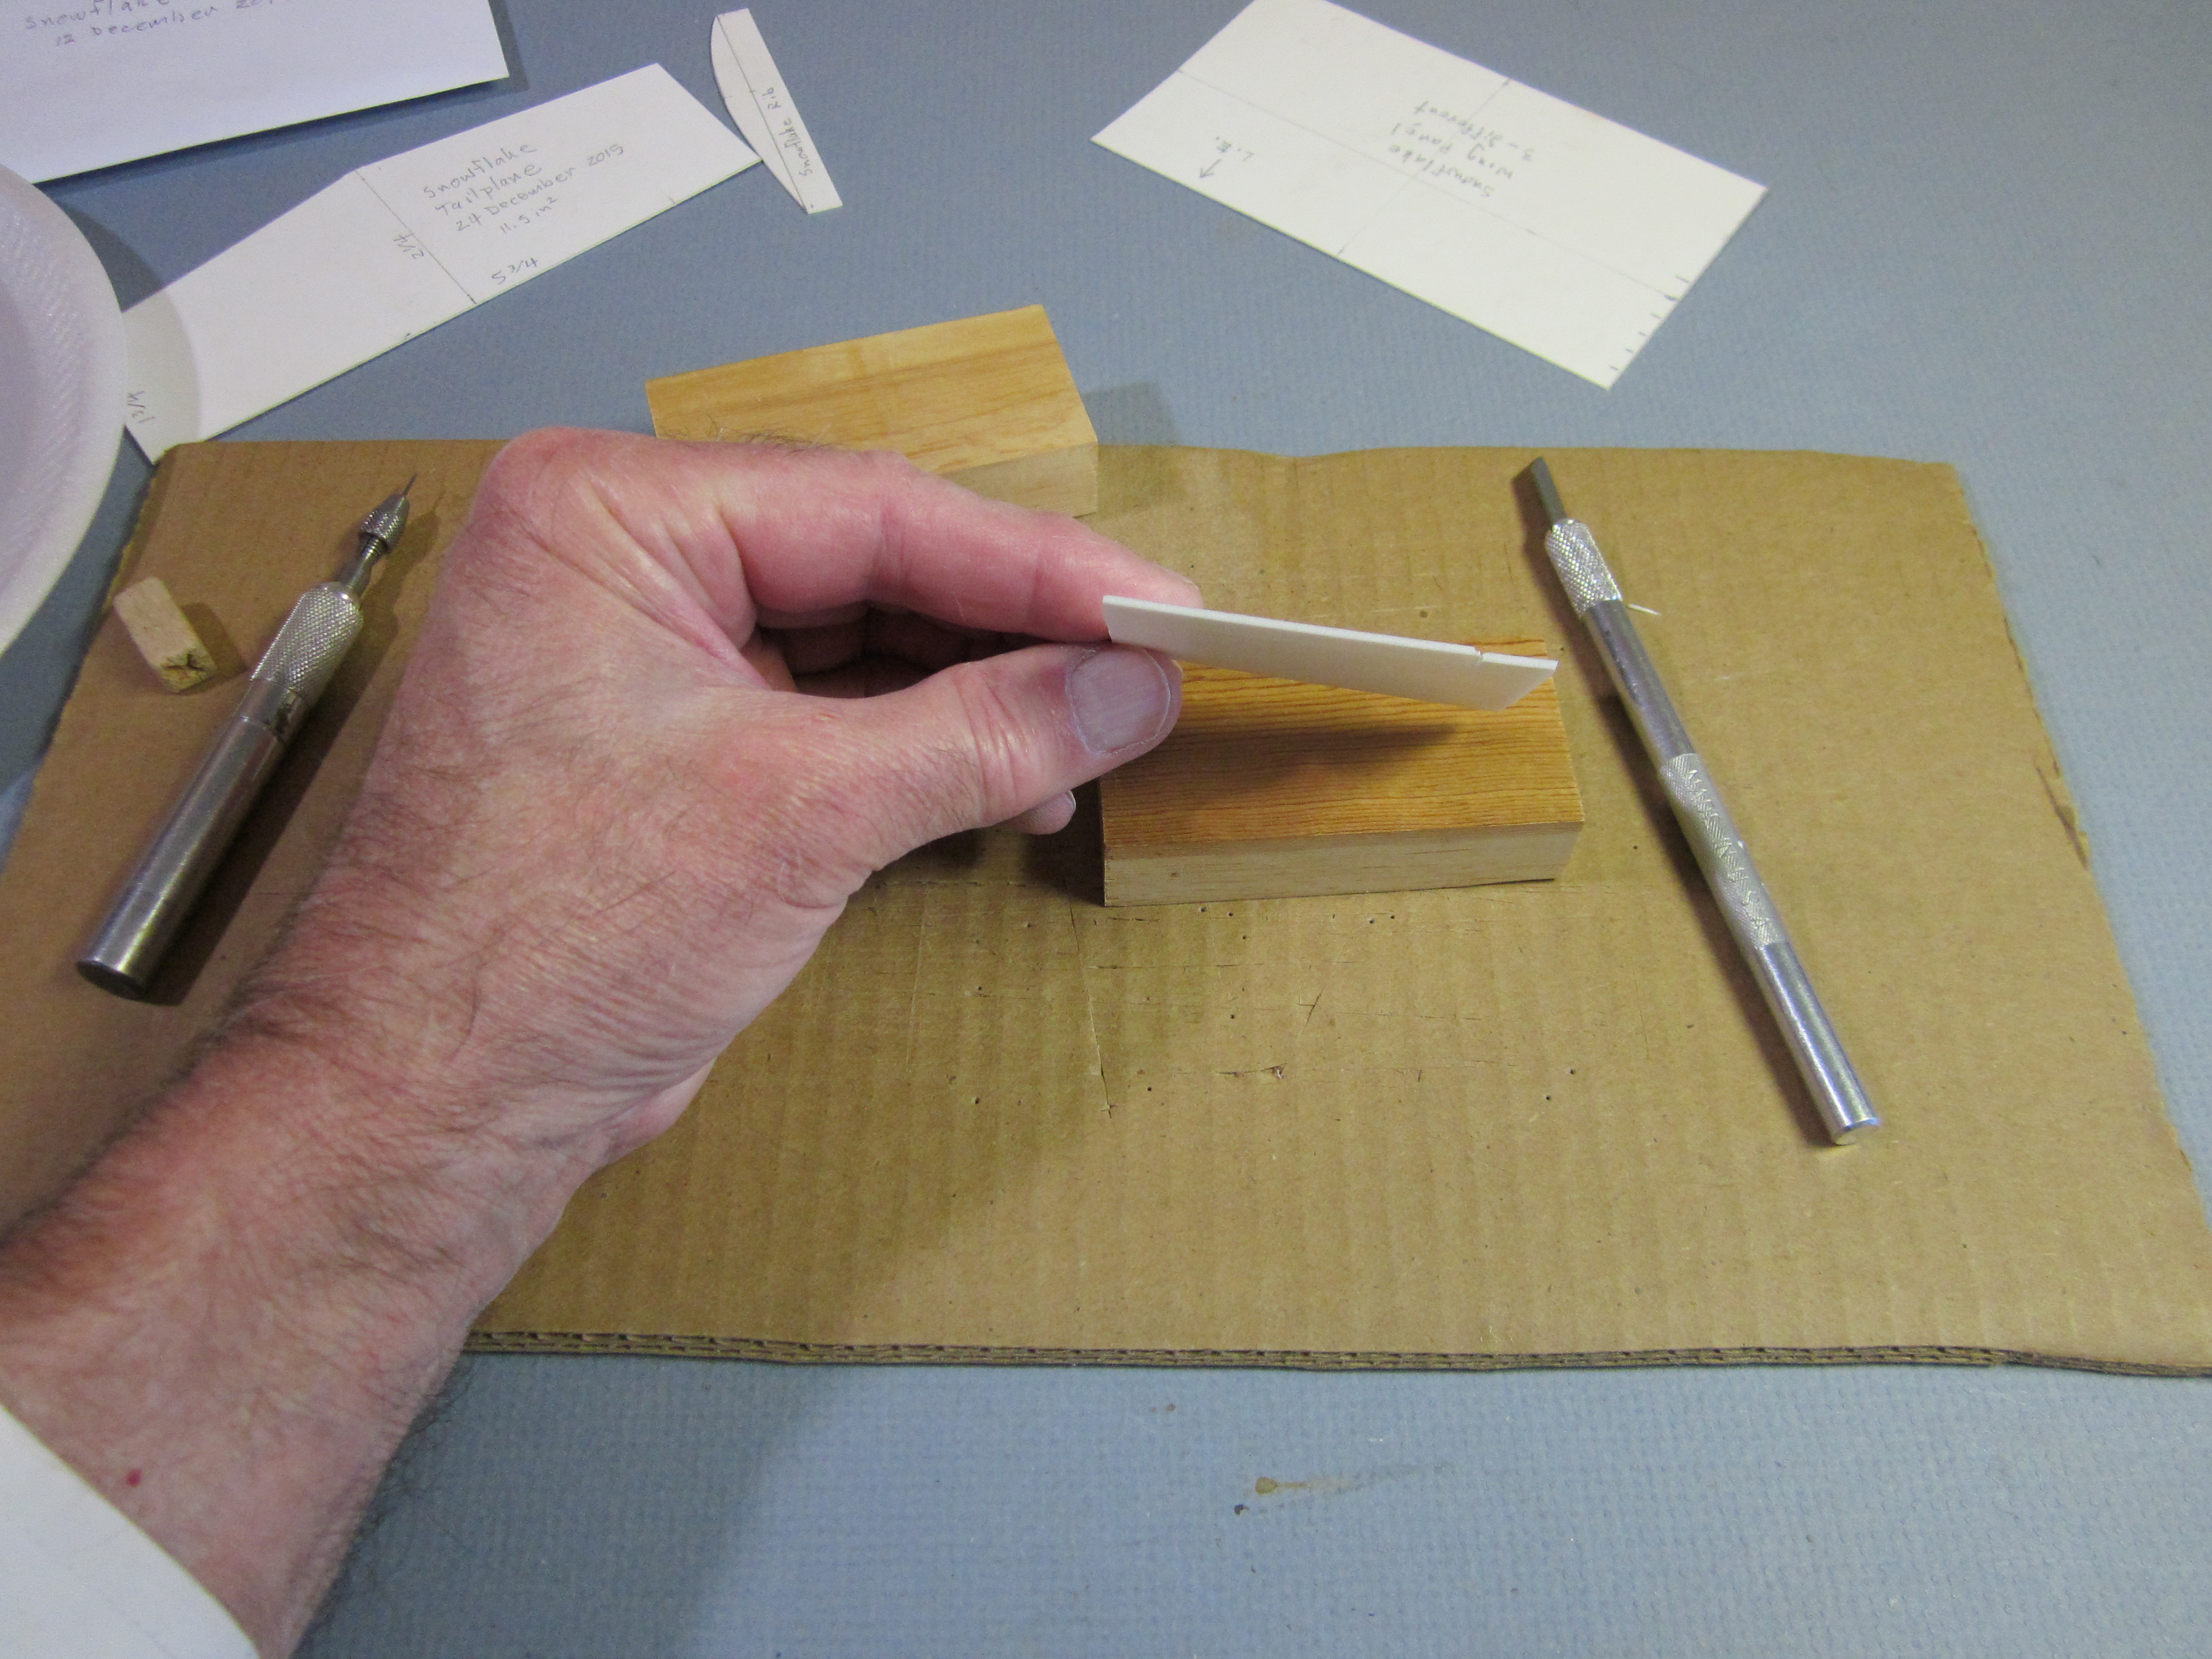
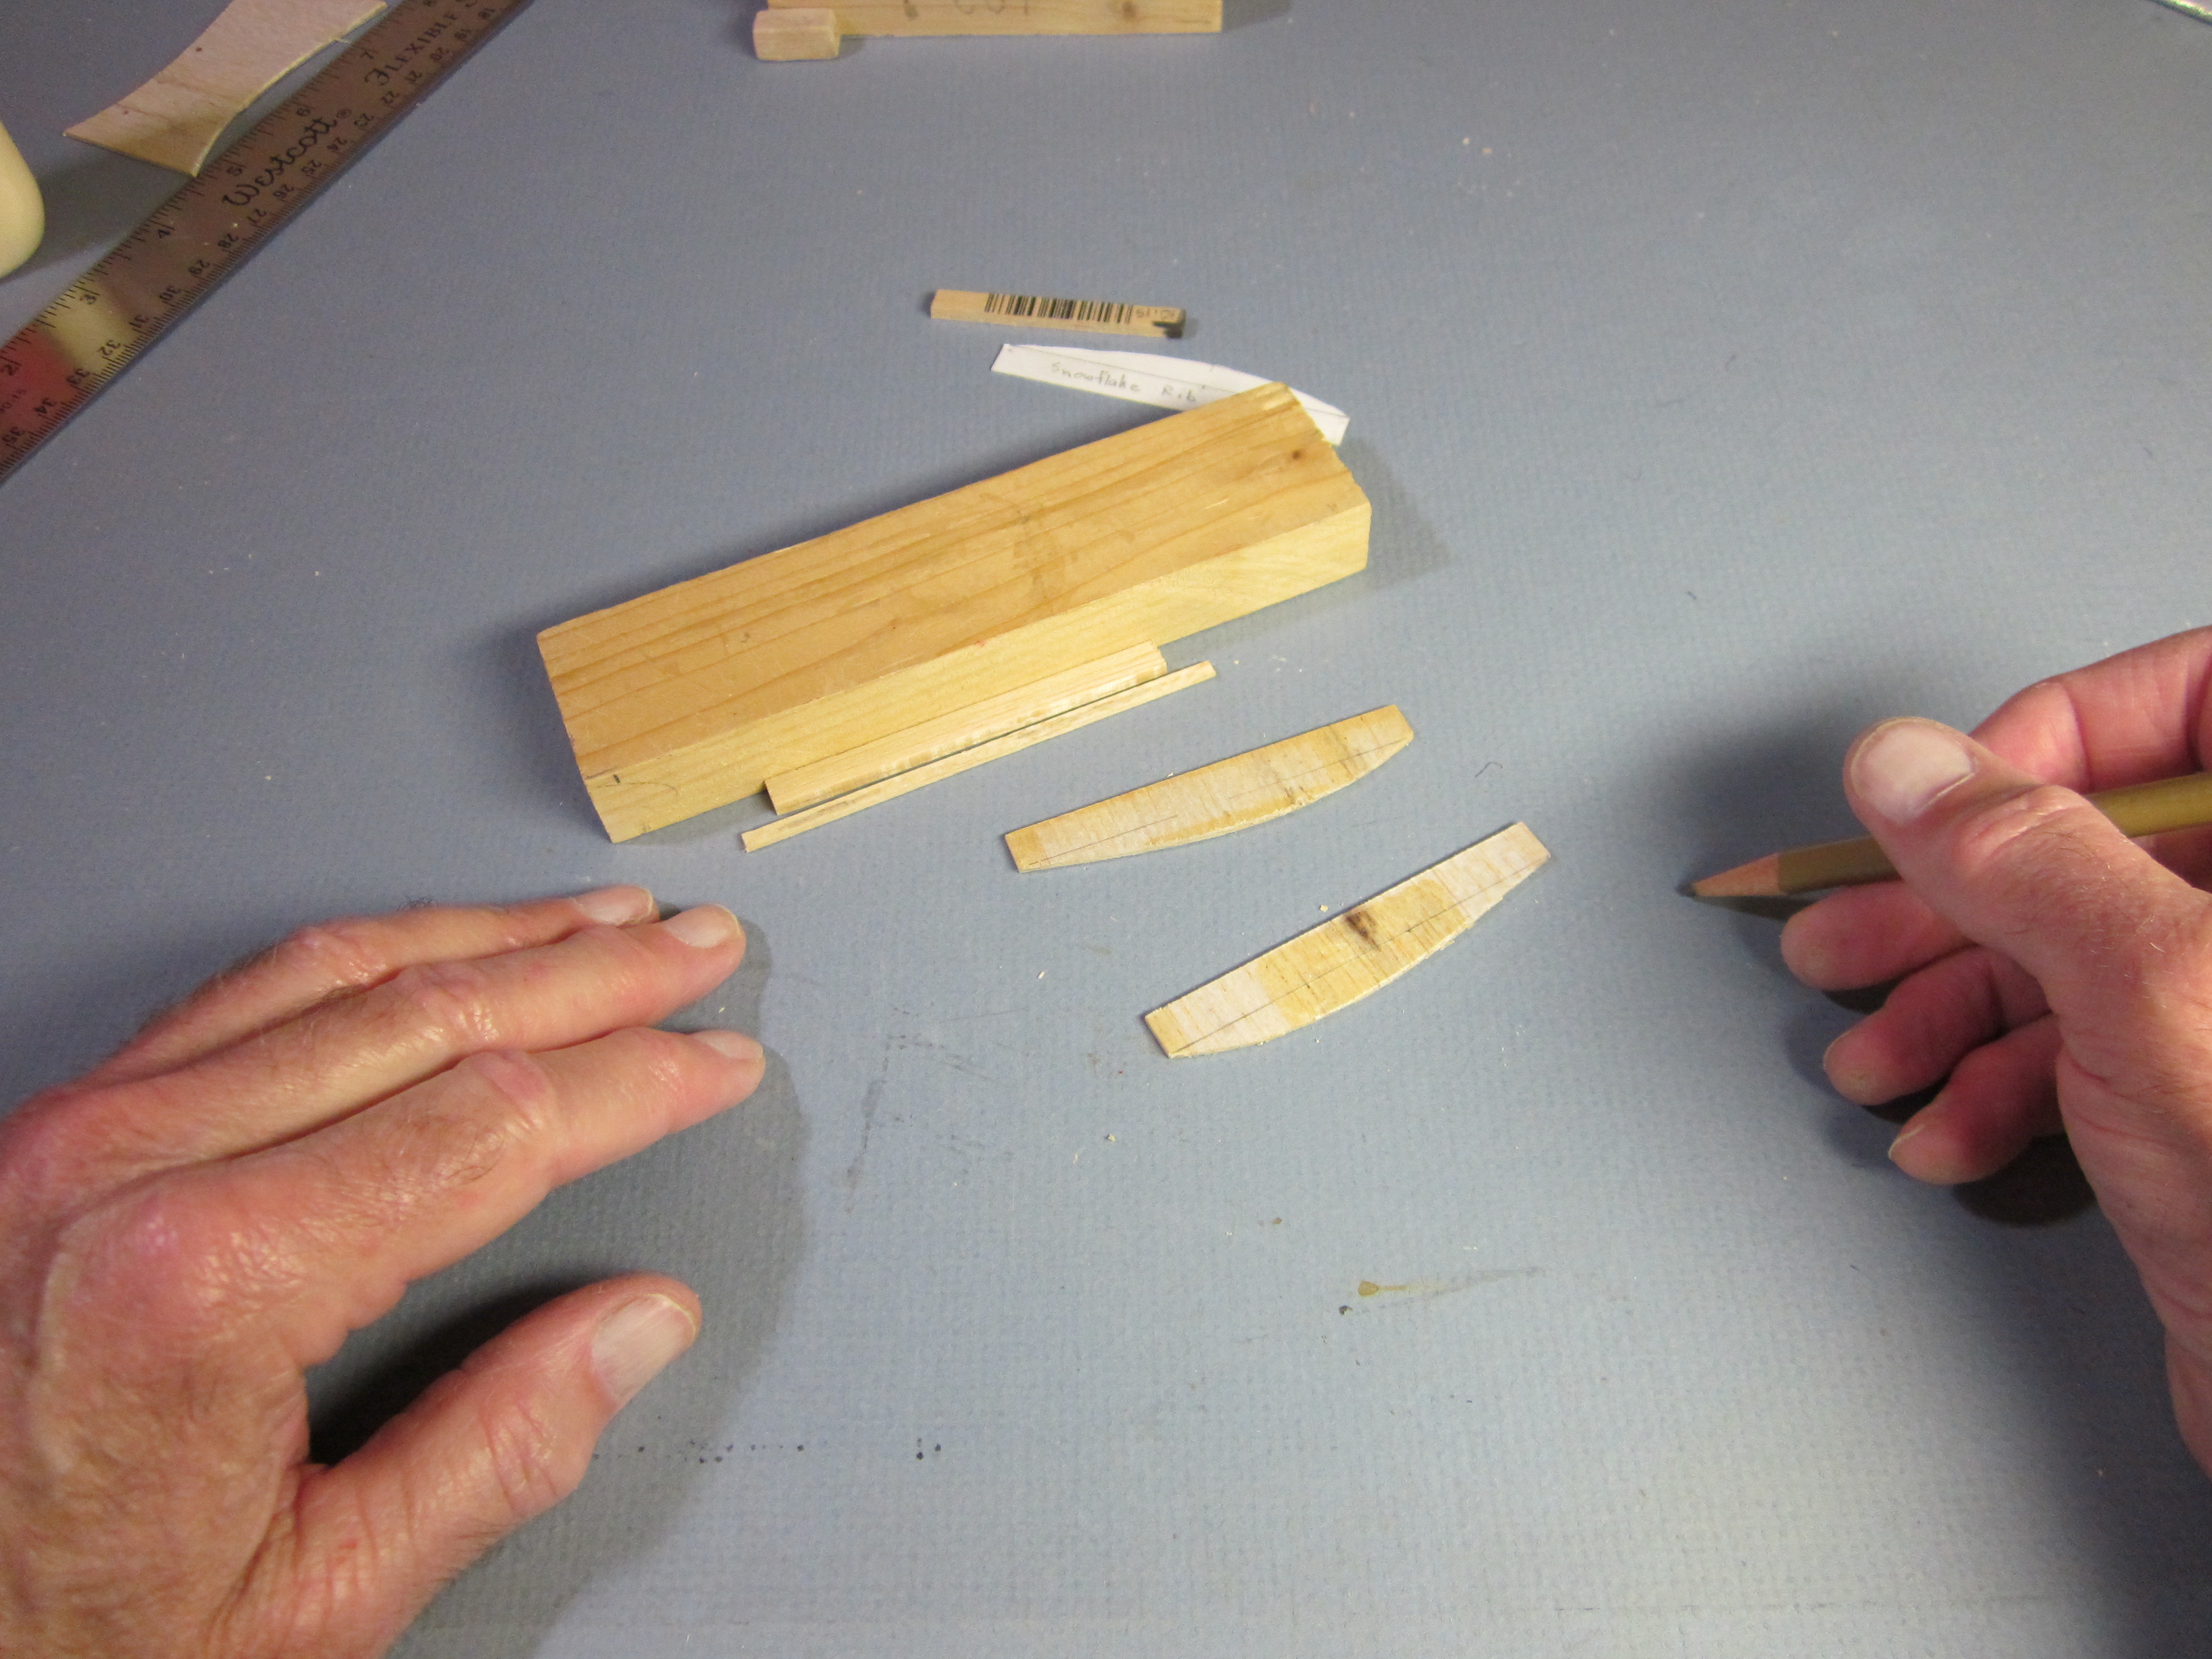
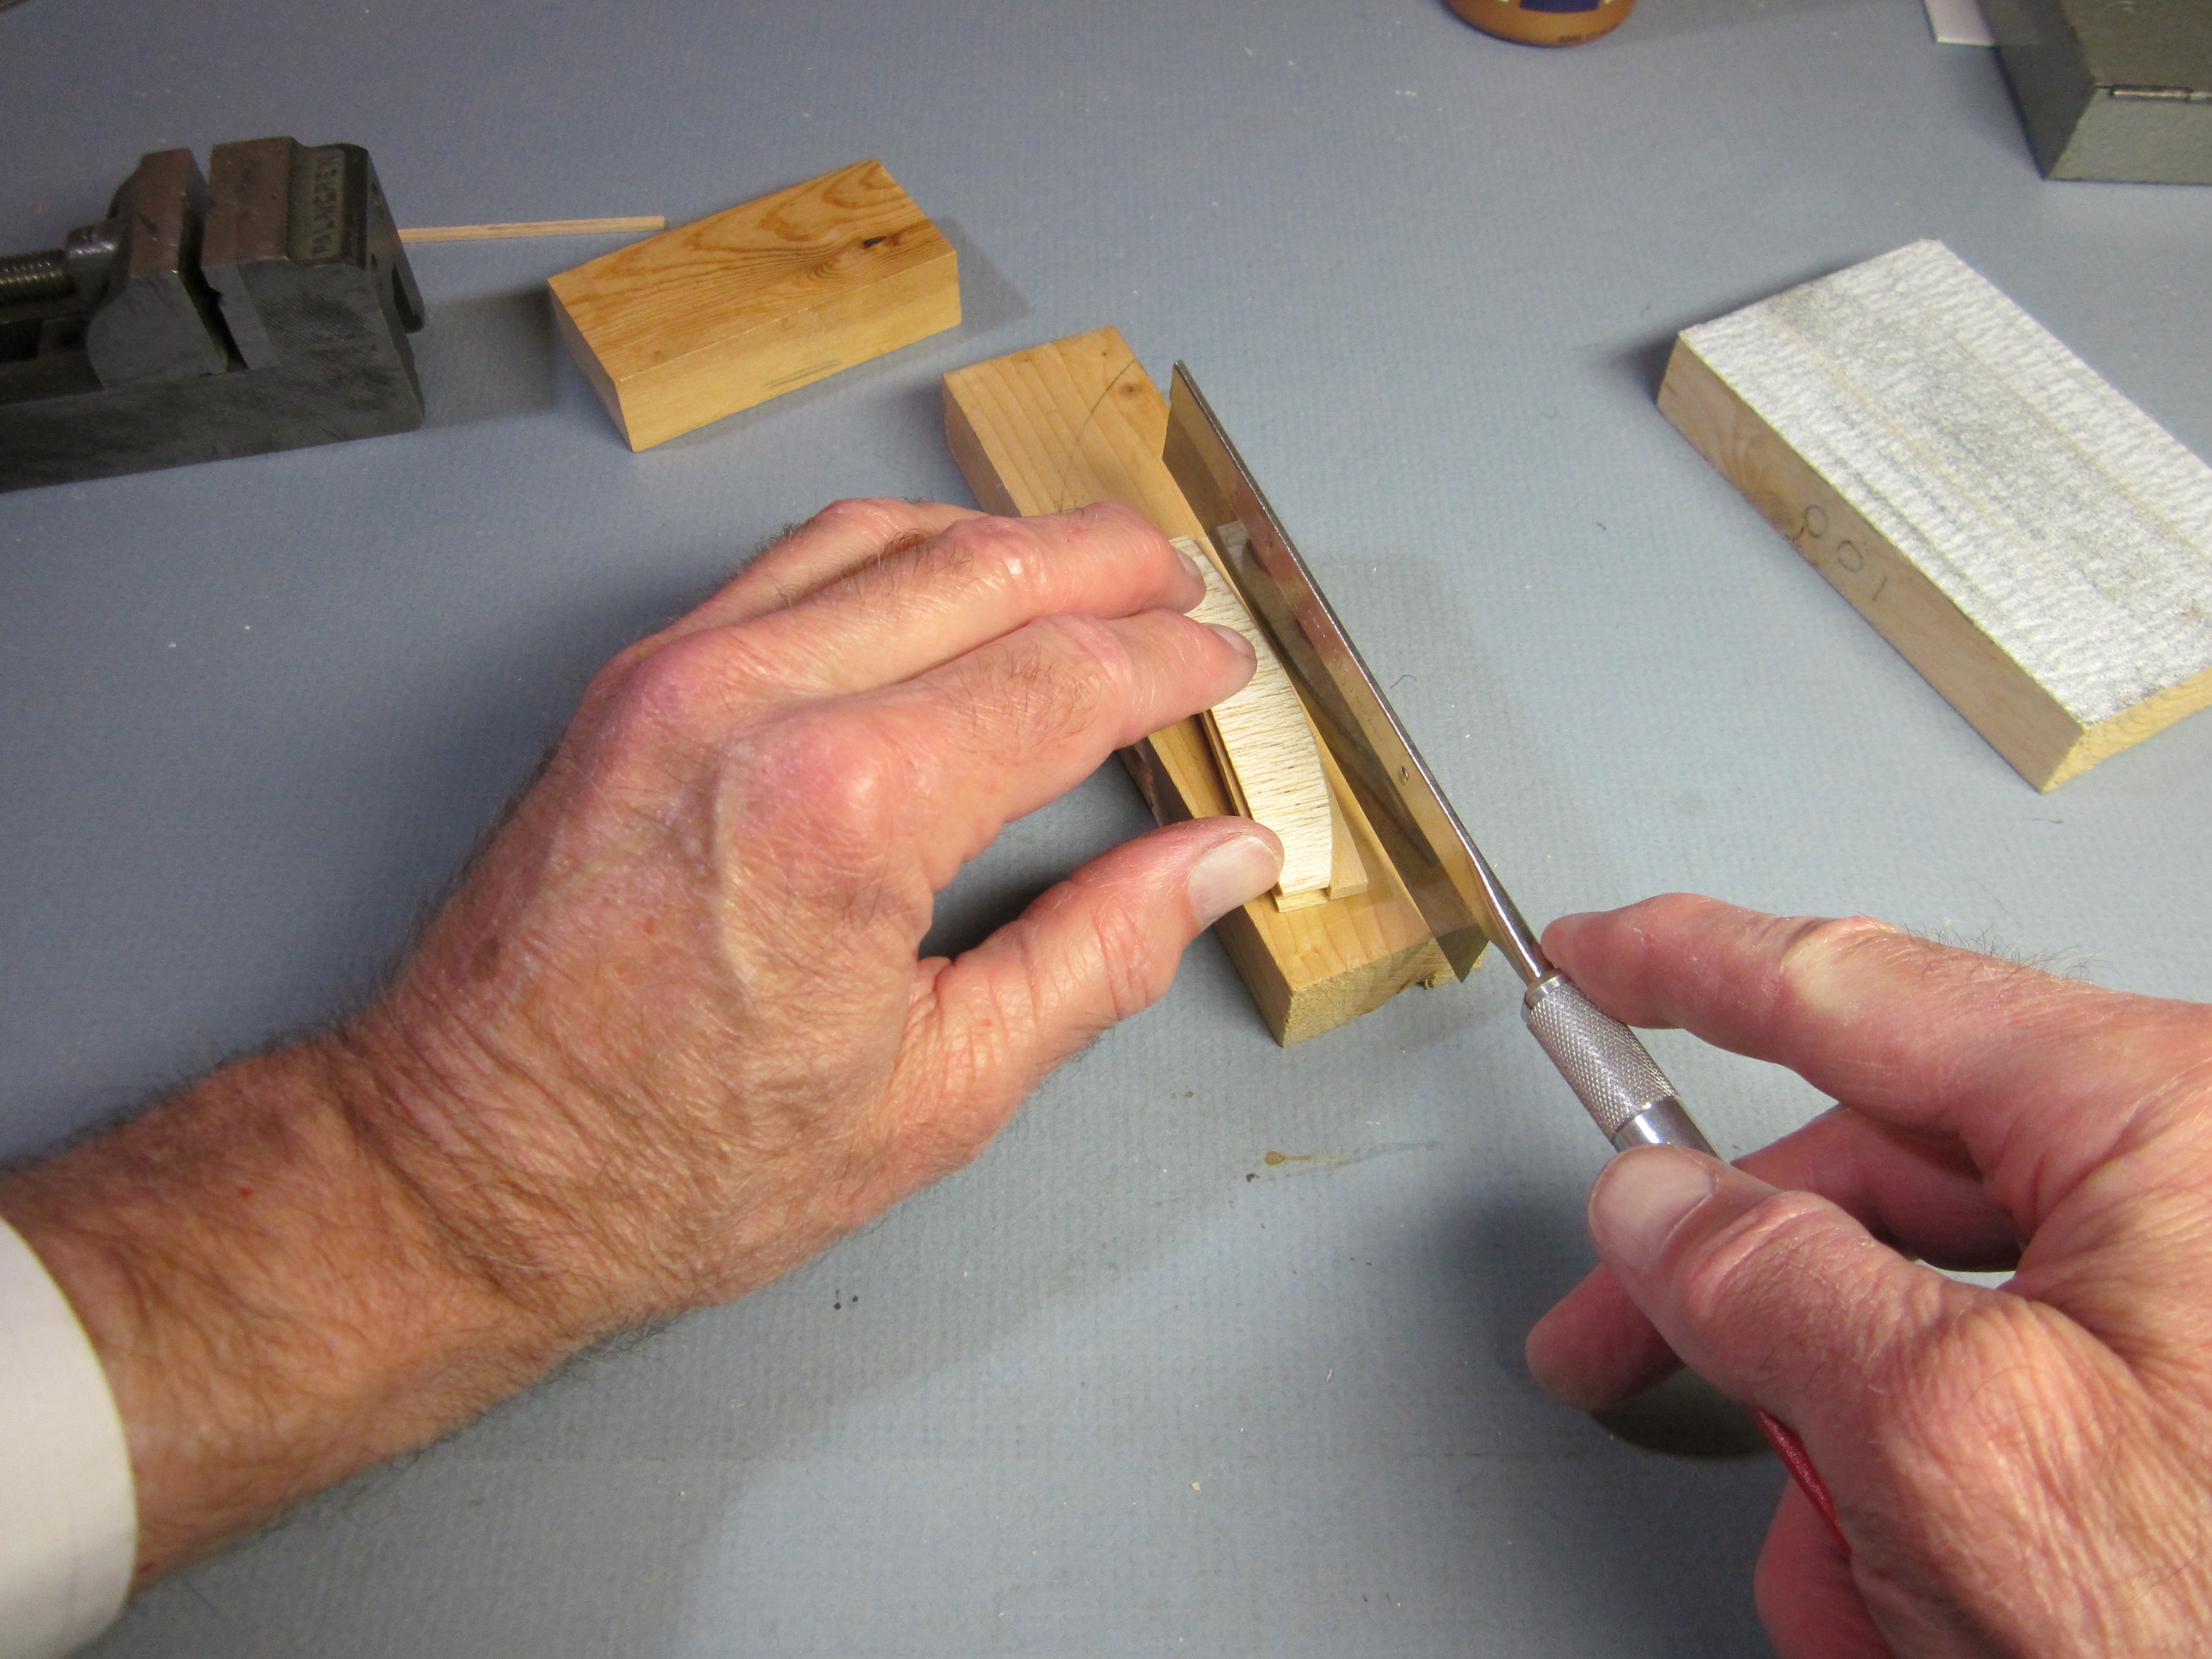
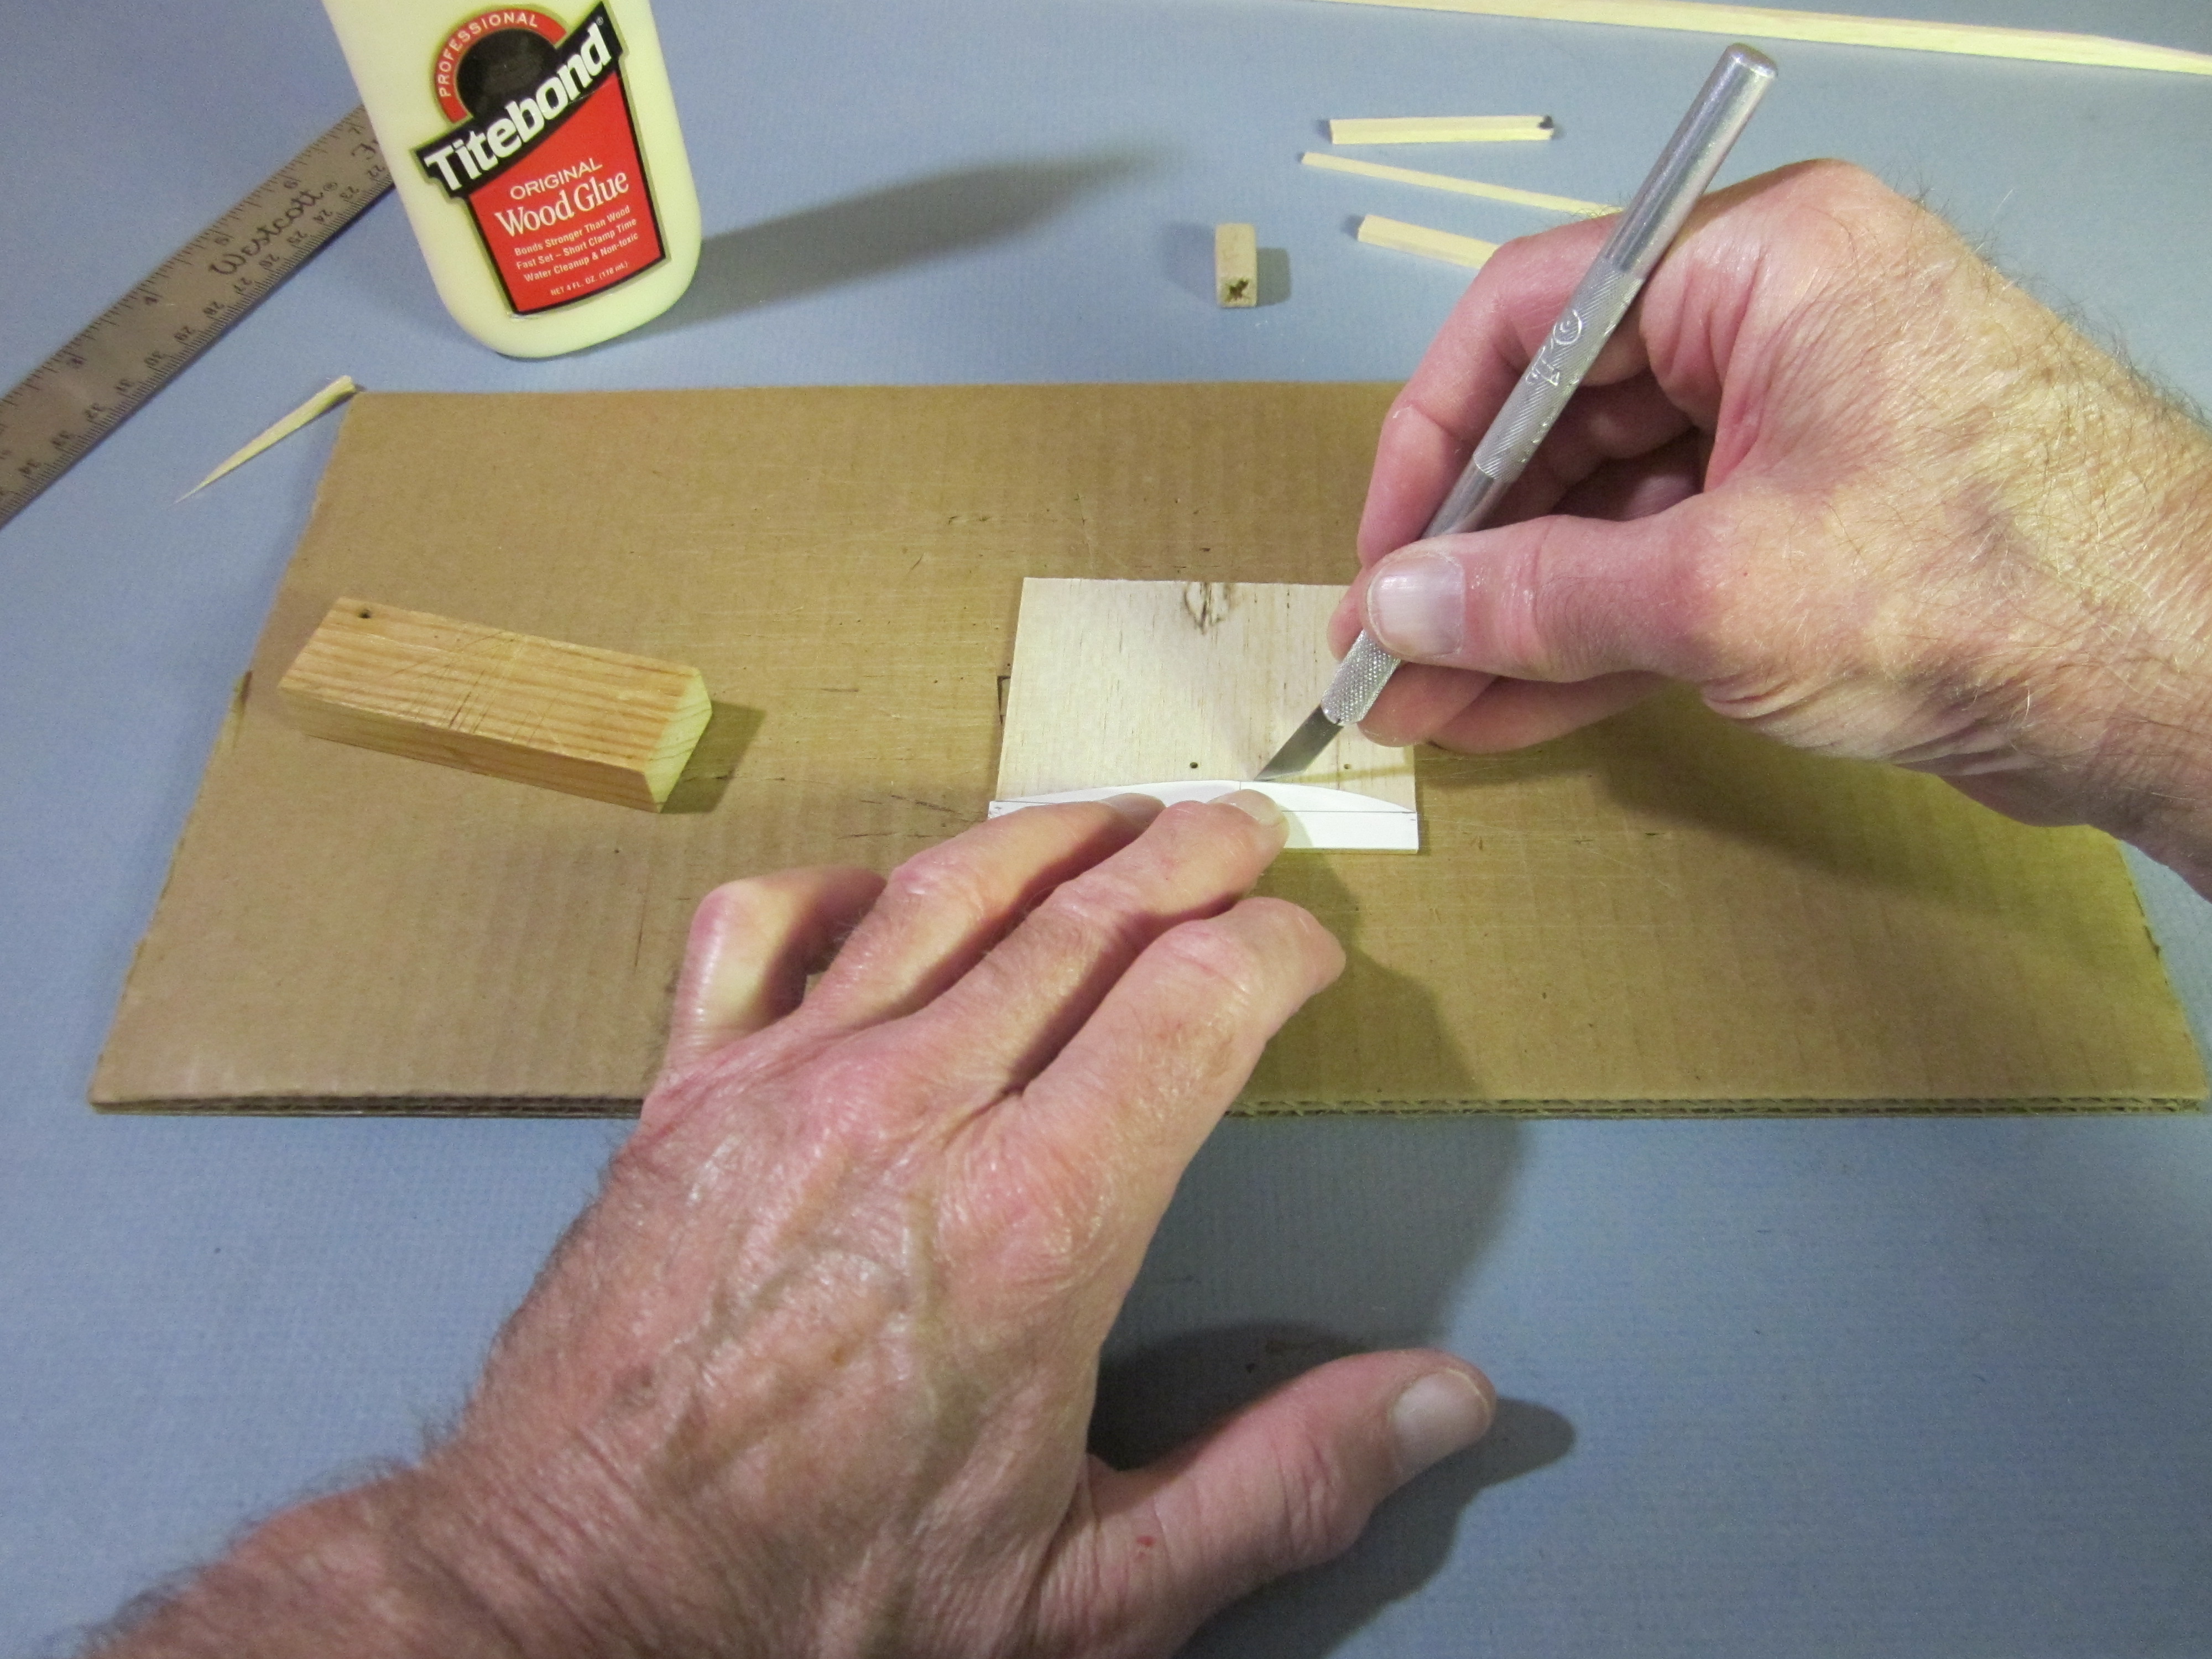 With a block of wood, align the flat edge of the rib template with the end of the 3″ wide 1/16″ balsa sheet. Cut along the curved top edge of the rib. Make several shallow cuts, rather than trying to cut through in one pass. It is easier to make precise cuts with gentle pressure. The blade is kept tangent to the template curve, so it will not cut into the template.
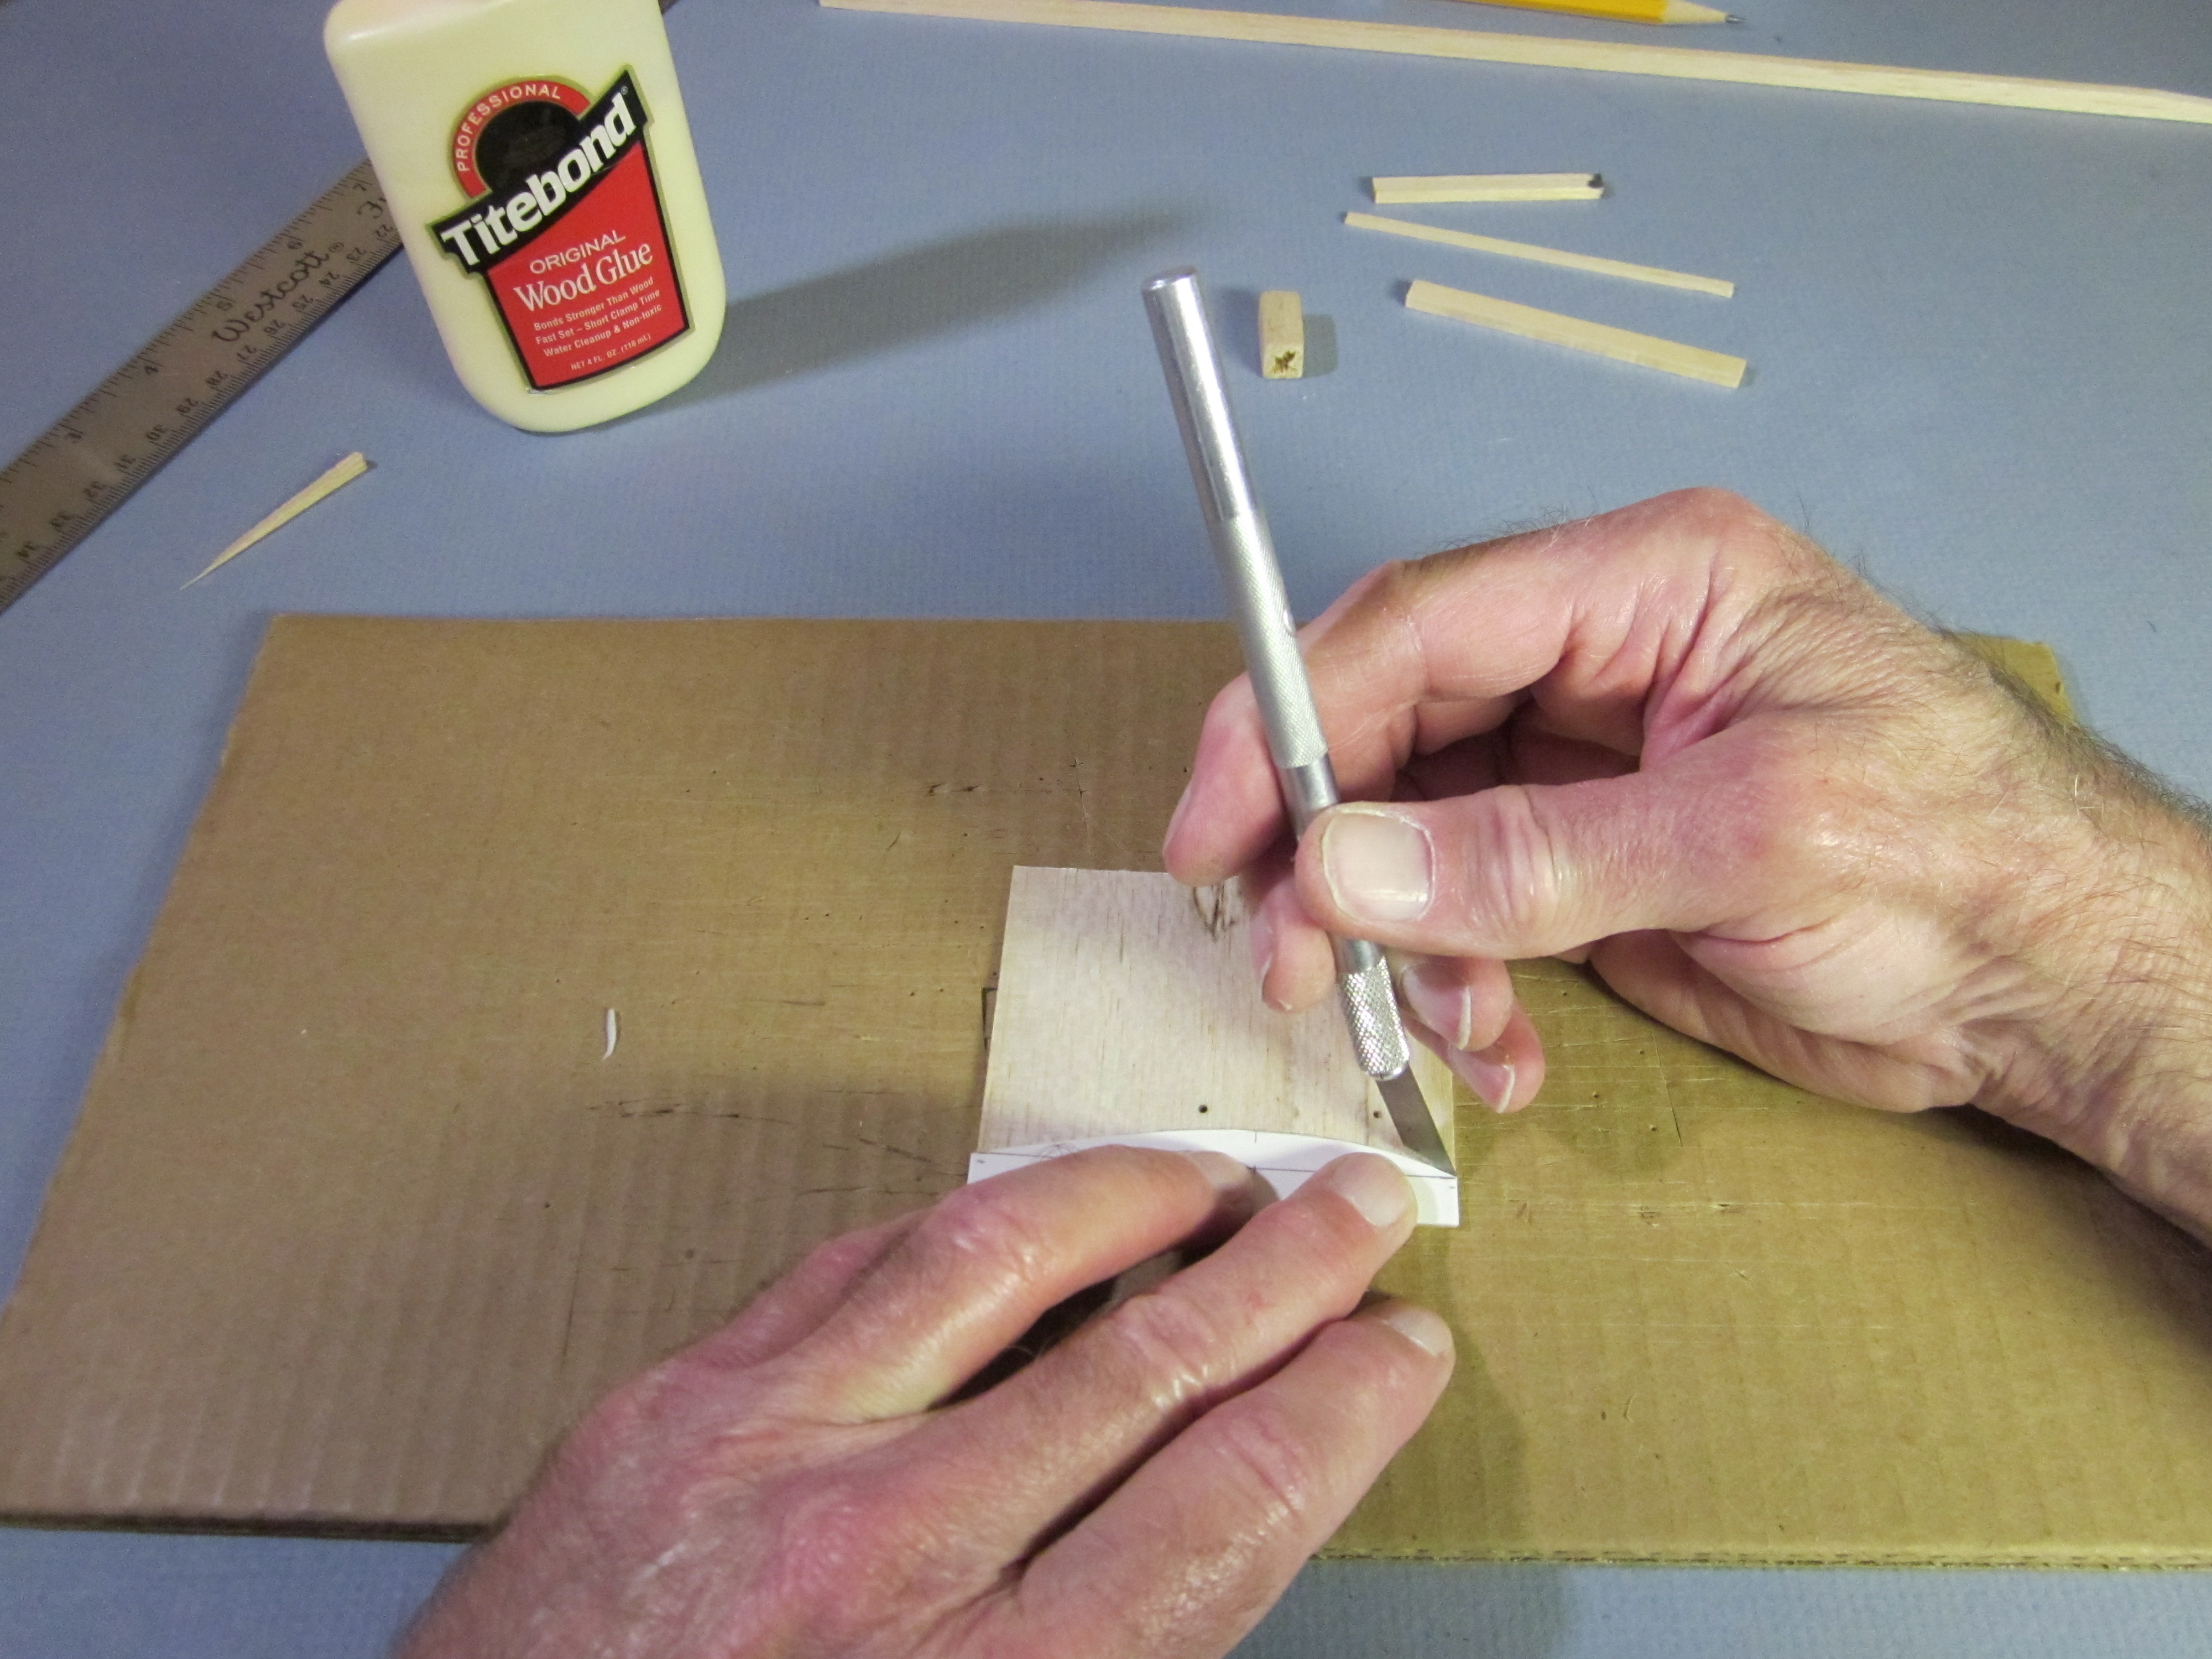 Cut inward at the edges. If you cut out across an edge, the wood will splinter. Make two of these.
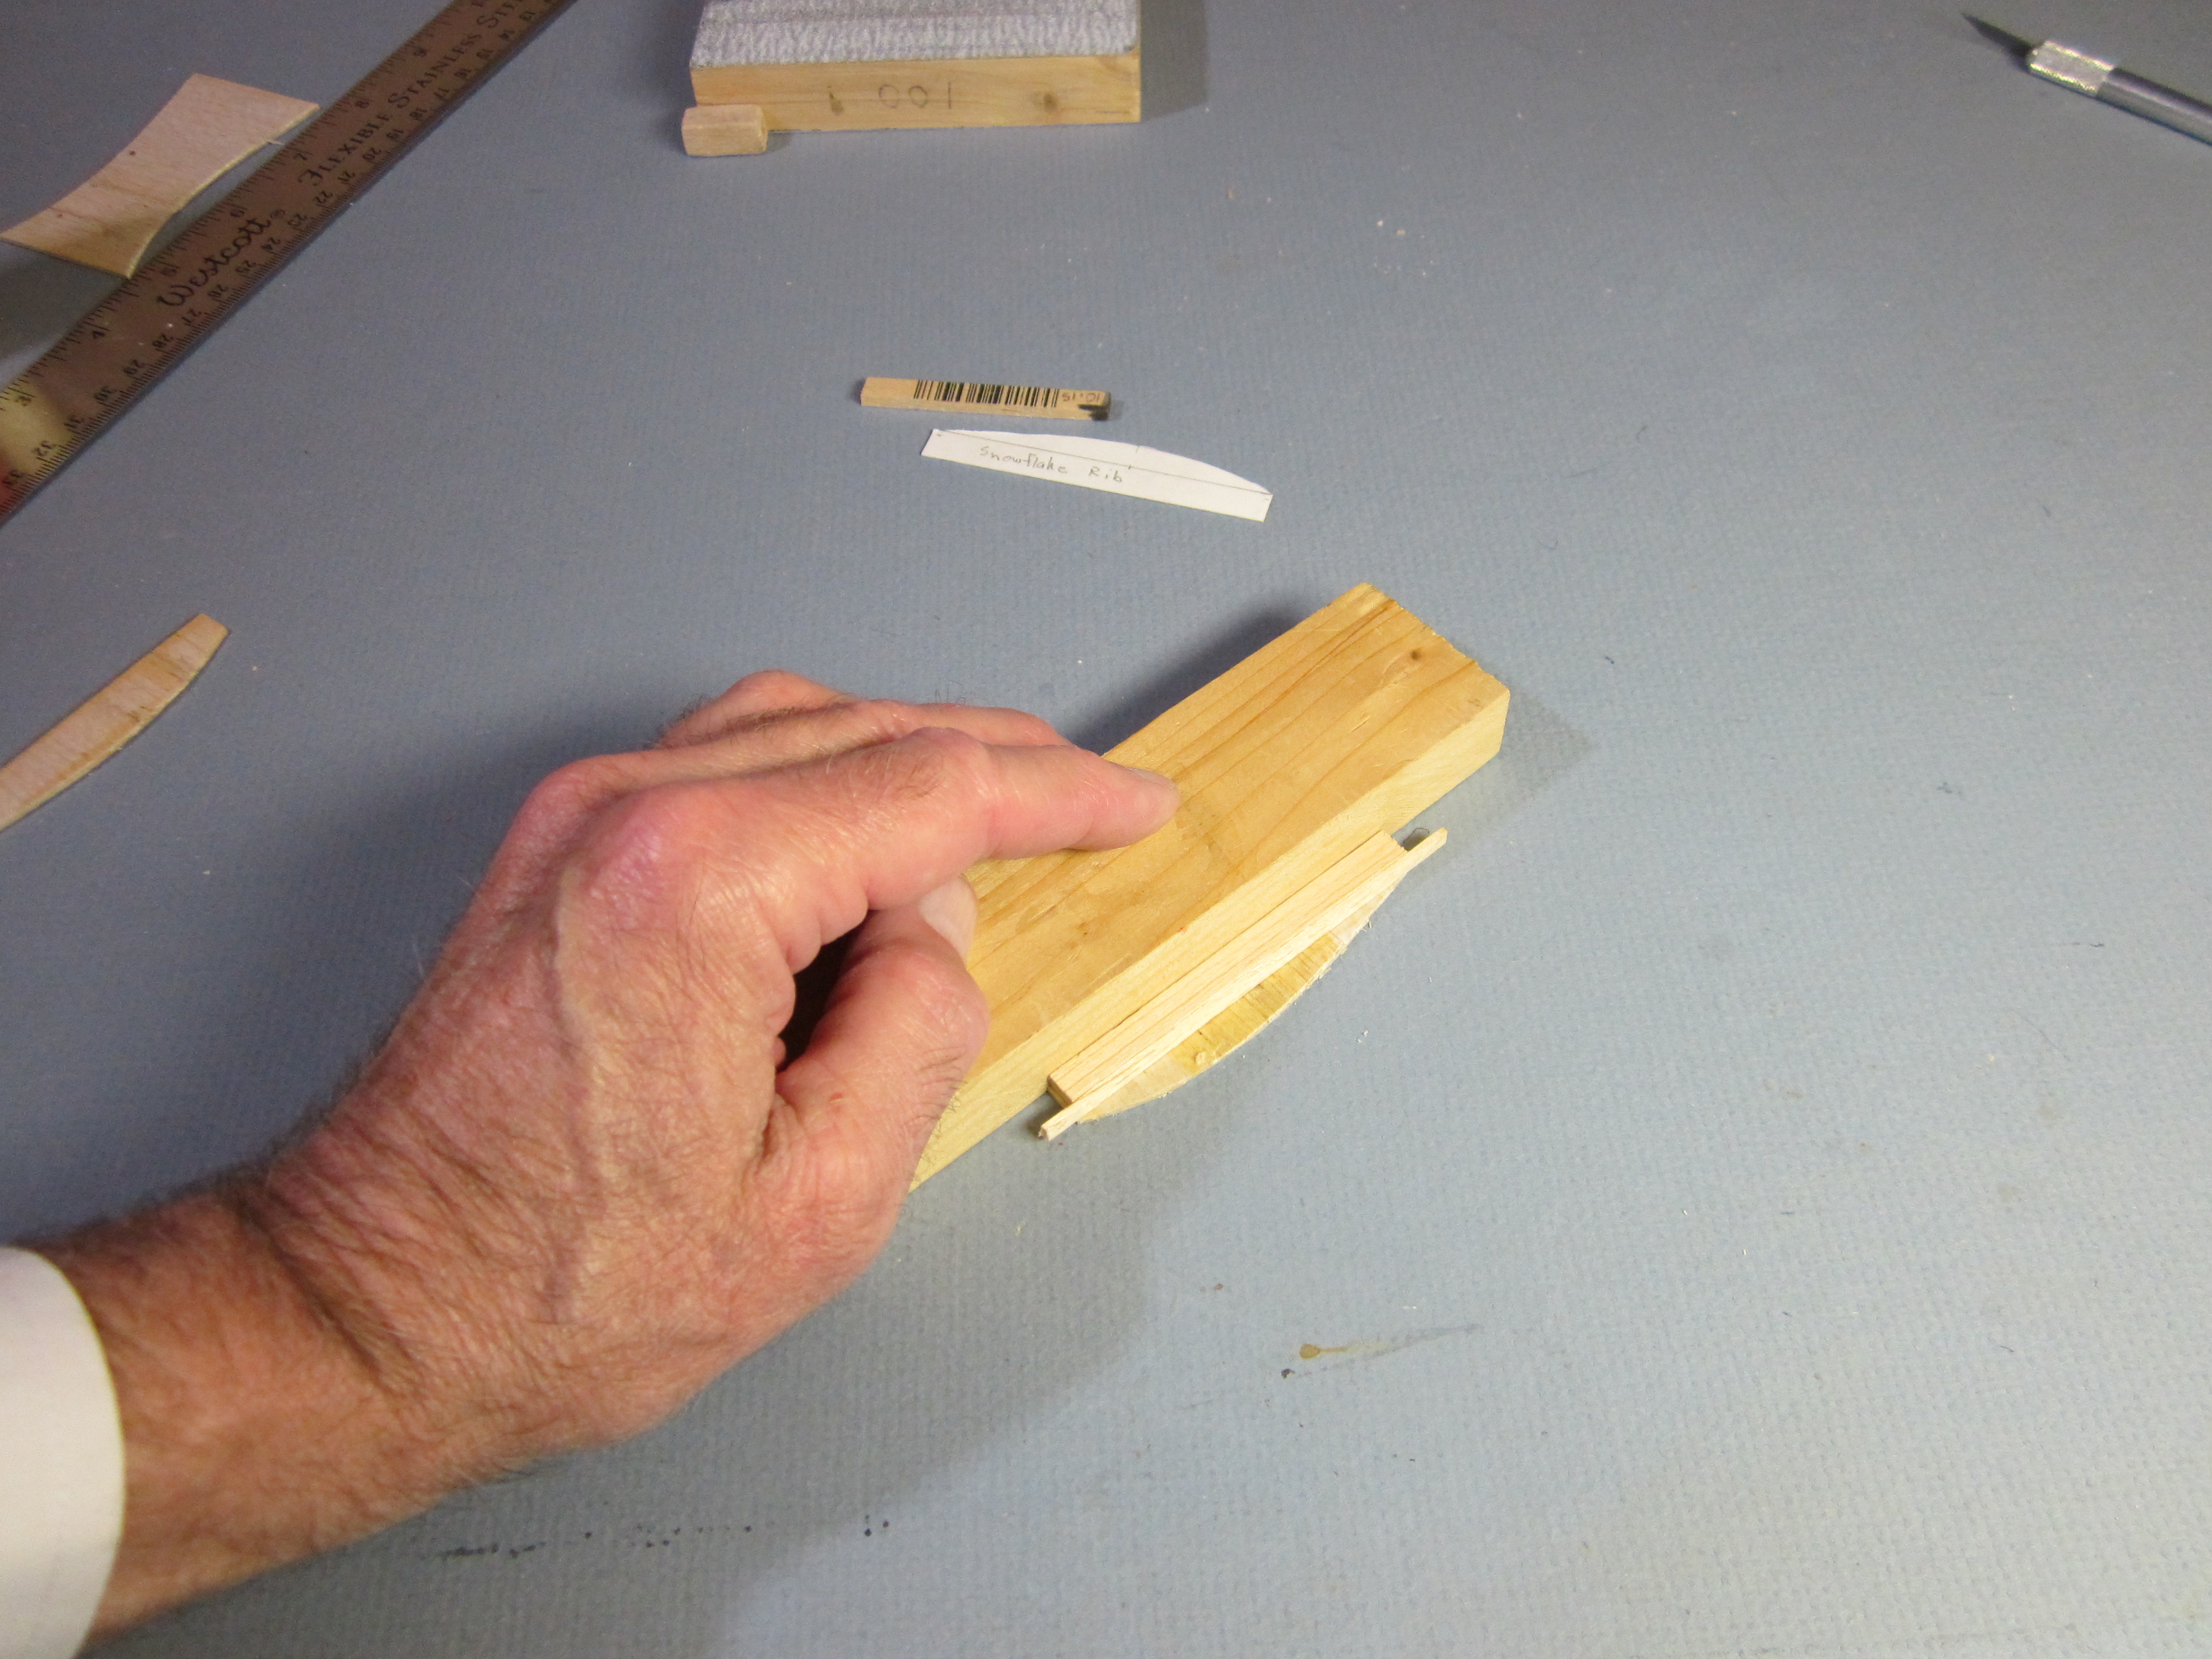 Press the bottom edge of the side plate against a block of wood, place a 1/4″ stick and a 1/16″ stick on top of it and press them against the block. Draw a pencil line on the side plate along the 1/16″ stick.
 Do the same with the other side plate. Note that these are not the same. They are mirror images of each other. One is right and one is left.
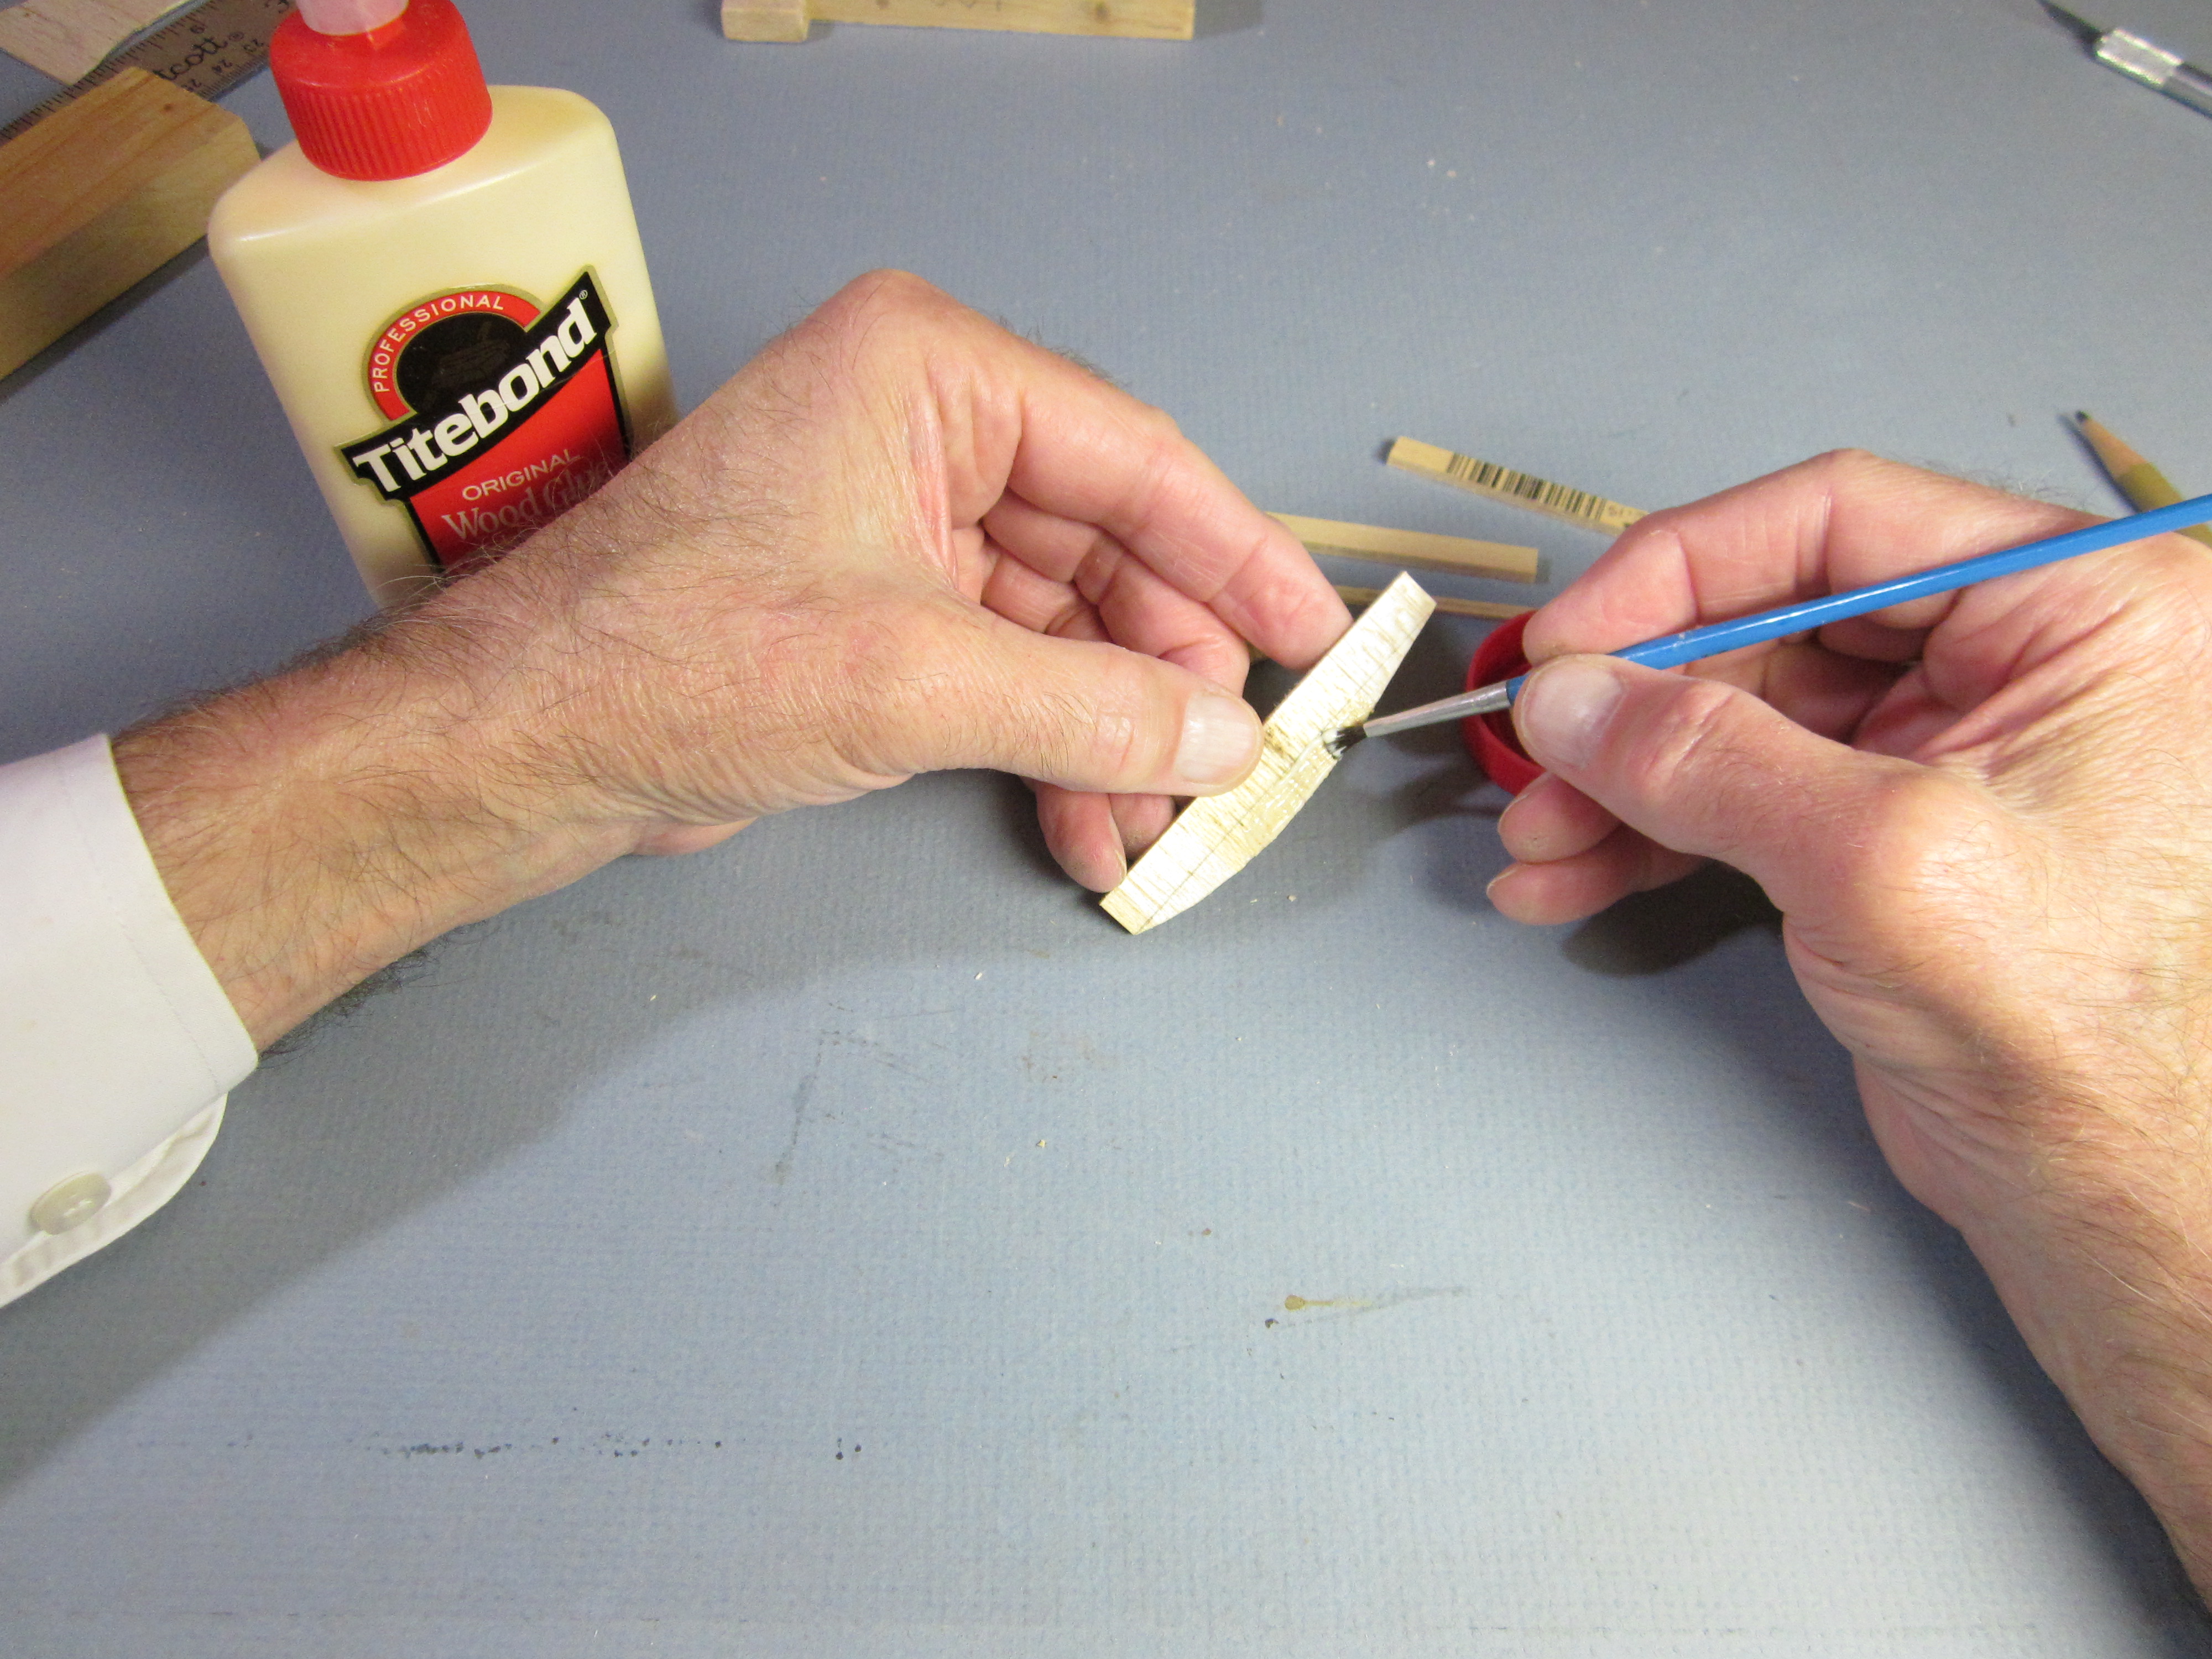 Apply glue to the rib portion of the side plate, above the pencil line.
 Place the 1/8″ x 1/4″ x 3″ rib block on the glued surface, aligning its edge with the pencil line. Press it down.
 Apply glue to the other rib surface.
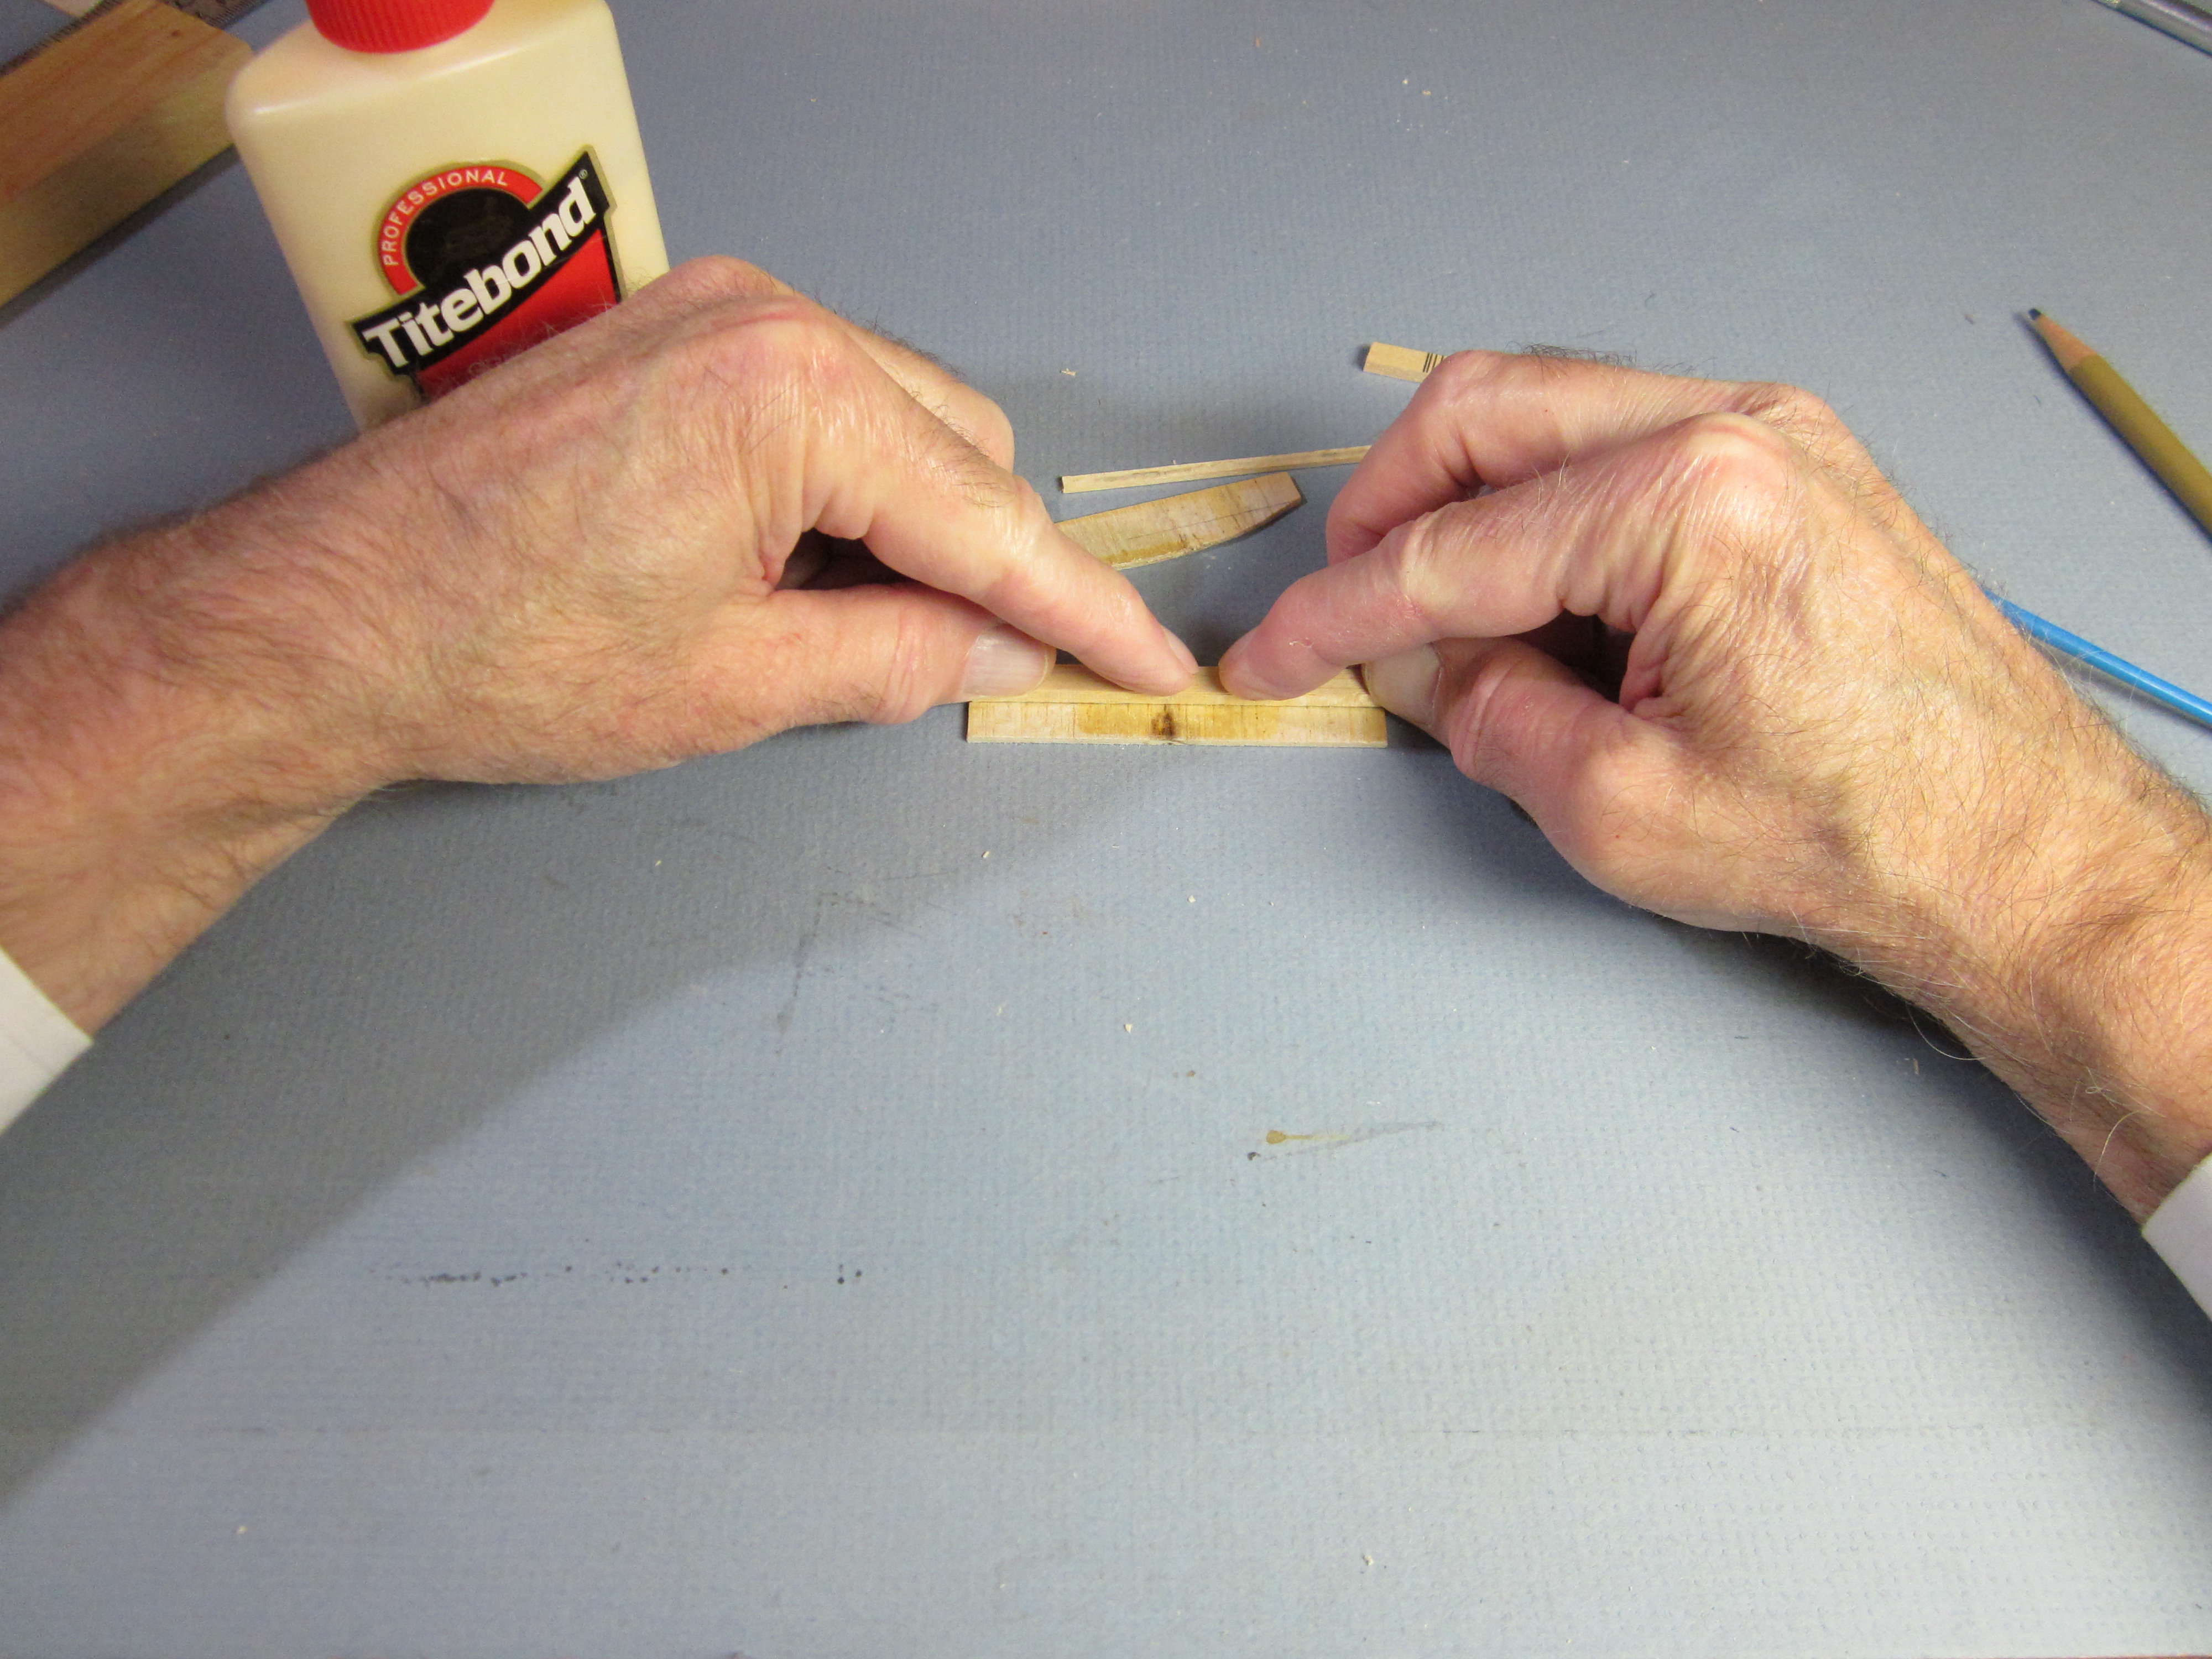
 Using a block of wood, align the bottom edge and ends of this face plate with the other.
 Insert a bit of scrap 1/8″ x 1/4″ balsa in the slot between the face plates.
 Press the assembly. Set it aside for a while to let the glue dry.
 After the glue has dried, cut off most of the excess from the rib block. Be careful to not cut into the rib. Final shaping will be done with sandpaper.
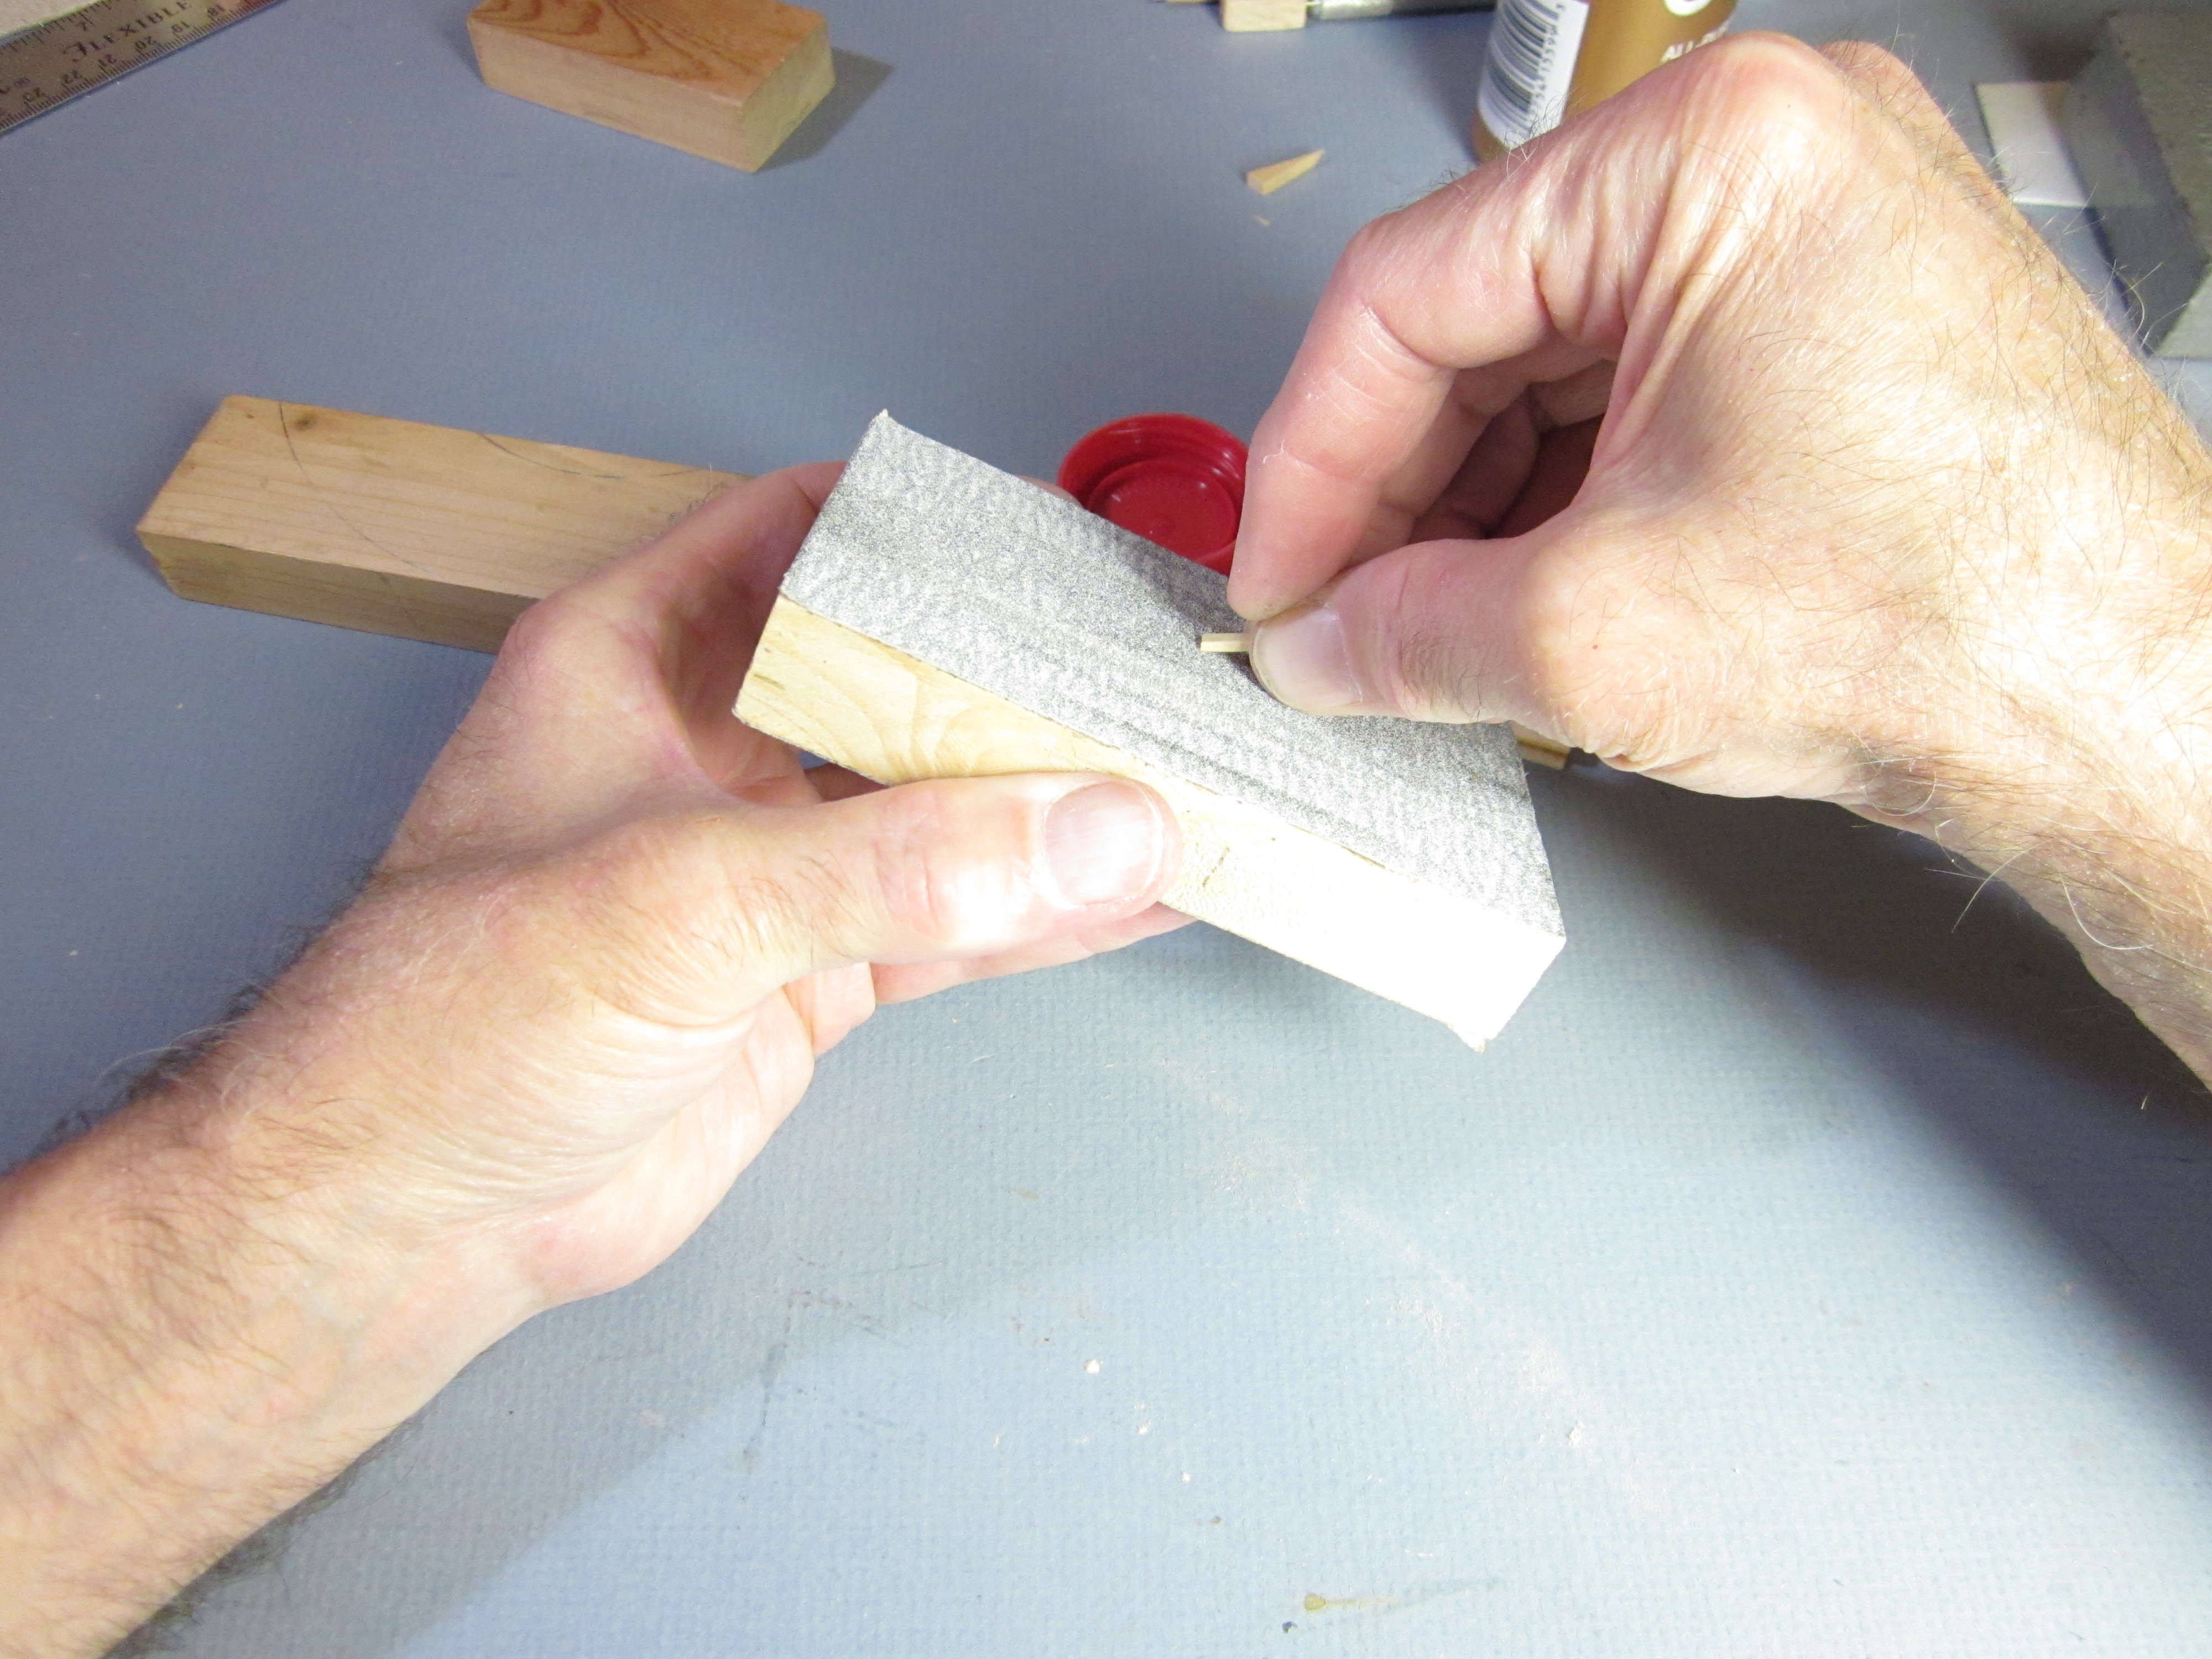
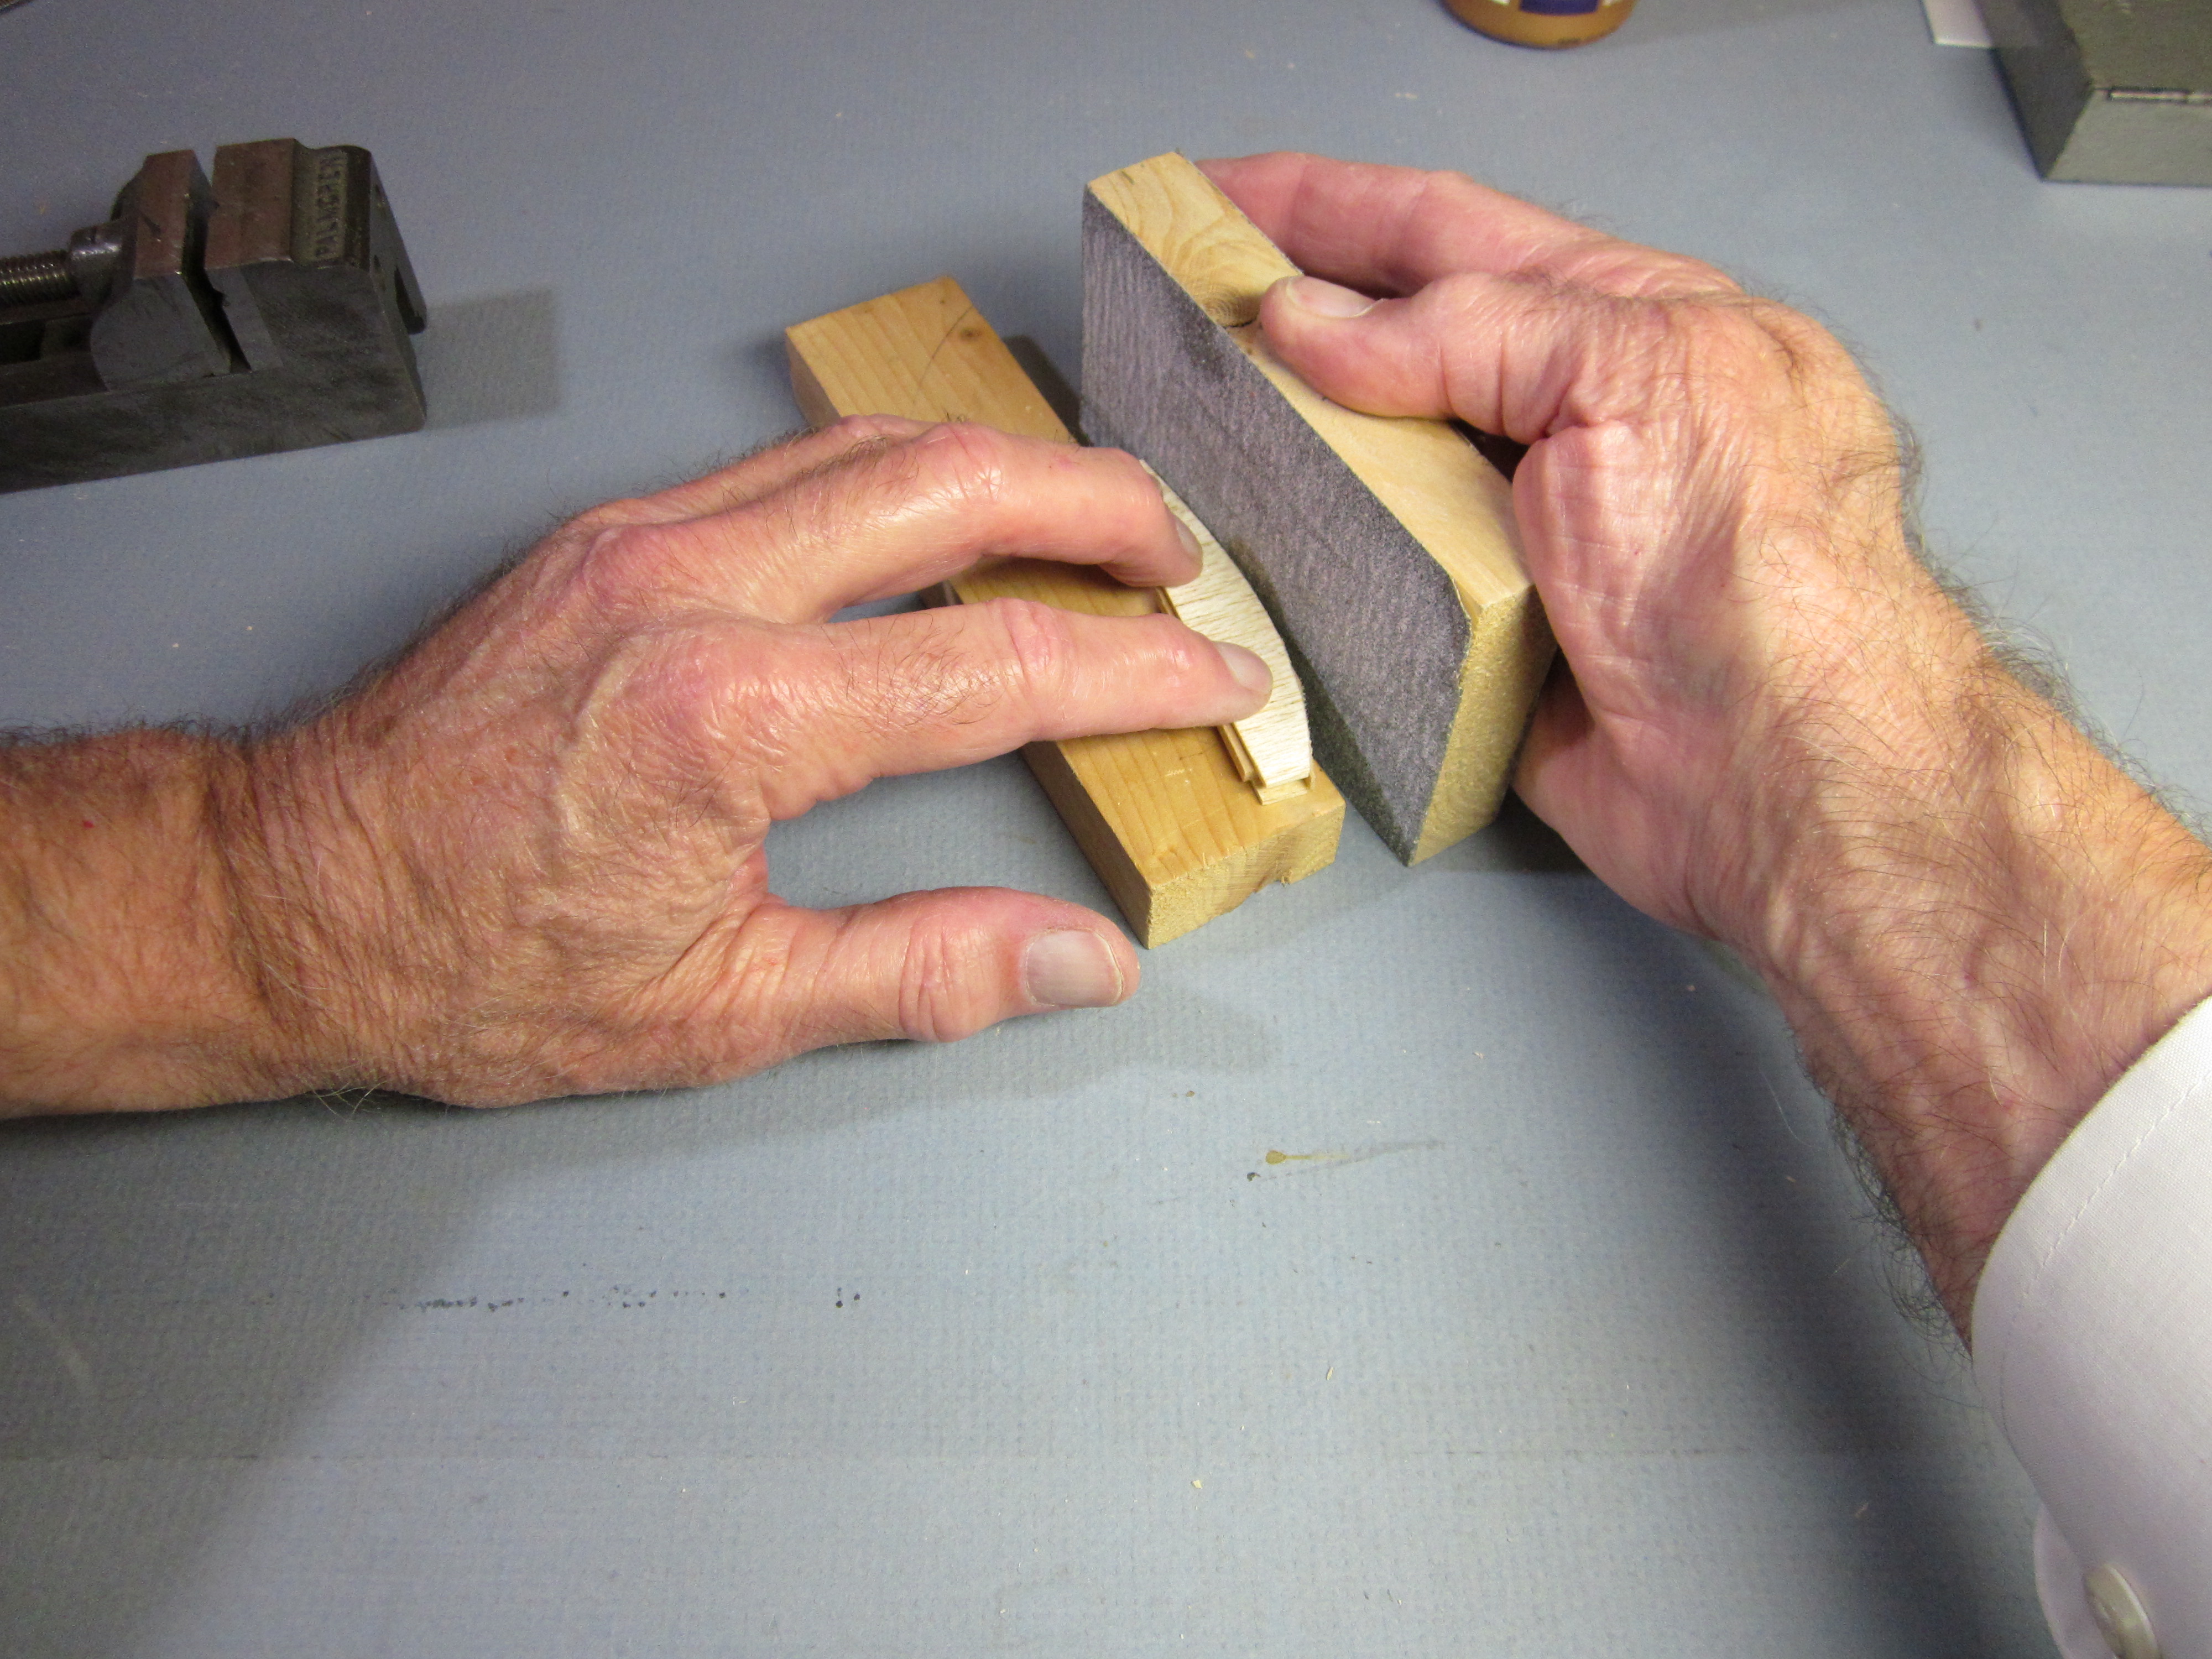 Place the wing saddle on its side on a block, with the scrap spacer still in the gap, and use the vertical sanding block to sand the upper surface of the rib smooth along the entire length and side to side.
 The smooth top of the rib.
 Remove the temporary spacer from between the side plates.
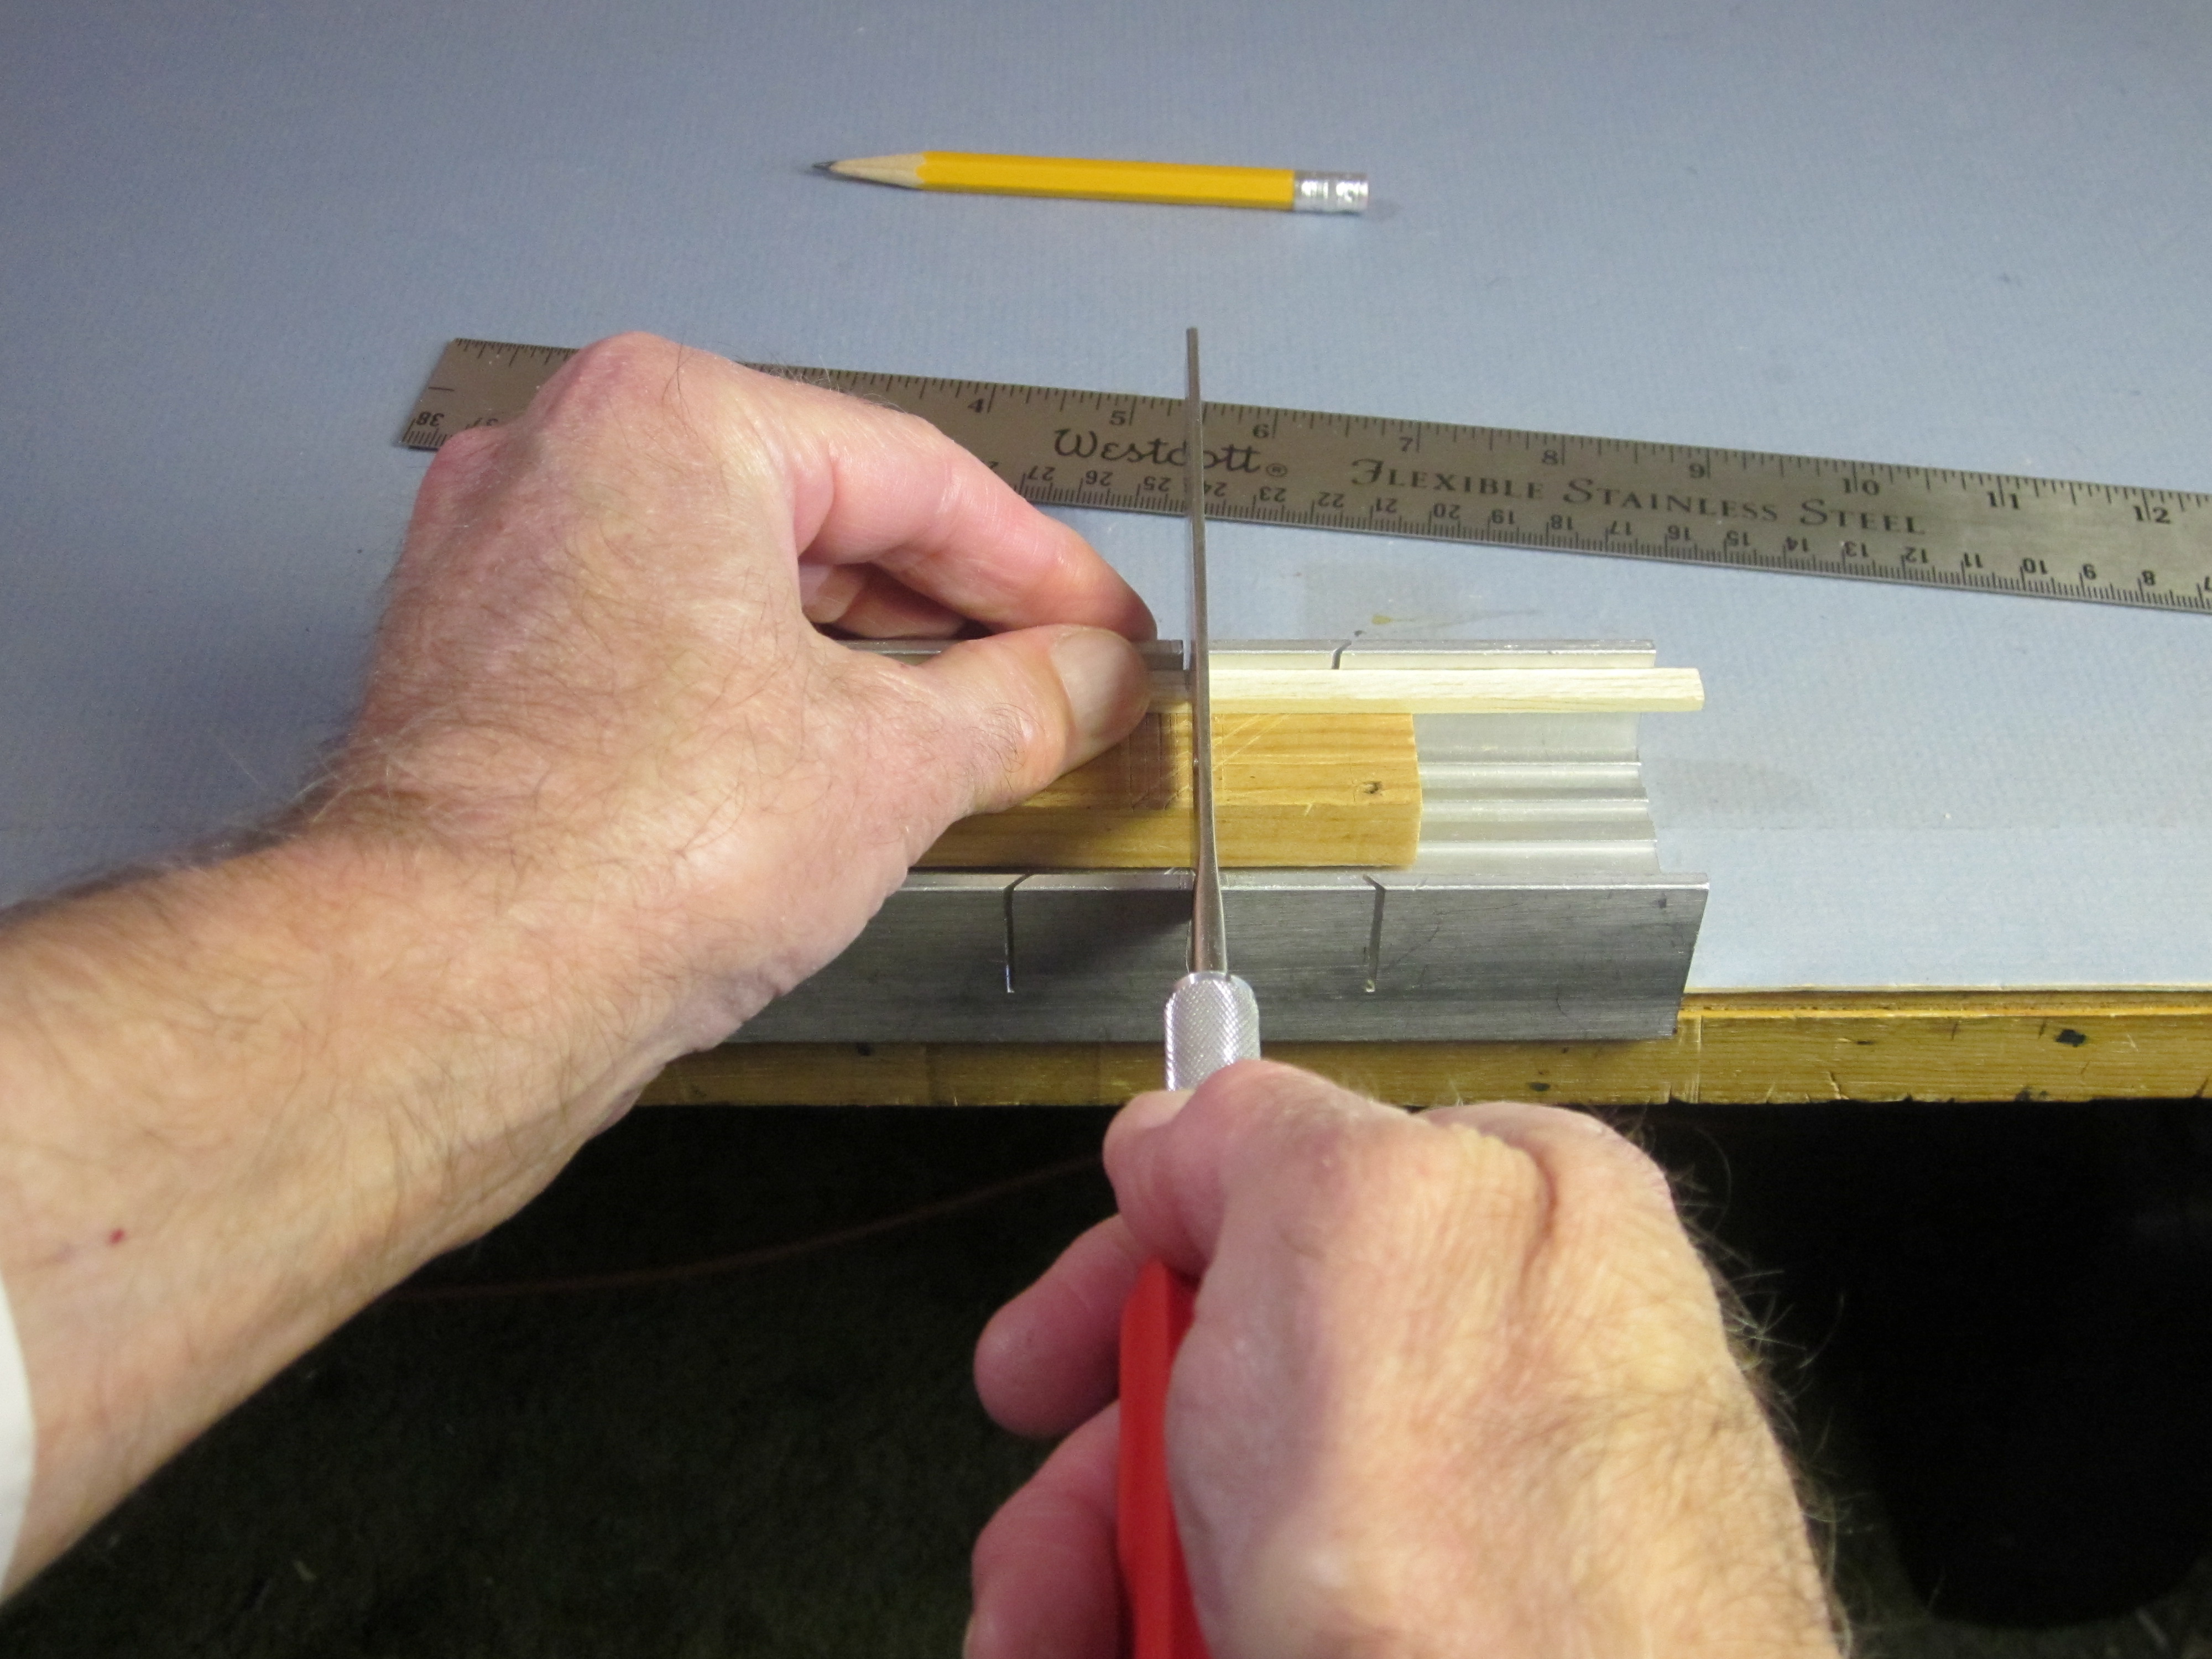
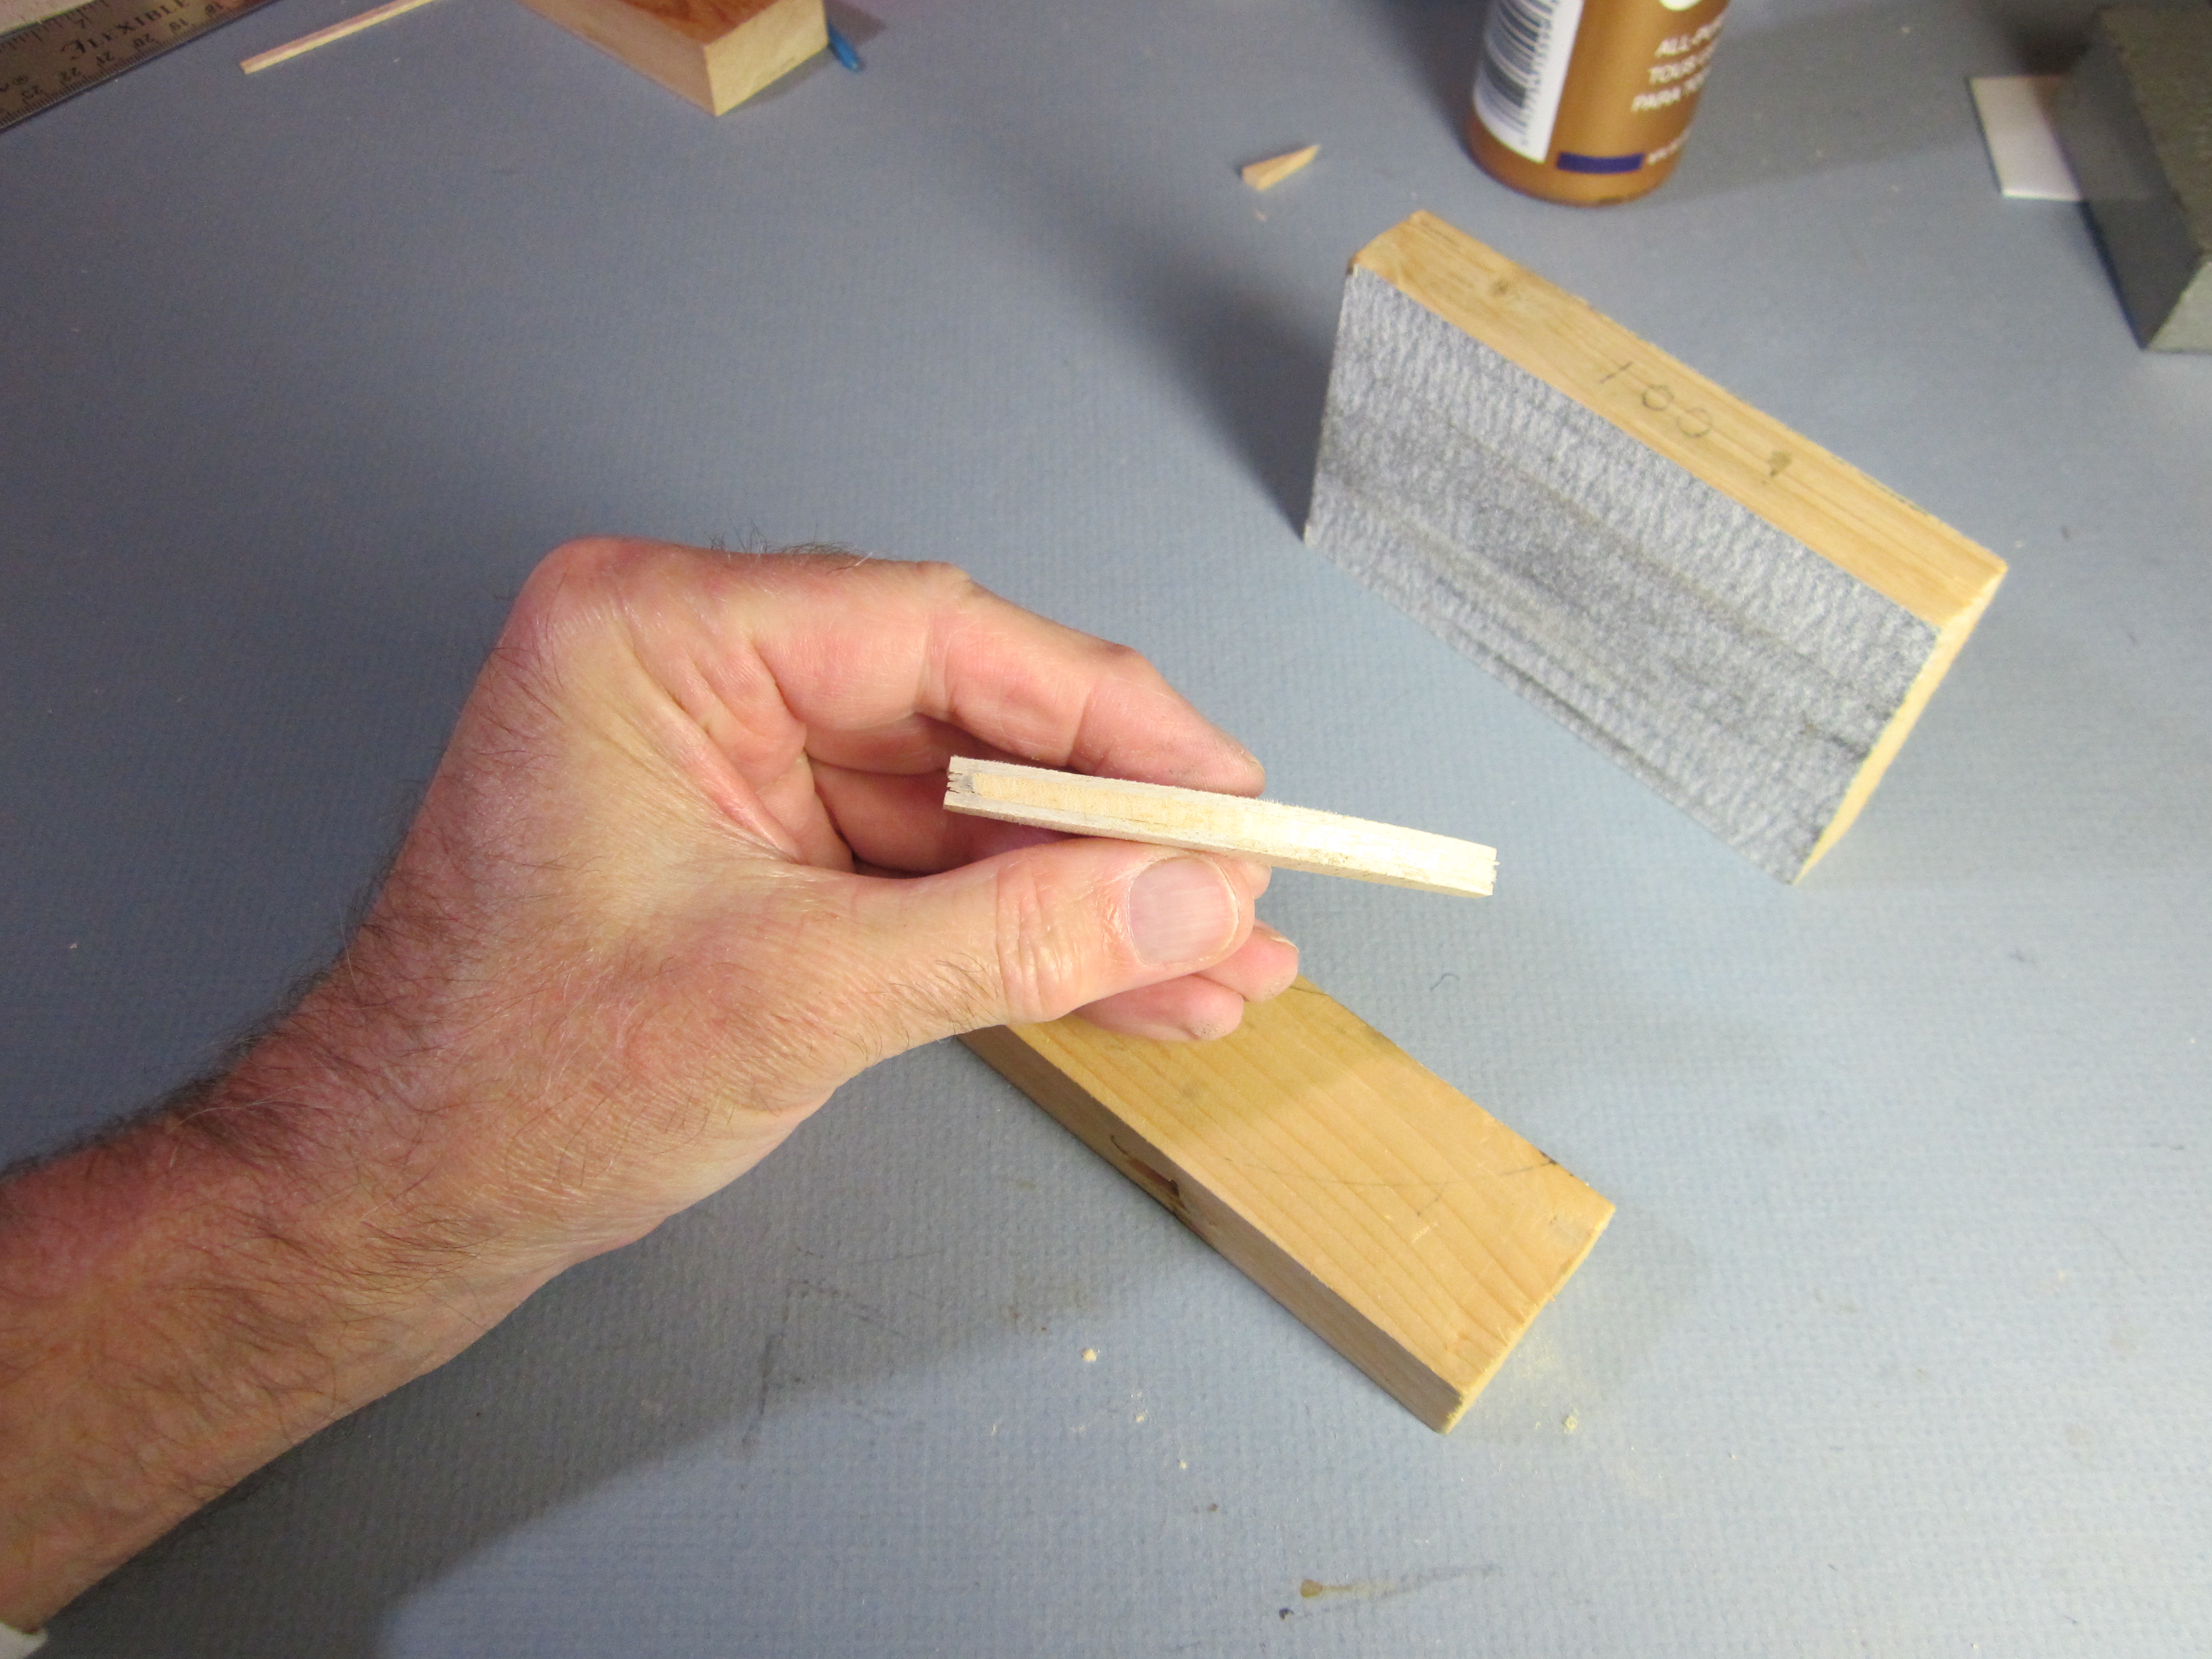
 Sand a 35 degree taper in each end of the 1/16″ x 1/8″ x 3 5/8″ hold down stick.
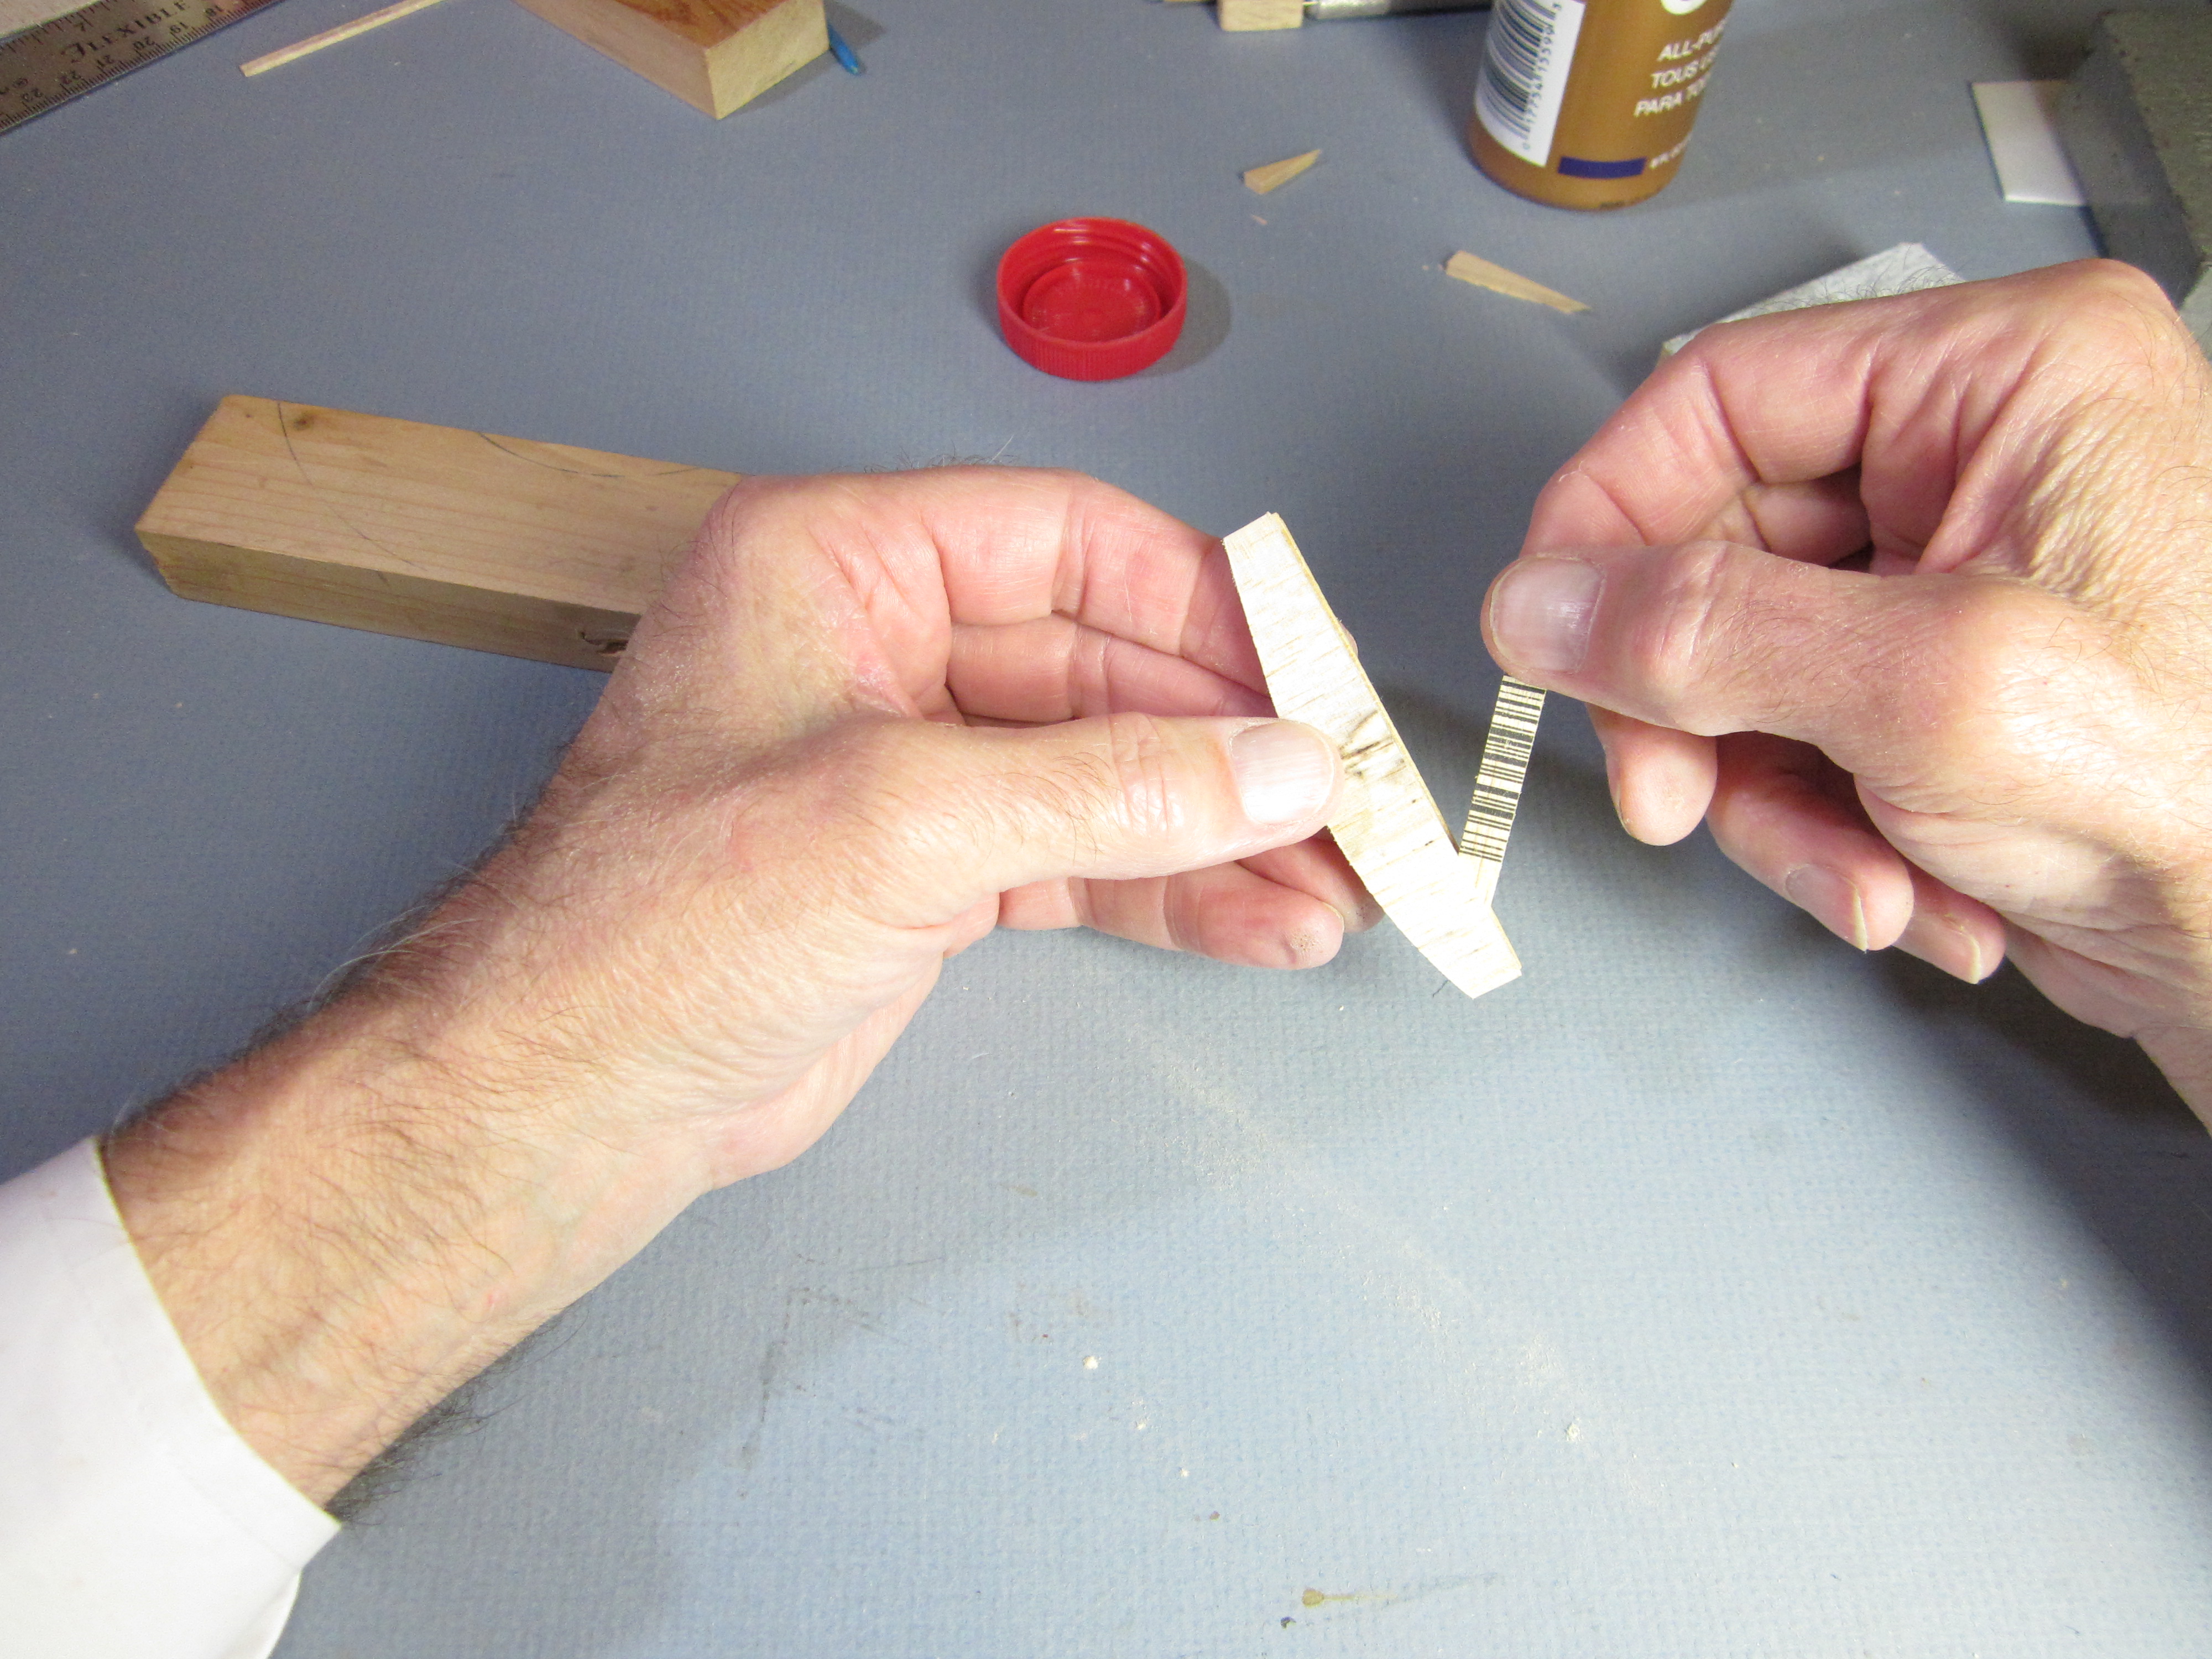
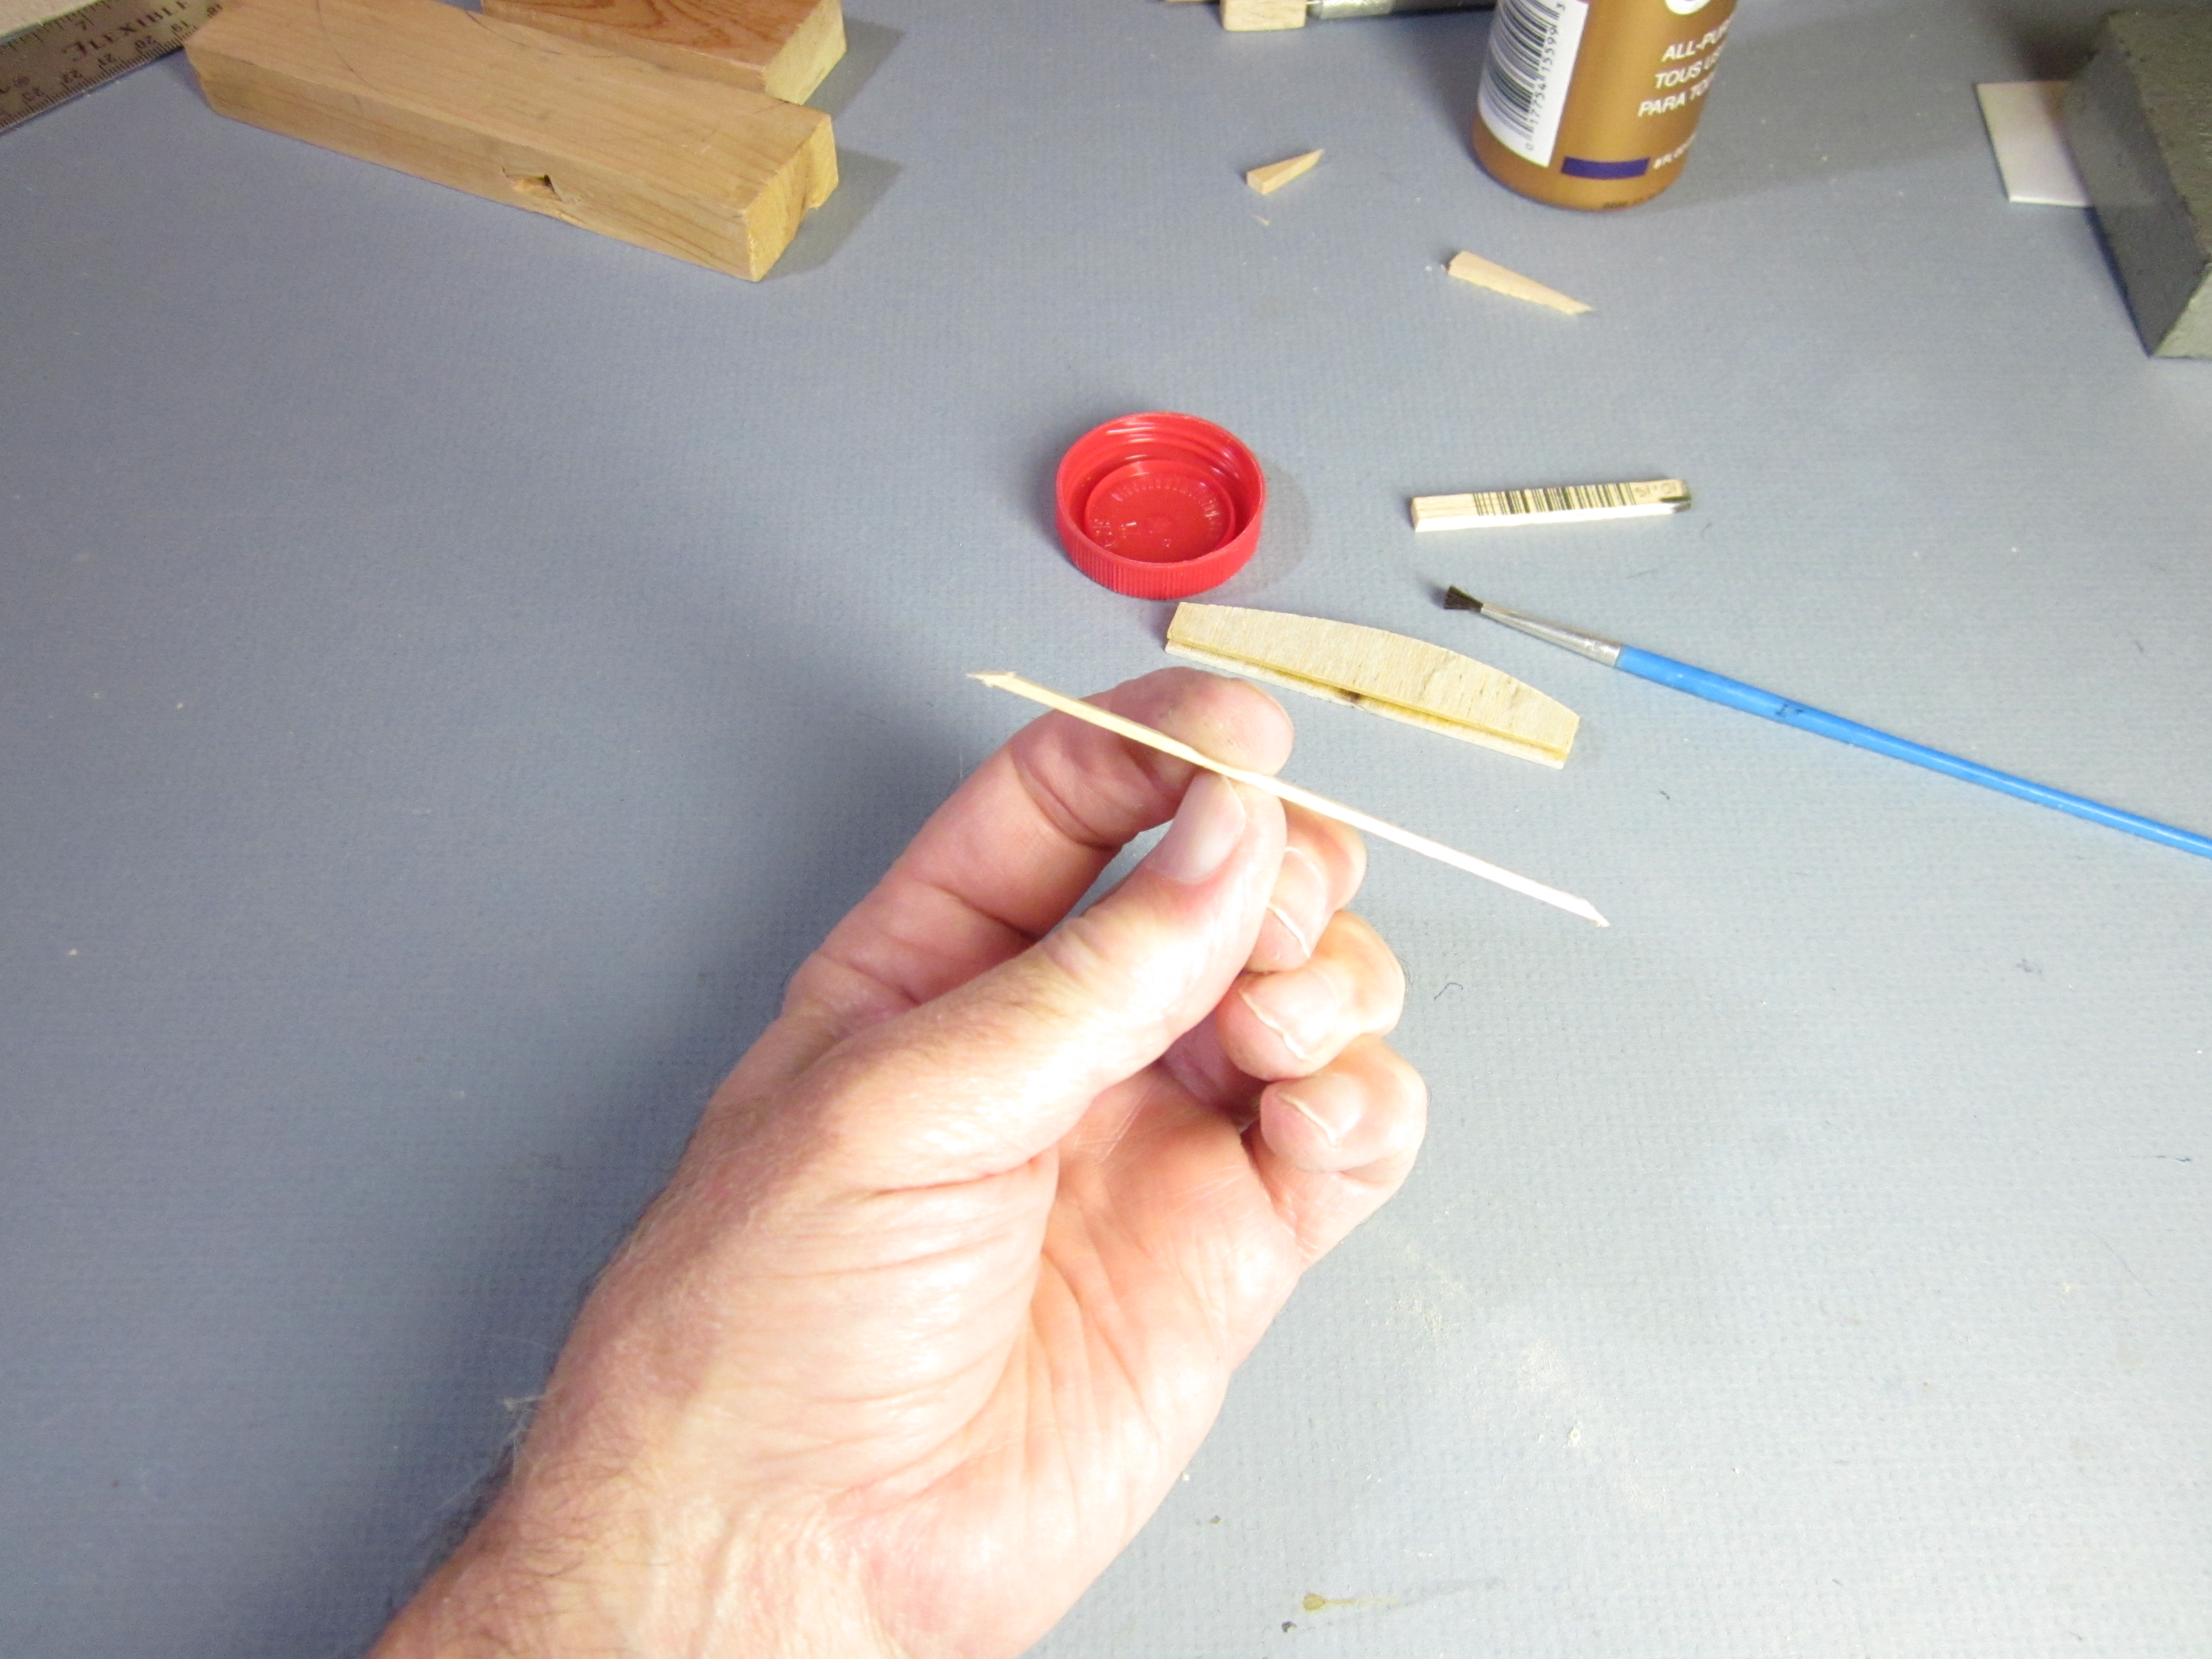 It will look like this.
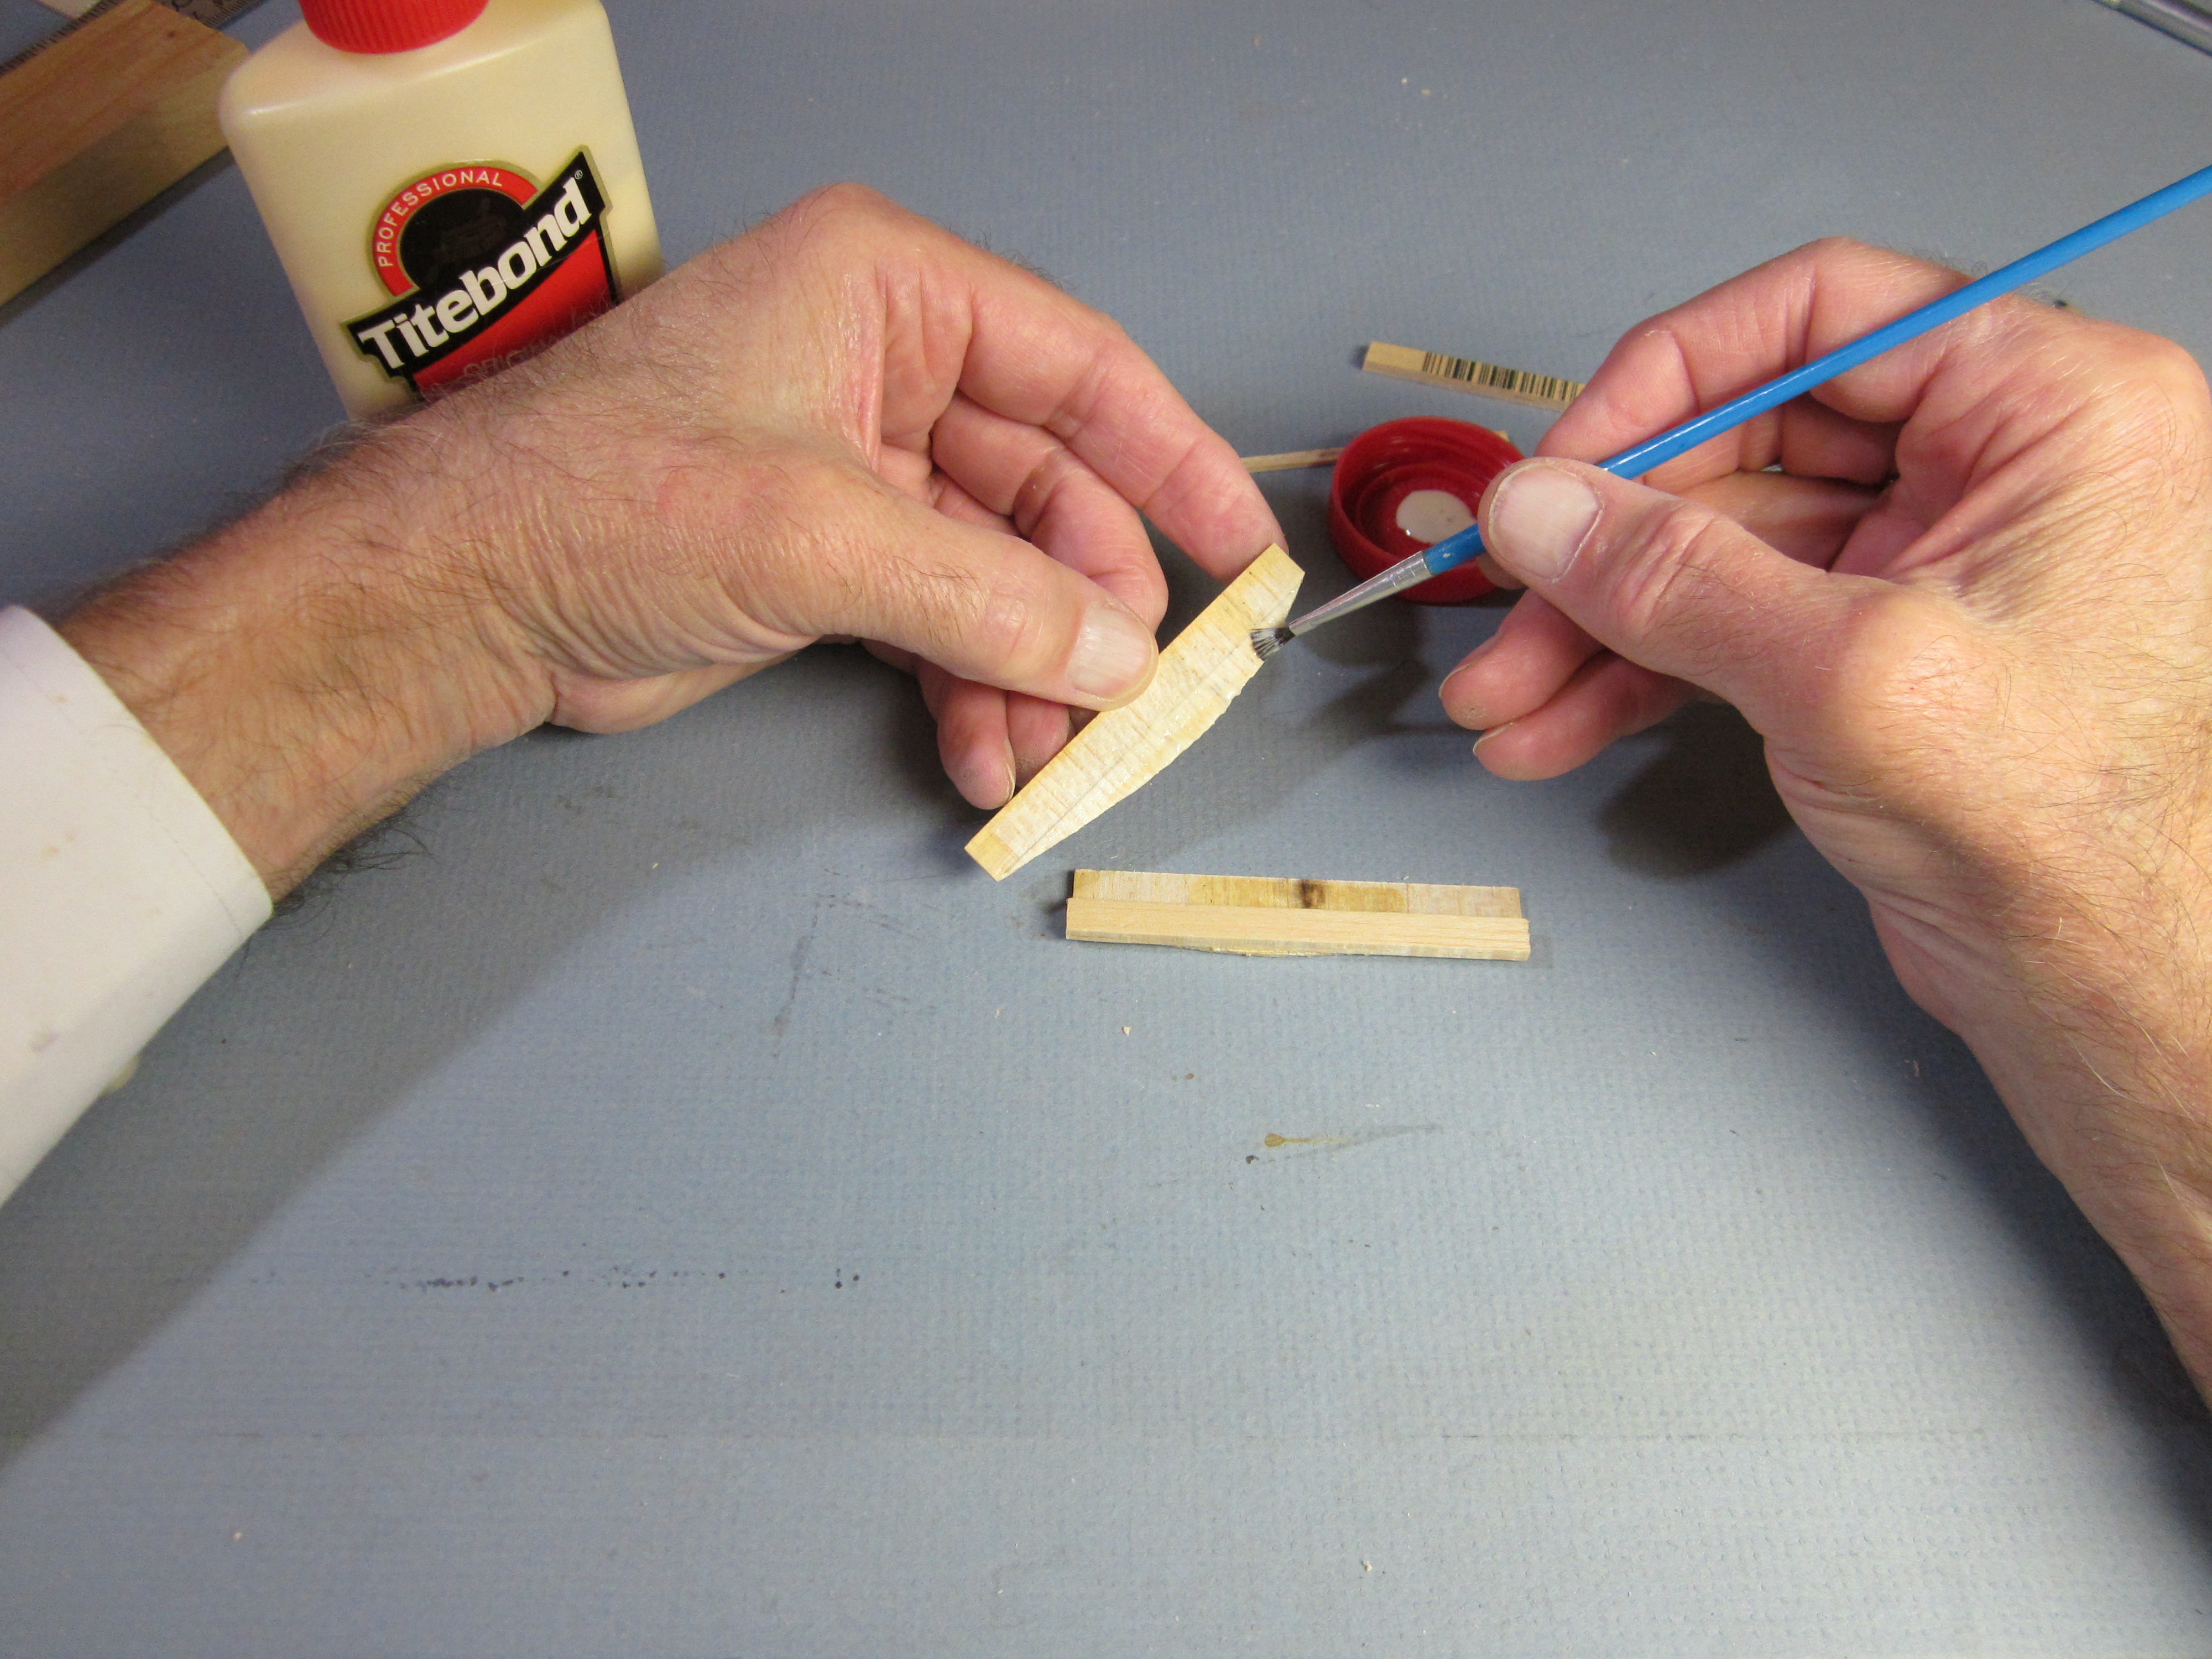
 Apply glue to the underside of the rib.
 Put the hold down stick in the gap with the beveled side toward the top.
 Press the hold down stick firmly against the bottom of the rib. Be sure the stick projects equally from each end of the saddle.
glue the fin to the stick
 Sand the bottom of the fin square.
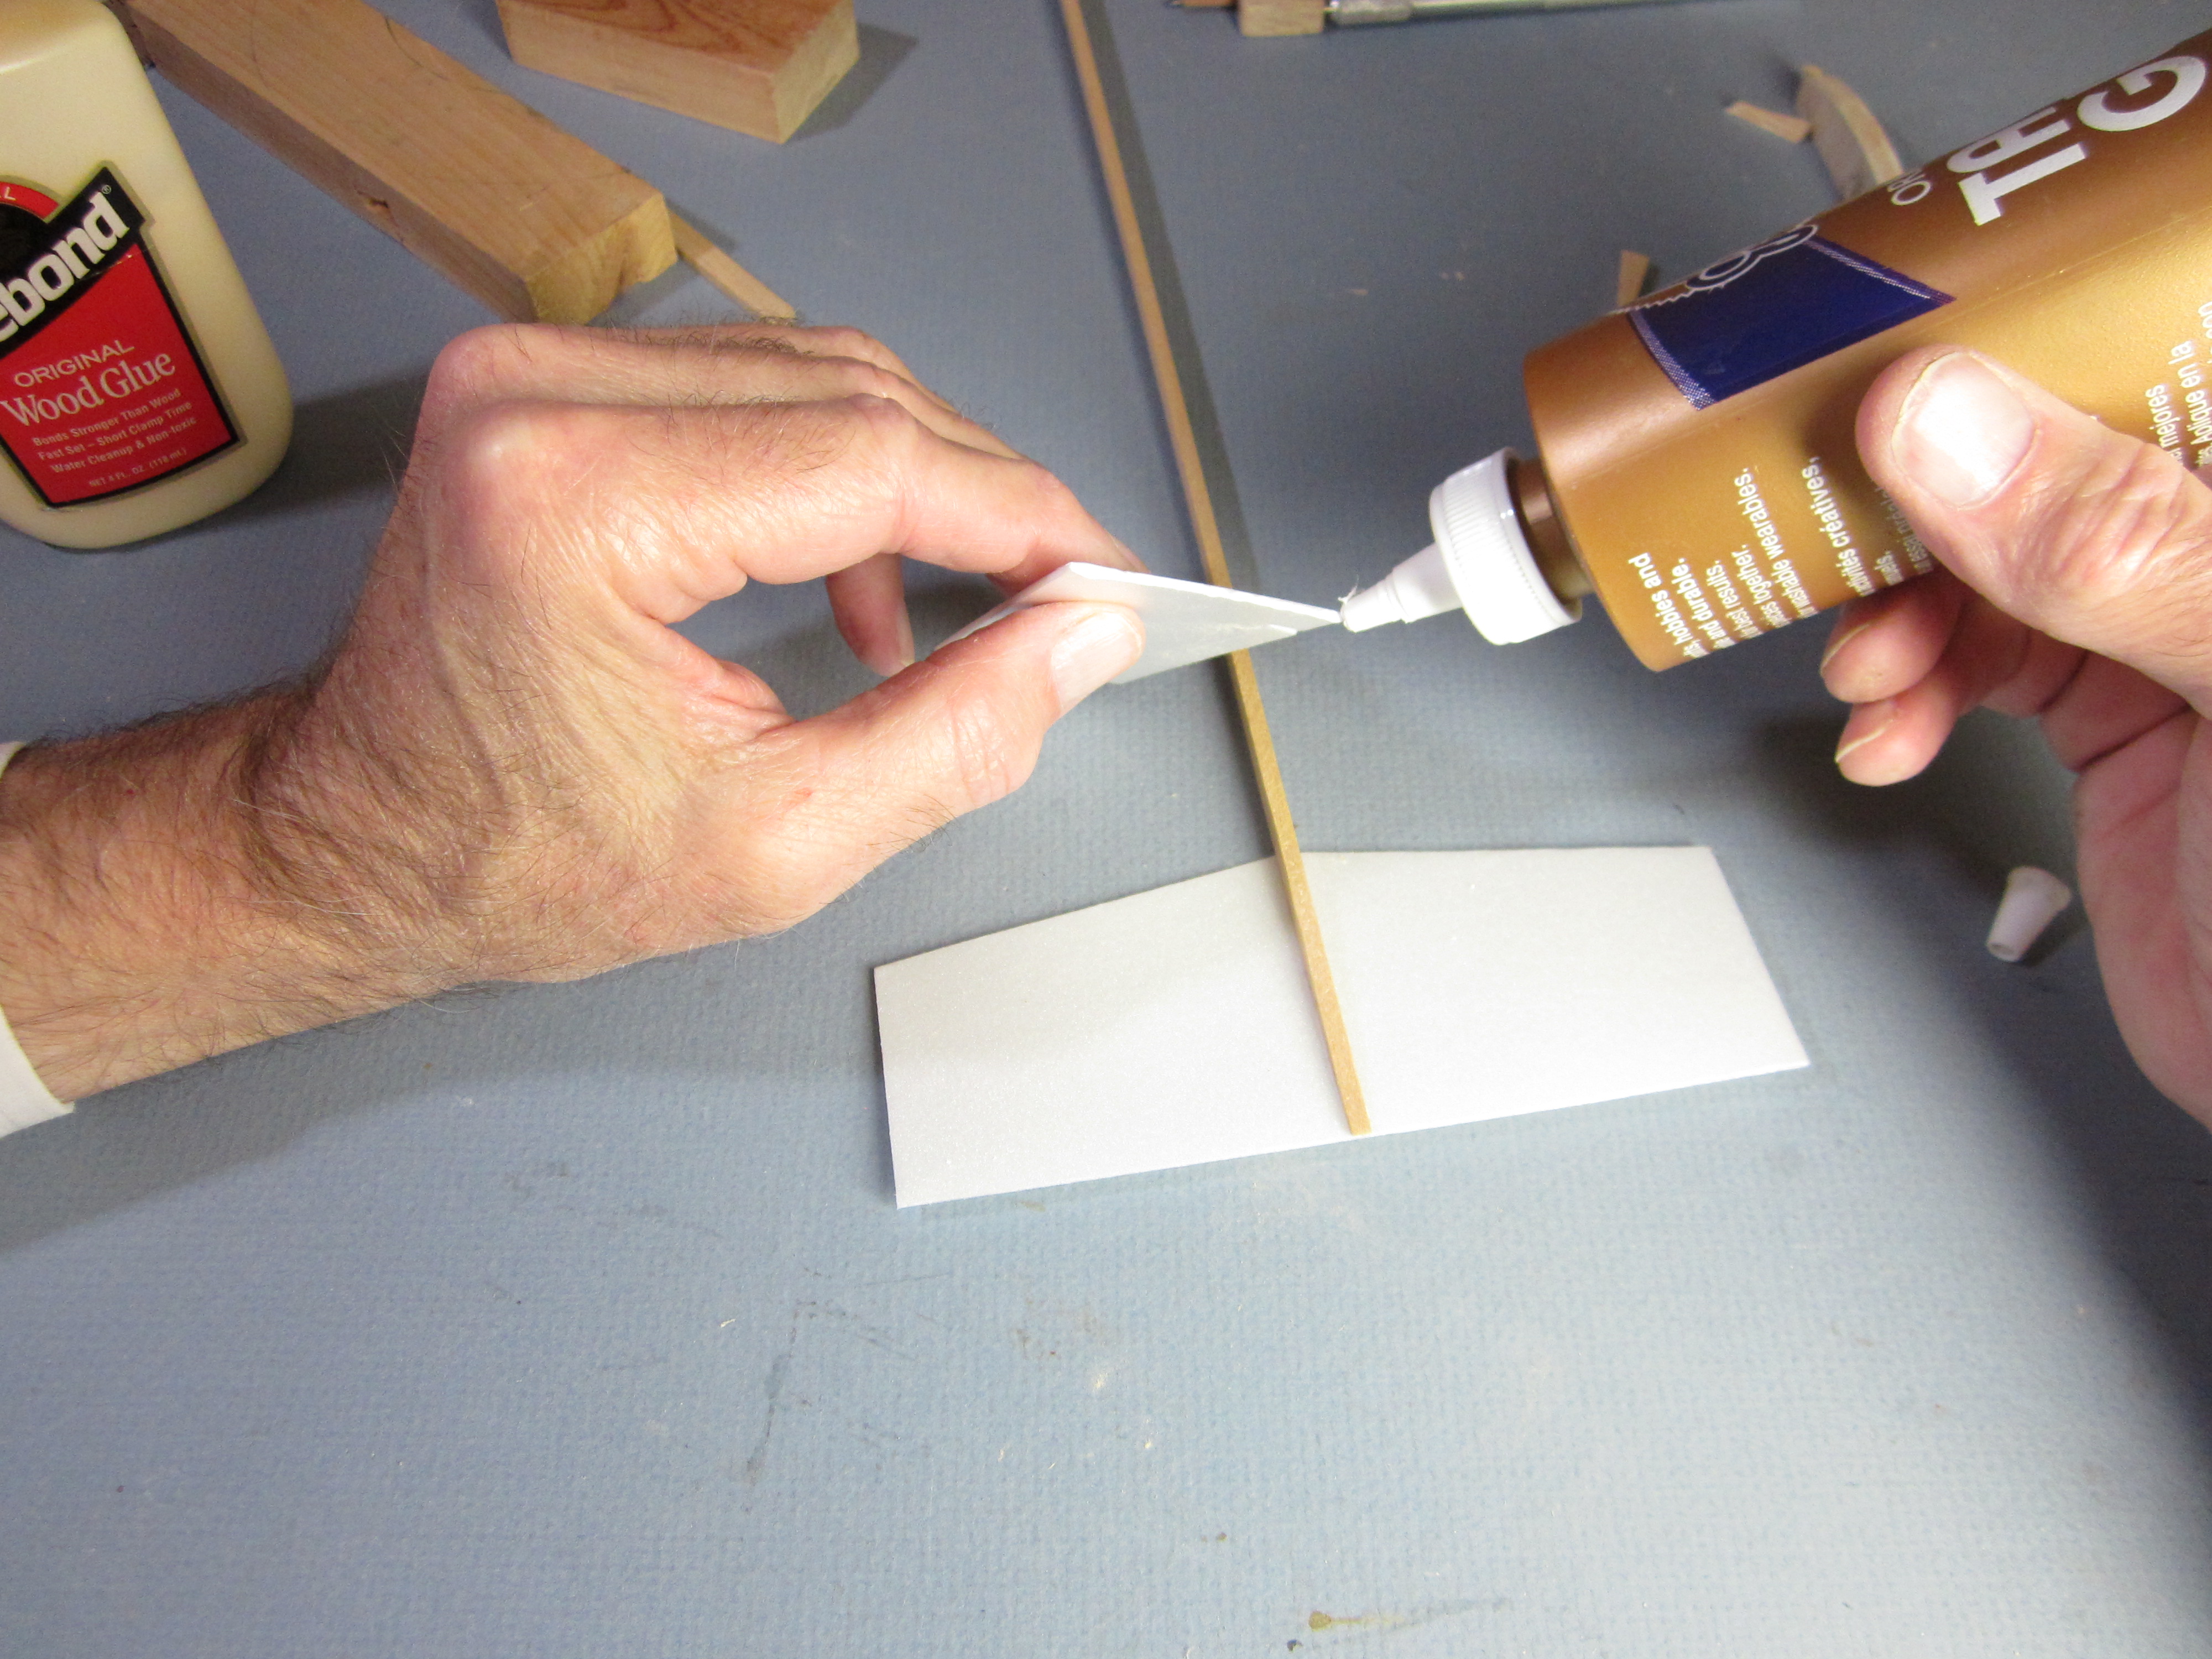 Run a bead of glue along the base of the fin.
 Center the fin on the stick and press it in place. The rudder goes in back.
 Block the fin in place until the glue dries. The fin should be perpendicular to the tailplane.
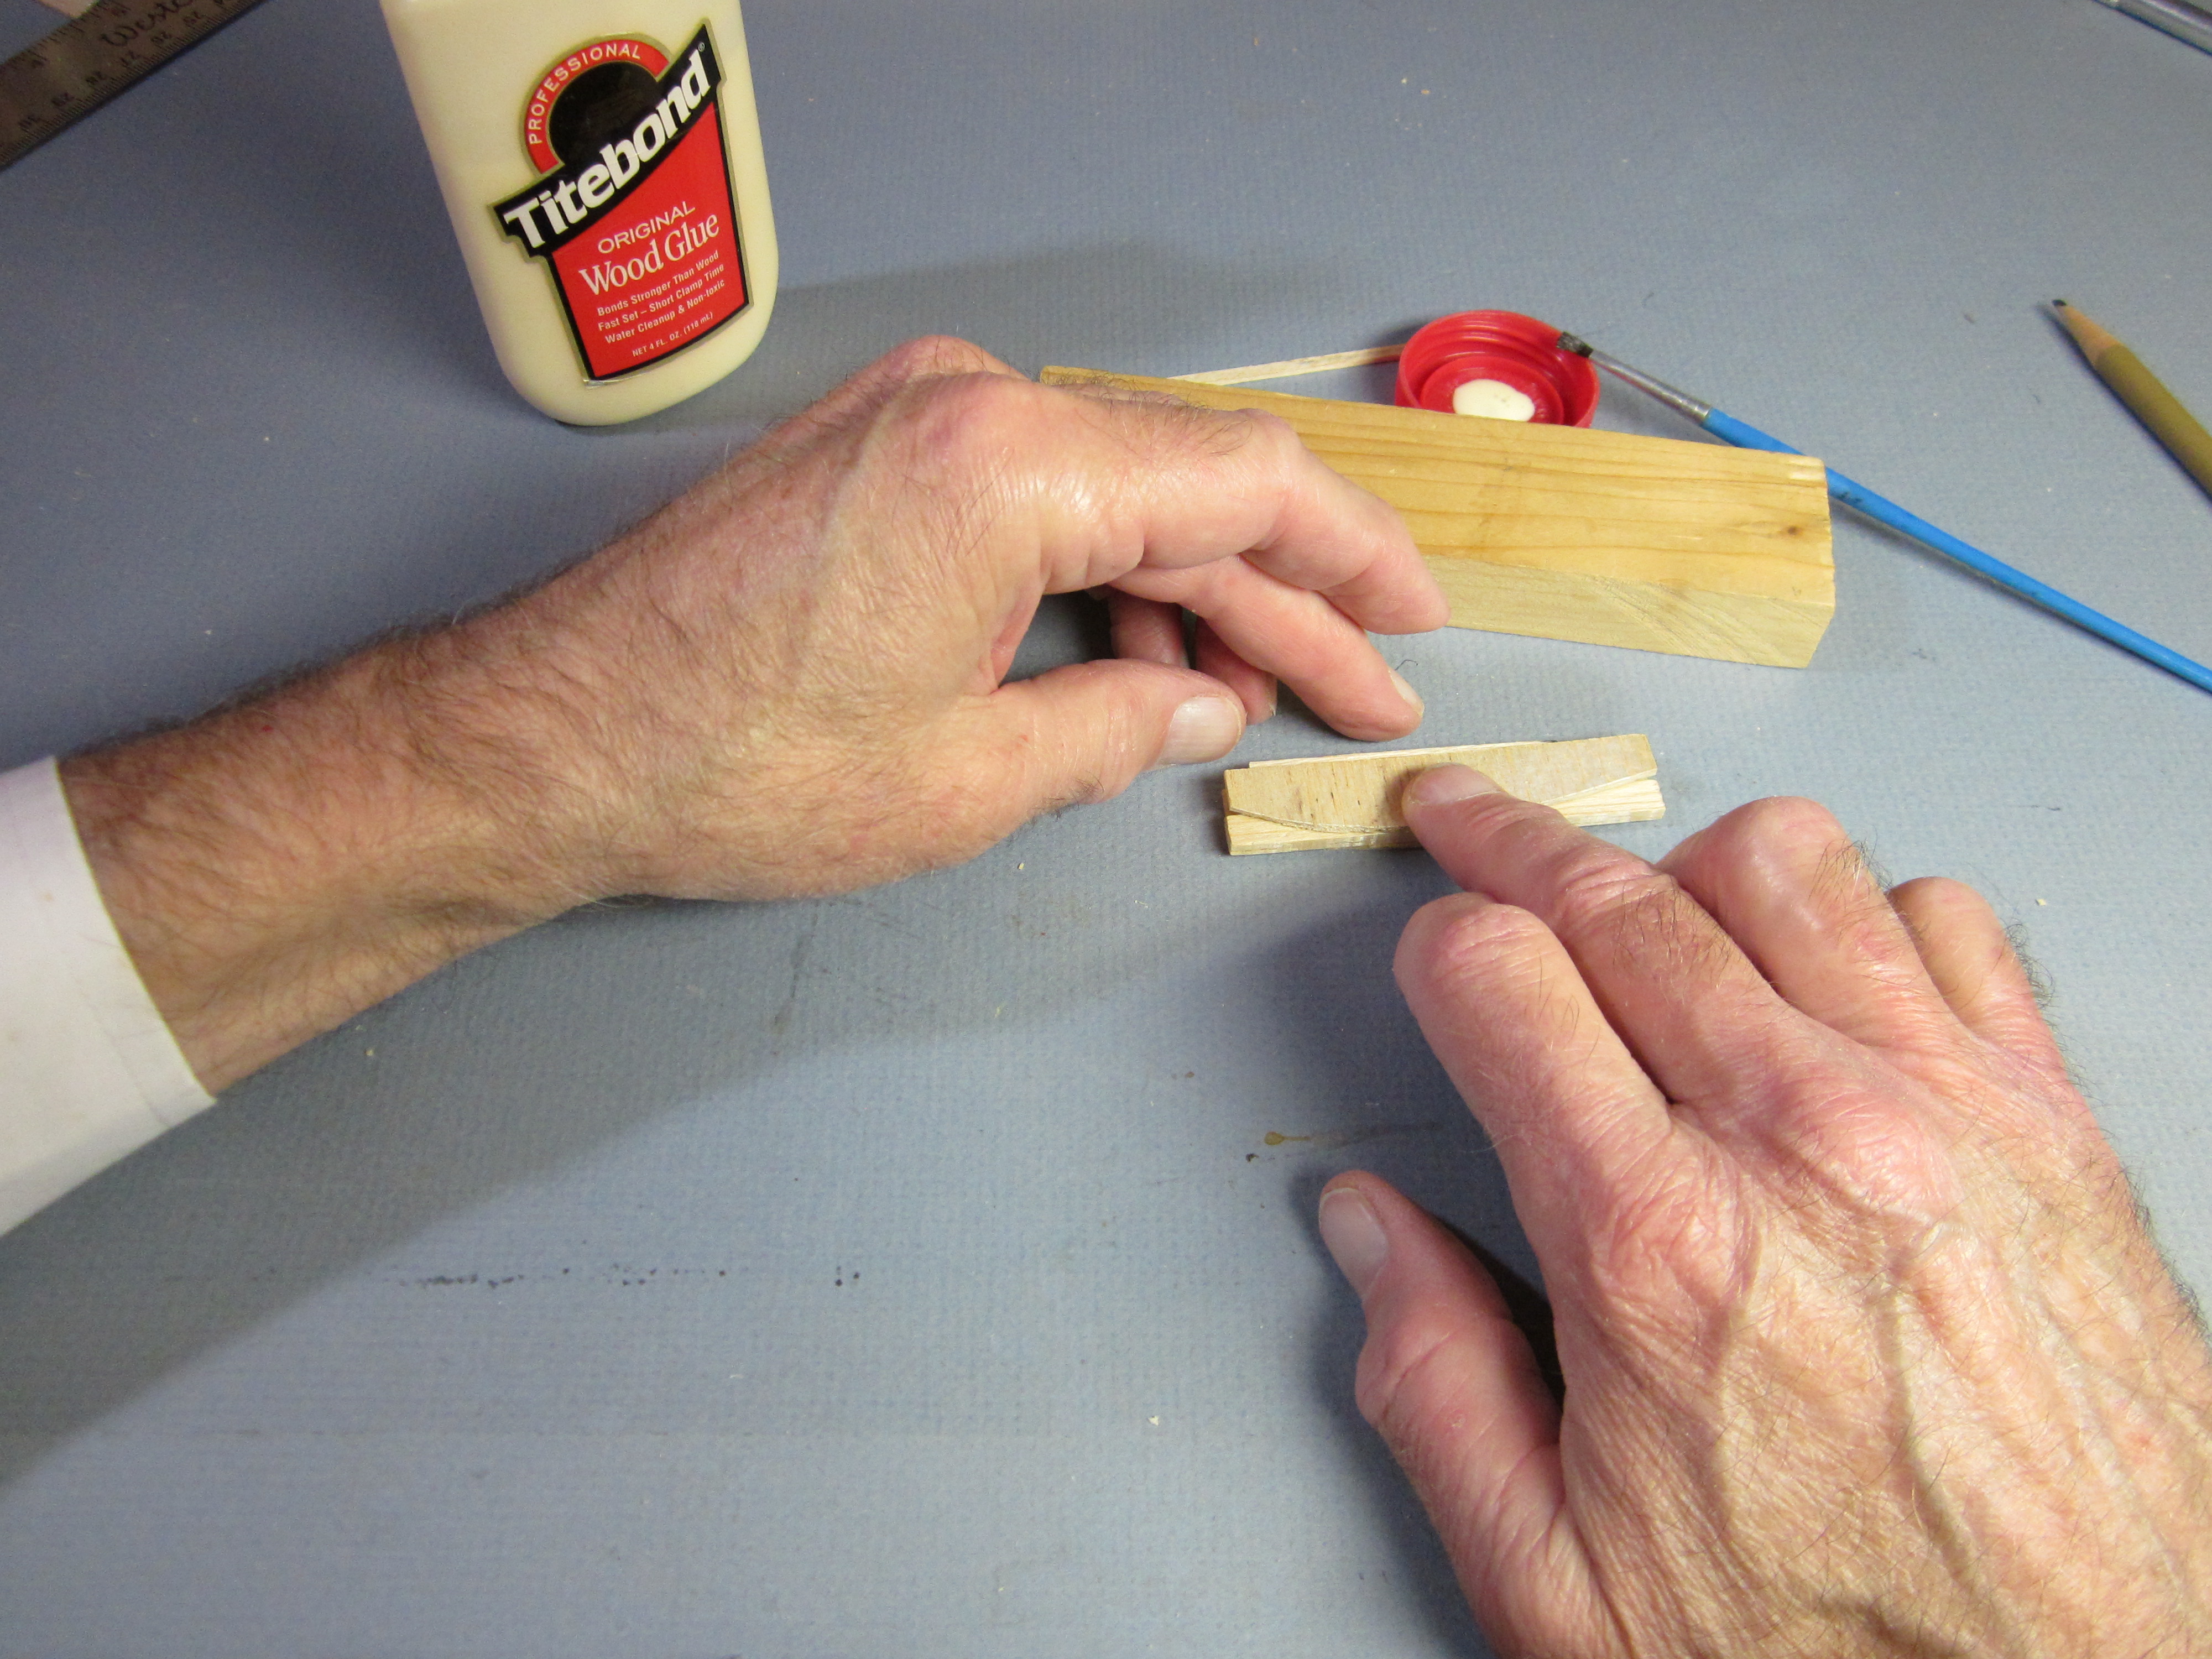
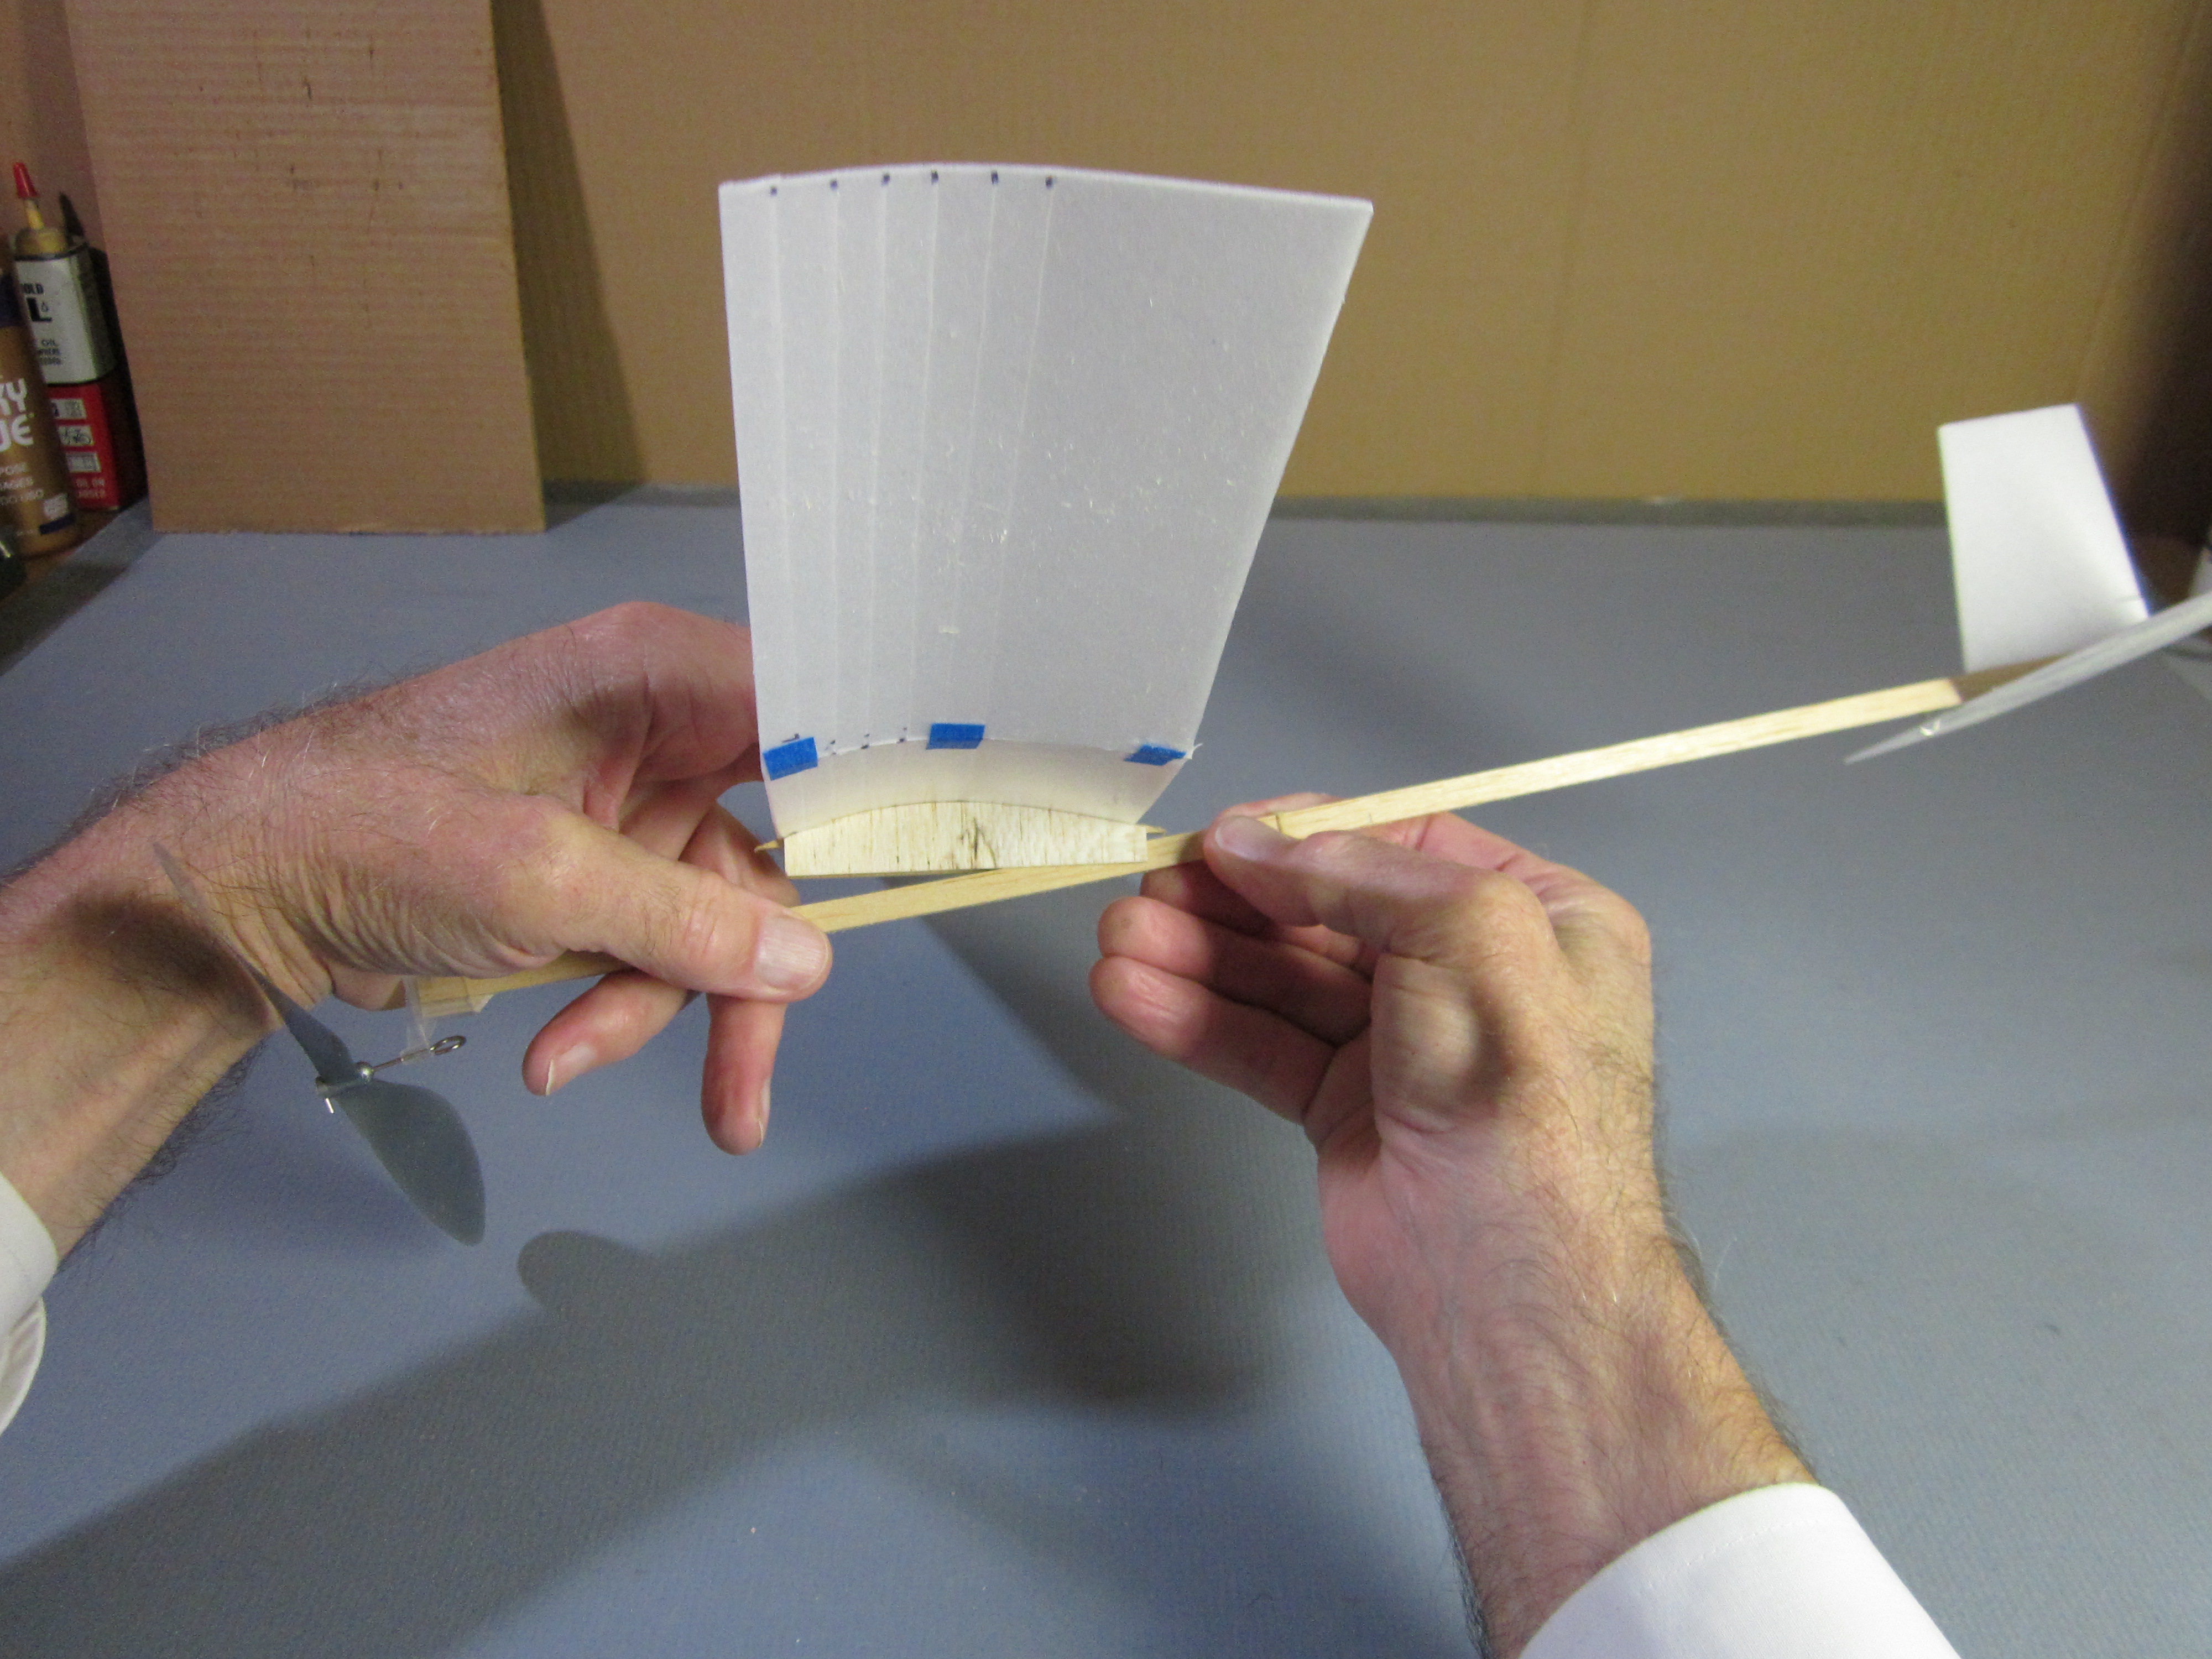
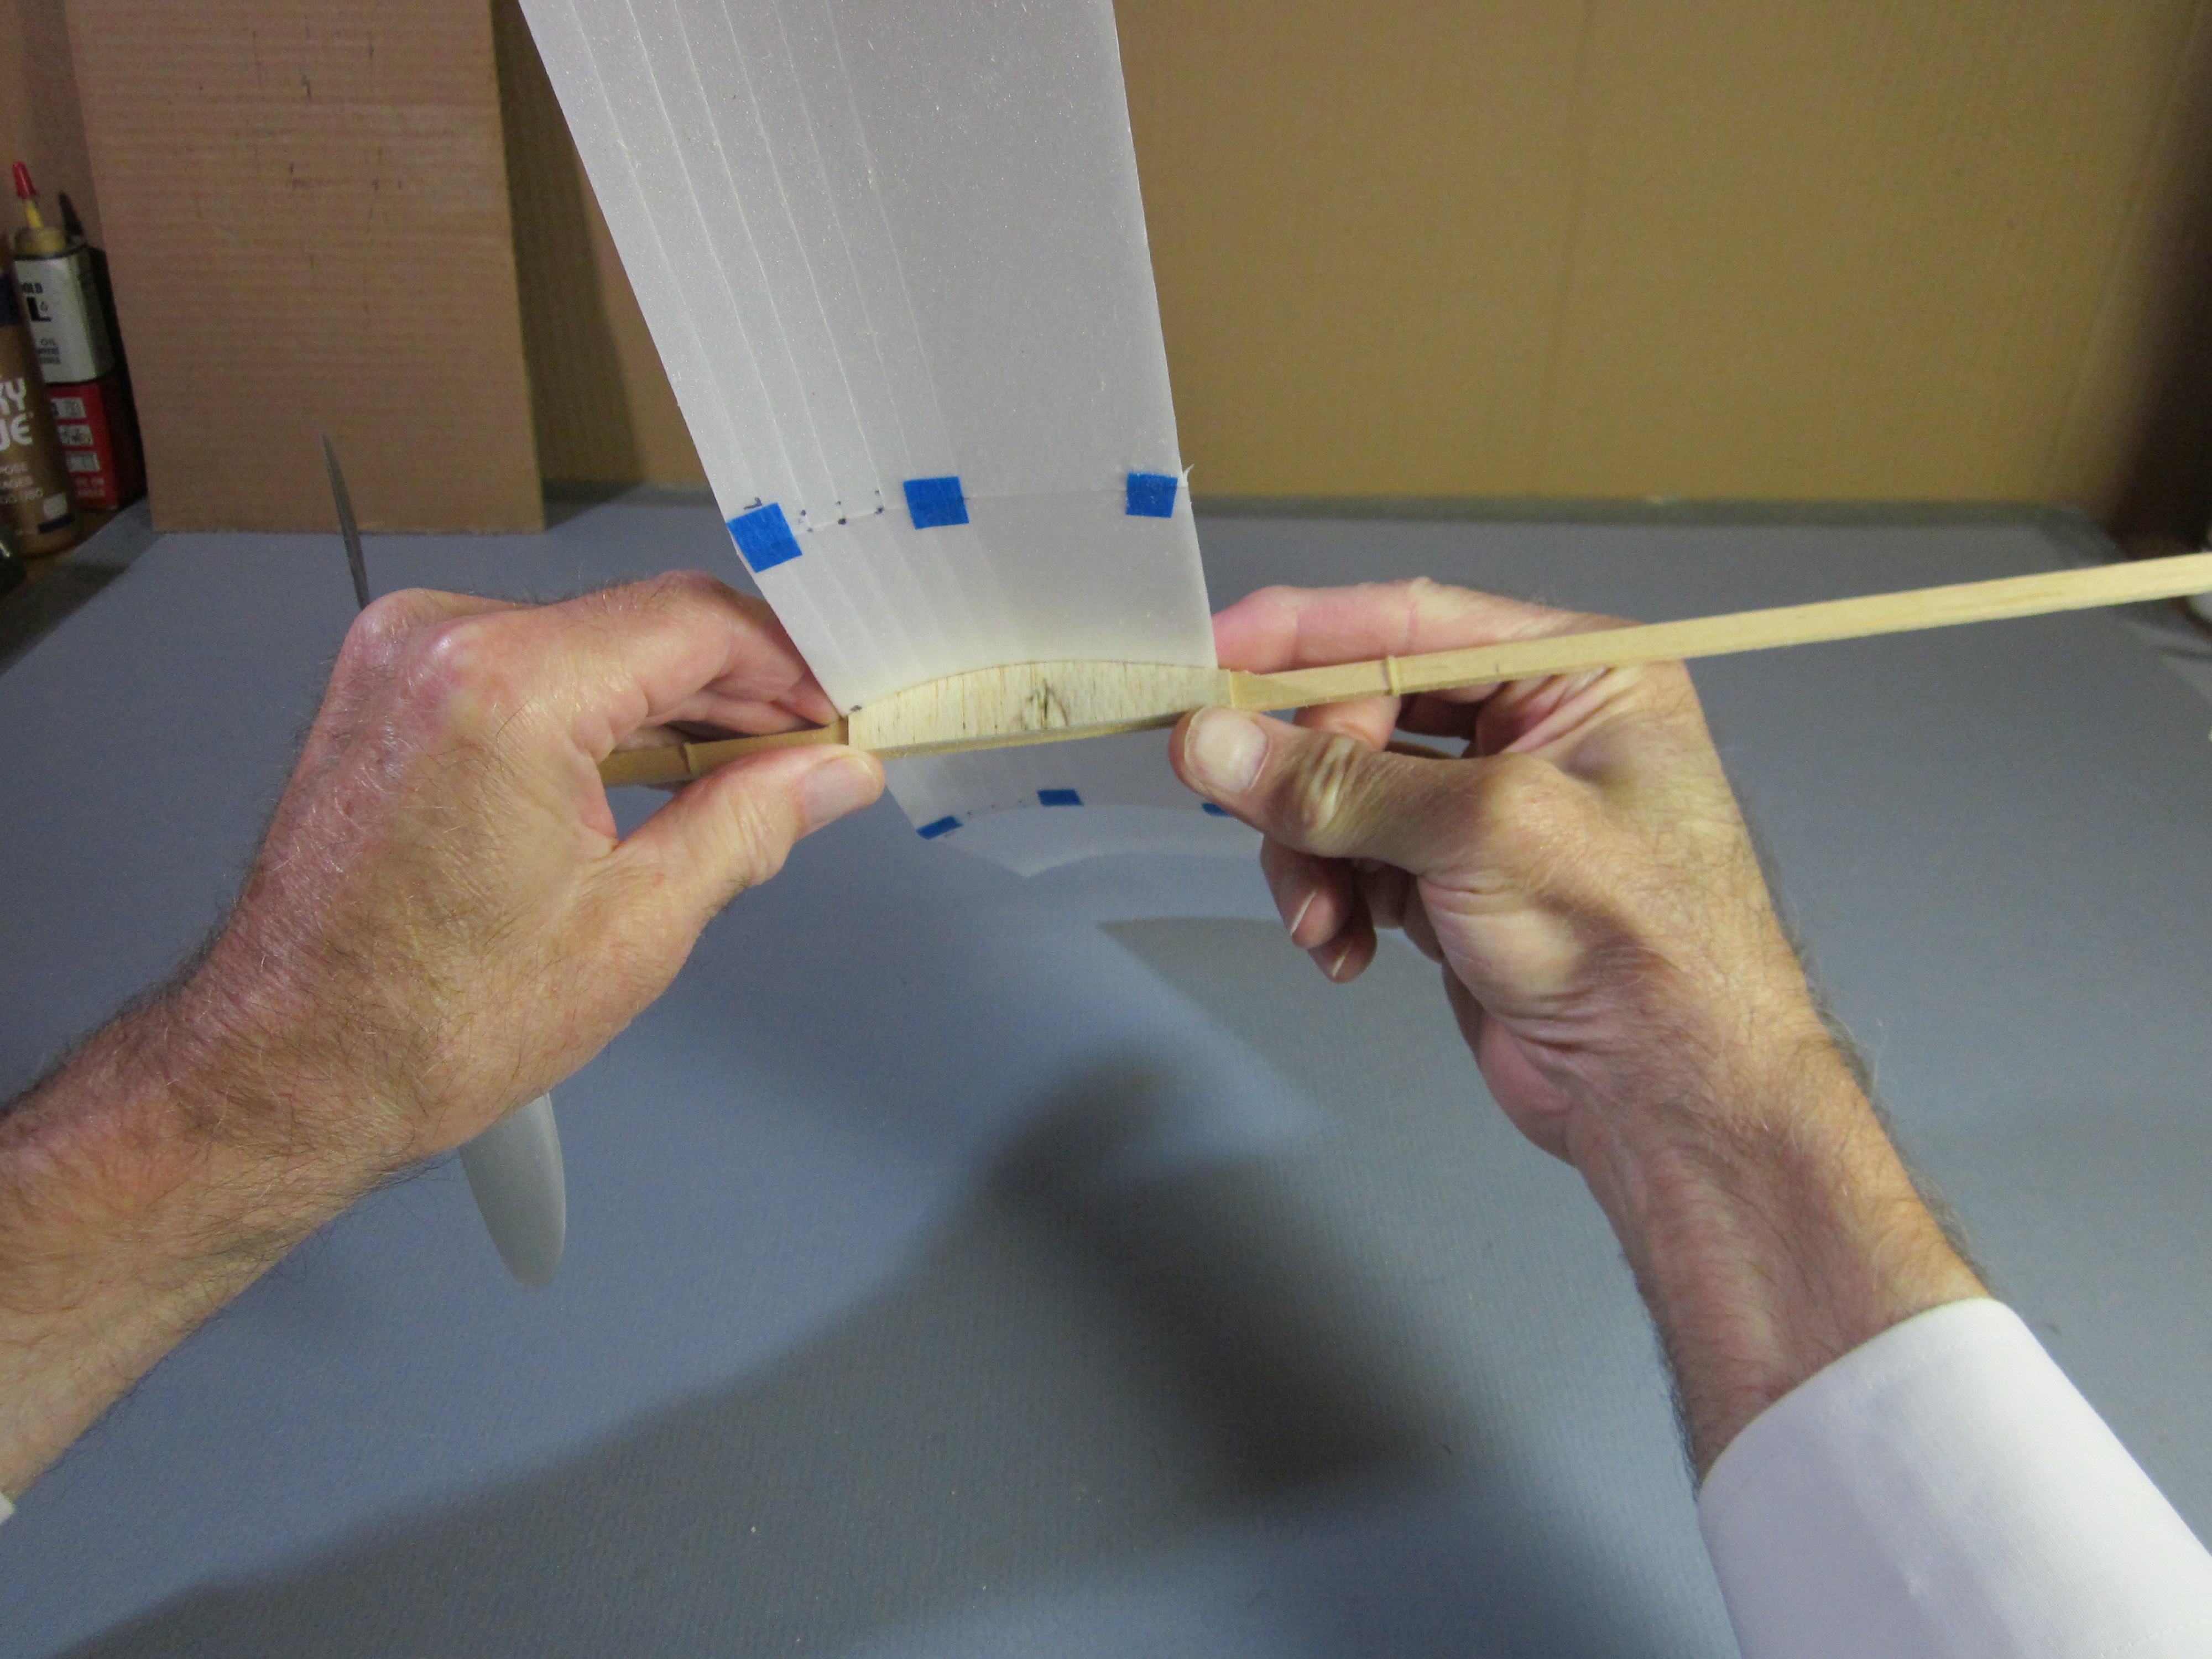
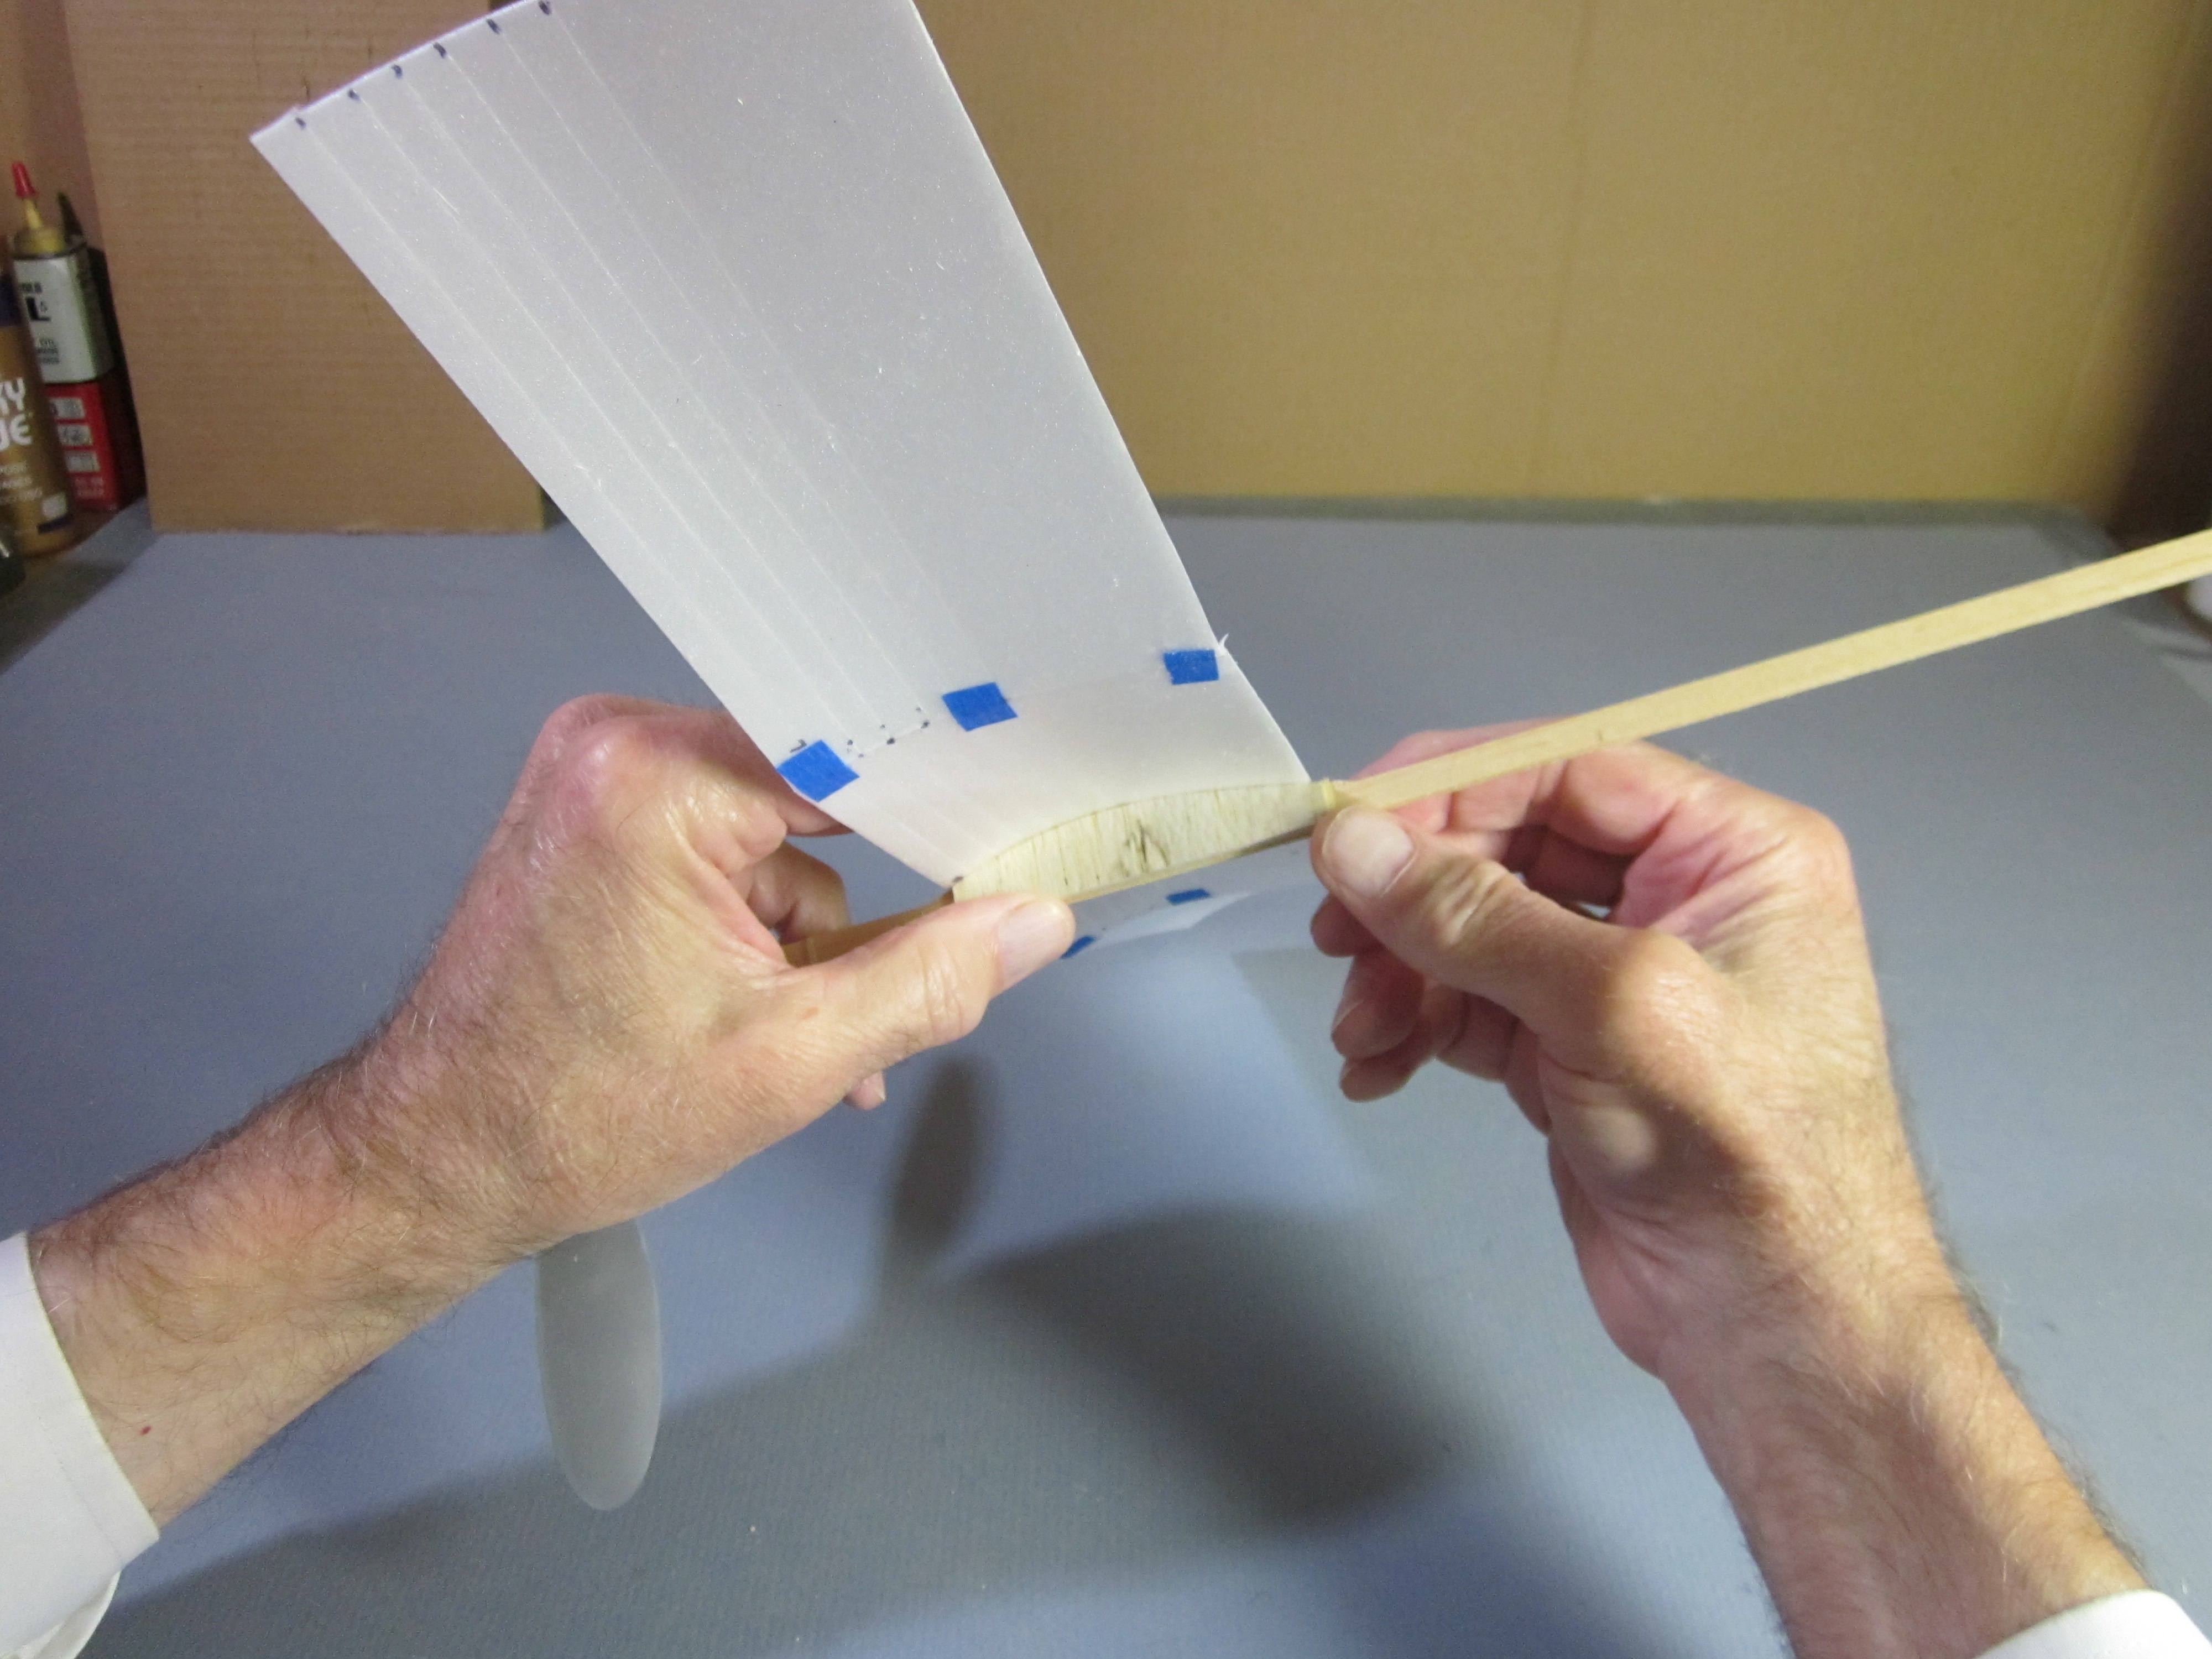
Glue the wing to the saddle
 Run a bead of glue along the top of the rib.
 Spread the glue uniformly all over the top of the rib.
 Like that.
 Place the saddle on the tabletop. Align the pinholes on the wing centerline with the center of the rib and press the wing down on the rib. Make sure the leading edge of the wing corresponds to the leading edge of the rib.
 Place weights along the wing leading and trailing edges to hold it down straight and level until the glue dries. Be sure the wing is pressed down firmly onto the rib along its entire length.
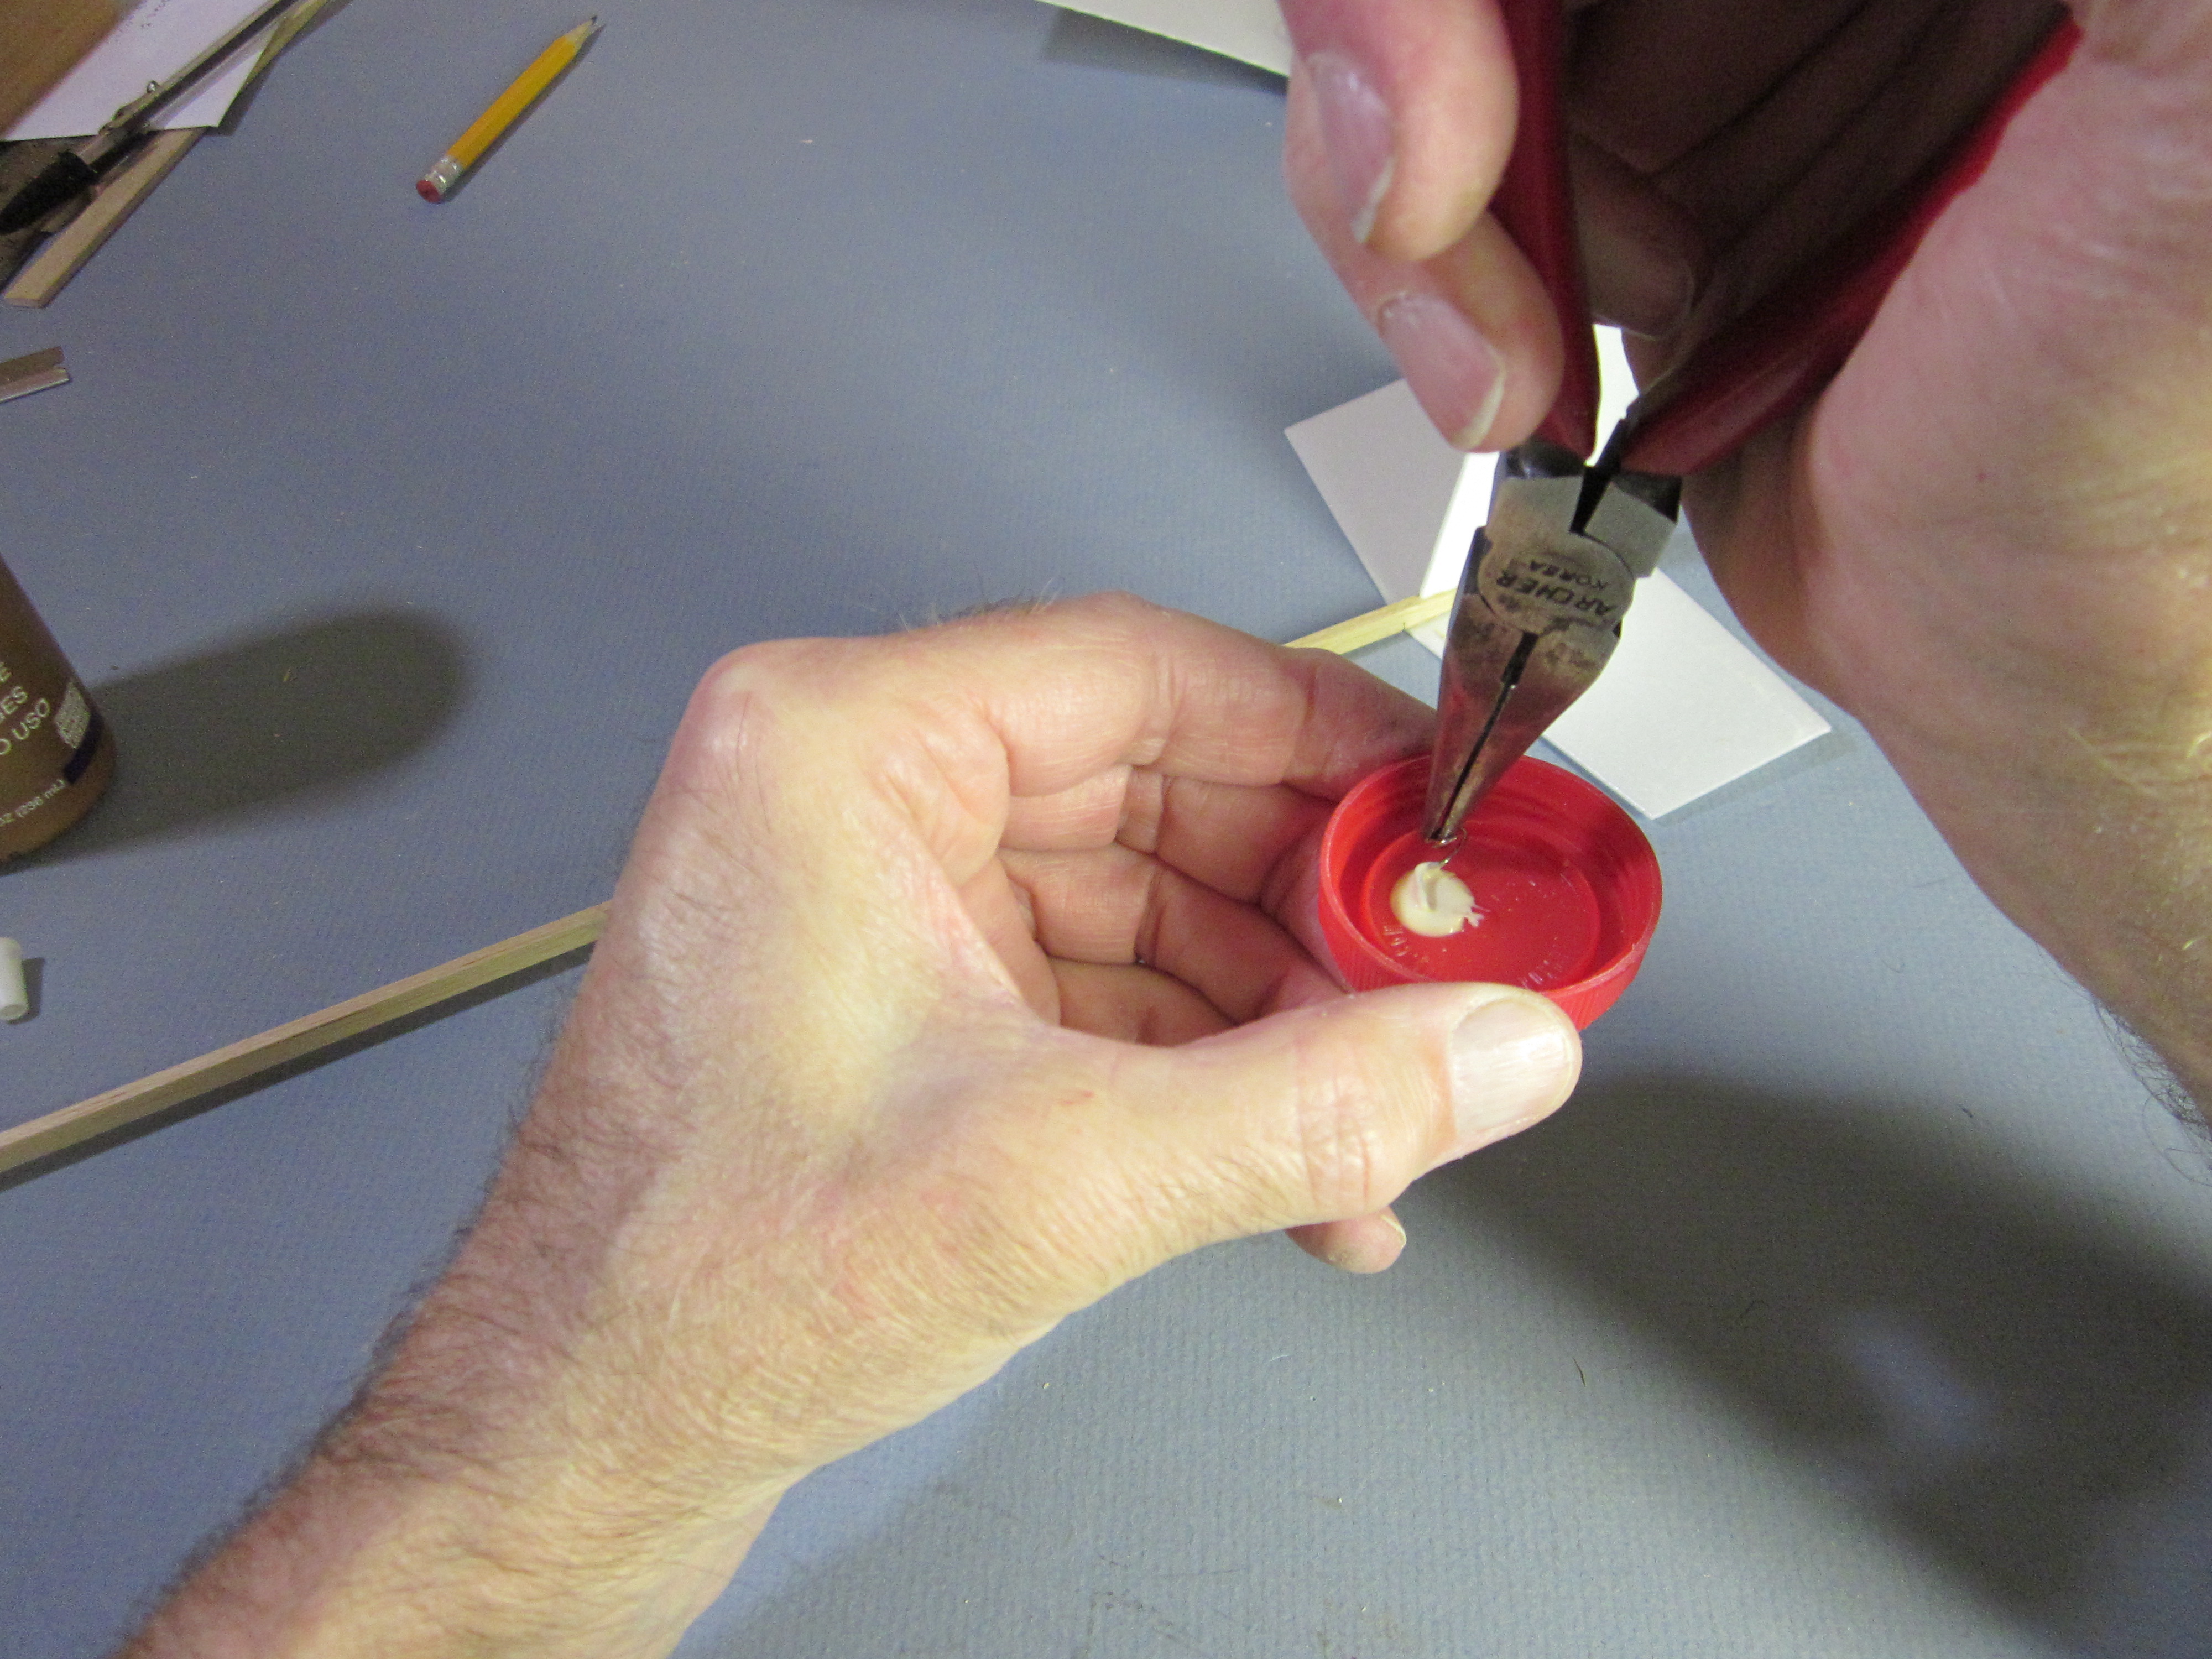
MAKE THE REAR MOTOR HOOK and glue it to the fuselage
 The rear motor hook can be made from an ordinary 1″ straight pin or a 1″ length of 0.020″ steel wire.
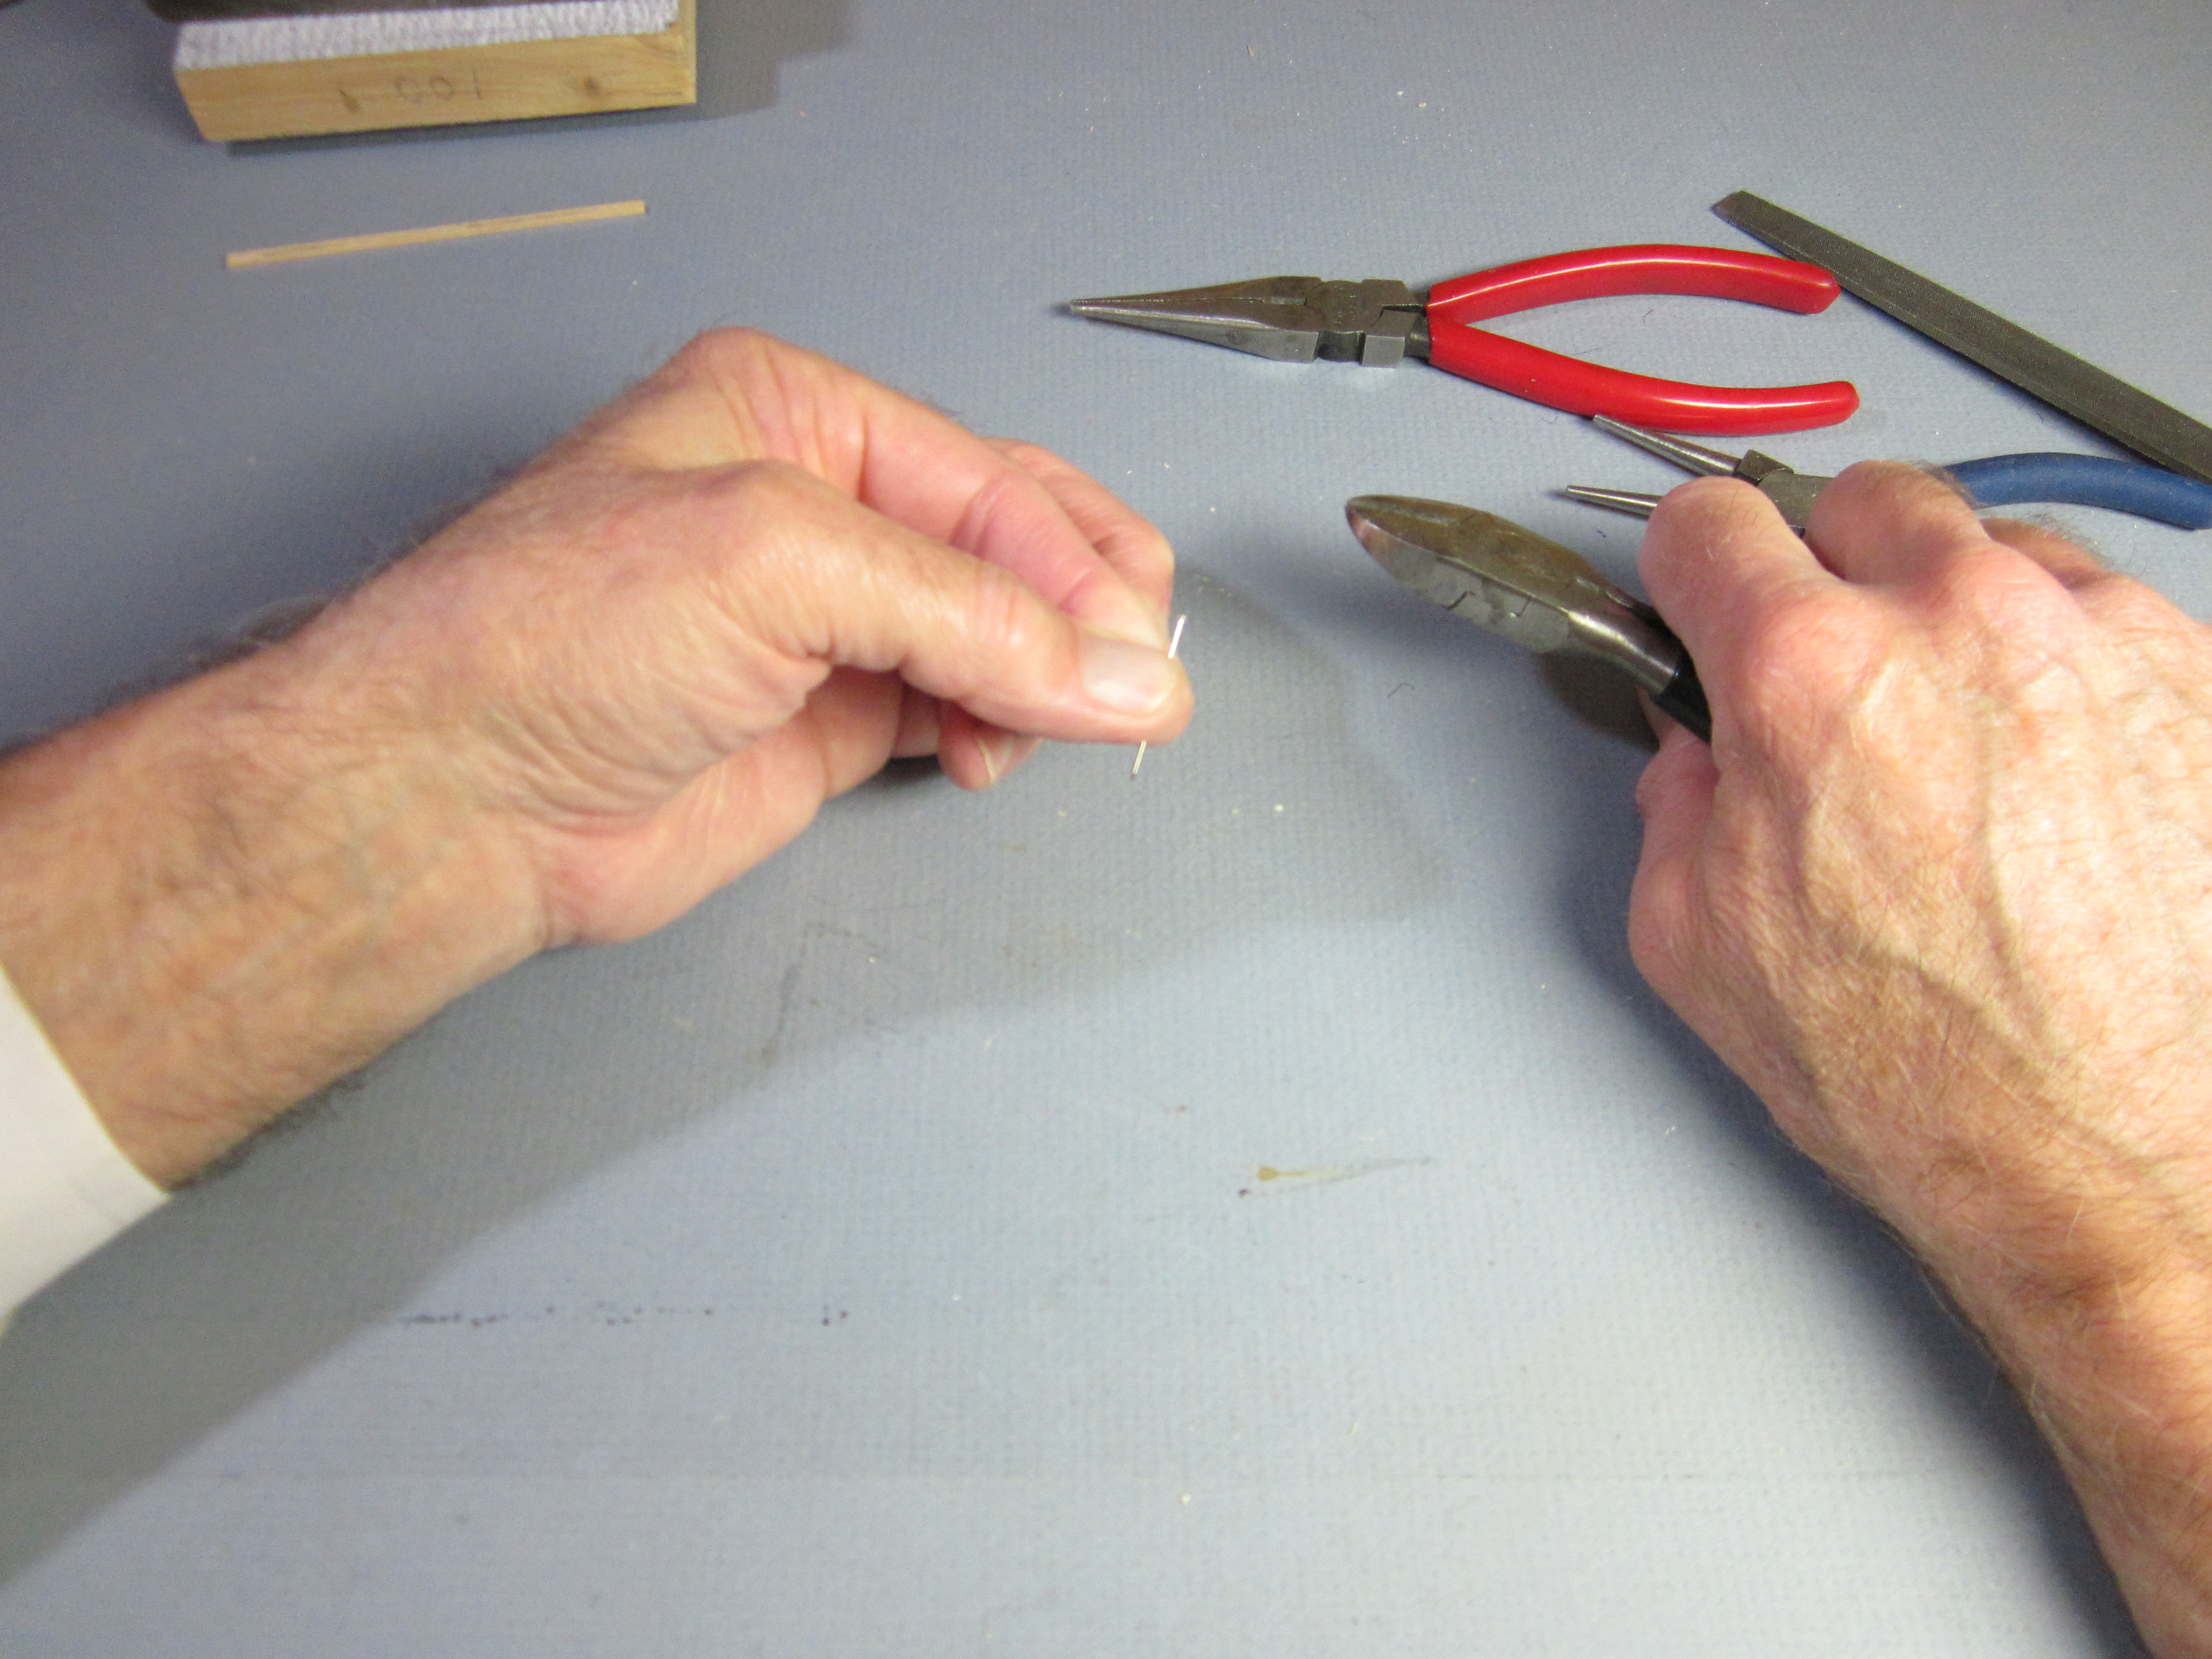
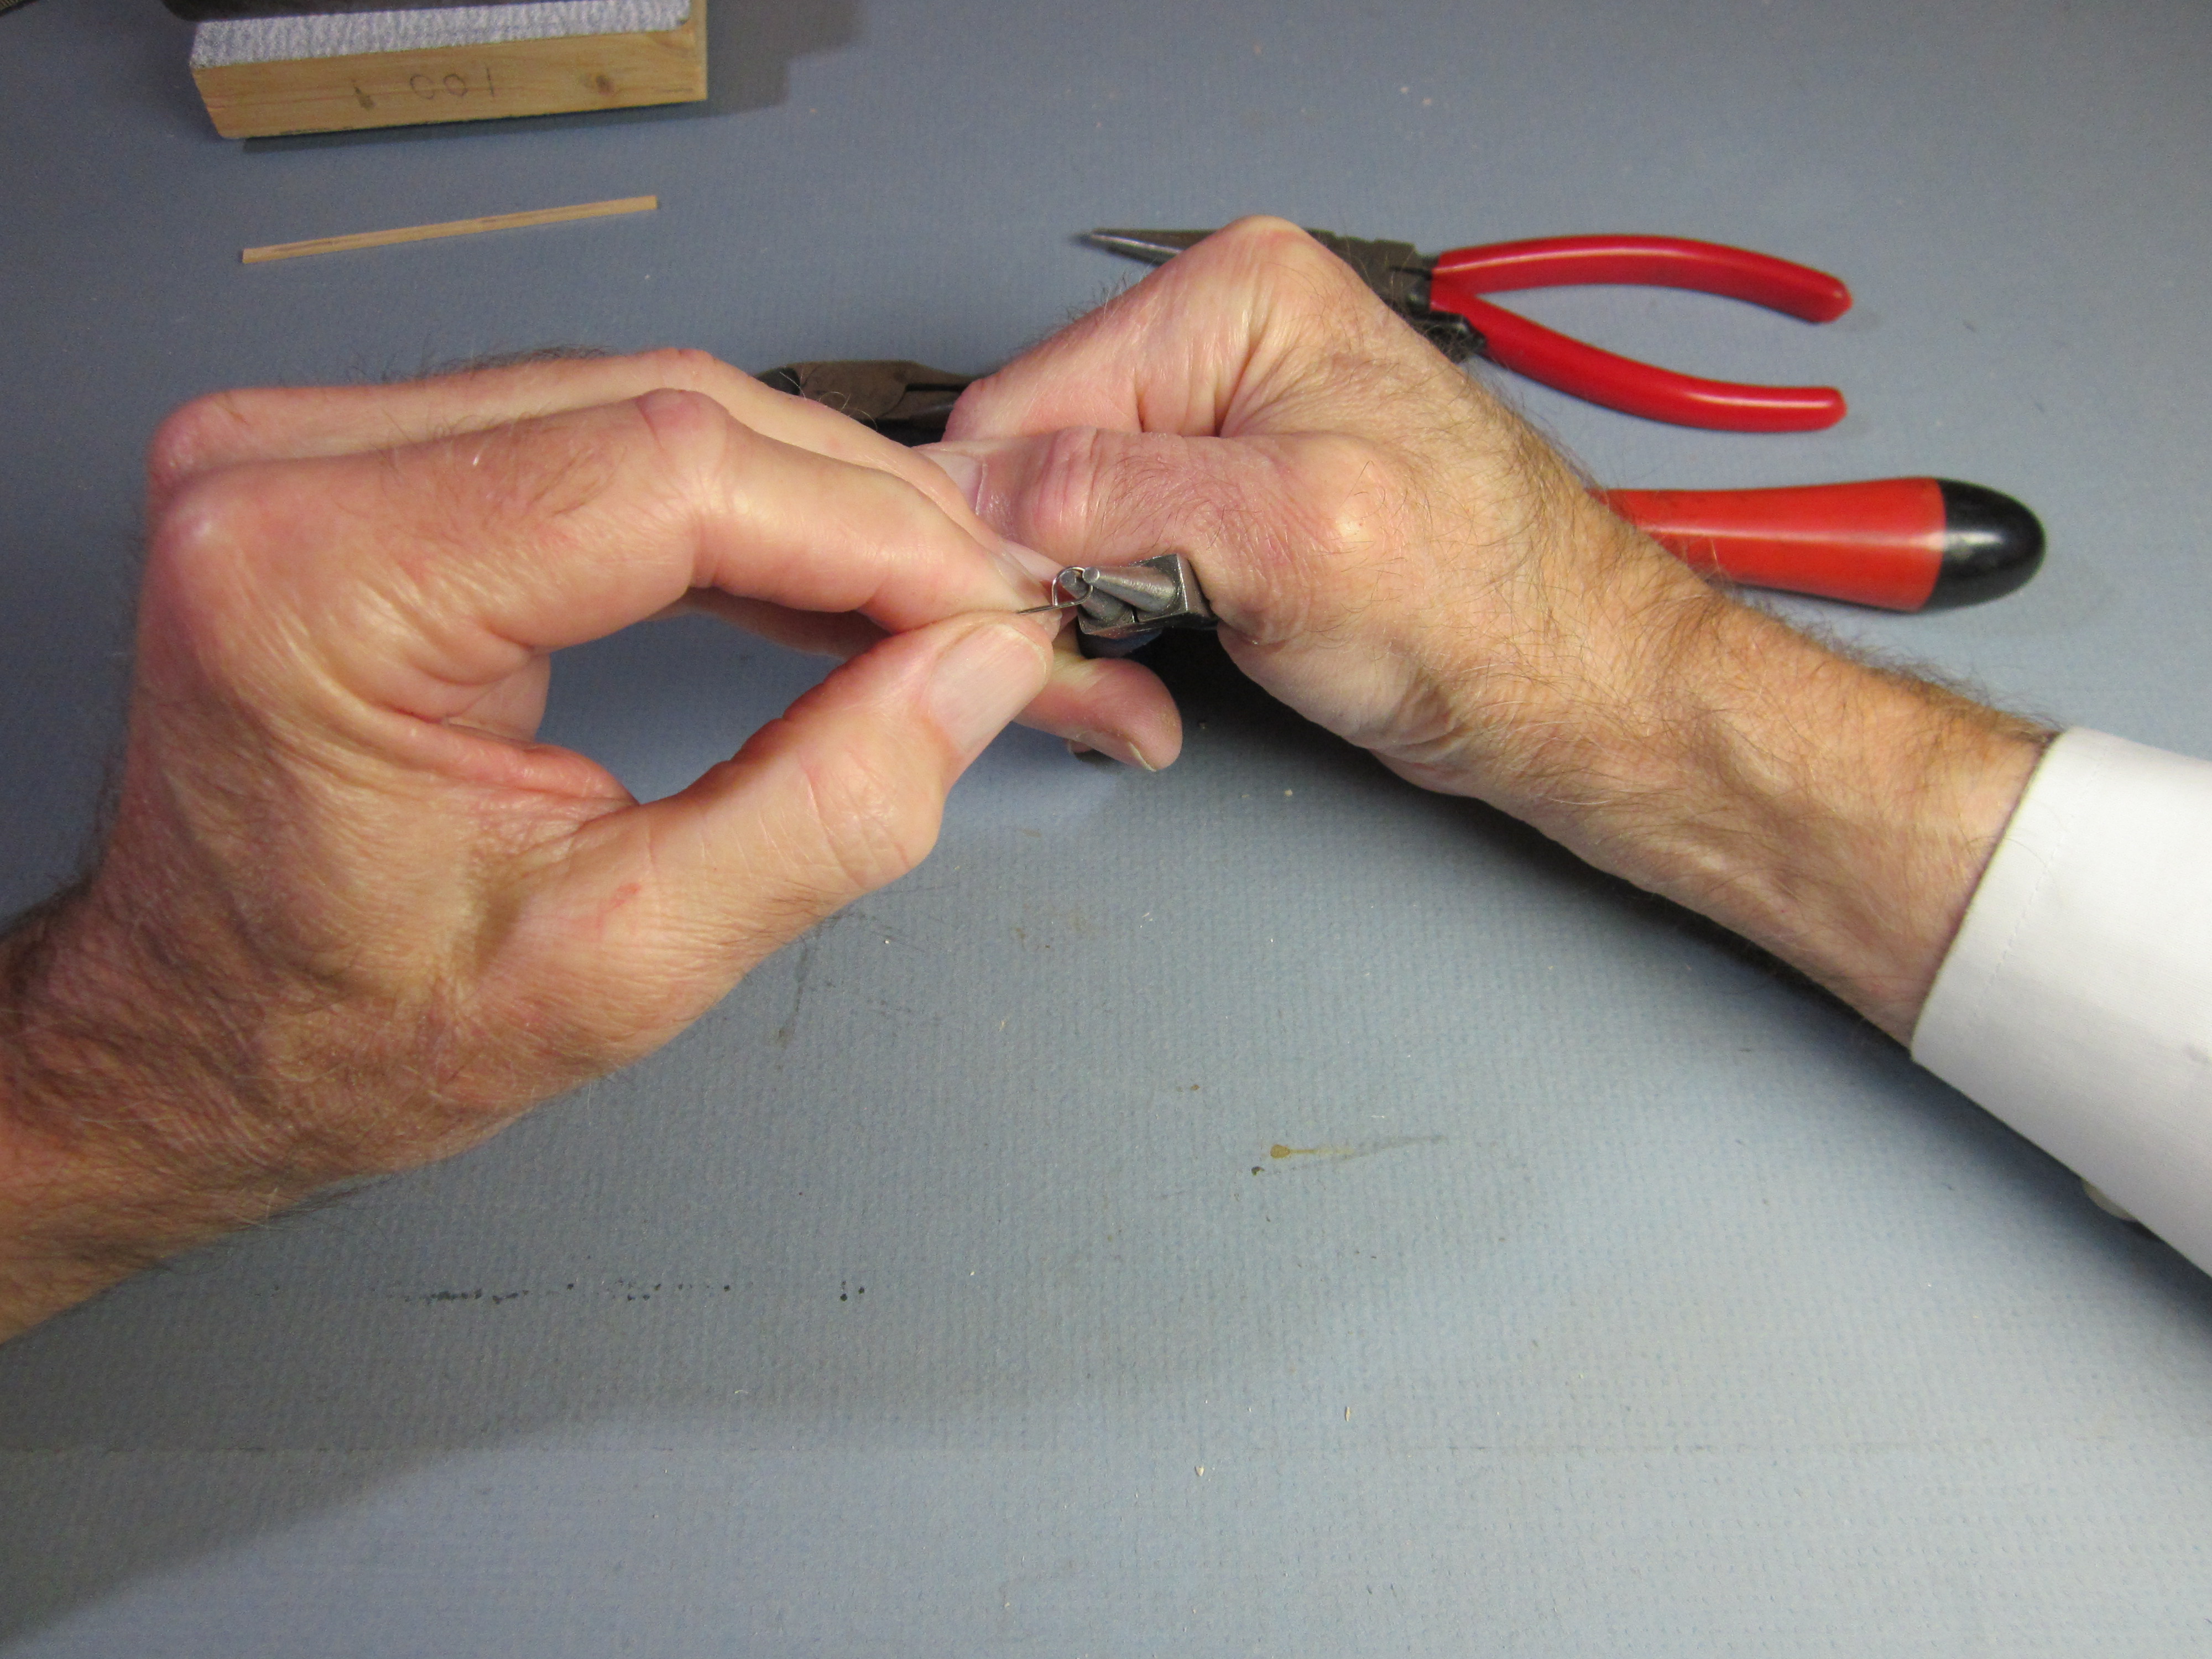
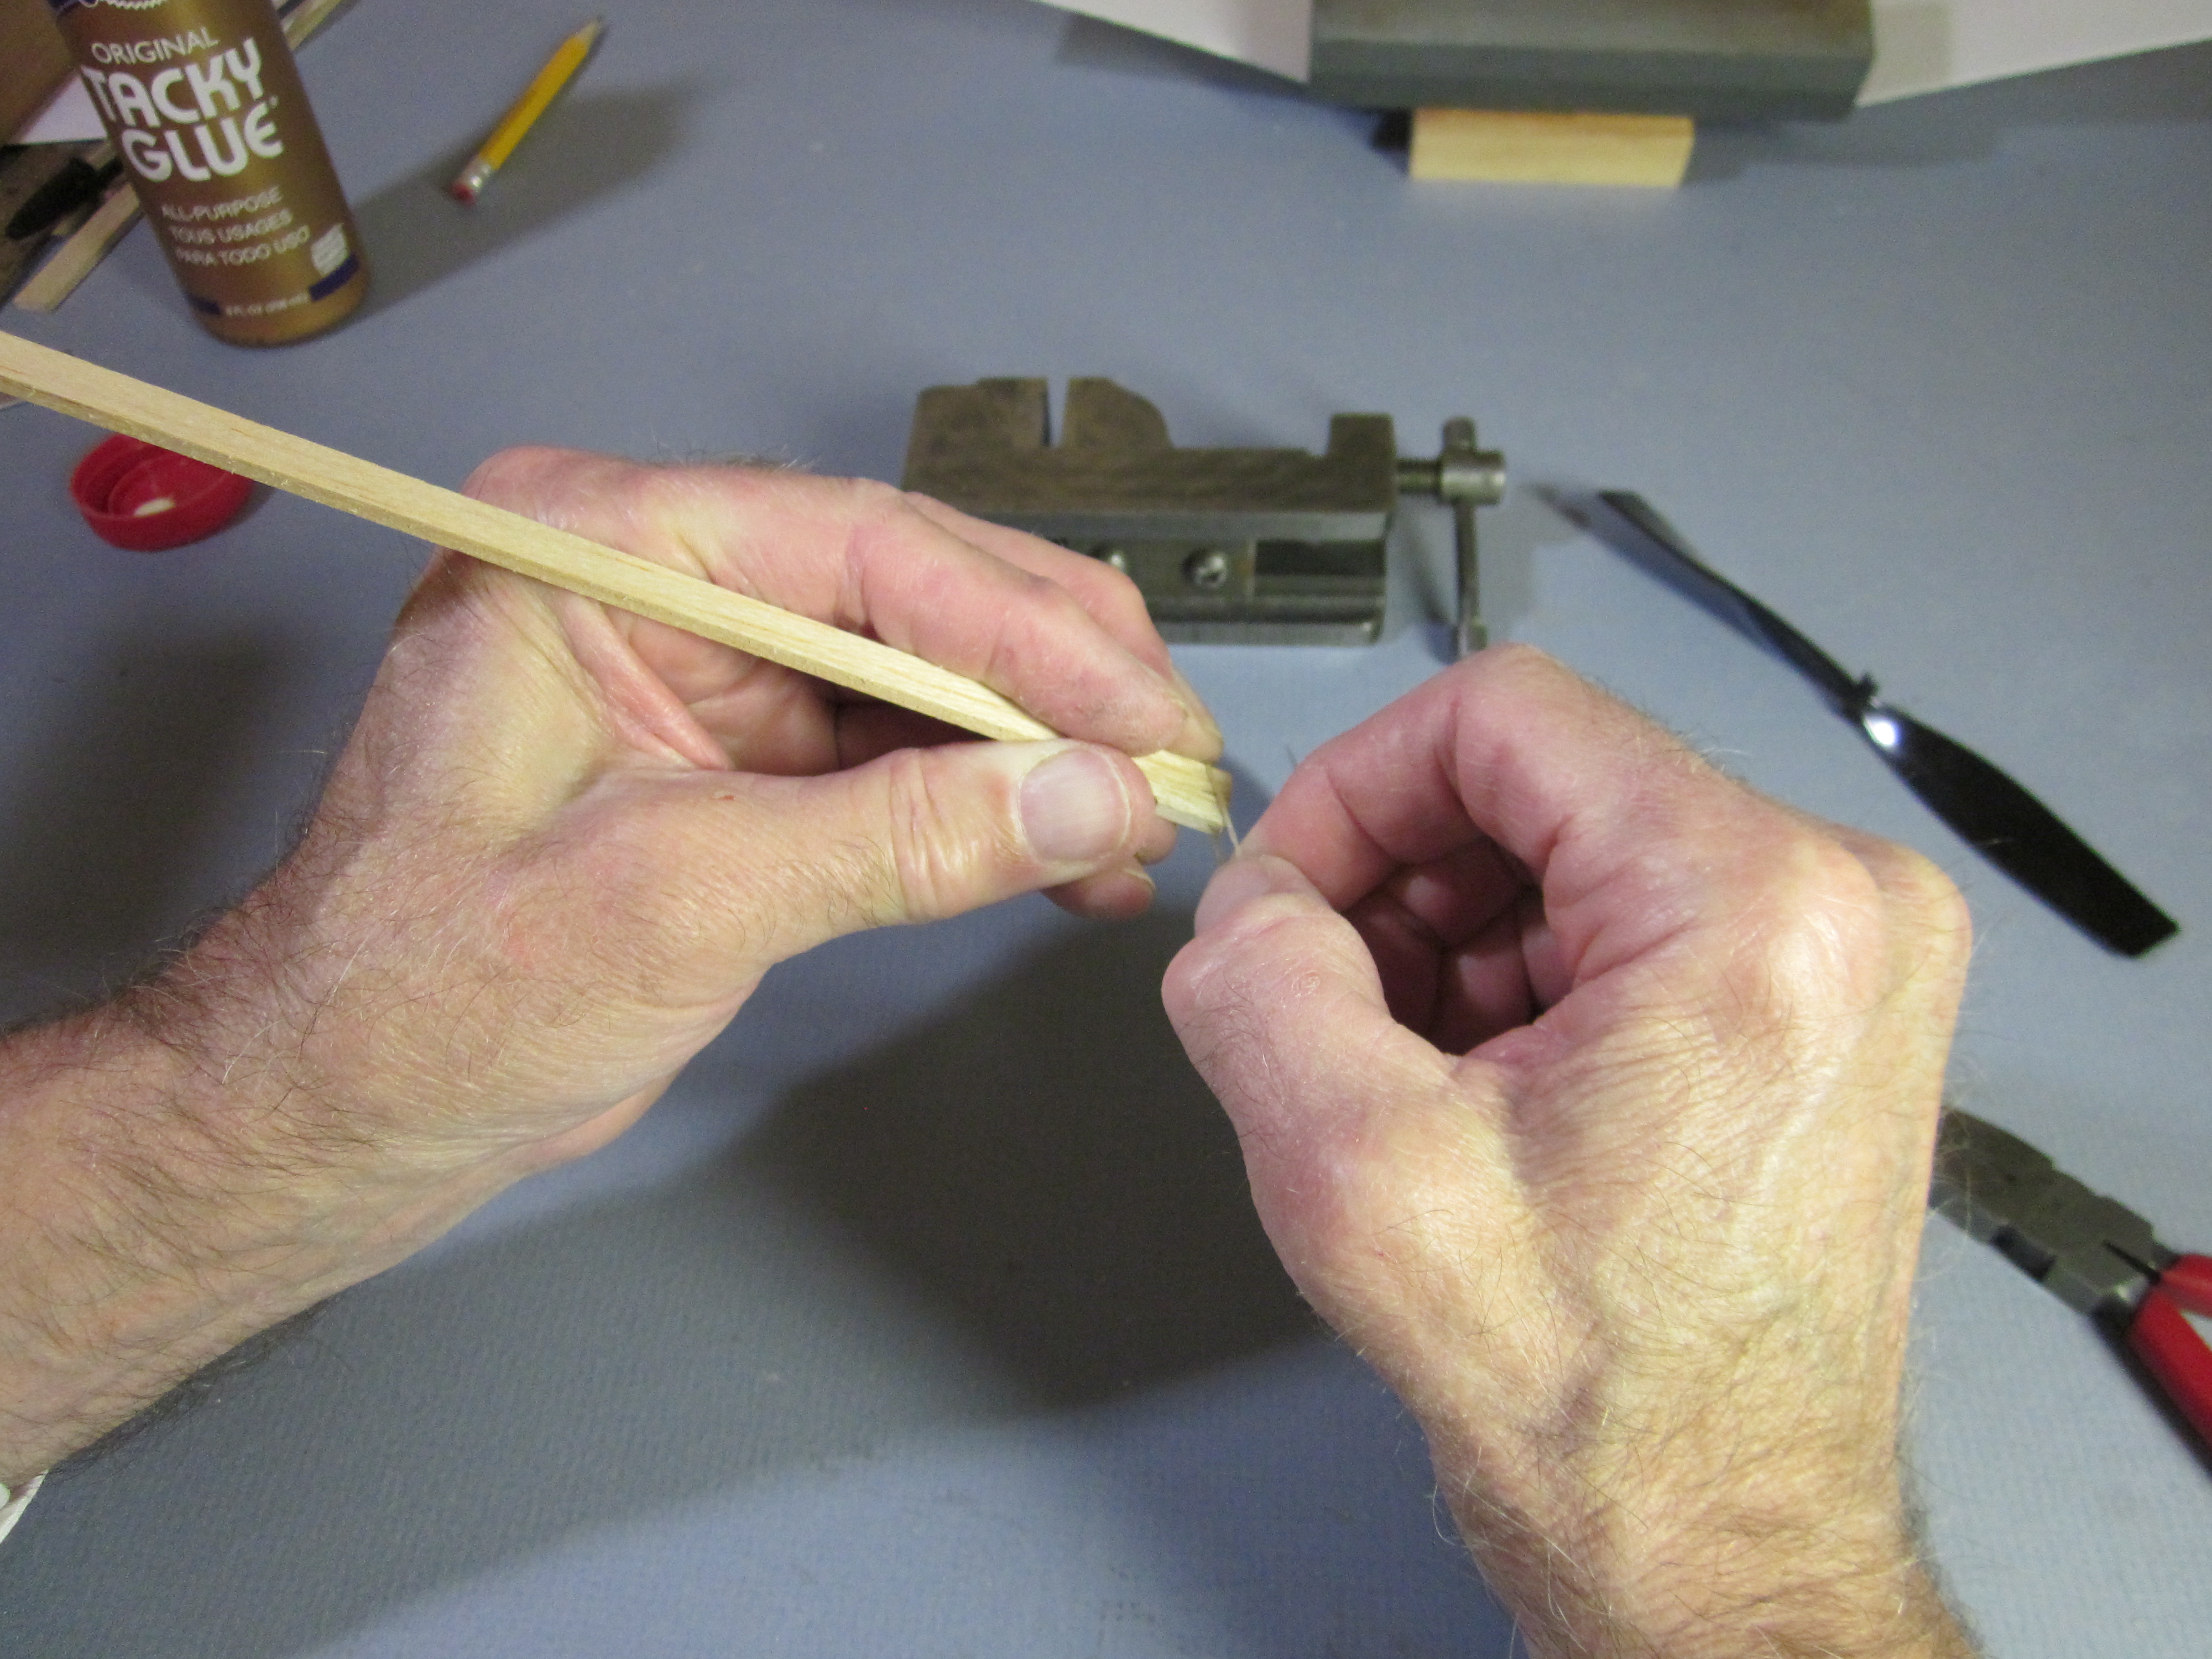
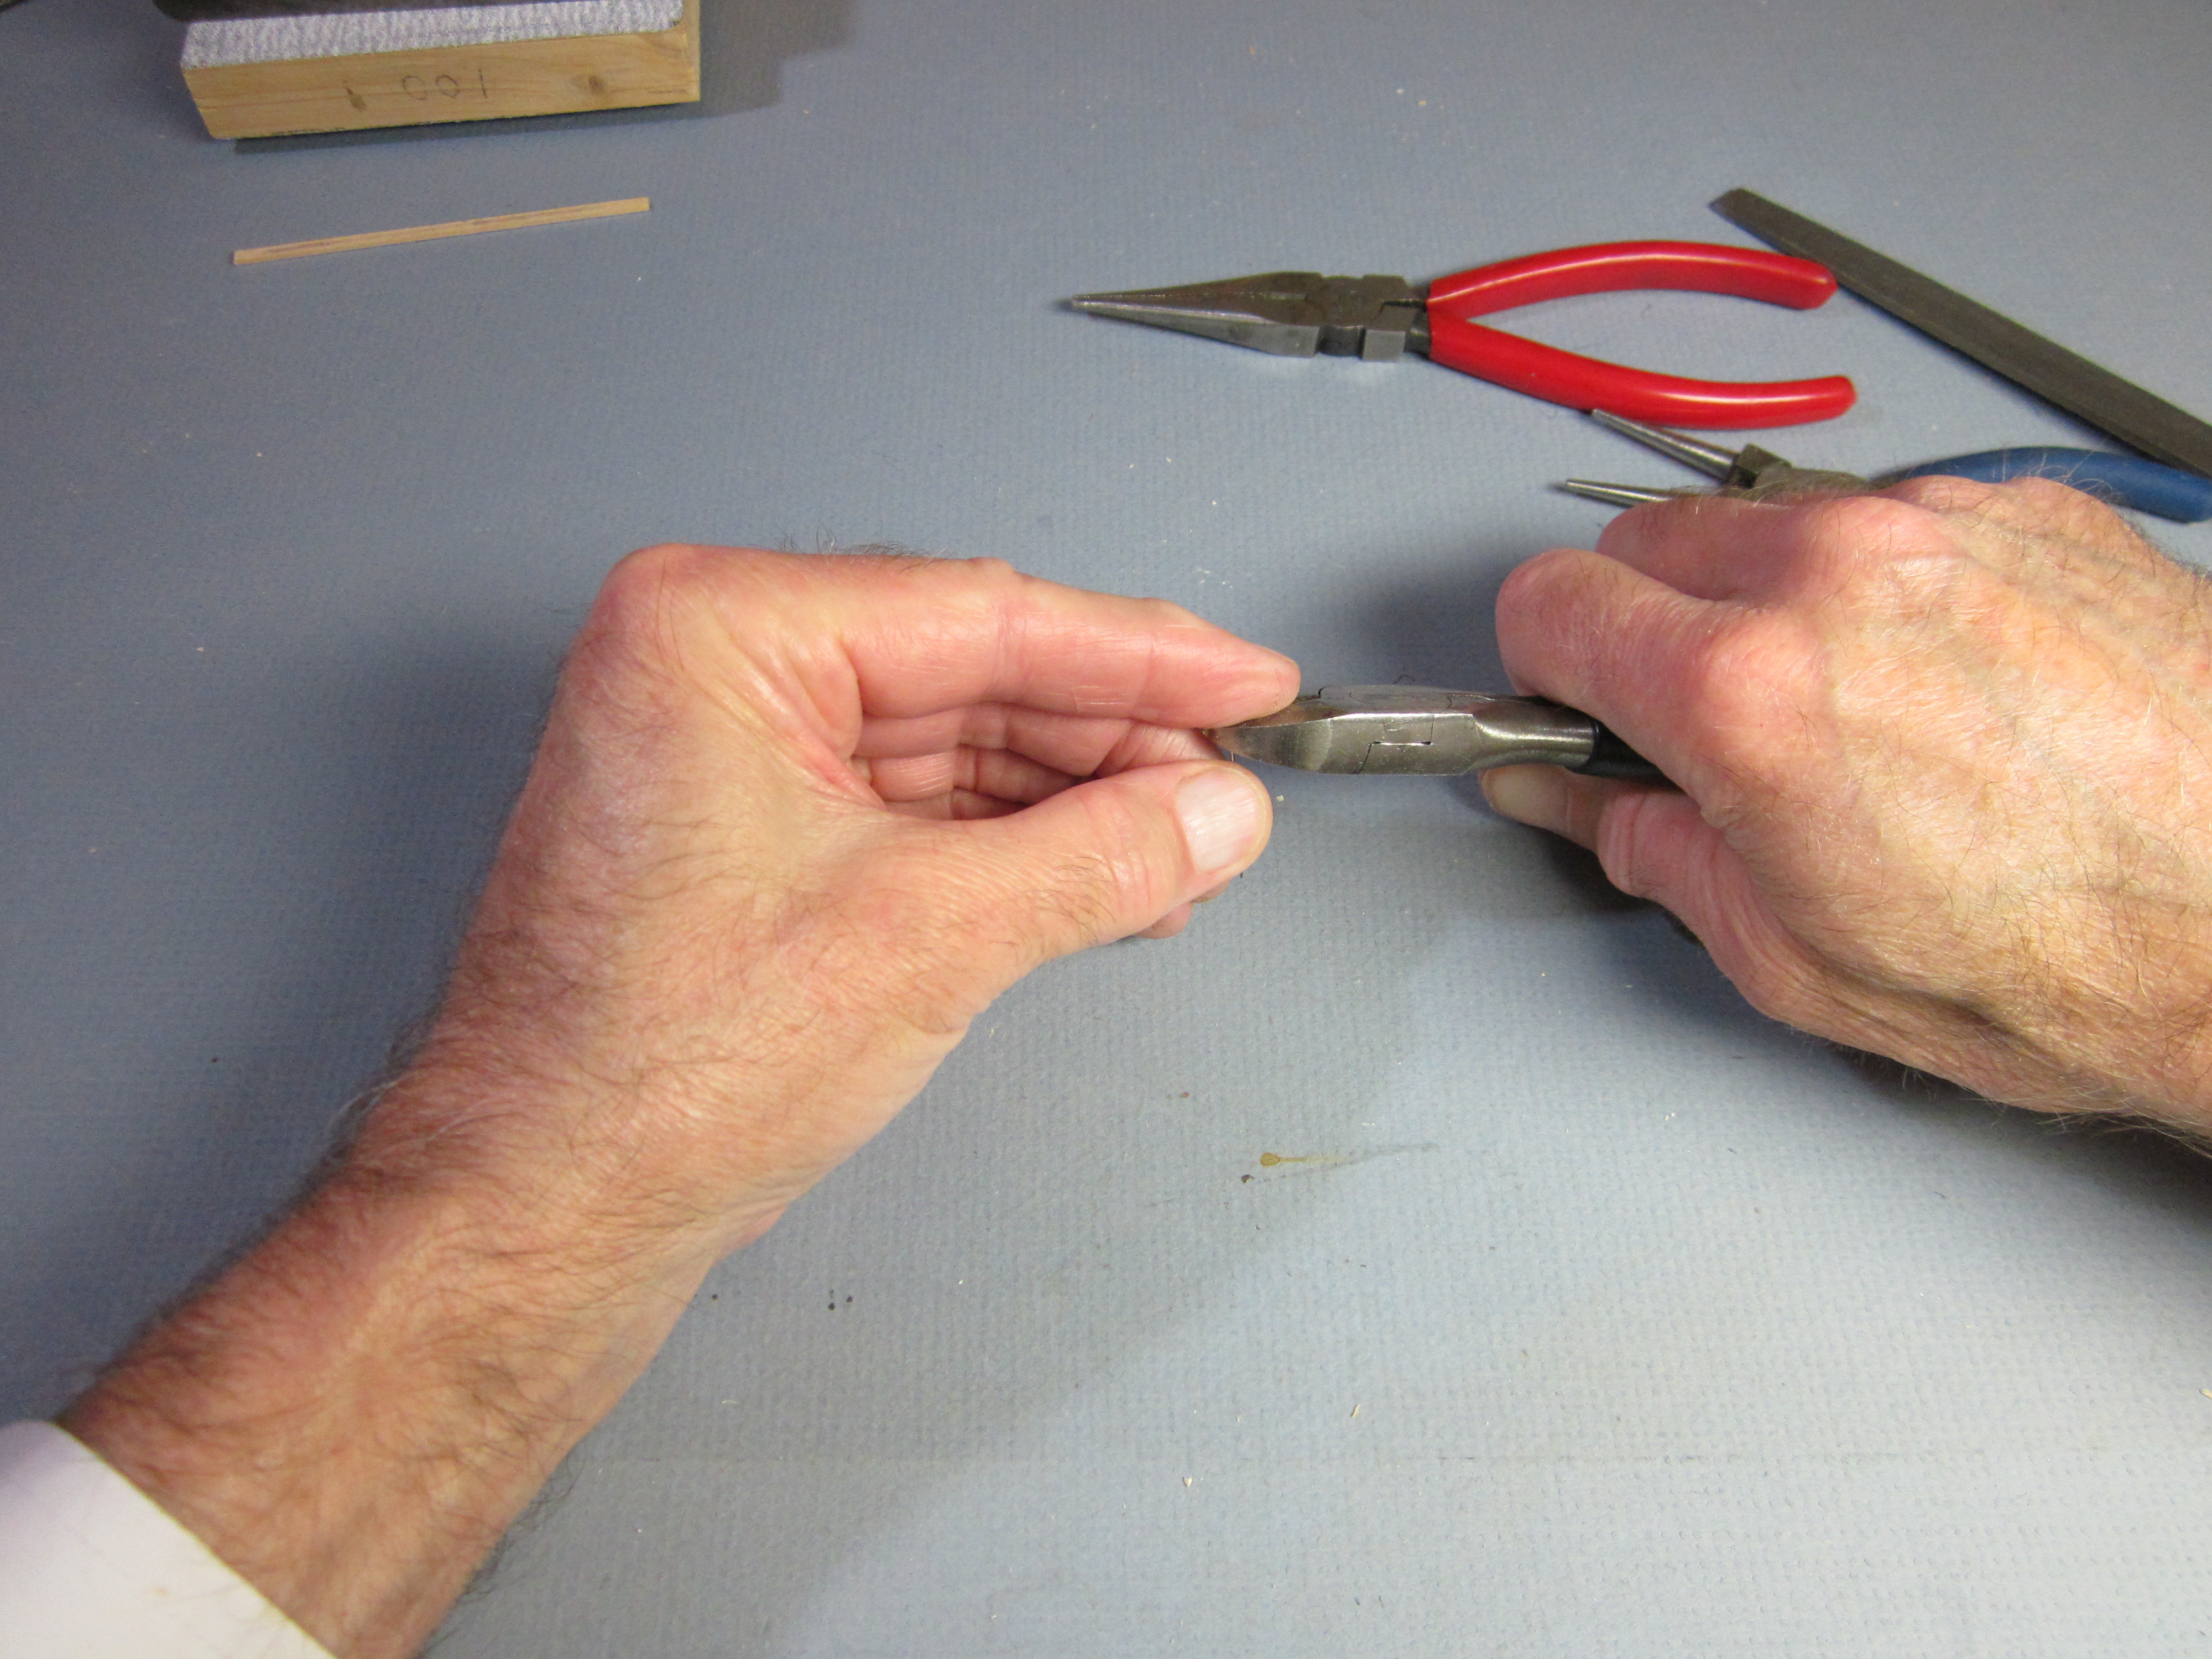 Start by cutting the head off the pin. Hold the shaft between your fingers, place the diagonal cutter against the pin head and put a finger over the head to keep it from flying off.
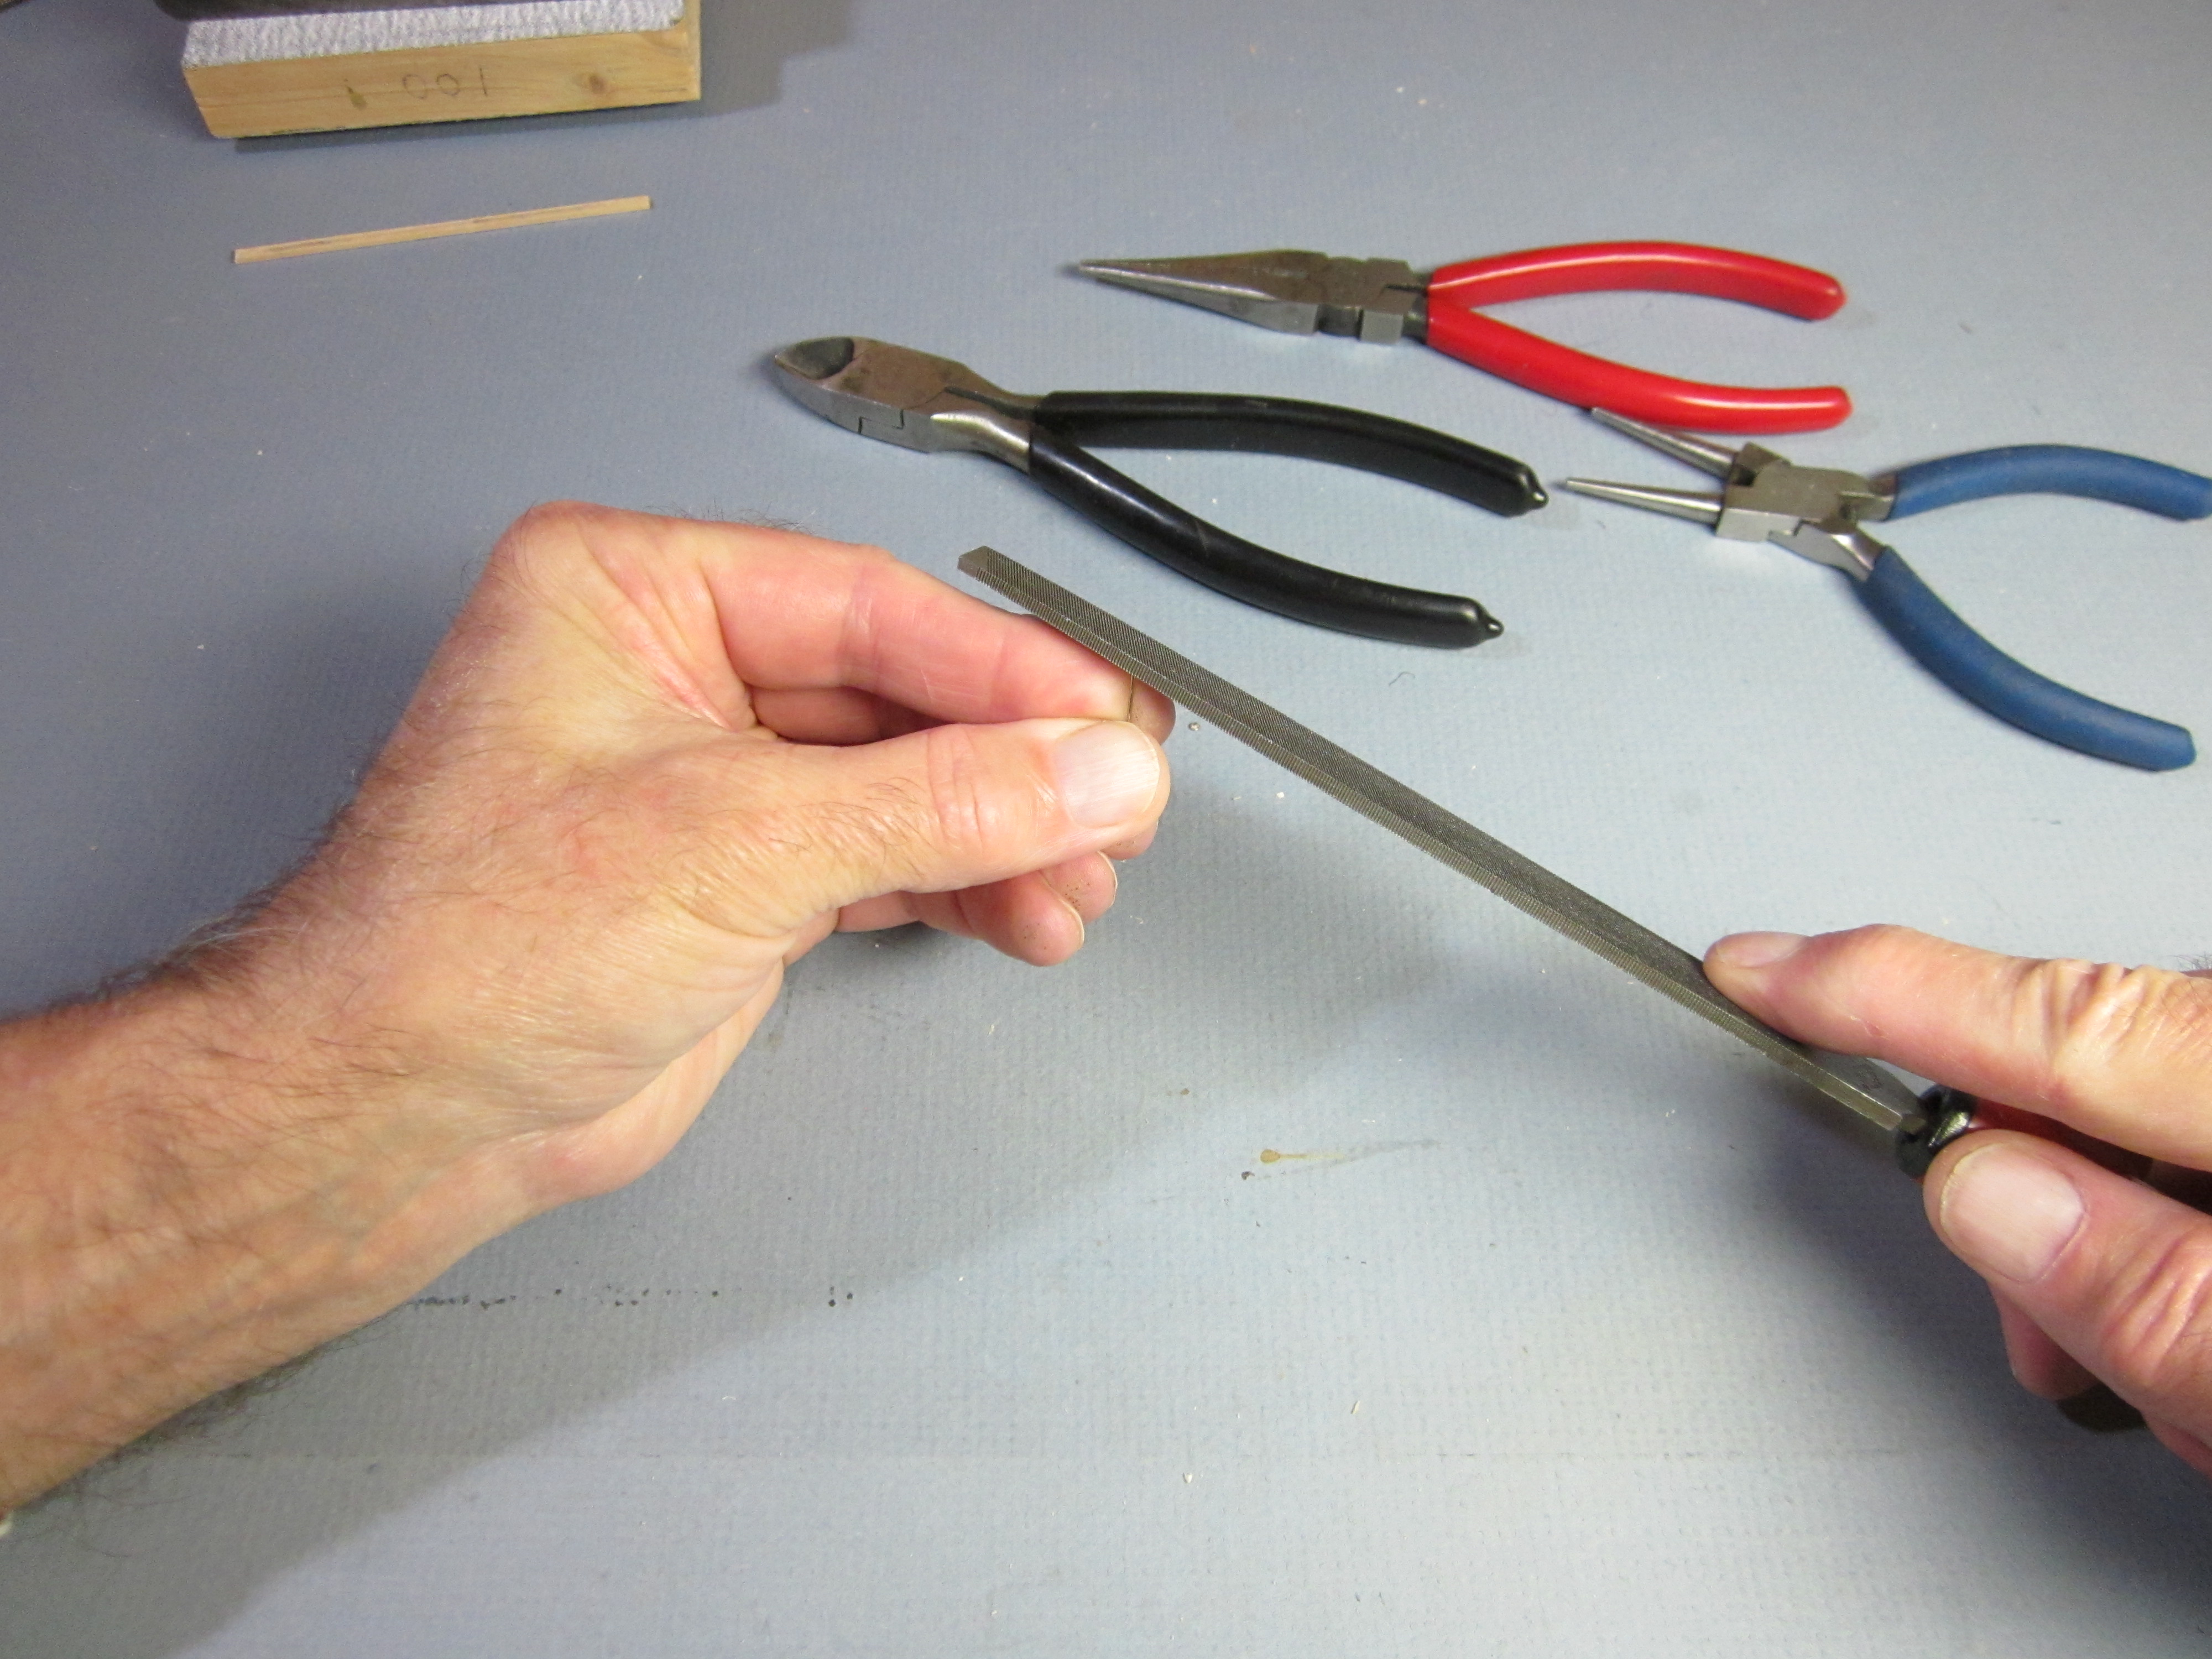 The diagonal cutter leaves a sharp chisel end on the wire. This can cut into your rubber motor, causing it to break when it is wound up. File the sharp end round. Start by filing the end down flat, then twirl the wire between your fingers as you file across the end at different angles.
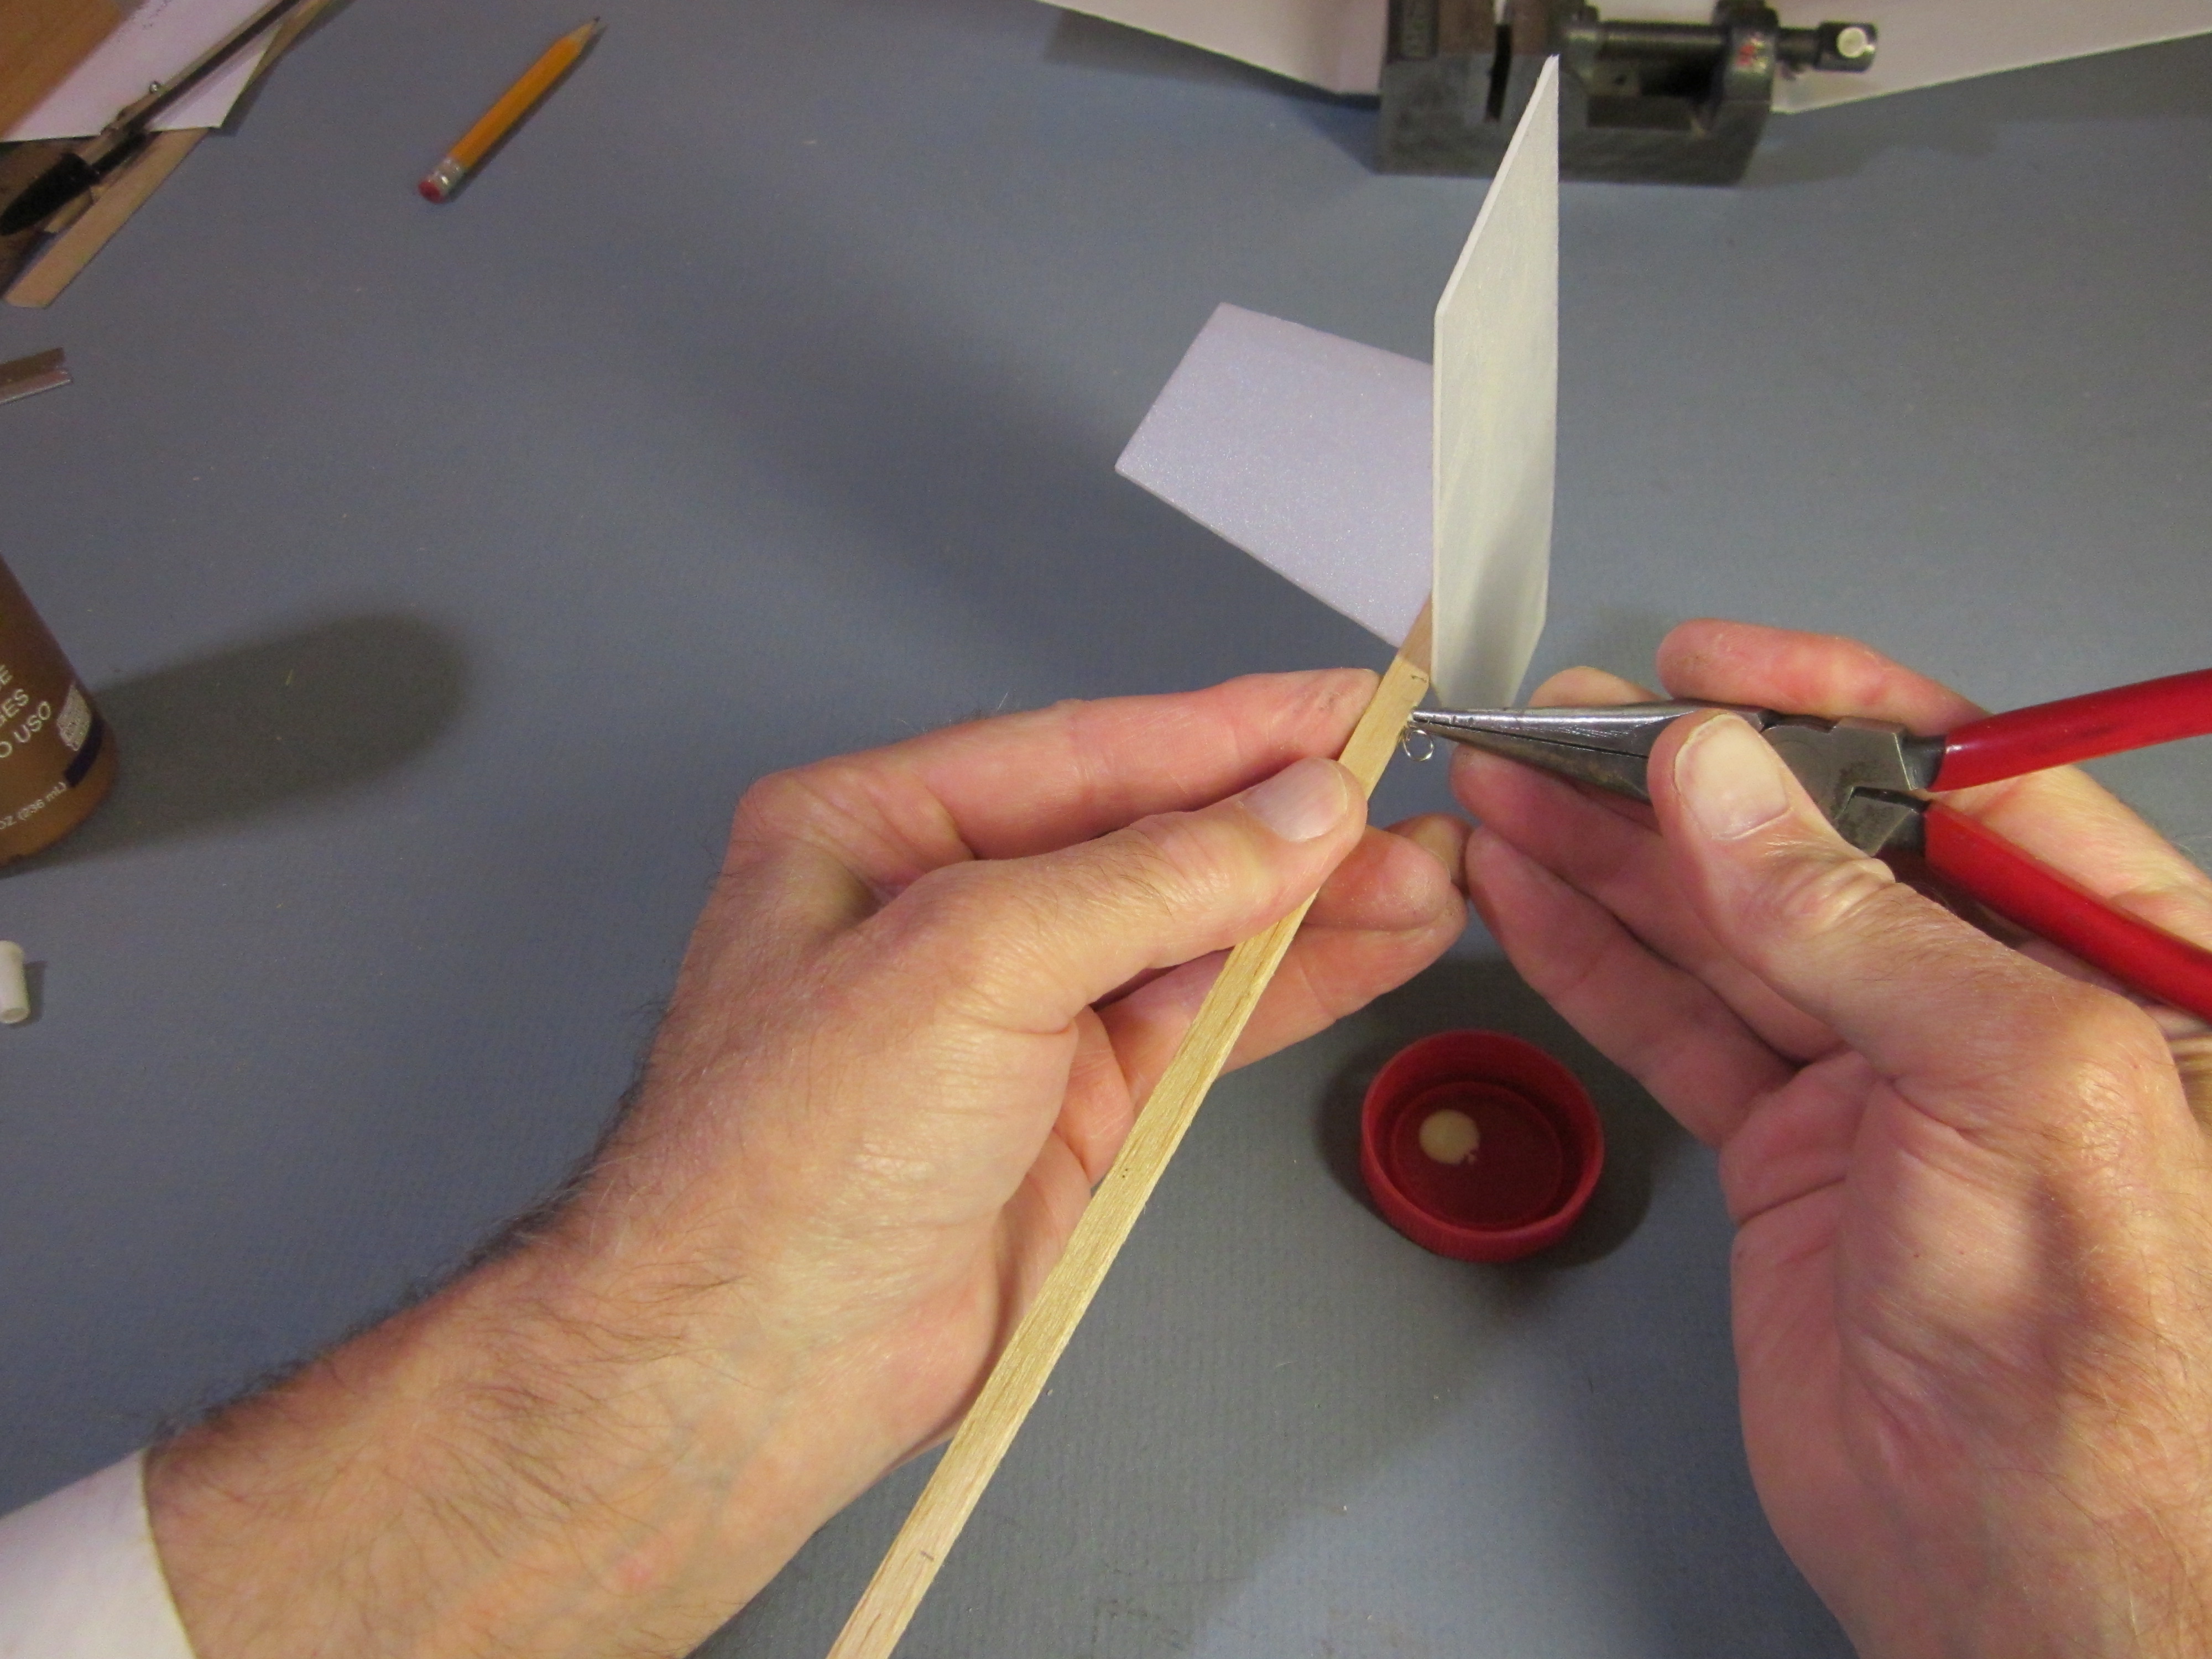
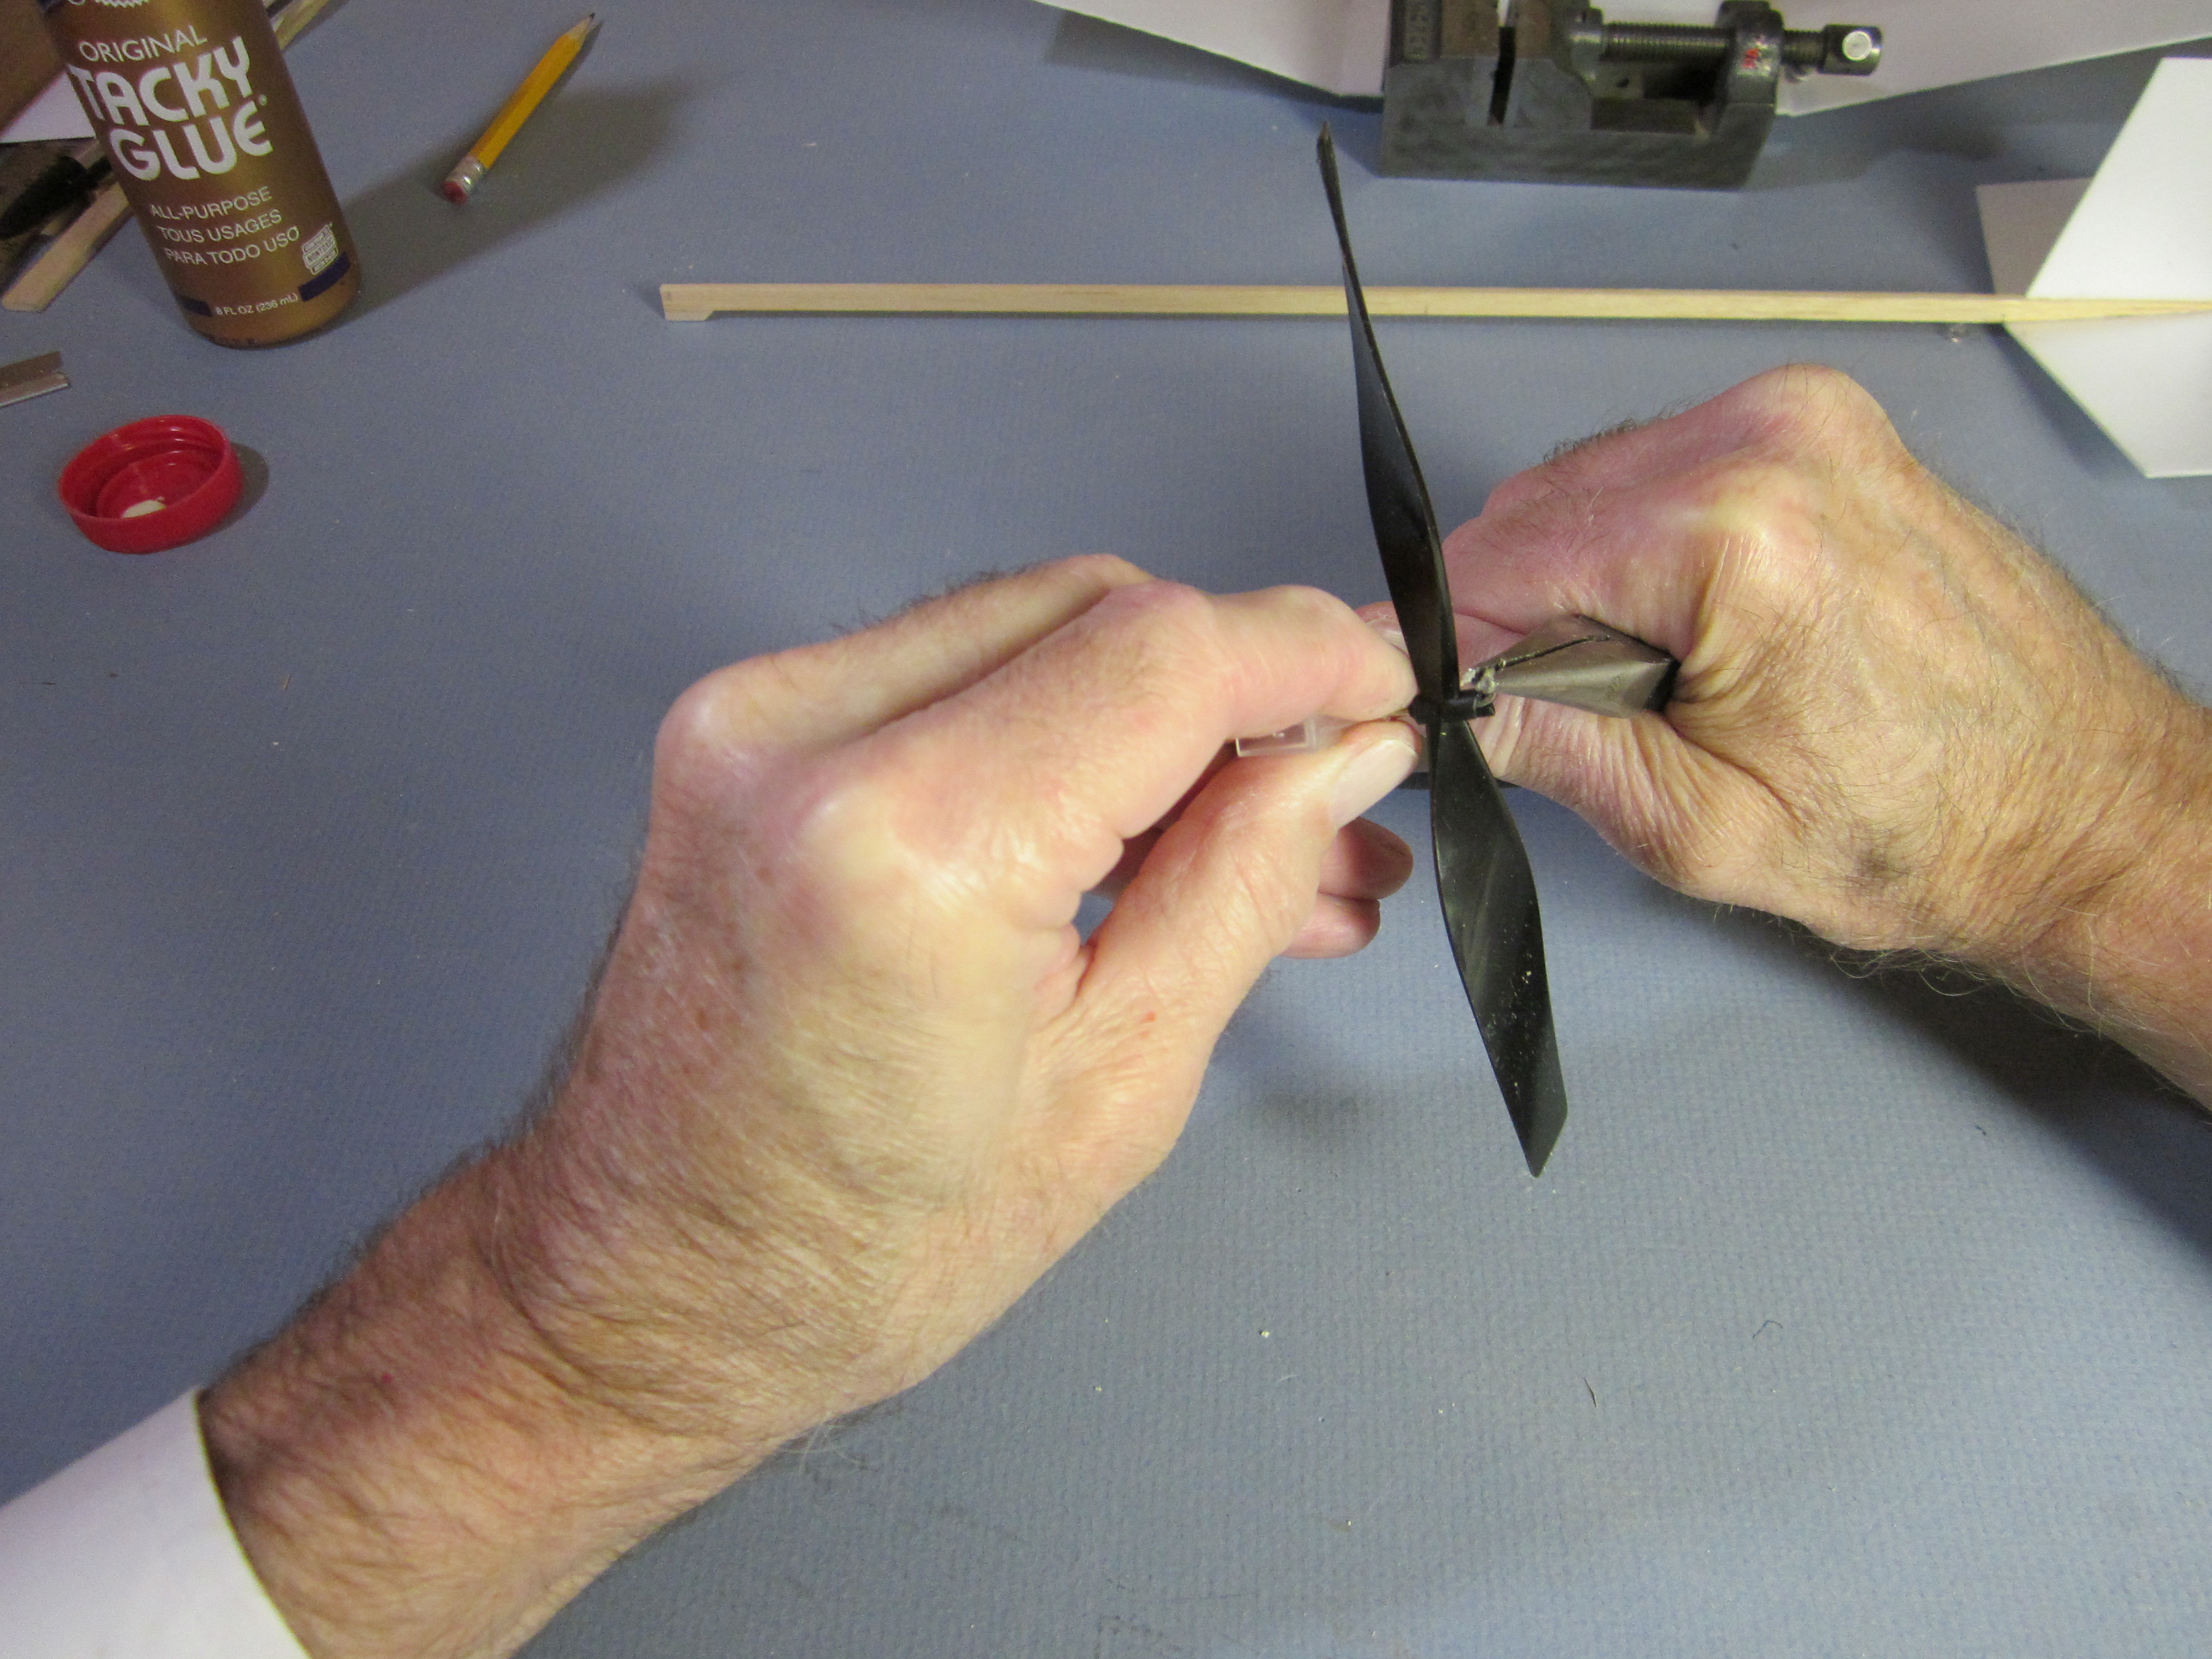
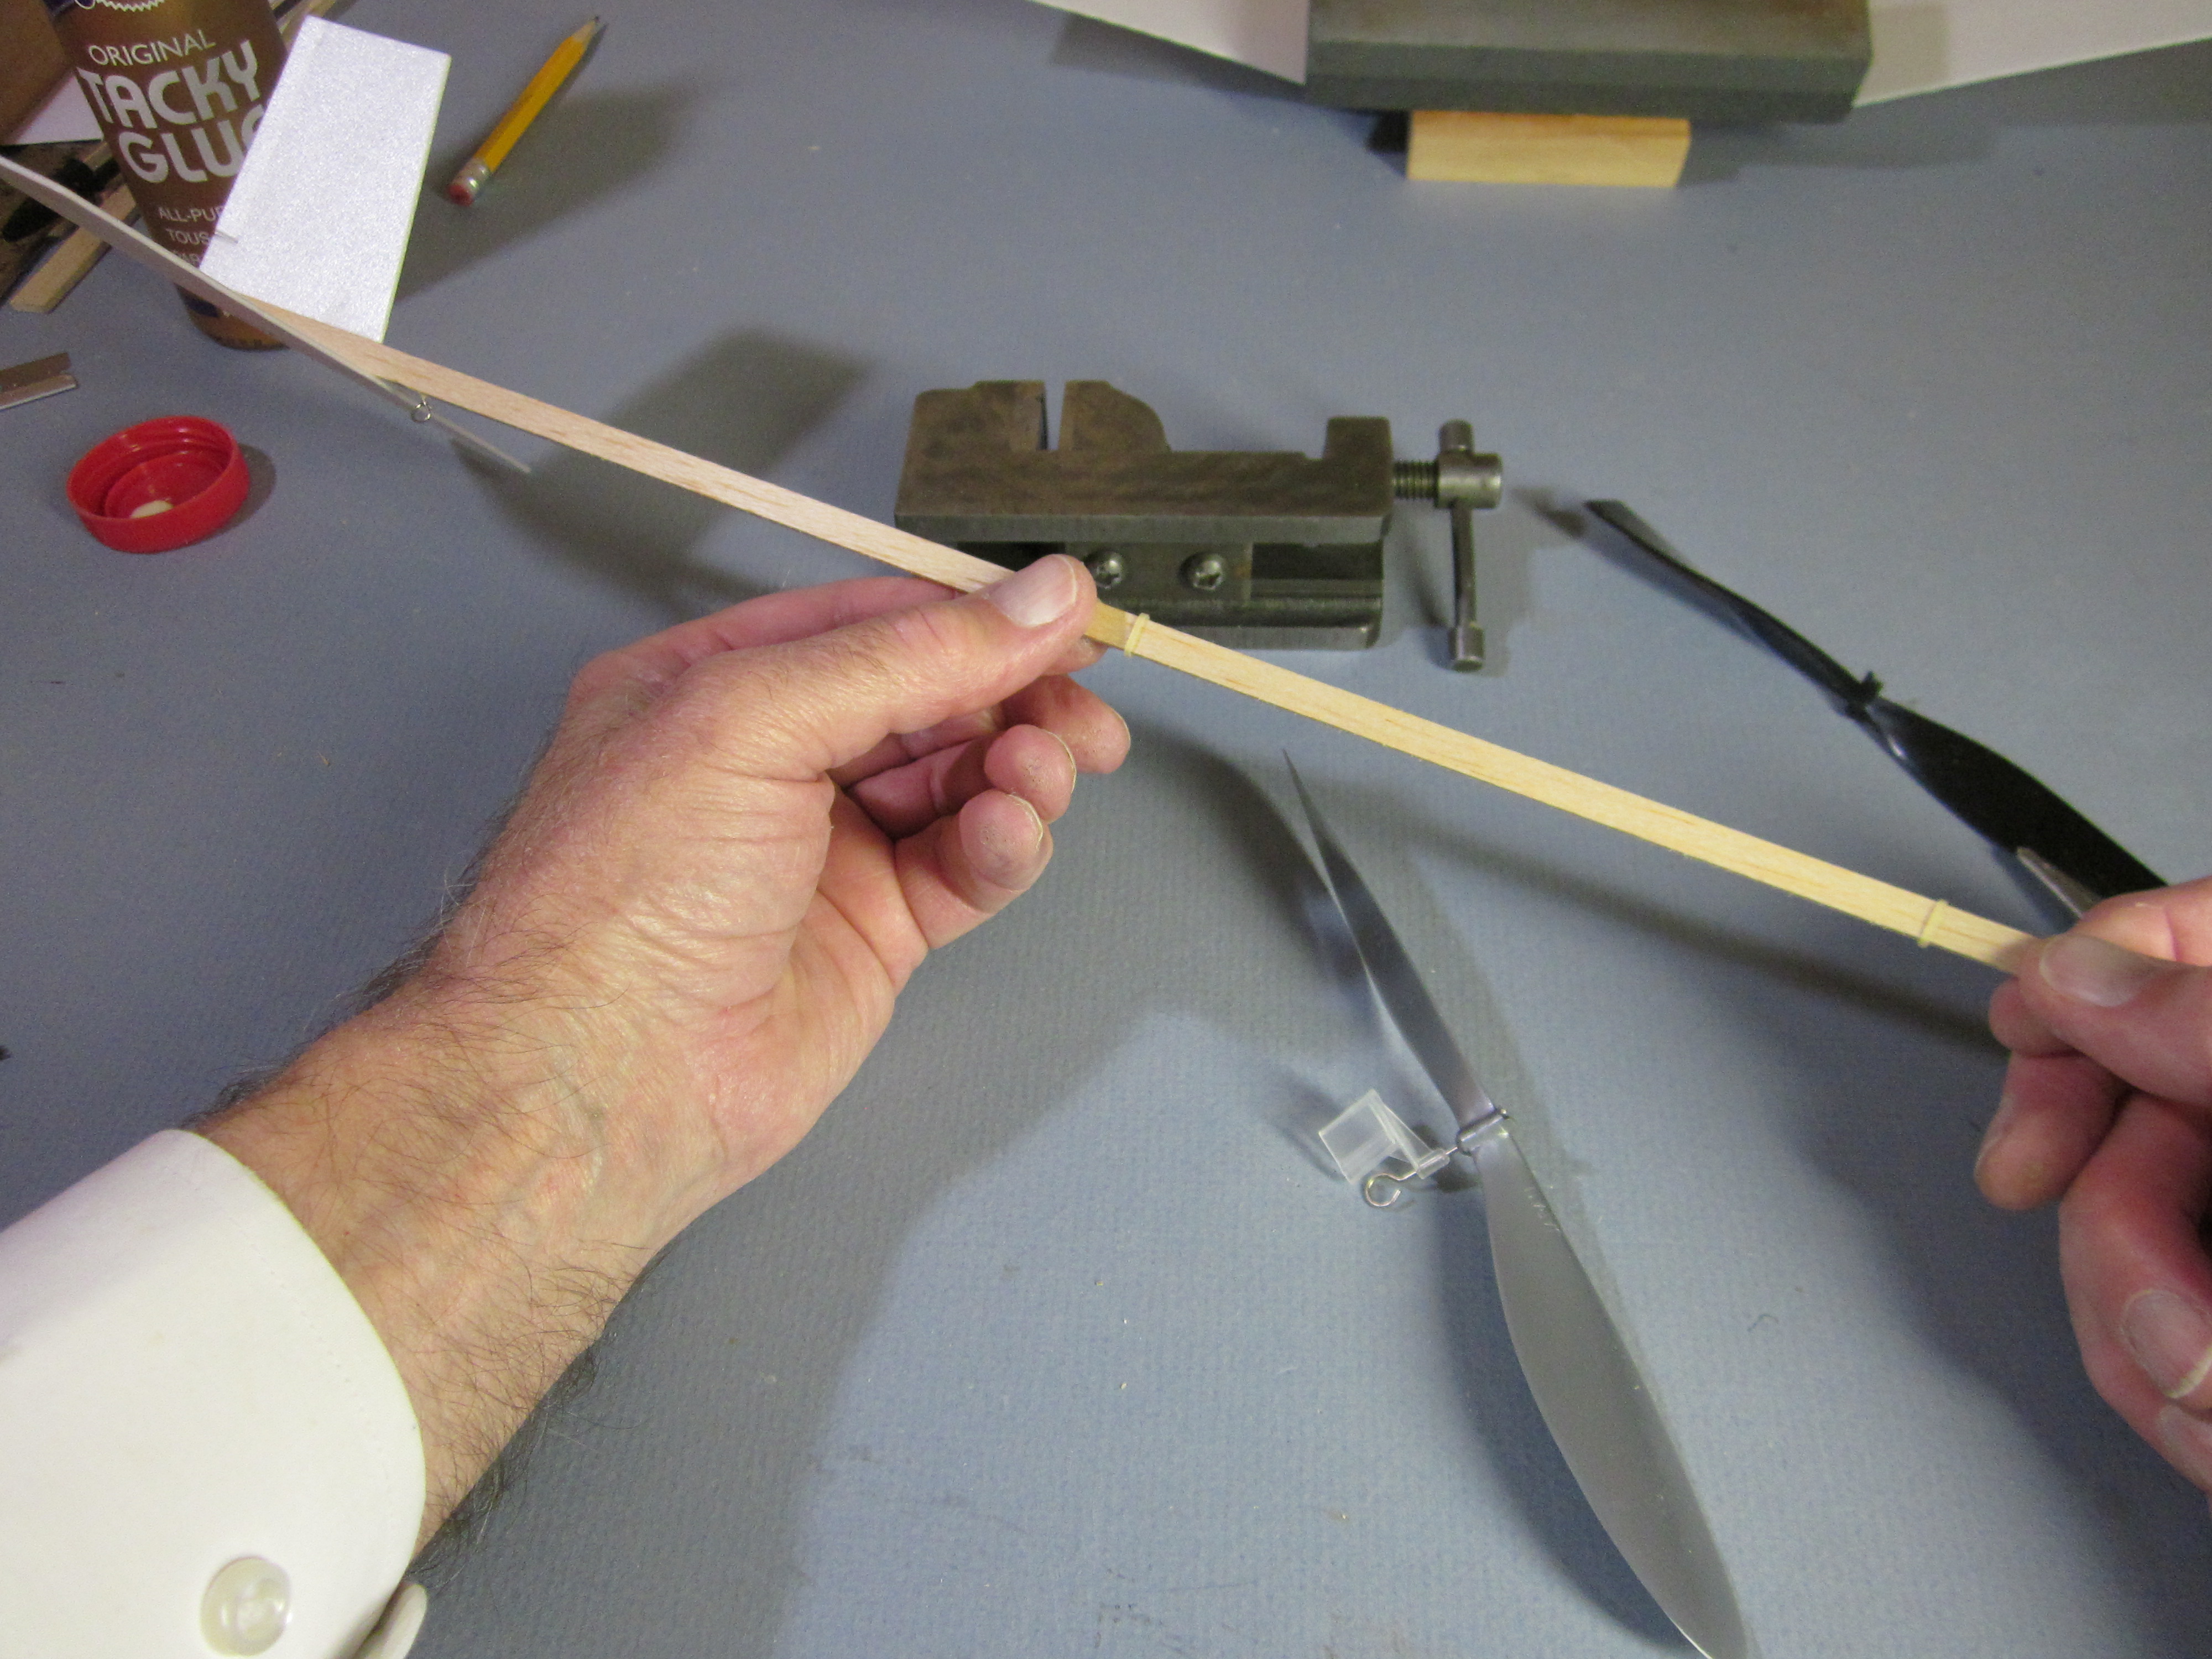
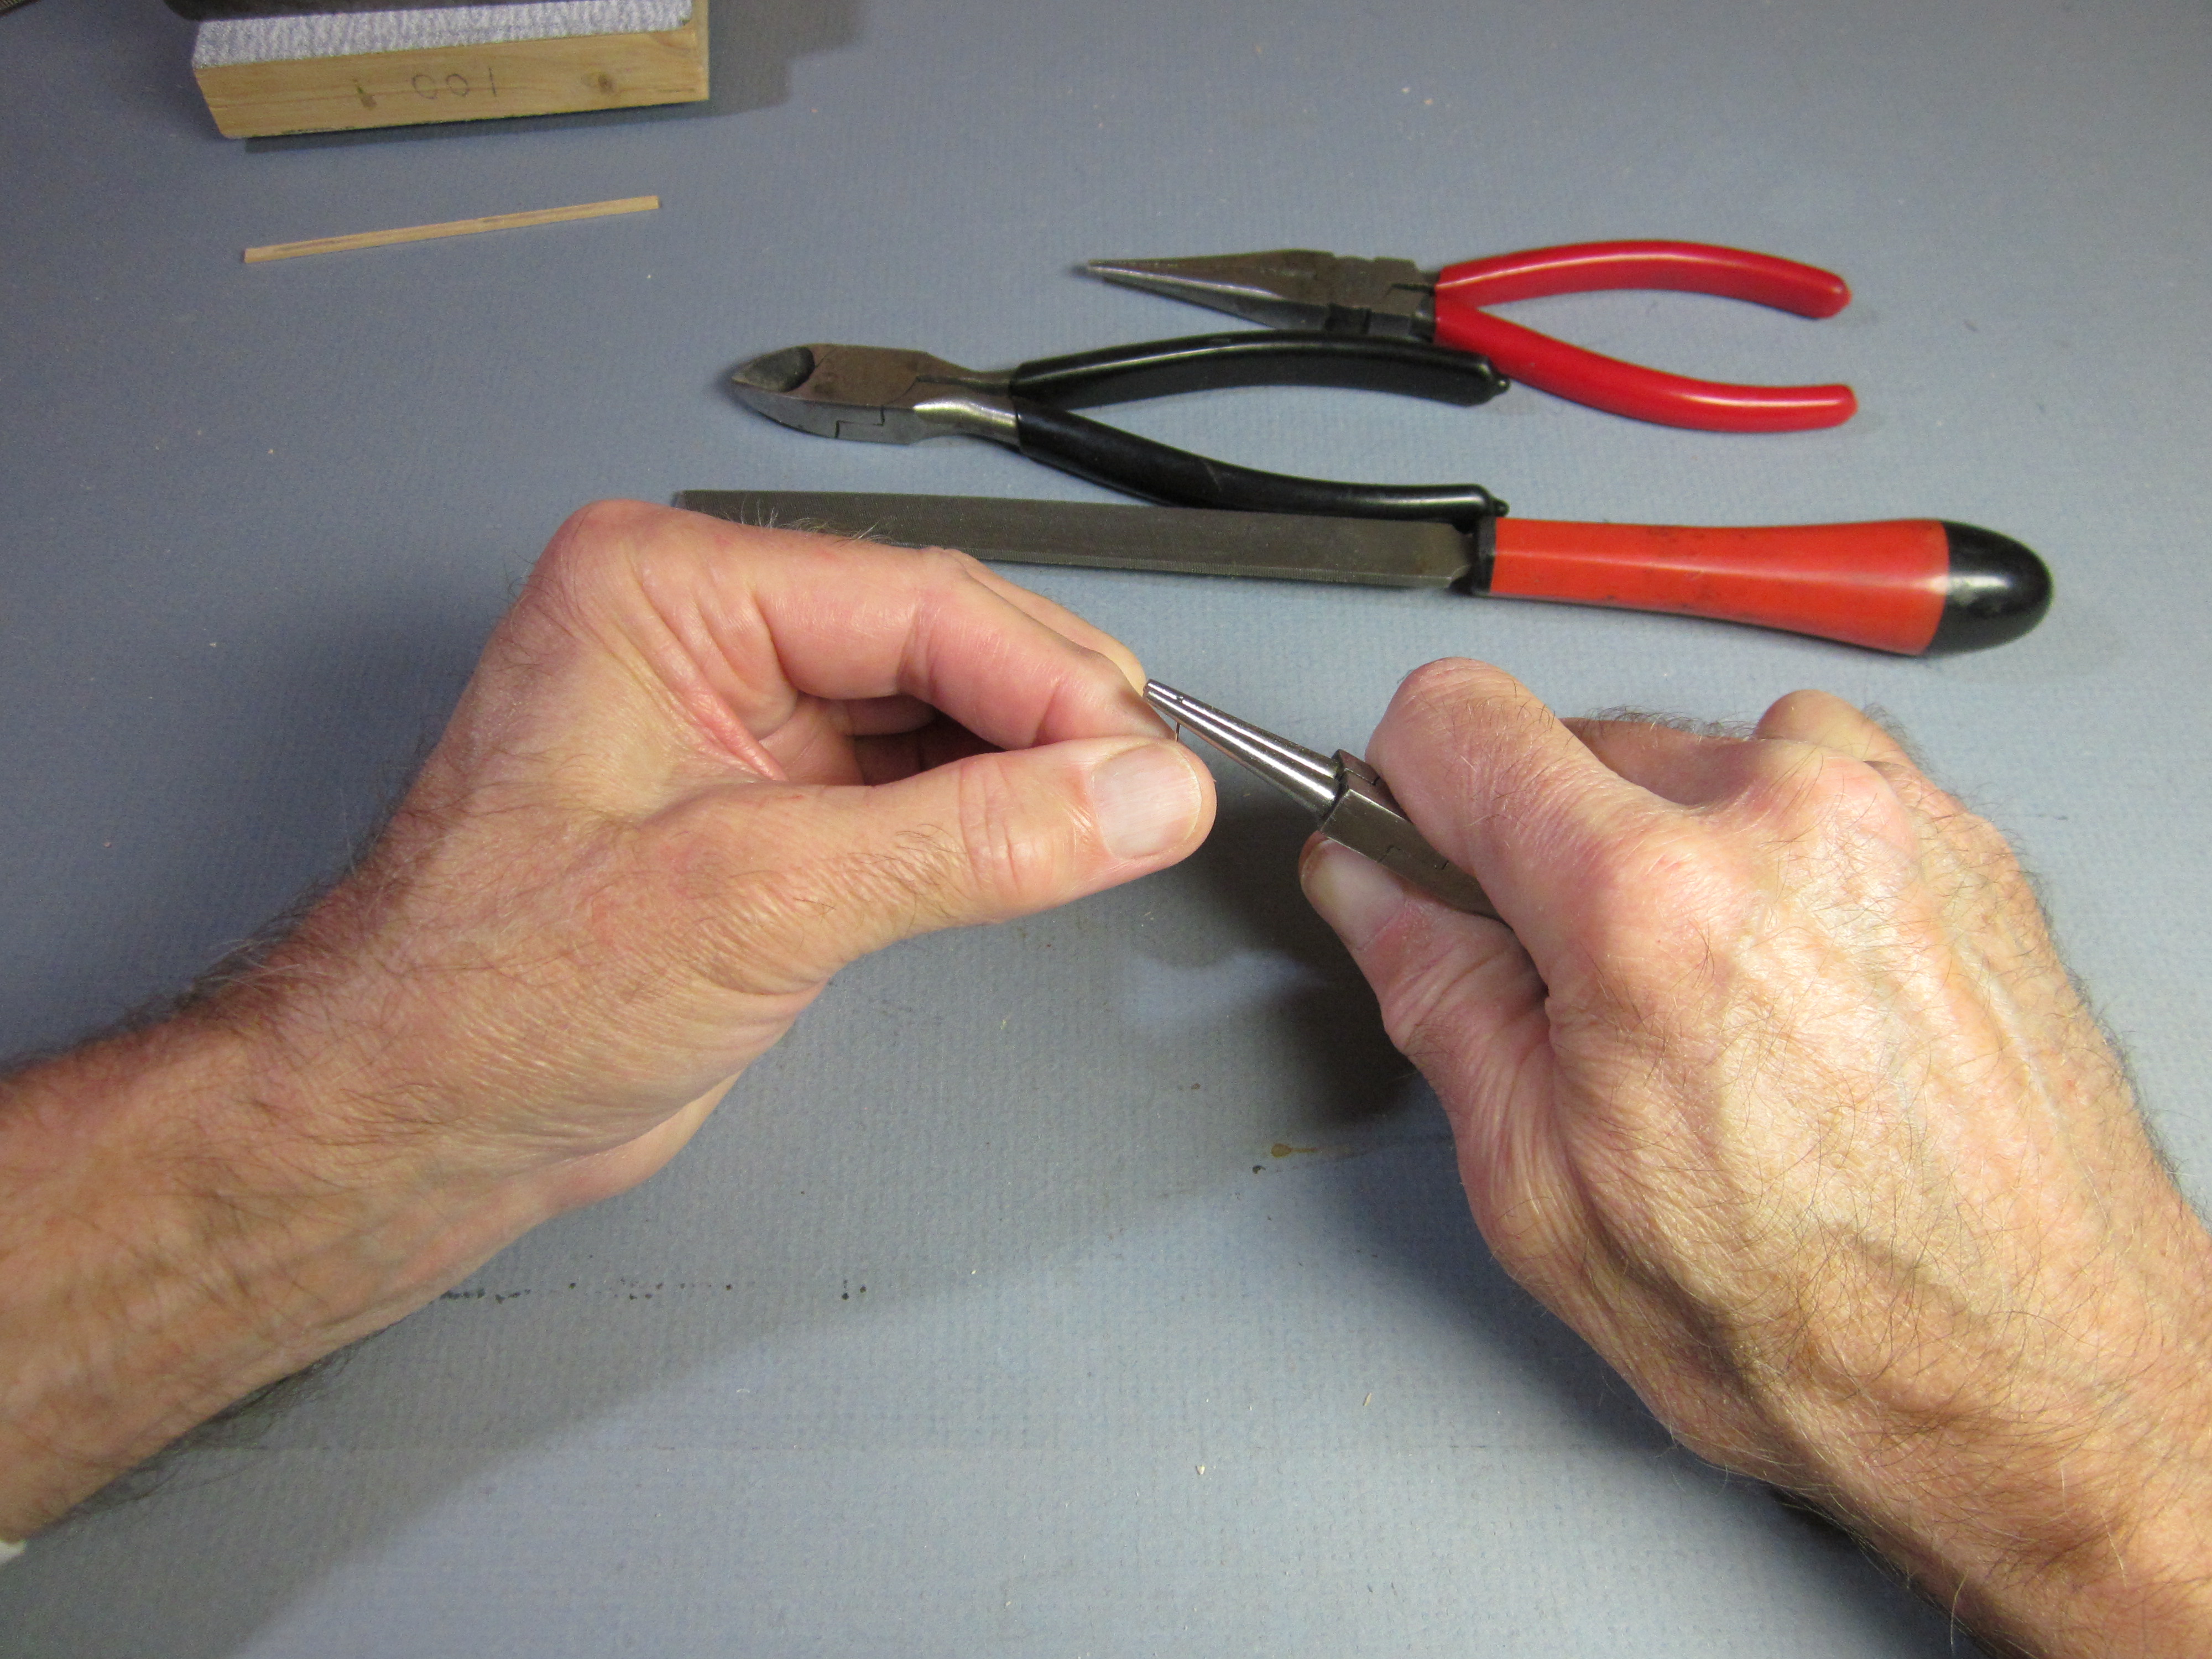 Motors can twist off a hook. The motor will have a clockwise twist in it. With a right handed pig tail in the hook, the motor will twist itself onto the hook. Put the end of the pin in the round nose pliers at an angle where it has about a 3/32″ diameter.
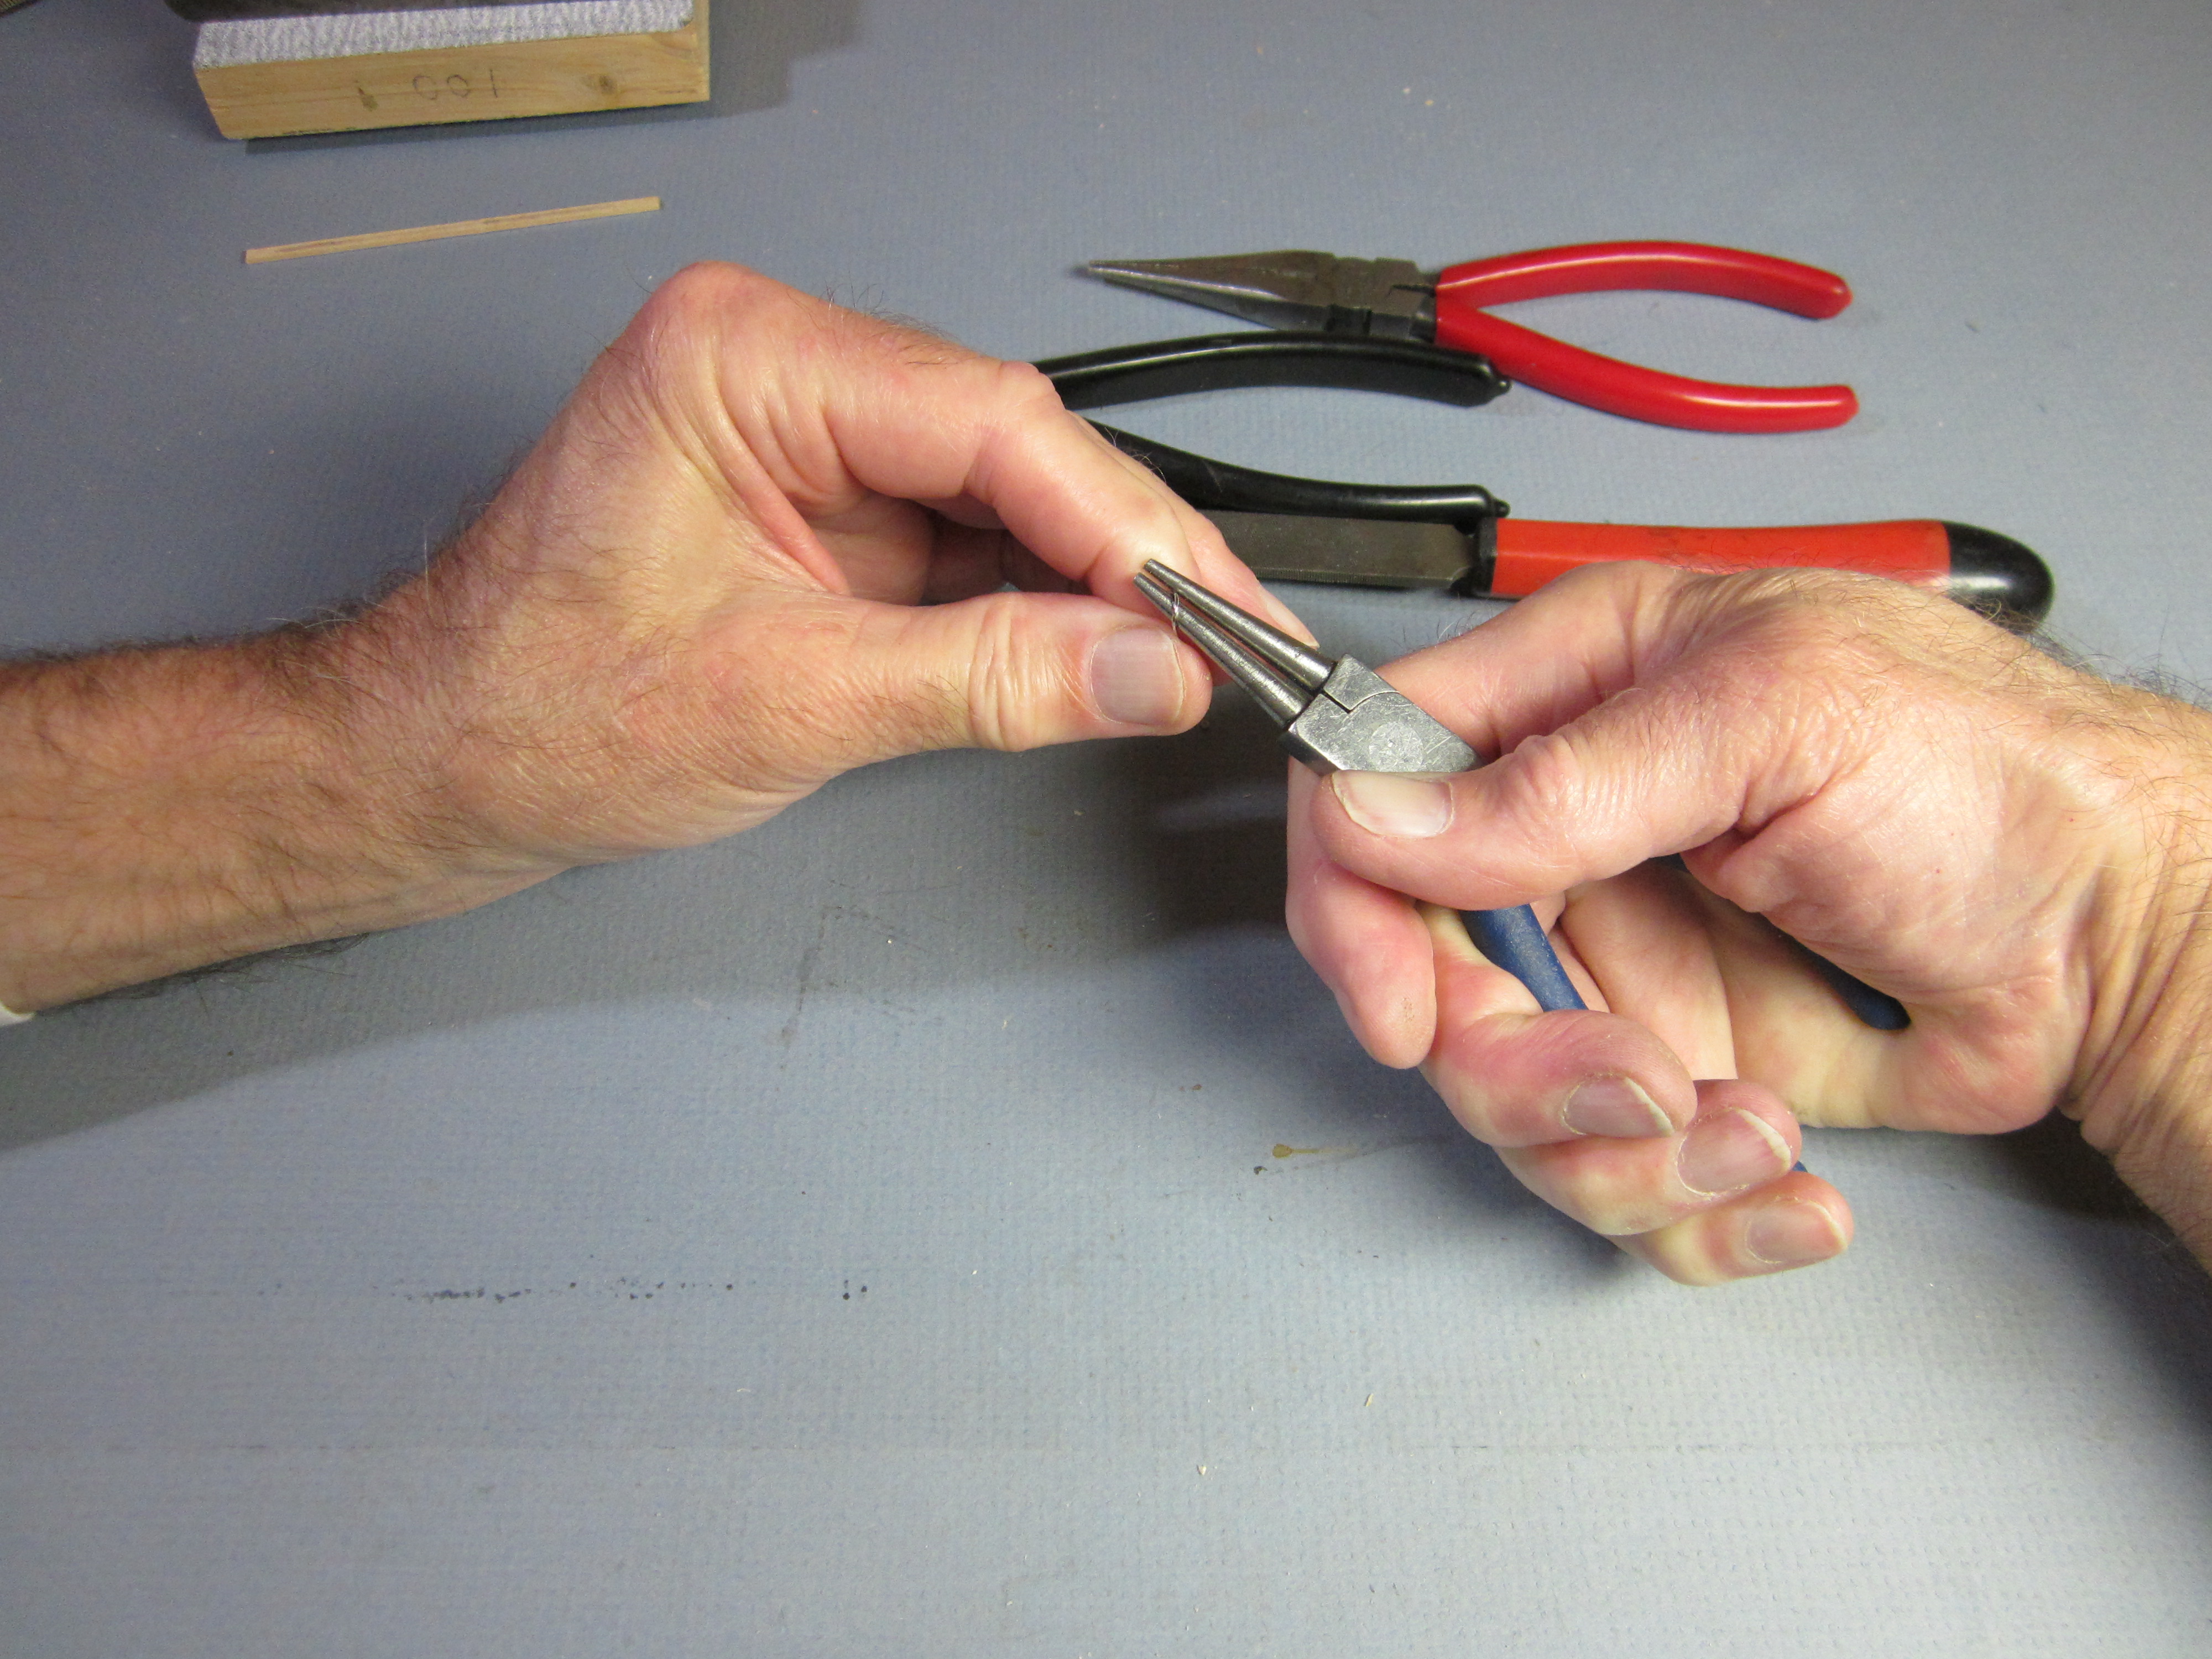 Twist the wire around the pliers to form a right handed helix. Roll up the fingers of your right hand and point your thumb out. A right handed helix goes in the direction the thumb points when going along it in the direction the fingers point.
 Bend it around to make a complete loop. There should be enough room between the end and the remaining shaft that an O-ring can easily fit through the gap.
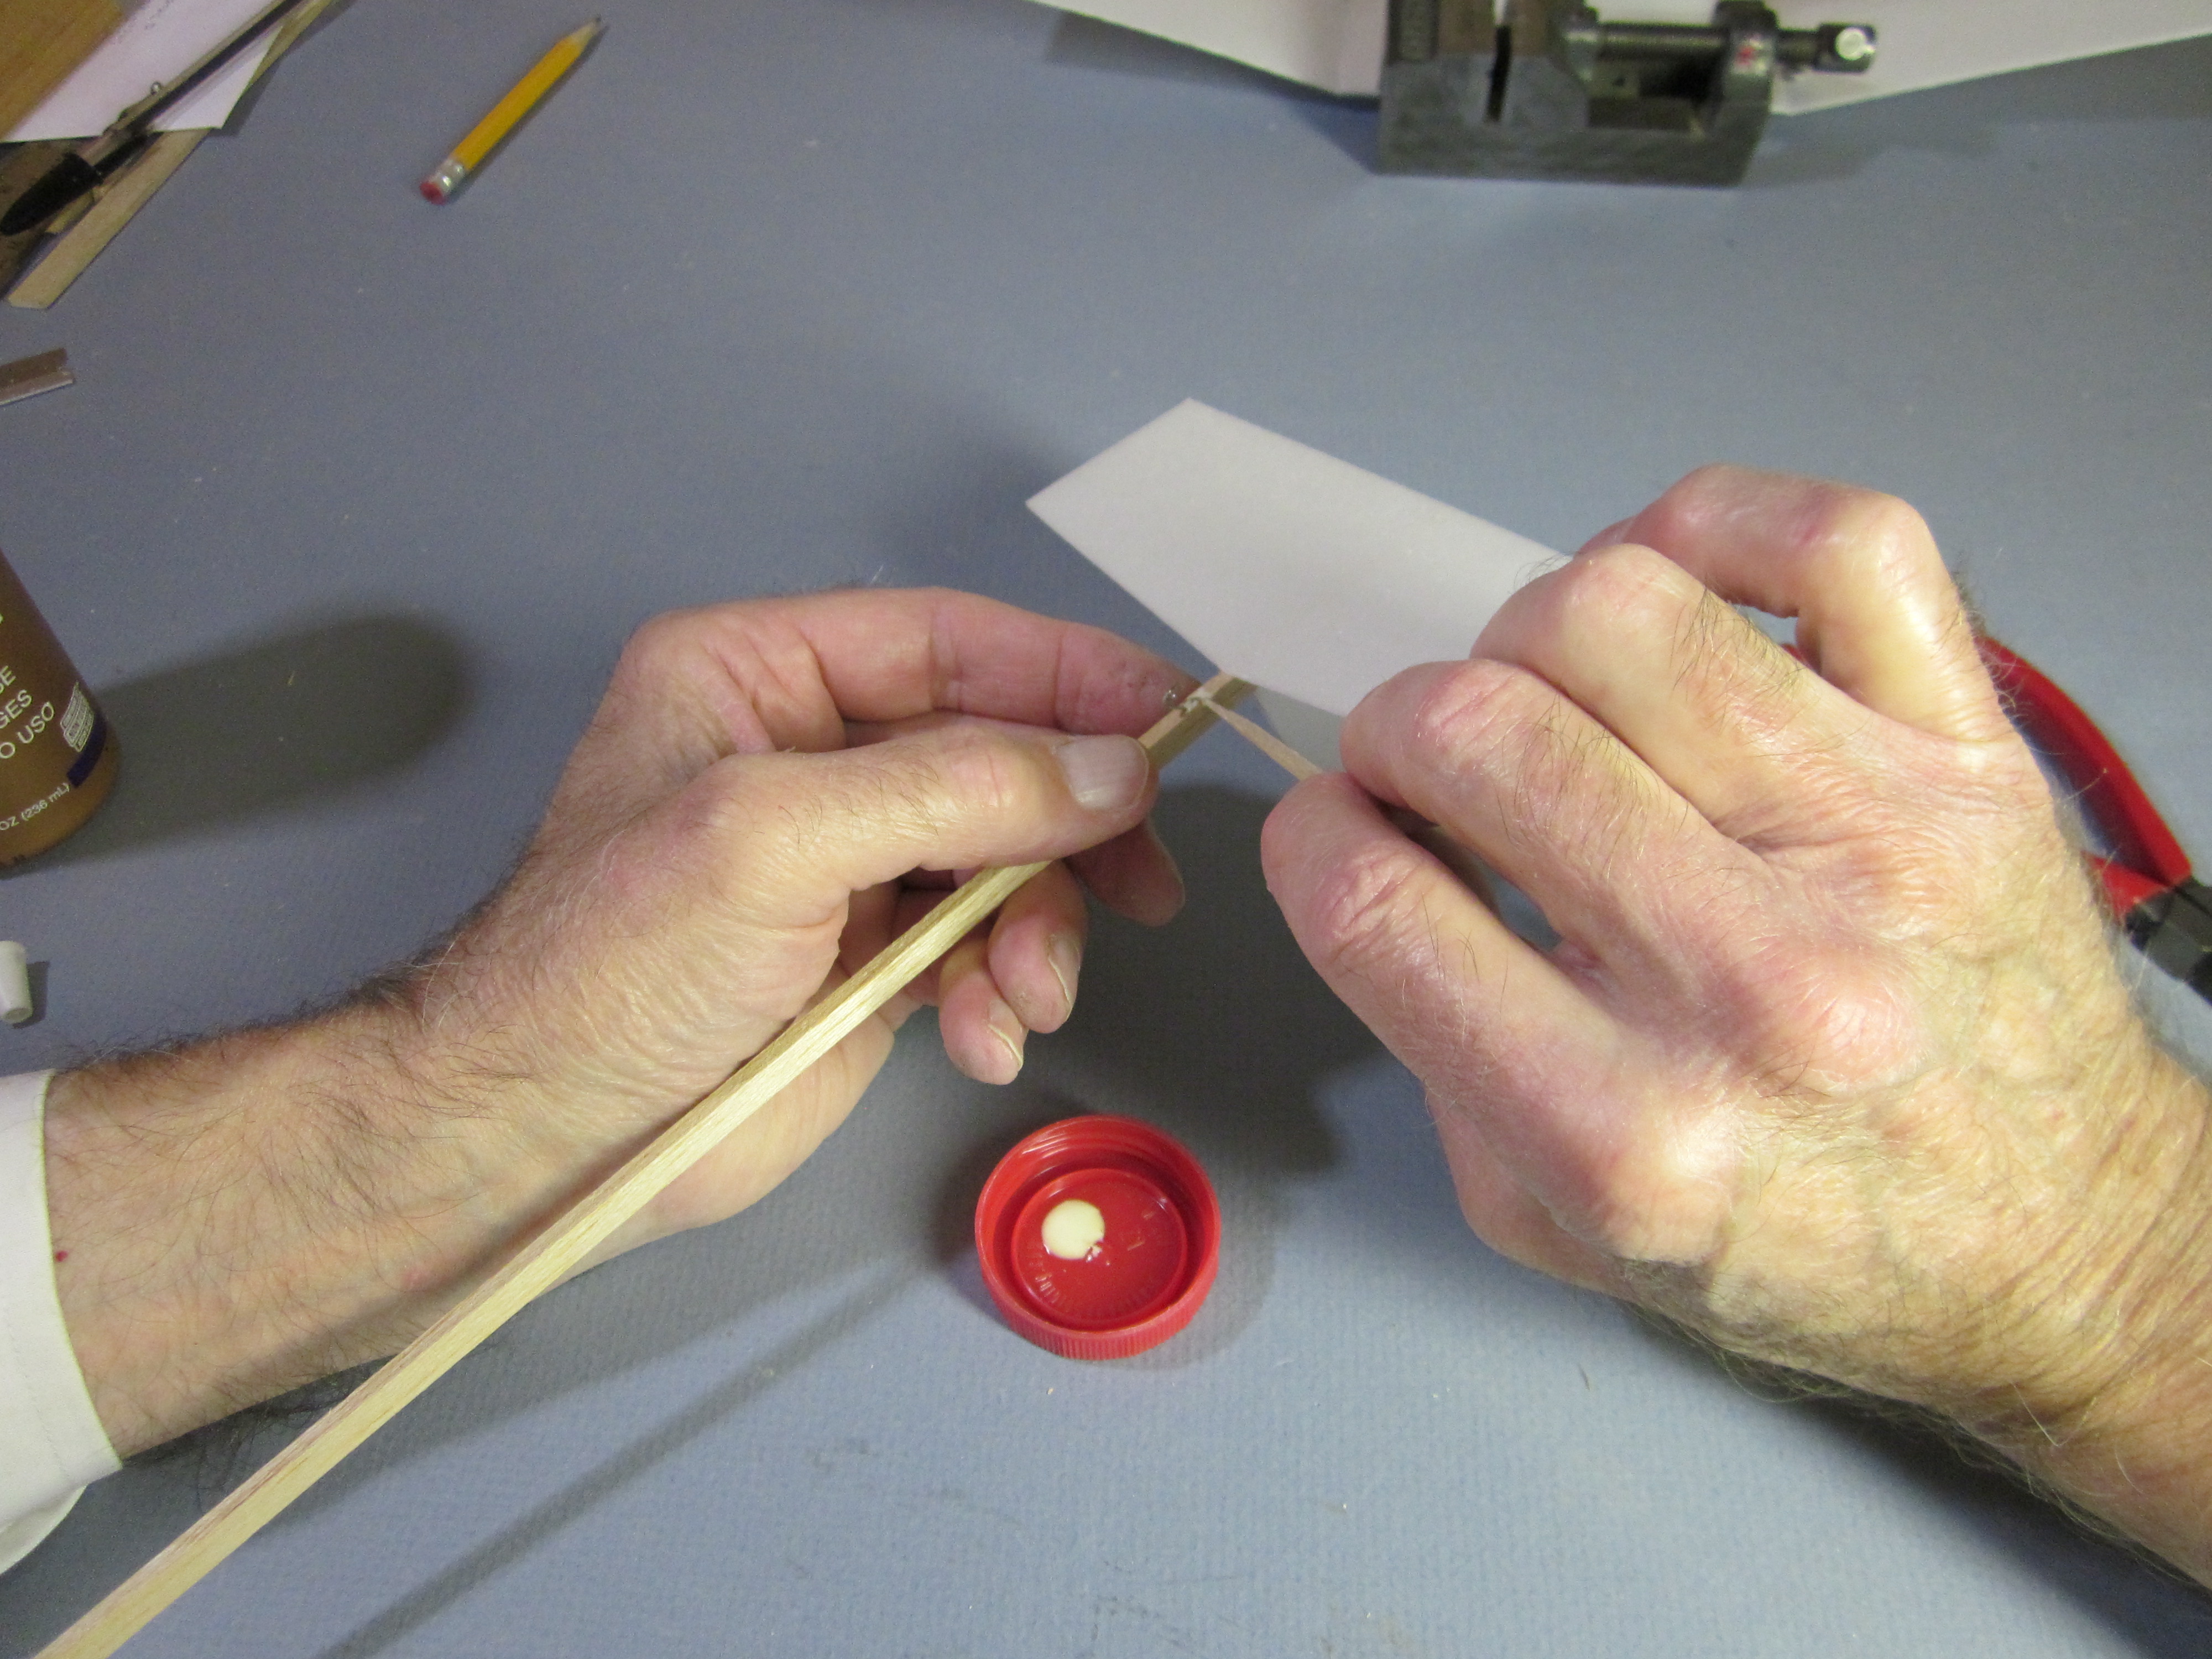
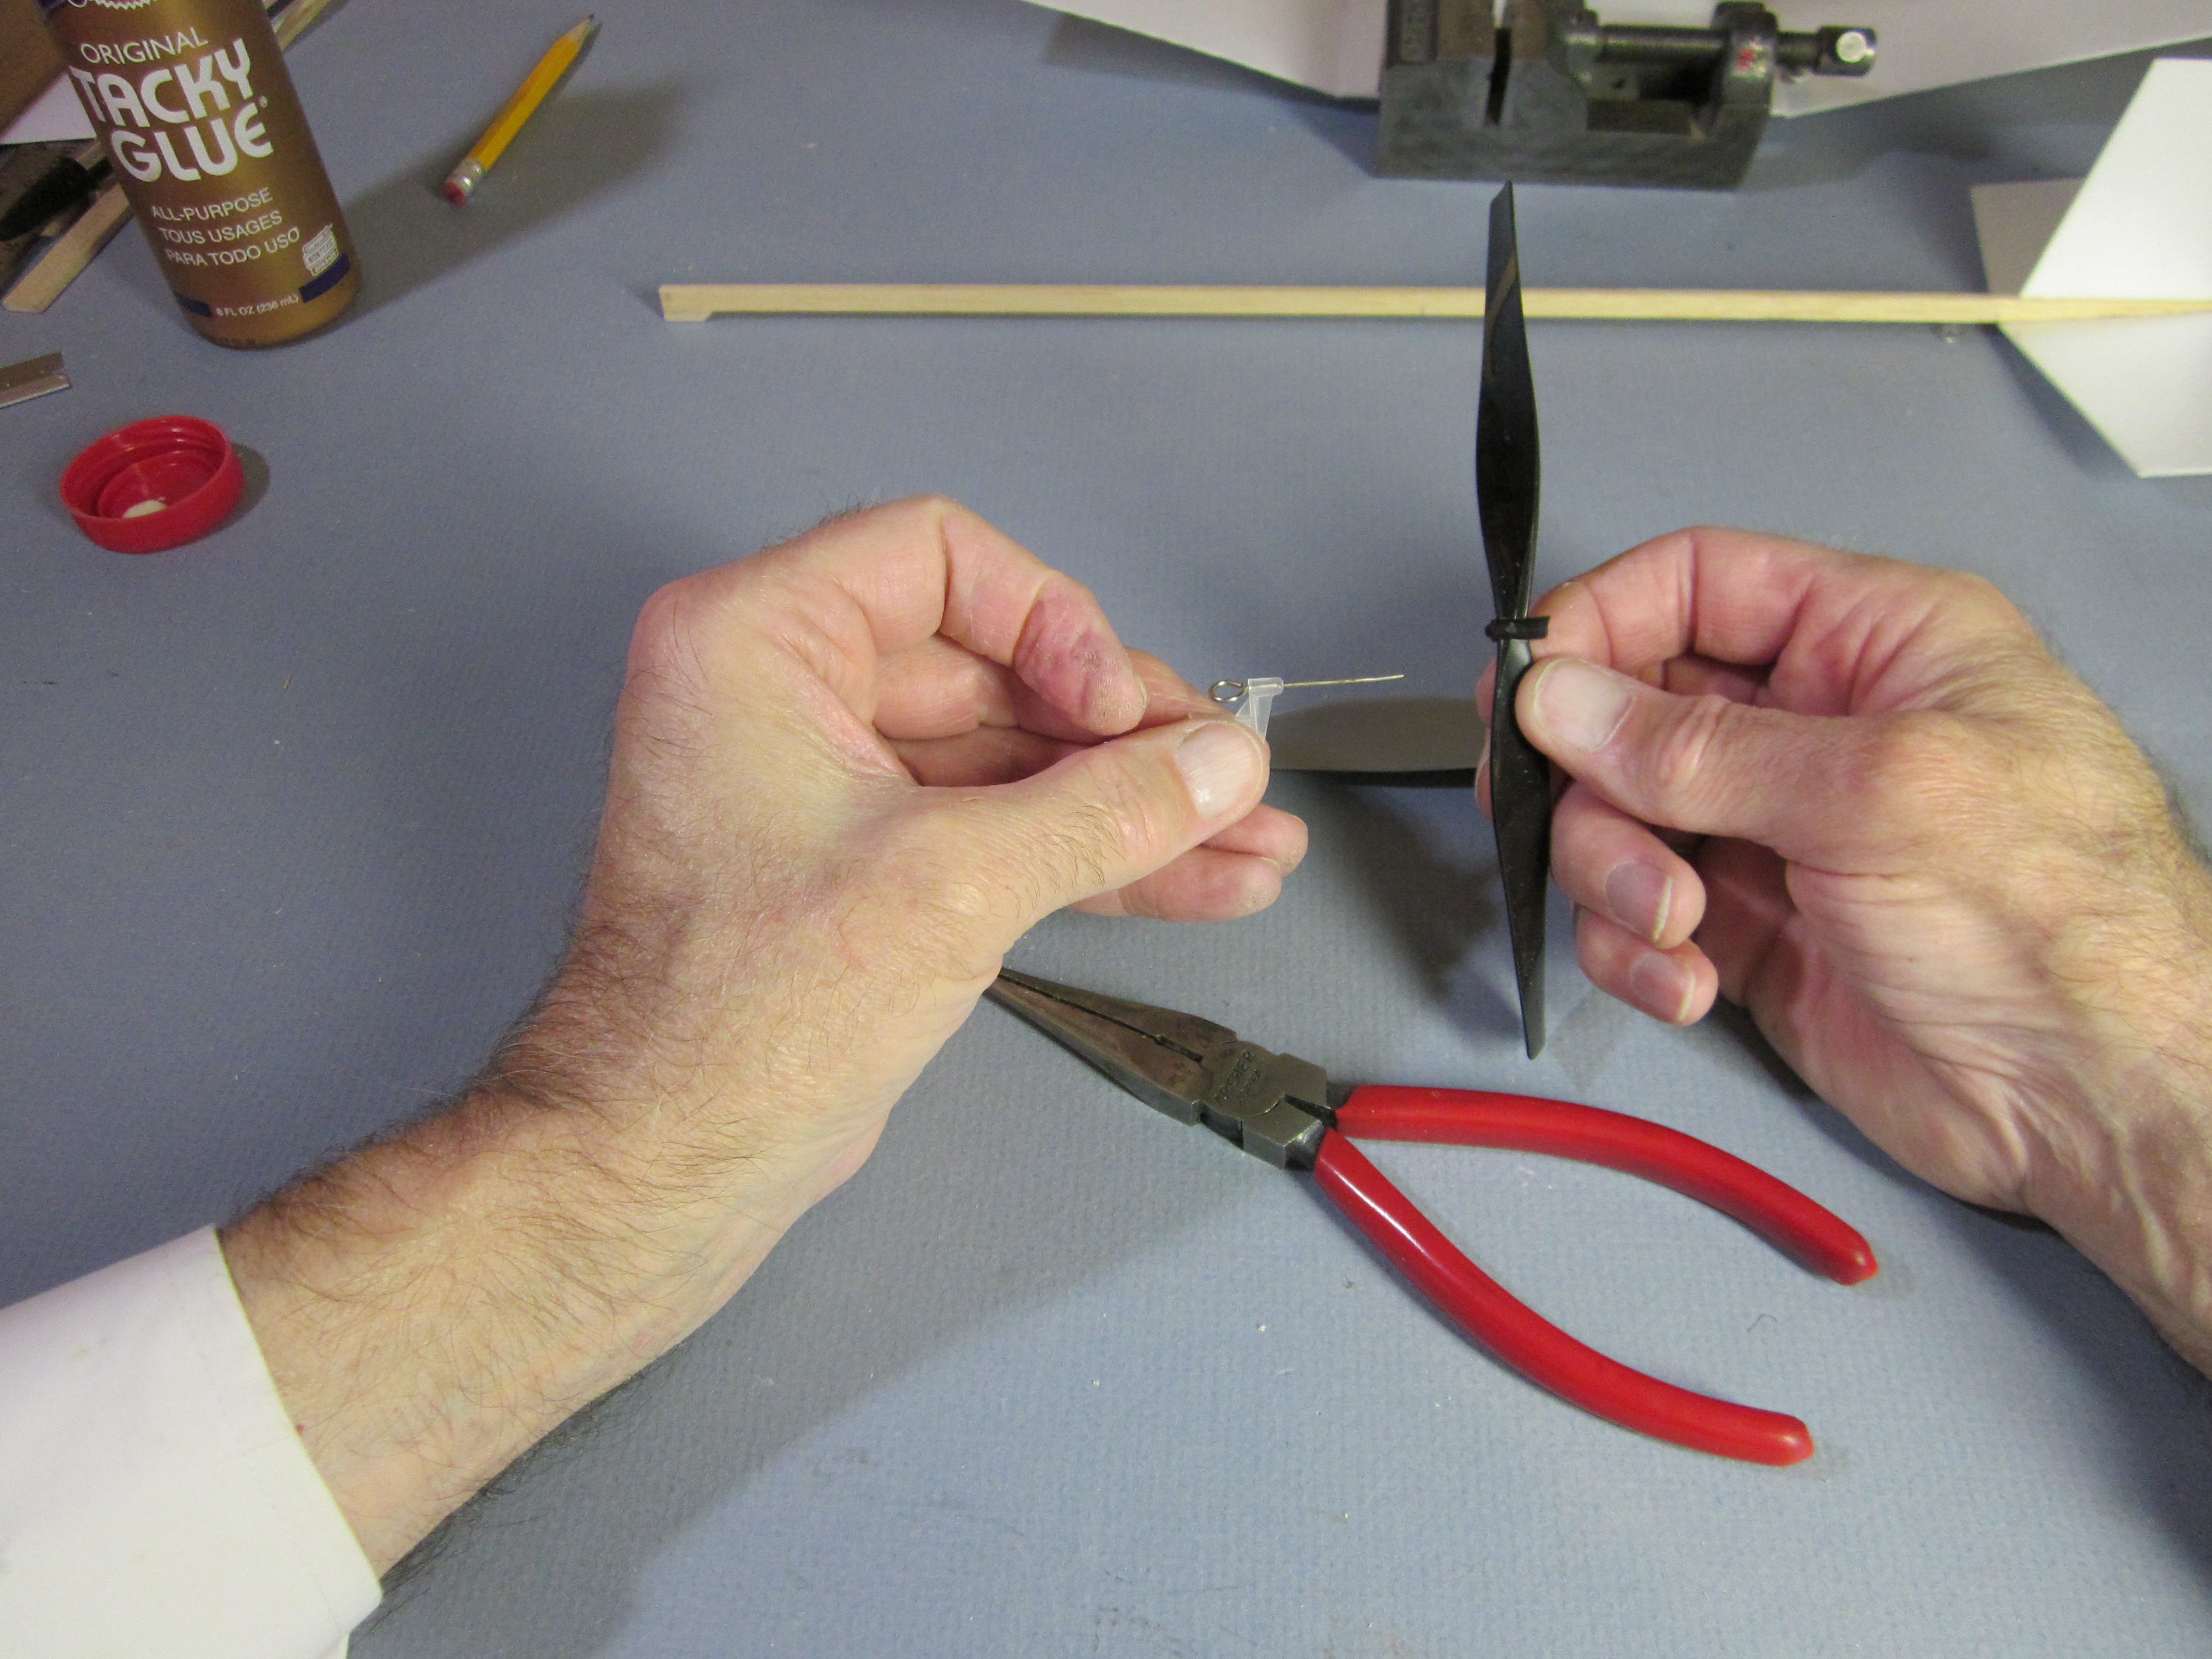
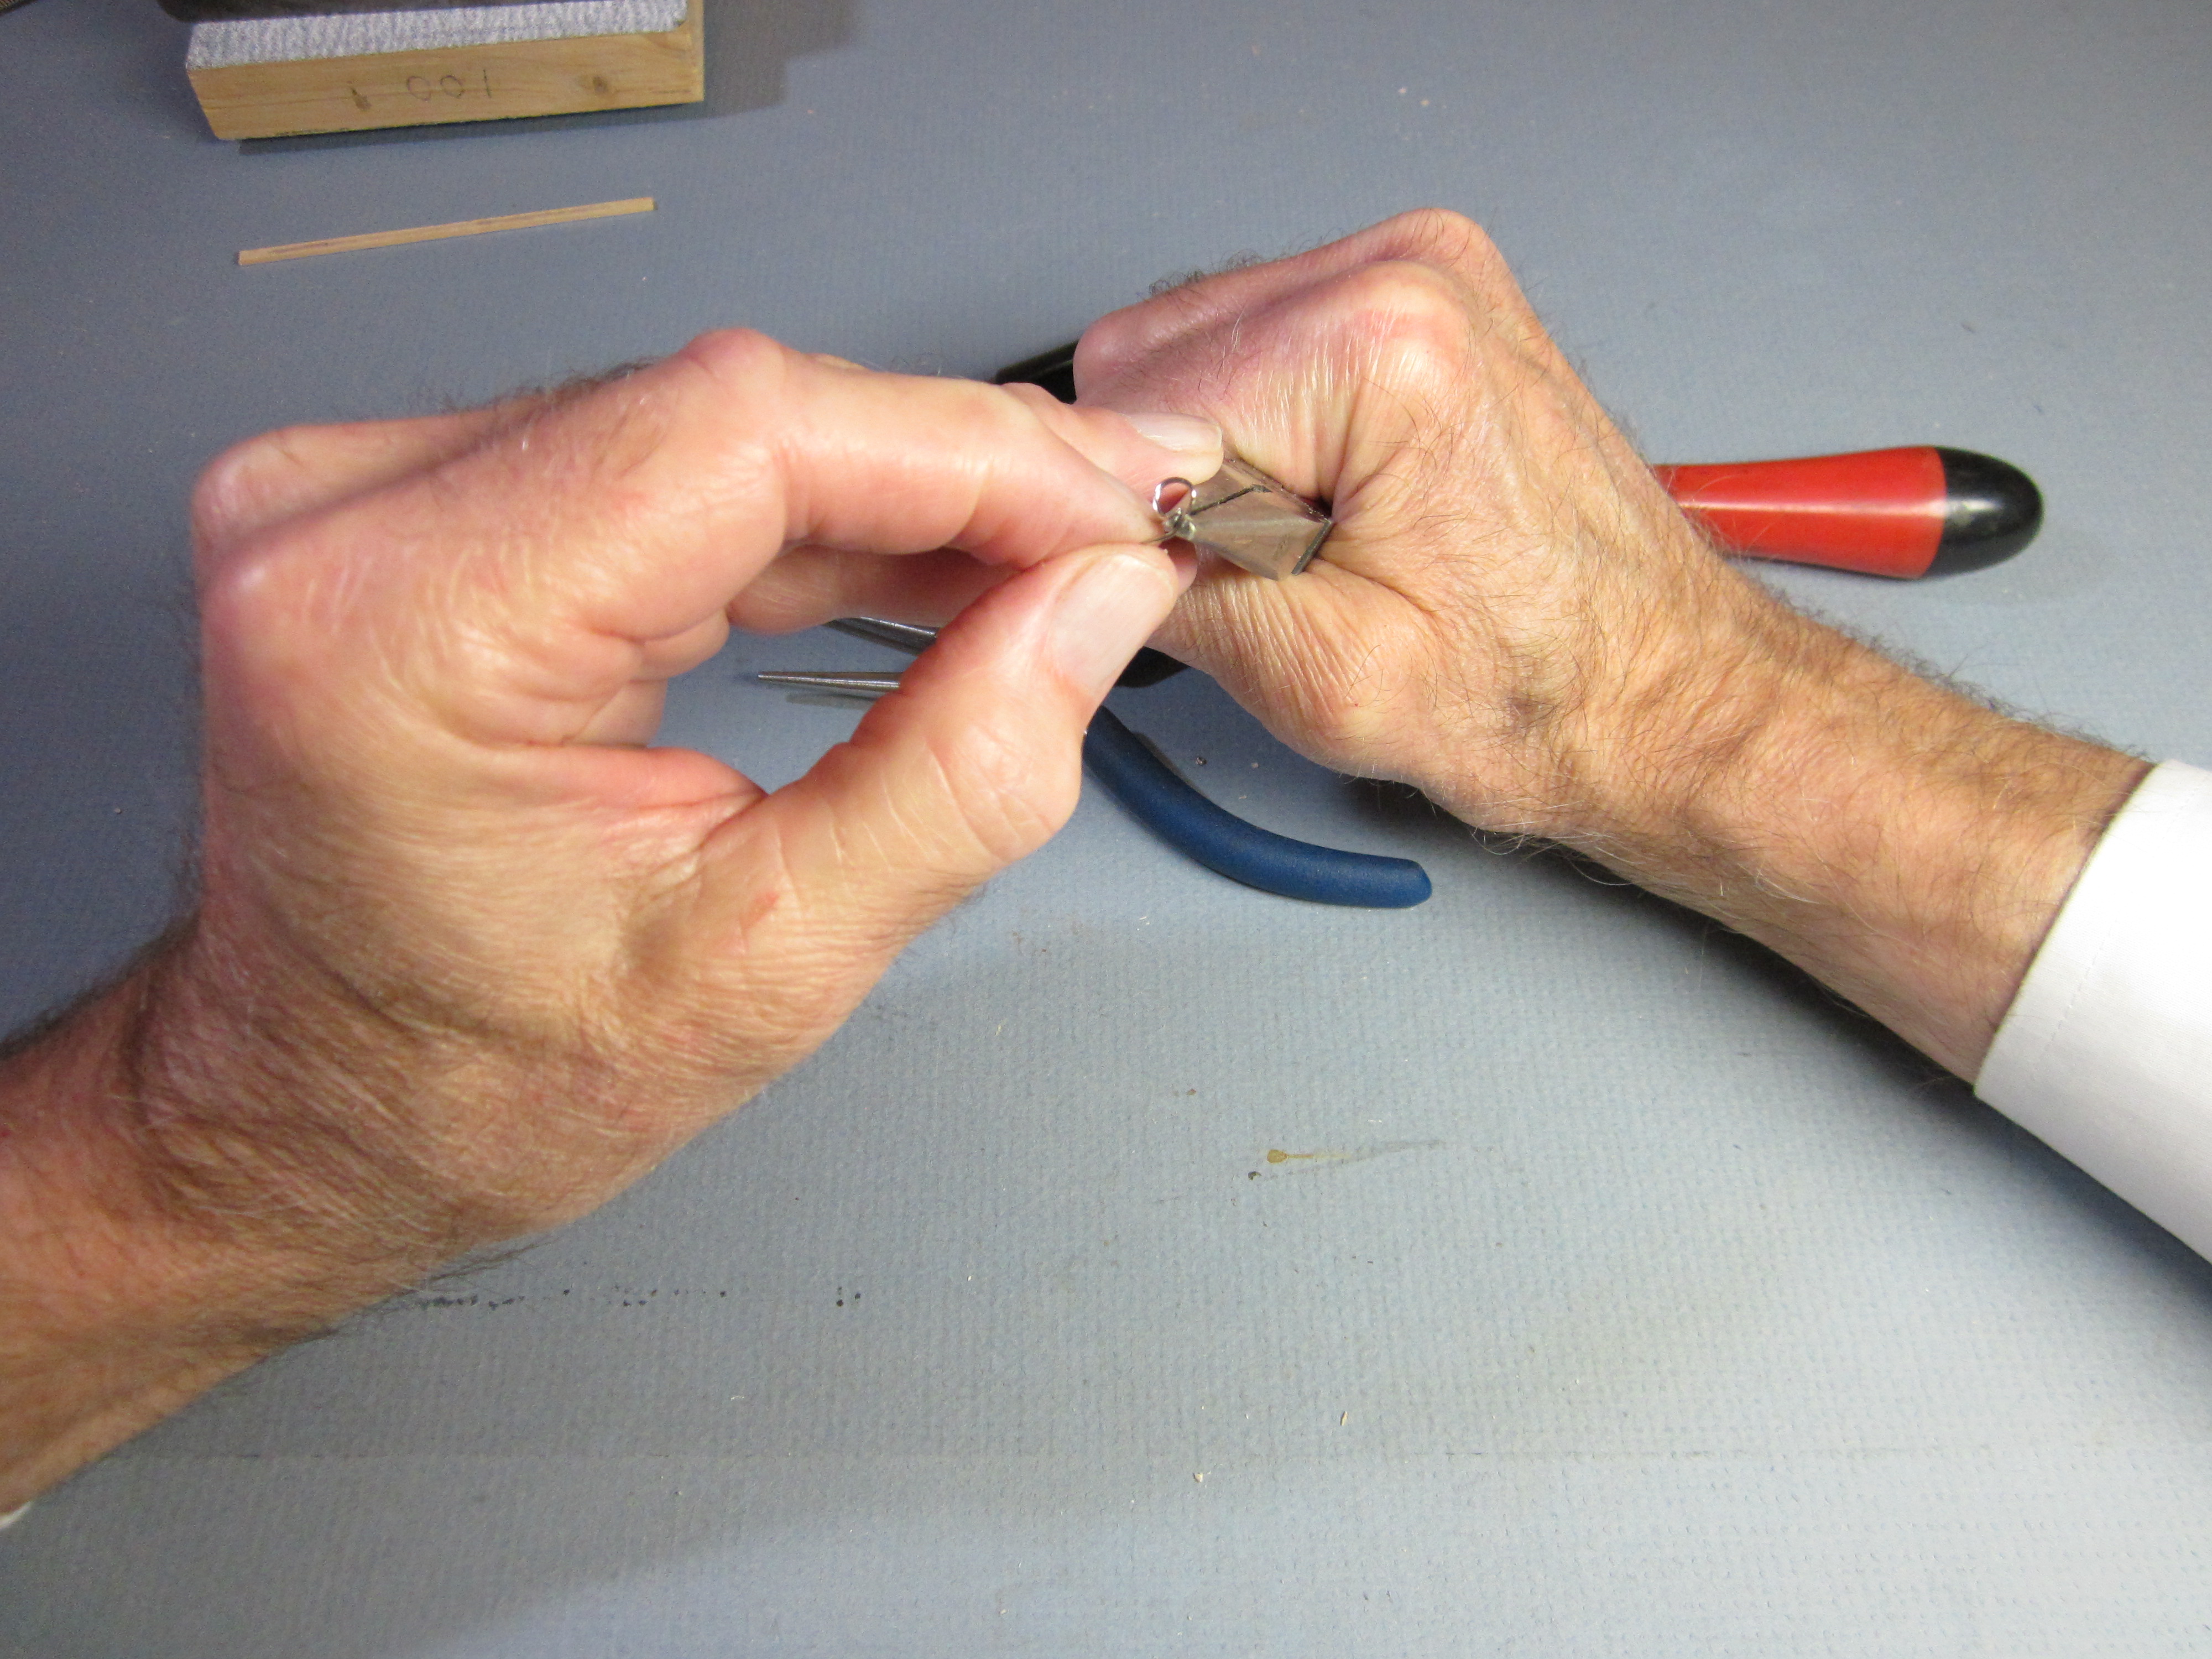 Bend the wire 45 degrees to raise the loop up from the stick. The center of the loop should be about 1/8″ above the stick.
 Half of the remaining straight piece is bent down at a right angle. These last three straight pieces lie in the same plane. Since this is short and hard to grip, and has a sharp end, use a block of wood to bend it.
 There is the finished hook.
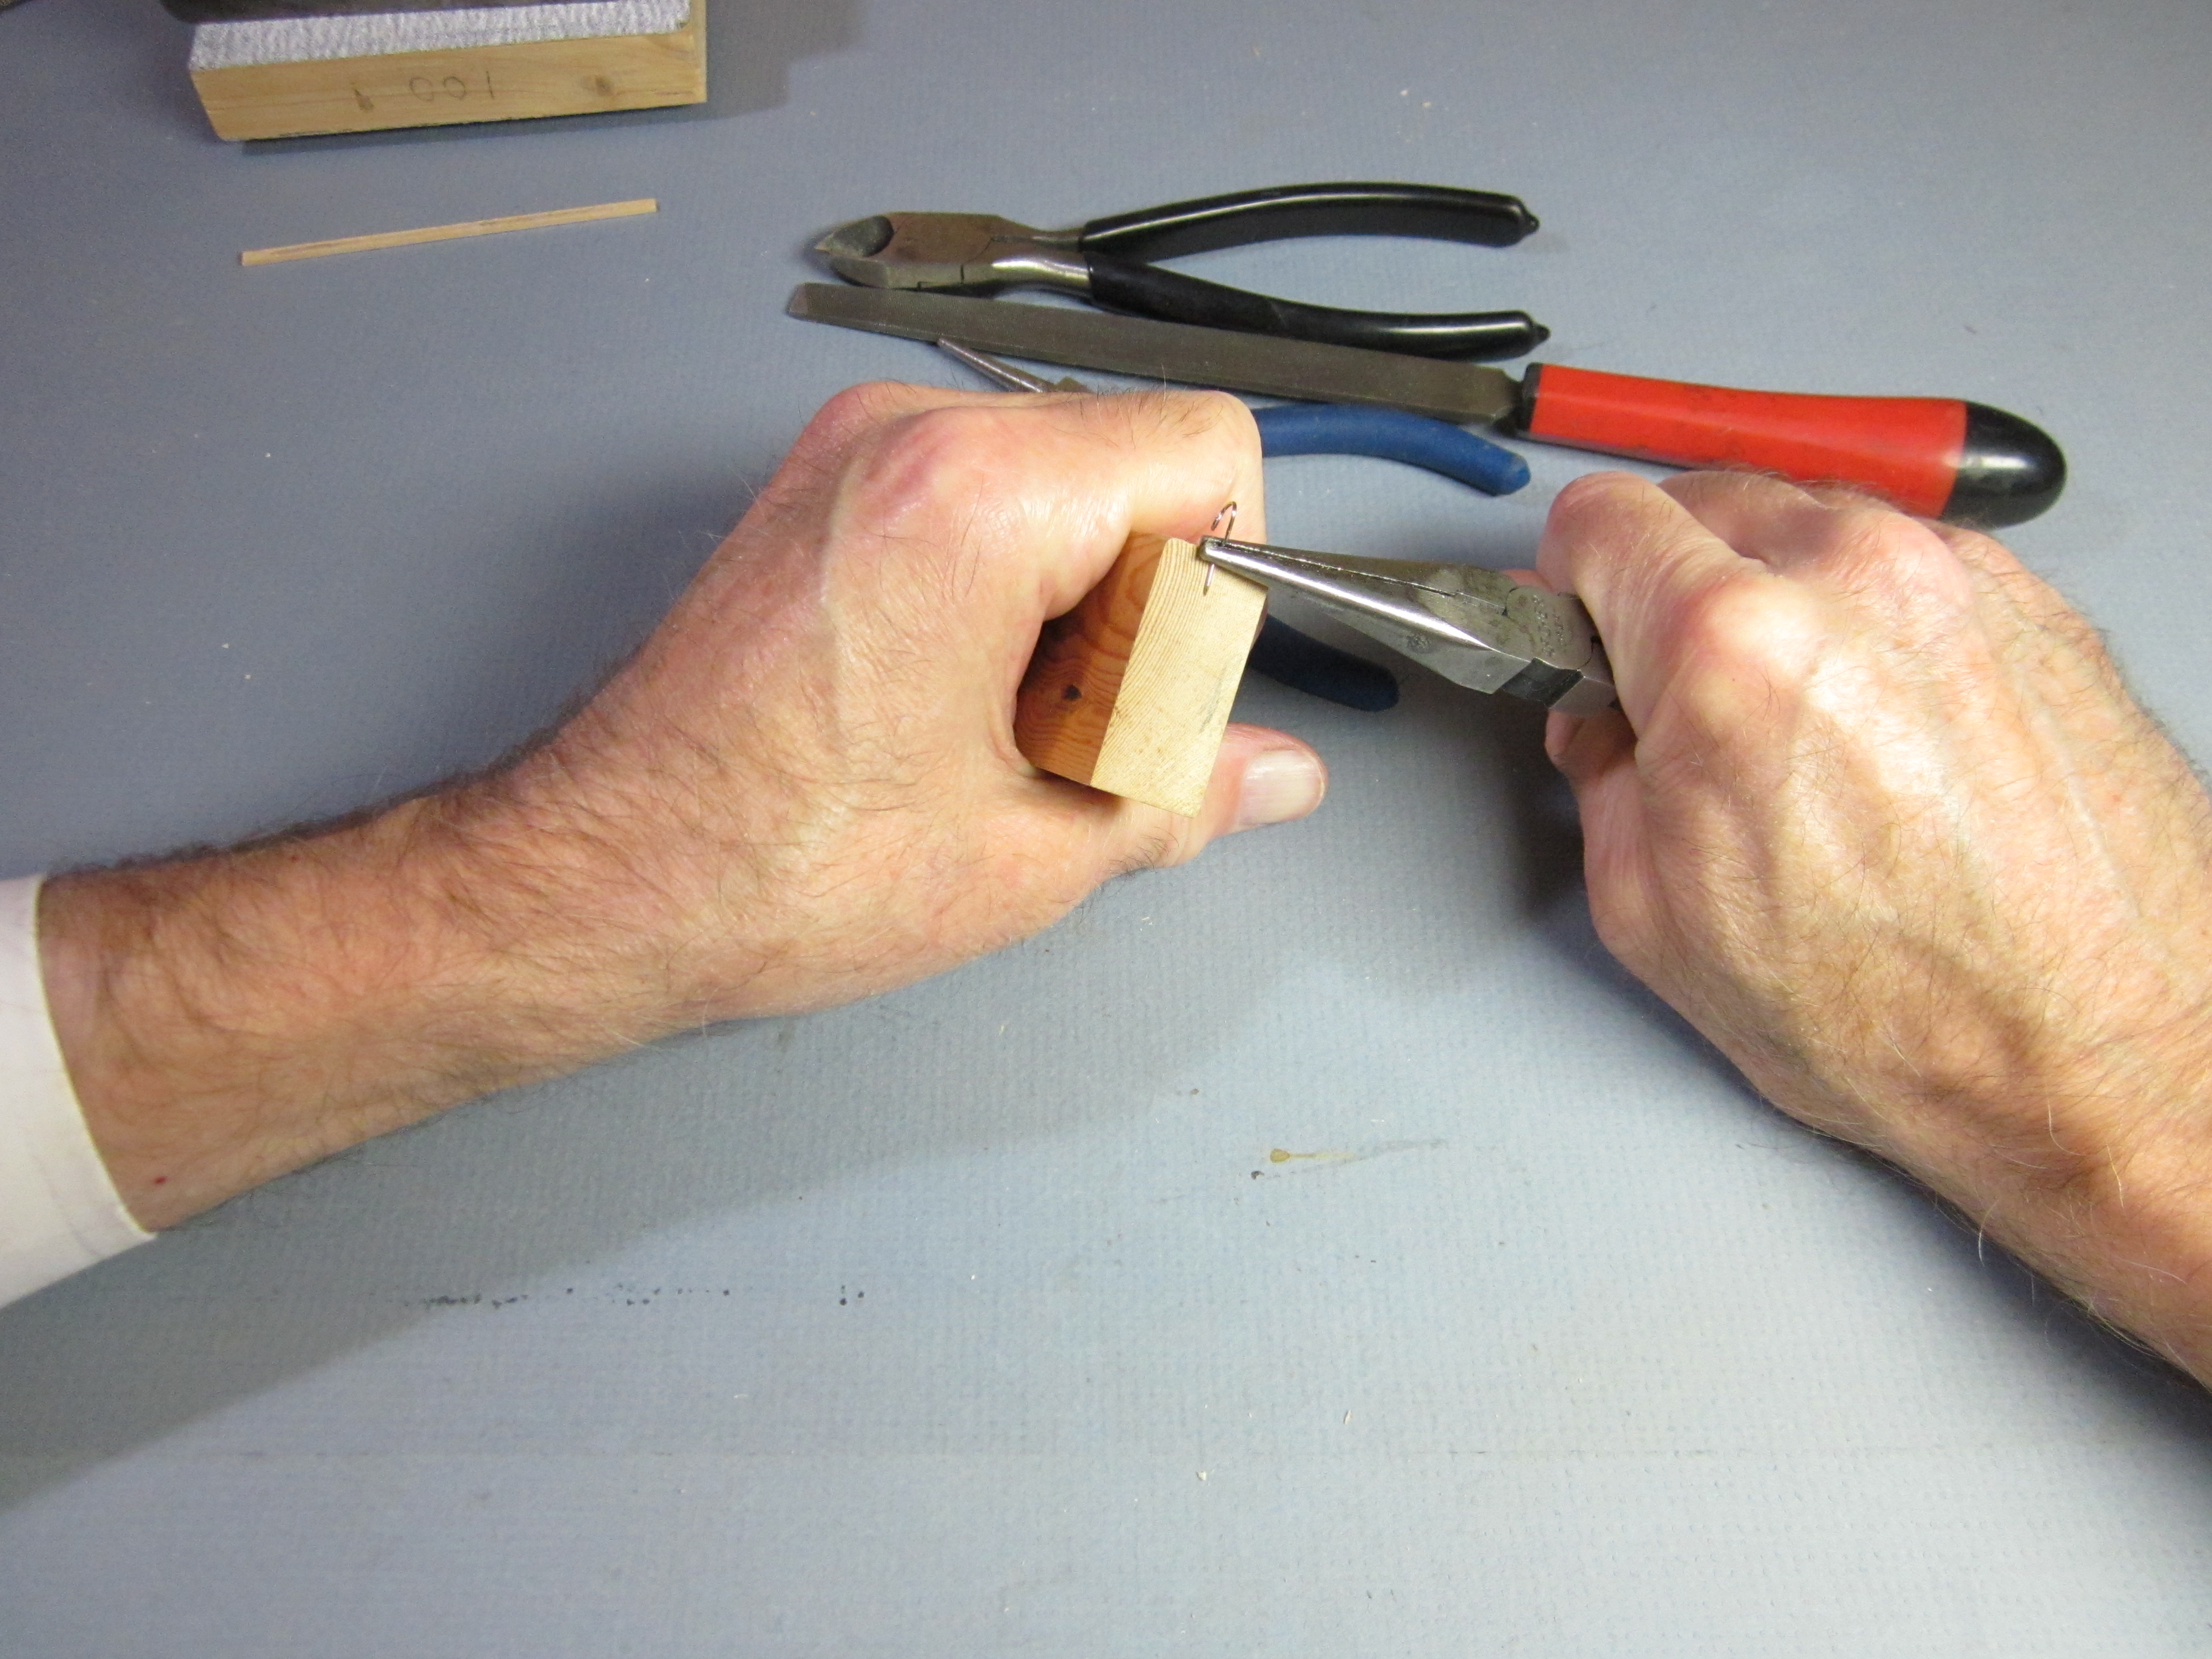
 Poke a pinhole in the underside of the stick about a quarter of an inch forward of the tailplane. Make it perpendicular to the surface.
 Get glue on the point and adjacent straight piece.
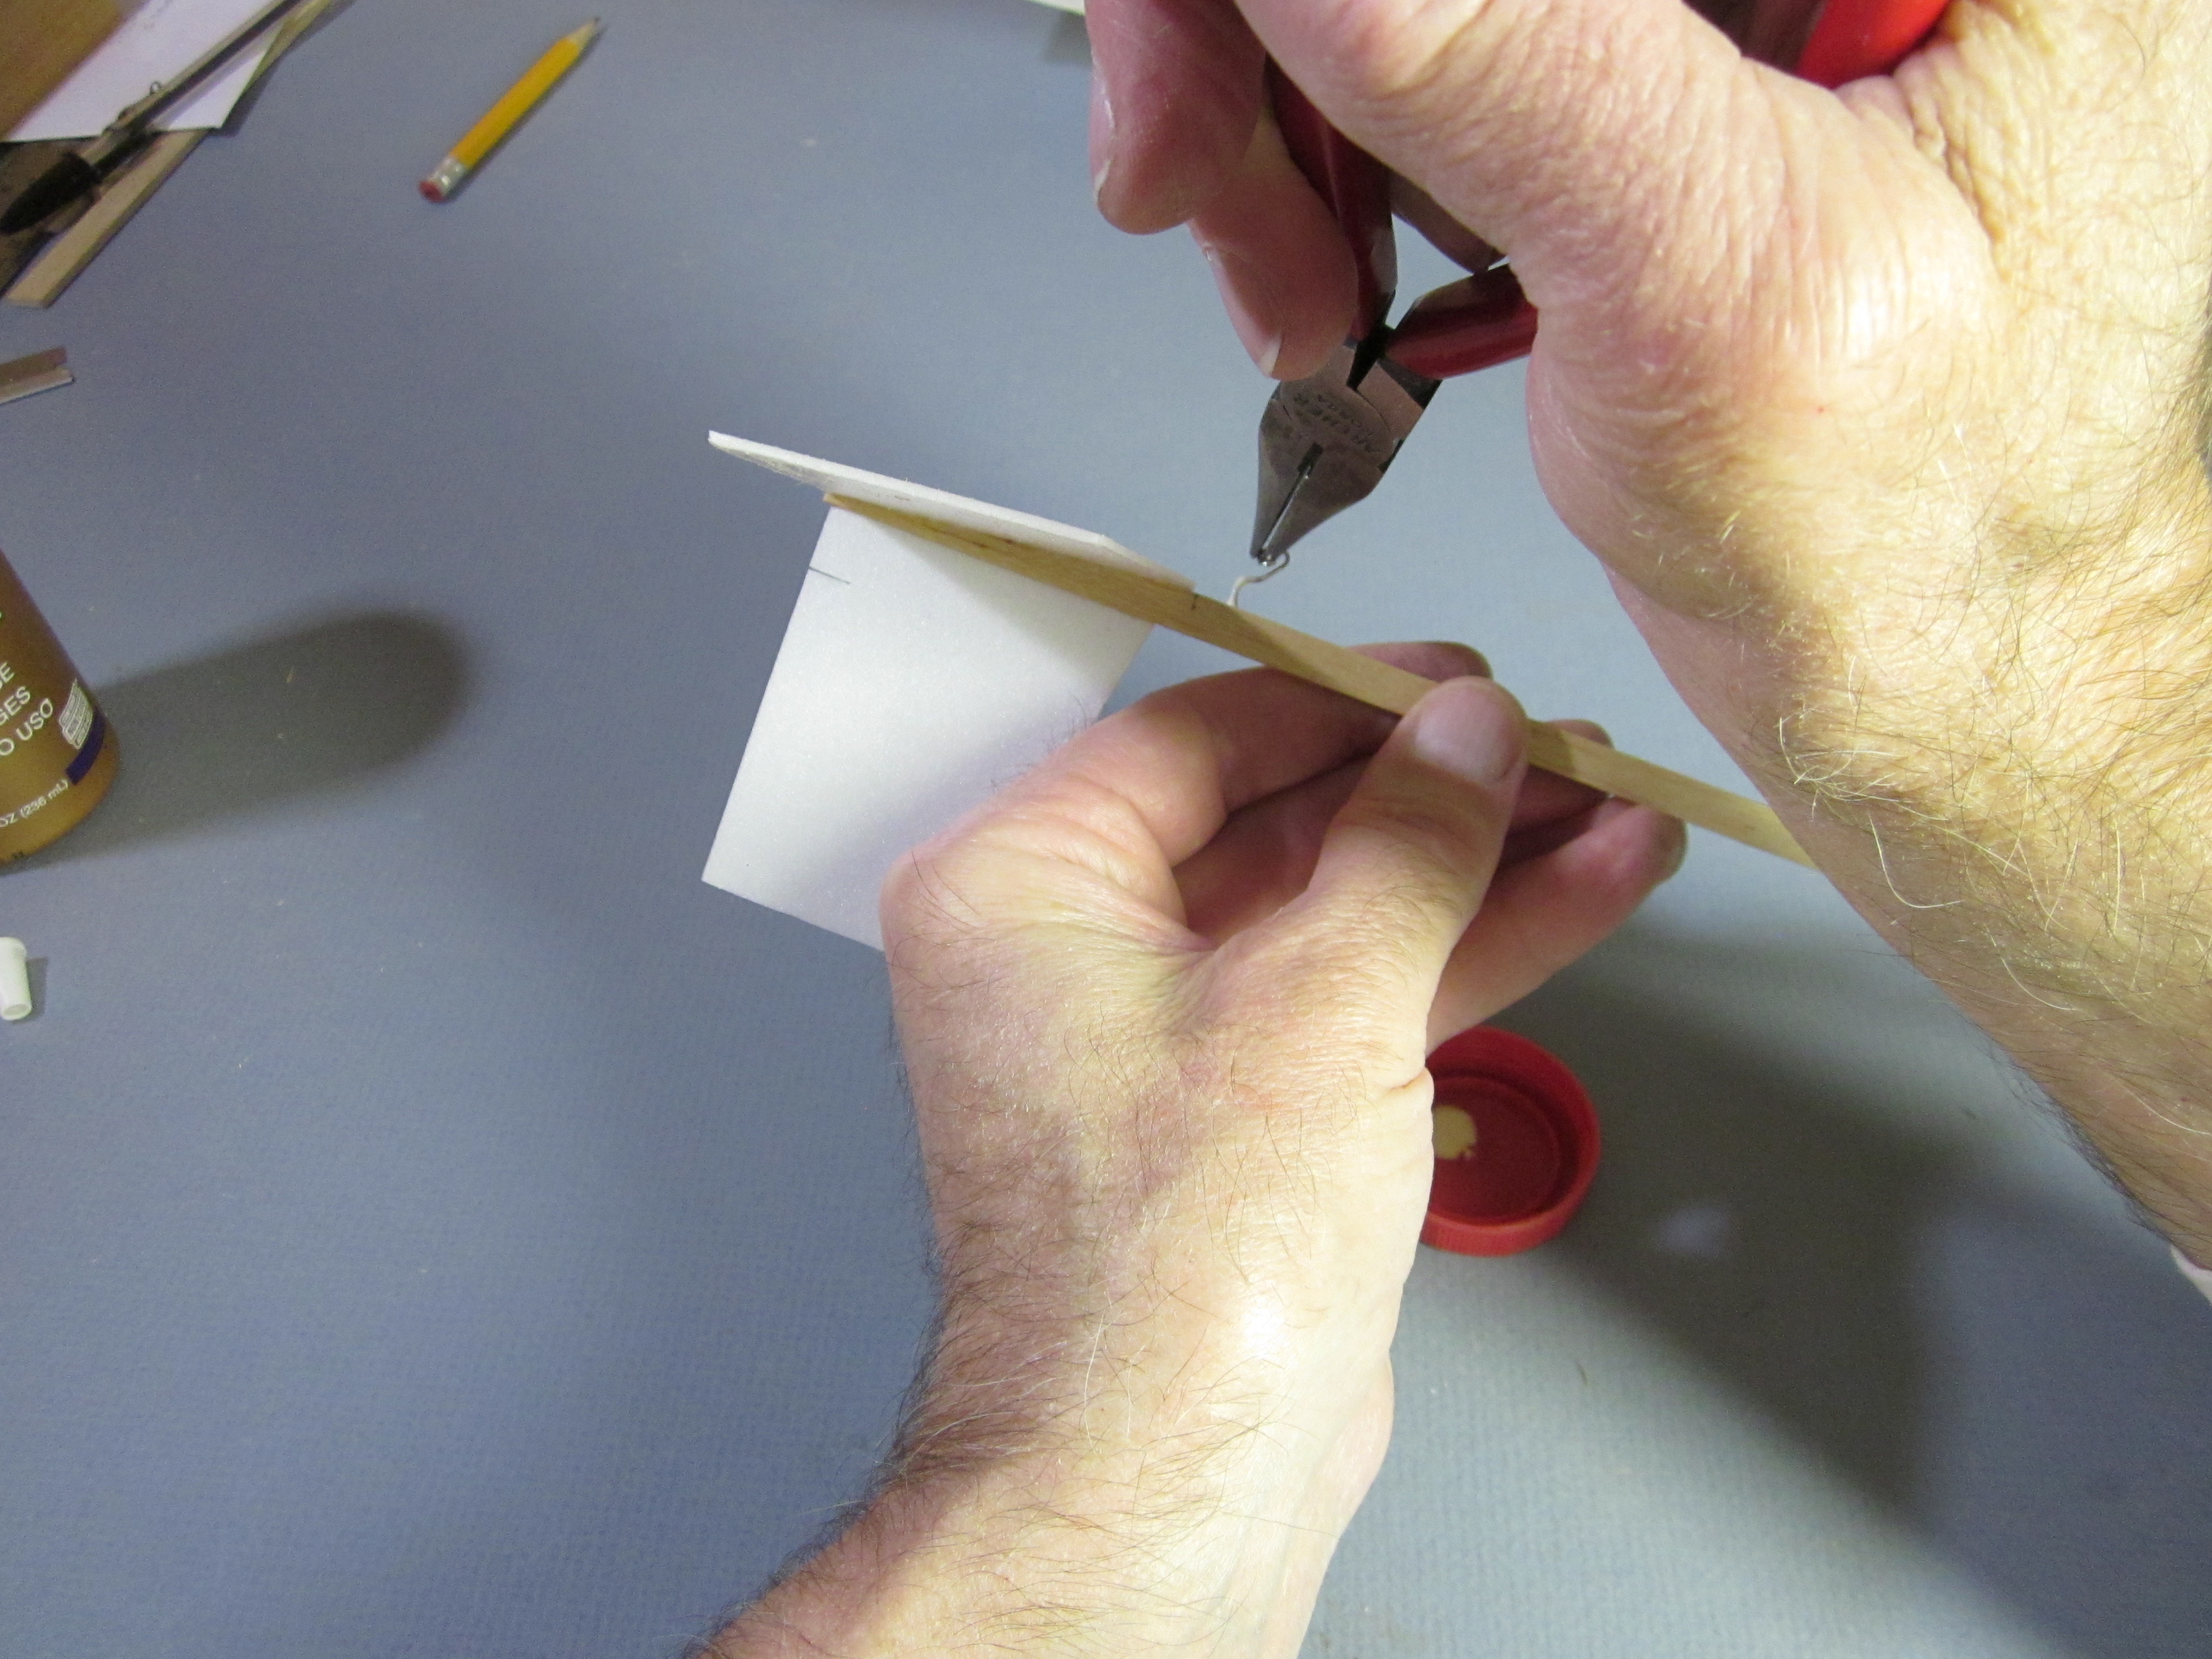 Insert the point into the hole you just made, with the hook toward the front end of the stick.
 Press the horizontal straight piece into the wood.
 Apply a fillet of glue anywhere the wire is in contact with wood.
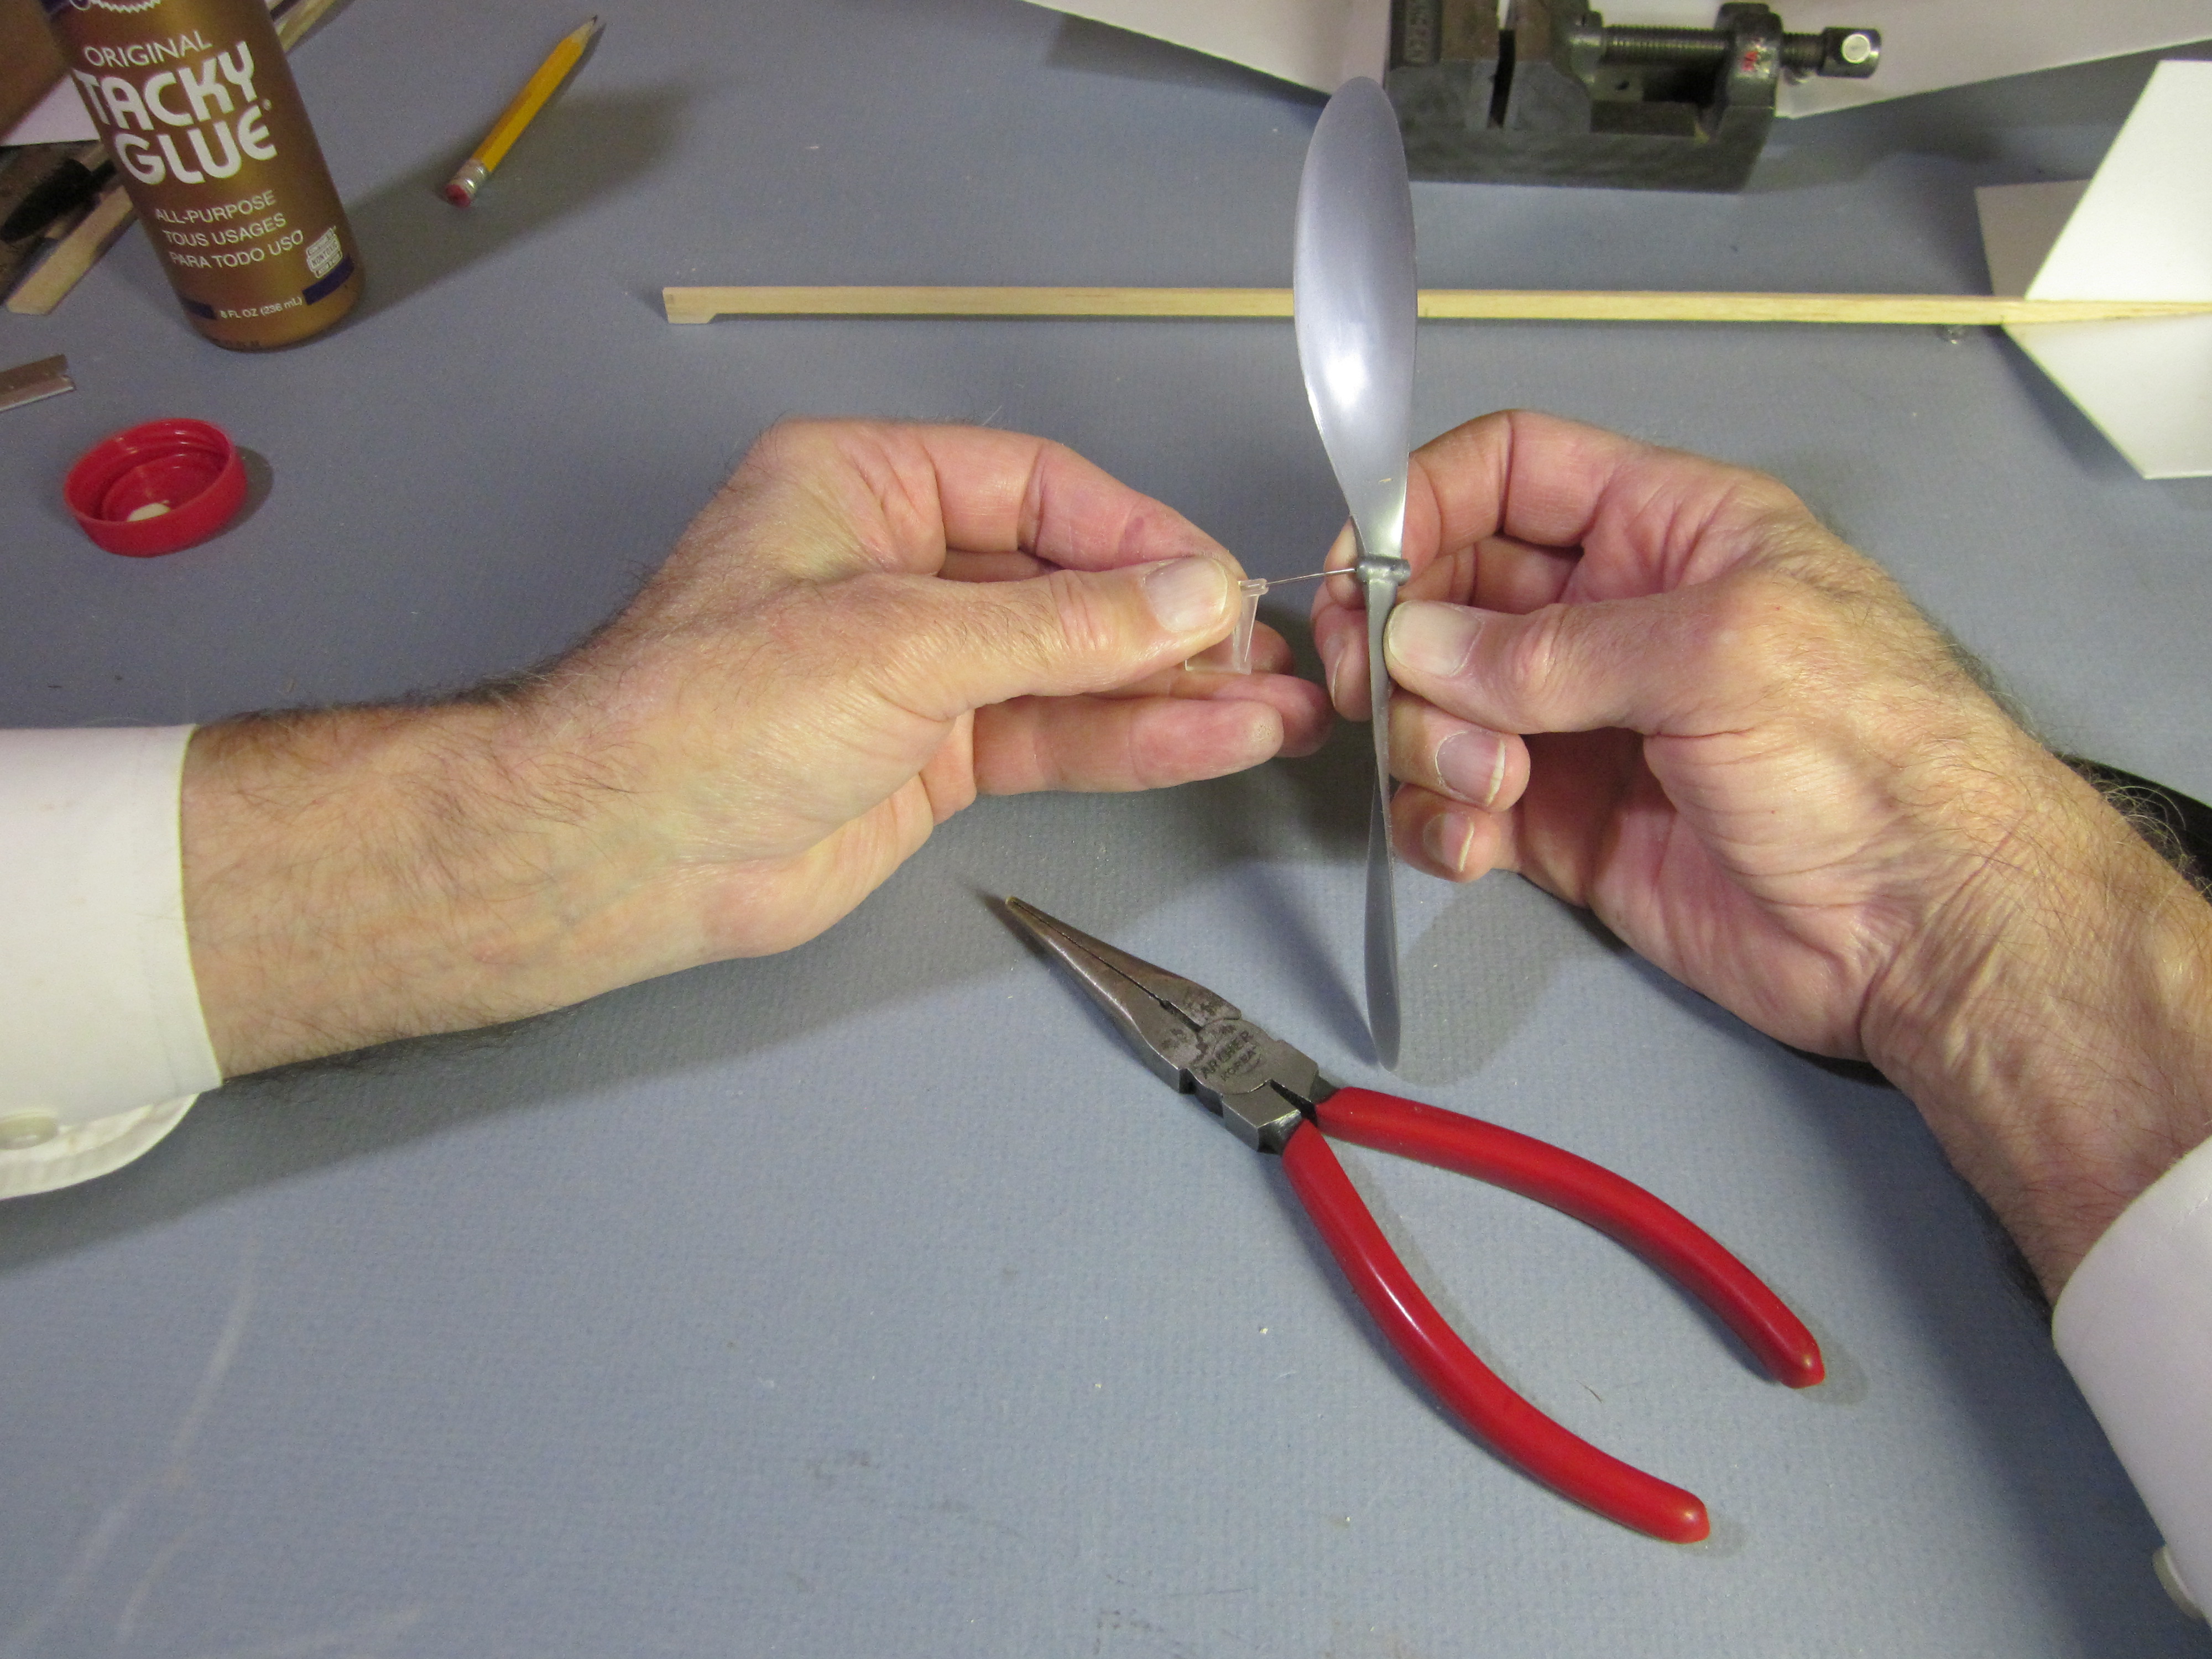
Make the propeller assembly
We want a 7″ prop with shaft and hanger. These can not be bought as a complete assembly, so we must make it up. I replaced a 6″ prop from an assembled unit with the 7″ prop.
 Bend the end of the prop shaft straight.
 Keep at it until the prop slides easily off the shaft. If necessary straighten out any curve in the prop shaft where it will go through the prop hub.
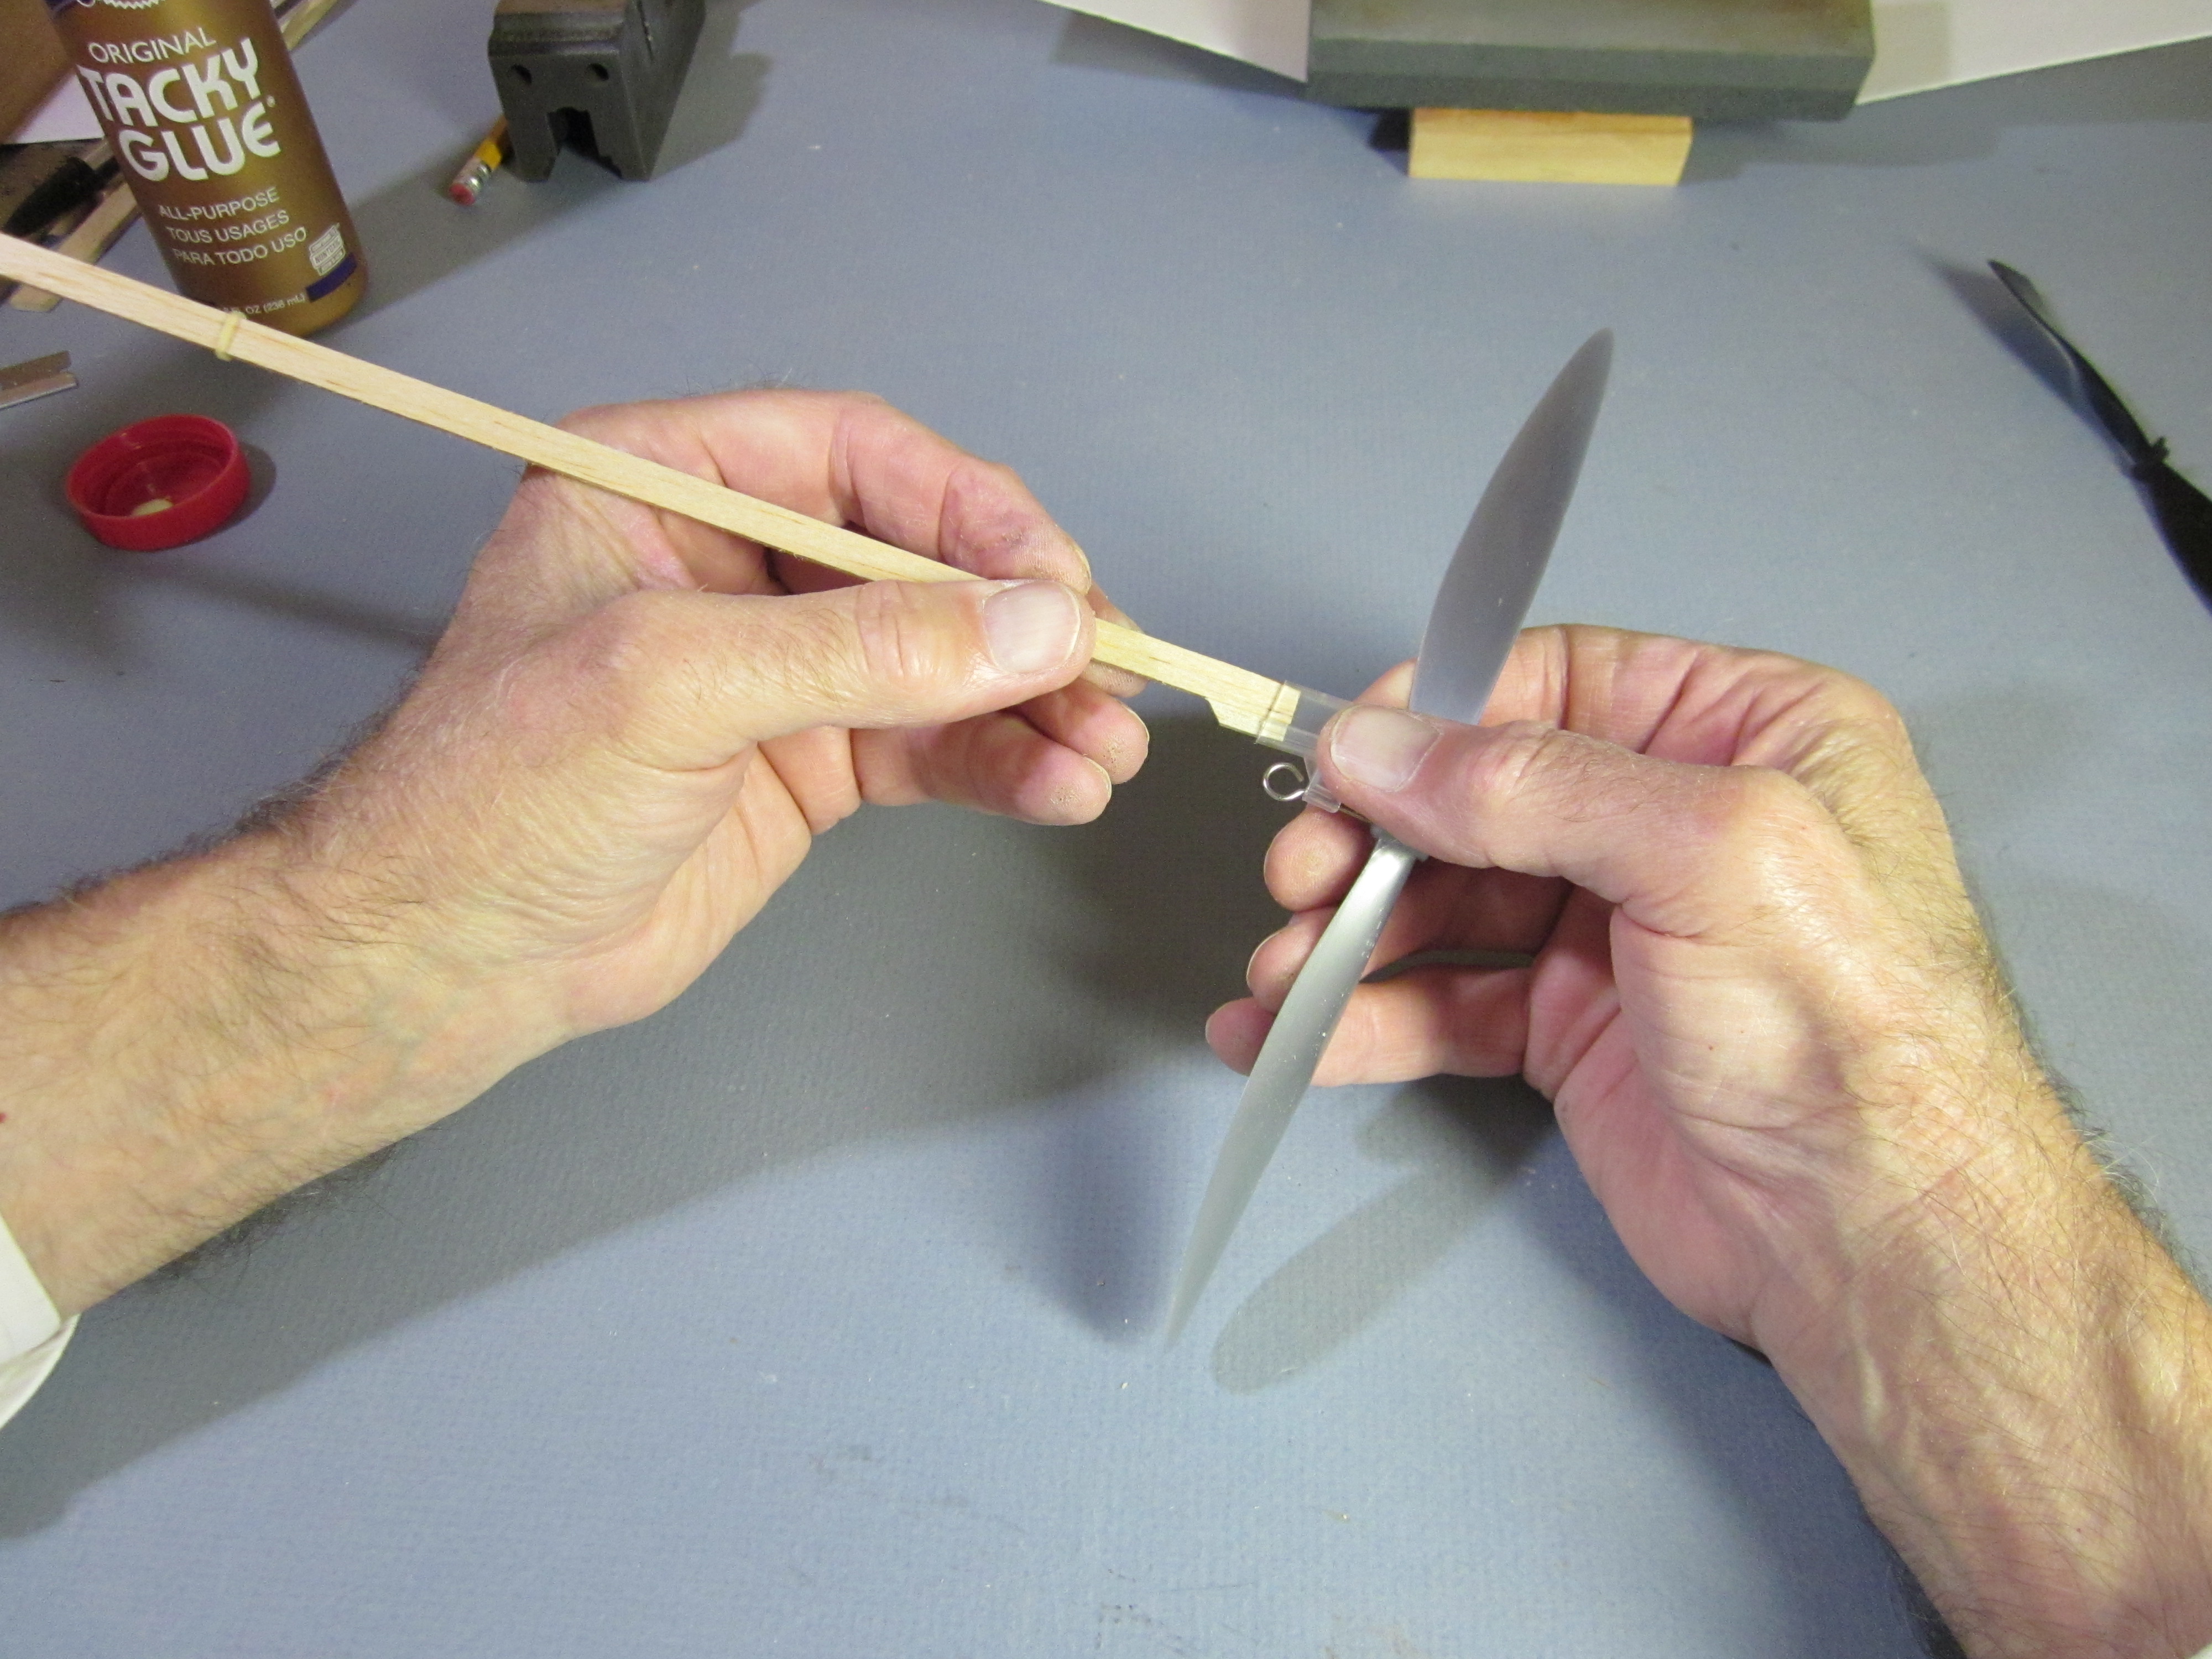
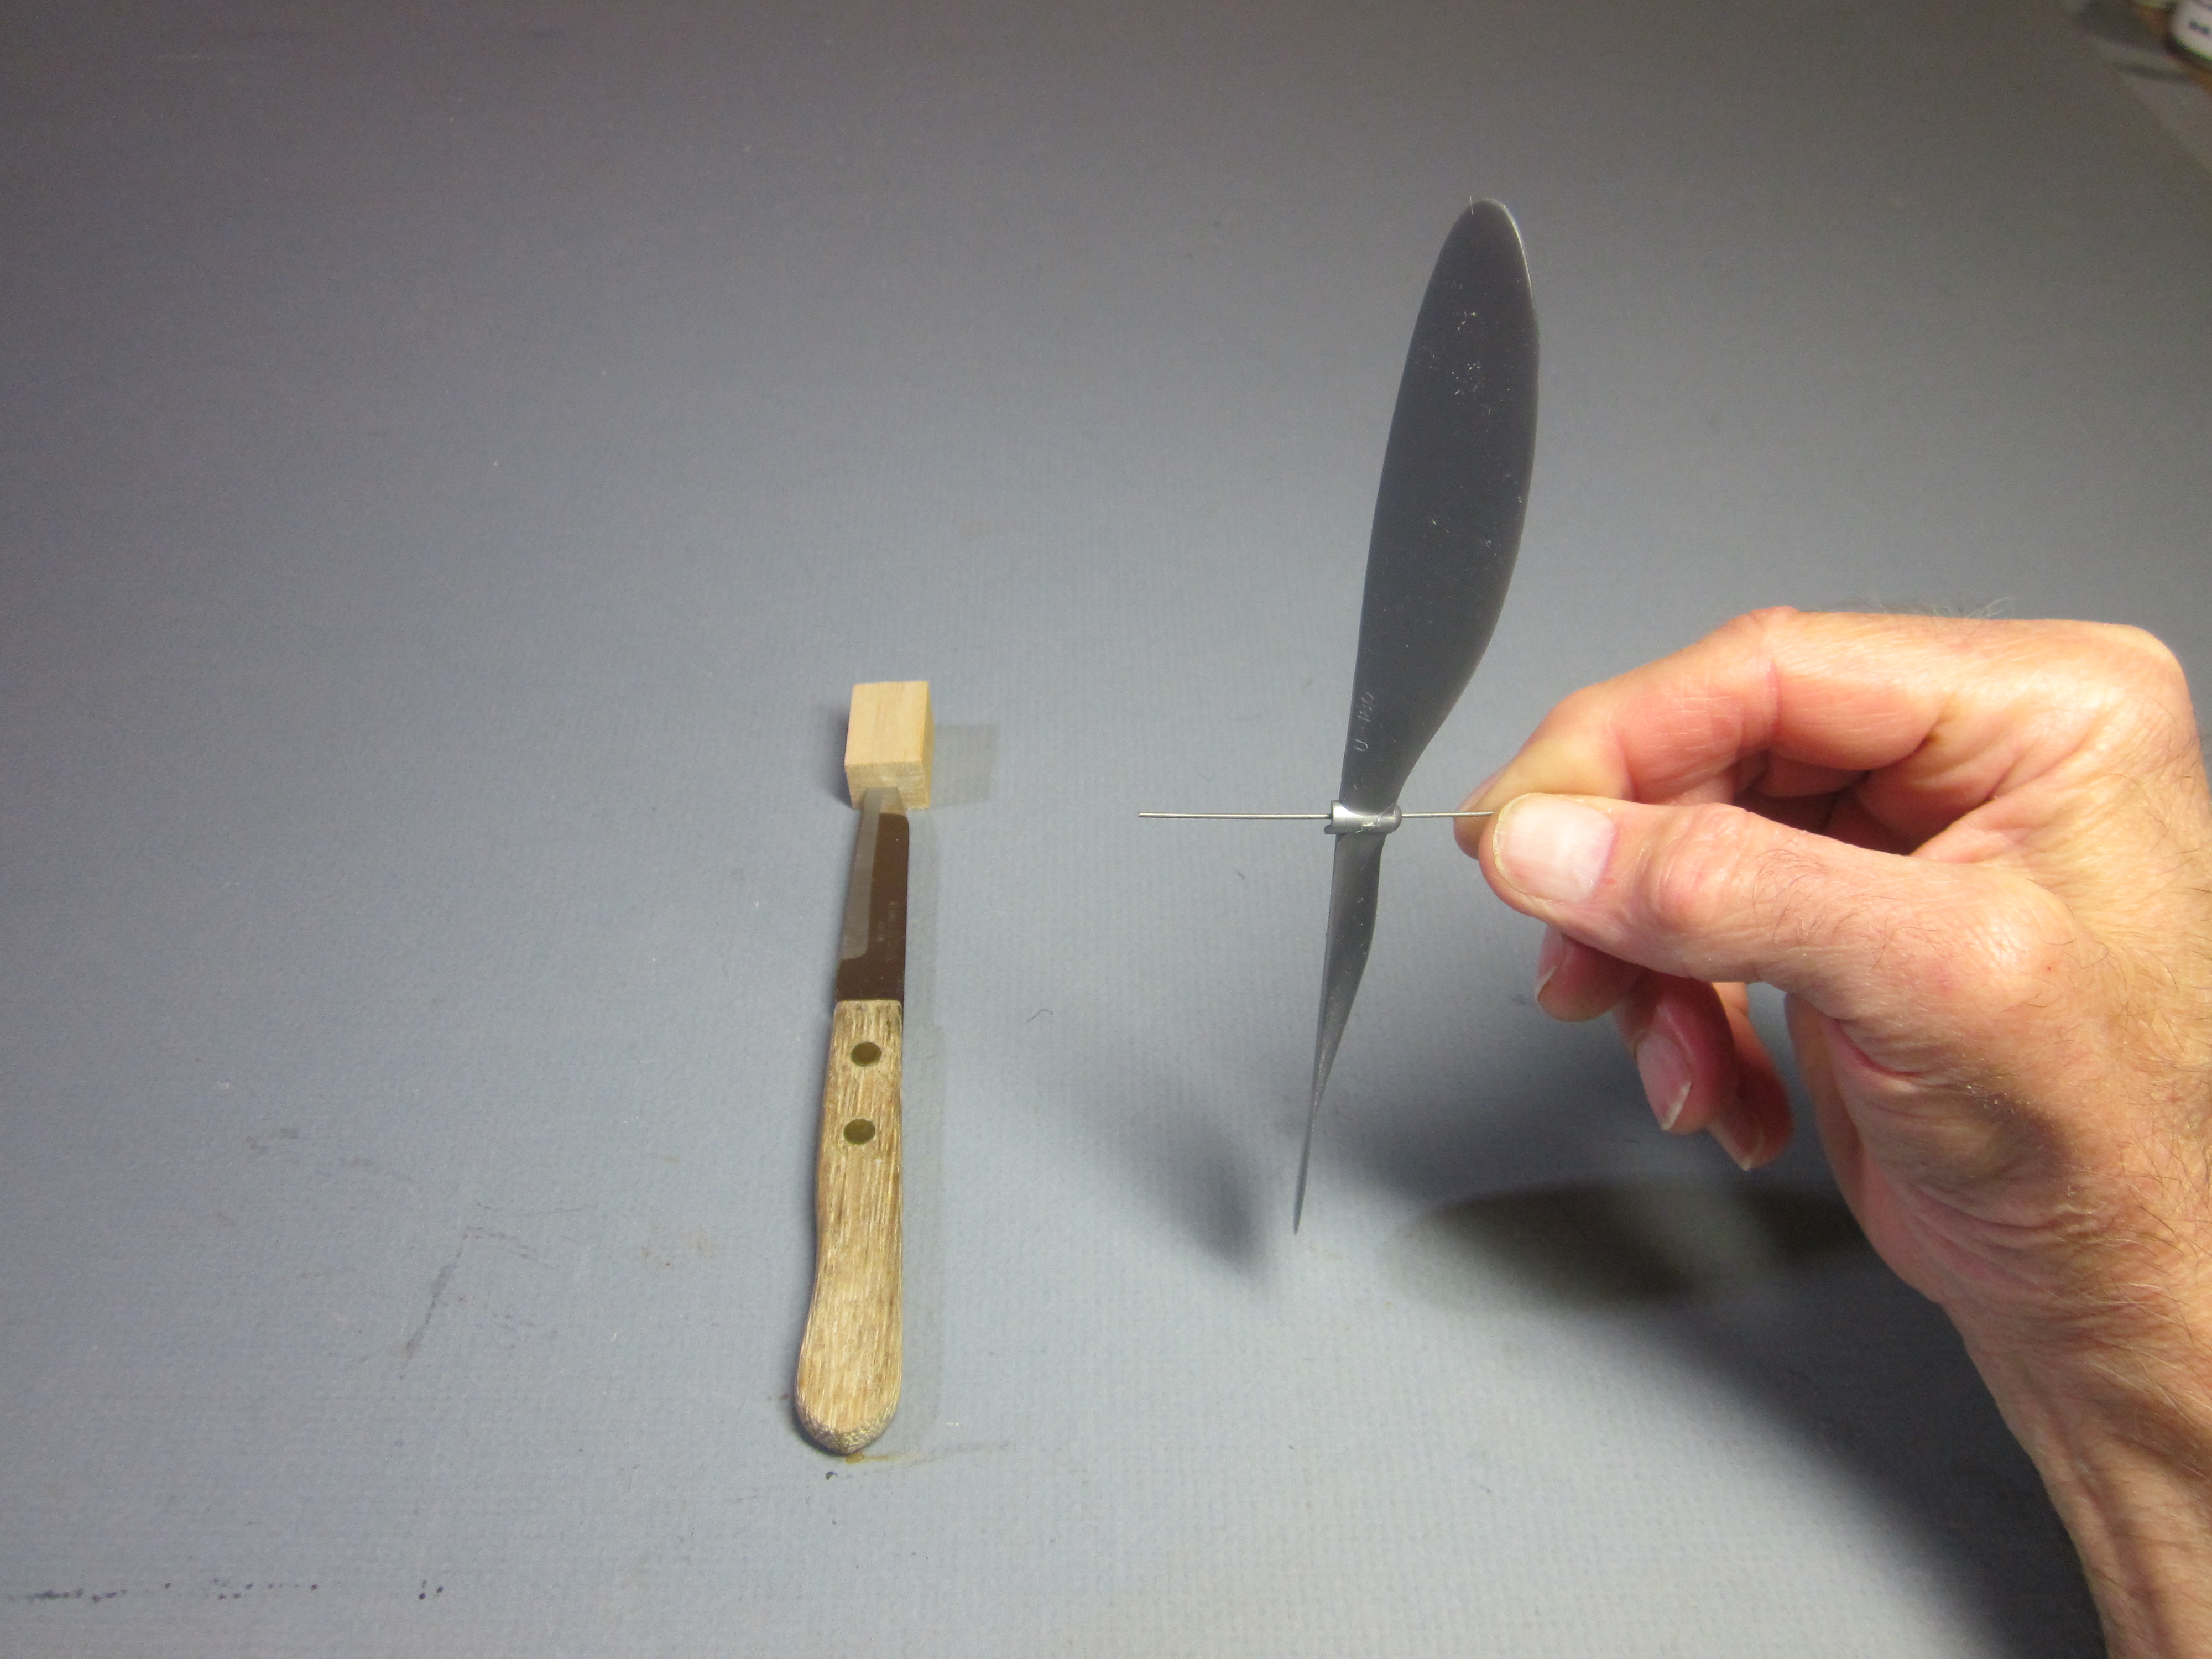 Most plastic props aren’t balanced. If you put them on a horizontal shaft, one blade will swing down. The prop will vibrate the entire airplane, wasting energy.
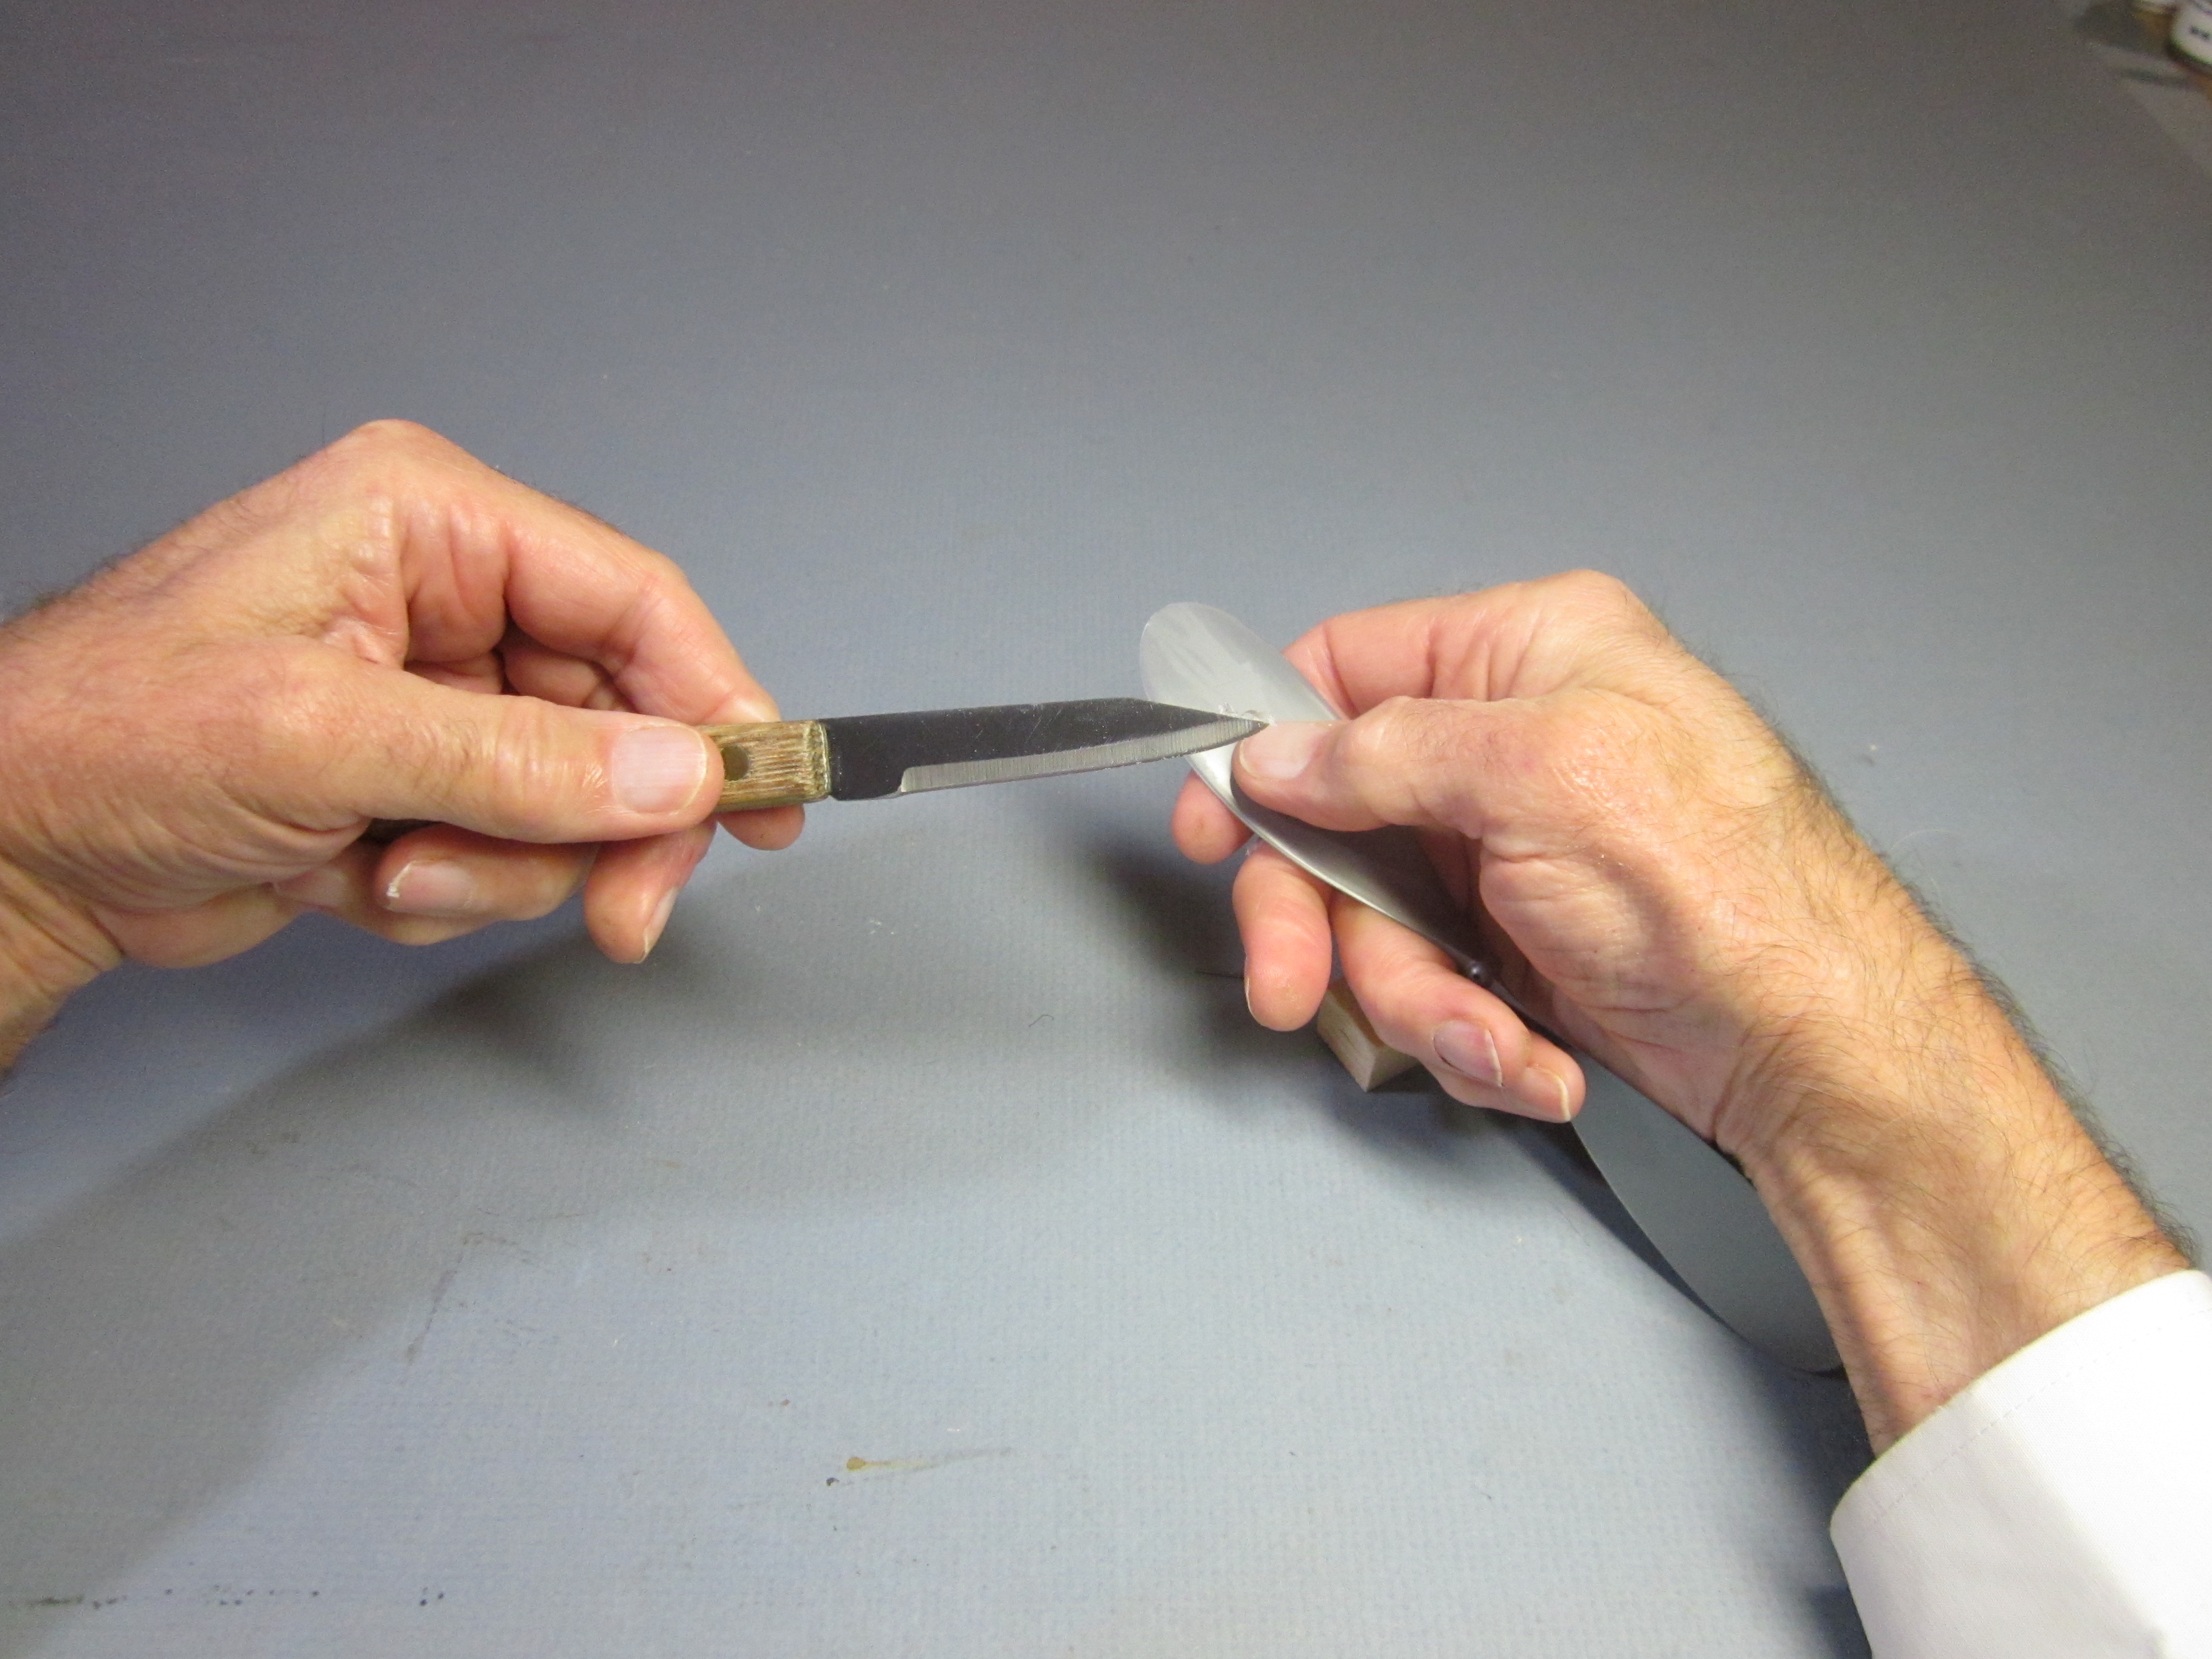 Many people scrape the back of the heavy prop blade with a razor blade. This doesn’t work very well, because the straight edge of the razor does not fit the compound curvature of the prop blade. Also, scraping from side to side across the blade risks going over the edge and cutting your finger. I use a kitchen paring knife with a curved edge near the tip.
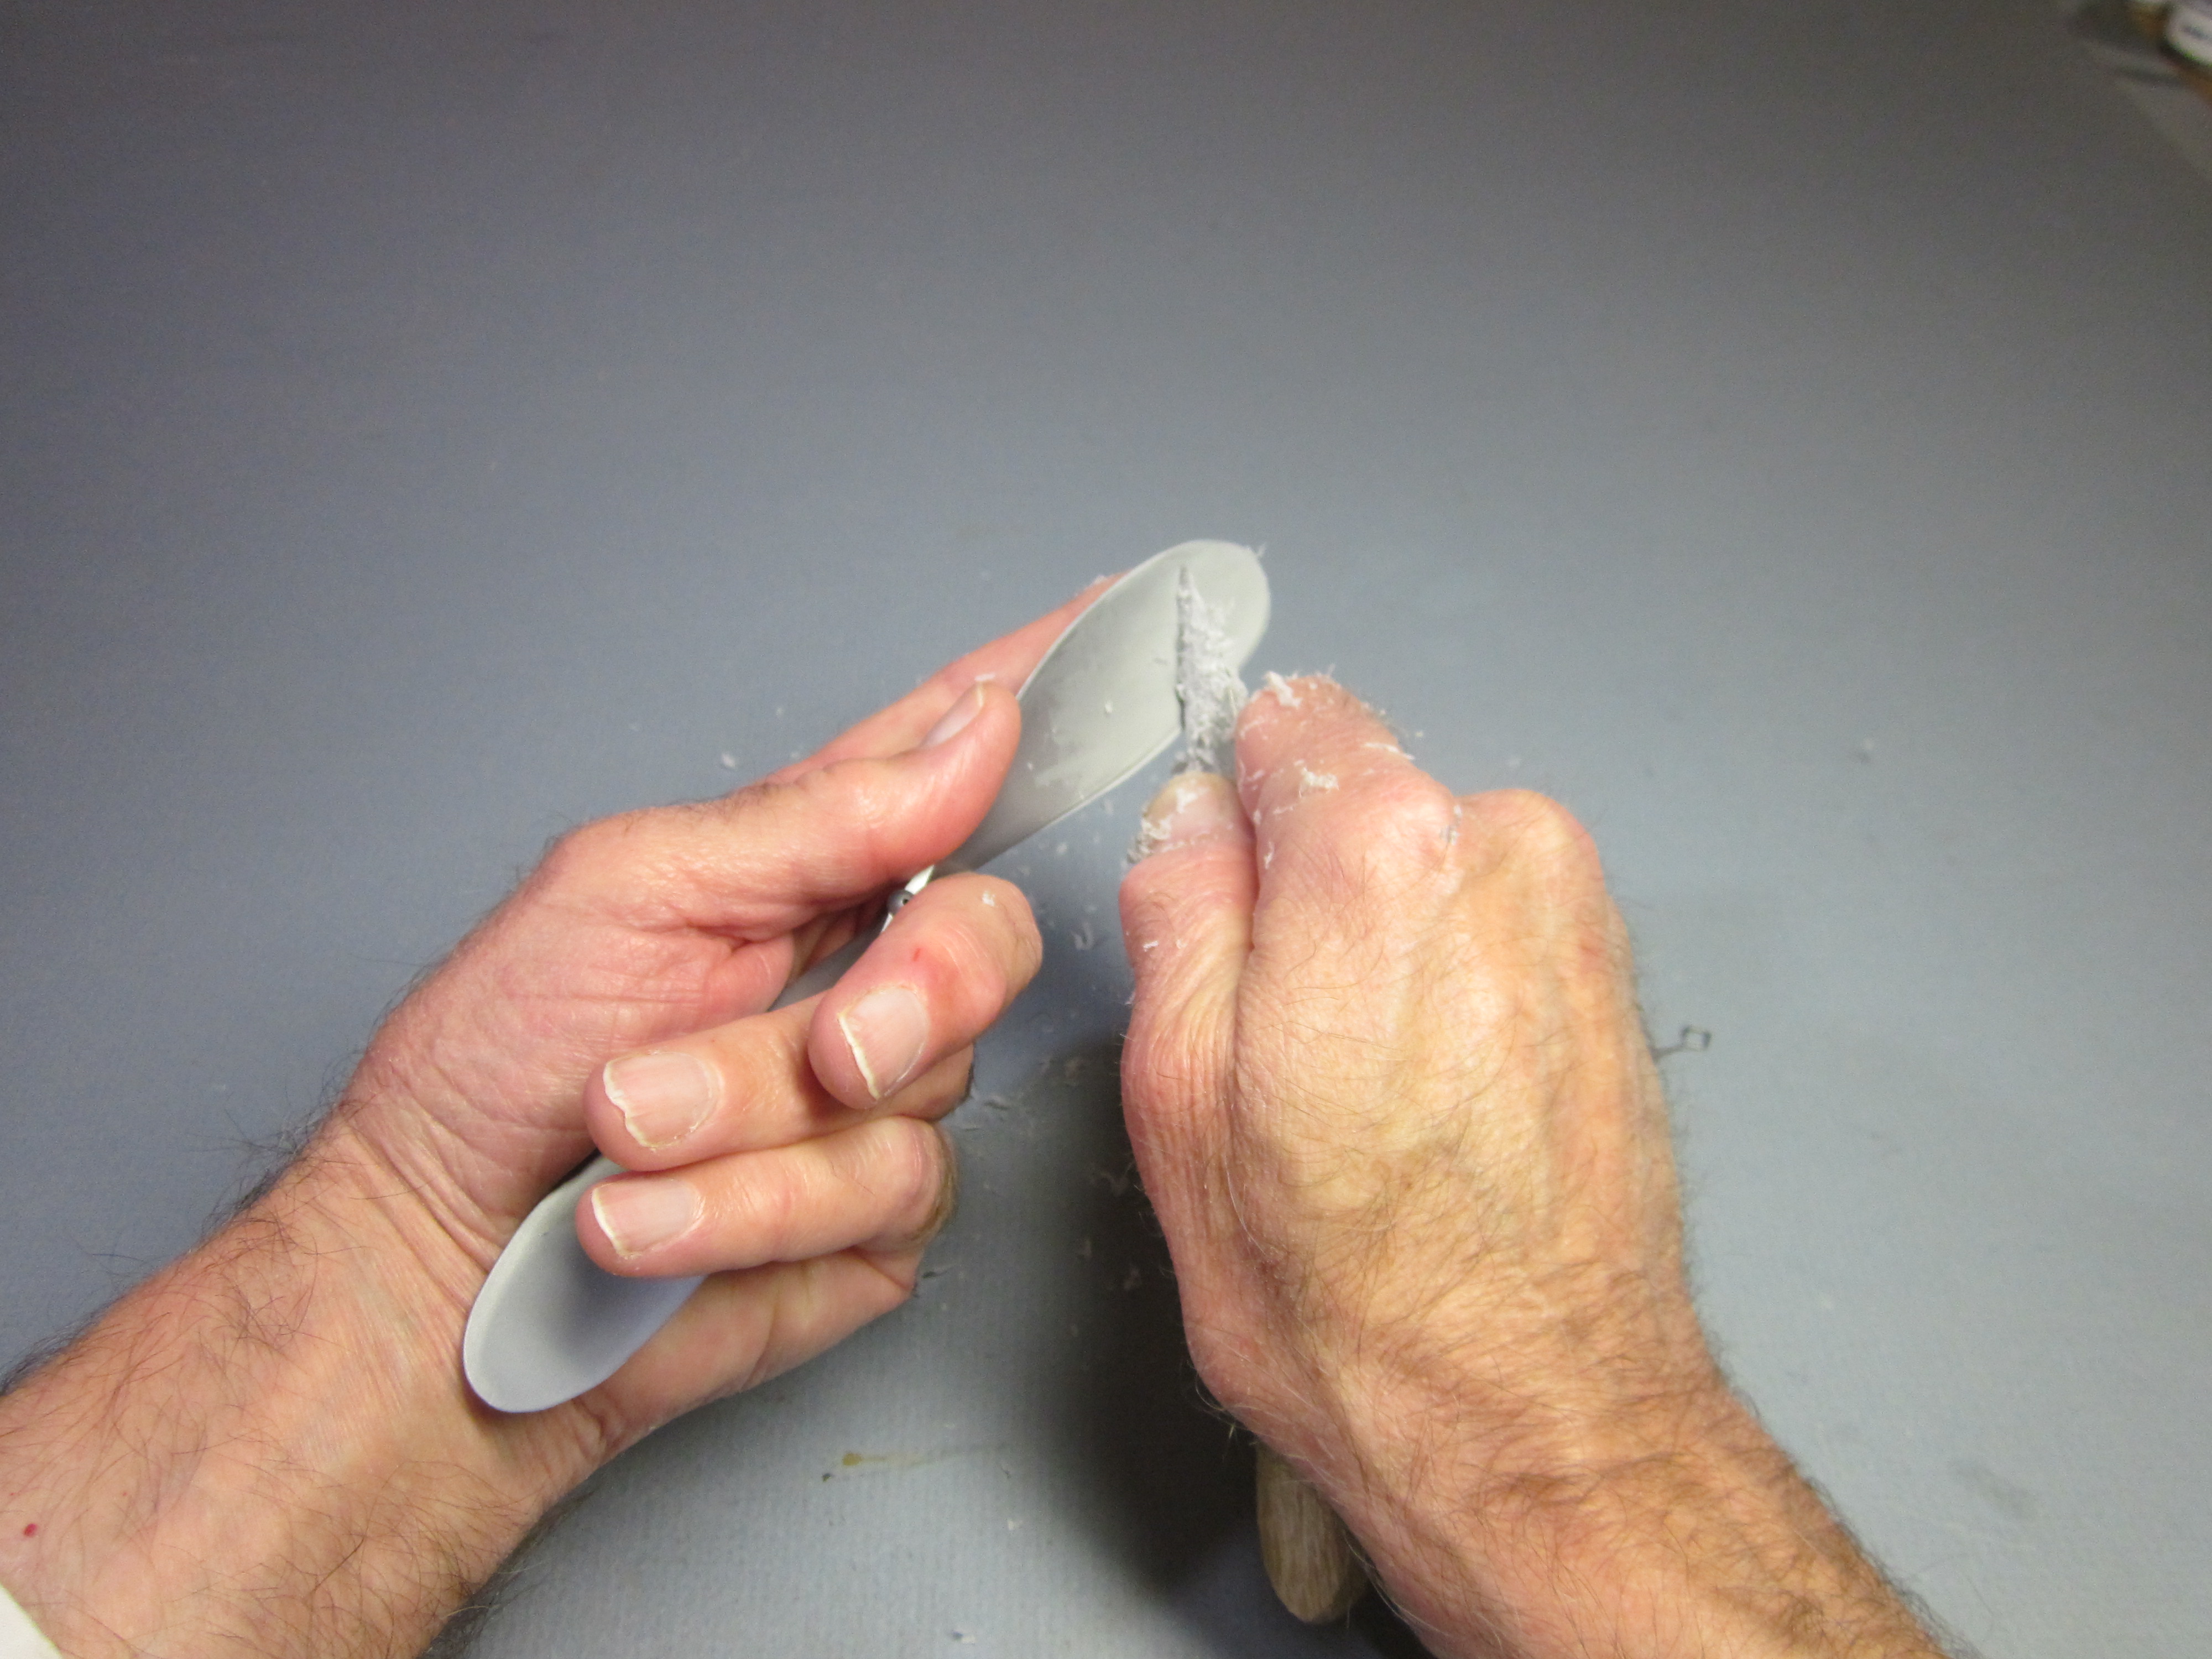 Angling the curved knife blade permits scraping off a wide area of the prop blade. Scraping toward the tip prevents hitting fingers.
 Keep scraping the heavy blade, checking for balance from time to time, until the prop balances.
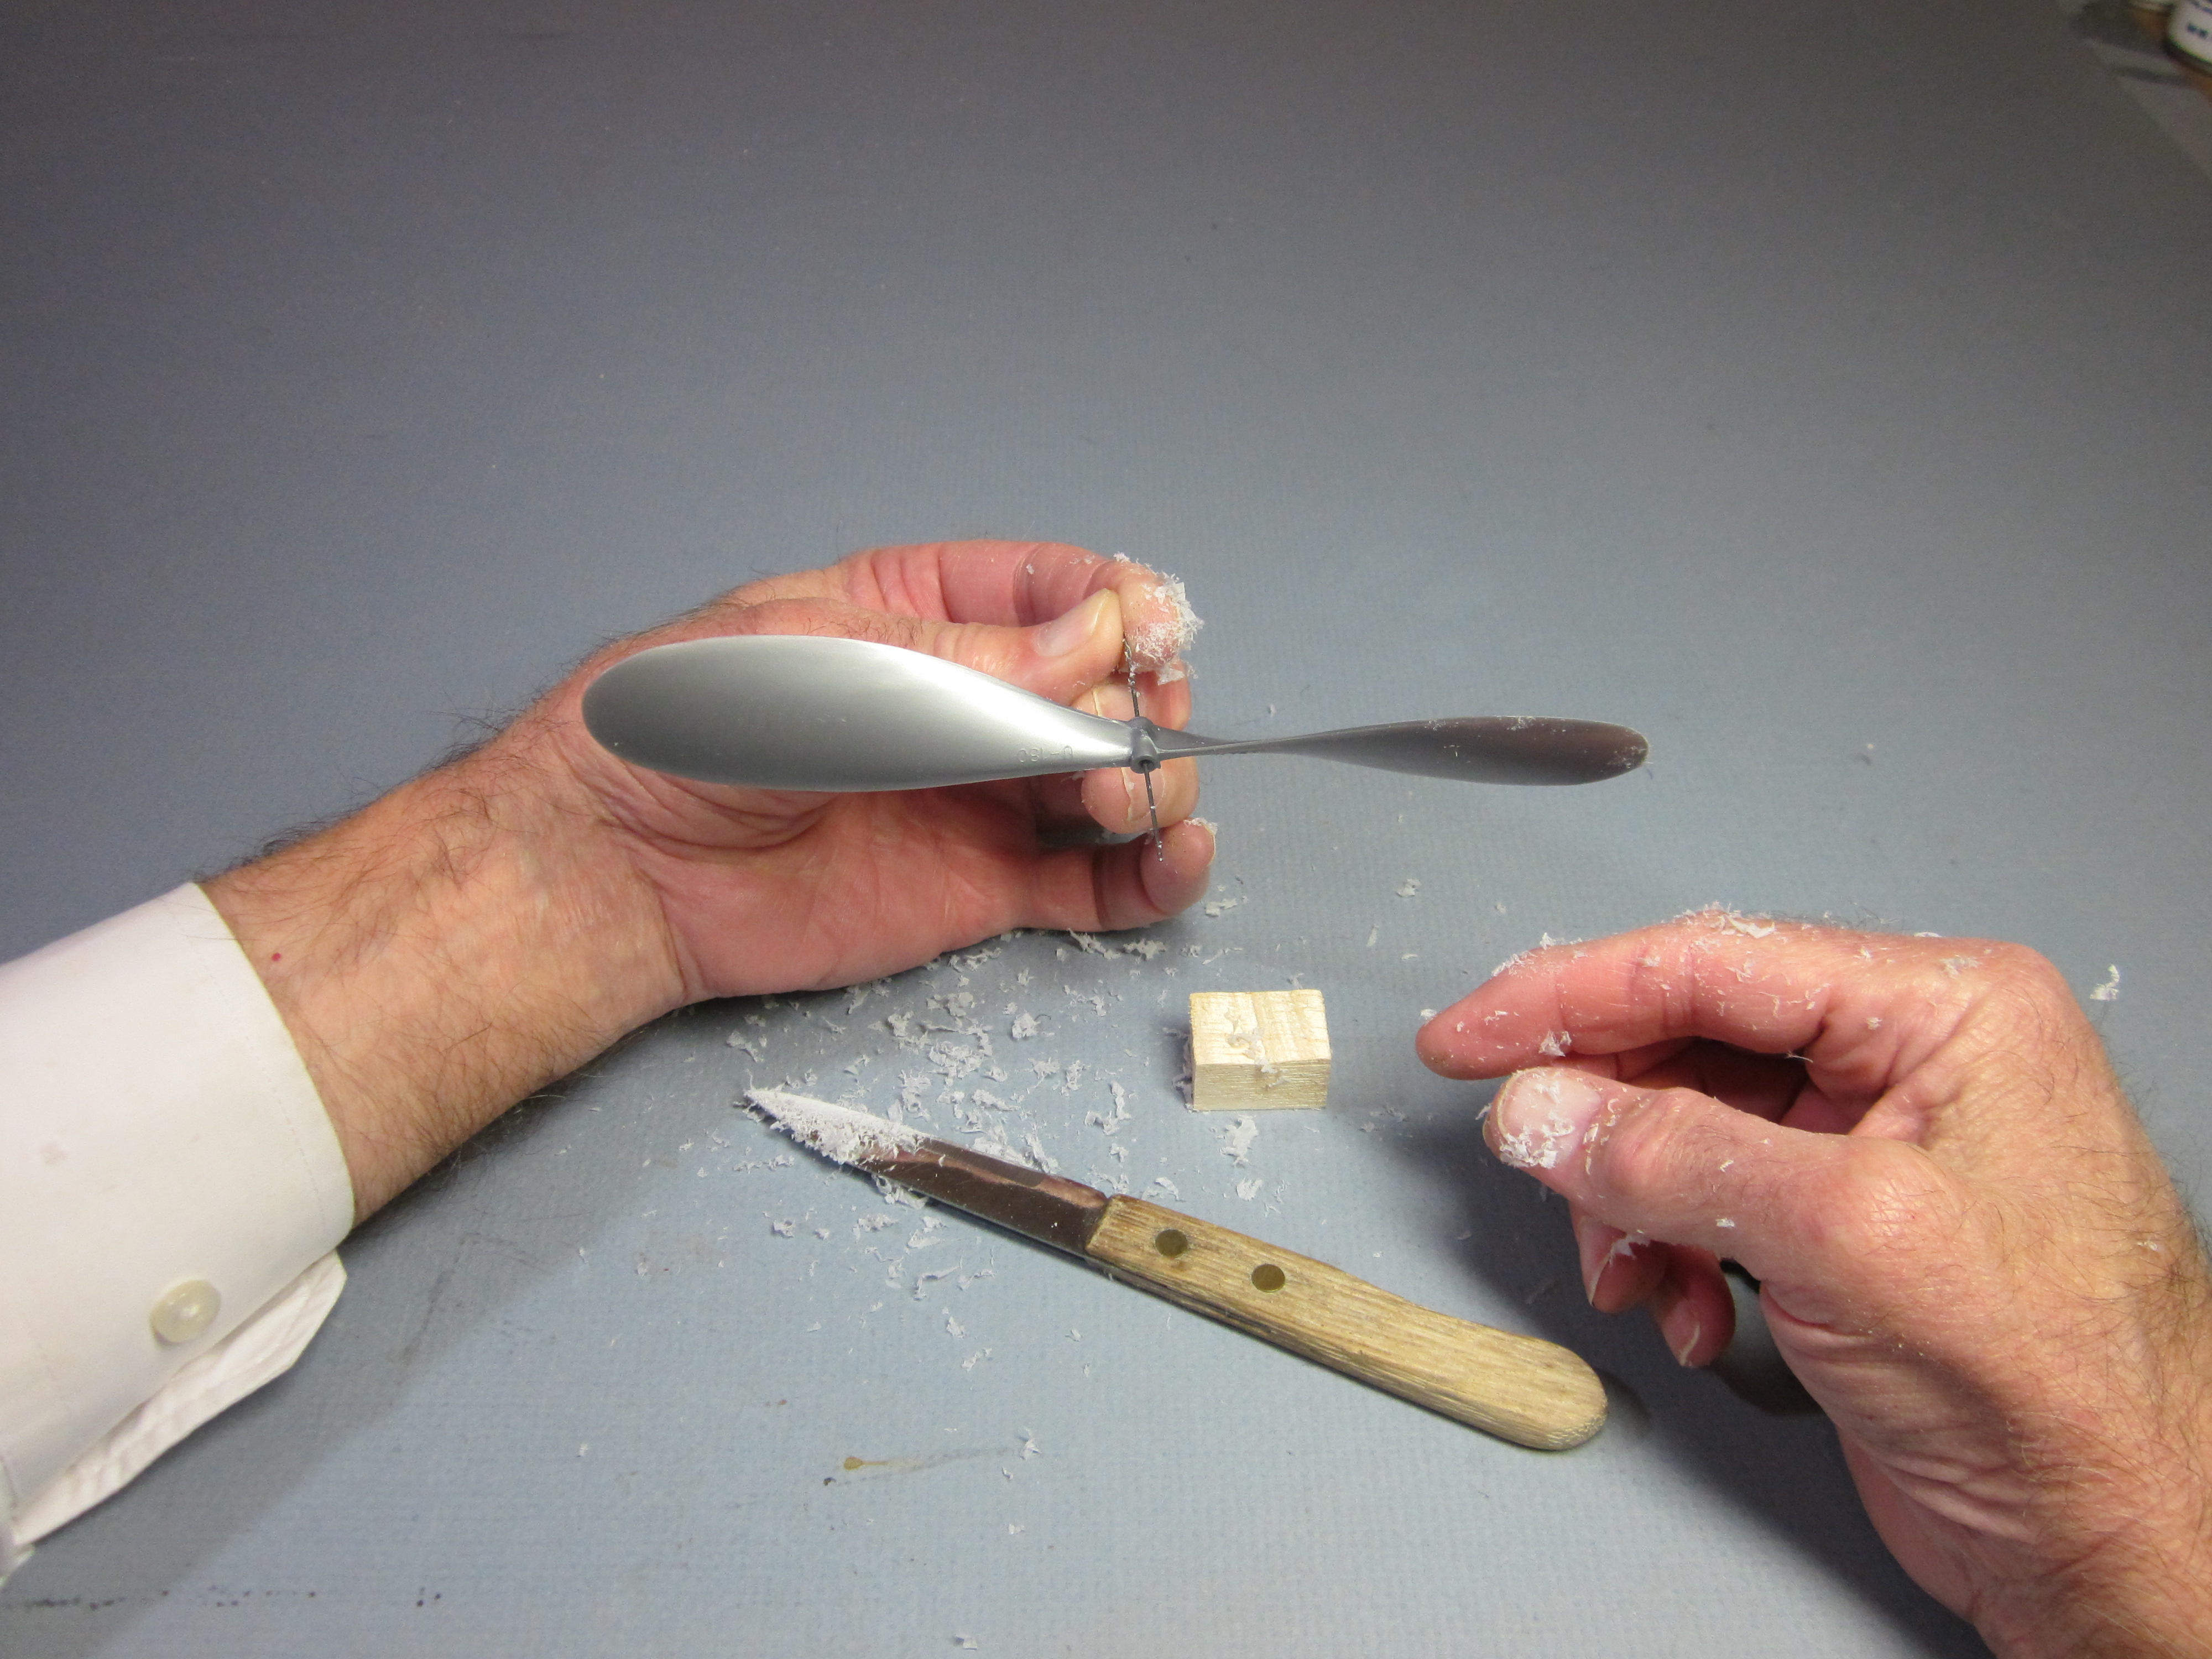
 With the prop shaft through the bearing, hook to the rear, put the shaft through the back side of the prop. This is the side where the hub is rounded.
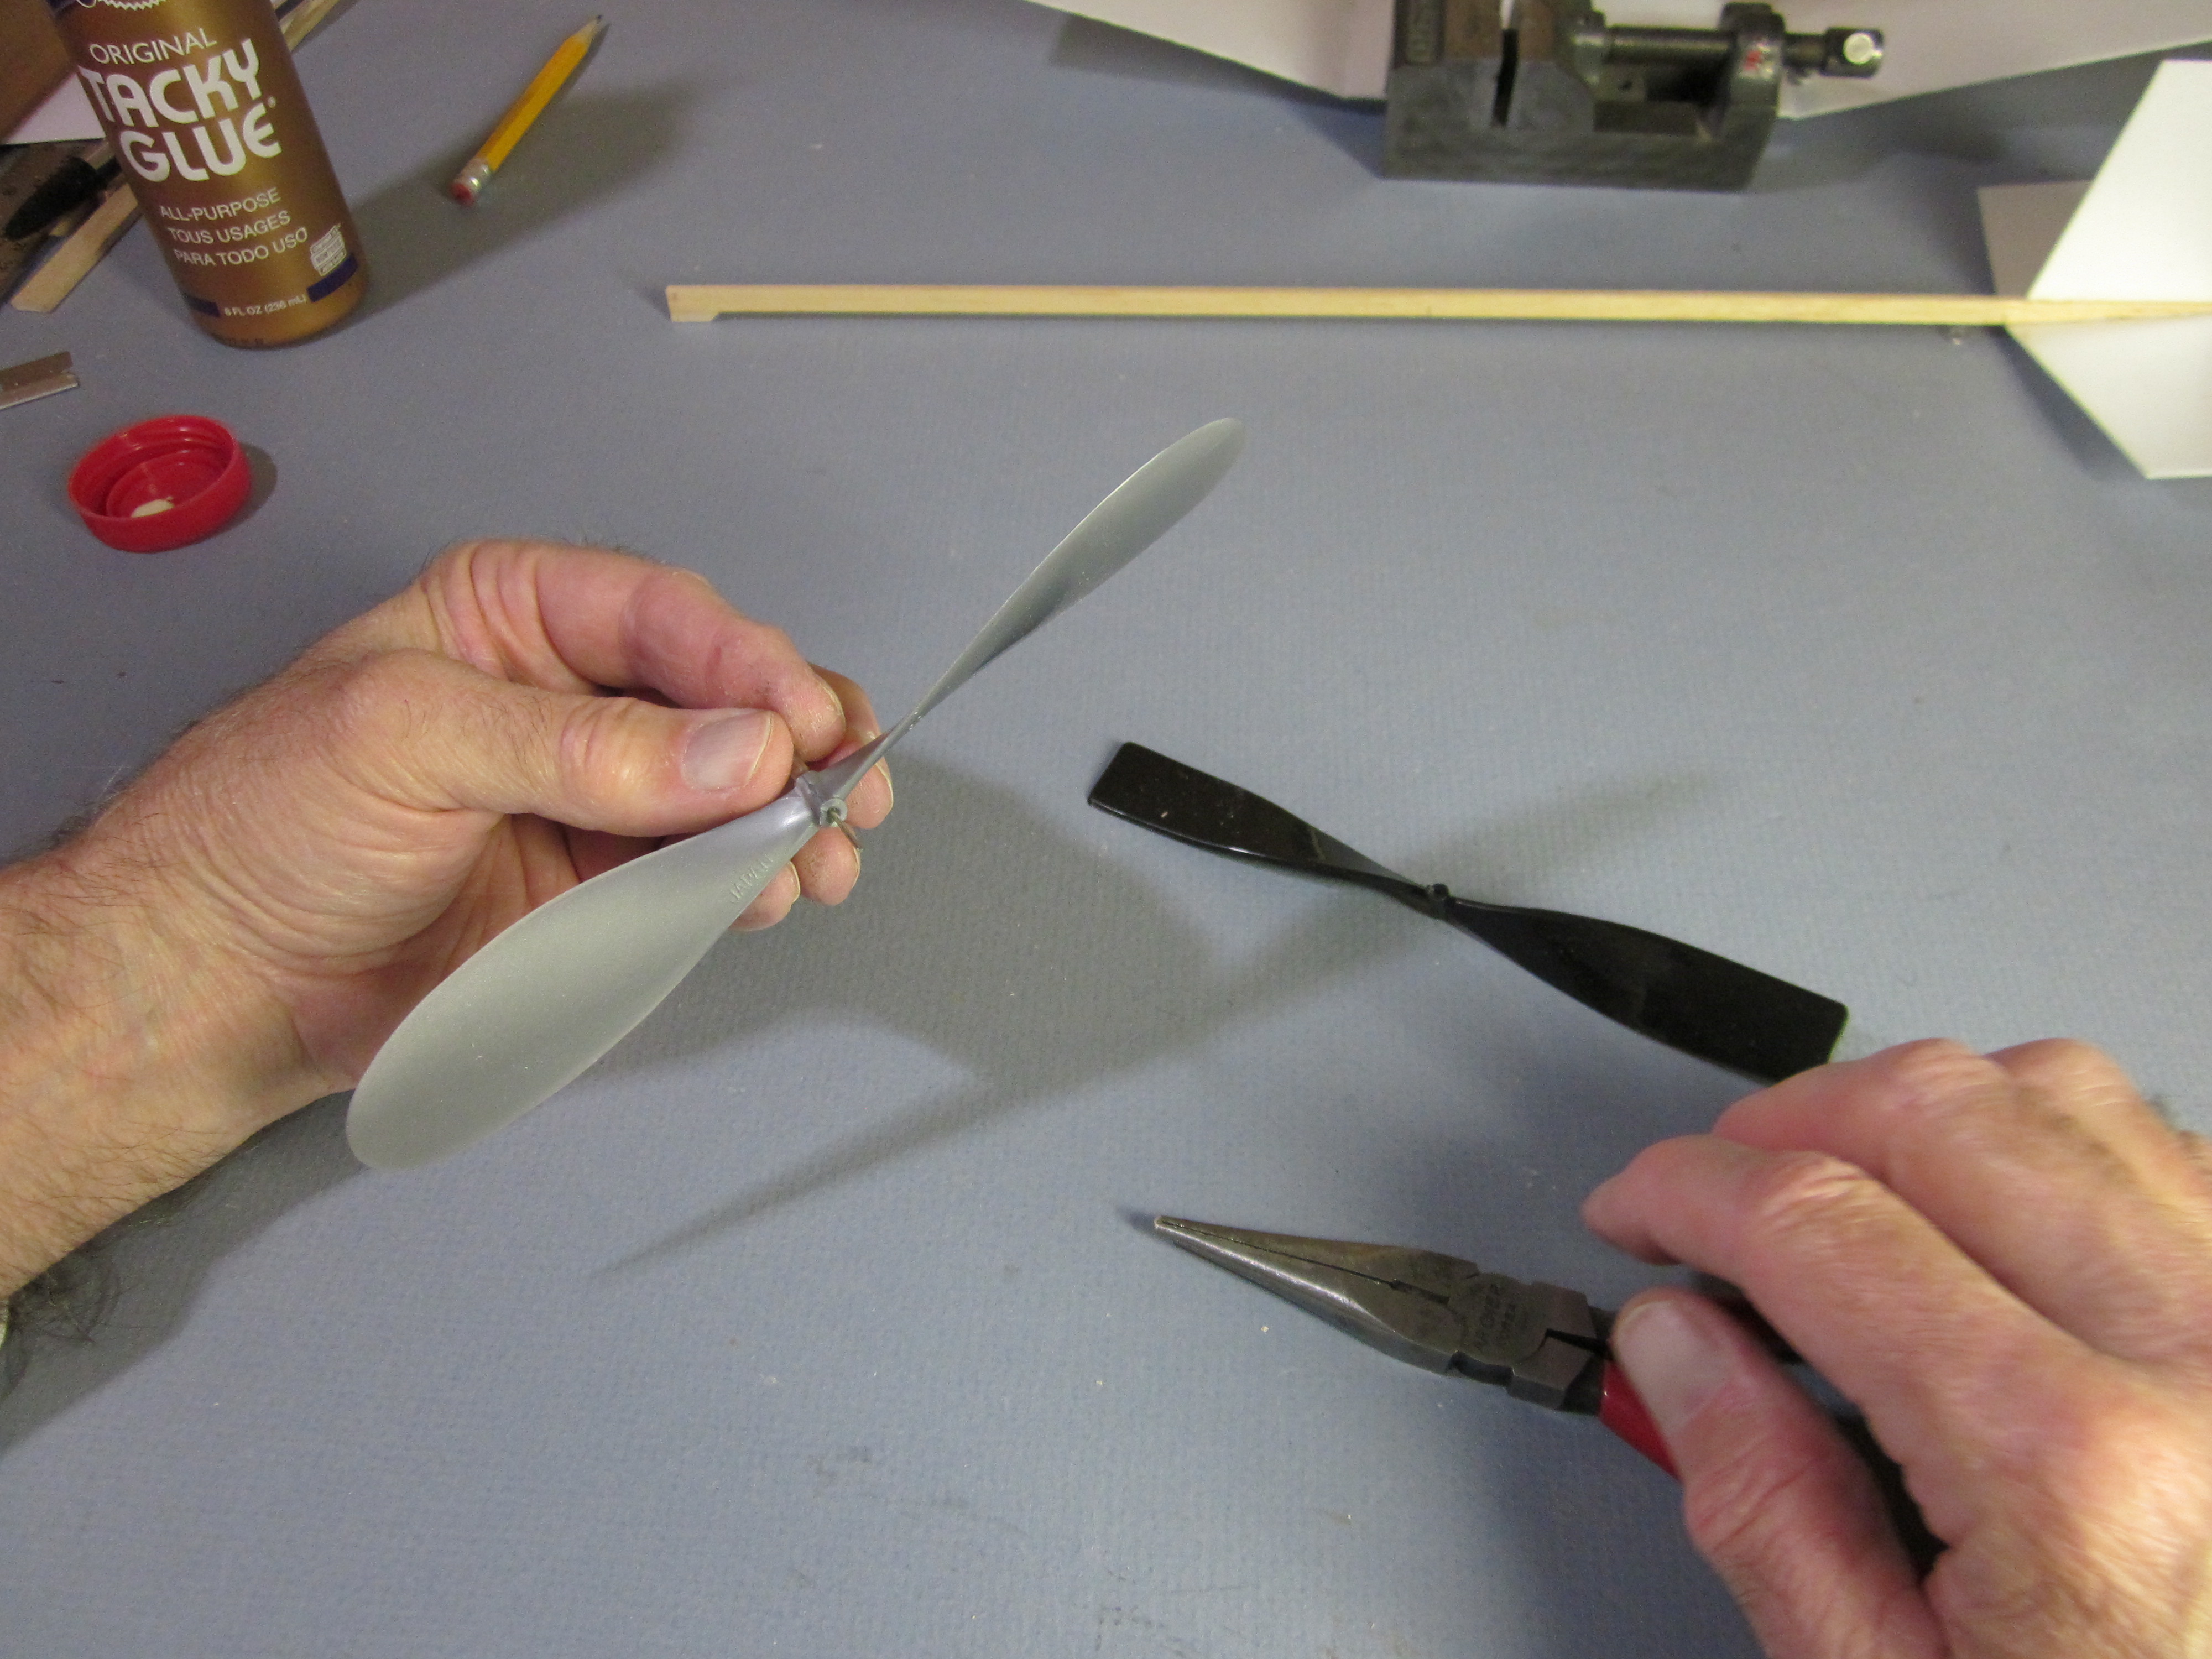 The front of the prop hub has the freewheel ramp on it.
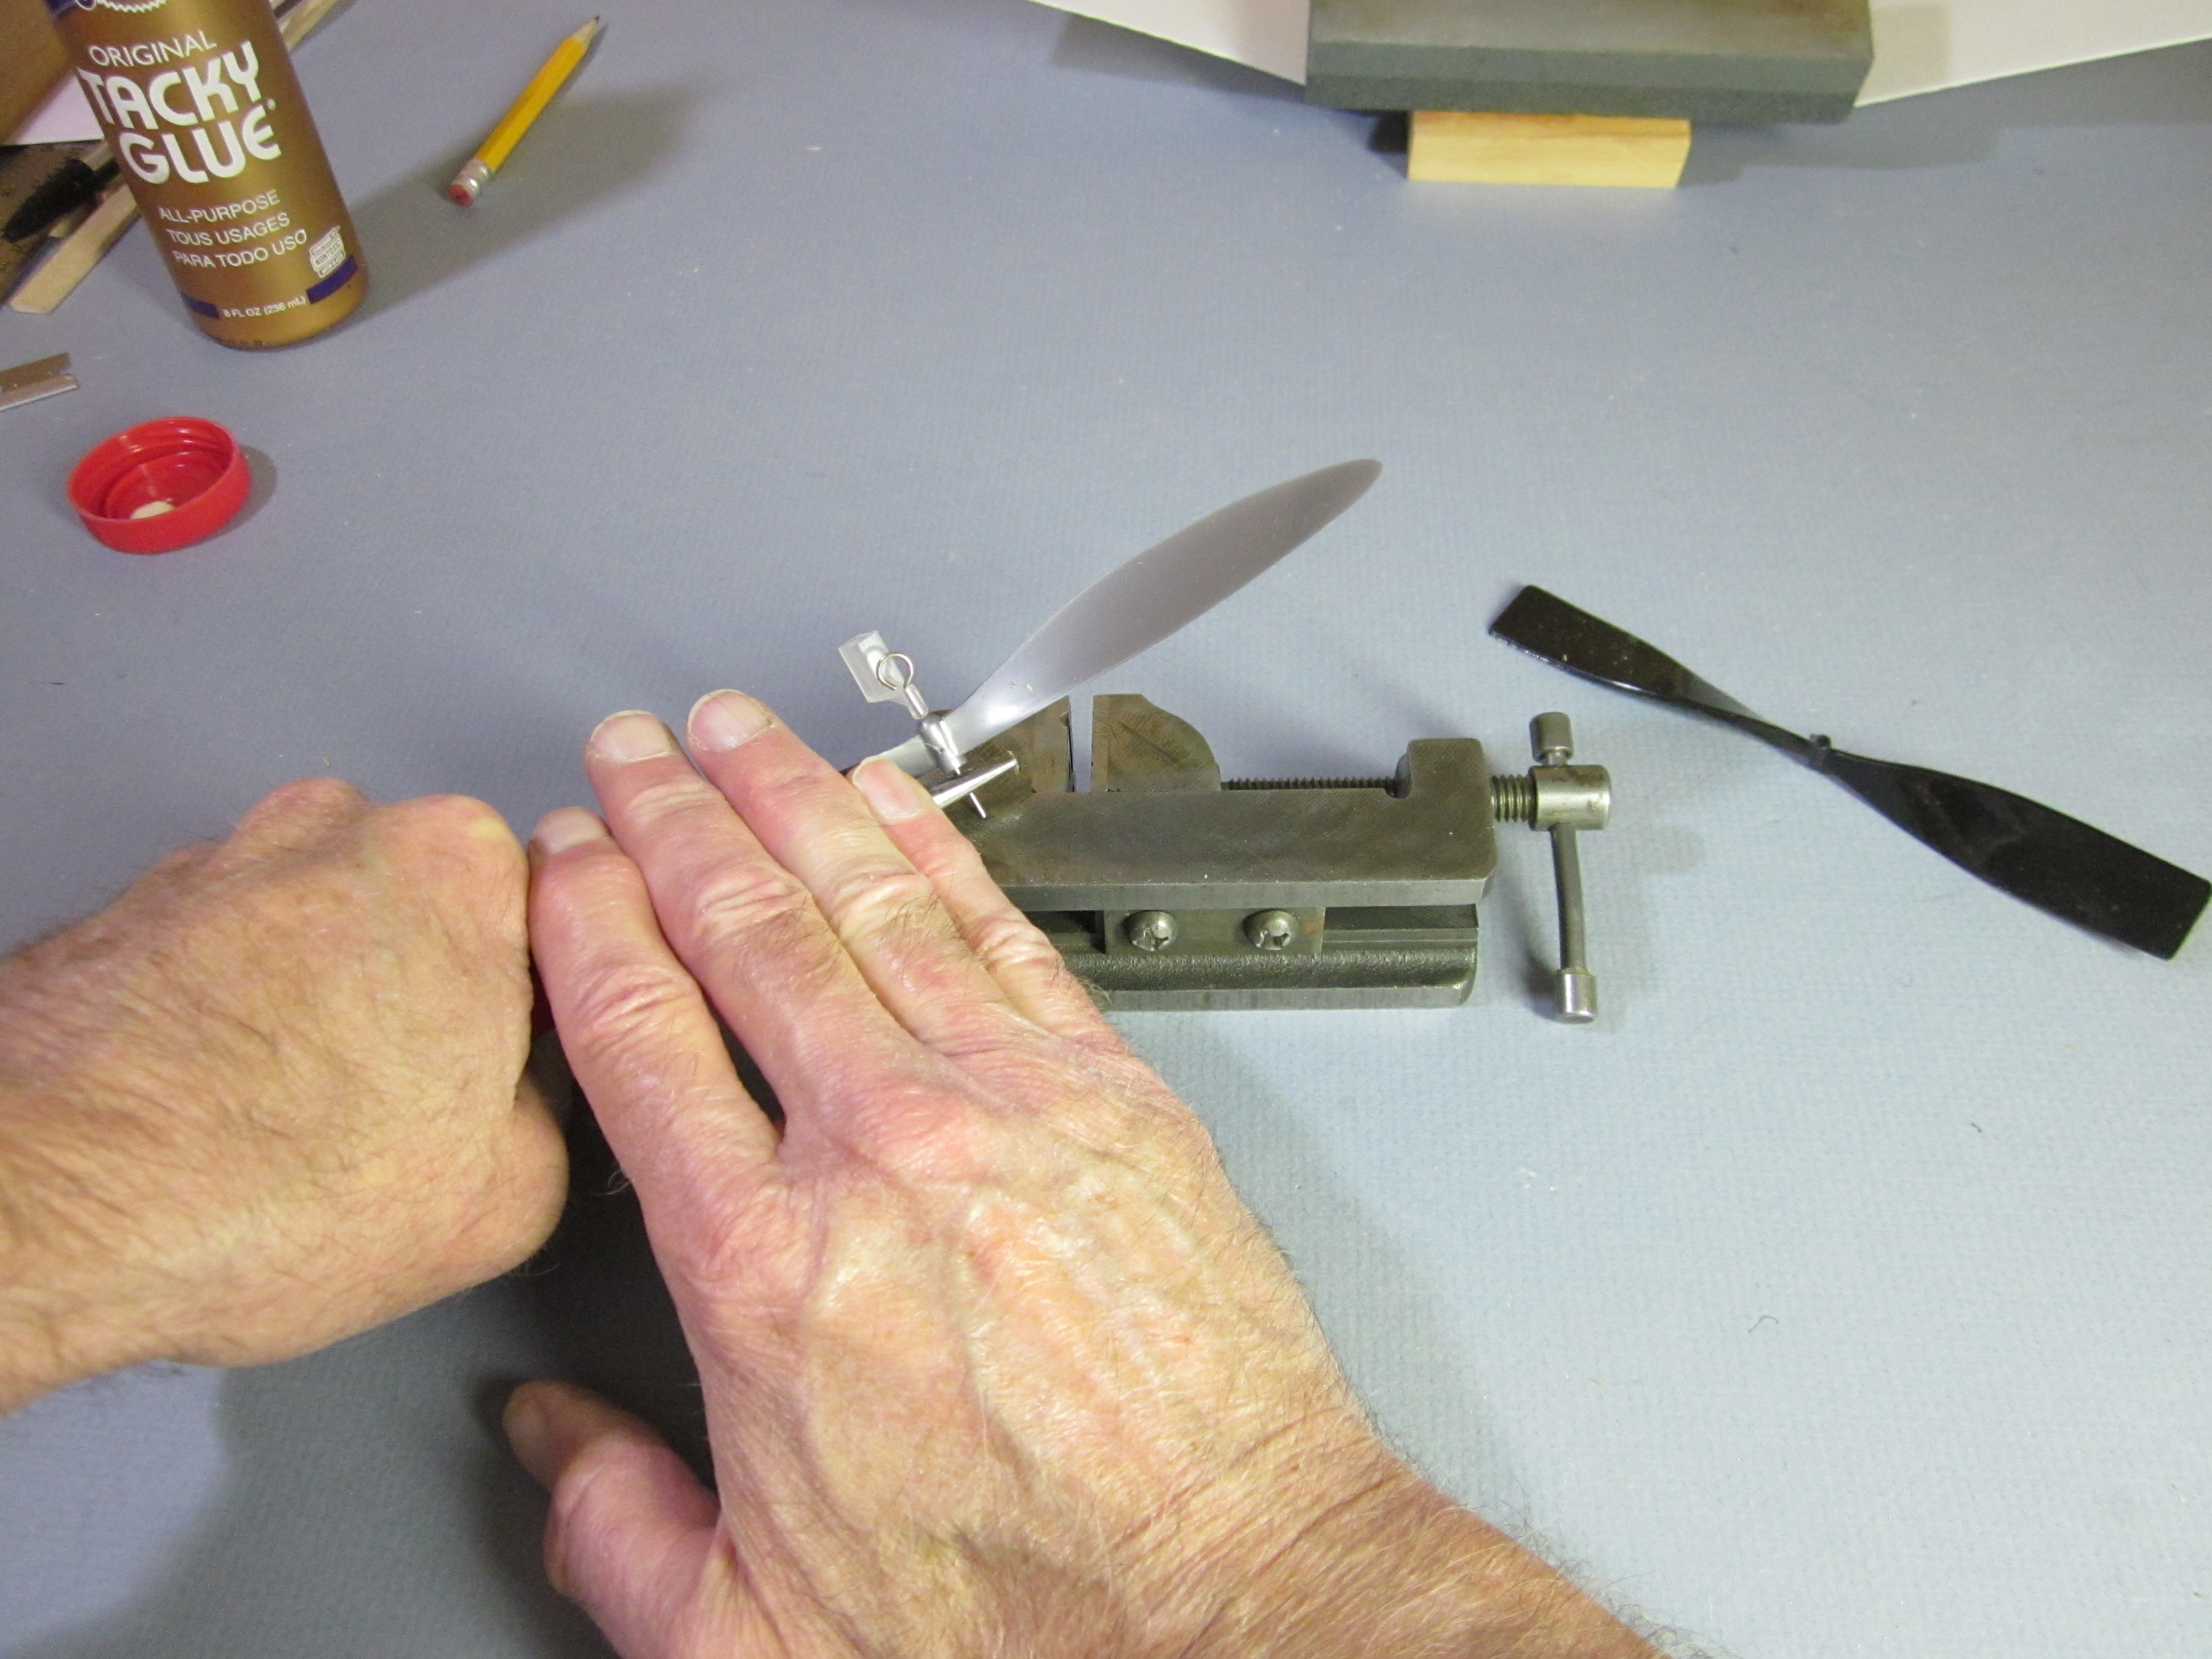 If we grab the end of the shaft with the pliers and bend it over, we will likely put a curve in the shaft. That can jam the prop and prevent it from freewheeling. To avoid that, we grip the shaft tightly and bend the end over by pressing it against a hard object.
 Bend it to almost a right angle.
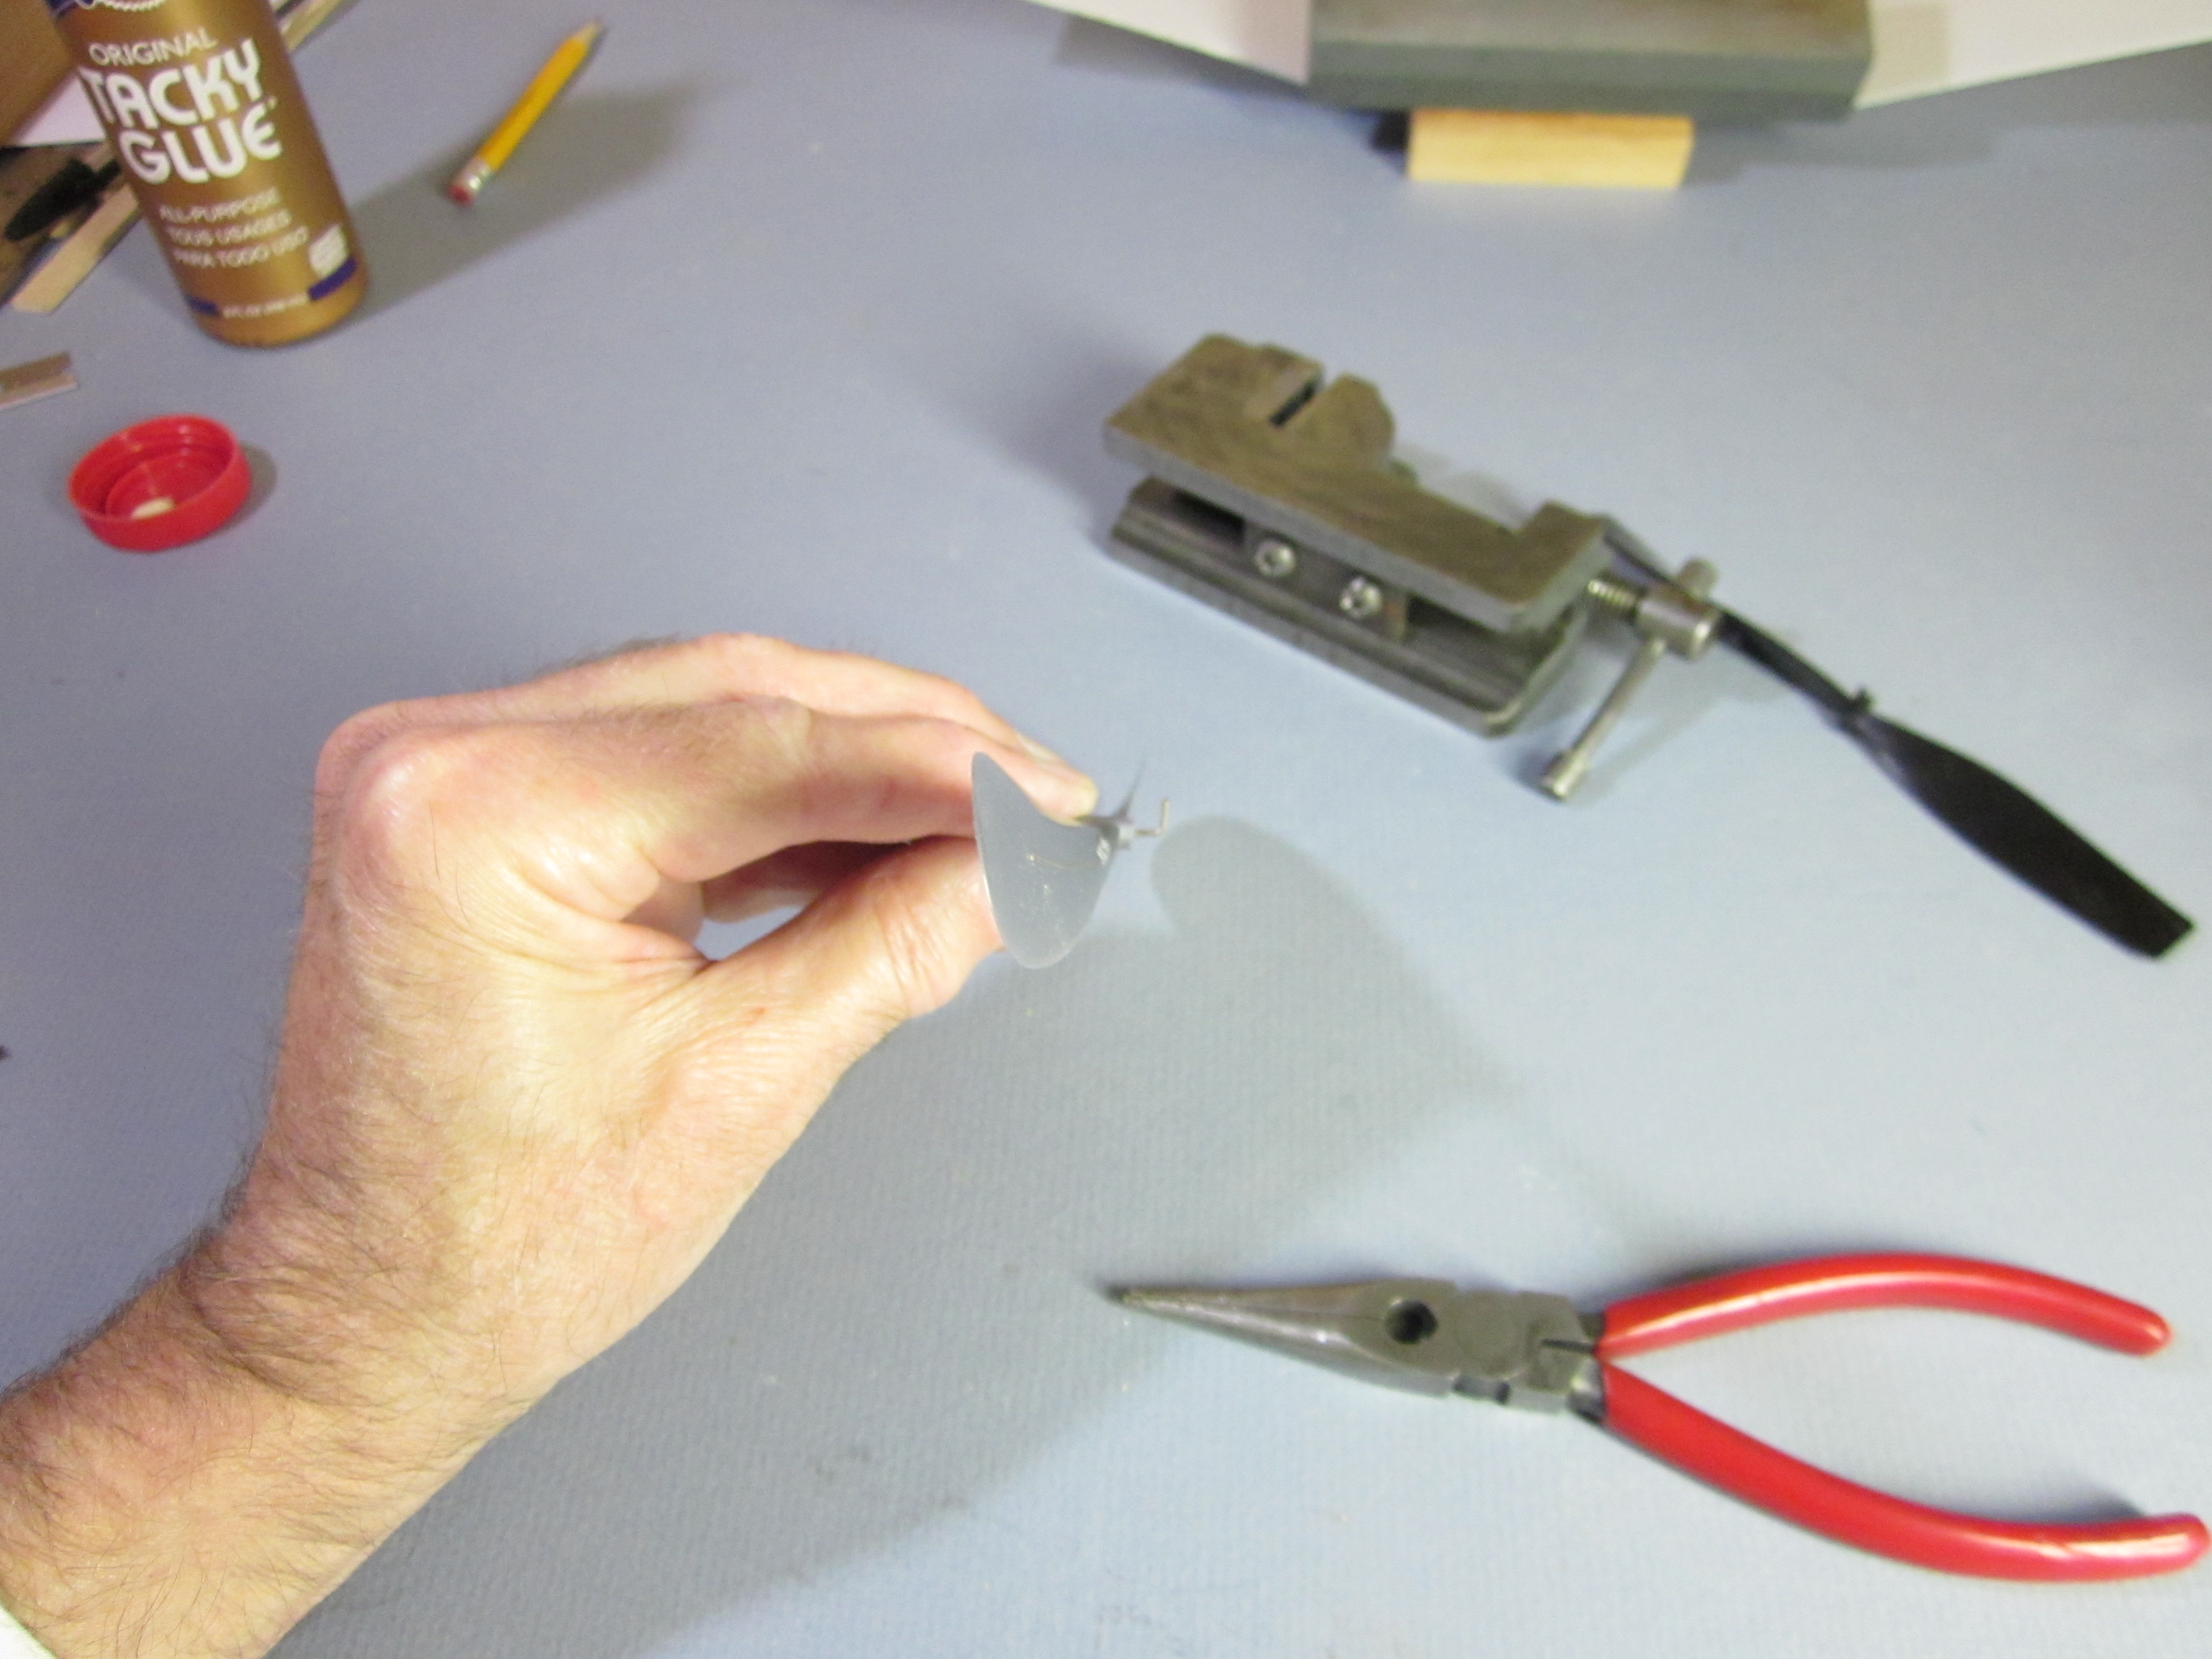
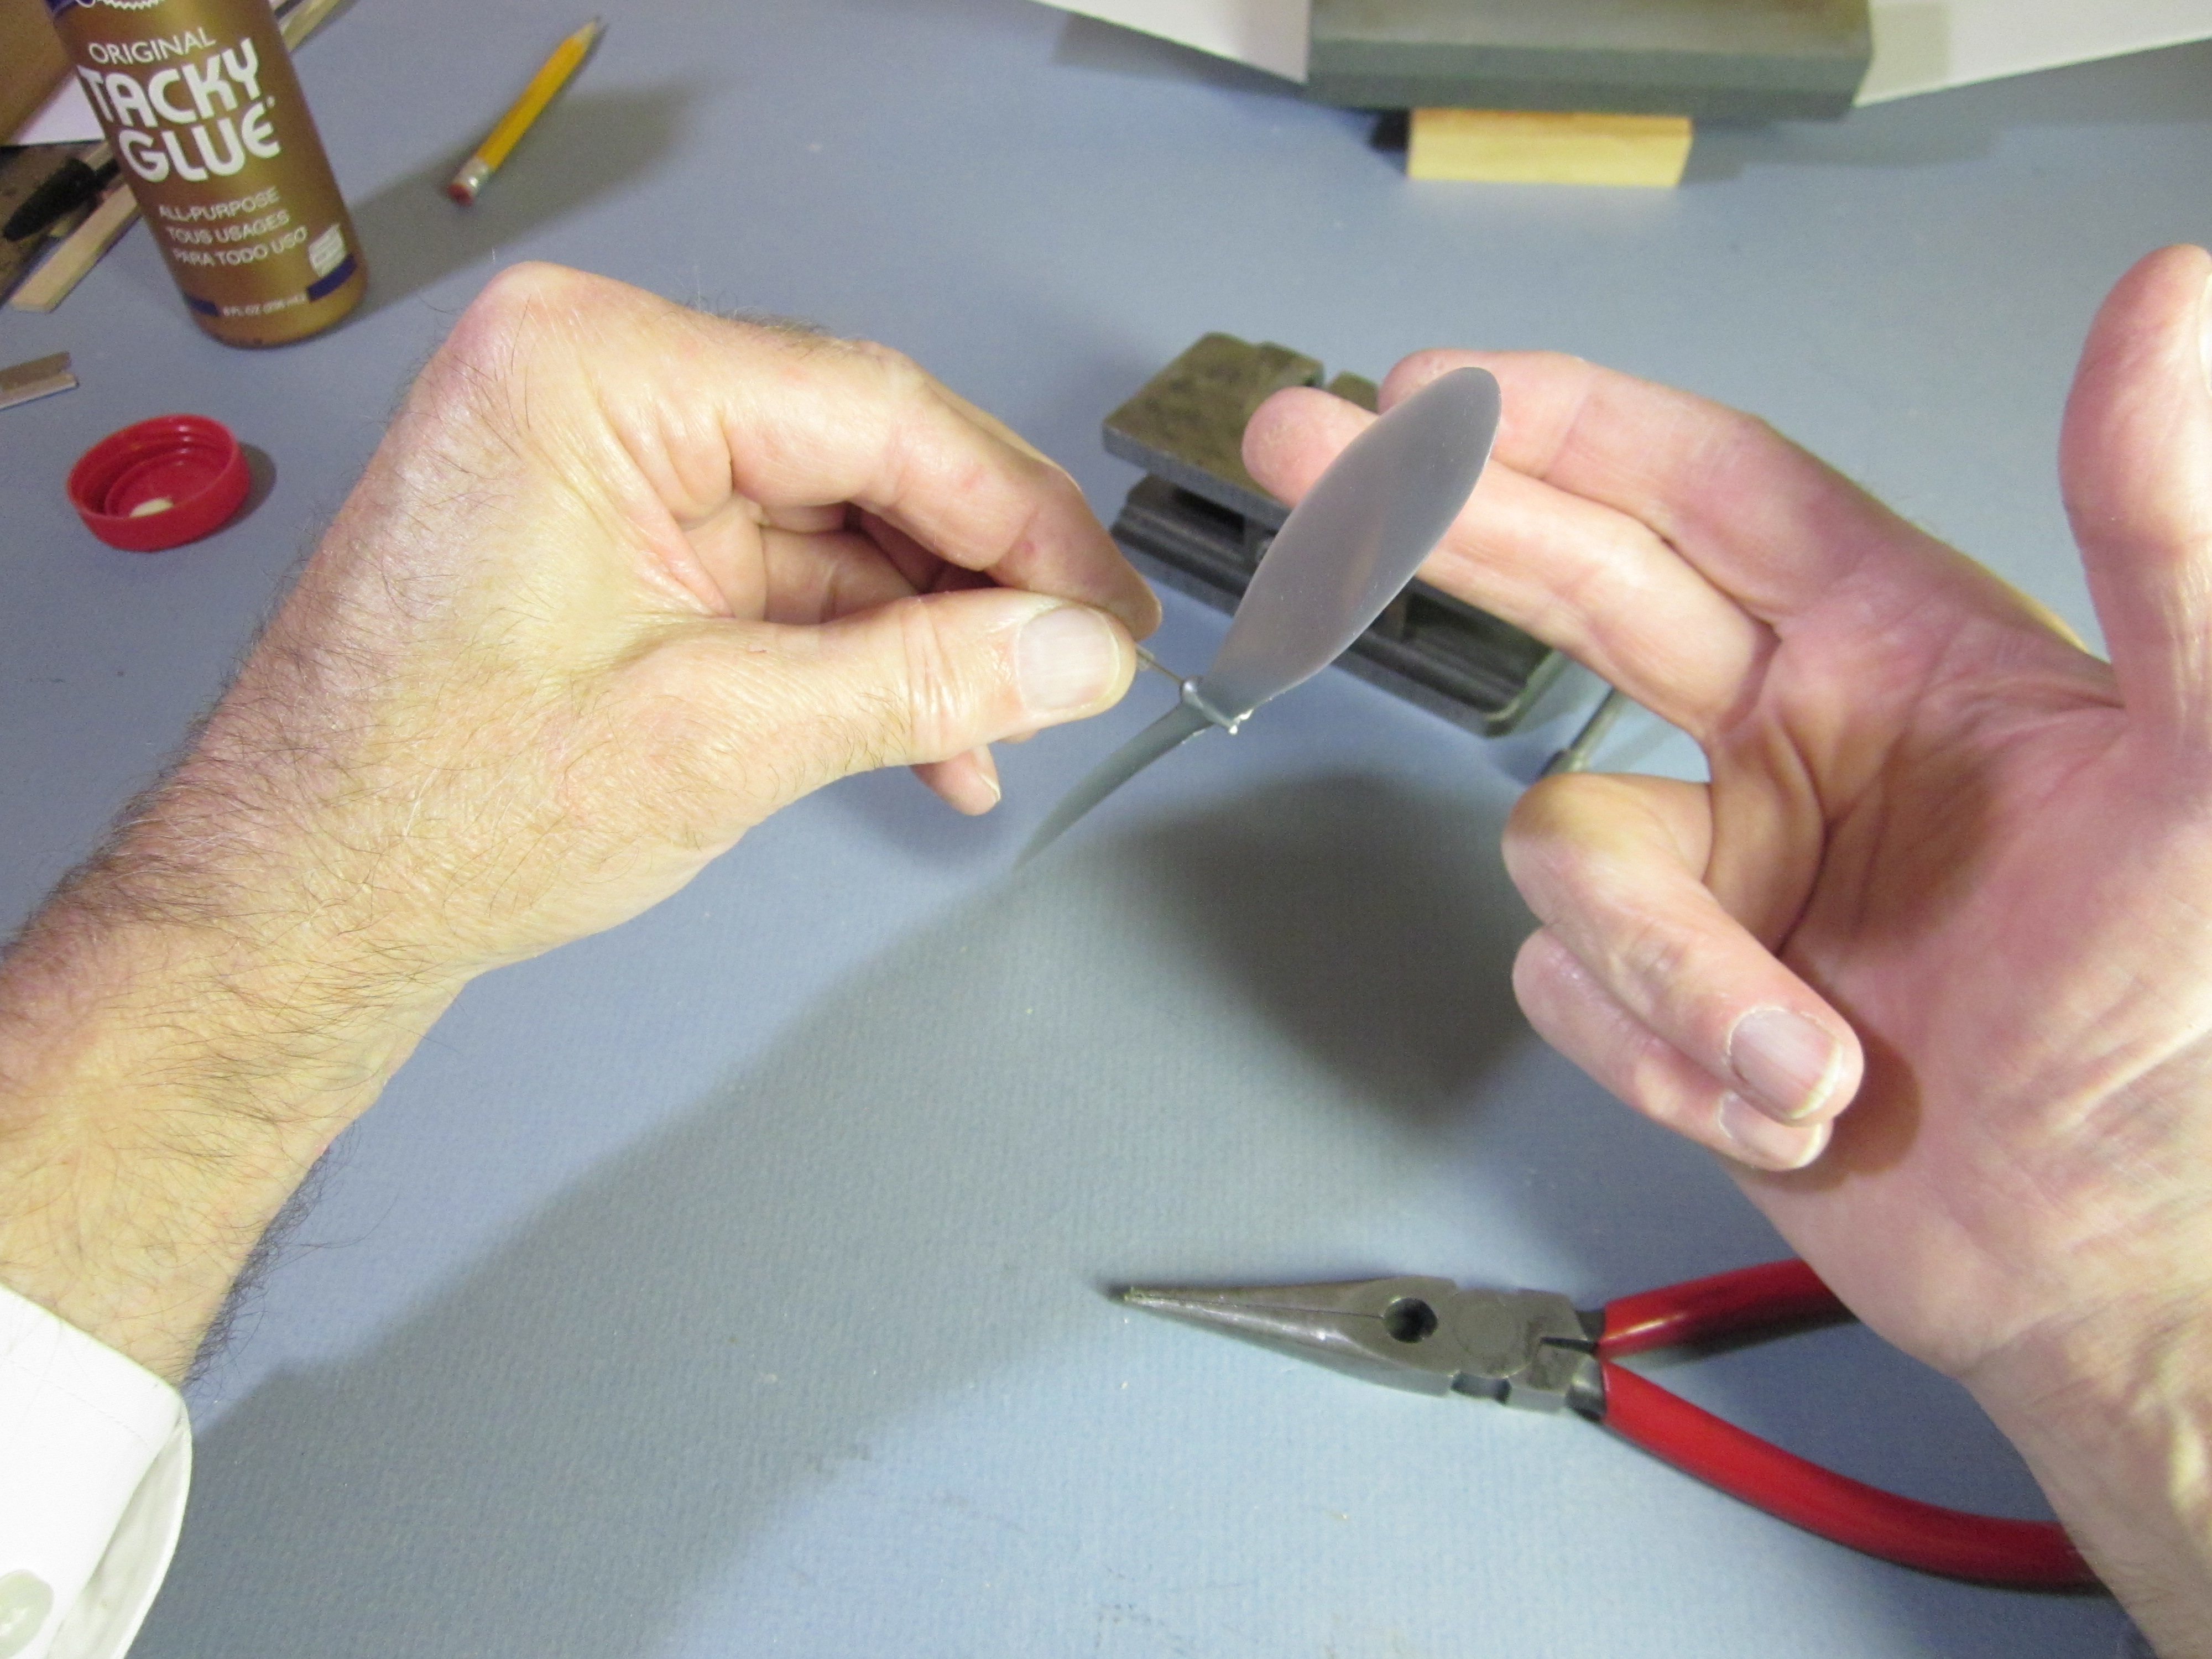 Extend the shaft and flip the prop forward to make sure it spins freely.
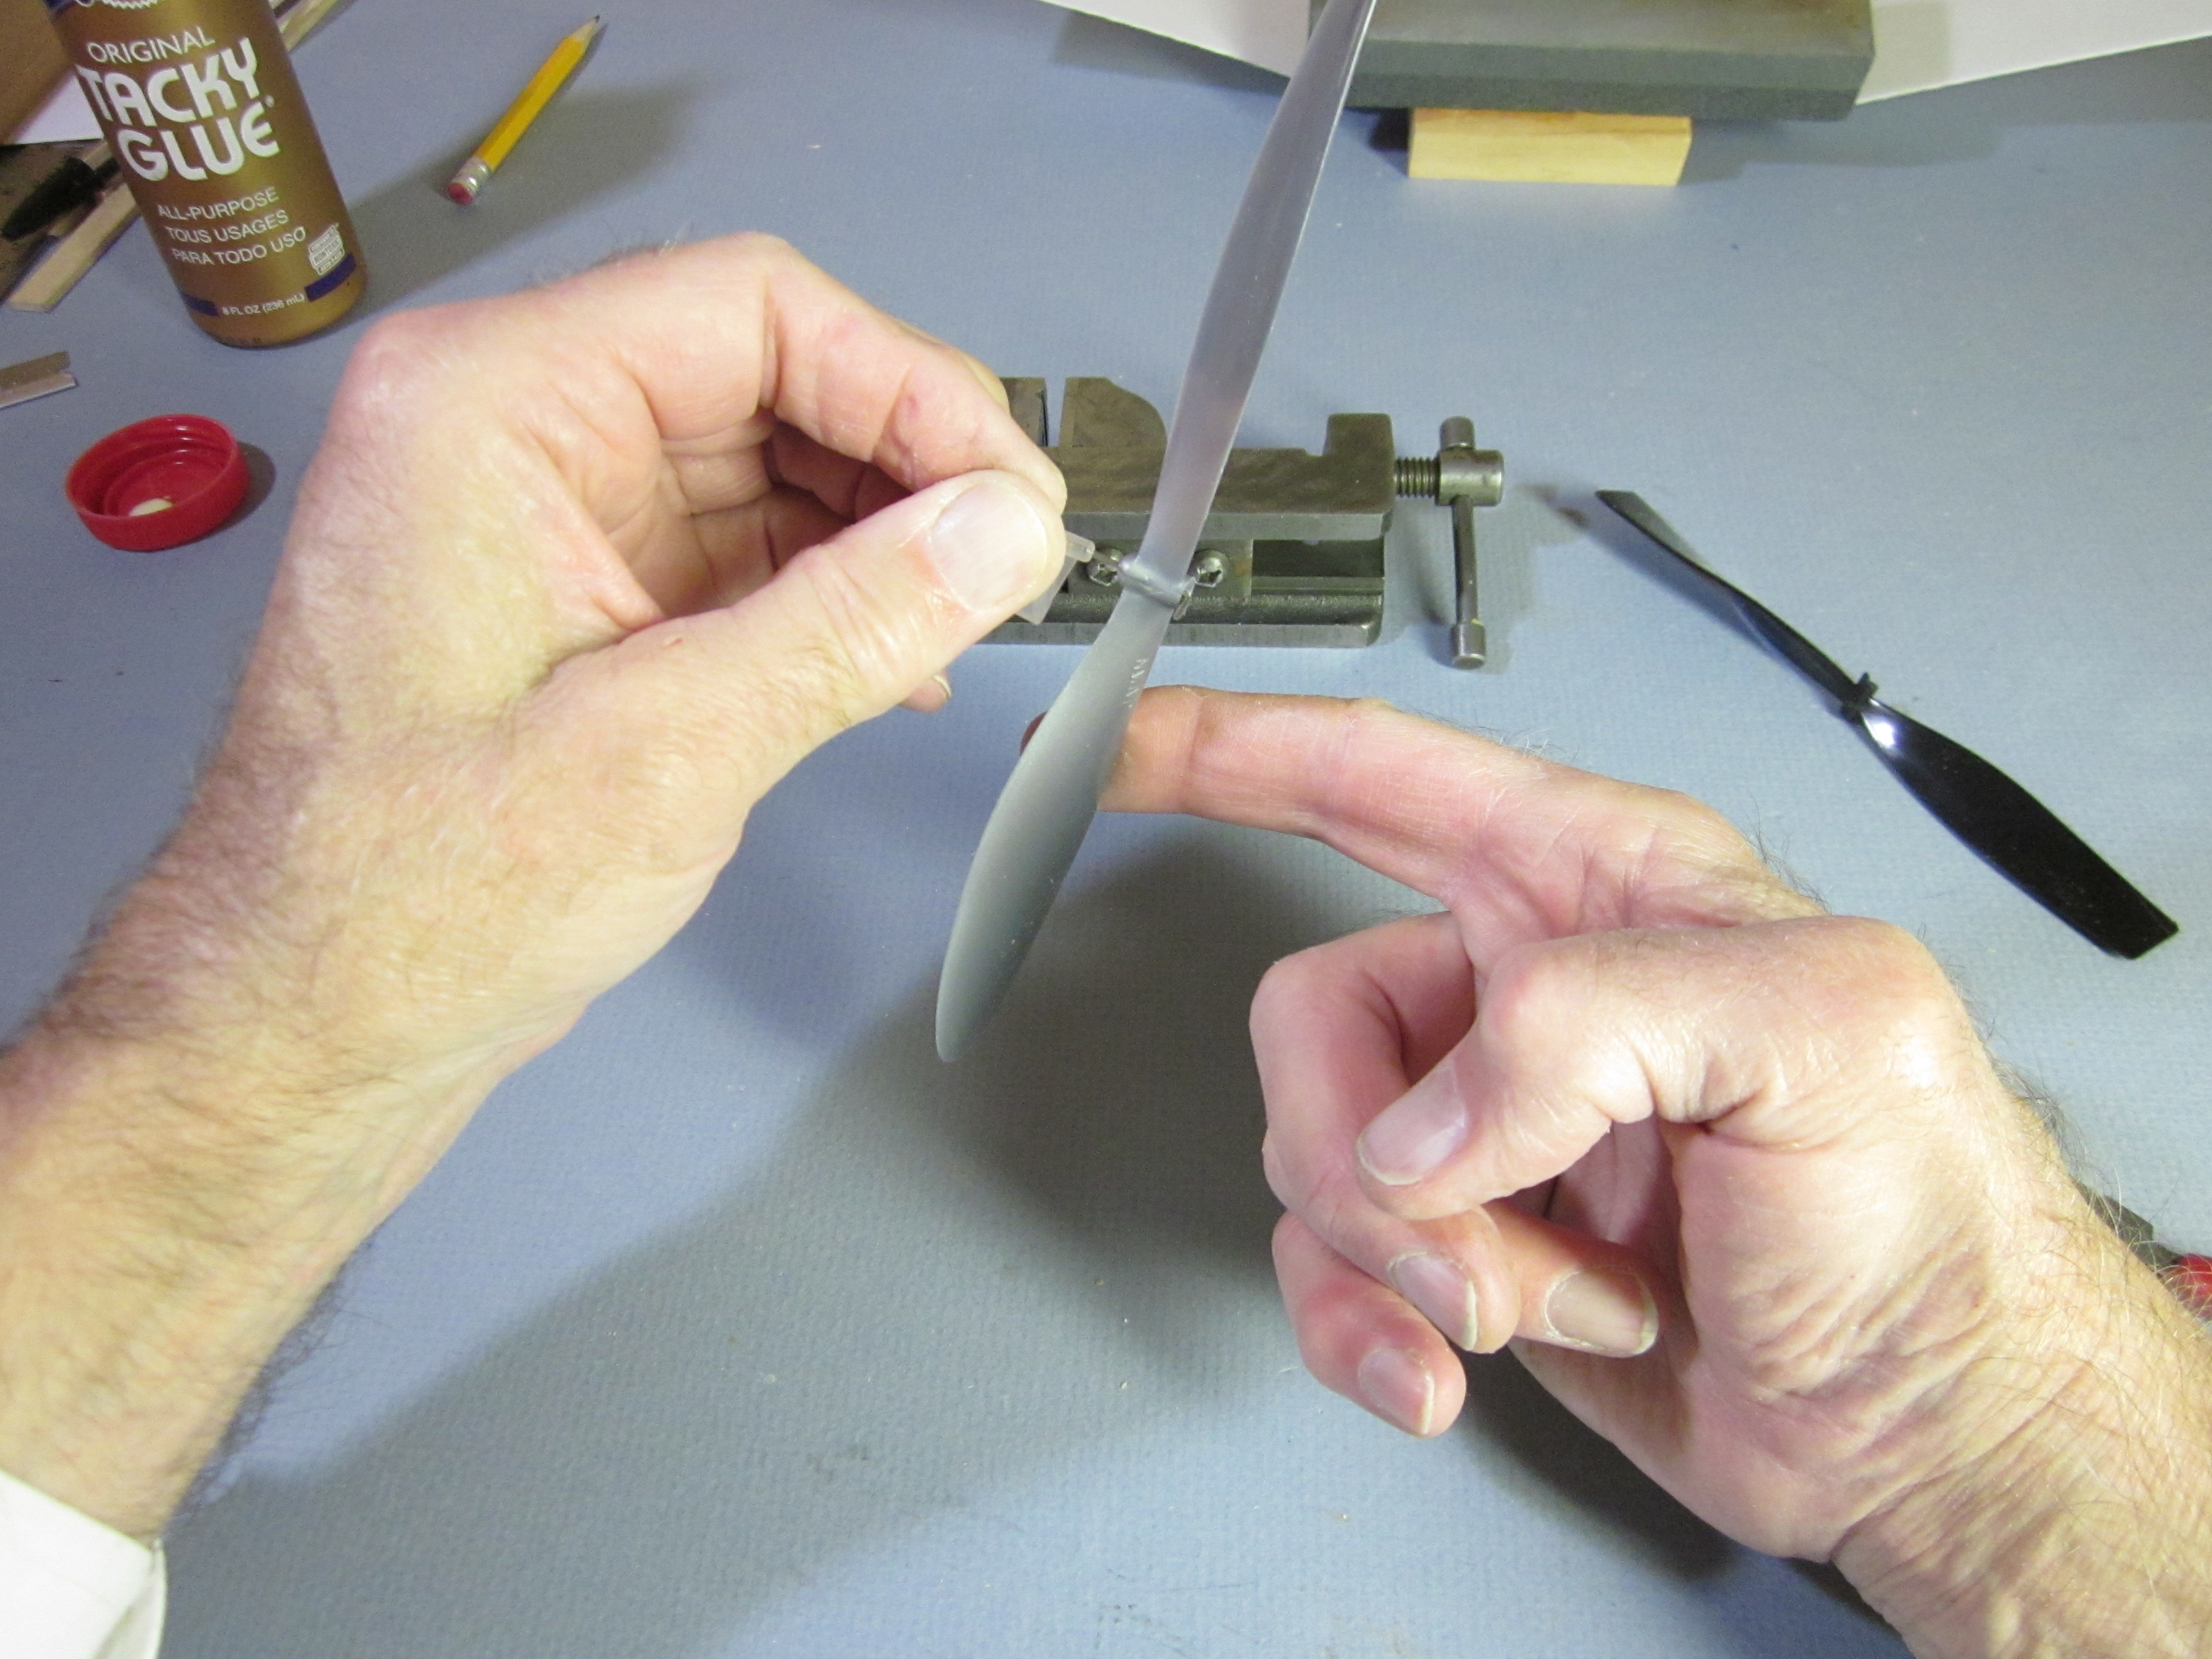 Turn it the other way to make sure it engages the ramp.
Final Assembly
 Slip two dental bands over the front end of the stick.
 Roll them down to about where the wing leading and trailing edges will be, about 3″ and 6″ from the front end of the stick.
 Insert the front end of the stick into the open box end of the prop hanger. Put the bearing and shaft on the underside of the stick, so the prop hook aligns with the rear motor hook. This should be a snug fit.
 Slide the stick into the slot under the wing saddle. Make sure the front, more curved, part of the wing goes forward. A good place to start is with the leading edge about 3 1/2″ from the front end of the stick. The wing slides along the stick to adjust balance.
 Press the wing saddle down onto the stick until the hold down stick lies flat along its whole length on top of the stick.
 Roll the aft band up onto the hold down stick, against the wing.
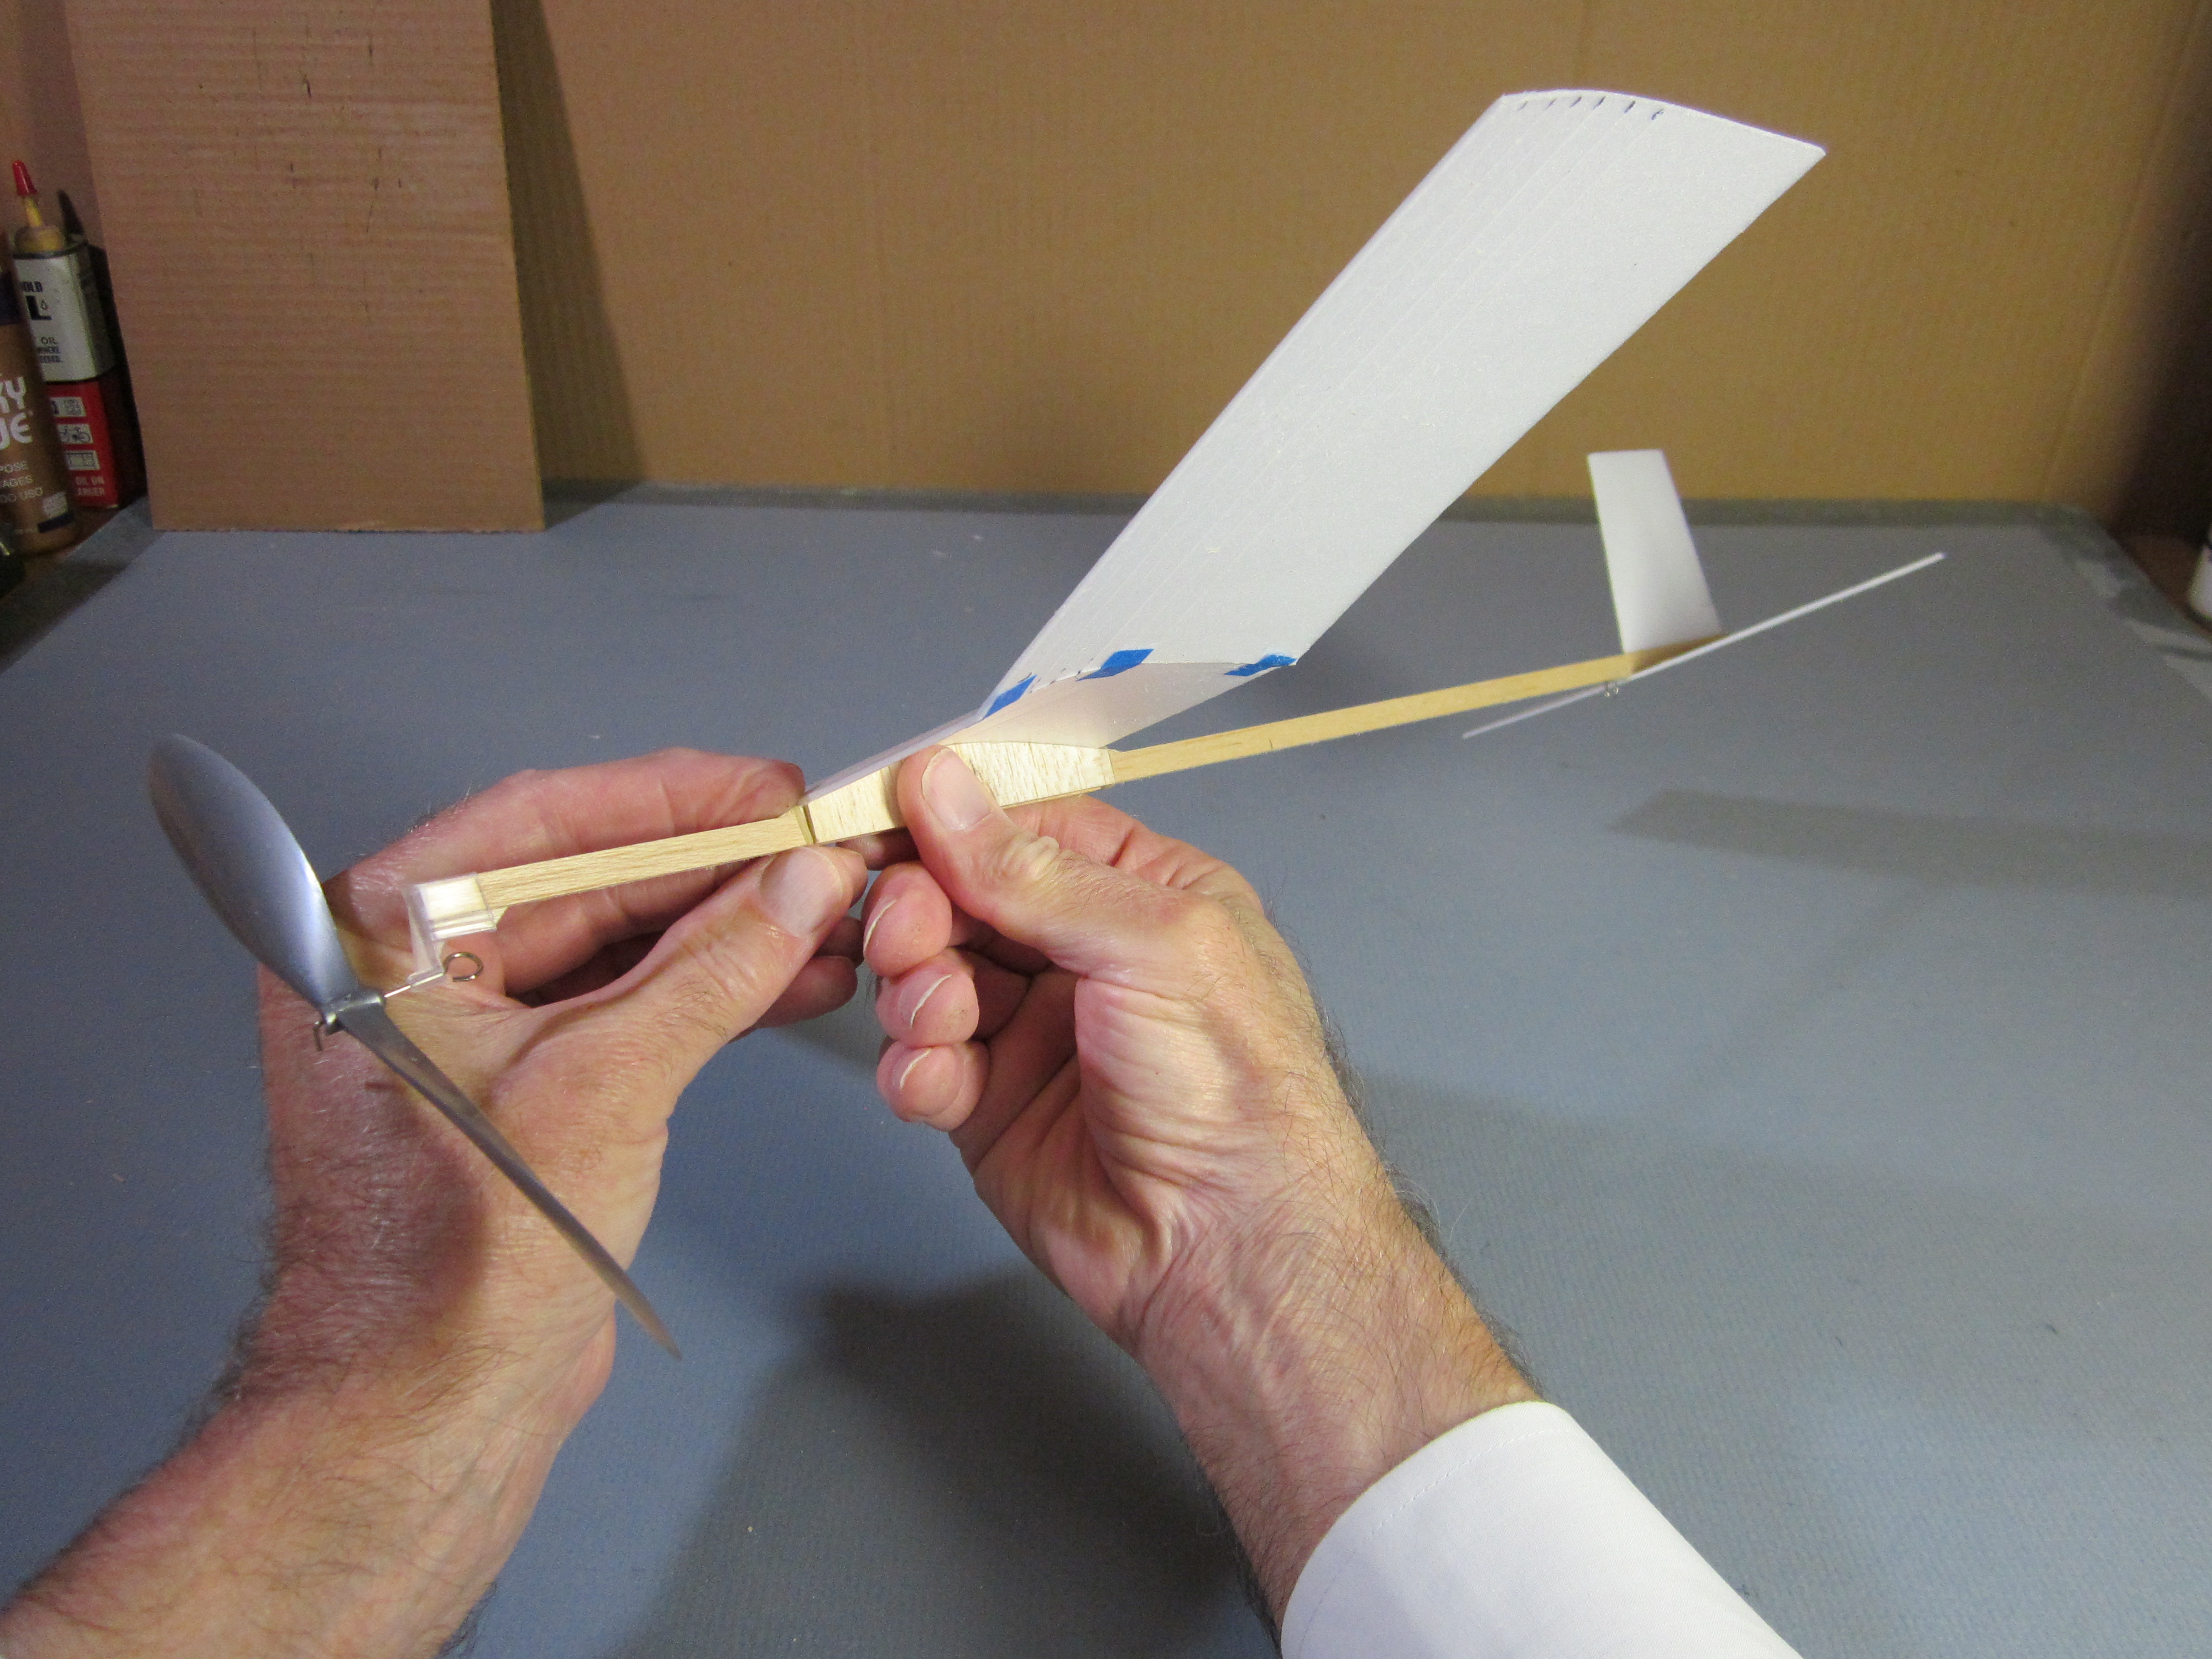 Roll the forward band up onto the the hold down stick, against the wing.
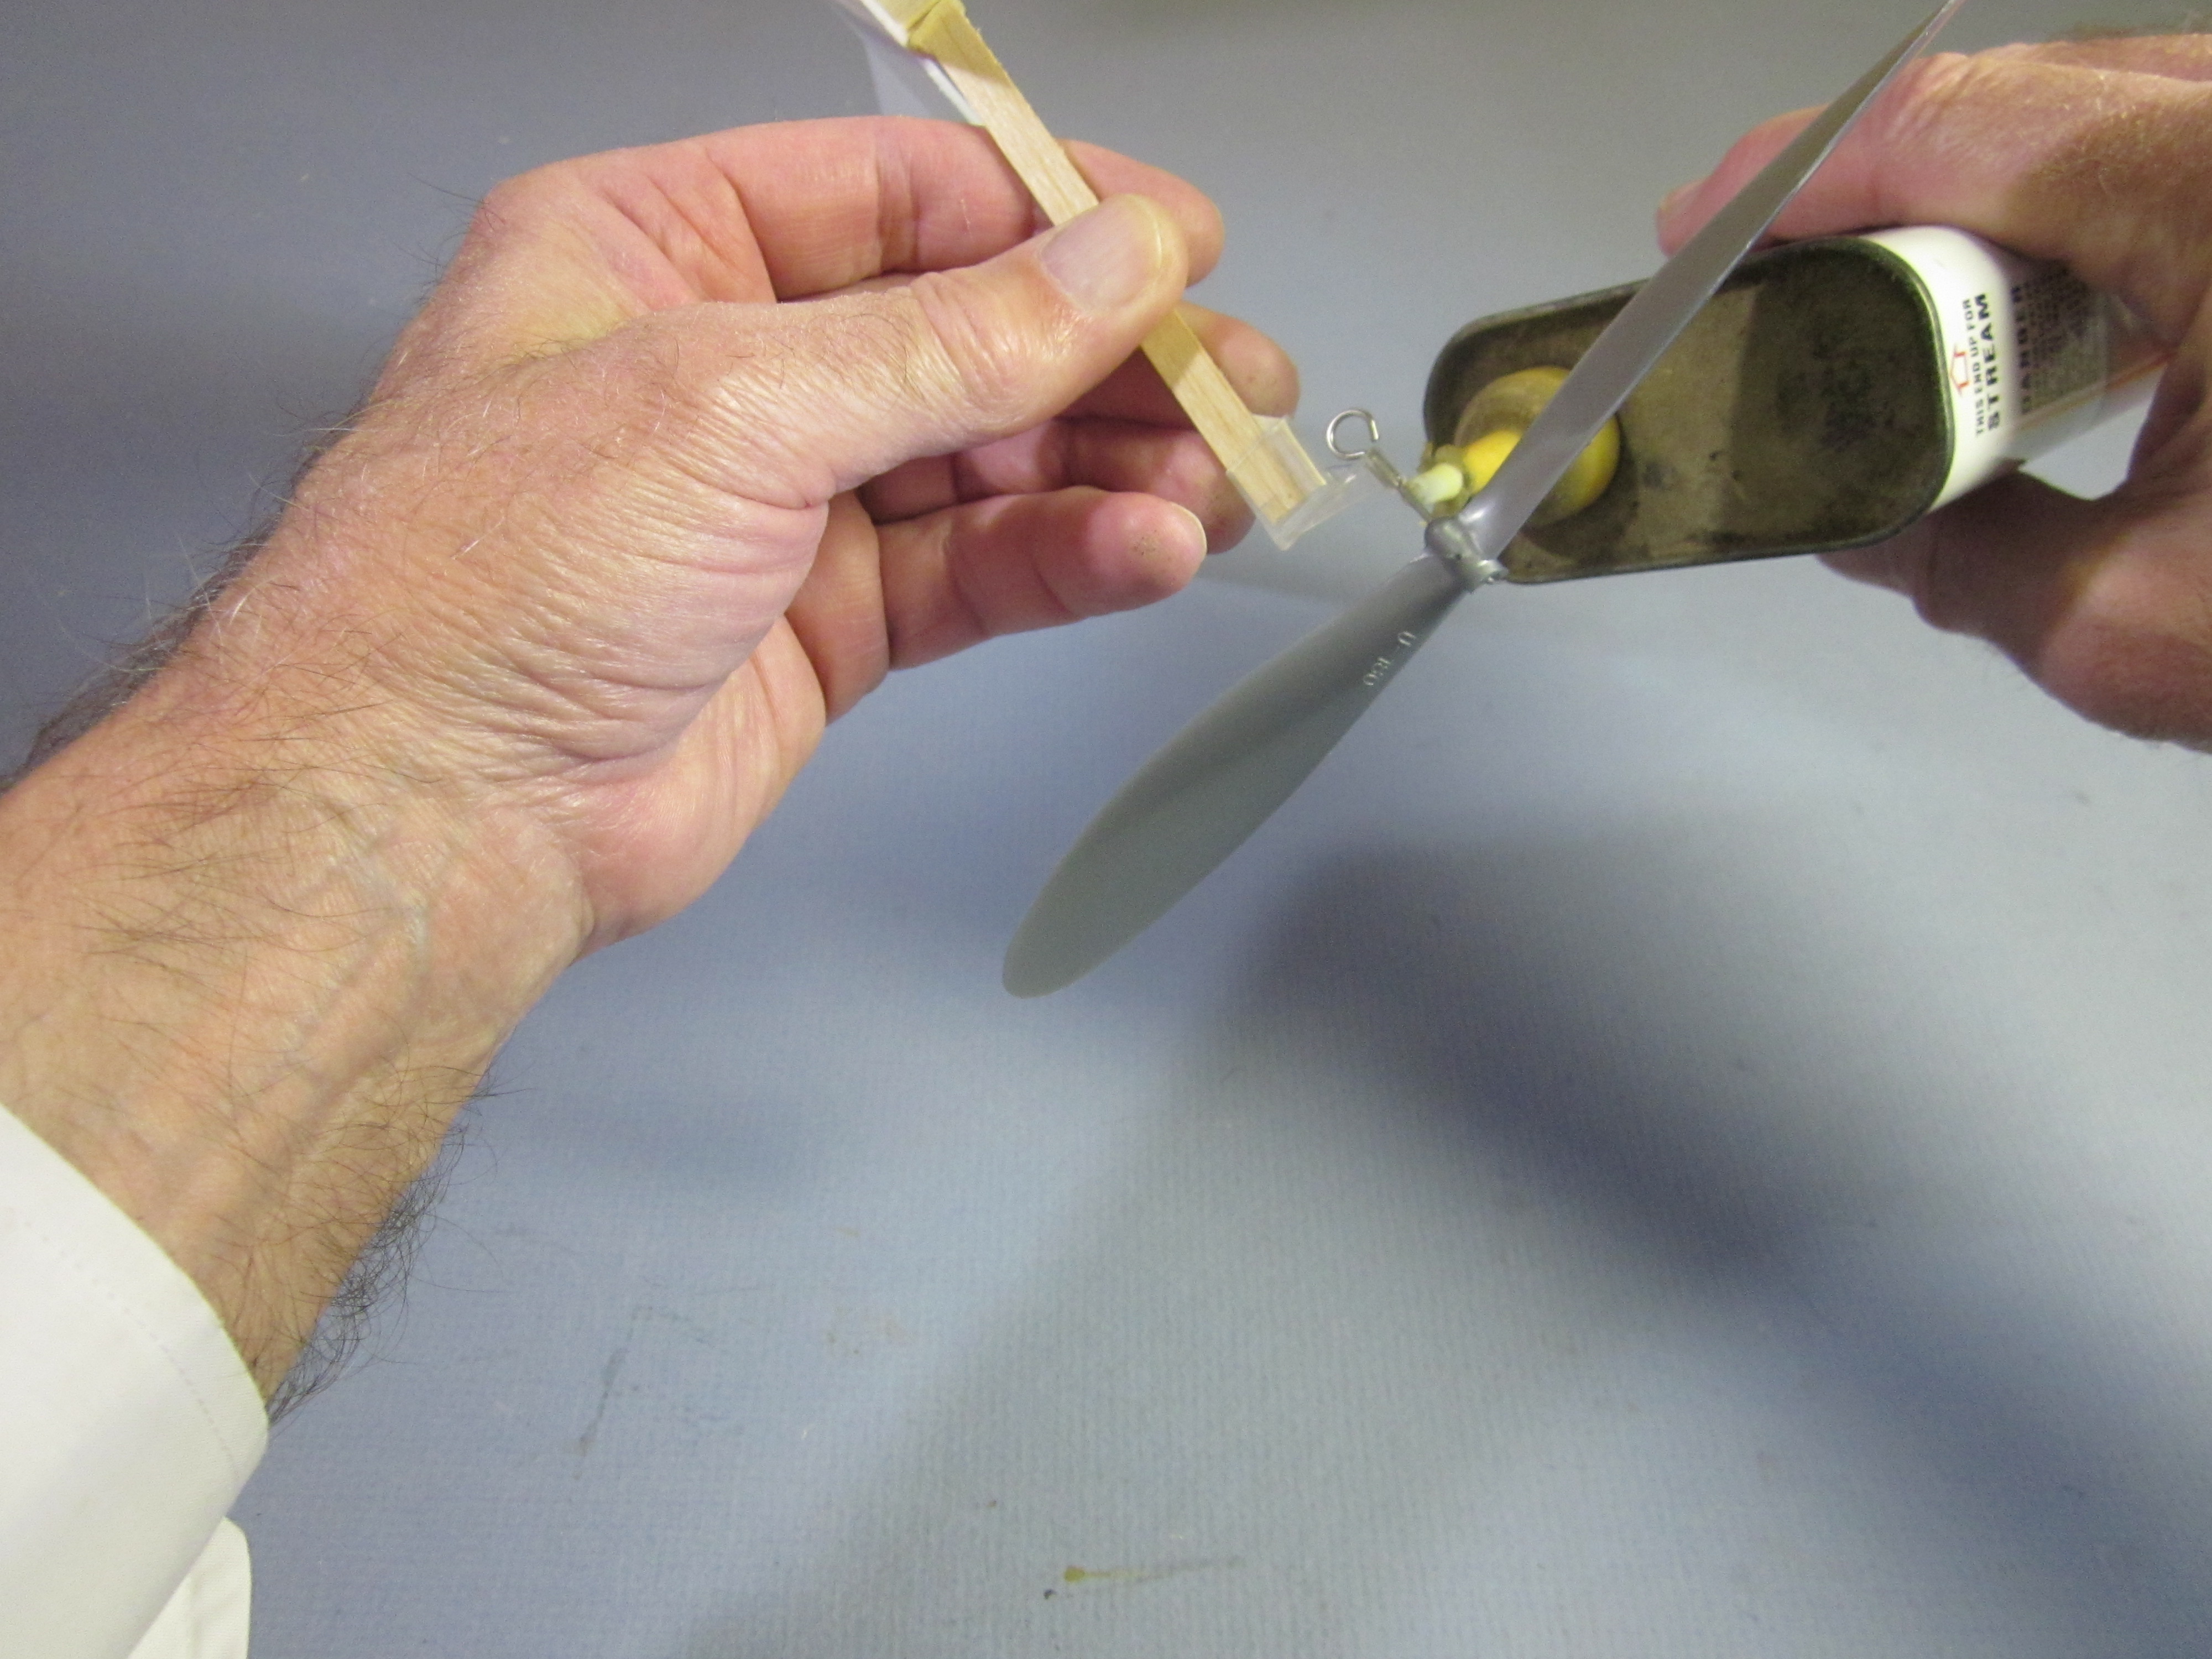 Put a bit of light machine oil on the bearing, shaft and hub.
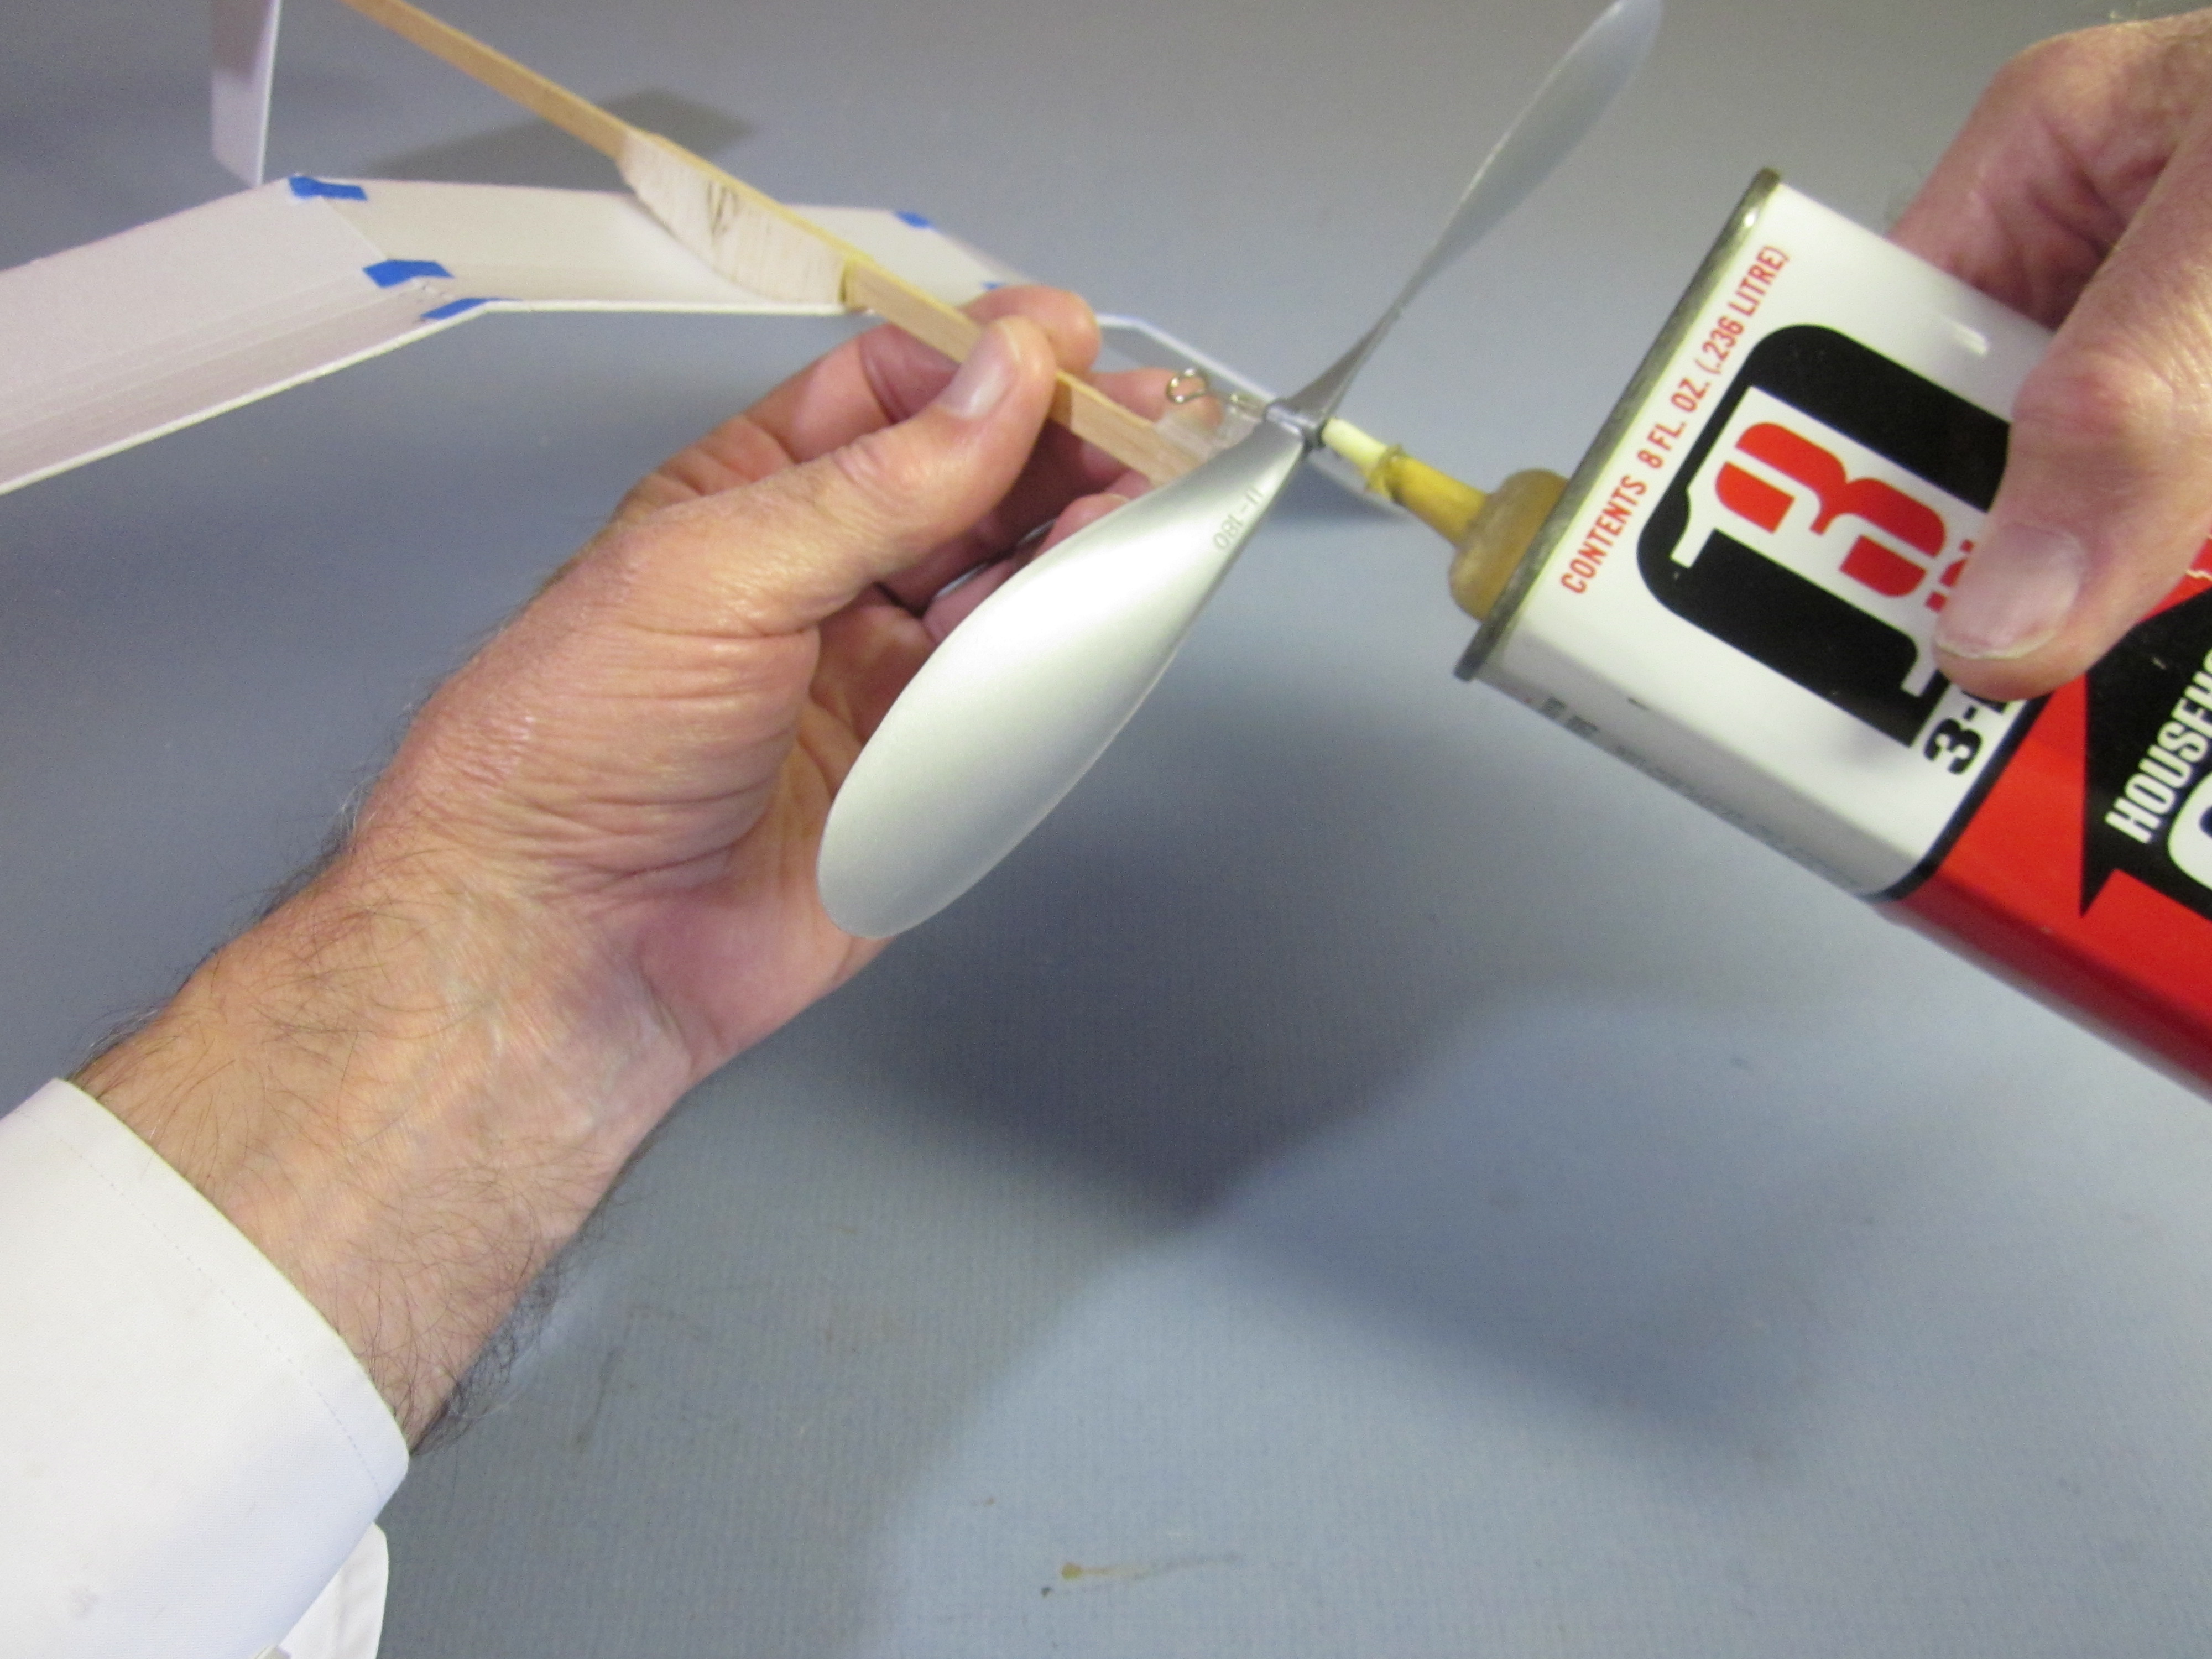 Put some light oil on the ramp.
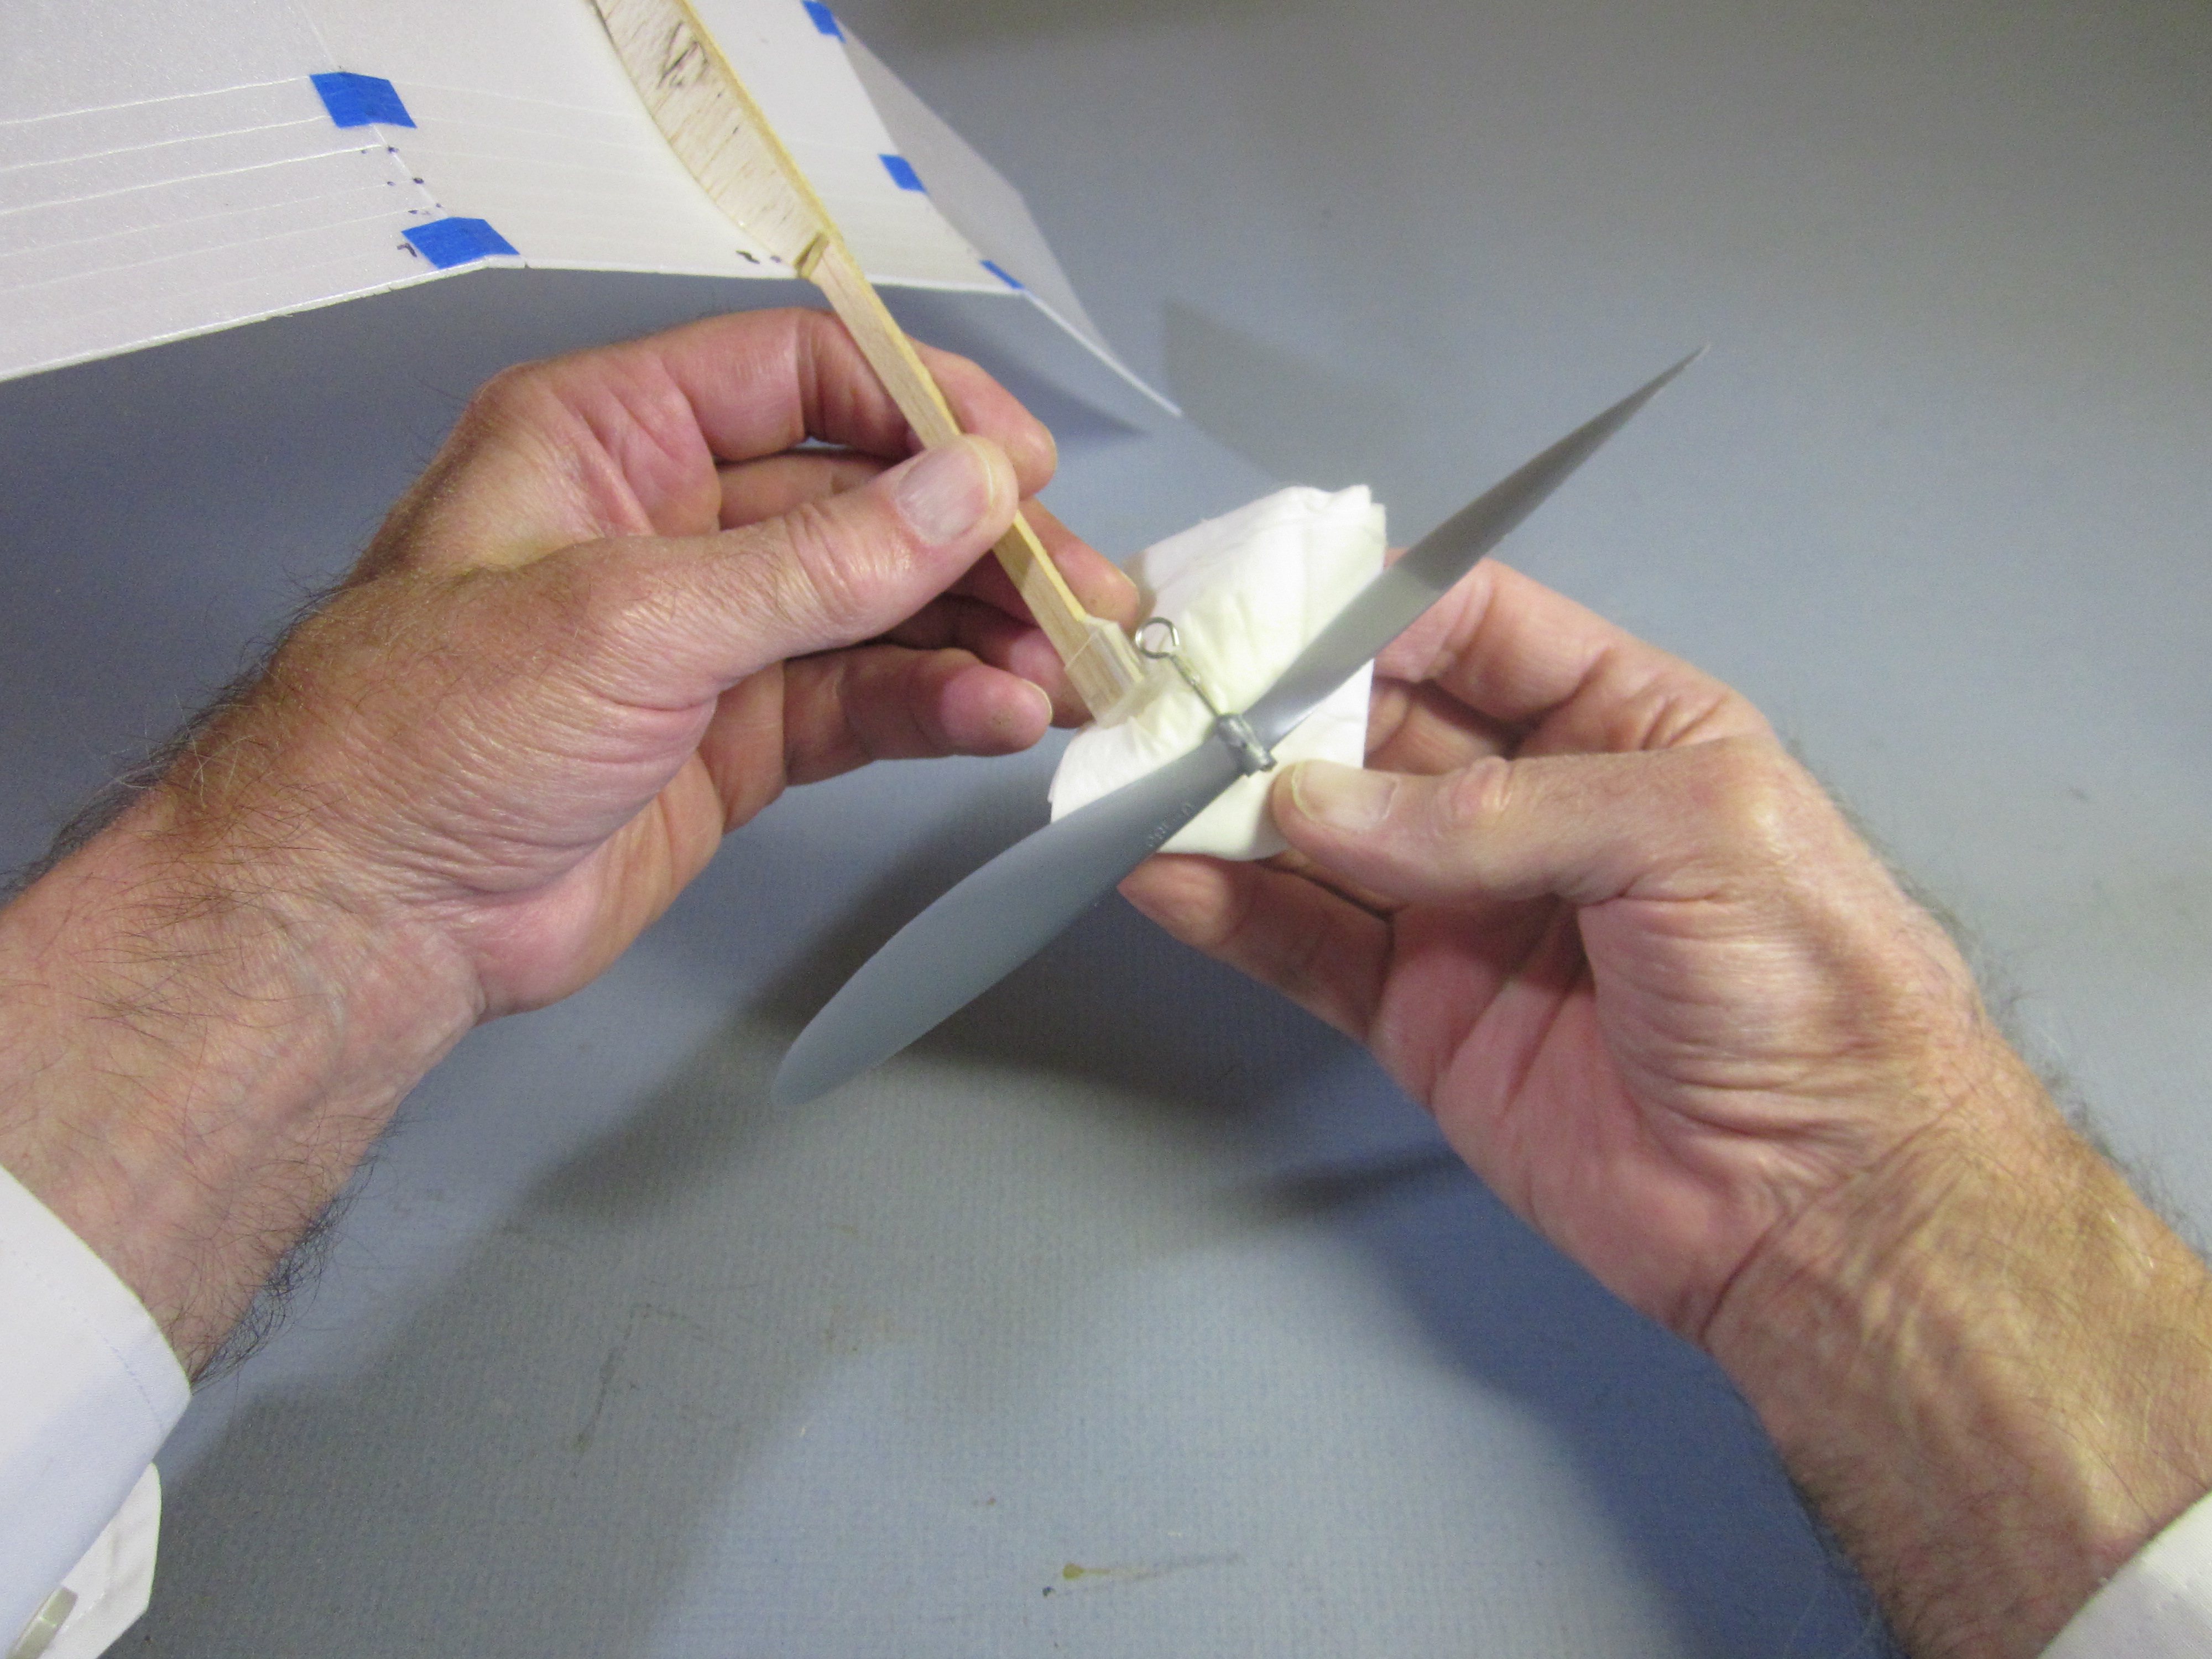 Blot off excess oil. Keep the oil off the hook.
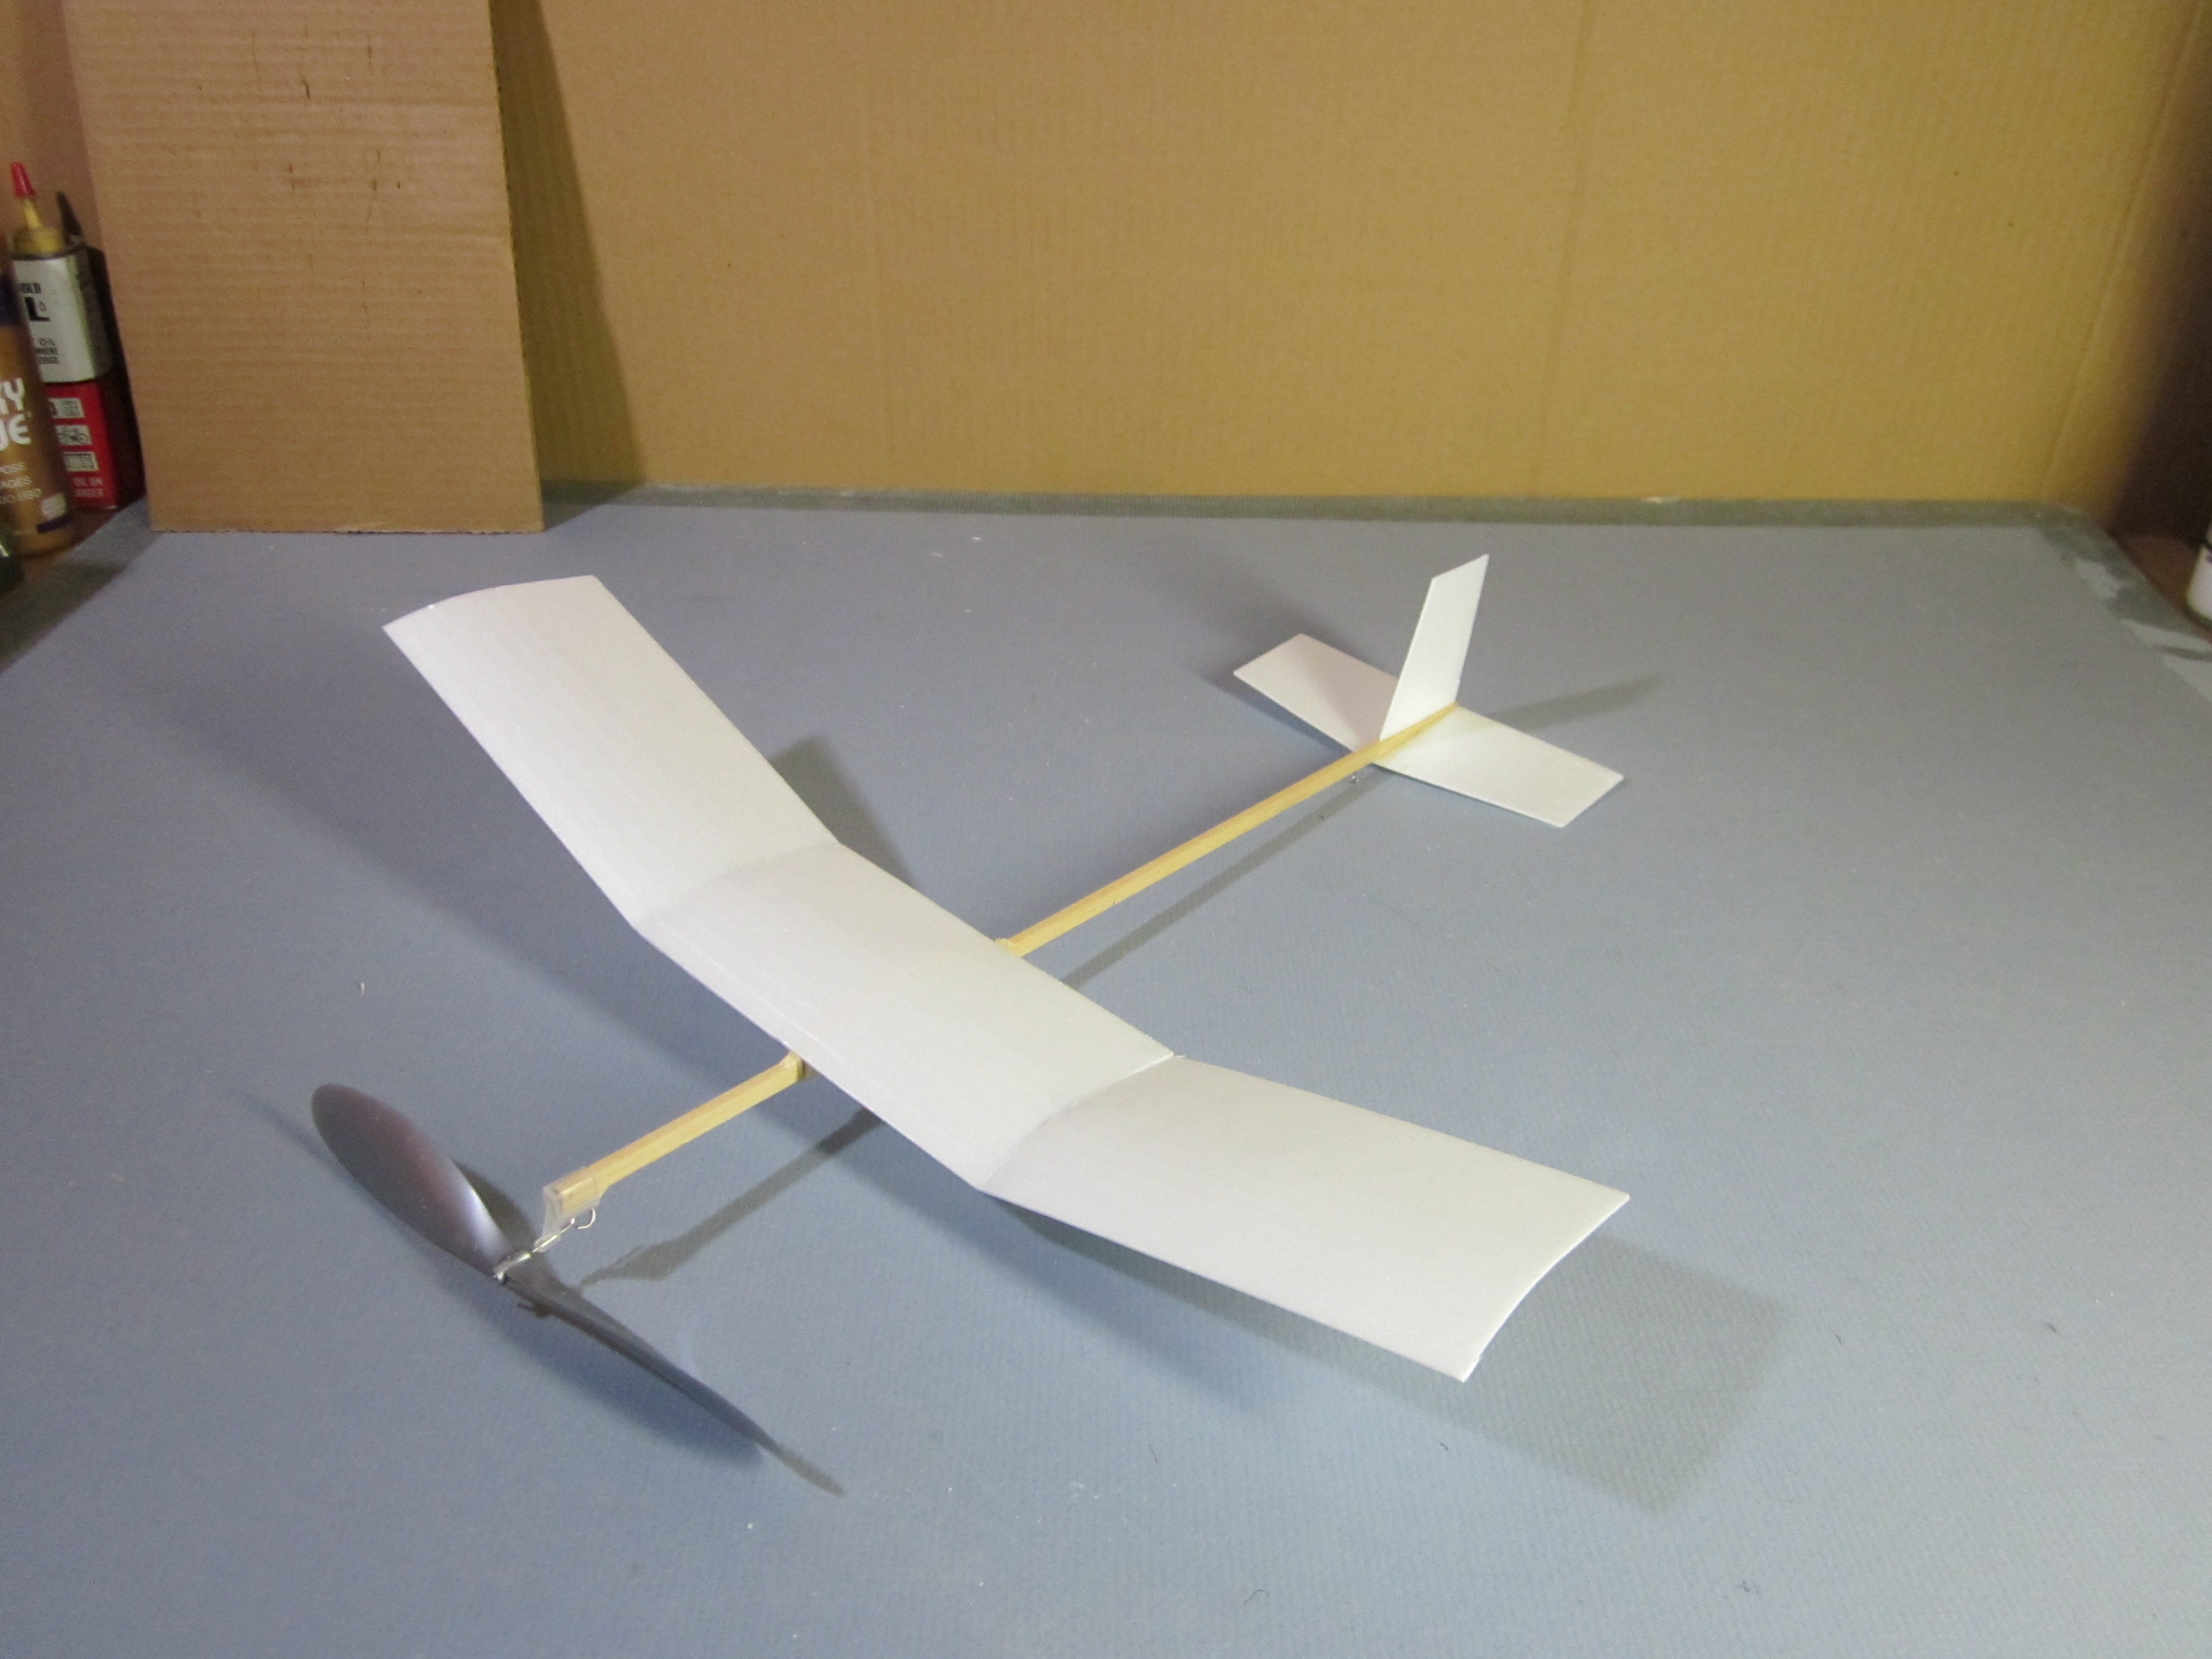 That completes the construction of the airplane.
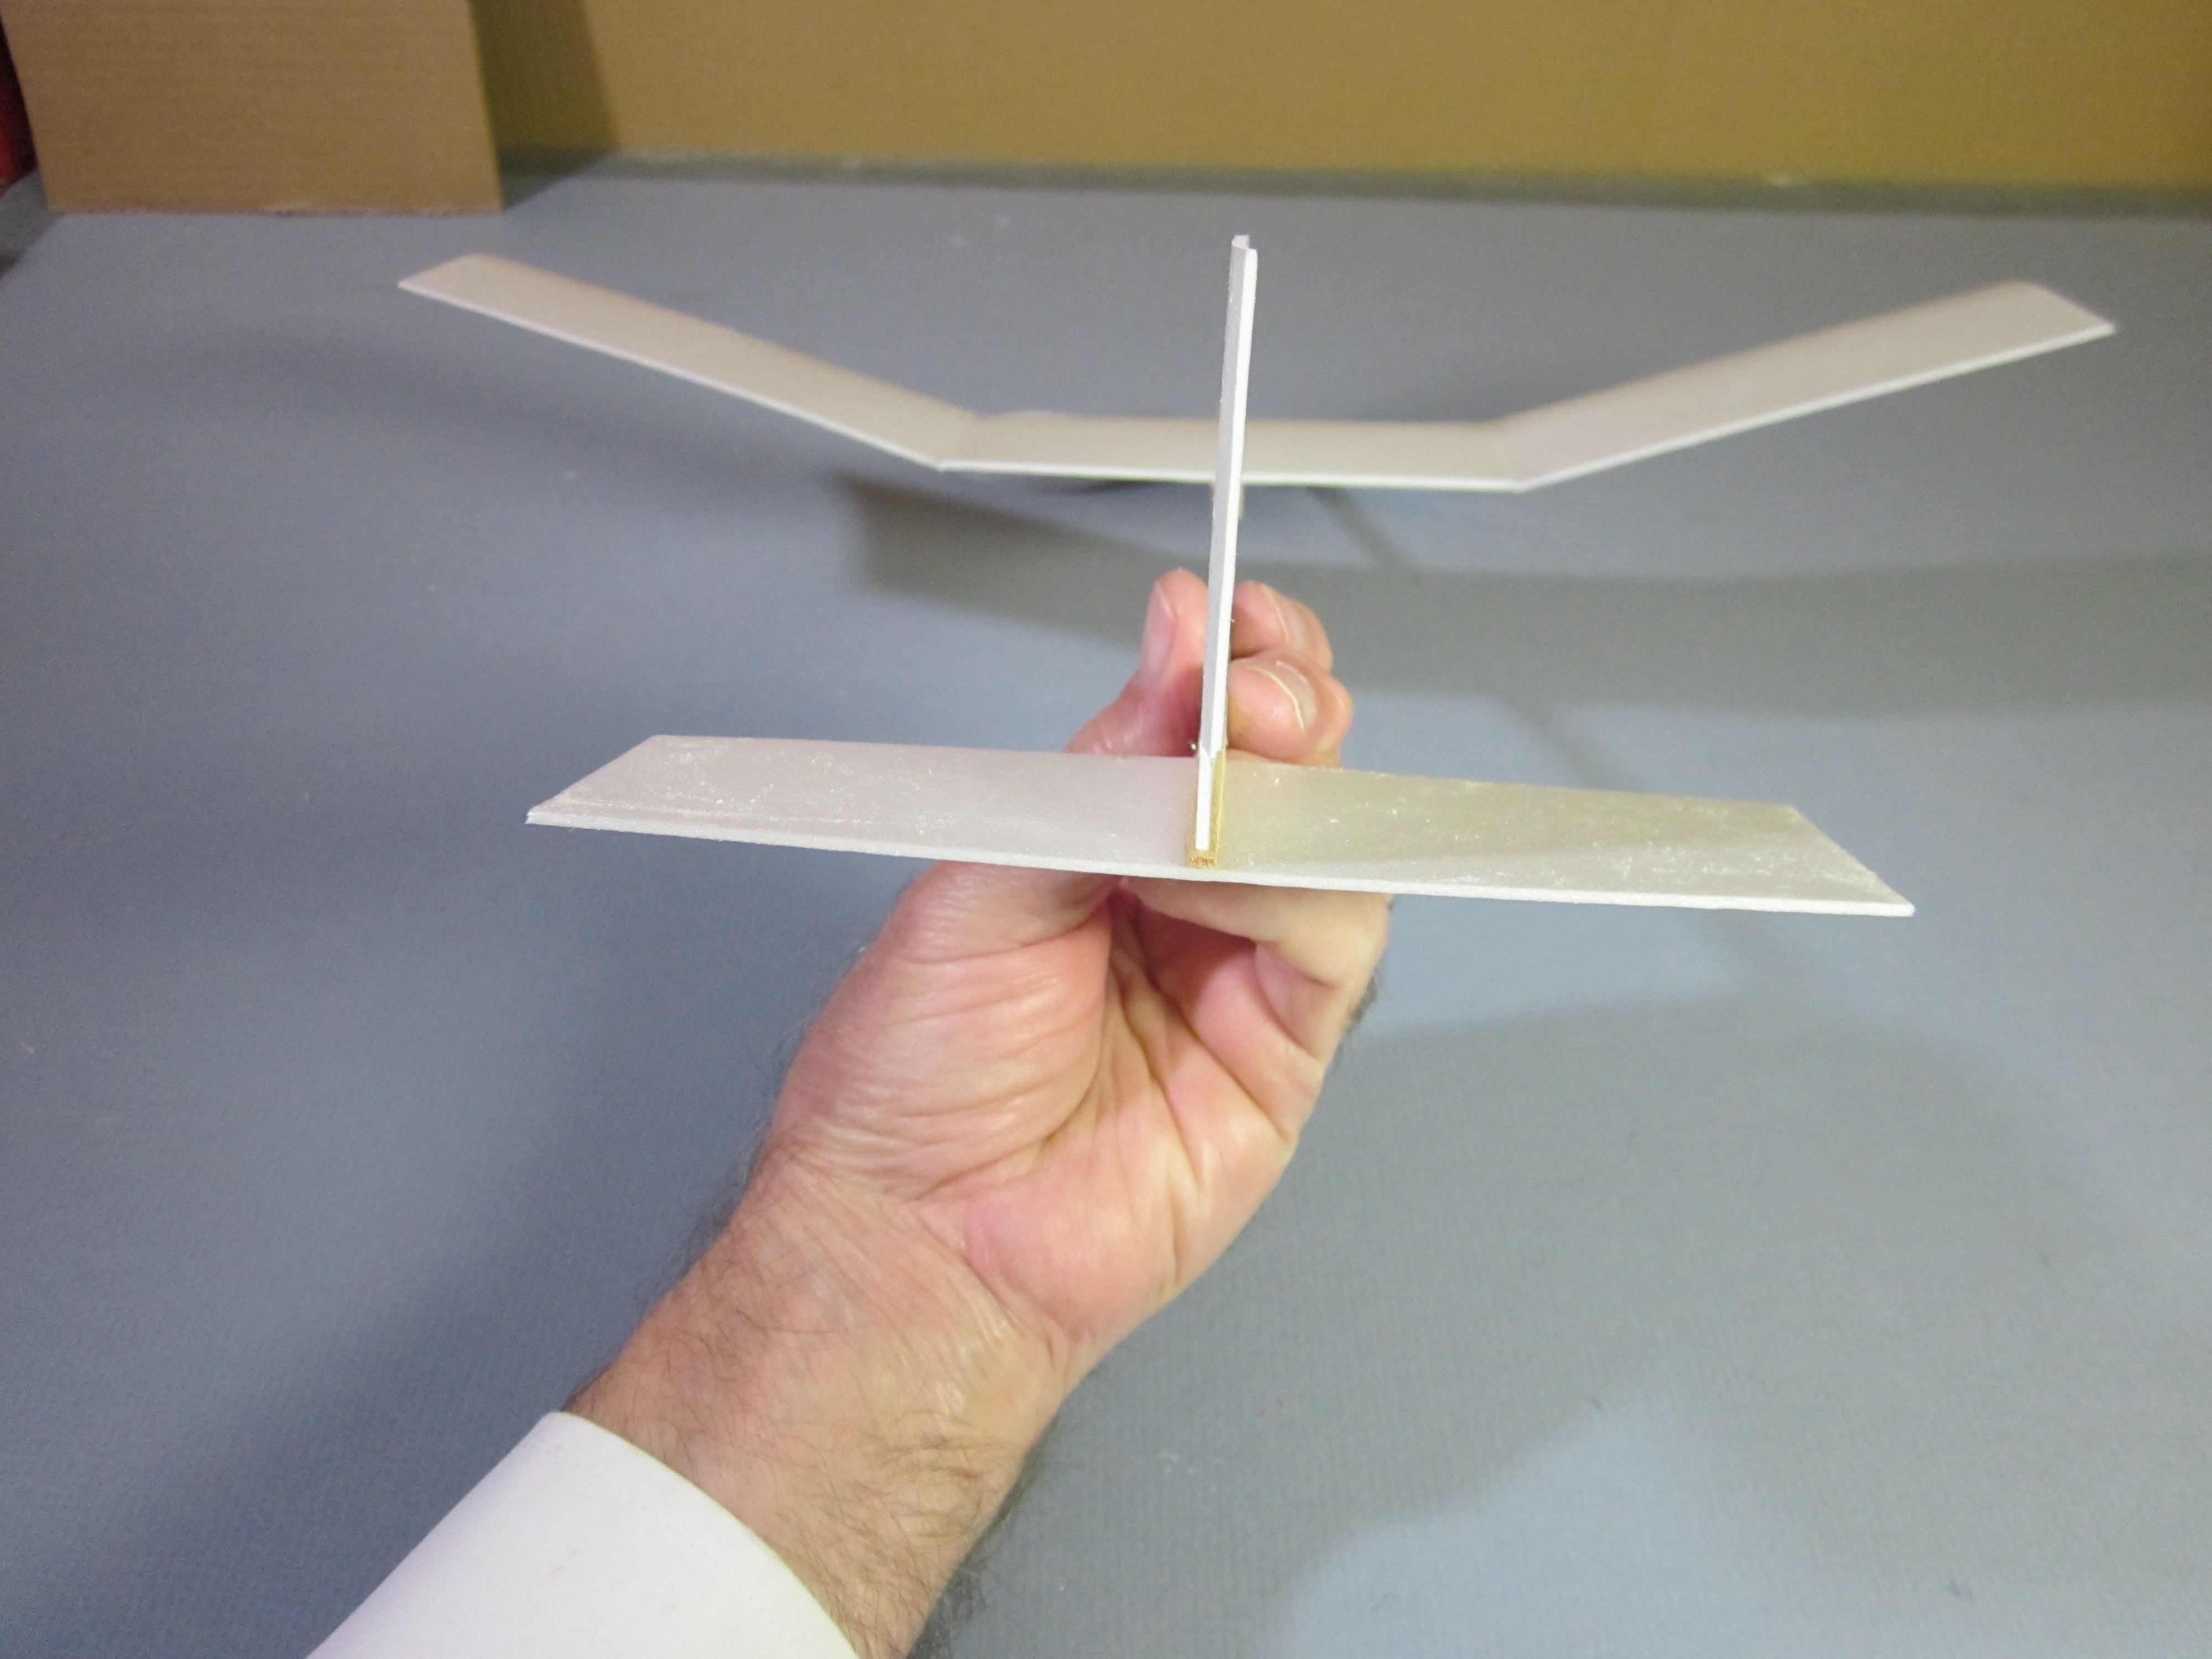 Inspect the airplane from front, back and…
 top to make sure everything is straight, square and properly aligned. If anything is out of place, correct it now before beginning flight tests.
Make the motor
We will use two motors, one for flight testing and trimming and another for flying. (If the flight motor is more than twice the distance between the hooks, you can double it up for flight testing.) The flight test motor is shorter and thicker than the motor used for duration. We need a motor that will quickly get the plane up just high enough to check climb and turn, then run out of turns so we can check descent. We want a steep, steady climb, circling right, a right cruise and a gradual descent, turning right, with the prop freewheeling. The test motor must be long enough to go slack when it is unwound, so the prop can freewheel. It will not be fully wound, it is wound just enough to get high enough for the test glide. The hooks are 13″ apart, so we start with a 14″ loop of 1/8″ rubber.
Experience with similar planes suggested that a 22 1/4″ loop of 0.045″ x 0.086″ rubber would work well for this plane and that is what I used to get the two minute flights. Making this motor required using a rubber stripper. If you don’t have a rubber stripper, the nearest standard size is 3/32″ (0.09375″ wide) strip. Make the loop at least 26″ long. The dimensions of the motor determine how many turns you can put into the motor and thus how long the motor will run.
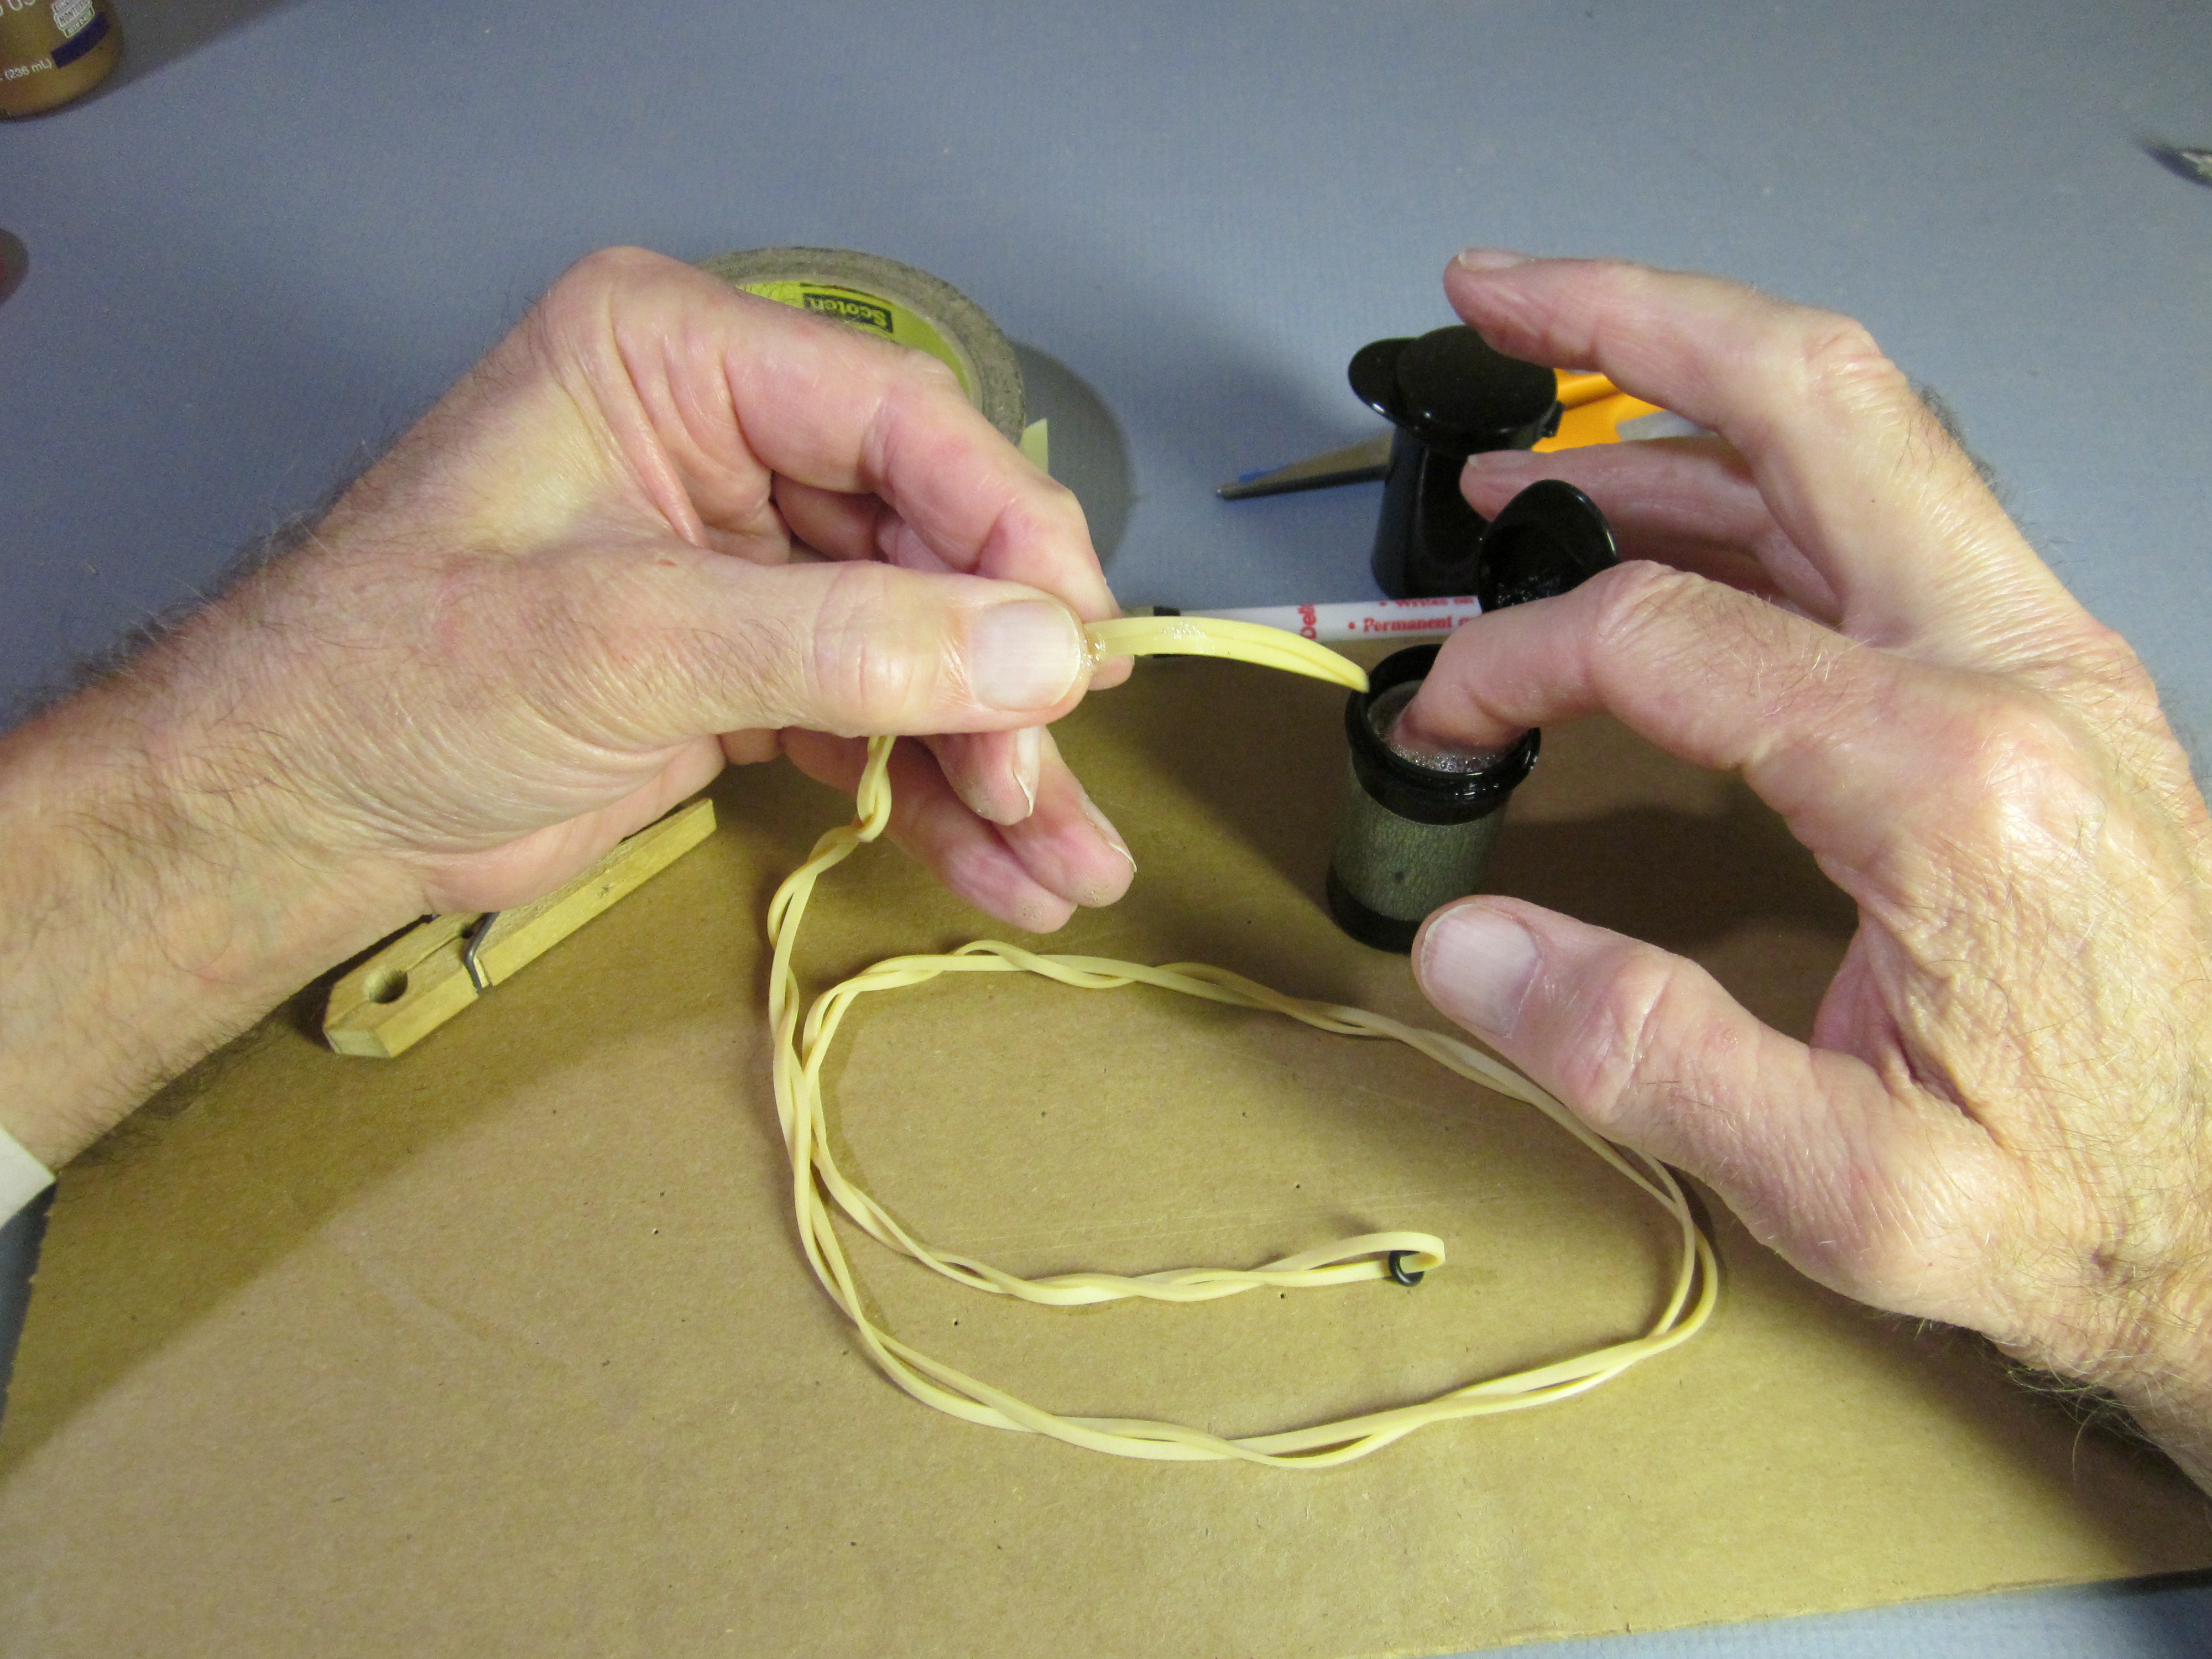
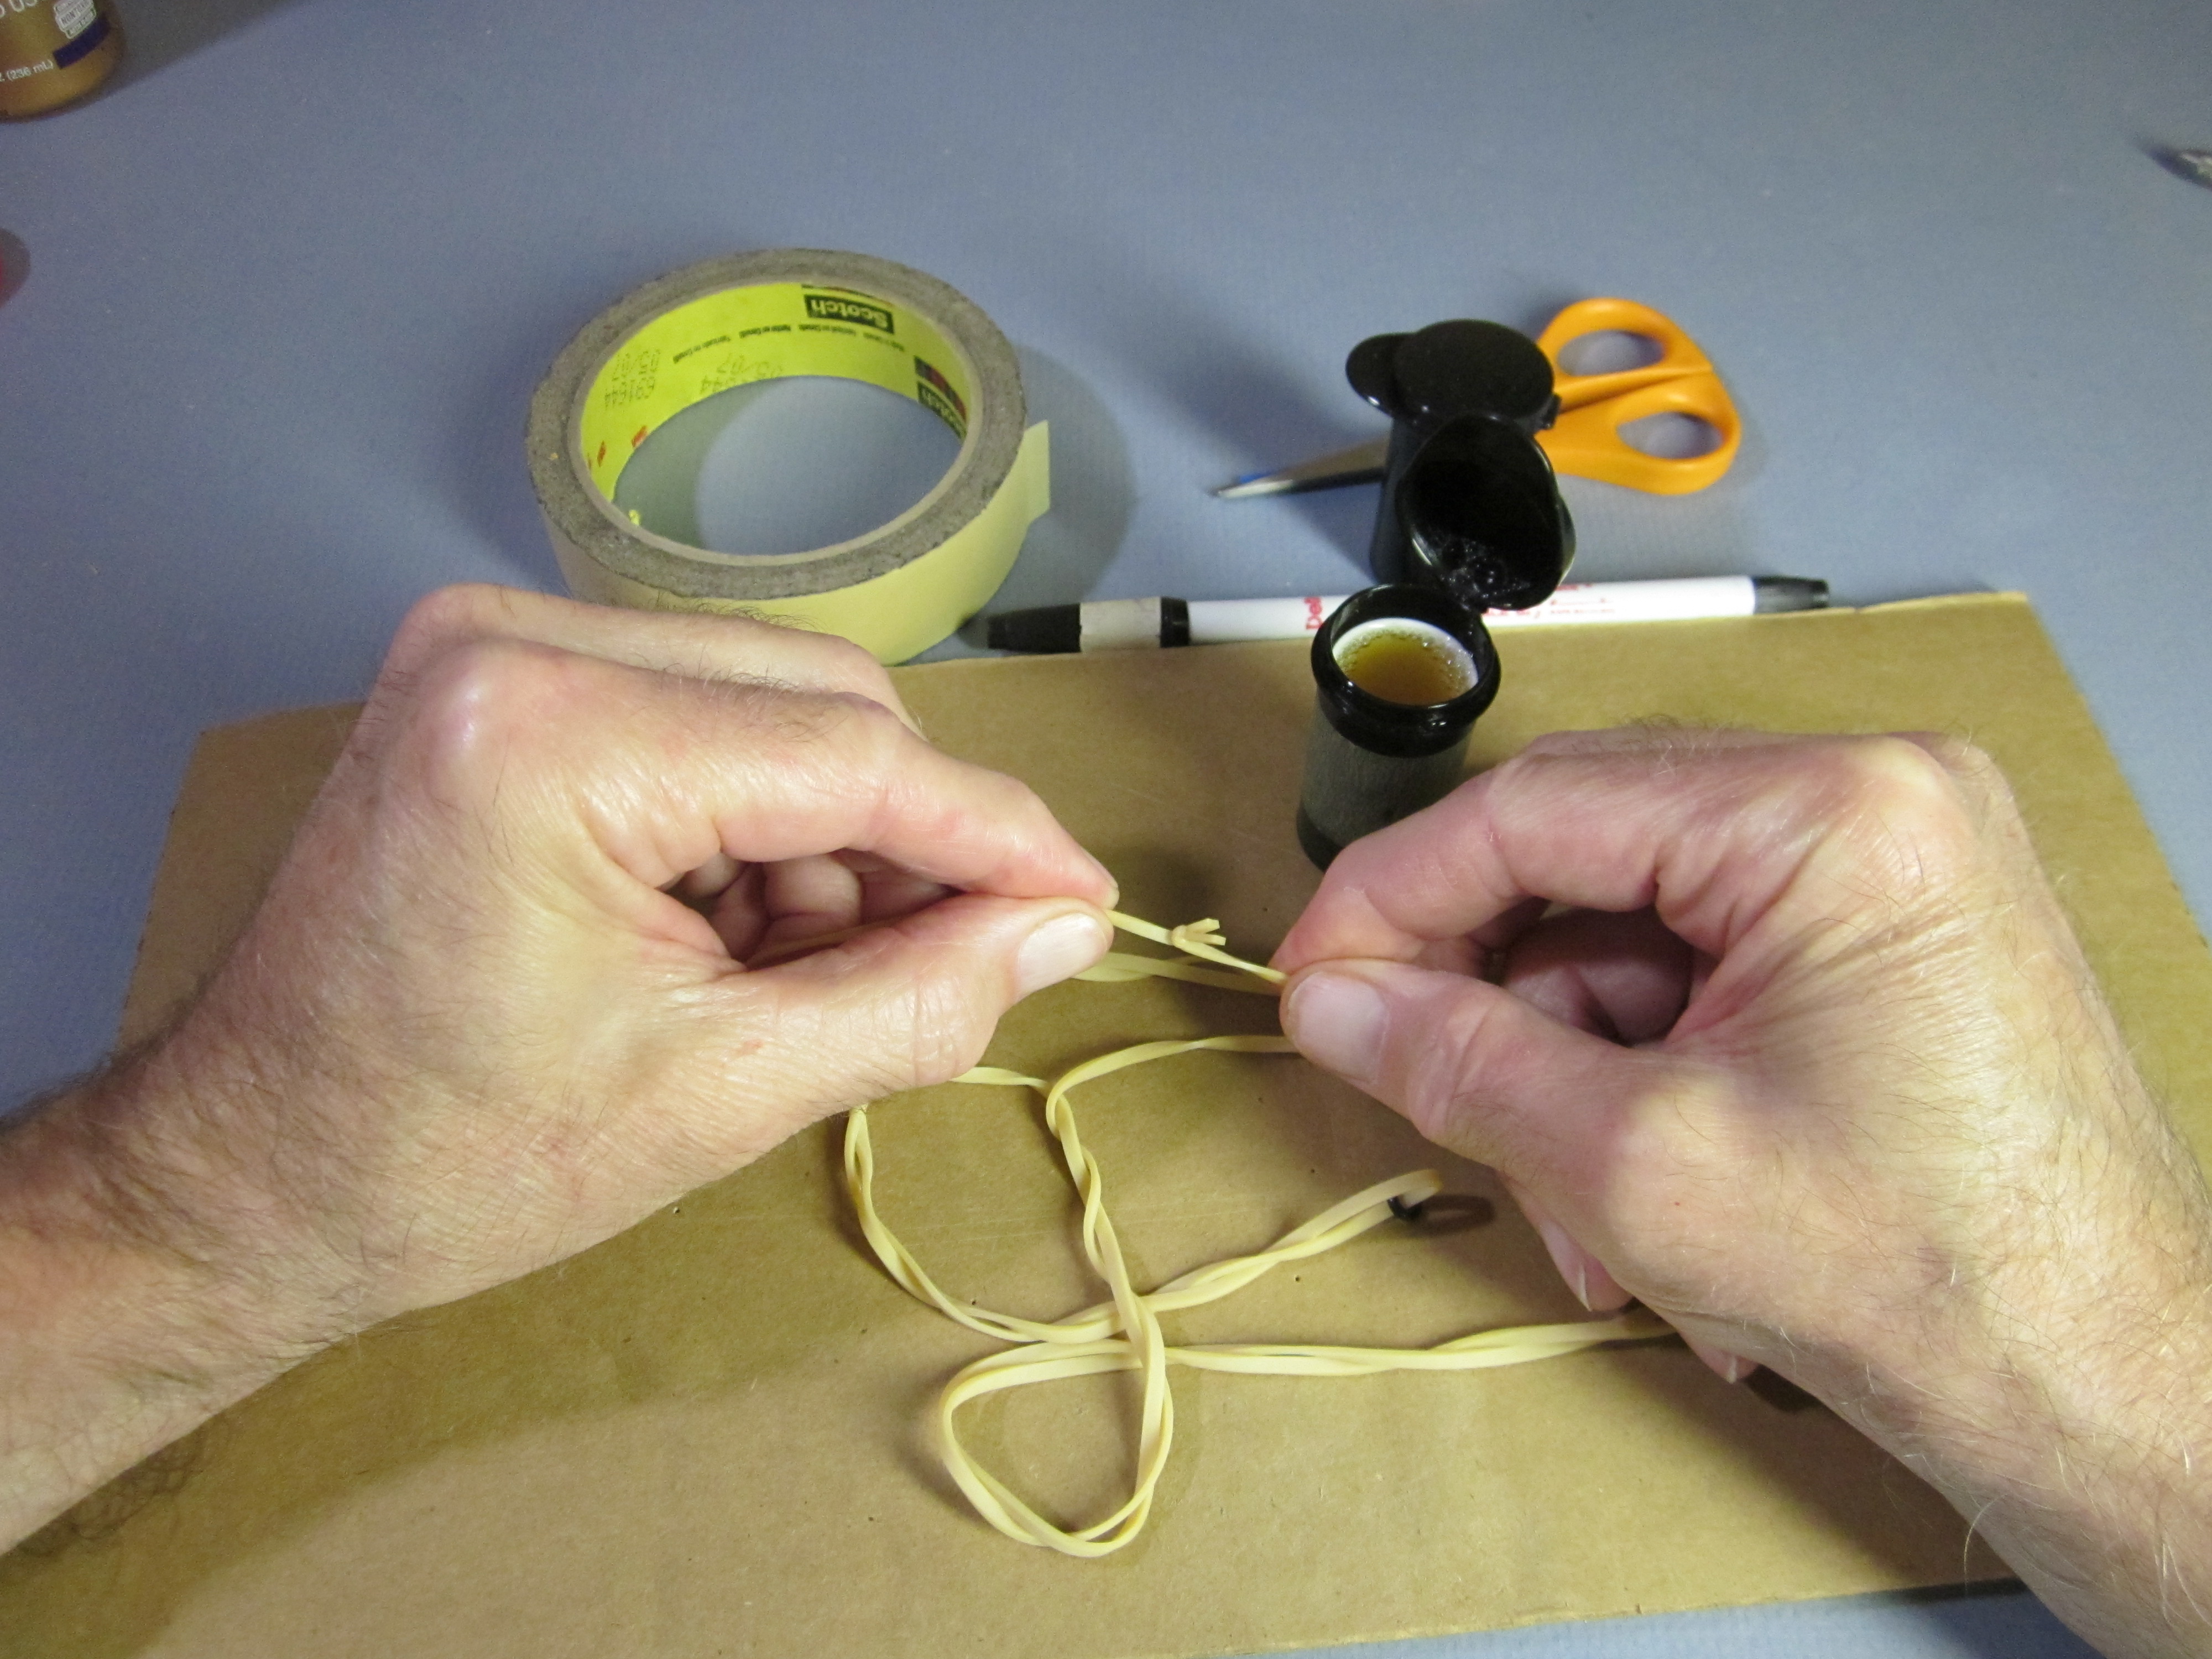
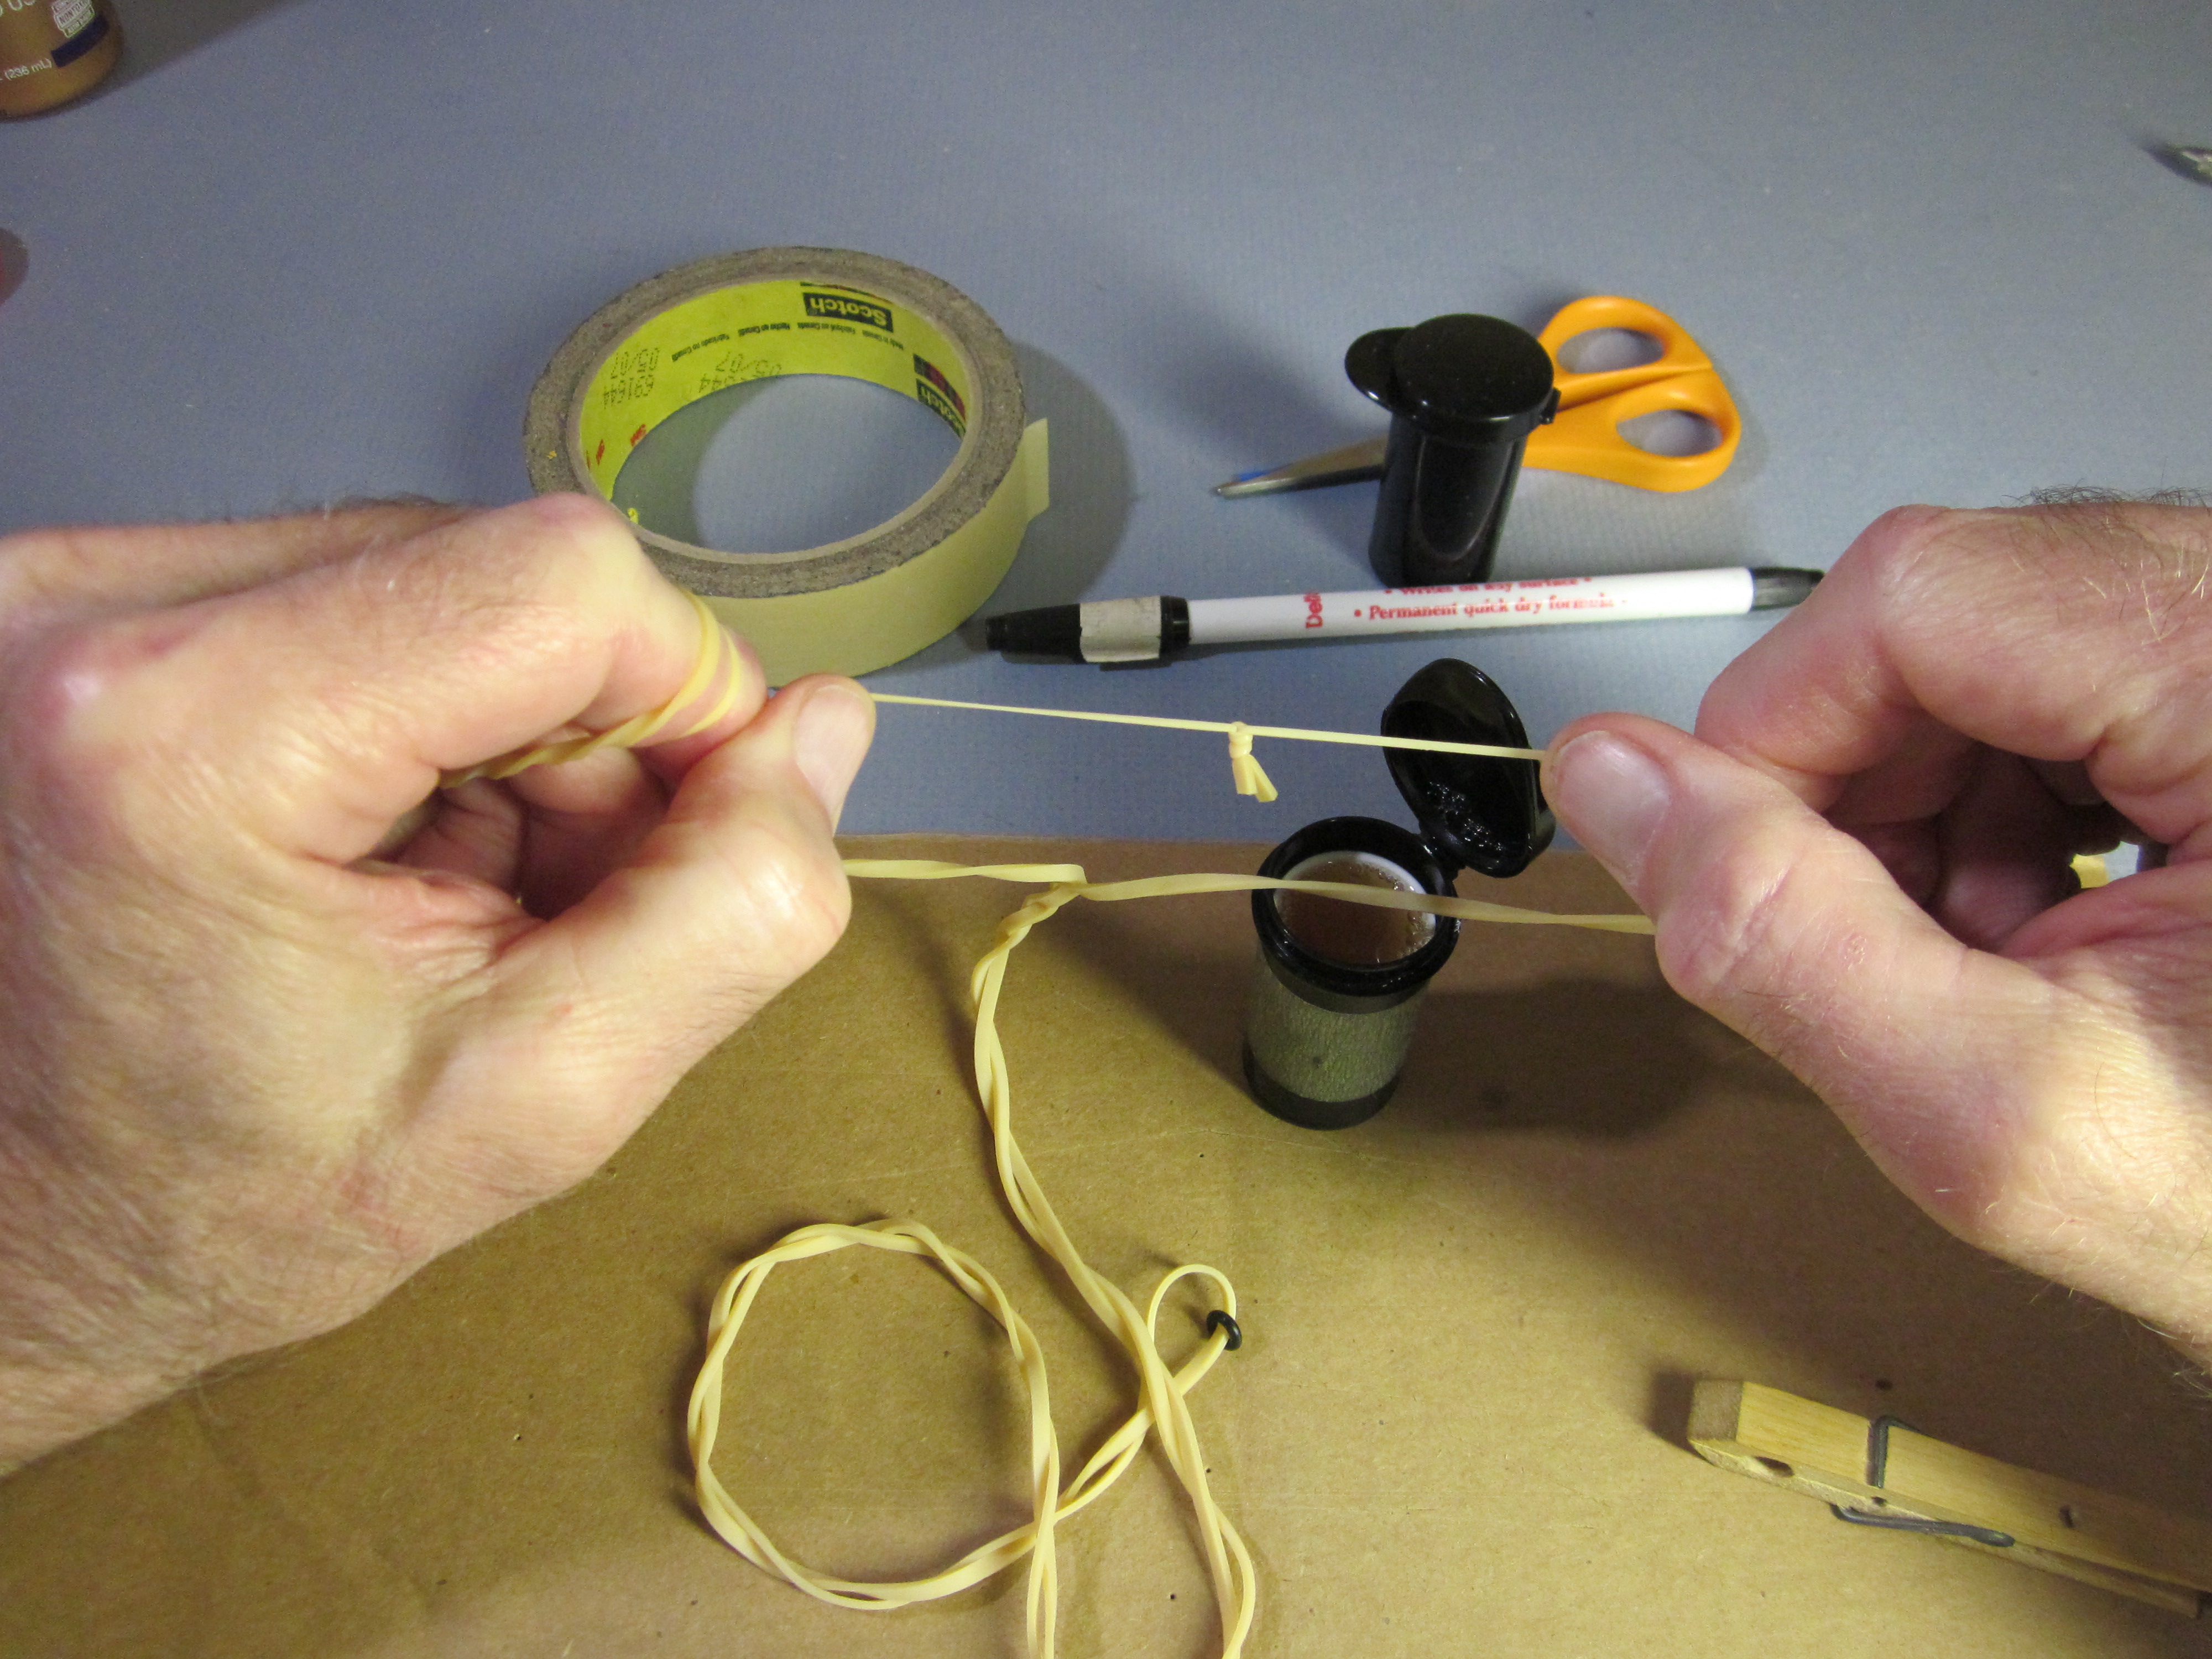
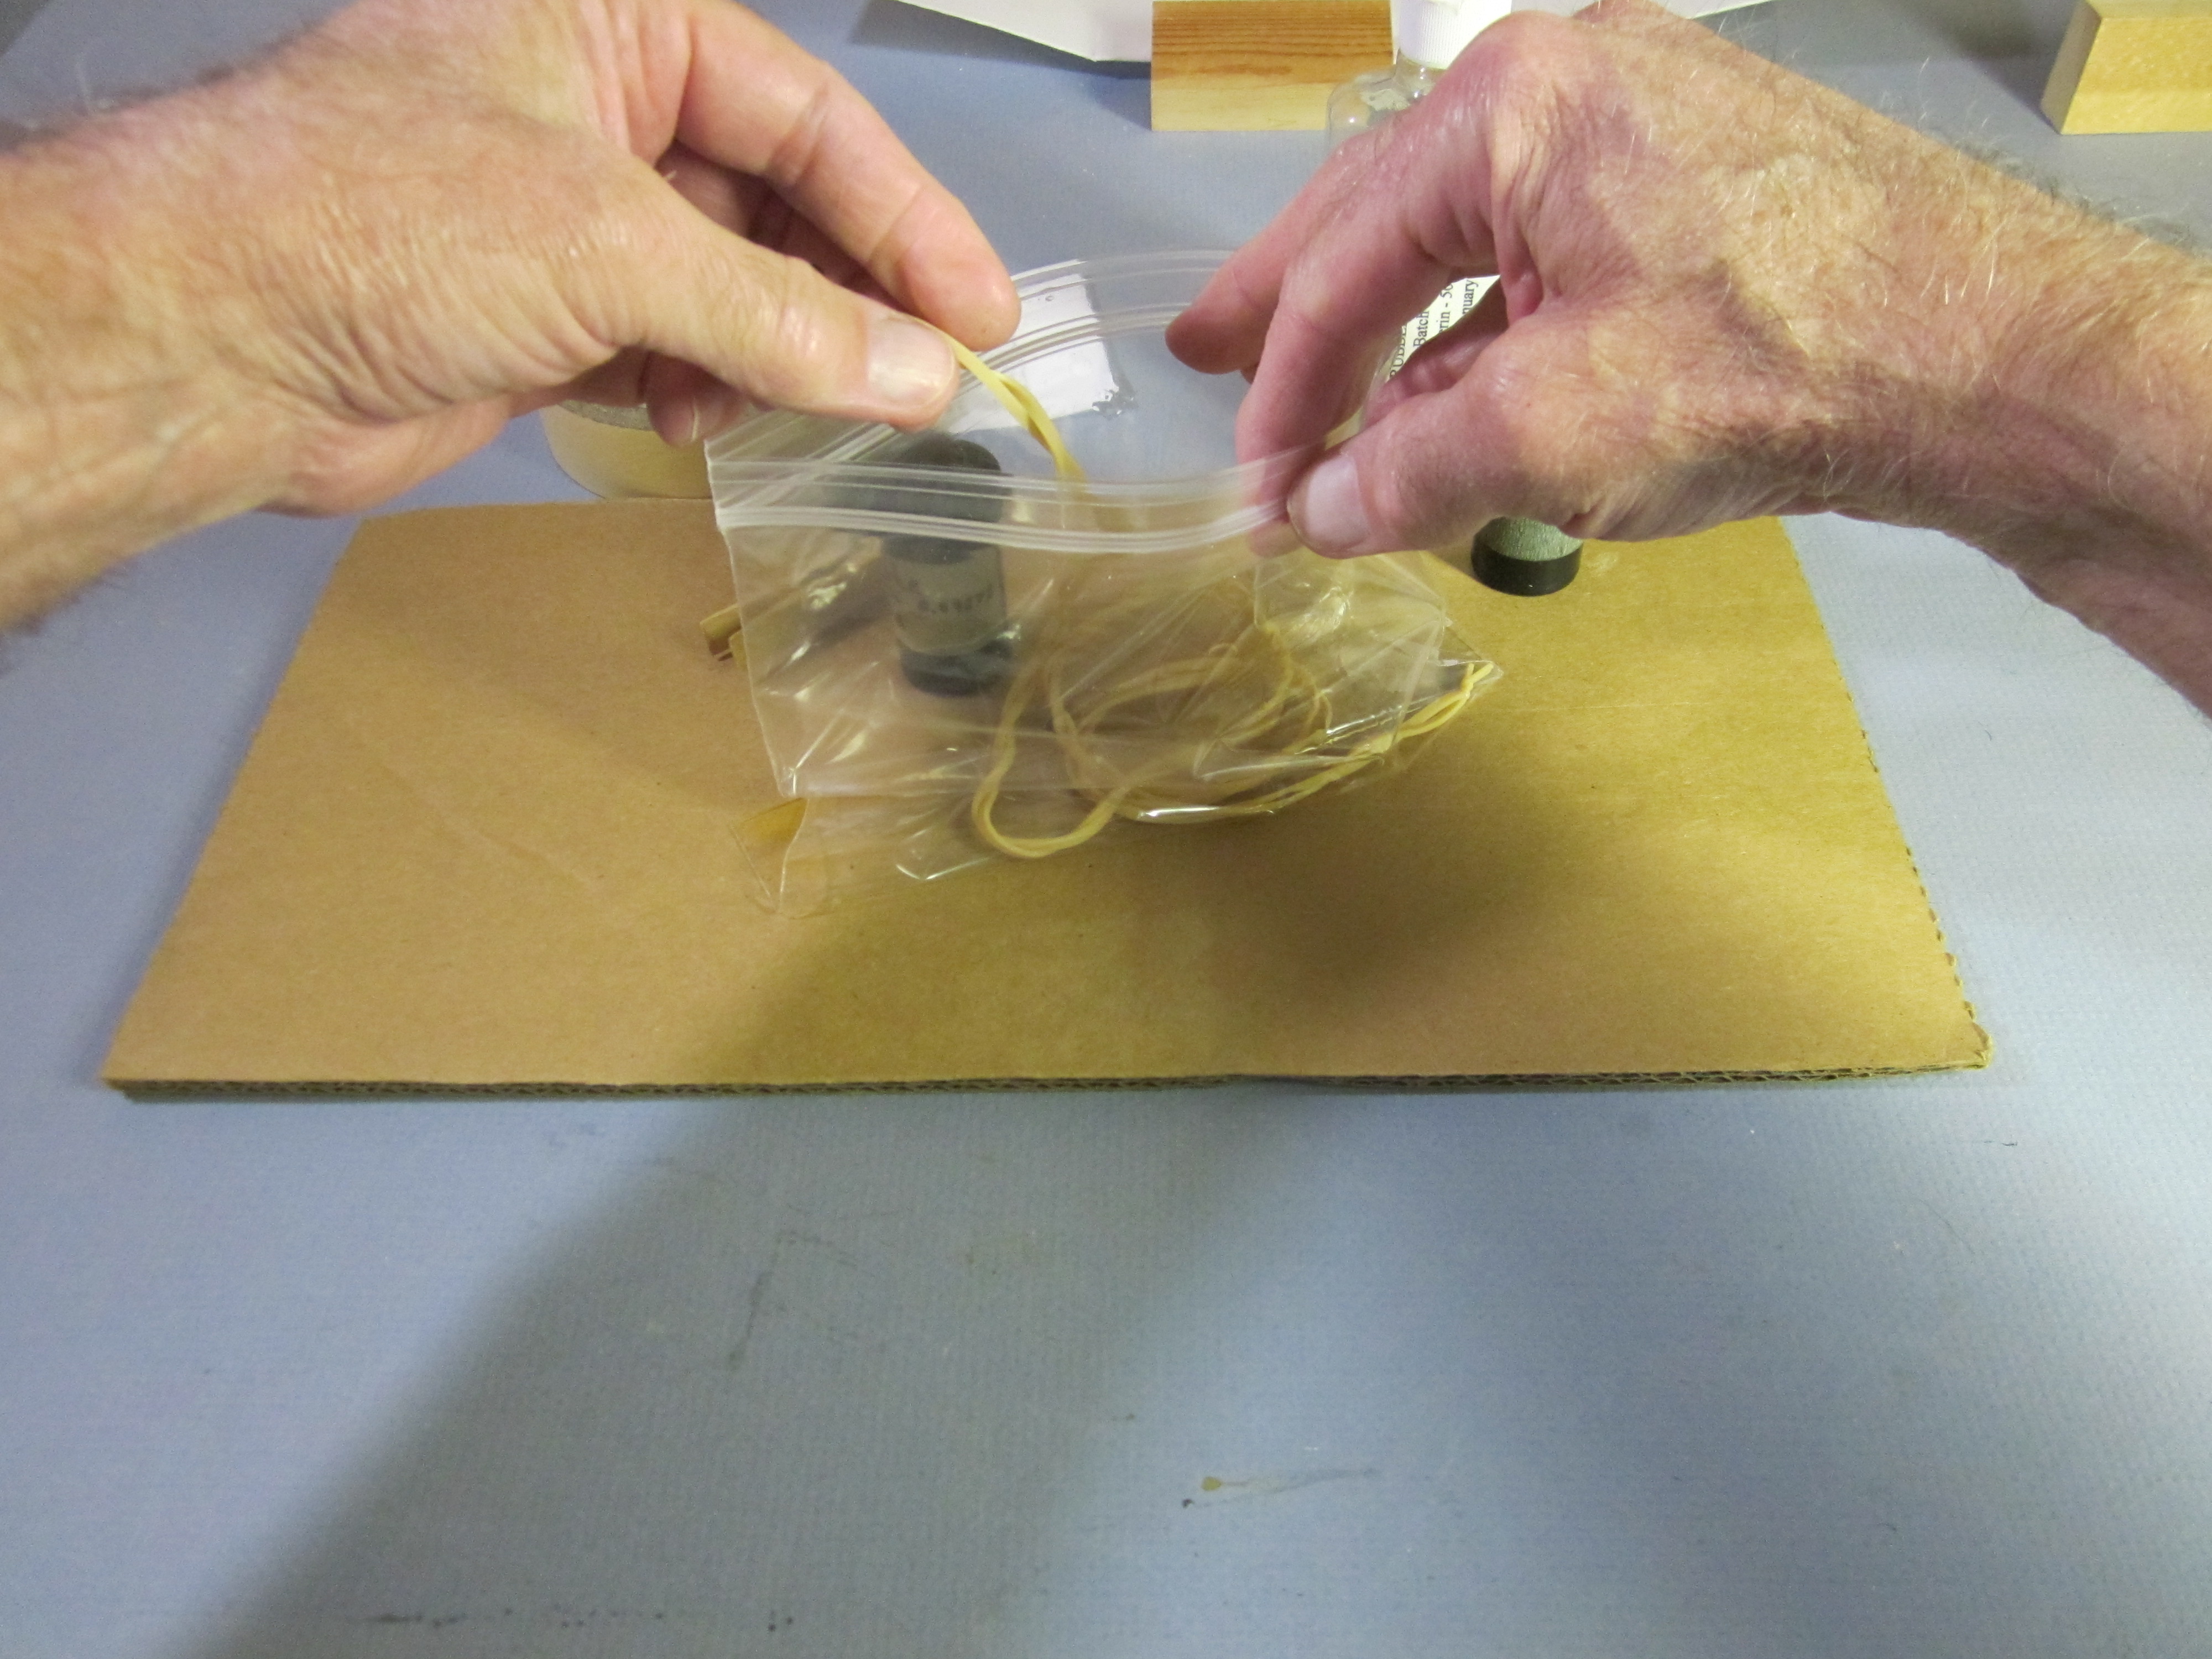
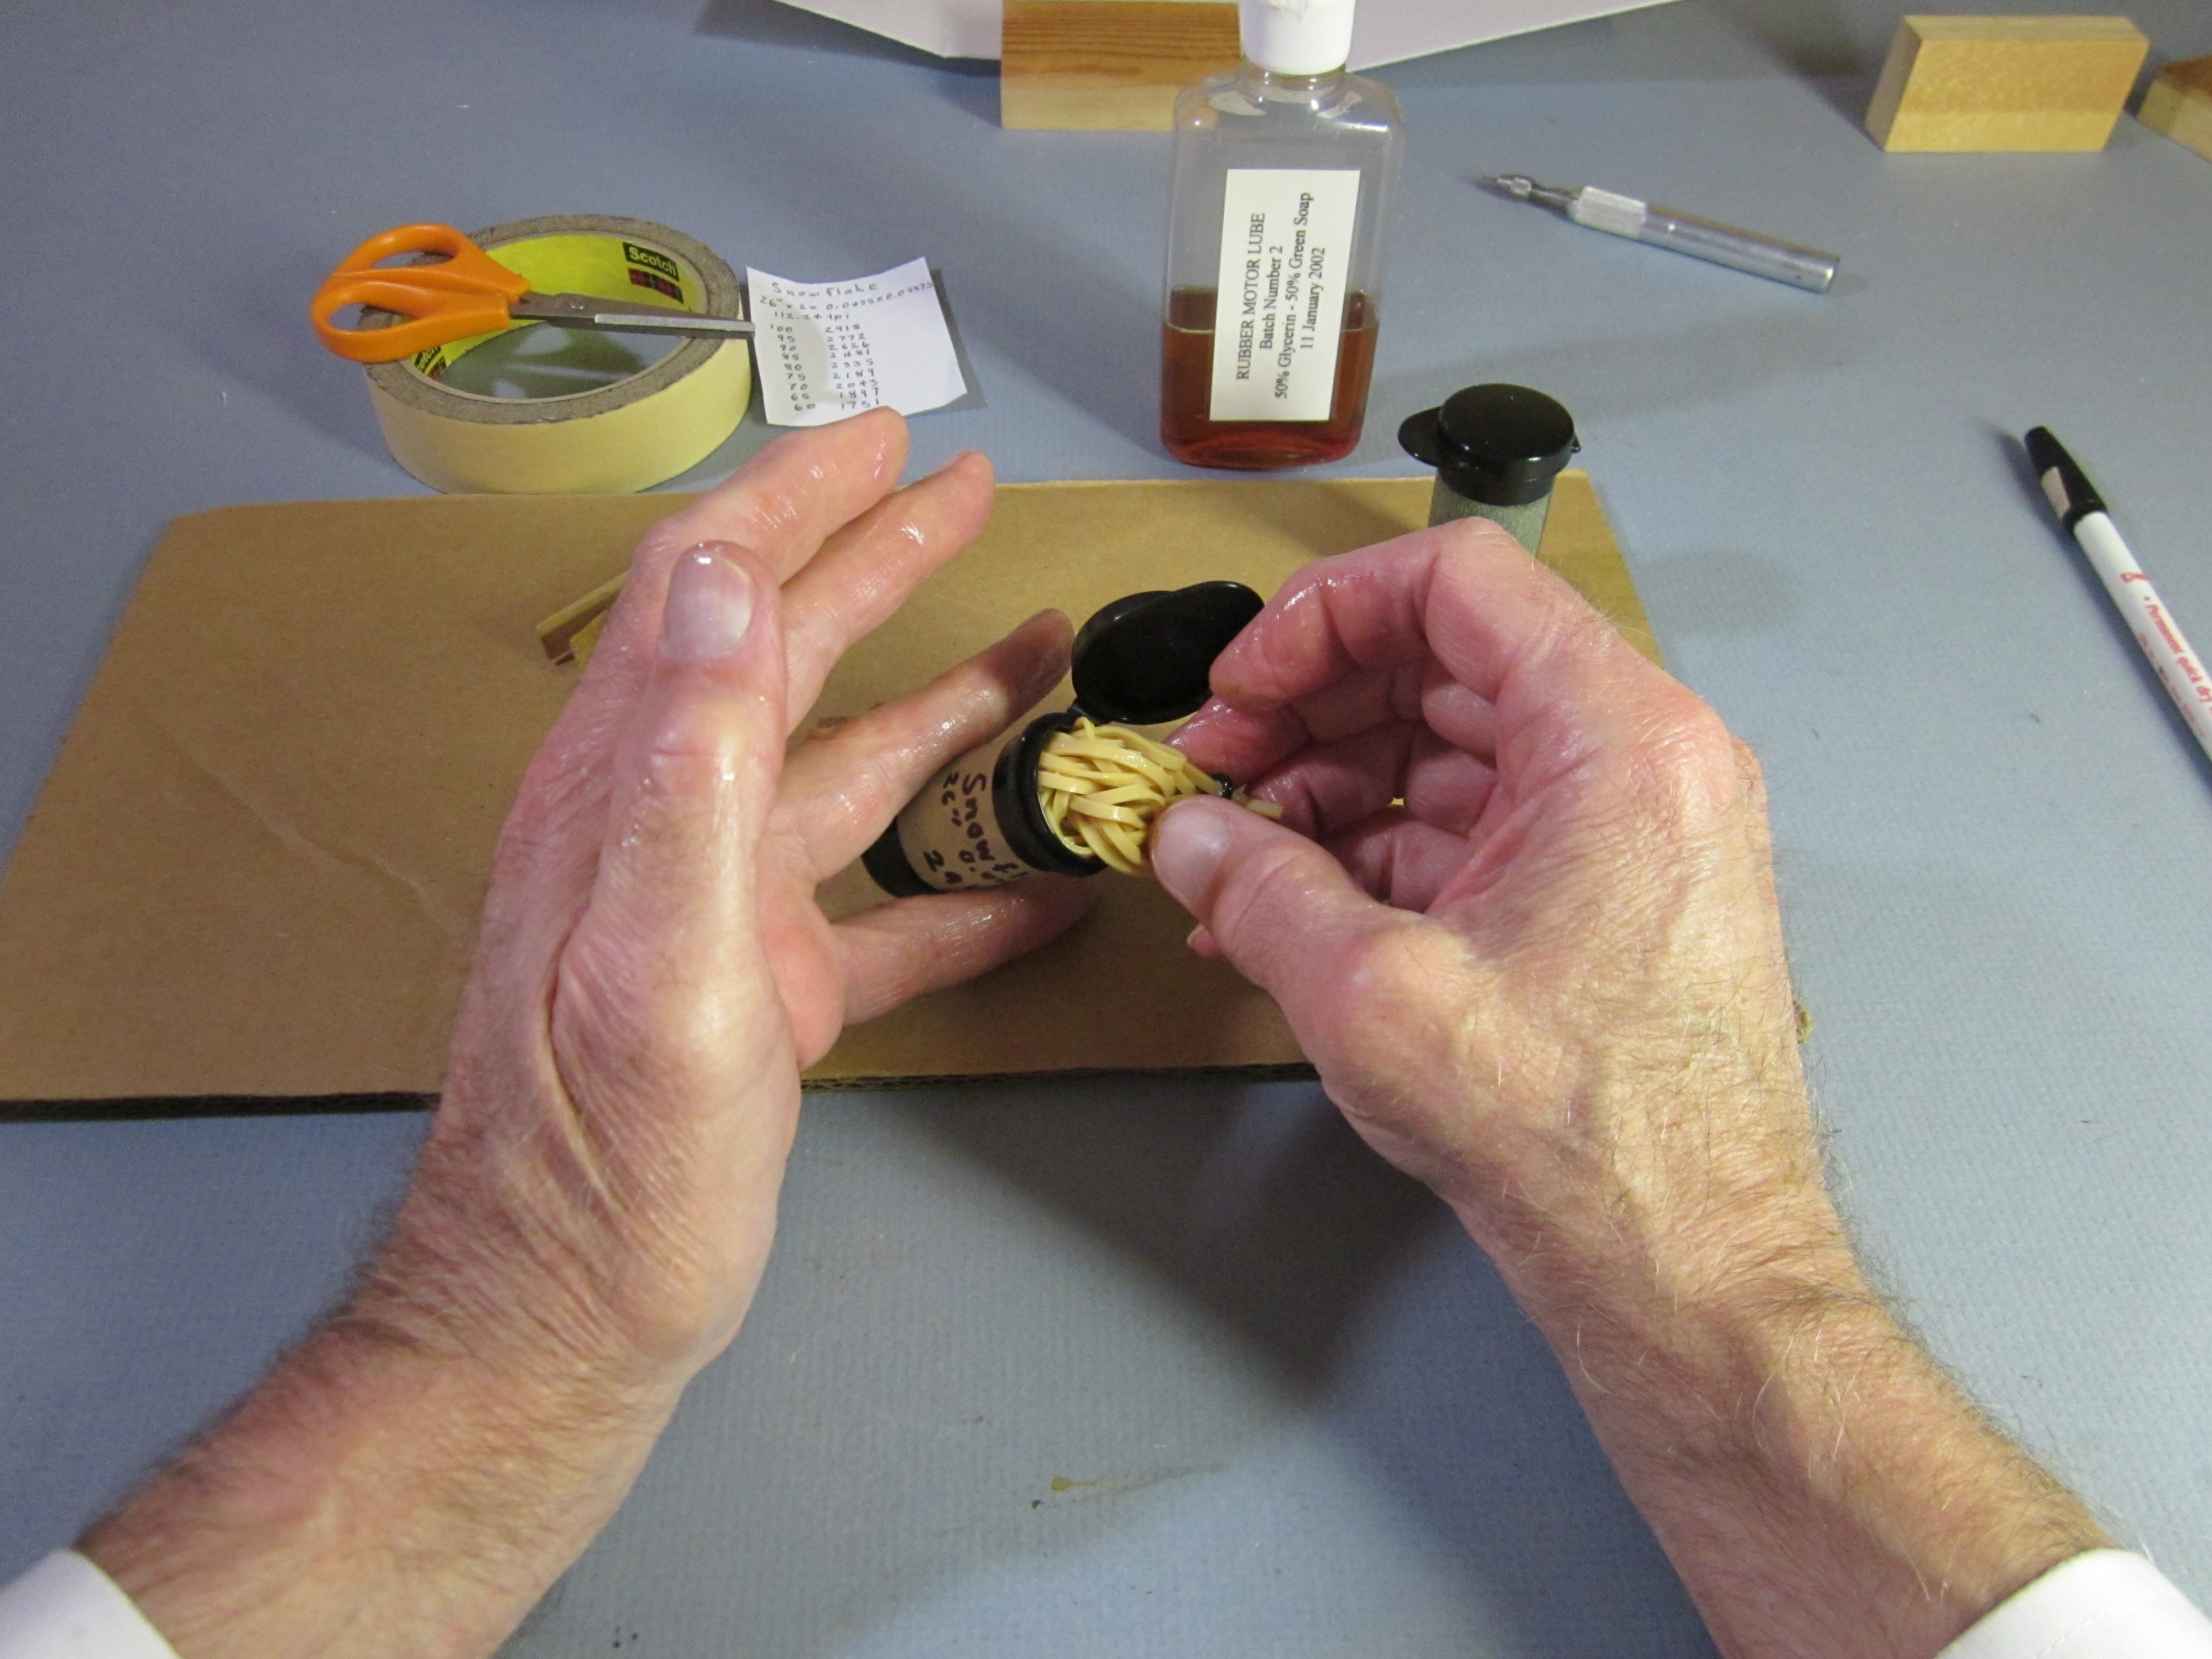
 For the duration motor, cut a 52 1/2″ length of 3/32″ rubber. Wash it and blot it dry. Put one end through an O-ring.
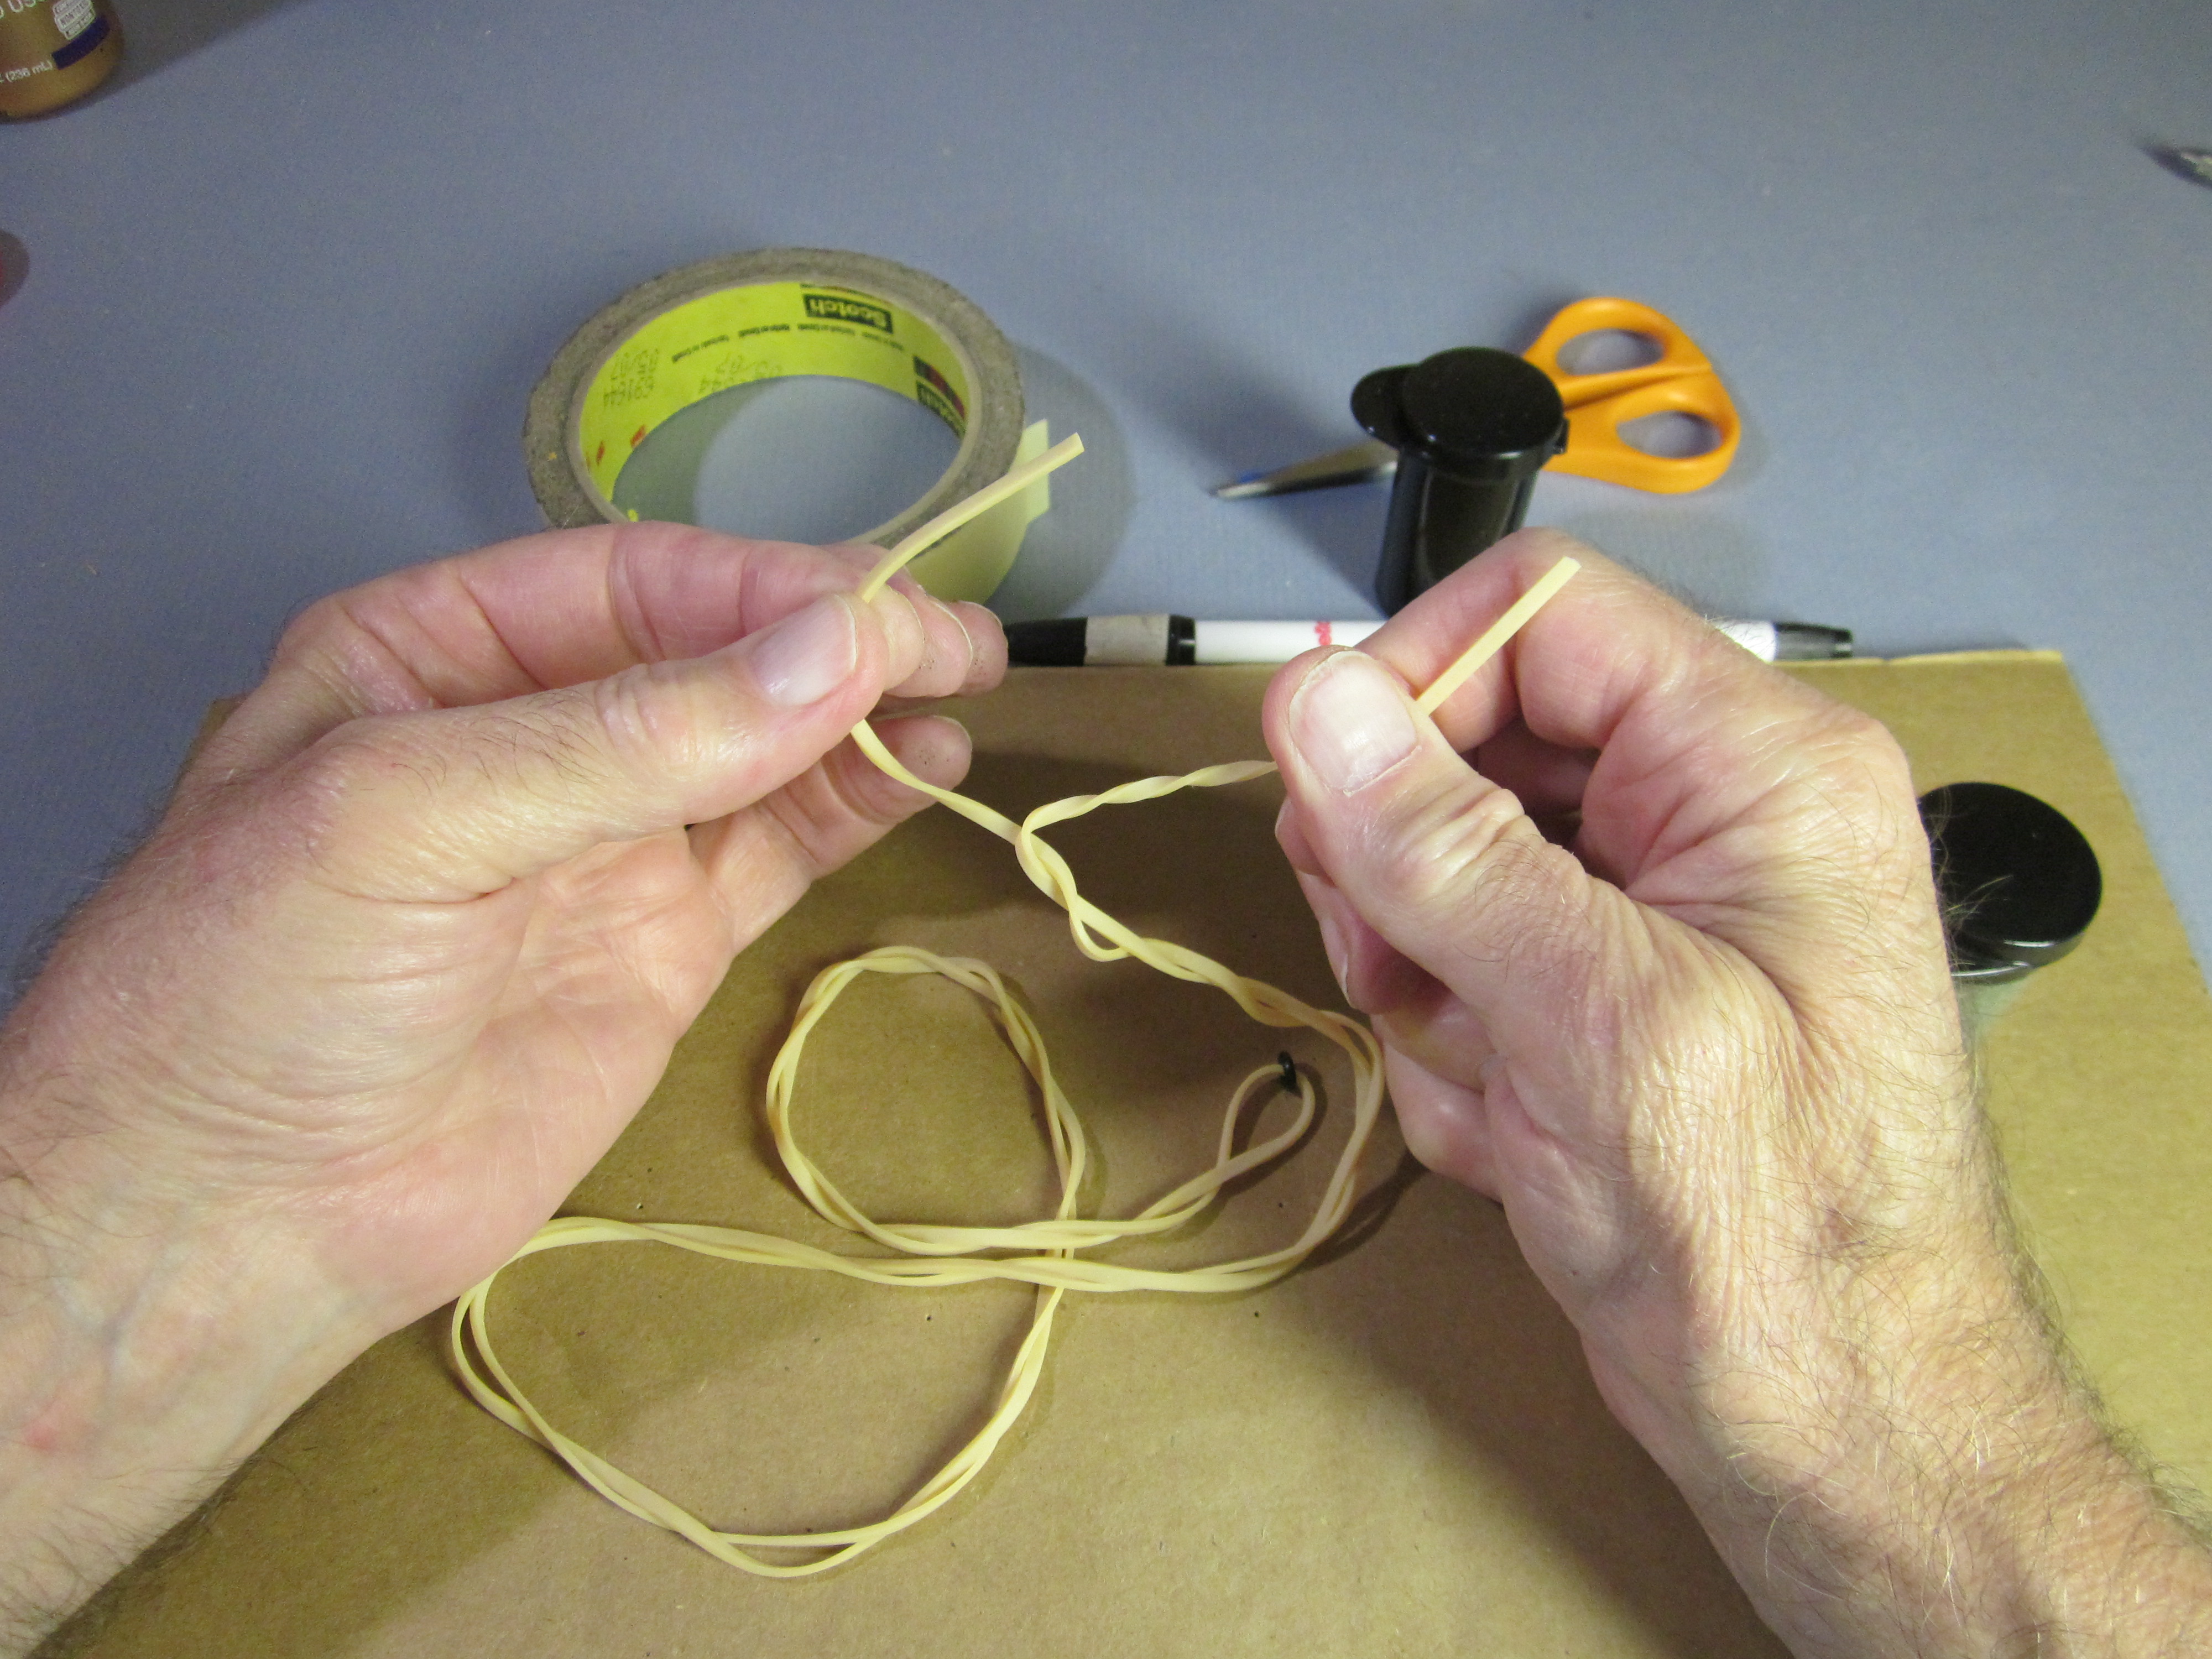 Twist one end of the strip clockwise until the two halves of the motor are twined around themselves for their entire length.
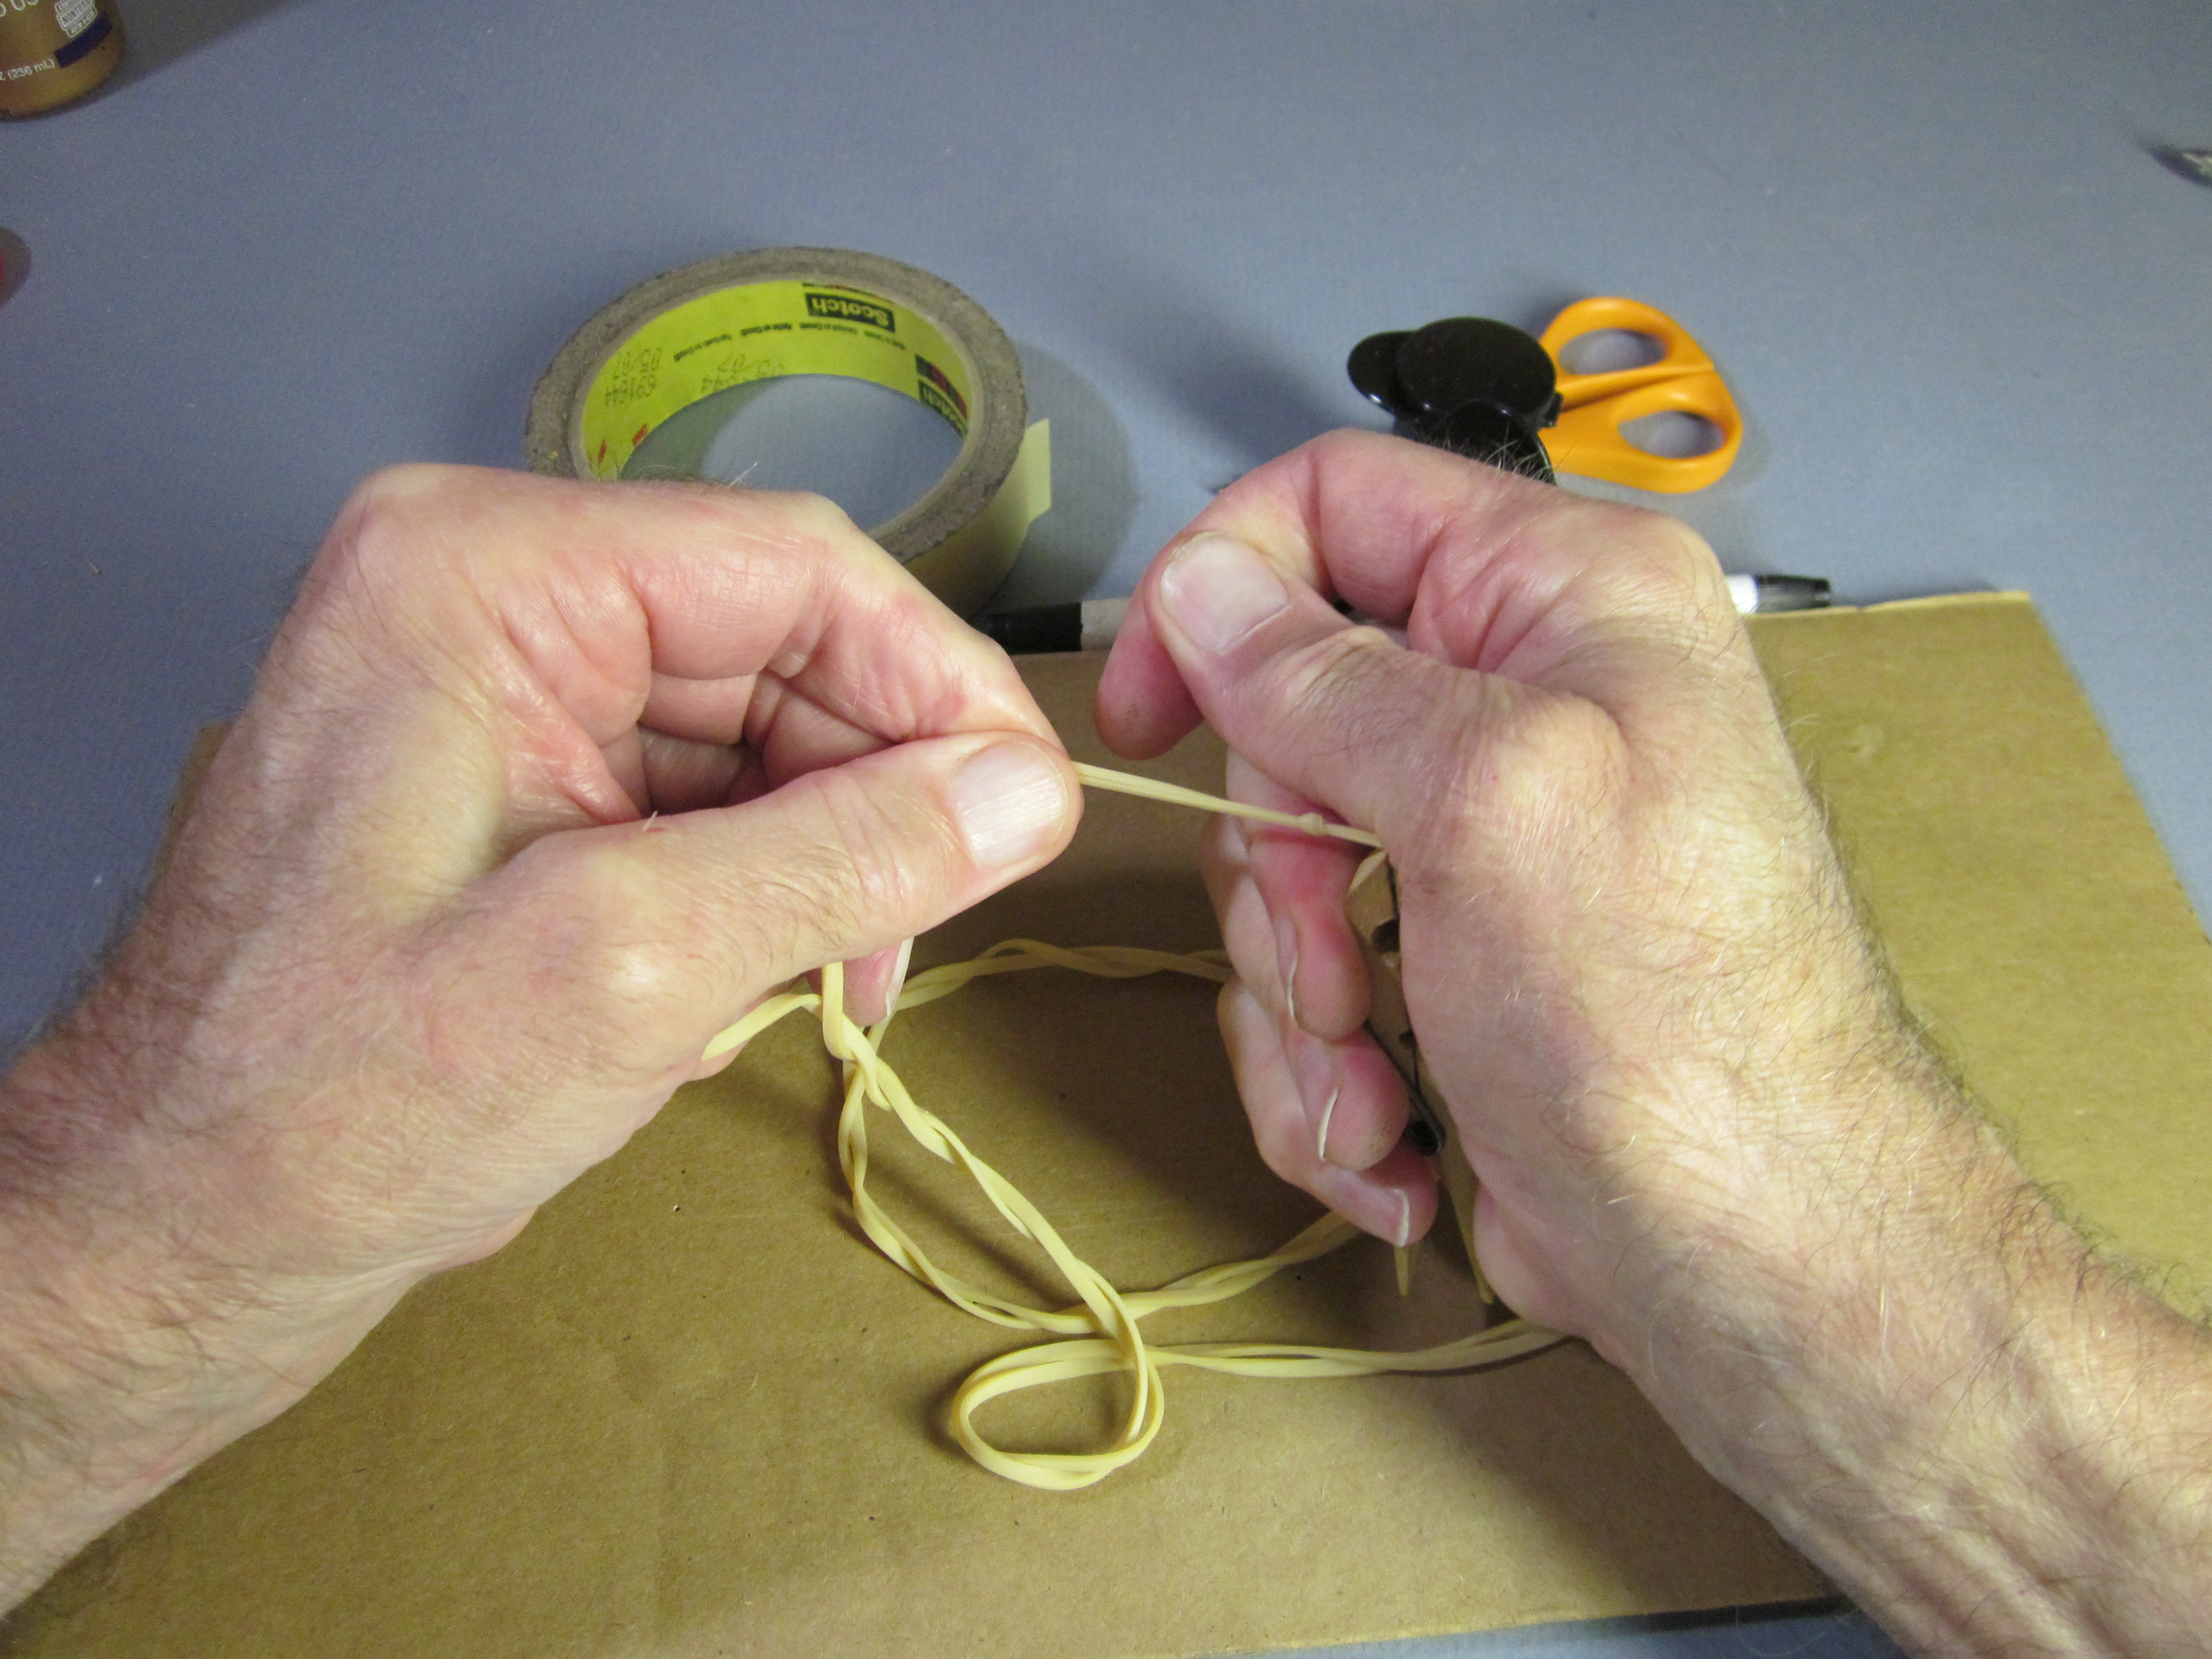
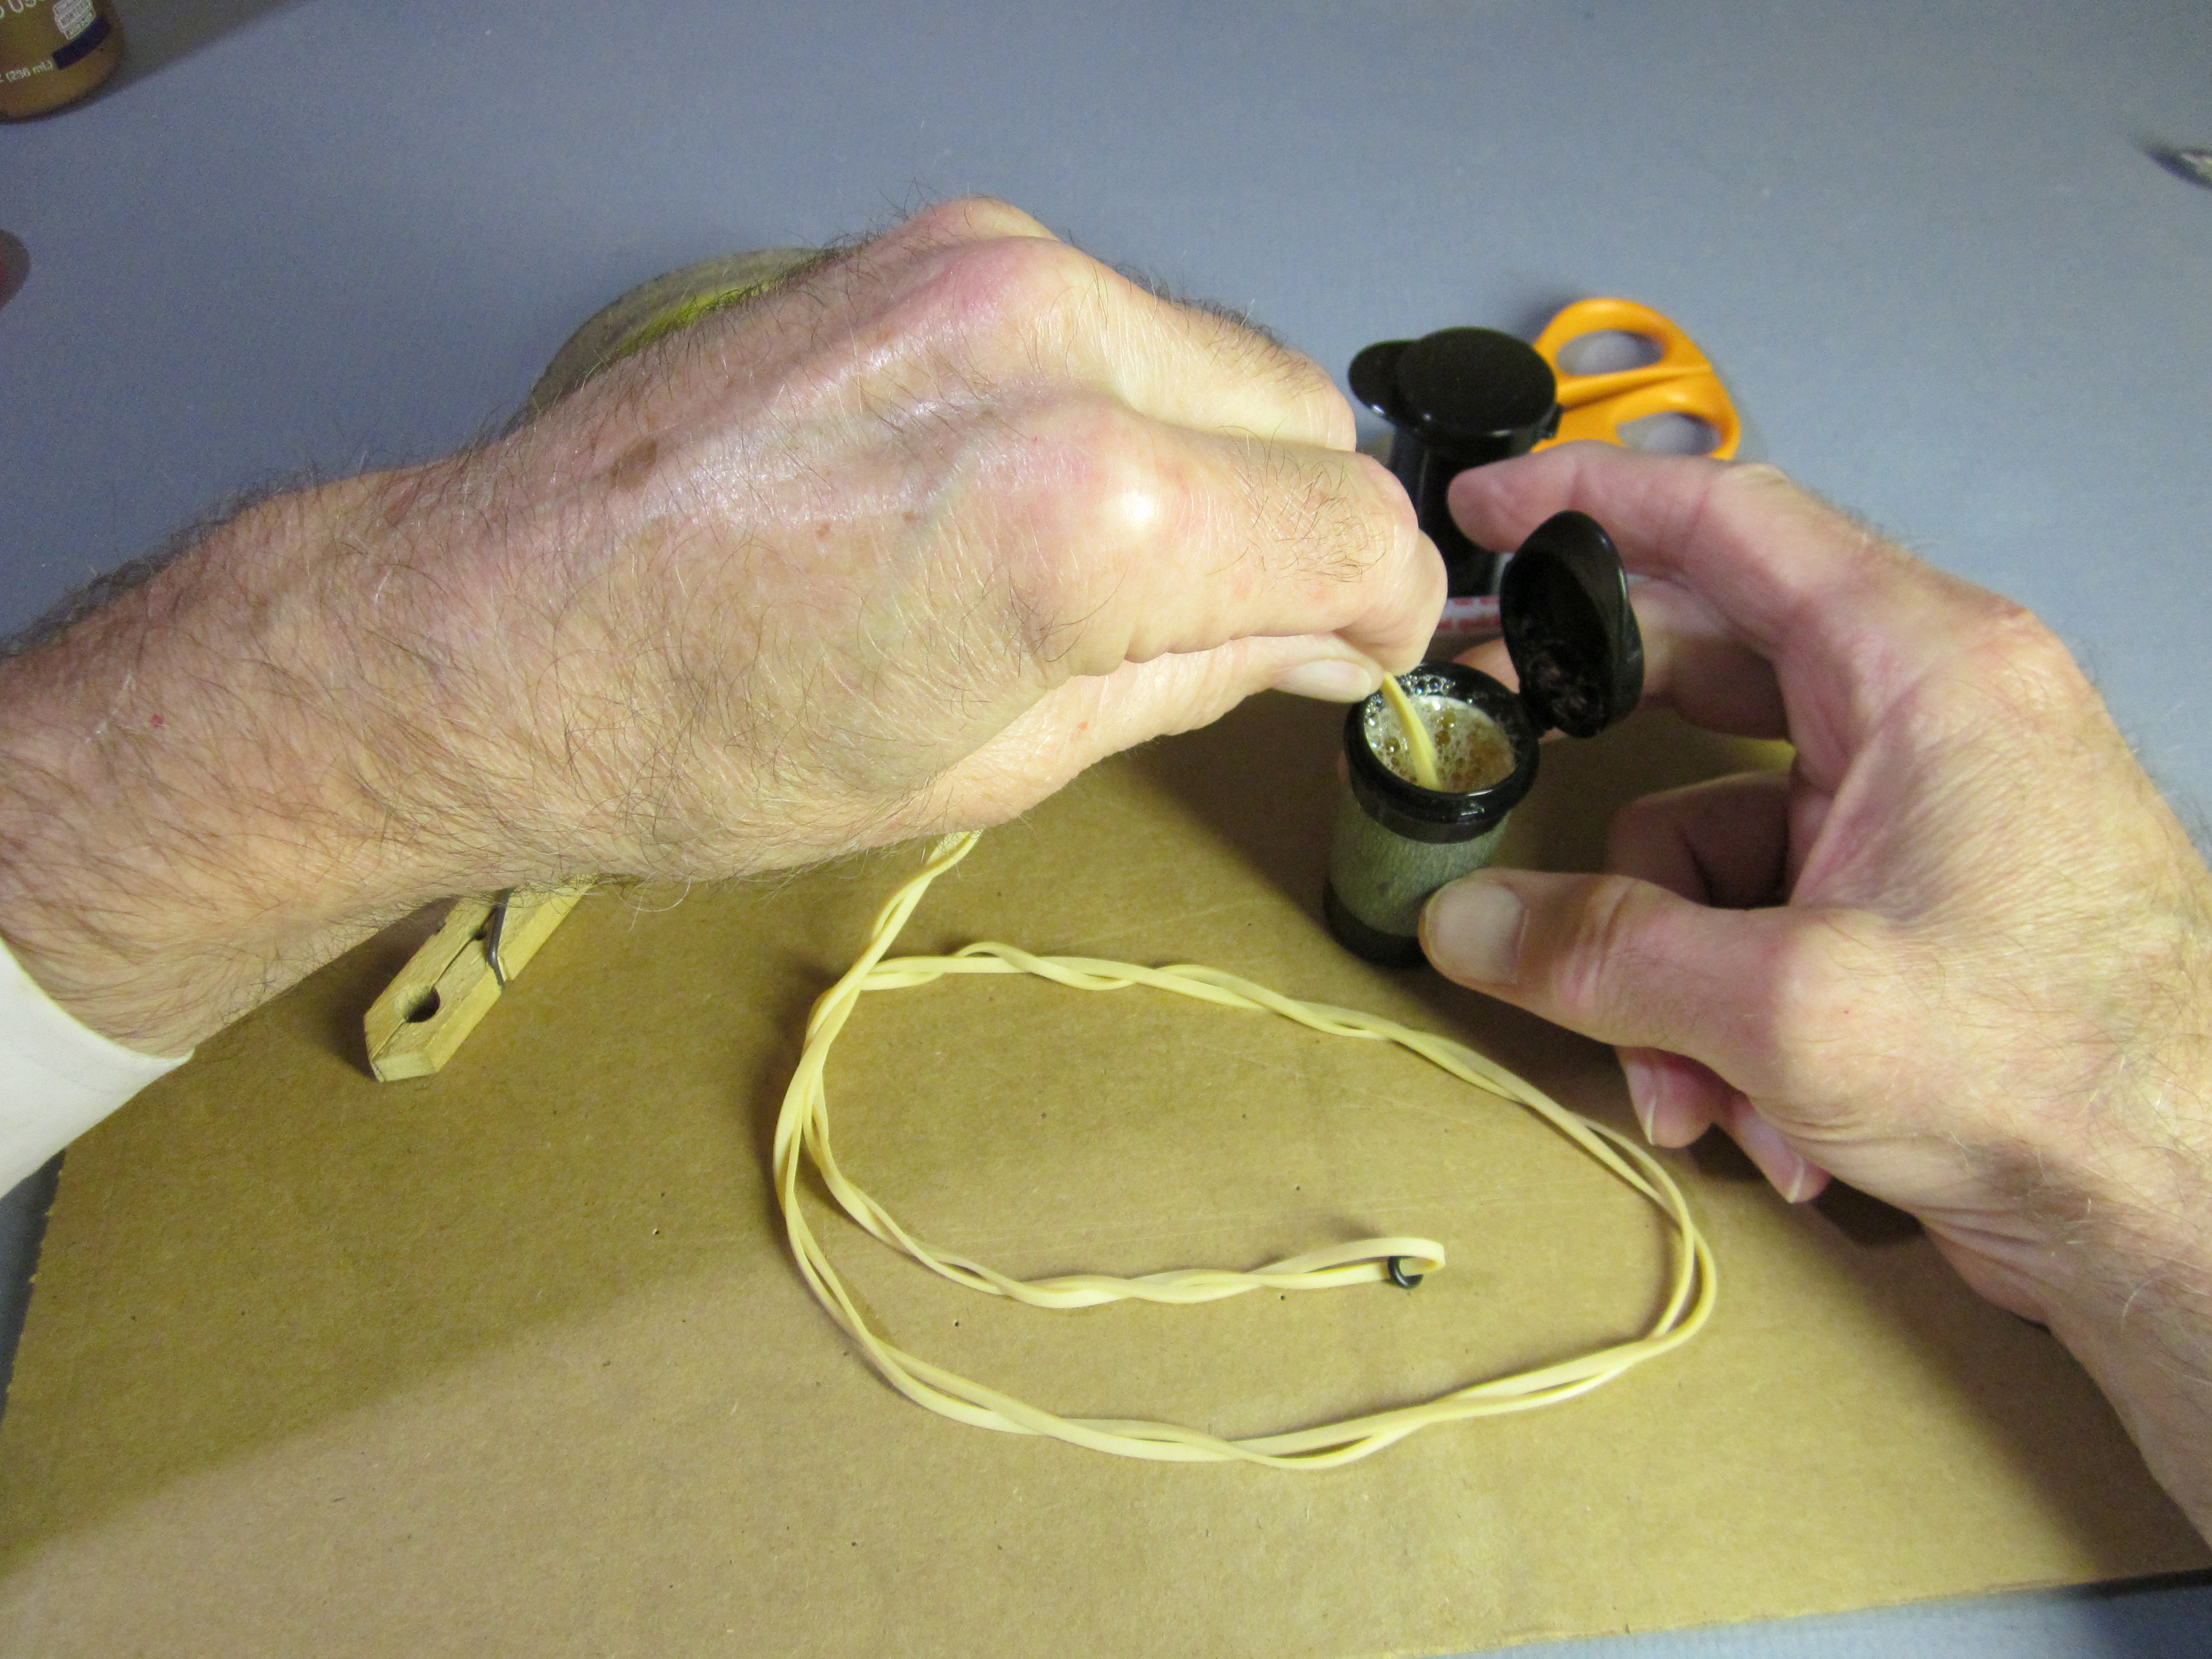 Hold the motor about 2″ from the ends and dip both ends into a solution of knot lube. Knot lube is two volumes of motor lube mixed with one volume of water. If you tie knots with straight lube, you will be able to see the knots untie themselves. Knot lube is not so slippery, just enough to allow us to tie tight knots in the rubber without tearing it.
 Dip your finger and thumb into the knot lube.
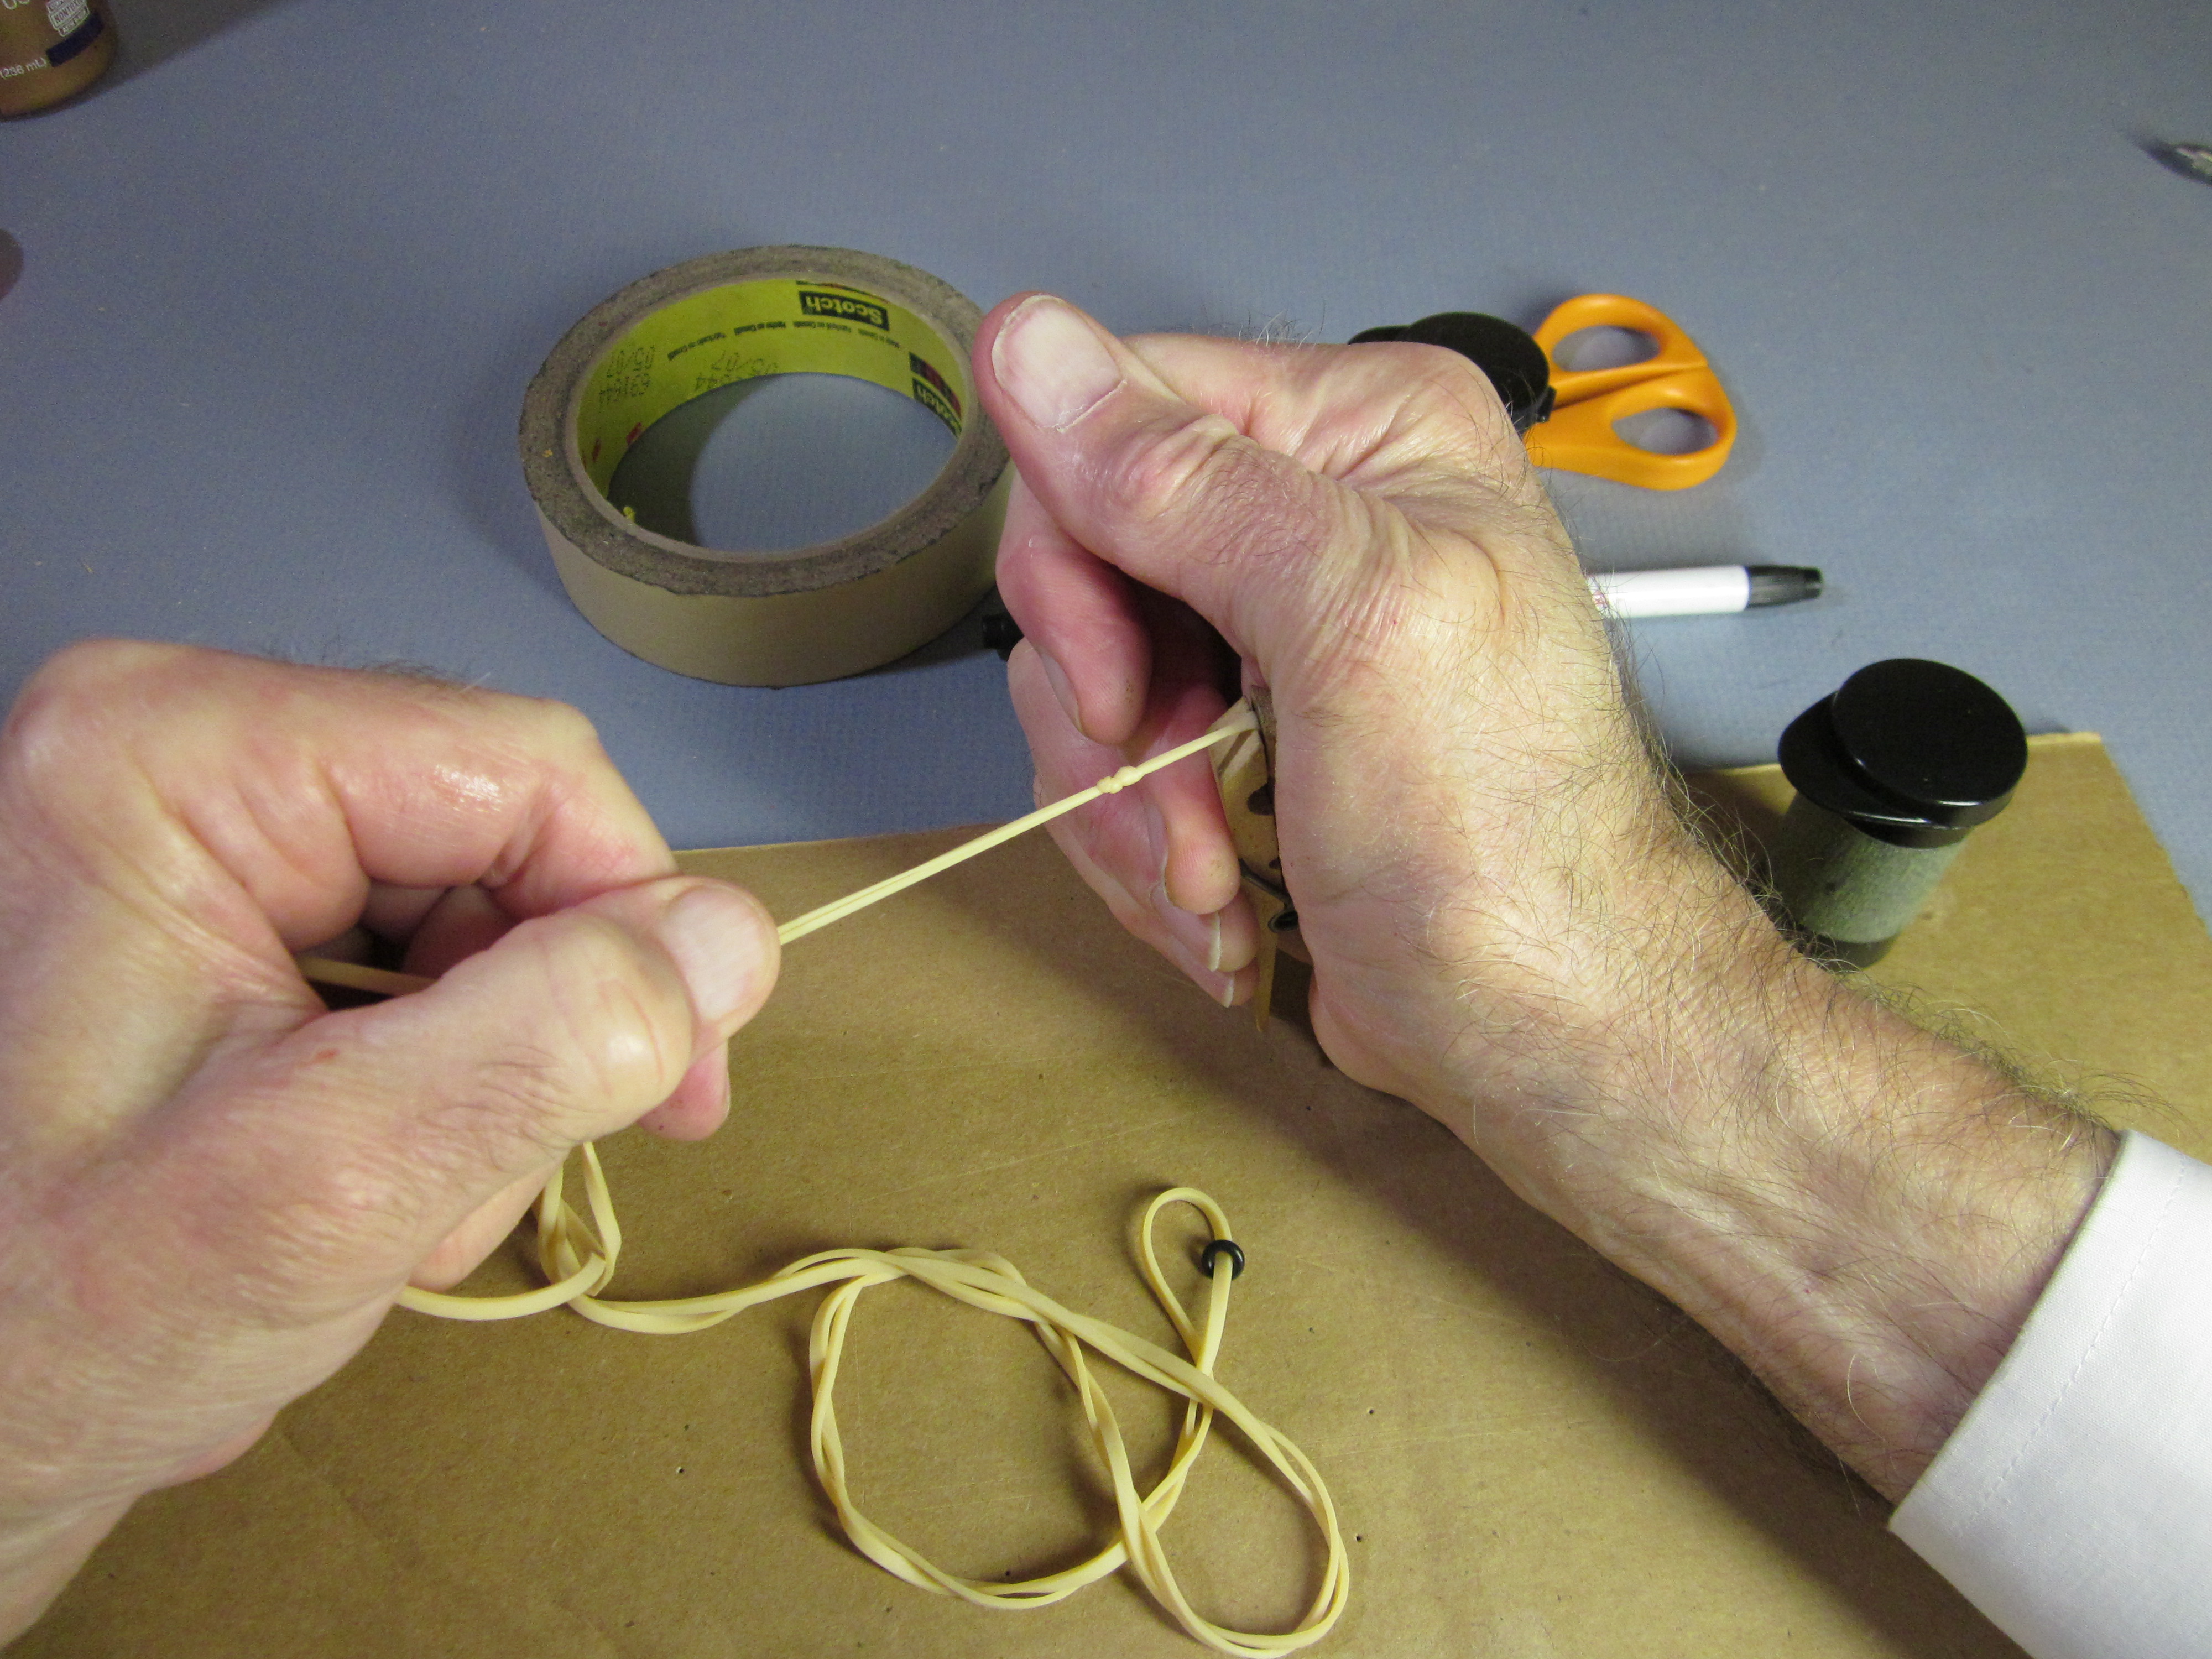
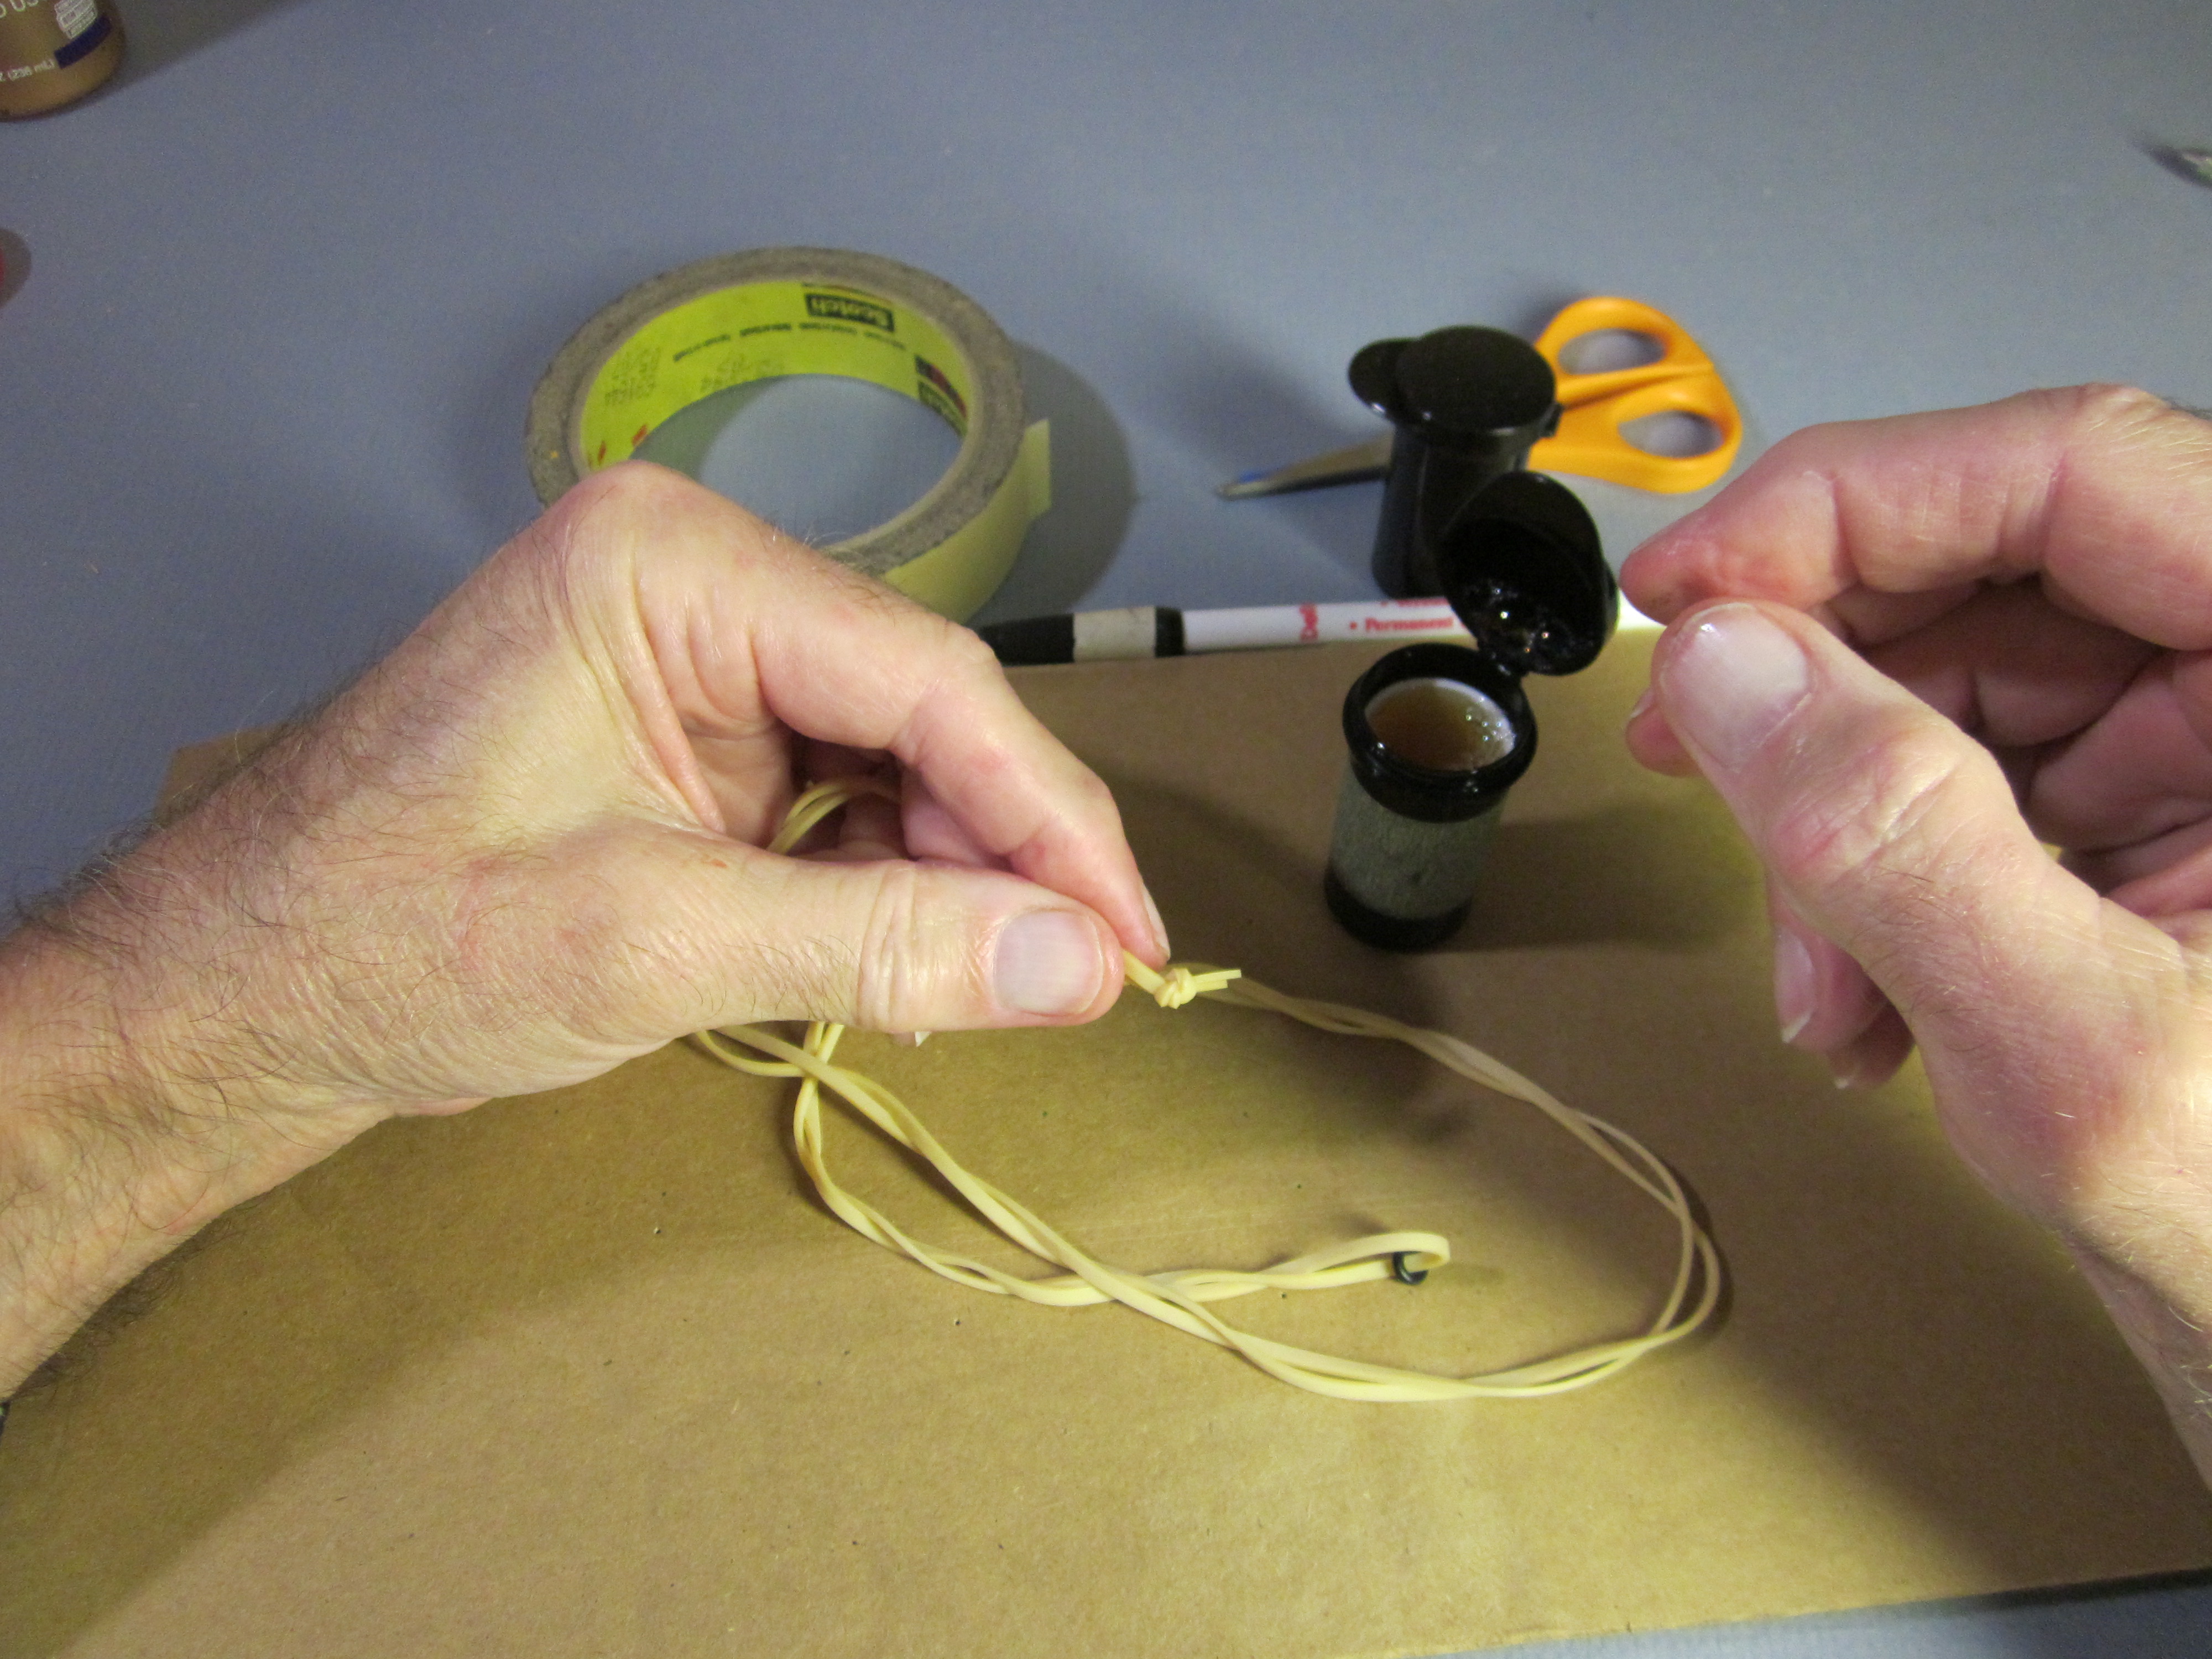 Tie a simple overhand knot in the pair of strands. Pull it out close to the ends.
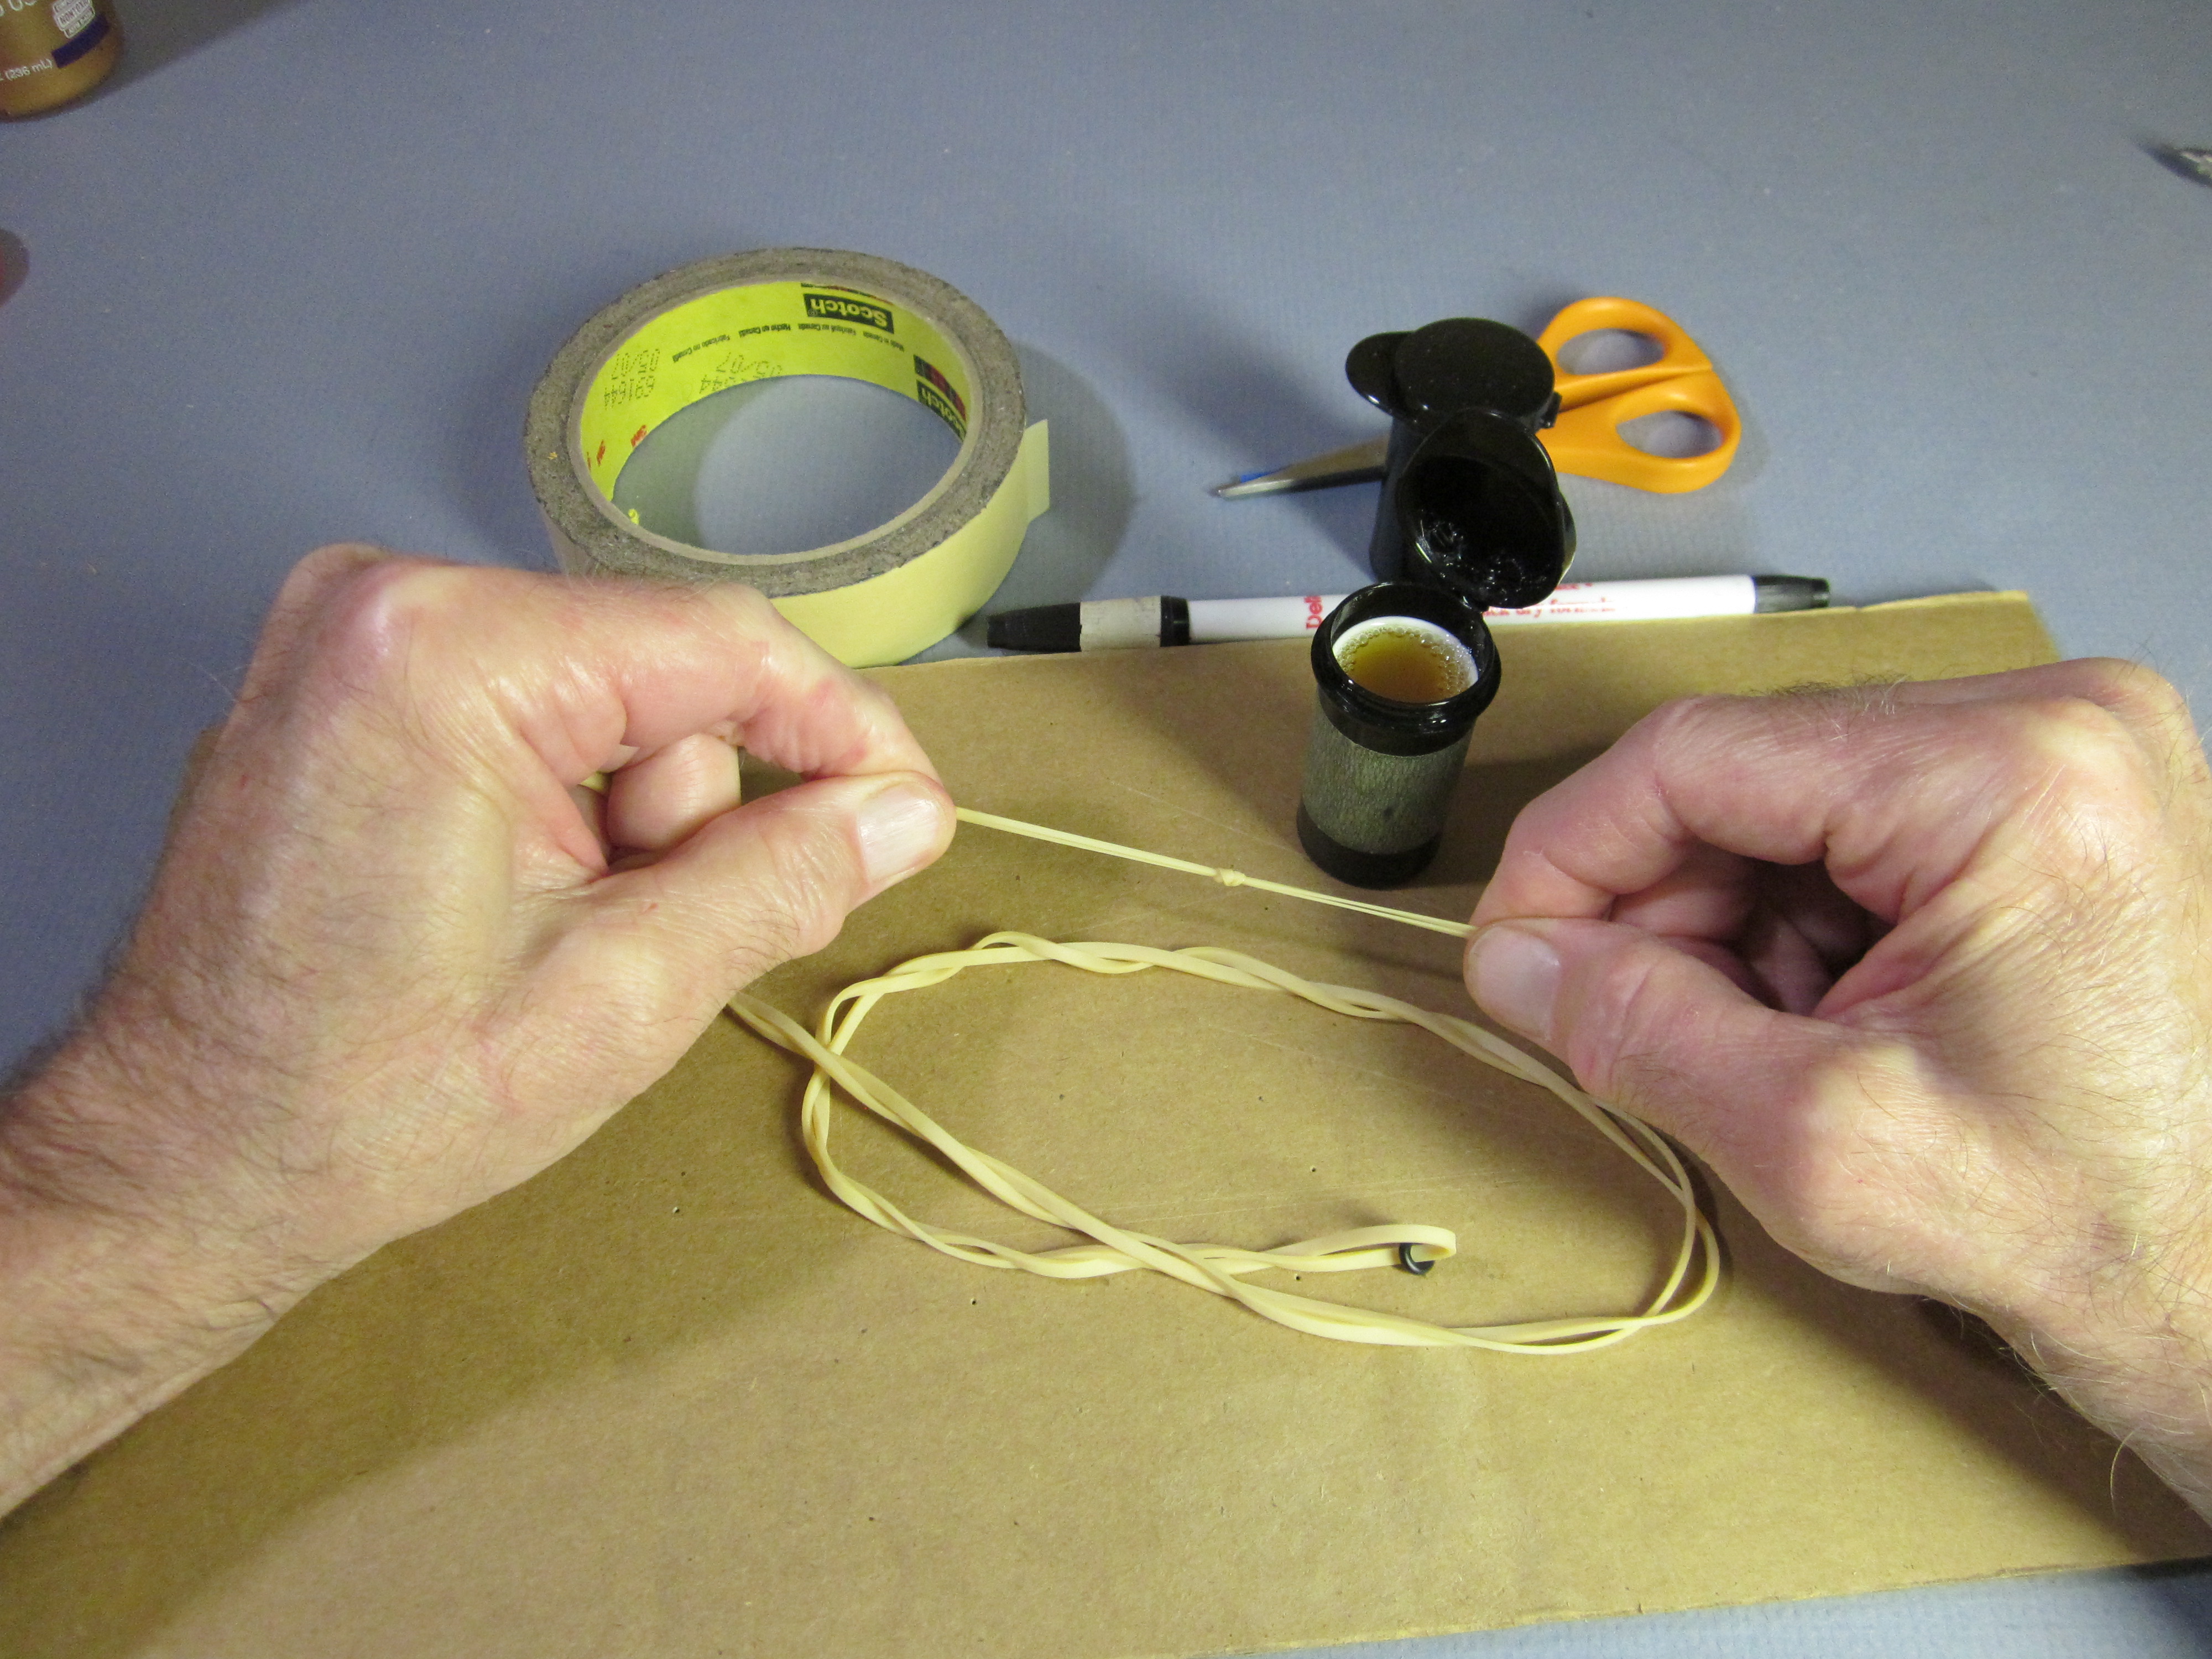 Pull the knot tight.
 Pull the two strands to move the knot close to the ends of the strands.
 Pull until the knot is no more than about 1/8″ from the ends.
 Grab the ends tightly and pull the knot very tight. I am using a clothes pin to grip the short ends.
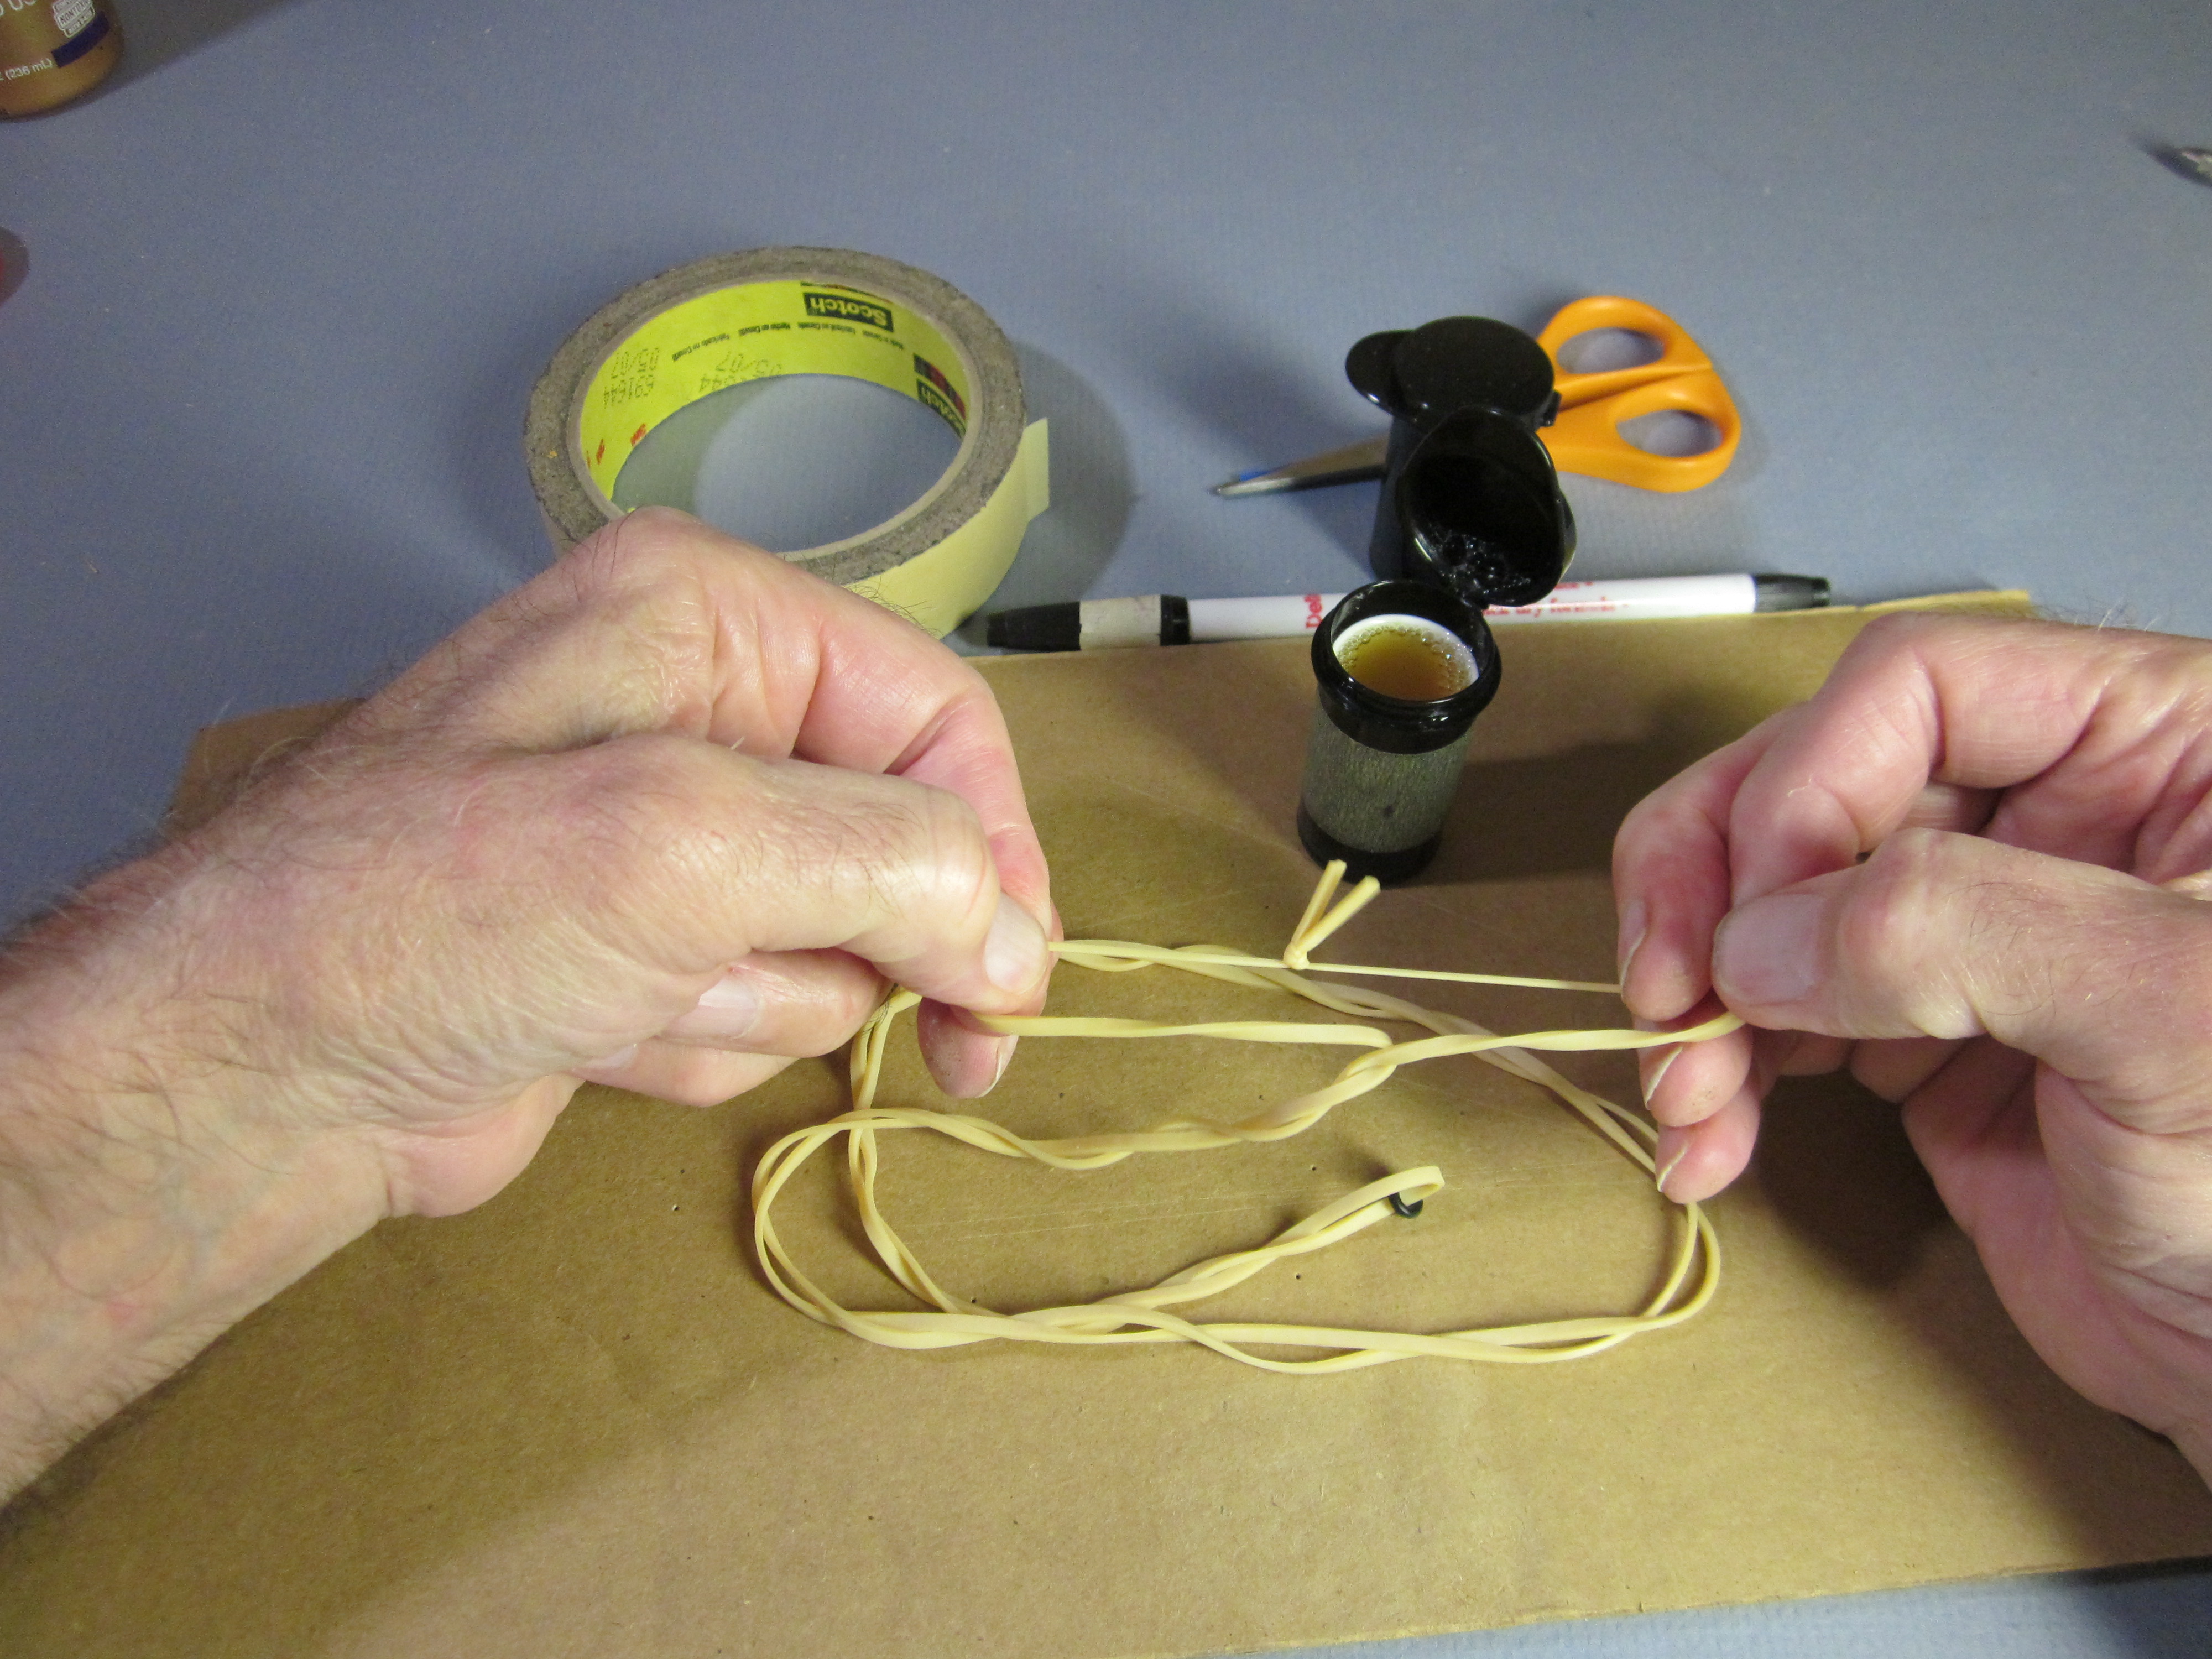
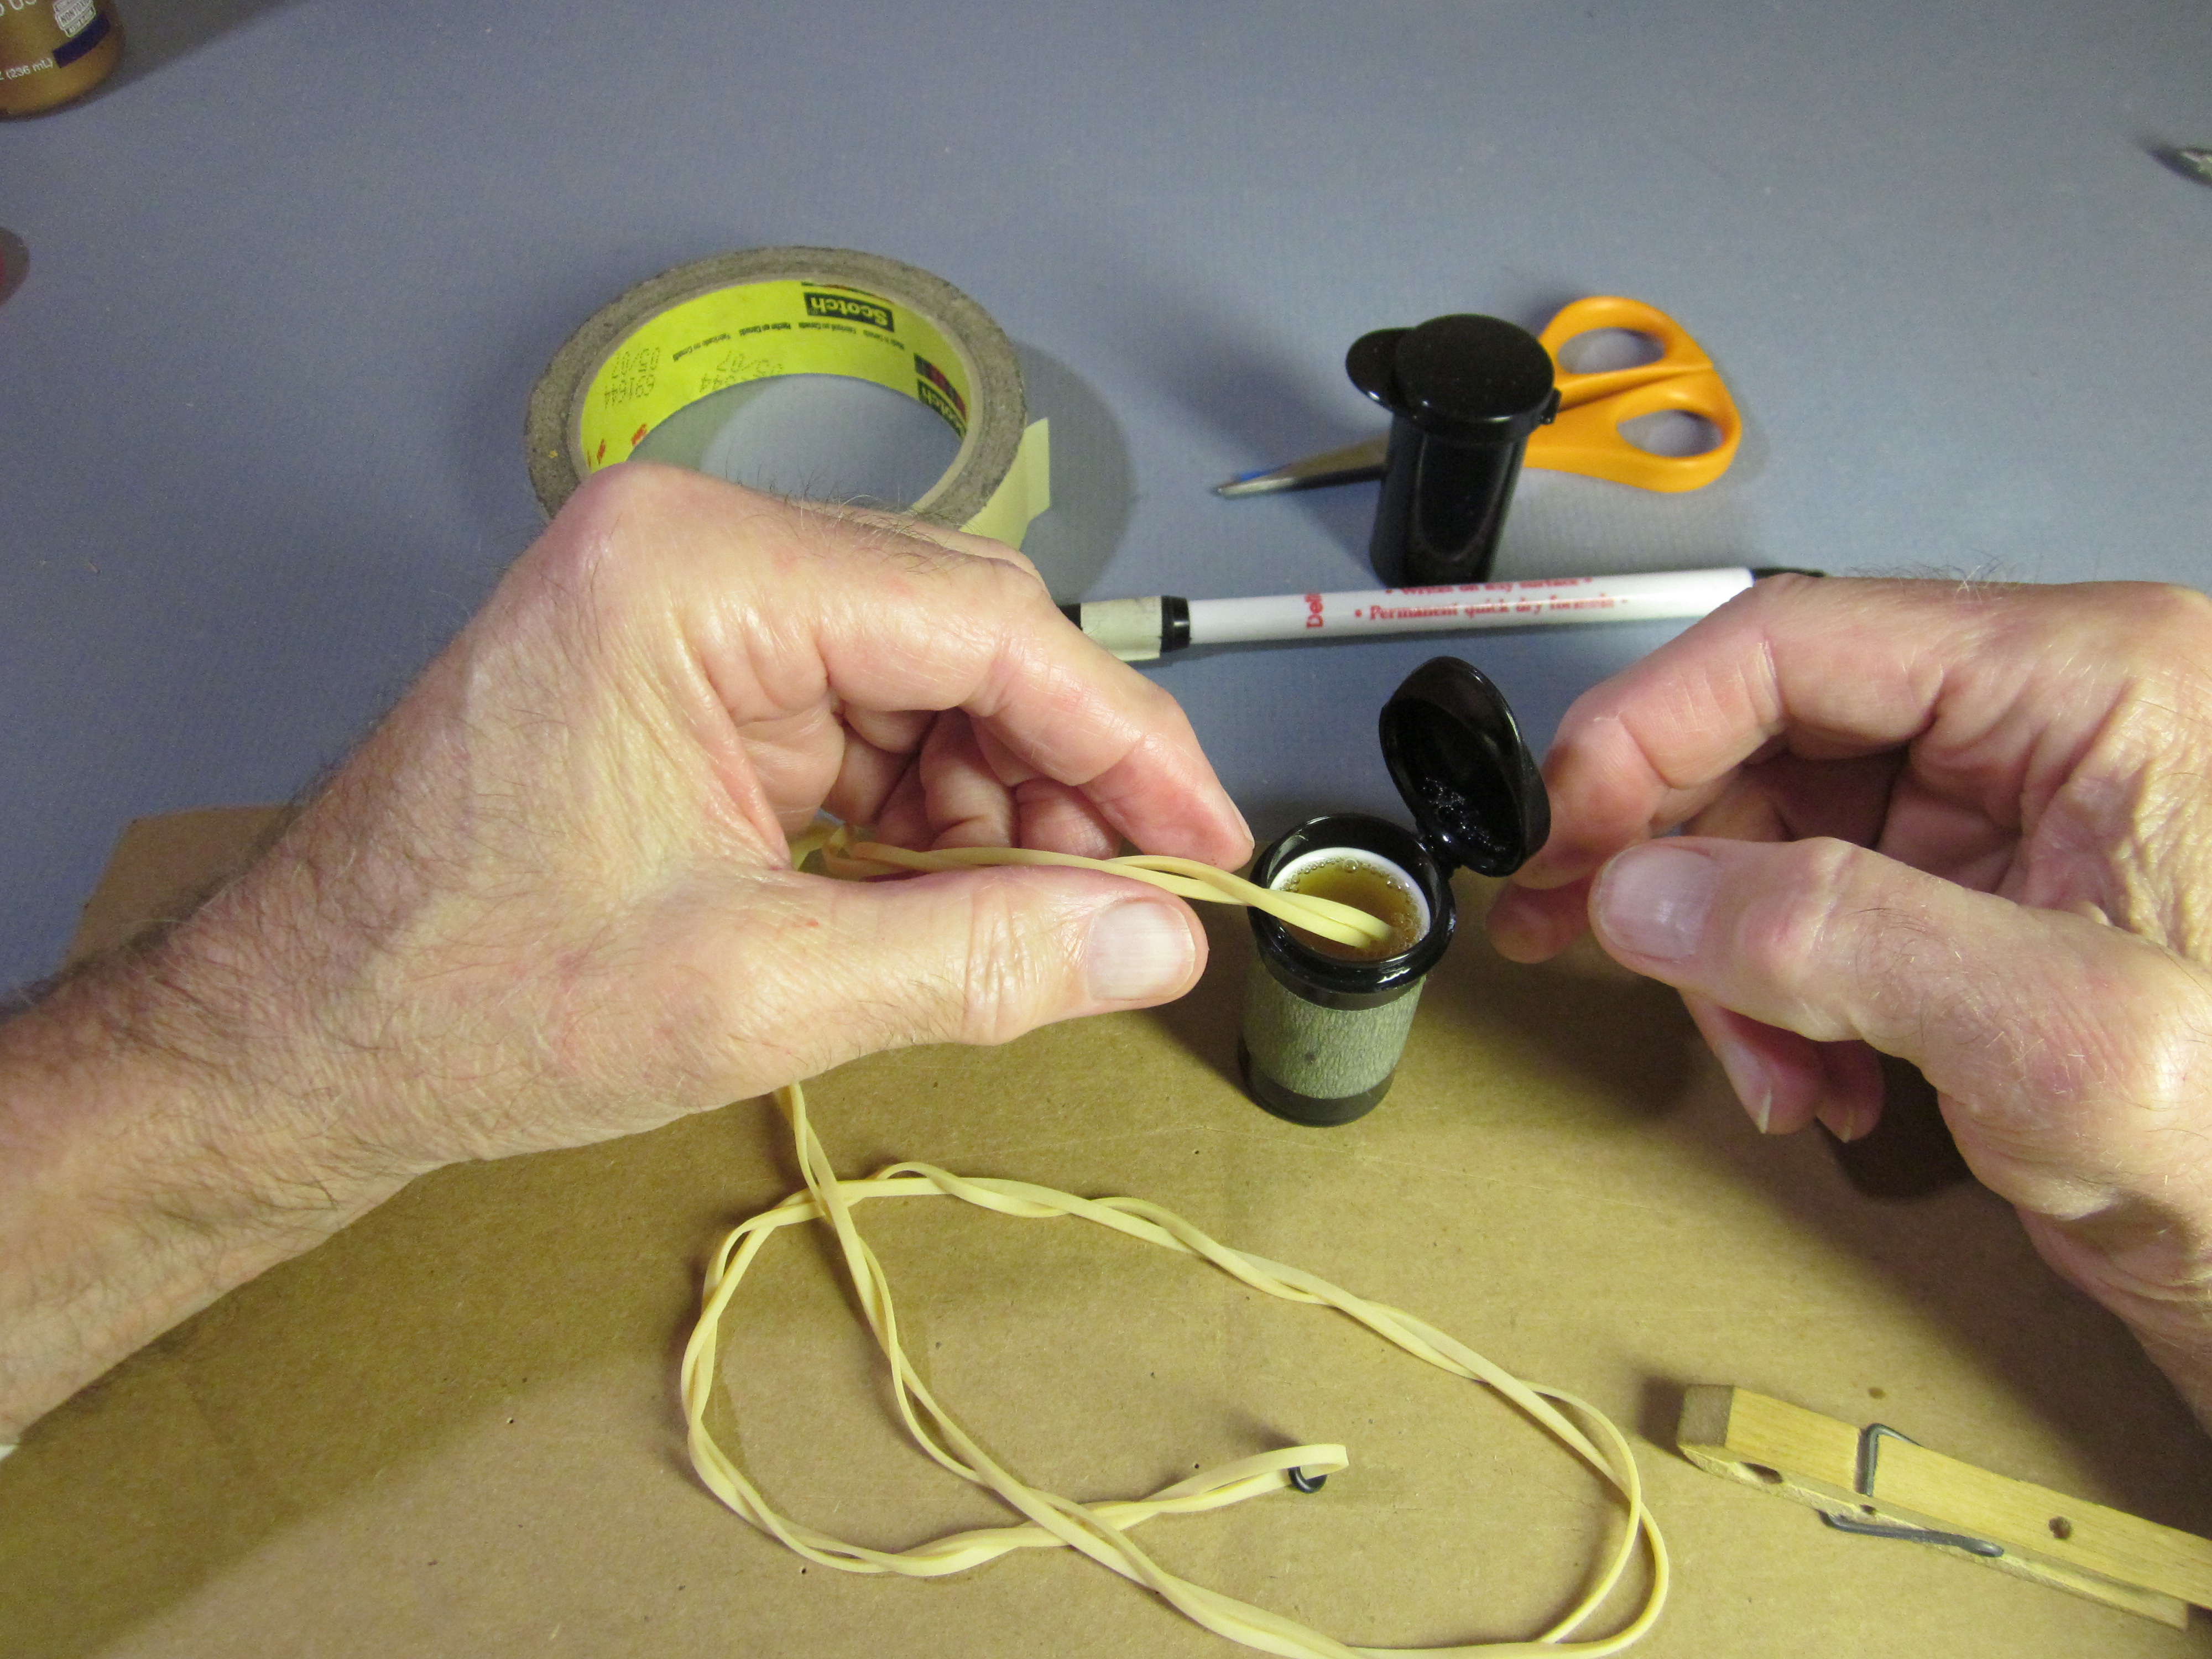 Dip the knotted end into the knot lube.
 Tie another overhand knot in the motor, but this time, loop it in the opposite direction. Pull it snug.
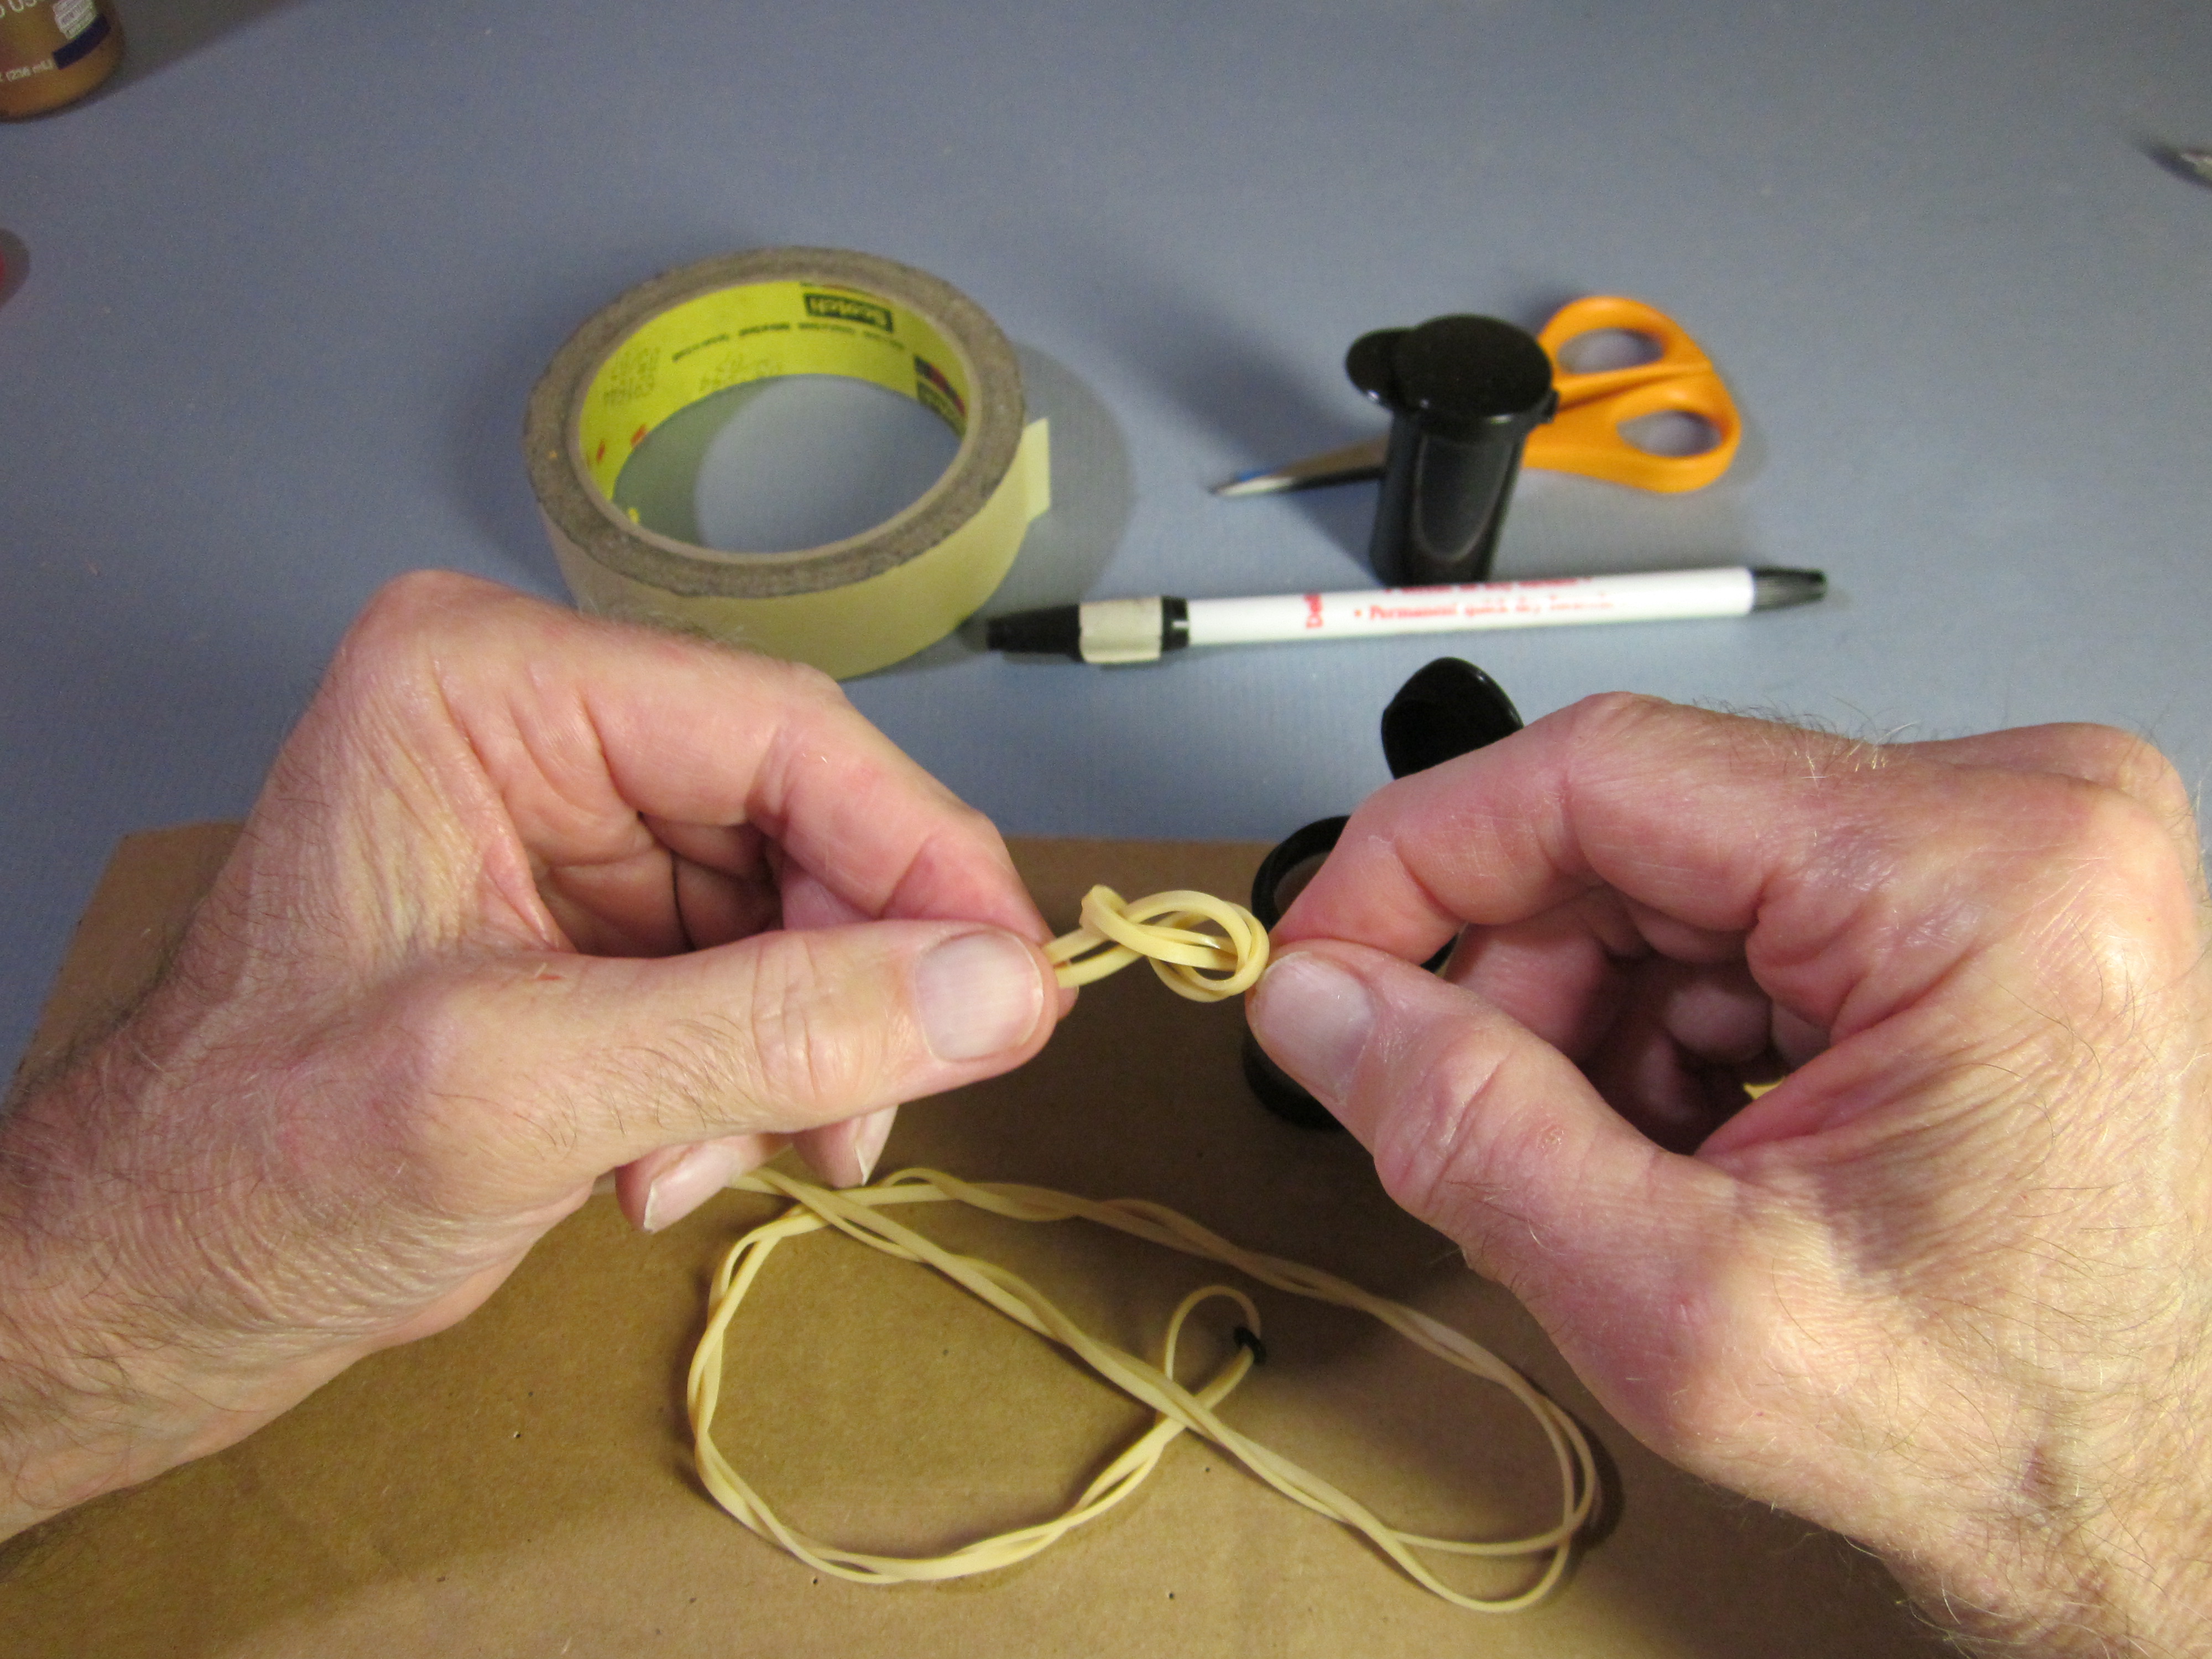
 Pull this knot down hard against the first knot.
 Pull this knot very tight.
Motors must be protected from dirt and light. If you have several motors, they must be identified. Some people store their motors in paper envelopes with the data written on the envelope. You can put your motors in plastic baggies with the data written on a paper tag. These should be kept in a light tight box.
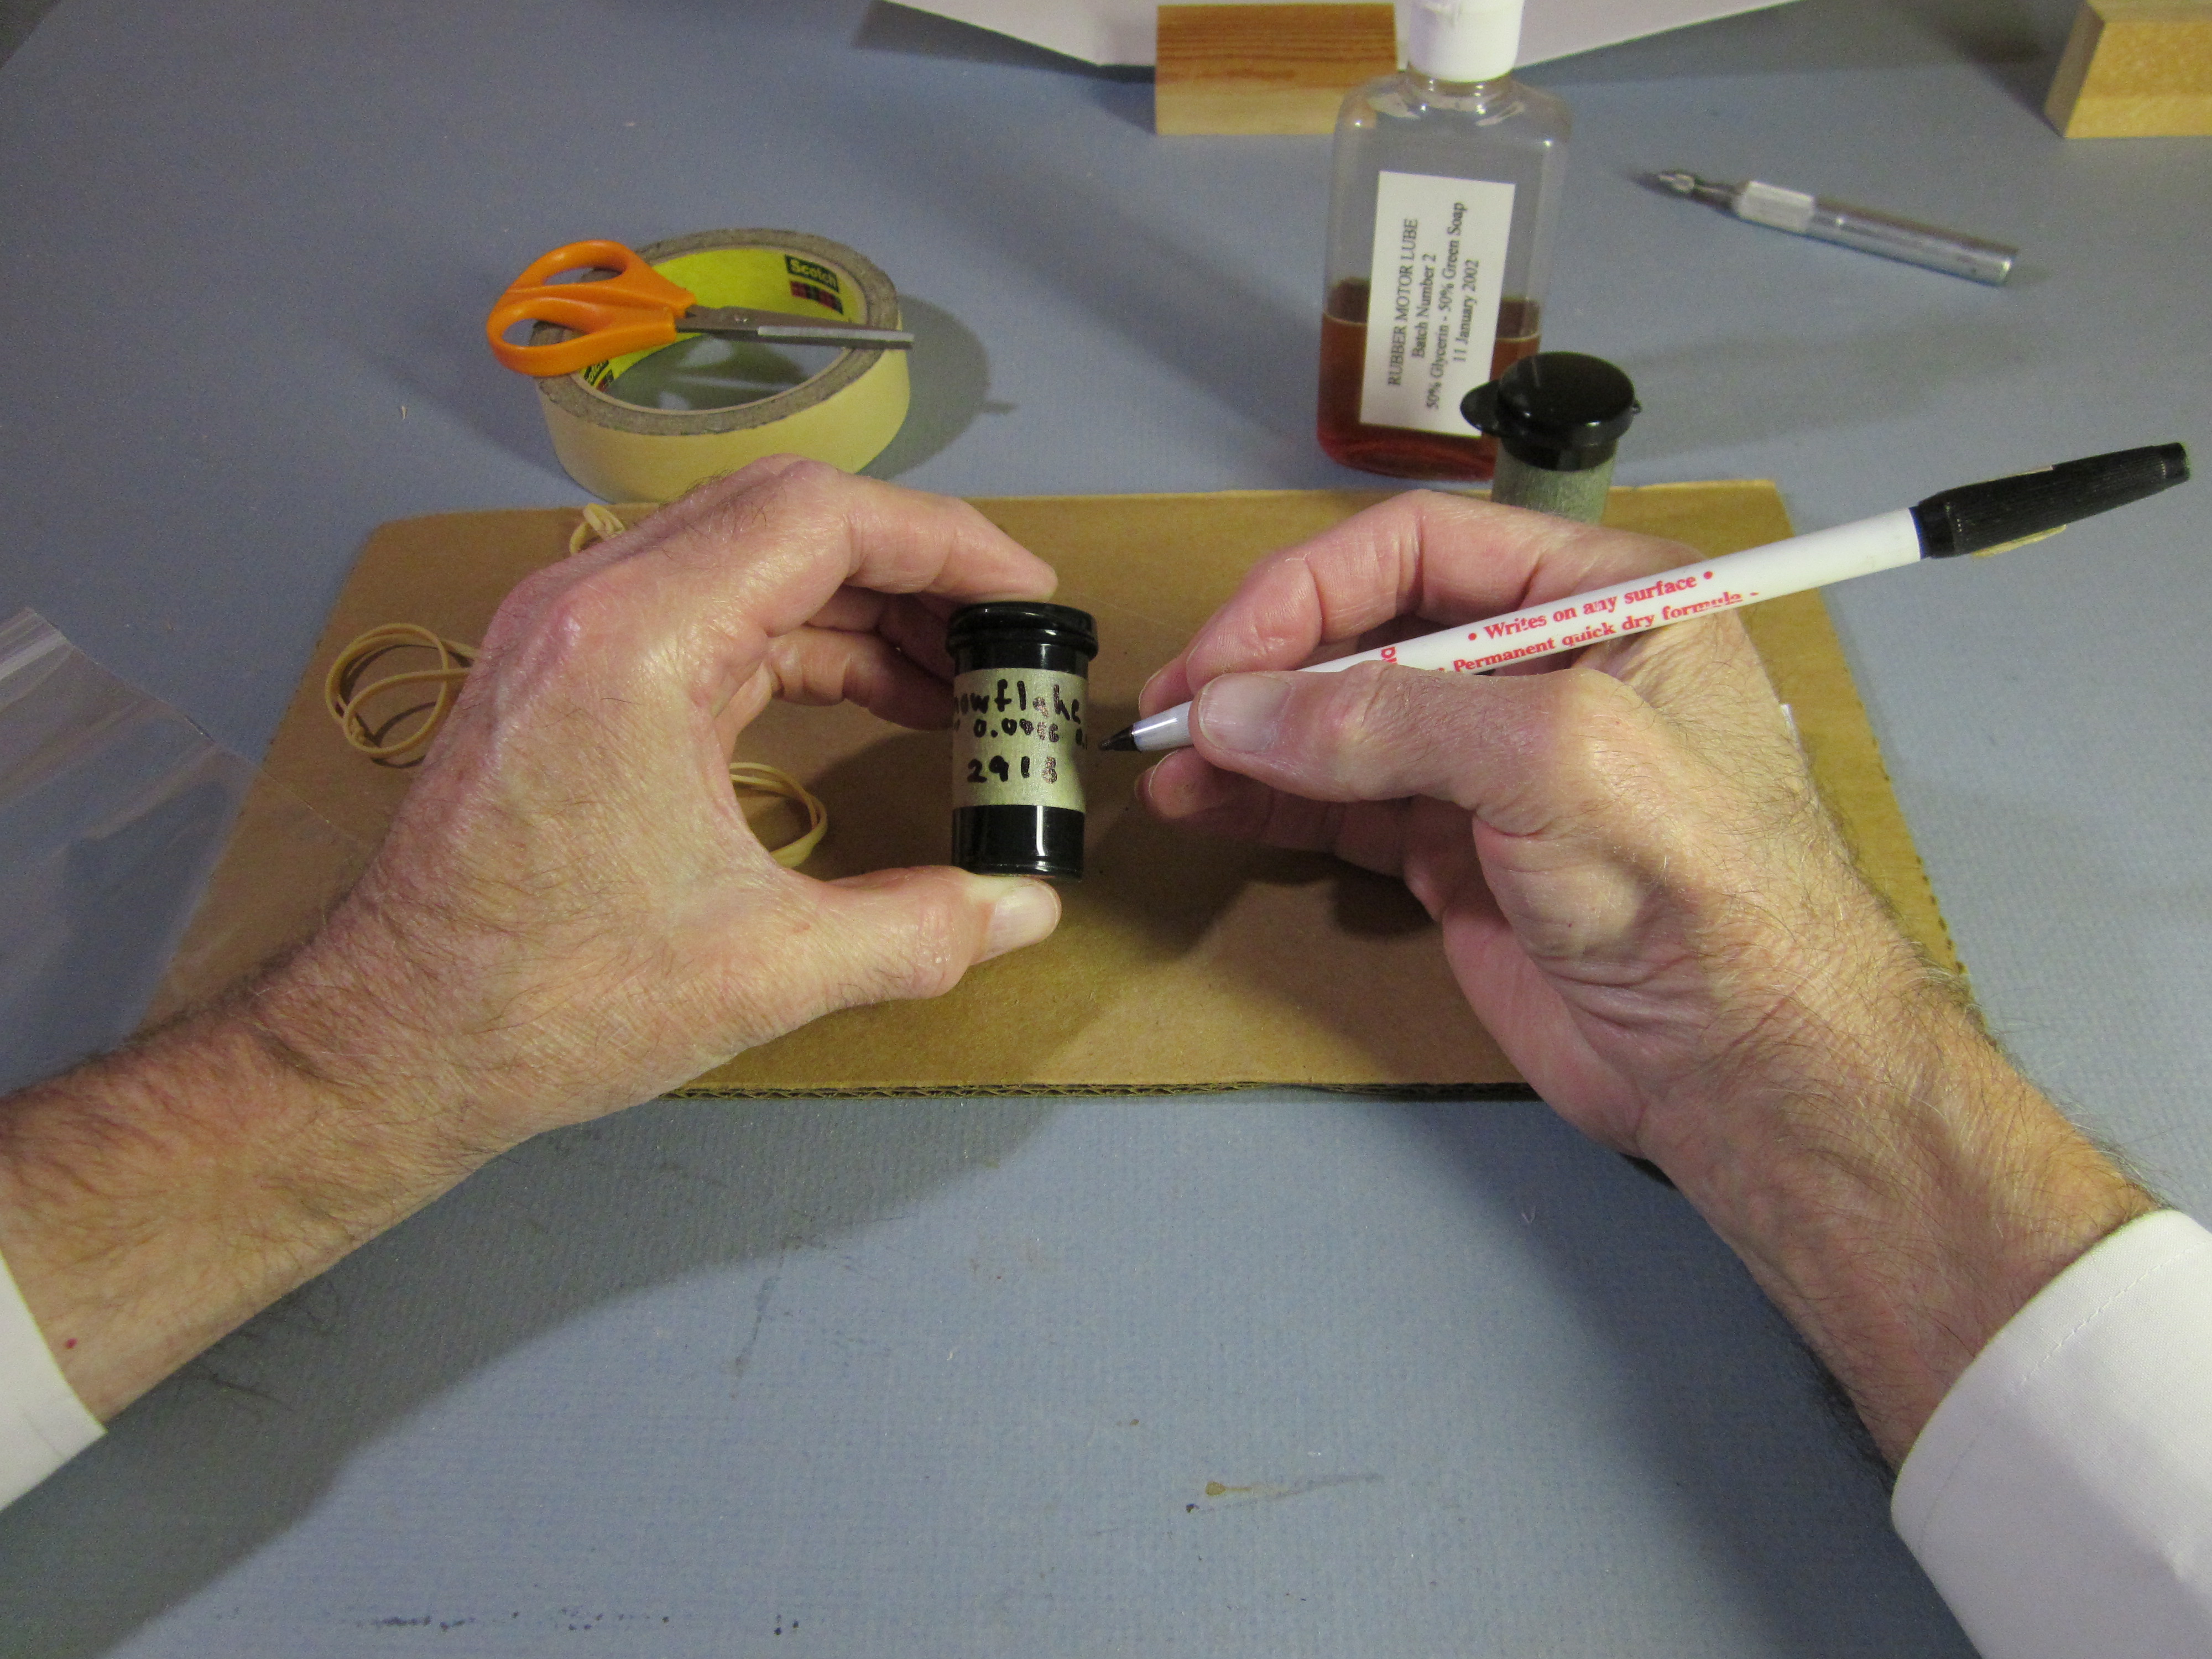 I lube my motors and store them in plastic cans. The name of the airplane, the dimensions of the motor and the estimated breaking turns are written on a masking tape label.
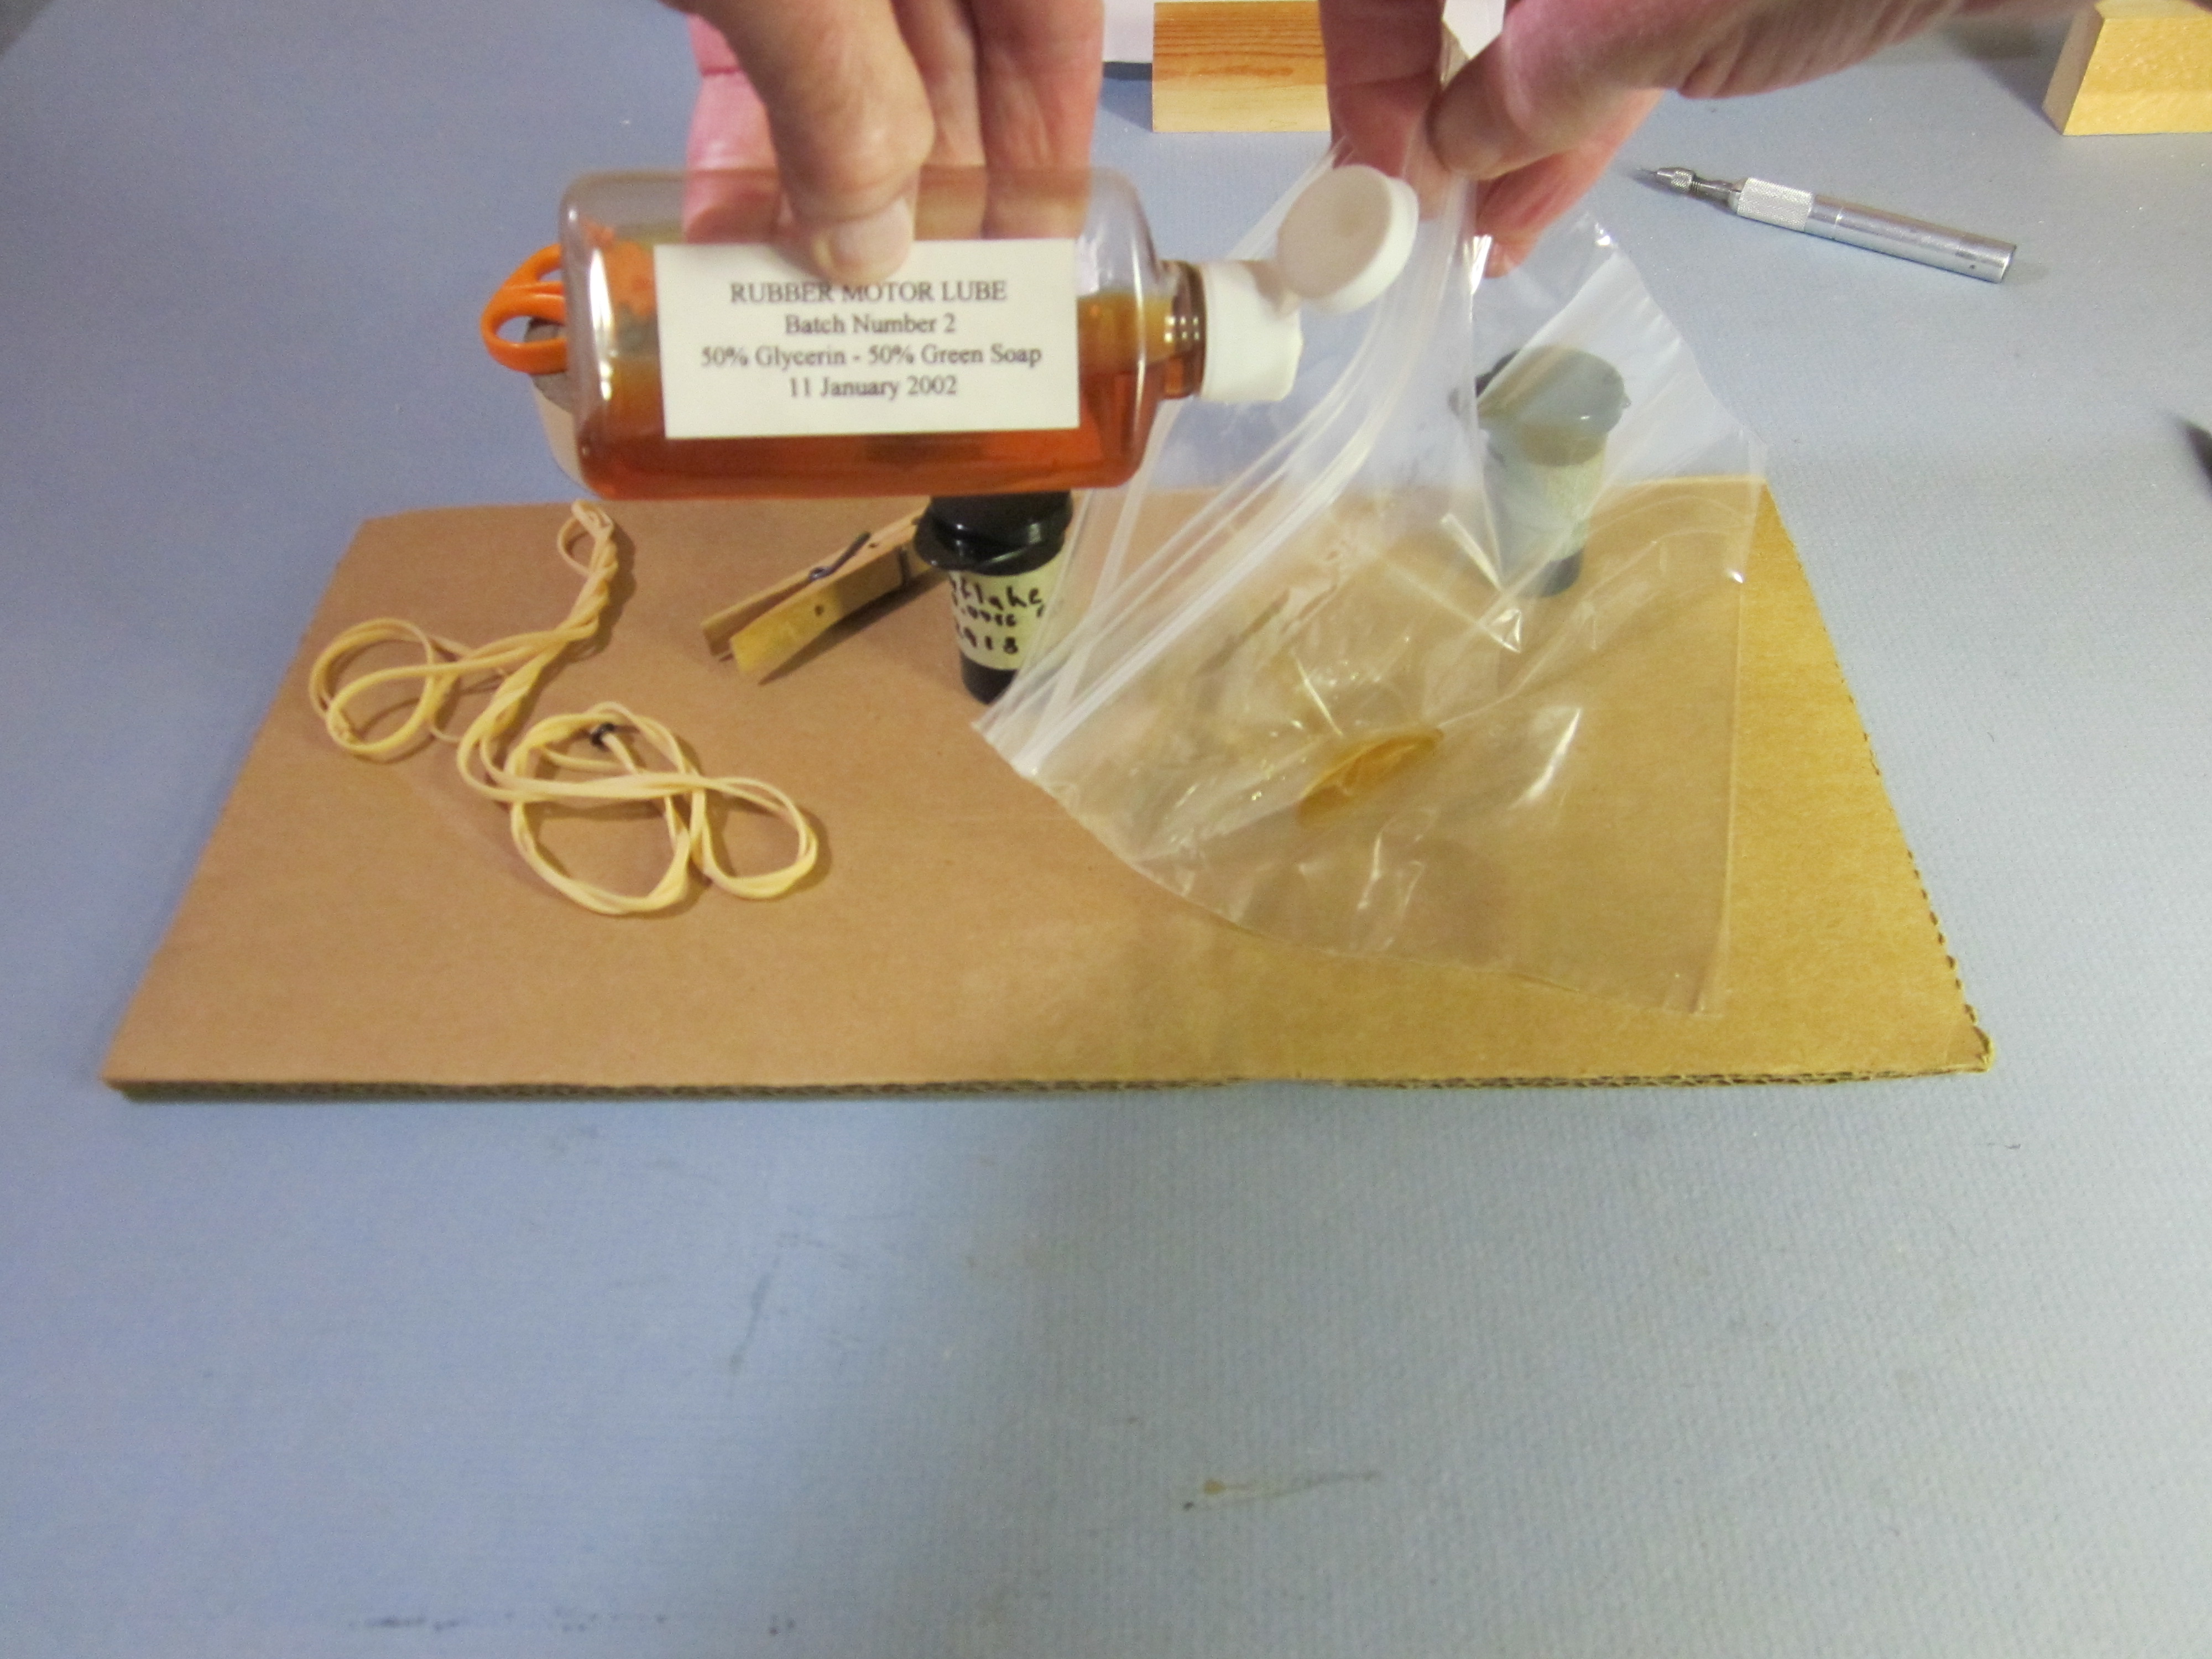 Put about a teaspoonful of lube into a plastic baggie. (You can pour it into the palm of your hand, if you don’t mind taking a bath.)
 Drop the motor into the baggie.
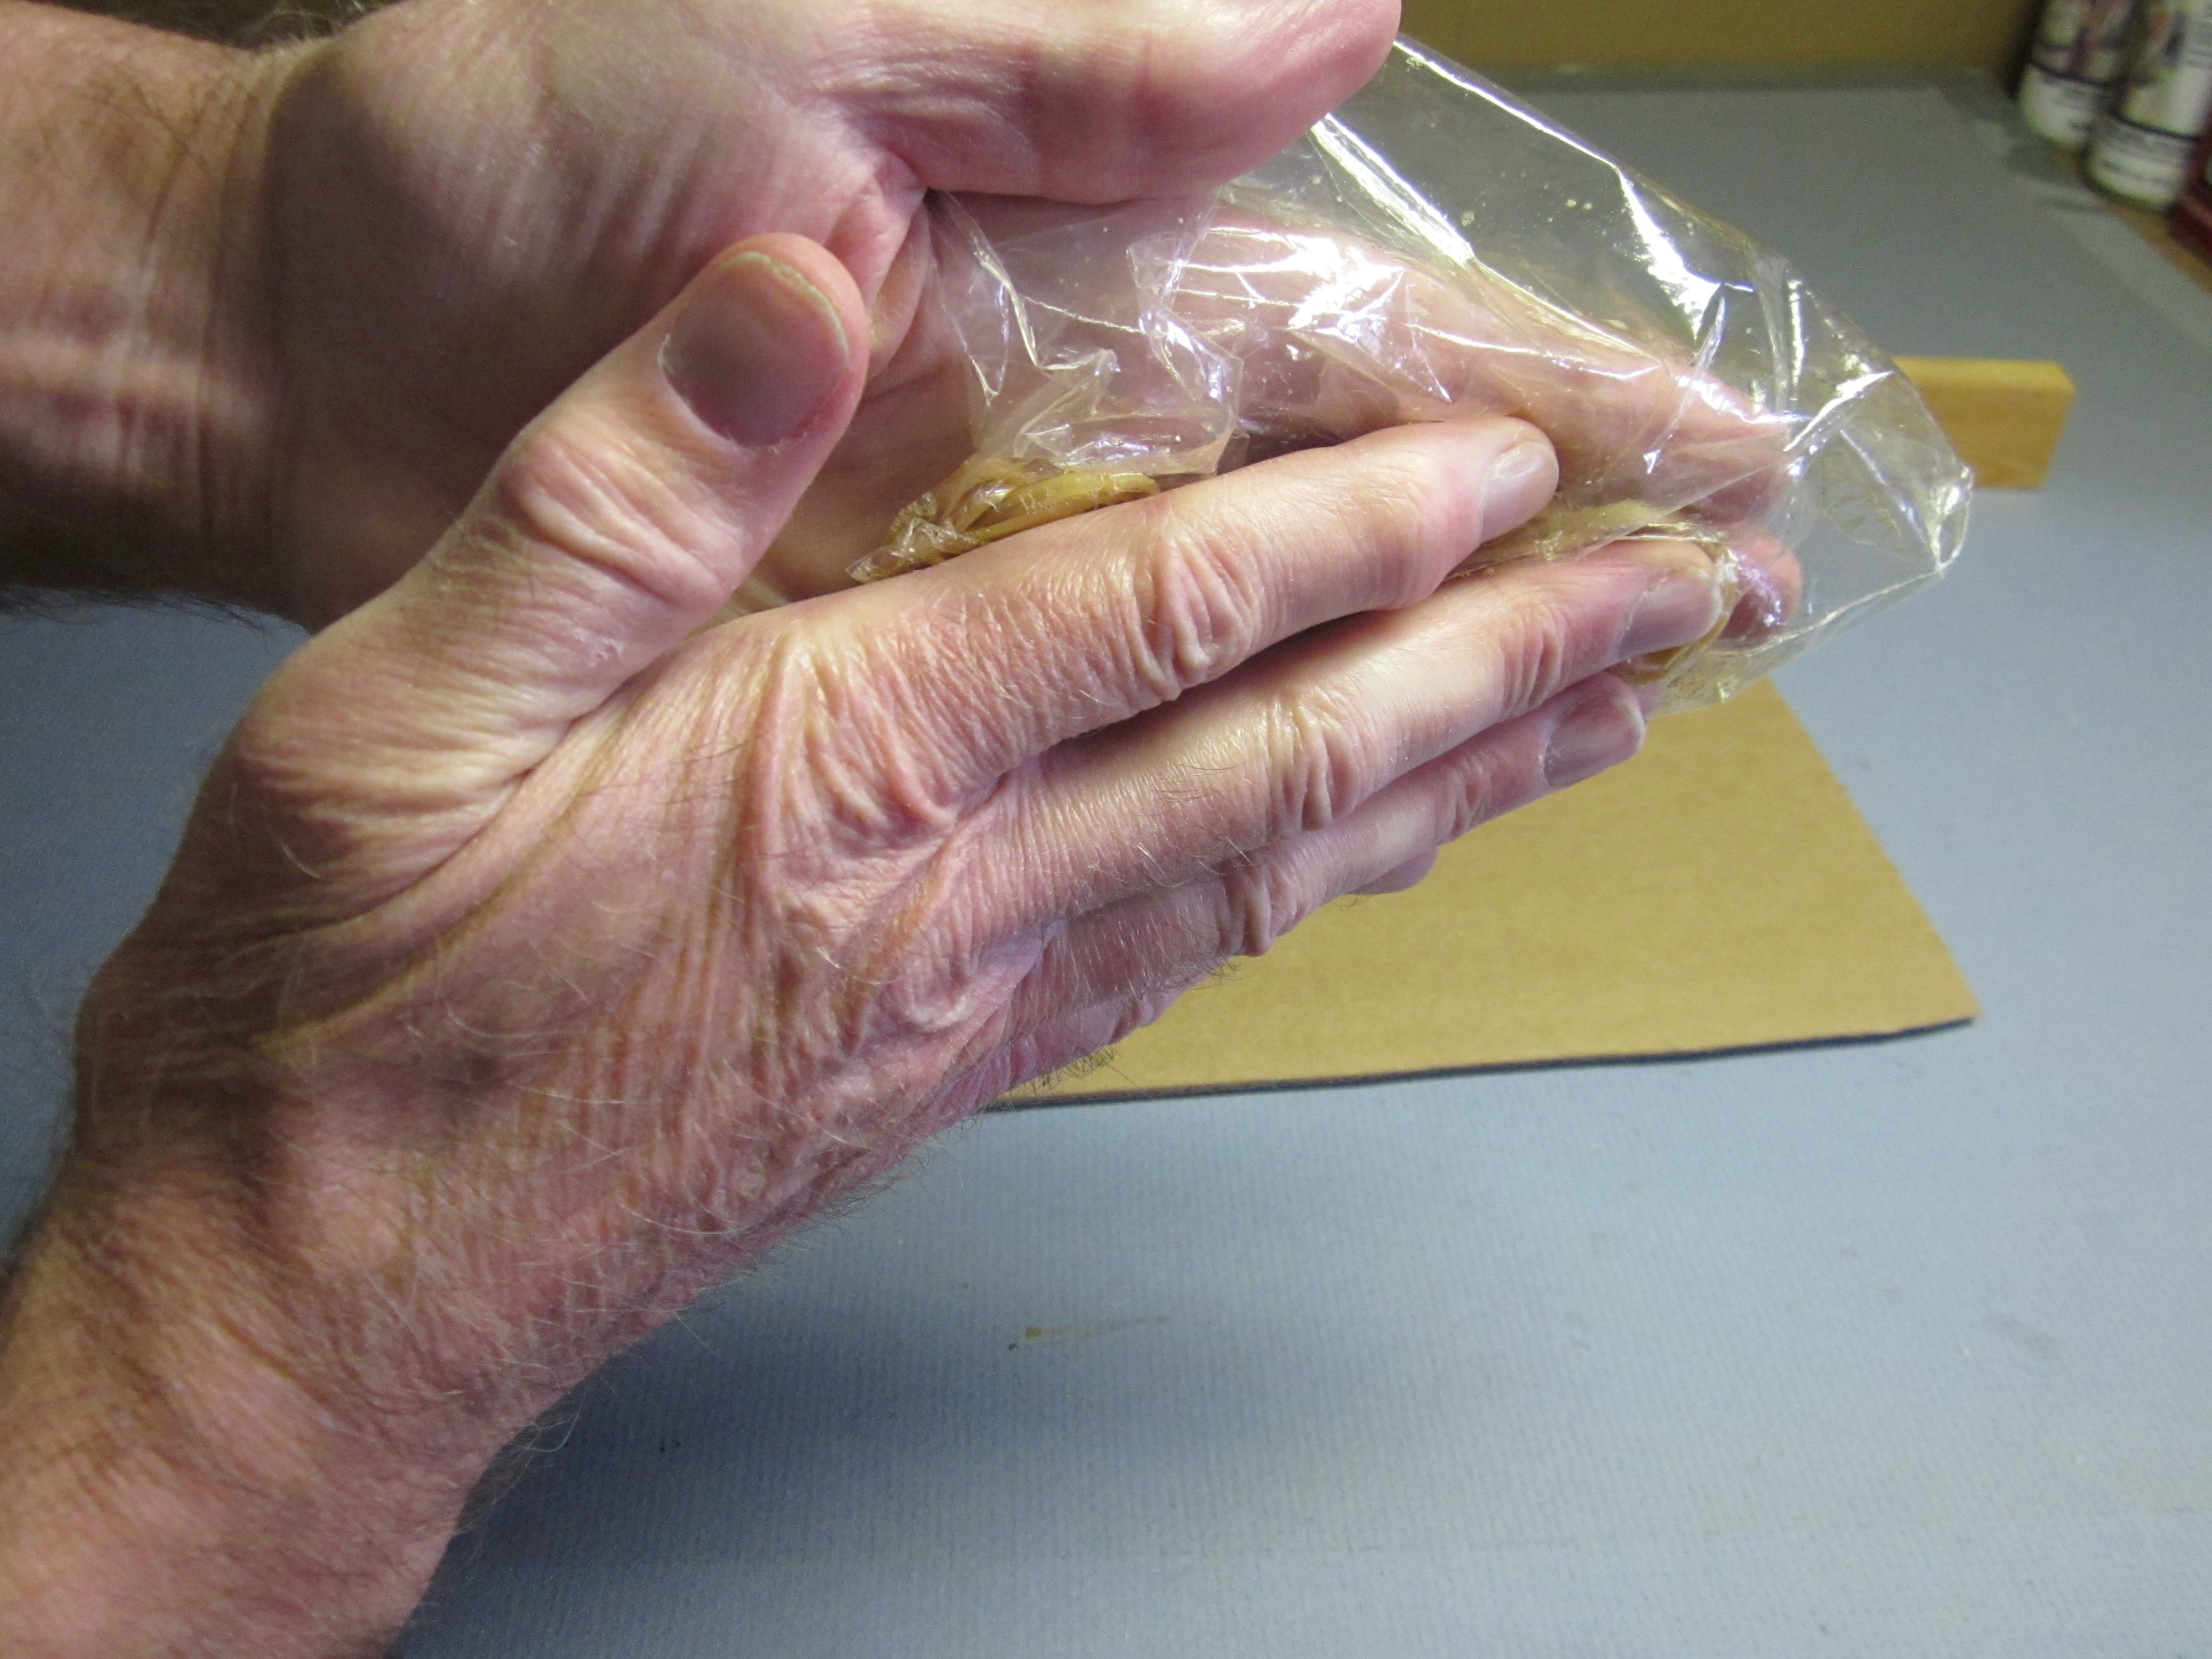 Massage the baggie…
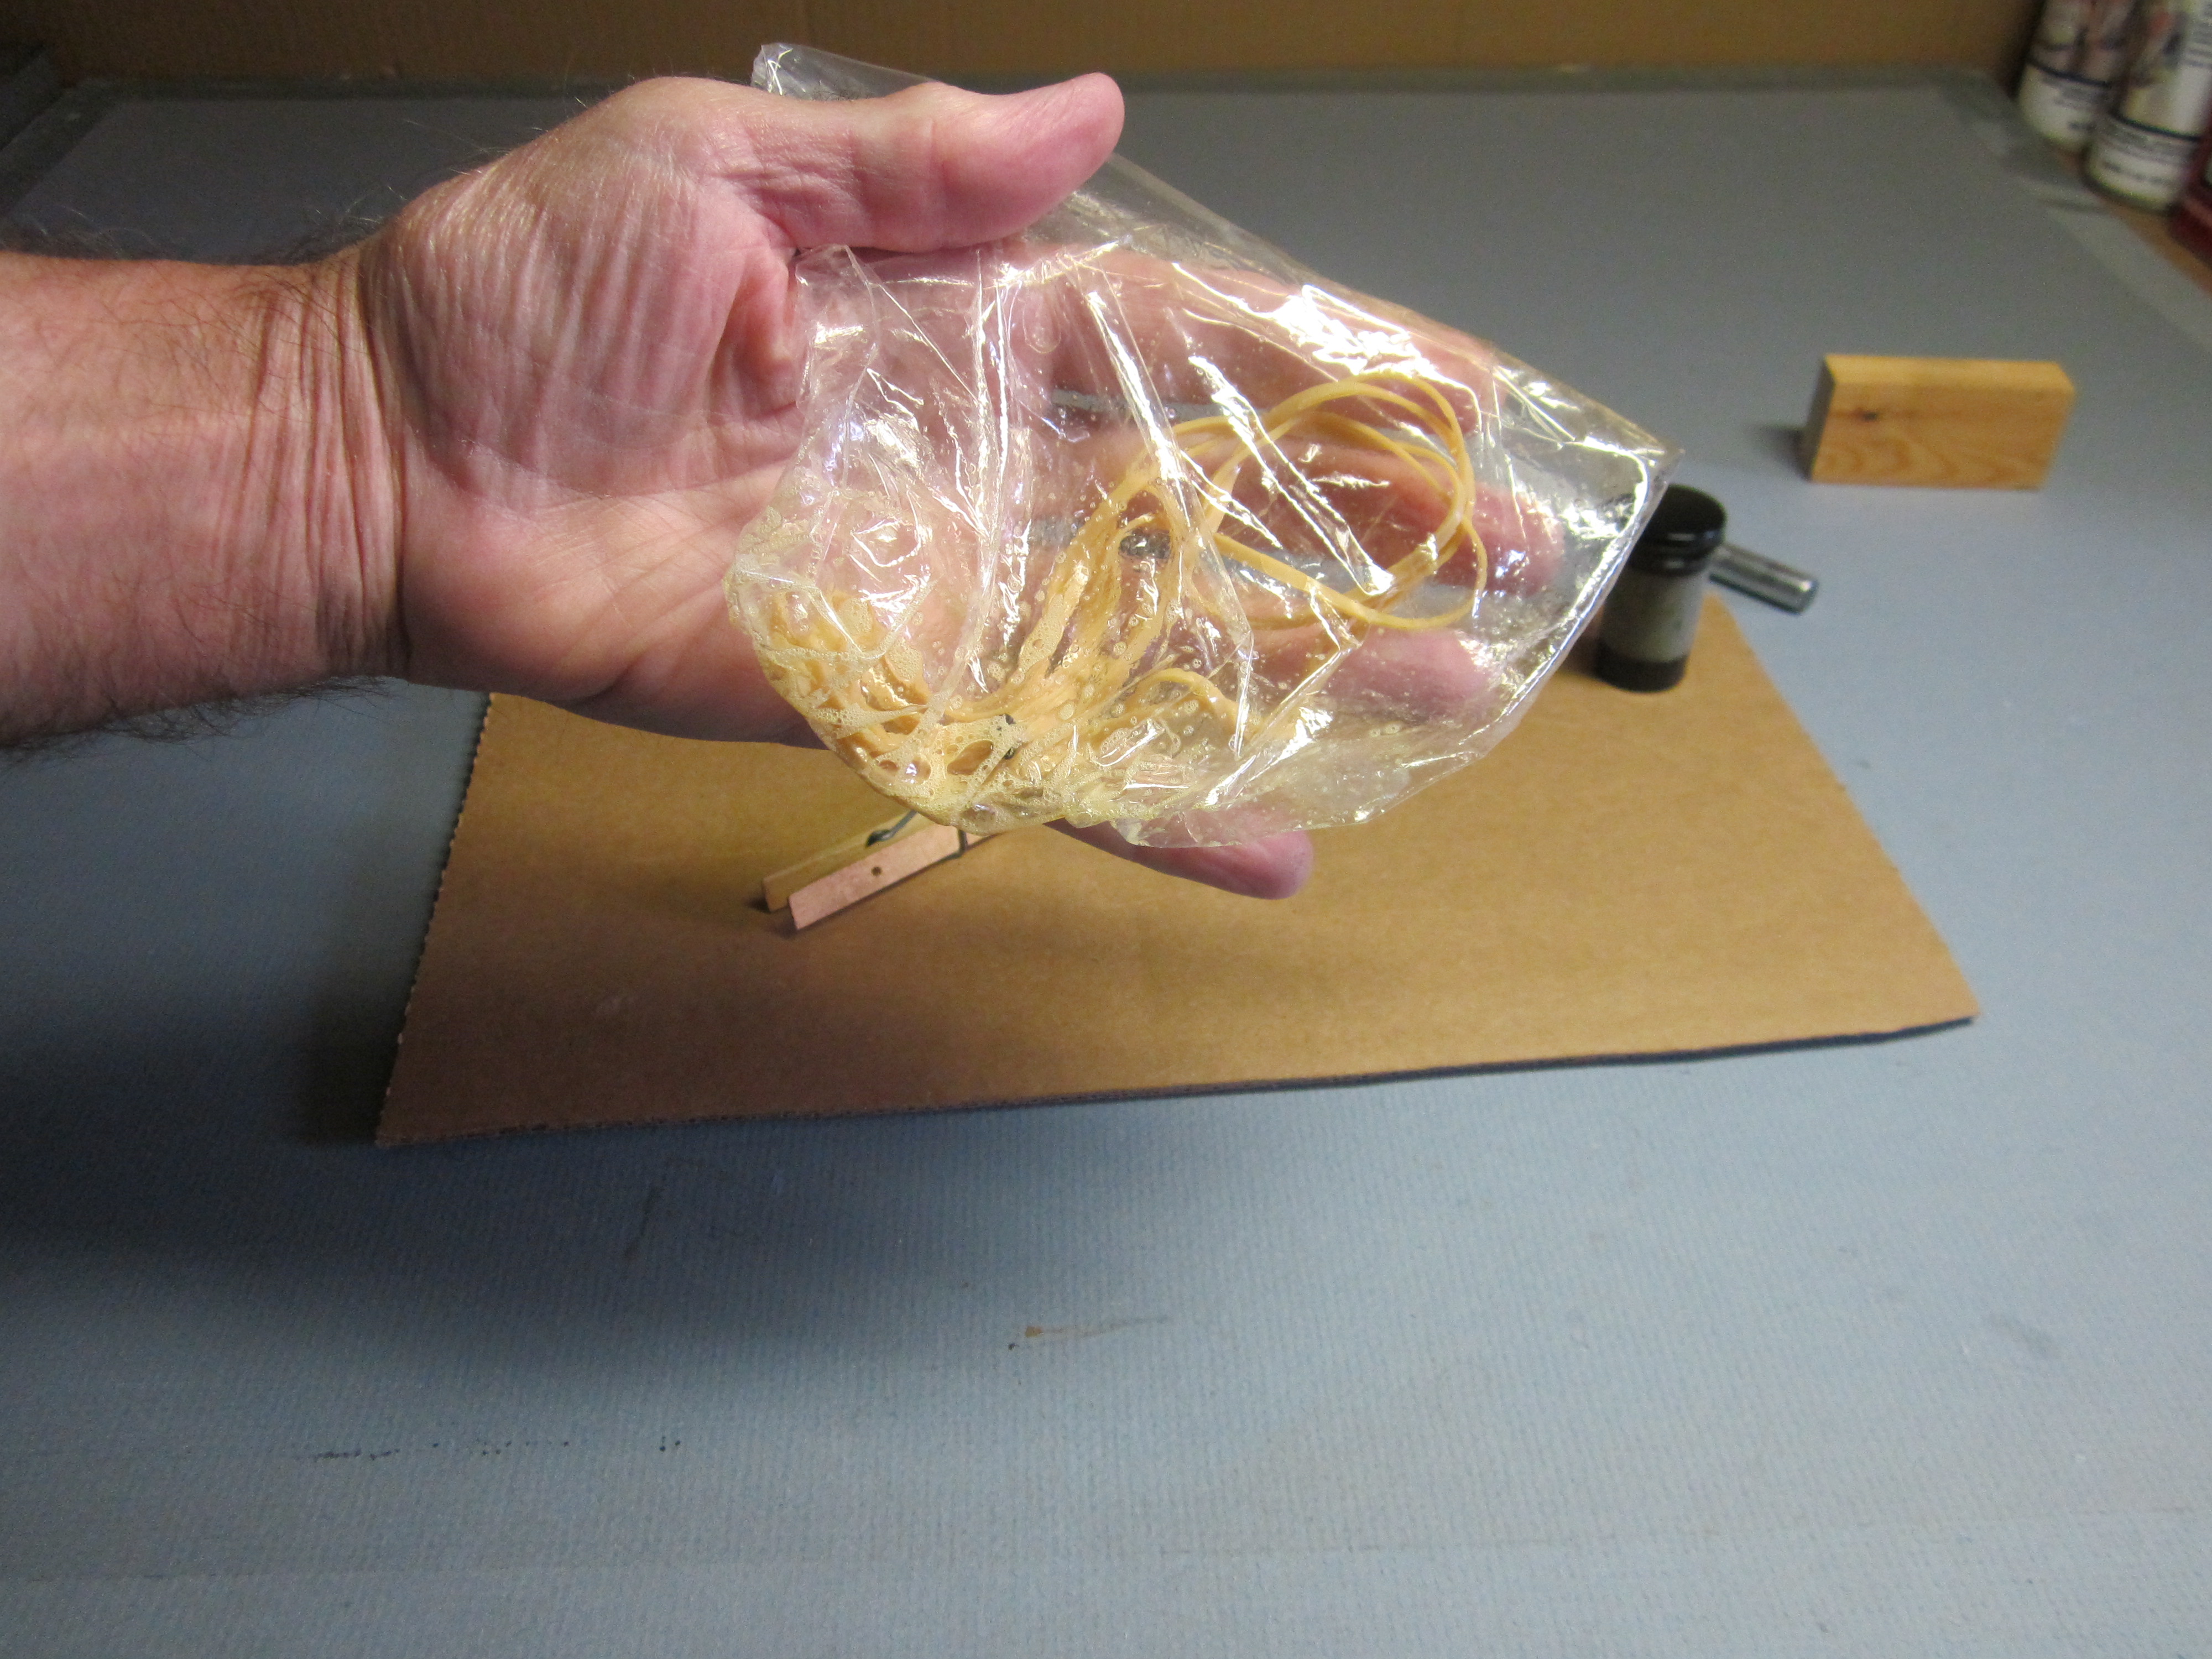 …until the motor is completely coated with lube.
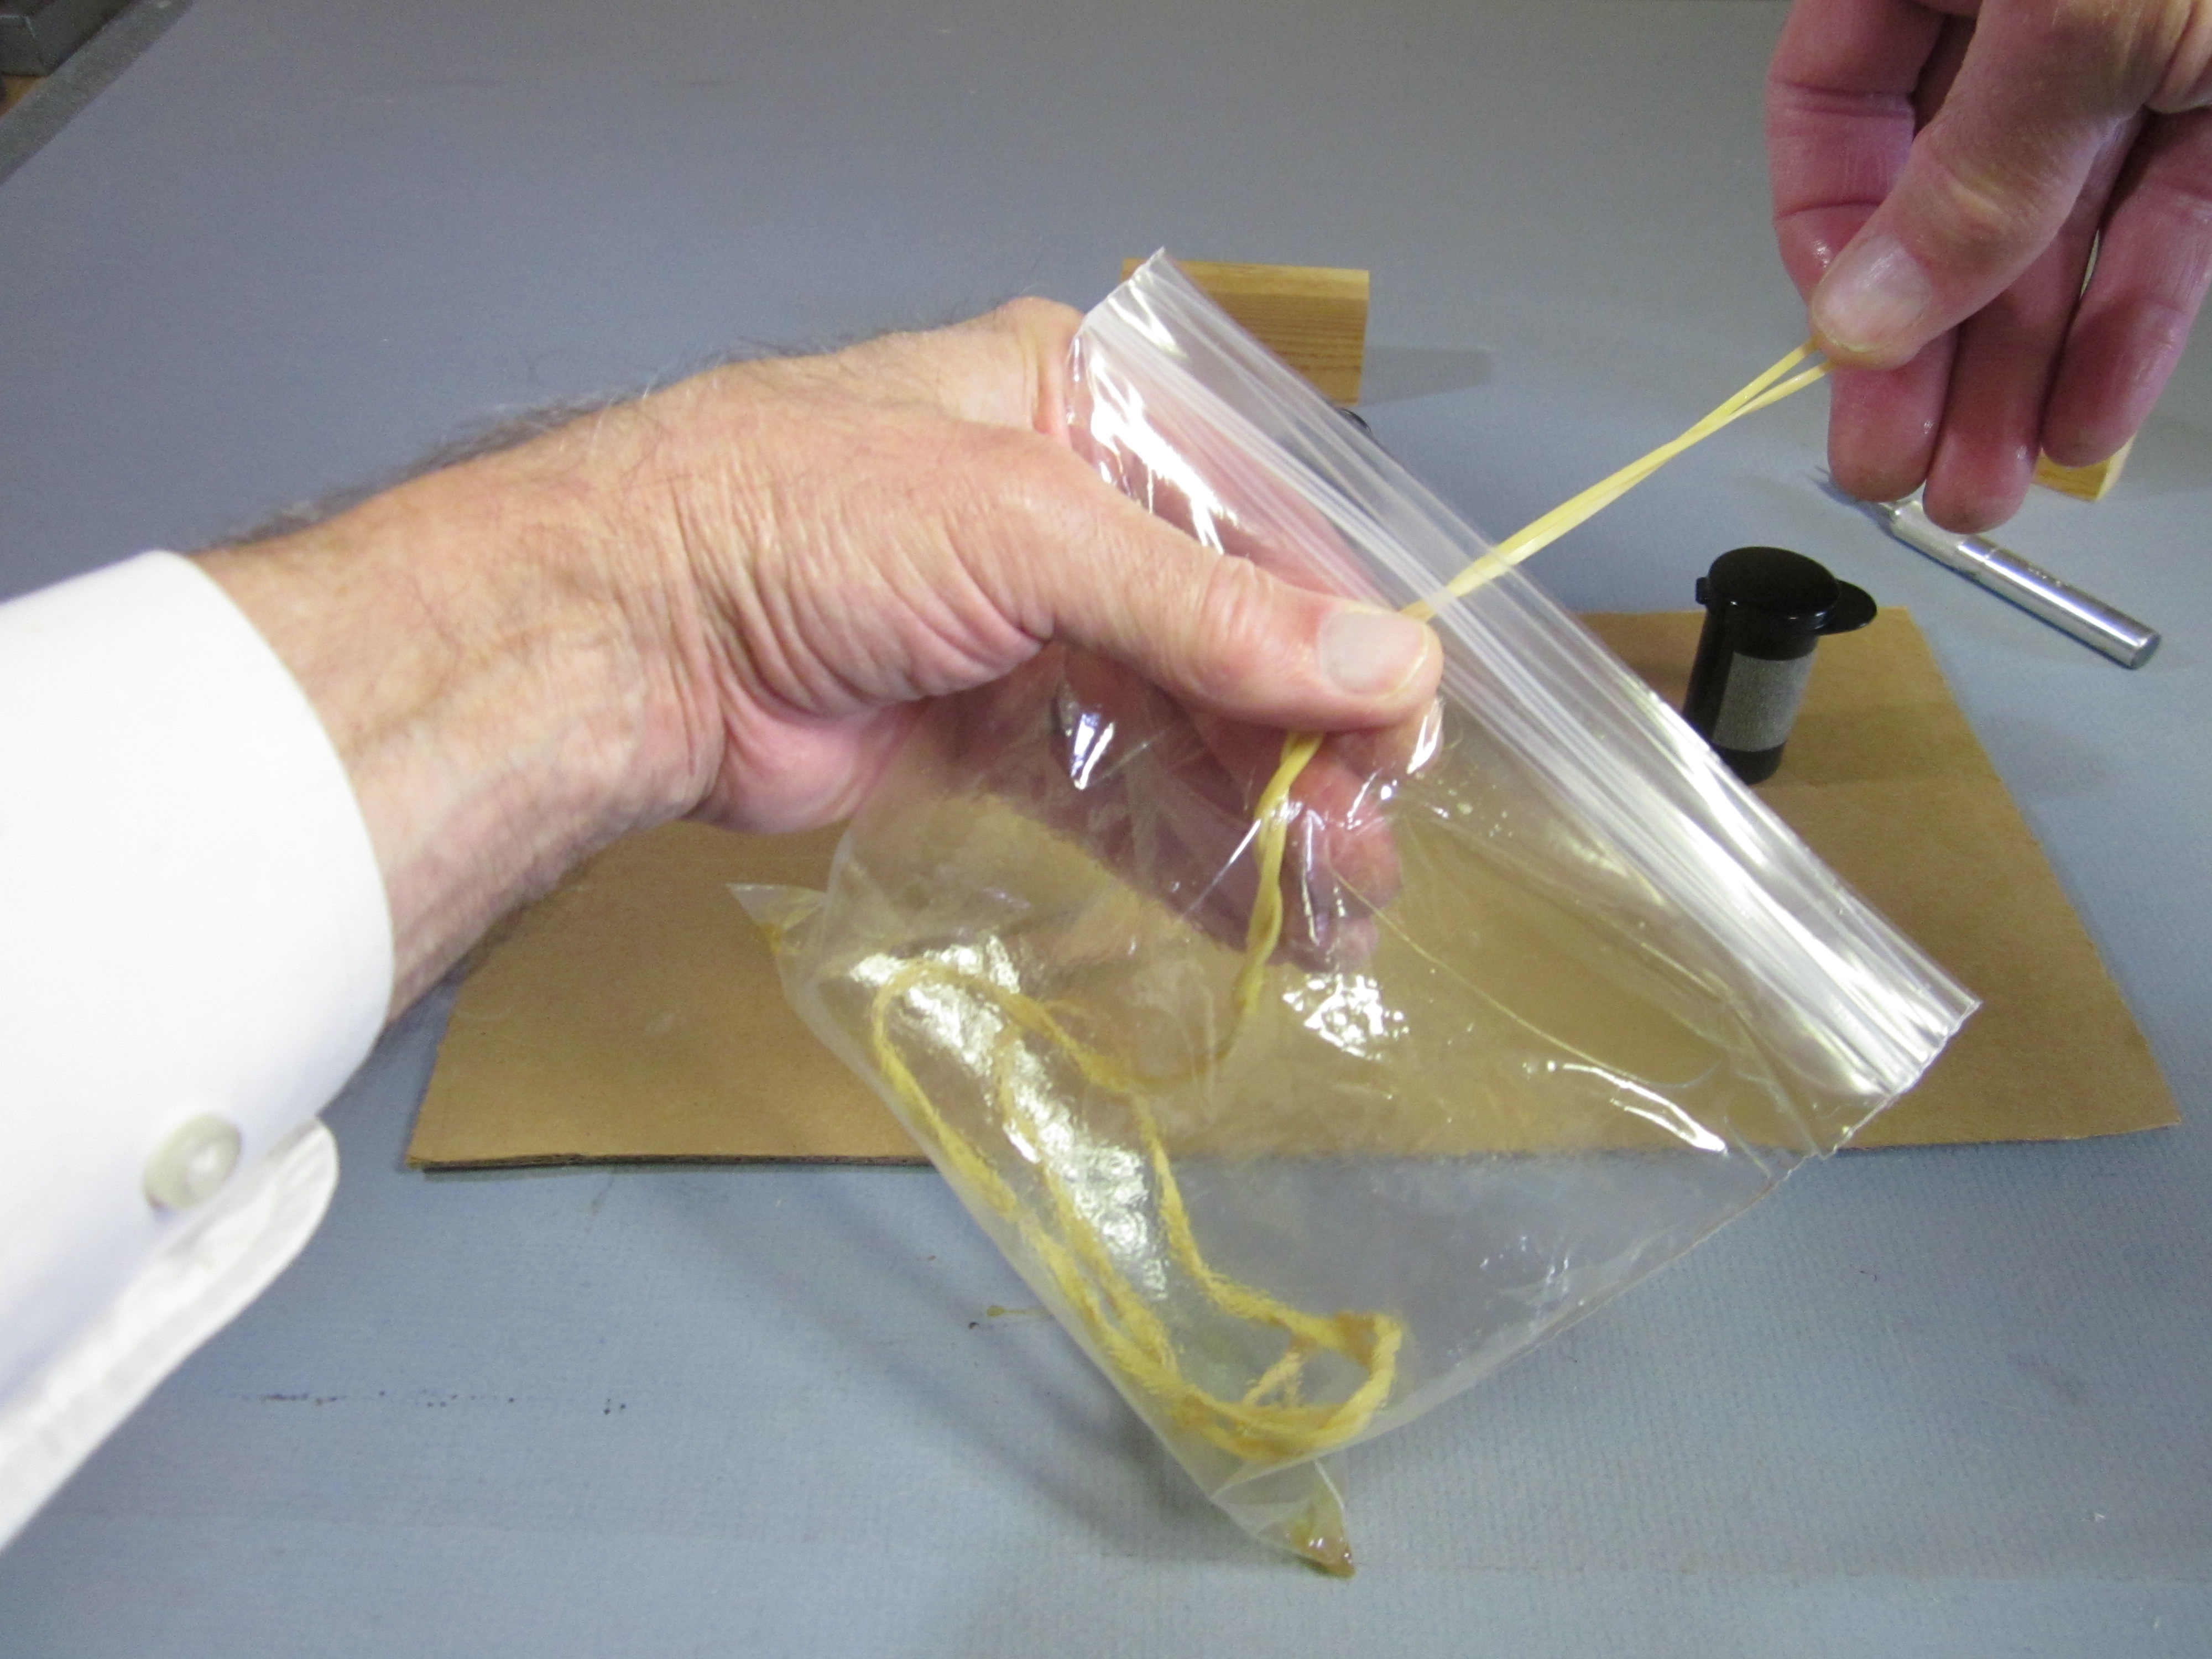 Reach in and grab the knot end of the motor. Pull it out of the bag between two fingers to squeeze off excess lube. A thin coating is sufficient.
 Fold the motor and put it into the can. Now you can wash your hands again.
fly the snowflake
We start in the shop by balancing the plane with a motor on it.
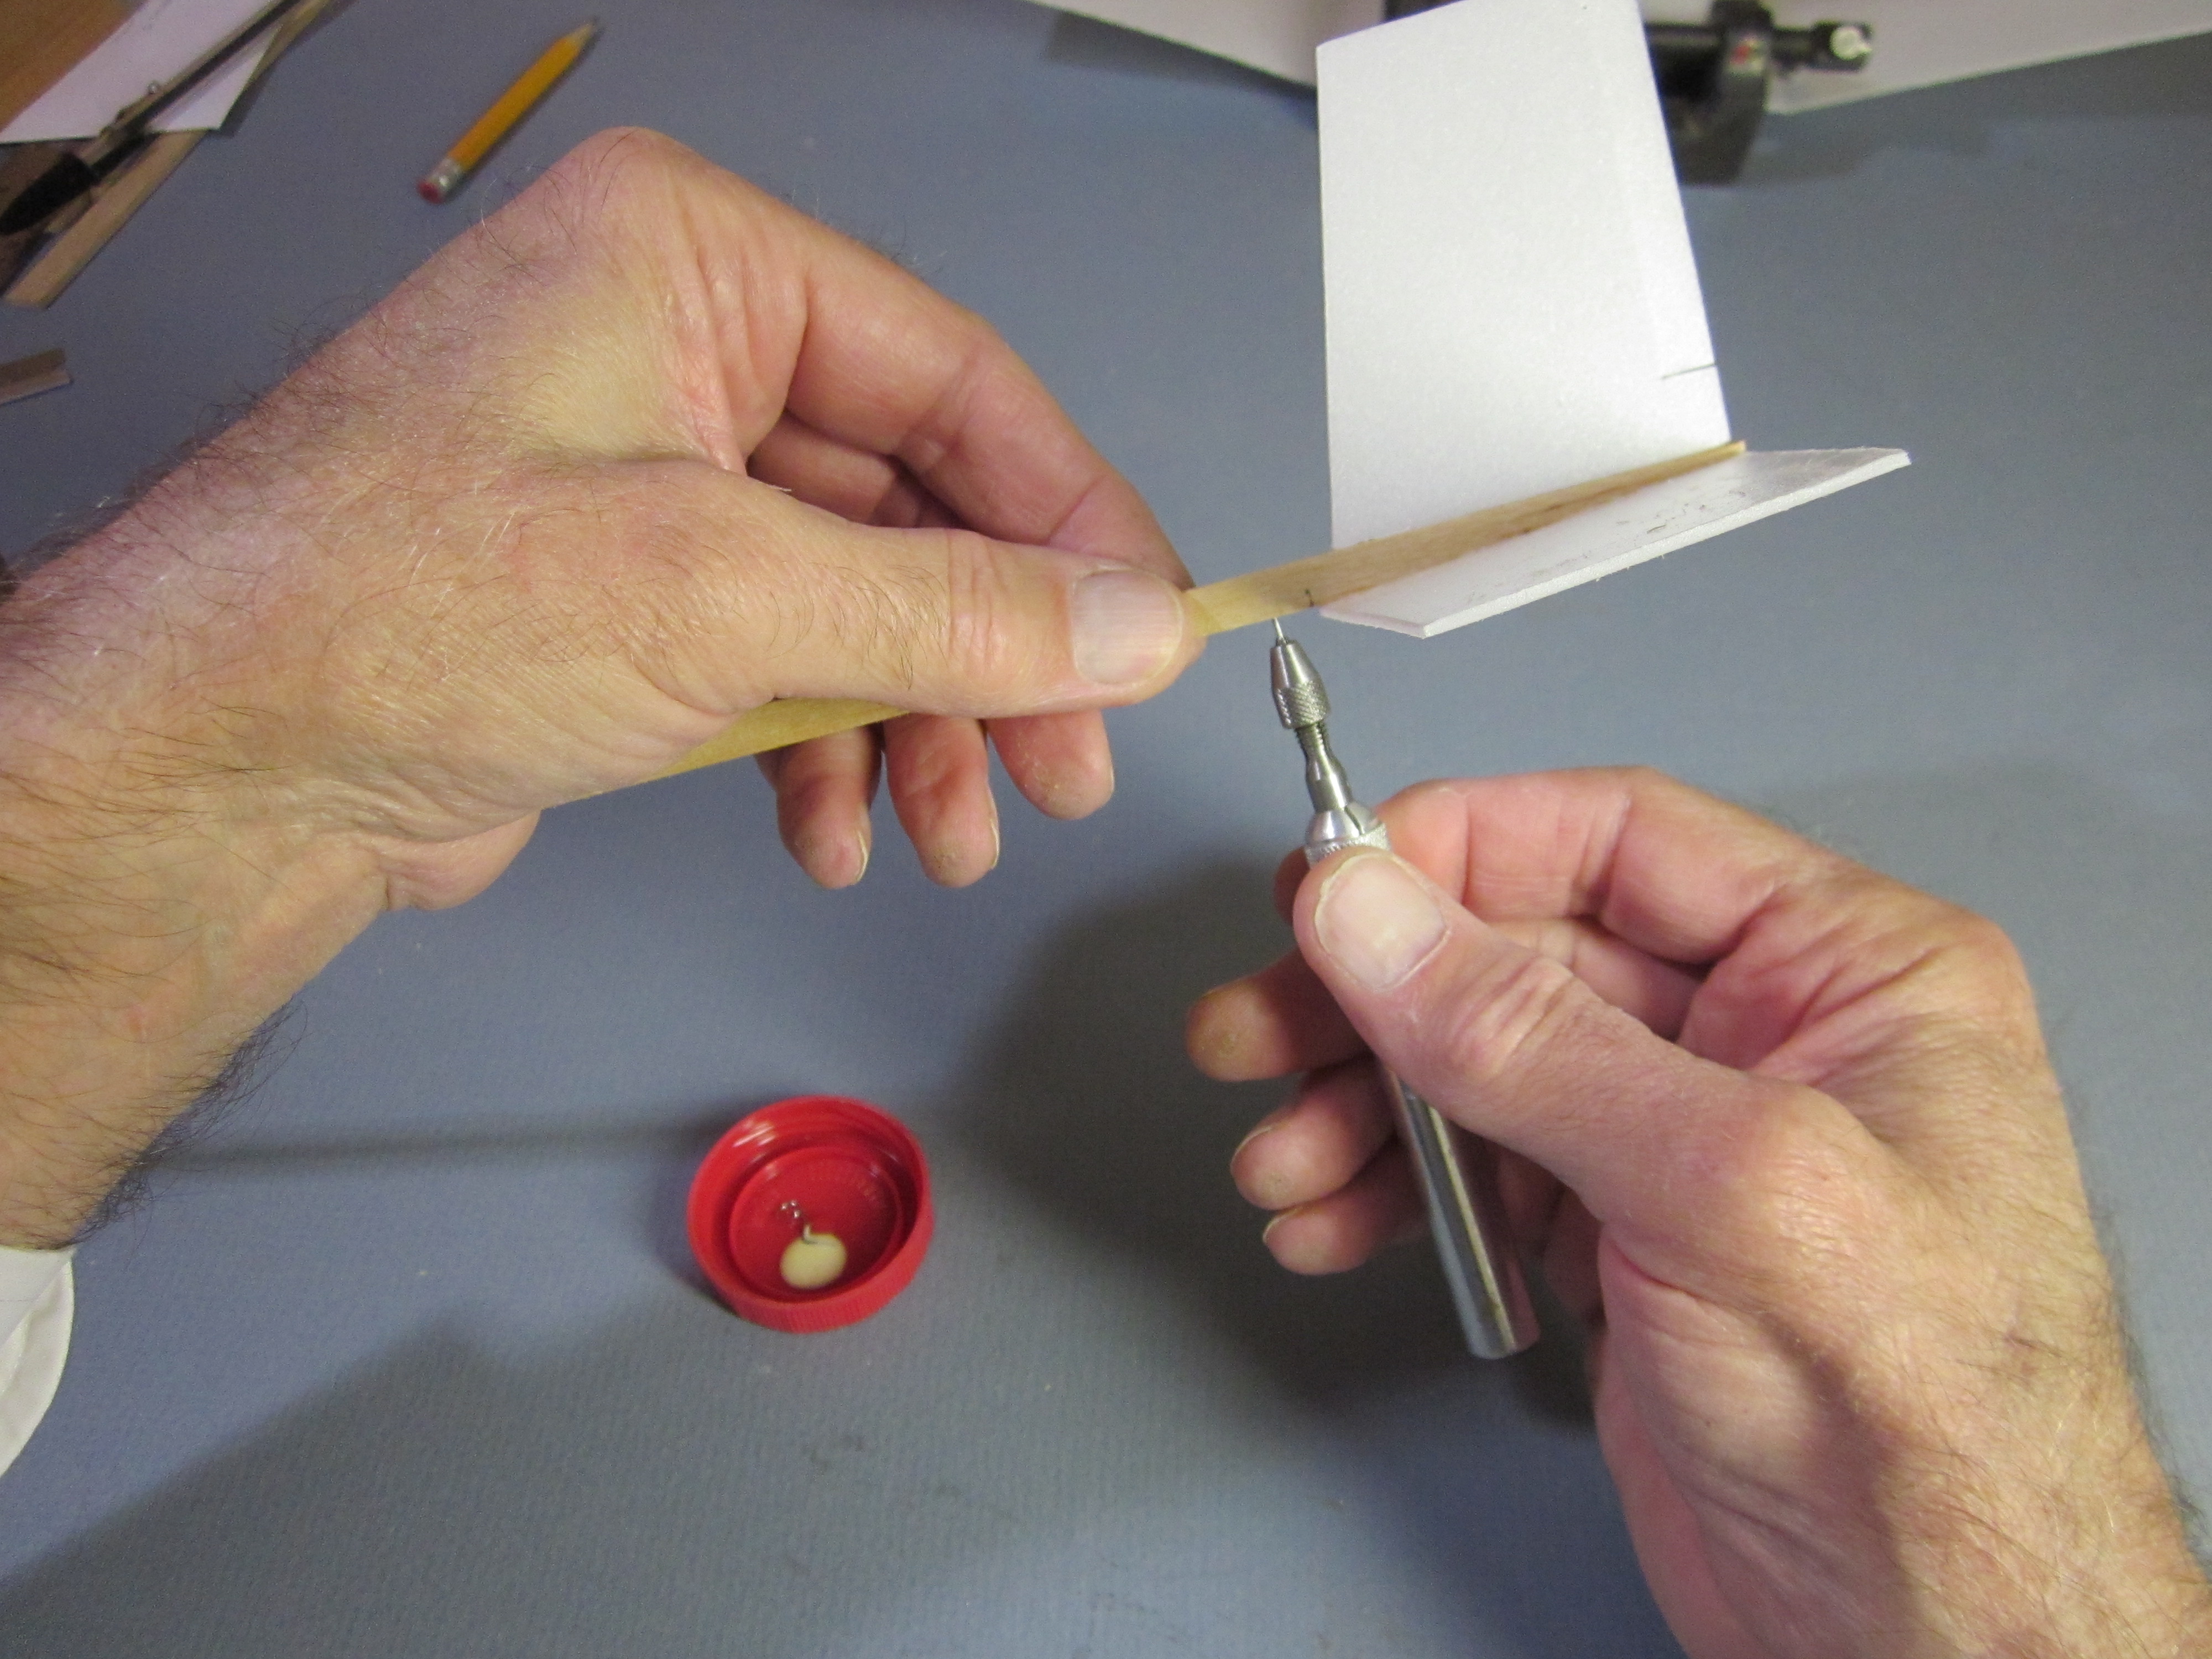
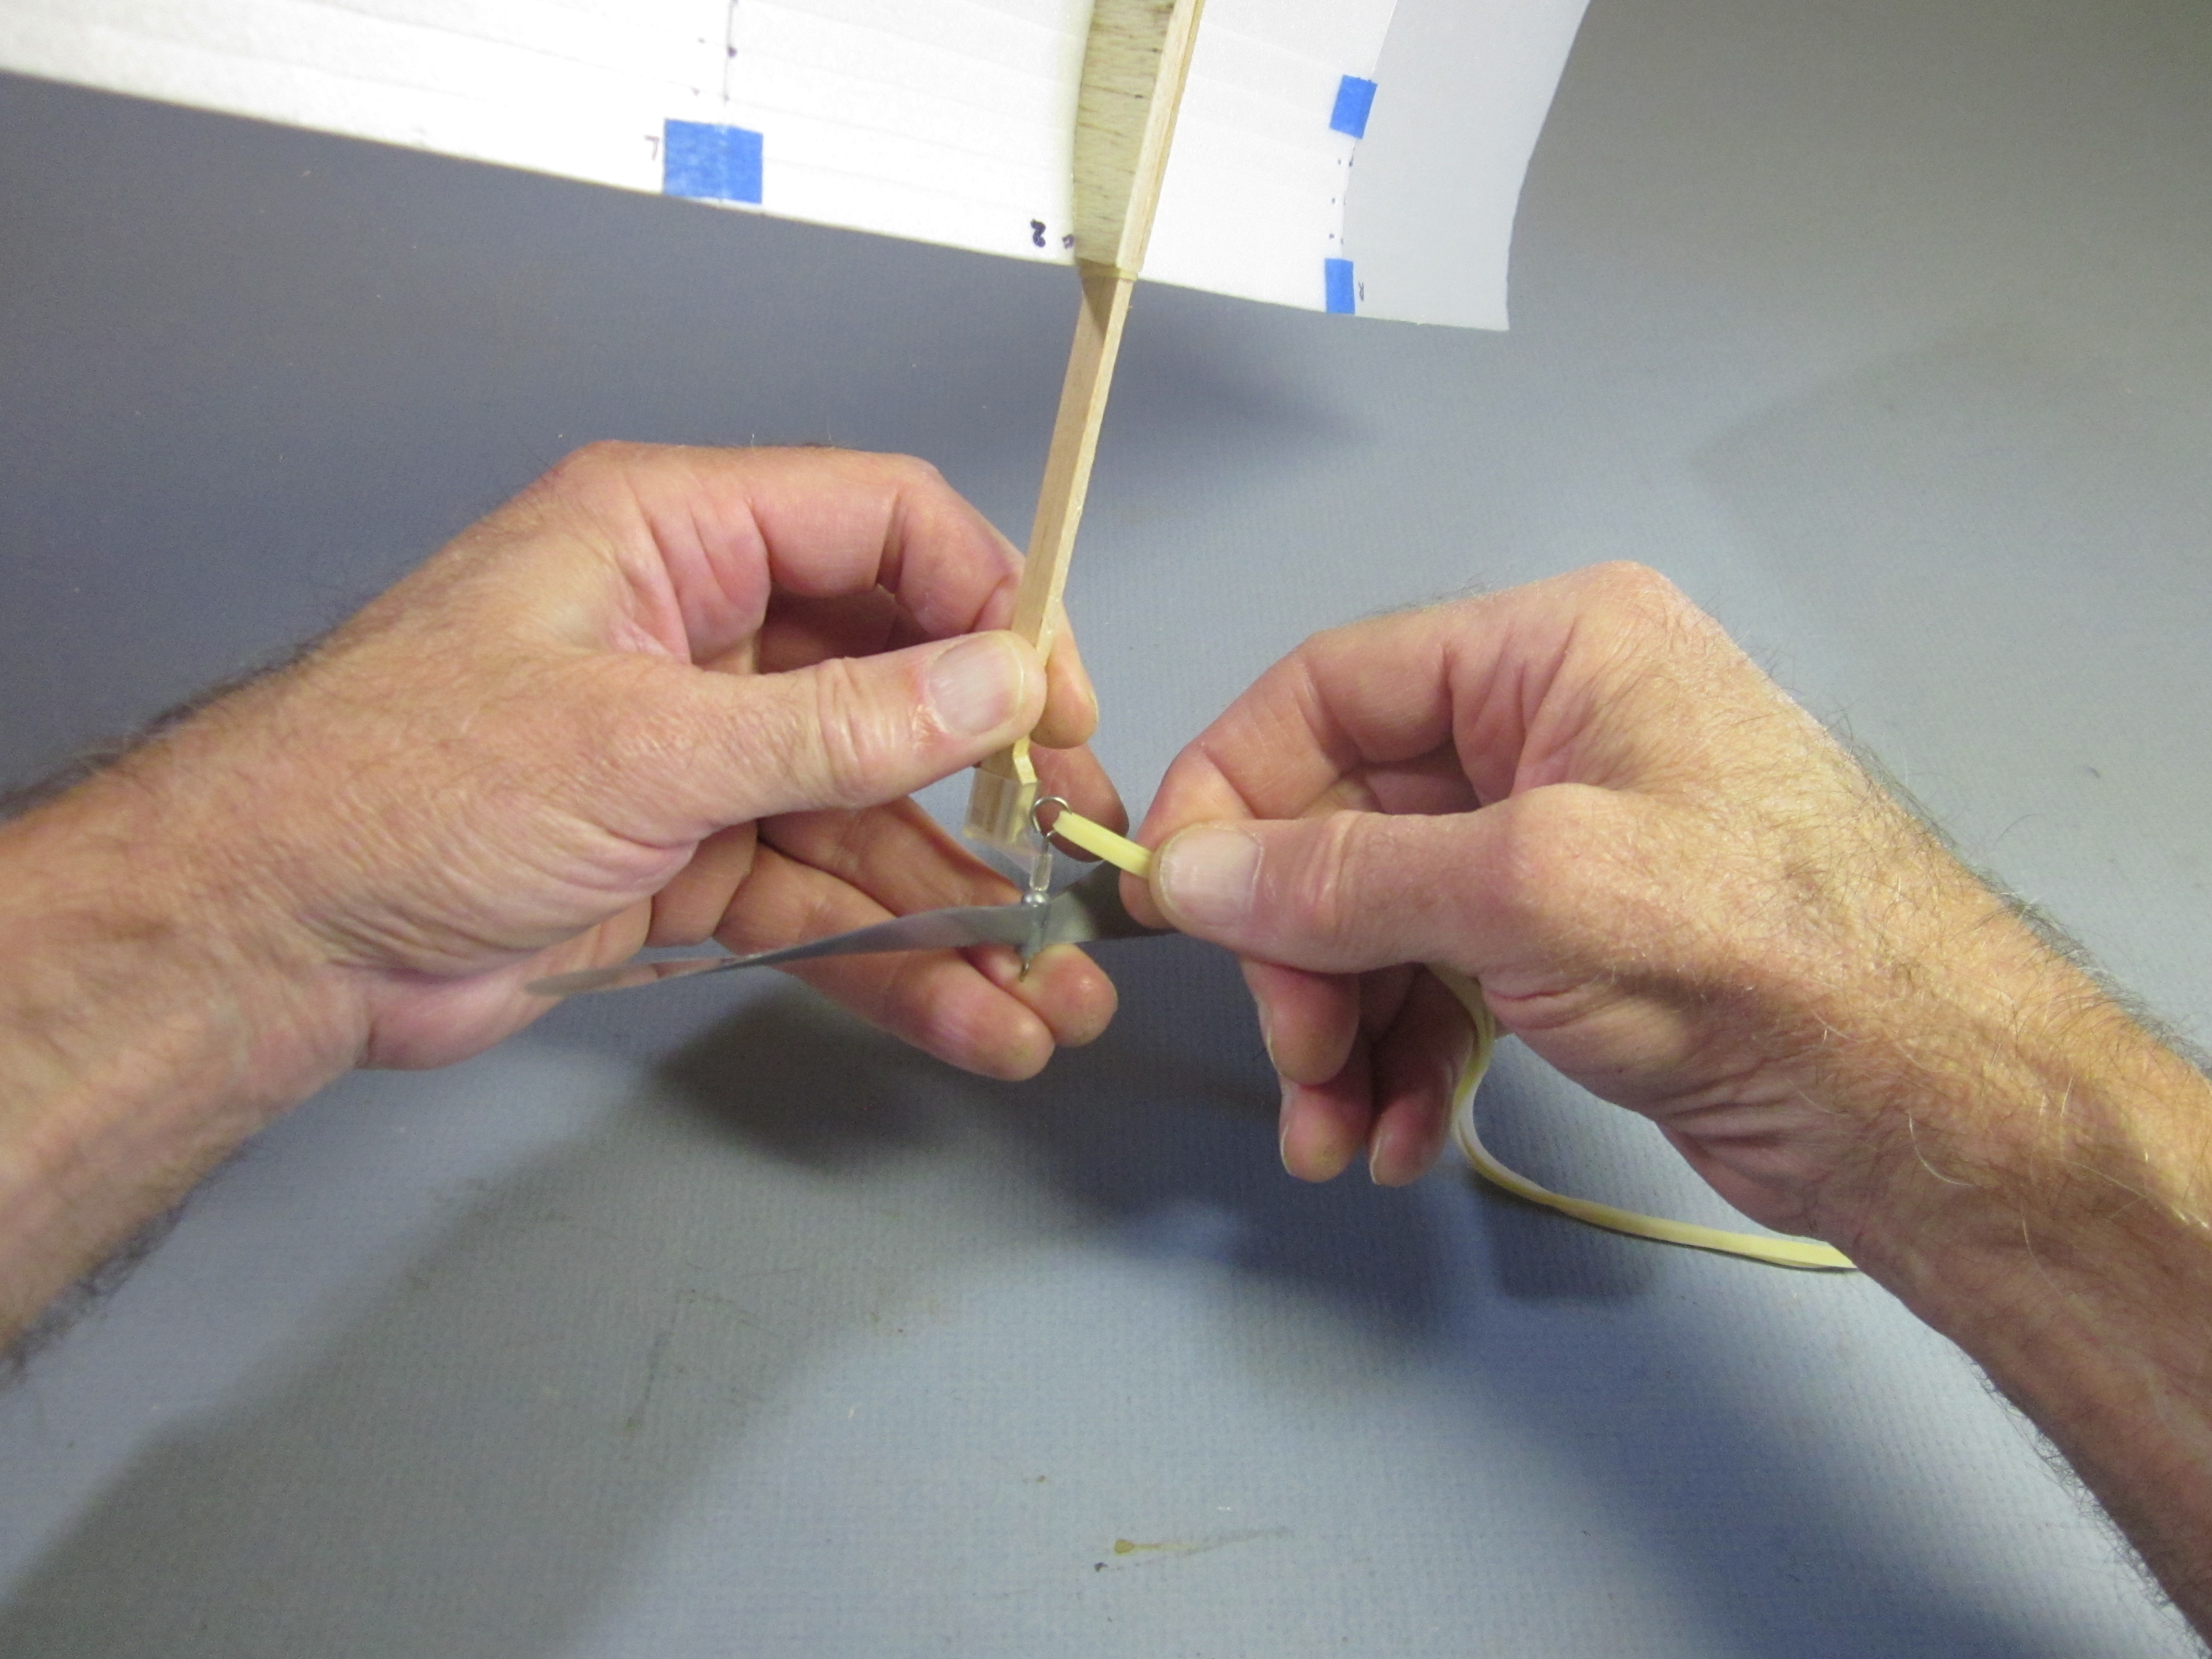 Put the loop end of the motor onto the prop hook.
 Put the knot end of the motor on the rear motor hook. With a short motor that is going to be finger wound, there is no need for an O-ring. We put the knot on the rear hook because if we put it on the prop hook, the tag ends would rub on the stick at every revolution, slowing the prop.
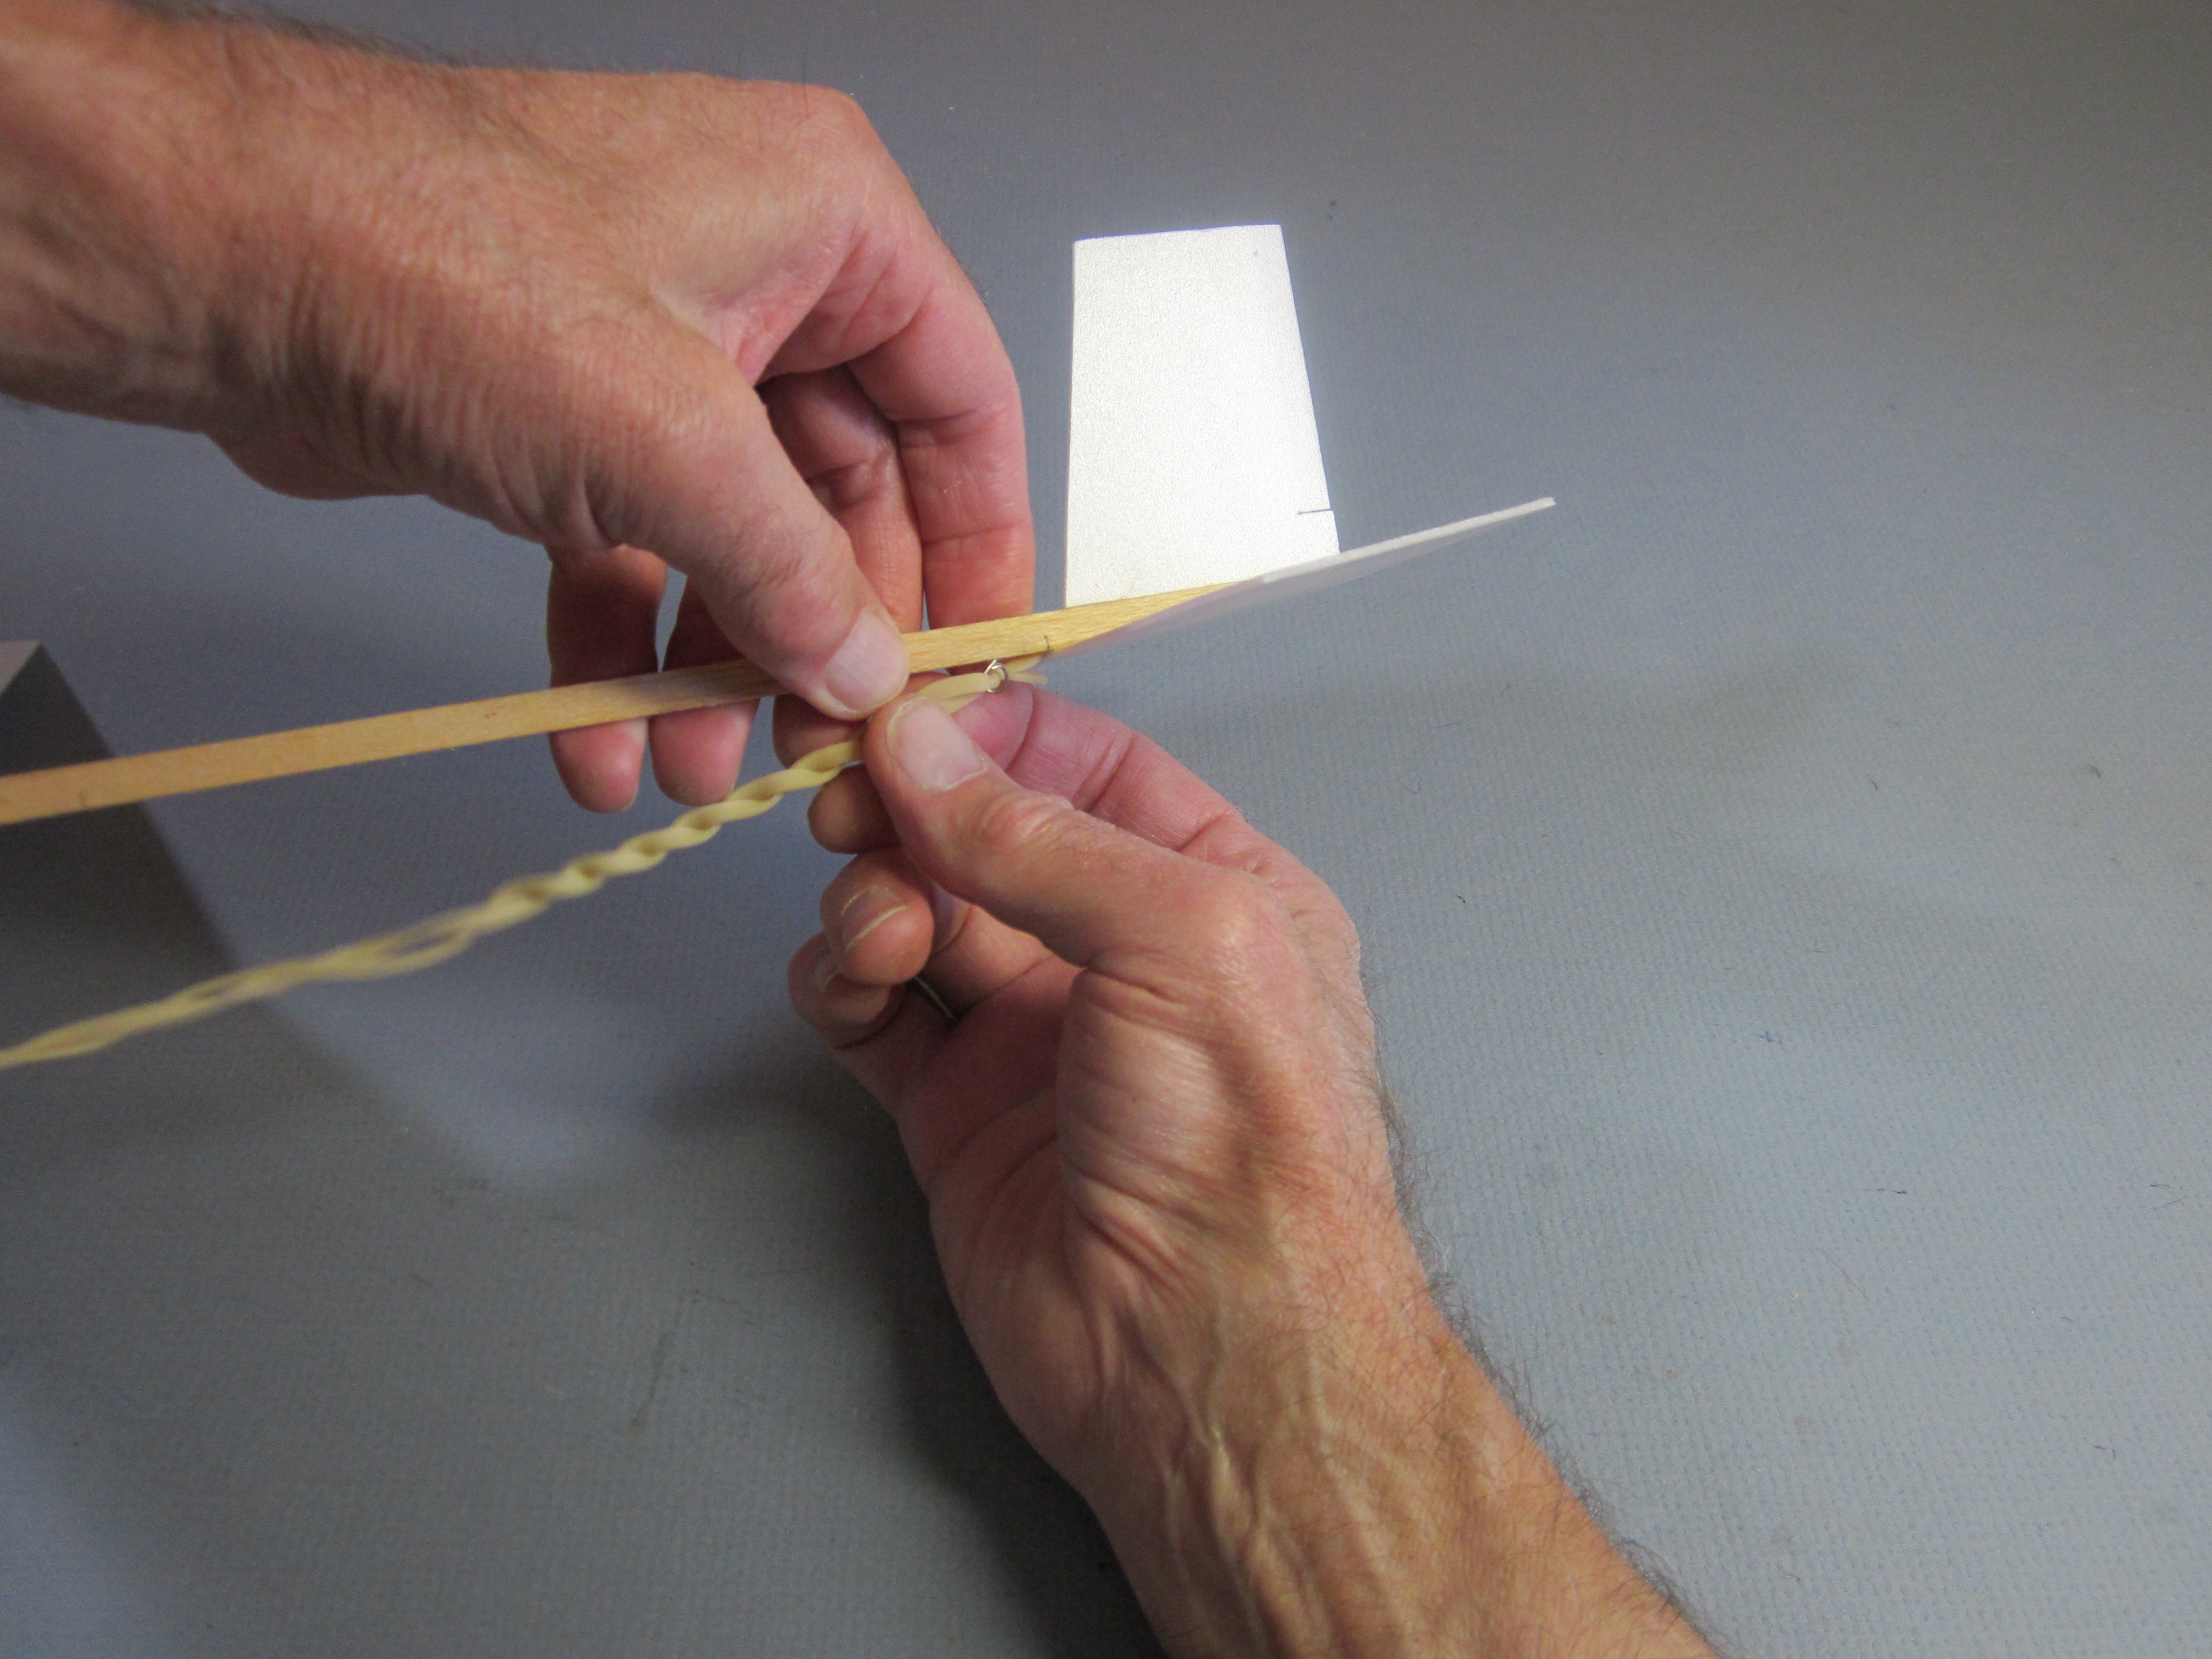
With the longer motor, we can double it. Put the O-ring on the rear hook, pull the two strands through the prop hook and loop the other end onto the rear hook.
 We can bend the prop hanger a bit to the right. Motor torque will roll the plane to its left, causing a left turn. At high torque, this will become a left power dive. To avoid that, we make the plane fly right, against torque.
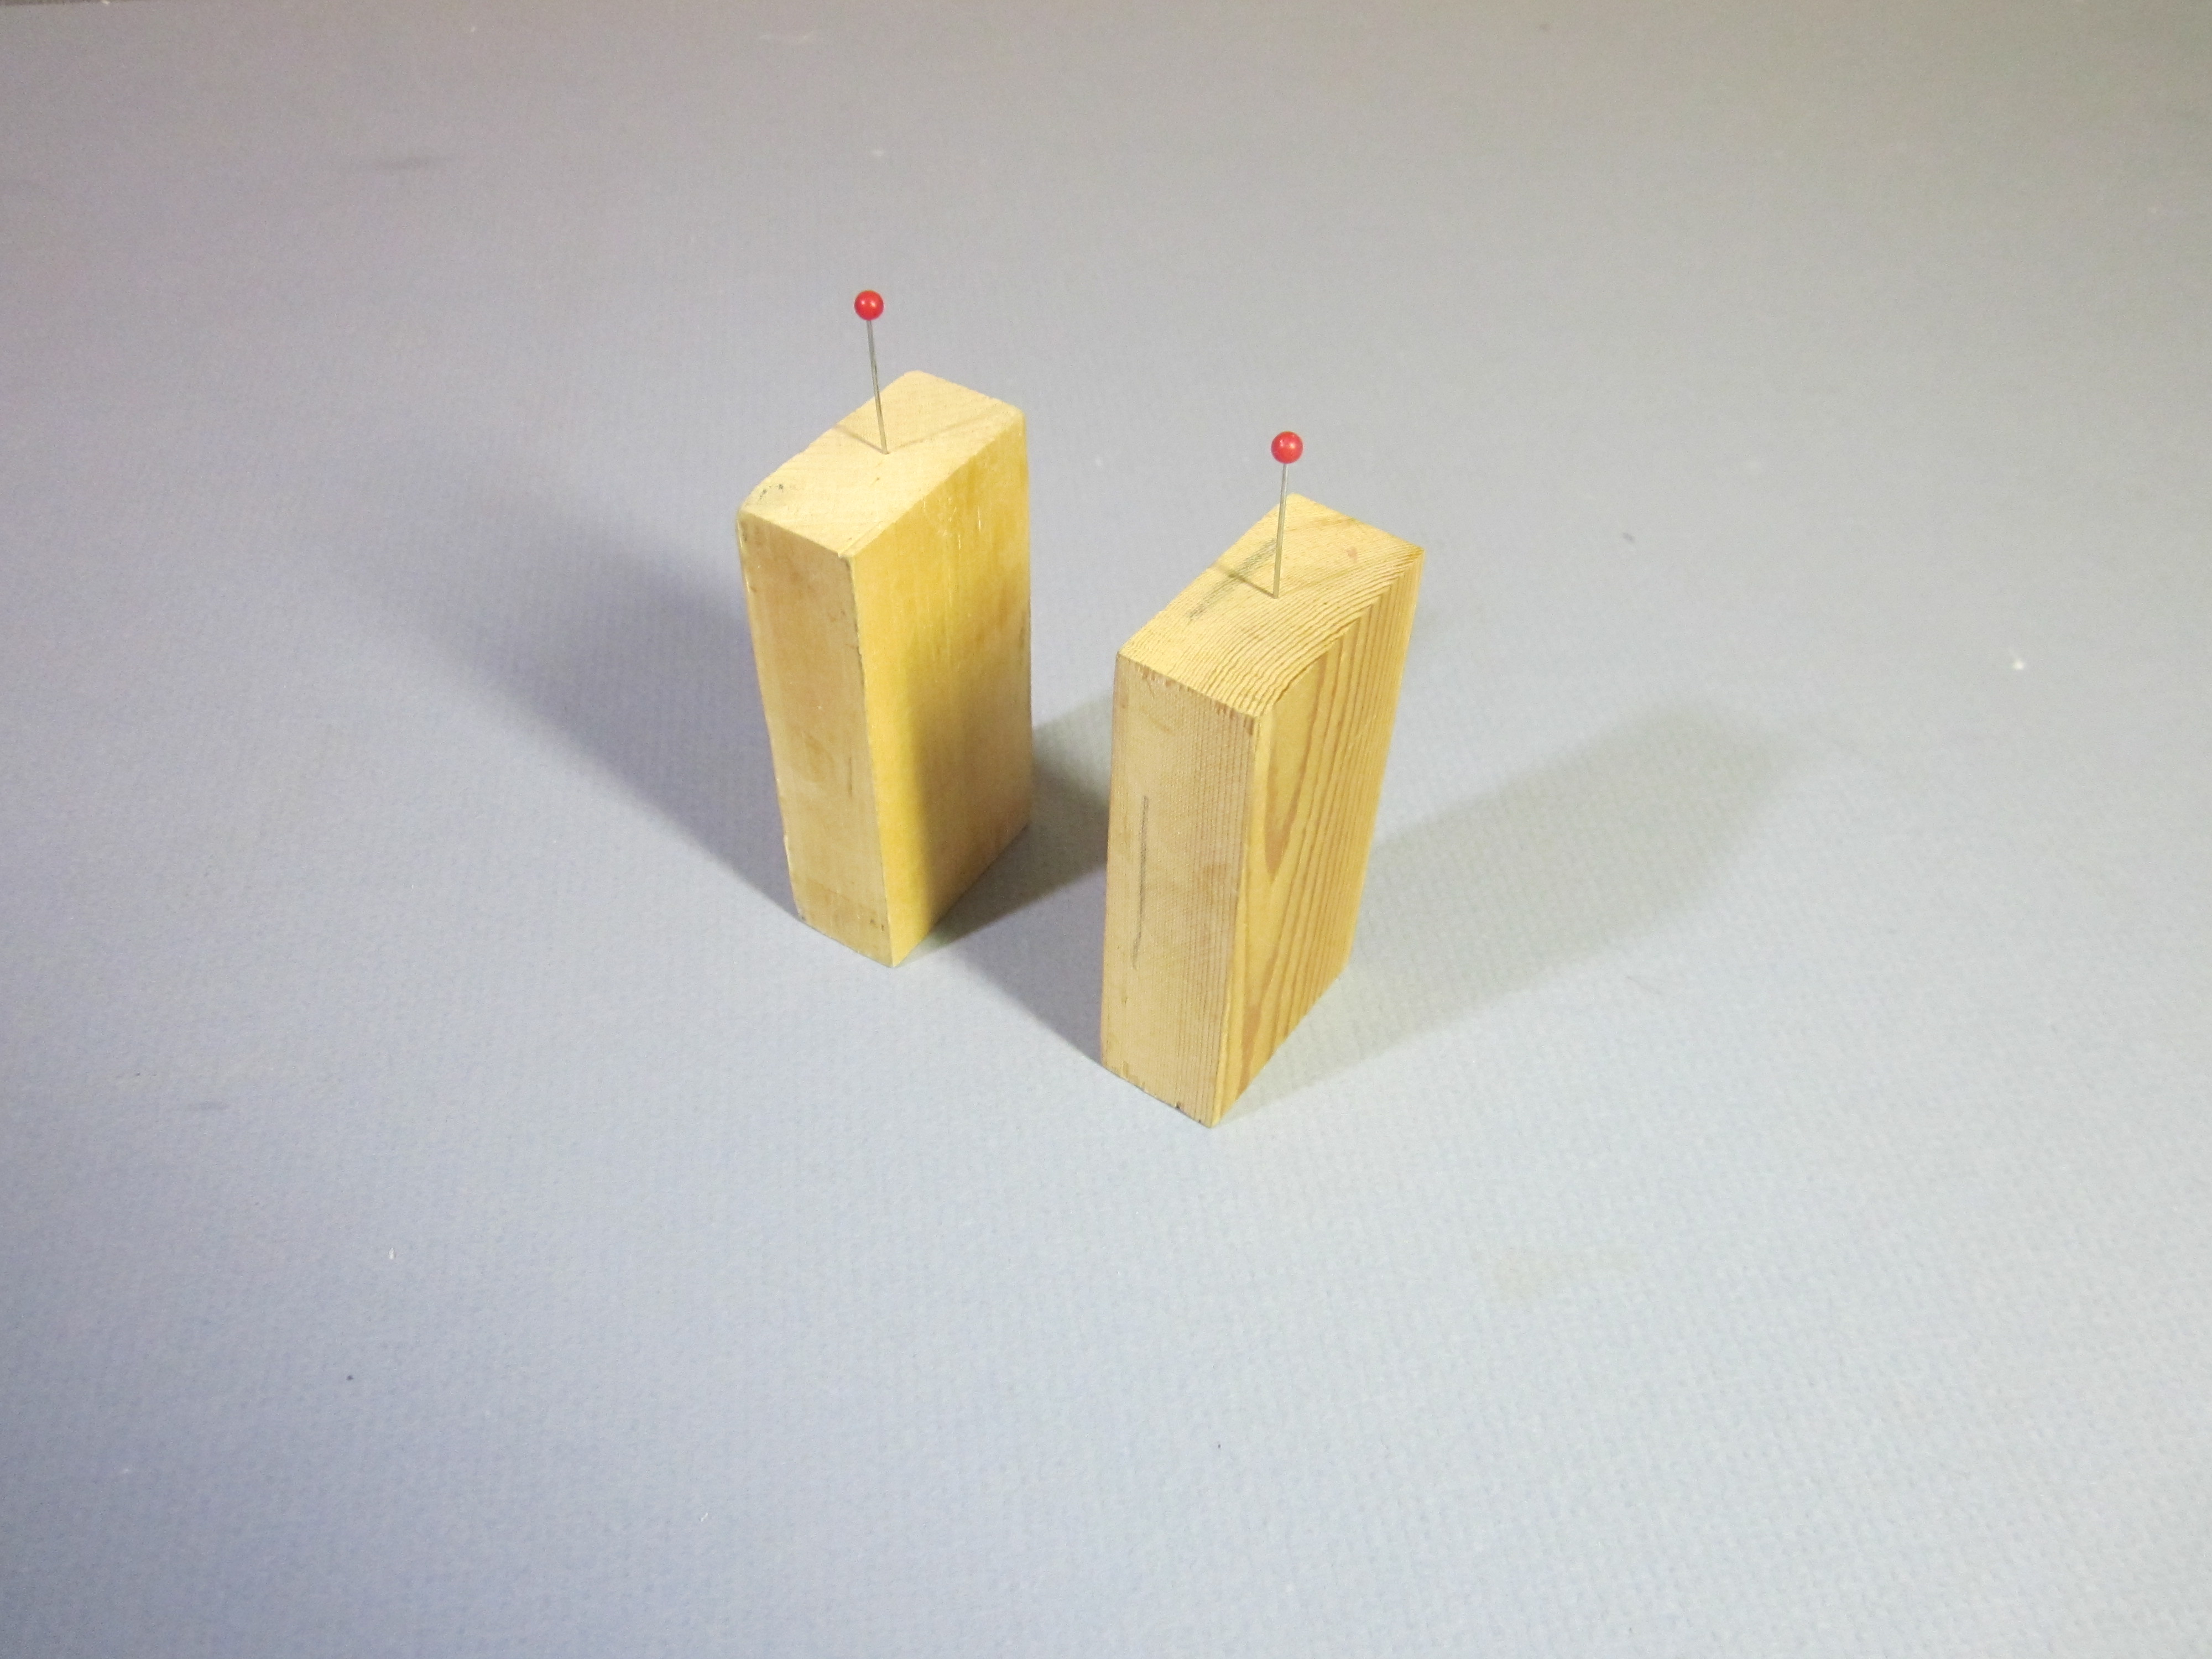 The plane will be balanced on the heads of two pins stuck in the ends of a couple blocks of wood. This will hold everything up off the table.
 Slide the wing as necessary until the plane balances (without the prop resting on the table) with the pin heads at the 40% crease. Experience says this is a good place to start.
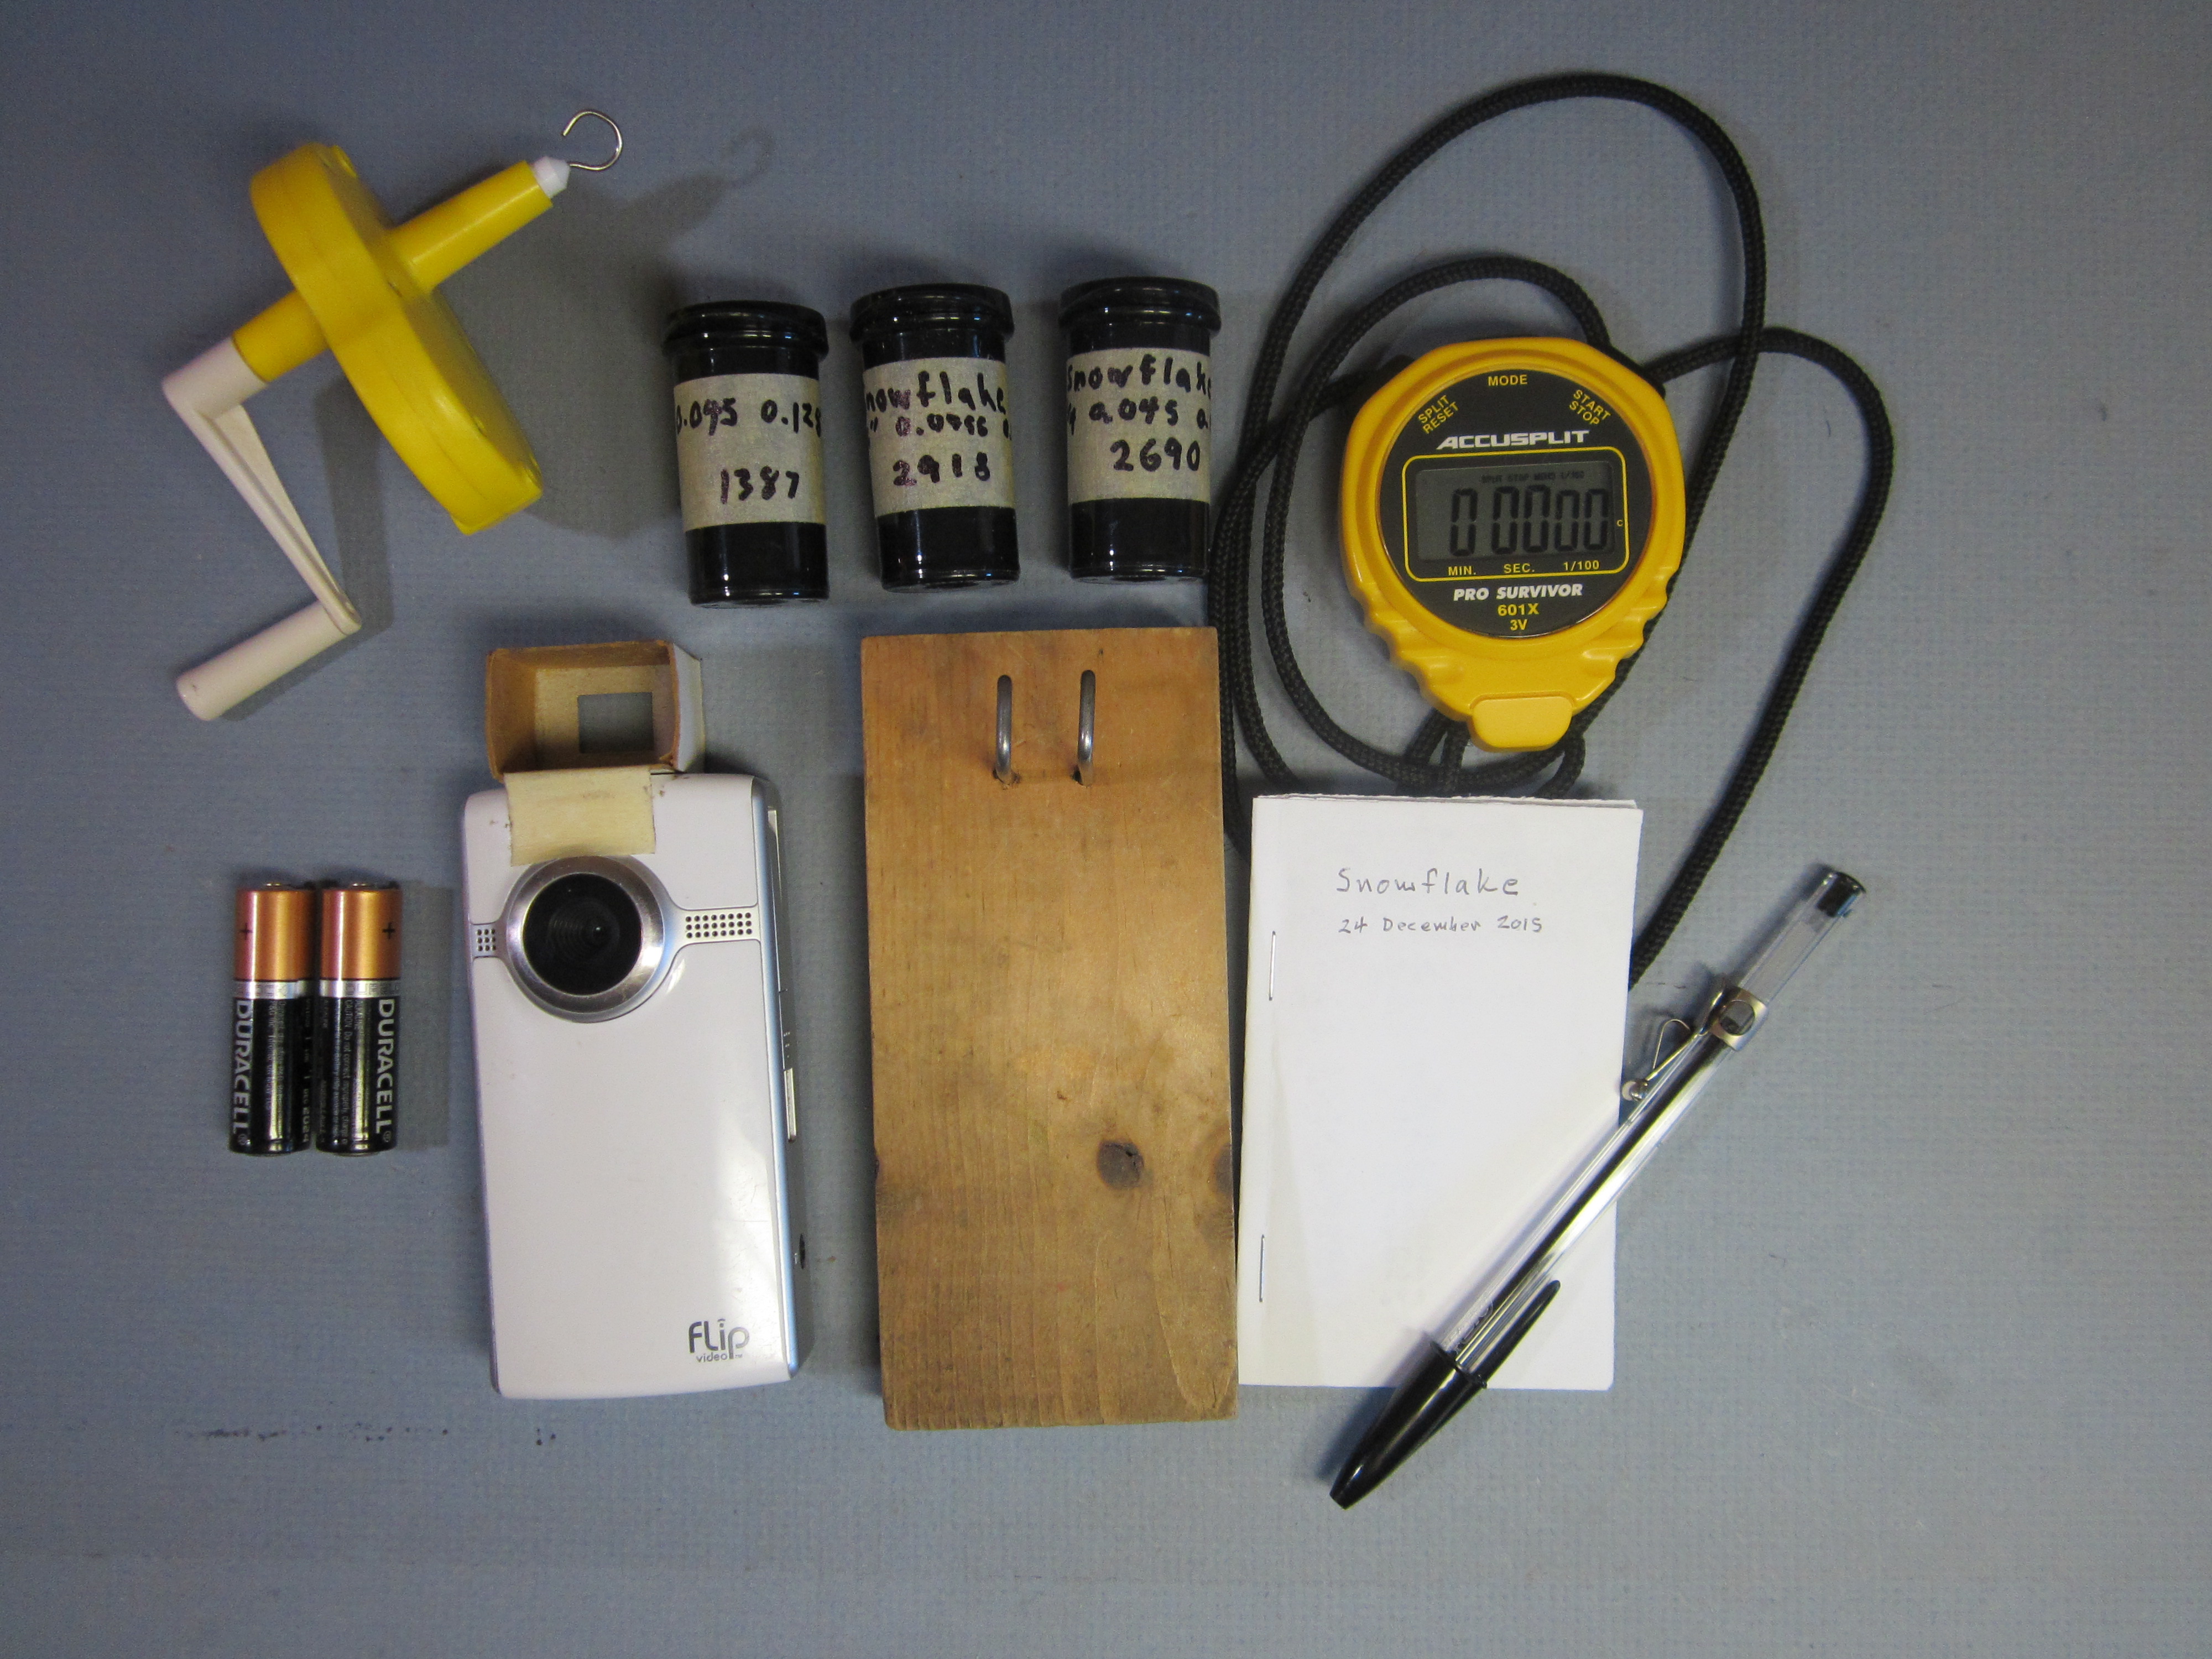 Gather the things you will need on the field. This could include a winder, motors, stopwatch, video camera and extra batteries, foot stooge, flight log and pen. For quick finger wound tests, the motor might be all you need. You could include a baggie of lube. These can be conveniently carried in a belt pack. Don’t forget the retrieval pole.
 If you wind with the motor hanging down slack, it will wrap around the hook and the shaft, forming a knot and jamming against the stick. To avoid this, pull the motor back in line with the shaft and put a few turns into it. Use your index finger to turn the prop slowly in a clockwise direction. The ramp on the front of the prop will engage the shaft and turn it. Notice how the rubber twists.
 Put in just enough turns to take the slack out of the motor. Note the first knot forming.
 Now you can shift your grip closer to the prop and begin winding faster. Count turns in groups of ten, like this: One, two, three, four, five, six, seven, eight, nine, ONE, one, two, three, four, five, six, seven, eight, nine, TWO, one, two, three, four, five, six, seven, eight, nine, THREE, one, two, three, four, five, six, seven, eight, nine, FOUR, one, two, three, four, five, six, seven, eight, nine, FIVE, one, two, three, four, five, six, seven, eight, nine, SIX, one, two, three, four, five, six, seven, eight, nine, SEVEN, one, two, three, four, five, six, seven, eight, nine, EIGHT, one, two, three, four, five, six, seven, eight, nine, NINE, one, two, three, four, five, six, seven, eight, nine, TEN. Ten tens is a hundred. When you get to TWENTY, you will have two hundred turns in the motor. This is a good place for the first test flight.
 Here knots have formed along the whole length of the motor.
 Hold the plane under the wing with one hand and hold the tip of the prop with the other. Hold it at a comfortable height, shoulder high or over your head. Have the wings level and the nose pointed slightly up. Rear back, swing forward and step forward, pushing the plane forward and releasing the plane and the prop at the same time. Do not throw it hard. Push it forward at close to flying speed. The propeller will immediately take over and pull the plane through the air. After a couple launches, you will see the speed and attitude the plane wants to go right after release. Try to match that condition when you launch it.
Test flights are made with a 14″ loop of 1/8″ rubber to check climb, turn and descent. Short flights are made to allow fine tuning before attempting a longer flight that might get into trouble. The goal of the trimming process is to get the plane to make a steep, steady climb, long cruise and slow descent, turning uniformly to the right. This involves adjusting the wing position on the stick to get proper longitudinal balance, right rudder for turn in the descent and right thrust to get proper right circle in the climb, in that order.
Your first flight might look something like this.
Observe carefully and describe what the plane is doing. It makes a steep, slow climb, a brief stall, turning left, levels off and flys steadily, straightening out, then begins a gradual descent, turning right. This tells us that the wing is in the right place, because the cruise and the descent are good, and the rudder is turning the plane right in descent, but it is turning left in the powered climb. The correction is to bend the prop hanger to the right so the prop will pull the plane into a right turn under power.
 To make it fly to the right under power, we bend the prop hanger to the right, to point the prop to the right. This video shows what we want to see before trying more power.
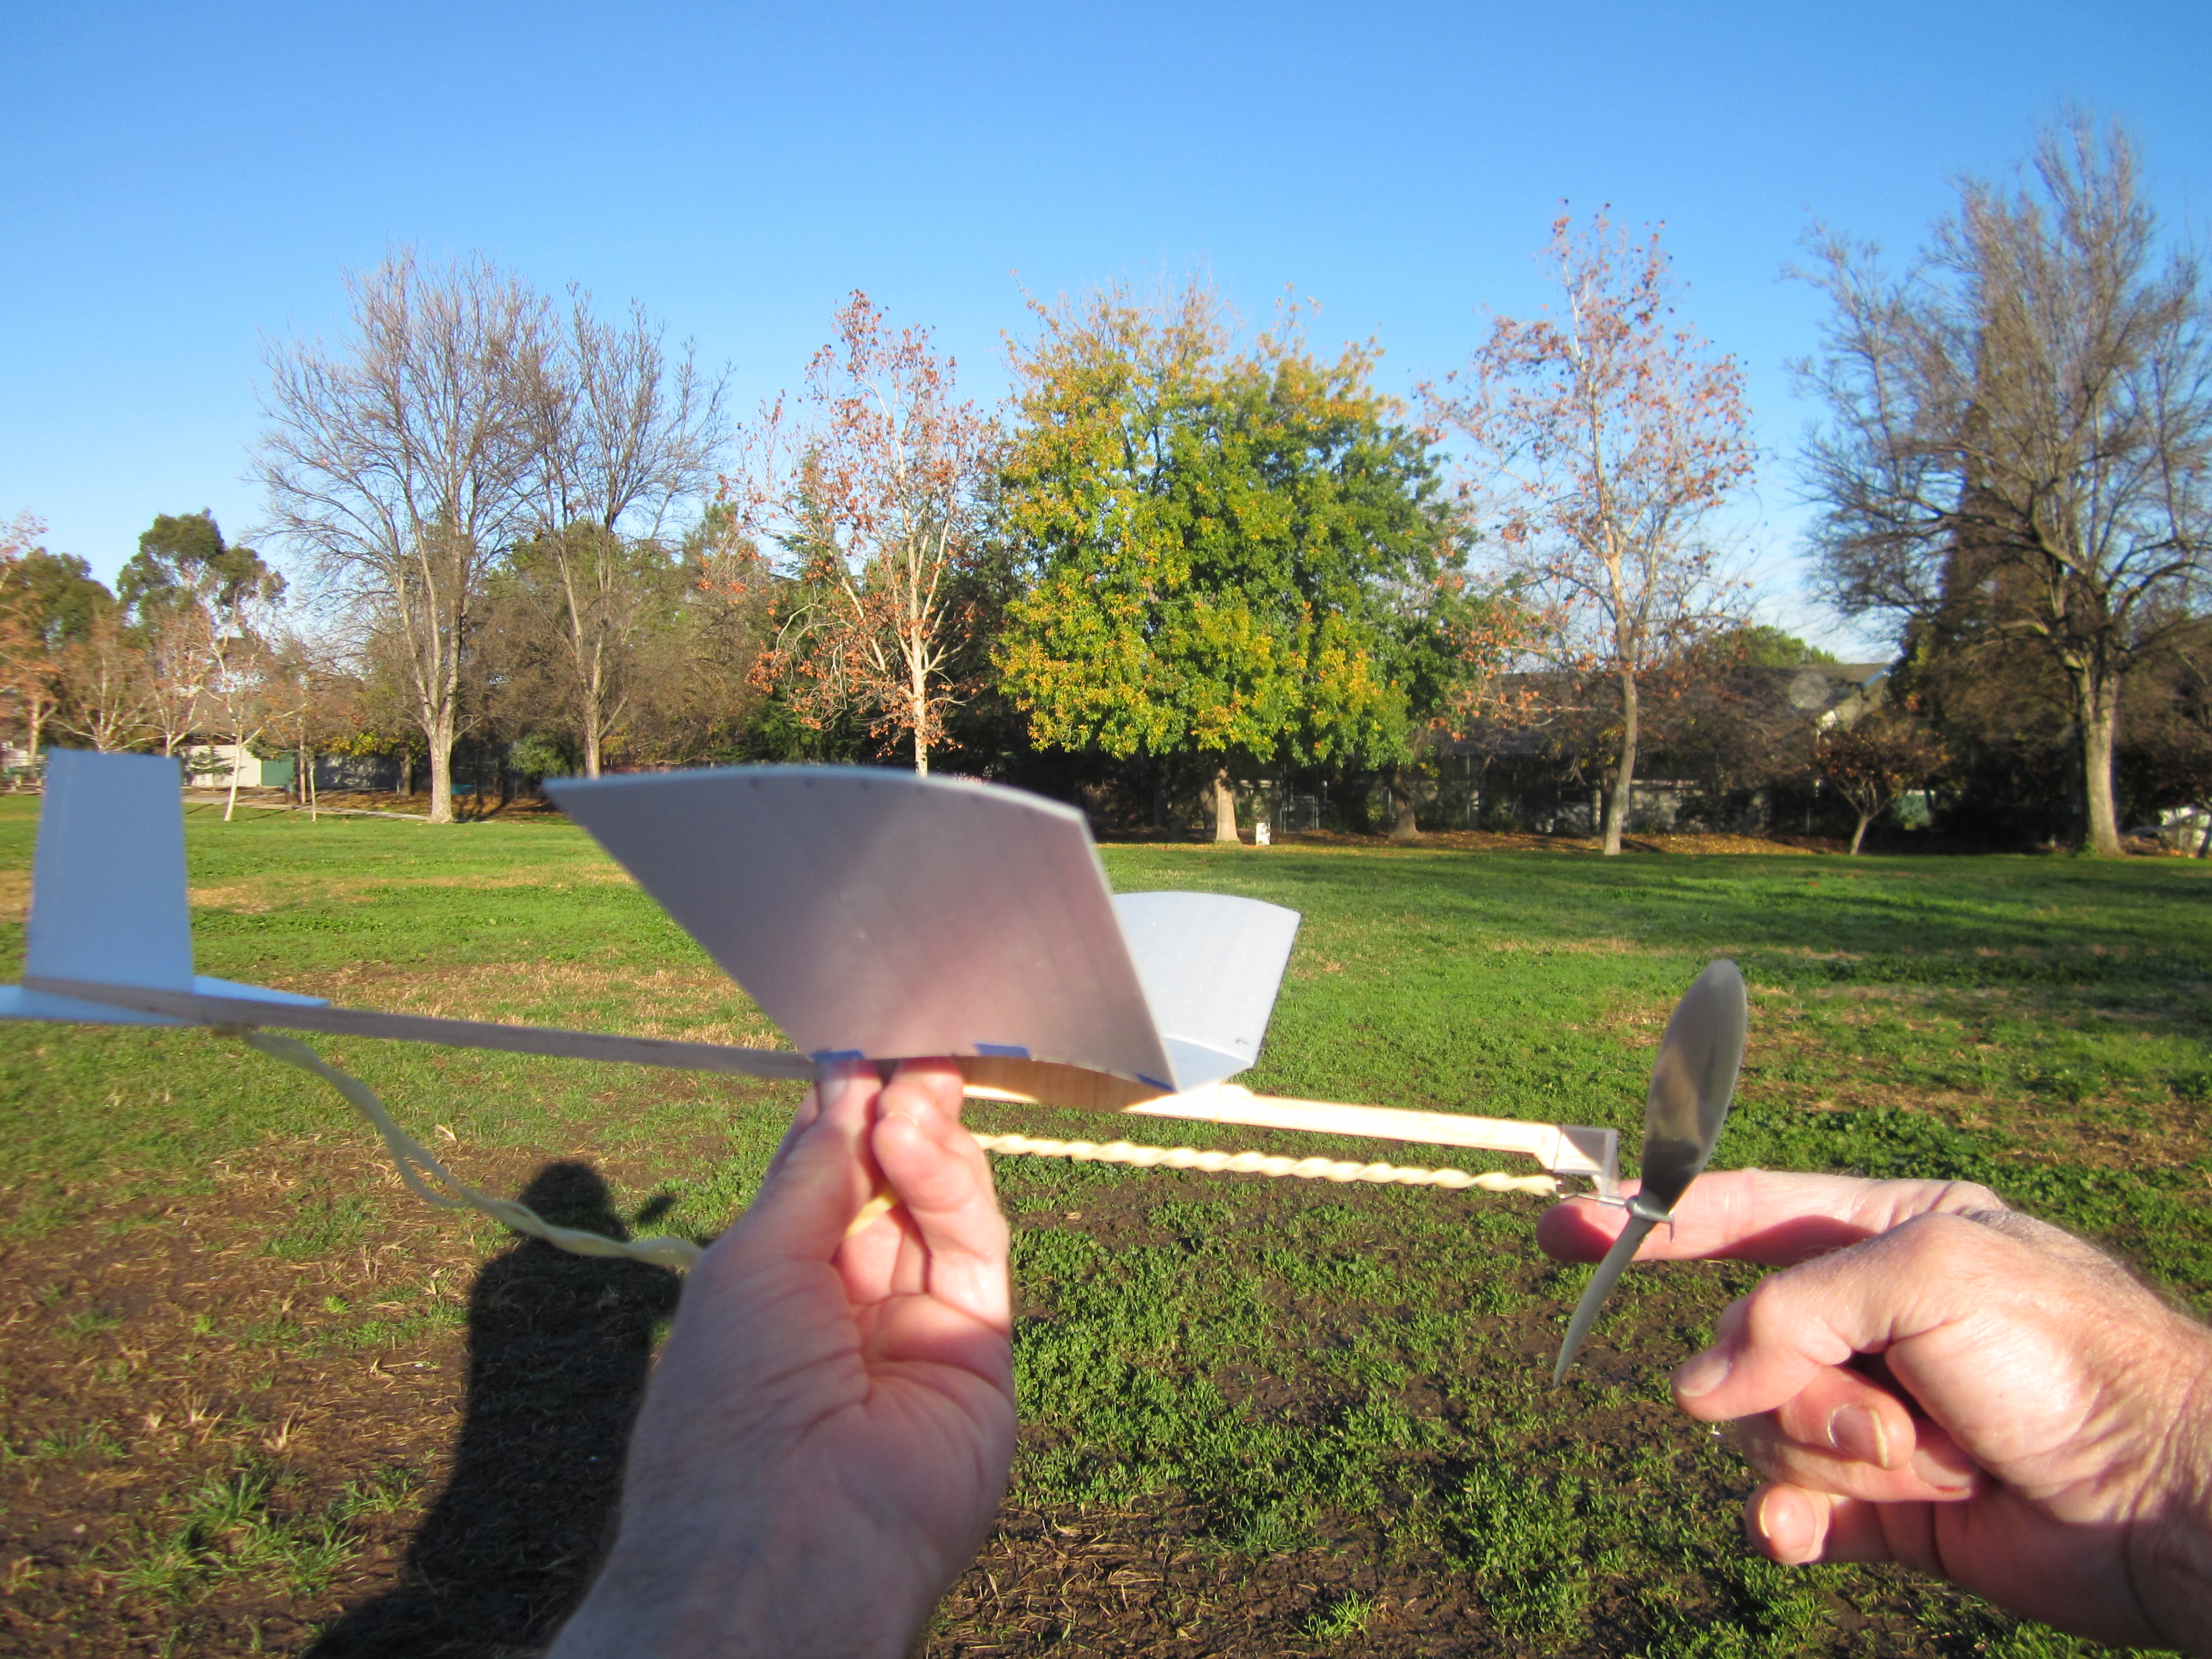
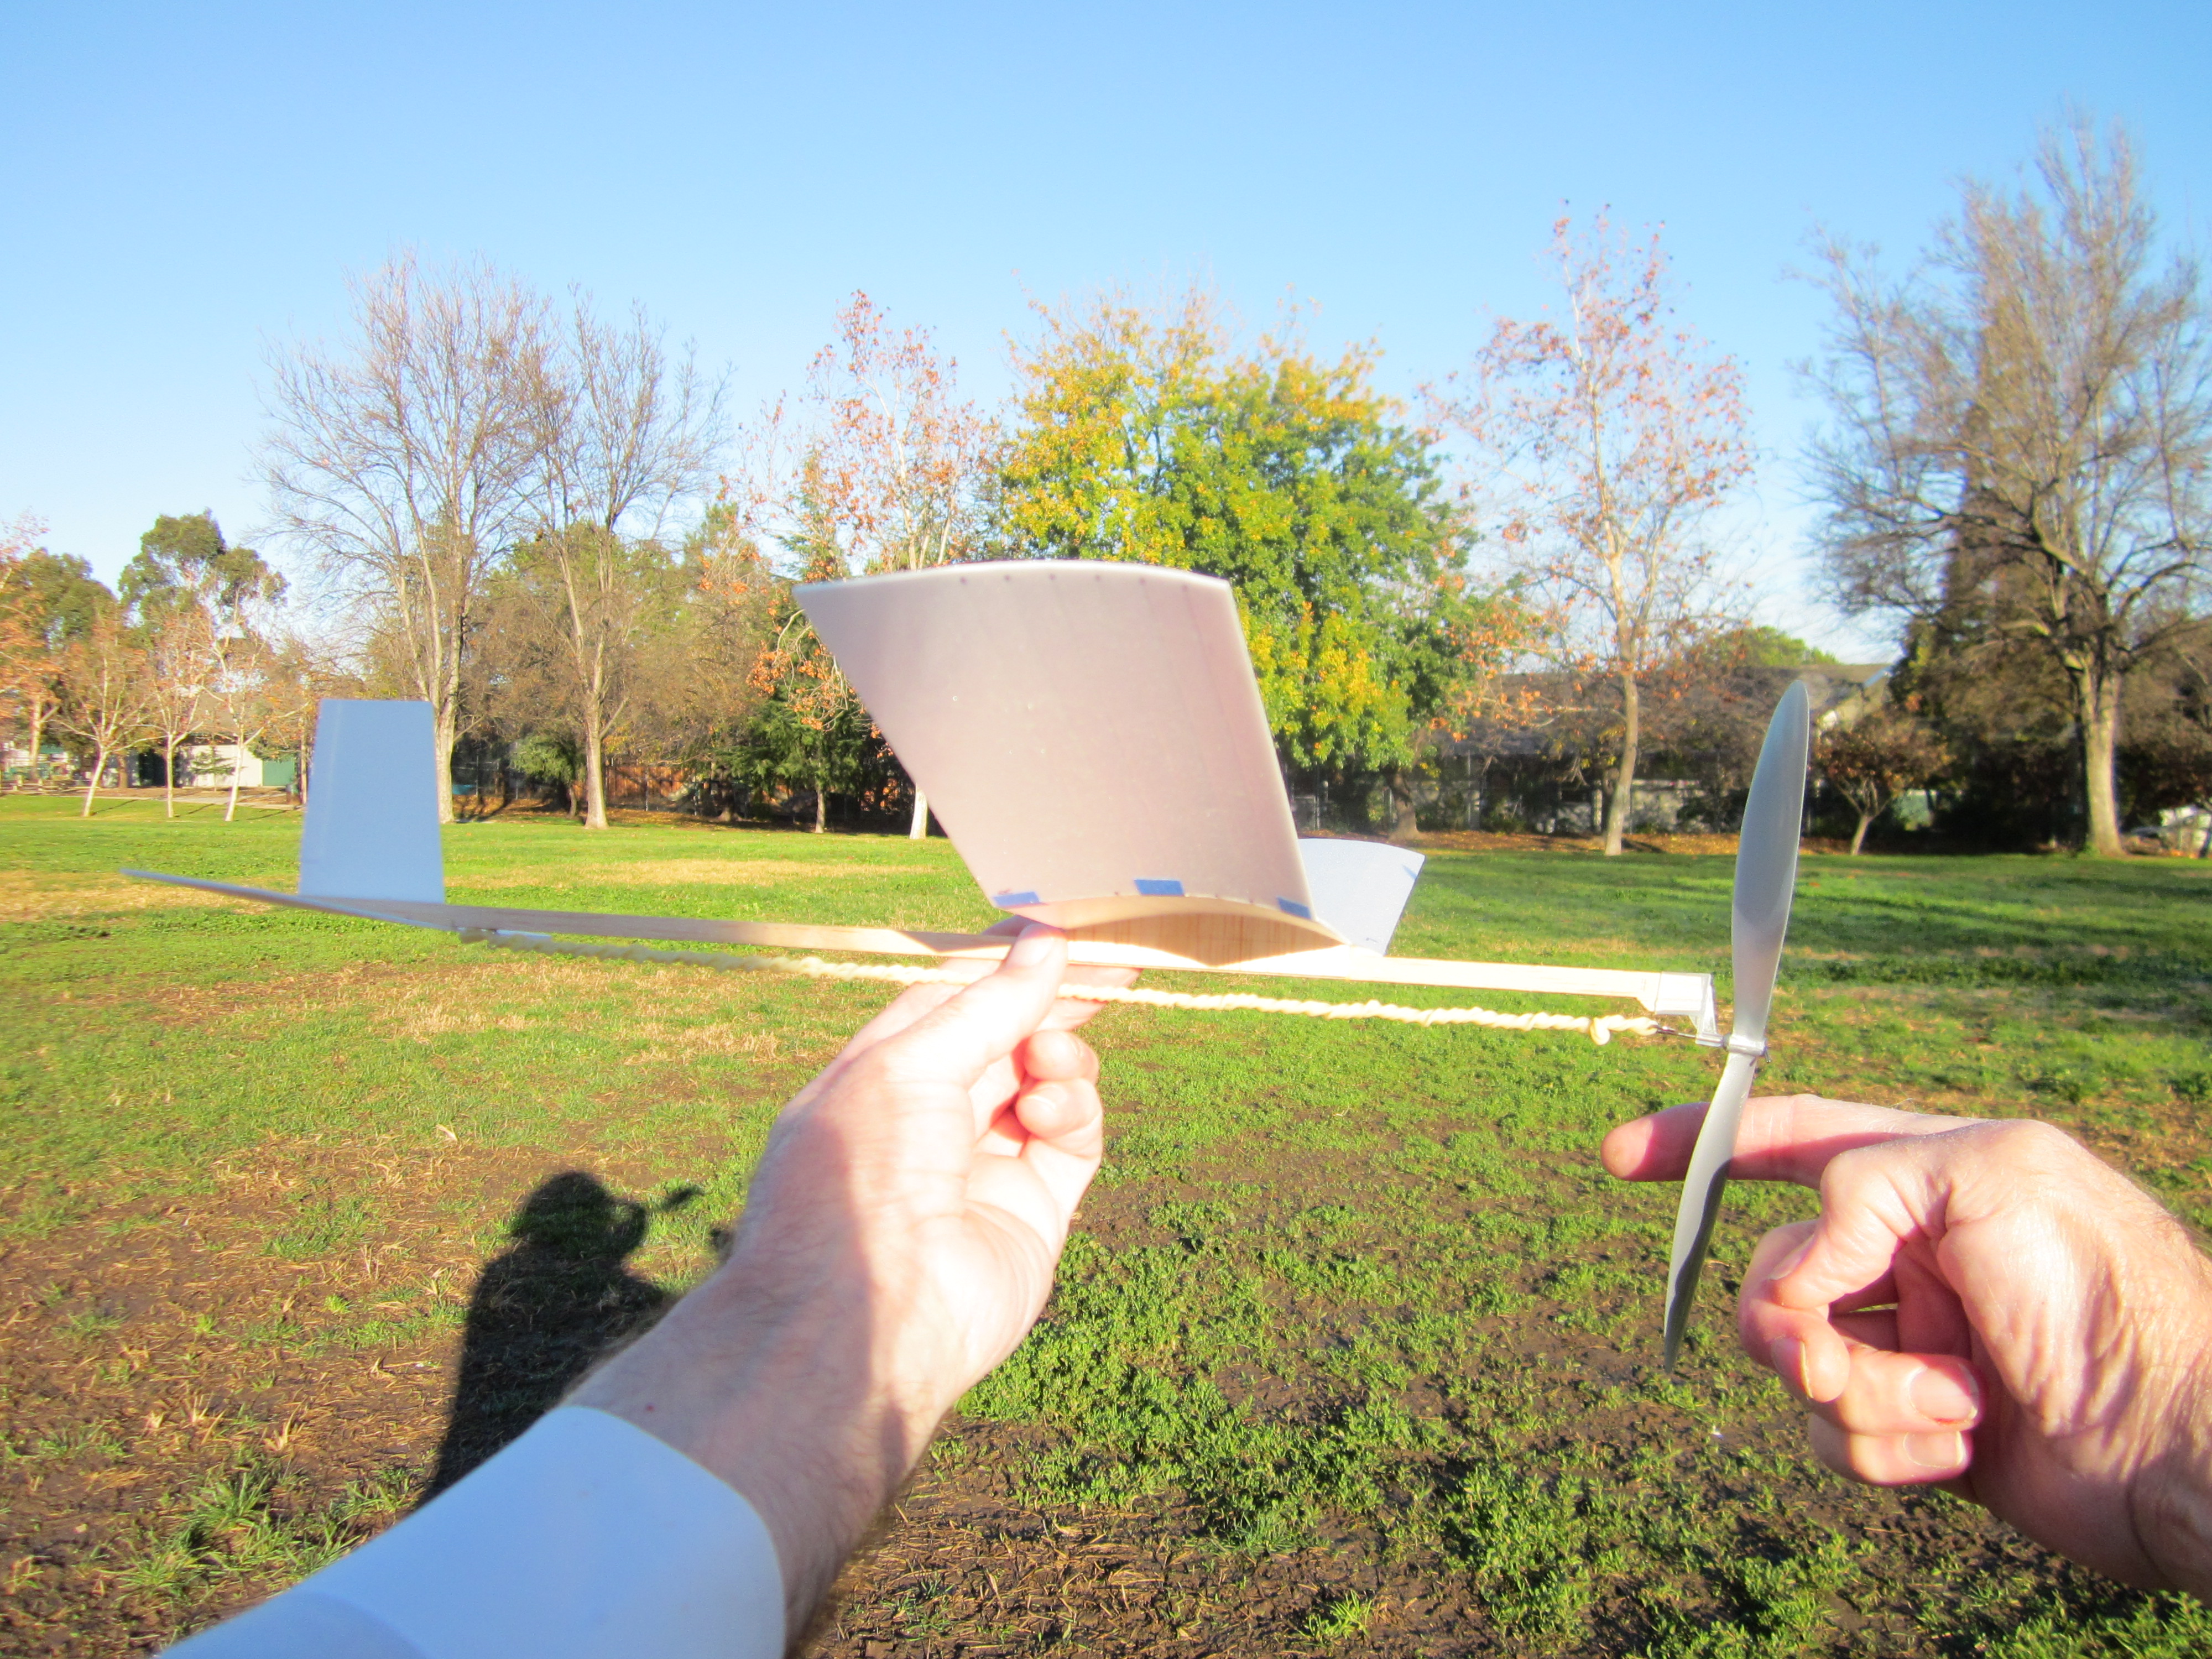
With the plane properly trimmed, we can try a longer motor for more turns and a longer flight. I used a 22 1/4″ loop of 0.045″ x 0.086″ rubber. Winding a long motor requires a way to stretch it out. If you tried to finger wind it, the motor would roll itself into a ball around the prop shaft. If you have a friend to fly with you, your friend can hold the prop as you stretch the motor and wind it. If you fly by yourself, you will need a stooge to hold the prop as you wind the motor.
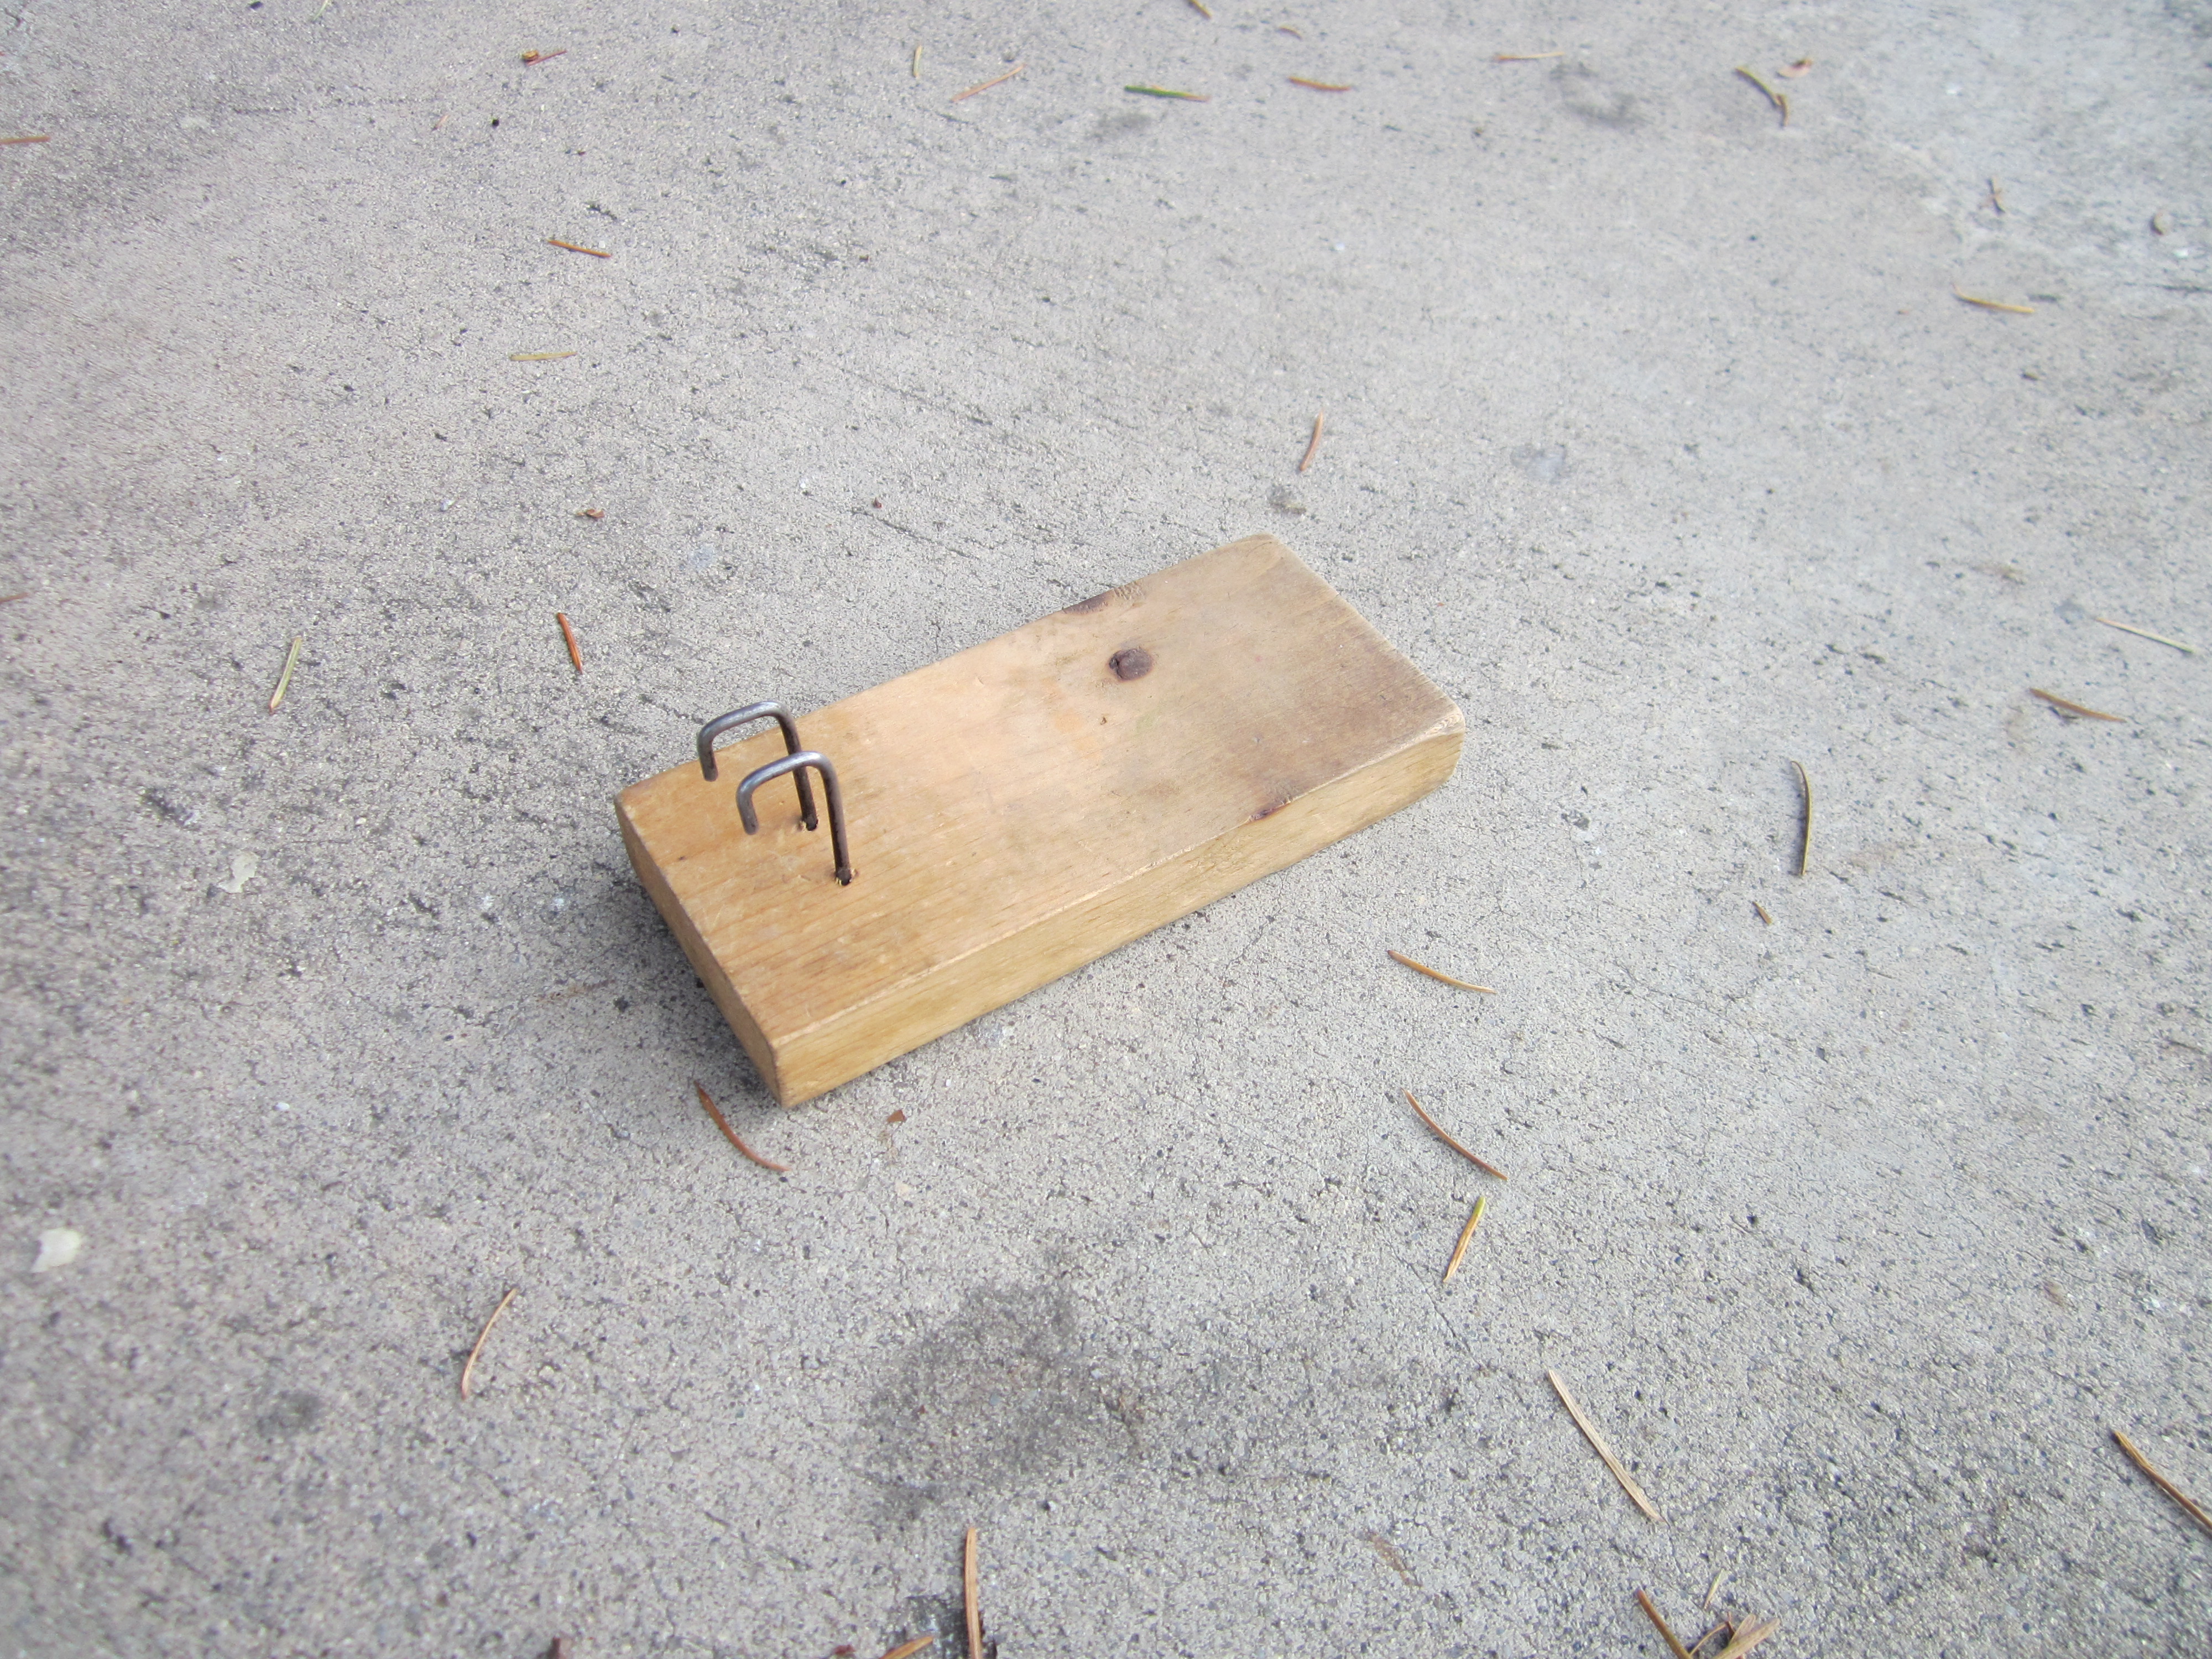 I use this simple, portable foot stooge. It fits in my pocket.
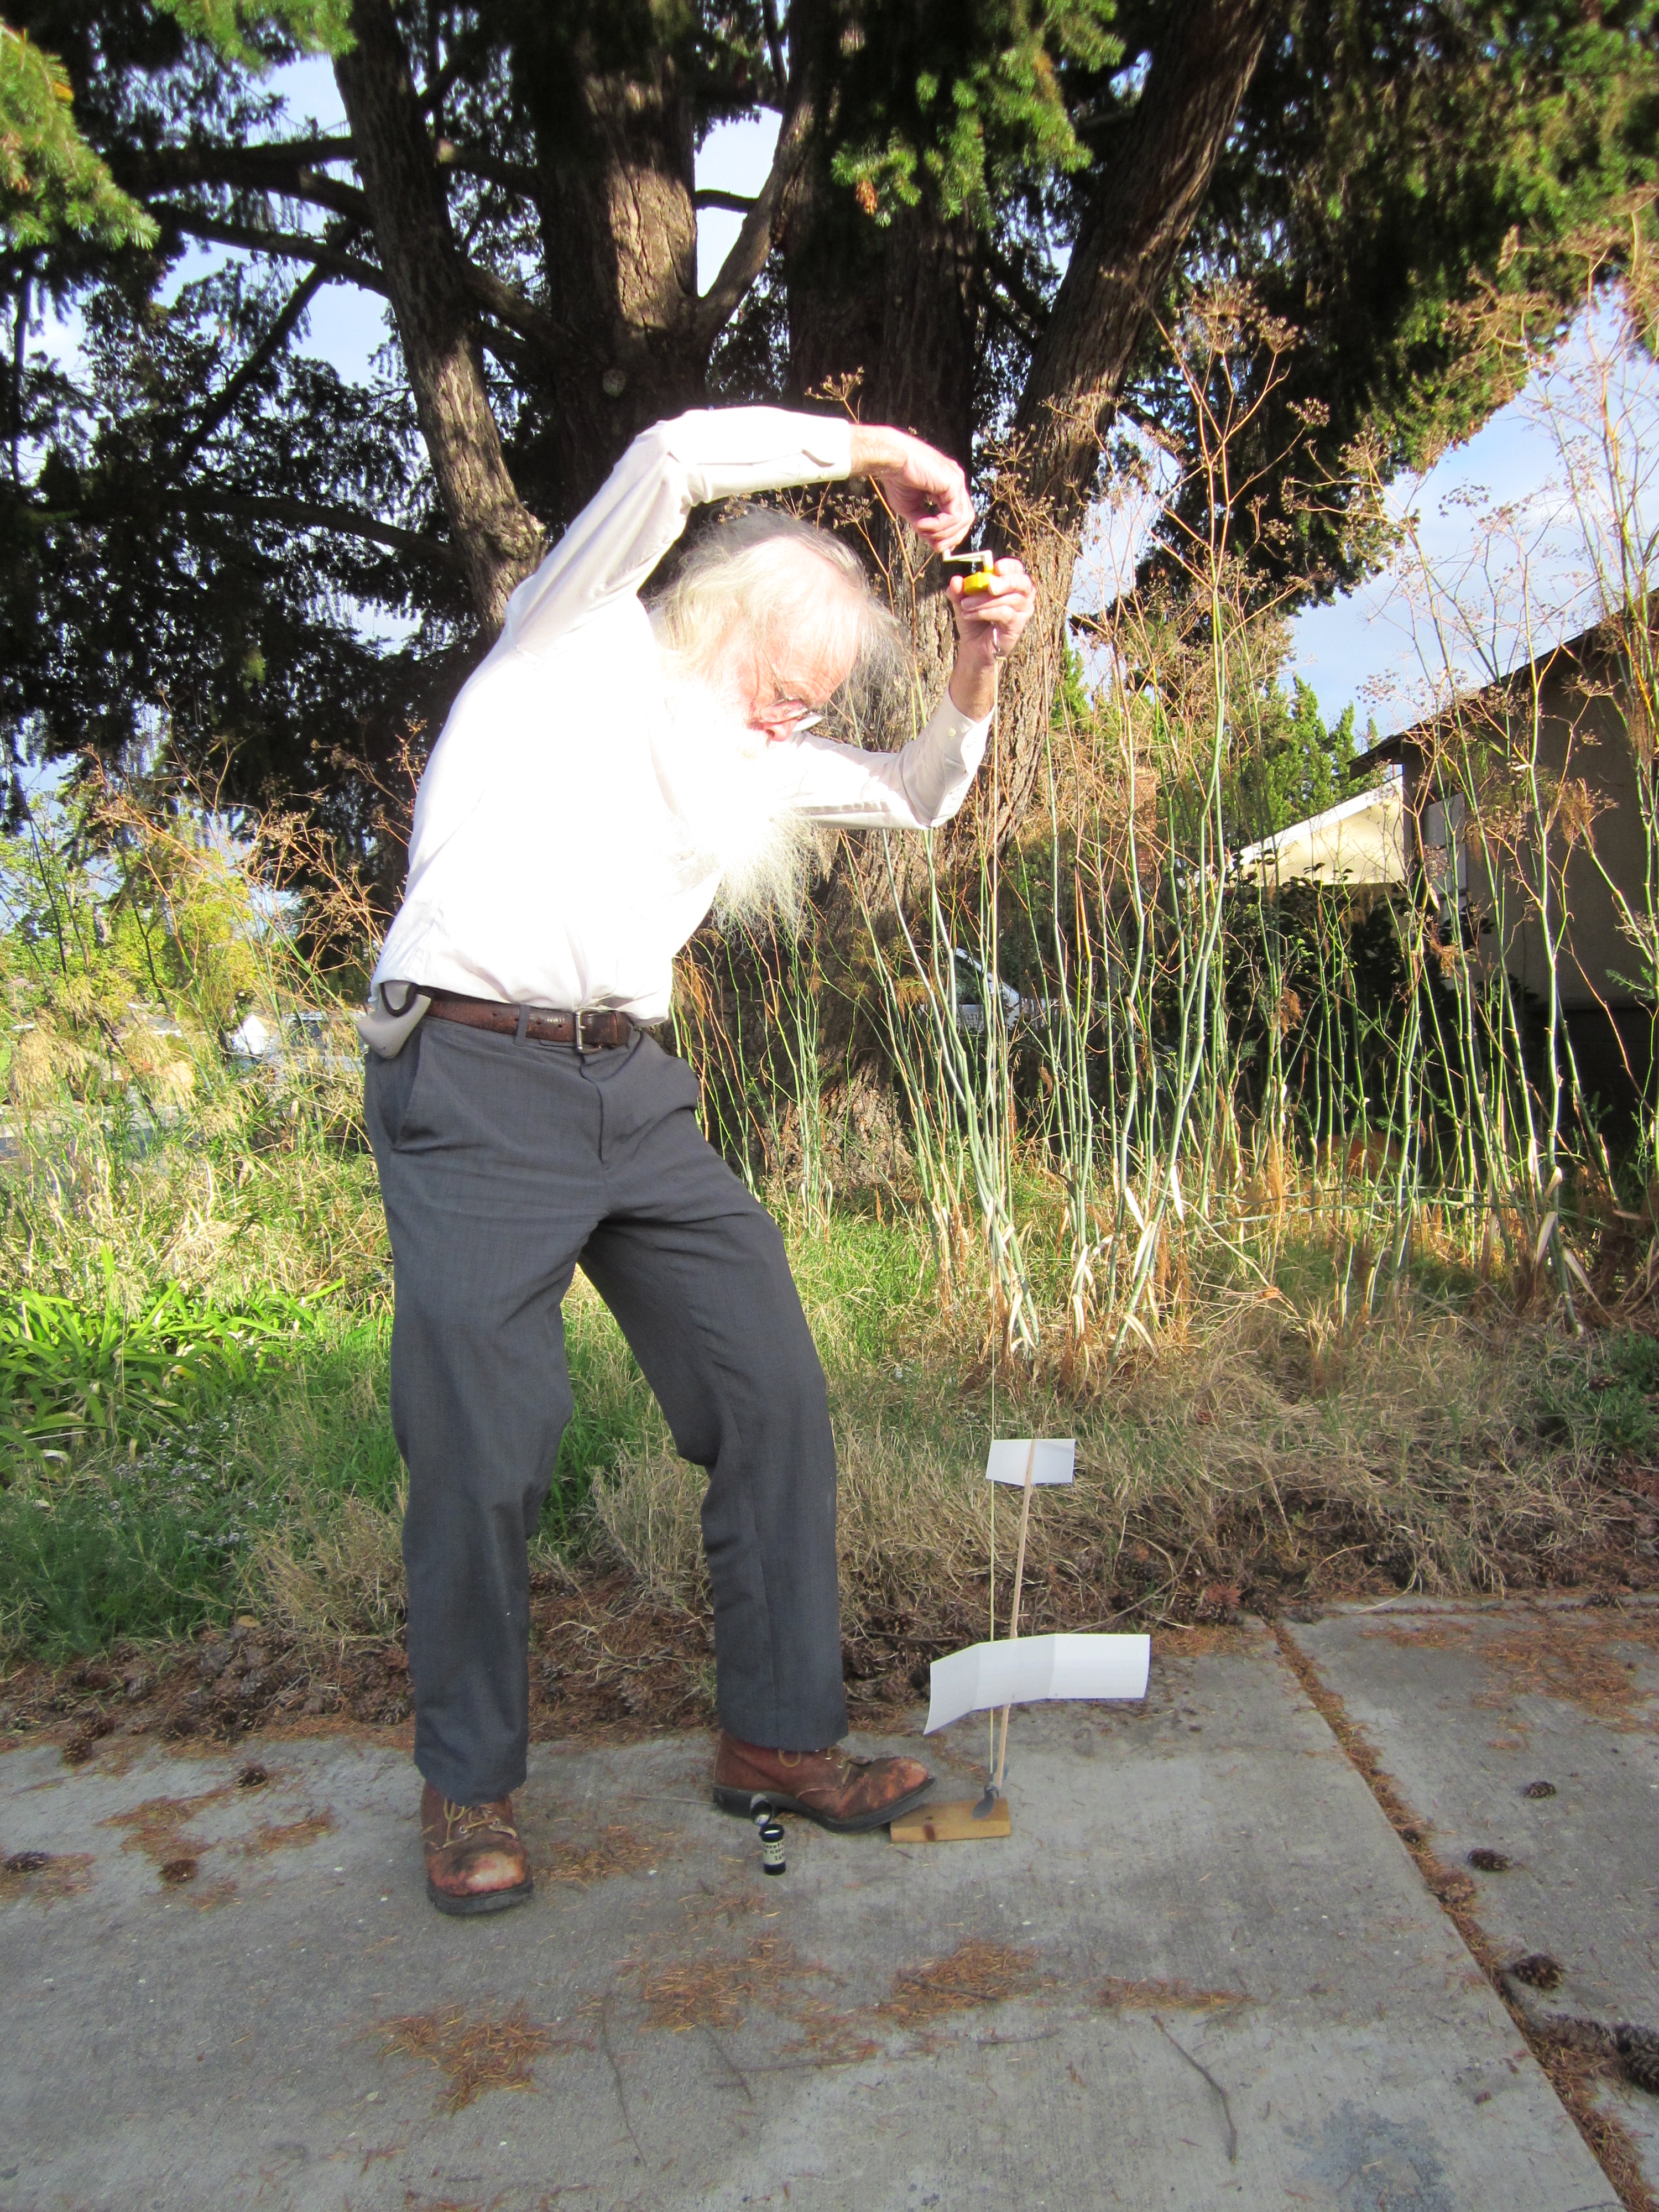 The foot stooge is placed on the ground and held securely in place with a foot. The propeller is engaged in the hooks, the motor is looped into the prop hook, the O-ring is placed on the winder hook and the motor is stretched as much as possible. Turns are put in until the motor begins to tighten, then the winder is lowered toward the tail until the desired number of turns are in the motor. Then the O-ring is taken off the winder hook, the winder put in a pocket, the stick is held near the rear motor hook and the O-ring placed on the hook. The prop is disengaged from the stooge, the stooge is put in another pocket and we are ready to launch.
This is the first two minute flight of the Snowflake.
Are you saying that the plastic prop hanger can be bent to change thrust angle?
First test flight in 10 knots of wind shows promise but wants to hang on prop, needs more down angle. Wandered around for maybe 300 feet.
At 82 this is the first rubber band plane that would go further than across the room.
Thanks,
Yes, the plastic prop hanger can be bent slightly, which is all you need. It bends more easily if it is warm. Do it slowly.
10 knots of wind is way more than I would want to fly in. More than 2 knots is risky. You can’t tell whether the flight is in response to the airplane trim or the wind.
Hanging on the prop is not necessarily remedied with downthrust. Wing may be too far forward, May not have enough turn and bank. When a plane banks into a turn, the aerodynamic force tilts into the center of the circle, there is less vertical component and less inclination to nose up.
Where do you find the curve tool?
The curve tool is known as a French curve and is available wherever drafting tools are sold. Stationery and art stores will have them, or look online.
Where should I get the curve tool you use for the templates, Gary?
The curve tool is known as a French curve and is available wherever drafting tools are sold. Stationery and art stores will have them, or look online.
May I have the plan please for my students. We have regular Aeromodelling classes in our Centre Point school, India.
There is no plan, as it says in the instructions. Cardboard templates are made for cutting out the sheet foam parts.
Parabéns, Excelente!
Teşekkürler. Emeğinize Sağlık.
I’ll try this. It will be my first. Thanks for sharing the knowledge!
This looks like a great design! My son has a school project to build a rubber band powered airplane. I would like to use this design, however, on of the rules states a 5.5″ diameter propeller is the maximum. Given this, I was wondering if the entire design should be scaled down – or can this design be used with some slight modifications?
Thanks!
I would keep the dimensions of the plane and use the smaller propeller. The smaller propeller will weigh less, the wing loading will be less, the sinking speed will be less. The propeller will be a bit less efficient, more importantly, will turn faster and will run out the motor turns more quickly. If you are flying indoors, that may not matter much, since you don’t have the altitude to take full advantage of the energy available from the rubber. But once the contest is over, you can put the bigger propeller on for sport flying outside.
I just built a model based on this with my son as a test for an upcoming scout project. About the 6th flight on 300 hand winds we lost sight of it in clear blue skies at 7 minutes. I think the design is a keeper. I will have ten Cub scouts building and entering the postal in May.
Jim Buxton
Hi Jim Buxton,
If you are the same who has held so many indoor records, we are proud to have you among the supporters of the Foam Plate Plane Postal contest. If you are not the same, we are still very happy to have you and the scouts as part of our contest. Thanks for helping with youth aviation projects.
Ronnie Espolt
The same Jim Buxton. Thanks for the wonderfully simply model idea!
Nicely done, and I even learned a few new building tricks.
Wow.. more than 2 minutes. It’s really a Champion.
My Snowflake to take part of the Foam Plate Airplane Contest is under construction. I’ll try a polyhedral wing with panels from 7″ dishes. Their thickness is 5/64″. Bigger dishes I have found here in Brazil are 1/8″ thick or more and very difficult to bend without the help of a heating gun.
Another one, exactly as your will be made of a disposable trey cover, 5/64″ thick. First tests shows it is easier to work than the dishes foam.
Finally I’m building a 2 mm Depron Sierra Nevada but I think it will be overweight. Let’s see what this 68 y.o. FF beginner can achieve of all those nice airplanes.
I’ll be glad with yours sugestions or remarks if any.
Thanks for sharing your expertise and experience with us.
Gary
I like the foot stooge, will need to make one soon for myself.
I am sending along a photo of Don Link with a couple of foam plate planes he has built. Maybe just a page with pictures of builders with planes to encourage others. This was taken at the AMA Expo where I was promoting the foam plane contest. He let us keep them for the day to show off.
Very good build information thanks.