This kite is named Lupe La, Sun Kite, by the Hawaiians because its circular shape resembles the shape of the sun. An example is held in the Bernice P. Bishop Museum collections.
The kite is also known as ‘uo menemene, round kite, in Tahiti. You can see an old picture of some boys with their kites at the Bobby Holcomb site. Scroll down to the bottom of the page, on the right.
The construction of this kite is very similar to that of the Honu kite, so I won’t give a complete set of instructions for building it. I will describe only the places where the construction differs.
The materials used are a 1.5 mm diameter bamboo rod, 41 3/4″ long, for the perimeter, a 1.5 mm x 3 mm x 41 3/4″ bamboo stick for the spine and cross stick, Kozo (mulberry) paper, cotton kite string and glue. The kite will be 13 1/8″ in diameter.
You may not have exactly the same materials. Reasonable substitutions will work. You may find bamboo sun shades made from 1/16″ bamboo rods. You may use 1/16″ x 1/8″ spruce from the model airplane shop for the spine and cross stick. The paper must be light but strong. I used Kozo from Hiromi Paper, weighing about 26 grams per square meter. Light parcel post or gift wrap paper may be used. Even newspaper may be used, although it may not last as long.
Mark, Cut and Assemble the Framework Sticks
Start by marking the 1.5 mm rod 1/2″ from each end and at the center, 20 7/8″ from both ends. Also mark it 10 5/16″ on either side of the center mark, one quarter of the finished circumference. Mark the 1.5 mm x 3 mm x 41 3/4″ stick 13 3/8″ from one end and cut it there. Mark the 13 3/8″ piece 1/8″ from each end and in the center 6 11/16″ from both ends. Mark the 28 3/8″ piece 1/8″ from one end, then 6 11/16″ and 13 1/4″ from that end.
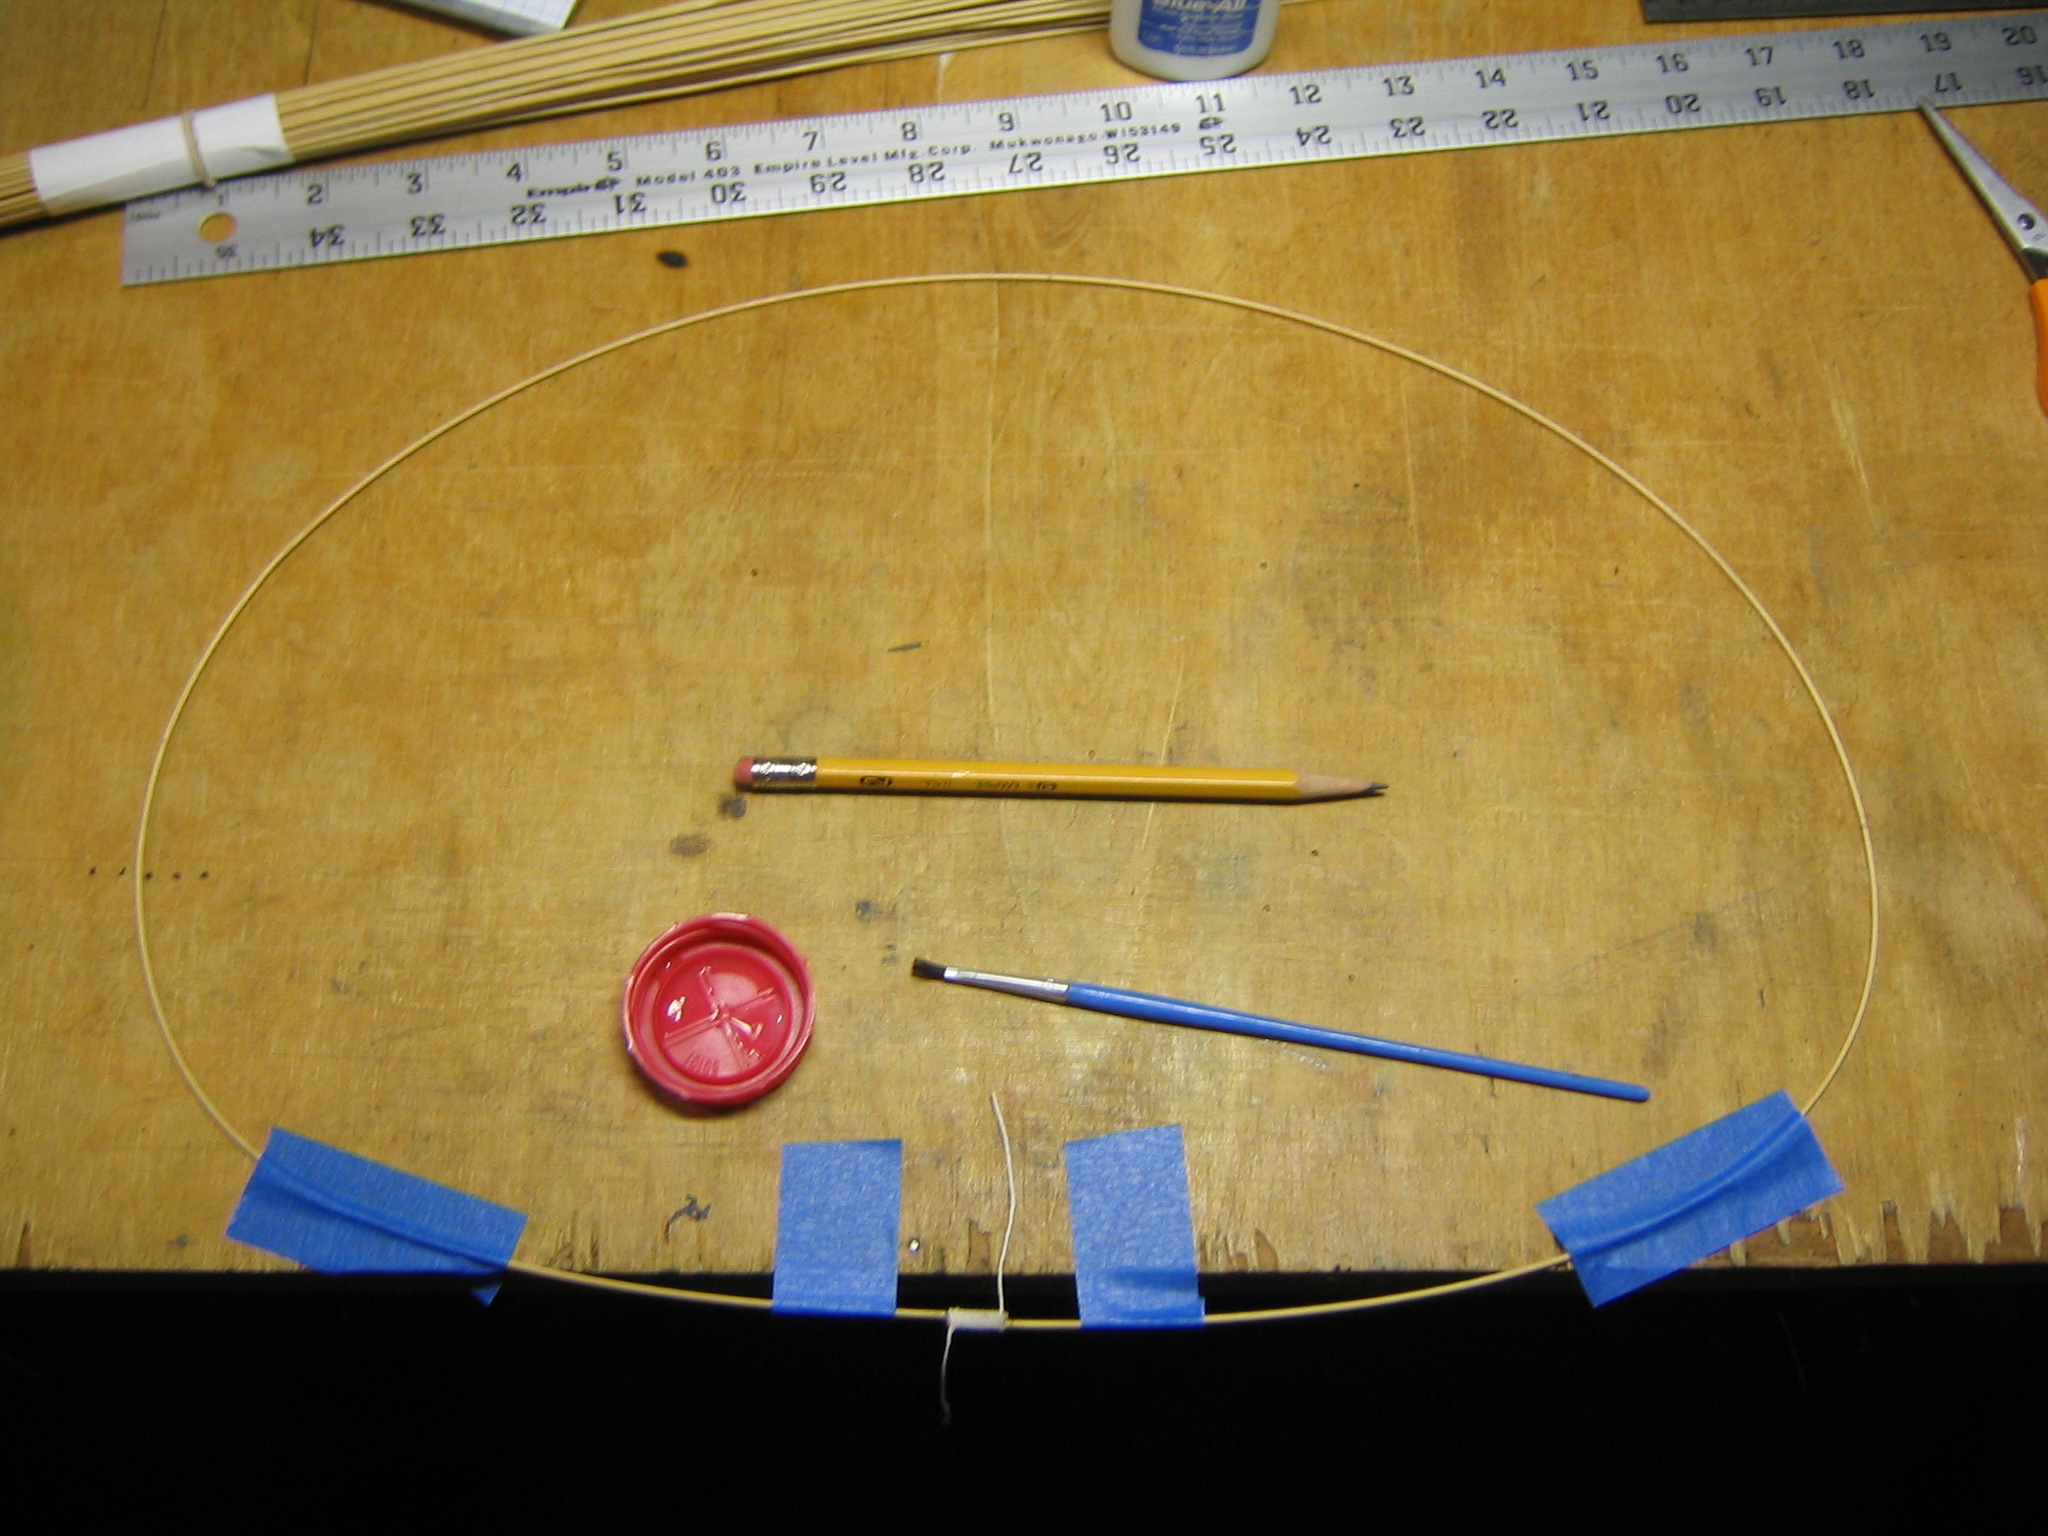
Fix the 1.5 mm rod so its ends overlap 1/2″ and bind the ends together with a string wrapping. I start one end with a clove hitch, wrap along the joint and secure the other end with another clove hitch. Paint the lashing with glue slightly diluted so it will sink in and saturate the lashing. This will make a circle with a diameter pretty close to 13 1/8″. (It will be over by the thickness of an aluminum can wall.)
Lash the center of the cross spar perpendicular to the spine at the 6 11/16″ mark. With the spine on the bottom, cross spar next and circle on top, lash the 1/8″ mark at the end of the spine to the center of the lashings on the circle, lash the tips of the cross spar to the 10 5/16″ marks on the circle and lash the 13 1/4″ mark on the spine to the 20 7/8″ center of the circle. Brush dilute glue around the joints into the knots and check that everything is correctly positioned before letting the glue dry.
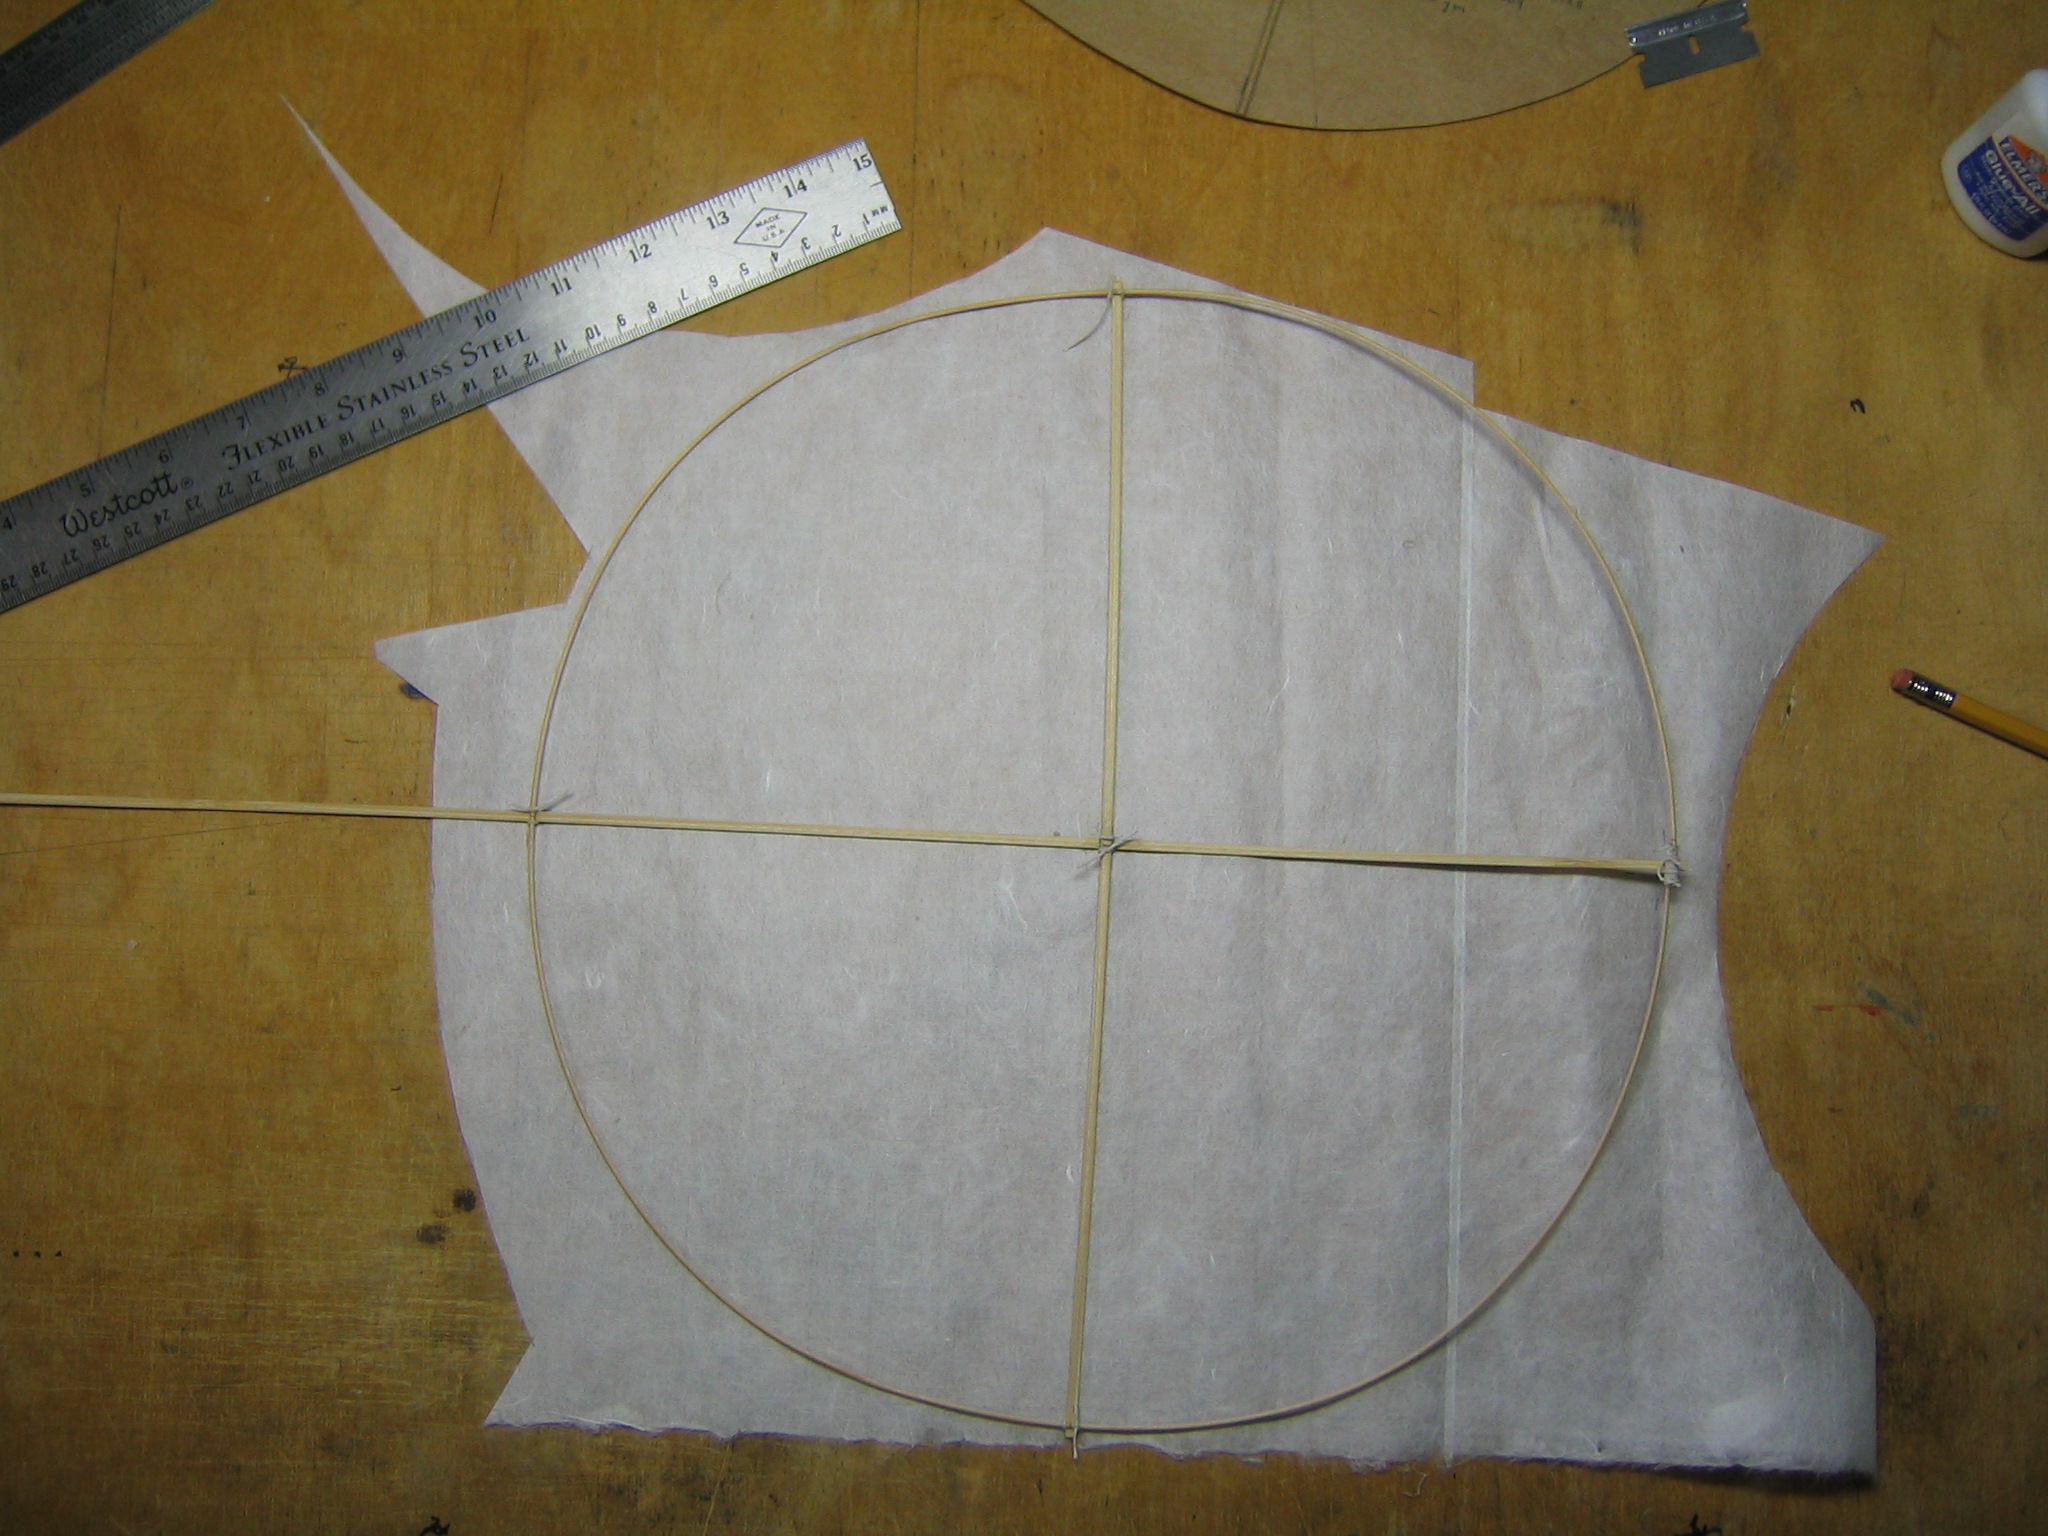
Here is the completed framework, ready to glue to the paper.
Attach Paper
The paper is attached by painting slightly diluted glue, one drop of water to three drops of glue, onto the spine, cross stick and perimeter, then placing the framework on the paper with at least 1/8″ margin of paper beyond the perimeter. Press it down and hold it in place with weights until the glue dries. Be careful to not distort the perimeter when doing this. The spine is in contact with the paper across the whole diameter, with the cross stick next and the perimeter on top. After the glue dries, cut the excess paper away about 1/8″ outside the perimeter, slit the paper margin outward from the stick to the edge every half inch, apply dilute glue to the paper margin and the stick and roll the paper smoothly around the perimeter stick. Pat it in place. Let the glue dry.
Measurement and Calculation
Part of this project is a quantitative comparison of various Polynesian kites. The geometry of the circle is simple enough that we do not need to make a cardboard pattern for weighing. The area is pi (3.14159) times the square of the 6 9/16″ radius = 135.297 square inches. The mean chord is the area divided by the diameter, thus 10.31″. The aspect ratio is the span divided by the mean chord, numerically equal to the span squared divided by the area, thus 1.273. The kite without tail weighed 9.4 grams. Loading is 107.6 grams per square meter. The center of gravity is at 8 7/8″ from the front edge, determined by suspending the kite from the end of one cross stick and marking where the plumb line crossed the spine.
Two points important for construction come from this calculation. The leading edge of the mean chord is 1 13/32″ from the front of the perimeter and the trailing edge of the mean chord is 1 13/32″ from the back edge of the perimeter. Mark those points on the back of the kite across the spine and onto the paper. The pencil marks should show through to the front. These are the points to which we will attach the bridle lines.
Bridle
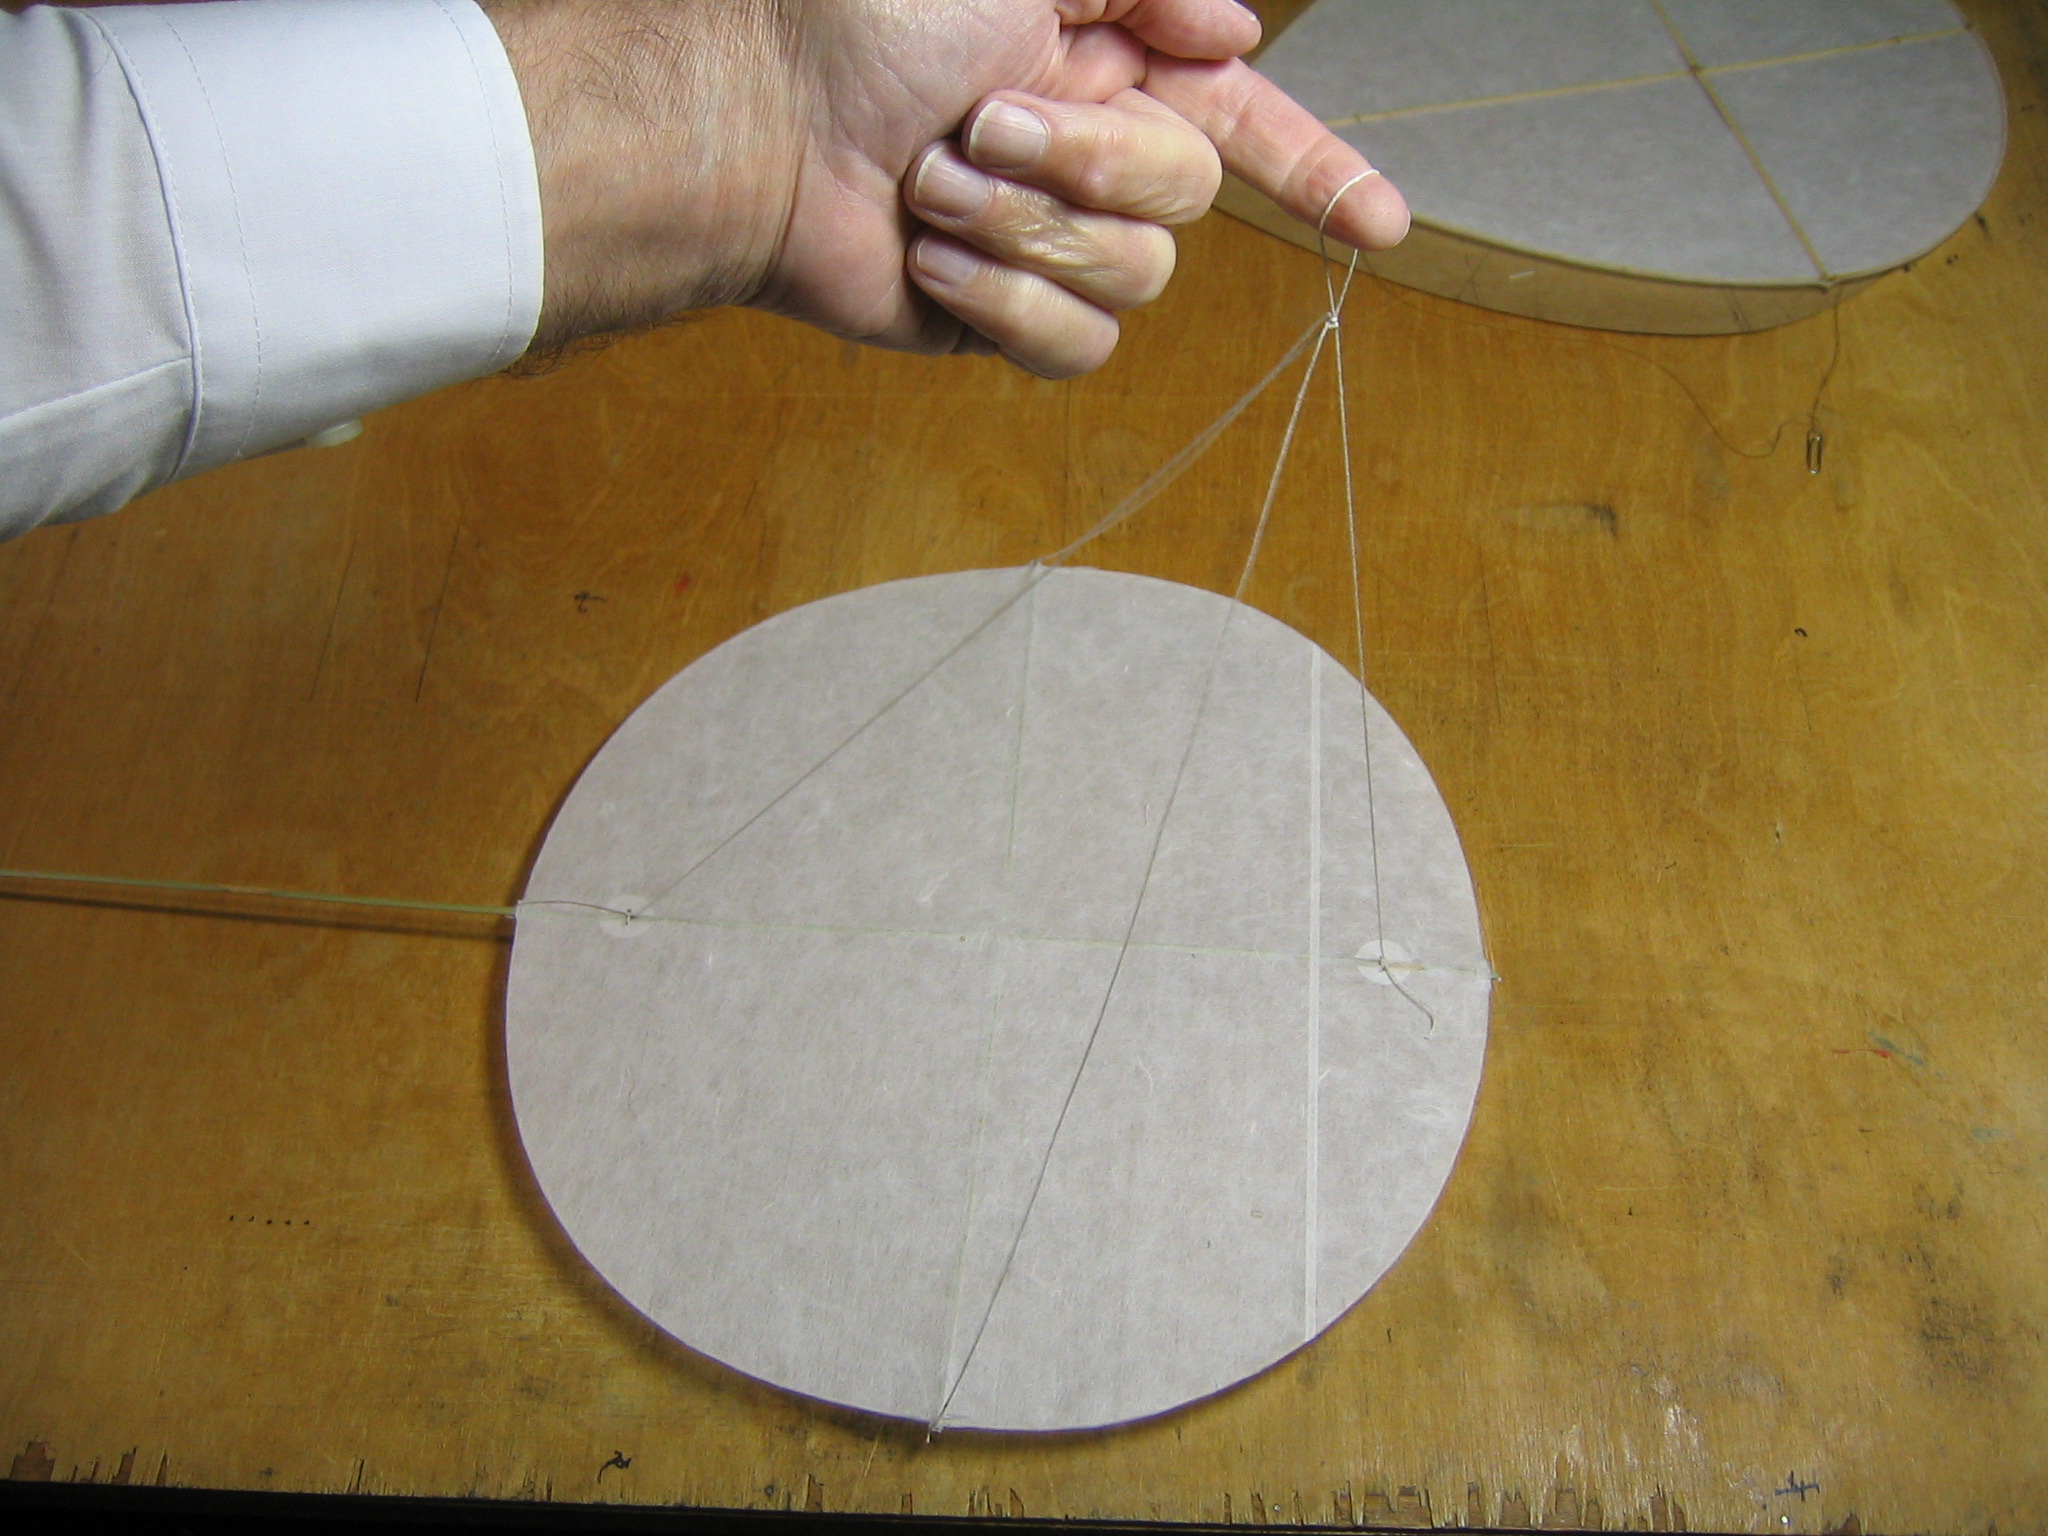
A four leg bridle was used. Later I changed the rig. First I will describe the original rig. Lateral bridle lines were needed to suppress a roll oscillation. The bridle had a 1″ loop for attaching the flying line. The forward leg was 11 3/4″ long, the aft leg was 14 1/2″ long and the two side legs were each 14″ long. The fore and aft legs were tied around the spine through holes poked in the paper. The paper was reinforced with 3/4″ circles of paper glued over the spine on the back of the kite at those points. You can trace around a US penny to make the circles. The lateral legs were tied around the bridle loop with a clove hitch just outside the knot and to the ends of the cross stick.
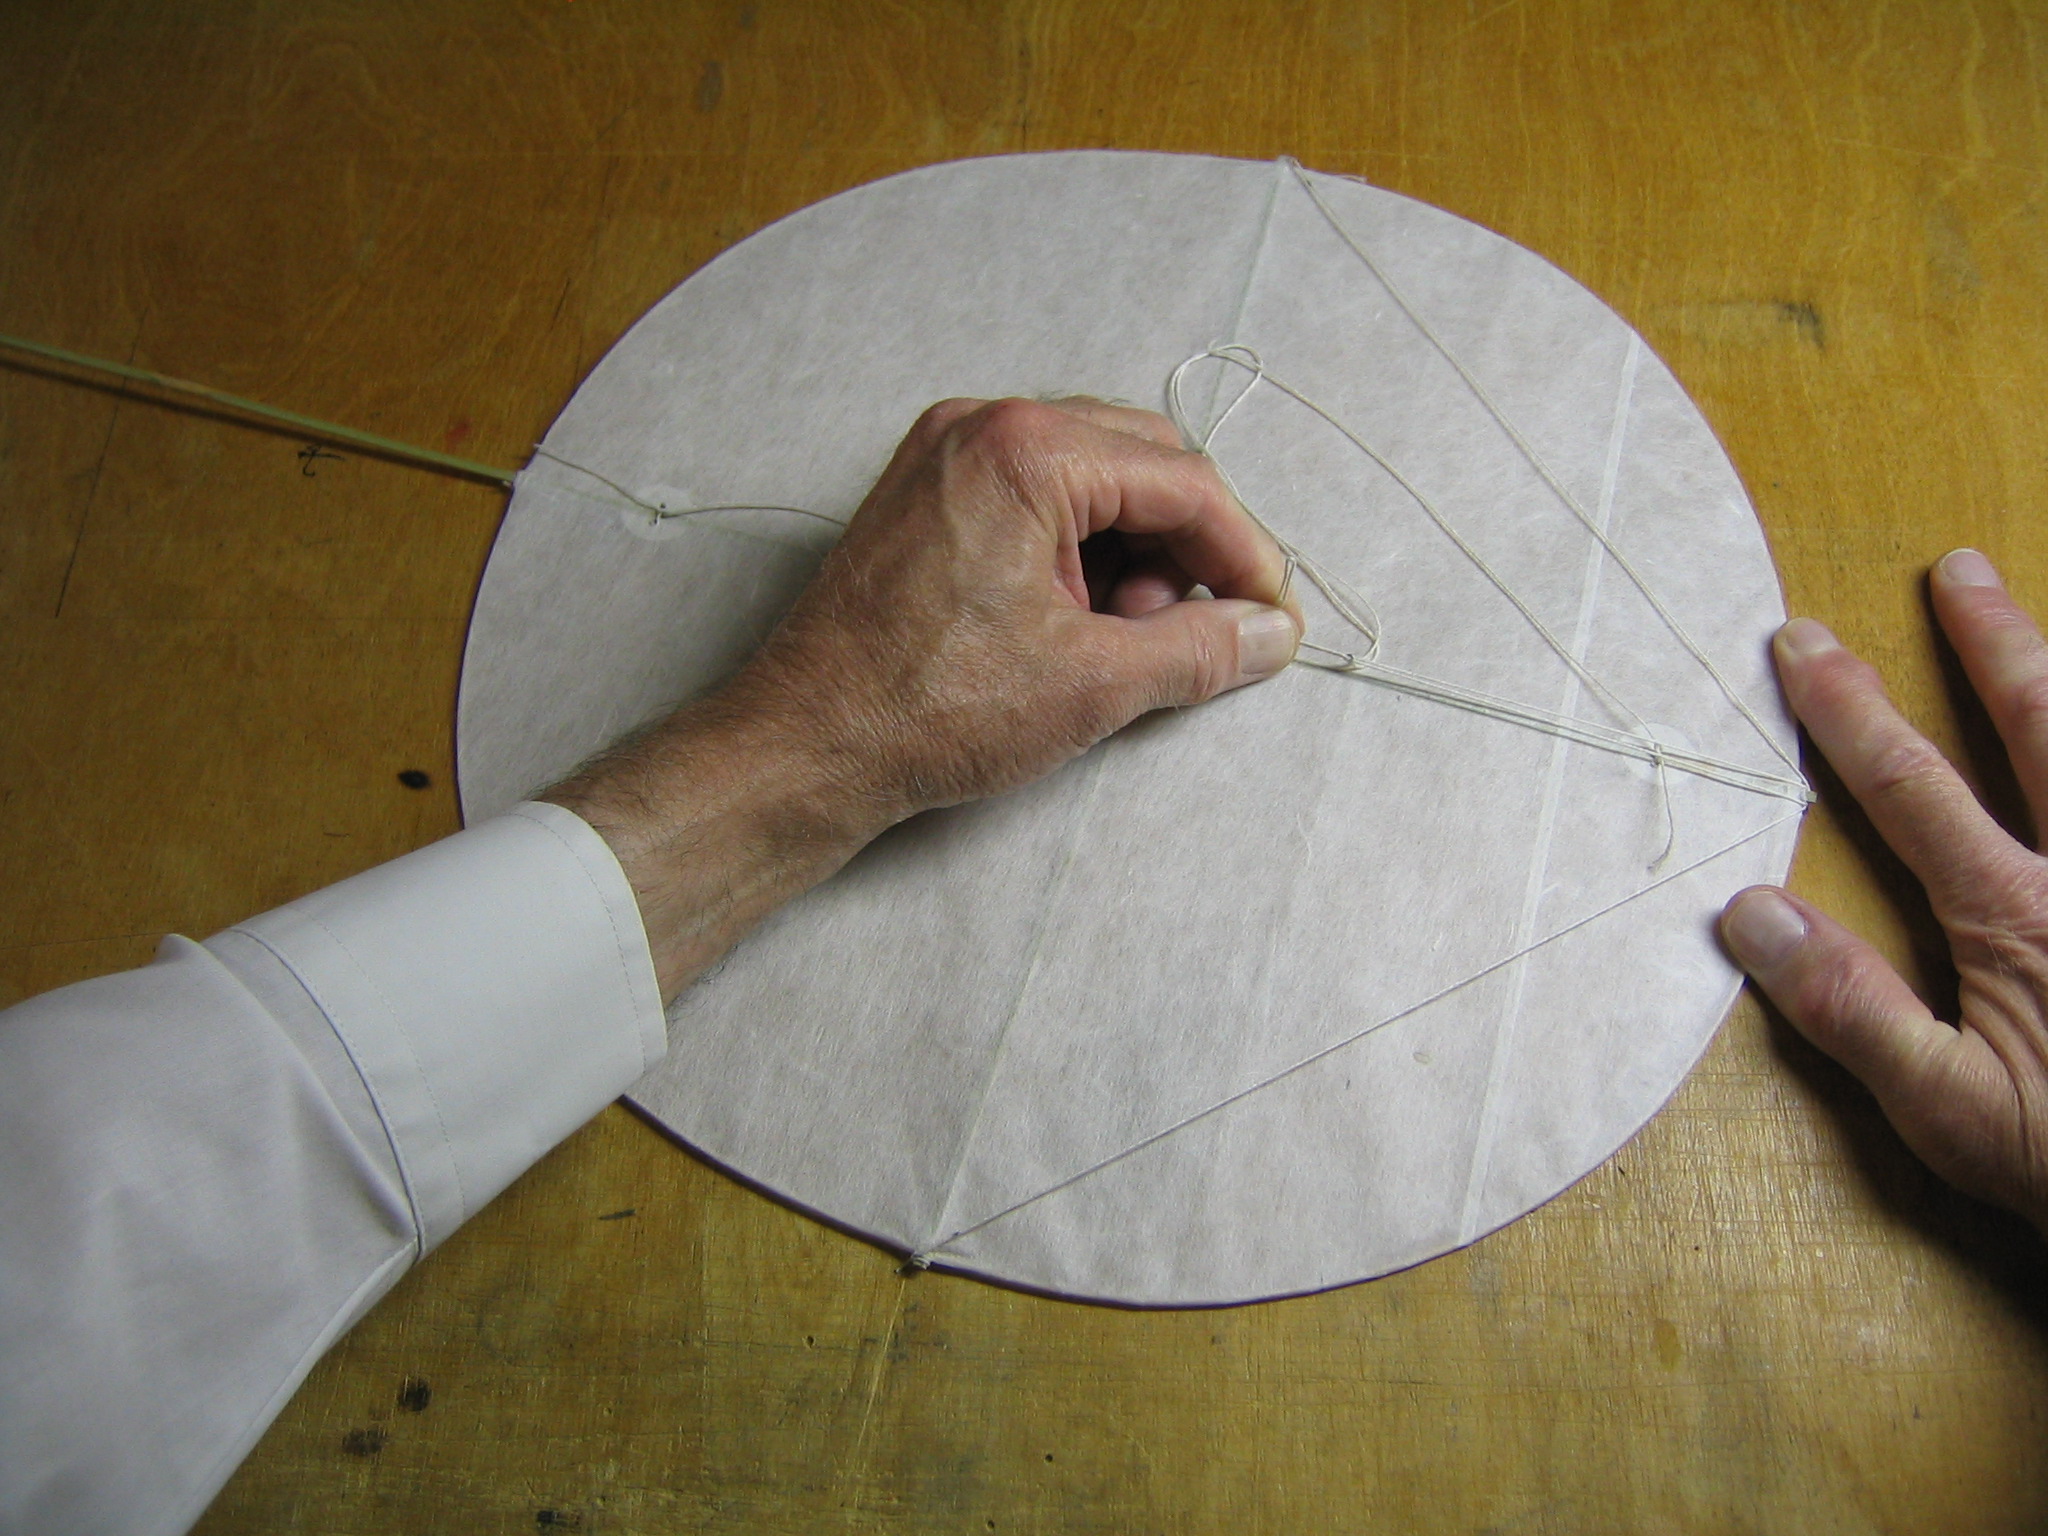
To verify that the lateral bridle lines are of equal length, loop them over the top of the spine and pull the bridle loop tight. If they are not equally tight, loosen the knot and pull the loop out evenly until the knot is snug. The lateral lines may be slightly loose, it is the longitudinal bridle that takes the force and establishes the attack angle of the kite.
This bridle allowed the kite to deform and buck in strong wind. See the new bridle description below in the Flying section for the final rig.
Tail
I used the 1 1/8″ x 12′ tail made with the Honu kite. It may need a bit more in a stronger wind. With this tail about half way down the sting, the kite spun uncontrollably. It might have been stable with twice as much tail.
Later I tested different size tails at different locations along the sting. I made tails from 1 3/4″ wide crepe paper streamers, starting at 100 square inches and going up in steps of 20 square inches to 440 square inches. I found that a minimum of about 320 square inches of tail was required. To prevent spinning at higher wind speeds, I recommend using 340 square inches of tail area, a length of 183 inches. You can make tails from other kinds of paper by cutting it into strips parallel with the grain direction (the direction it tears most easily) and gluing them together. Crumple the tail up into a tight ball and unroll it several times to roughen it, soften it and make it flexible.
I found that with tails over 340 square inches the kite would diverge to the side at low speed. It got worse as the area got more, eventually displaying a wandering from side to side until the wind got pretty strong. This side to side motion can be dangerous when flying among trees or other obstacles.
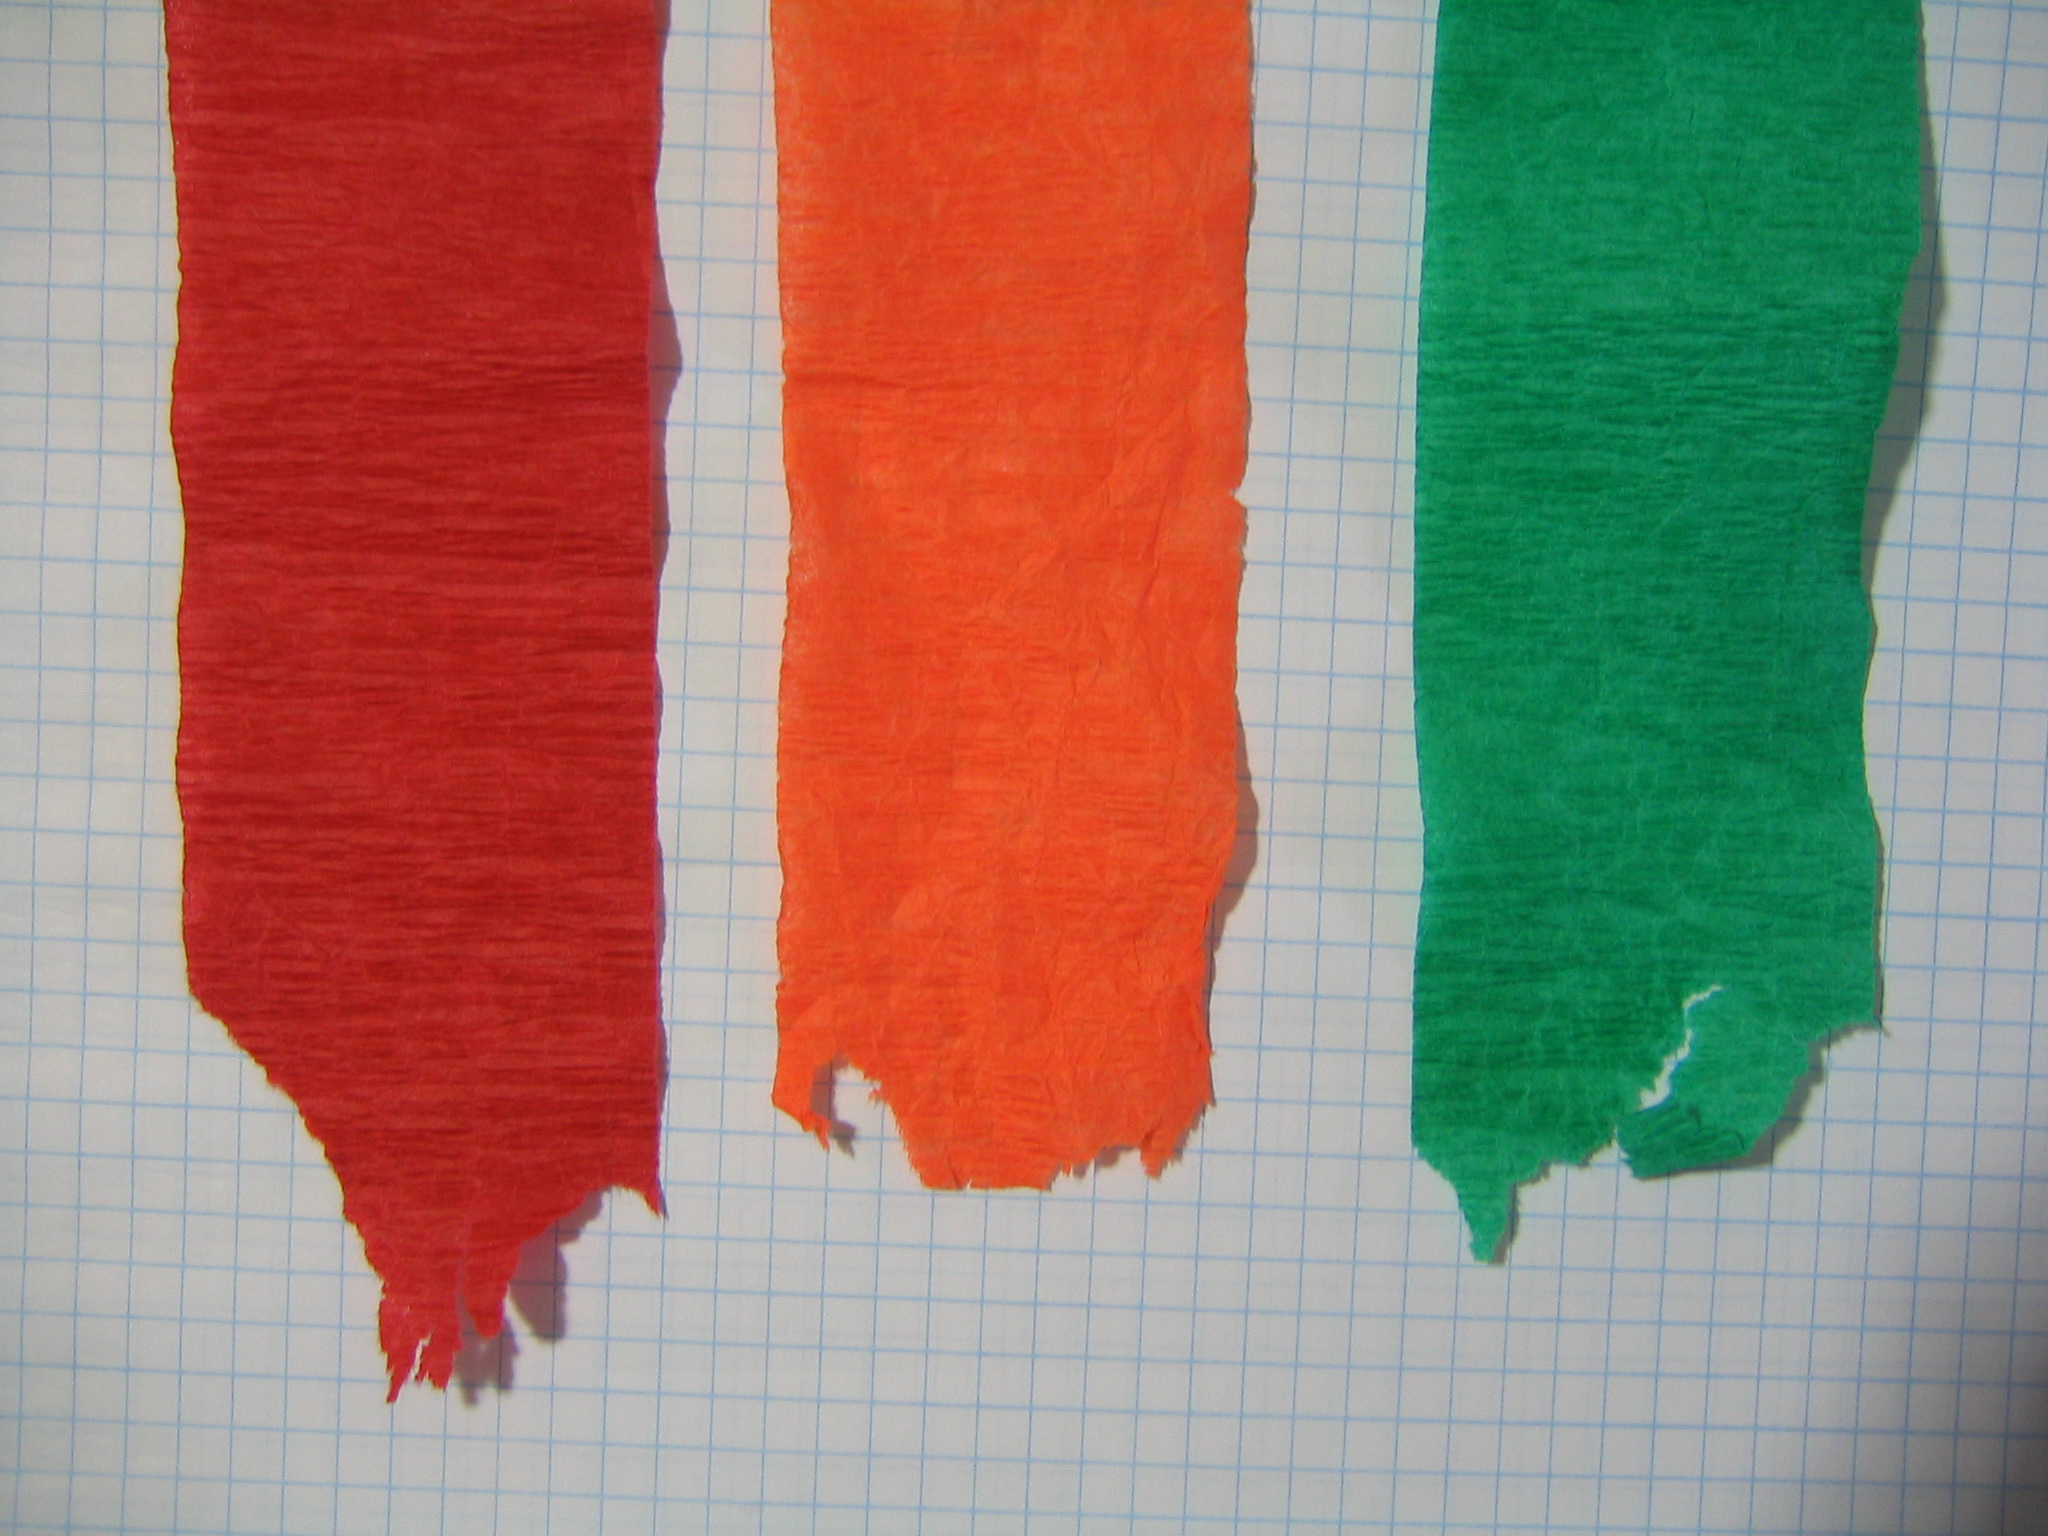
Crepe paper is alright for quick tests, but it is not good as permanent tail material. It is soft and frays in the wind, especially if softened by dampness.
Flying
Initially the kite was flown without the lateral bridle. It oscillated mildly in roll. The lateral bridle fixed that and the kite flew nicely, as you may see in this video.
Later I found that the kite would buck in stronger wind. By watching closely, I noticed that the spine was bending upward from the pressure of the strong wind, forming a cambered airfoil. Such airfoils are unstable in pitch, tending to pitch down sharply. This caused the kite to dive and tangle in its bridle, bringing the kite to the ground.
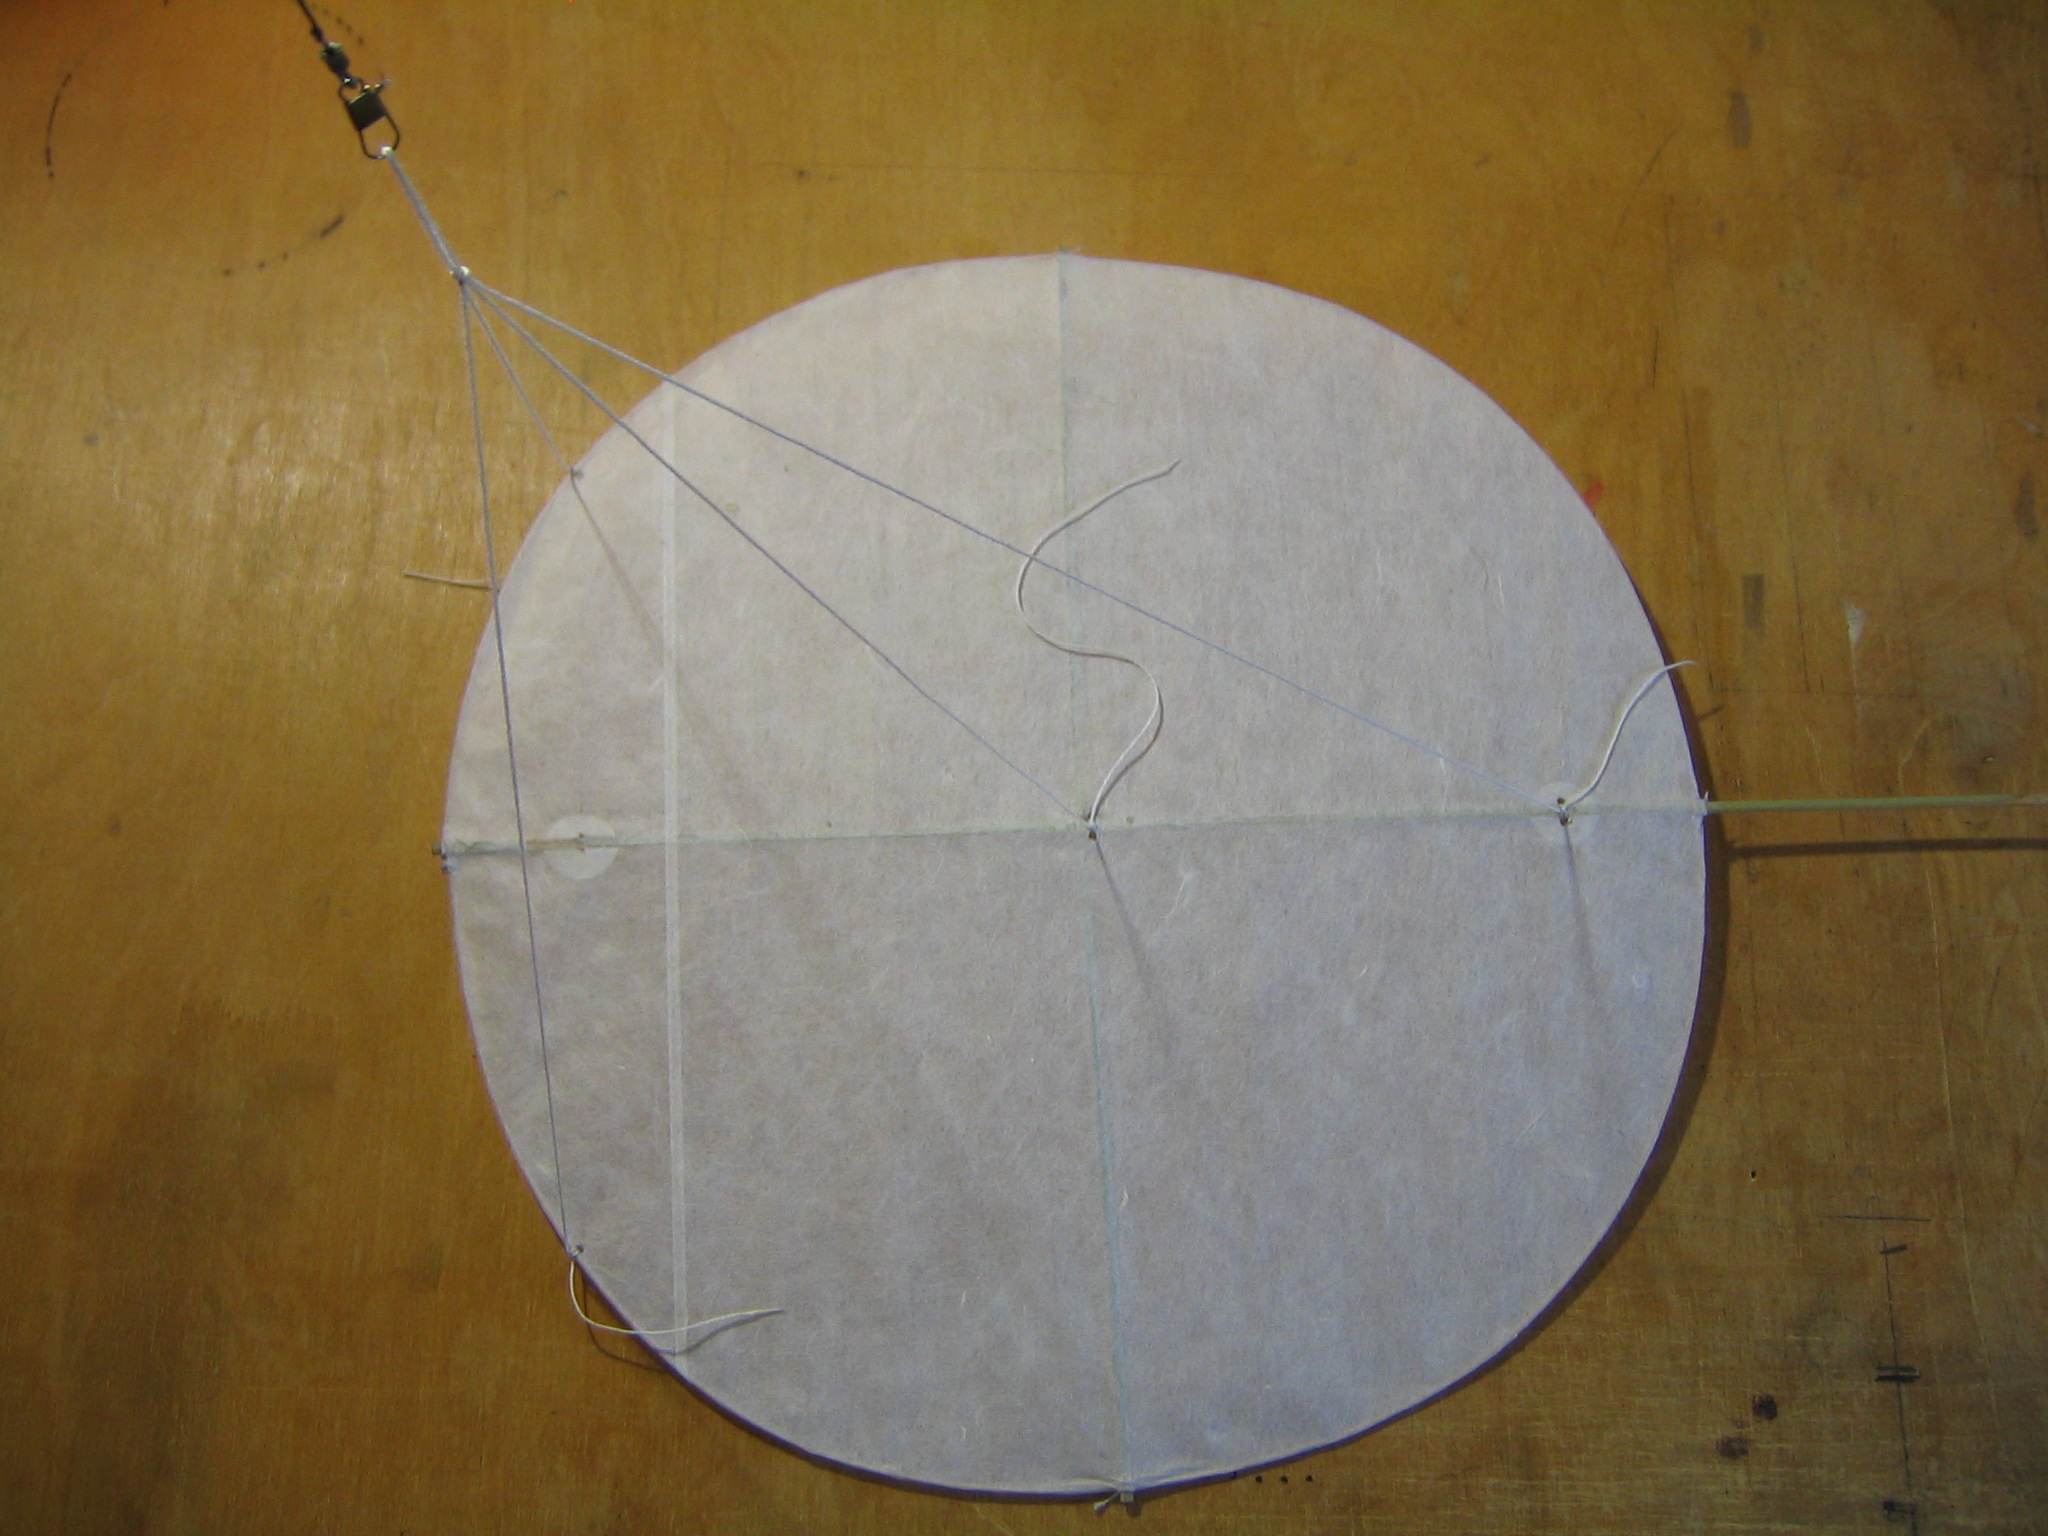
To prevent this I rerigged the bridle to include a line to the center of the spine. I removed the lateral bridle lines from the ends of the cross spar. I replaced the forward bridle line with two going to the perimeter. You can see that the two forward lines are even with the position of the original, located on a line perpendicular to the spine 1 13/32″ from the front of the perimeter. These two are 11 7/8″ long. I started with a 32″ length of string, marked at its midpoint and 11 7/8″ on either side of the midpoint. I tied the ends around the perimeter stick so the marks coincided with the knots. The knot forming the bridle loop in the center two is tied around the forward loop at the center mark. The center line is tied around the crossing of the spine and the cross stick and it is 12 3/8″ long. The fourth line is 14 5/8″ long and it may not be necessary. The center of pressure will be a little less than a third of the diameter back from the leading edge.
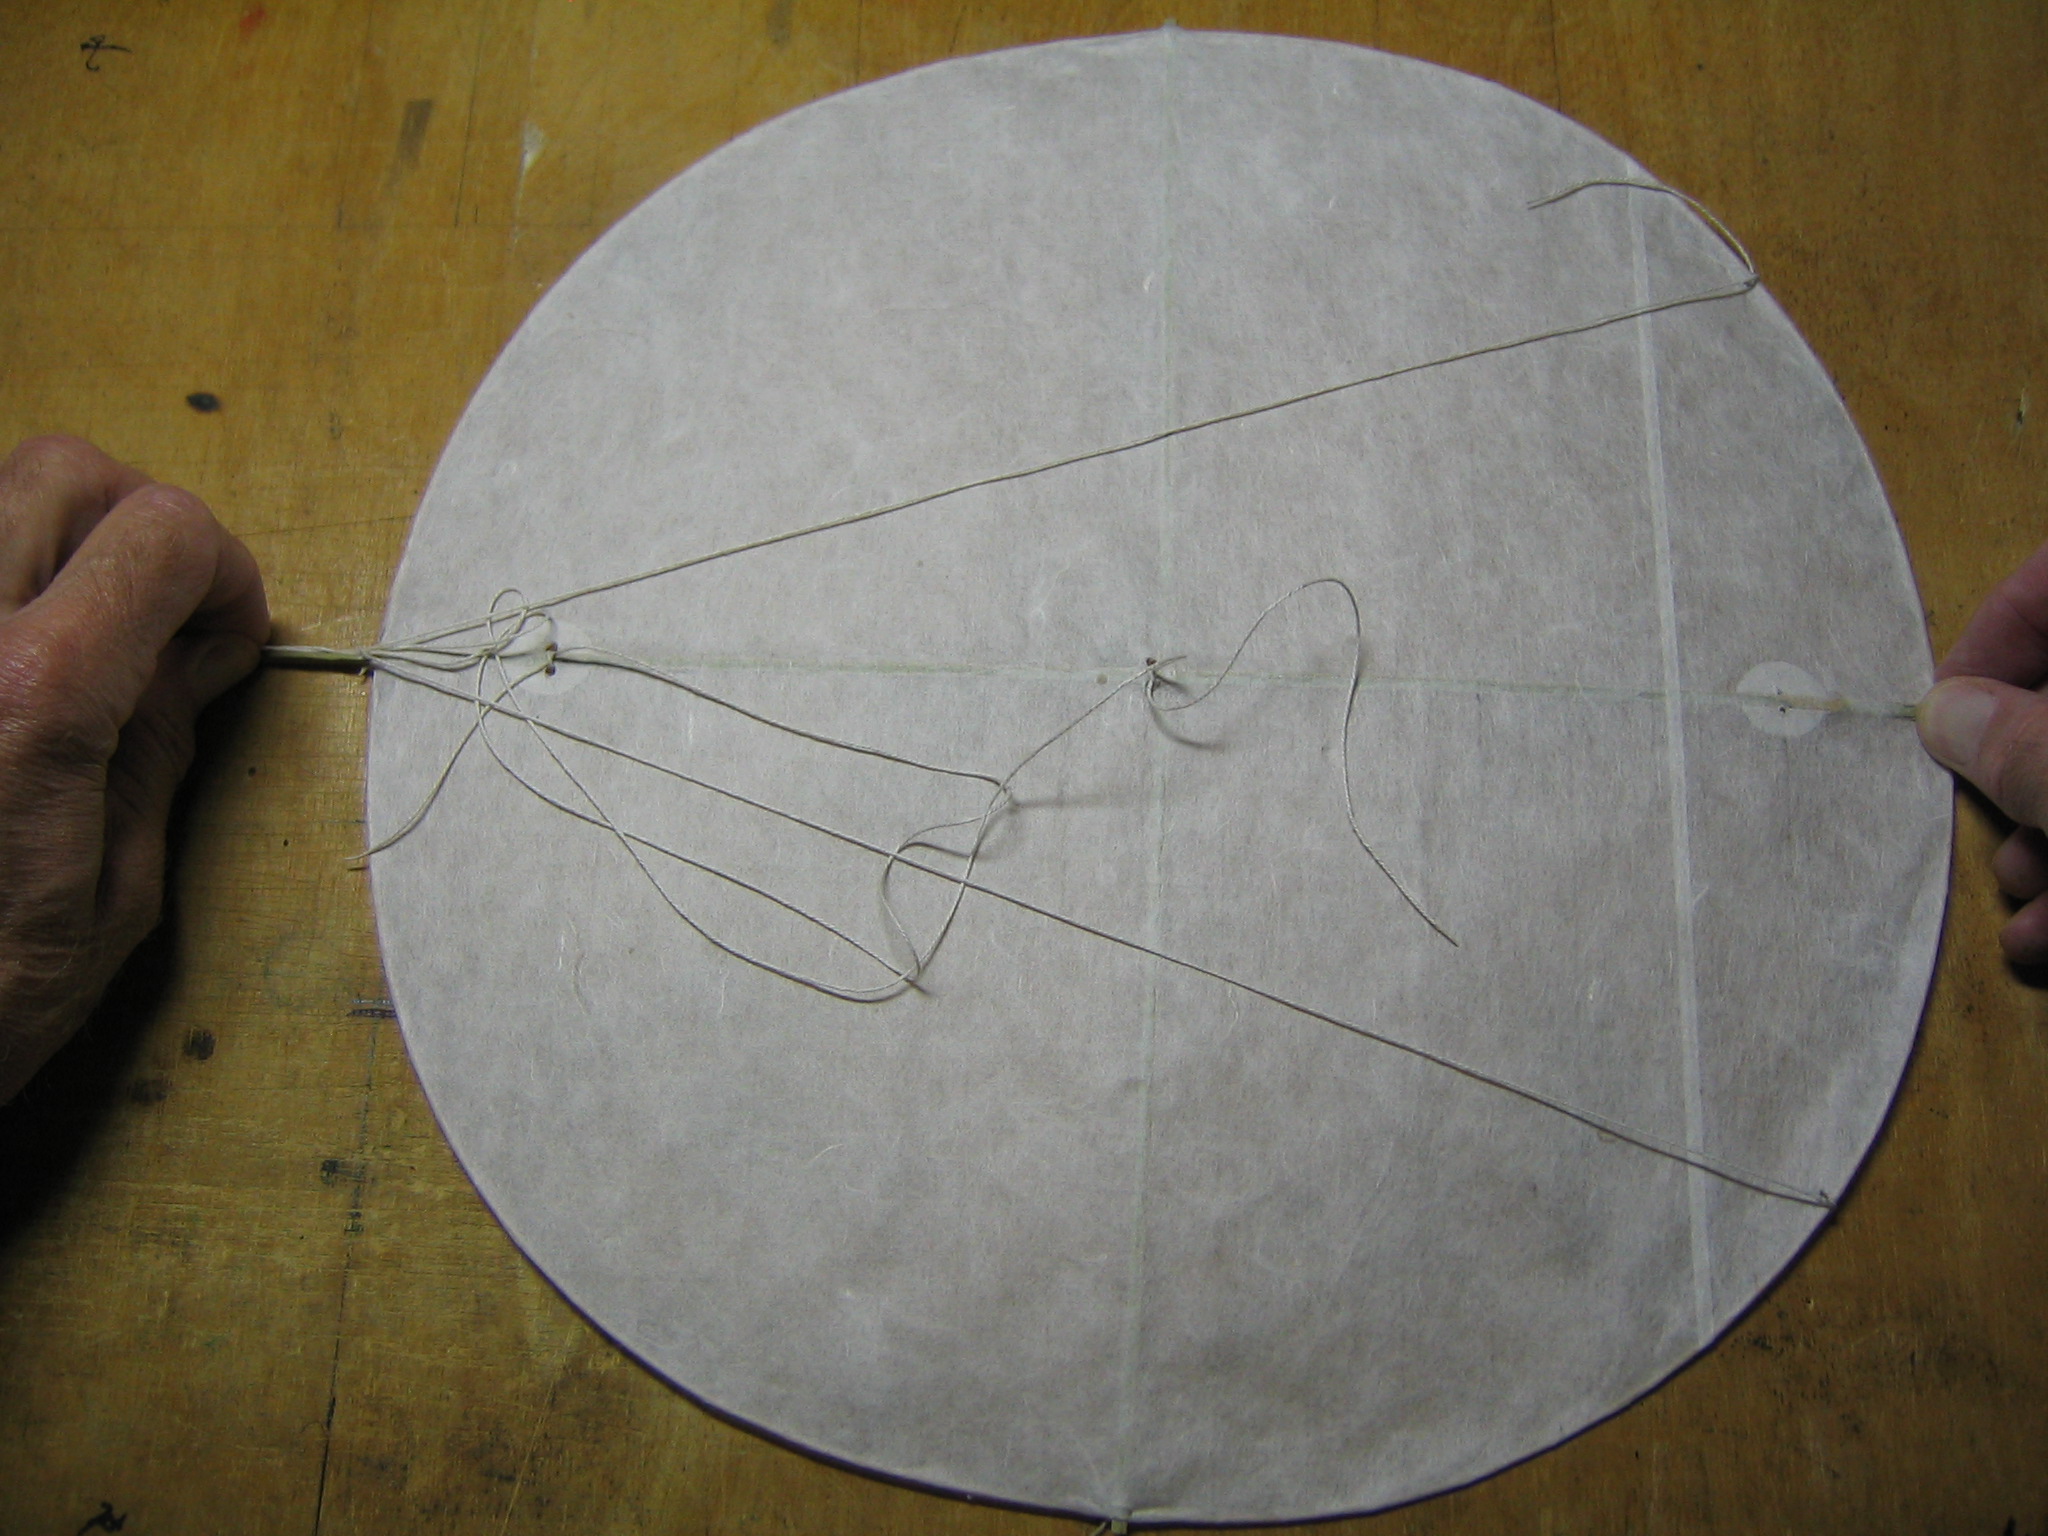
Pull the bridle loop straight back along the spine to make sure it is centered. Work a little dilute glue into each knot to prevent them from slipping.
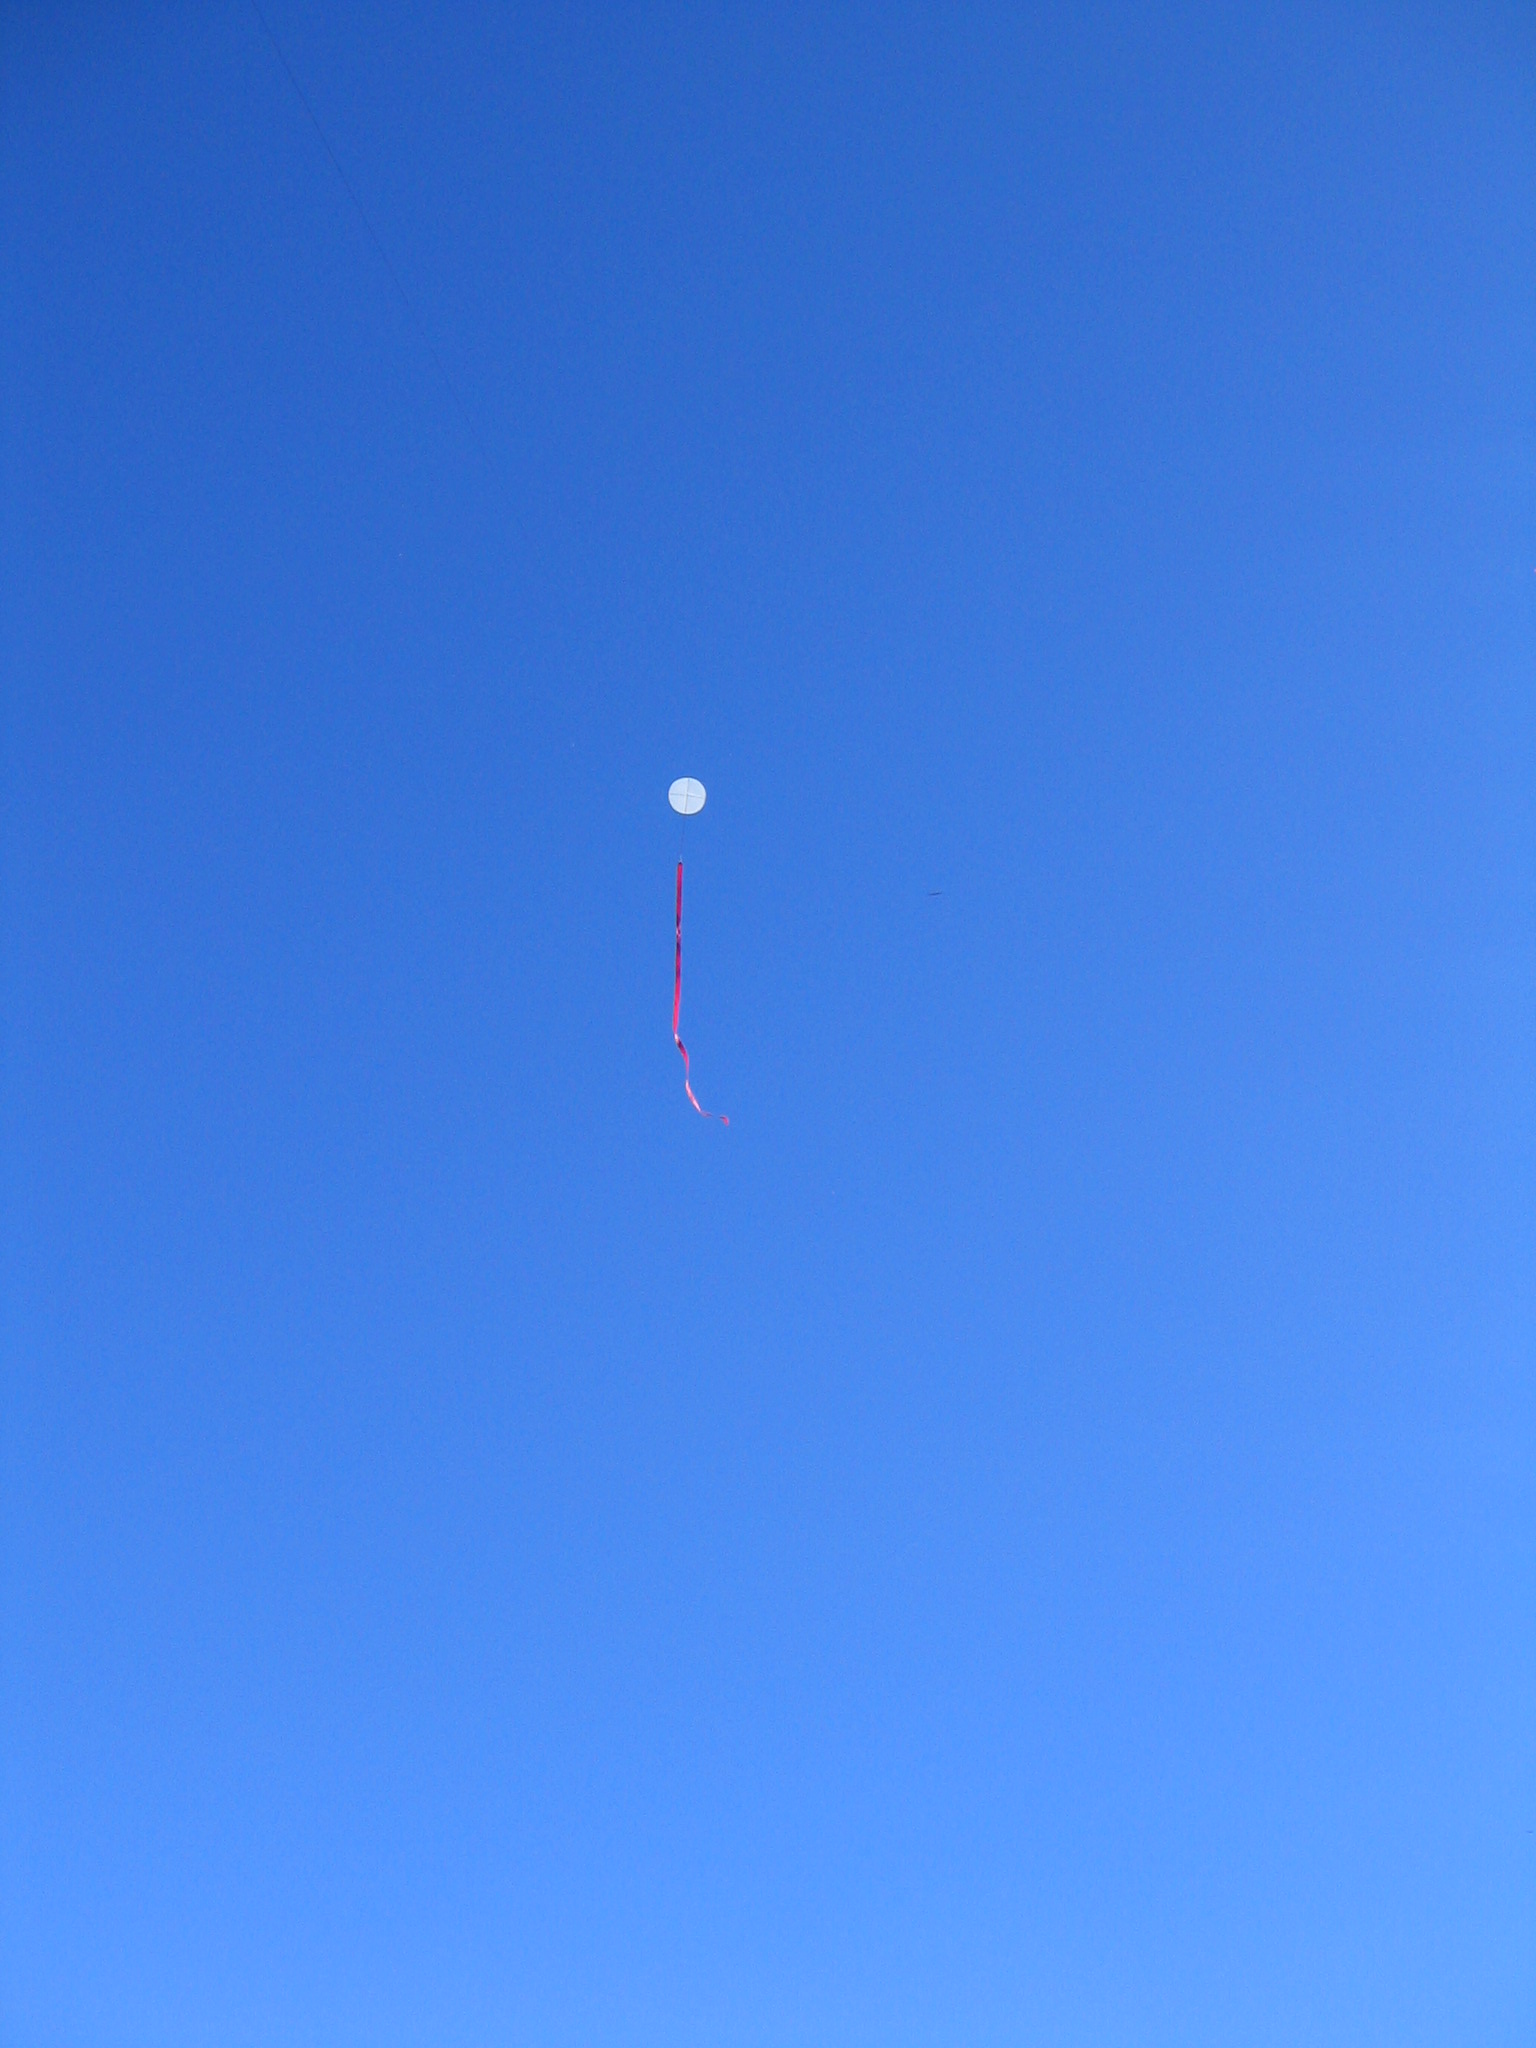
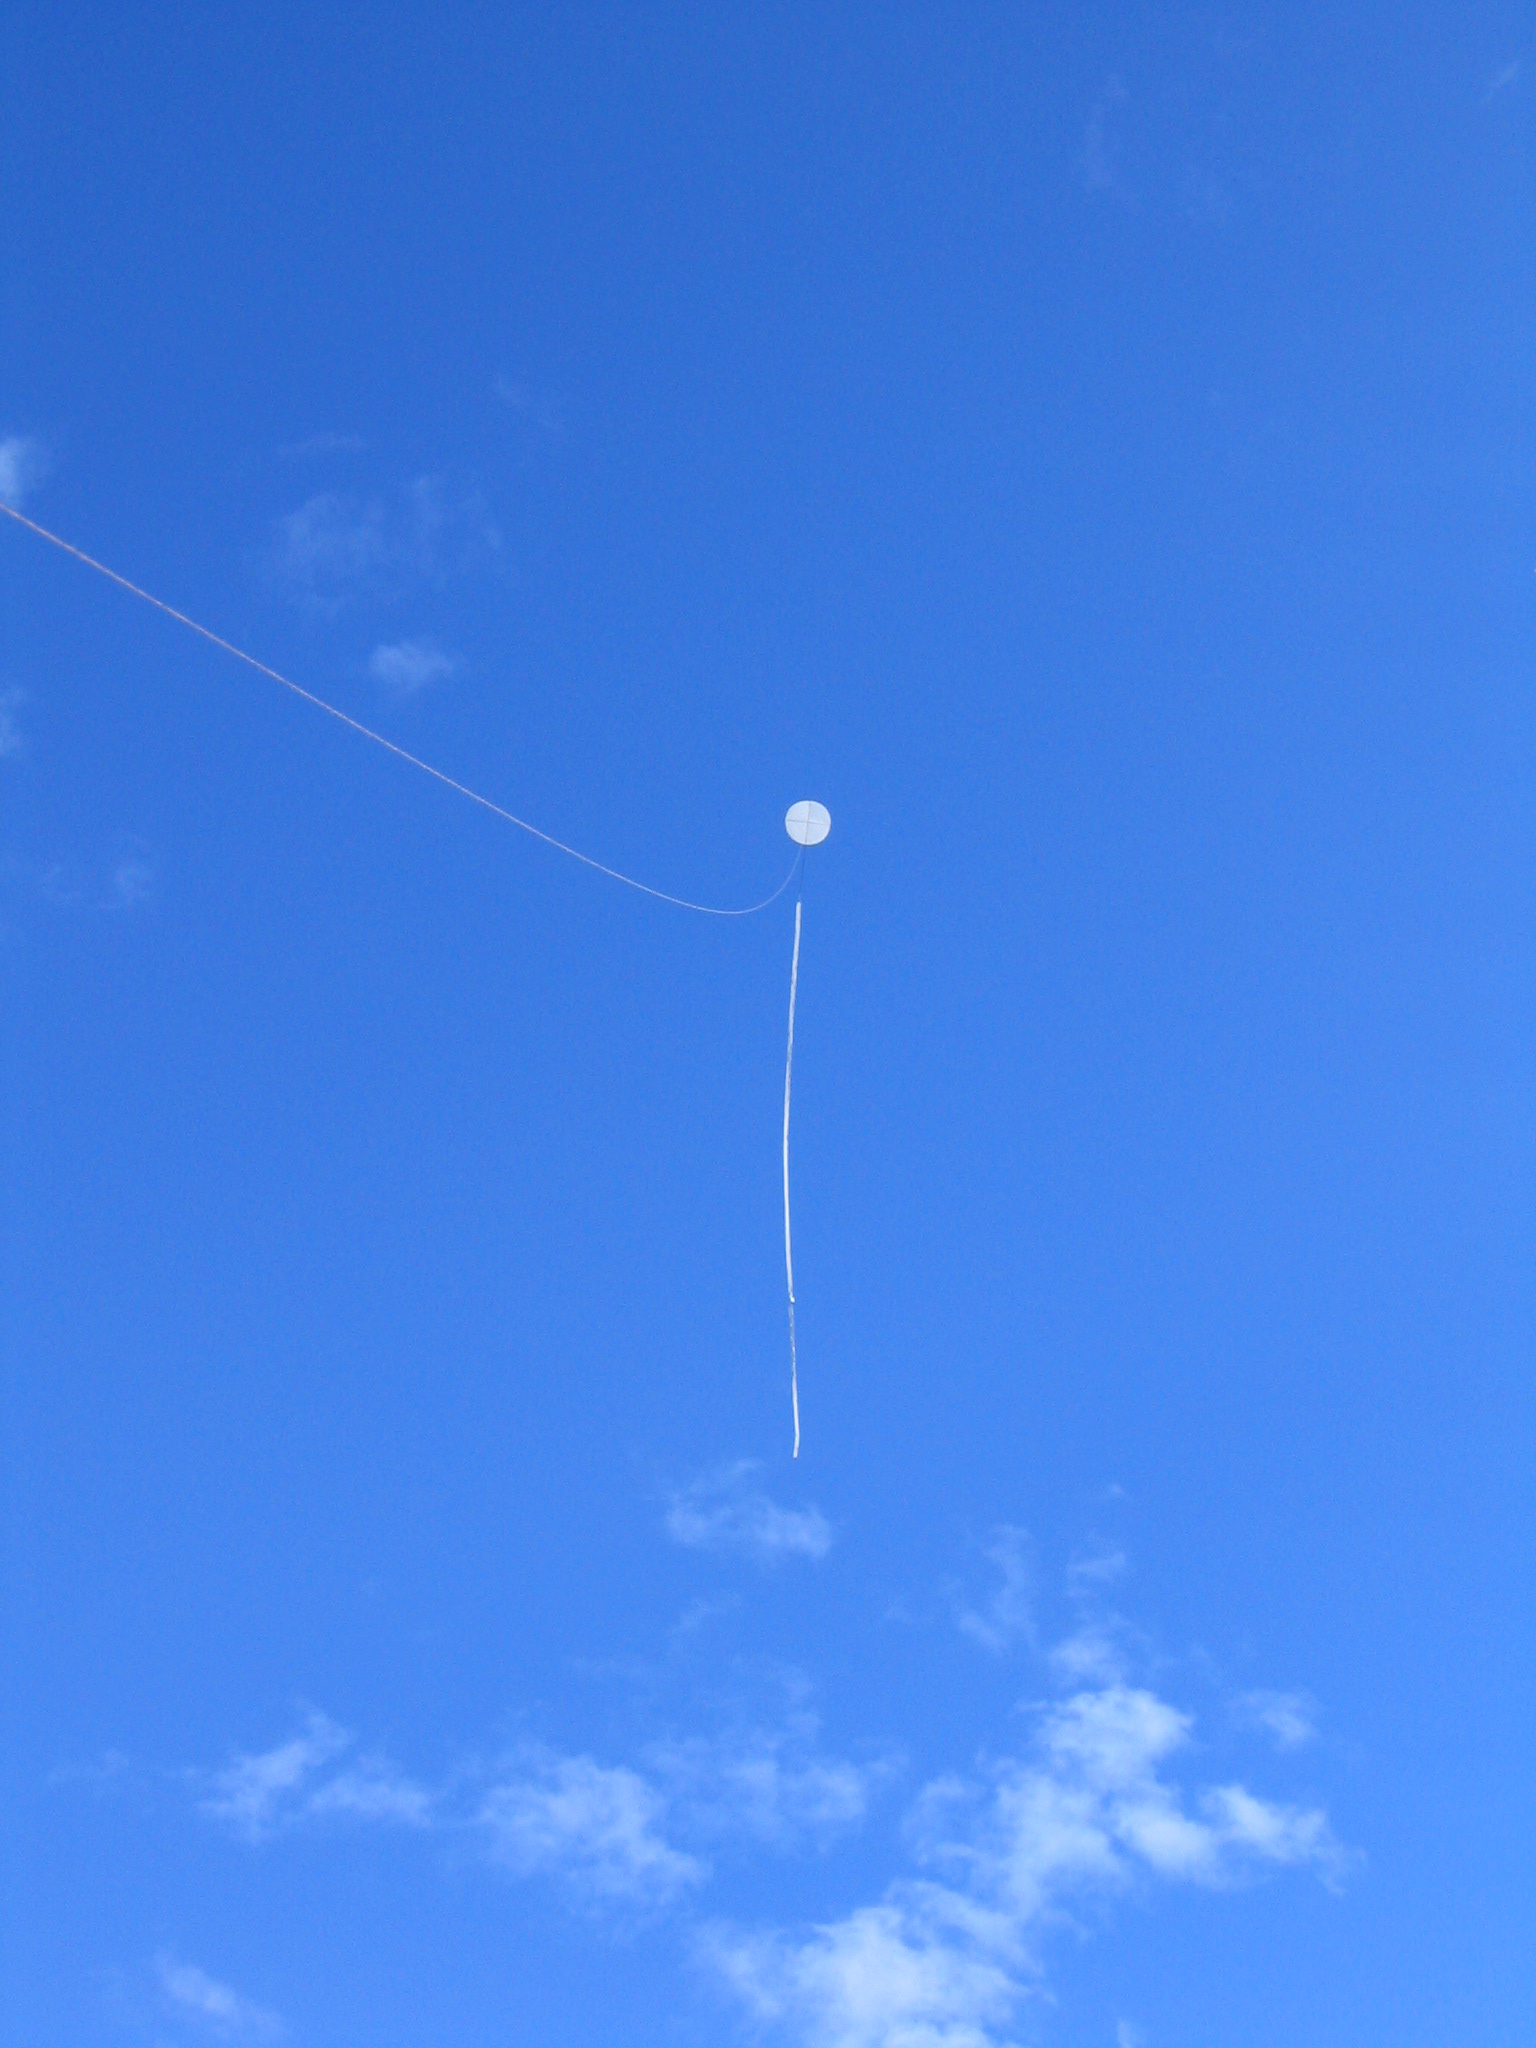
Here the kite is flying in its final form, four leg bridle with 340 square inches of tail tied to the end of the sting.
Aloha! Mahalo nui loa for the info and the detailed instructions. I am doing a Lupe La, Lupe Mahina and Lupe Manu for my Hawaiian studies final project and I’m having a hella hard time figuring out where to put the string.
The Lupe Manu is just for looks as it was the first 1 I made and it’s waaaaay too heavy.
The Lupe La is the one i’m making now and its for my grade
The Lupe Mahina is my show piece and cherry on top and I will be giving it to my Kumu as a gift after my presentation.
The Lupe La HAS GOT TO FLY OR I FAIL.
Please help.
You should be able to make a successful flying kite by following these instructions. If you are in Hawaii, you might find a local kite maker who makes Lupe La kites.