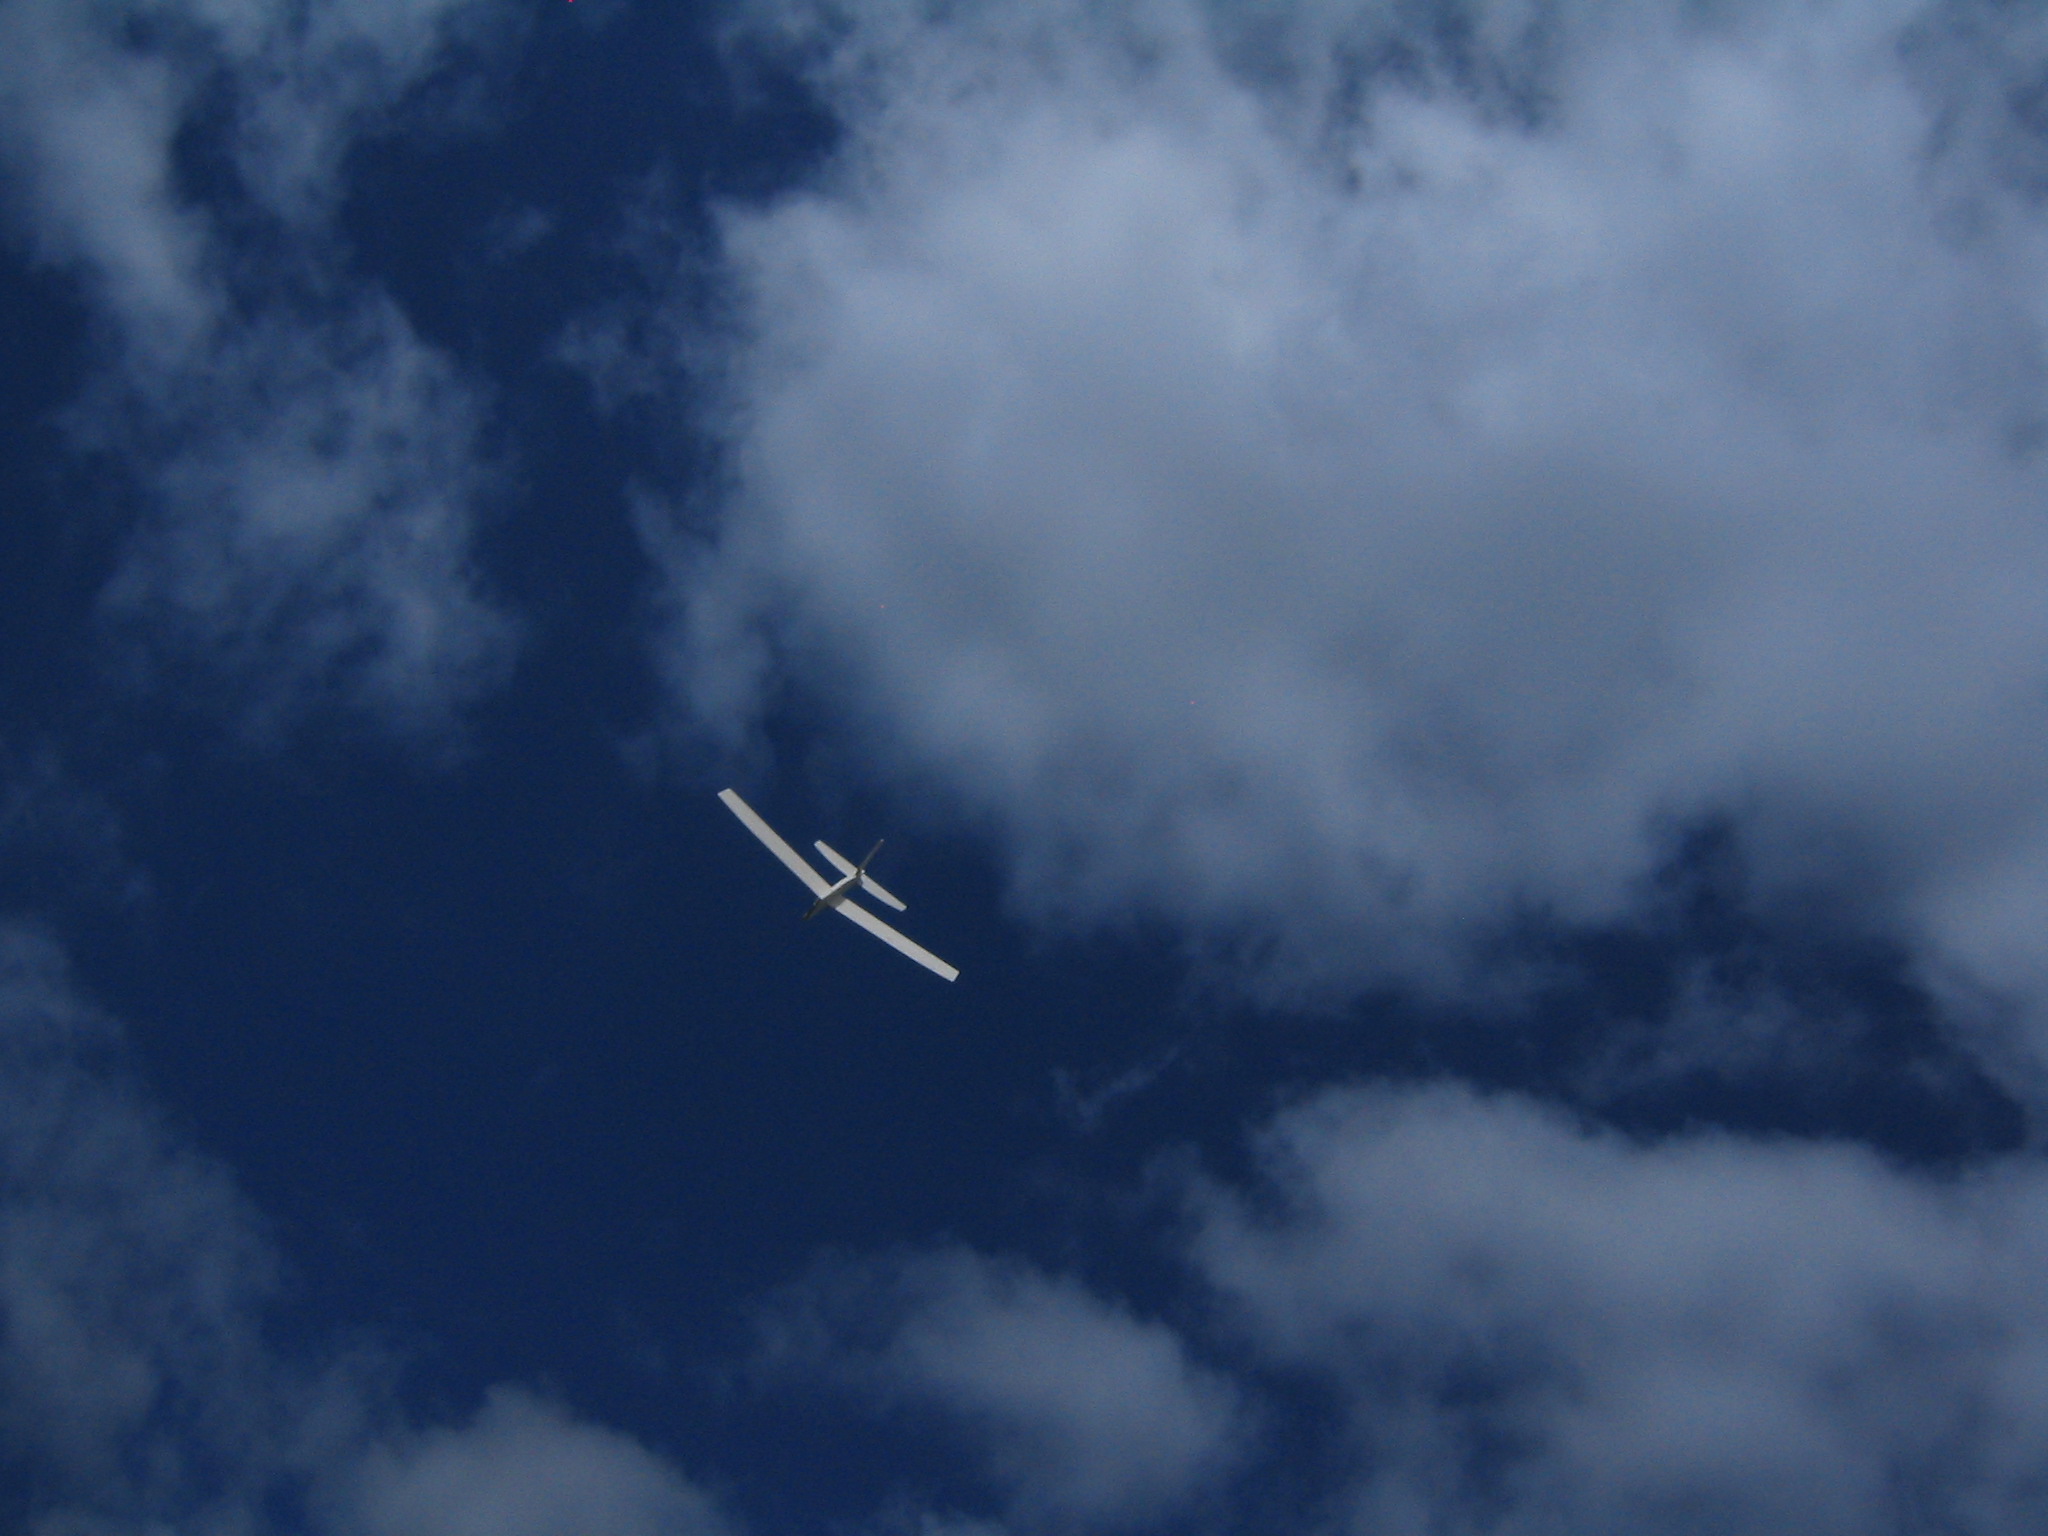
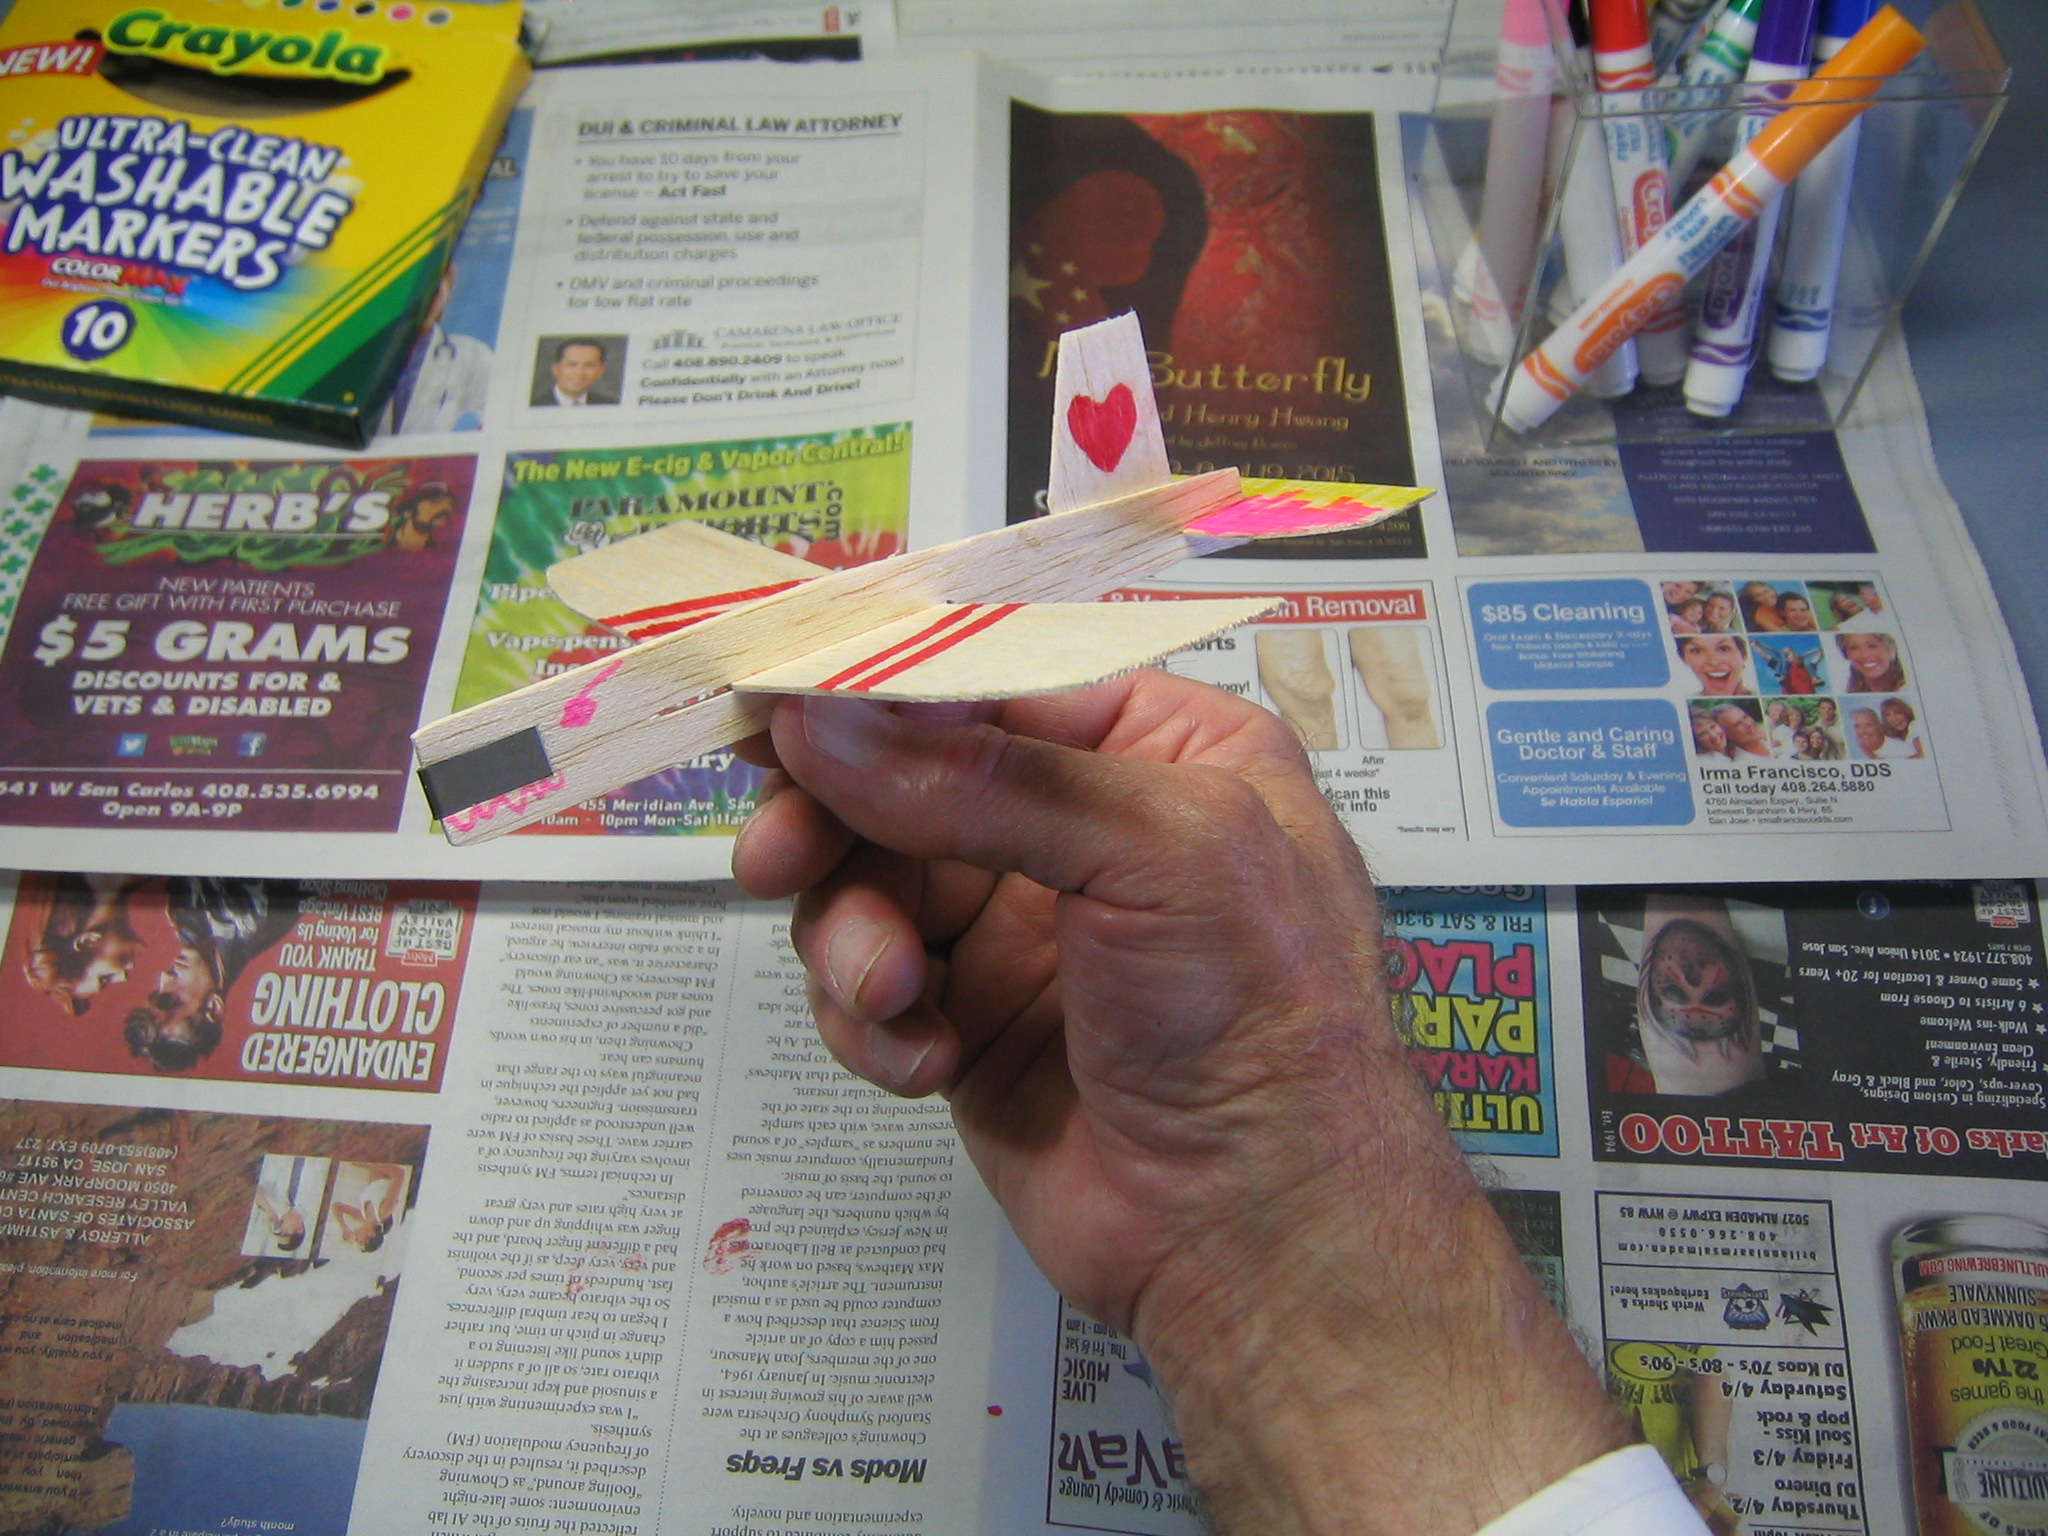
The Guillow’s 25-1 Balsa Glider
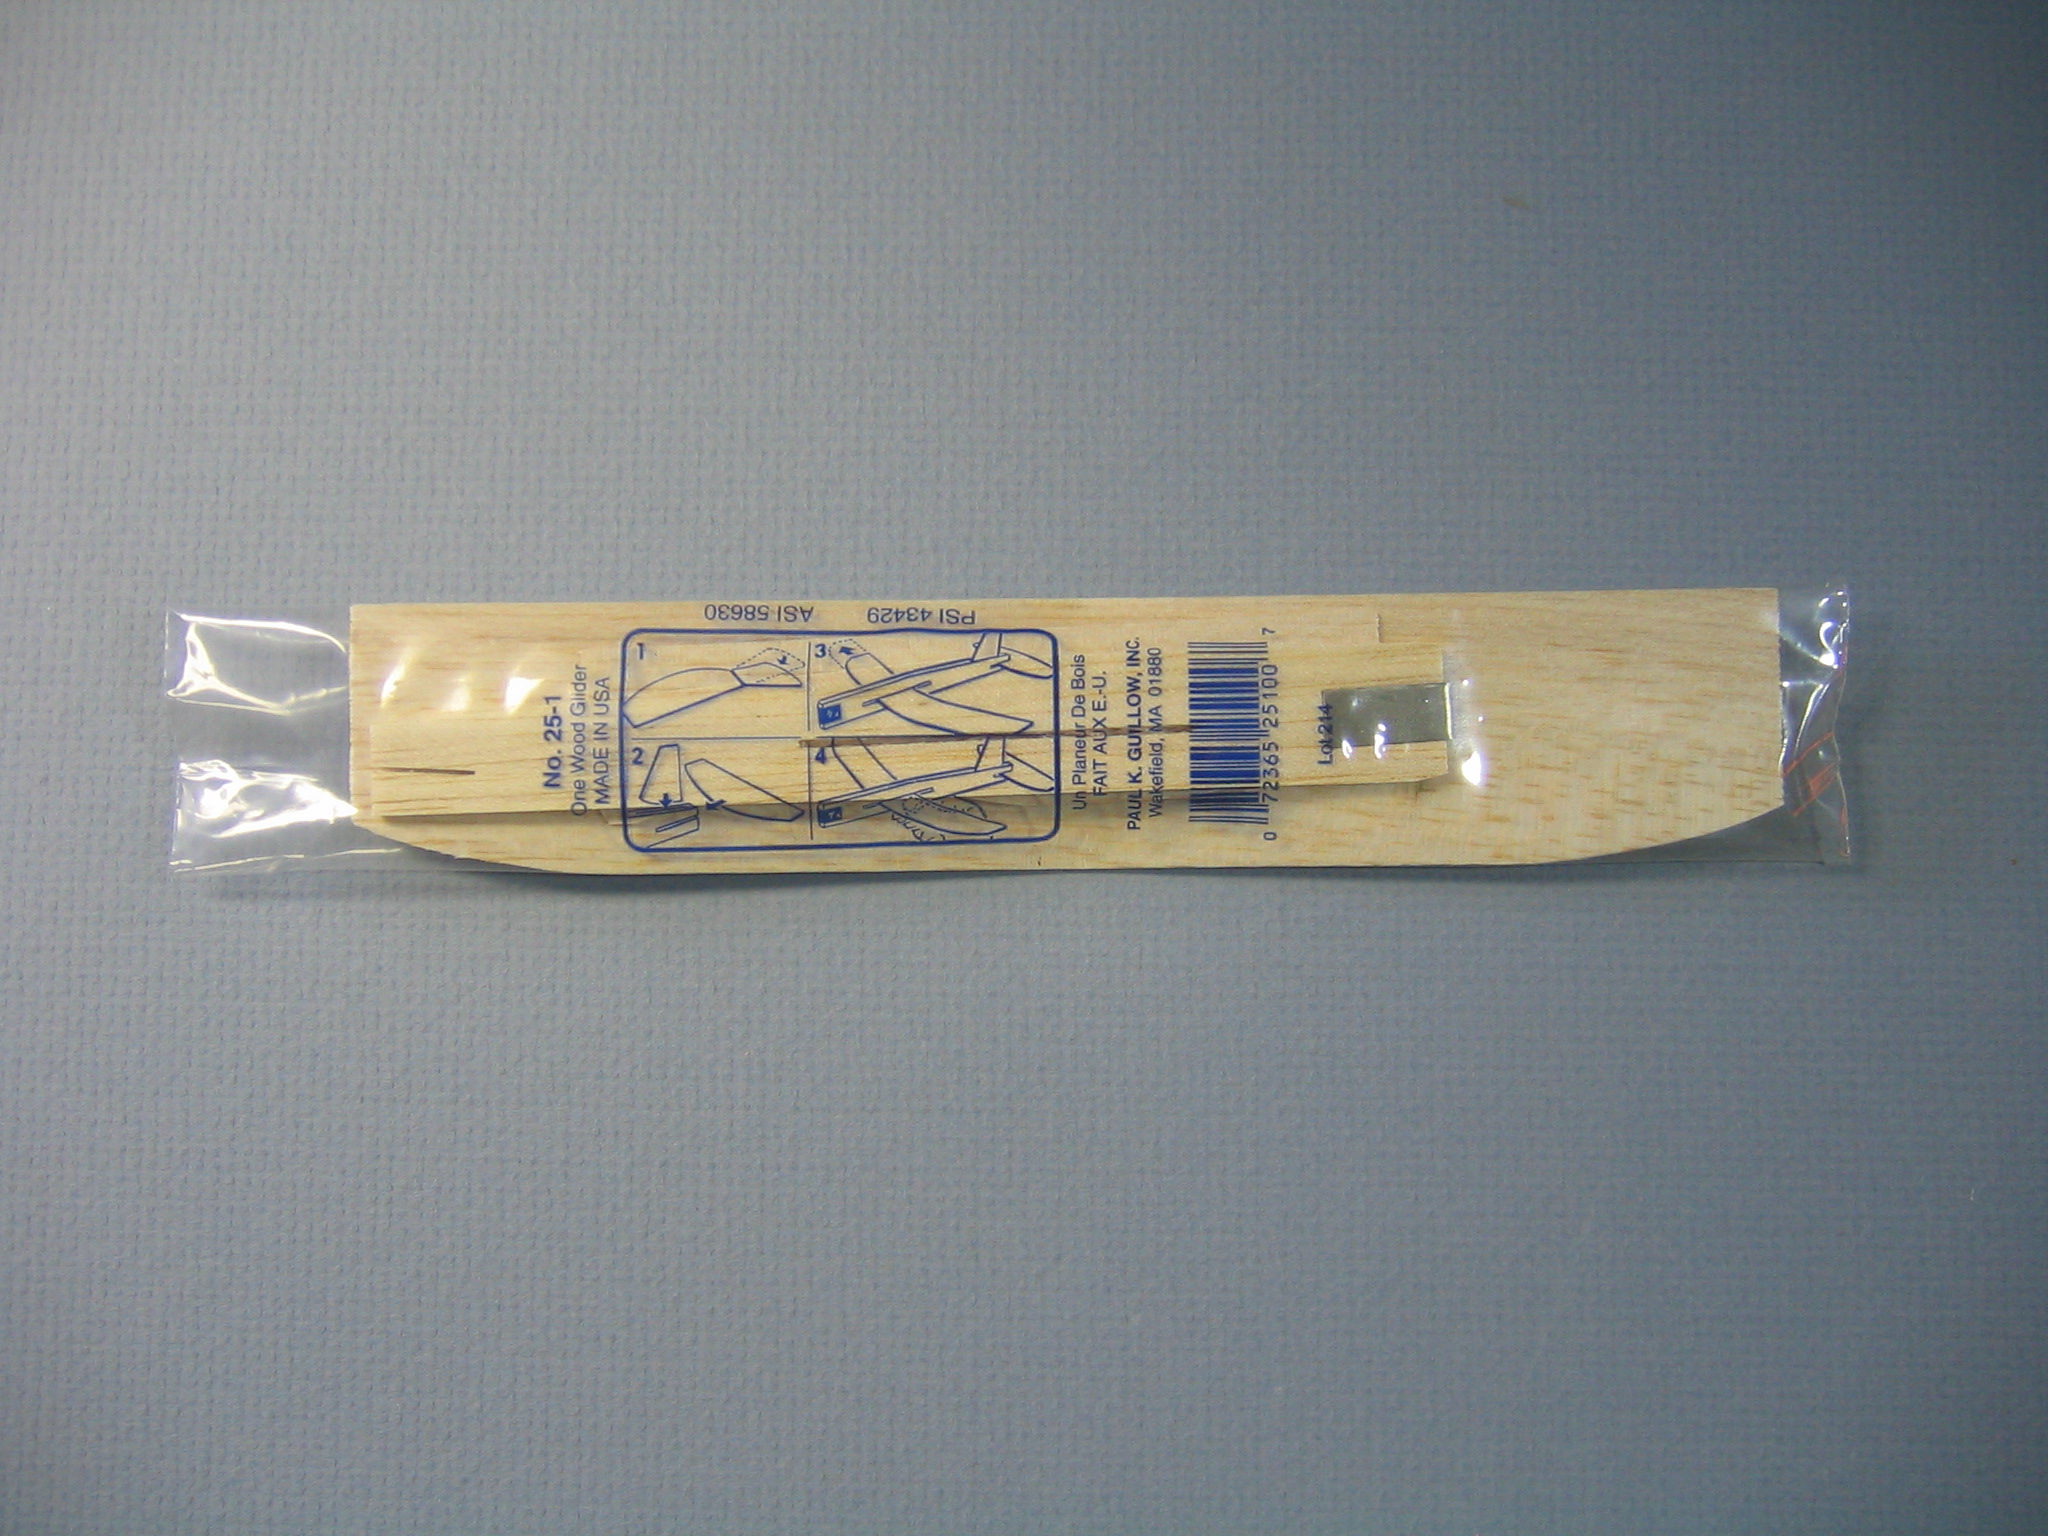
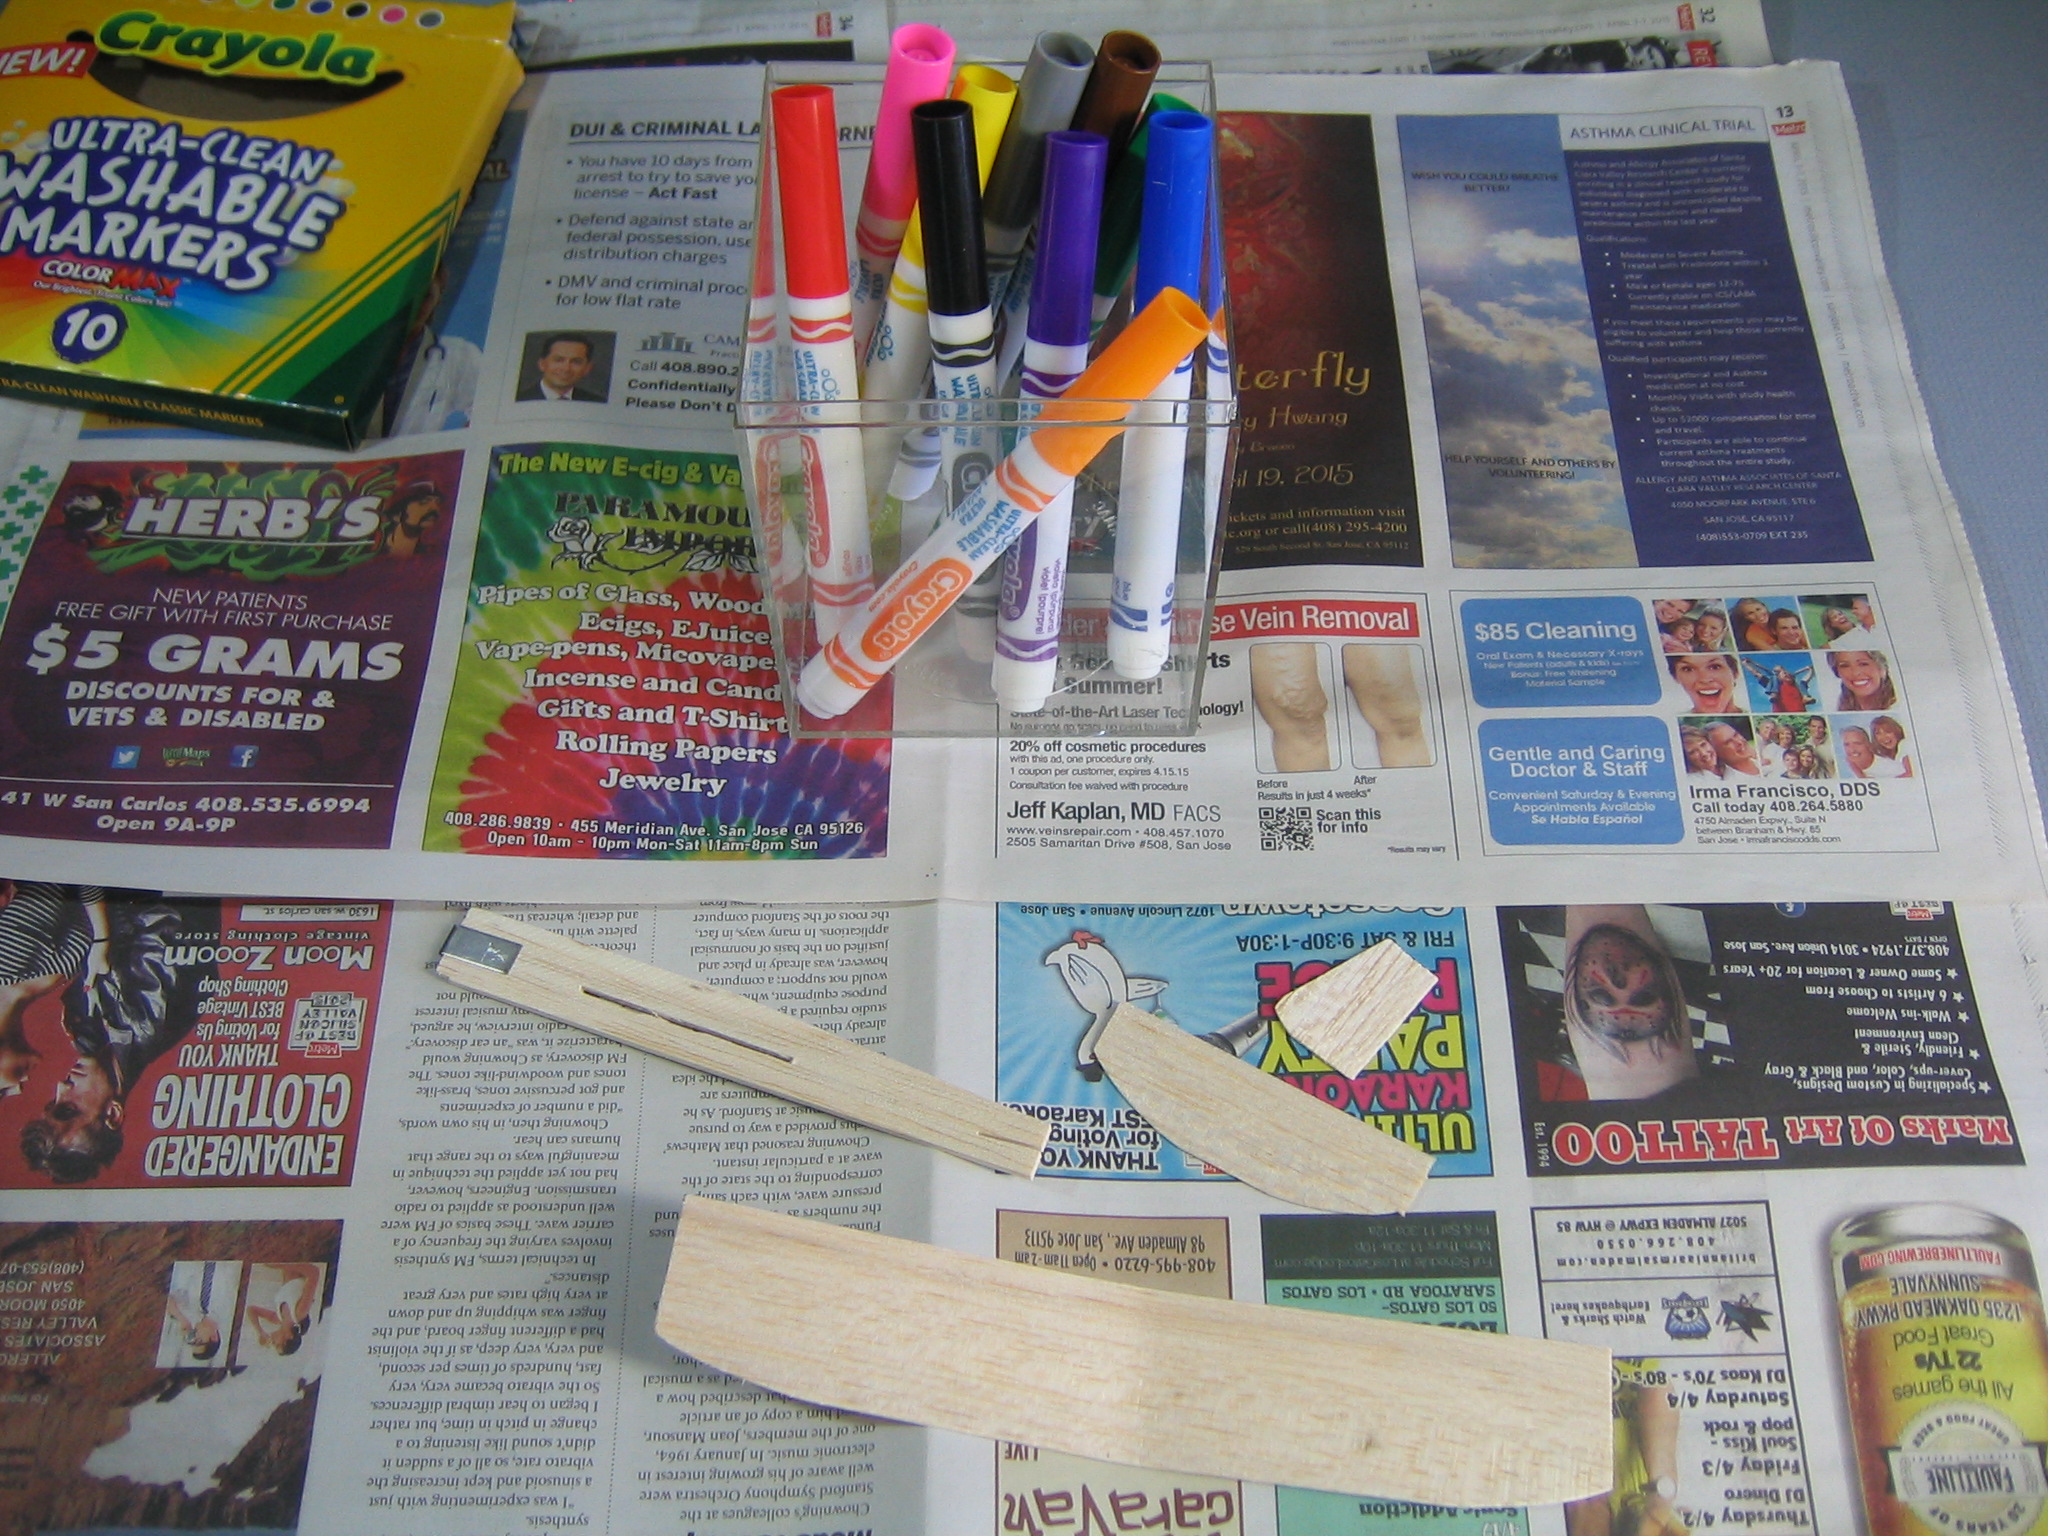
Guillow’s (Pronounced Gwillow’s) has been a leading manufacturer of balsa model and toy airplanes since 1926. Their smallest is the 25-1 glider. This consists of three pieces of balsa wood in a poly bag. You break apart the fin and tailplane and the four pieces slip together in a few seconds without any tools or glue. This is an excellent project for a quick group build in scout groups, classrooms, partys, conventions, picnics and family affairs. It also provides several glider games suitable for such groups. You get 20 gliders for $10. They are preprinted with special occasion artwork. Order them HERE. I special ordered 40 without any printing so they could be decorated by the kids at a family gathering using felt pens and stickers. Use the Contact Us page to order them.
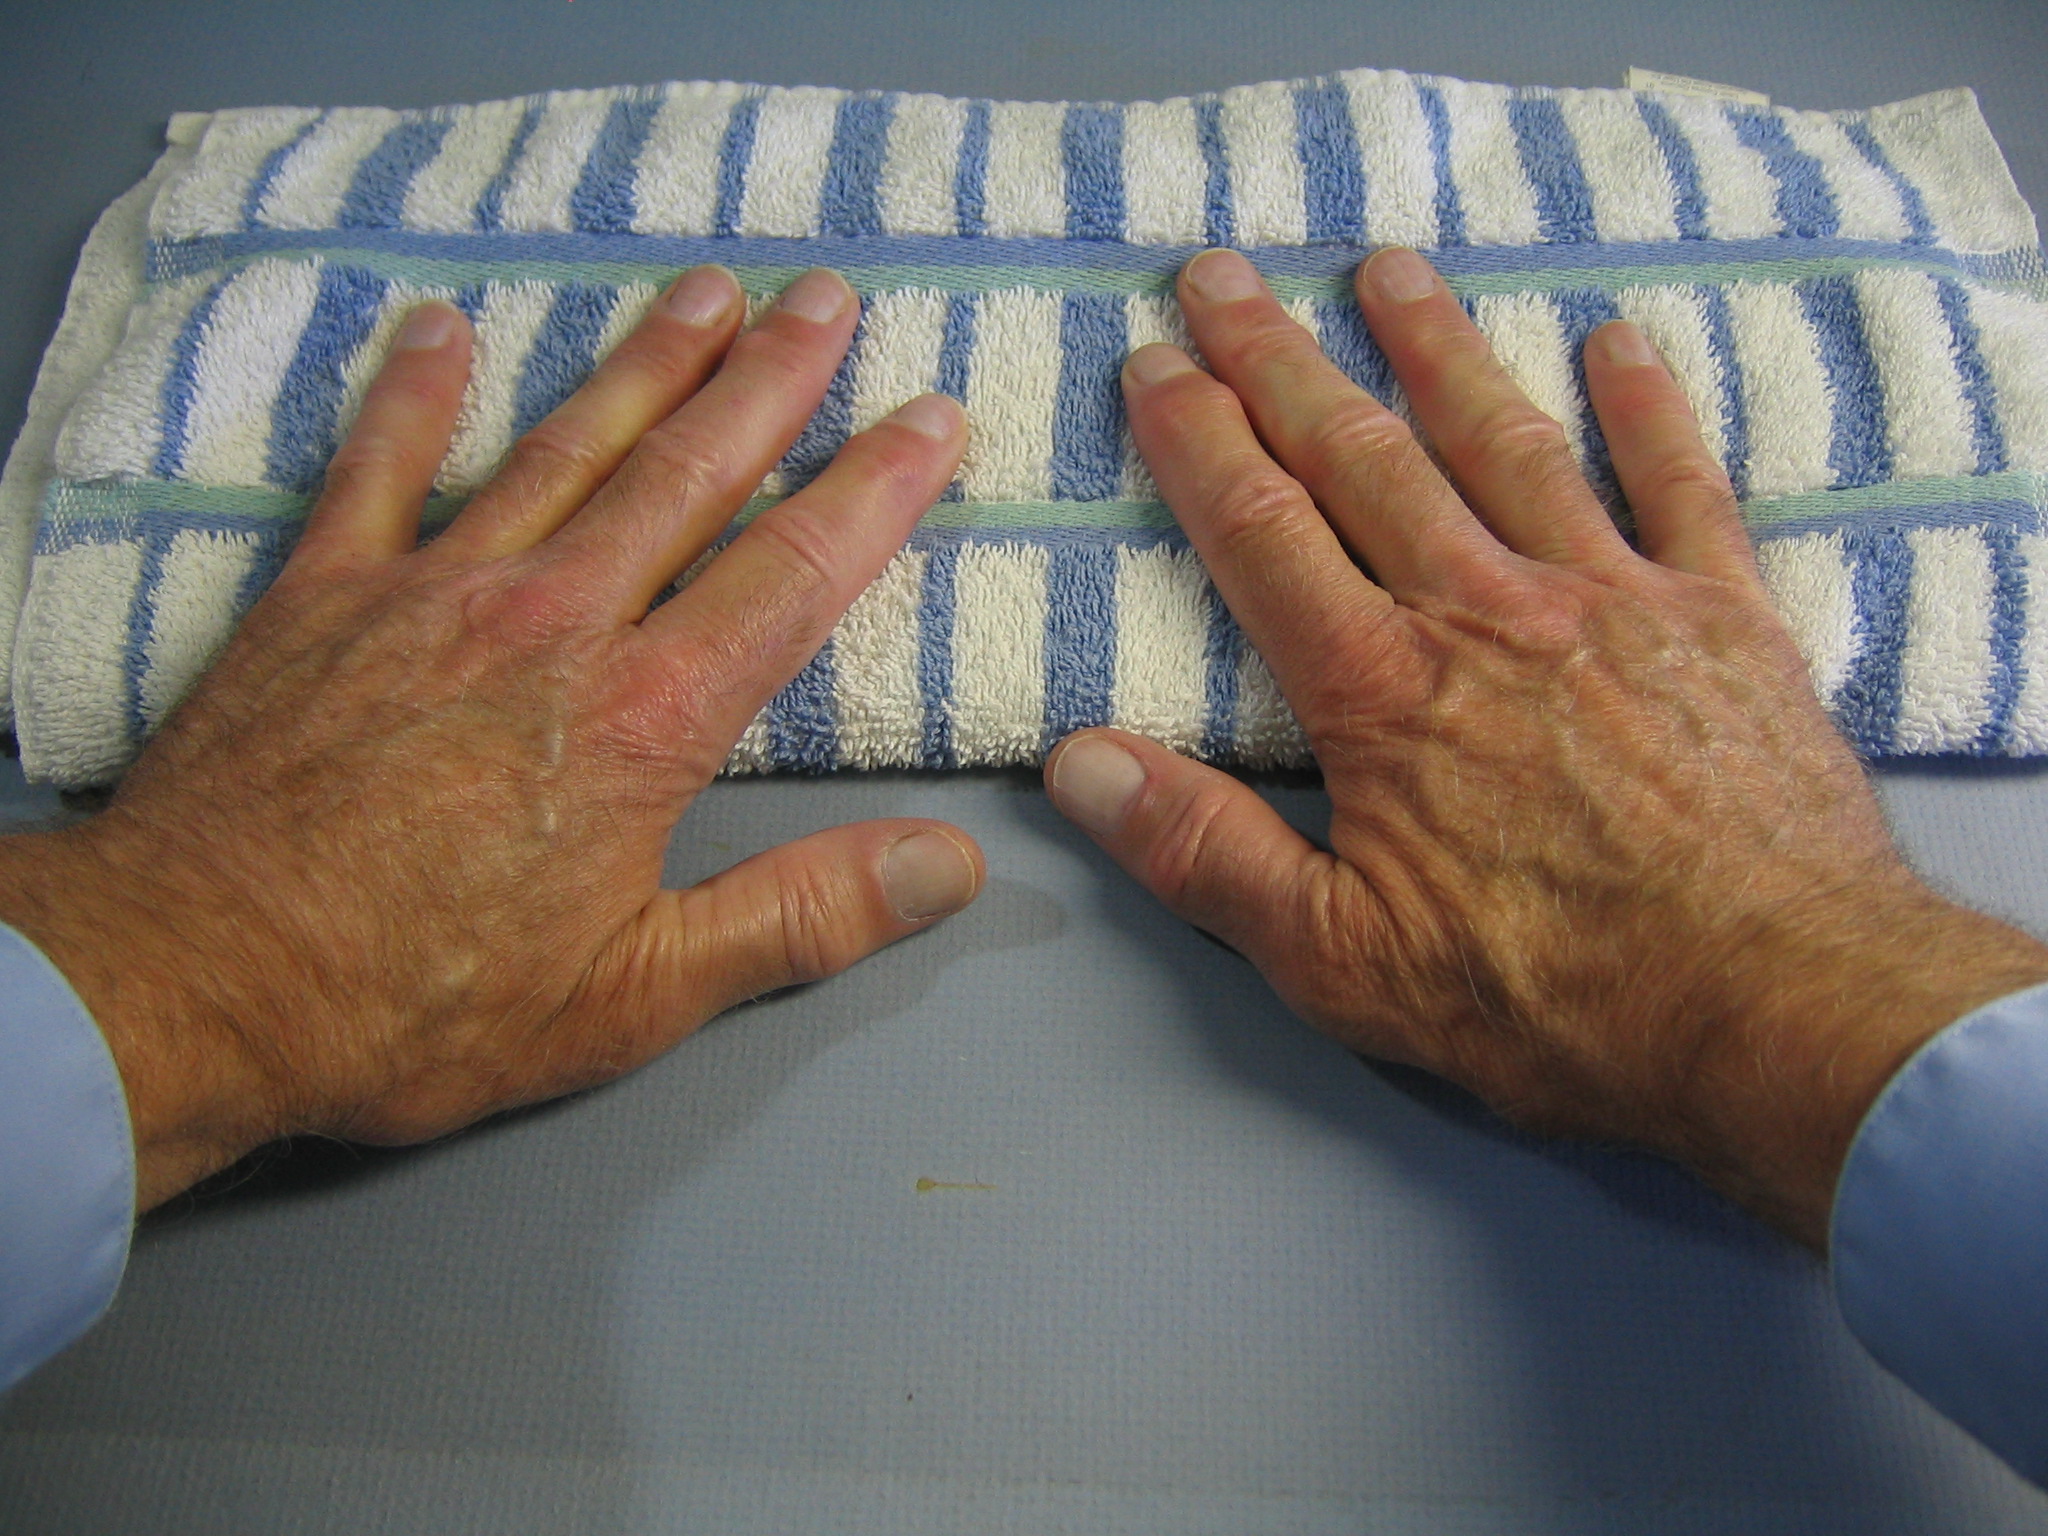
To supervise the construction and flying of these gliders by a group of kids, I set two 6′ tables at a right angle to each other, slightly separated, with four chairs at the ends and around the outside edges of each table. I stand inside the angle where I can see and be seen by all eight kids. I place the tables out near the flying field so I can keep an eye on both the building and flying, so I can assist as needed.
assembling the glider
Let’s get started.
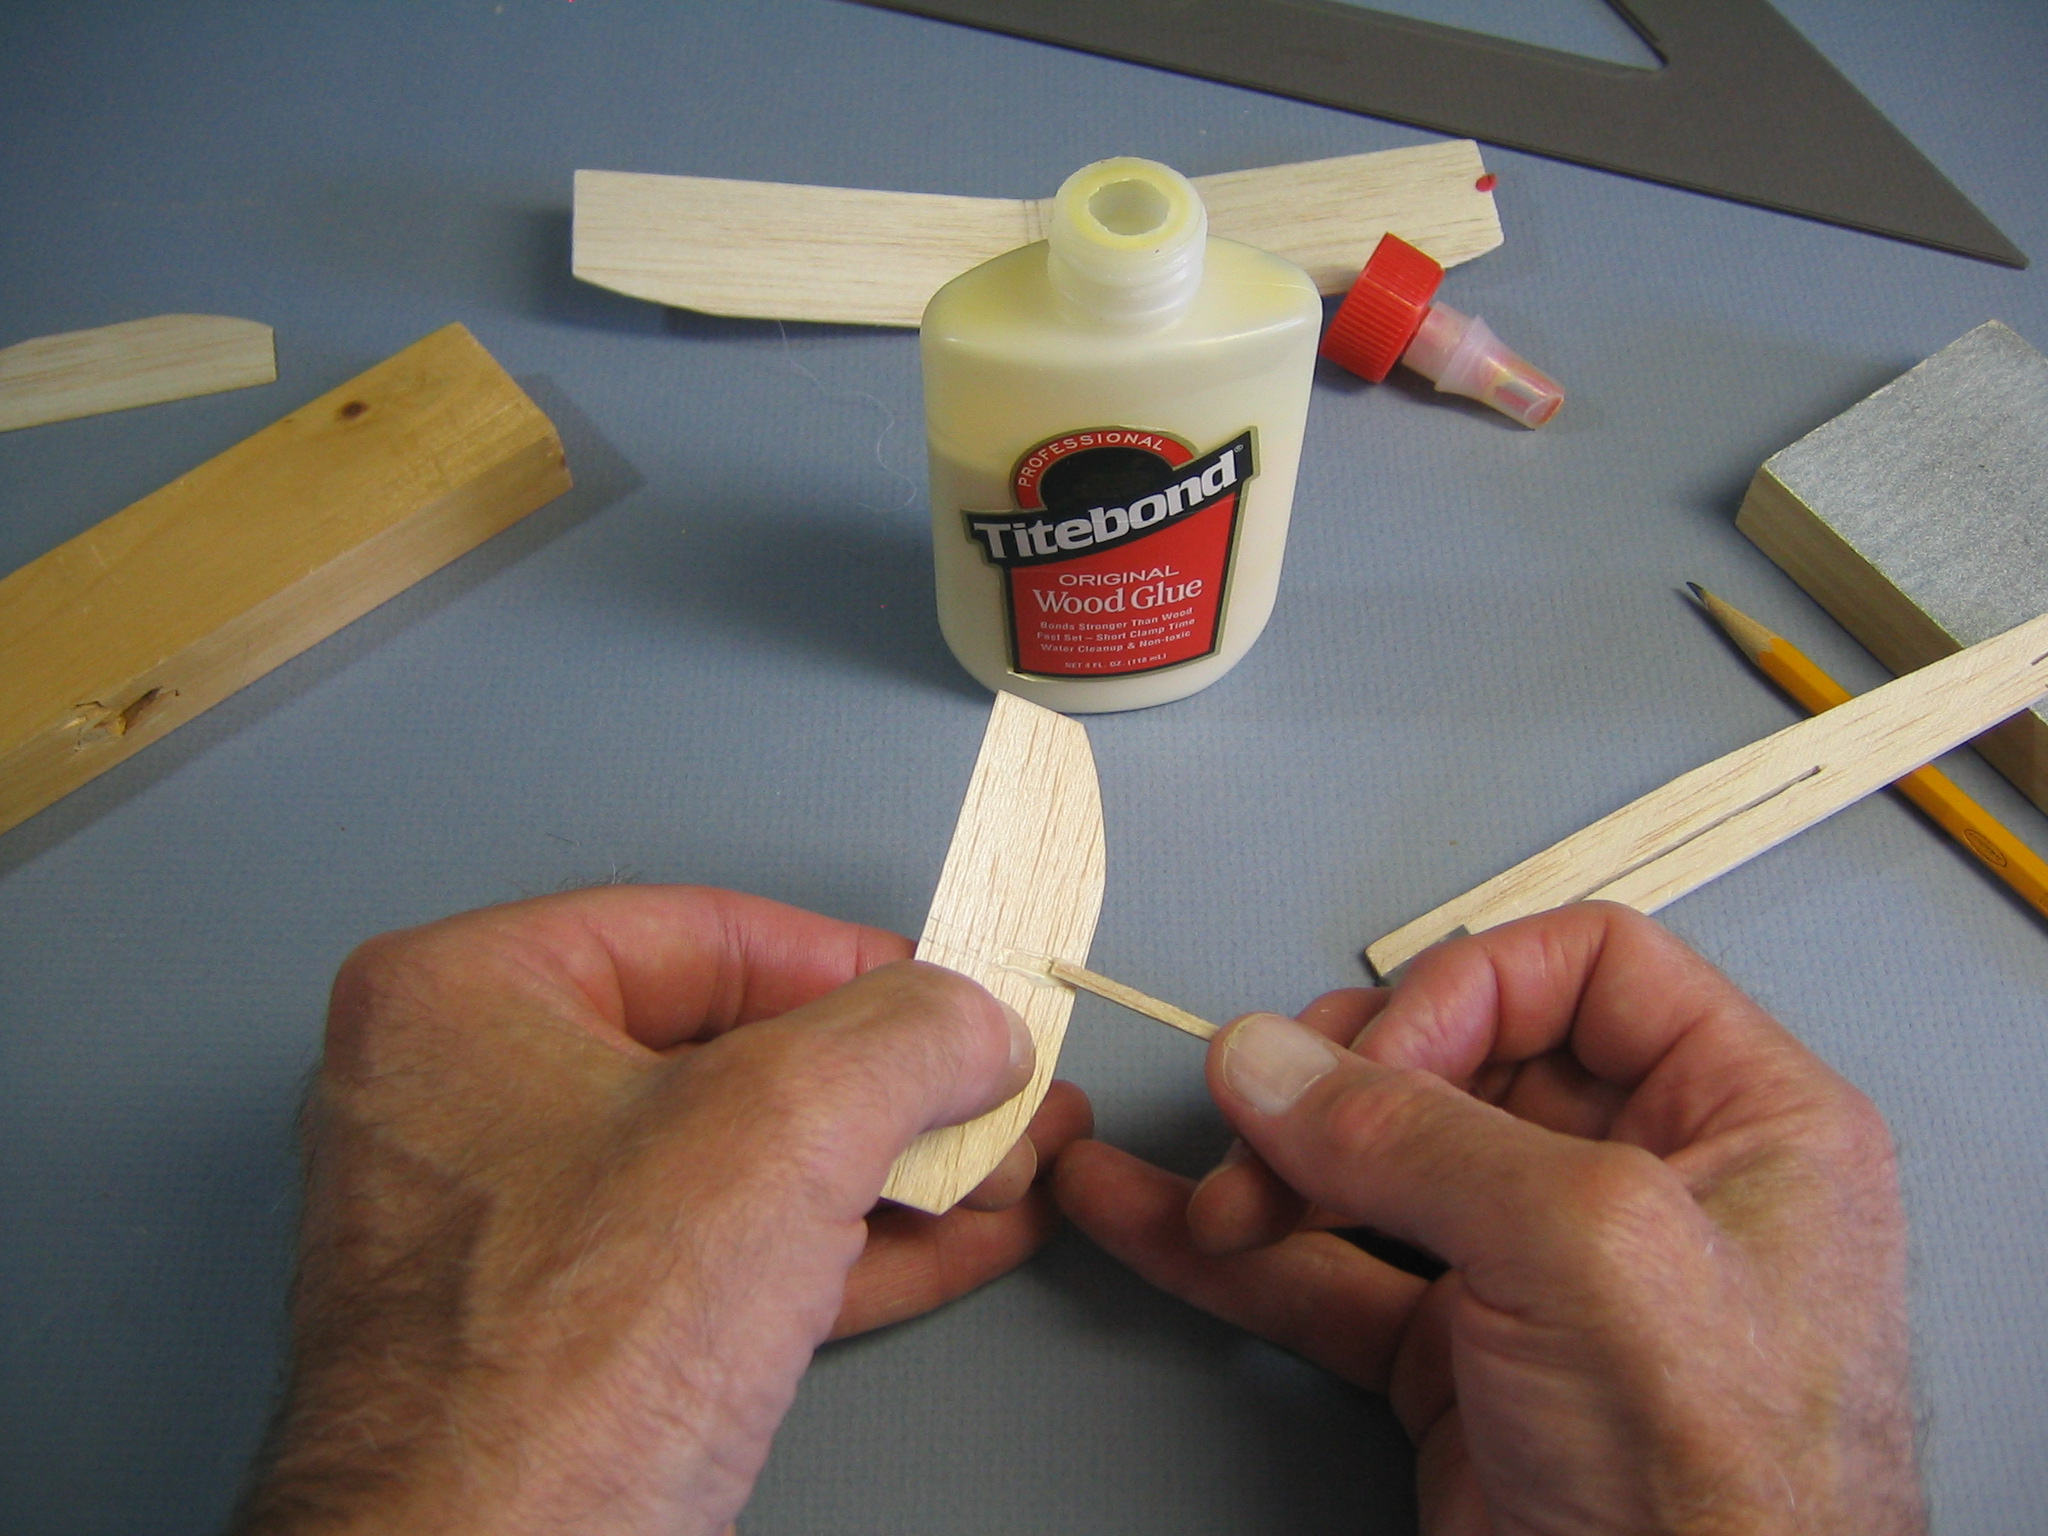
You will need kits, scissors, felt pens and glue. The glue is not necessary for building, it is for emergency repairs. Any glue suitable for wood will work. Decorating with felt pens is optional. It is best to decorate with something that will not add weight or interfere with flight.
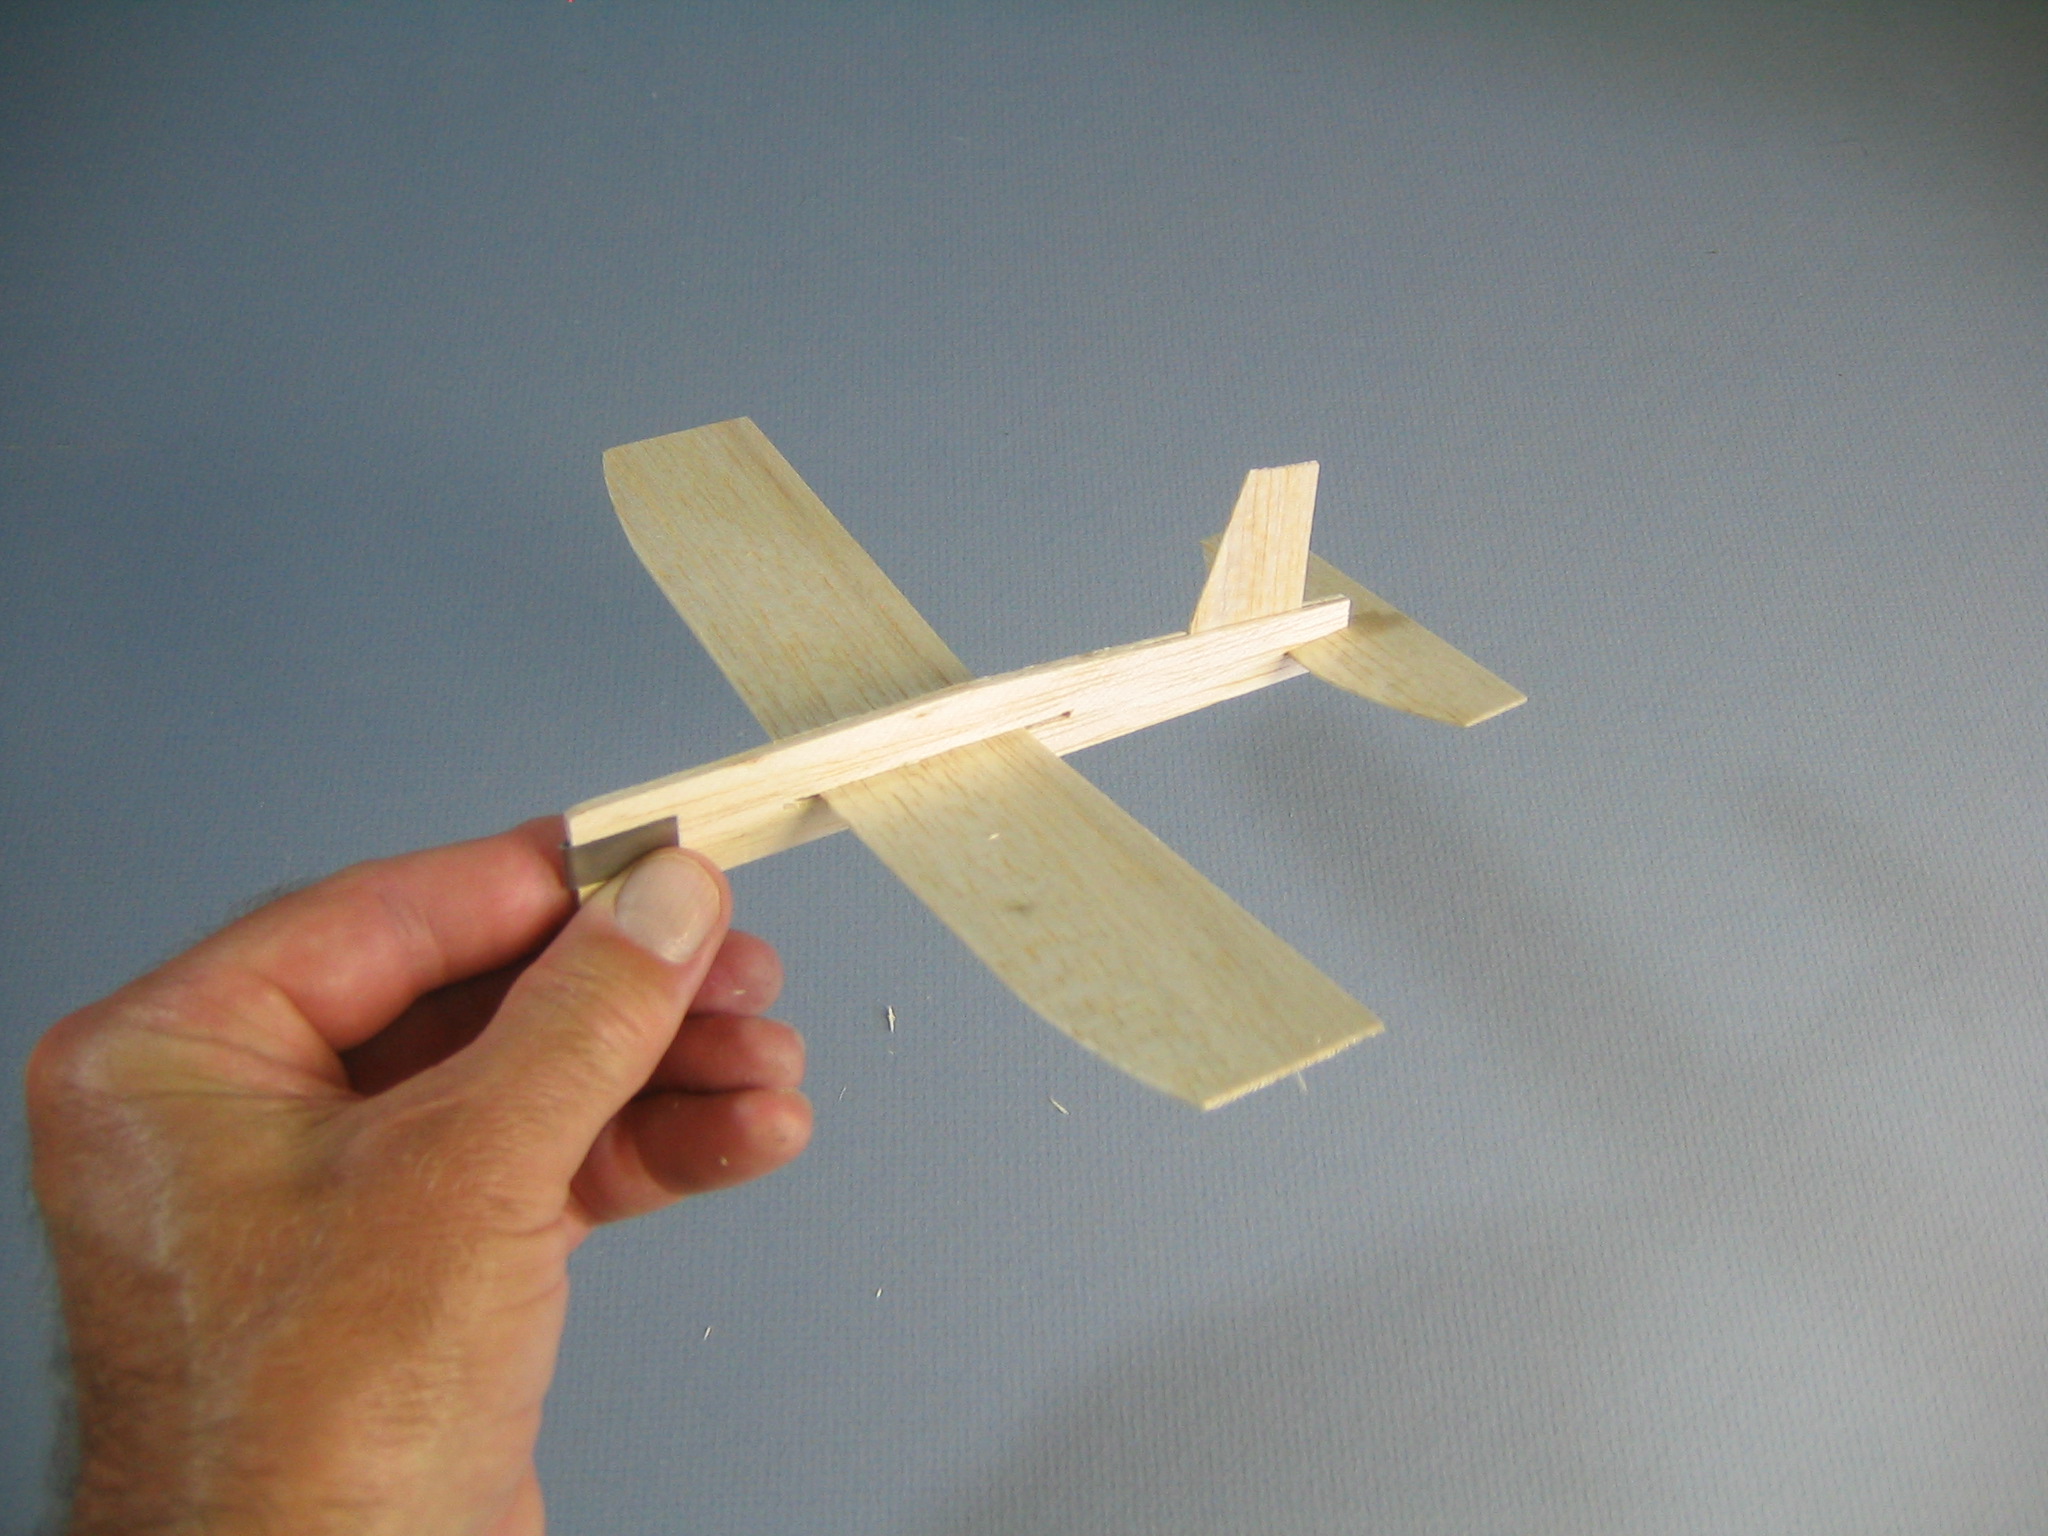
 First, it is important to have a completed example to show your students what the finished plane looks like. You can point out the four parts; the fuselage, wing, tailplane and fin.
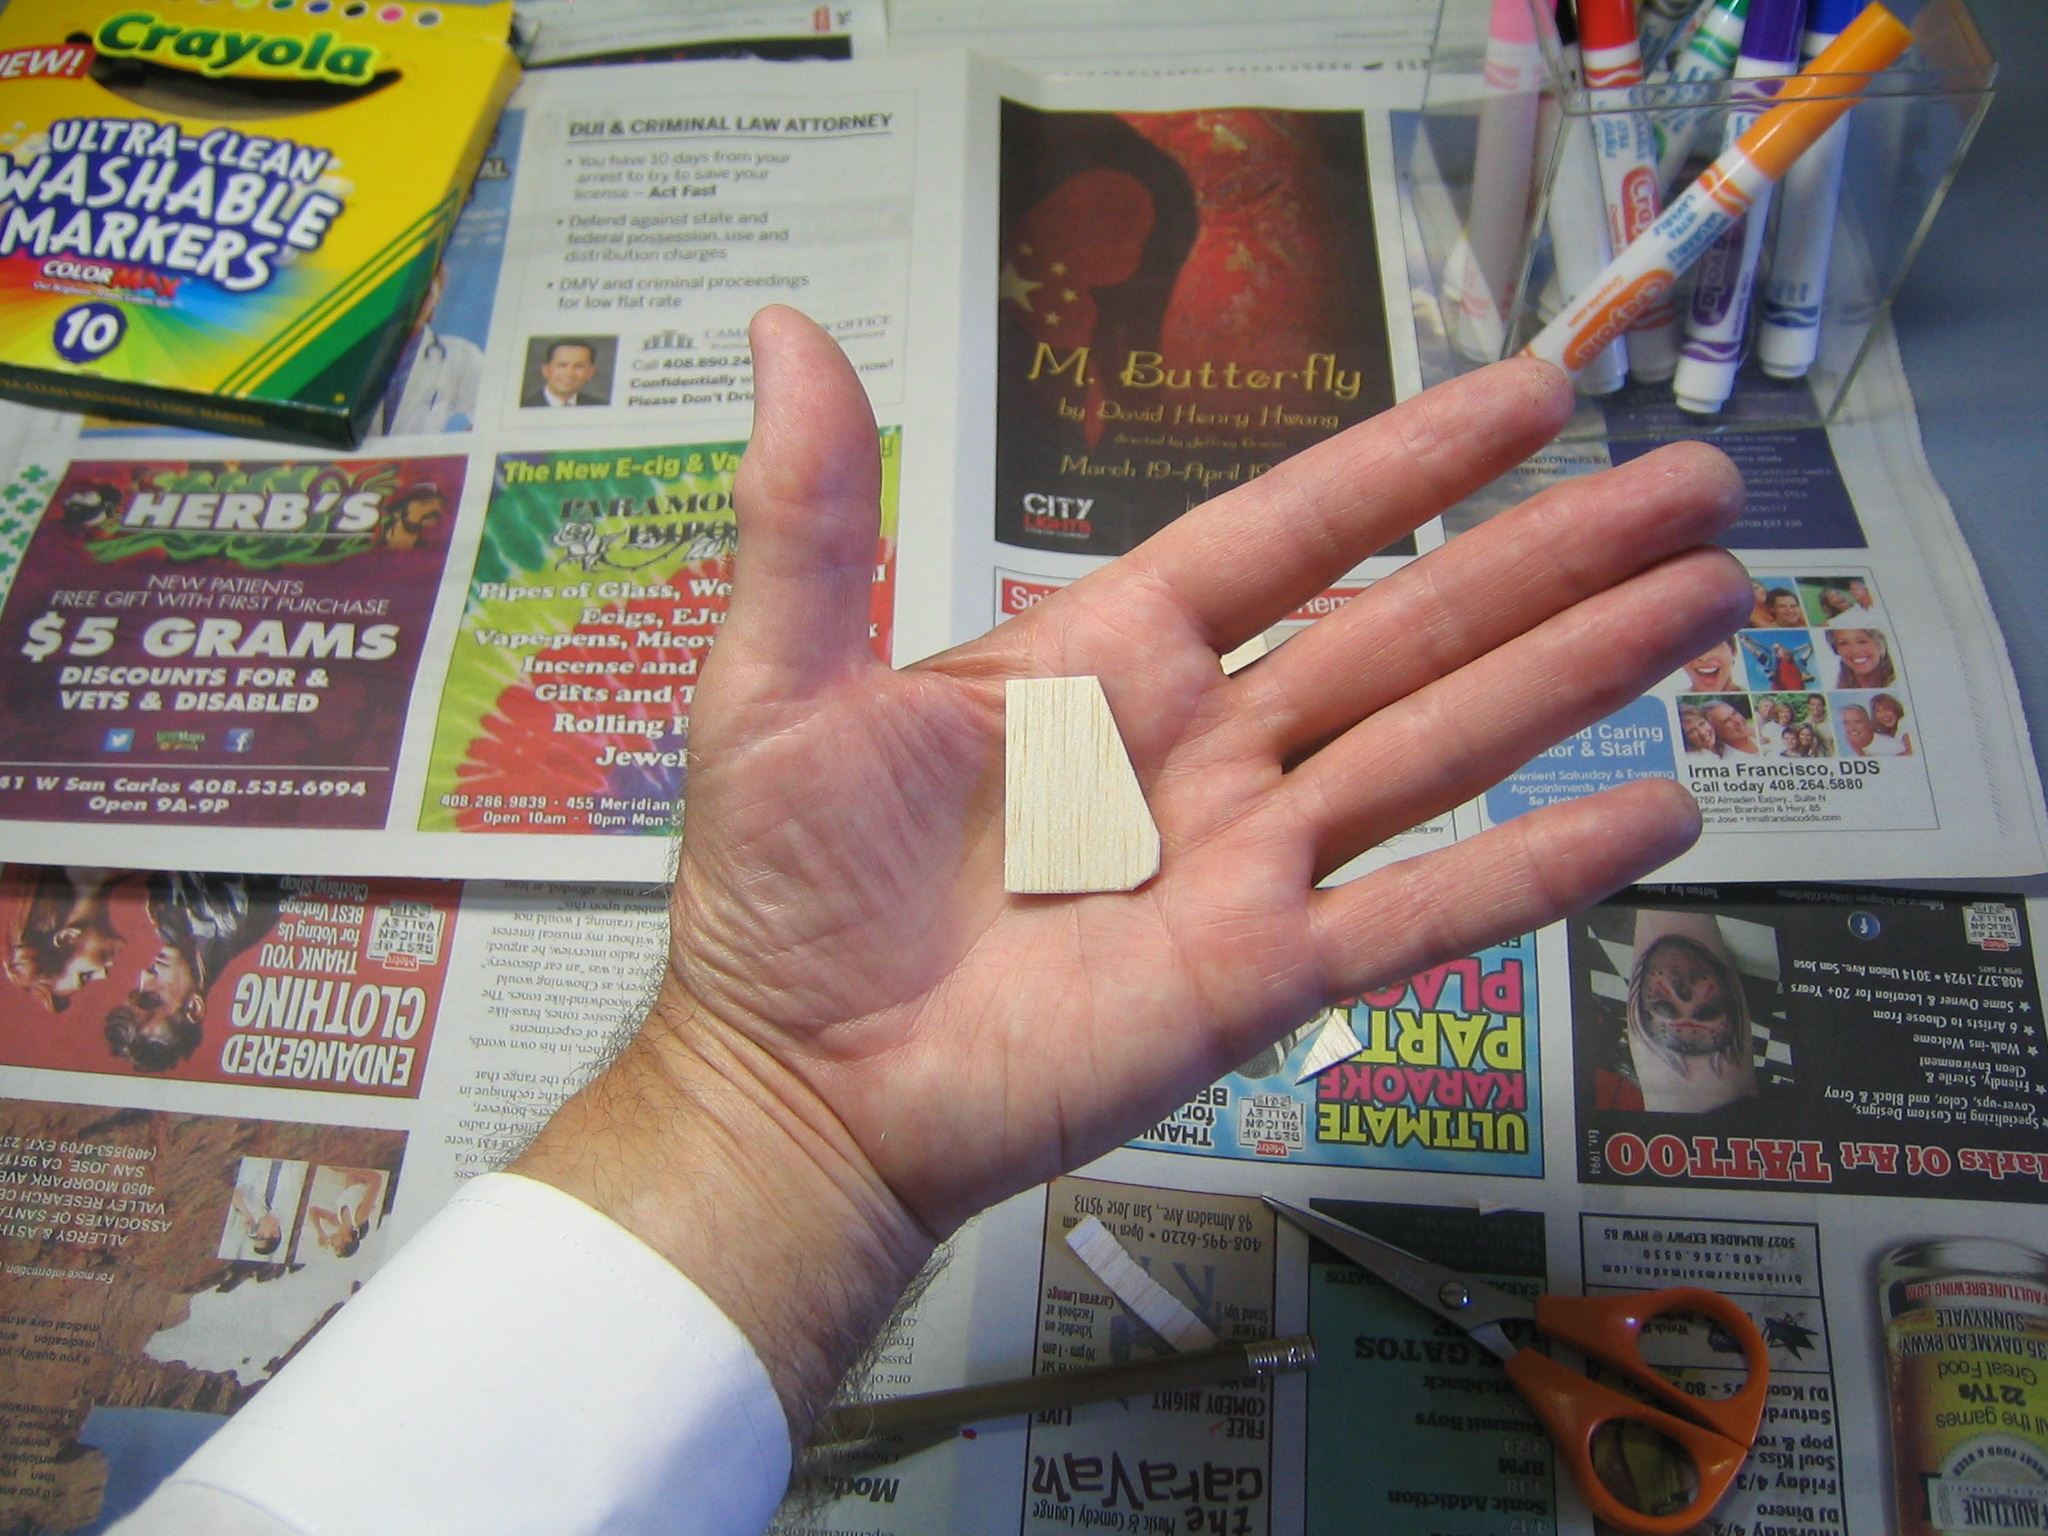
 The parts come together in a poly bag. Our first lesson is about balsa wood. We use balsa for gliders because it is light. It is also soft and fragile. It must be handled with care.
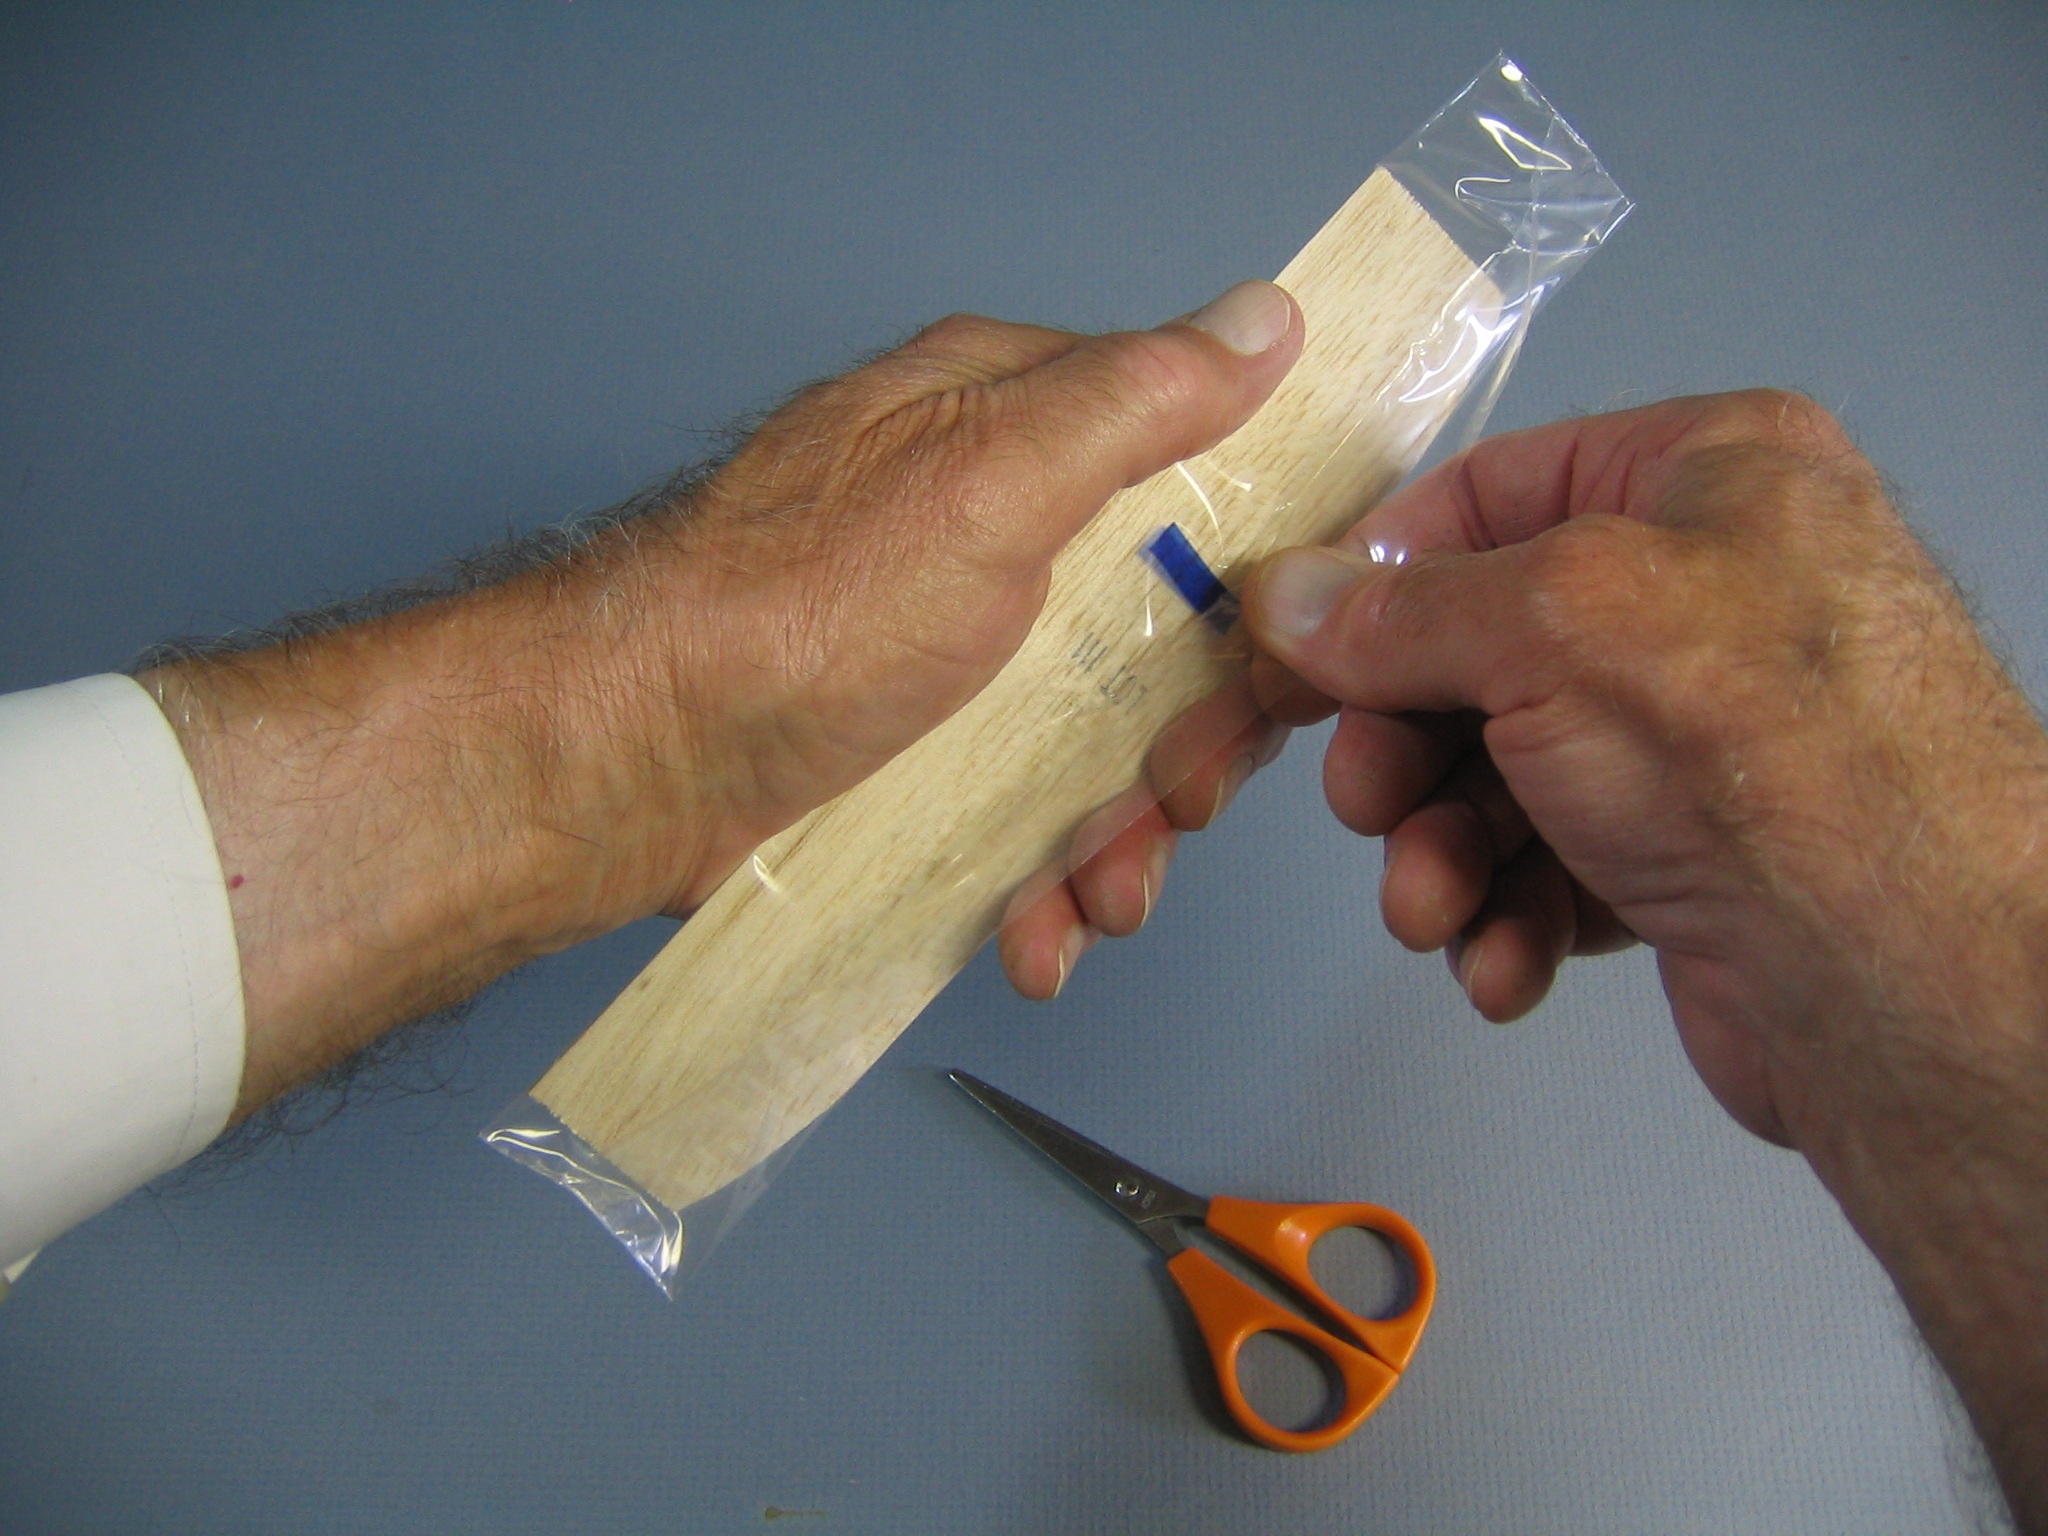 Kids gripping the balsa while tearing the poly bag off will often crush the balsa and break the parts. That is why we have the scissors.
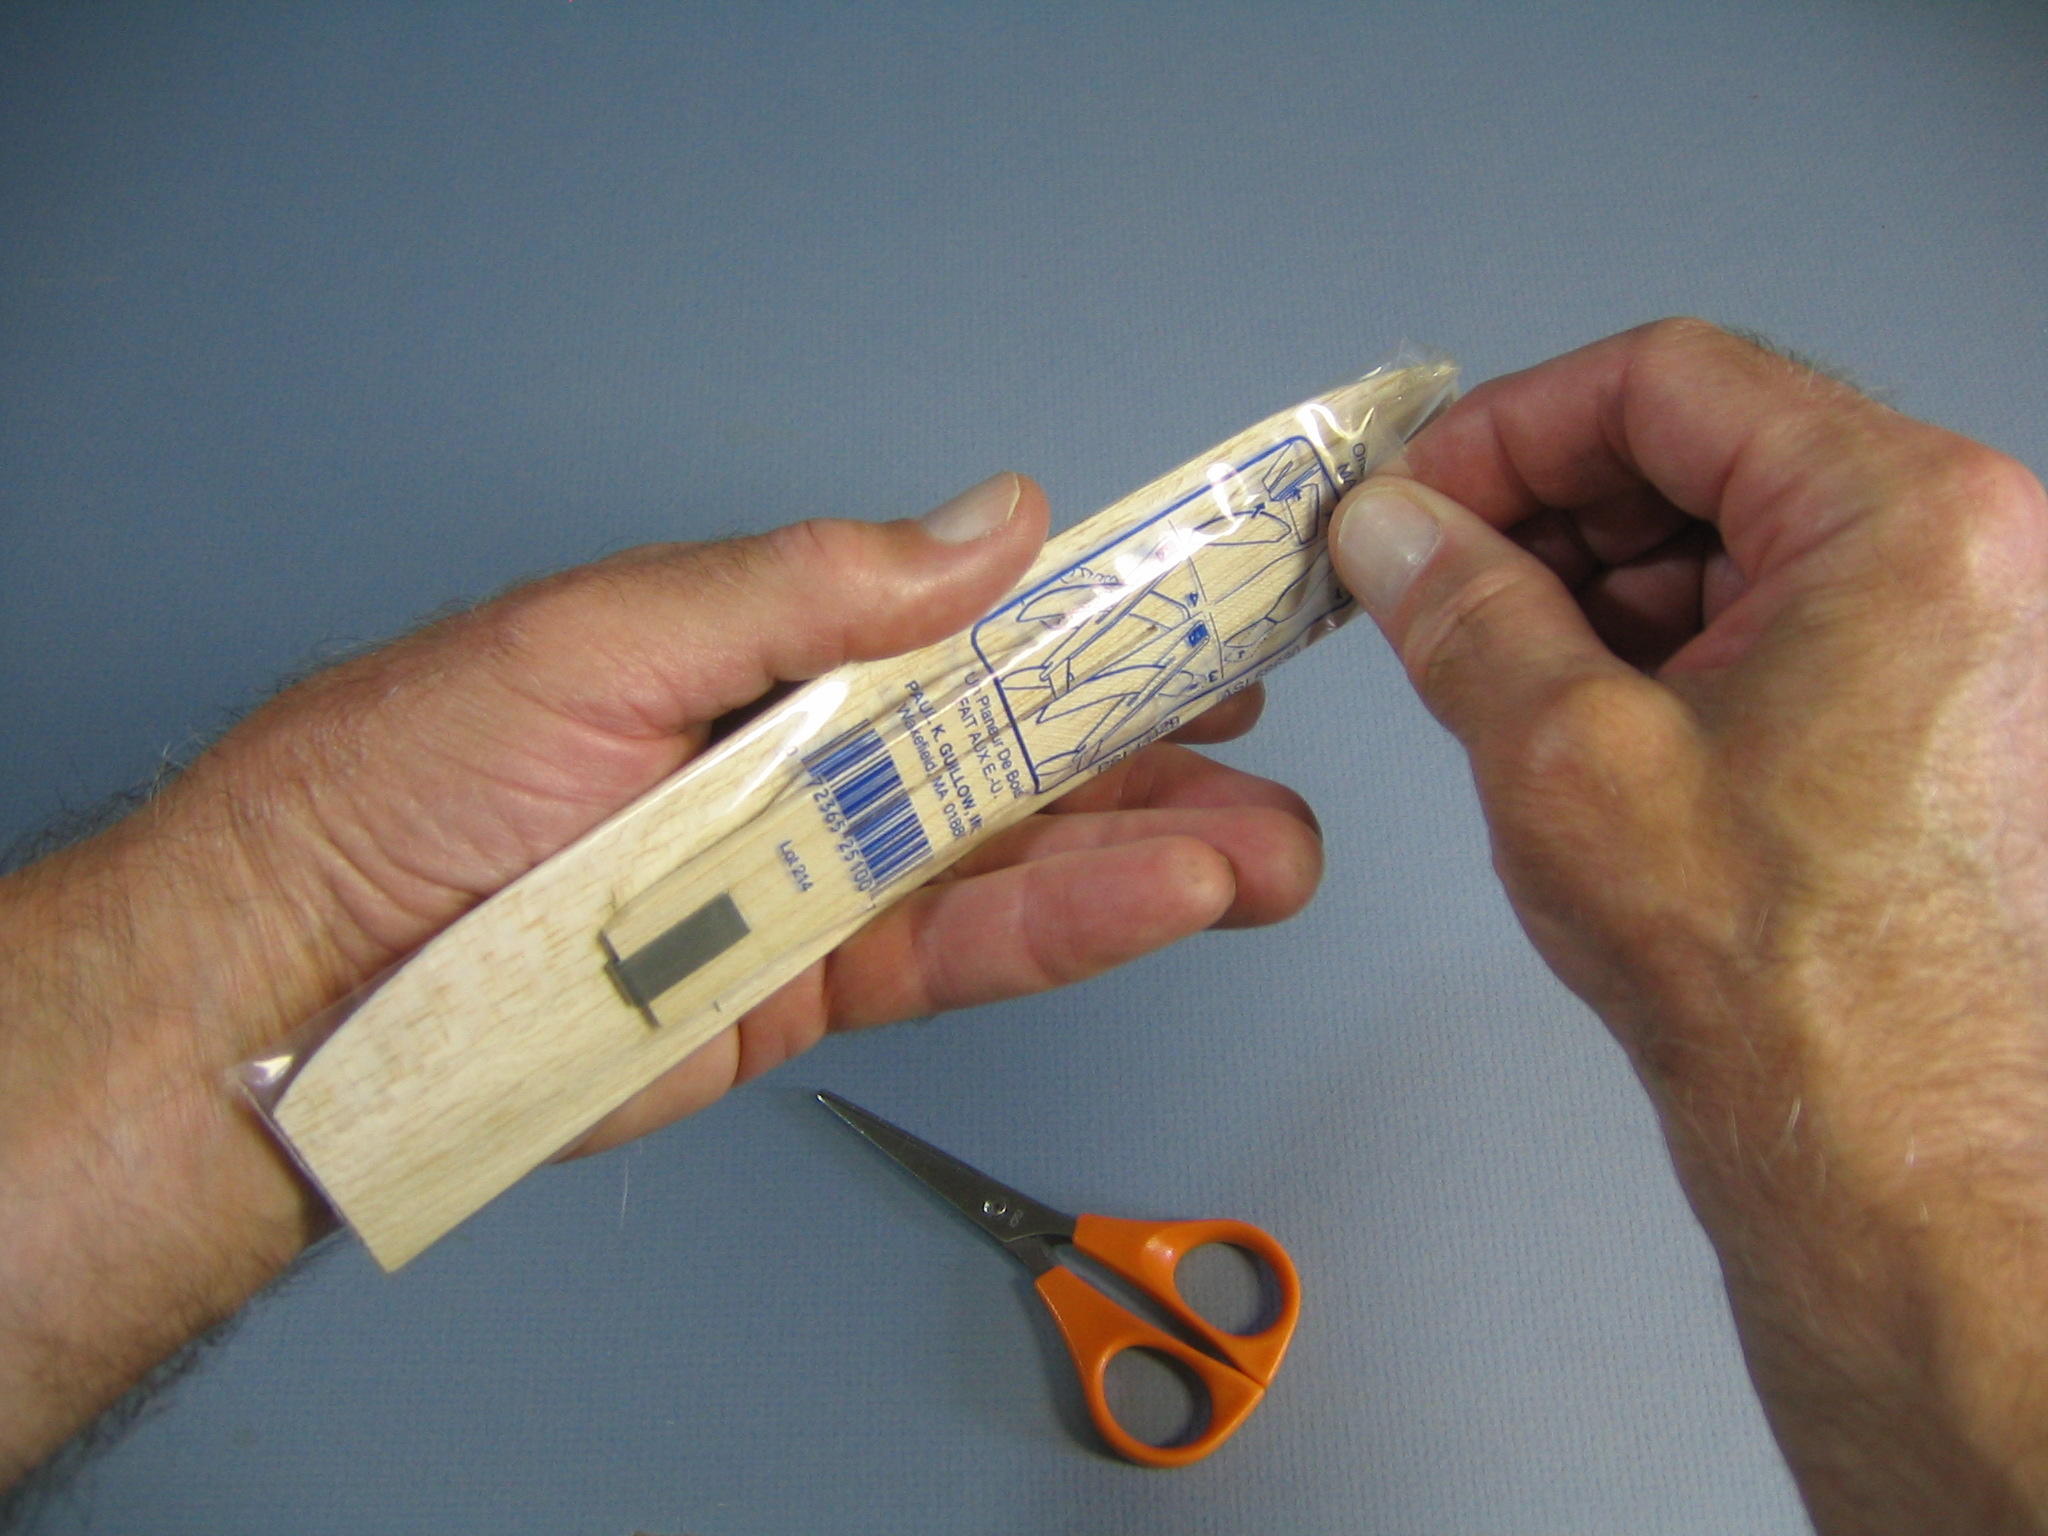 First we gently pull one end of the bag down to force the wood into the other end.
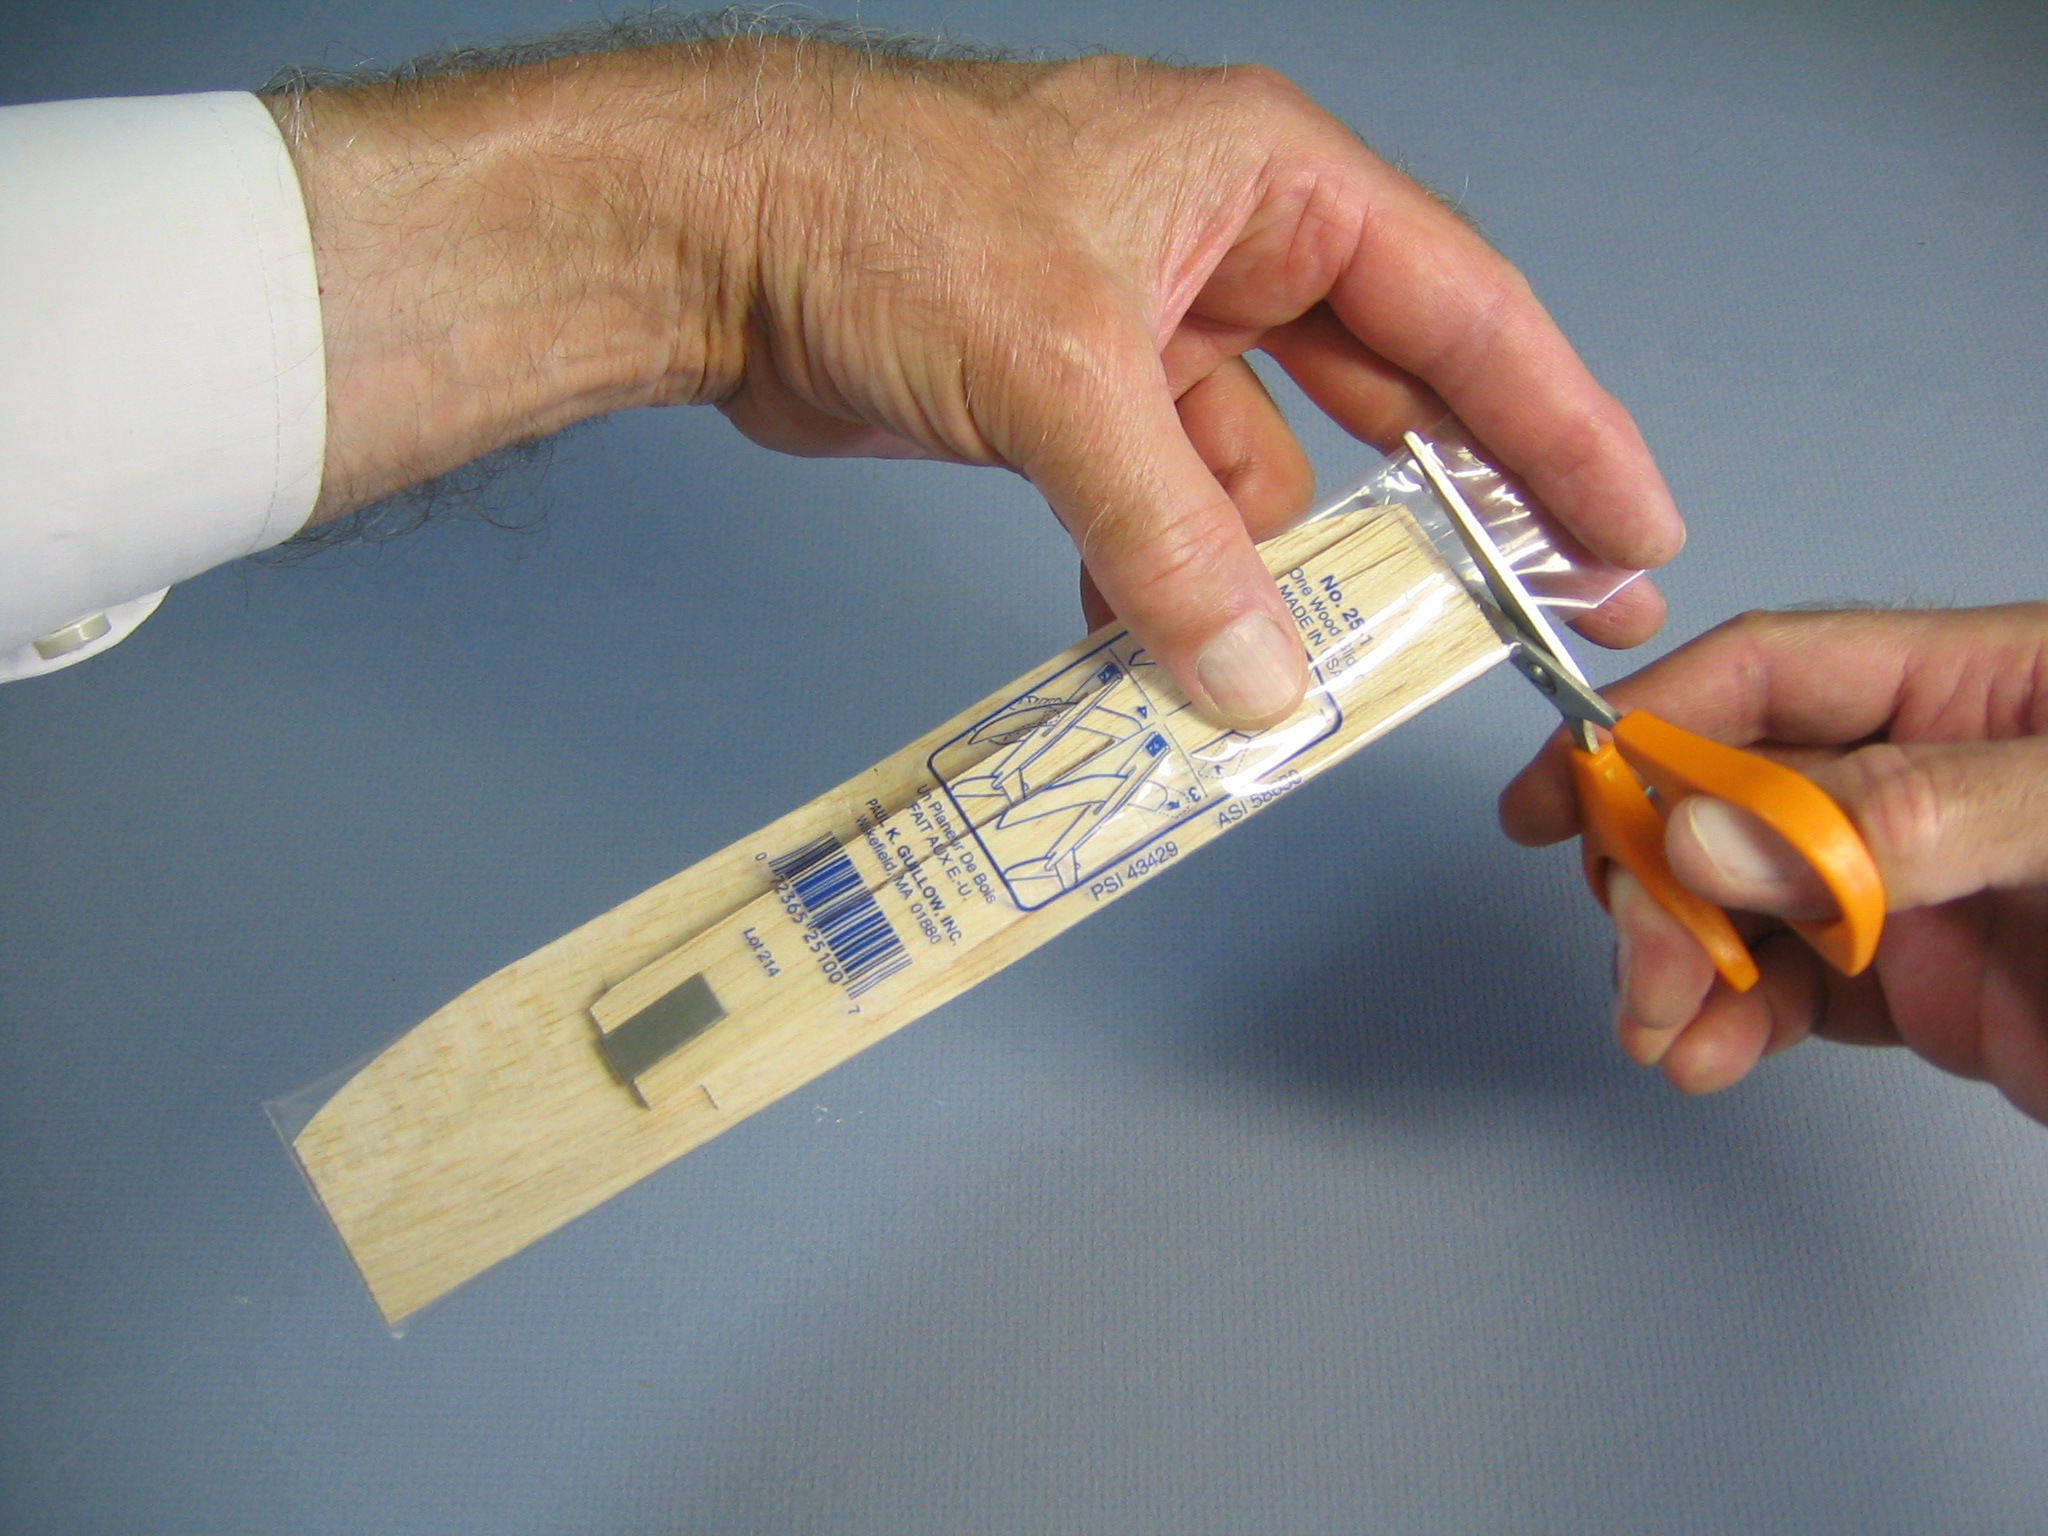 Now we can cut the end off the bag.
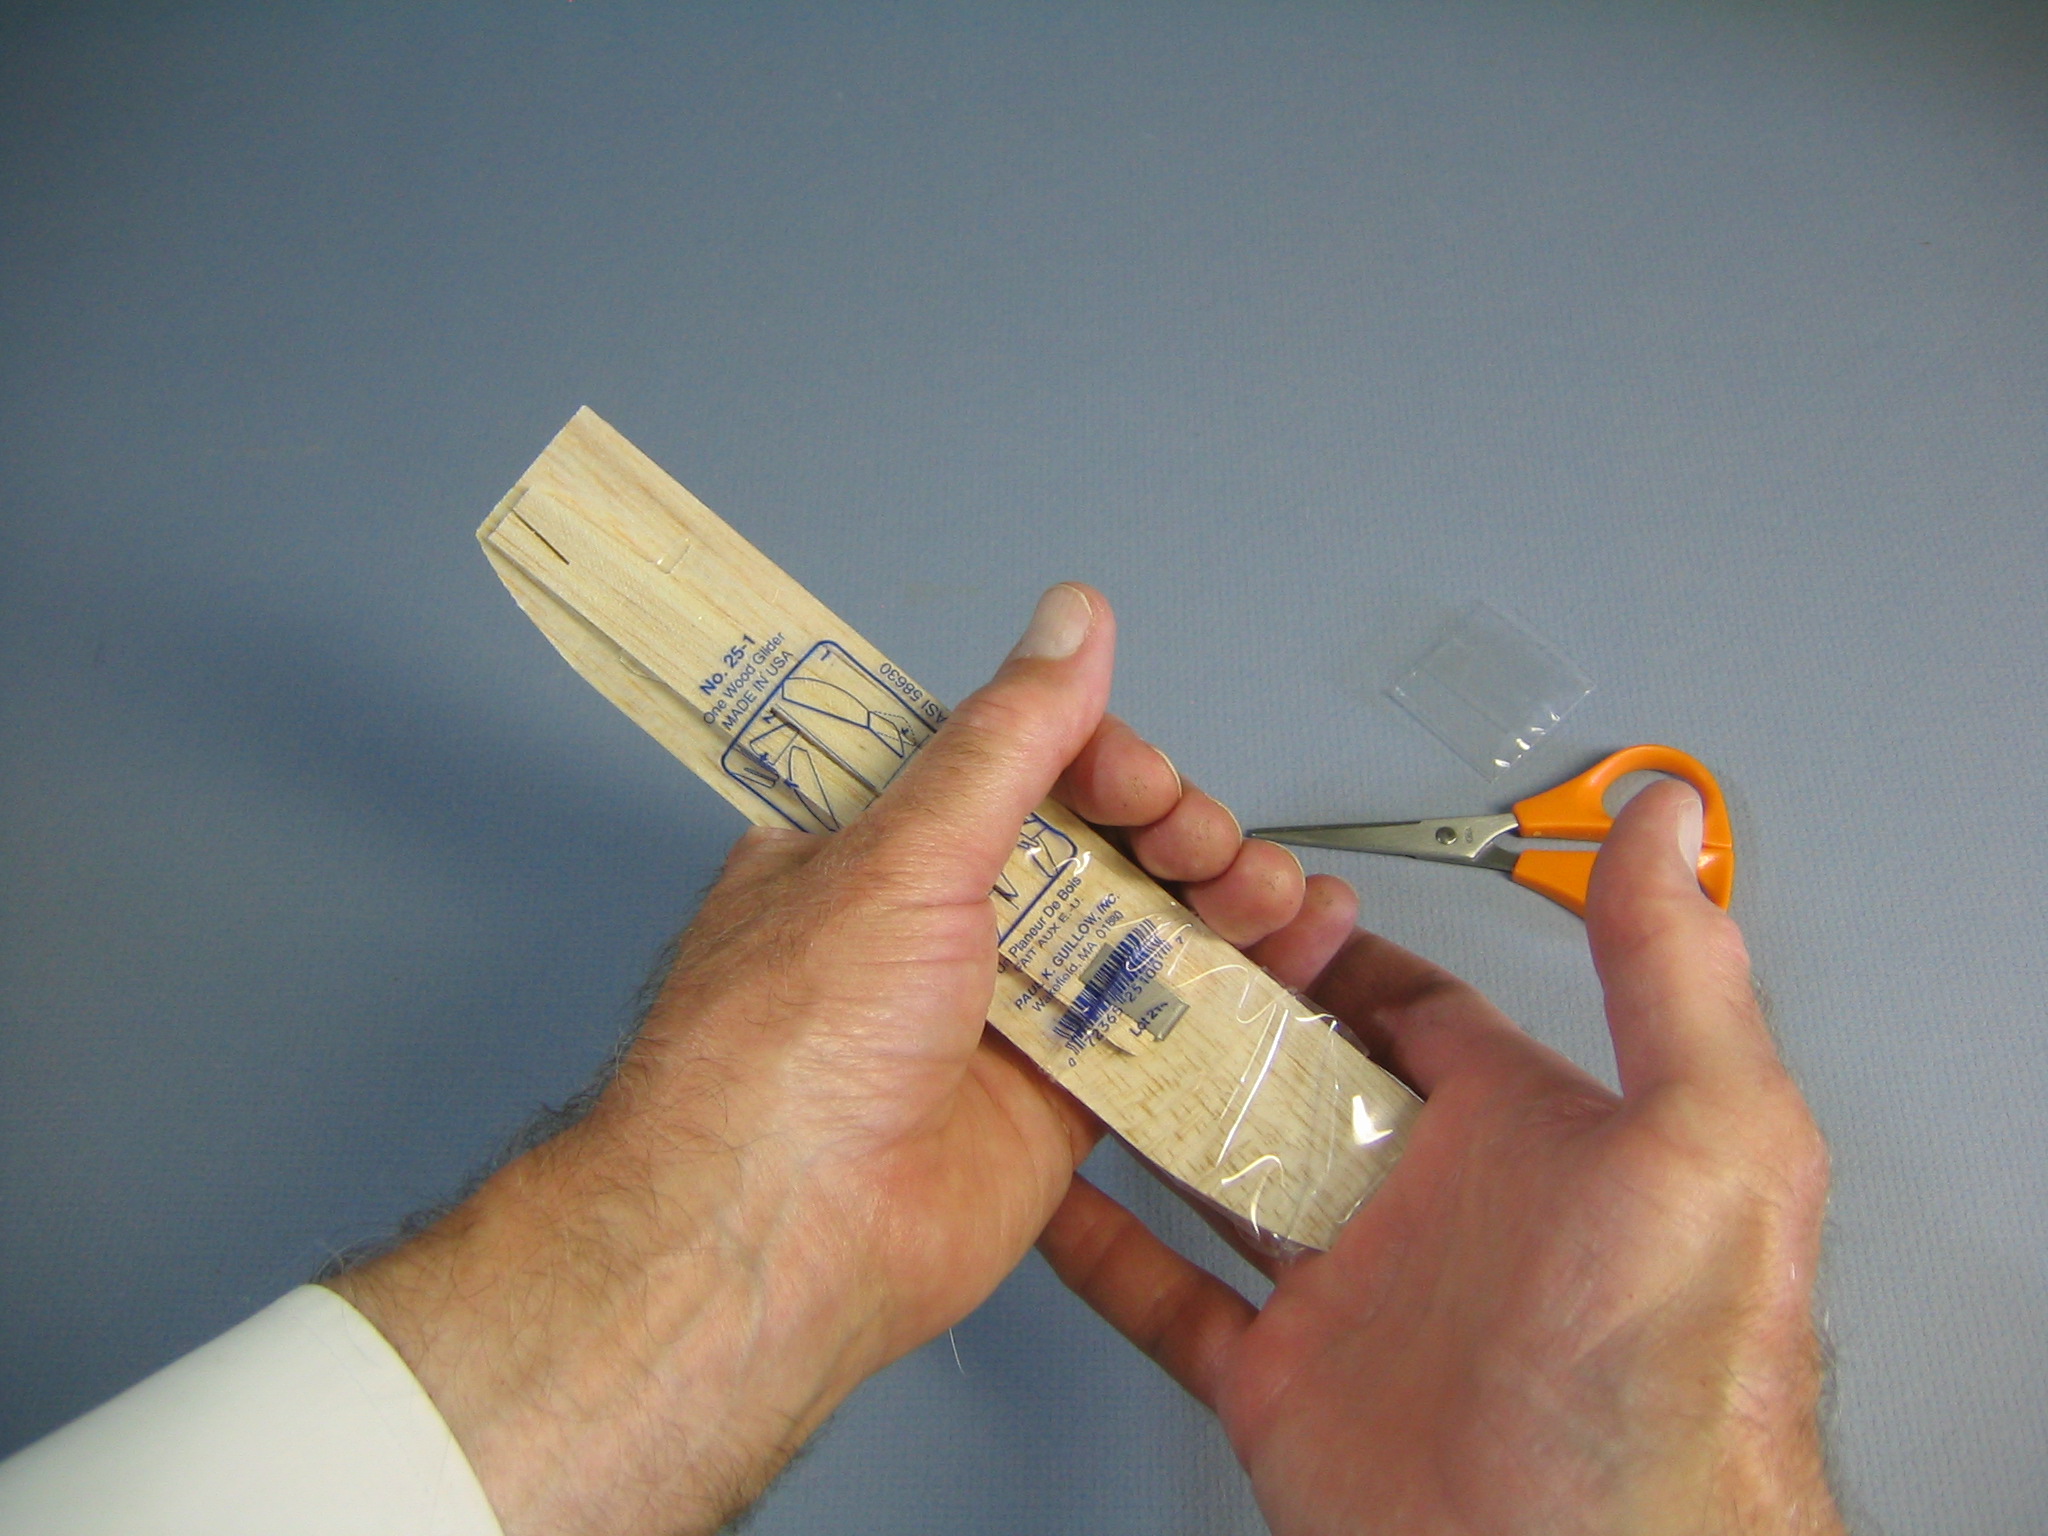 While gently holding the bag, press up against the bottom of the bag to push the wood a little bit out of the top.
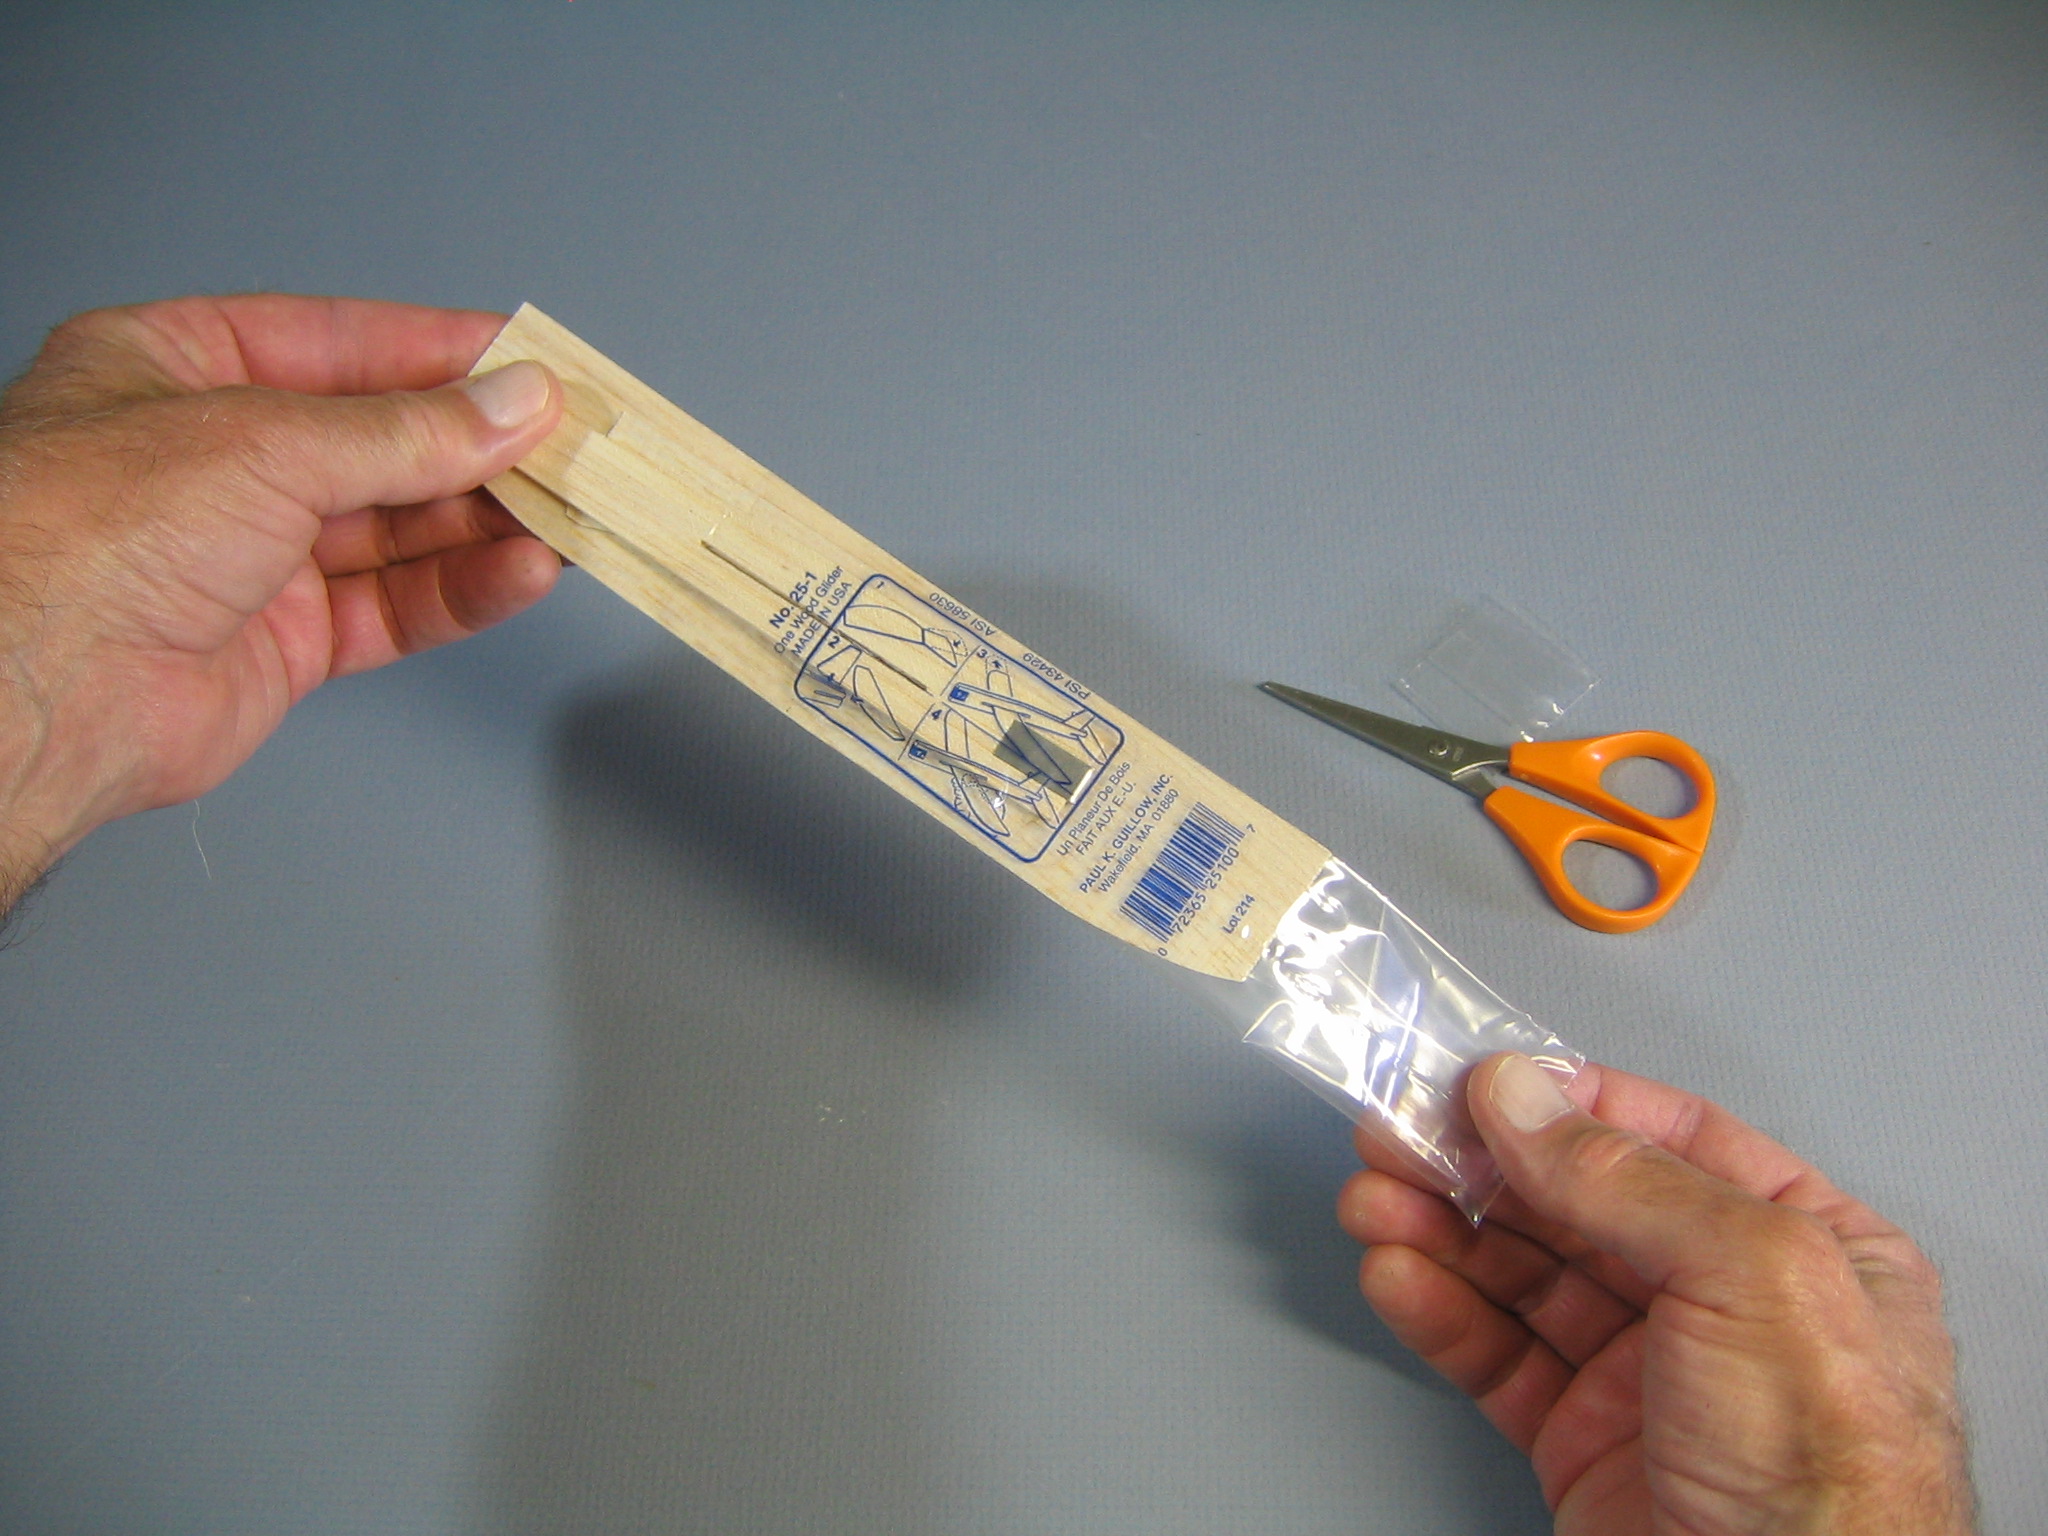 Withdraw the balsa parts from the bag.
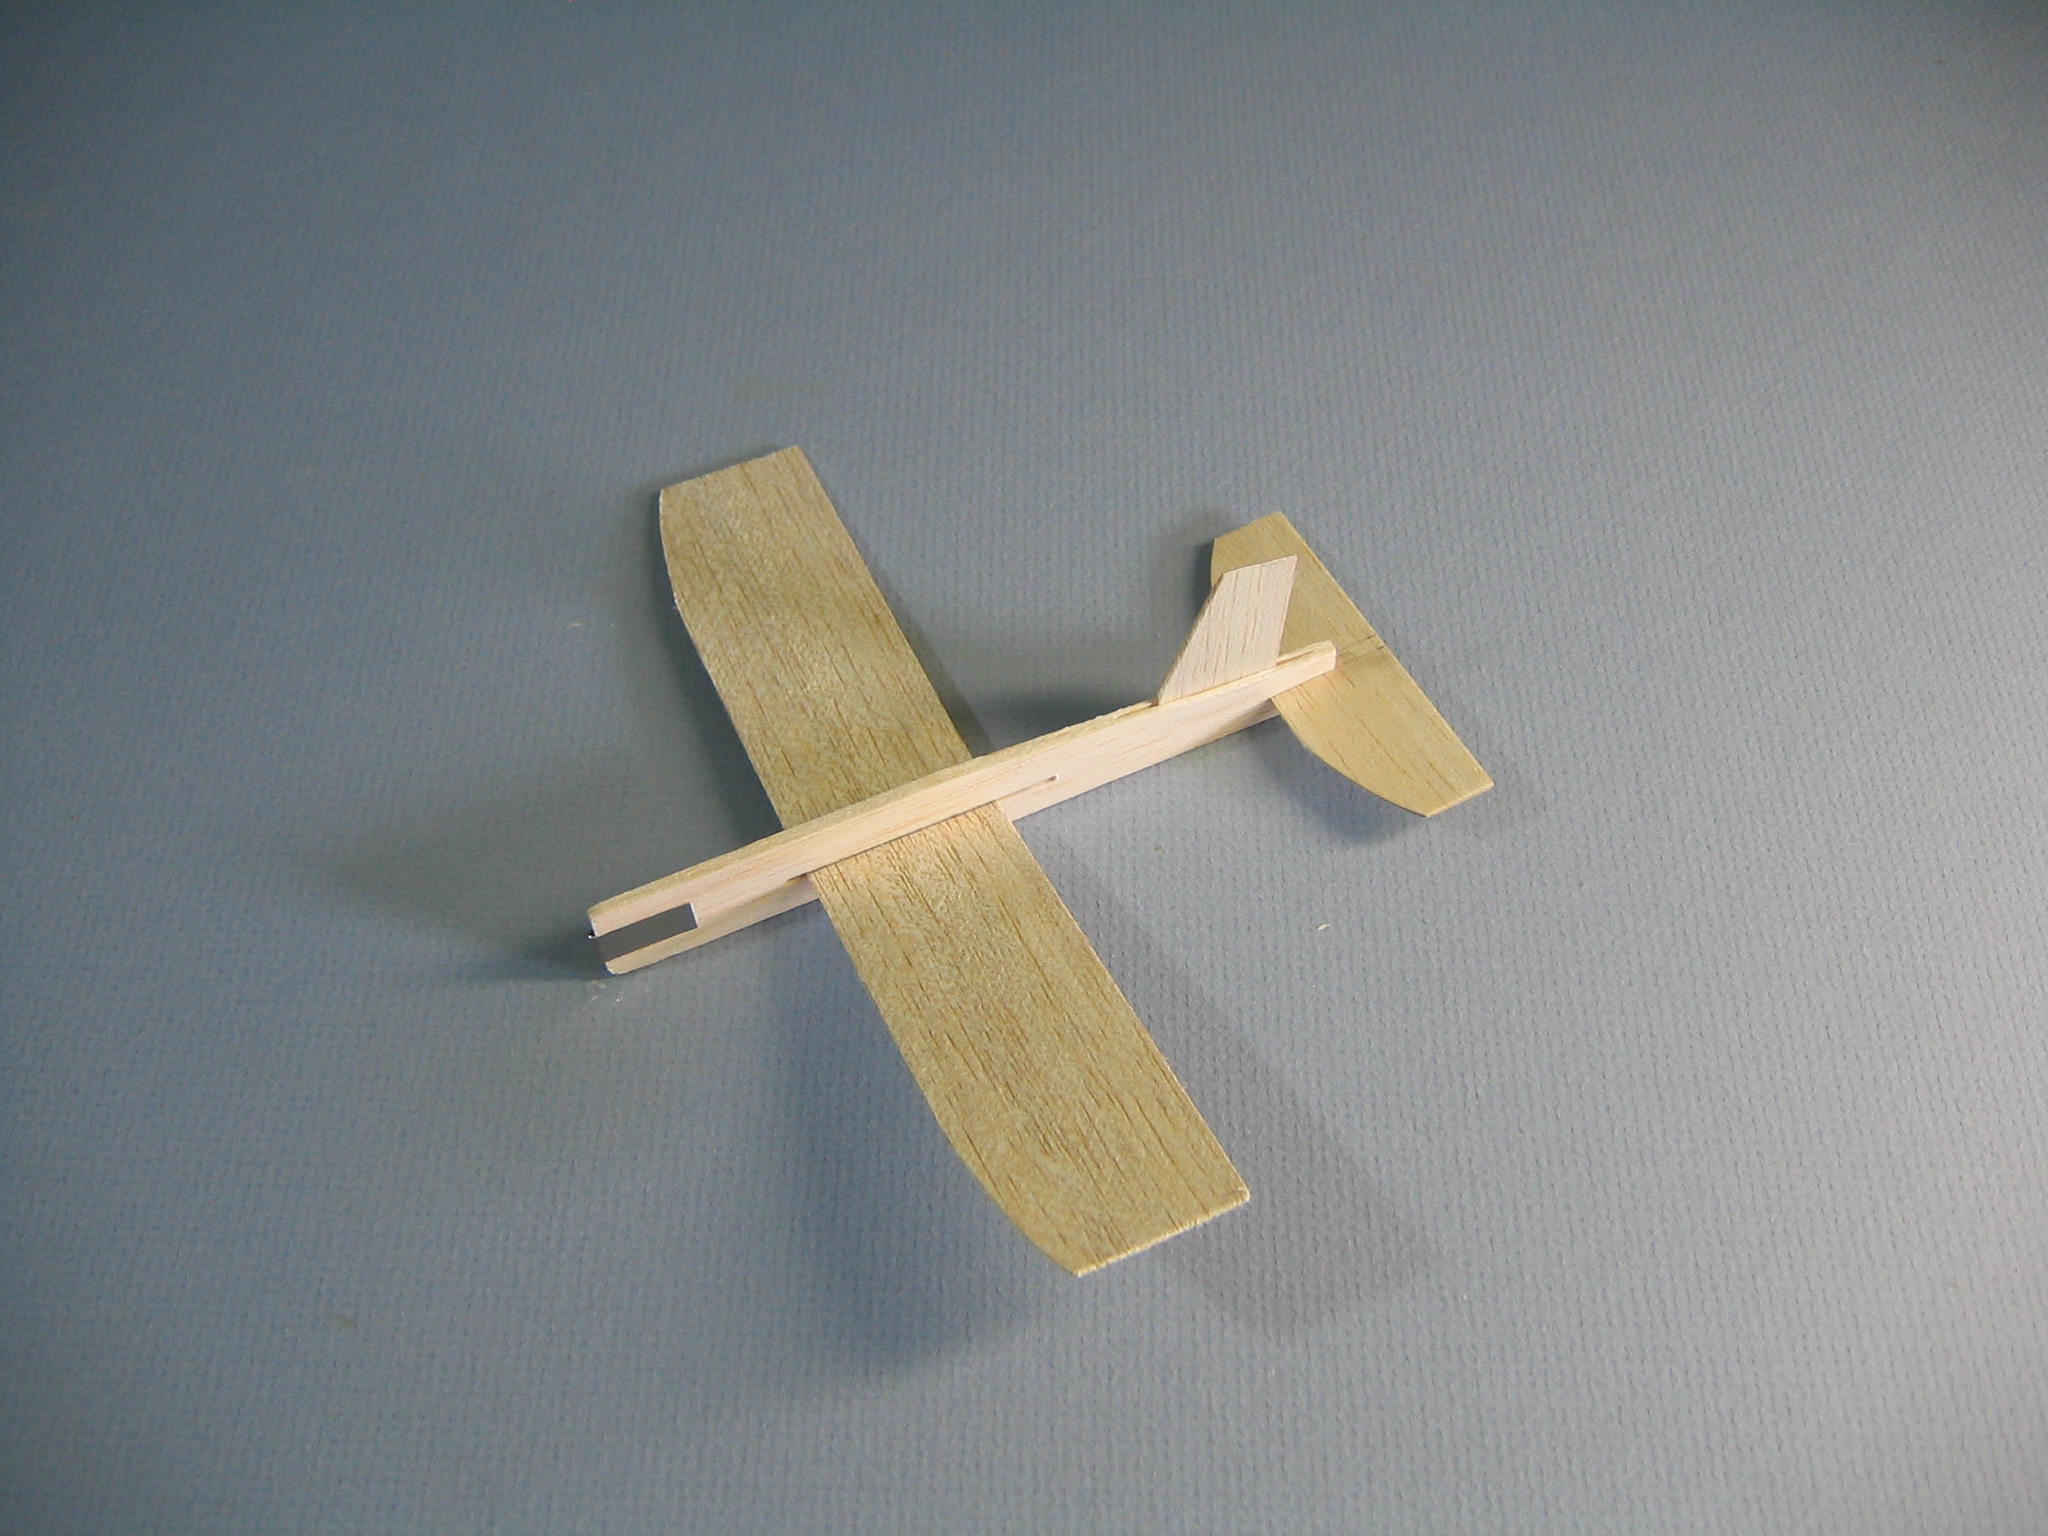
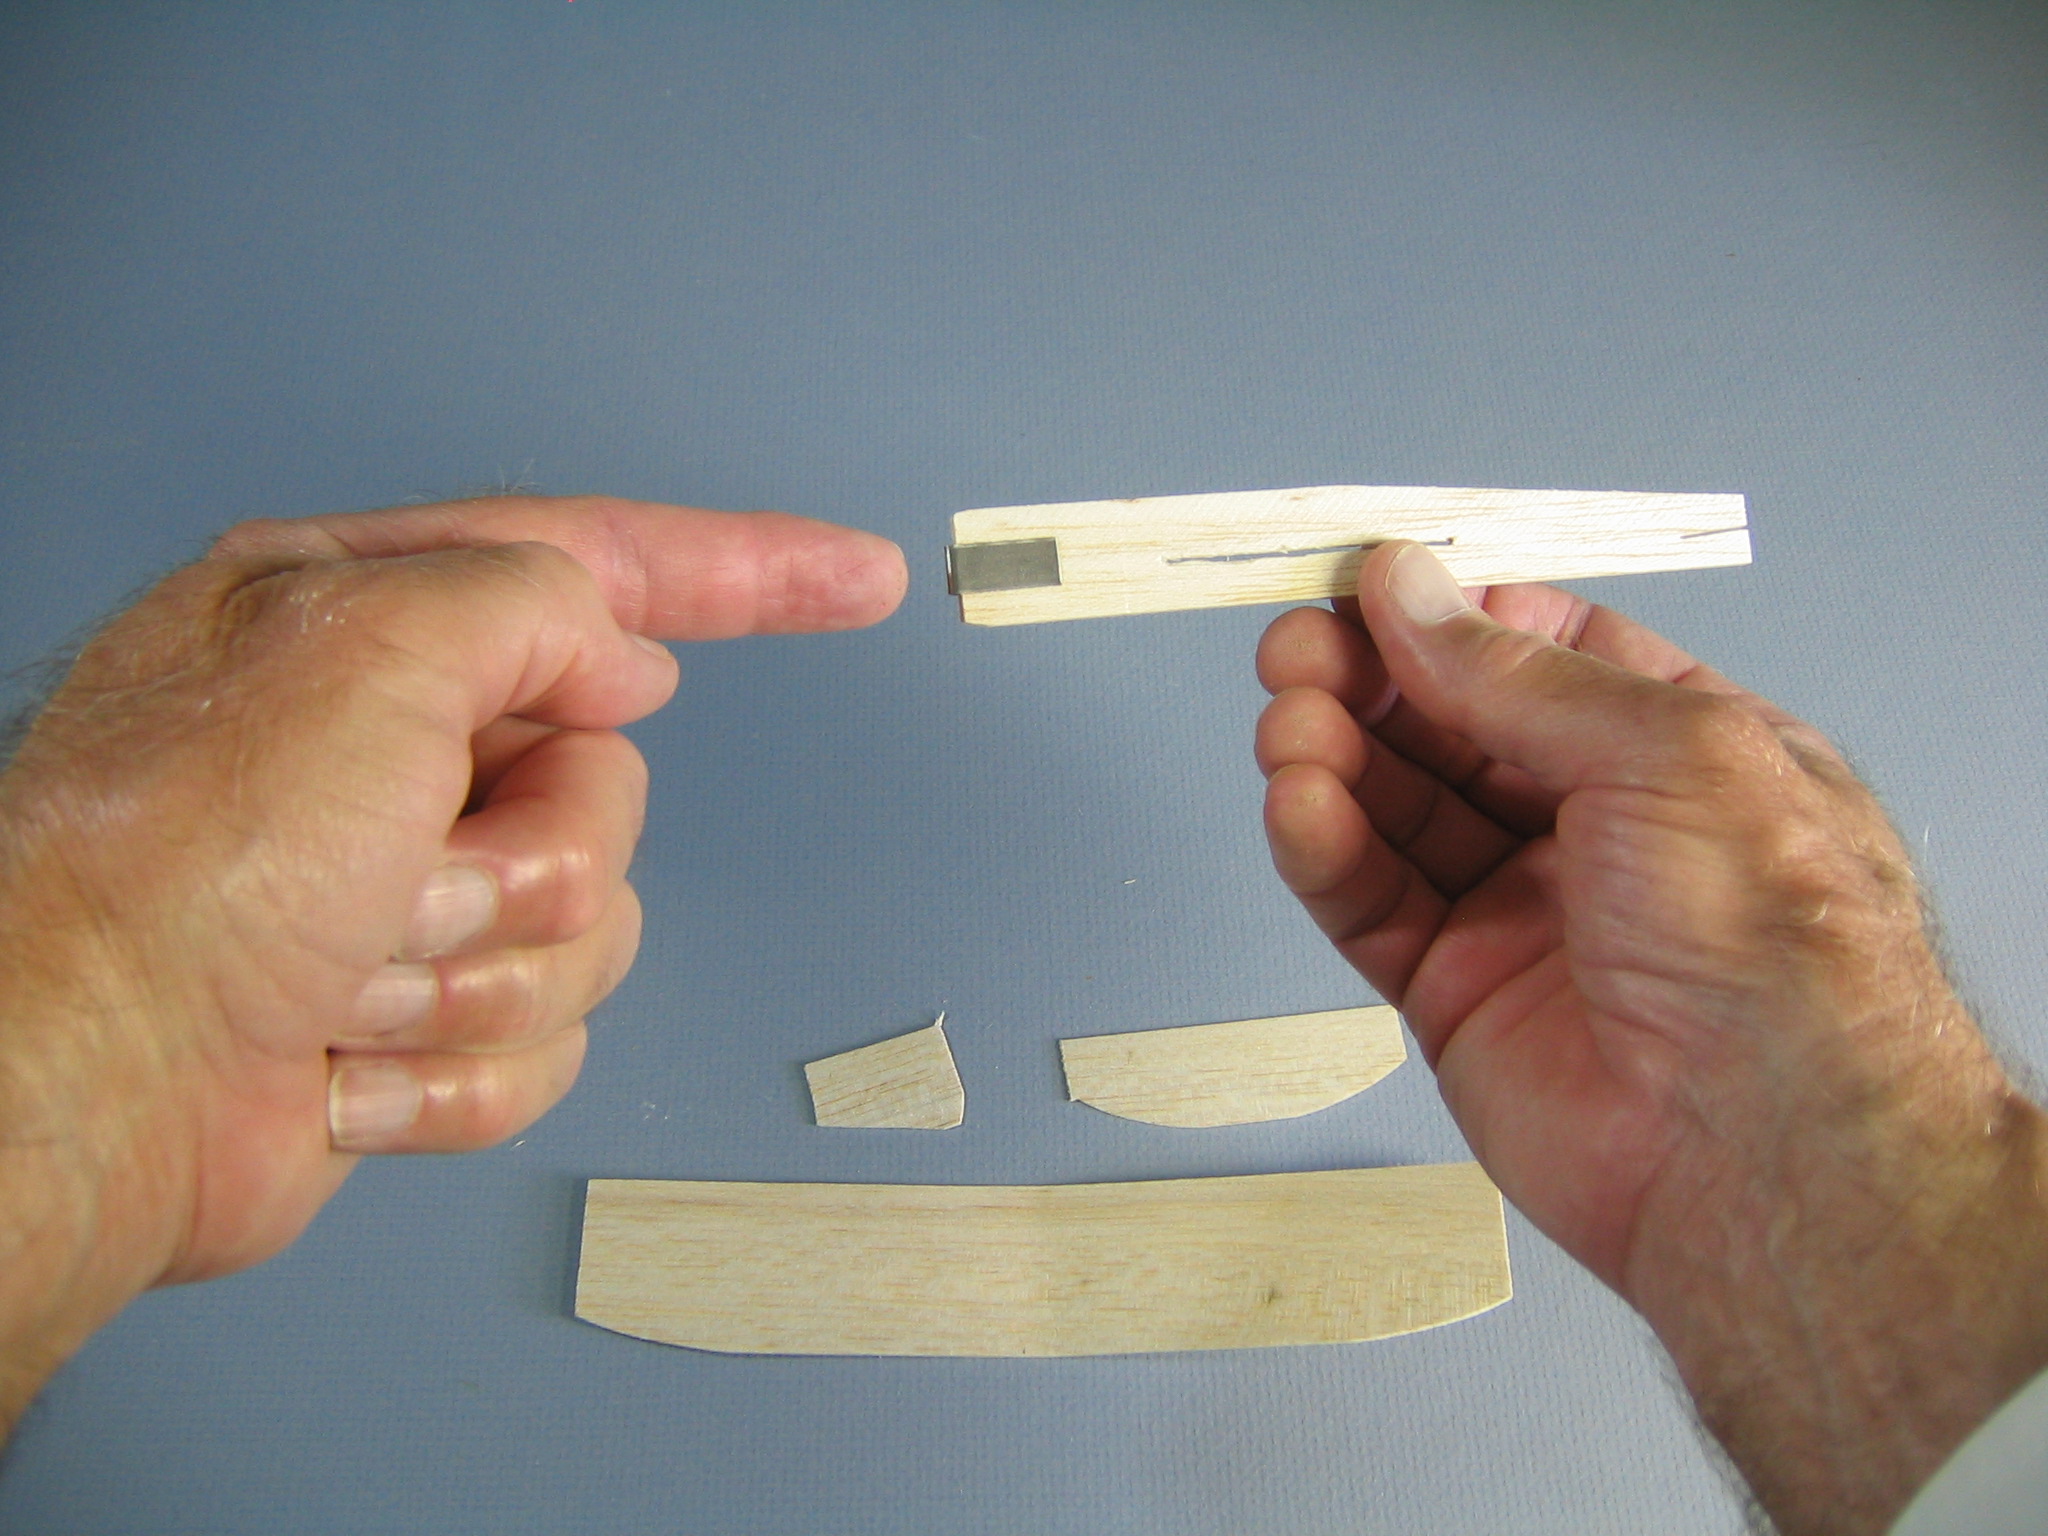
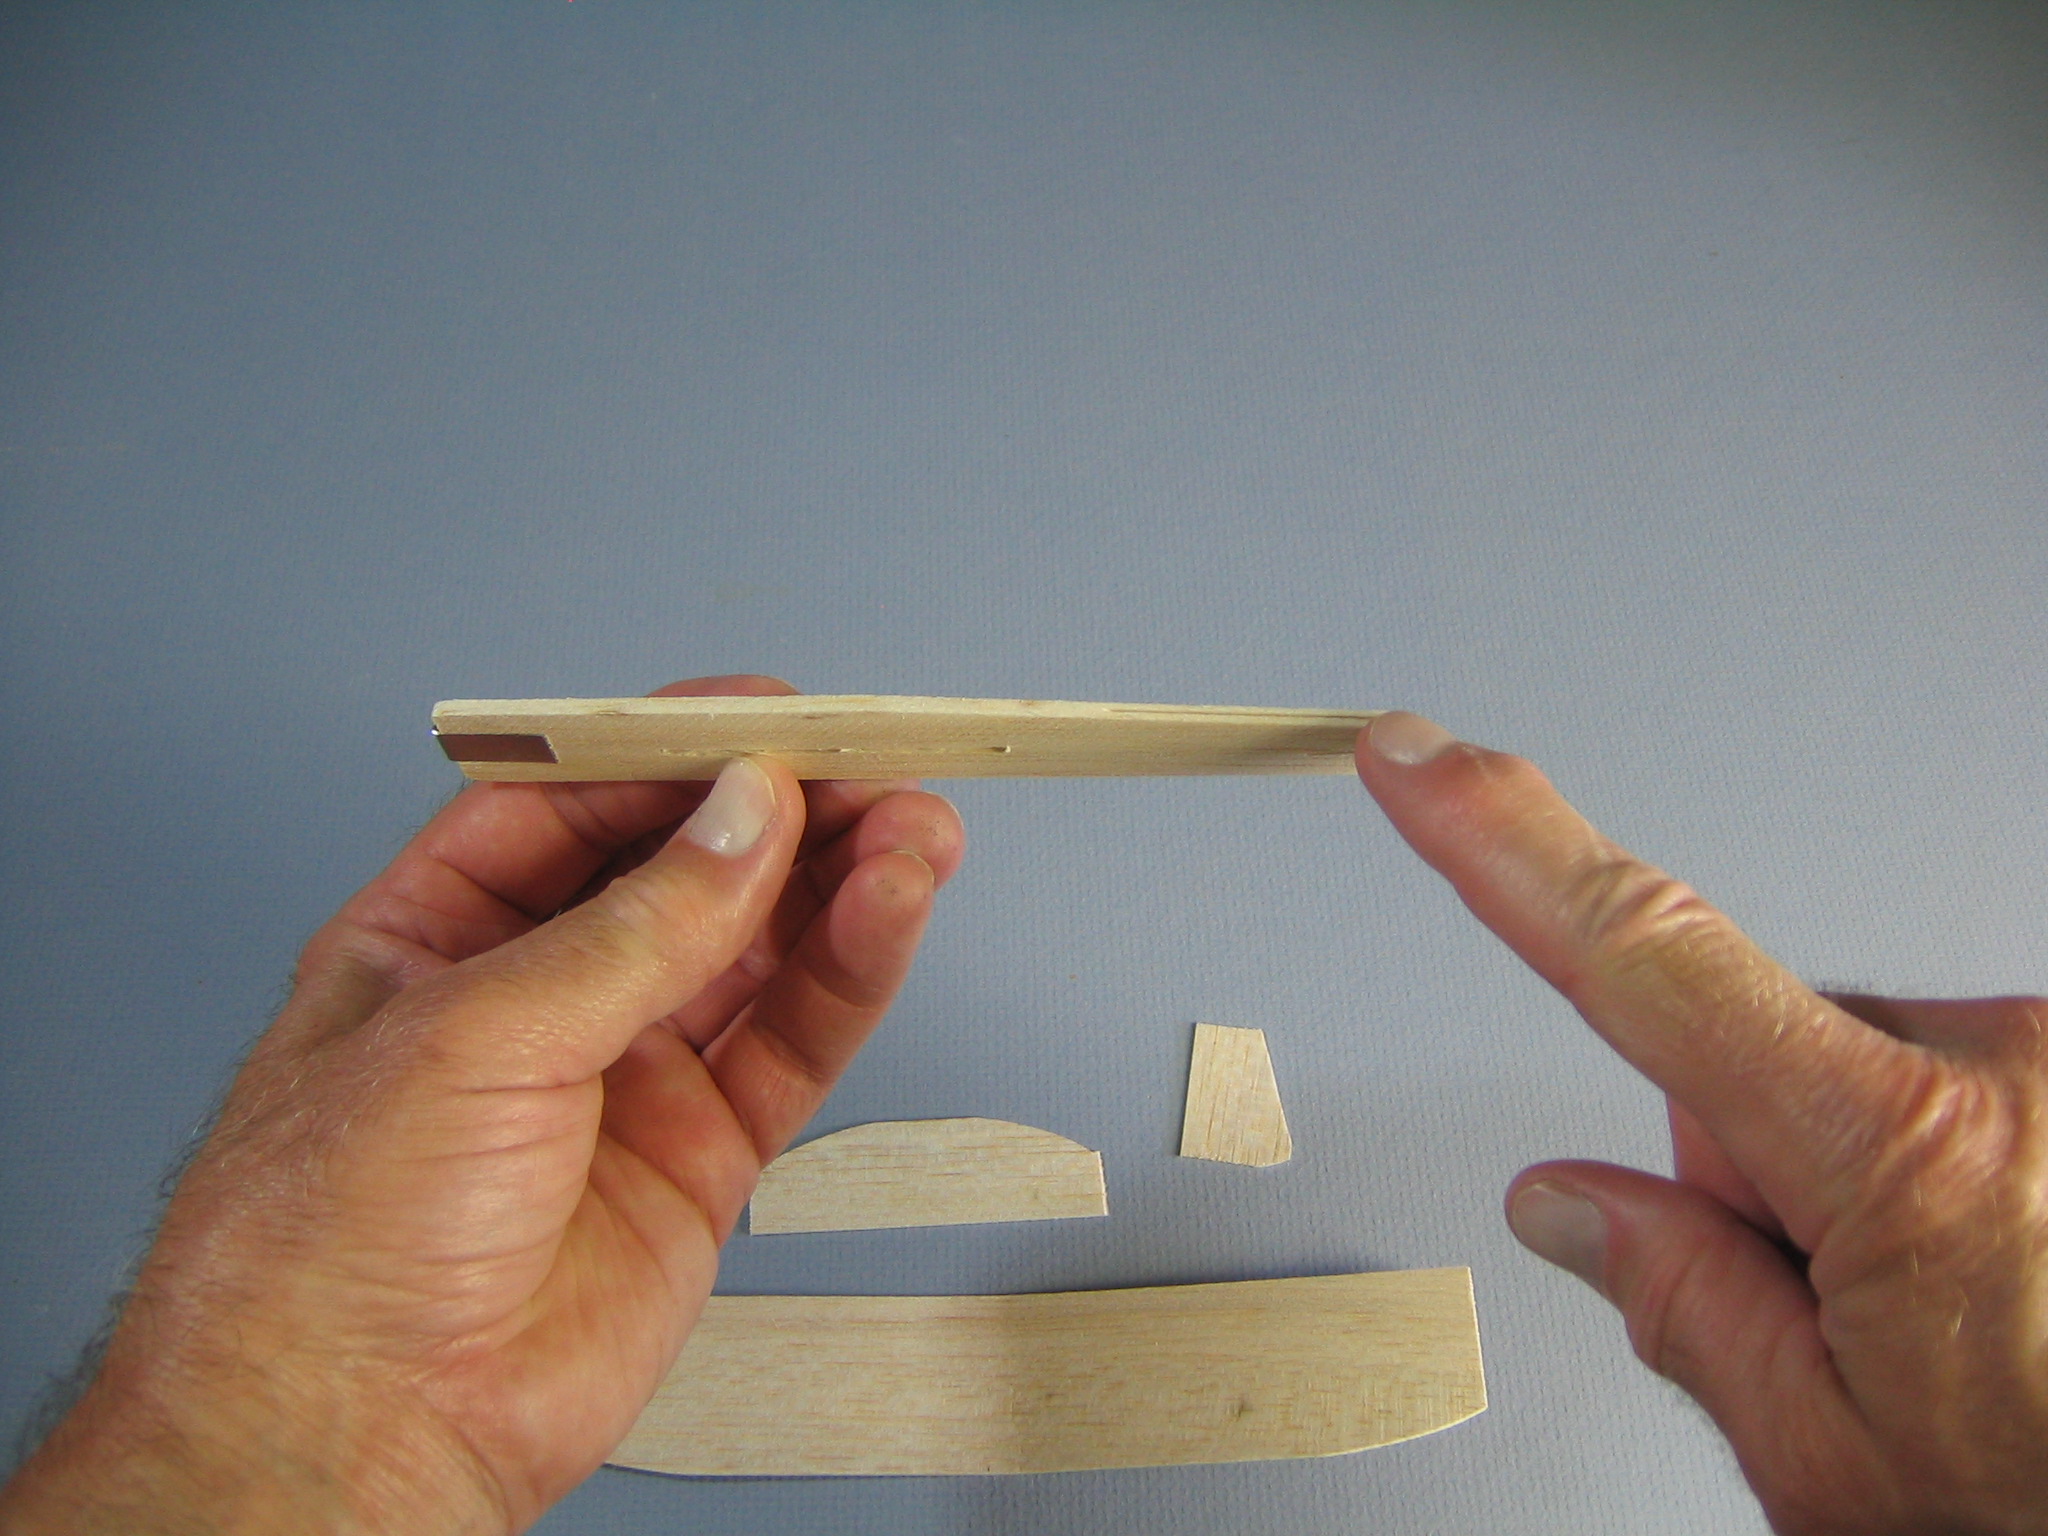
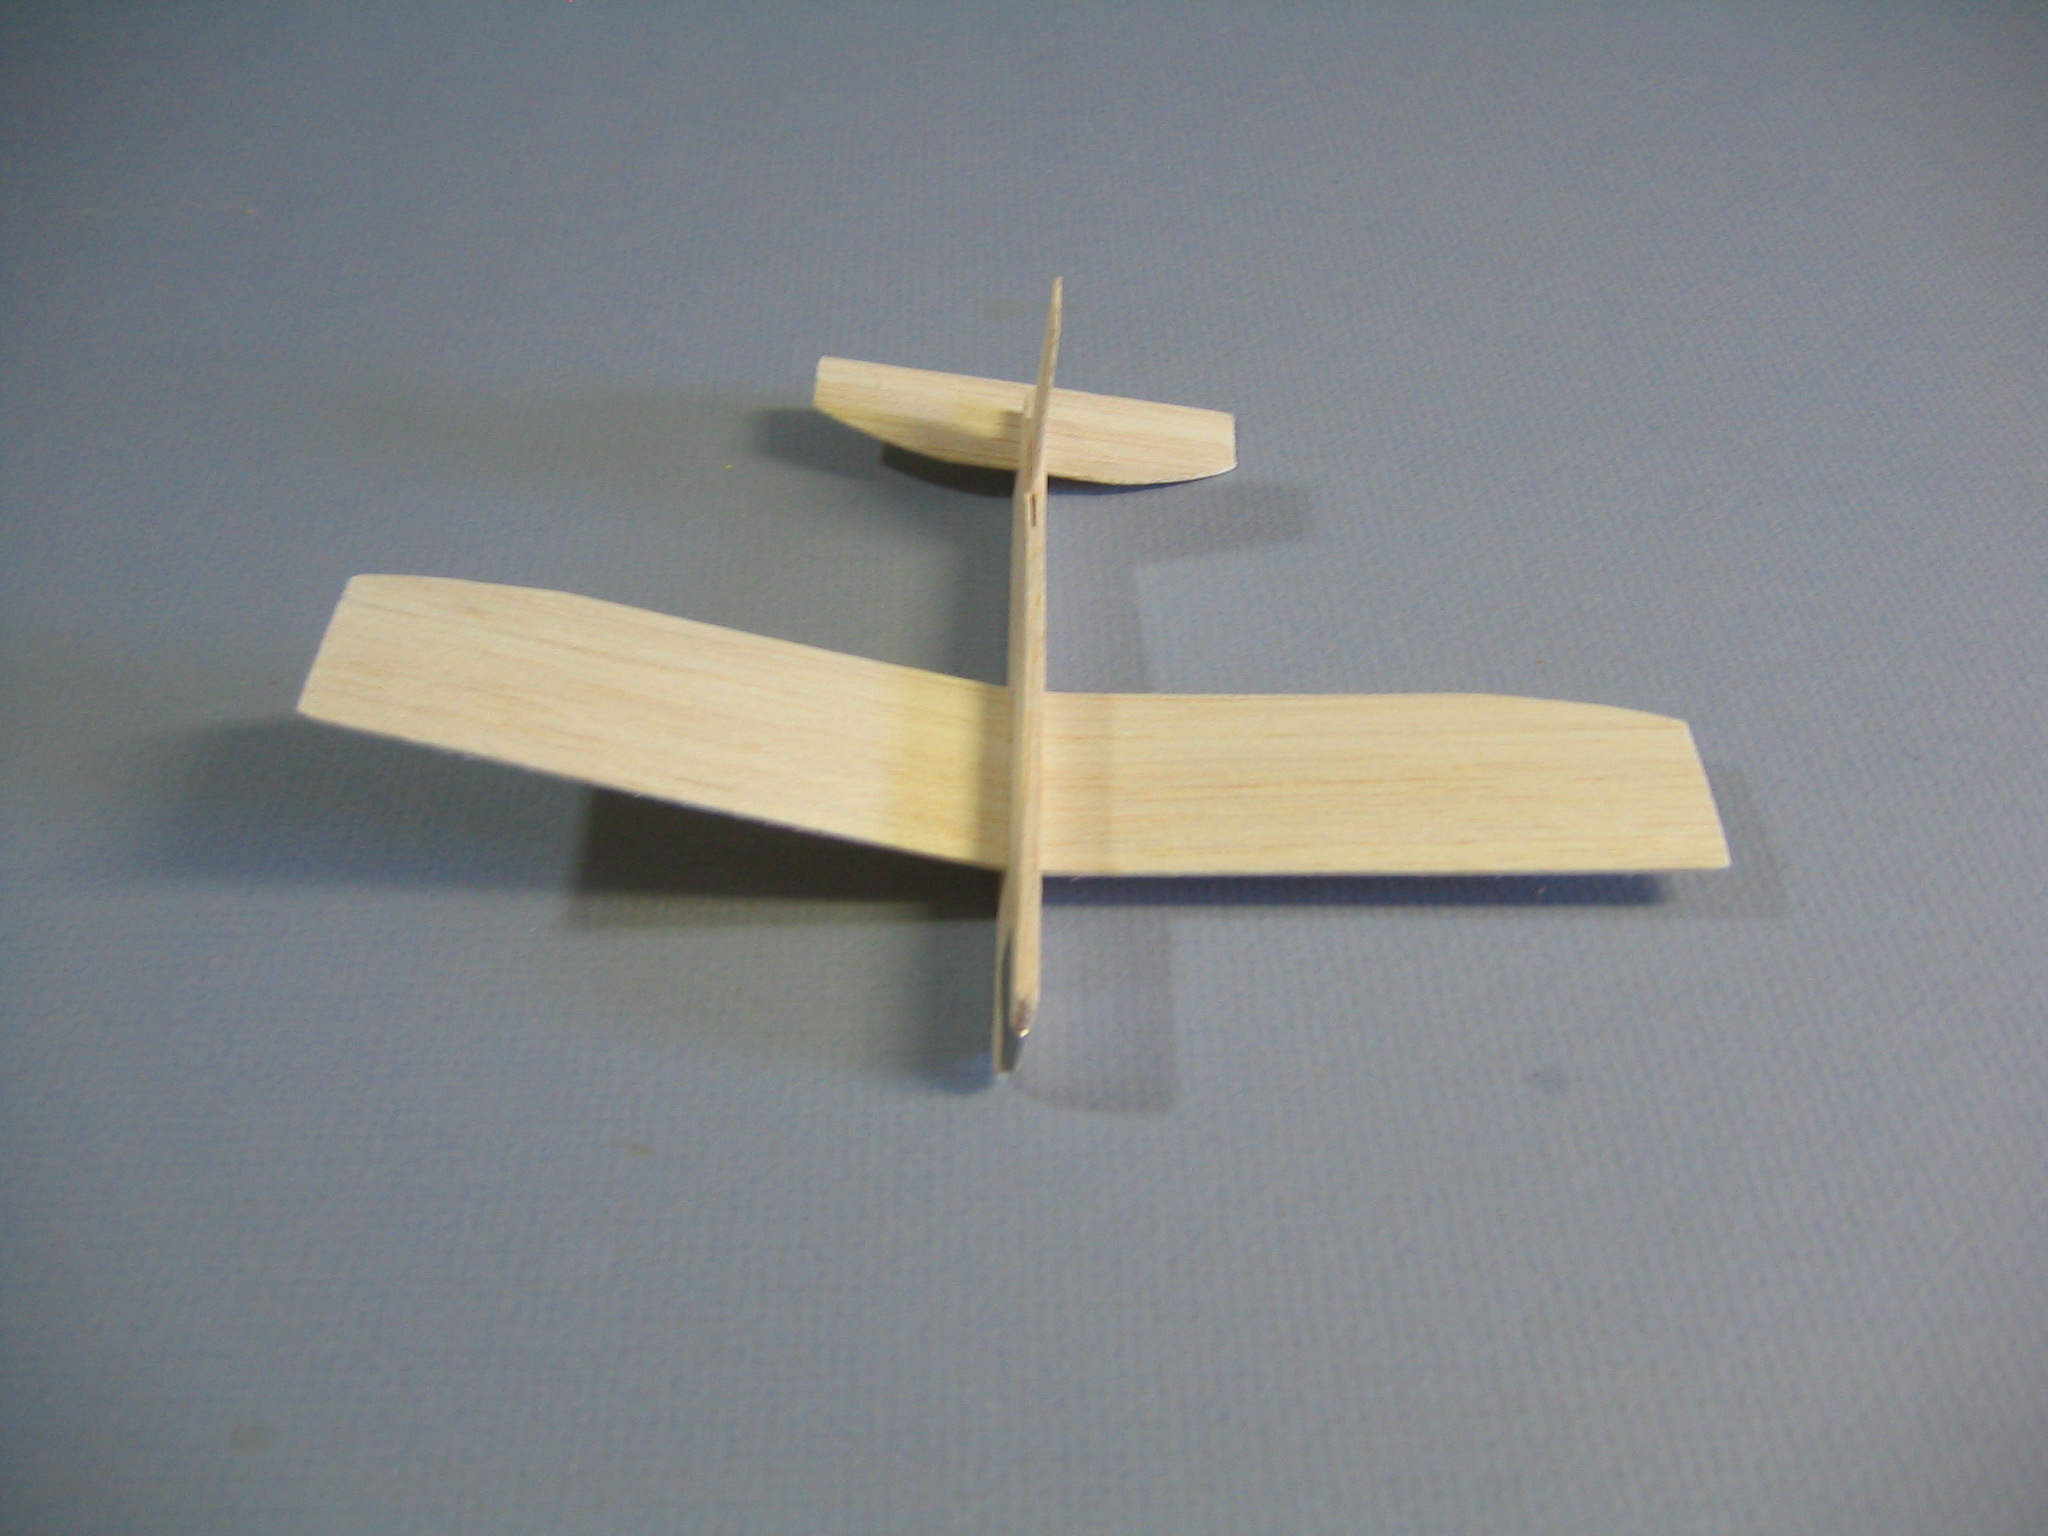
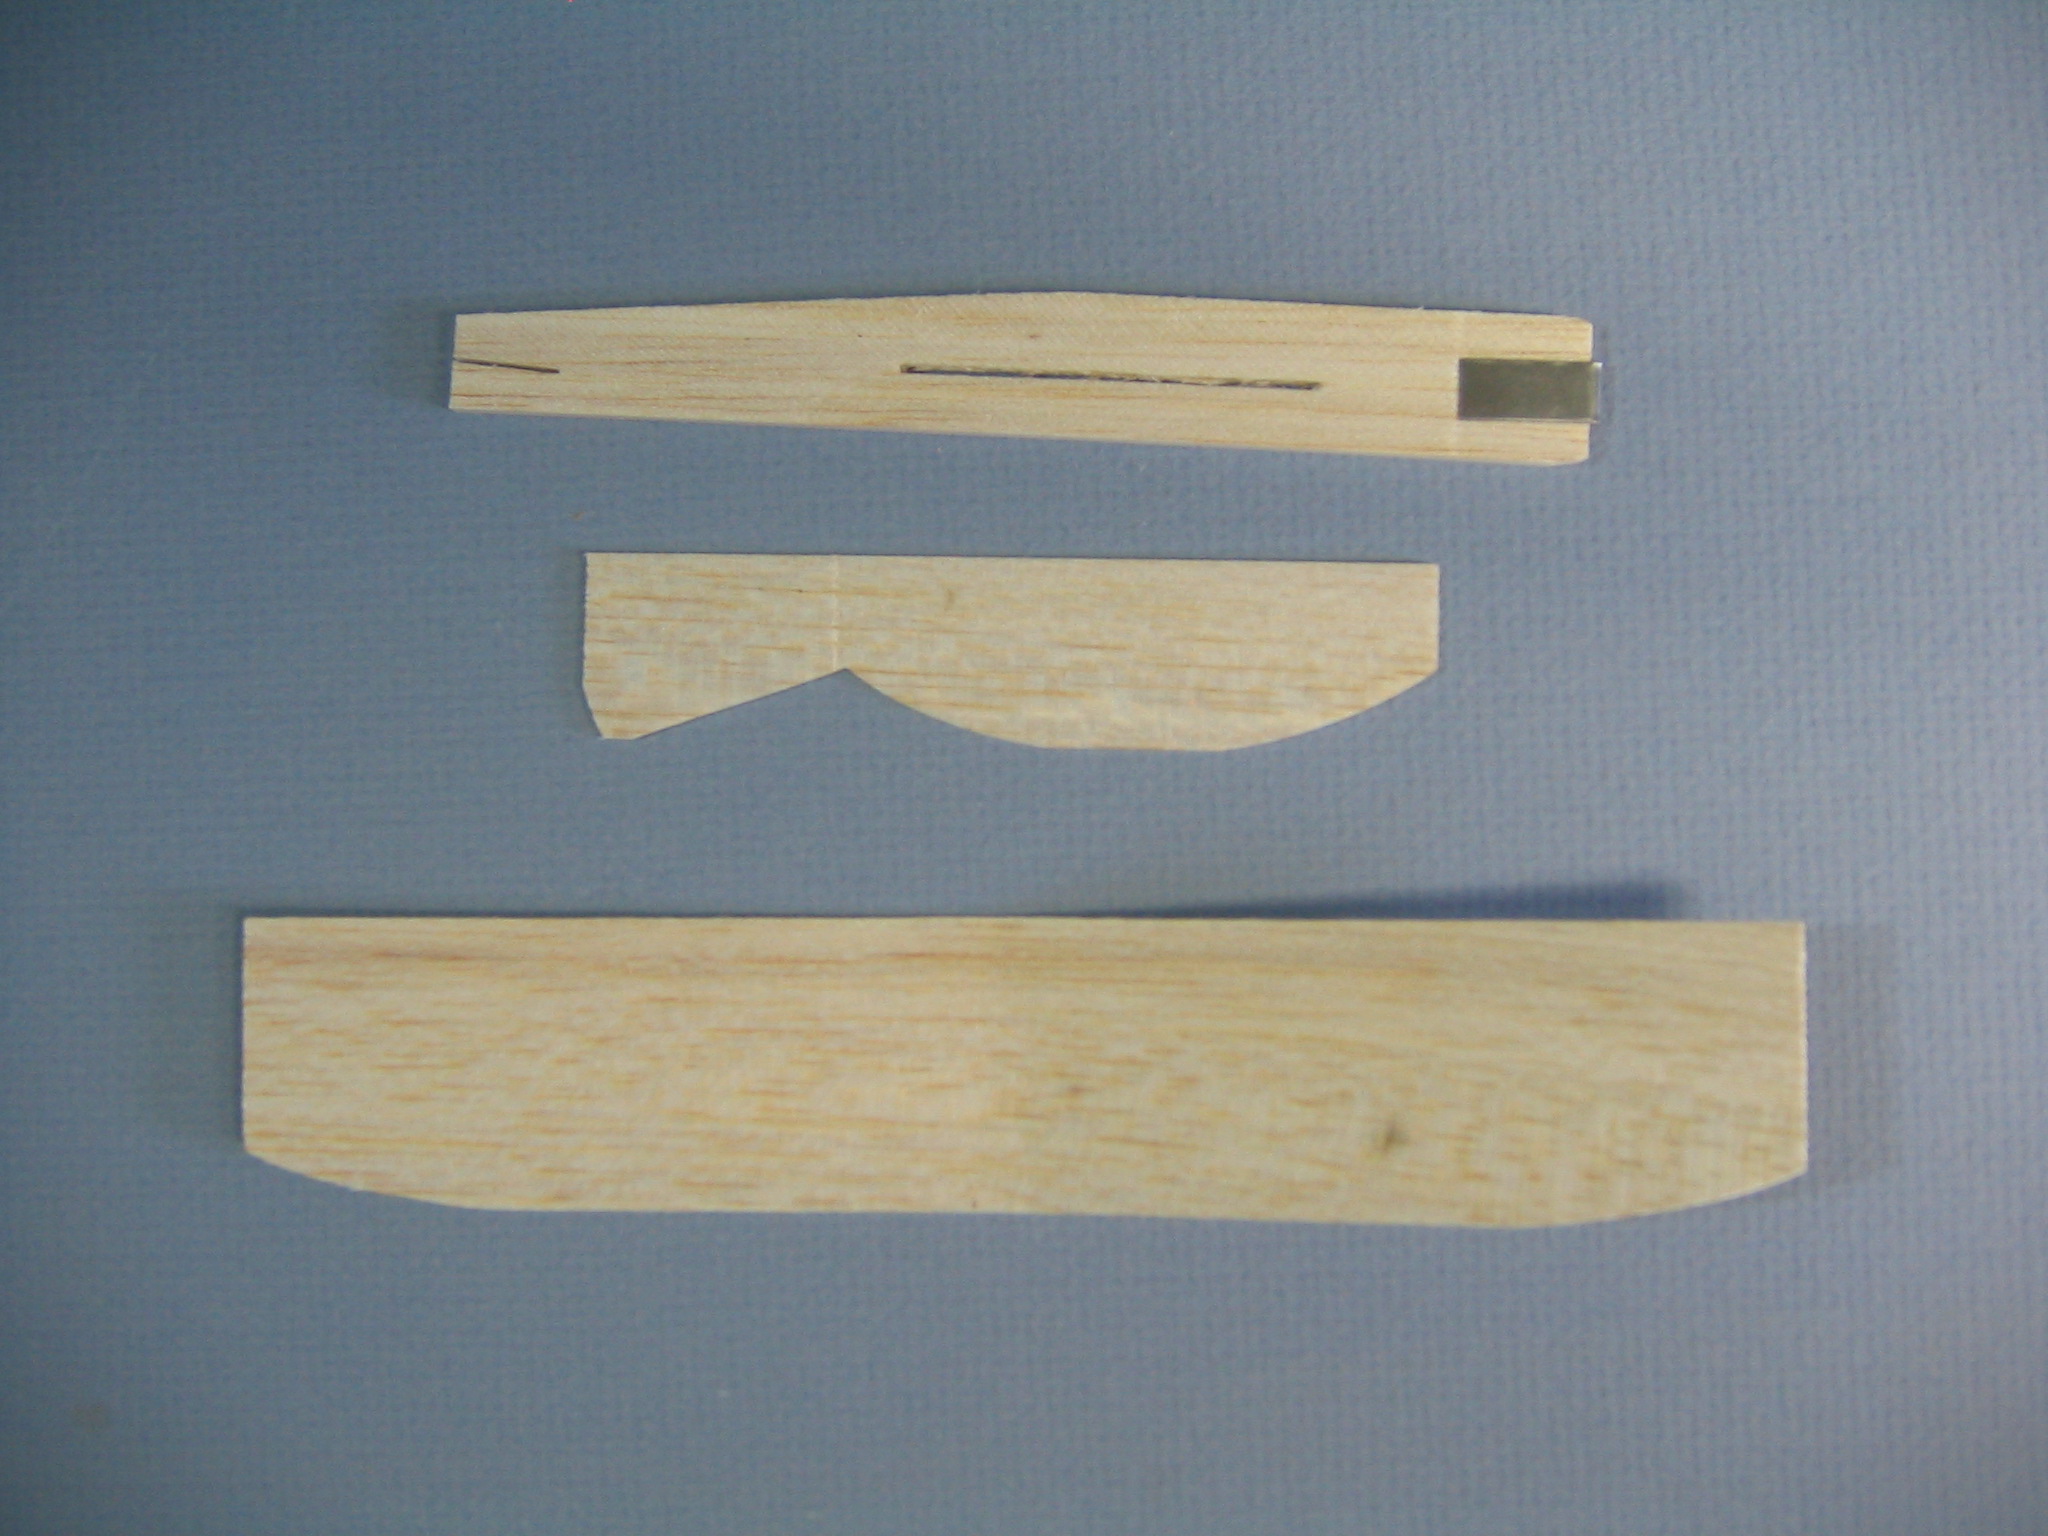 This is what we have, three pieces of balsa wood. At the top is the fuselage with metal nose weight and precut slots for the wing, tailplane and fin. Next is a flat sheet containing the fin and tailplane. The tailplane is sometimes called the stabilizer. At the bottom is the wing, prebent in the center to form the dihedral angle.
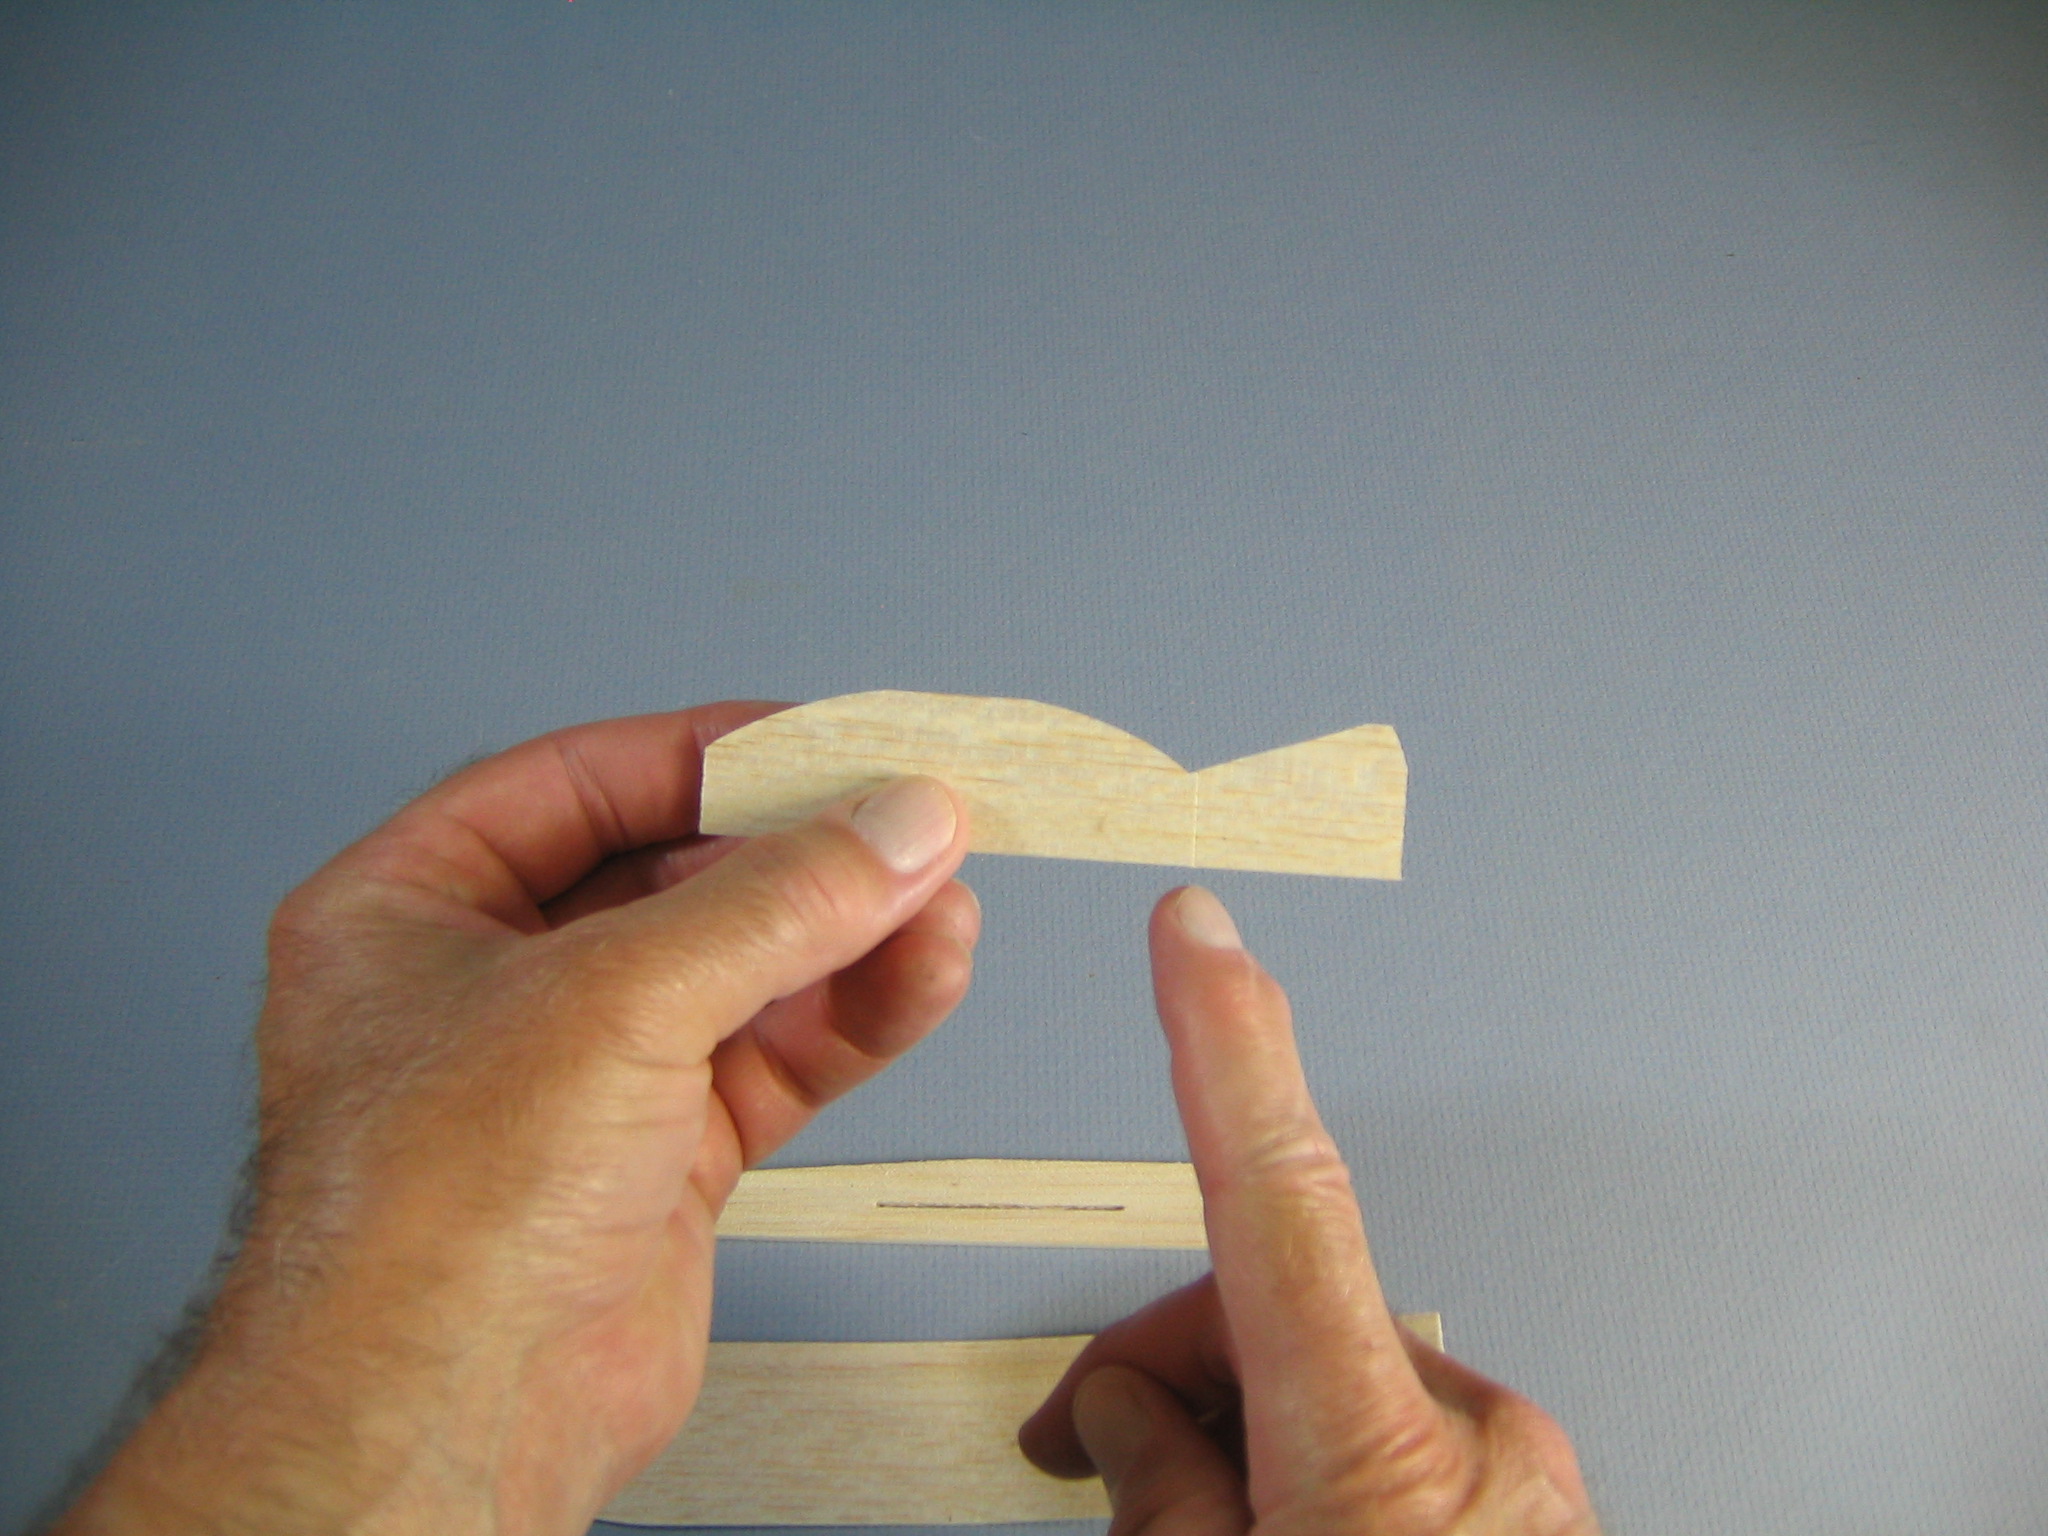 Note that there is a crease between the fin and tailplane. This is a breaking line that allows you to separate the two pieces.
 Grip it securely close to each side of the crease and bend it sharply to break the pieces apart.
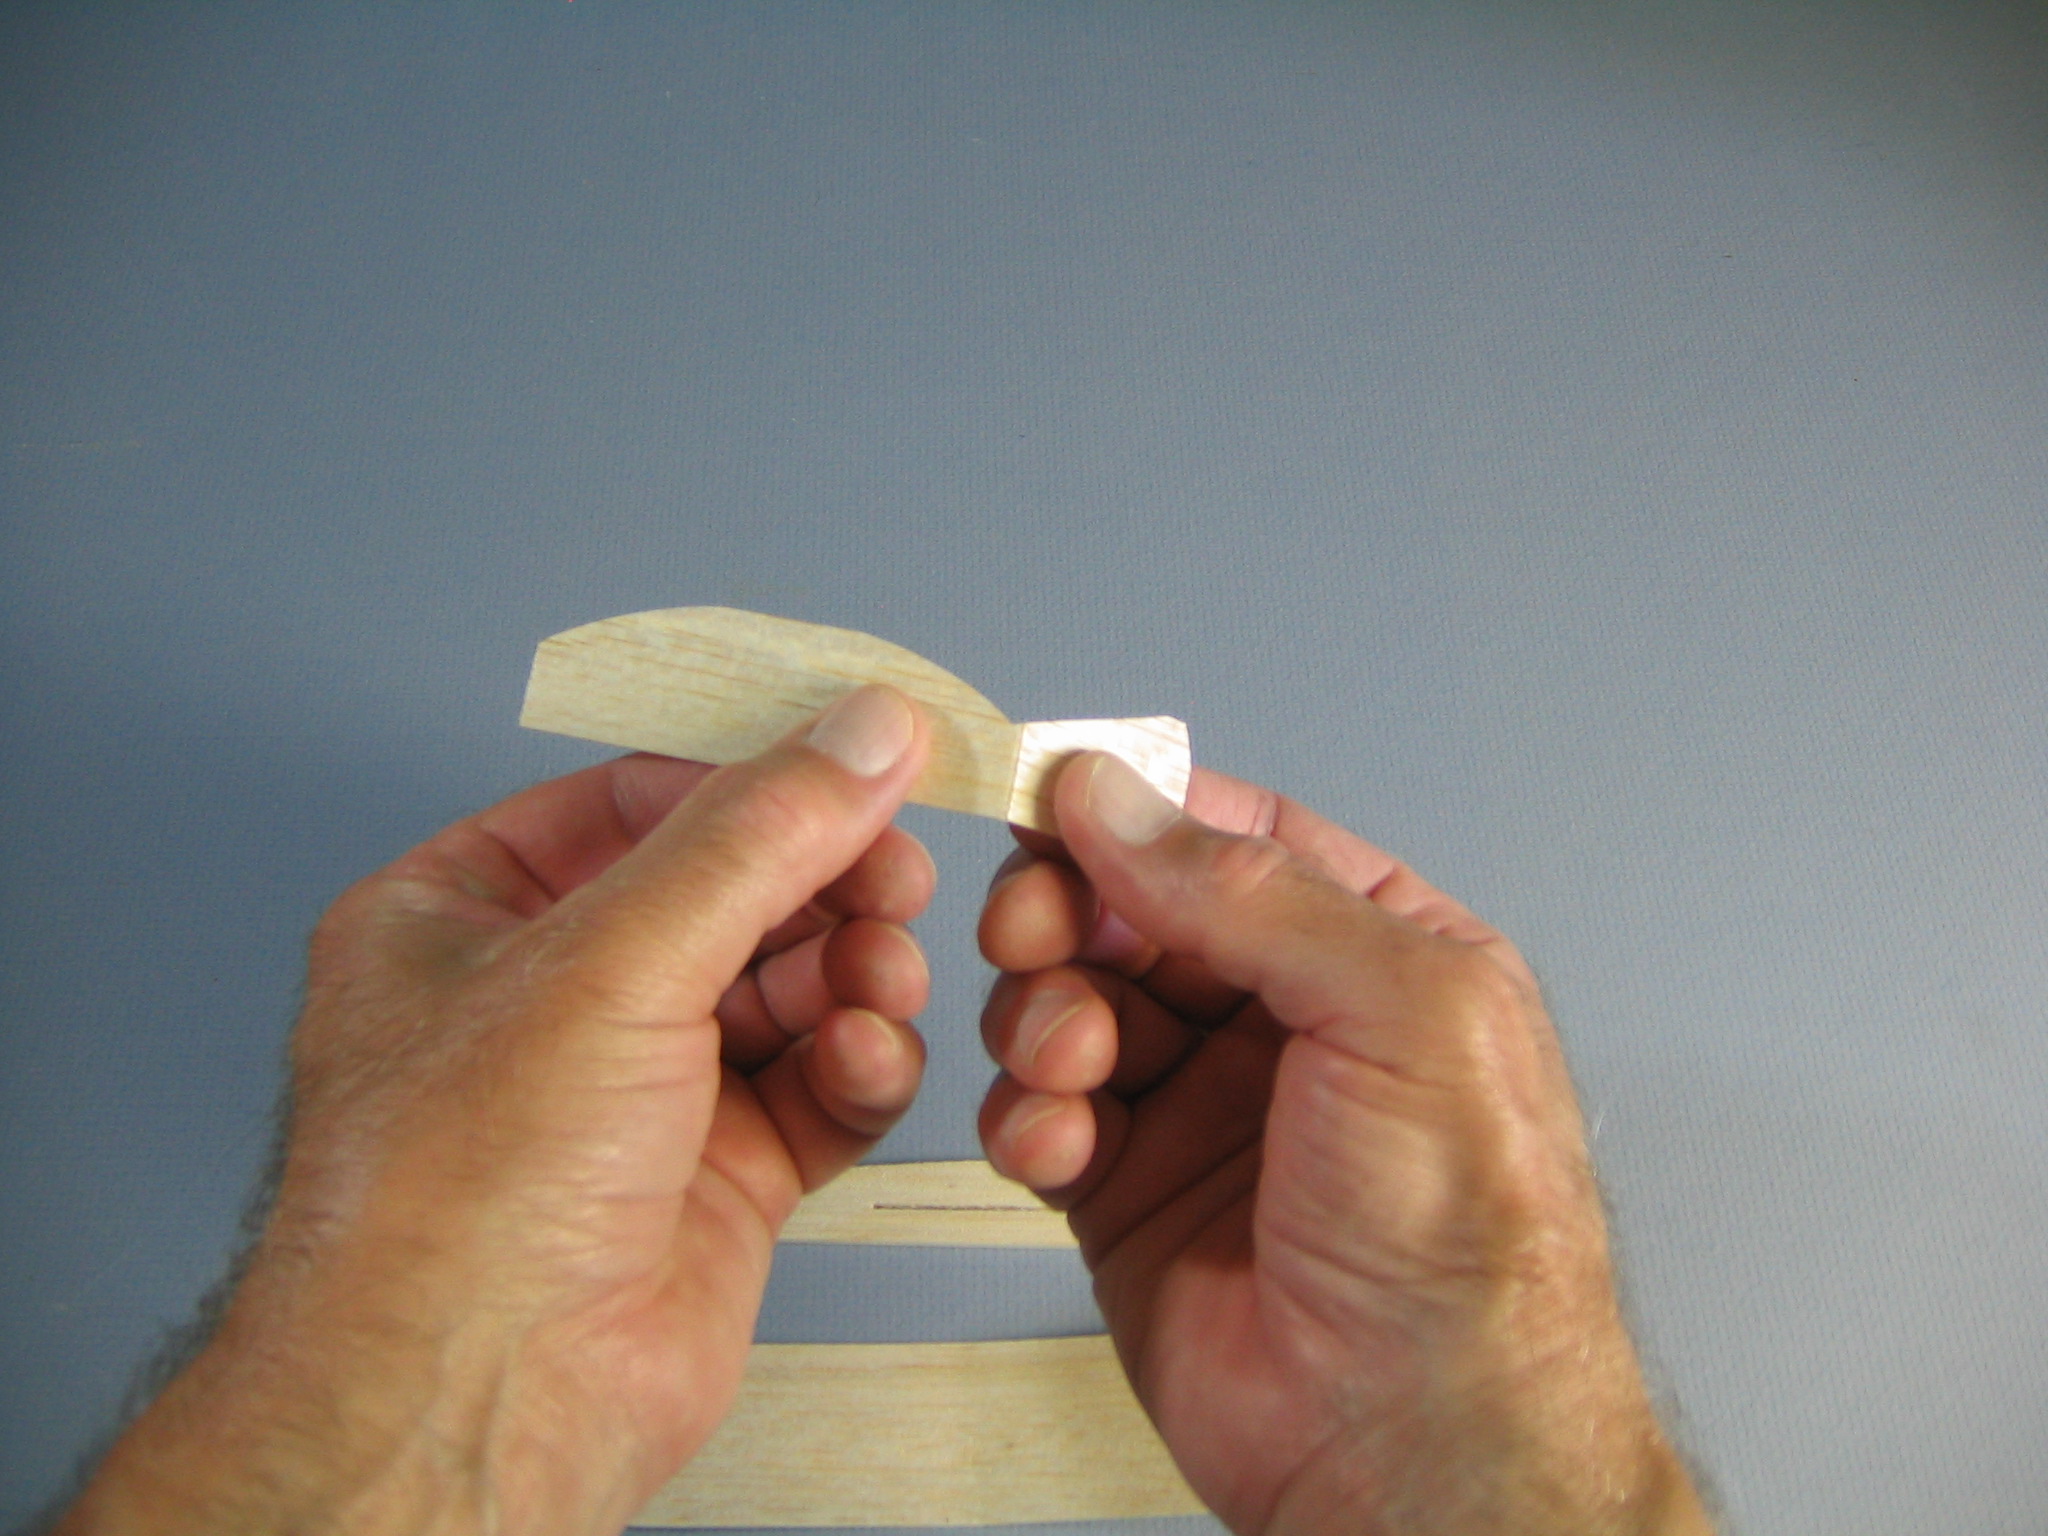
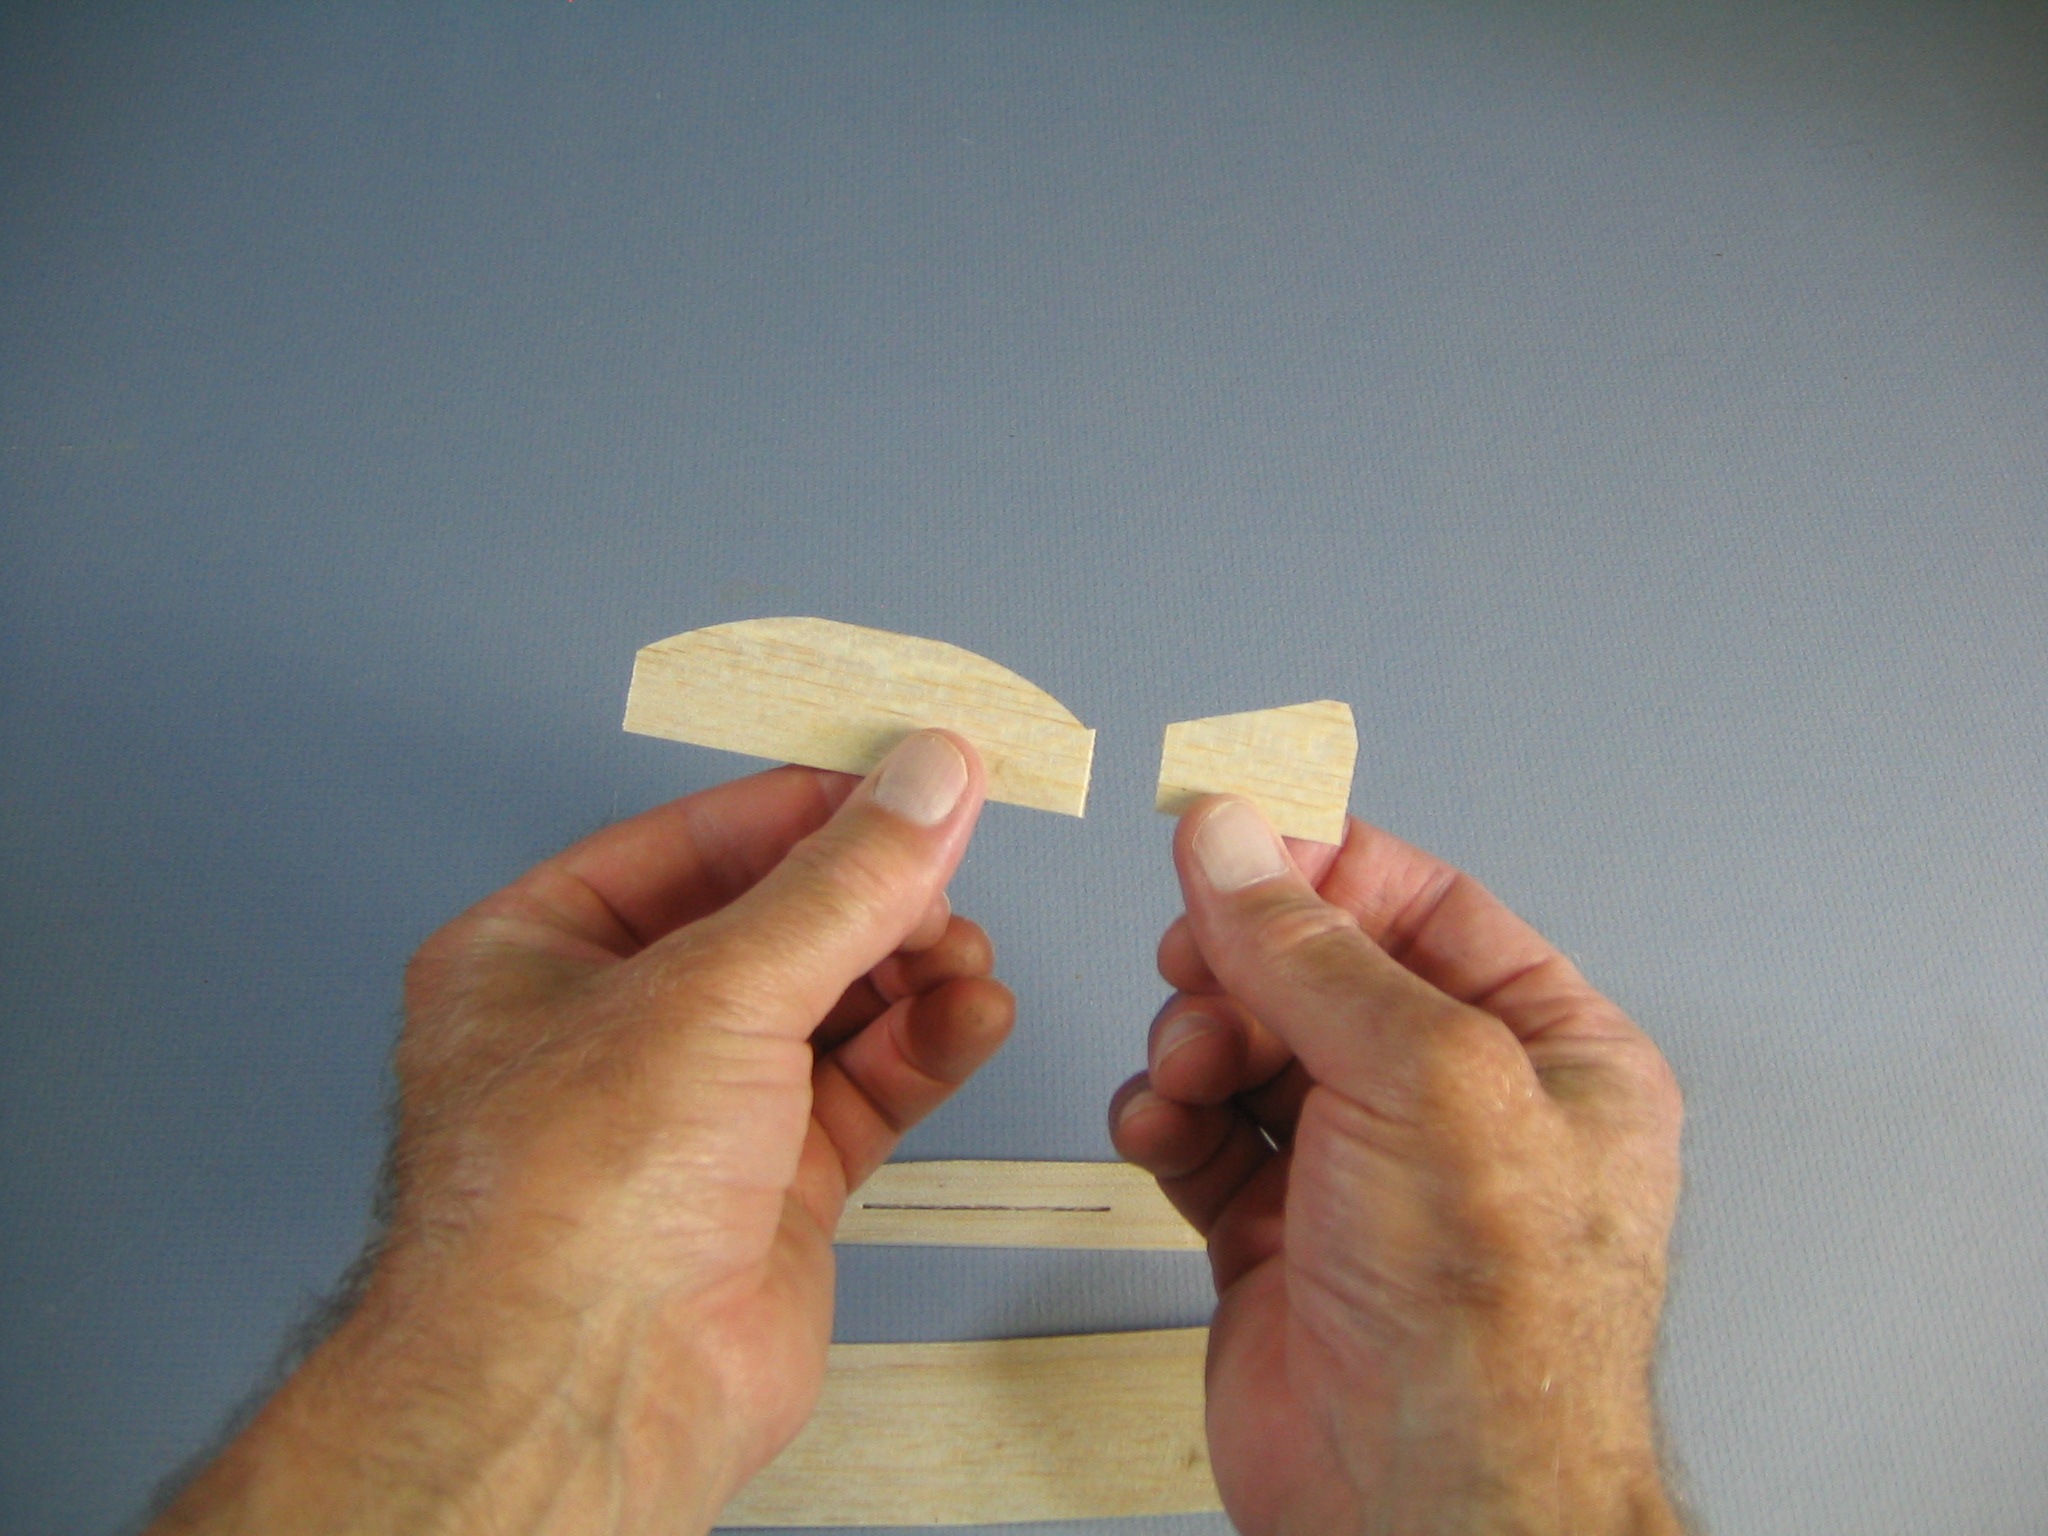 This separates the fin from the tailplane, giving us the four parts we need to complete the simple plane.
If you want to decorate your plane, now is a good time to do it, while all the parts can be put flat on the table. See below for instructions on decorating with color markers.
 There is a metal balance weight at the front end of the fuselage. Notice that the back of the fuselage is tapered. The taper is the top.
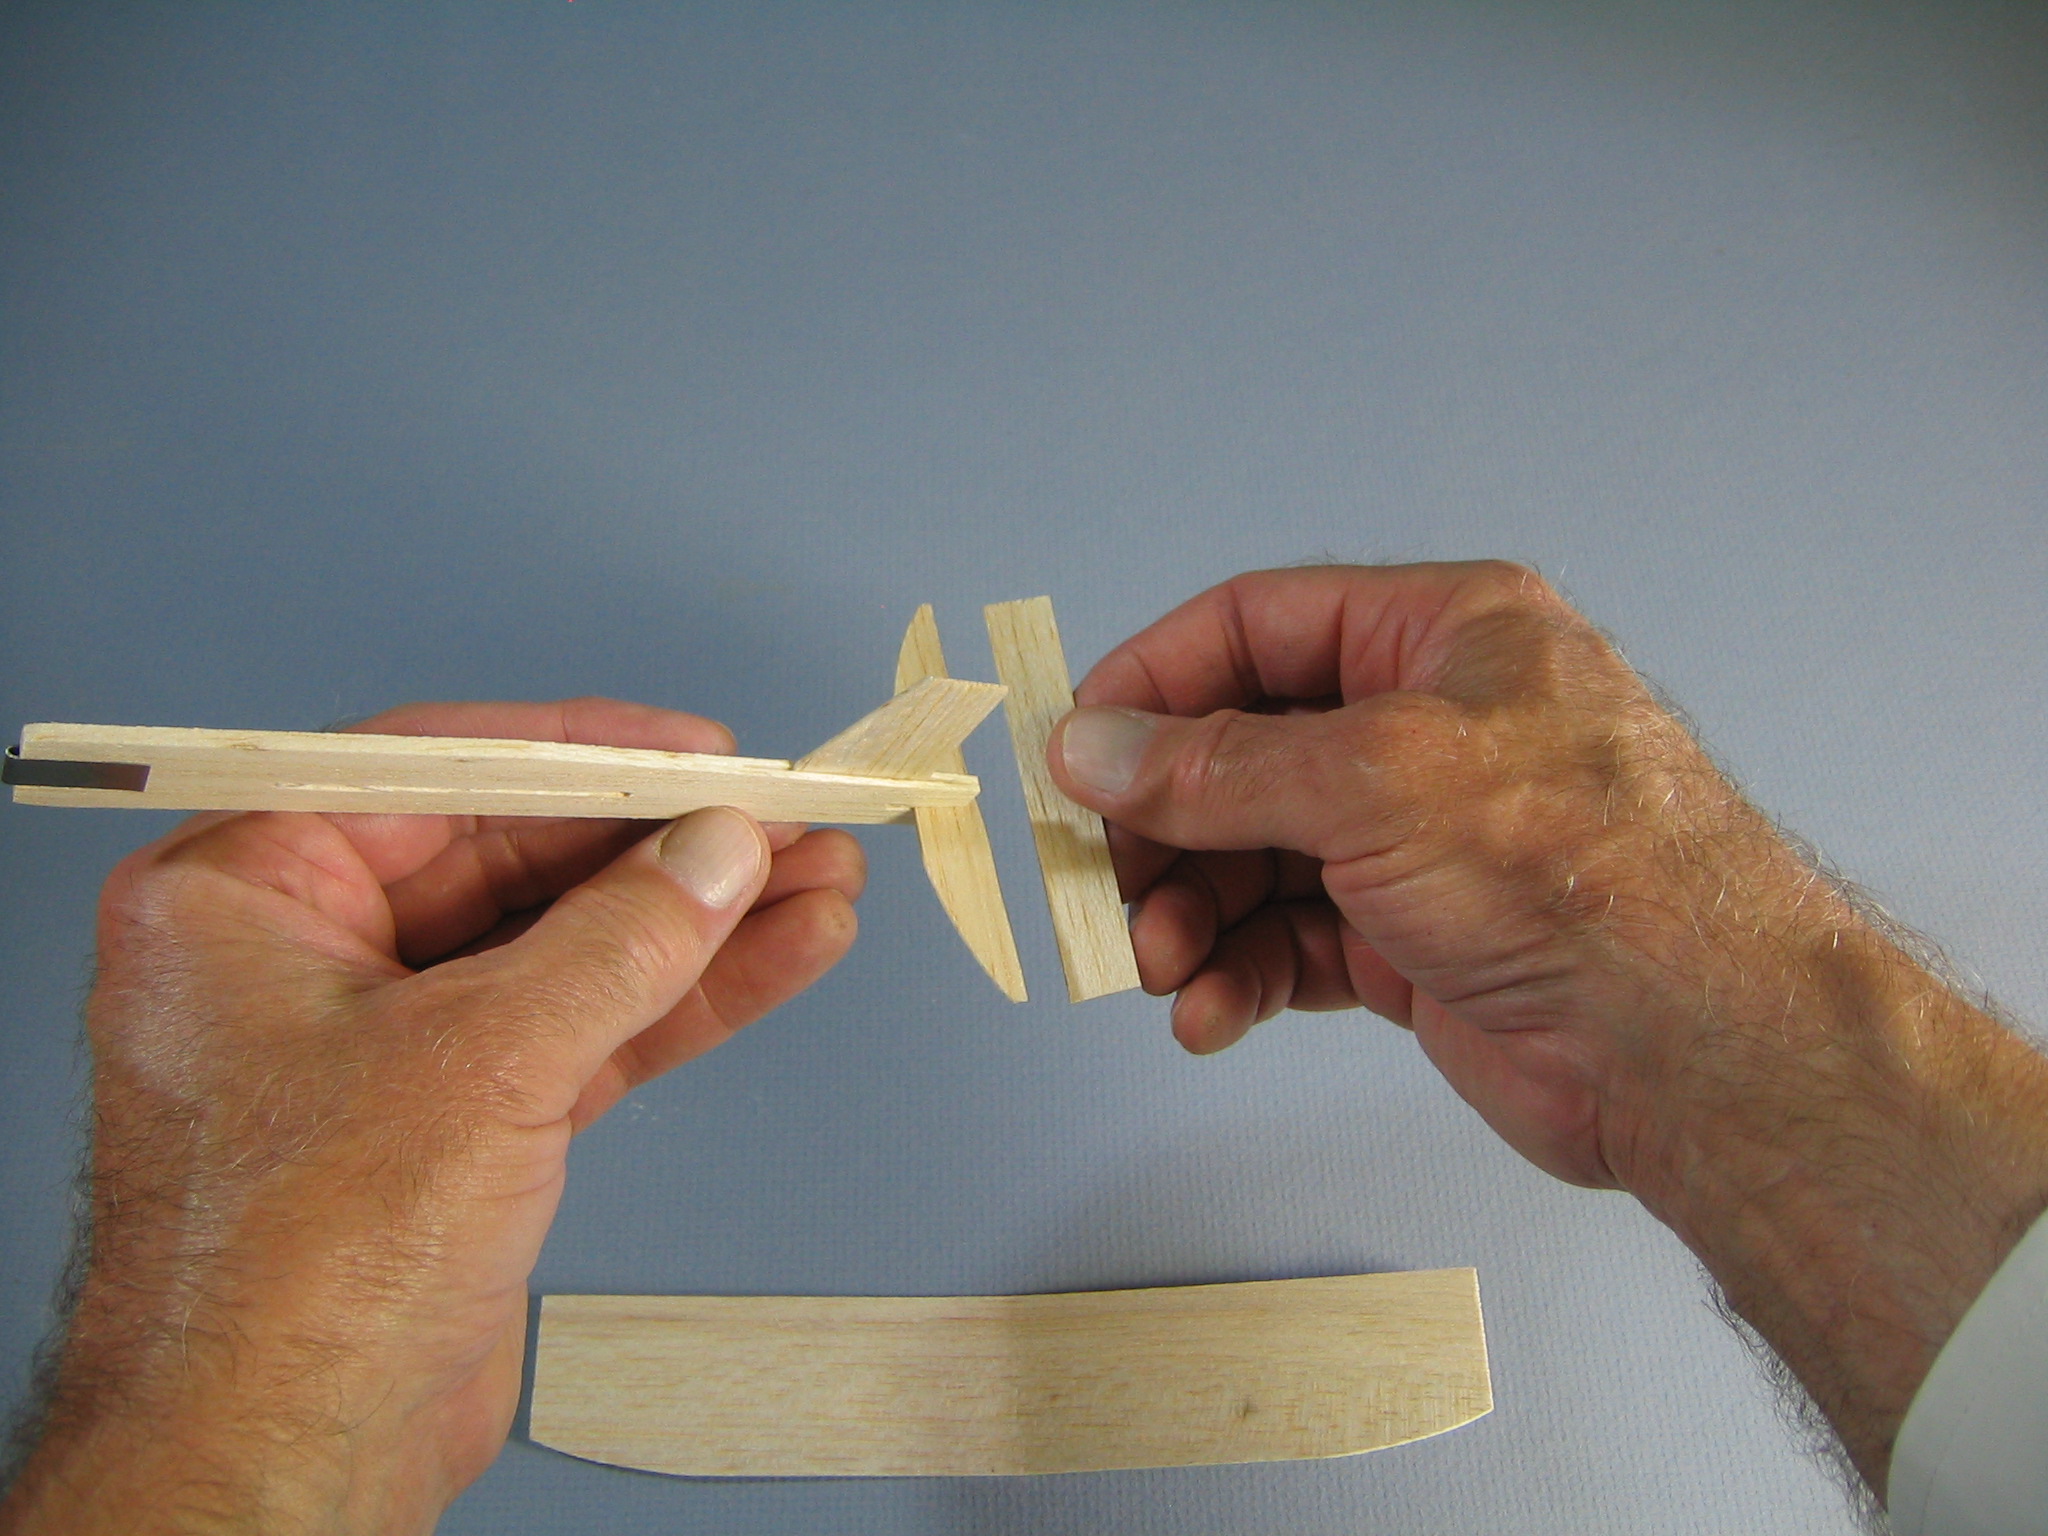
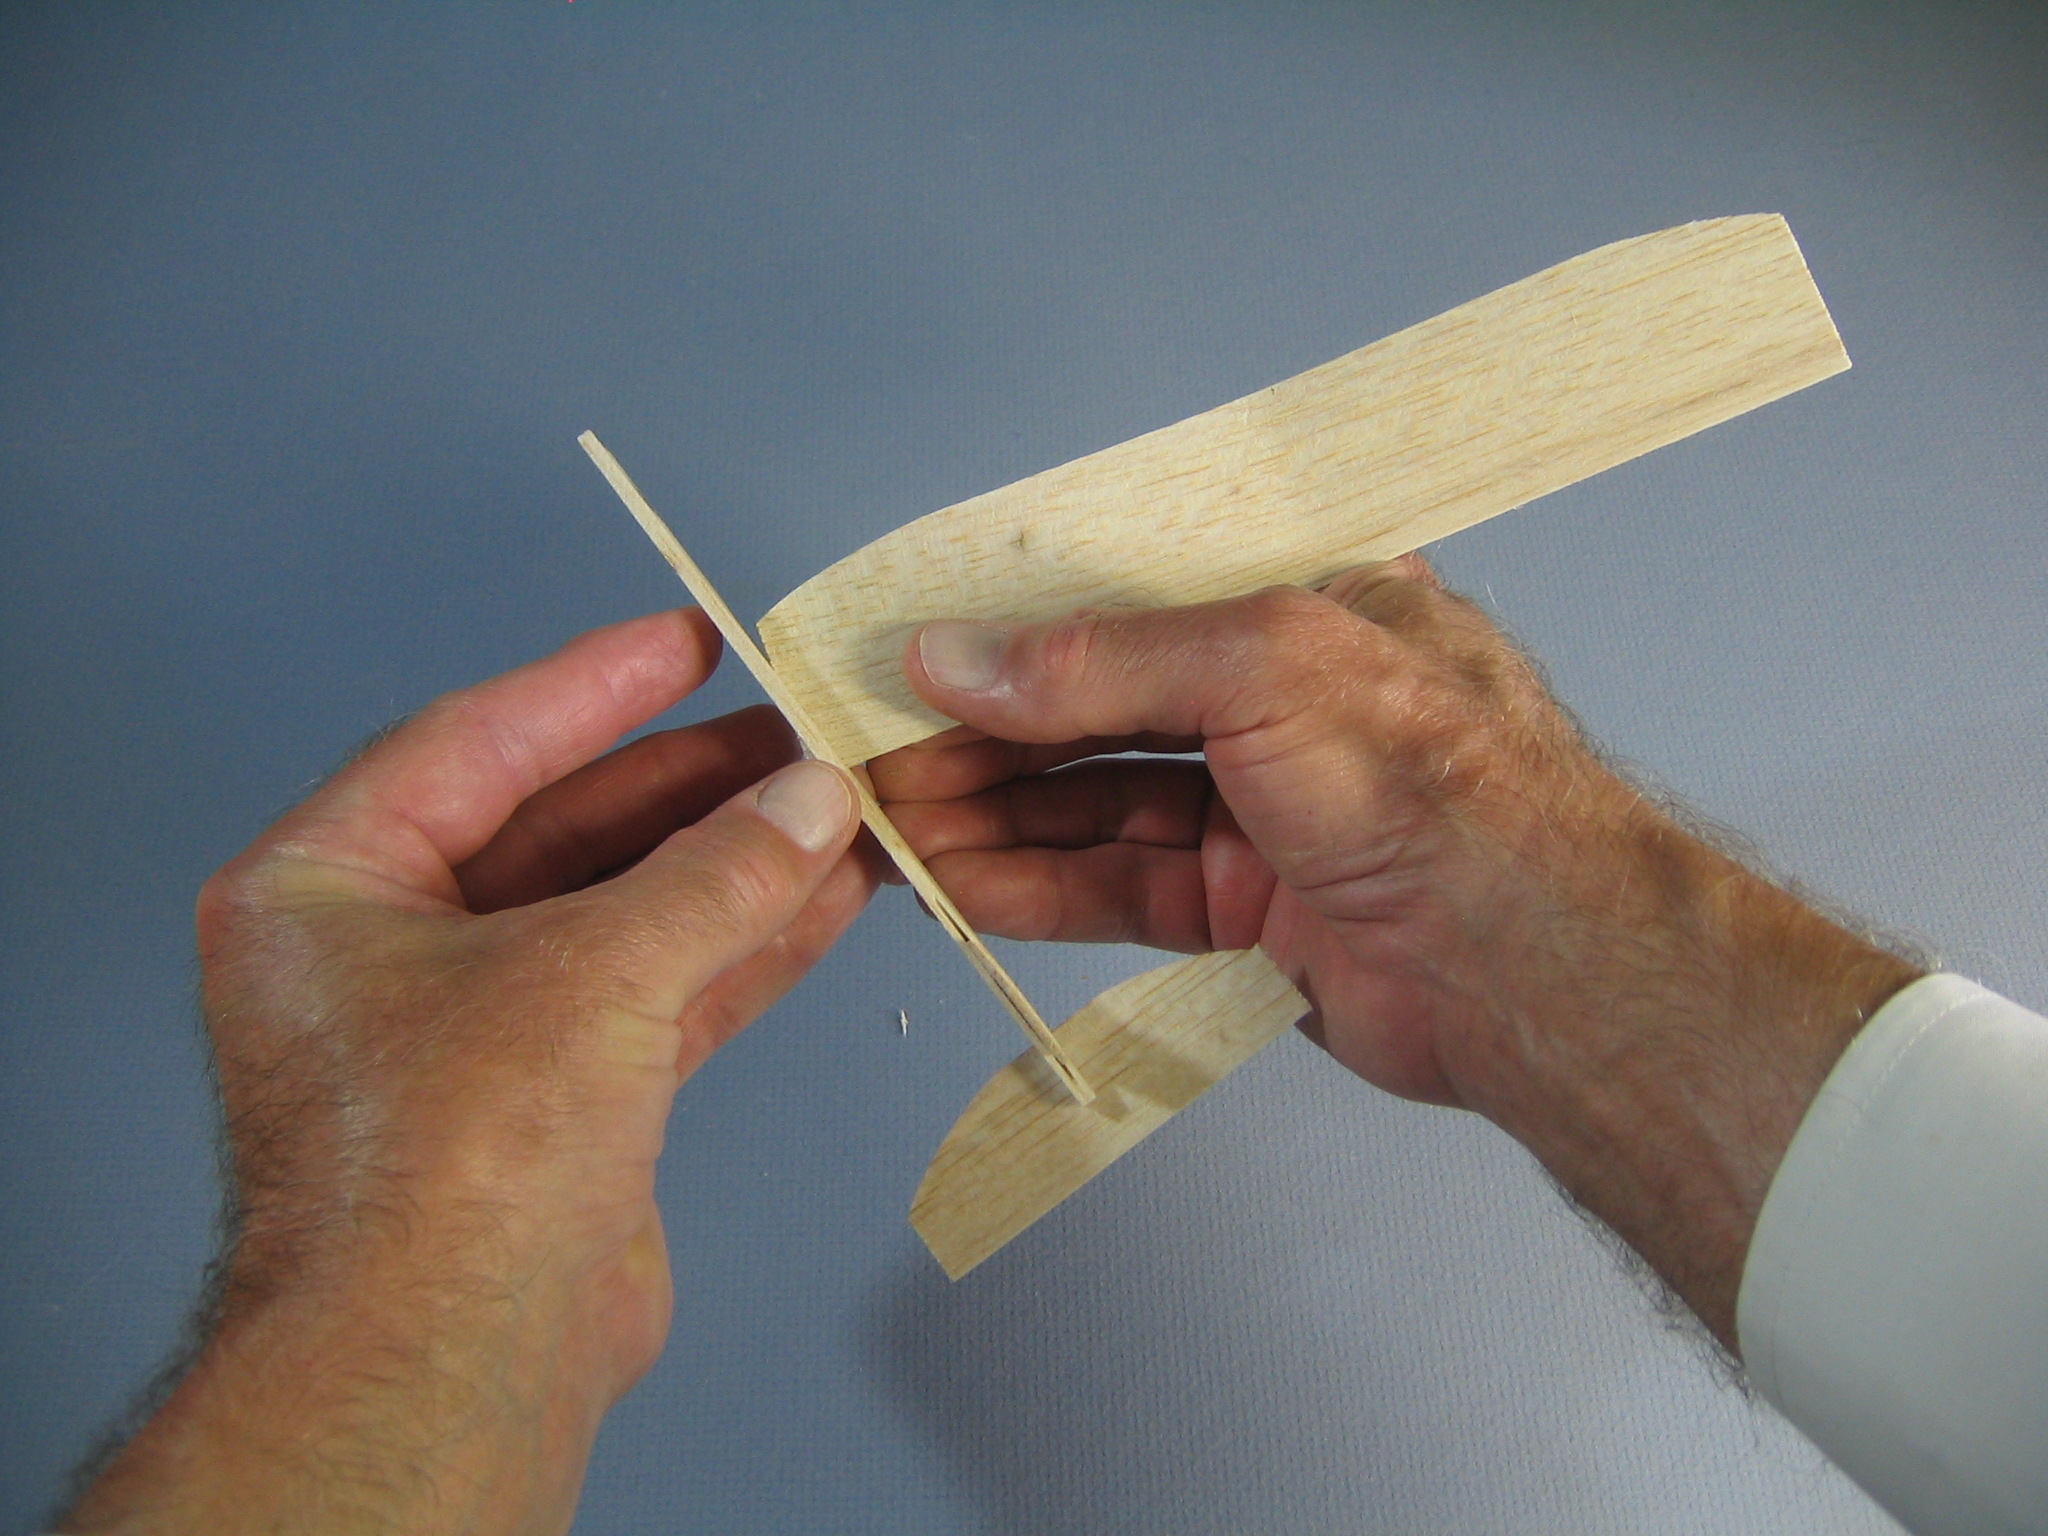
 Look at the tapered edge of the fuselage opposite the nose weight and find the slot cut for the fin. The fin will slip into this slot and stays with a friction fit. You can glue it if you want.
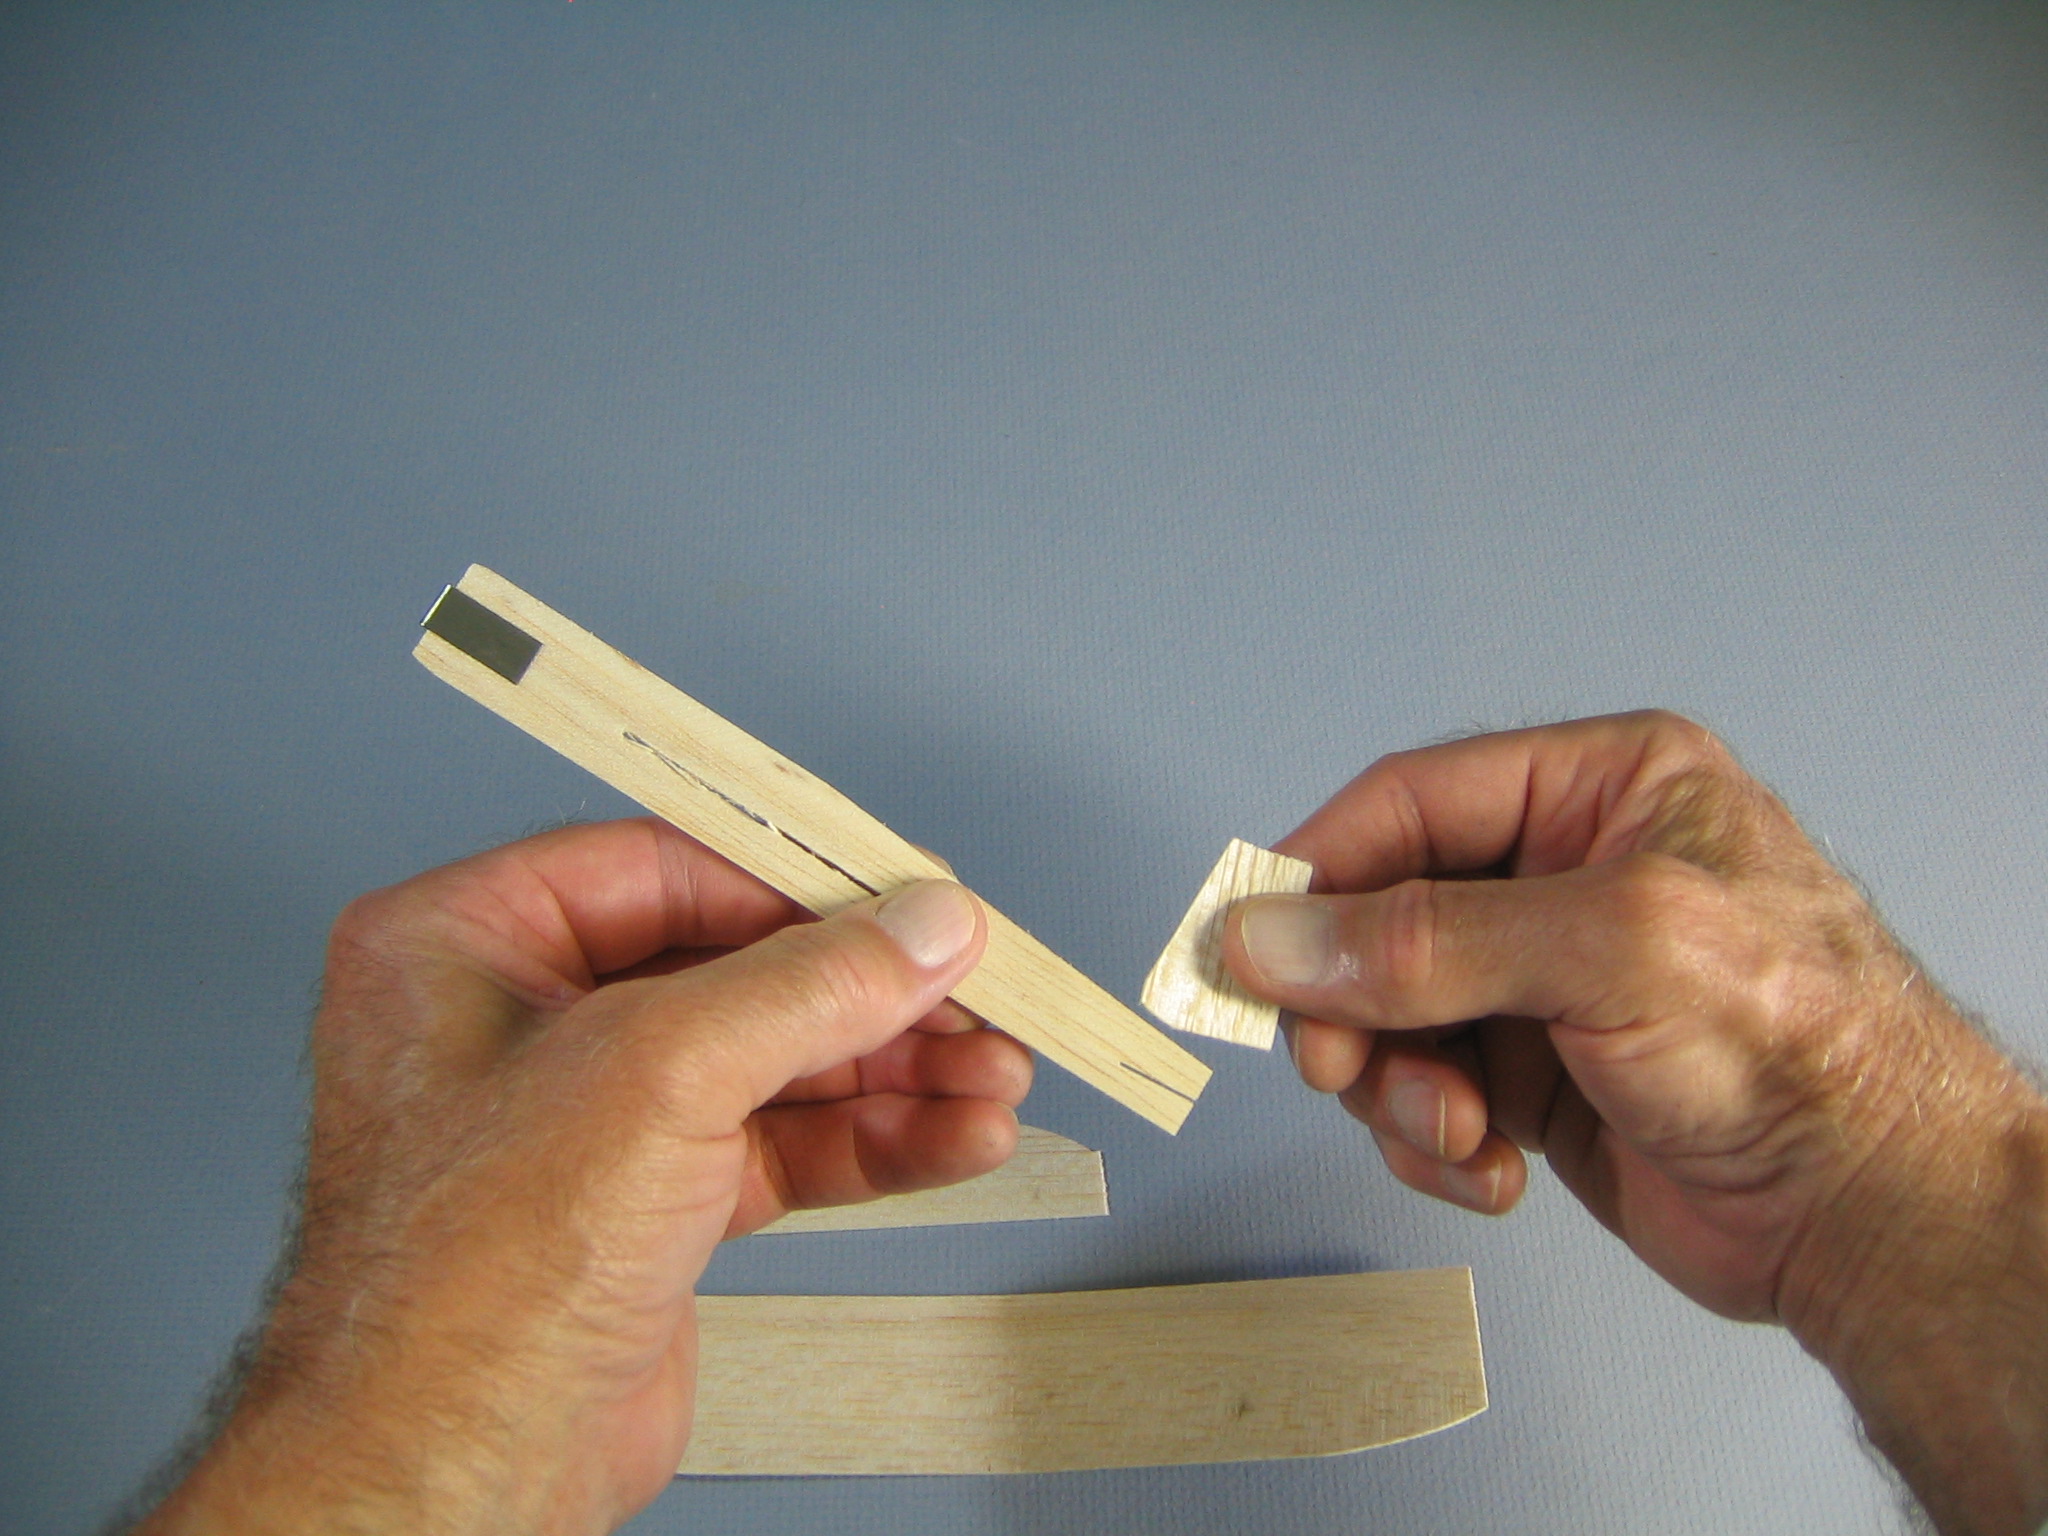
 Here is where we need to be careful. The fin does not go into the slot as shown here. This step is shown properly in diagram 2 of the assembly instructions printed on the bag. Who follows the instructions? At the end of our session, I found six broken fins and three fuselages with the fin slot plugged up with a strip of balsa.
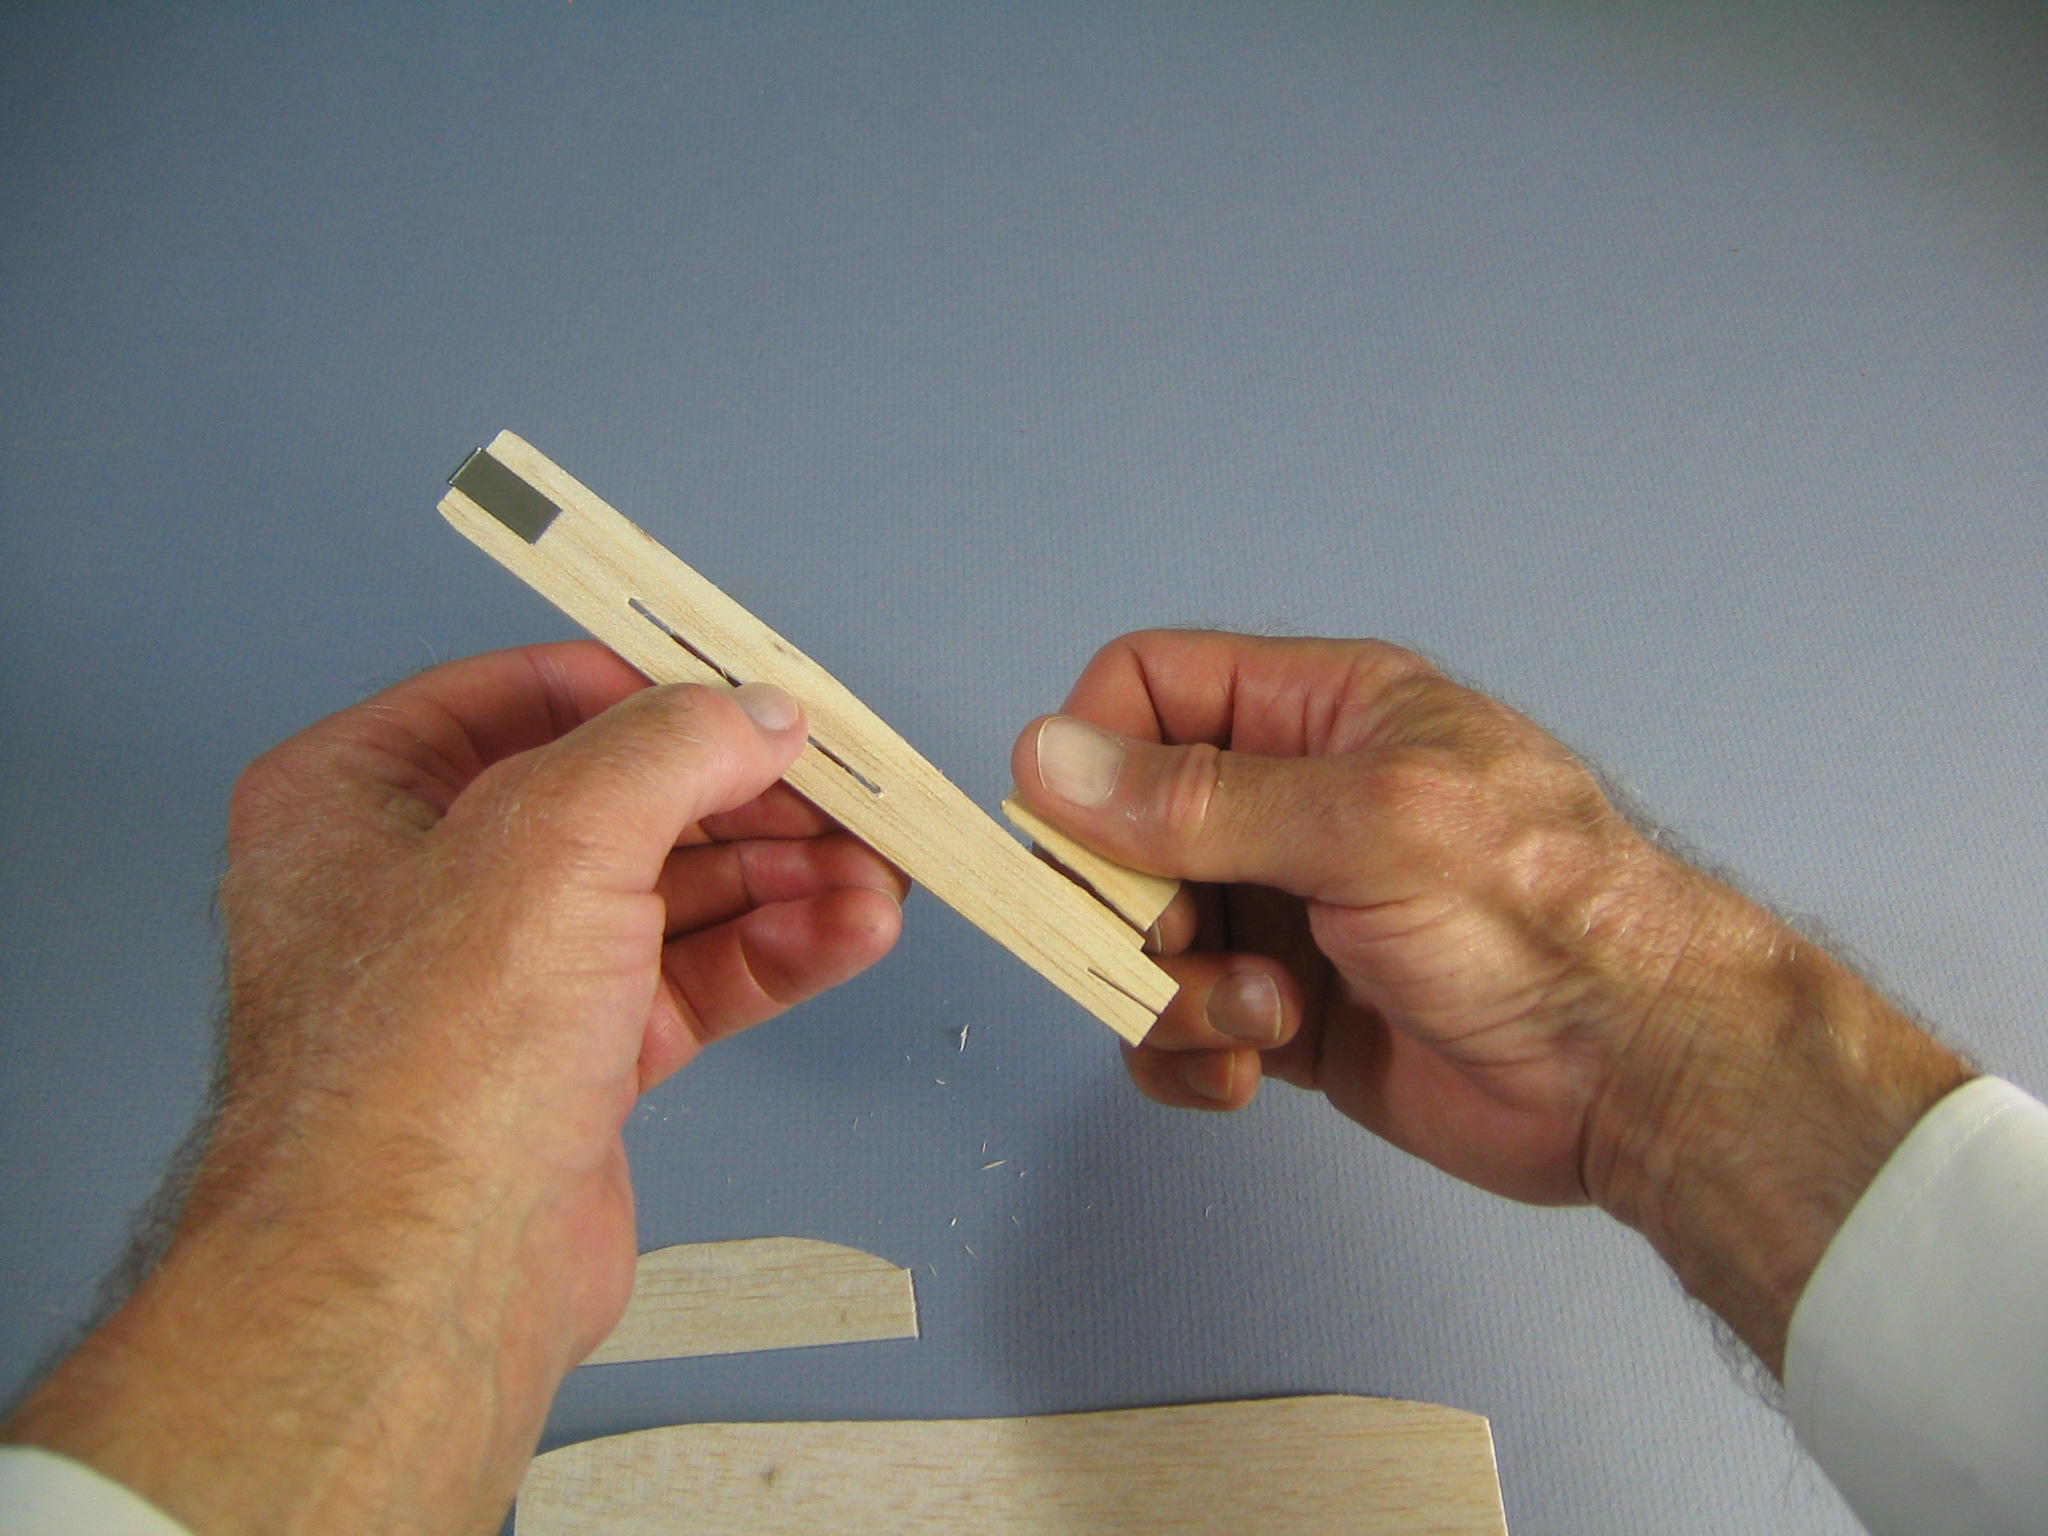 Here is why. Look closely at the wood and notice that it has grain. The grain runs from root to tip, along the length of the fin. Wood is stronger along the grain than across it. If you push the fin in like this, it will likely break. Not only do you have a broken fin, but you have plugged up the fin slot and you can’t get another fin into the slot, making the fuselage also useless. Our second lesson in balsa wood.
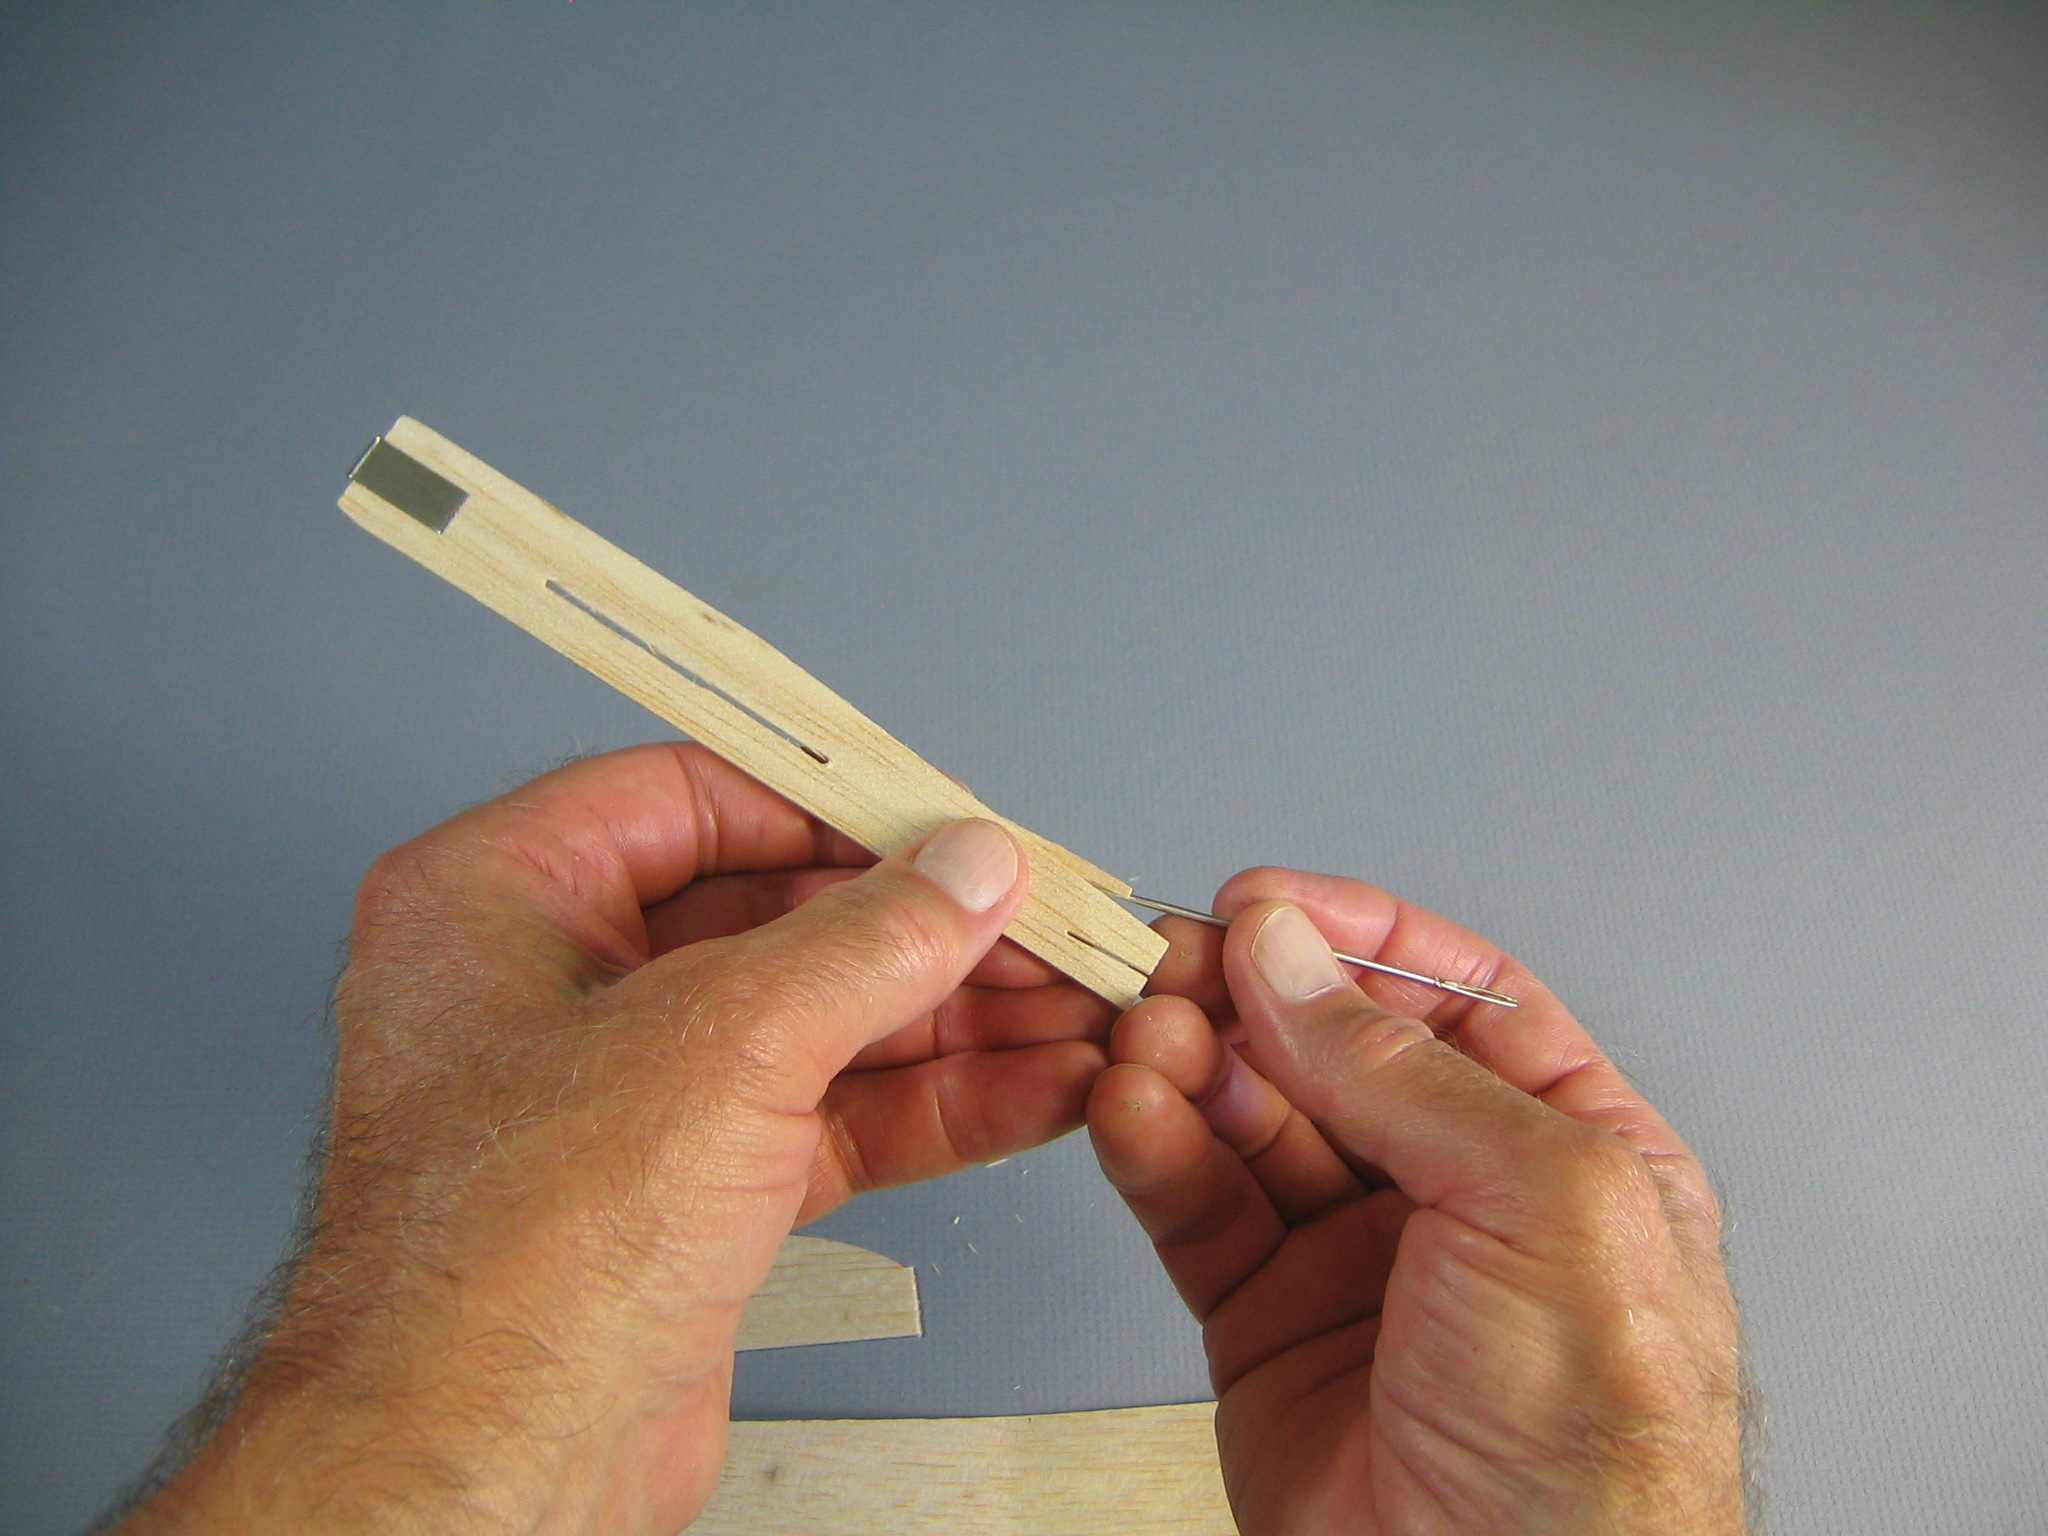 You can use a needle or pin to pry the sliver out of the slot and glue it back to the rest of the fin.
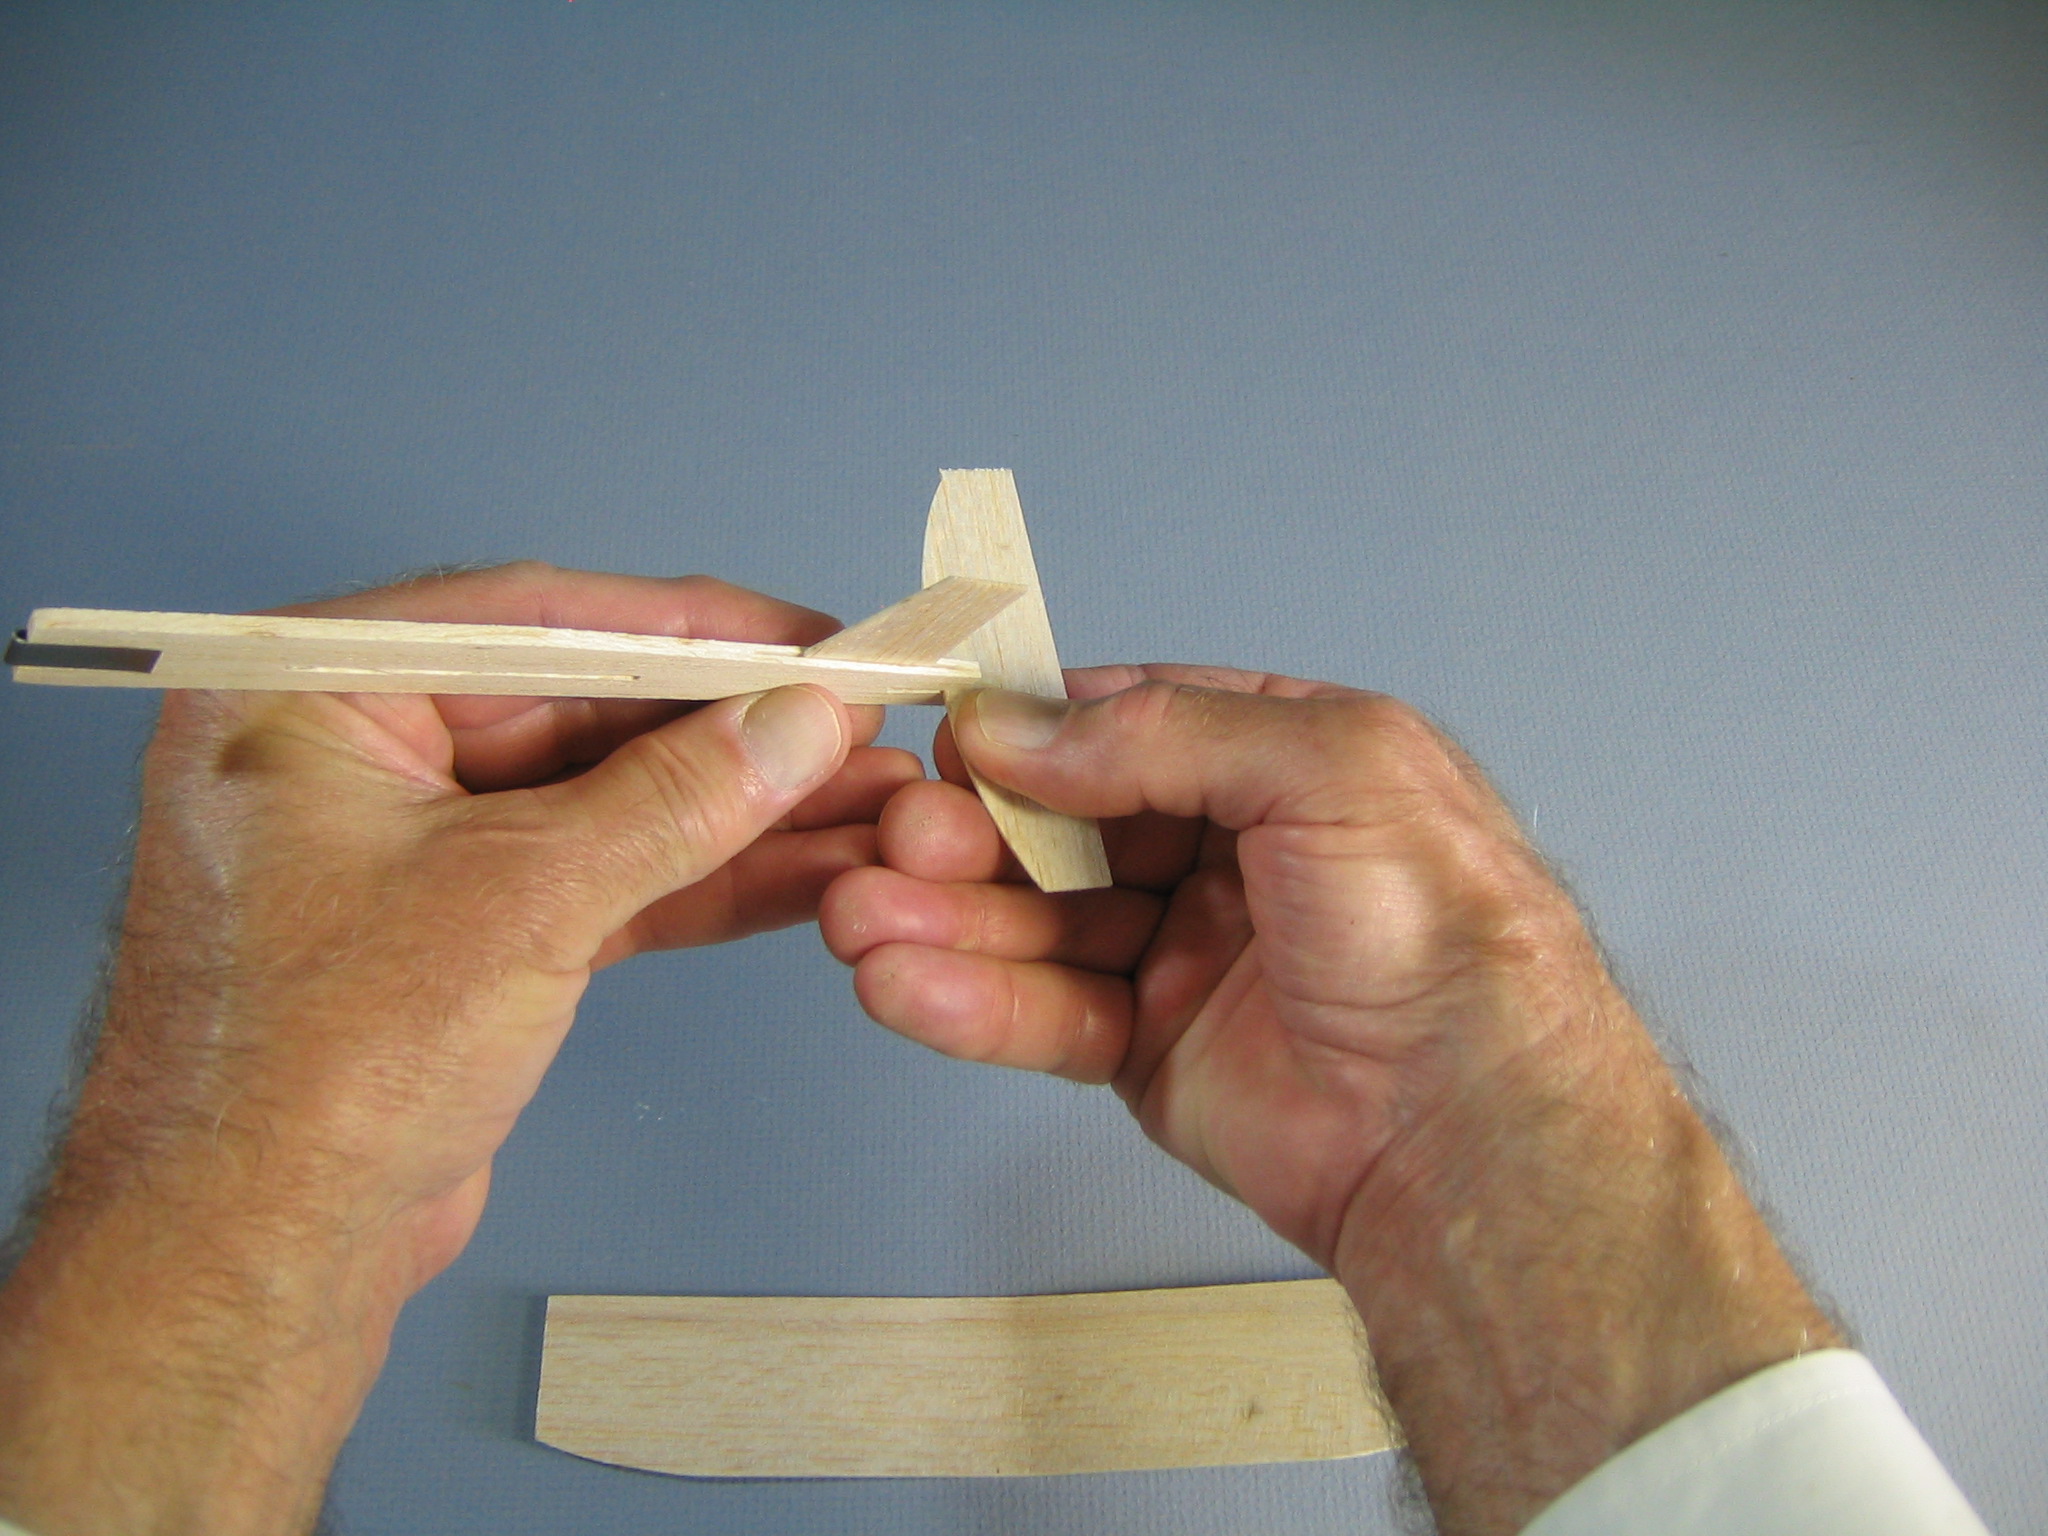
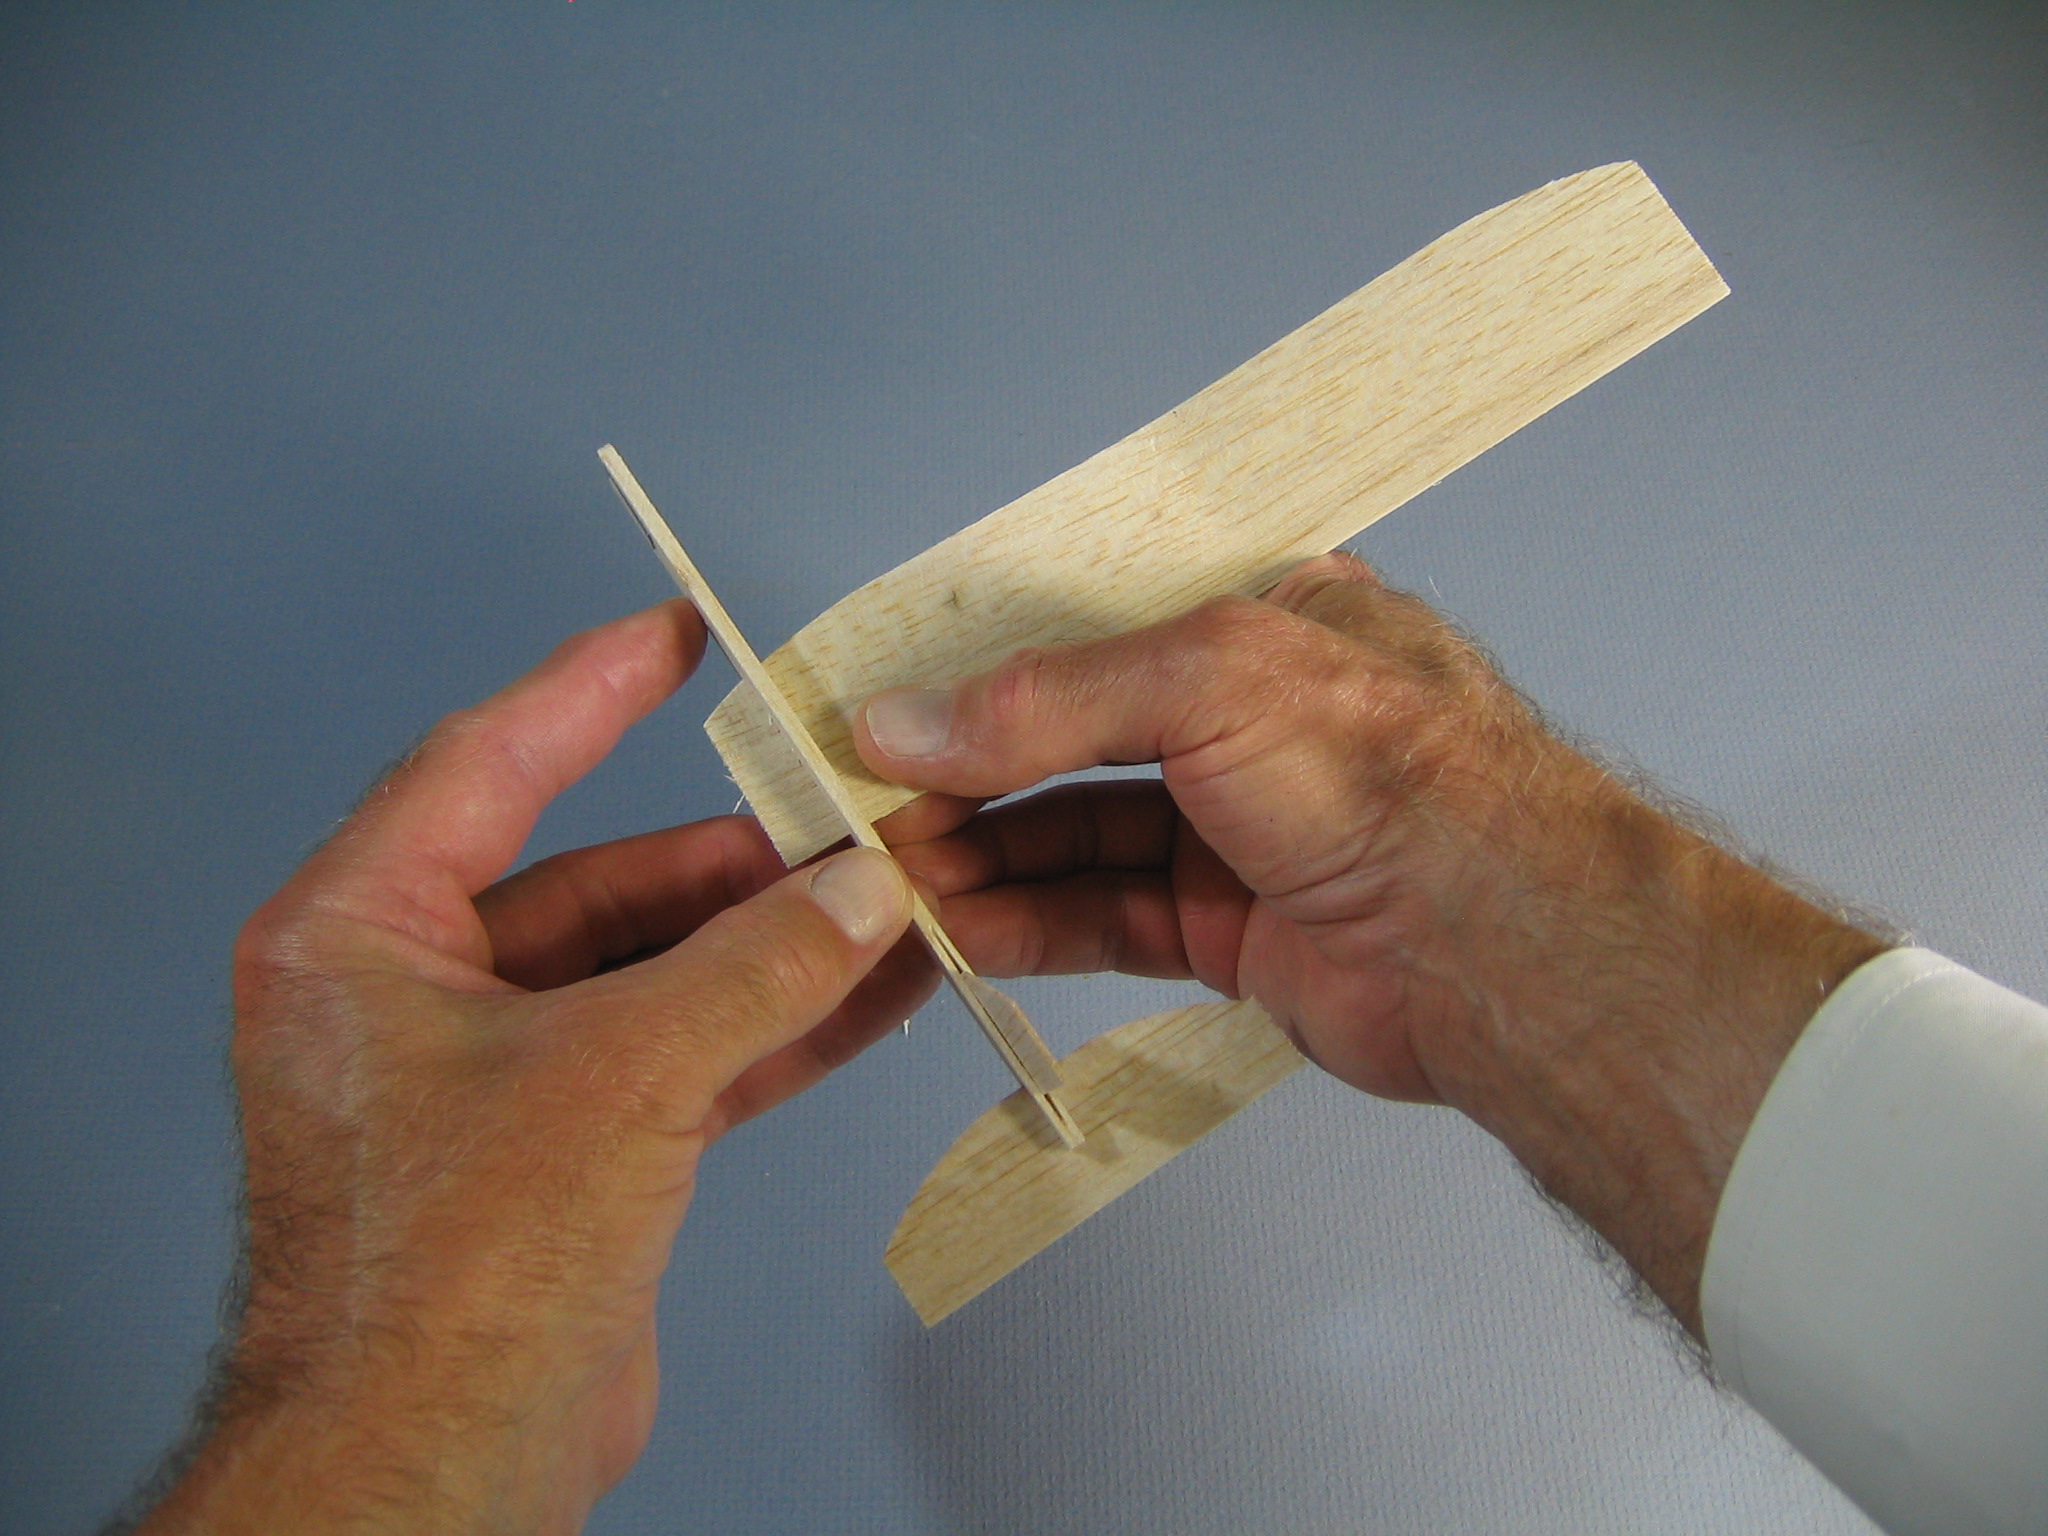
 This shows the correct orientation of the fin, projecting lengthwise up from the fuselage.
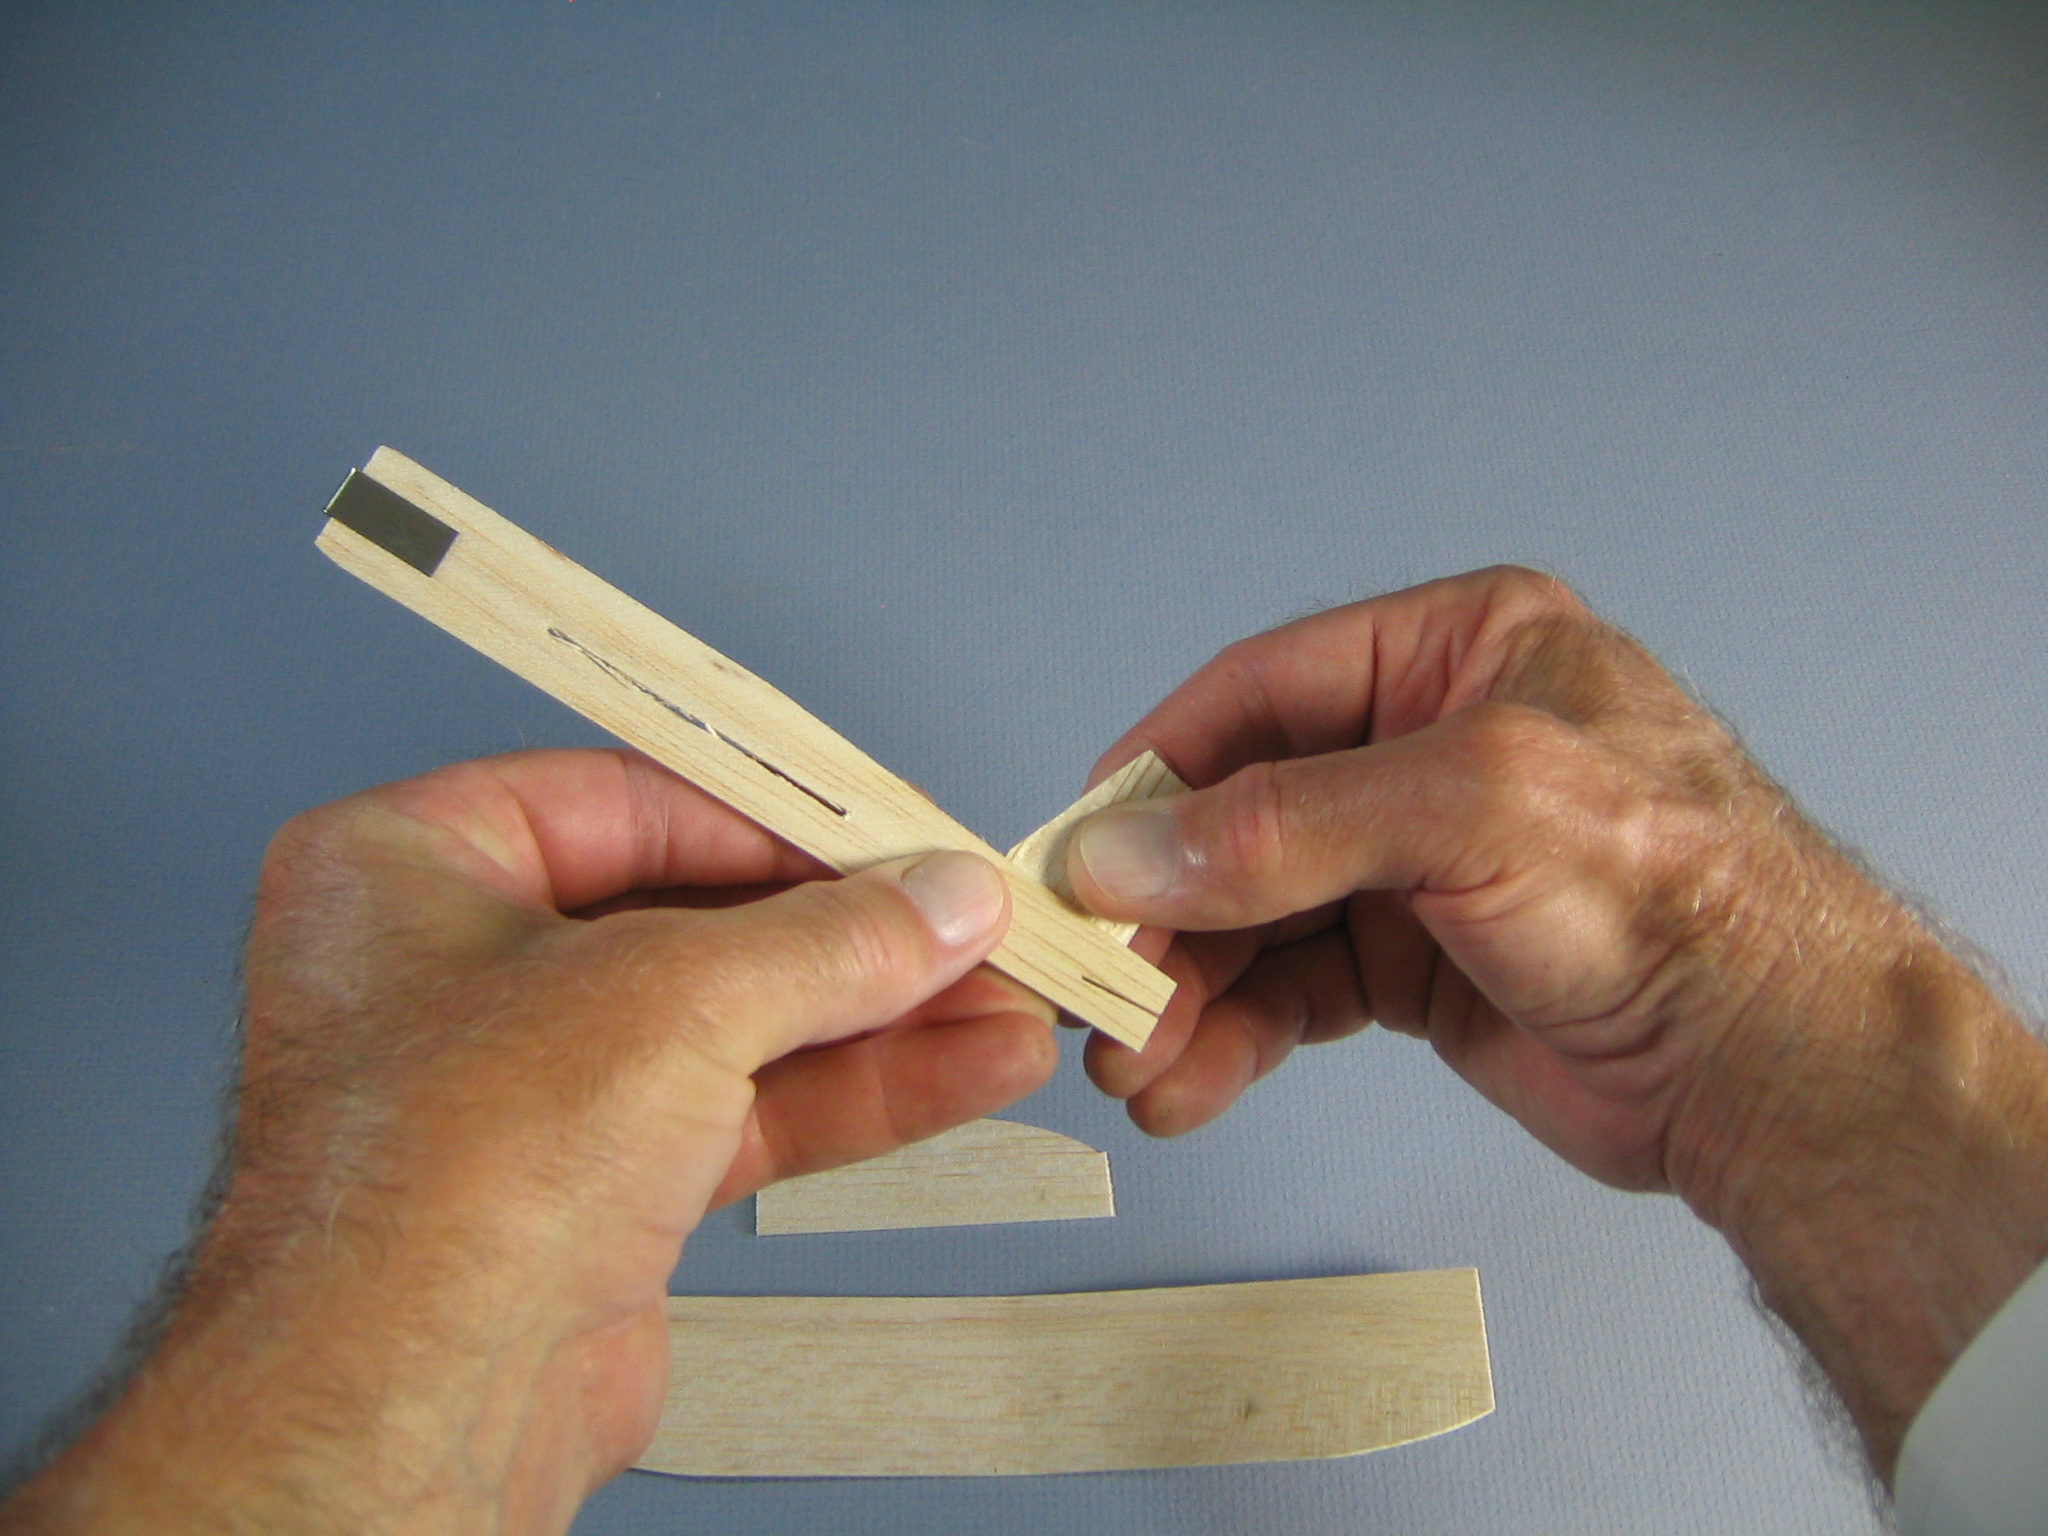 Also, it works better to slide it corner first, lengthwise into the slot, rather than trying to press it straight down.
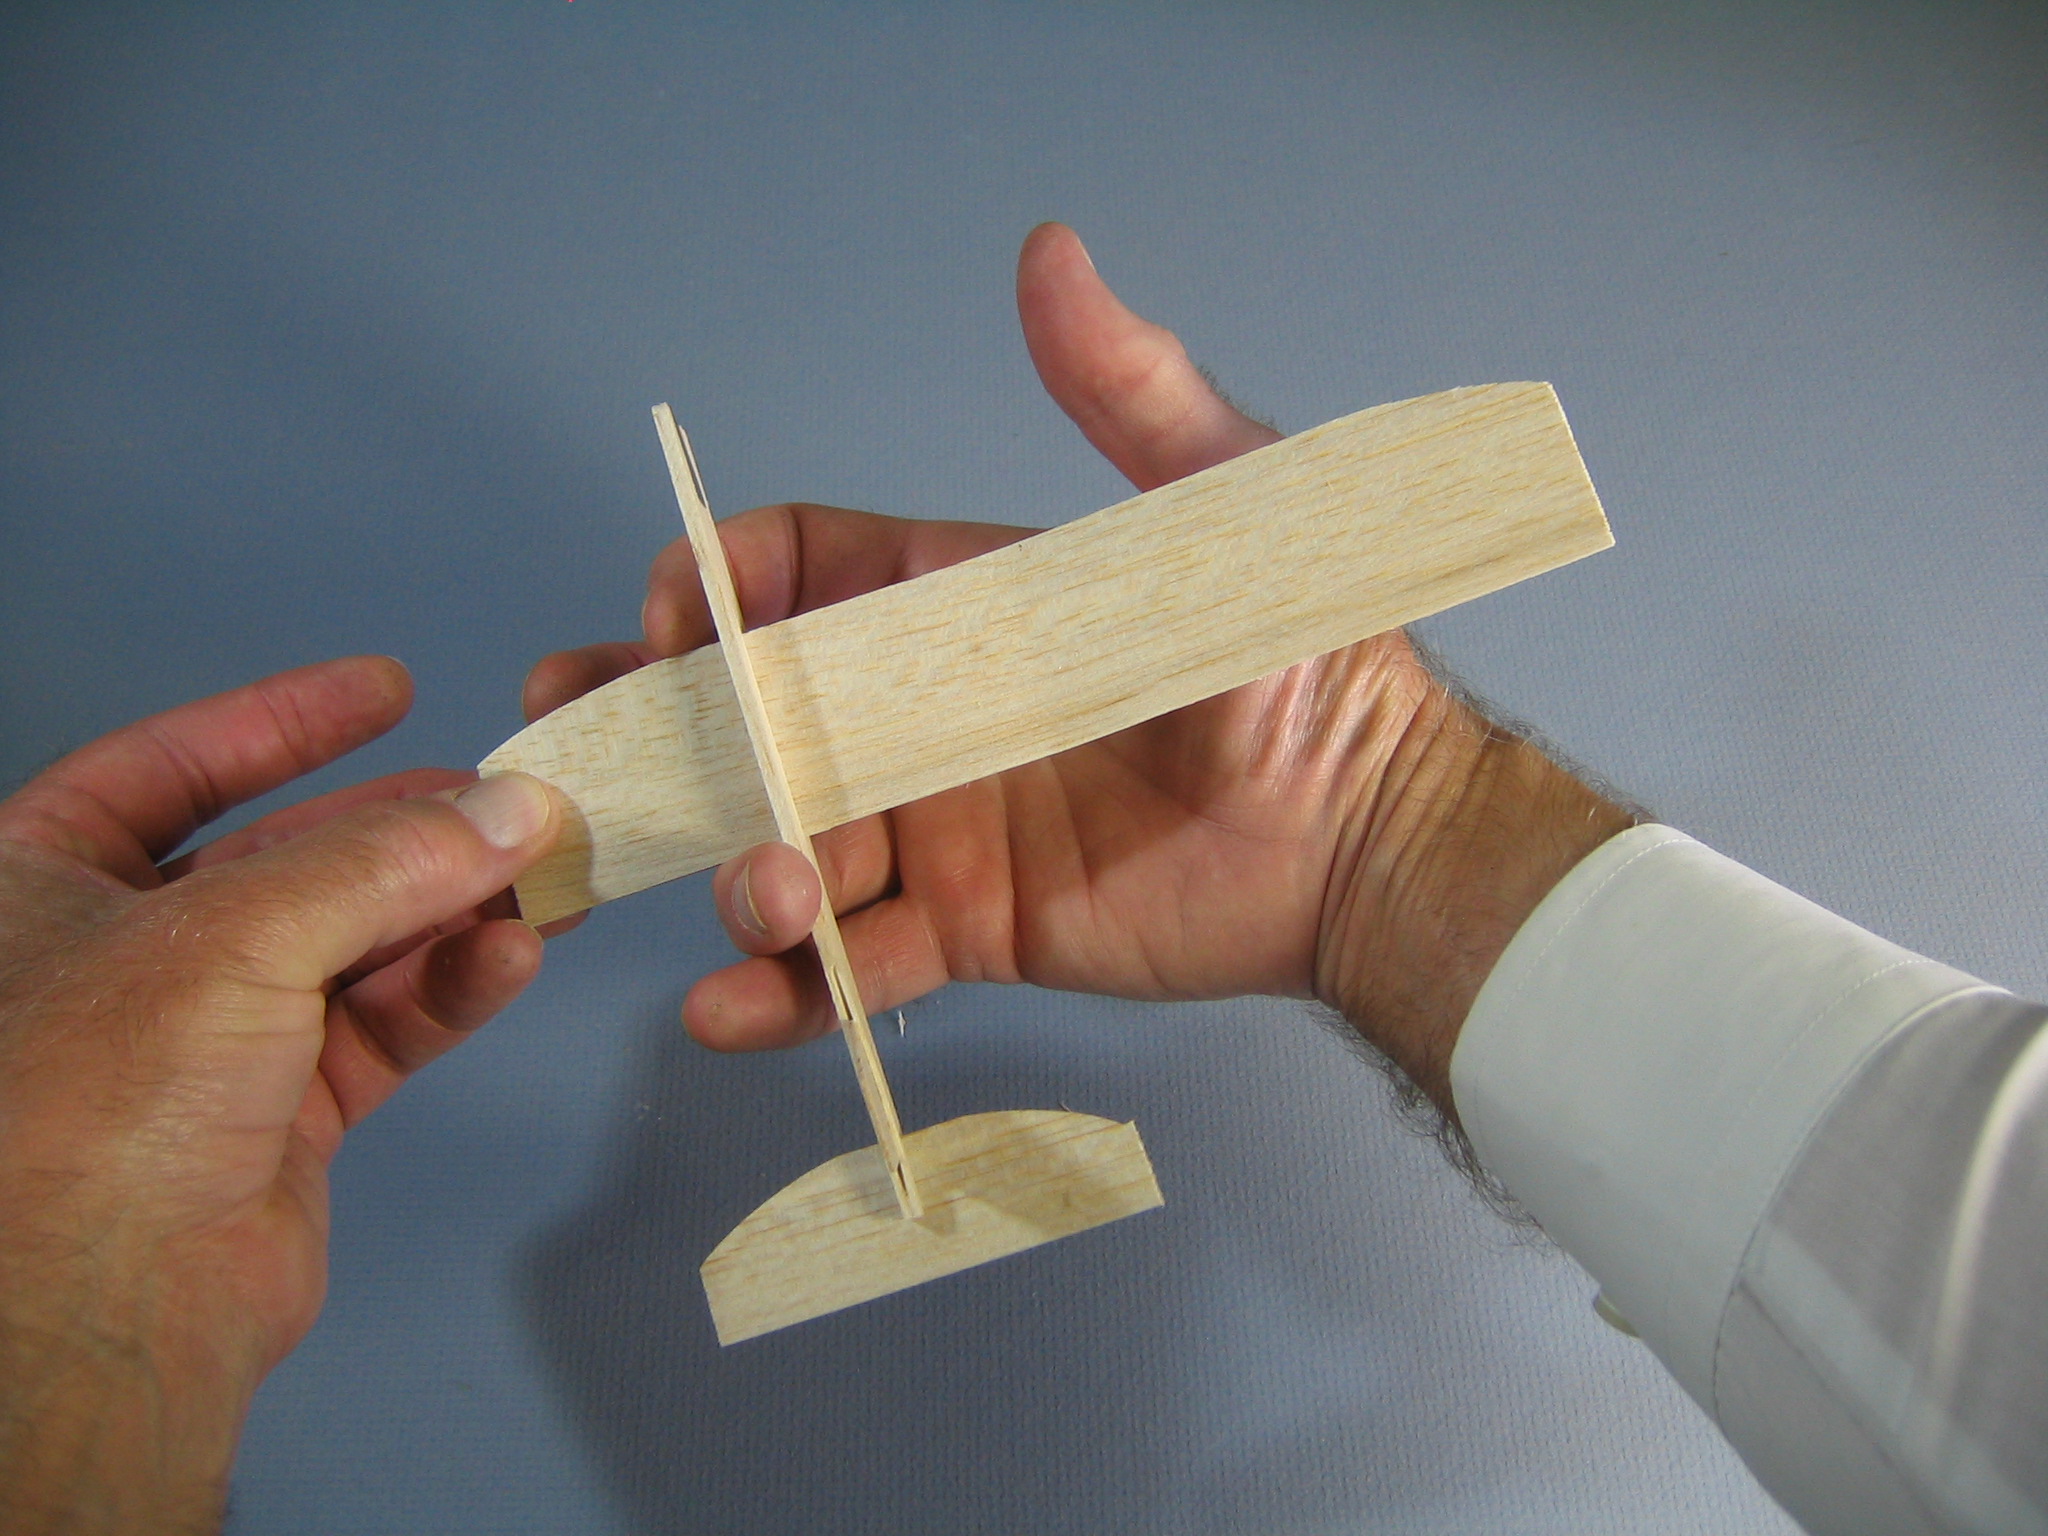
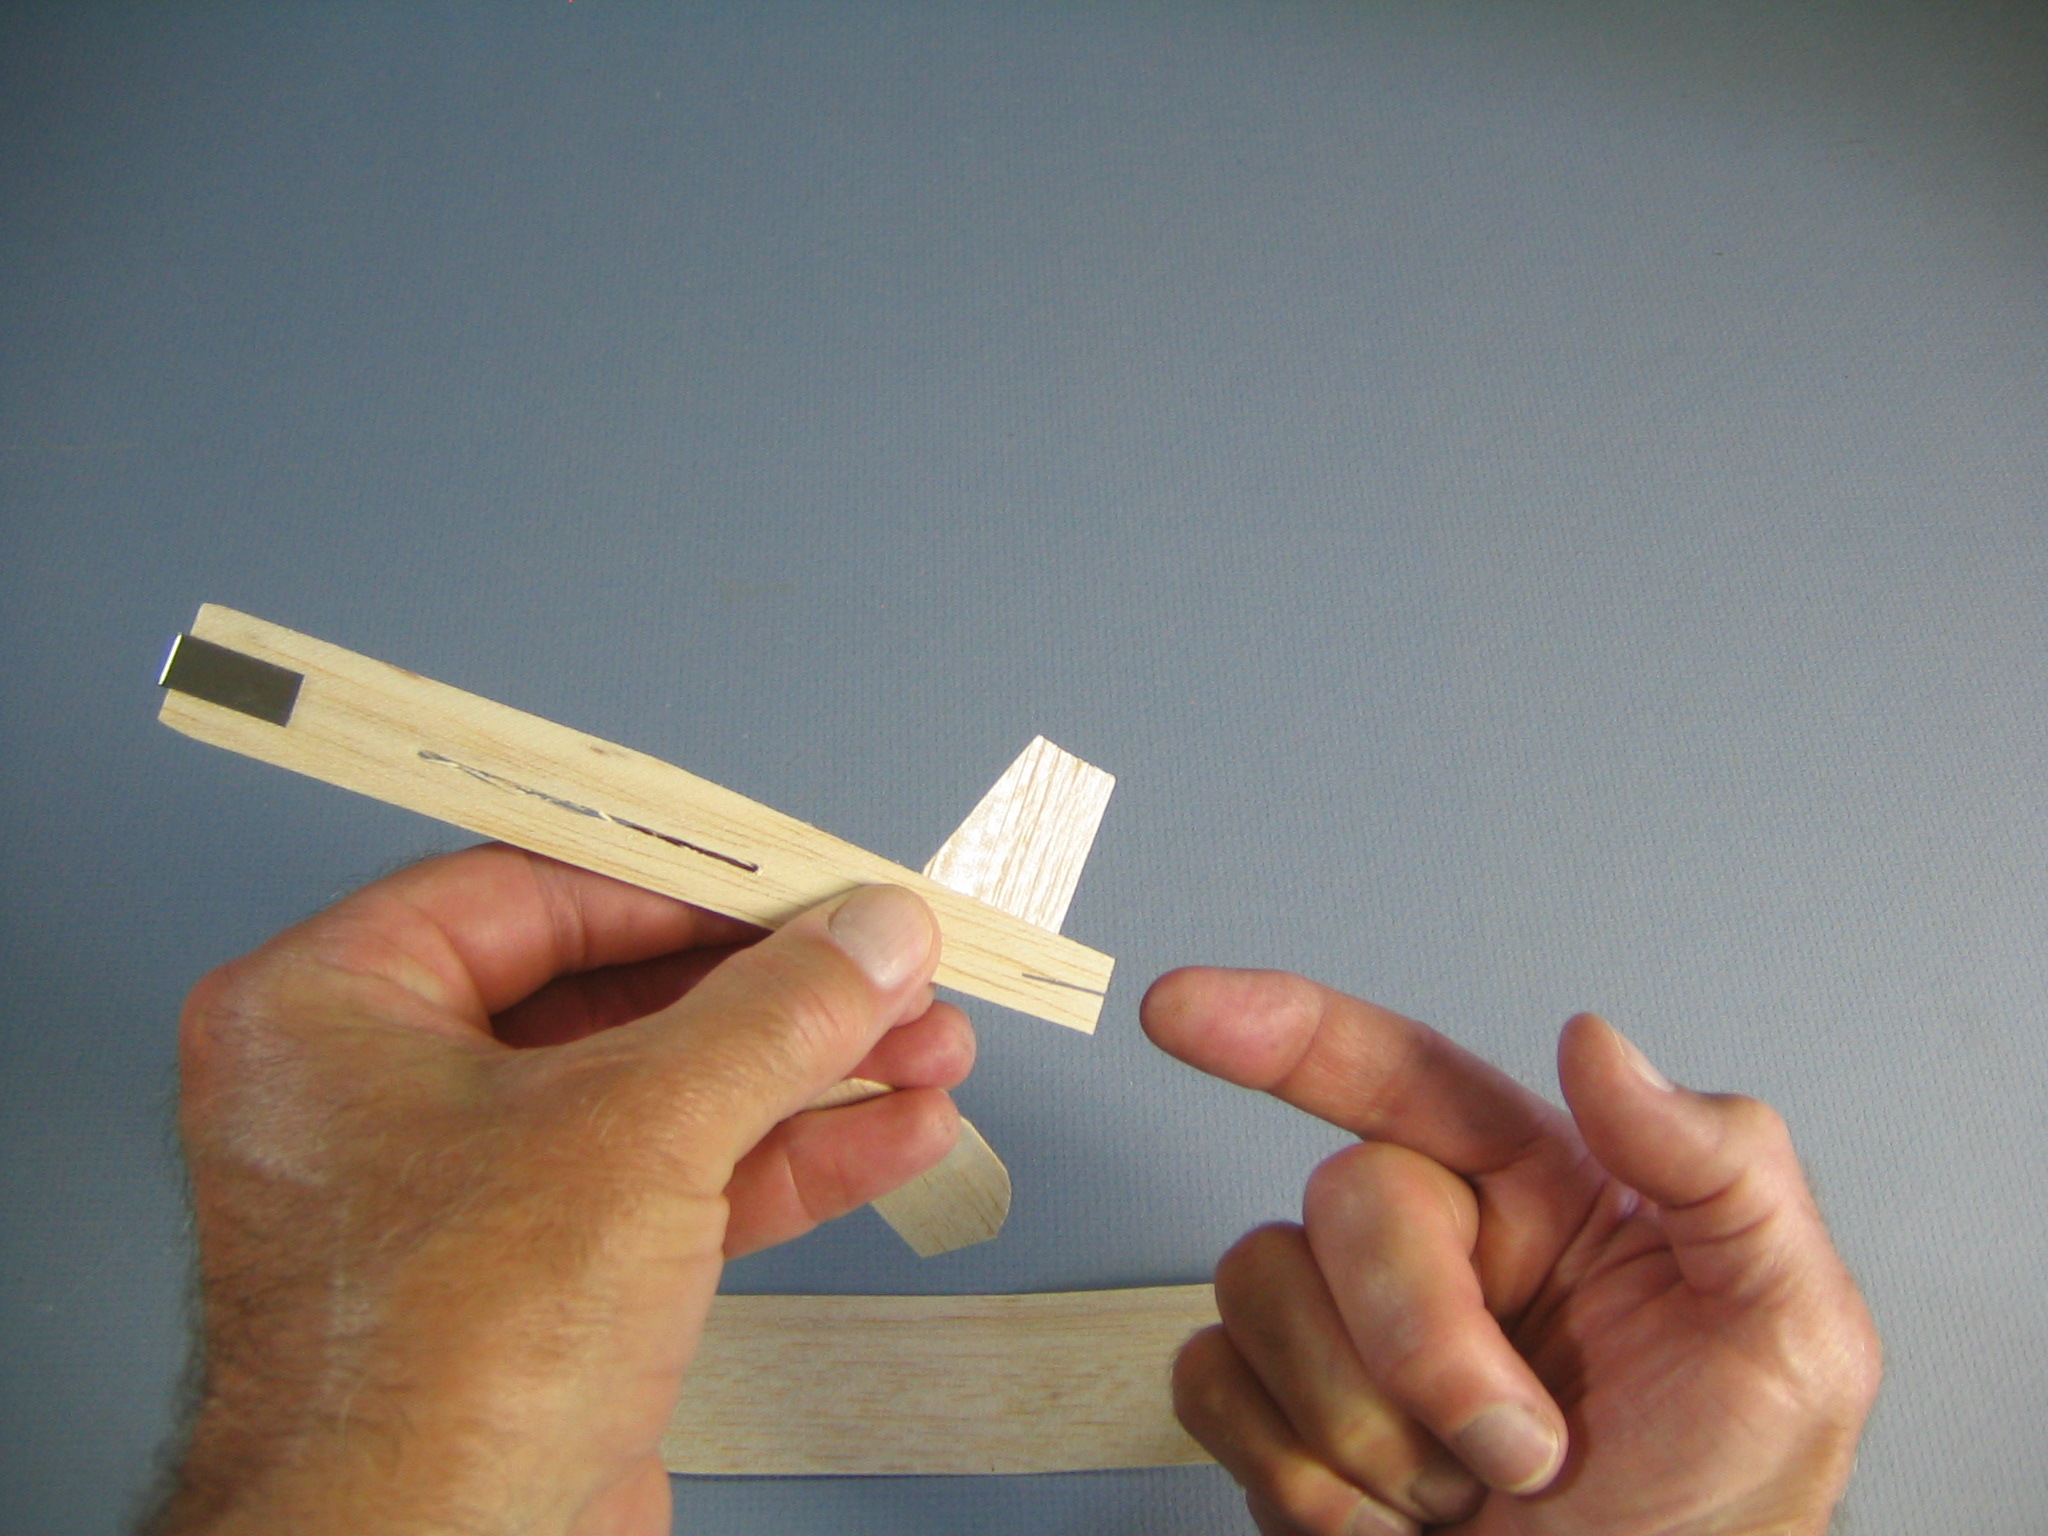 Next we will insert the tailplane into the slot at the back end of the fuselage.
 Once again, we must be careful how we do this. Holding it at the trailing edge and pressing it into the slot like this is not a good idea.
 That will likely result in a broken tailplane. I found eight broken tailplanes on the table when I got back from the flying field. Again, that glue bottle comes in handy. But it is better to not break parts.
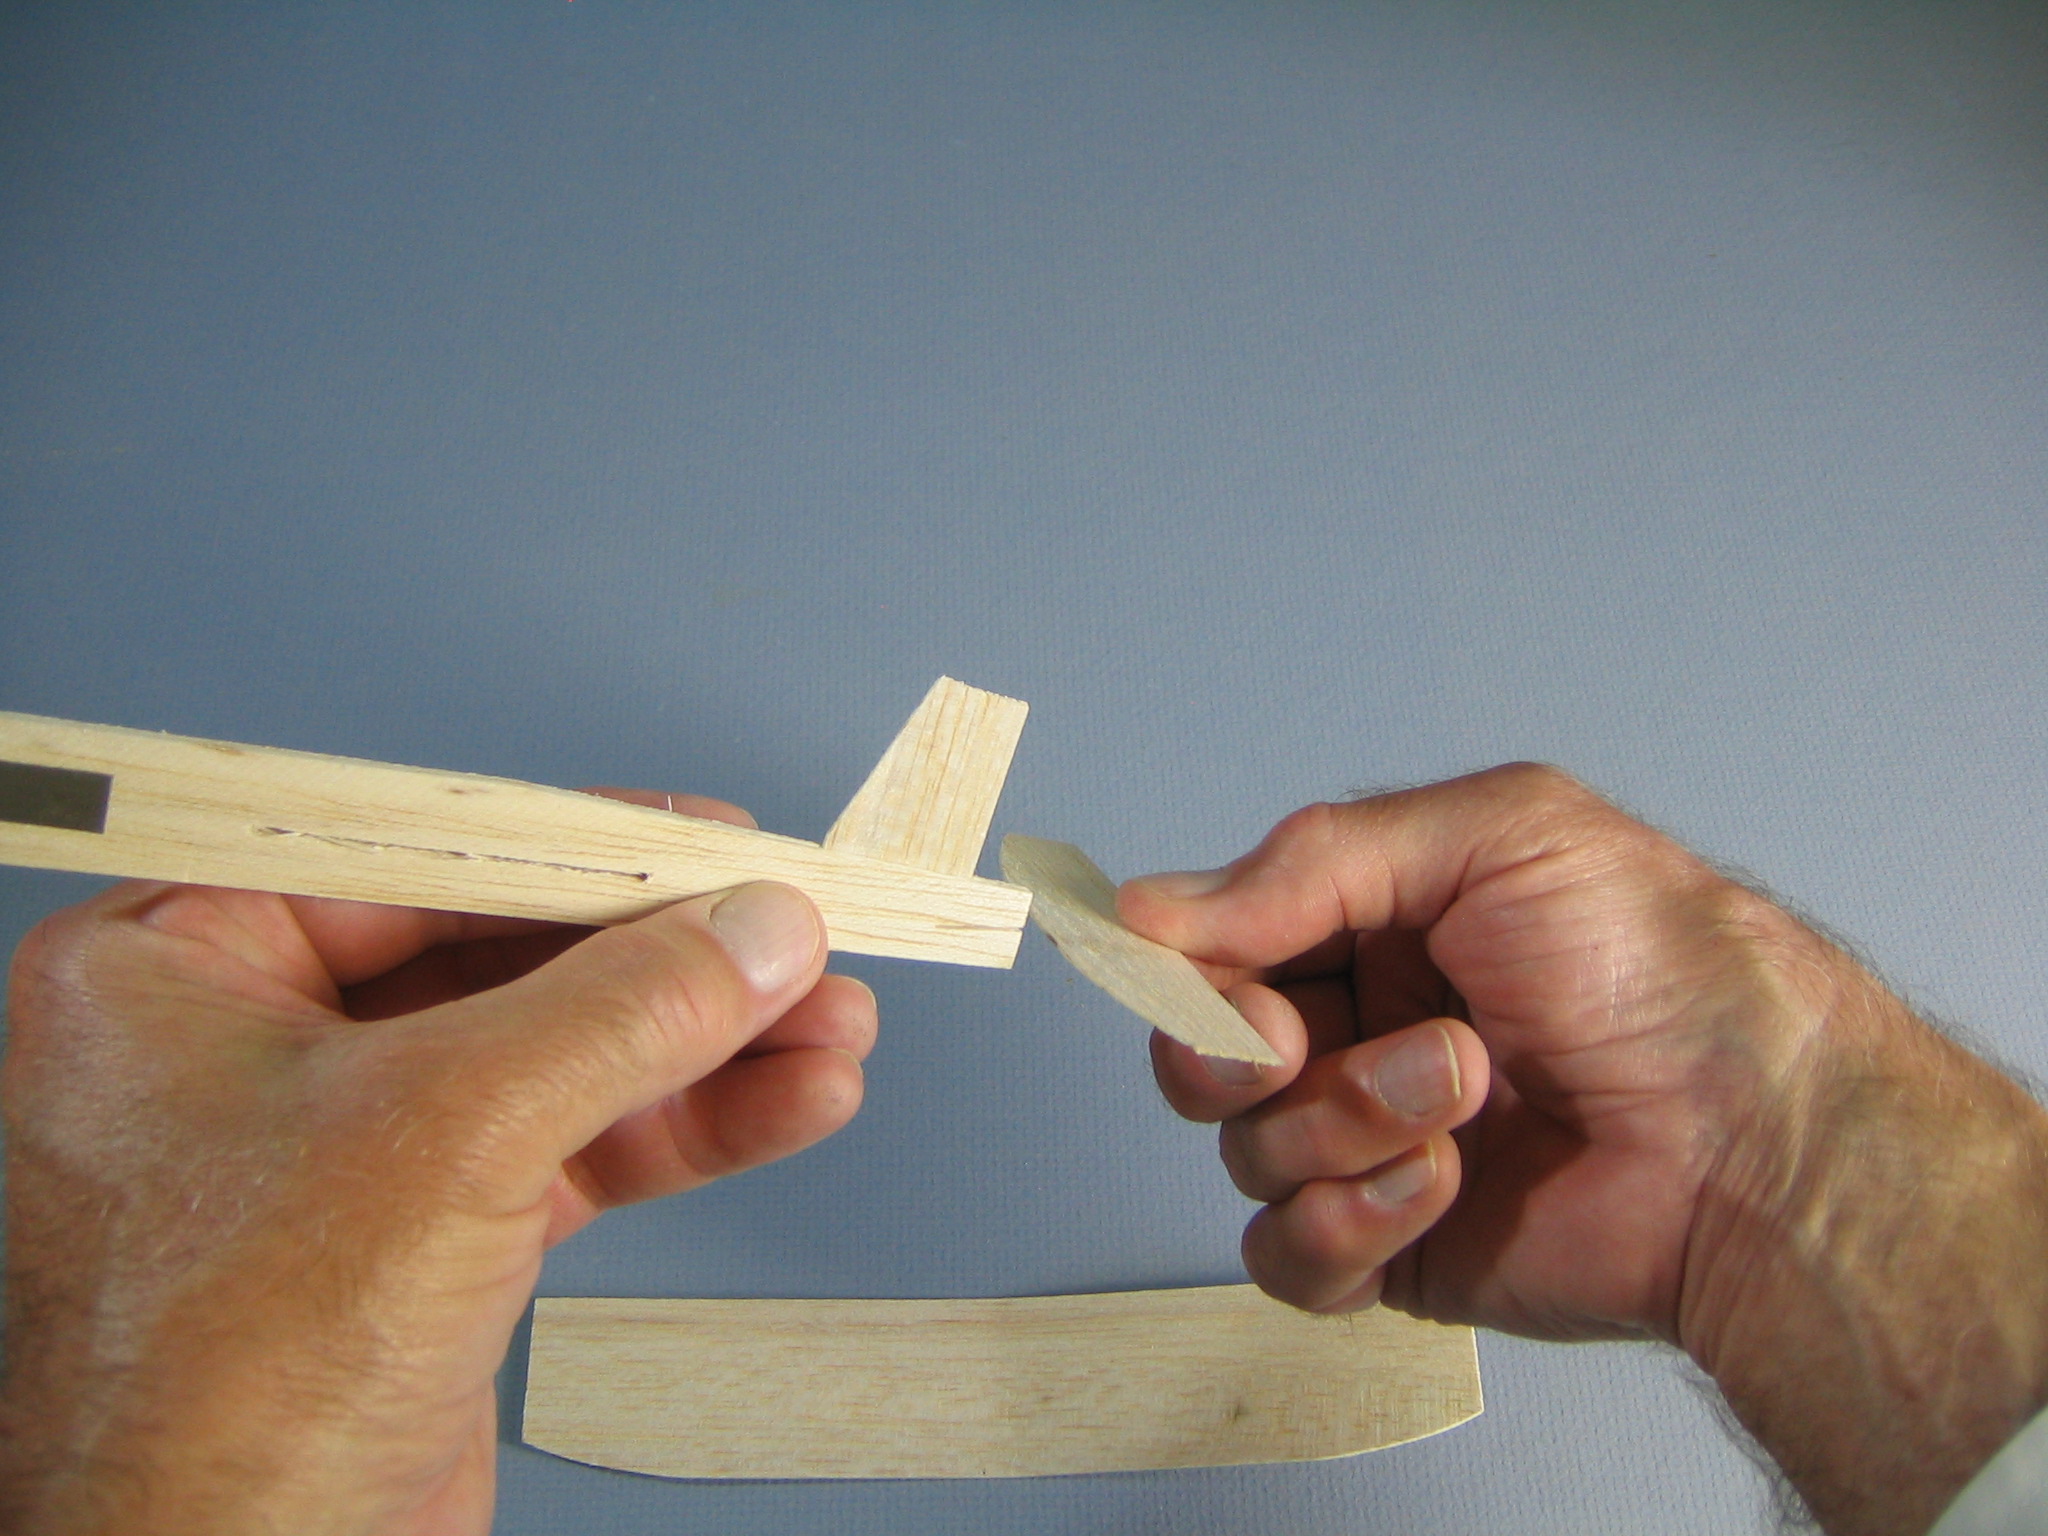
 The way to do it is to hold the tailplane near the front edge, near the center, and wiggle it a little from side to side as you slide it into the slot.
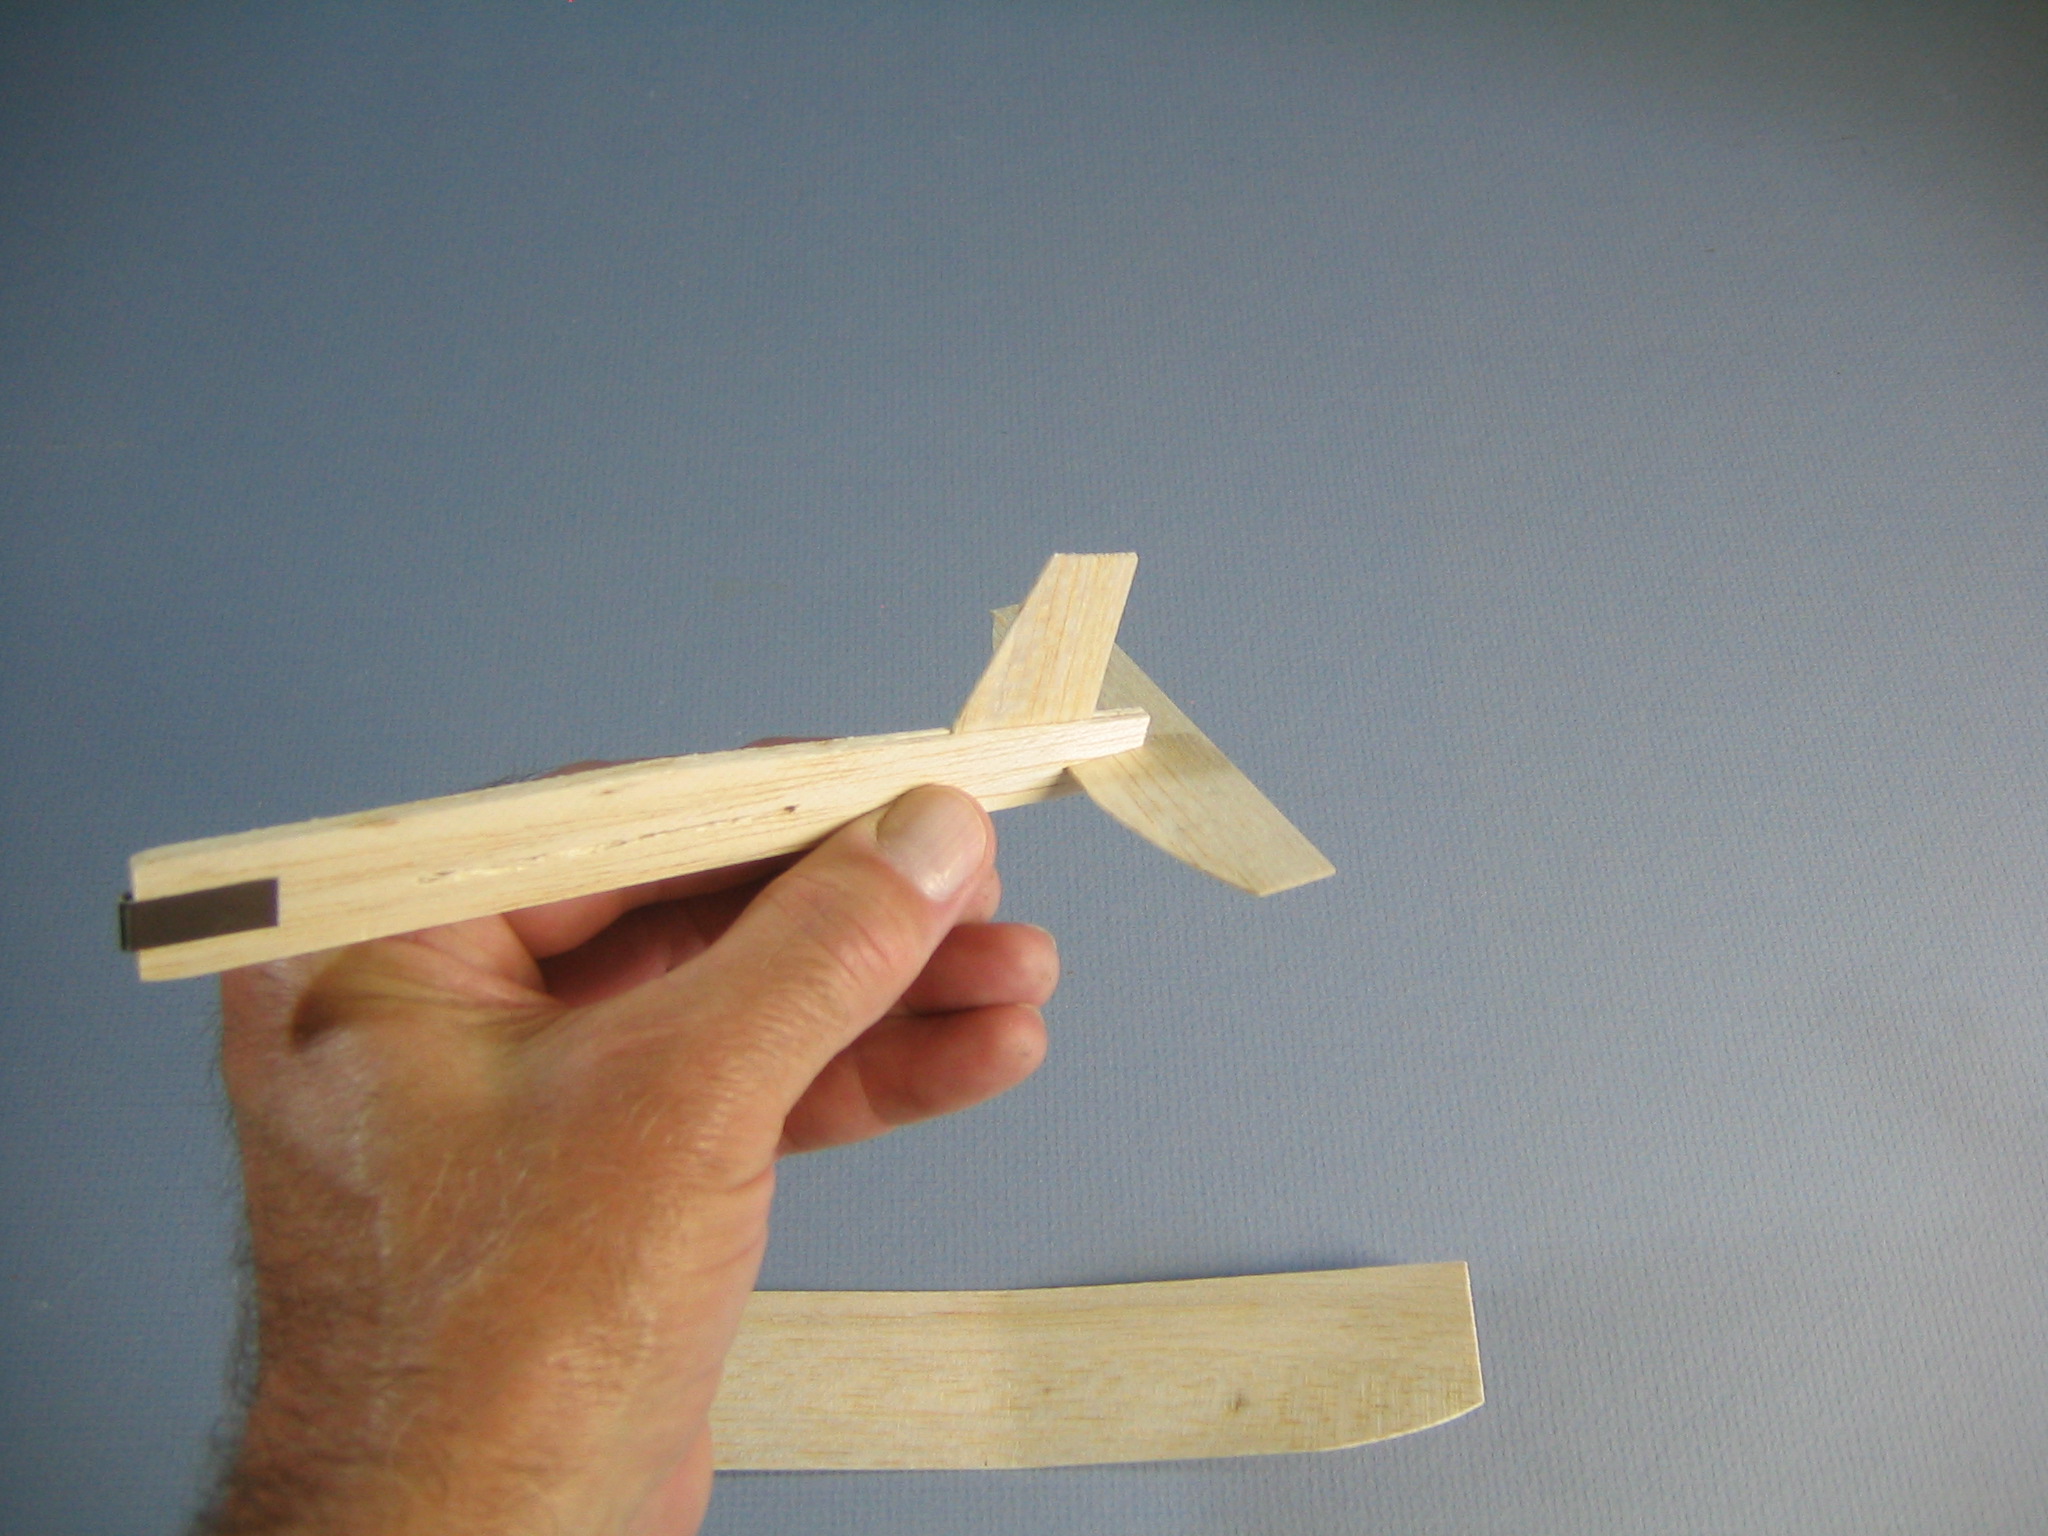 Line it up to be centered and perpendicular with the fuselage.
 Inserting the wing is another place where things can go wrong. If you push the wing in from one tip, you risk it buckling and breaking. If that happens, save the broken pieces. You might be able to glue them back together, but you can also use the balsa sheet to make replacement fin and tailplane parts if you don’t have any glue. I will show you how to do that later.
 The proper way to insert the wing is to hold it close to the tip and get it started corner first into the slot. Note that the wing is oriented so the dihedral angle is up; the wingtips will be higher than the center. Scroll down to see what this looks like from the front.
 Push it through just a little bit.
 Then pull it through the slot.
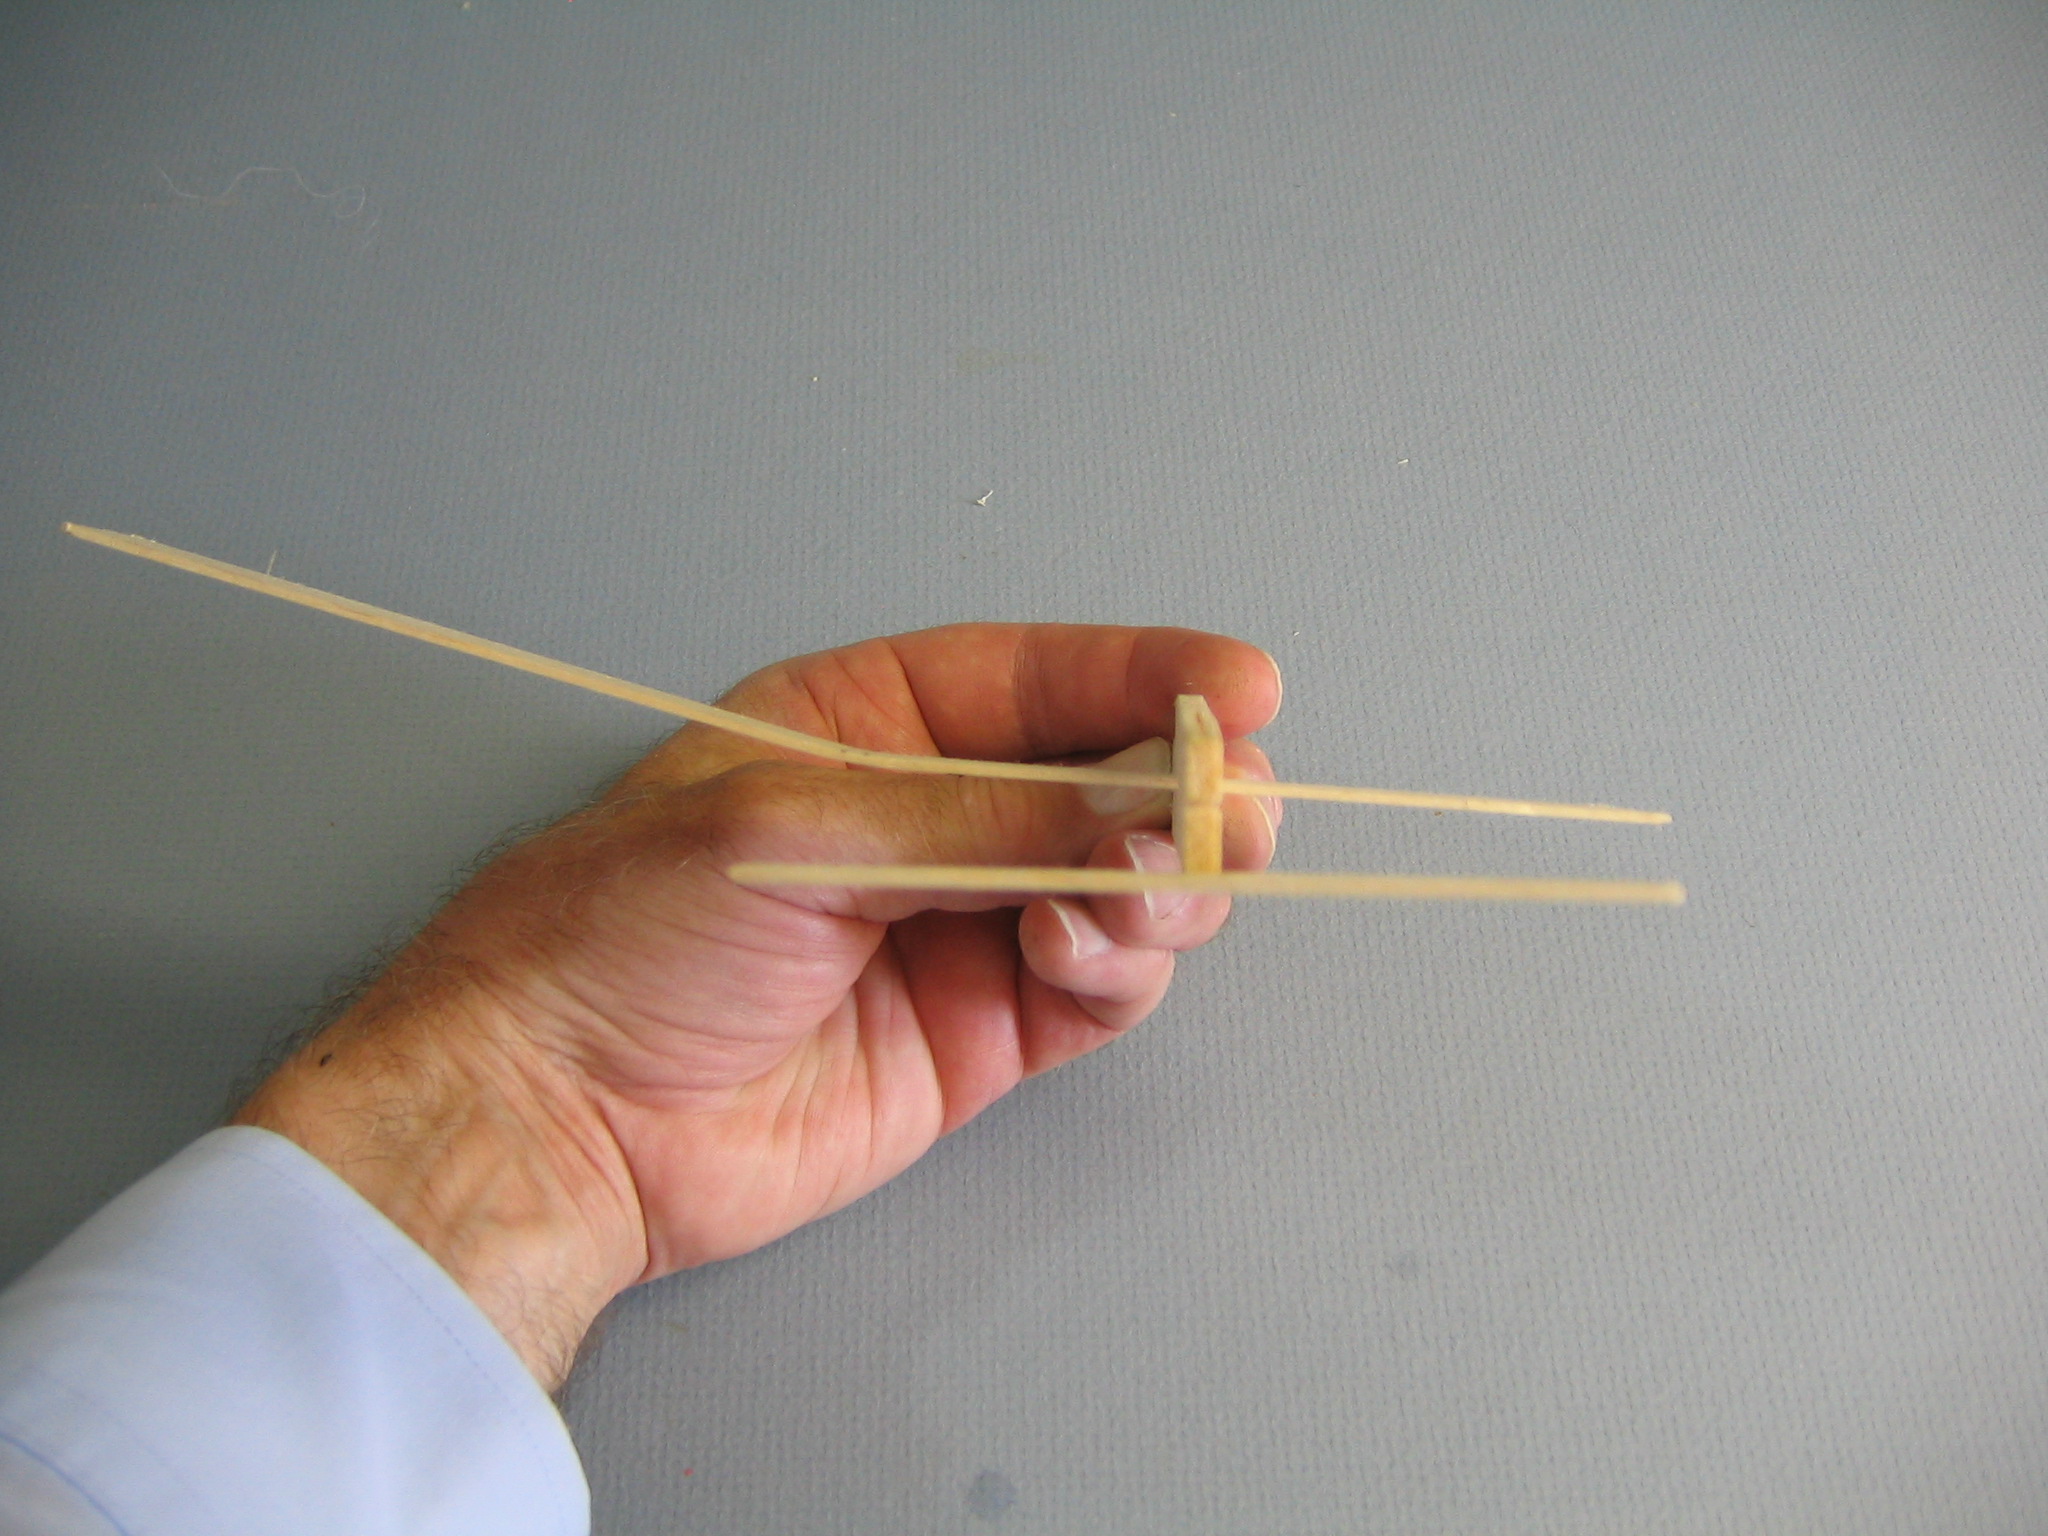
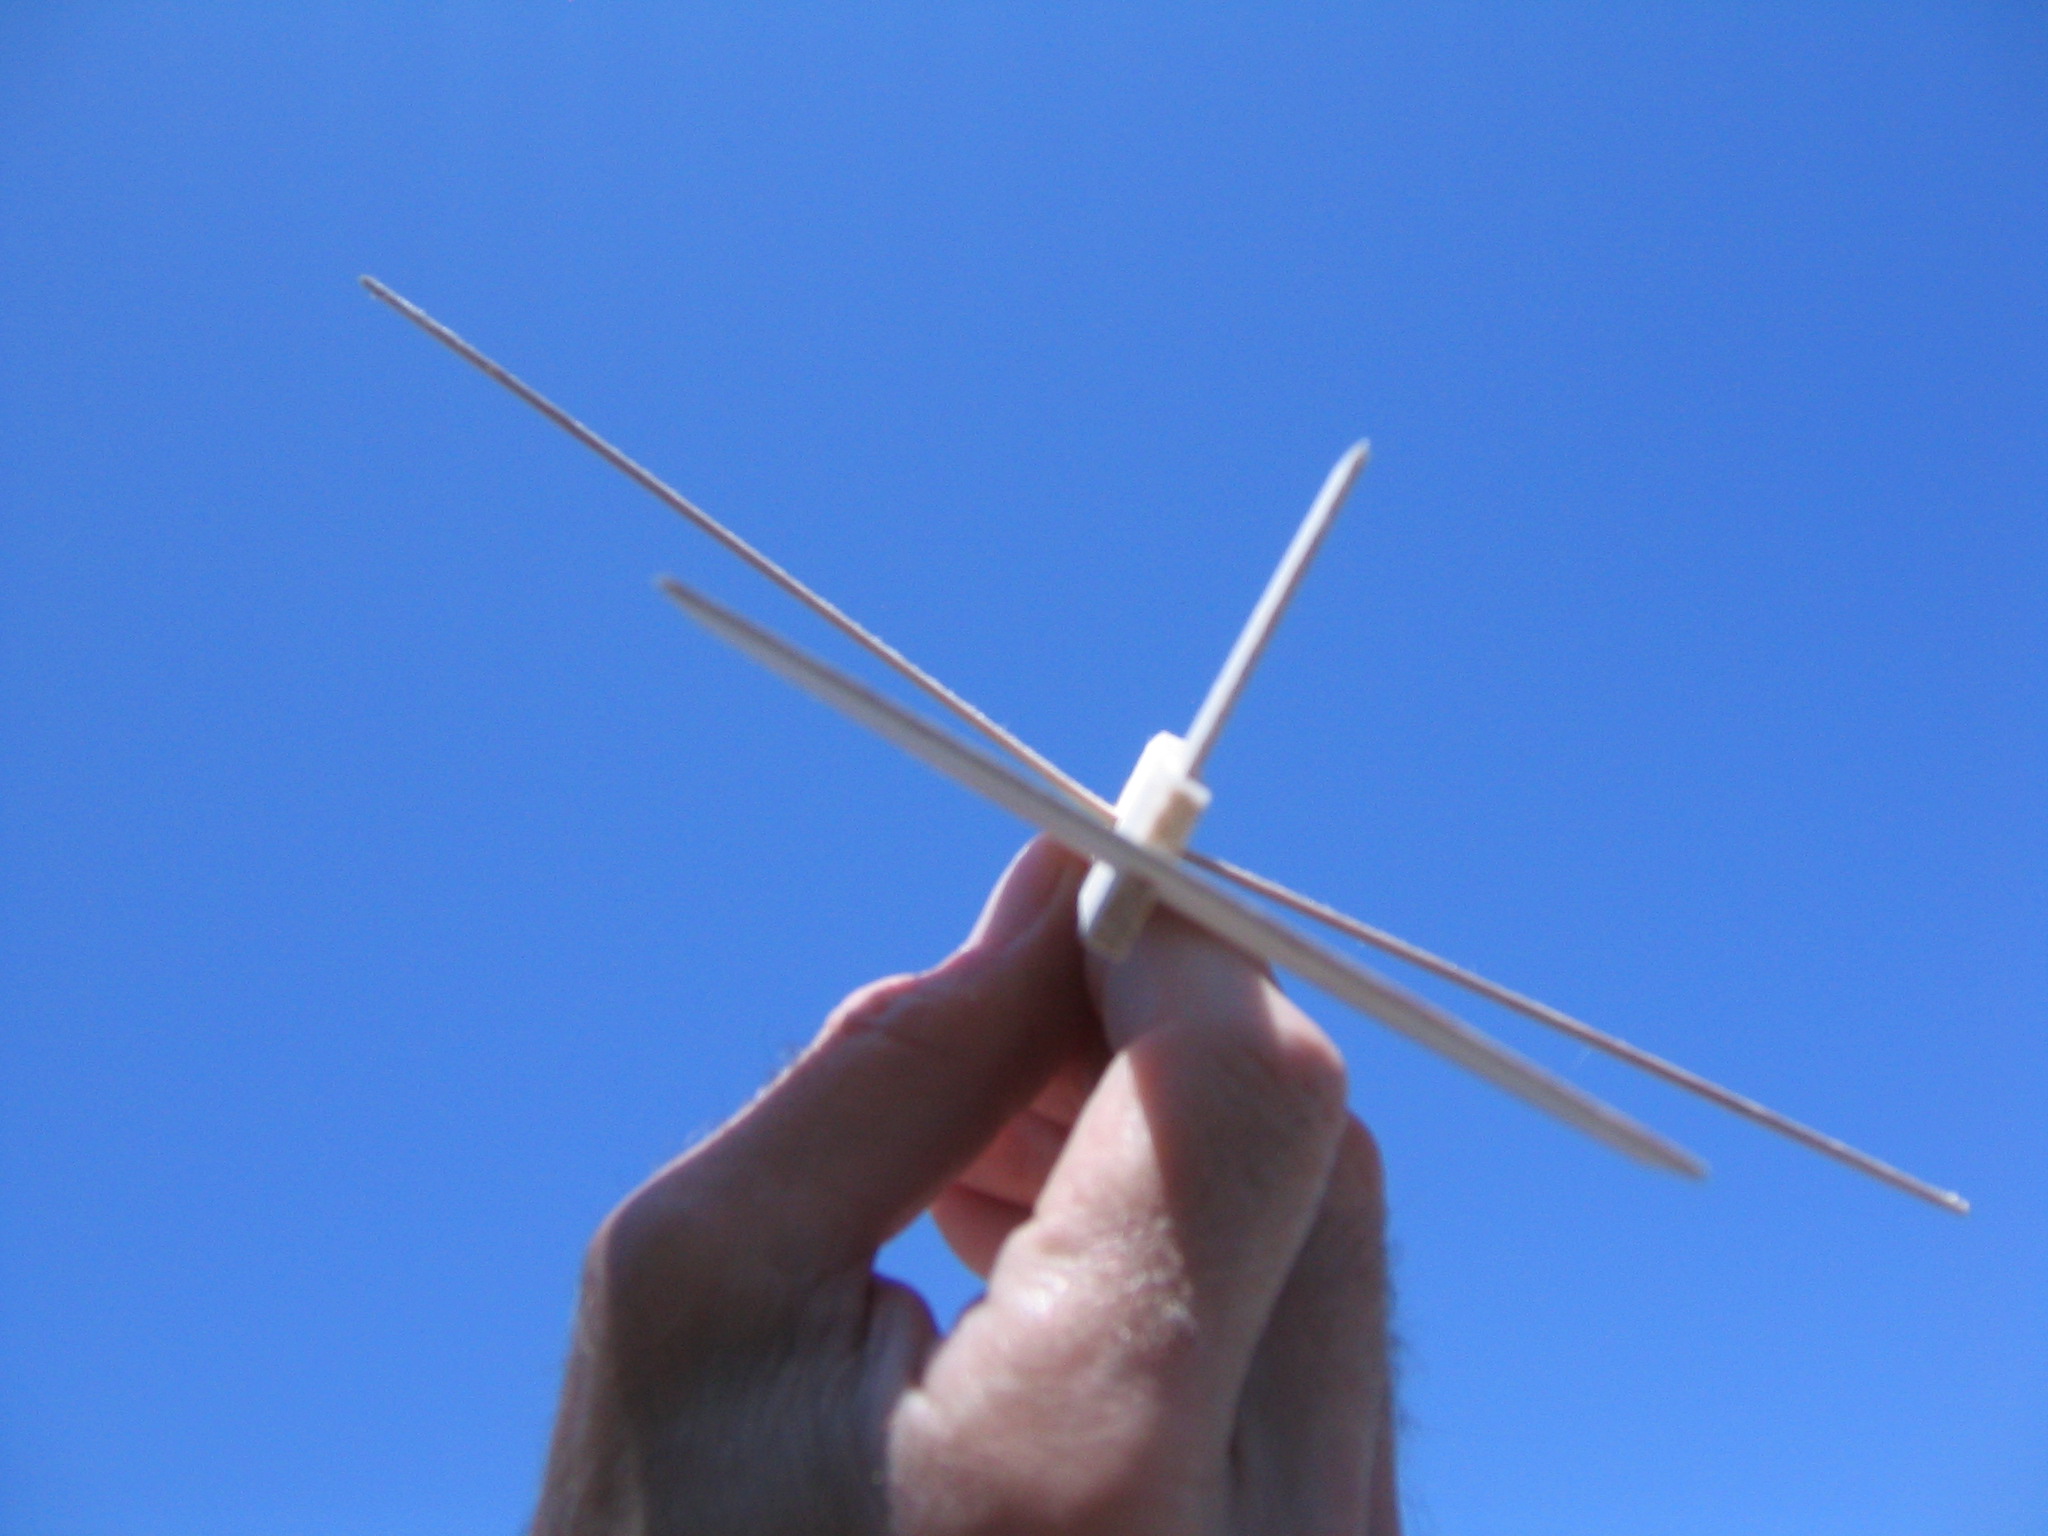
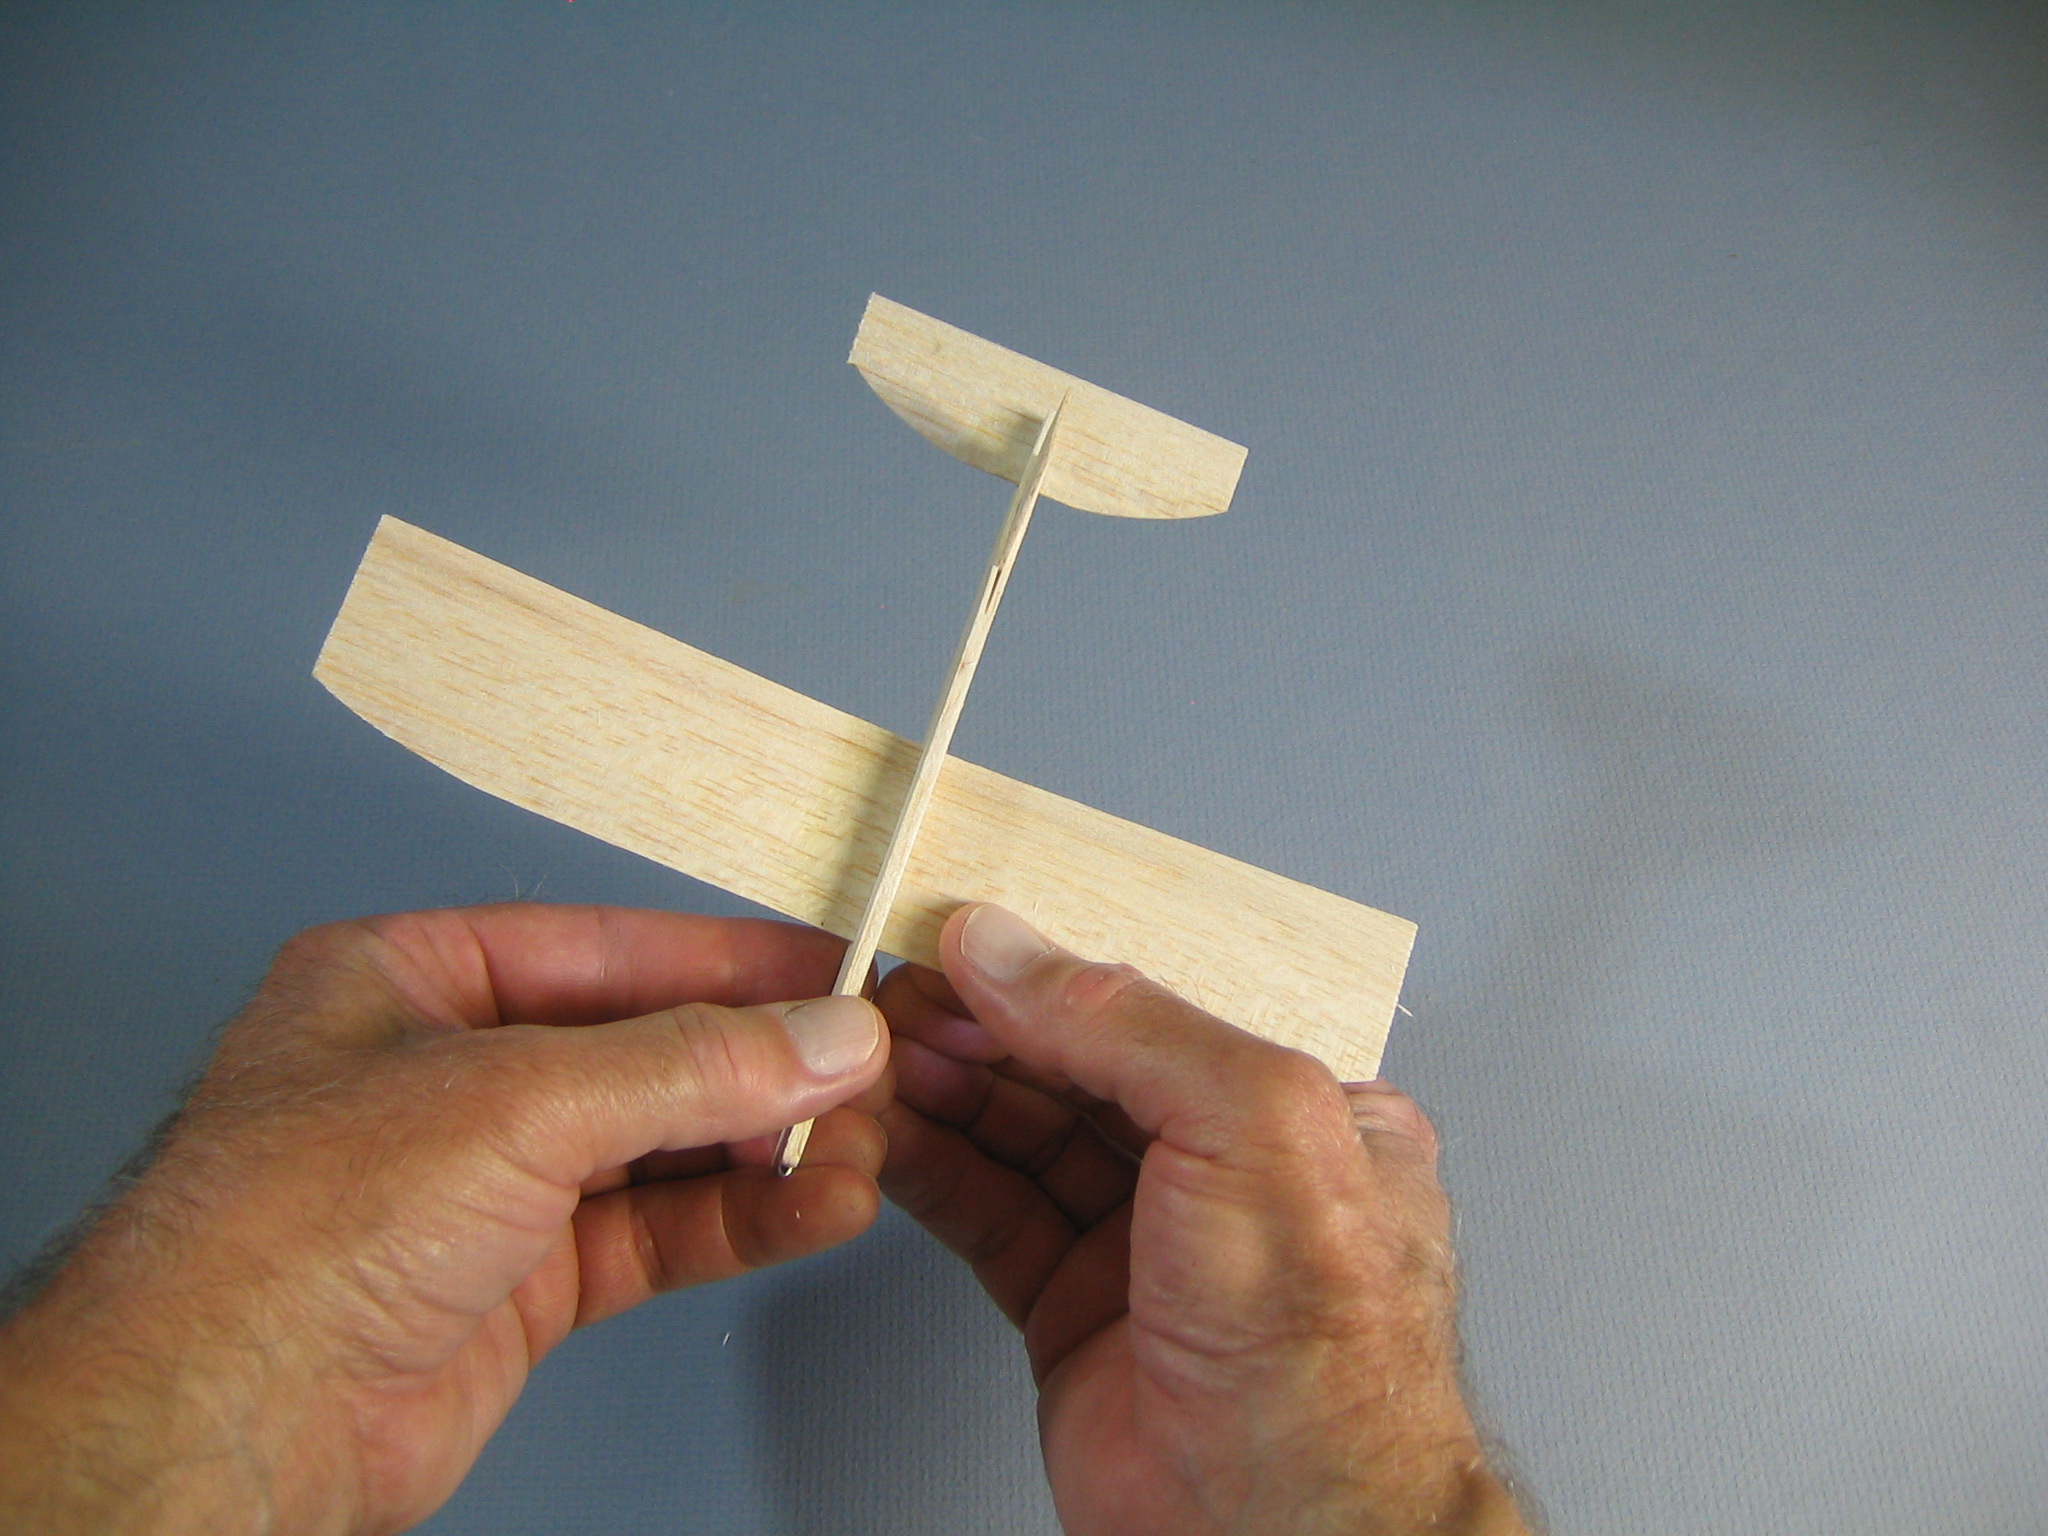 Adjust the wing until it is centered and square to the fuselage.
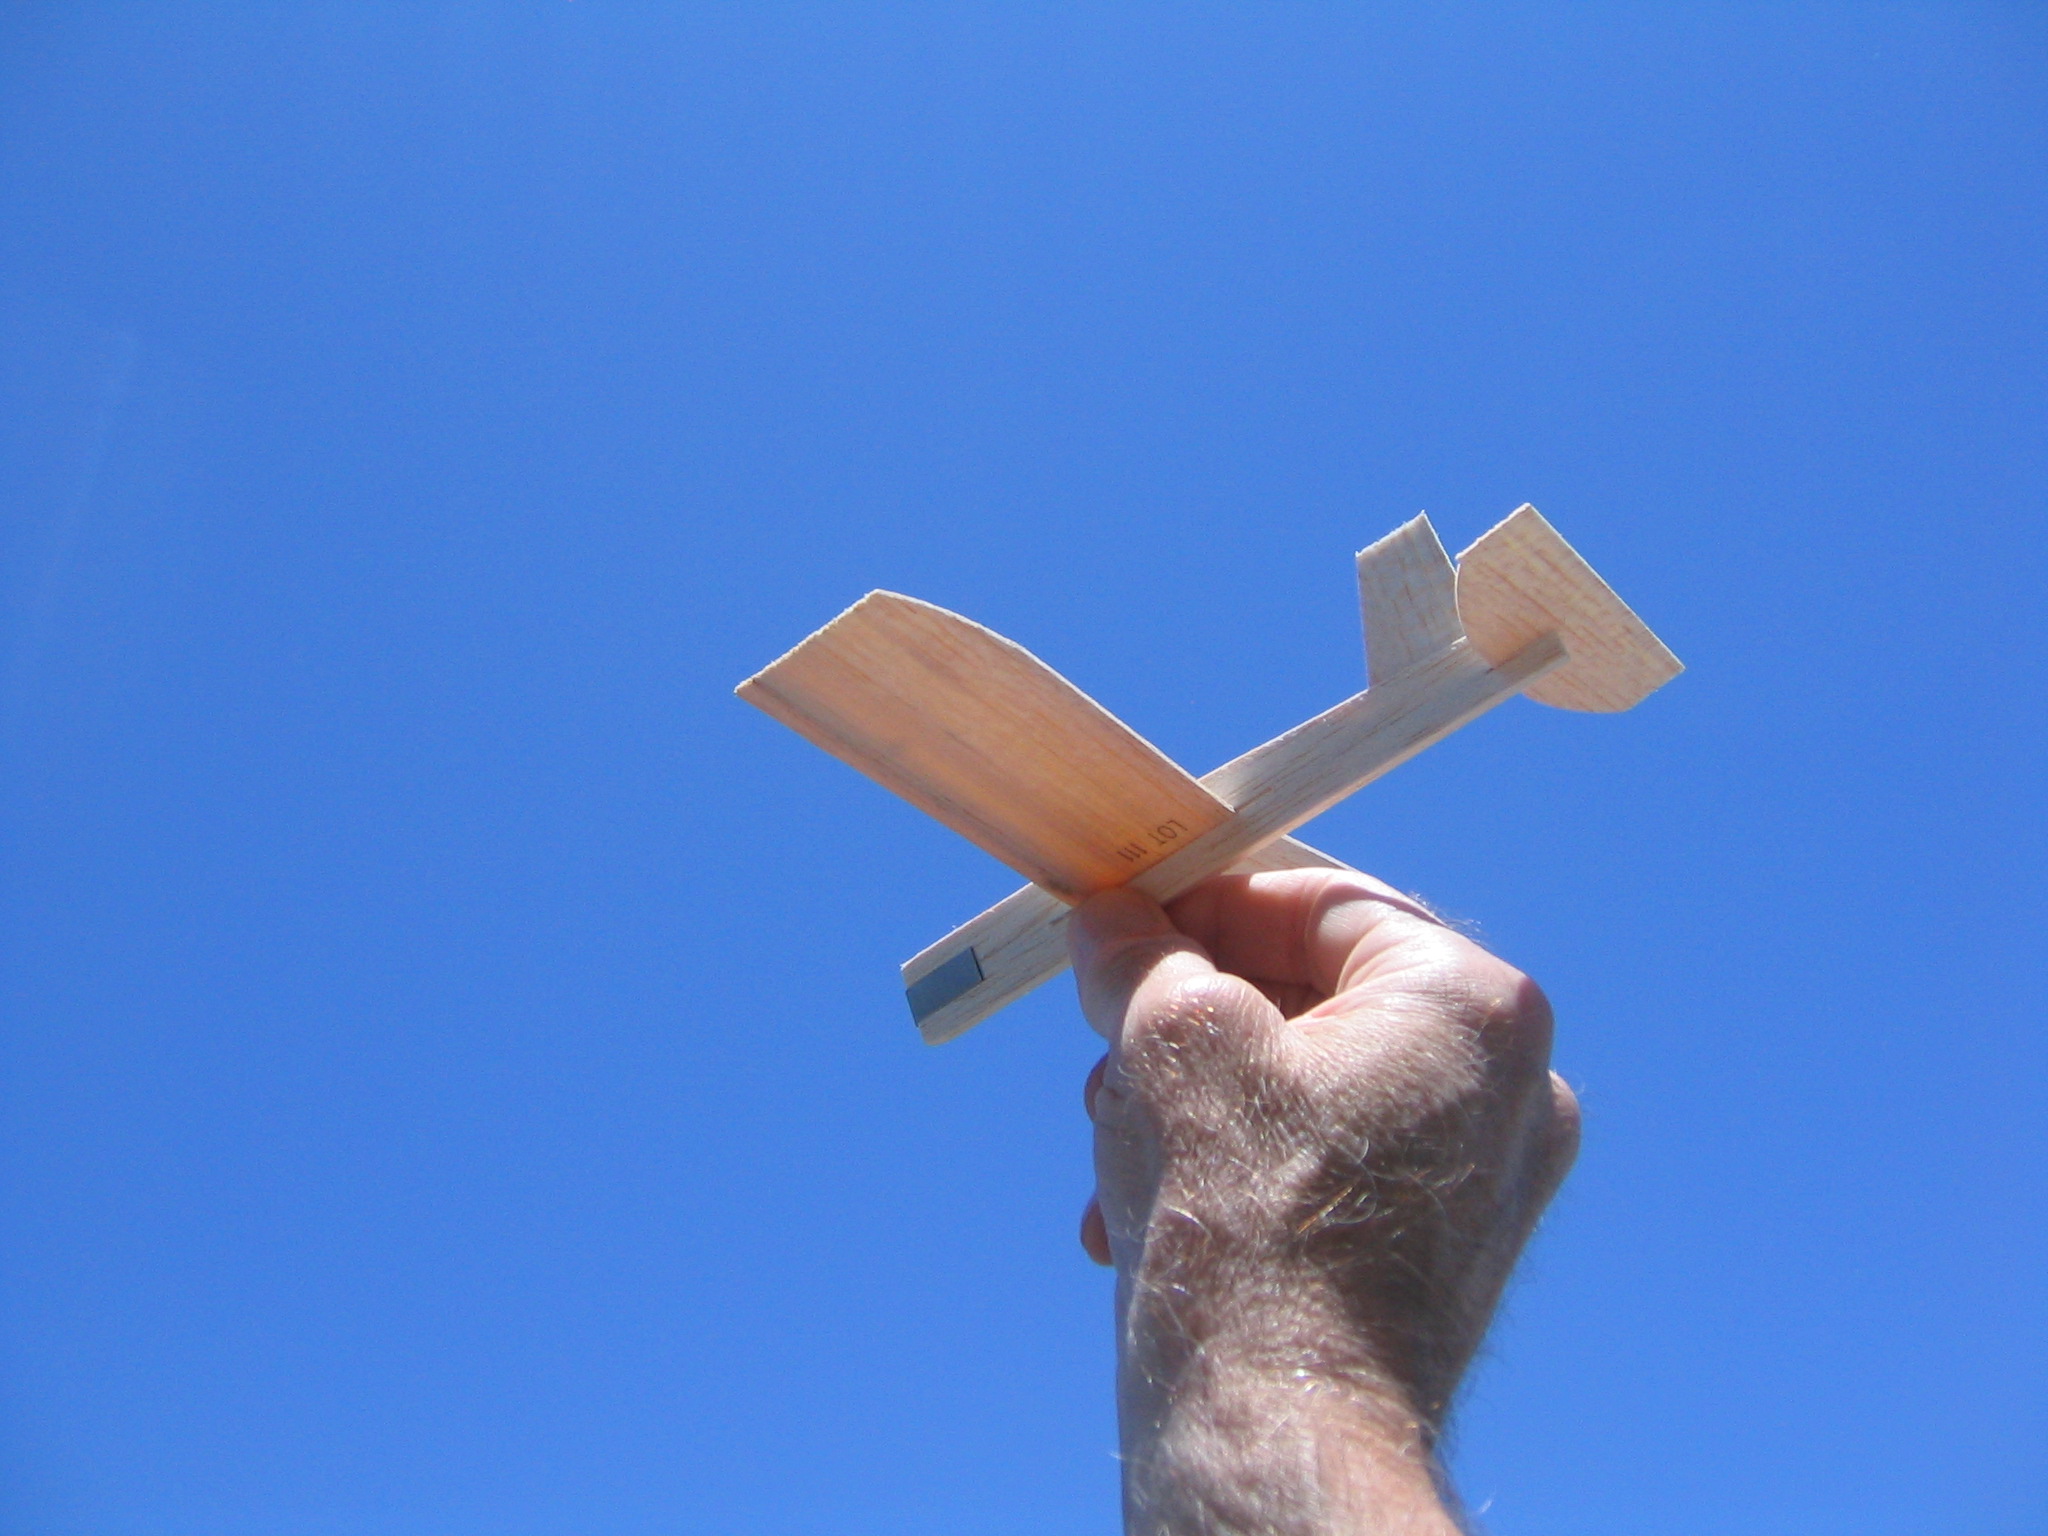
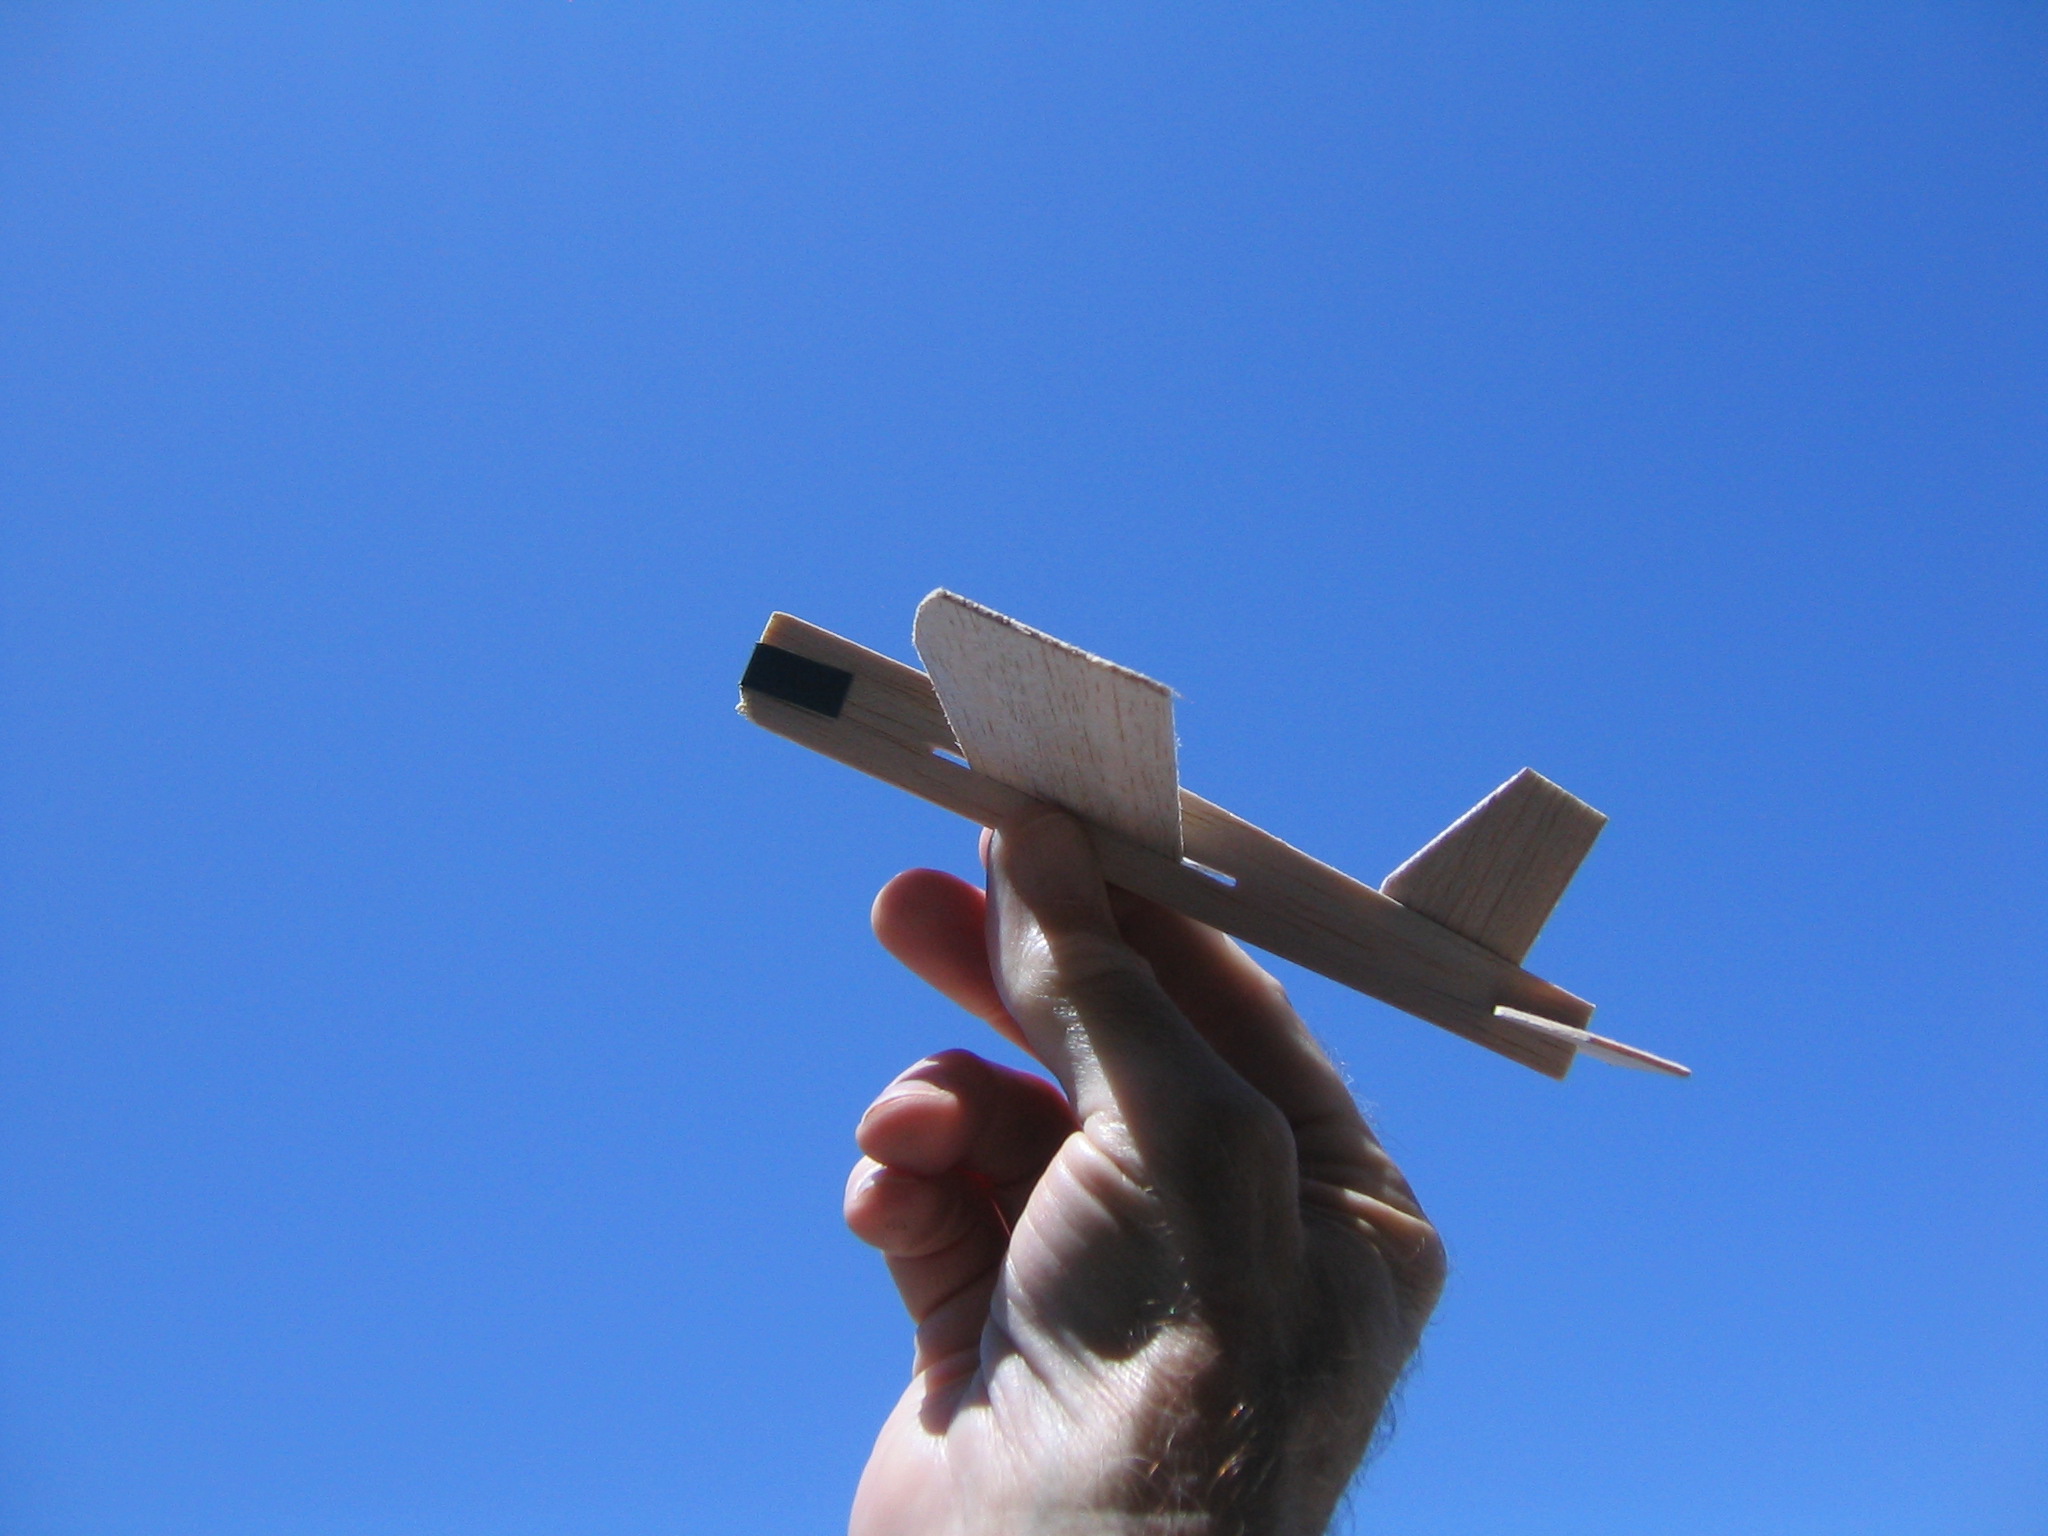
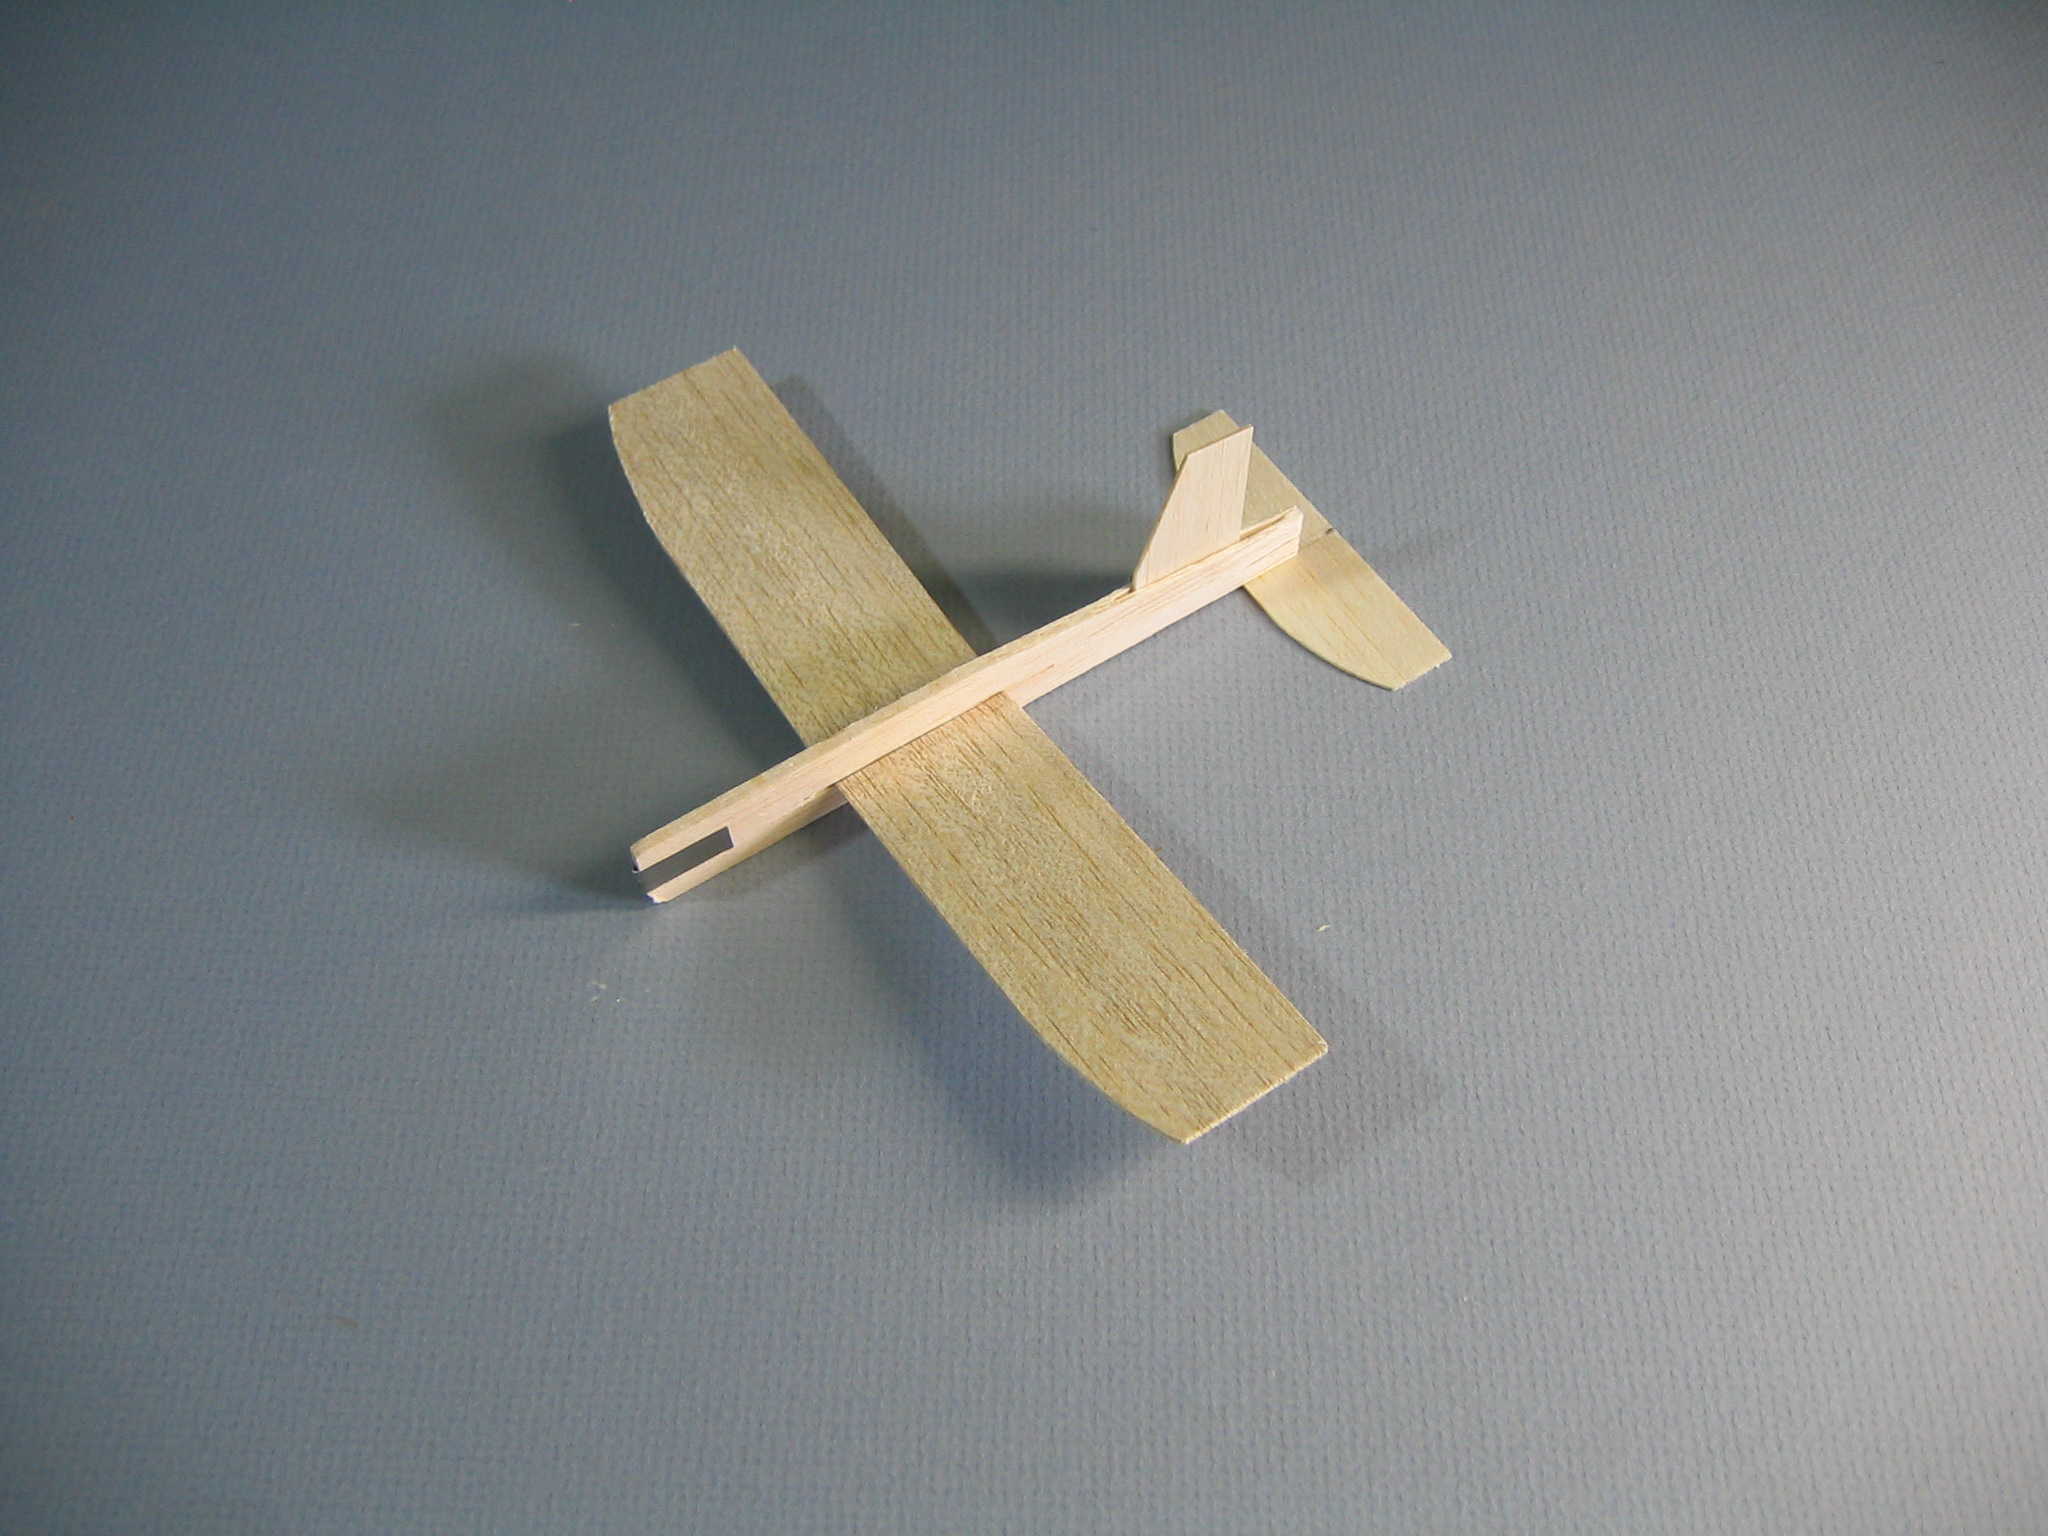
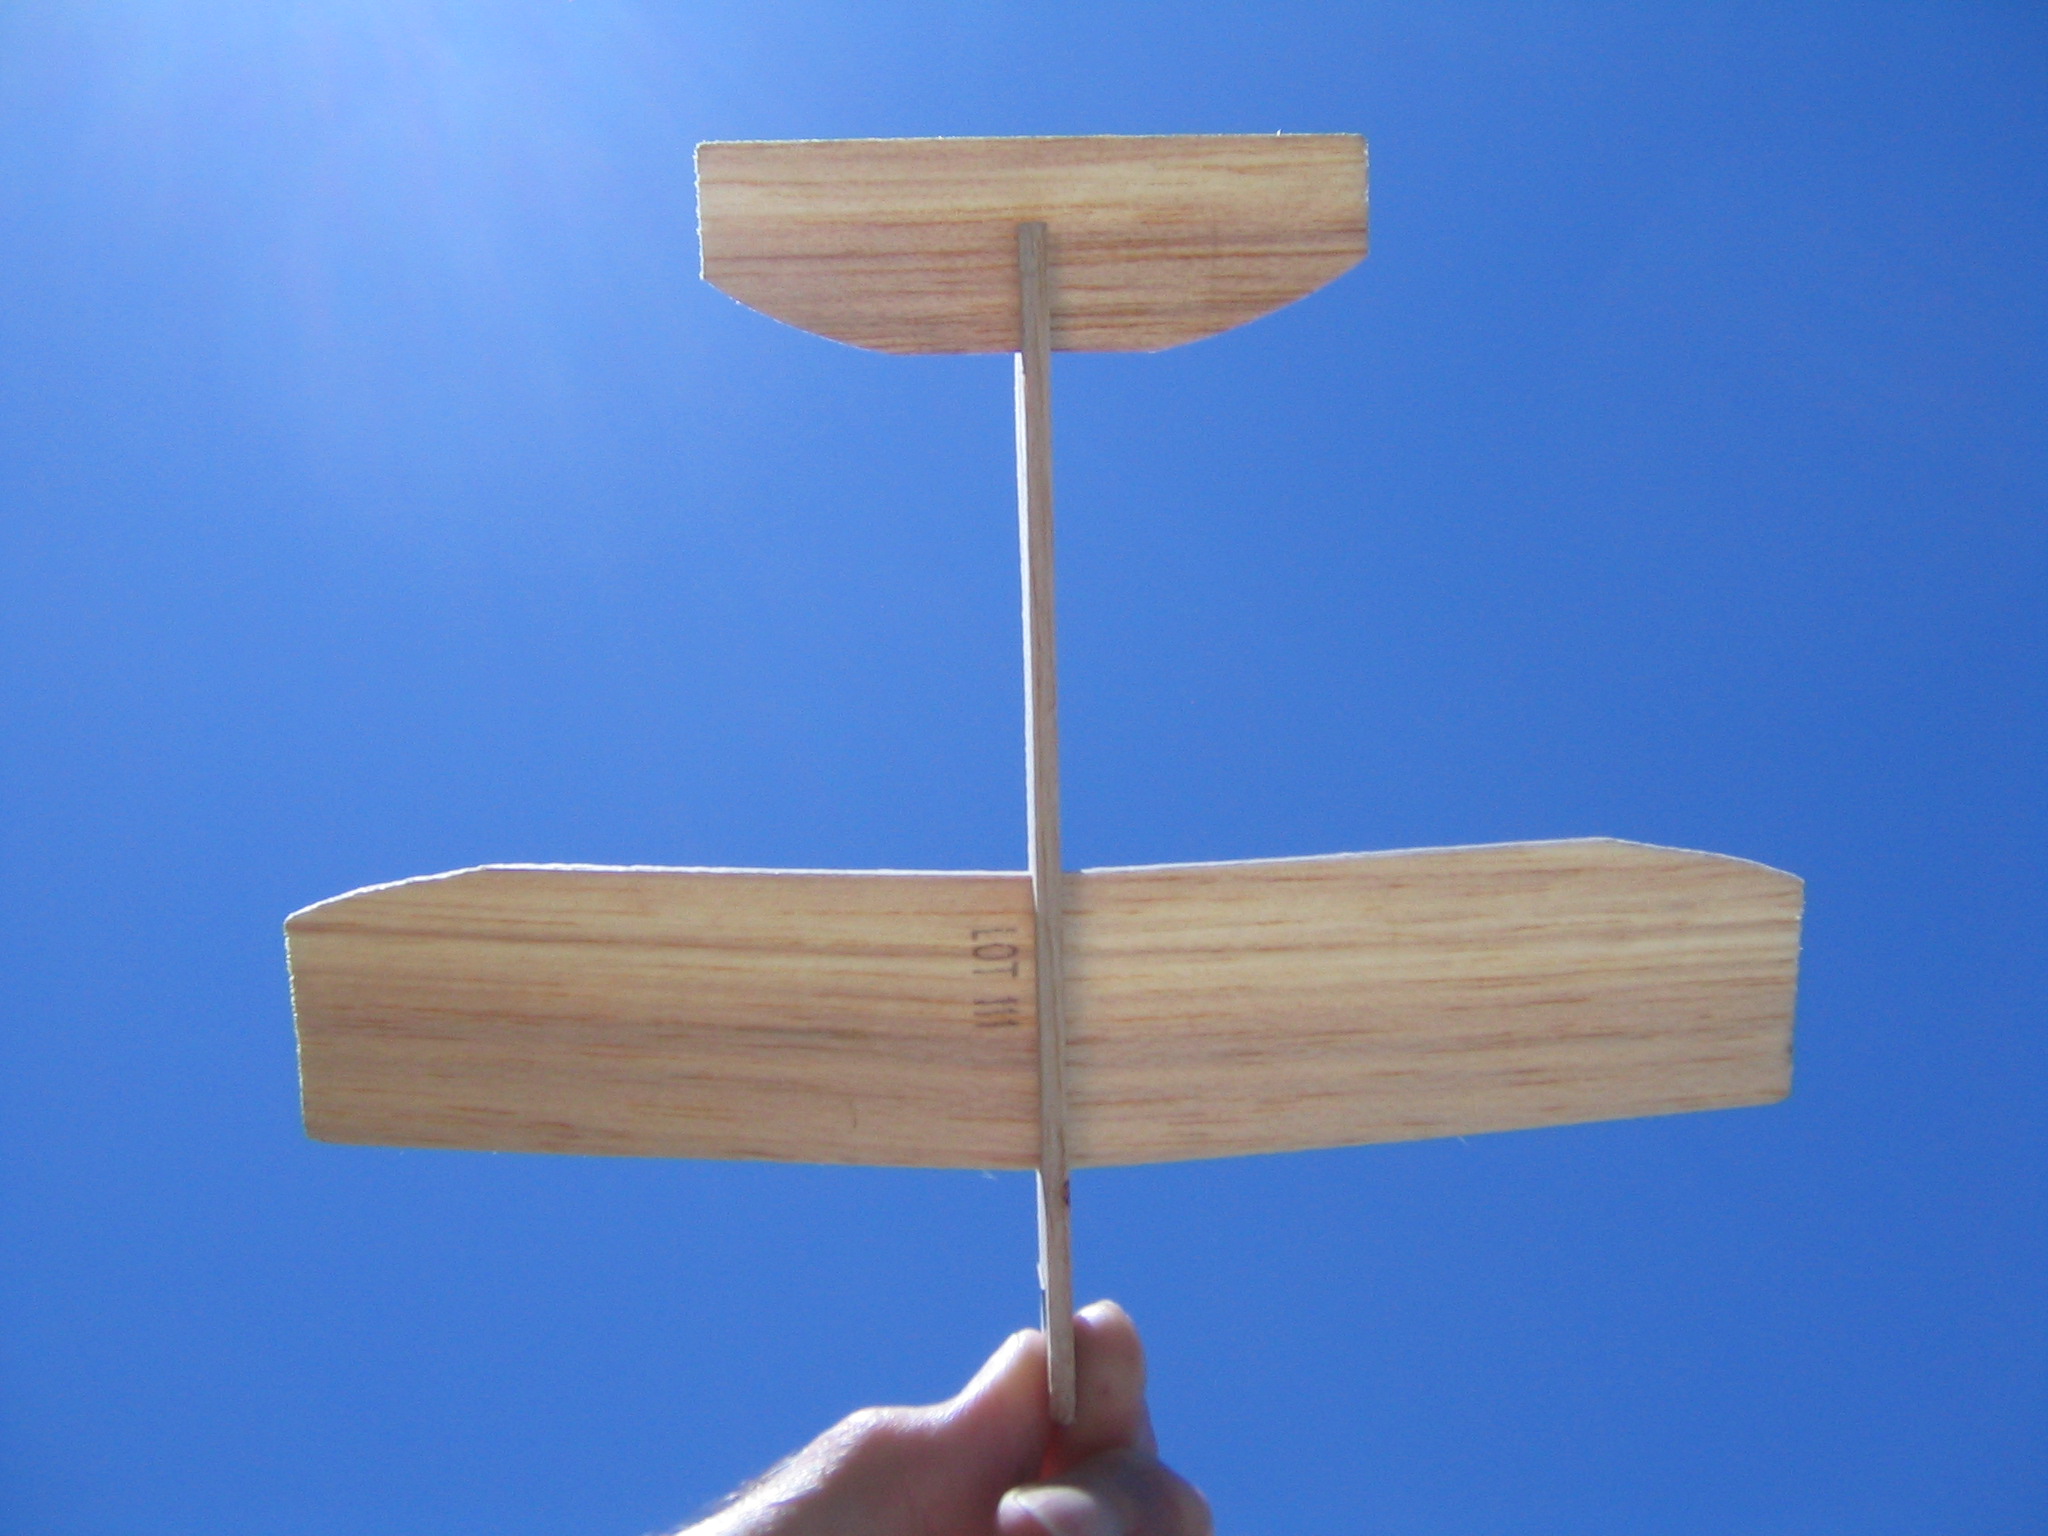
 That completes the construction of our Guillow’s 25-1 glider.
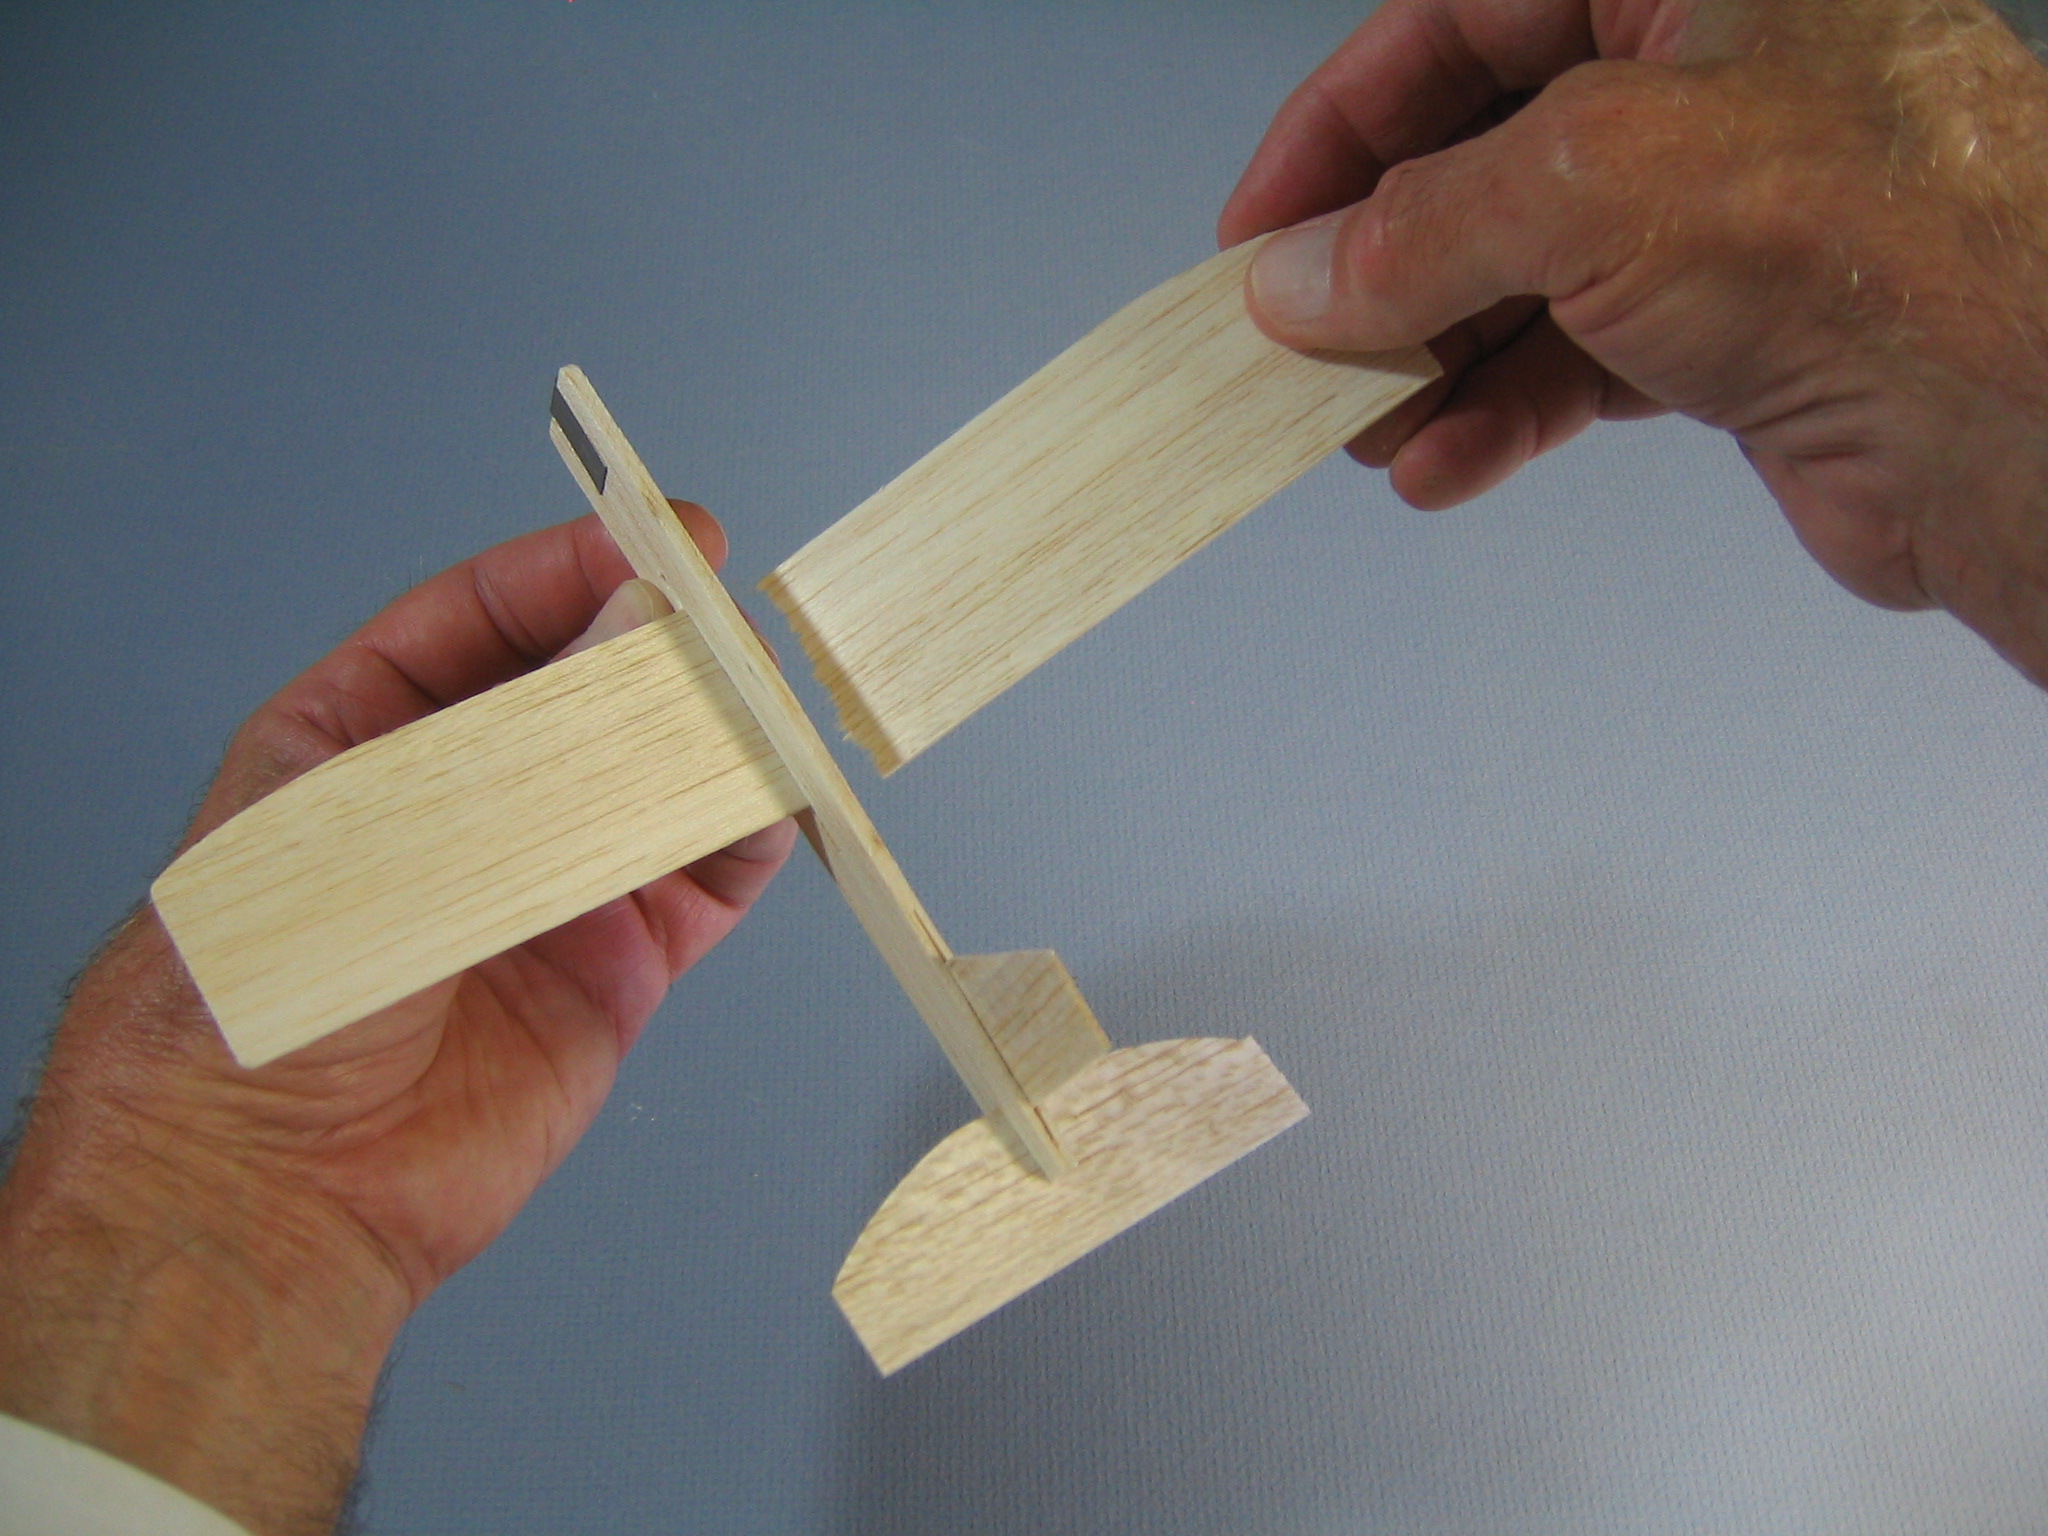
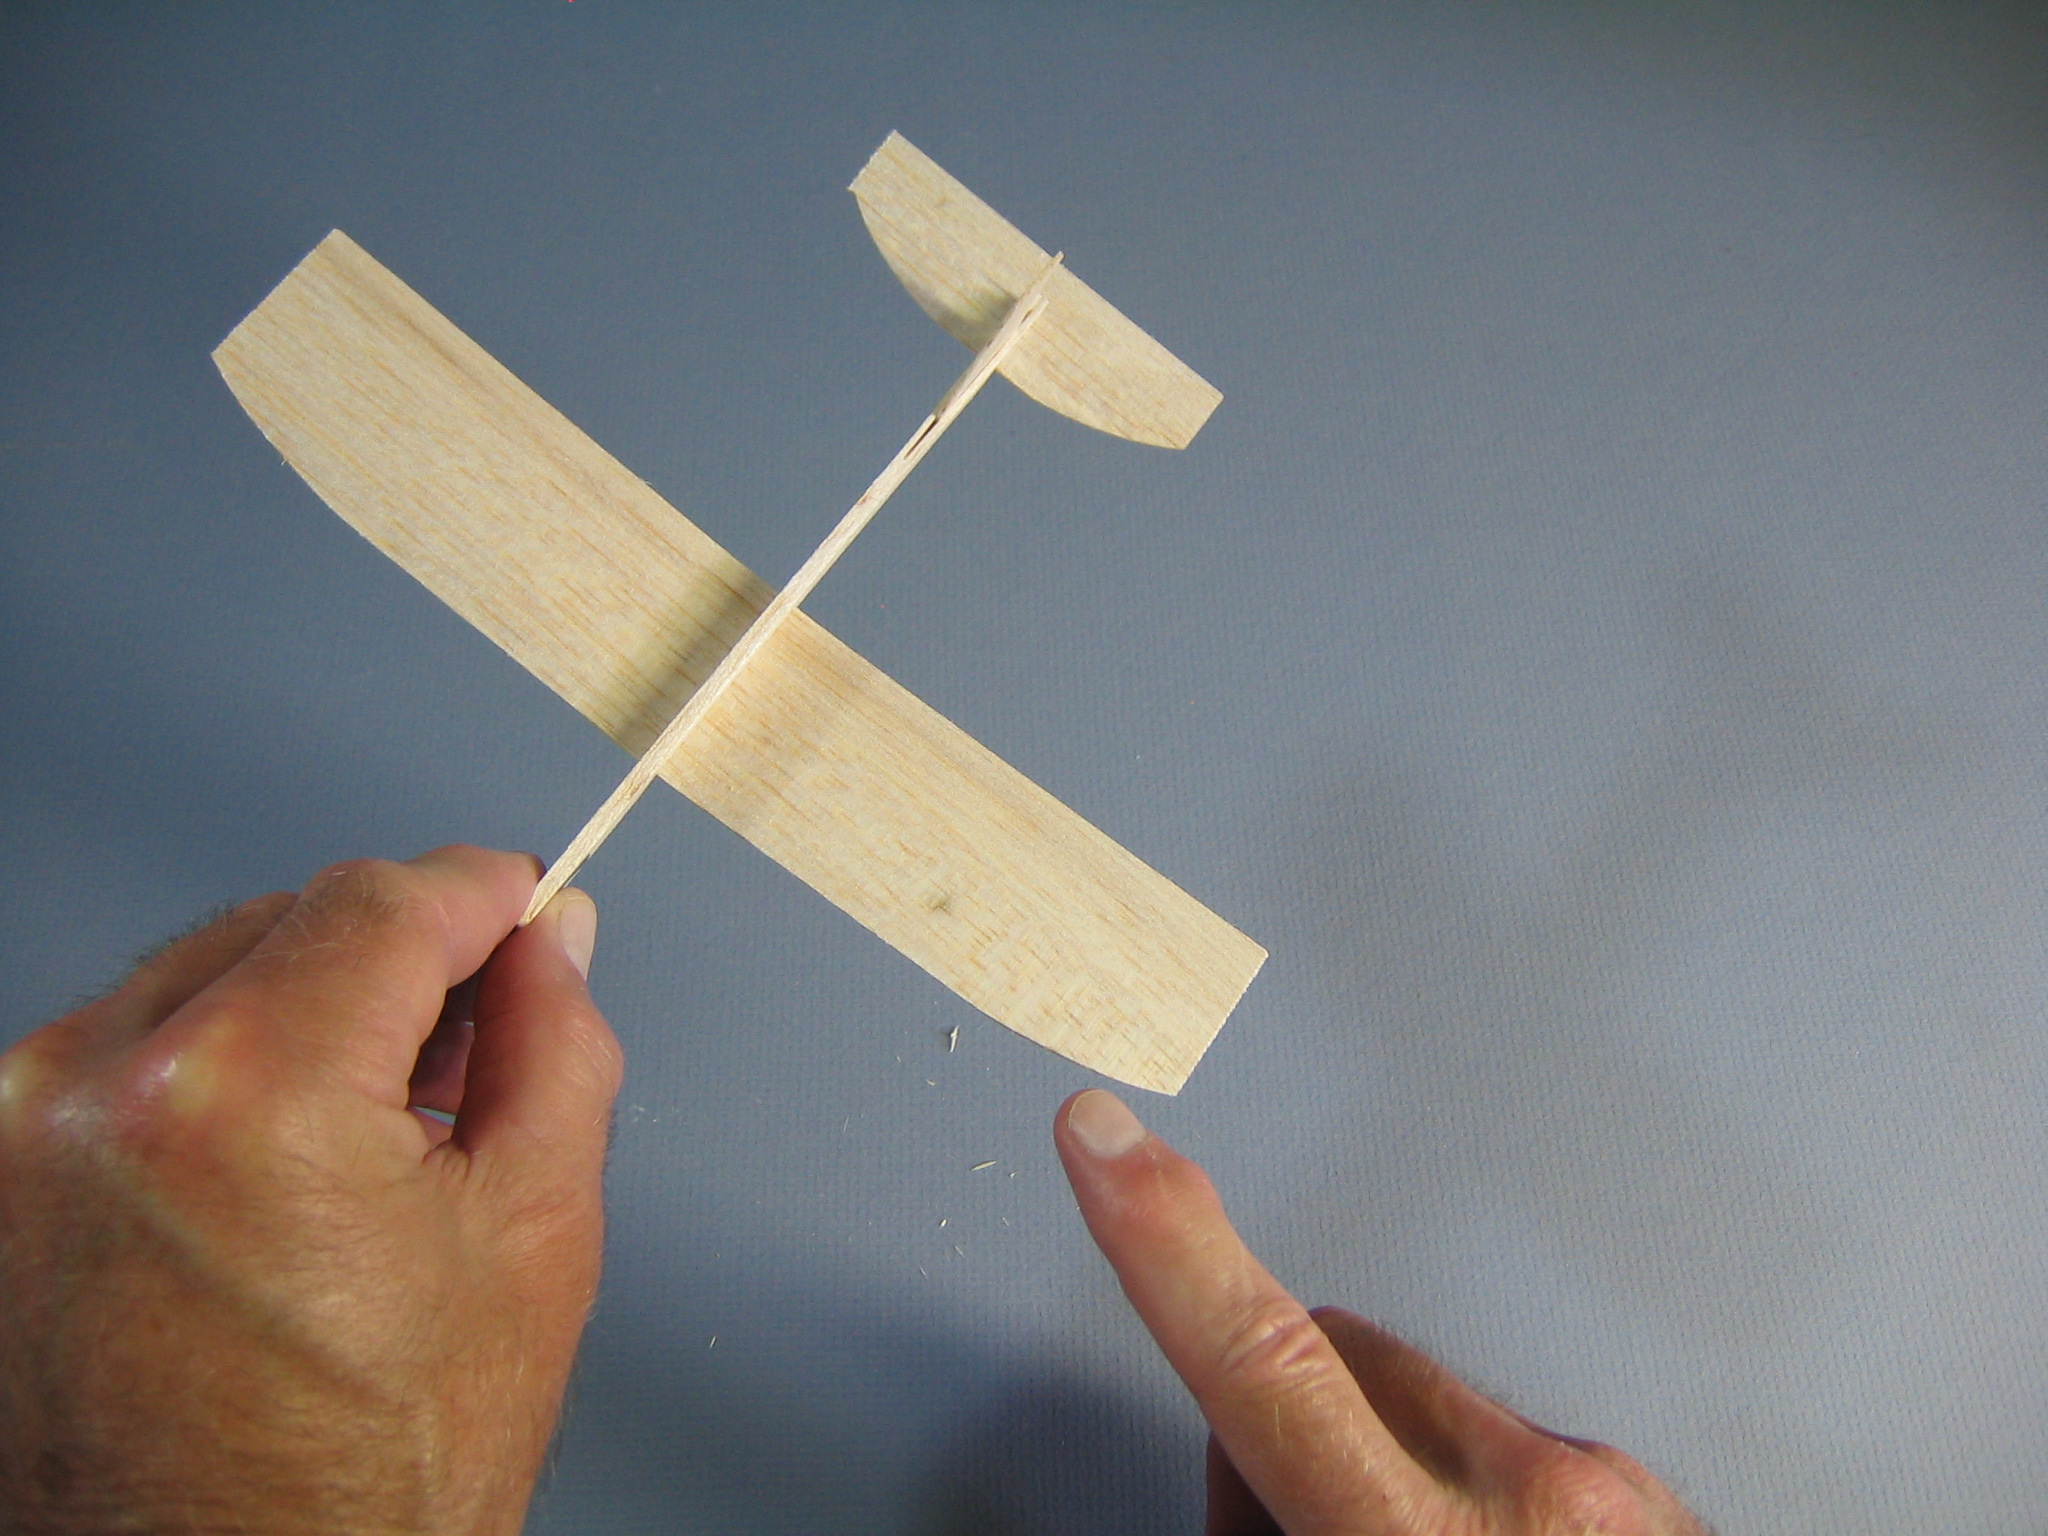 Notice that the wing and the tailplane have curved corners. The diagram shows these corners going in front.
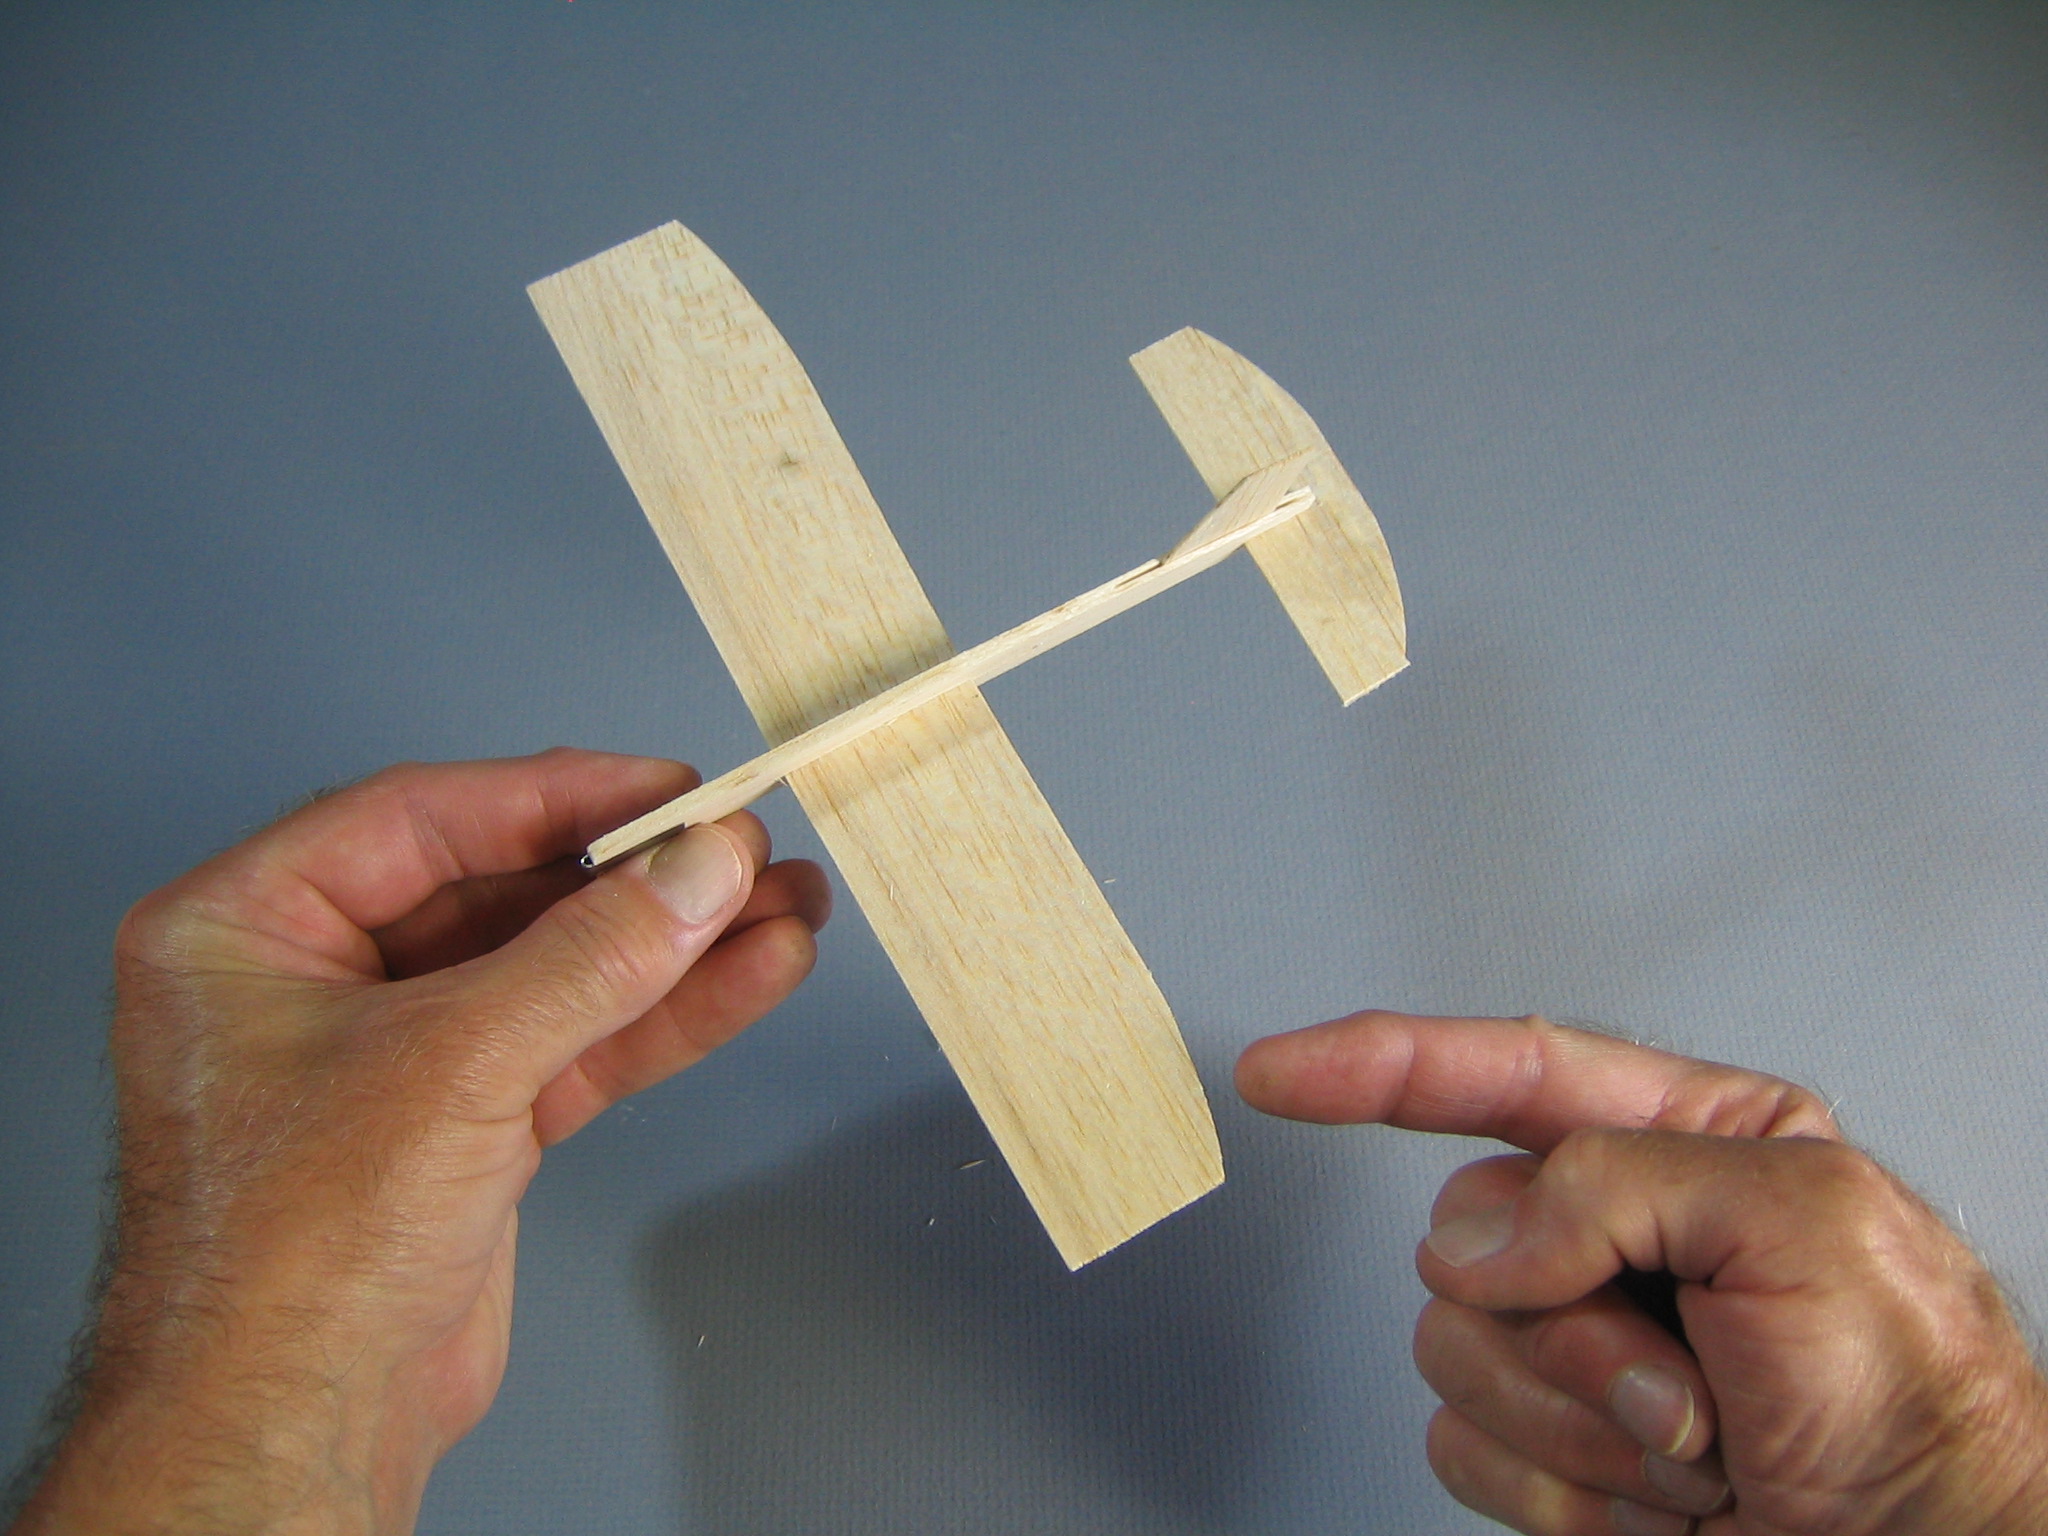 You can put the curved edges in back for a different look. There are four combinations of wing and tailplane orientation. It will fly just fine with any of them. Later you may find that reversing the wing can change the turning direction.
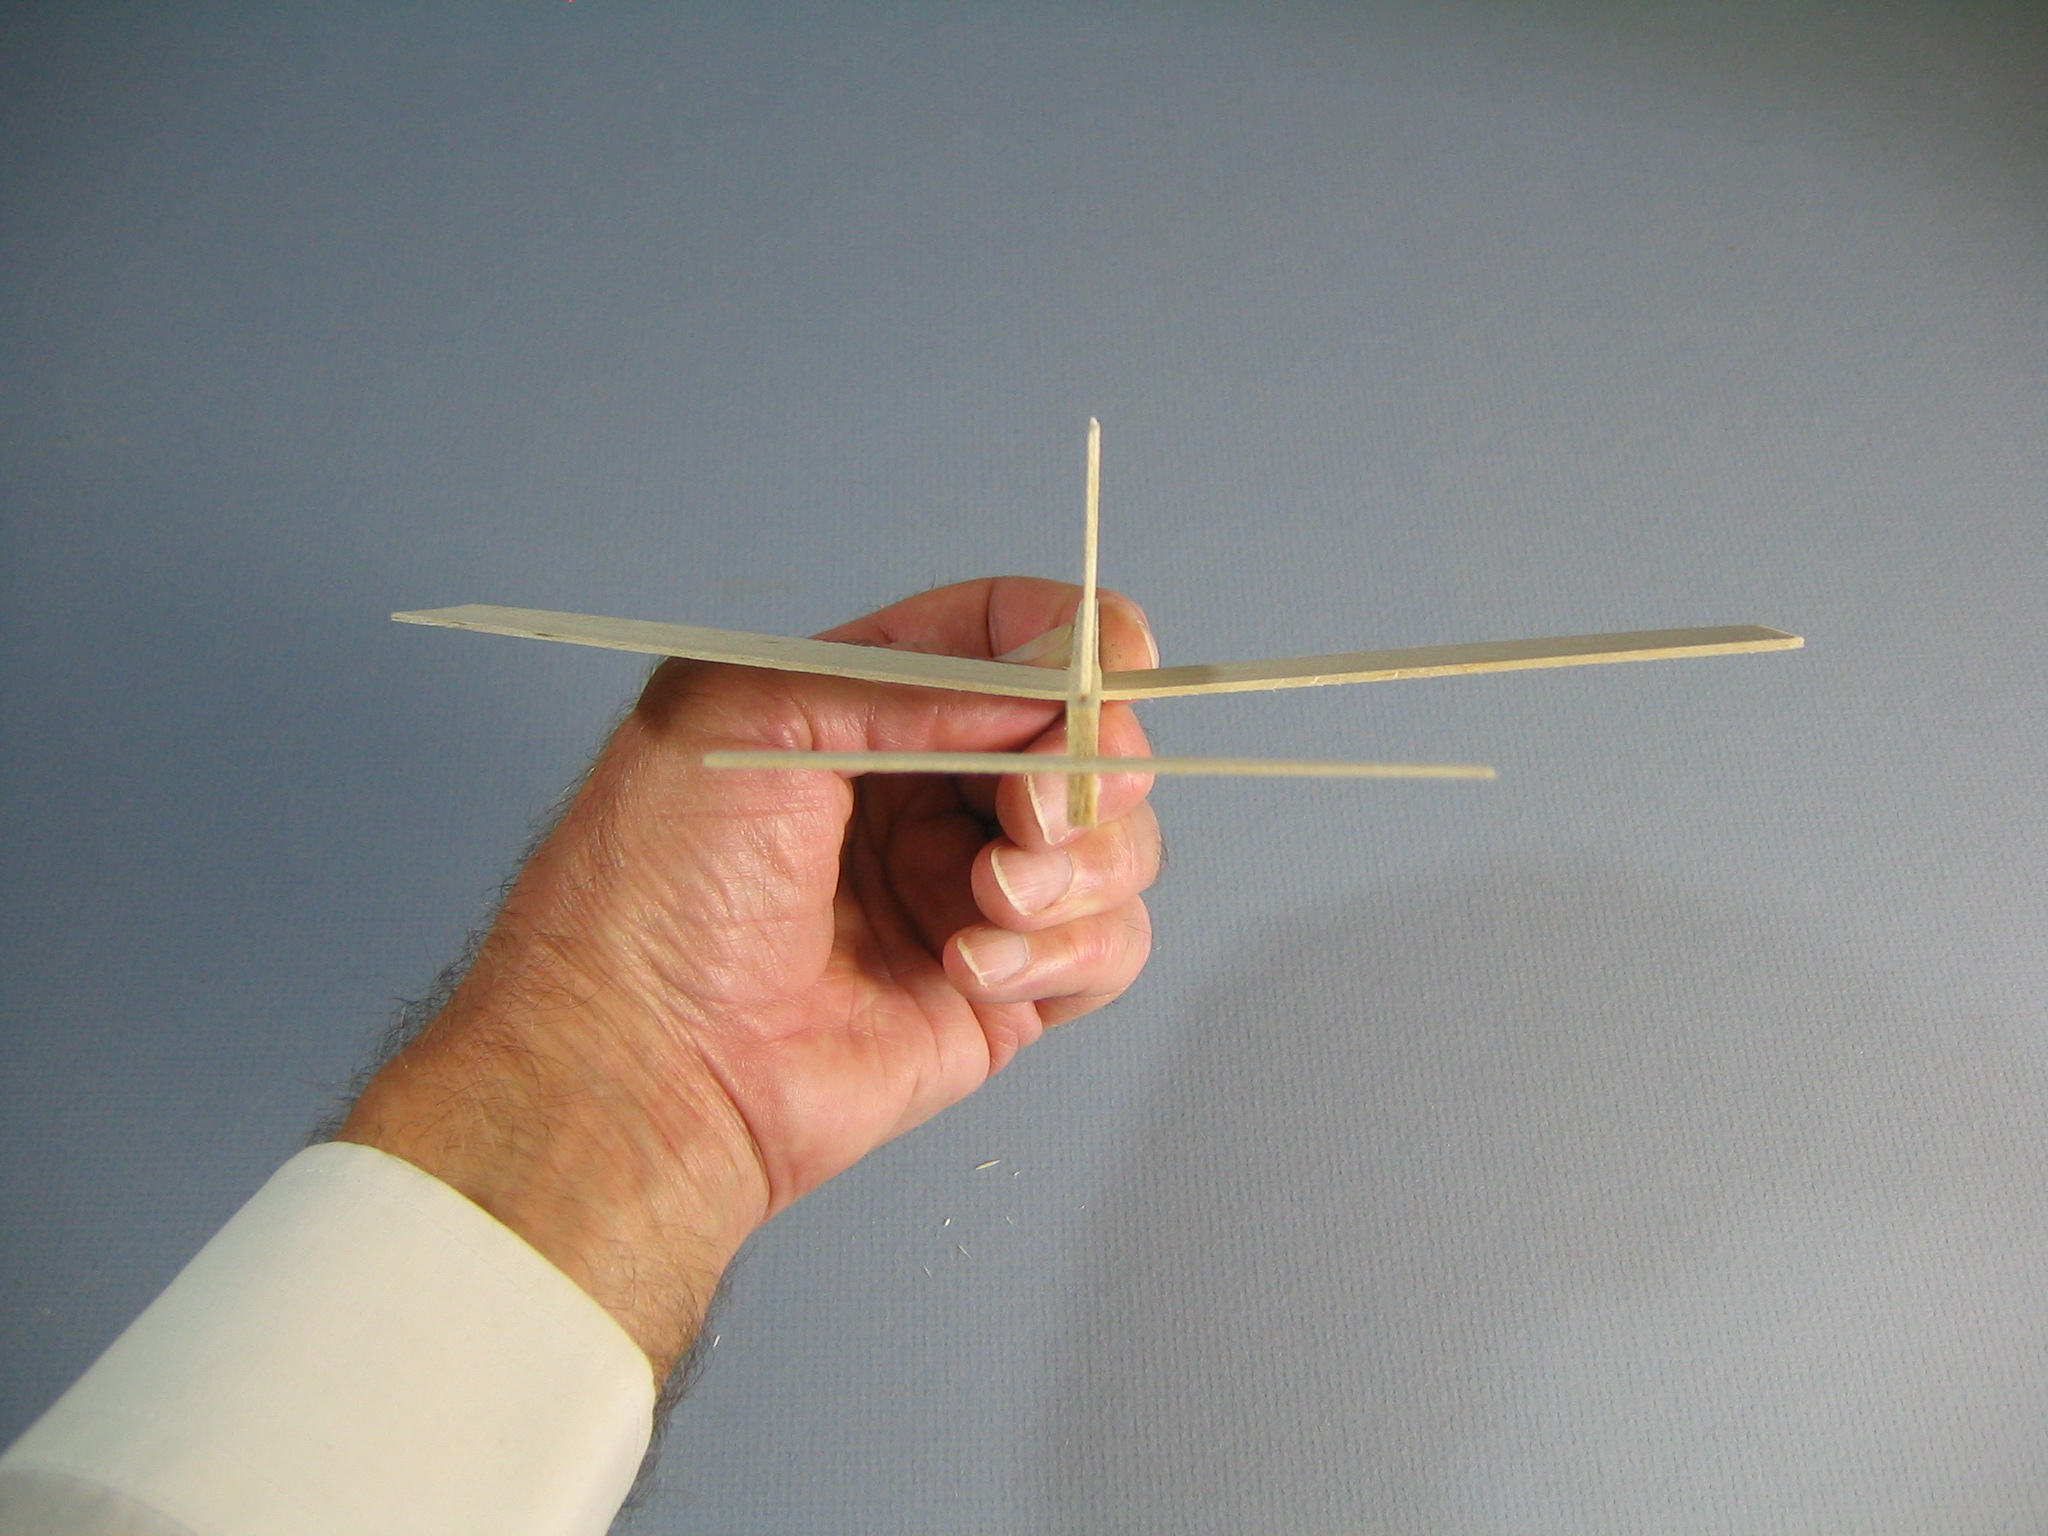
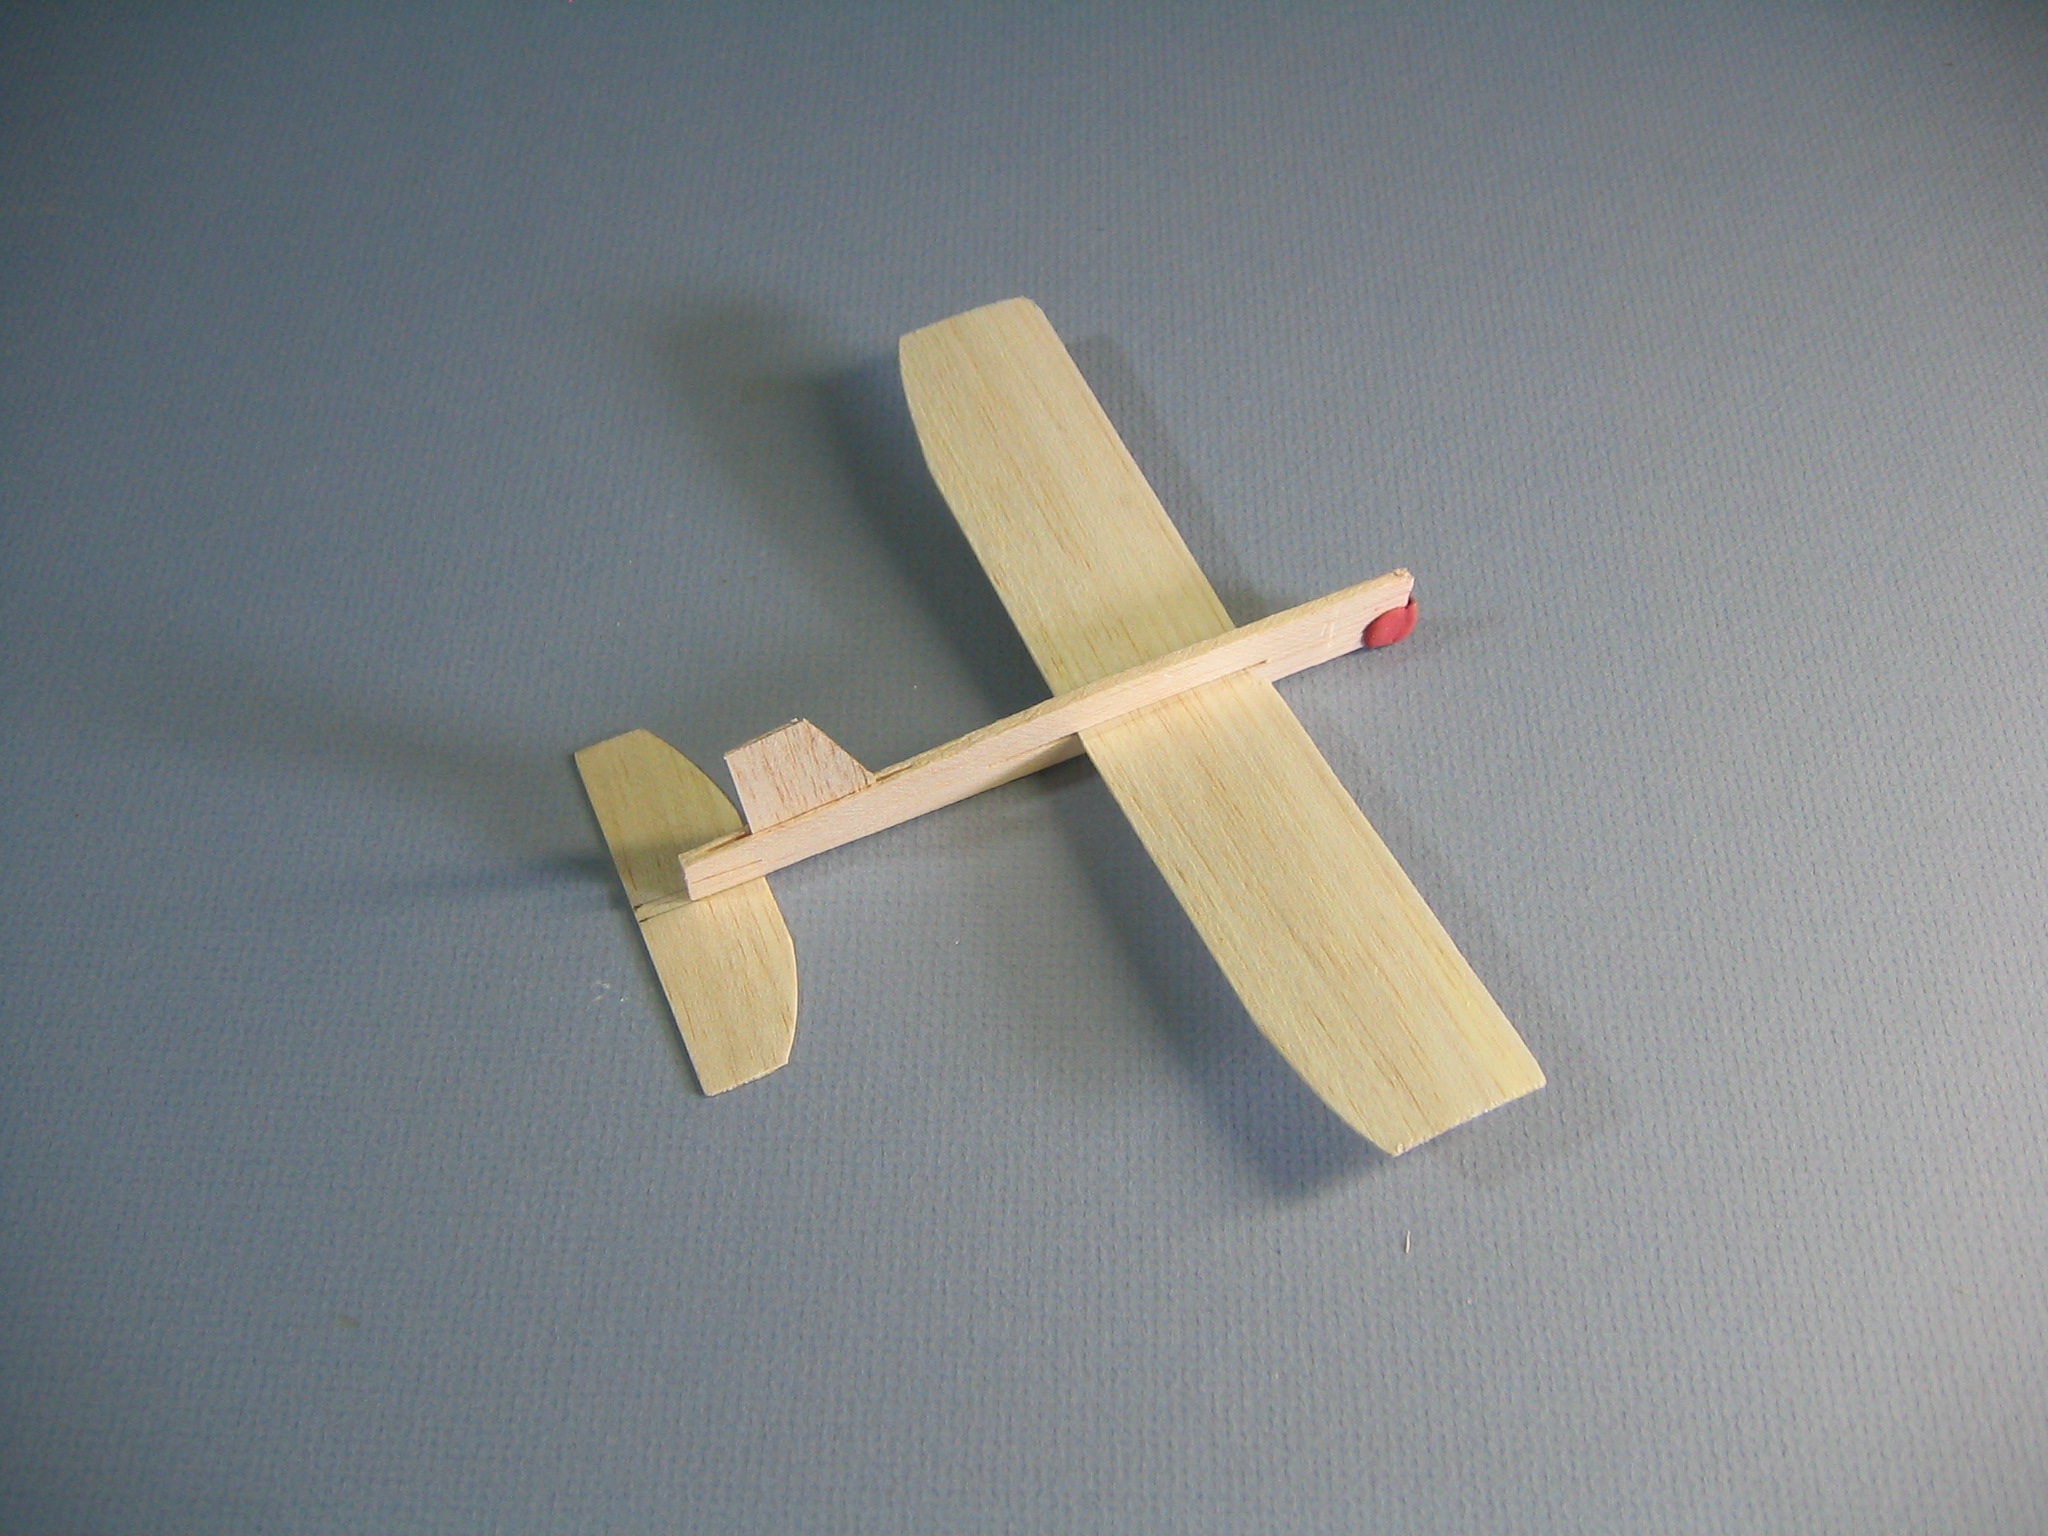
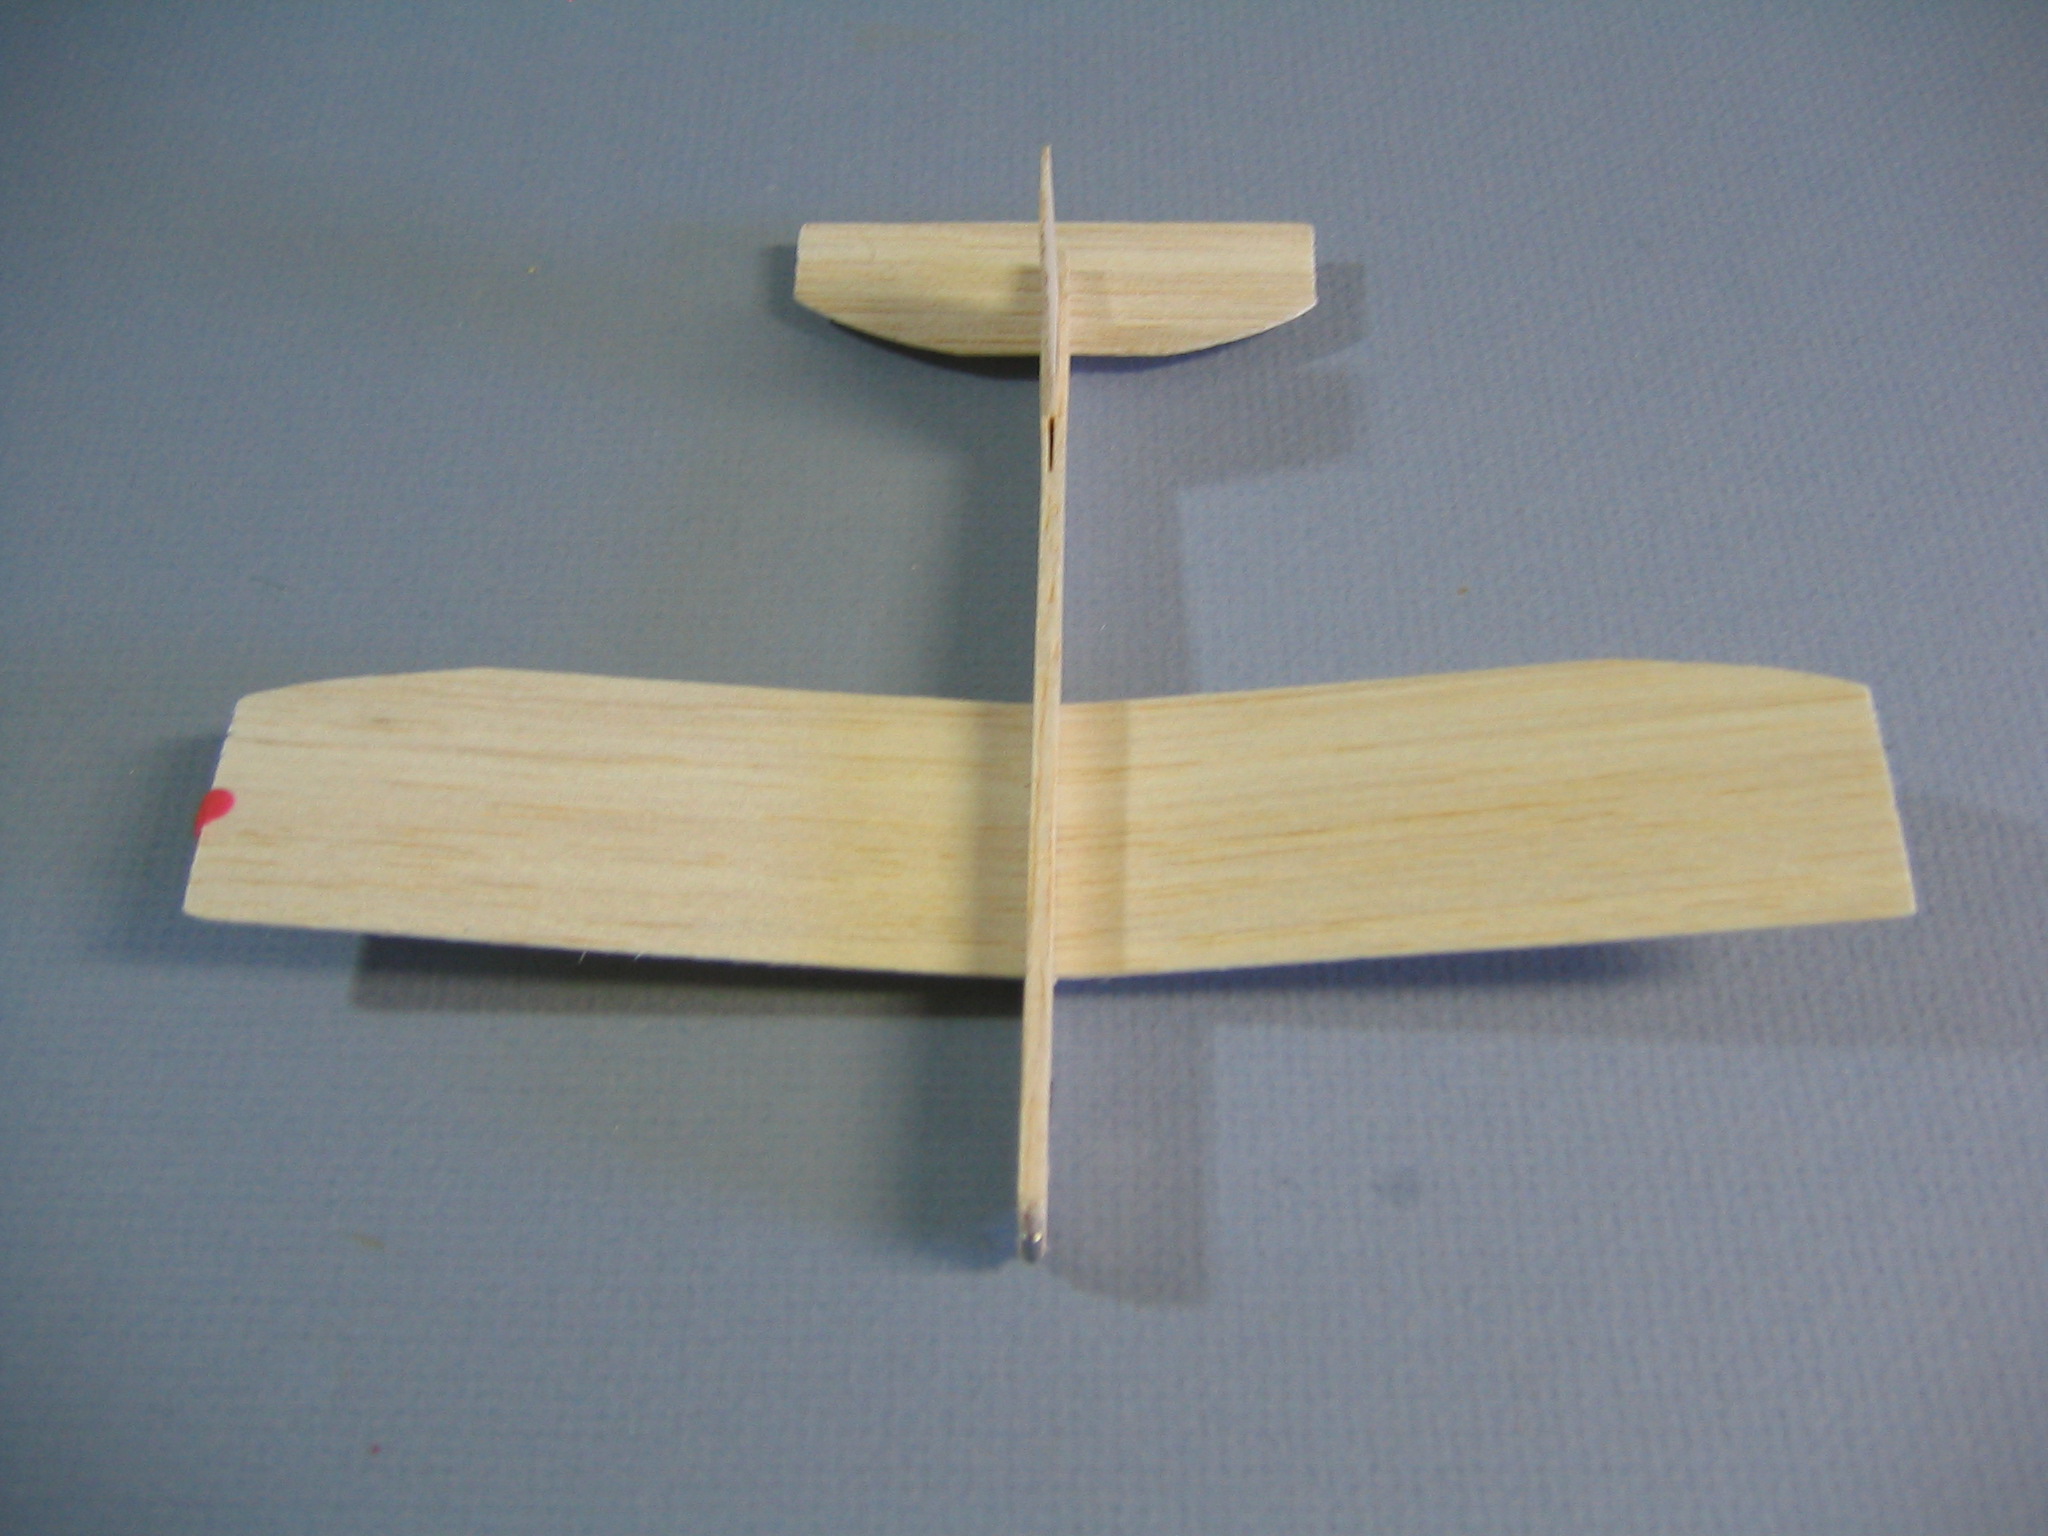
 For a straight glide, a line through the wingtips should align with the tailplane.
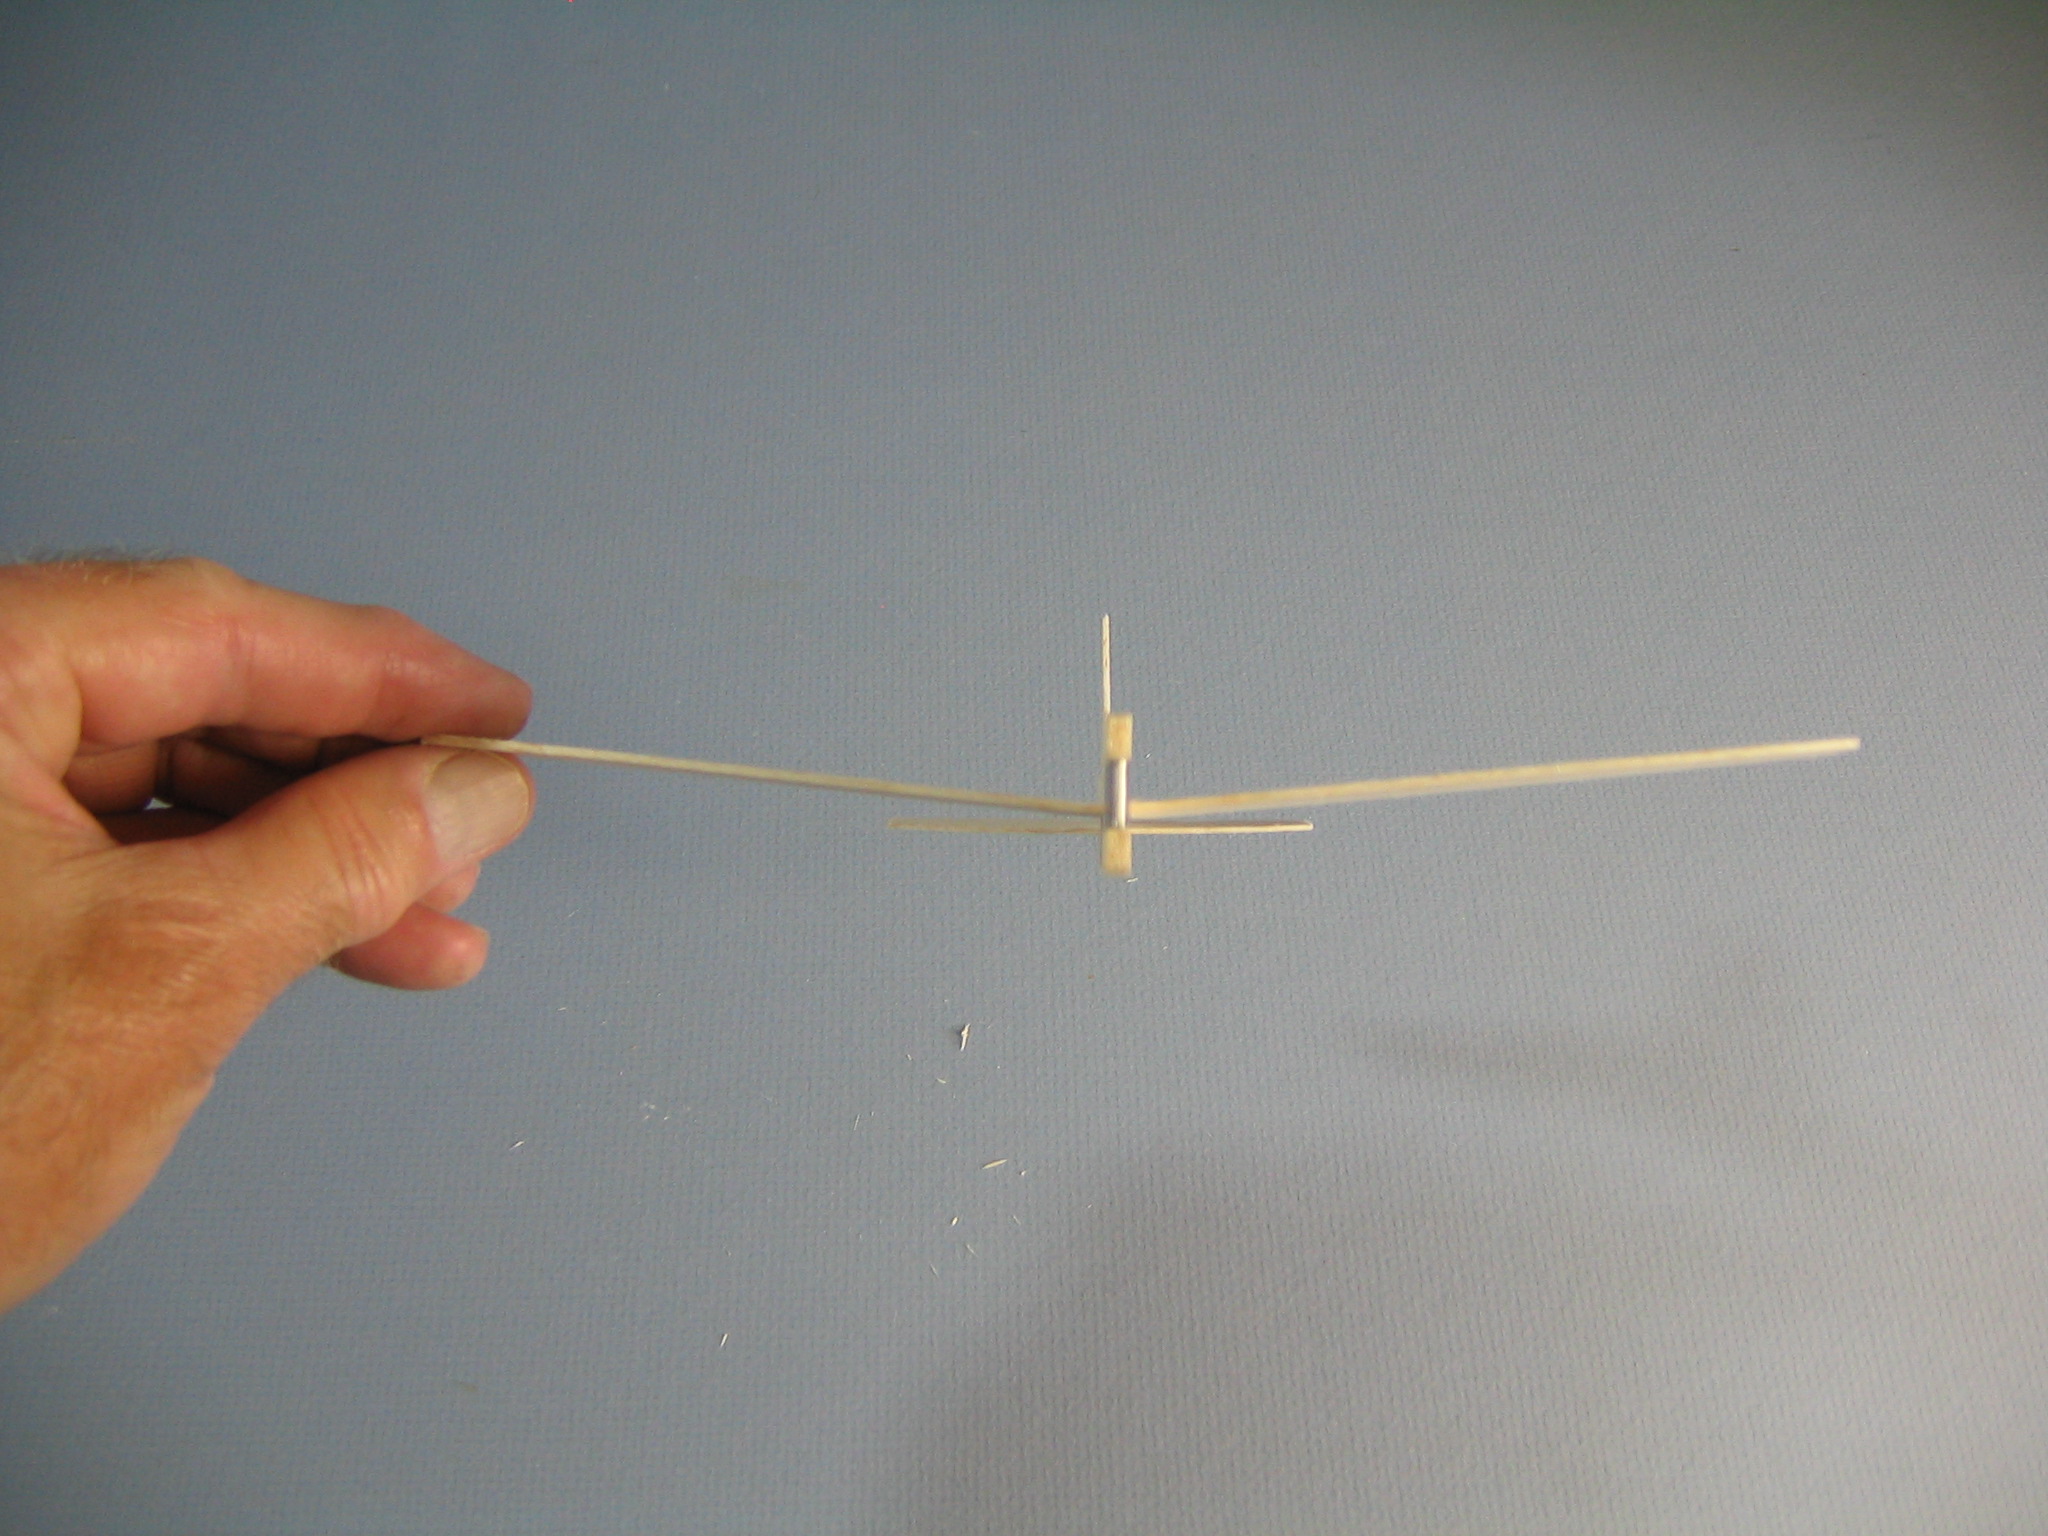
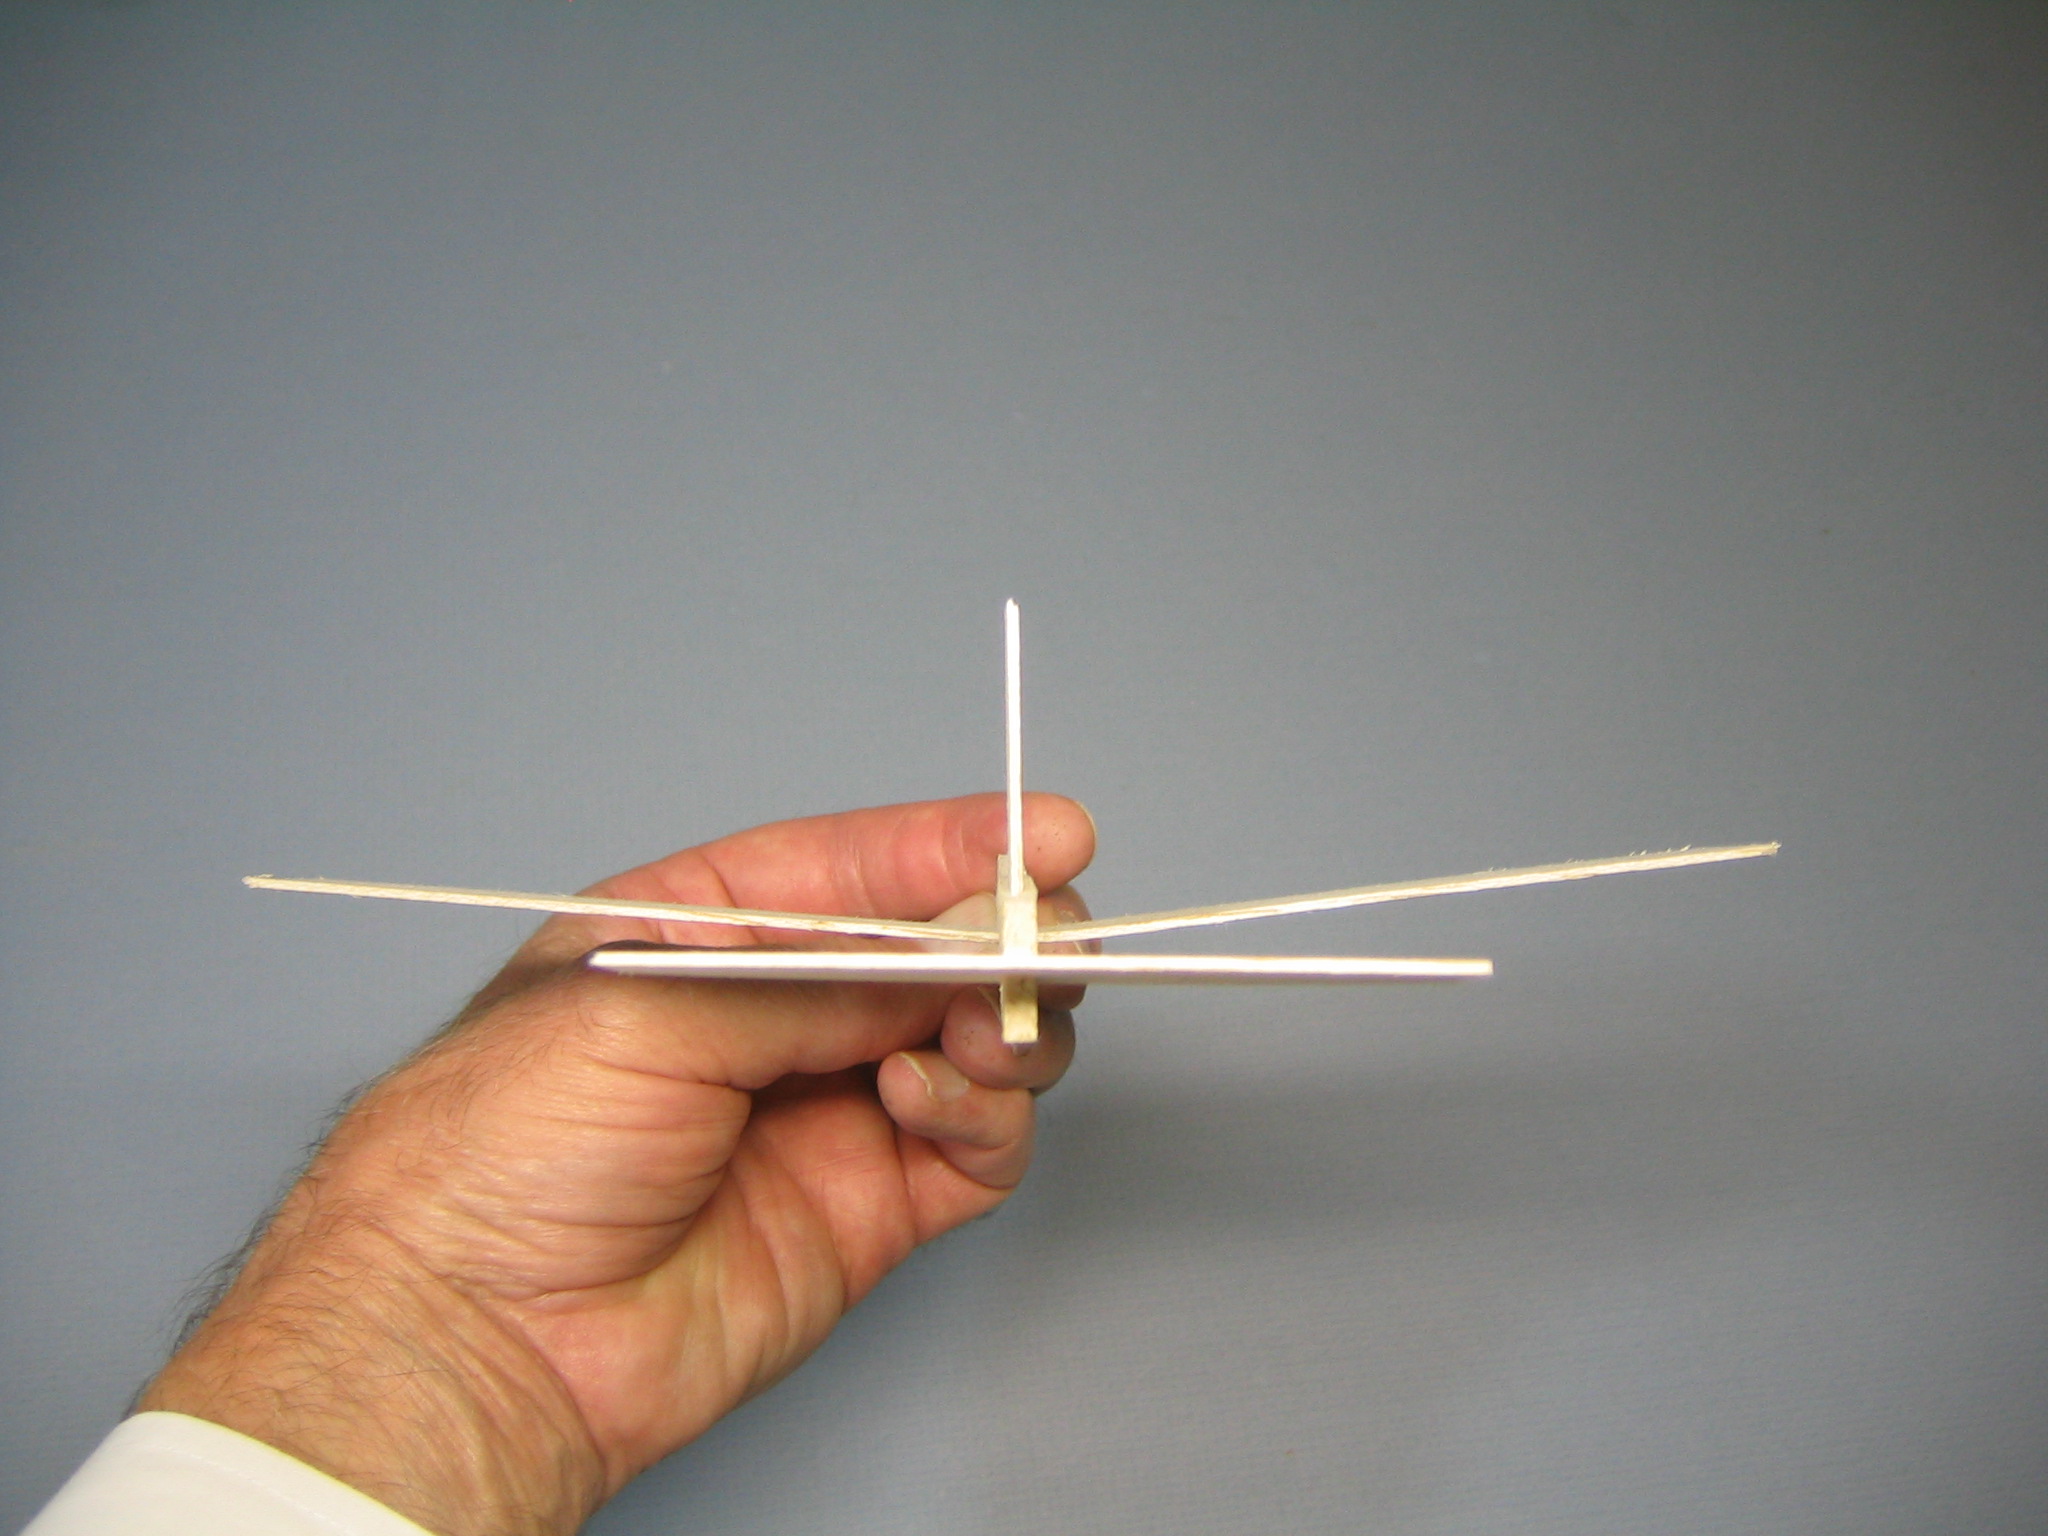
 This might be easier to see from the back.
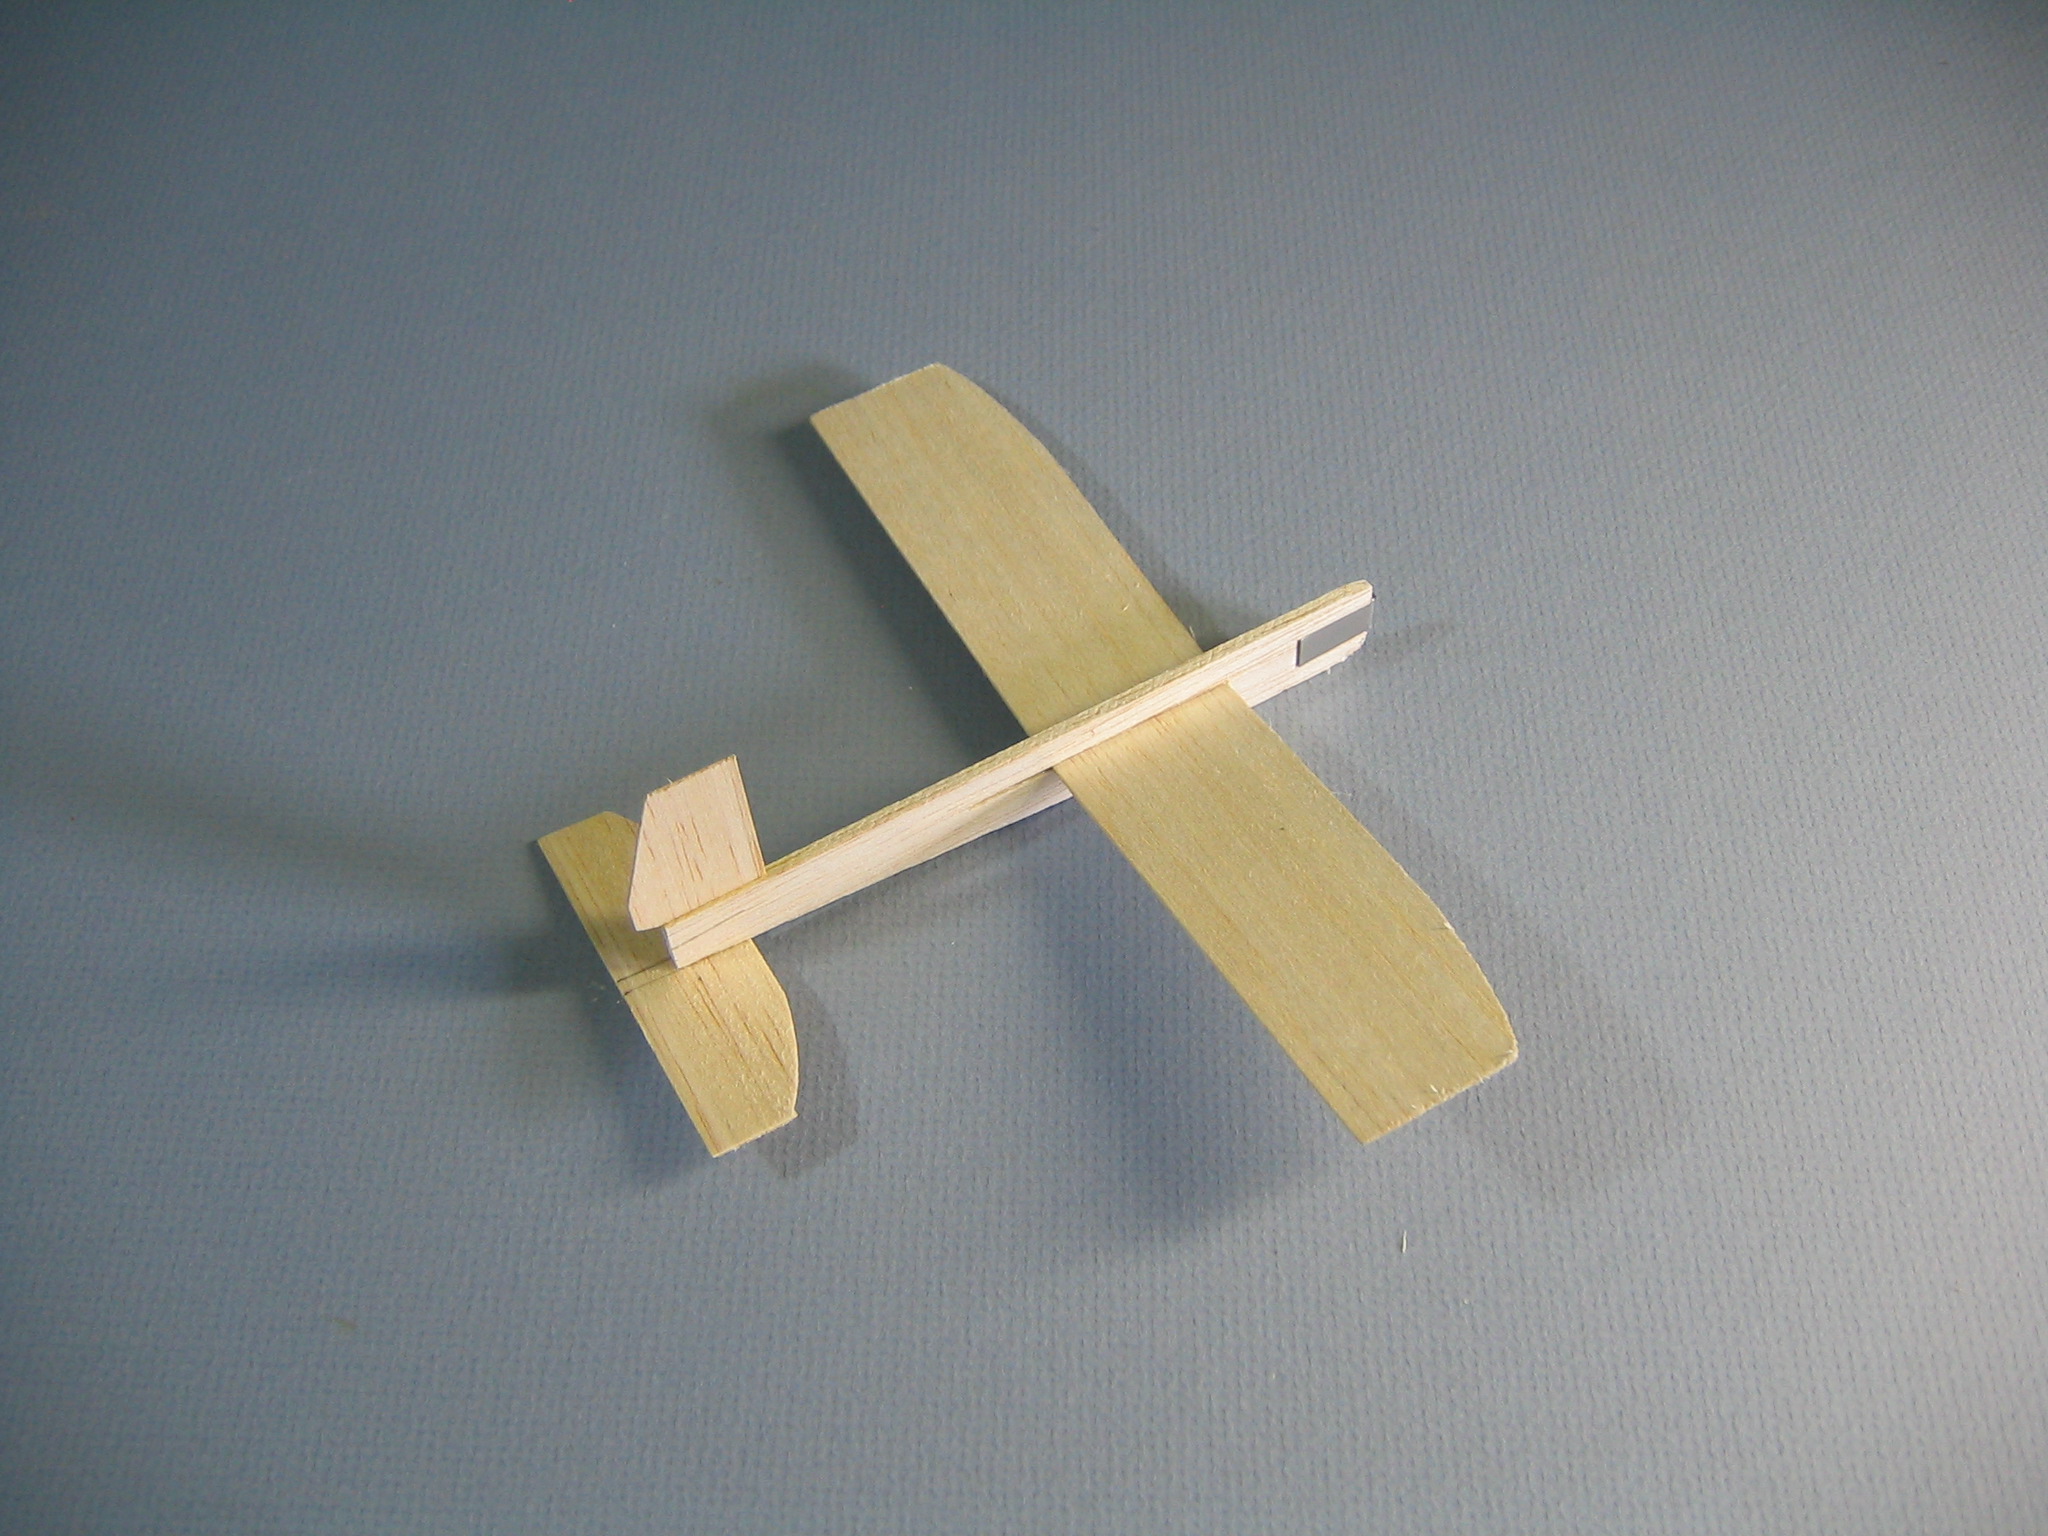
 Some wings are bent up more on one side than the other. This will make the plane turn. The wingtips will try to fly level. The tailplane will then be tilted to one side. The lift on the tailplane will pull a bit to the side, making the plane turn. In this plane, the tailplane will pull the tail to the left, making the plane turn to the right. For a right handed flyer, we prefer that it fly to the left.
 We can reverse the wing to get it to tilt the other way. Now the lift on the tailplane will pull to the right, making the plane turn to the left.
 Once in a while you will find a fuselage with the wing slot cut at an angle. Even with a symmetrical wing, this glider will want to turn right. See if you can find a wing that is bent the other way, with the right tip higher.
You can also get a left turn by dampening the fin and pressing your thumb into the left side, forming an airfoil shape in the fin, so it will pull to the right.
You can make the plane turn by pulling the wing a bit out to one side or by angling it slightly in its slot, with one tip ahead of the other.
Now that you have built a glider, it is time to learn how to fly it.
Flying the glider
 Start by holding it between thumb and forefinger, on the bottom of the fuselage, just below the leading edge of the wing. Hold it high above your head with the wings and the fuselage level. Take a step forward and give it a gentle push. Keep the nose pointing straight ahead as you release it. Throw it like a dart, nose straight ahead. The goal is to get a slow, steady, straight glide. If you throw it too fast, it will nose up, slow down and fall. If you don’t throw it fast enough, it will dive into the ground. Also, notice that the wing slot is longer than the width of the wing. You can move the wing back and forth to adjust how it flys. With the wing too far back, it will dive. With the wing too far forward, it may bob up and down or nose up and drop its tail. Experiment until you find the wing position and speed of launch that gives a straight, steady glide. If the glider makes a gentle turn, that is OK. Now you see that the glider has a natural gliding speed where the lift on the wings is equal to the glider’s weight.
 Inverted in the loop.
Now try holding the glider with the wings level and throwing it as hard as you can. See what happens. It will likely loop, going up in a vertical circle. Be careful it does not come around and hit you in the back of the head, be ready to jump aside. The glider returns to the ground in only a short time. What is happening here is that the fast speed produces much more lift than the weight of the glider. The extra lift pulls the glider up and around in a vertical circle. It is similar to tying a string to a weight and swinging it around. Eventually air resistance will slow the glider and it will recover to a steady glide.
 Angle of bank.
How can we get a longer flight? Try tilting the wings to one side. If you are right handed, tilt the wings away from you to your right, with the right wingtip lower than the left wingtip. (Lefties know to reverse these instructions.) Even try throwing it side hand, with the wings tilted vertically. You will find that at some angle of bank, the glider will climb up in a helix. It may level out somewhat high up and glide down. If we get the glider way up and it glides in a straight line, it could go far away before it comes down. We could lose it in a back yard, a tree or on a roof. To prevent it flying too far away, we will make it fly in a circle. Since banking it to the right makes it fly initially in a fast right circle, any additional right turn will make it turn downwards and come down quickly. It is best to adjust it to fly in a left circle. You can shape the fin or adjust the wing to make it fly in a large, slow, left circle when launched gently, as at first. Now throwing it fast in a right bank will make it go up in a right climbing helix. Gravity and air friction will slow it down. The fin will open the right circle. When it slows down, it can roll level, drop its nose and begin to glide down in a left turn. With practice you can make it roll out and glide down from pretty high up. You will find that it is easy to throw this glider too hard, so it loops back down to the ground.
 Angle of elevation
You control three things at the time of launch that in turn control the flight path. The elevation angle is the angle that the nose points above the horizon. The bank angle is the angle that the wings tilt to the horizon. The speed is how fast you throw it. By trying different combinations of these, you will figure out how to get the longest flights from your glider. More level wings will make it loop more. A higher elevation angle will make it loop back sooner. A higher speed will make it loop more. You will get the longest flight with intermediate amounts of each. Trying different combinations and seeing what happens is part of the fun of flying gliders.
I found that I got good flights with the wings at 75 to 80 degrees from vertical and the nose pointed up about 45 degrees, with a moderate speed of throwing. Glider flyers pick a point in the sky and throw to it. This glider won’t go very high. You throw with just enough speed to just get to that height. Anything more will just bring it down faster.
The parts are loose in their slots and they can get knocked around. The fin and tailplane may be glued in place. Once you have found the best position for the wing, you can mark the location or you can glue it in place.
basic glider stability
A glider must be able to maintain its orientation in the air and recover from disturbances to continue flying. It must be stable around three axis. Longitudinal stability is stability around the pitch axis, a line that passes from wing tip to wing tip through the center of gravity. Pitching is a rotation of the nose up or down. The main things involved in pitch stability are the wing and tailplane, the angle between them and the center of gravity, sometimes called the balance point. The lift on the wing and the lift on the tail balance the weight much like a teeter totter. If the glider is flying slower than its normal gliding speed, the wings will not be generating enough lift to support the weight and the glider will fall. The air will press against the underside of the tailplane, forcing it up and the nose will point down. The glider will speed up until the lift will support the weight. If the glider is flying much faster than its normal gliding speed, the lift will be greater than the weight, the lift will pull the glider up and the air will press down on top of the tailplane. The force on the tailplane will tilt the nose up and the glider will slow down. Yaw stability is stability around a vertical axis through the center of gravity. Yawing is a rotation of the nose to the left or right. The main things involved in yaw stability are the side area of the fuselage, the area of the fin and their positions relative to the center of gravity. The fin and tailplane act something like the feathers on an arrow to keep the nose pointed straight ahead into the direction of motion through the air. However, yaw stability is also linked to roll stability. Roll stability is stability around an axis that runs from nose to tail through the center of gravity. Rolling is a rotation that moves the wingtips up or down. It is mostly controlled by the dihedral angle. Dihedral means two surface and refers to the fact that the wing has two panels set at an angle to each other, with the wingtips higher than the center of the wing. Dihedral stabilizes roll because when one wingtip tips down, the glider will sideslip toward the low wing. The weight and the lift forces combine to pull toward the low wing. The sideslip brings air against the underside of the low wing, increasing its lift and pushing it back to level. The sideslip also brings air against the side of the fin, making the airplane turn into the sideslip. Also, when a glider turns, the wing on the outside of the turn moves forward faster than the wing on the inside of the turn. The faster wing gets more lift and rolls the opposite wing down toward the inside of the turn. Roll and yaw are linked. Roll stability and yaw stability are discussed together as lateral stability. This establishes a basic vocabulary for describing what your glider does as it moves through the air and permits some understanding of how it reacts to its motion through the air.
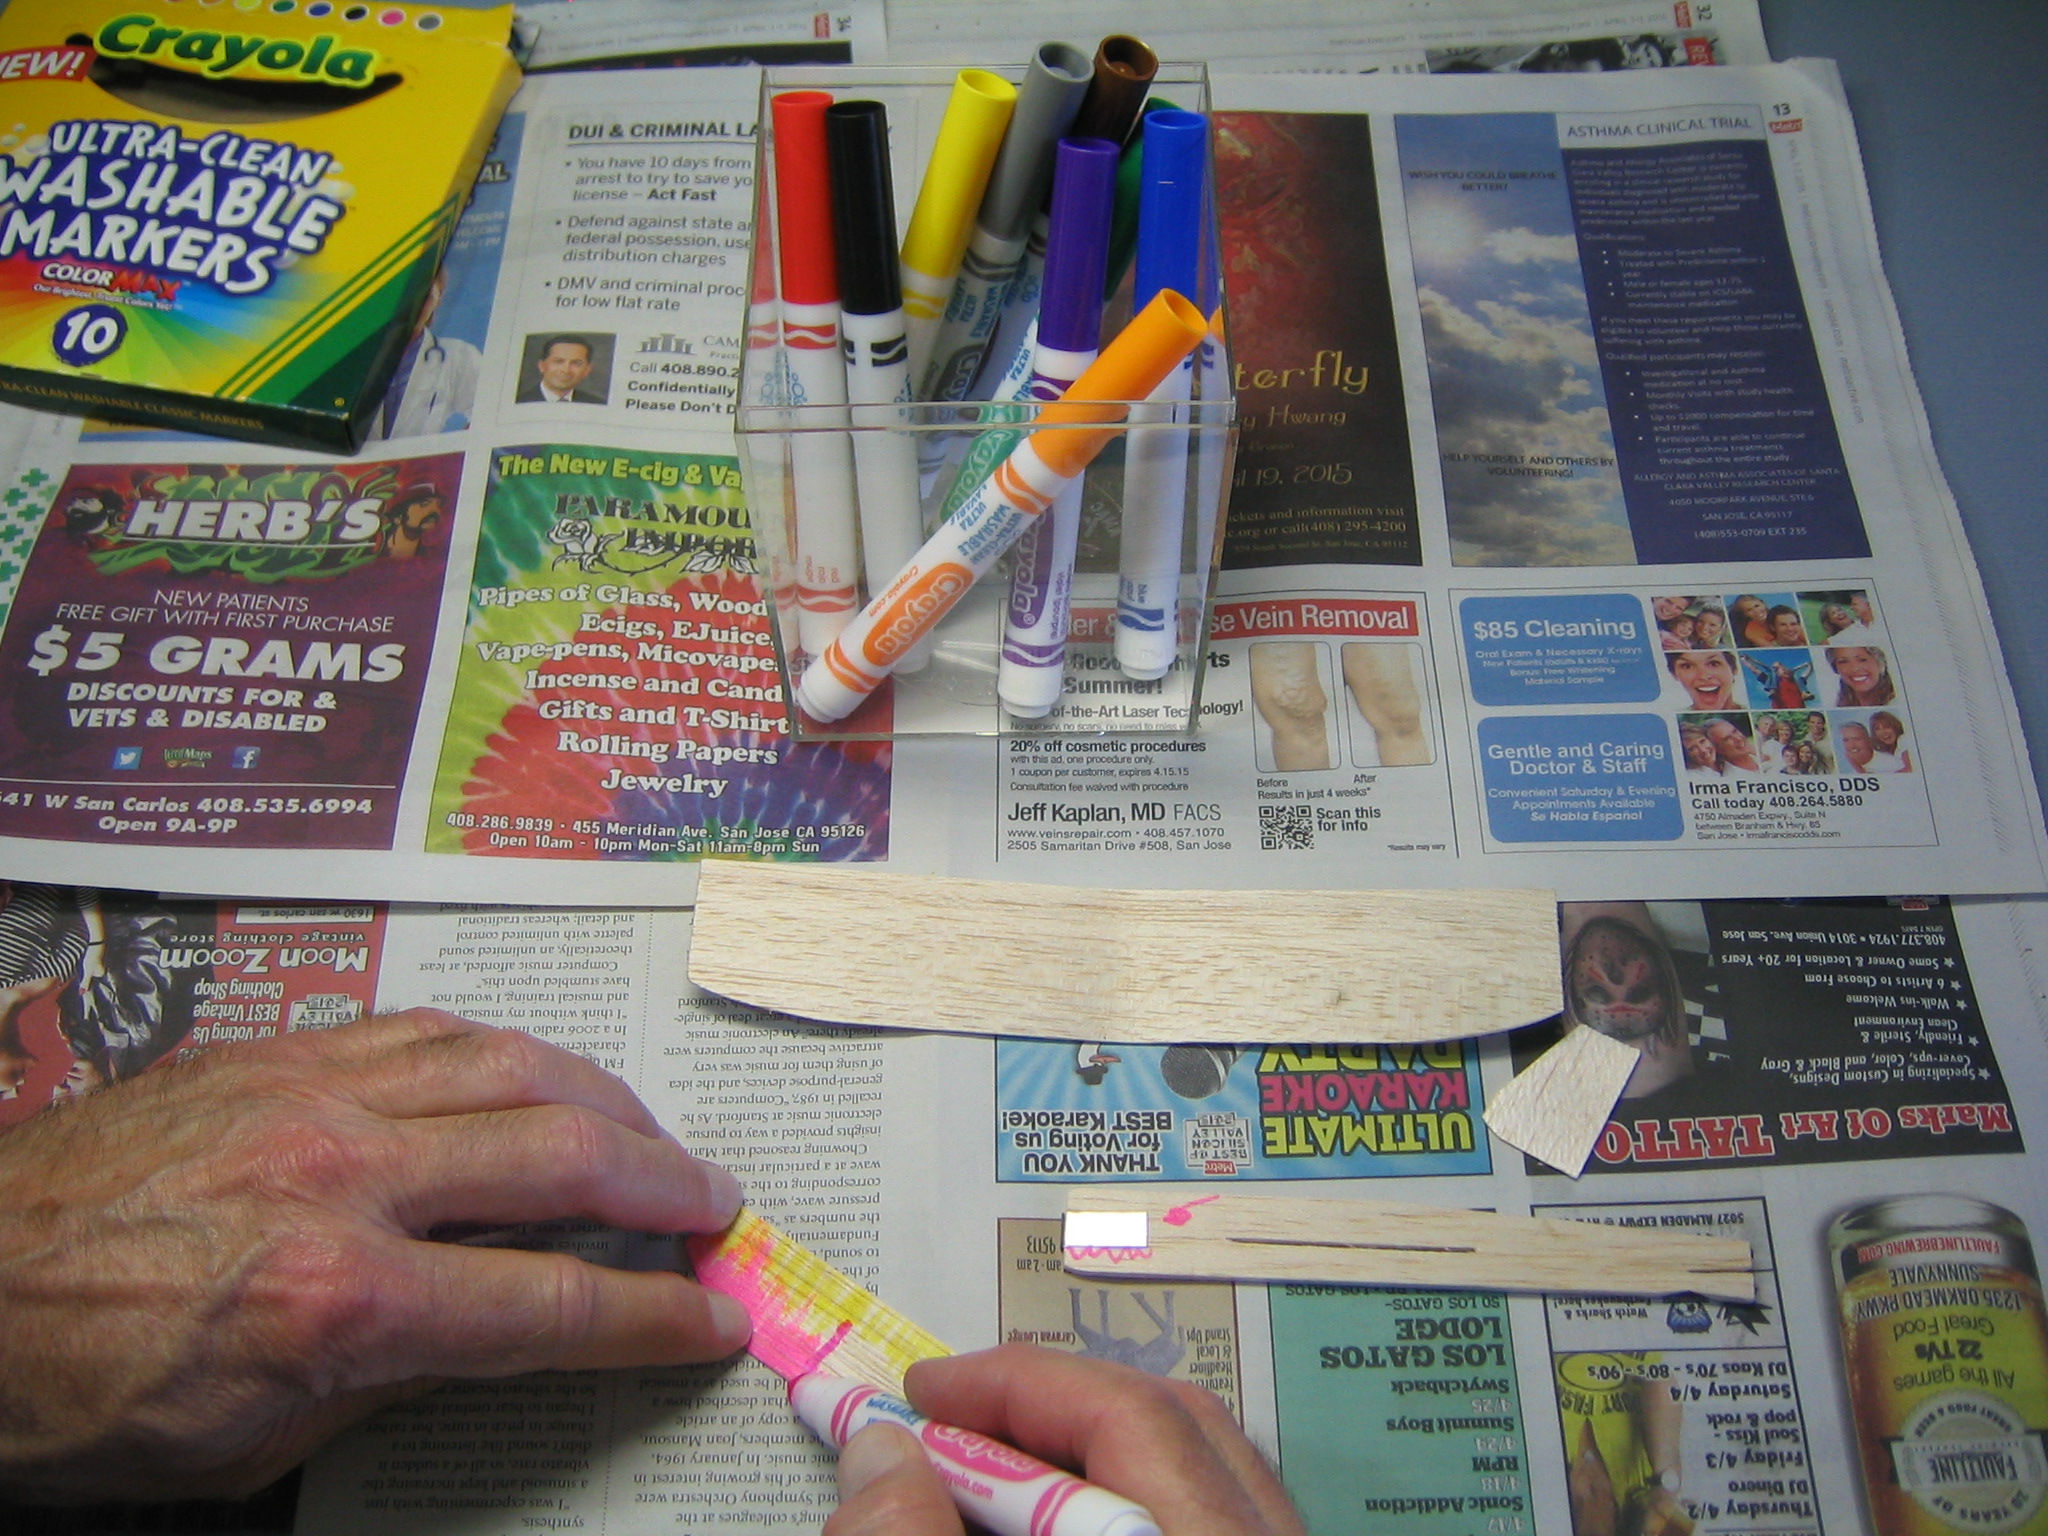
Decorating Your Guillow’s 25-1 Glider
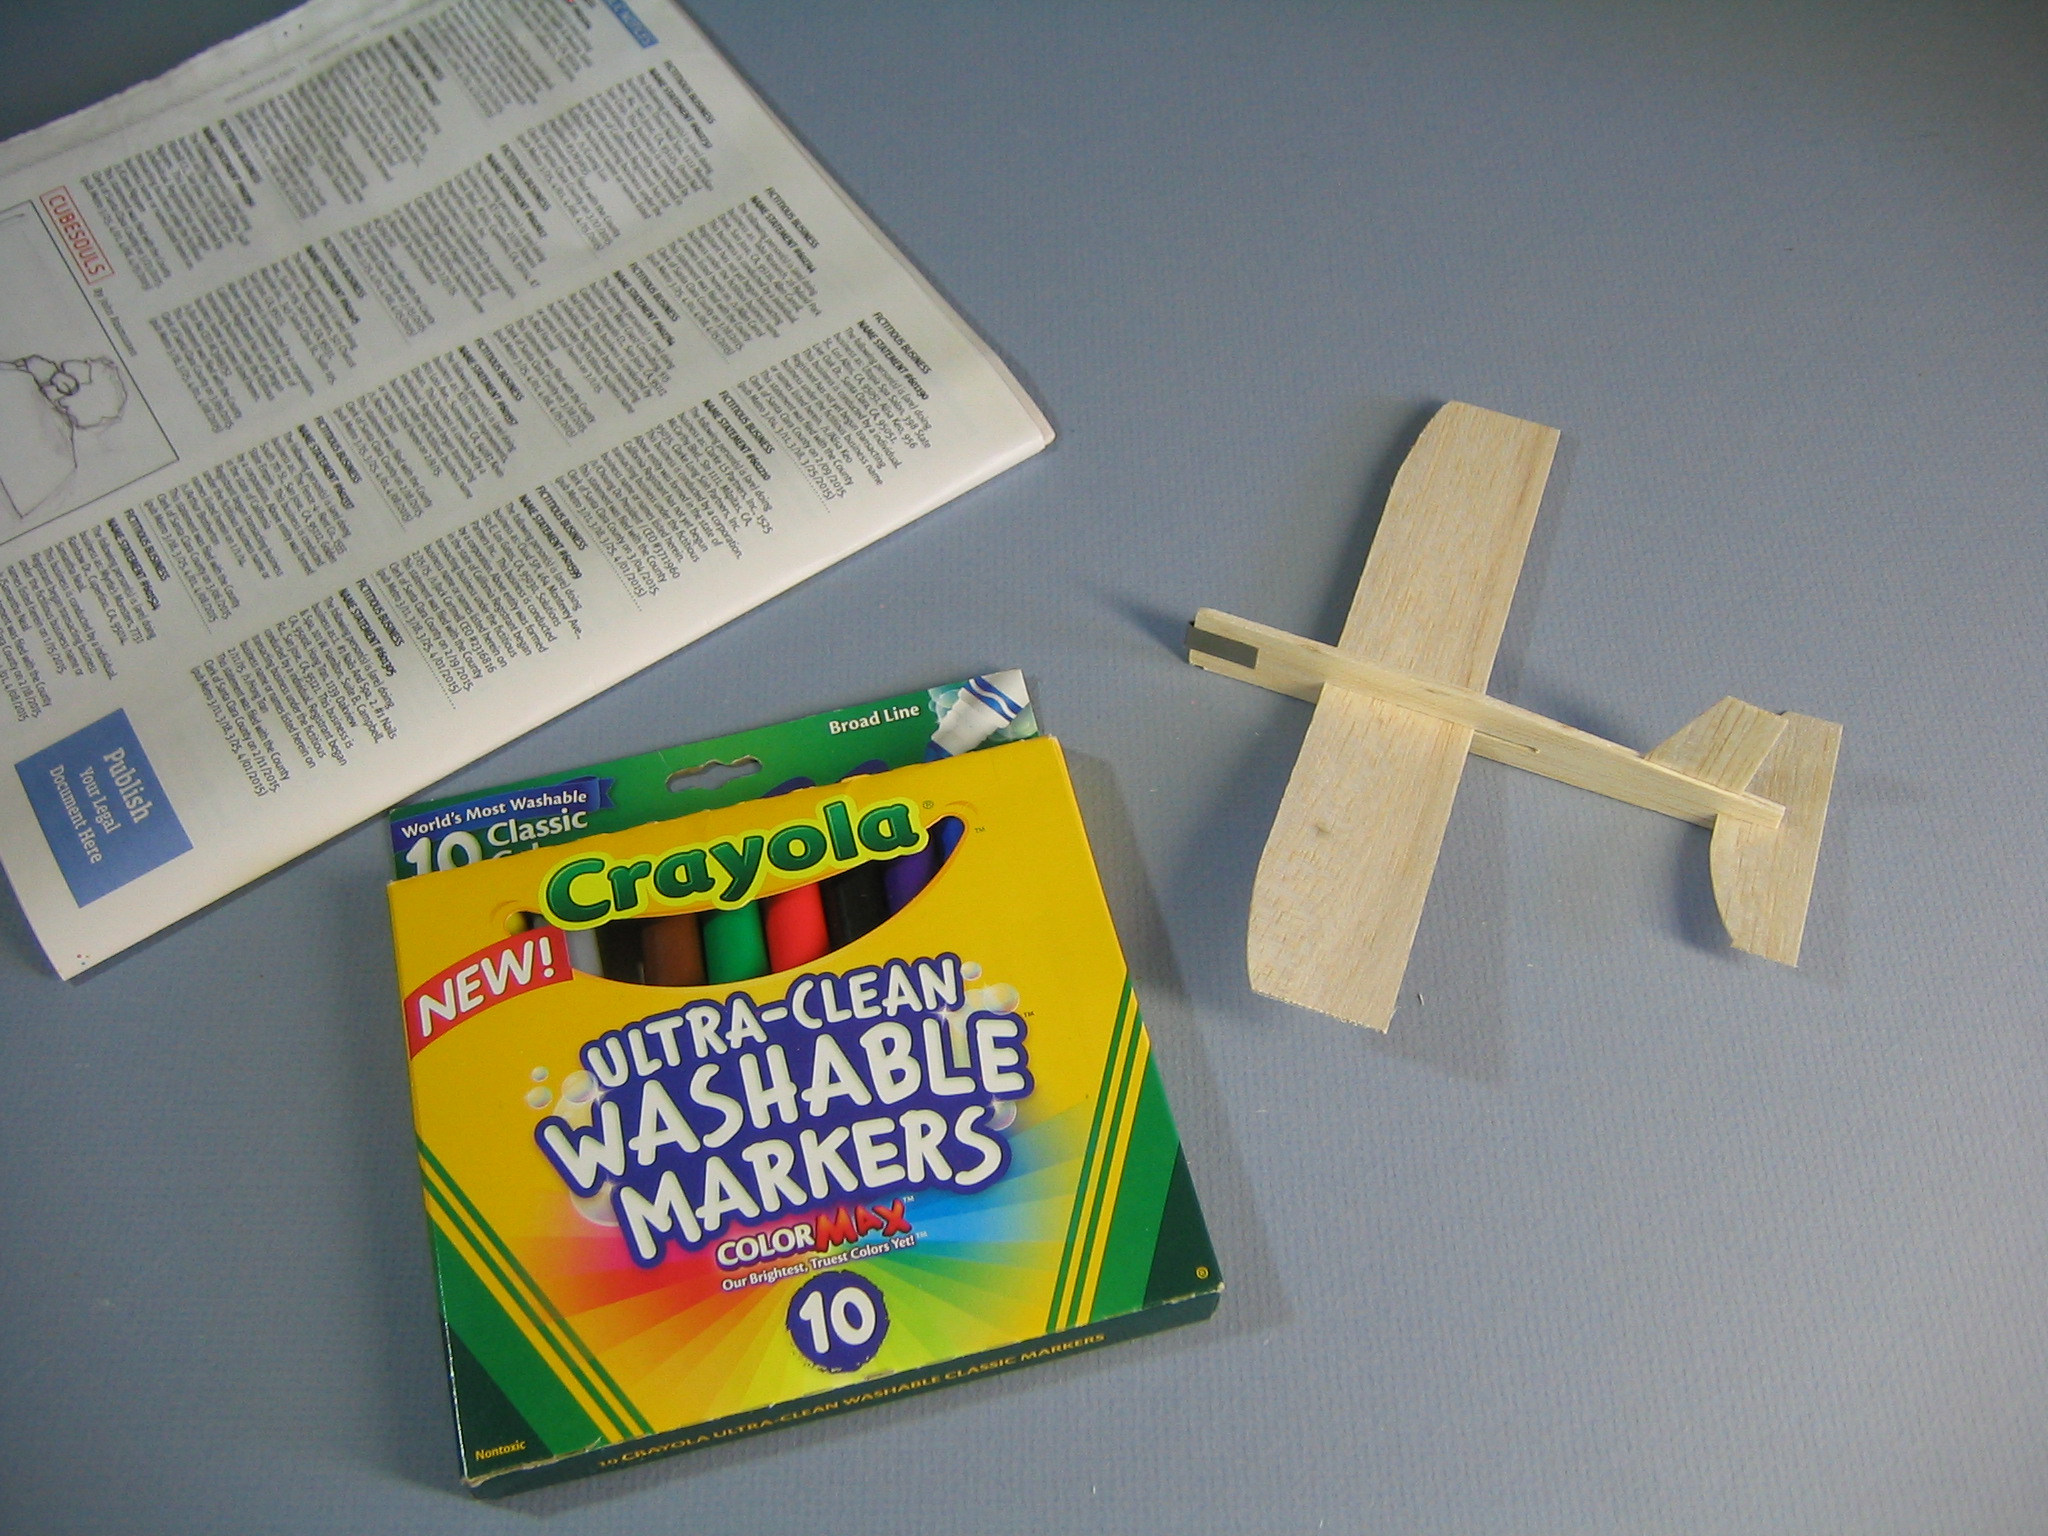 The best way to decorate your glider is with color markers. Avoid anything that adds weight or interferes with flight. You will want to cover your work surface with newspapers to protect it from marks.
 Decorating while assembled risks breaking things, so the glider should be taken apart, or decorate before you build it.
 Decorate the tailplane.
 Decorate the fin.
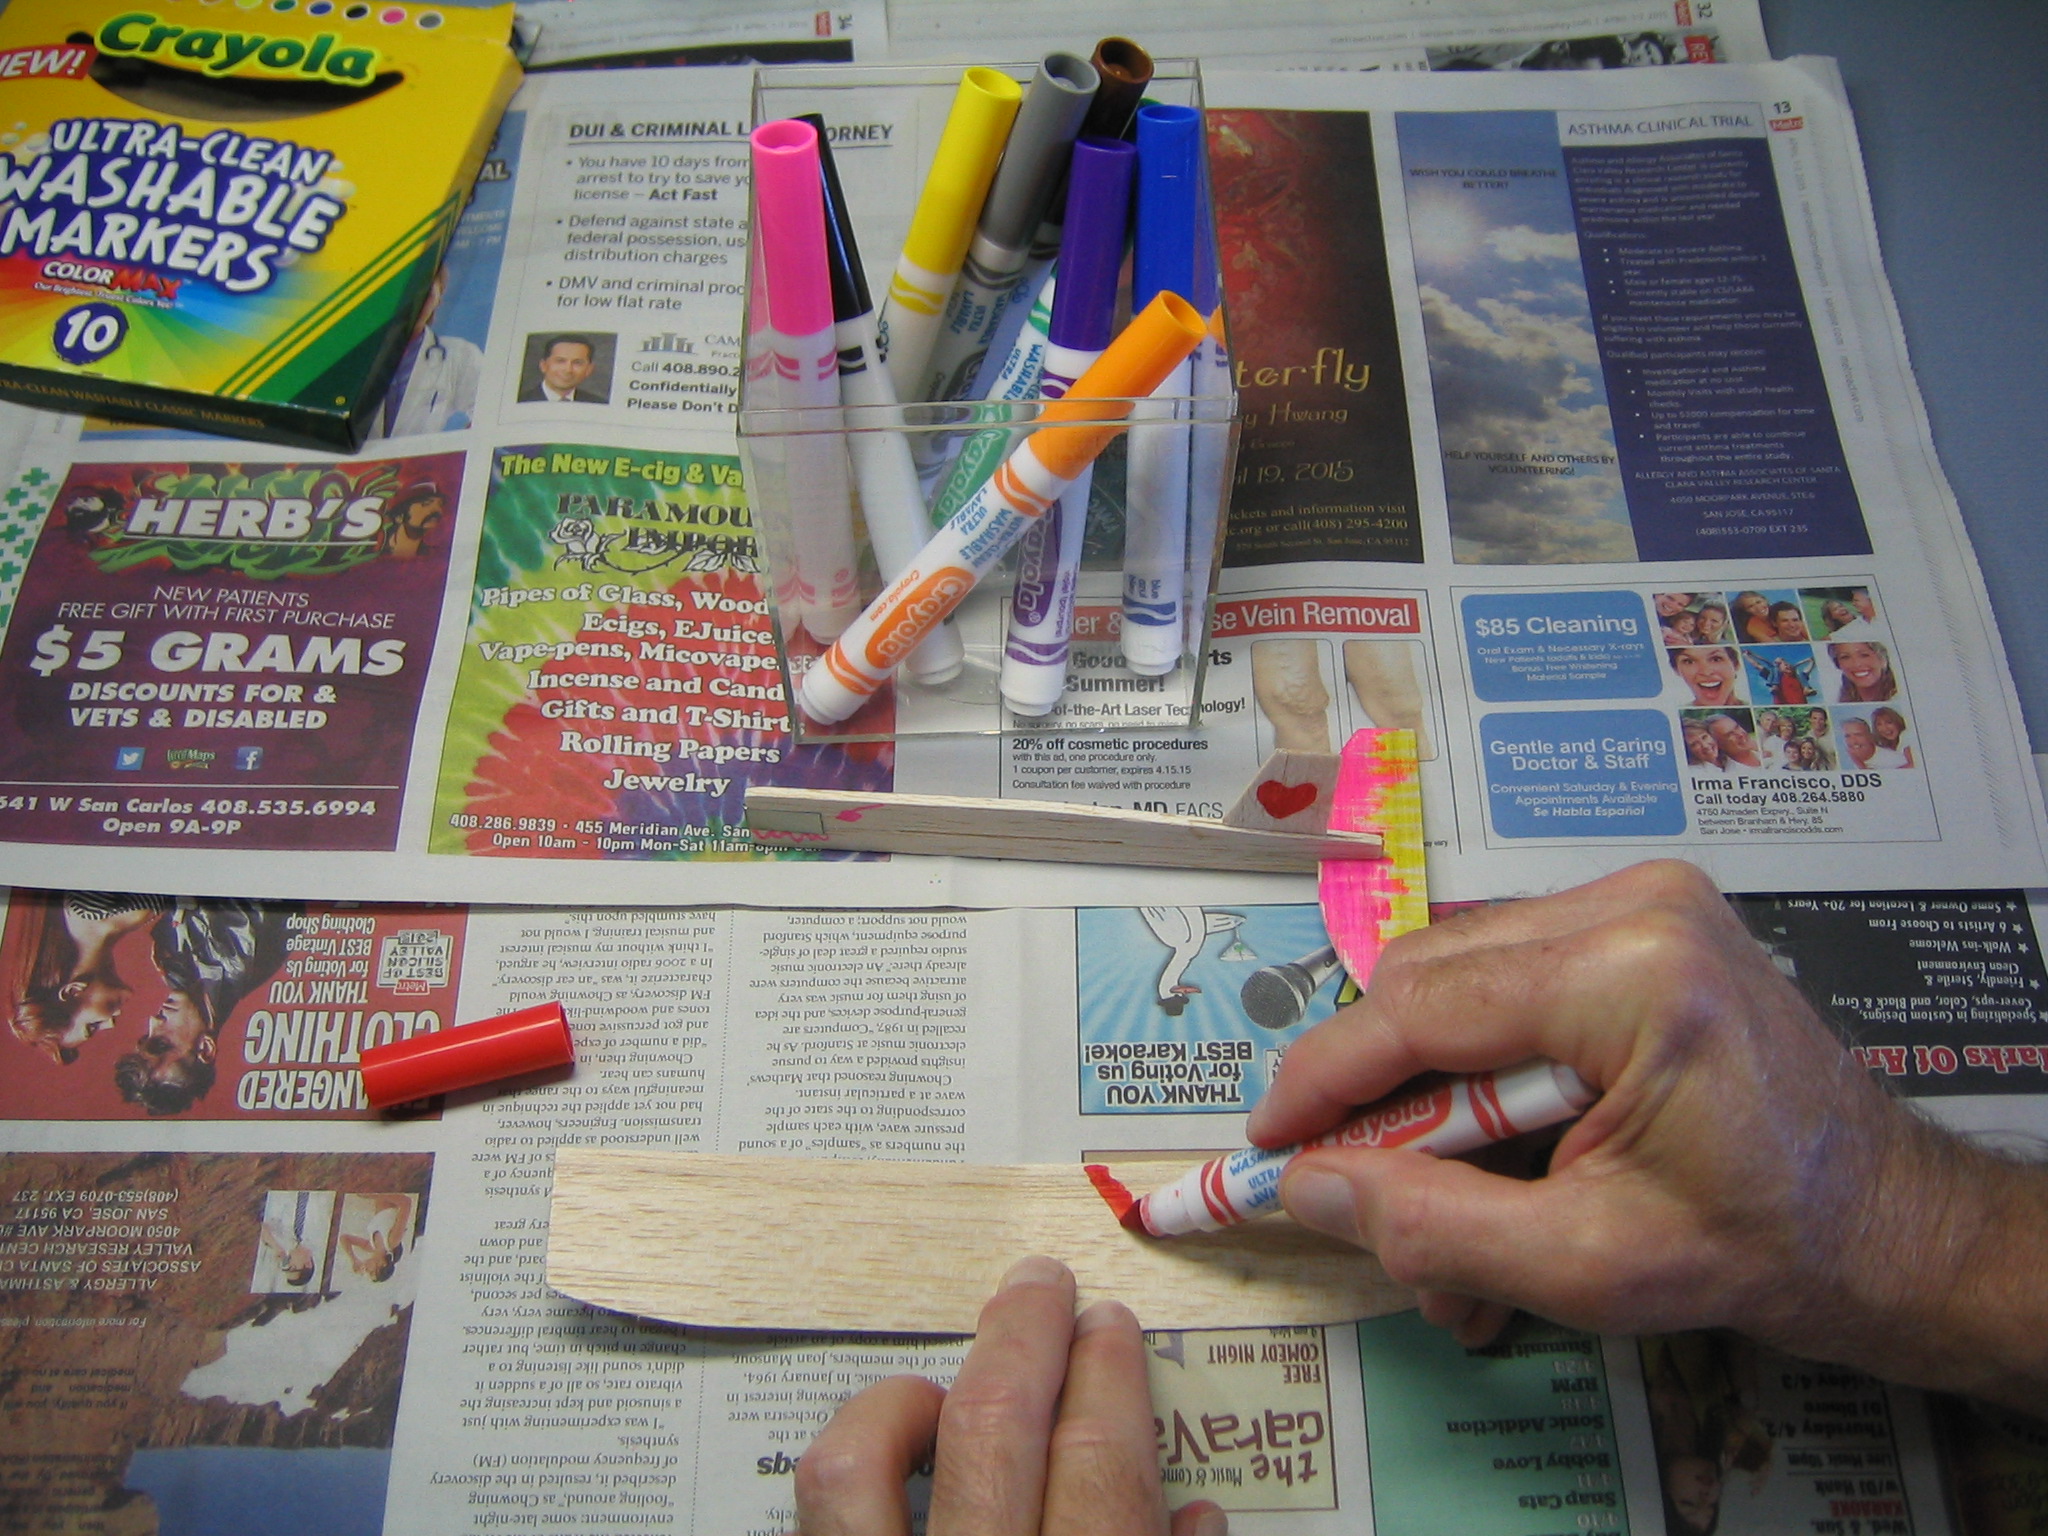 Decorate the wing.
 Get both sides. All done!
If you don’t decorate your plane in a distinctive way, at least put your name on it so it won’t get mixed up with somebody else’s plane.
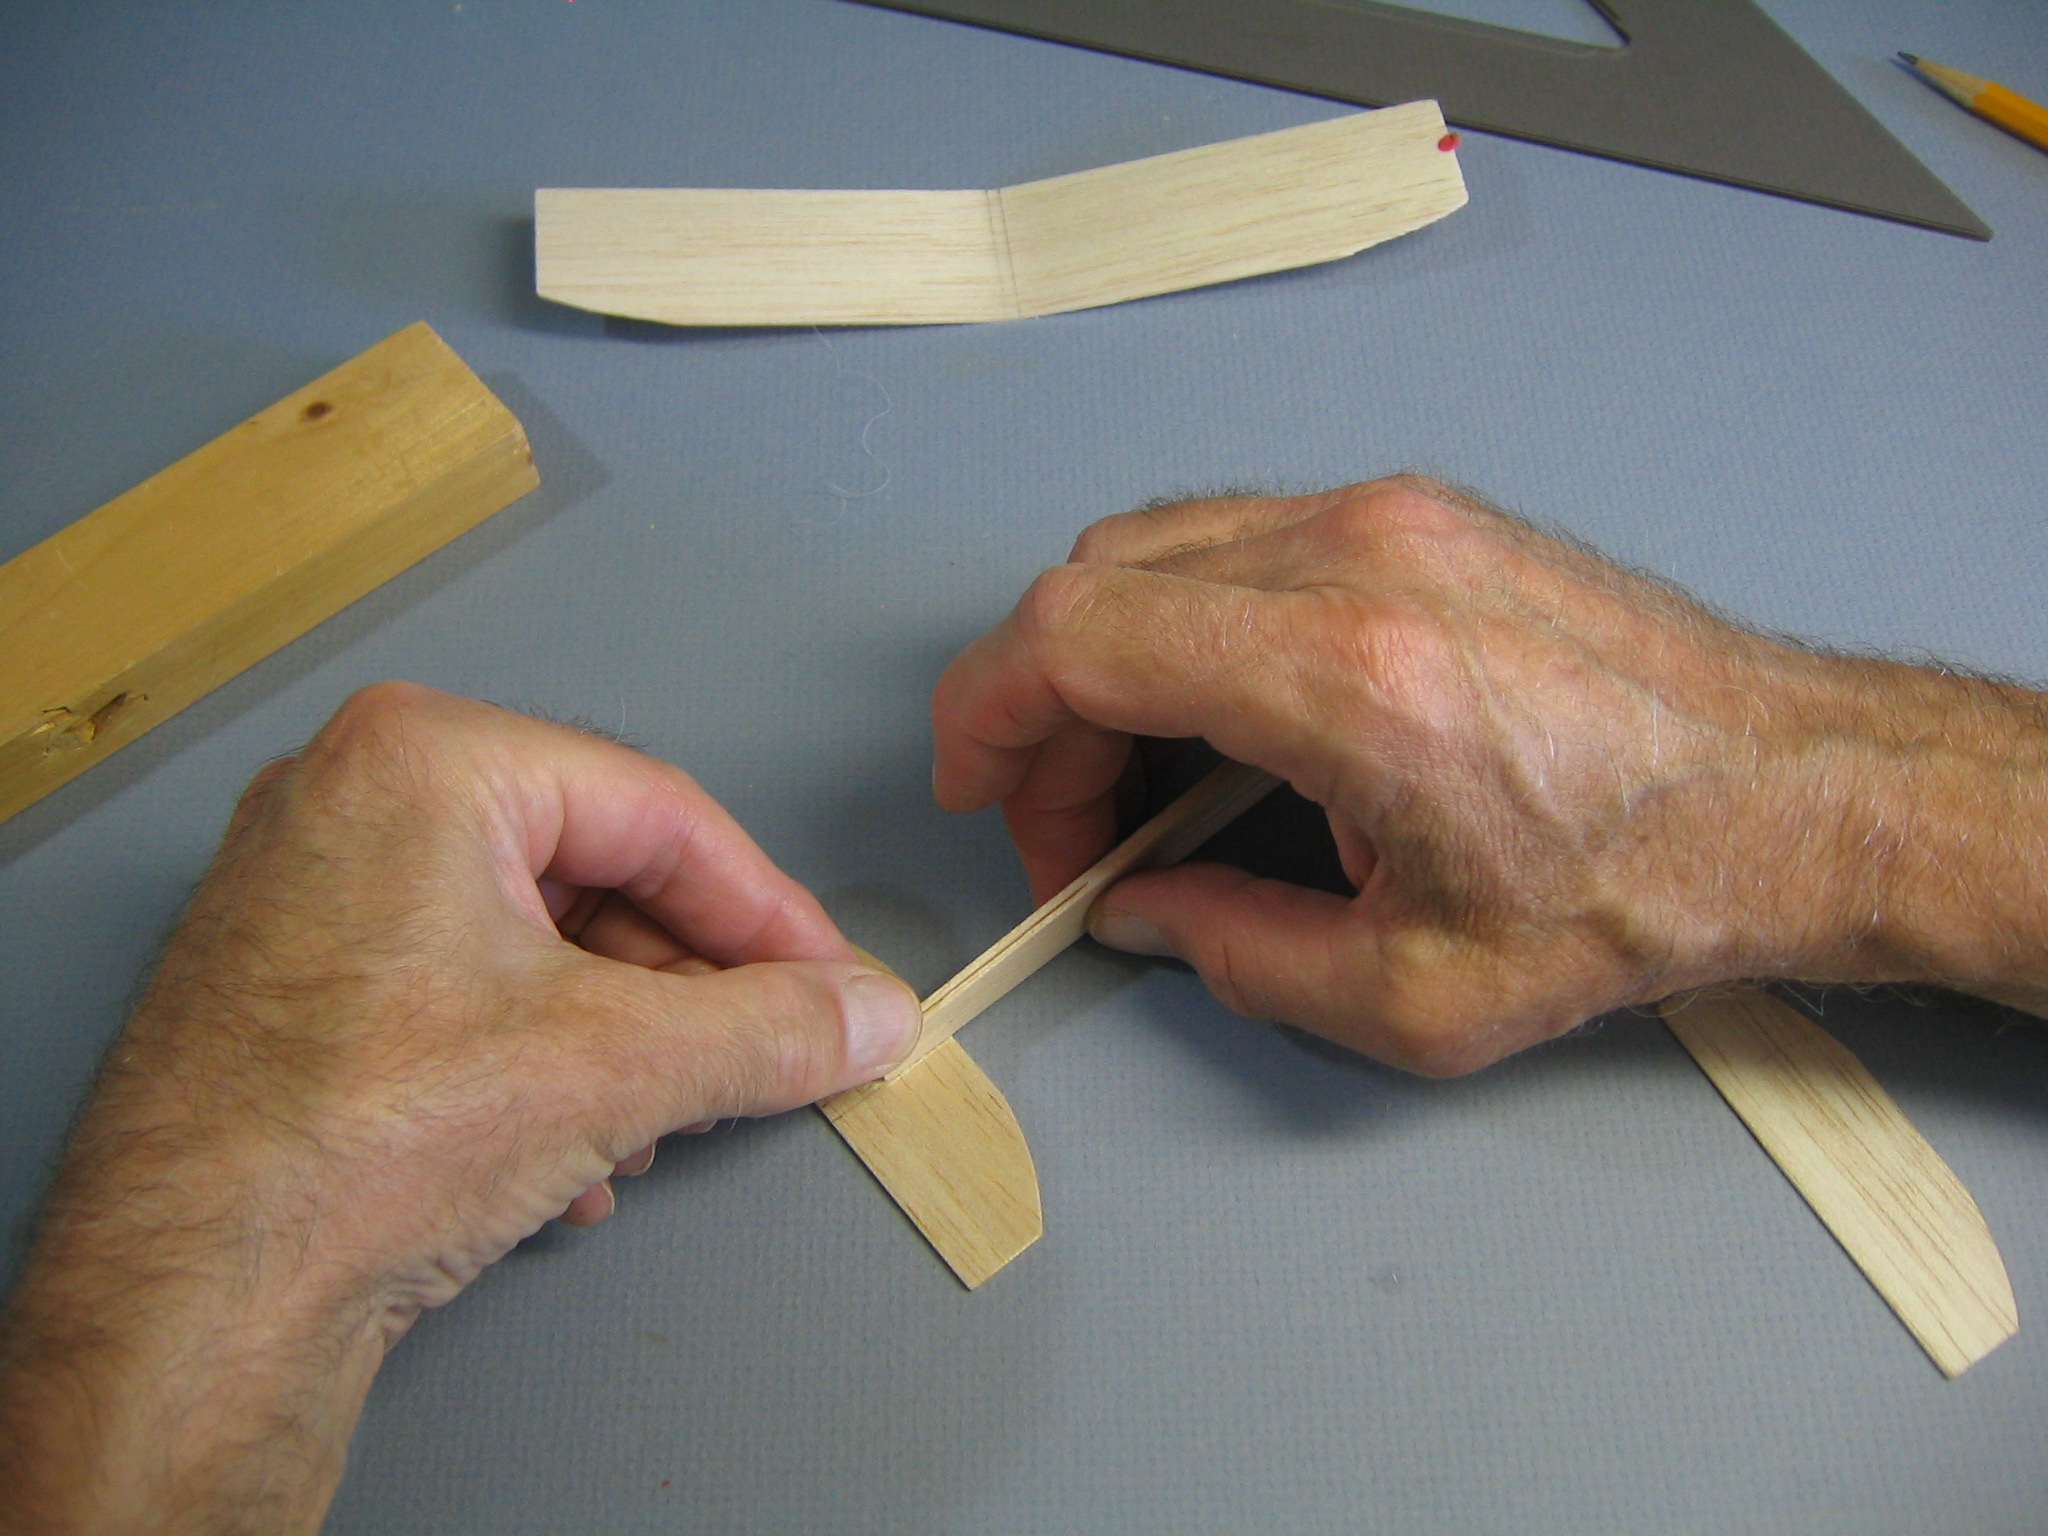
Making replacement parts
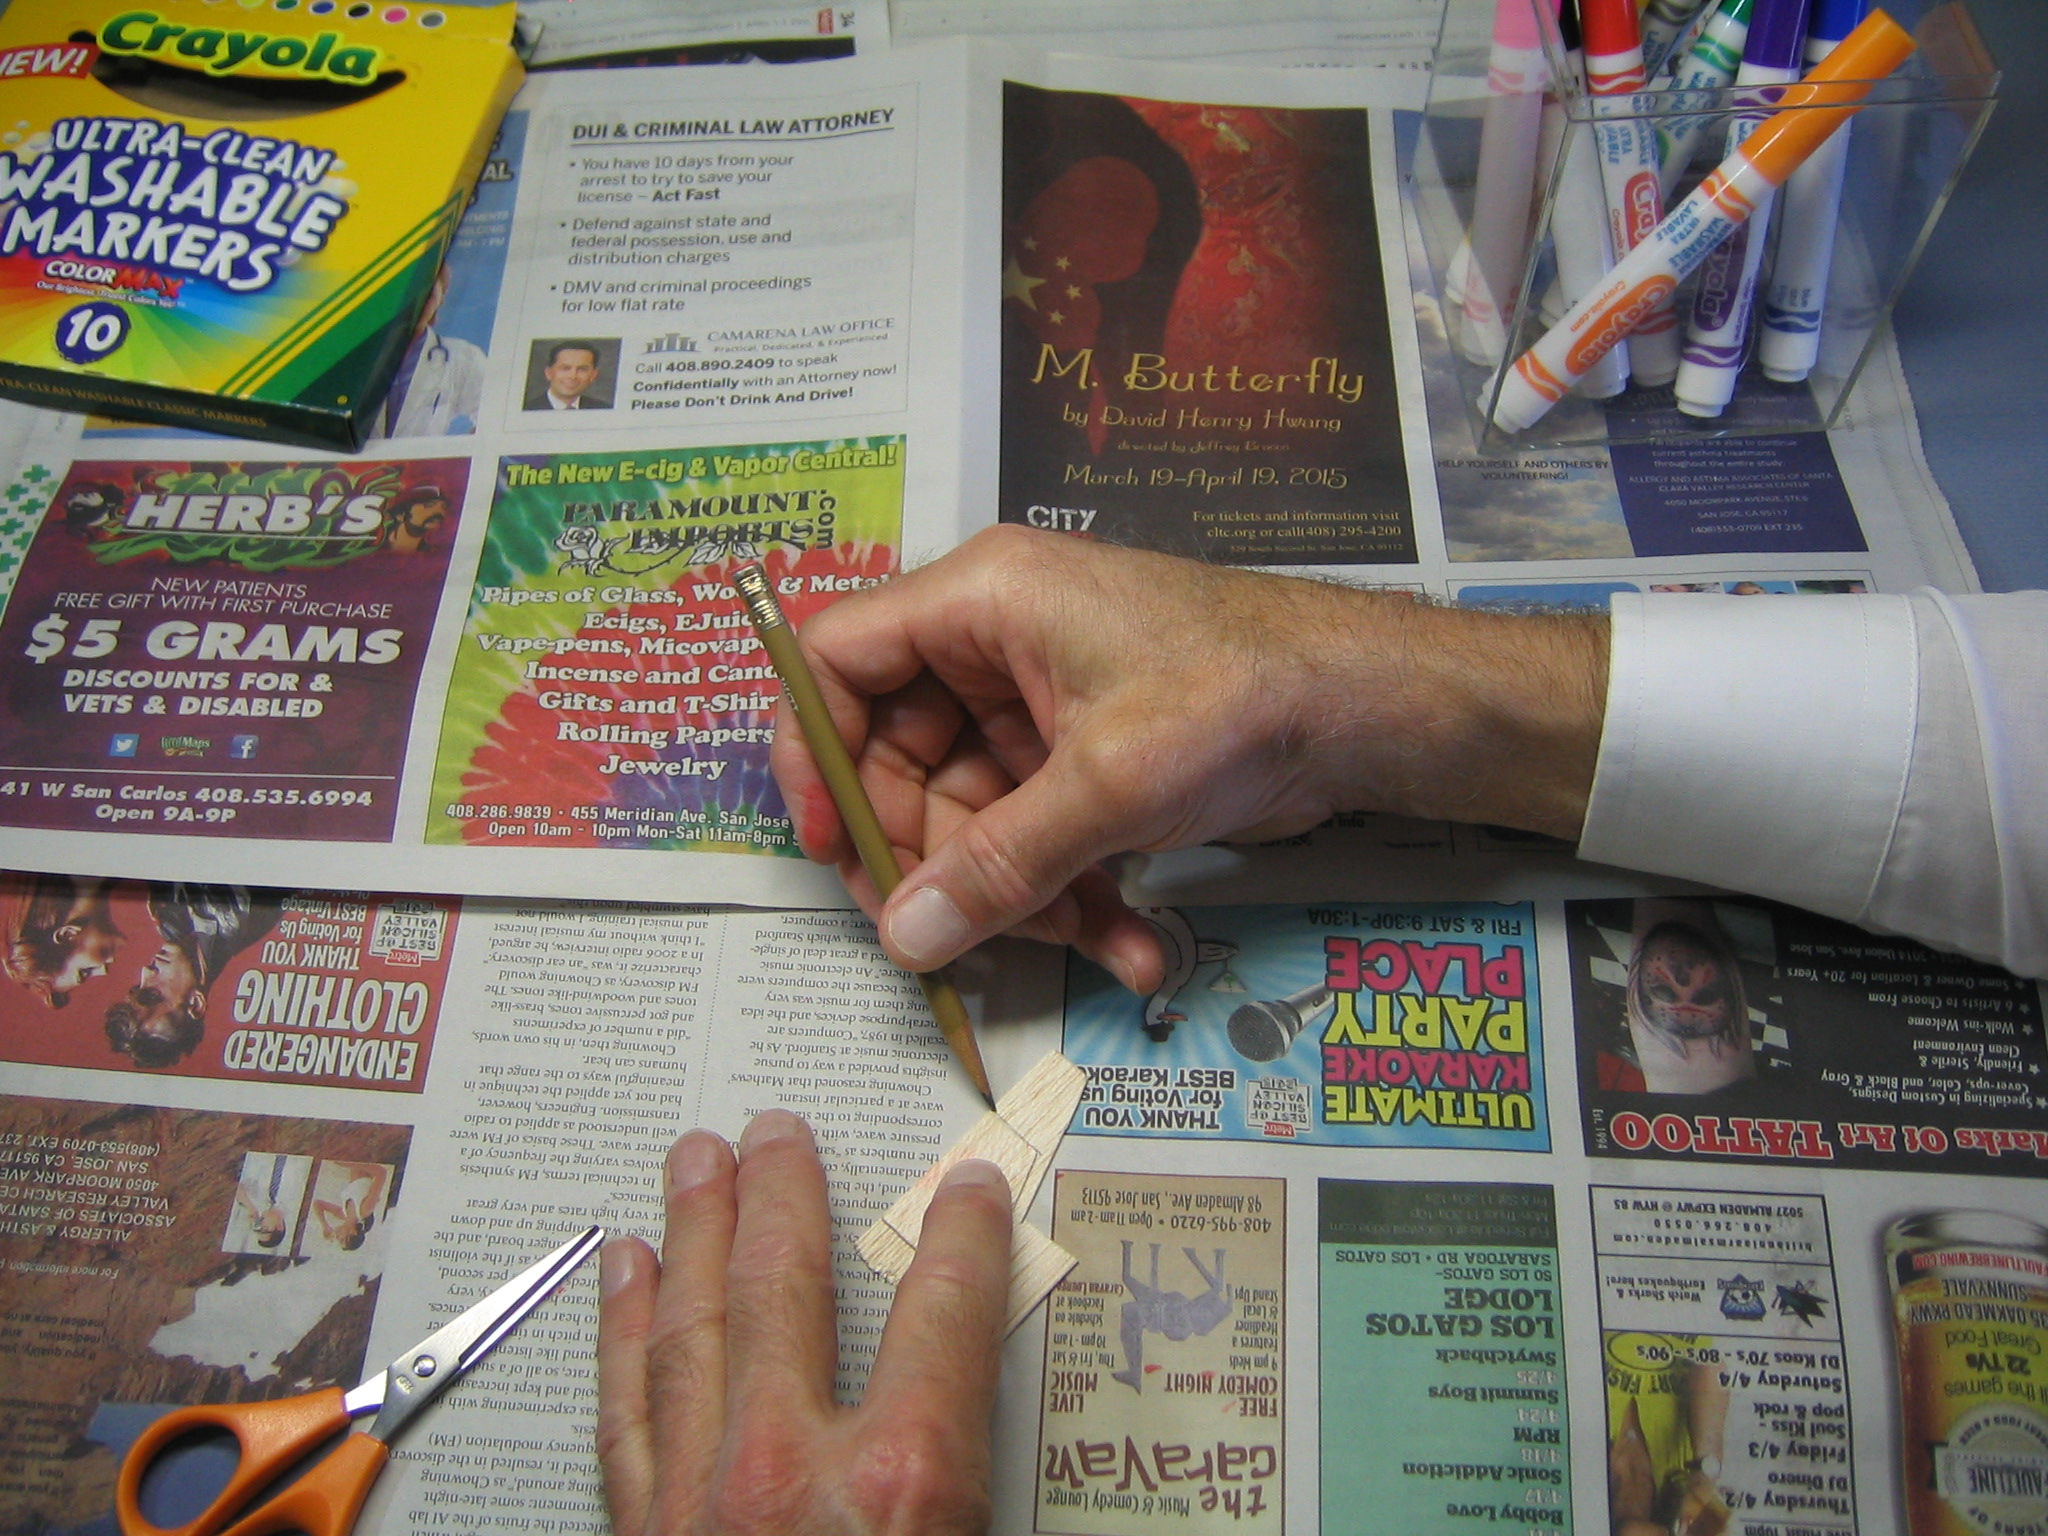 It is not unusual to have a lot of broken parts. There can be enough wood in a broken wing to make several smaller parts. One glider needed a new fin. It could have been a tailplane. I had a scrap salvaged from a broken wing and traced around a new fin onto the scrap.
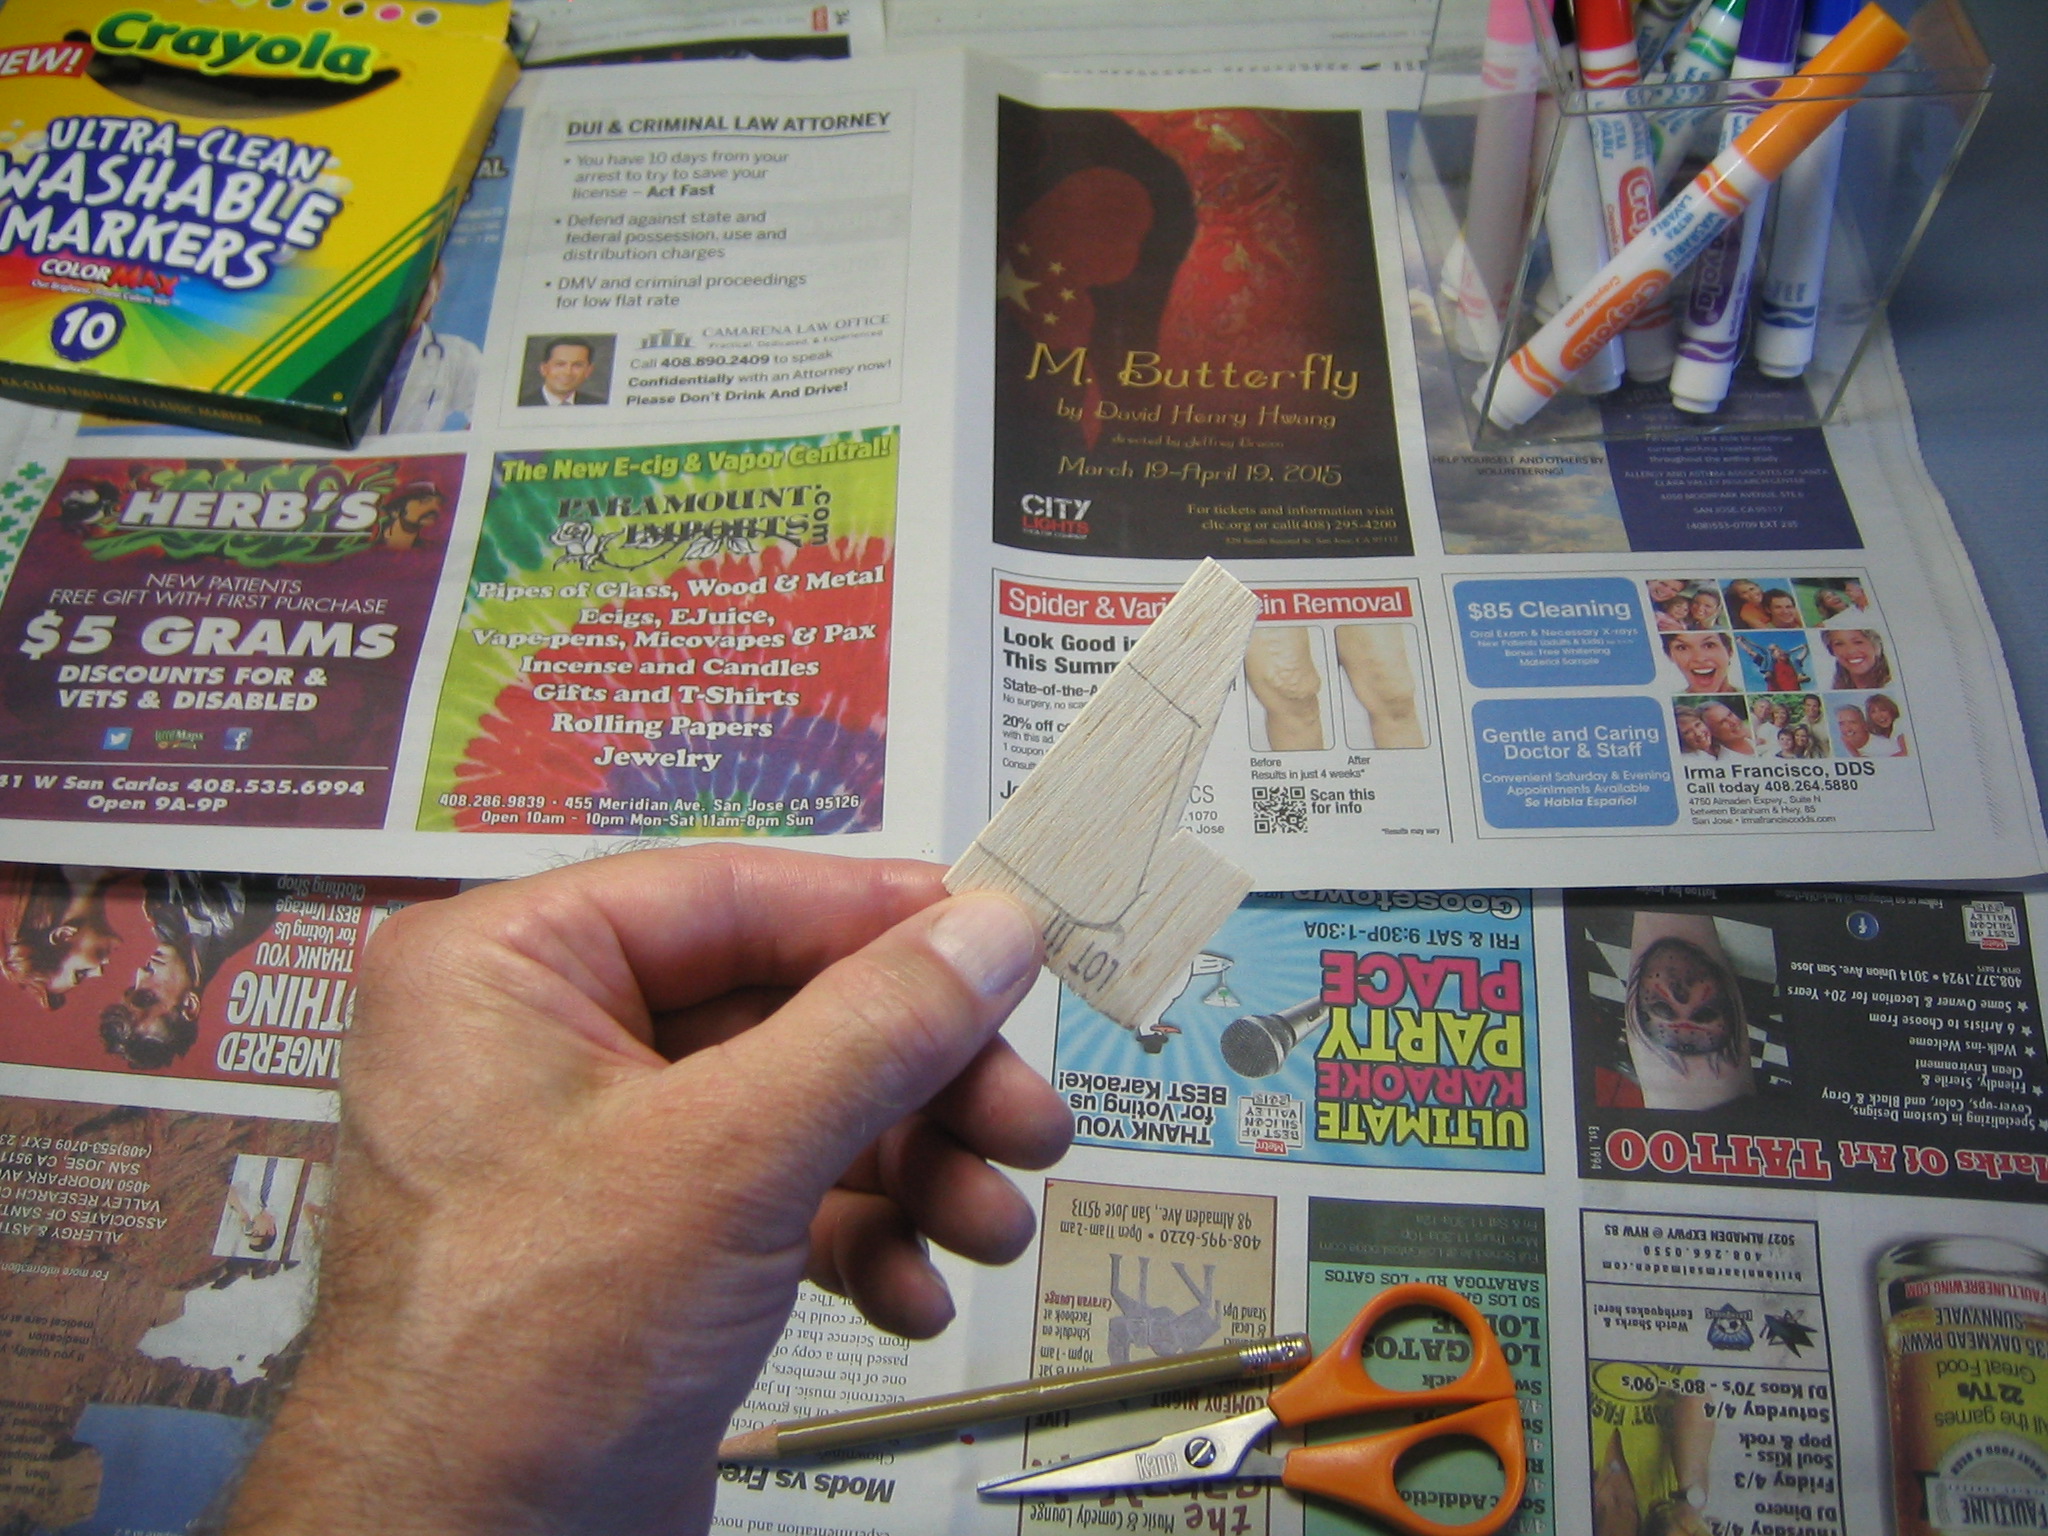 There’s the outline of the new fin.
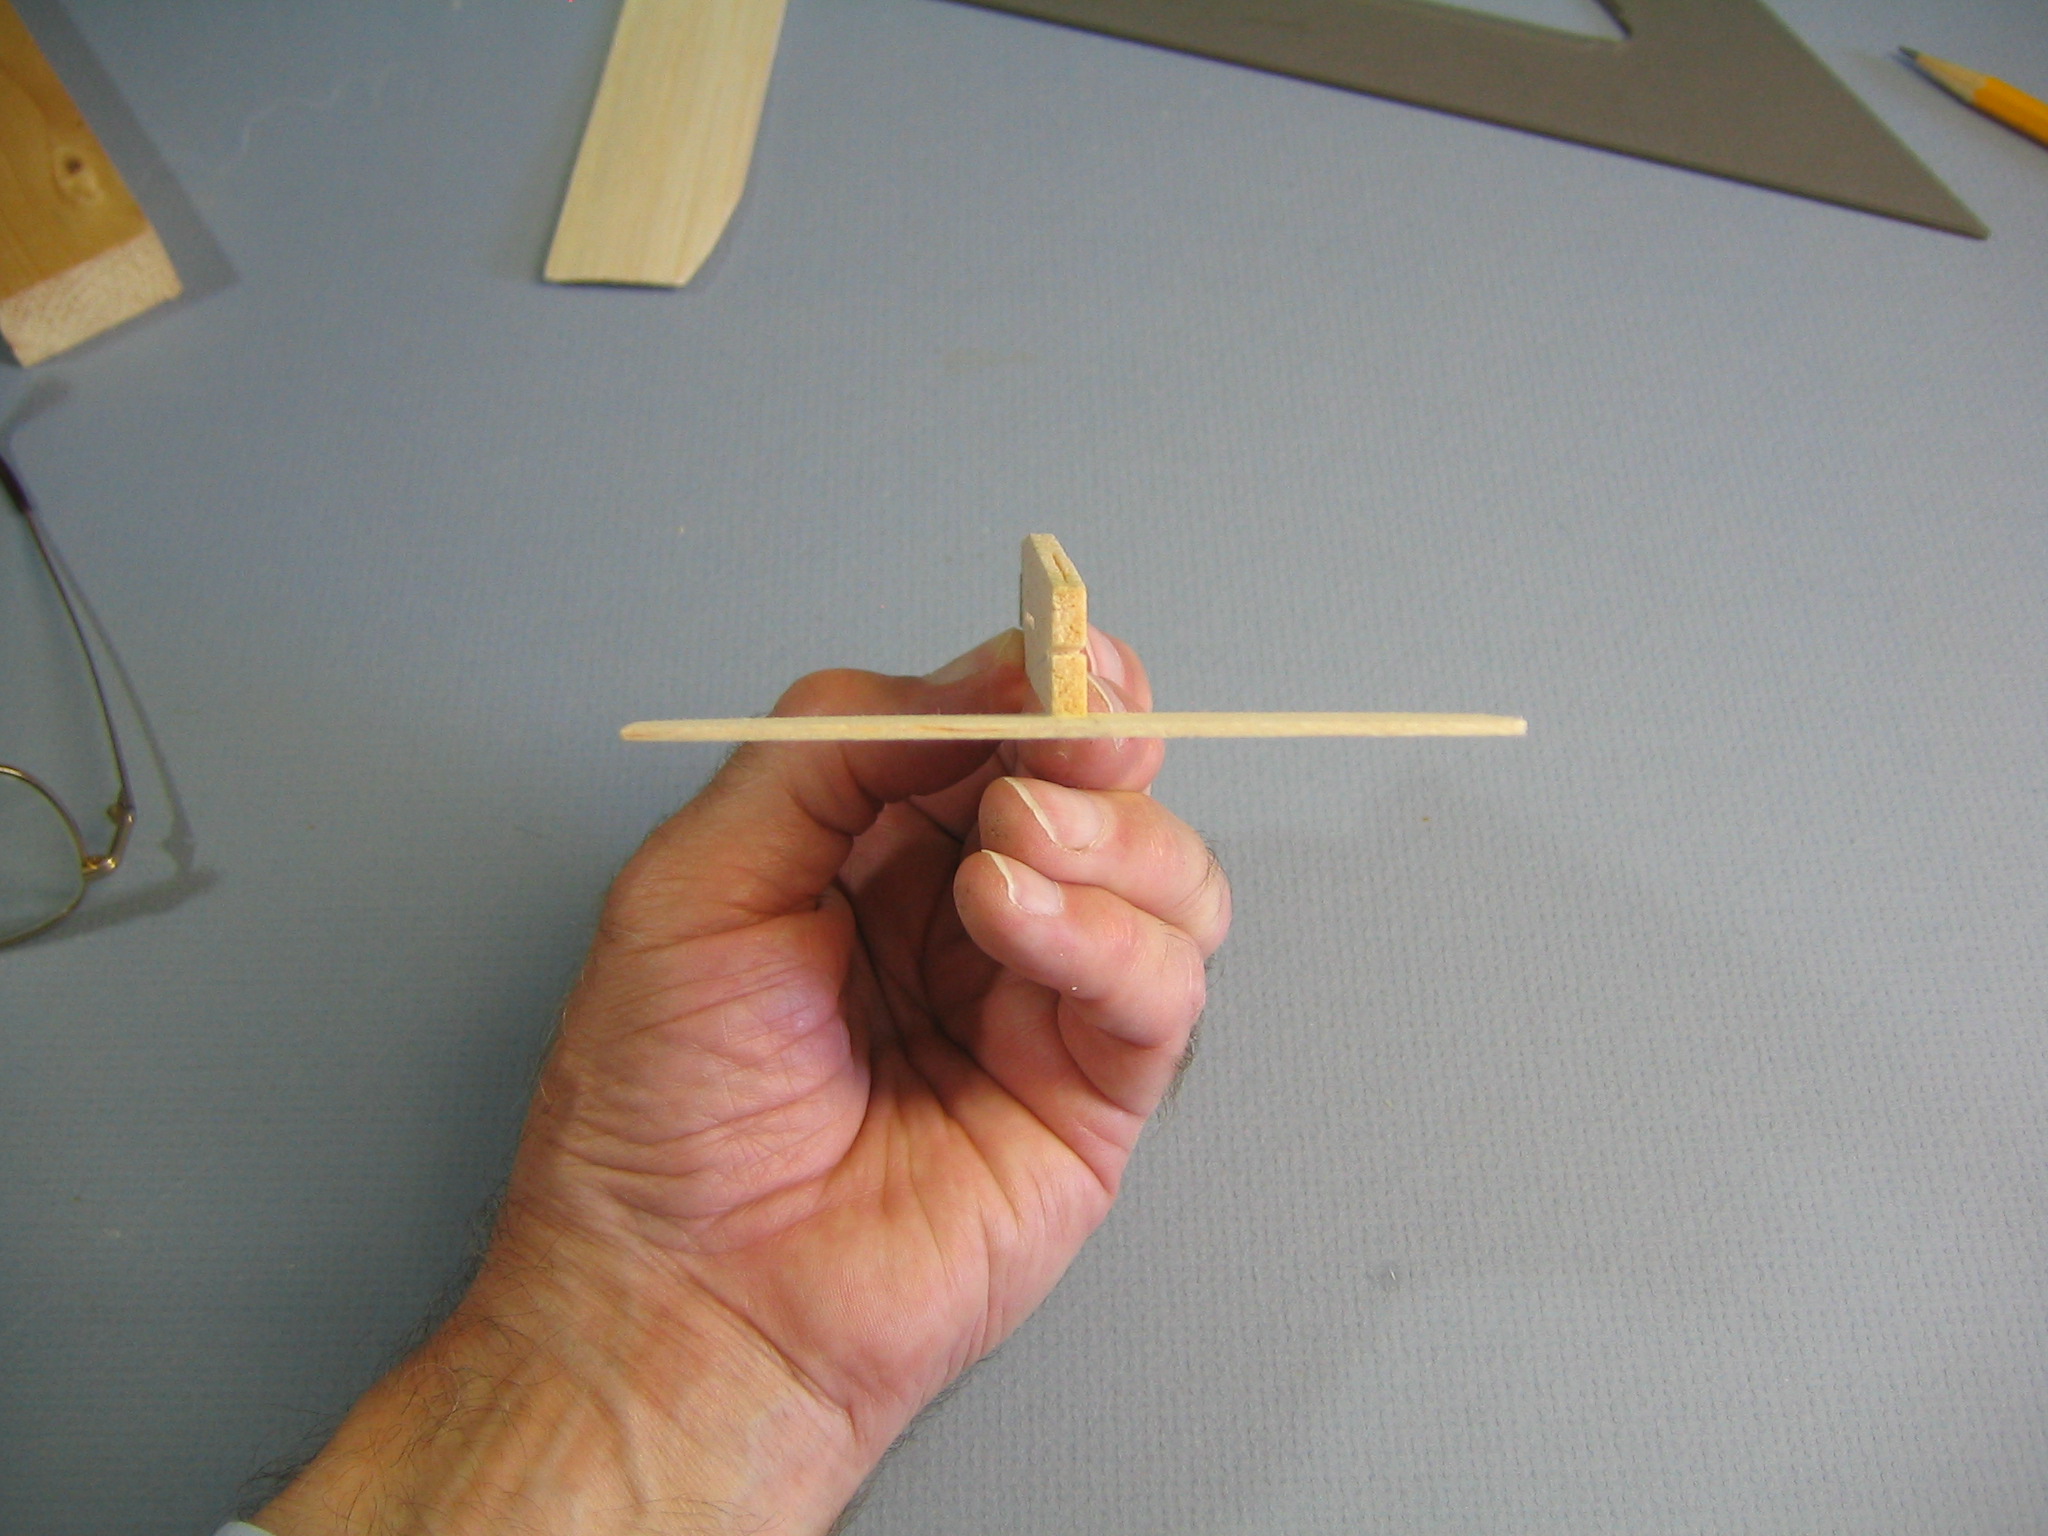
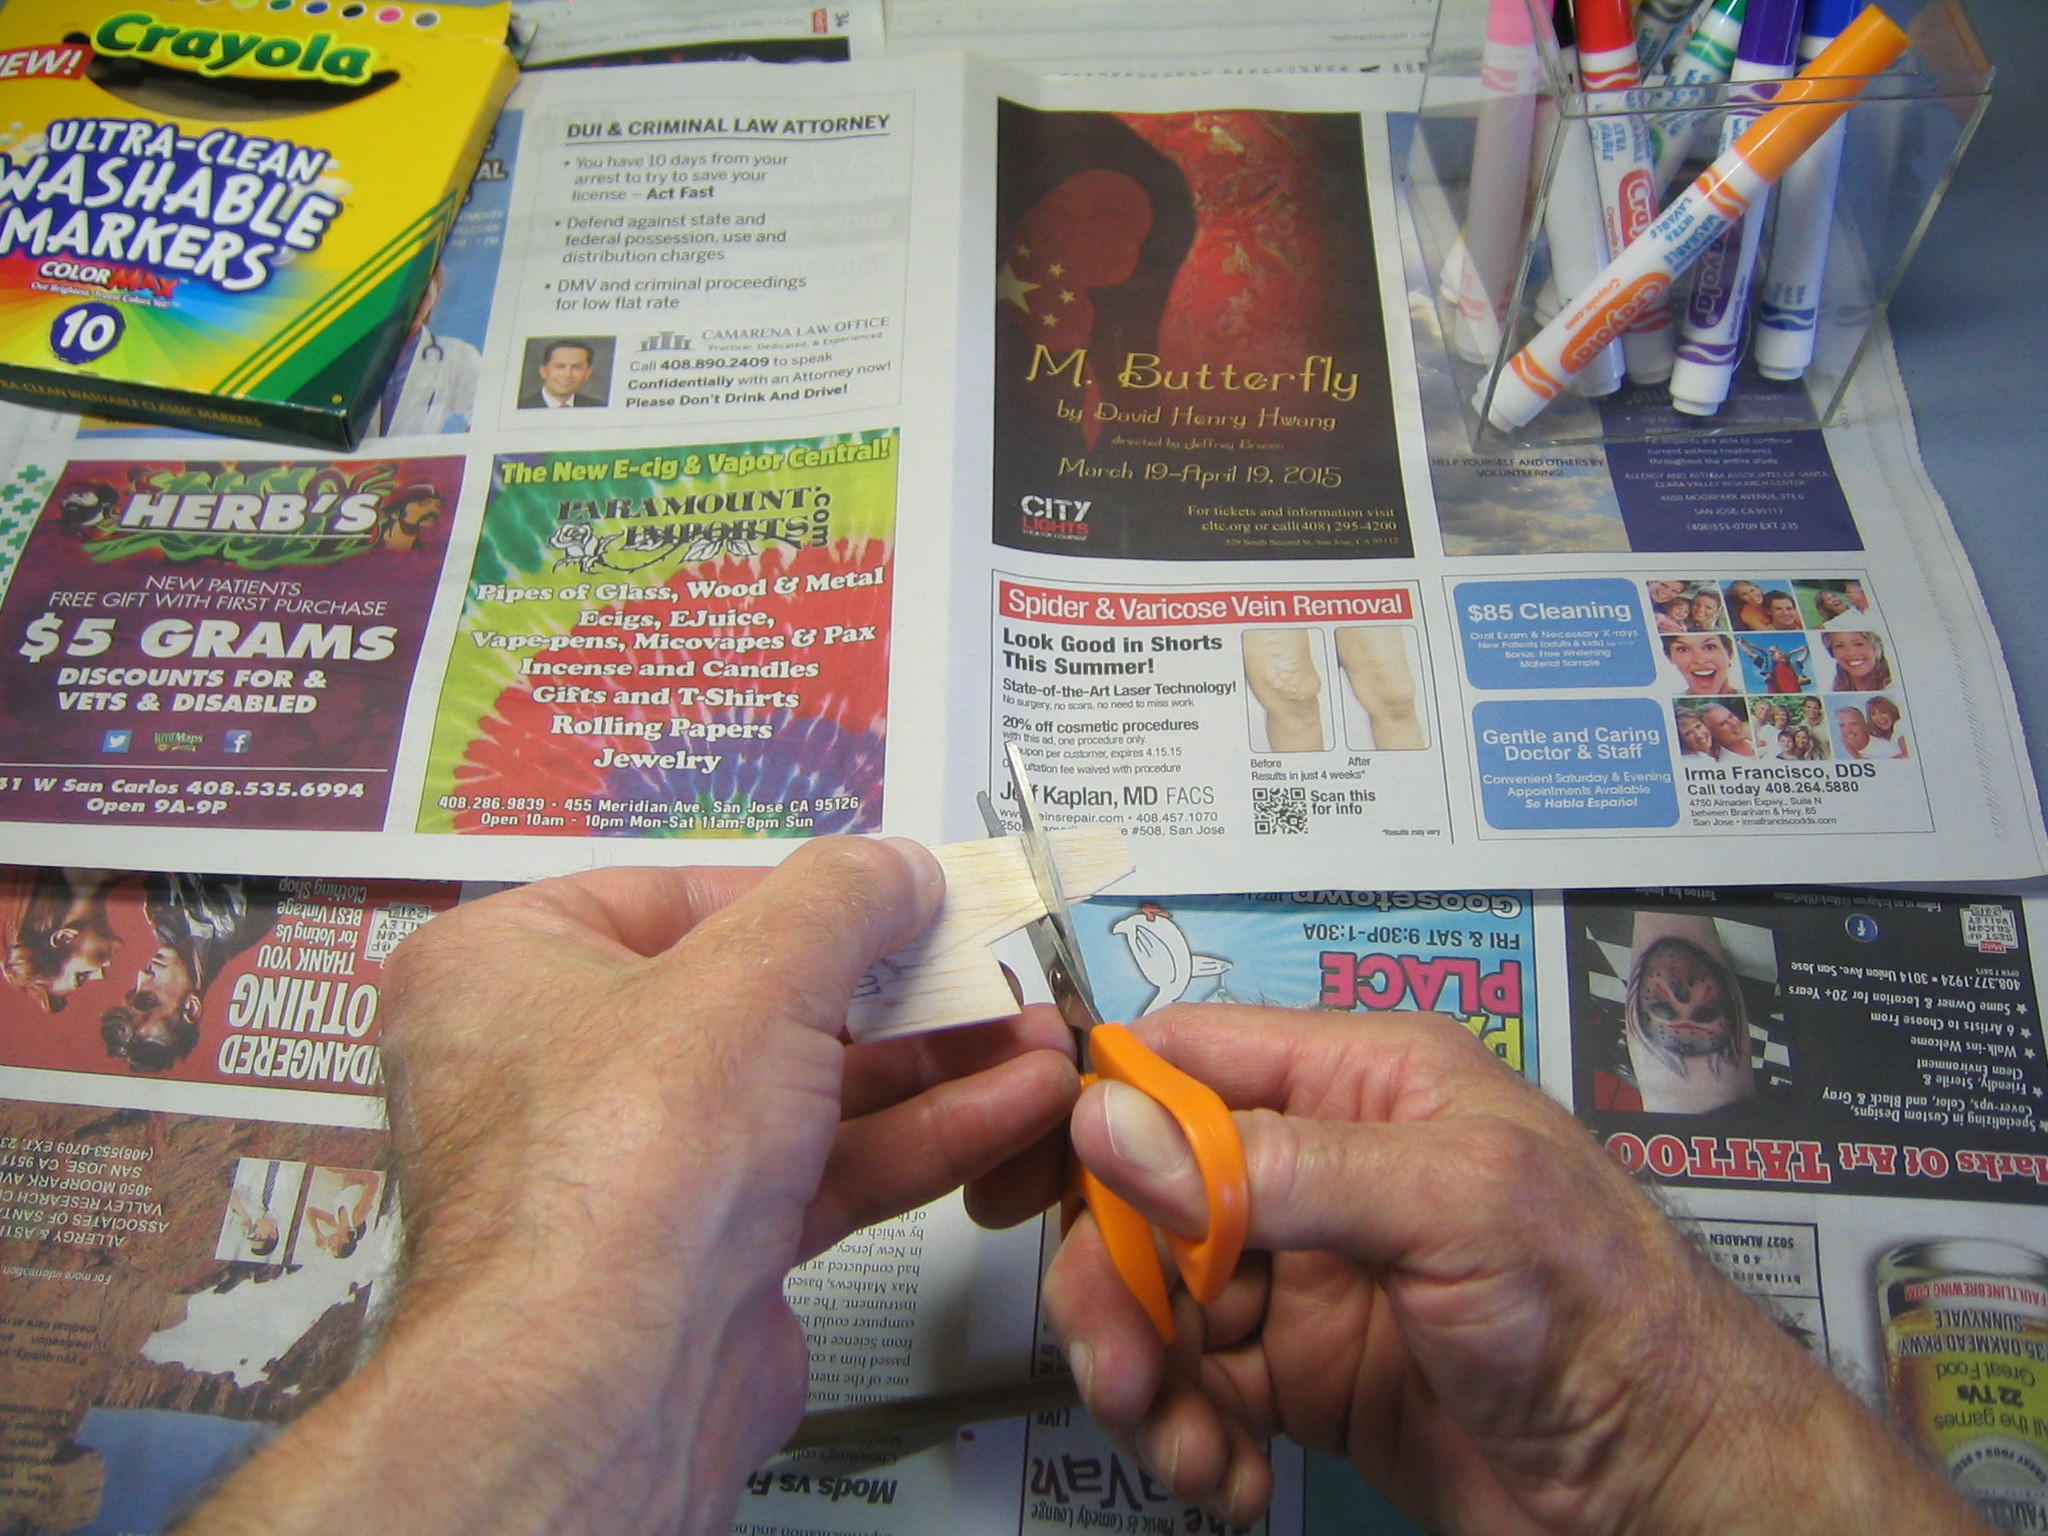 This thin wood may be cut with scissors.
 There’s our new fin!
games with Guillow’s 25-1 Gliders
There are several kinds of games and contests you and your friends can have with gliders. You can compete as individuals or as teams. You can each have your own glider or you can take turns.
See how many loops you can get it to make. Move the wing all the way forward and throw it as hard as you can. Gently bend the trailing edge of the tailplane up to make it more loopy.
See how many times you can get it to loop back to you and you catch it.
Hold the wings vertical and throw it sidearm. See if you can make it do a horizontal loop. See if you can get it to come back to you and catch it.
Have a contest to see how far you can get it to glide in a straight line.
Have a contest to see how long you can get it to stay up in the air.
Have a spot landing contest, see how close you can land to a target. Award points according to how close you land from the target.
Play aerial golf. Start far from a target and see how few throws it takes to get to the target.
Modifying the Guillow’s 25-1 Glider
We kids used to cut away excess wood from the fuselage and sandpaper the flying surfaces paper thin to lighten the glider, hoping to make them lighter and fly longer. We would replace the heavy nose weight with a short finishing nail.
 To reduce the loopyness and get a higher throw, I glued the tailplane to the flat bottom of the fuselage. It flew like a rock. Moistening and gently bending the back of the tailplane up got it flying again.
 I replaced the metal nose weight with clay. It flys alright, but with reduced weight it slows down so fast it still can’t be thrown very high.
 I glued the tailplane to the tapered side of the fuselage and glued the fin to the straight side, then put the wing in the other way, upside down. No difference, the angle between the tailplane and wing is about the same as it was with the tailplane in the slot. I also tried this with the metal weight replaced with clay, with a similar result. Later I found other changes that gave better results.
put camber in your wings and increase the dihedral
The 25-1 glider wing has no camber. The wing is flat from front to back. Airplane wings curve from front to back. Cambered wings can produce more lift to fly farther and come down more slowly. We can add camber to flat sheet balsa wings by soaking the wood in water until it is soft, then strapping it to a form and letting it dry out. This works better if you find a wing with soft balsa. You can tell soft balsa by bending it slightly to see how easily it bends across the grain. Soft balsa is also a lighter color and more translucent than hard balsa.
First we must mark the center of the wing so we can bend it evenly.
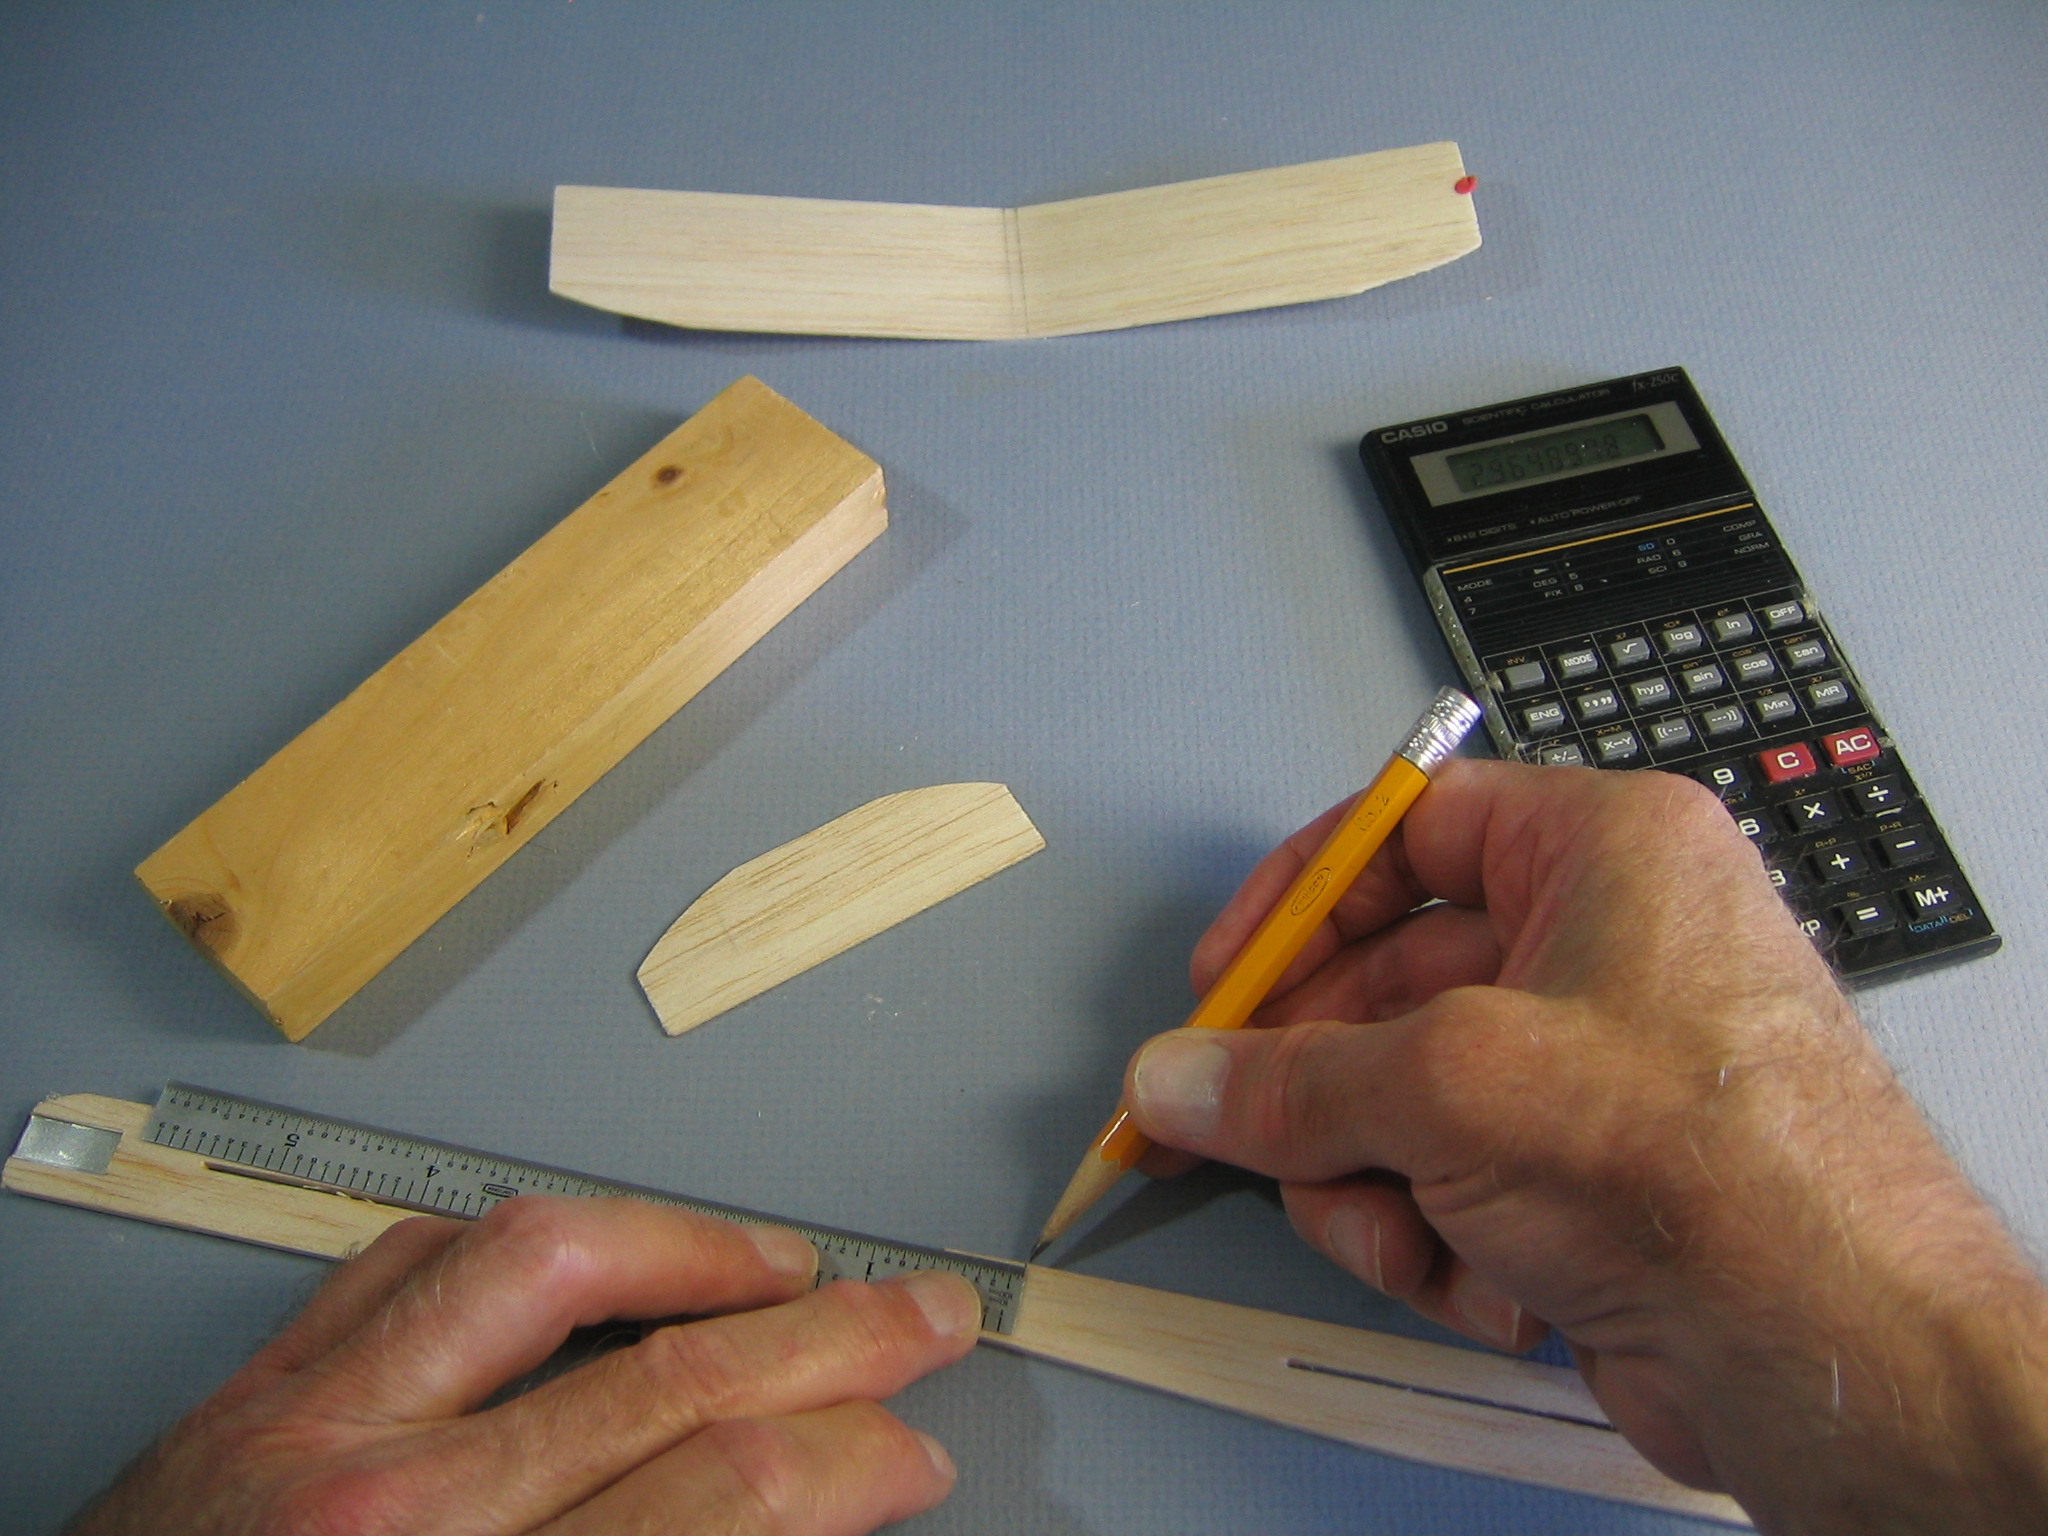
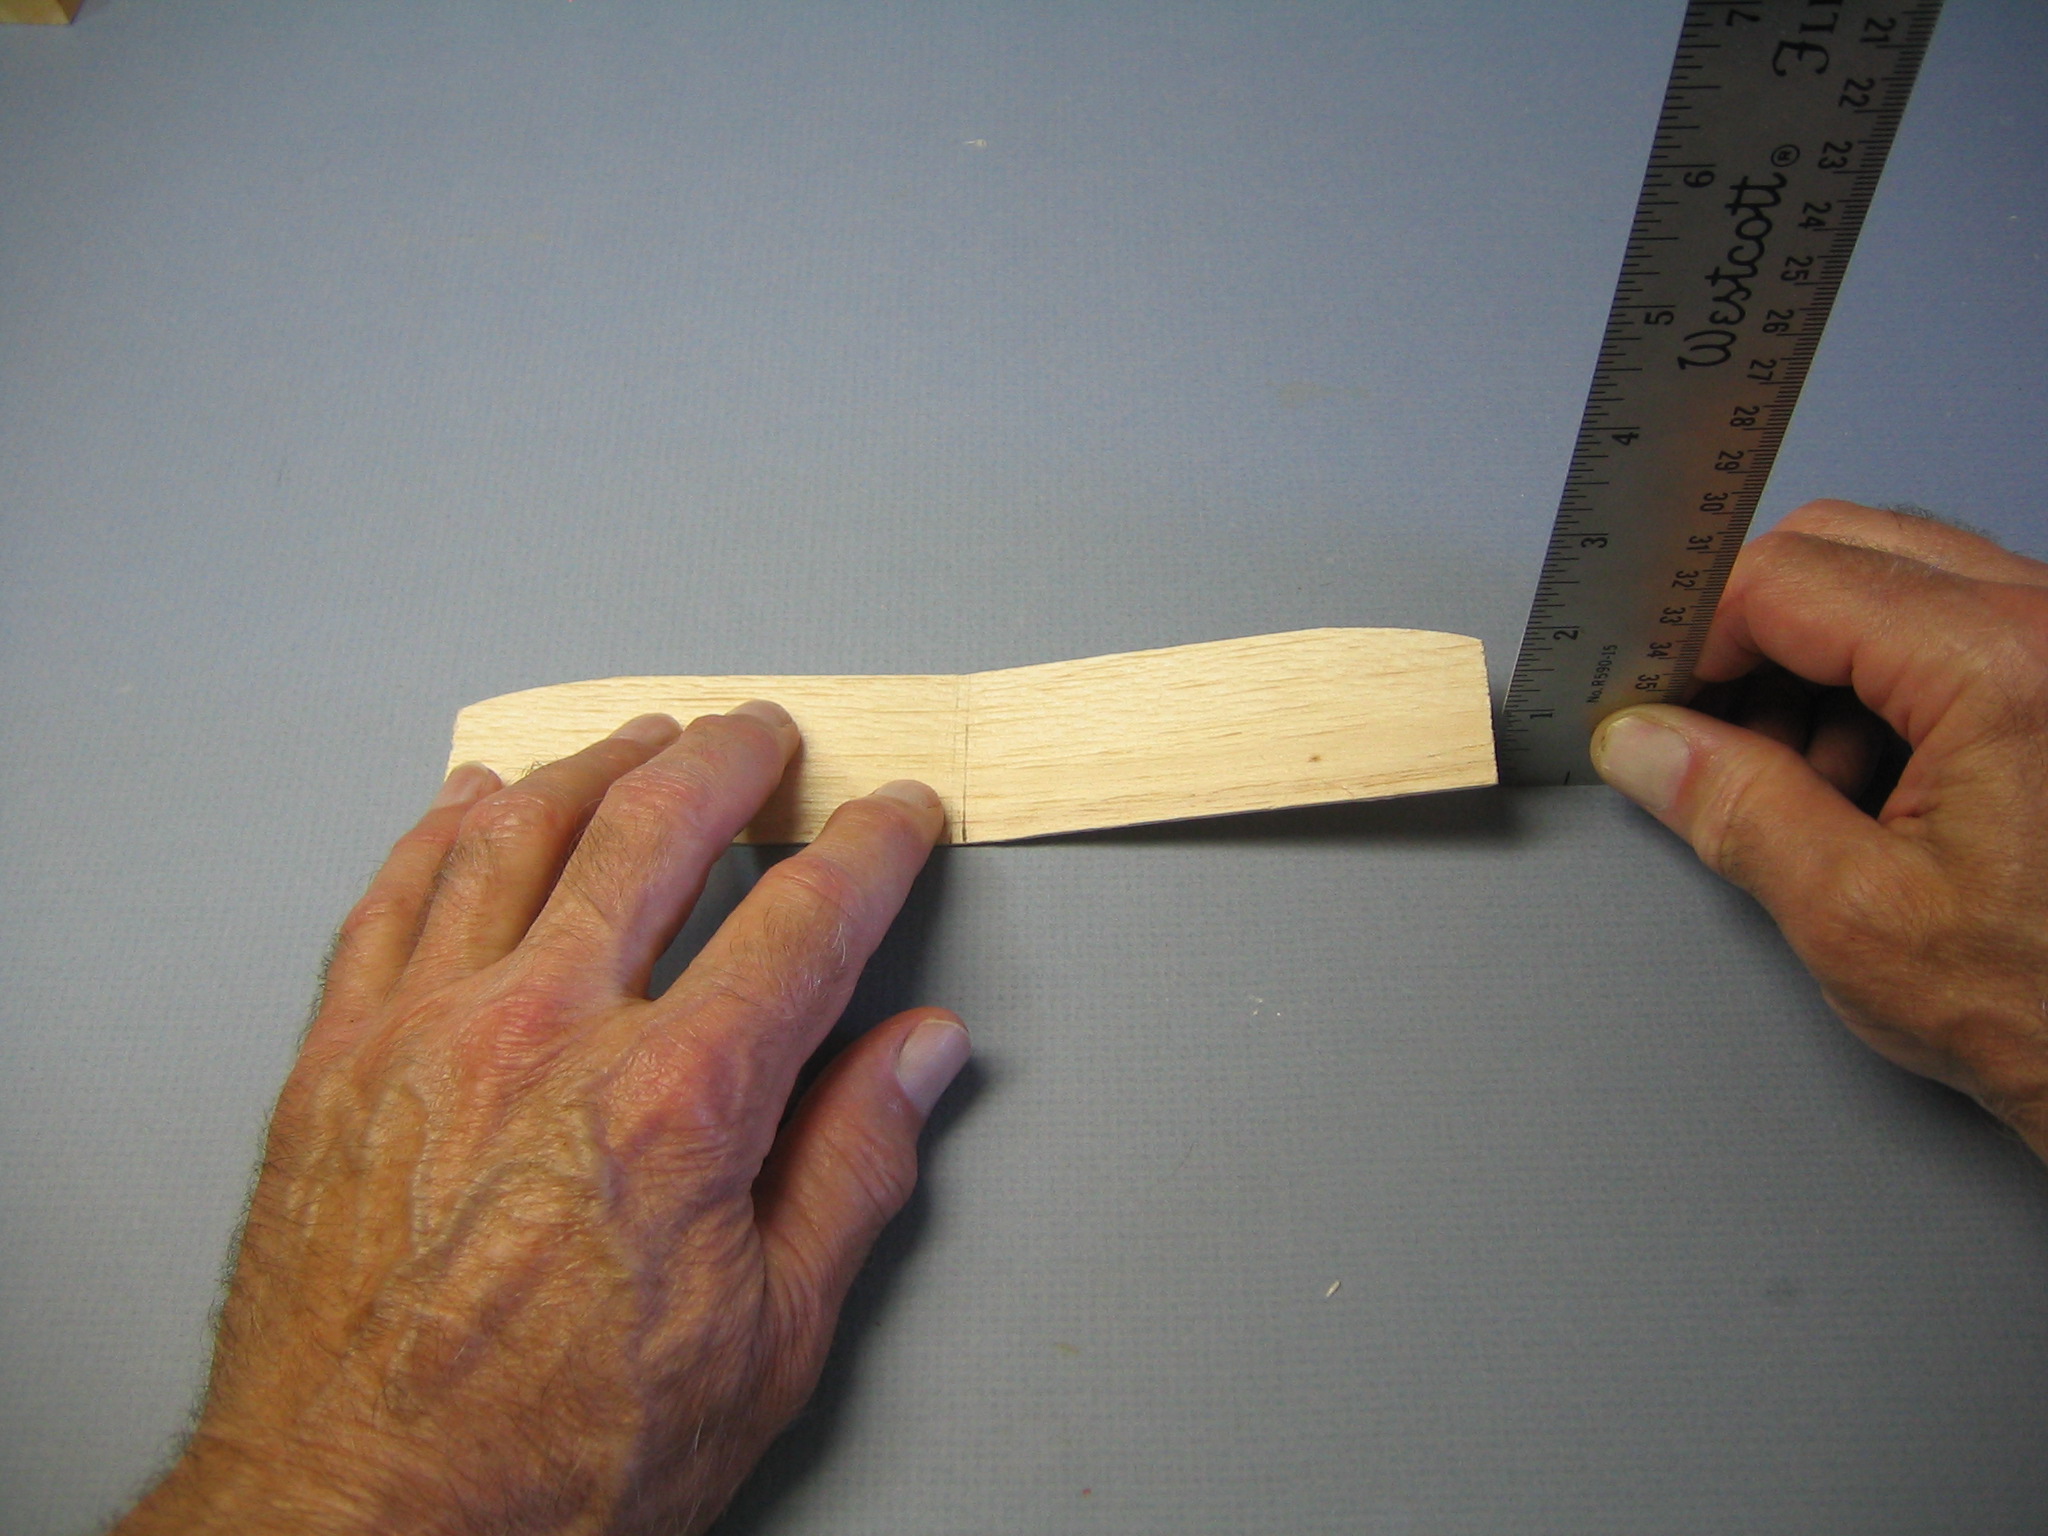
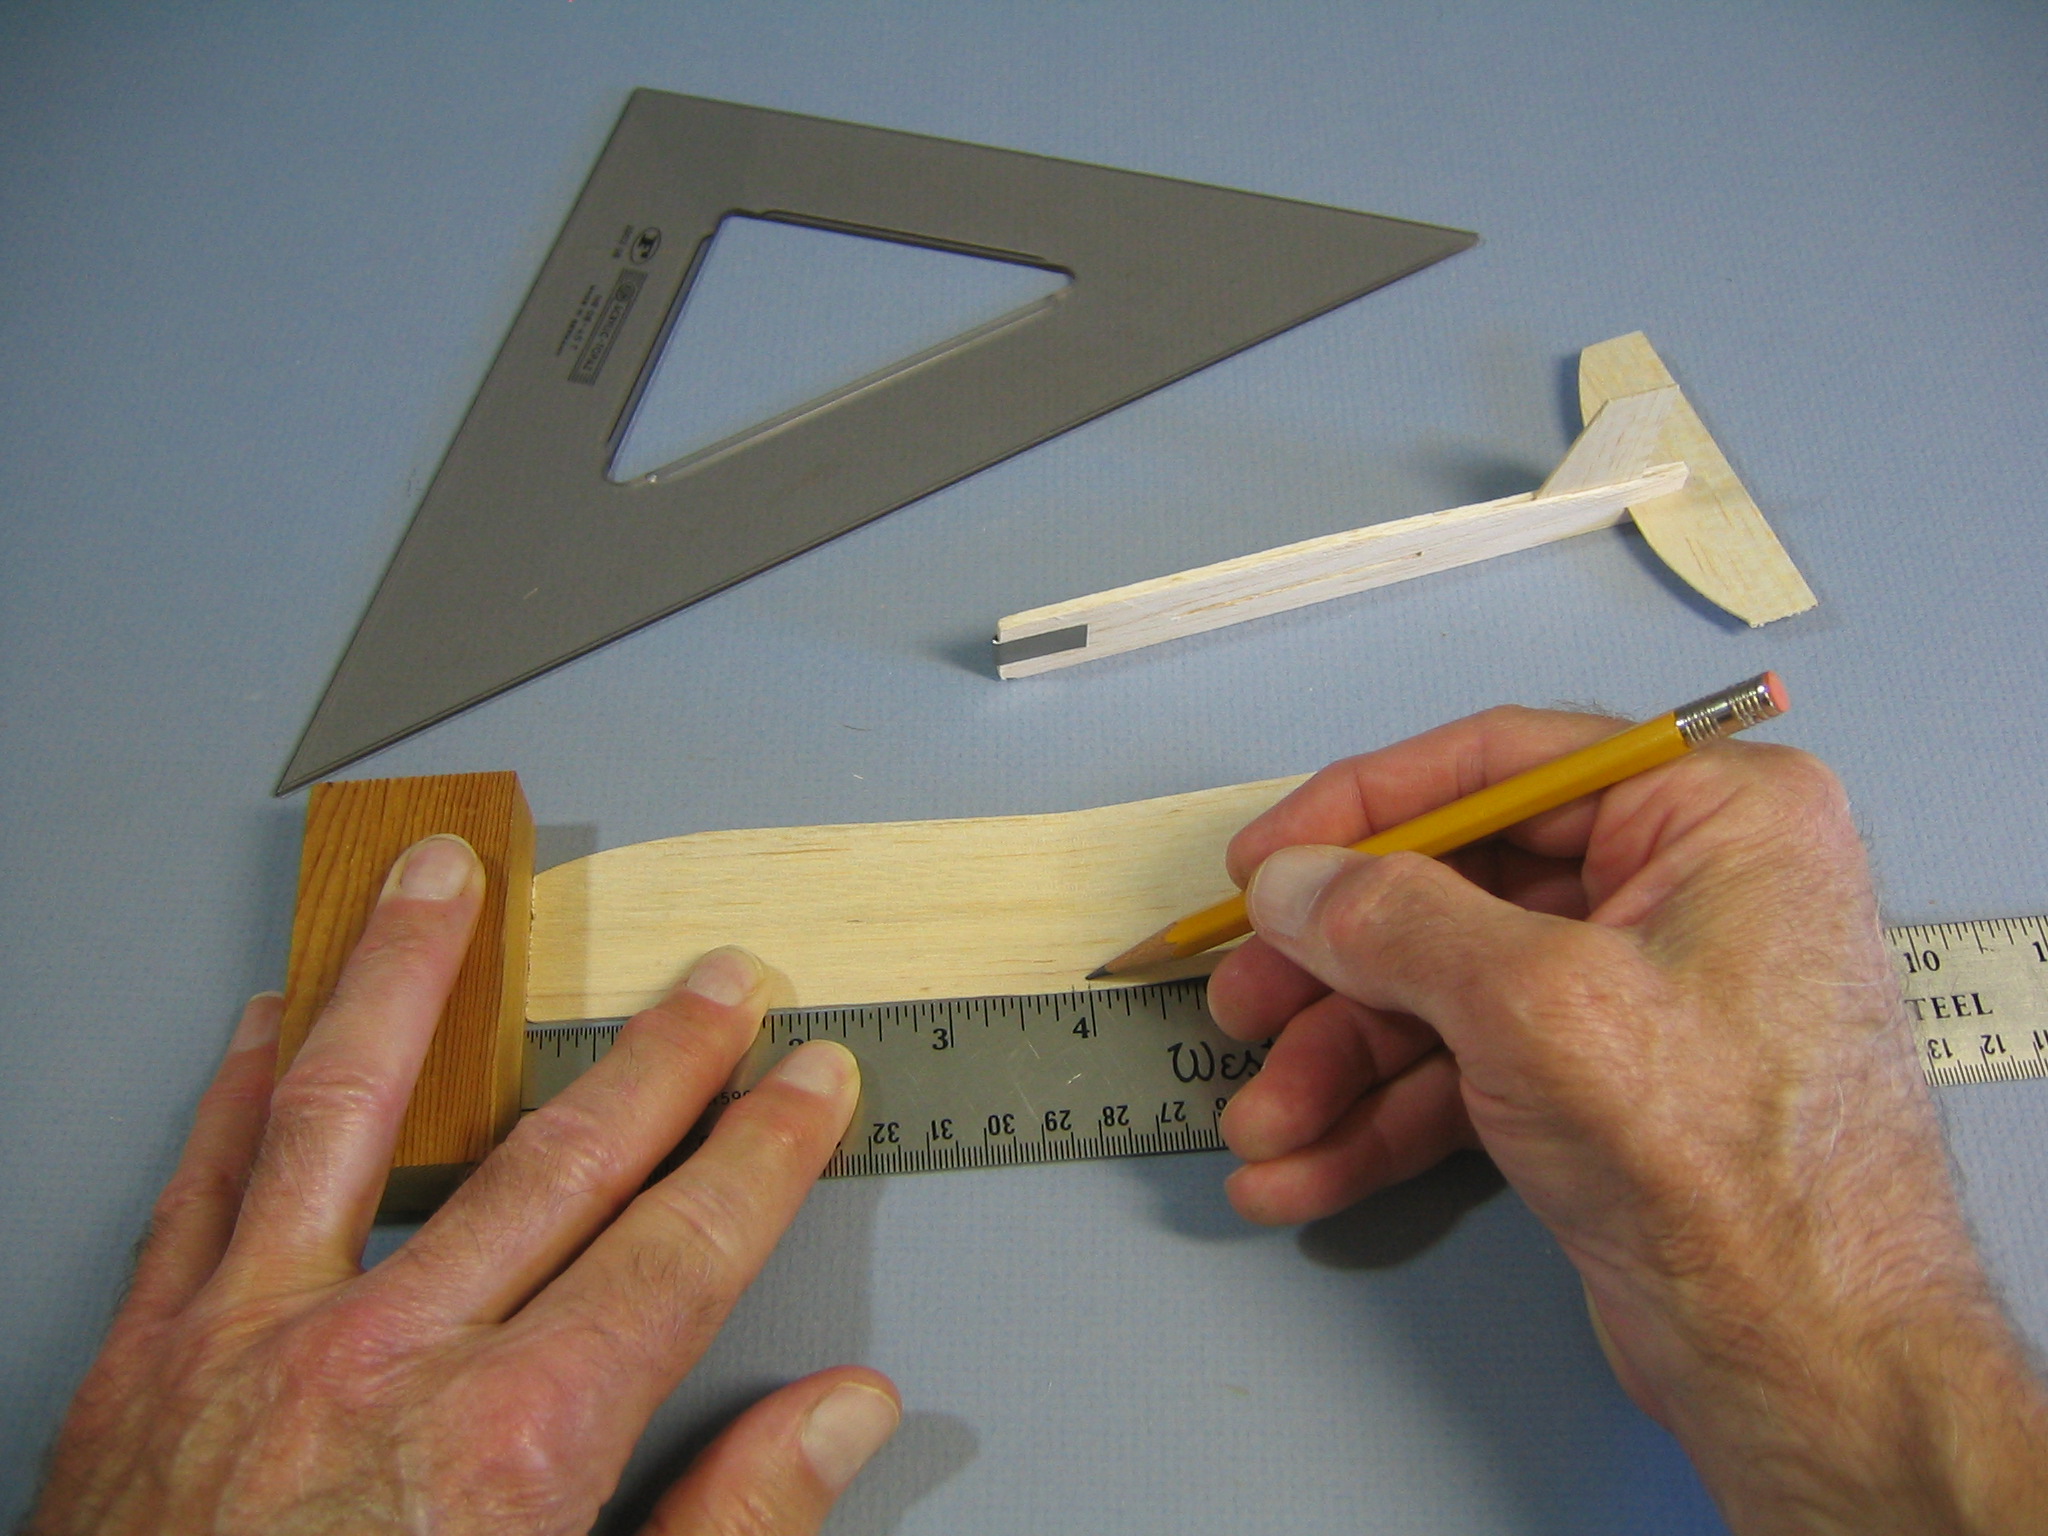 Mark 1/16″ on either side of the center of the leading edge. (The wing is 7 7/8″ long, so that is 4″ from each opposite end.)
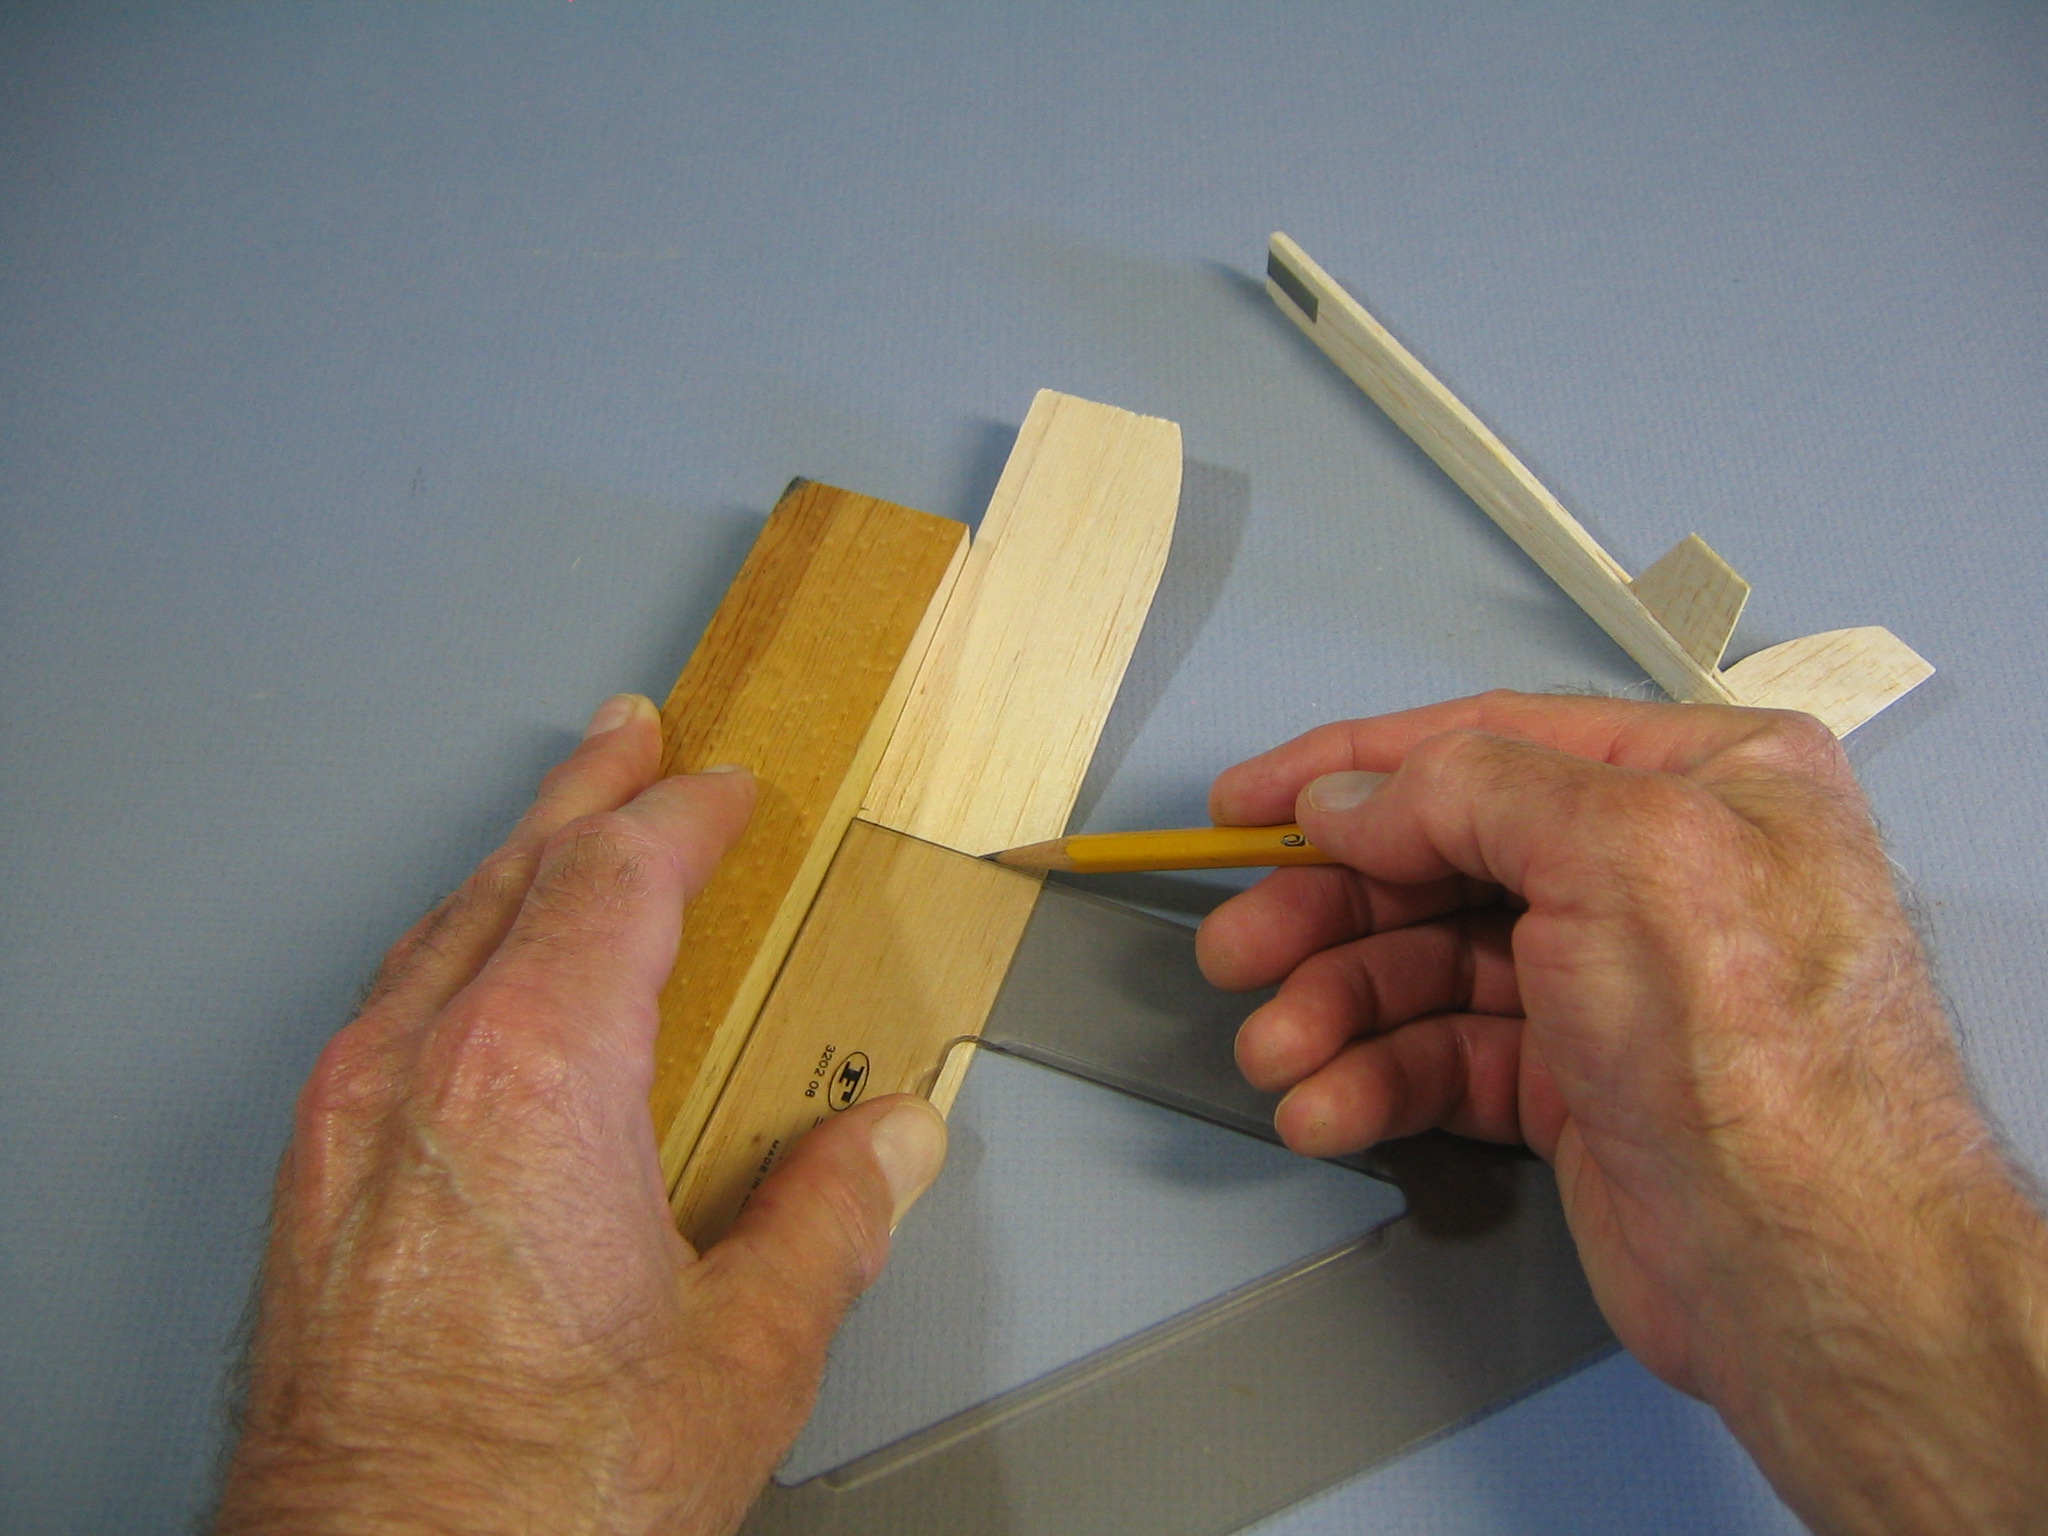 Draw lines perpendicular to the leading edge from both points. Use a soft pencil and draw lightly, avoid creasing the balsa. This will produce parallel lines 1/8″ apart. These locate the center of the wing and will allow you to center the wing in the 1/8″ thick fuselage.
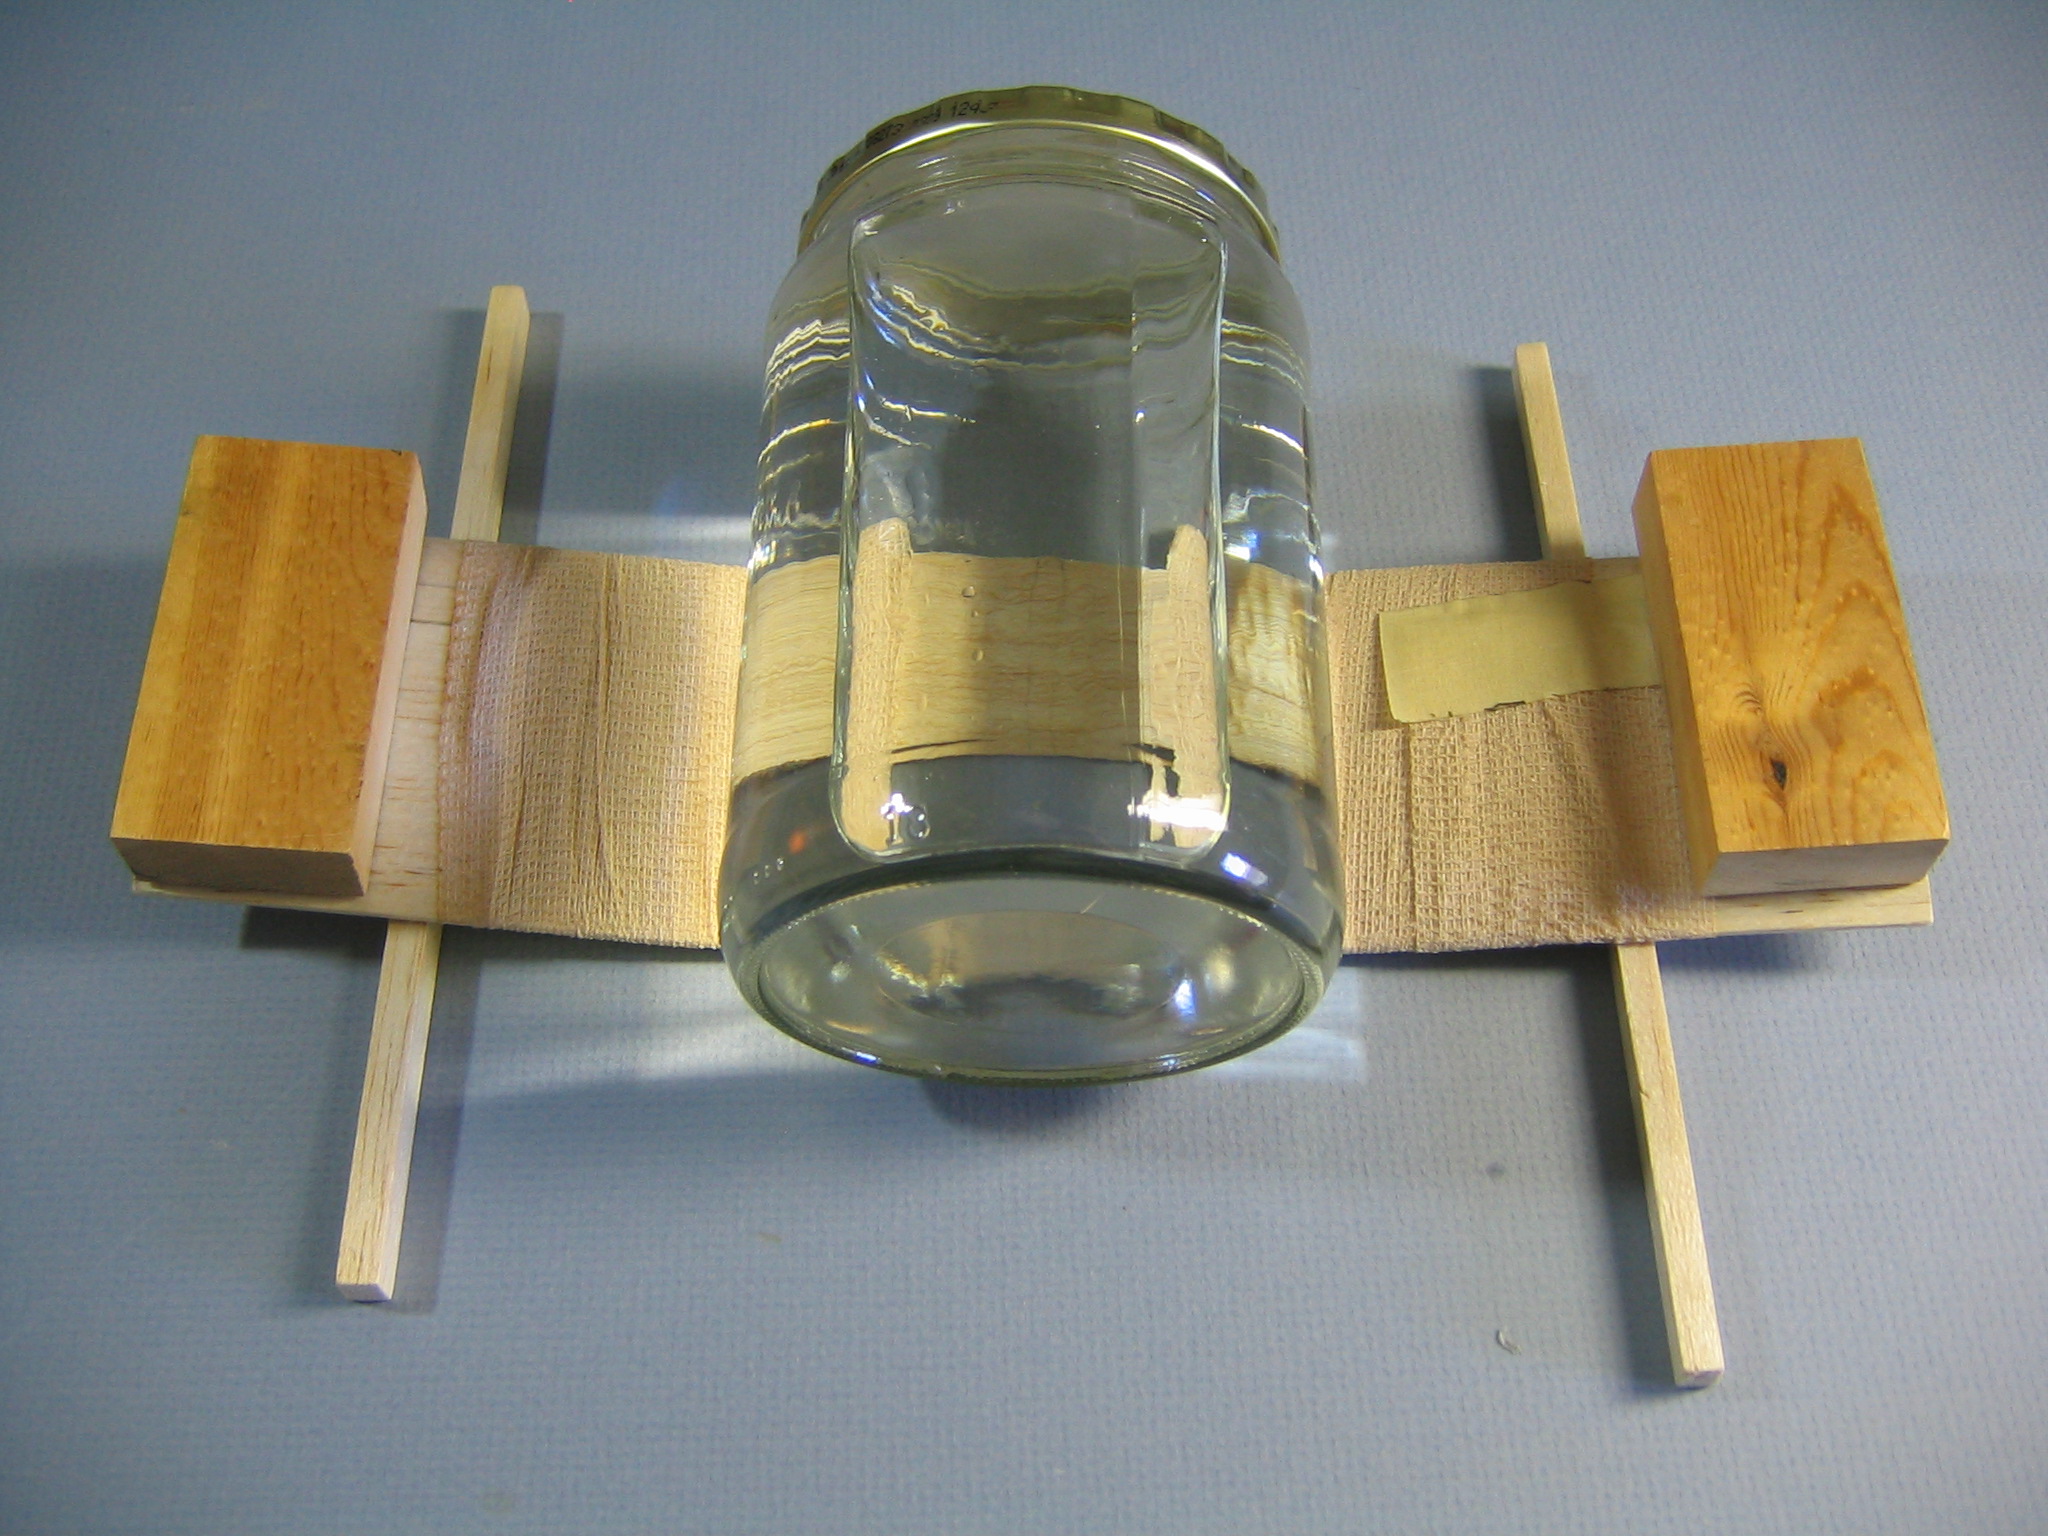
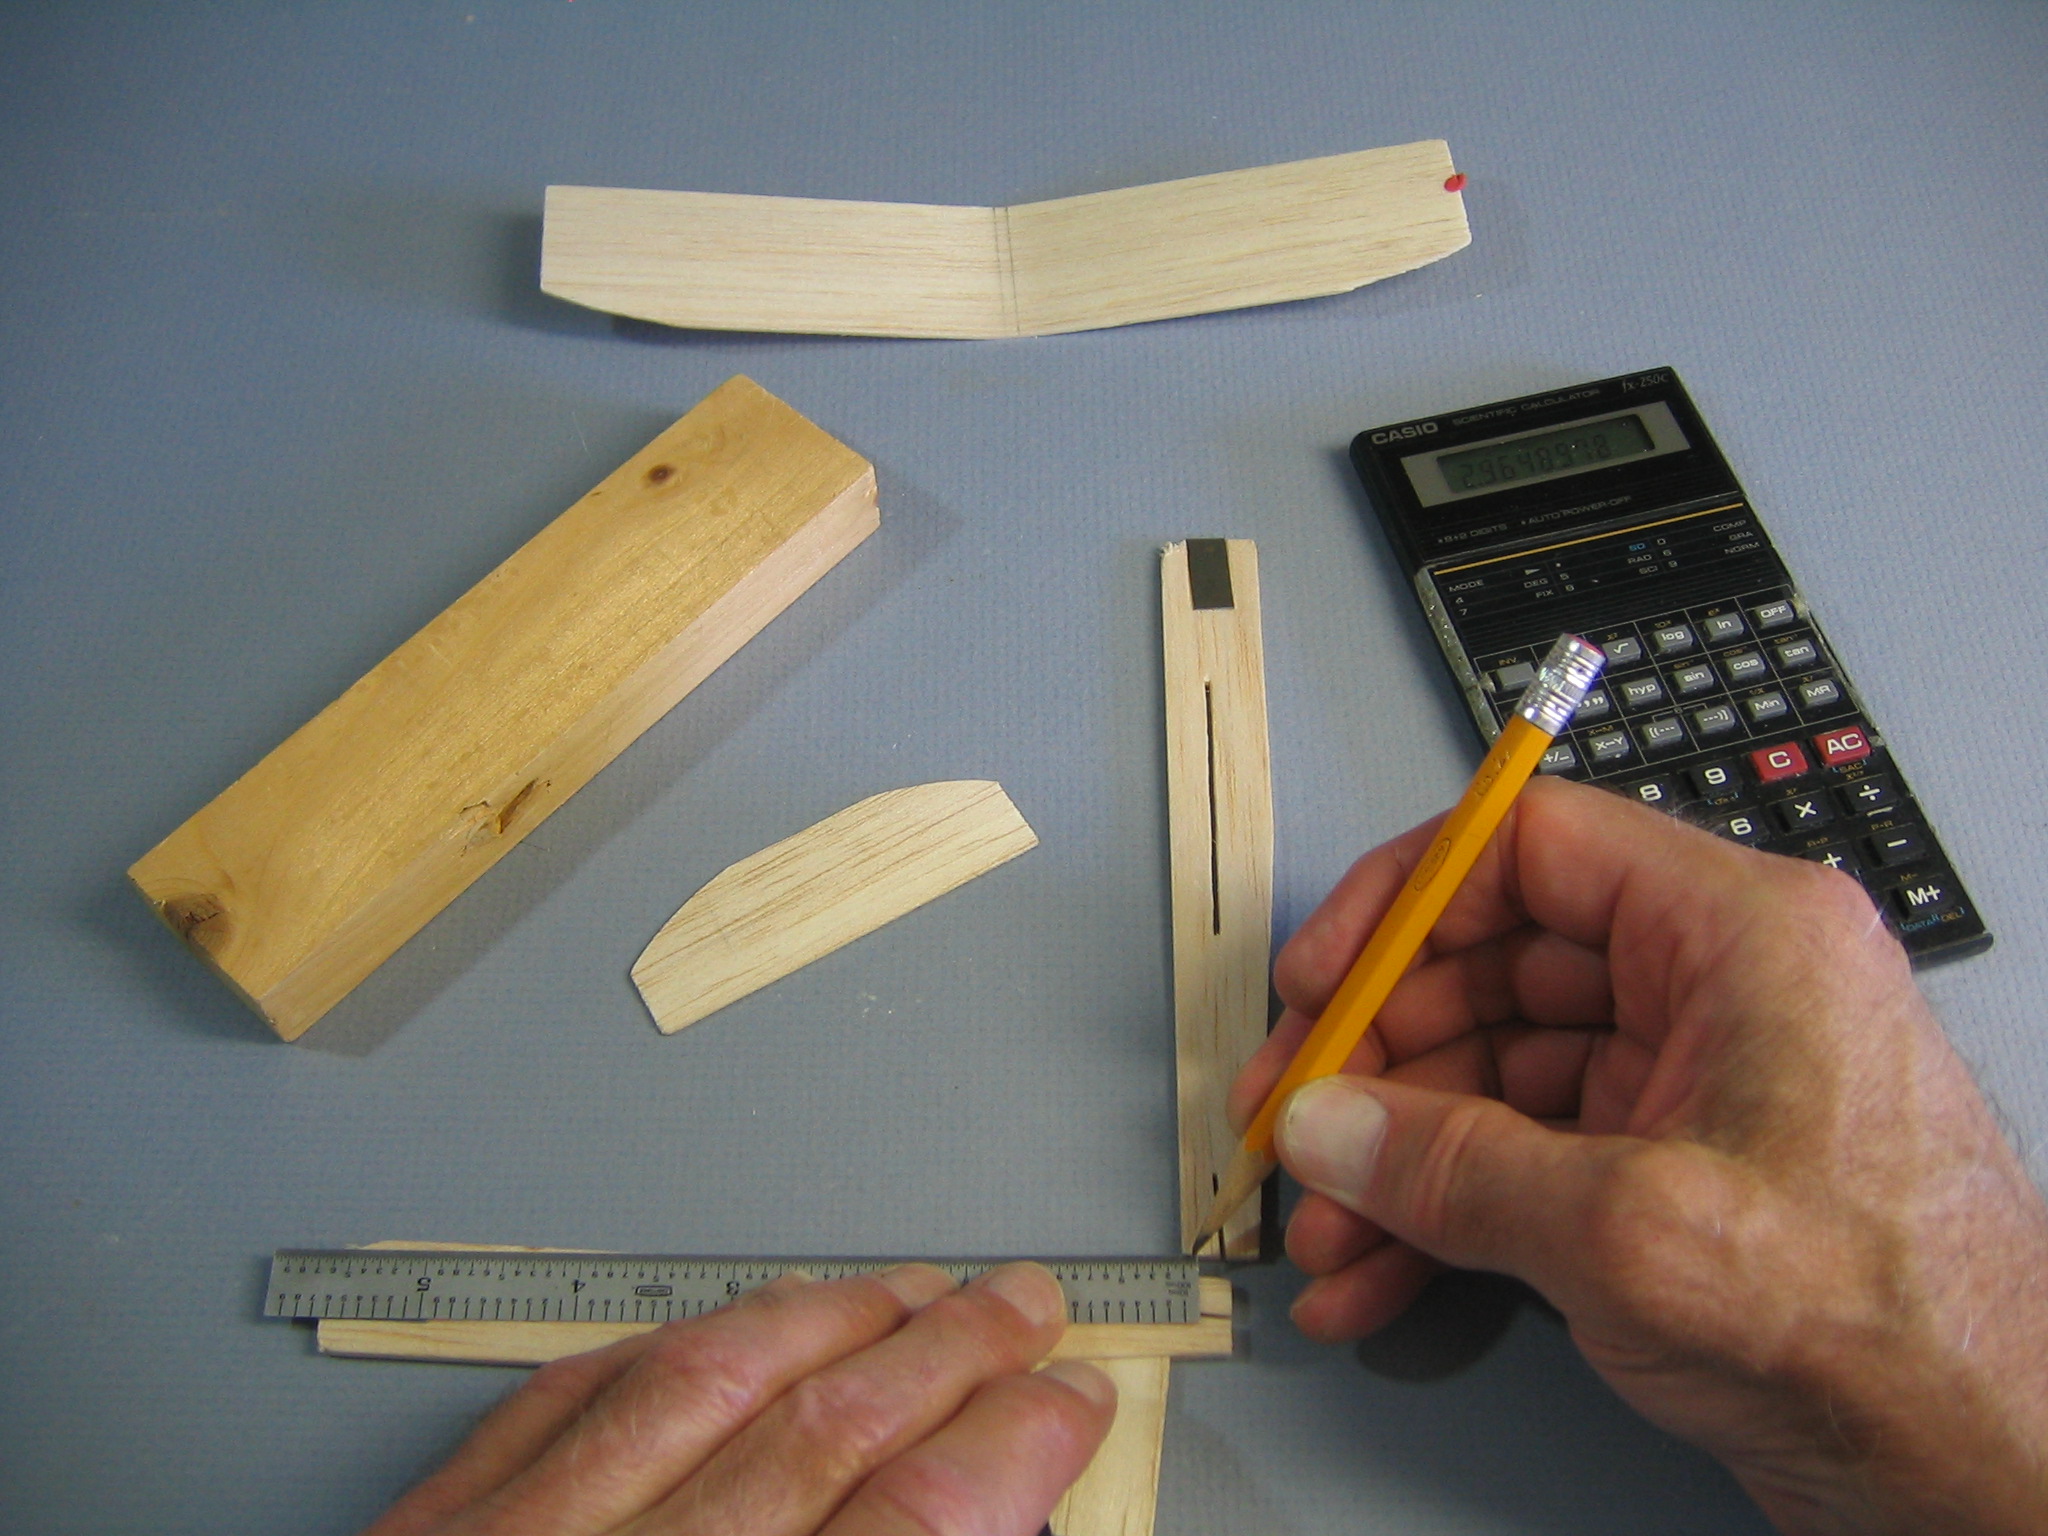
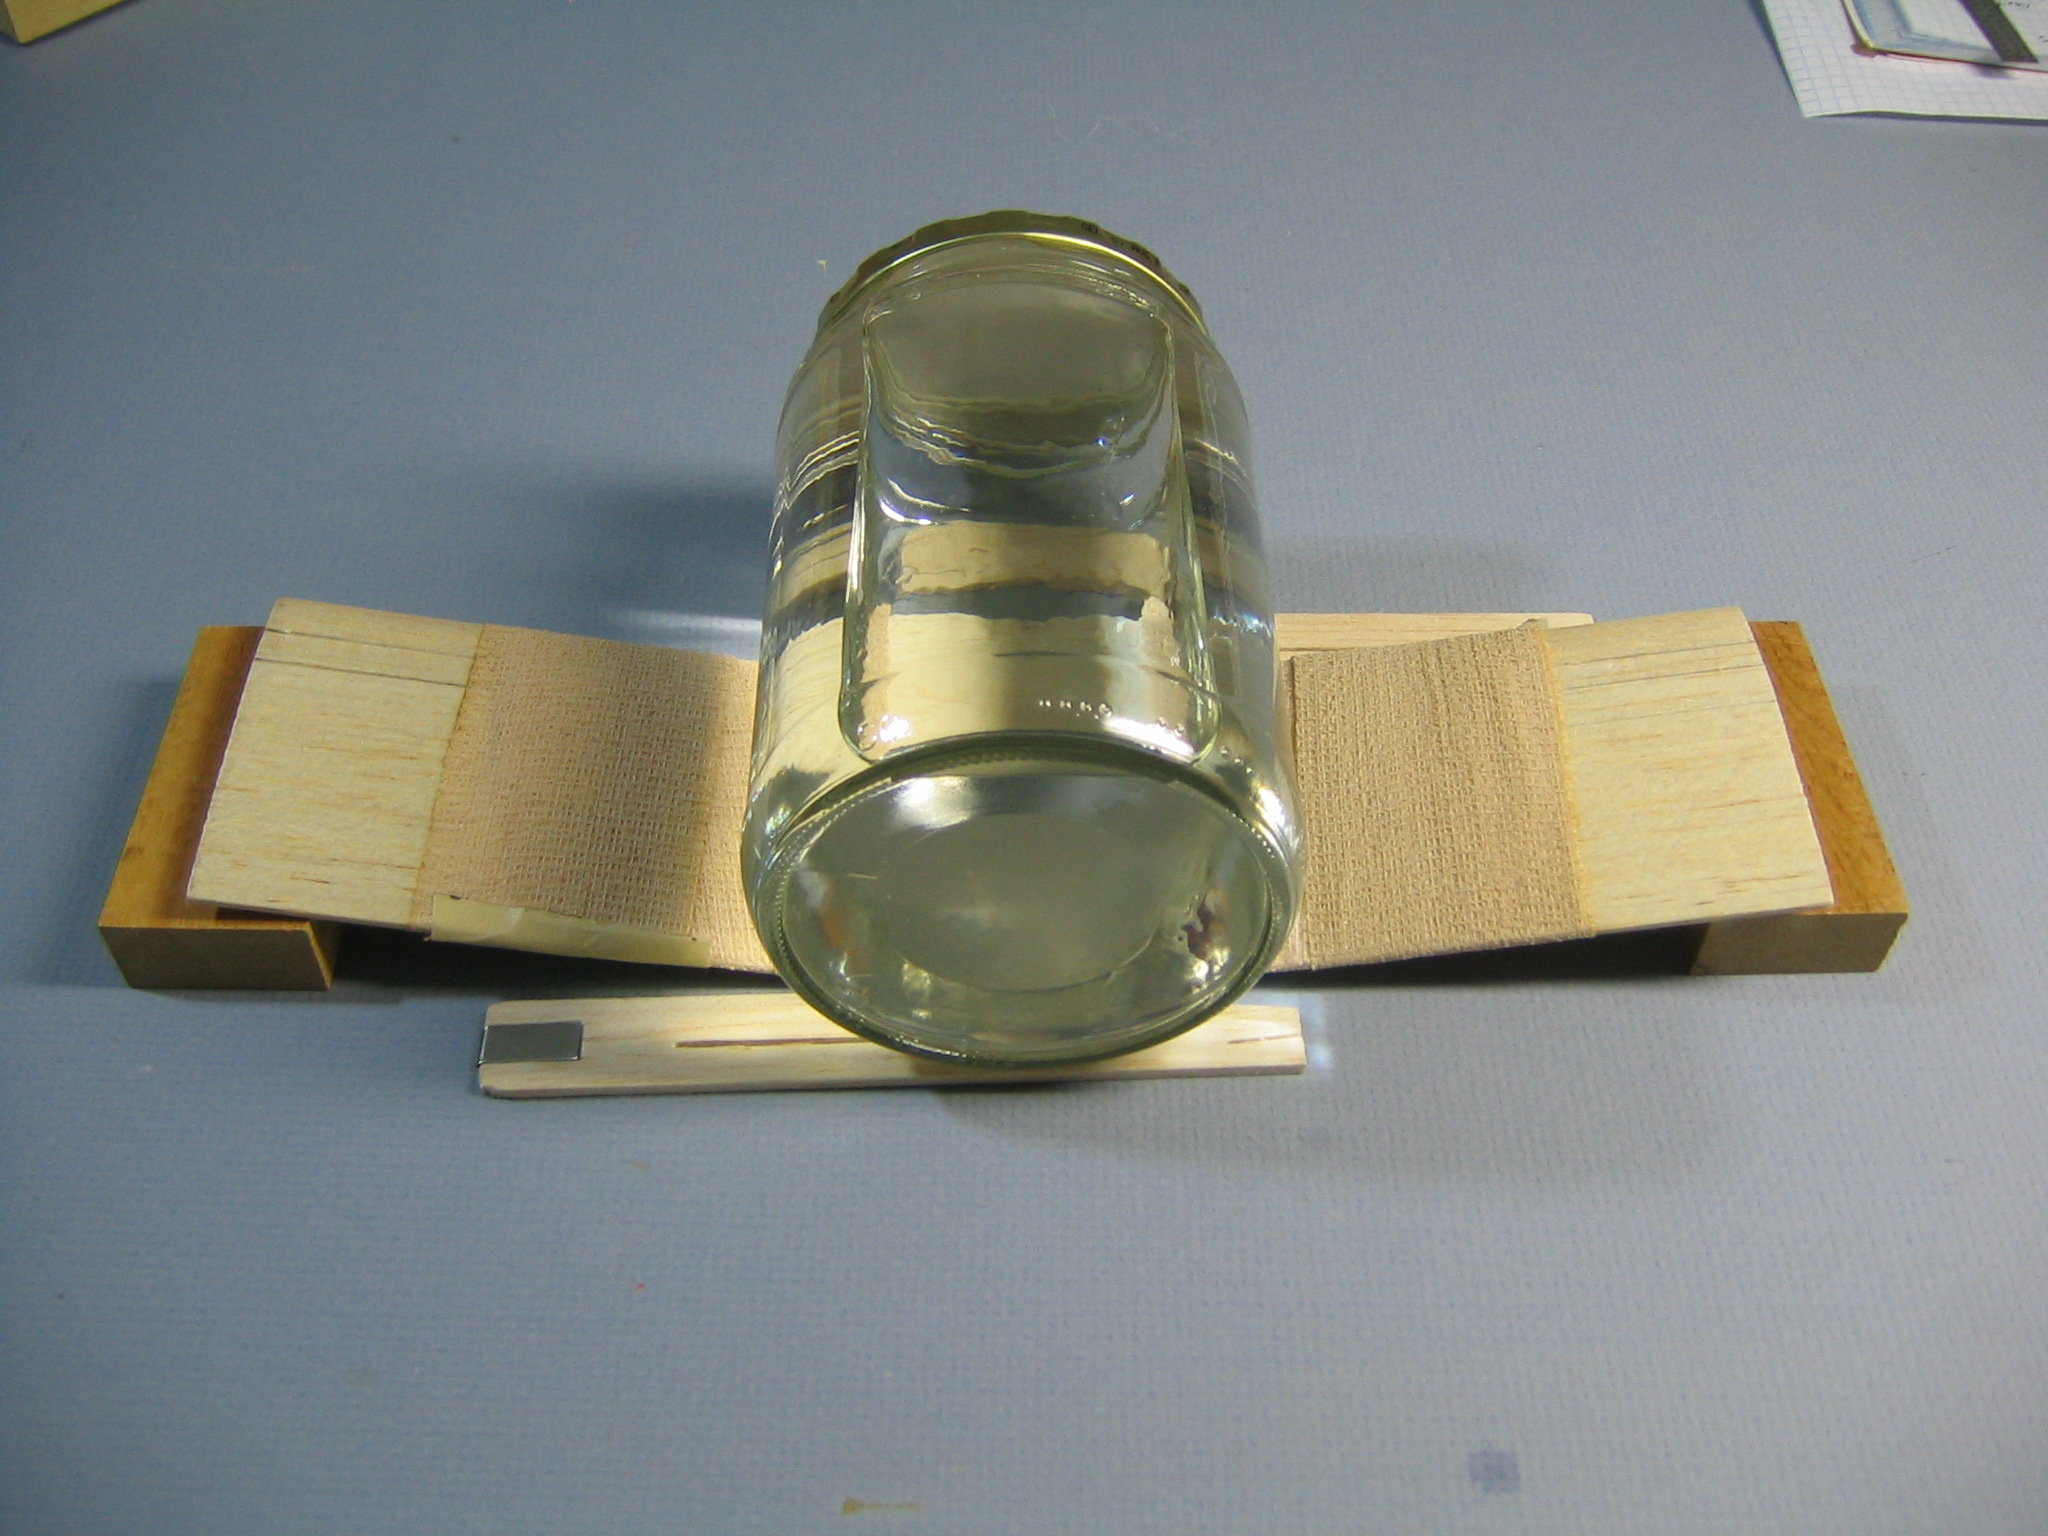
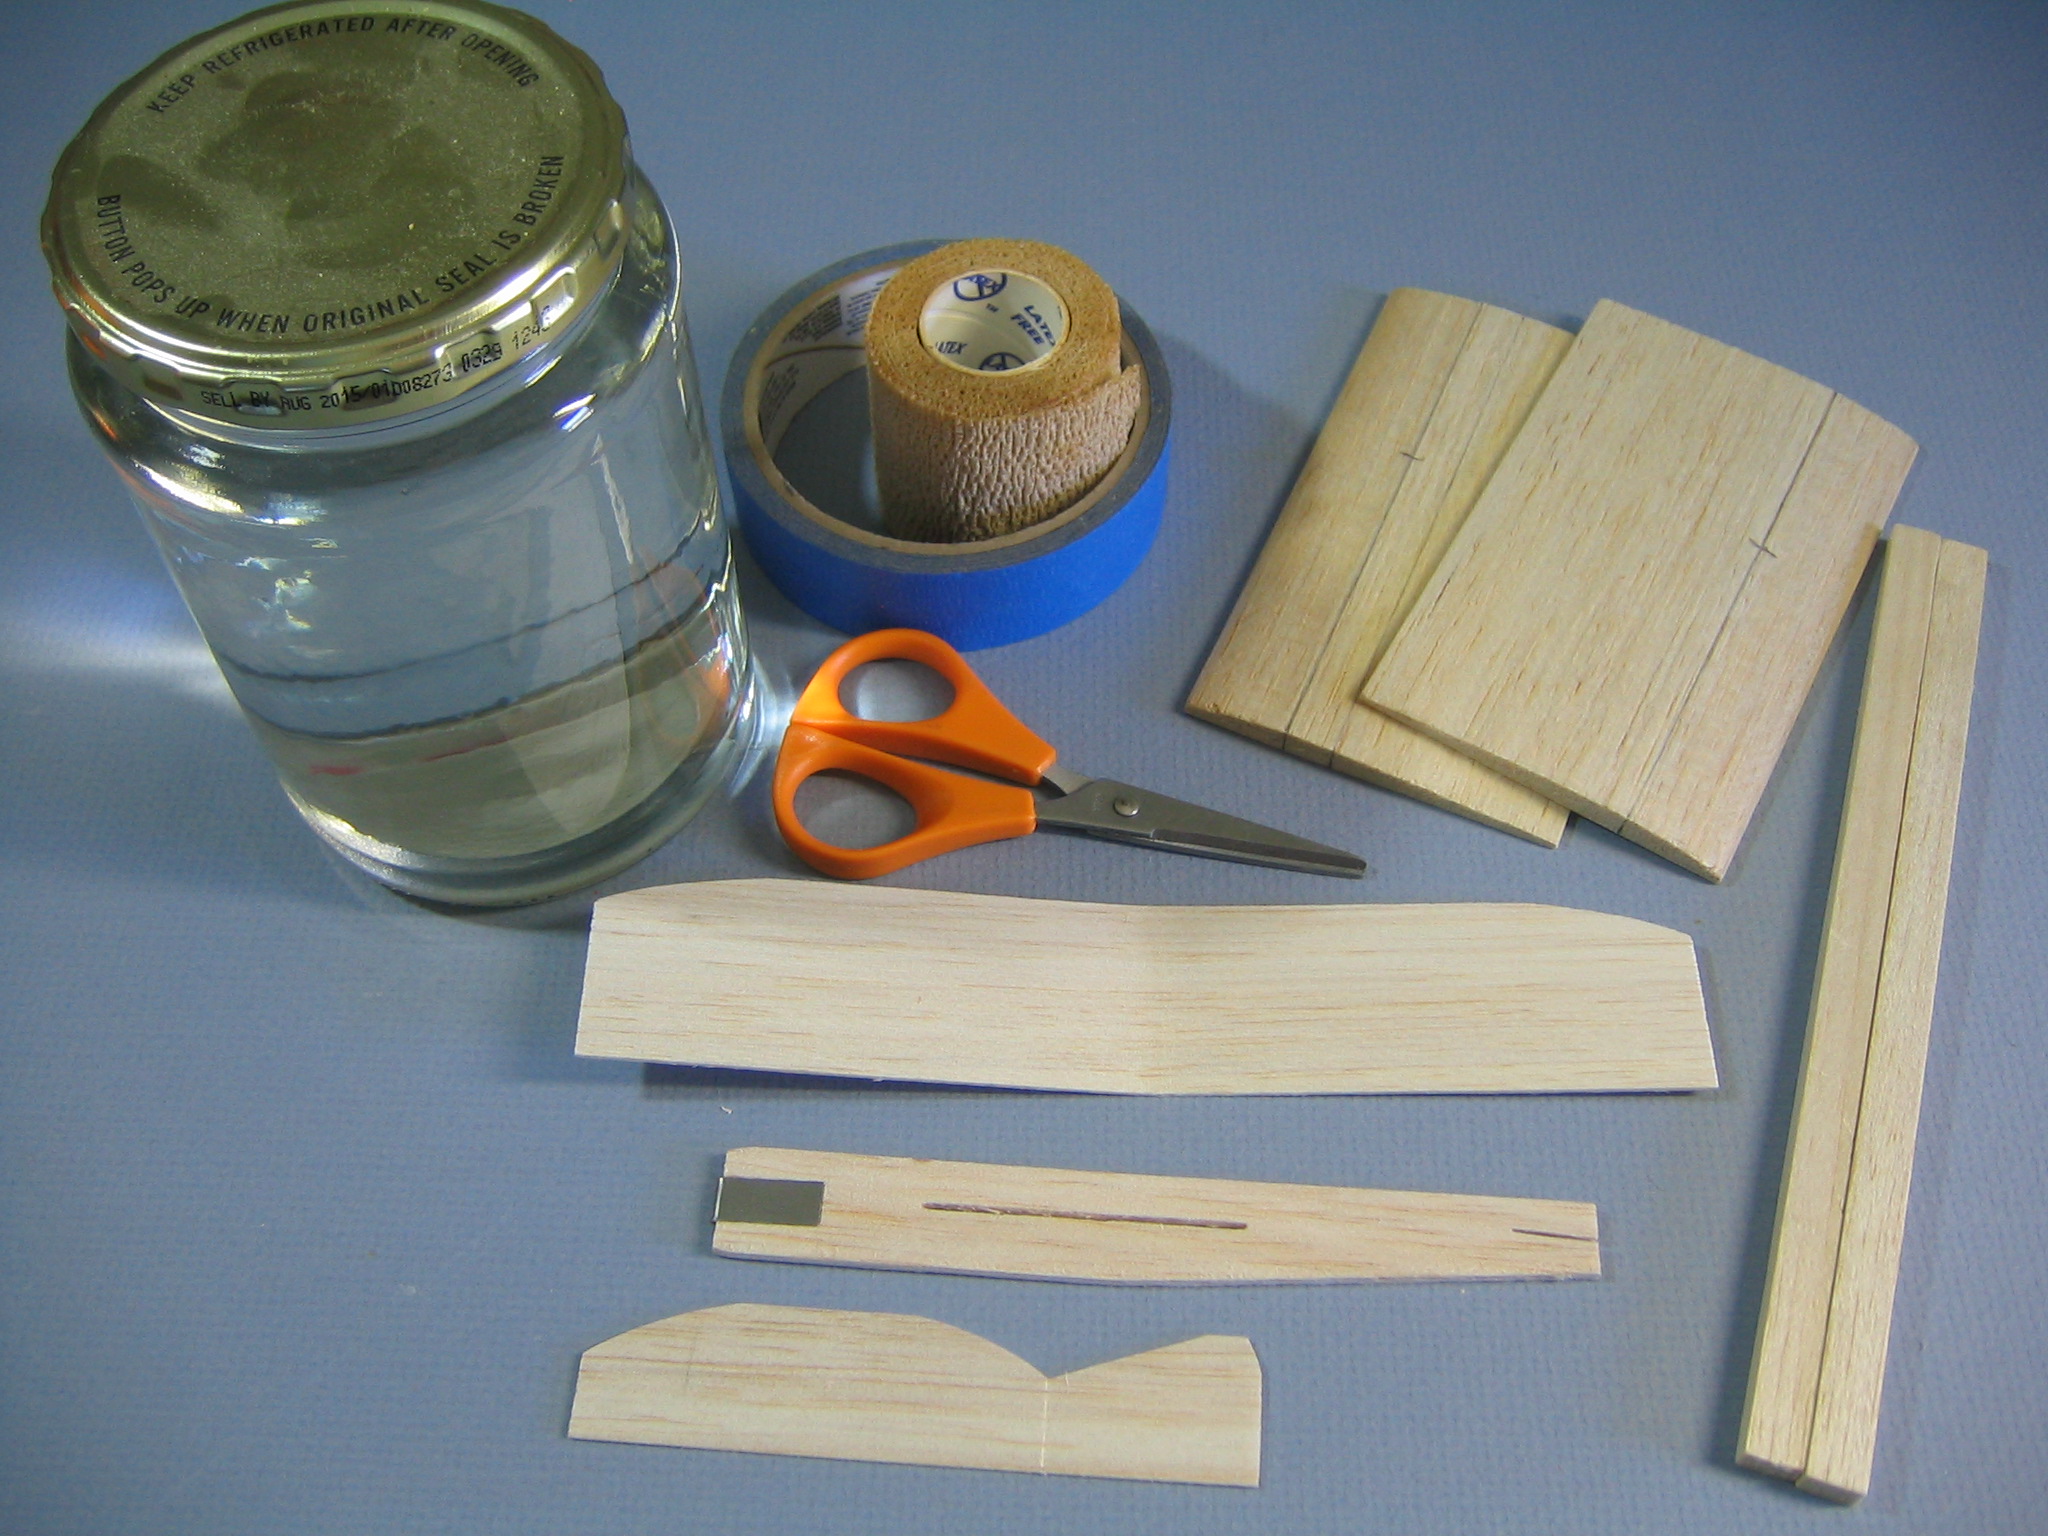 Some of the things you will need to put camber in the wings. Wing, balsa airfoil camber forms, masking tape, 4″ pickle jar full of water, self stick 2″ Ace Bandage, scissors and a couple 1/4″ sticks. Later we will use larger blocks of wood instead of the 1/4″ sticks.
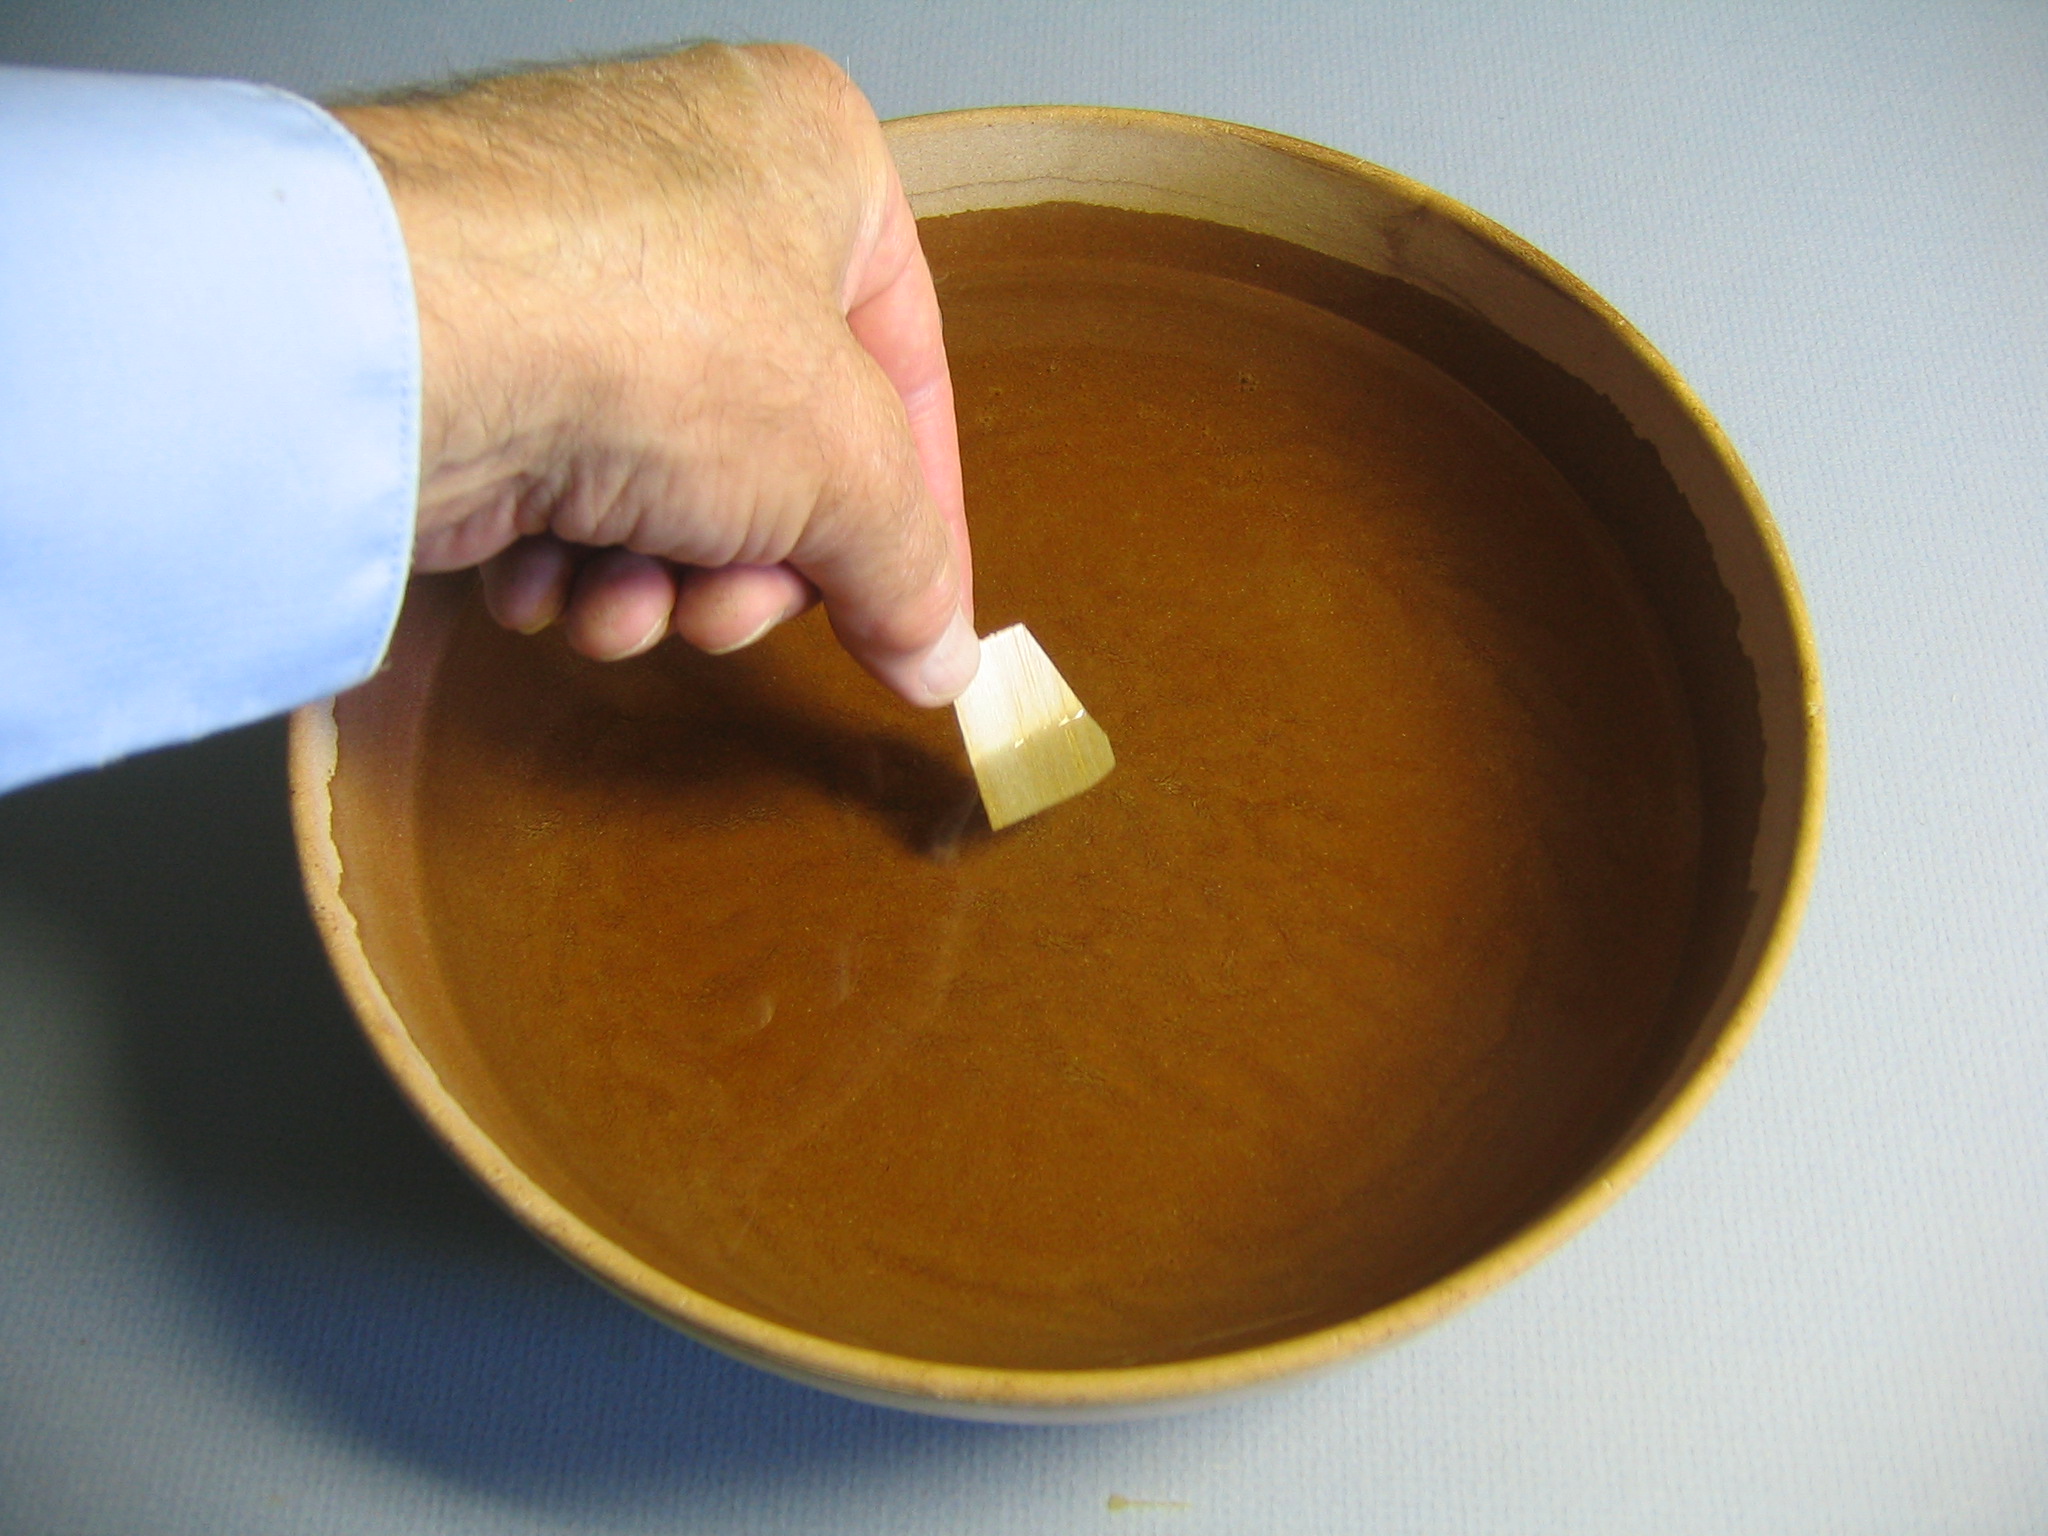
If you are teaching a class, use a plastic jar full of sand or gravel instead of a glass jar of water. Mayonnaise, coffee, sports drinks, nuts and other things come in plastic jars of about the same size as the one shown in the picture.
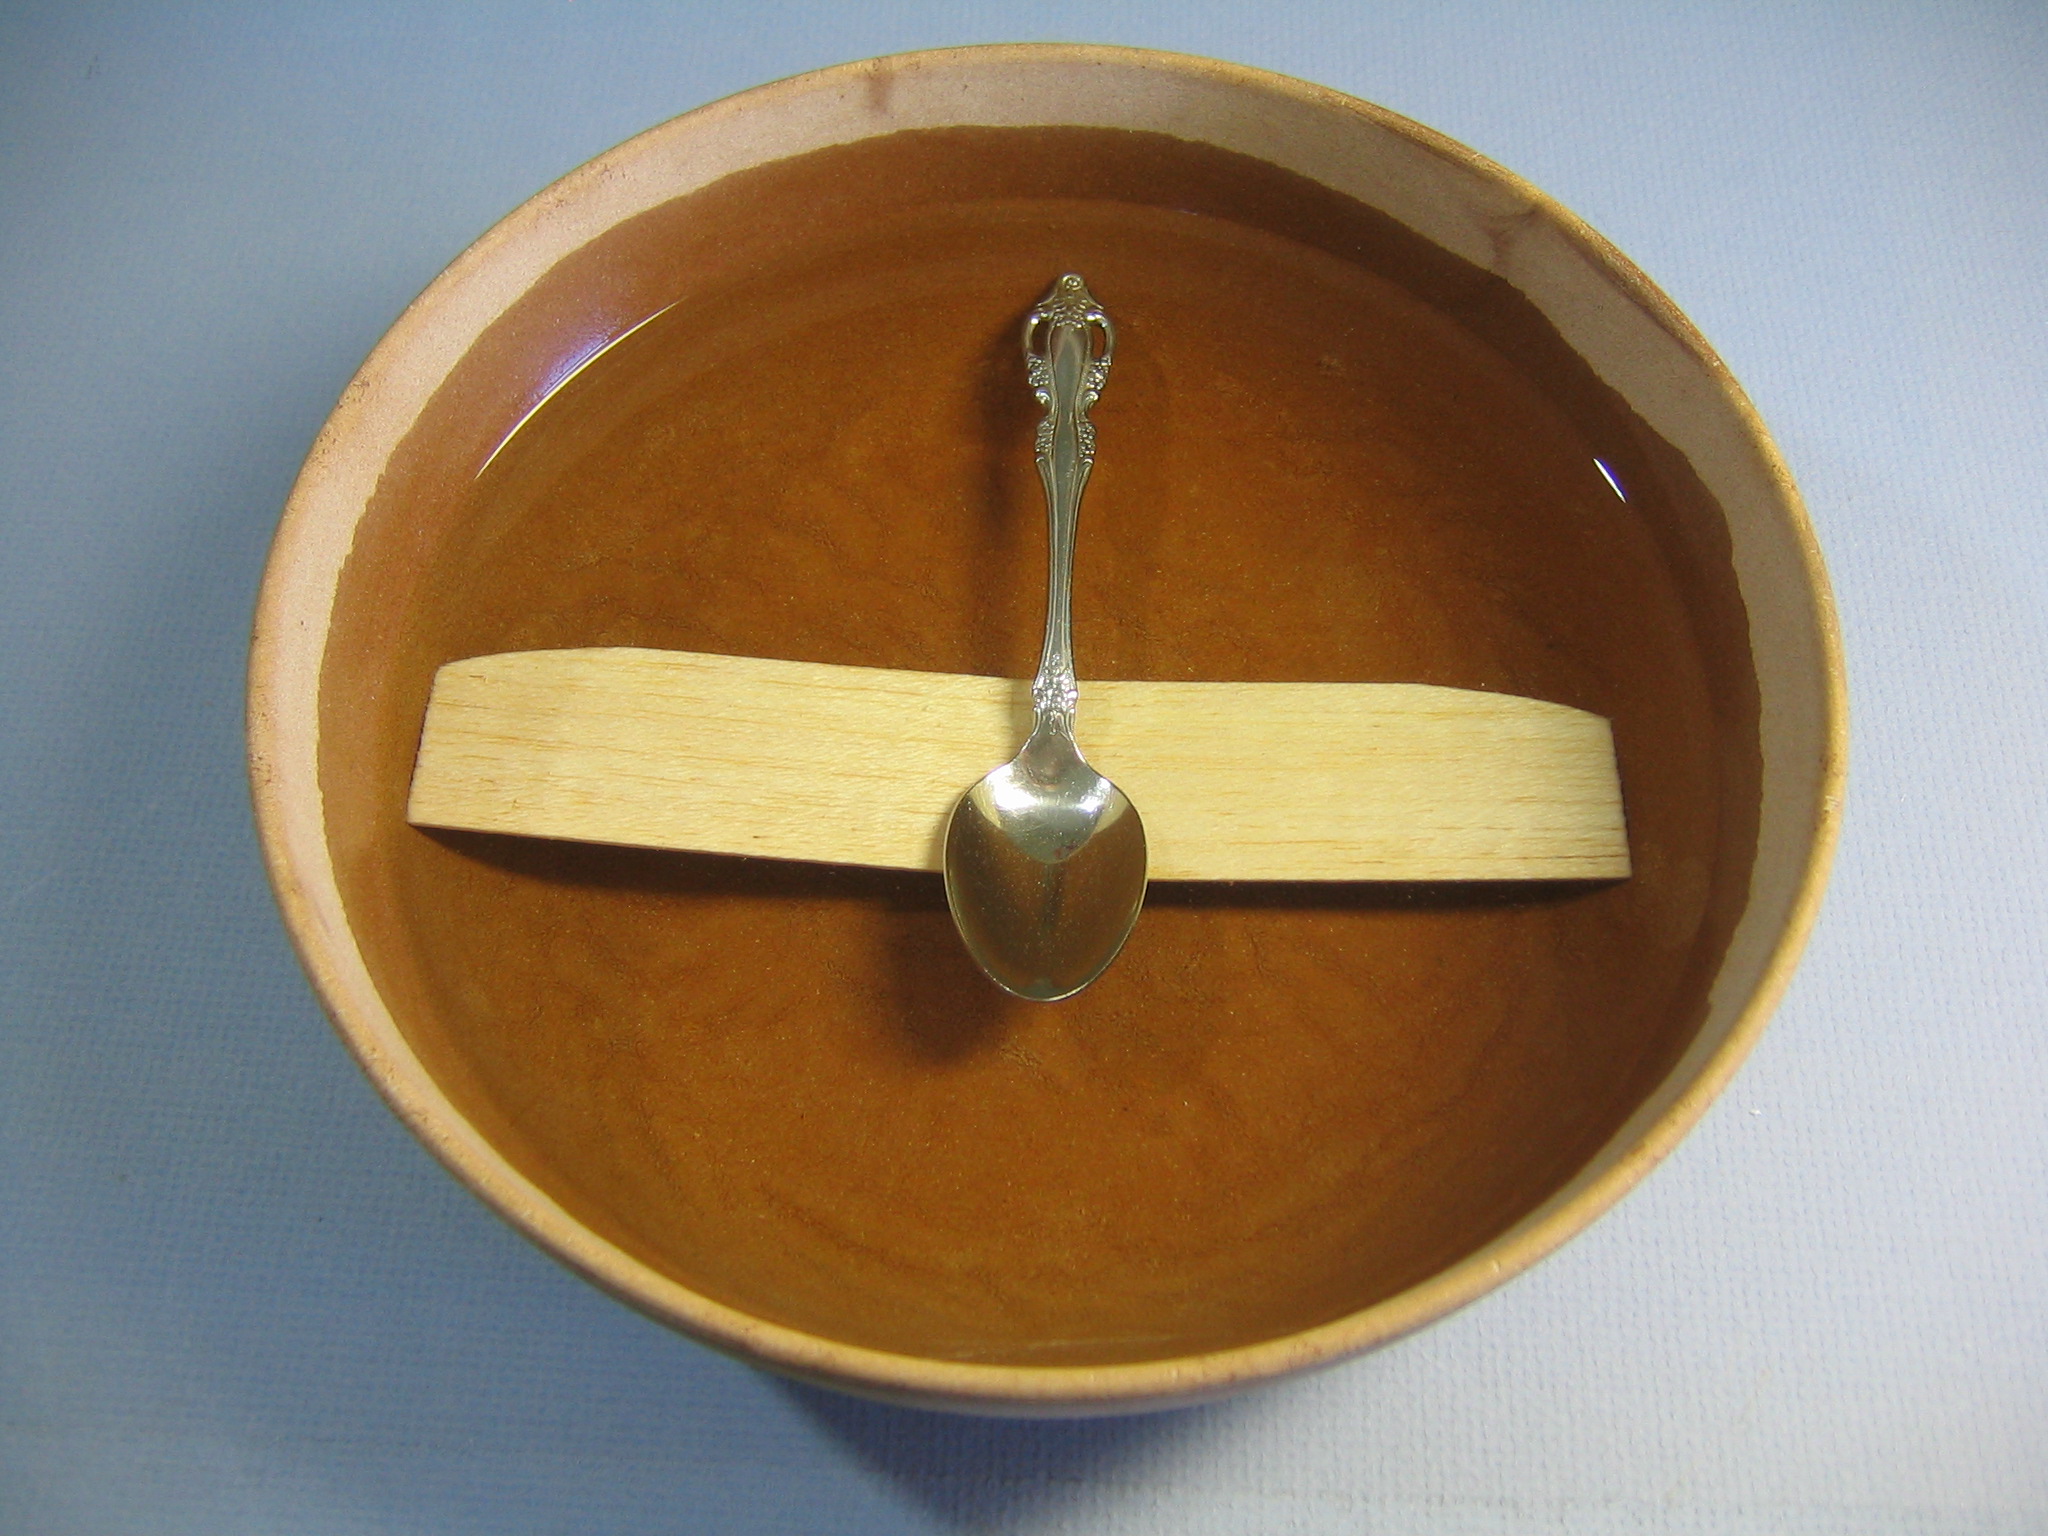
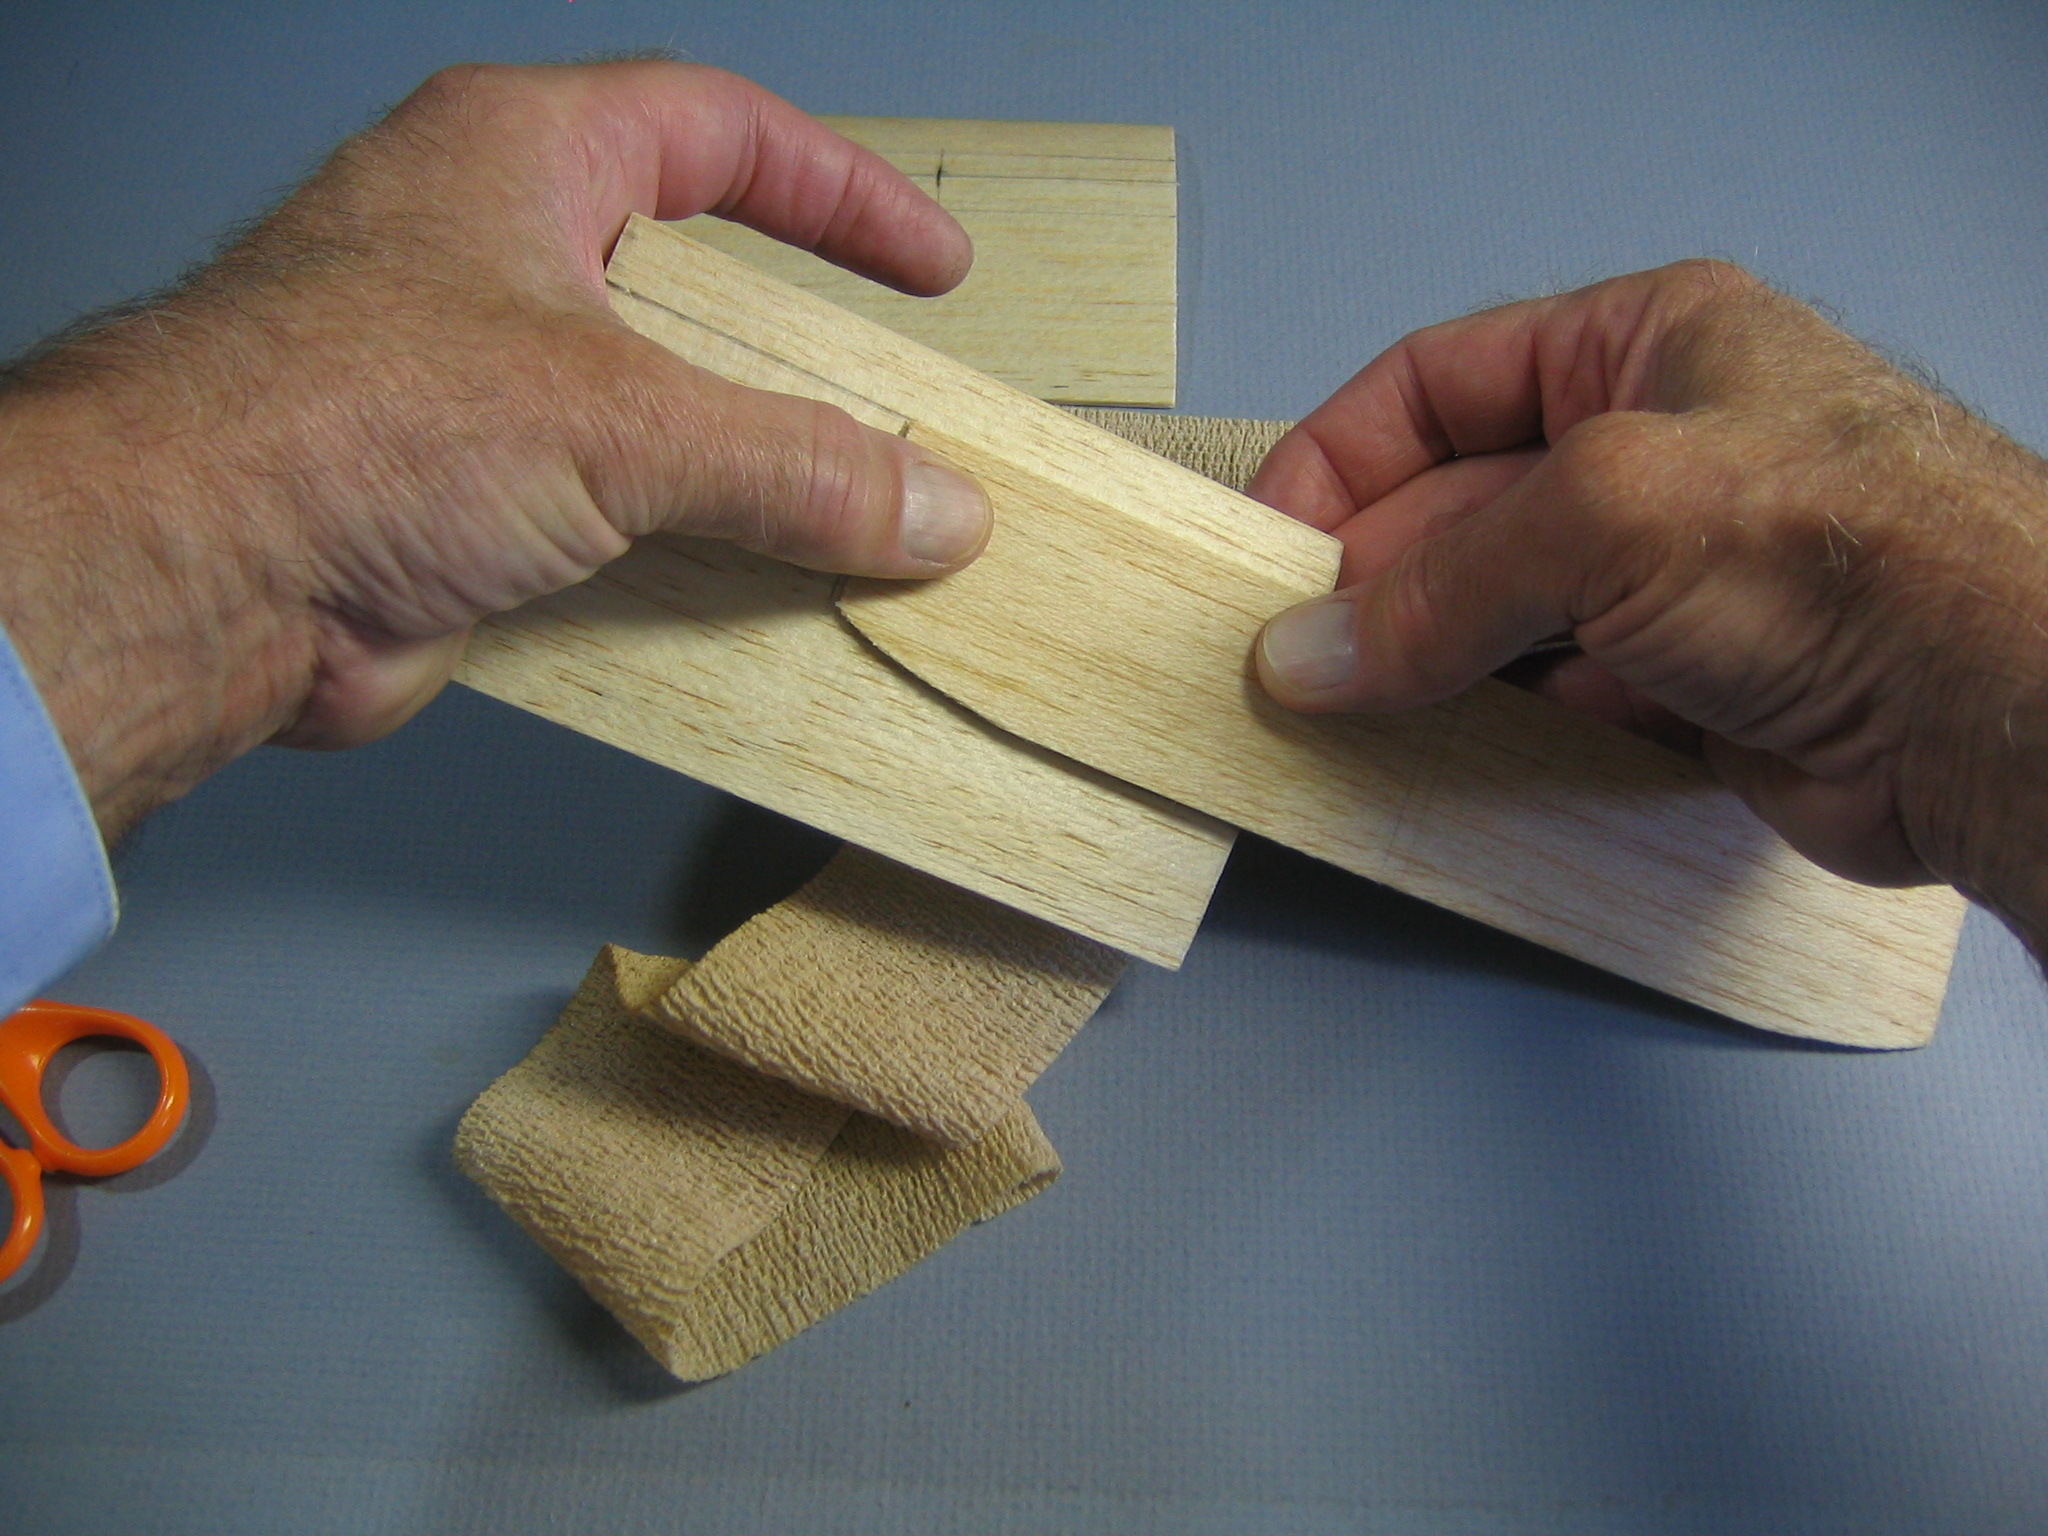
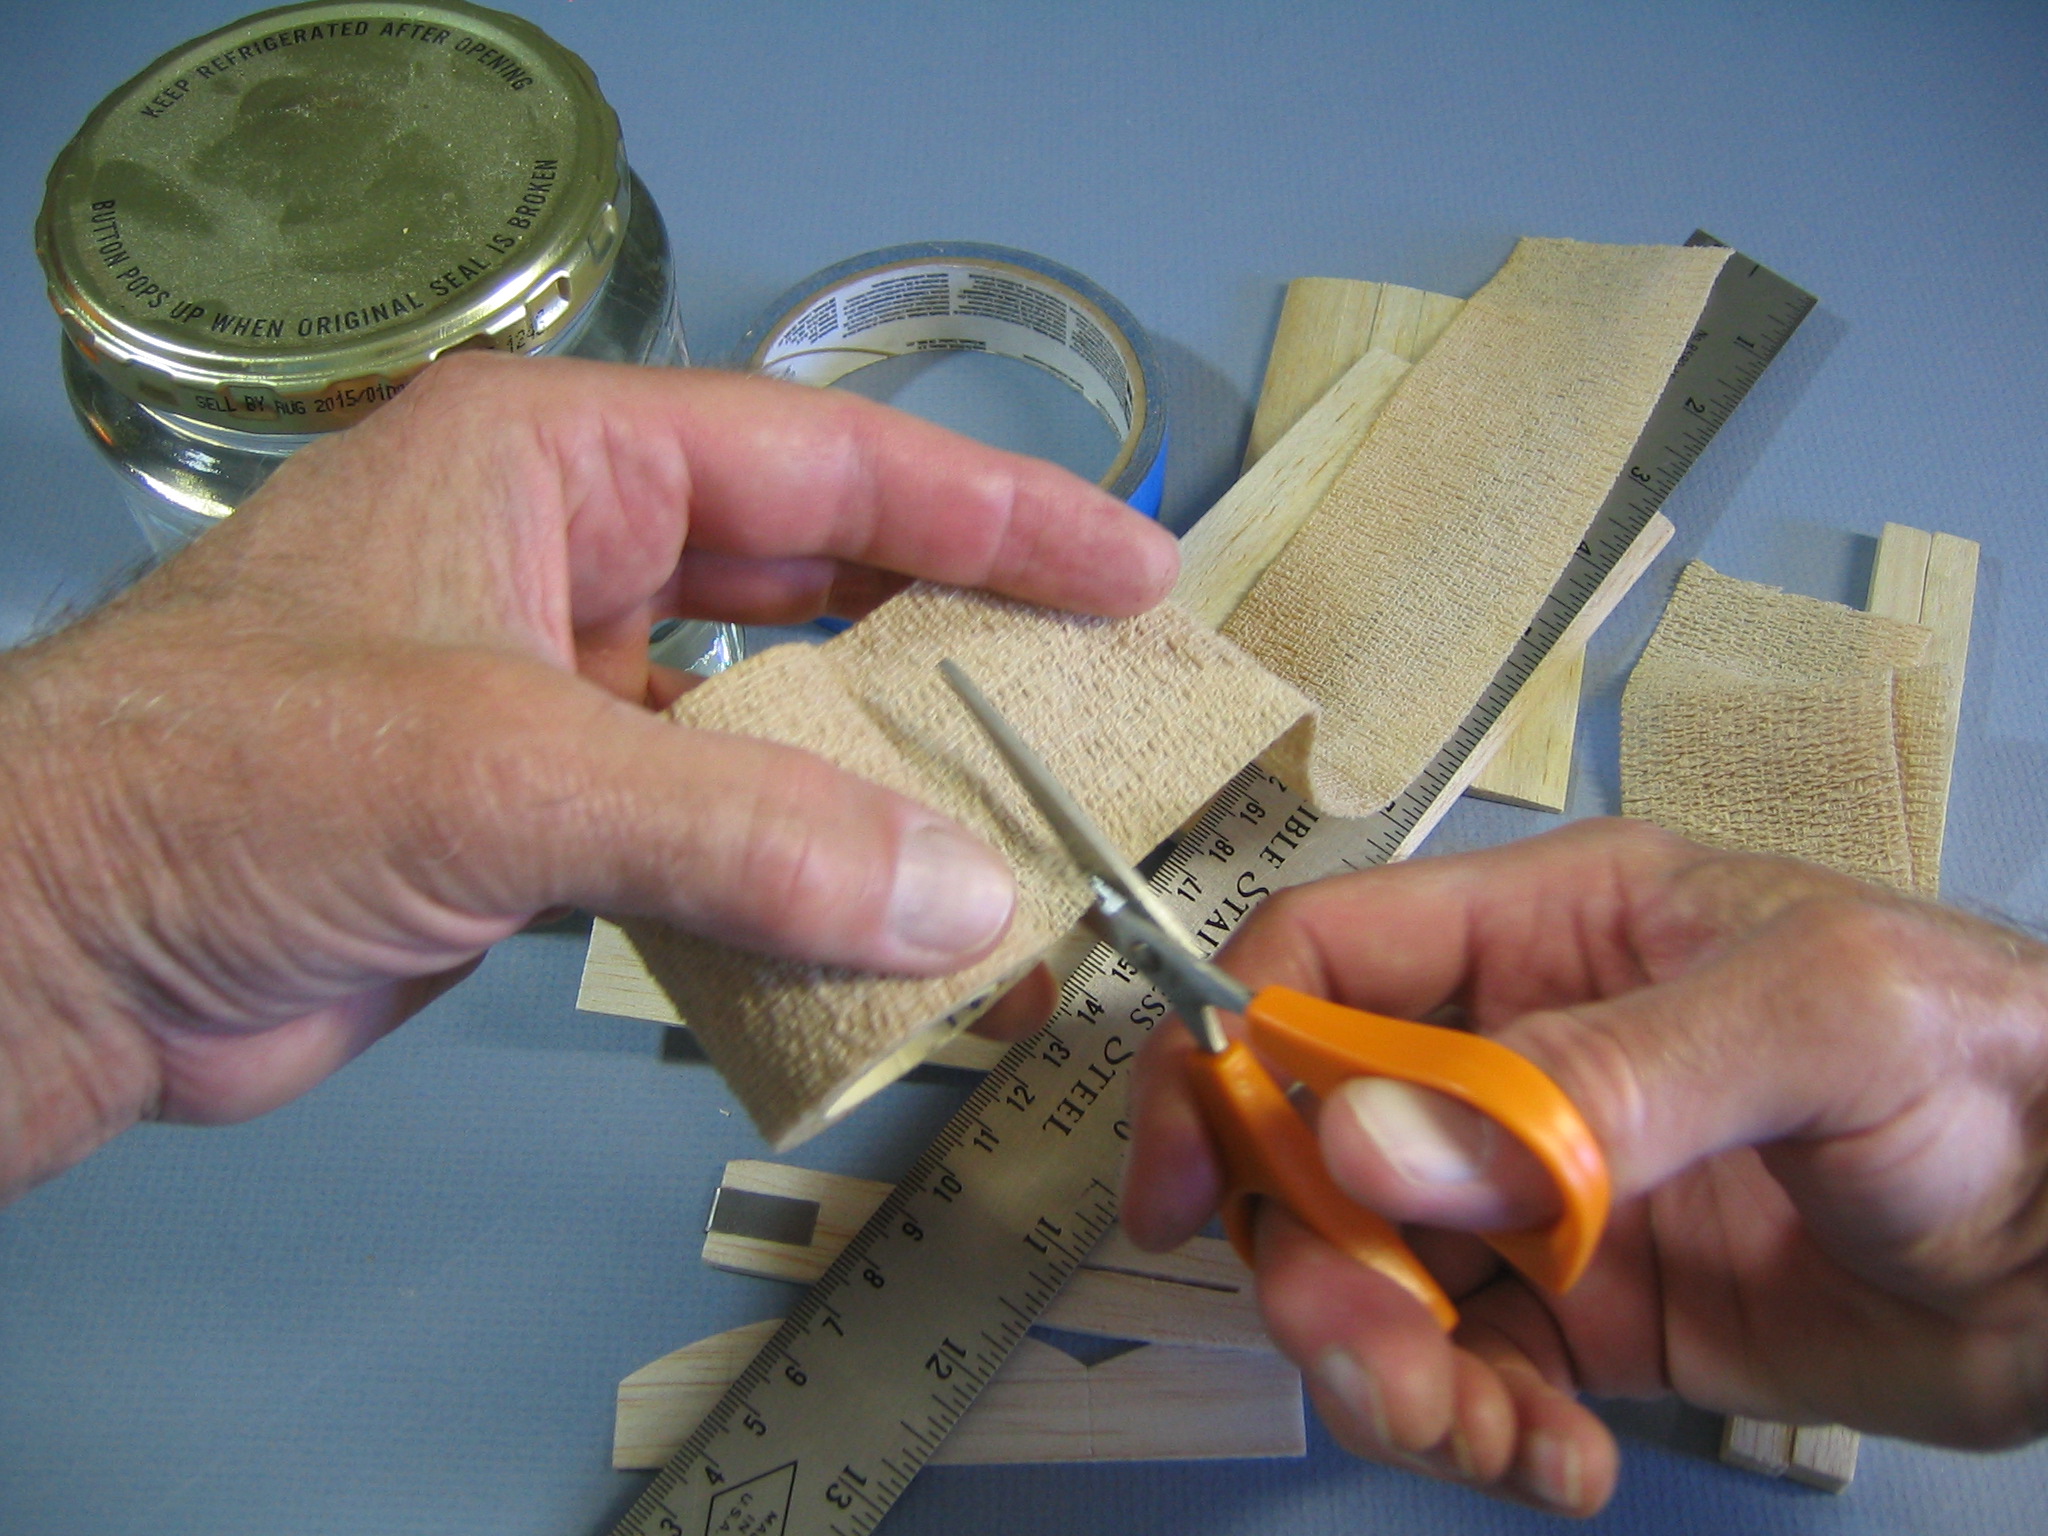 Stretch it out and cut two 8-12” lengths of the Ace Bandage. It stretches. You can pull it around the form, starting in the middle of the underside, going over the top twice and back to the middle of the underside to get the exact length you need.
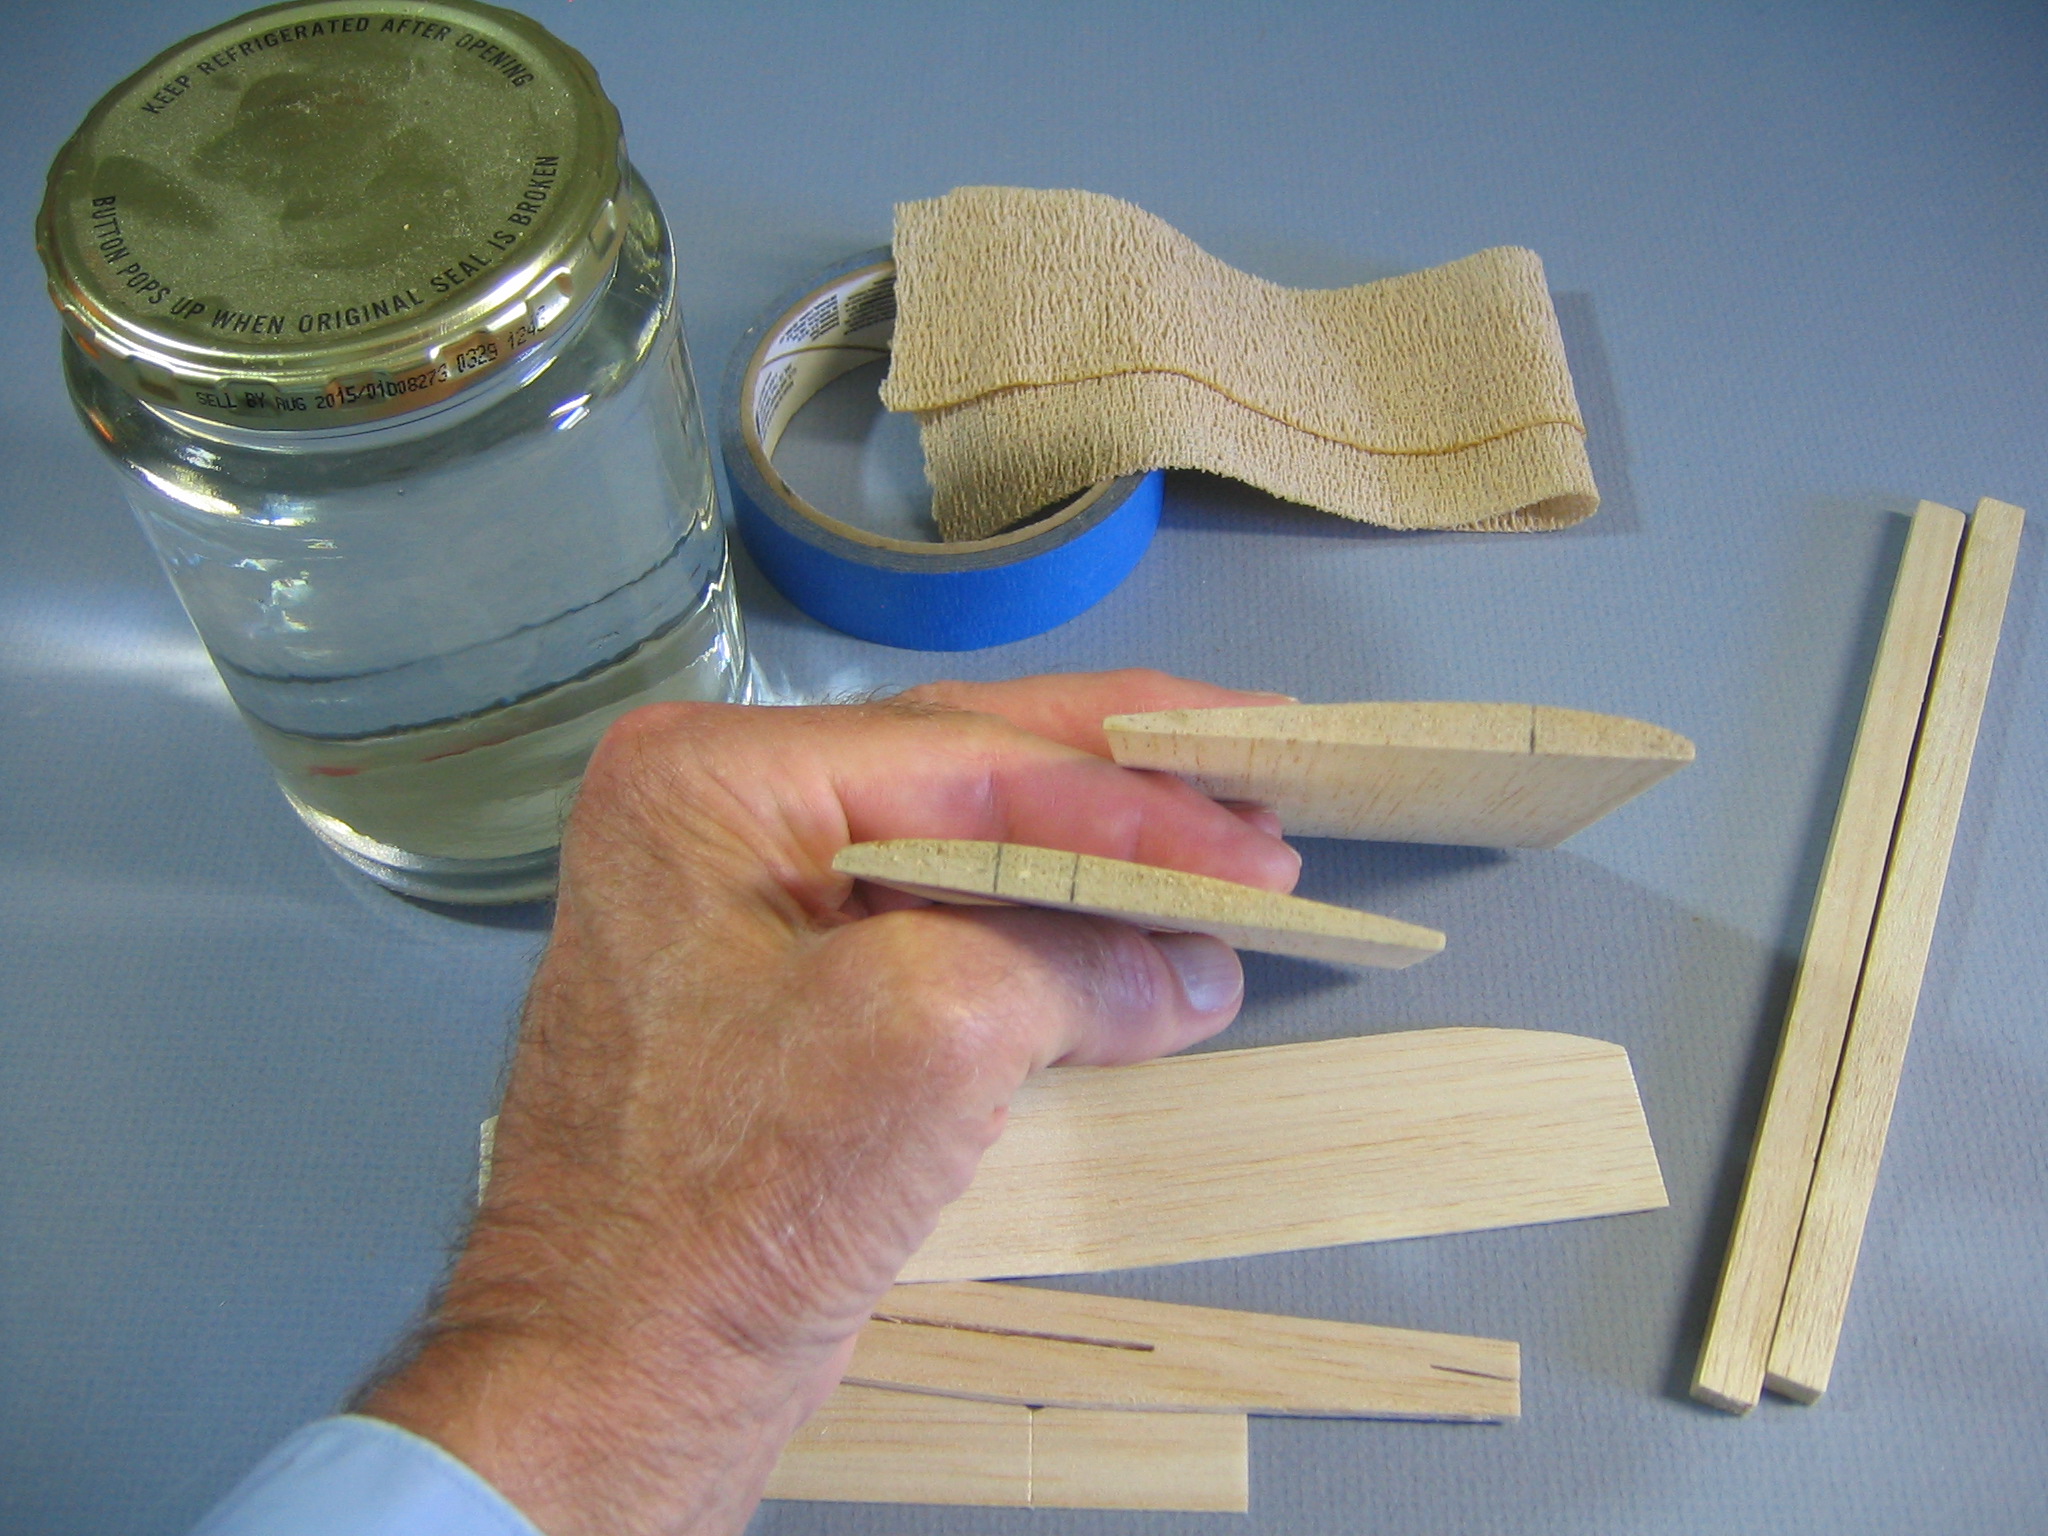 The airfoil form boards are from Sig Manufacturing, SIGB112, 1/4″ x 3″ x 36″ Airfoil Shaped Sheets. You can get them HERE in 3′ lengths. You might find them at local hobby store. You can also carve your own. These are 3″ wide and 5″ long, made for a previous project.
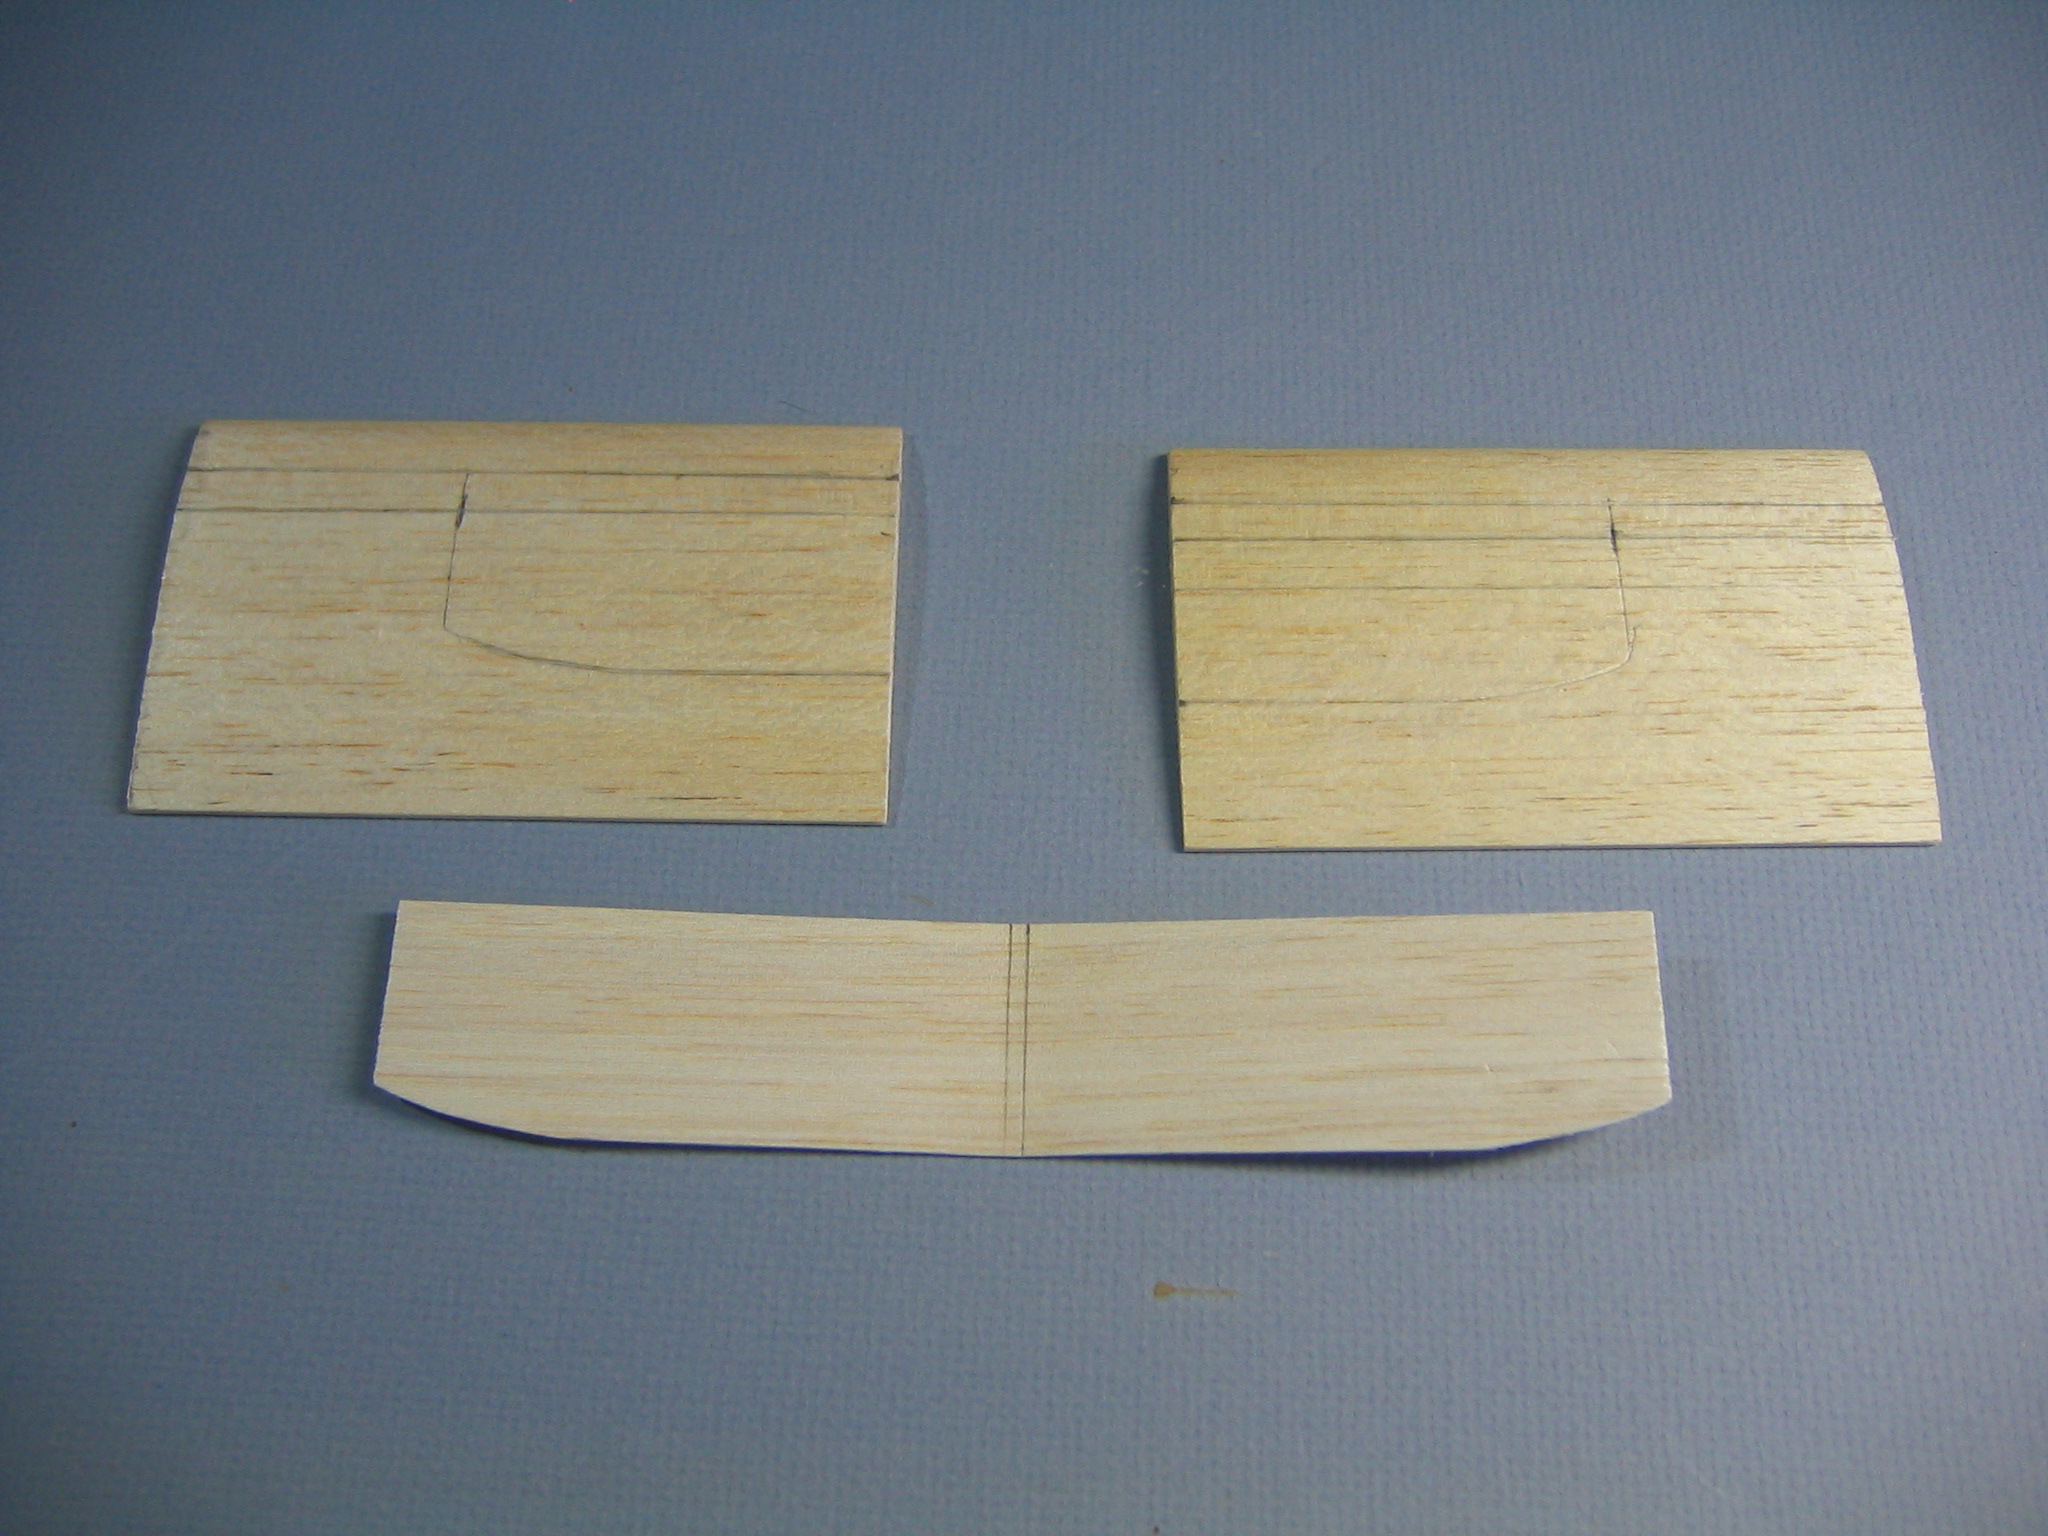 The form board is 3″ wide and our wing is 1 1/2″ wide. The wing leading edge will be put 1/2″ back from the leading edge of the form board. The center section of the wing still must be bent upward to form the dihedral angle. Wood can’t be bent in two directions at once, so the middle 2″ will not be strapped to the form board. That means the wingtips will be 3″ in from the inside end of the form board. I have traced the position of the wings on the form boards.
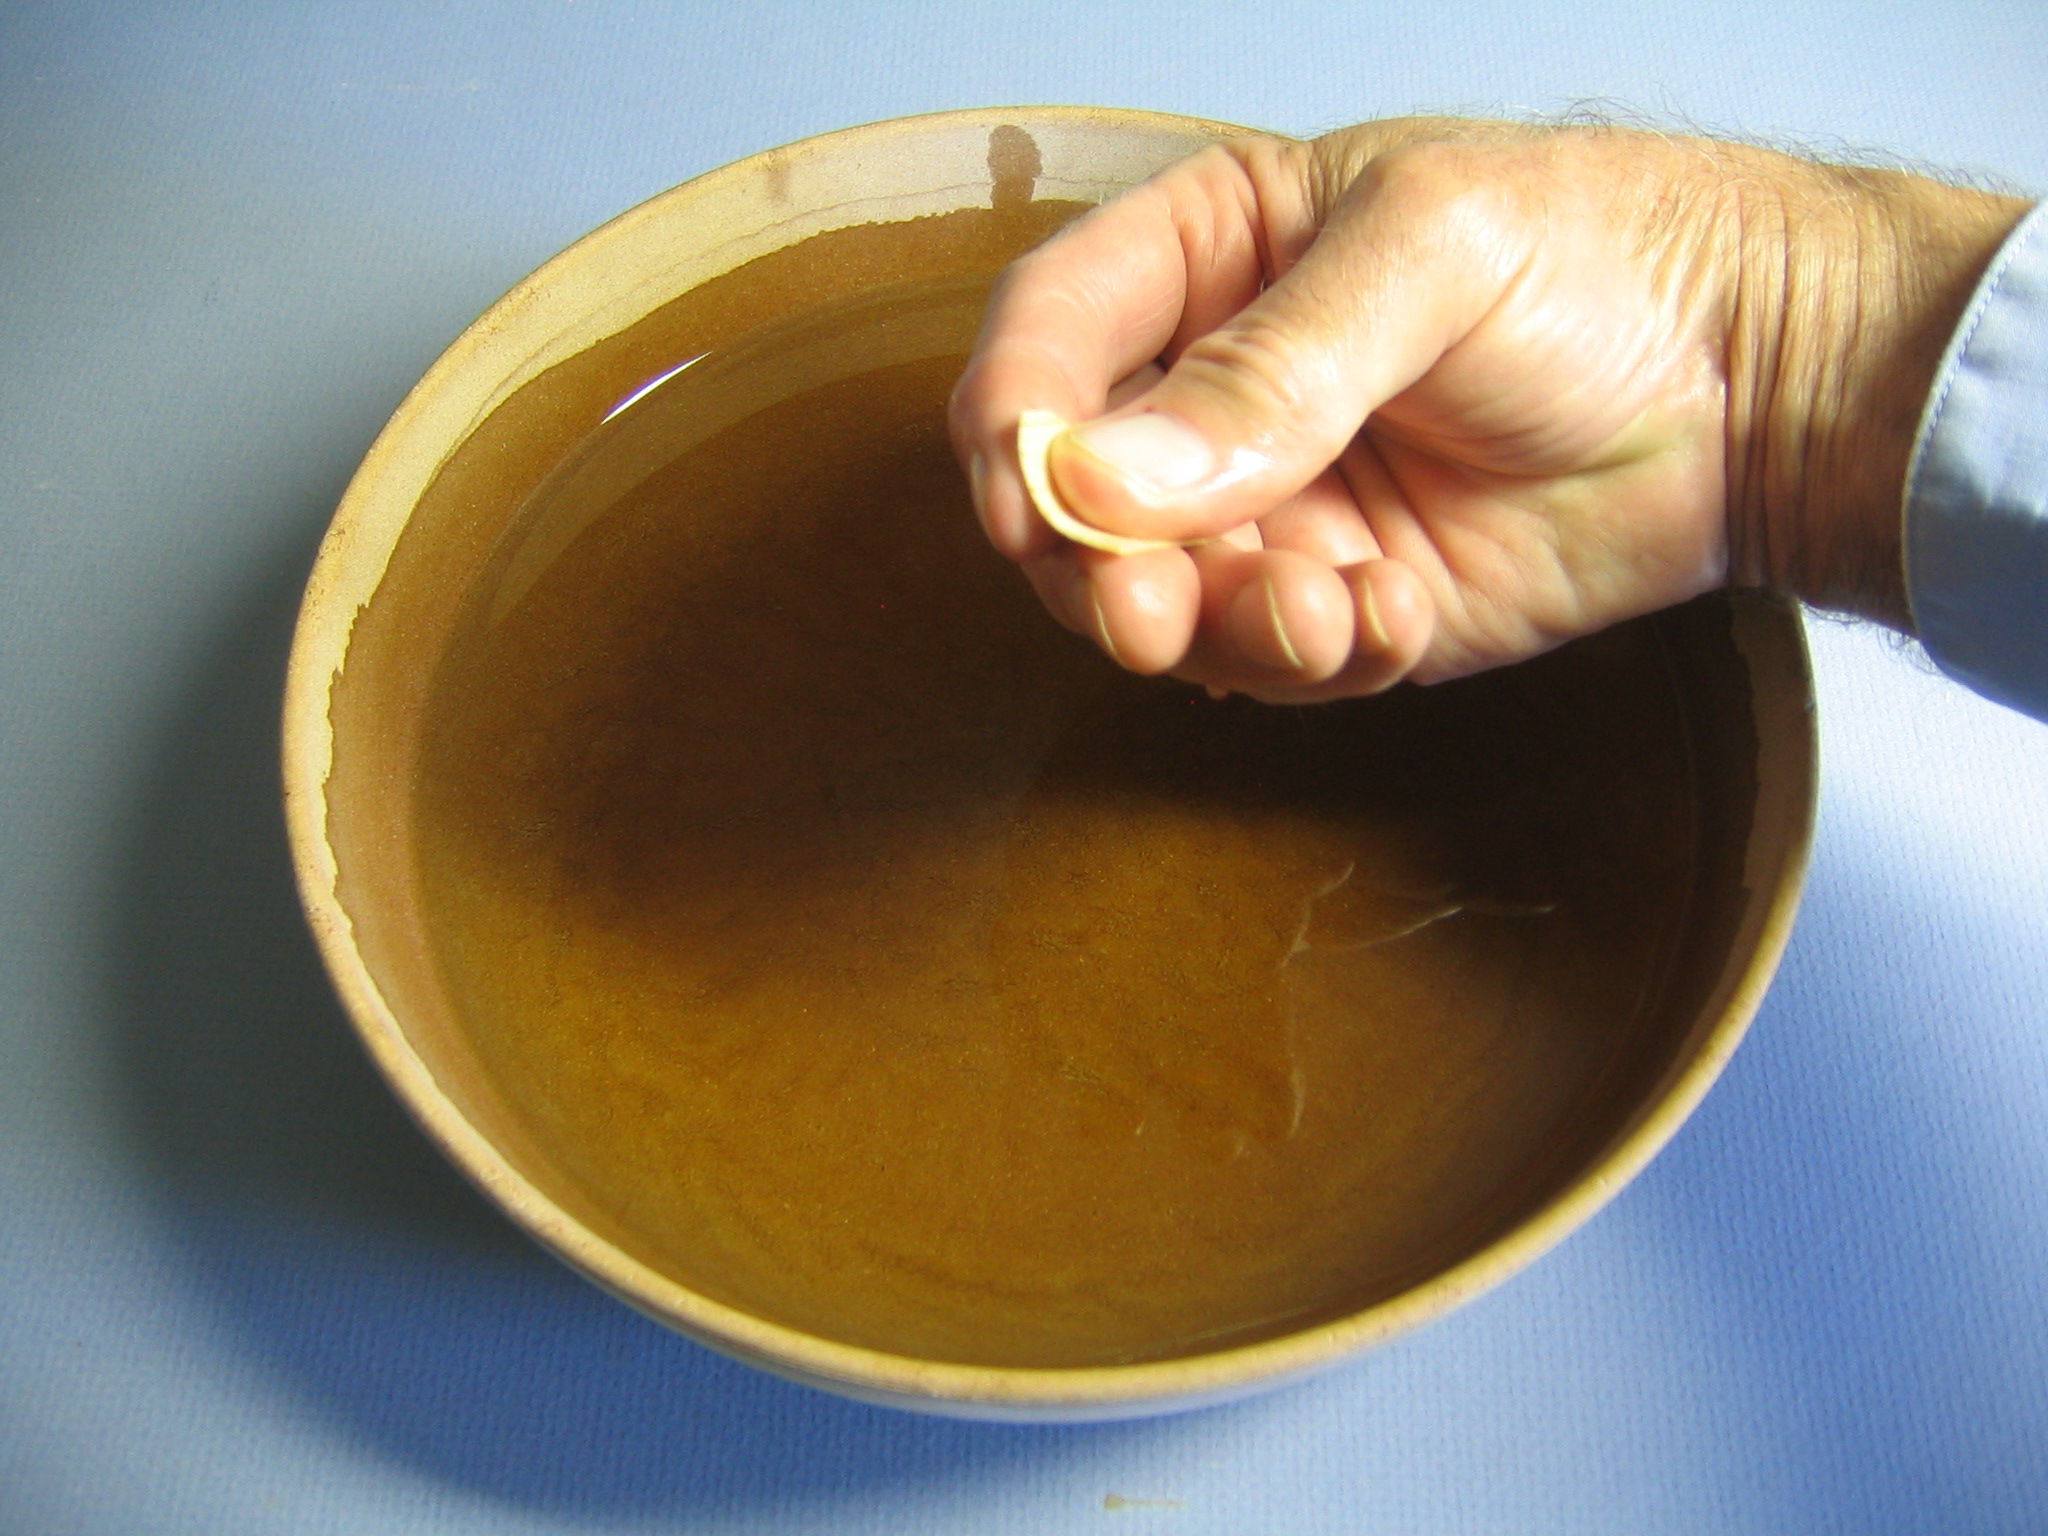
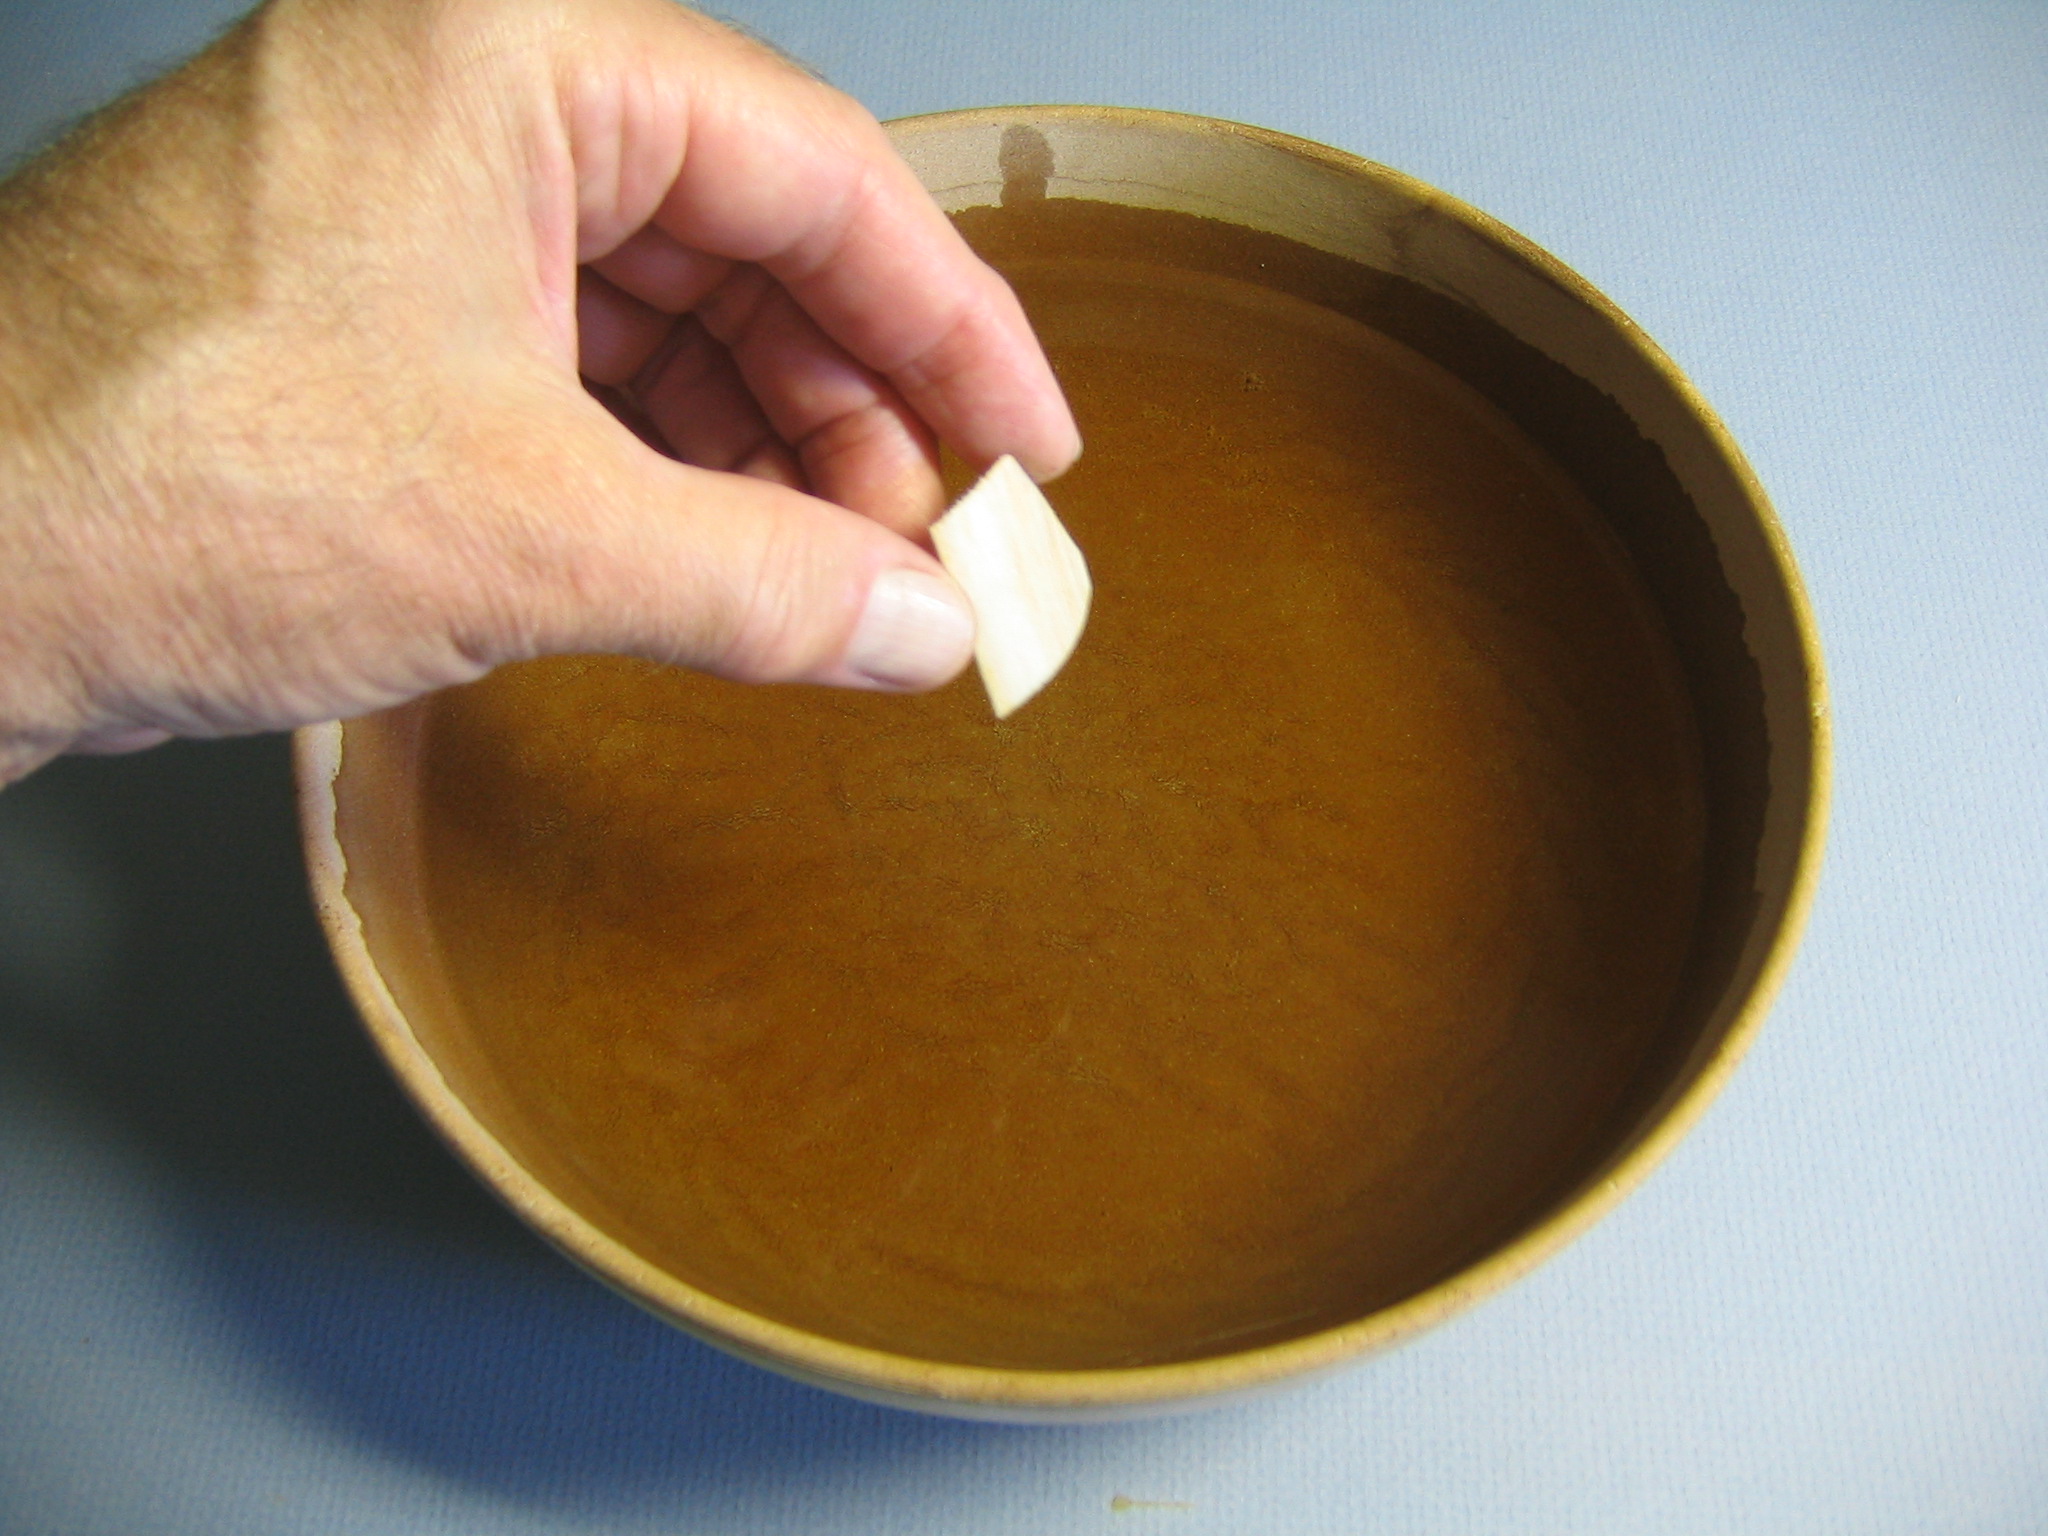
 Soak the wing in water until it becomes soft. Soft wood might take only a few minutes. Harder wood will take longer. Squeeze the wingtip gently from time to time to see when it gets soft.
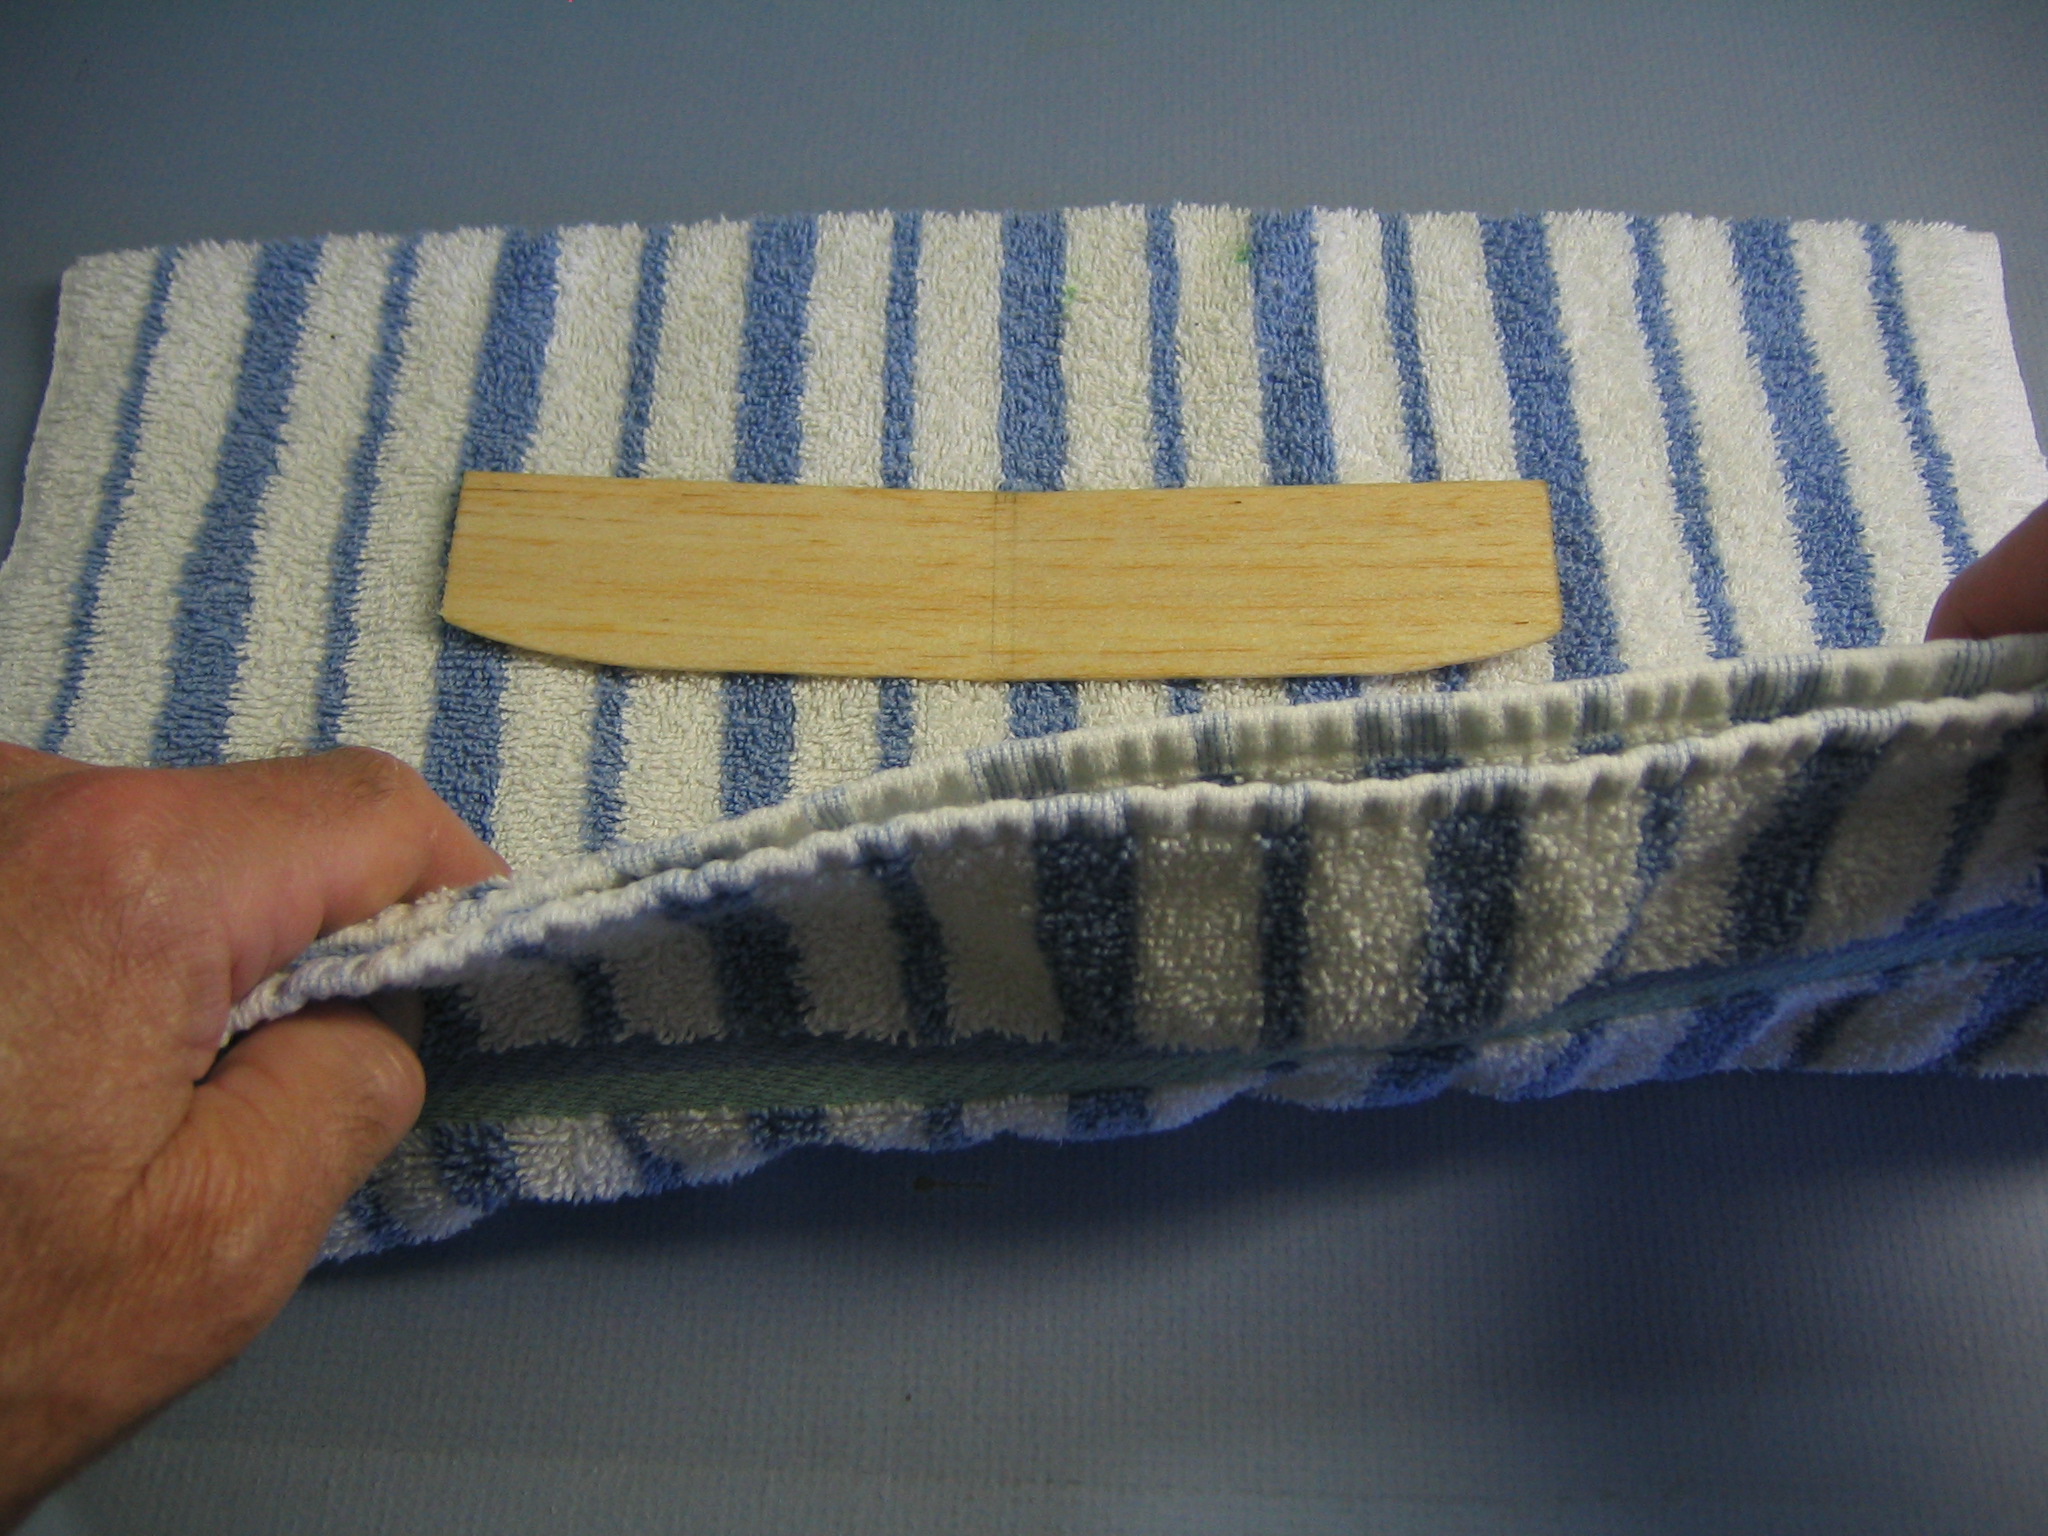 When you judge it is soft enough to bend around the form, remove it from the water and put it on an absorbent towel.
 Blot it dry.
 In the mean time, tape the end of an Ace Bandage to the back of the inside end of a form board so it leads off the trailing (thin) edge of the board. Prepare one for each wing. Note there is a left wing and a right wing, they are not the same.
 Align the wing carefully with the marked position. Press the trailing edge of the wing down against the form board.
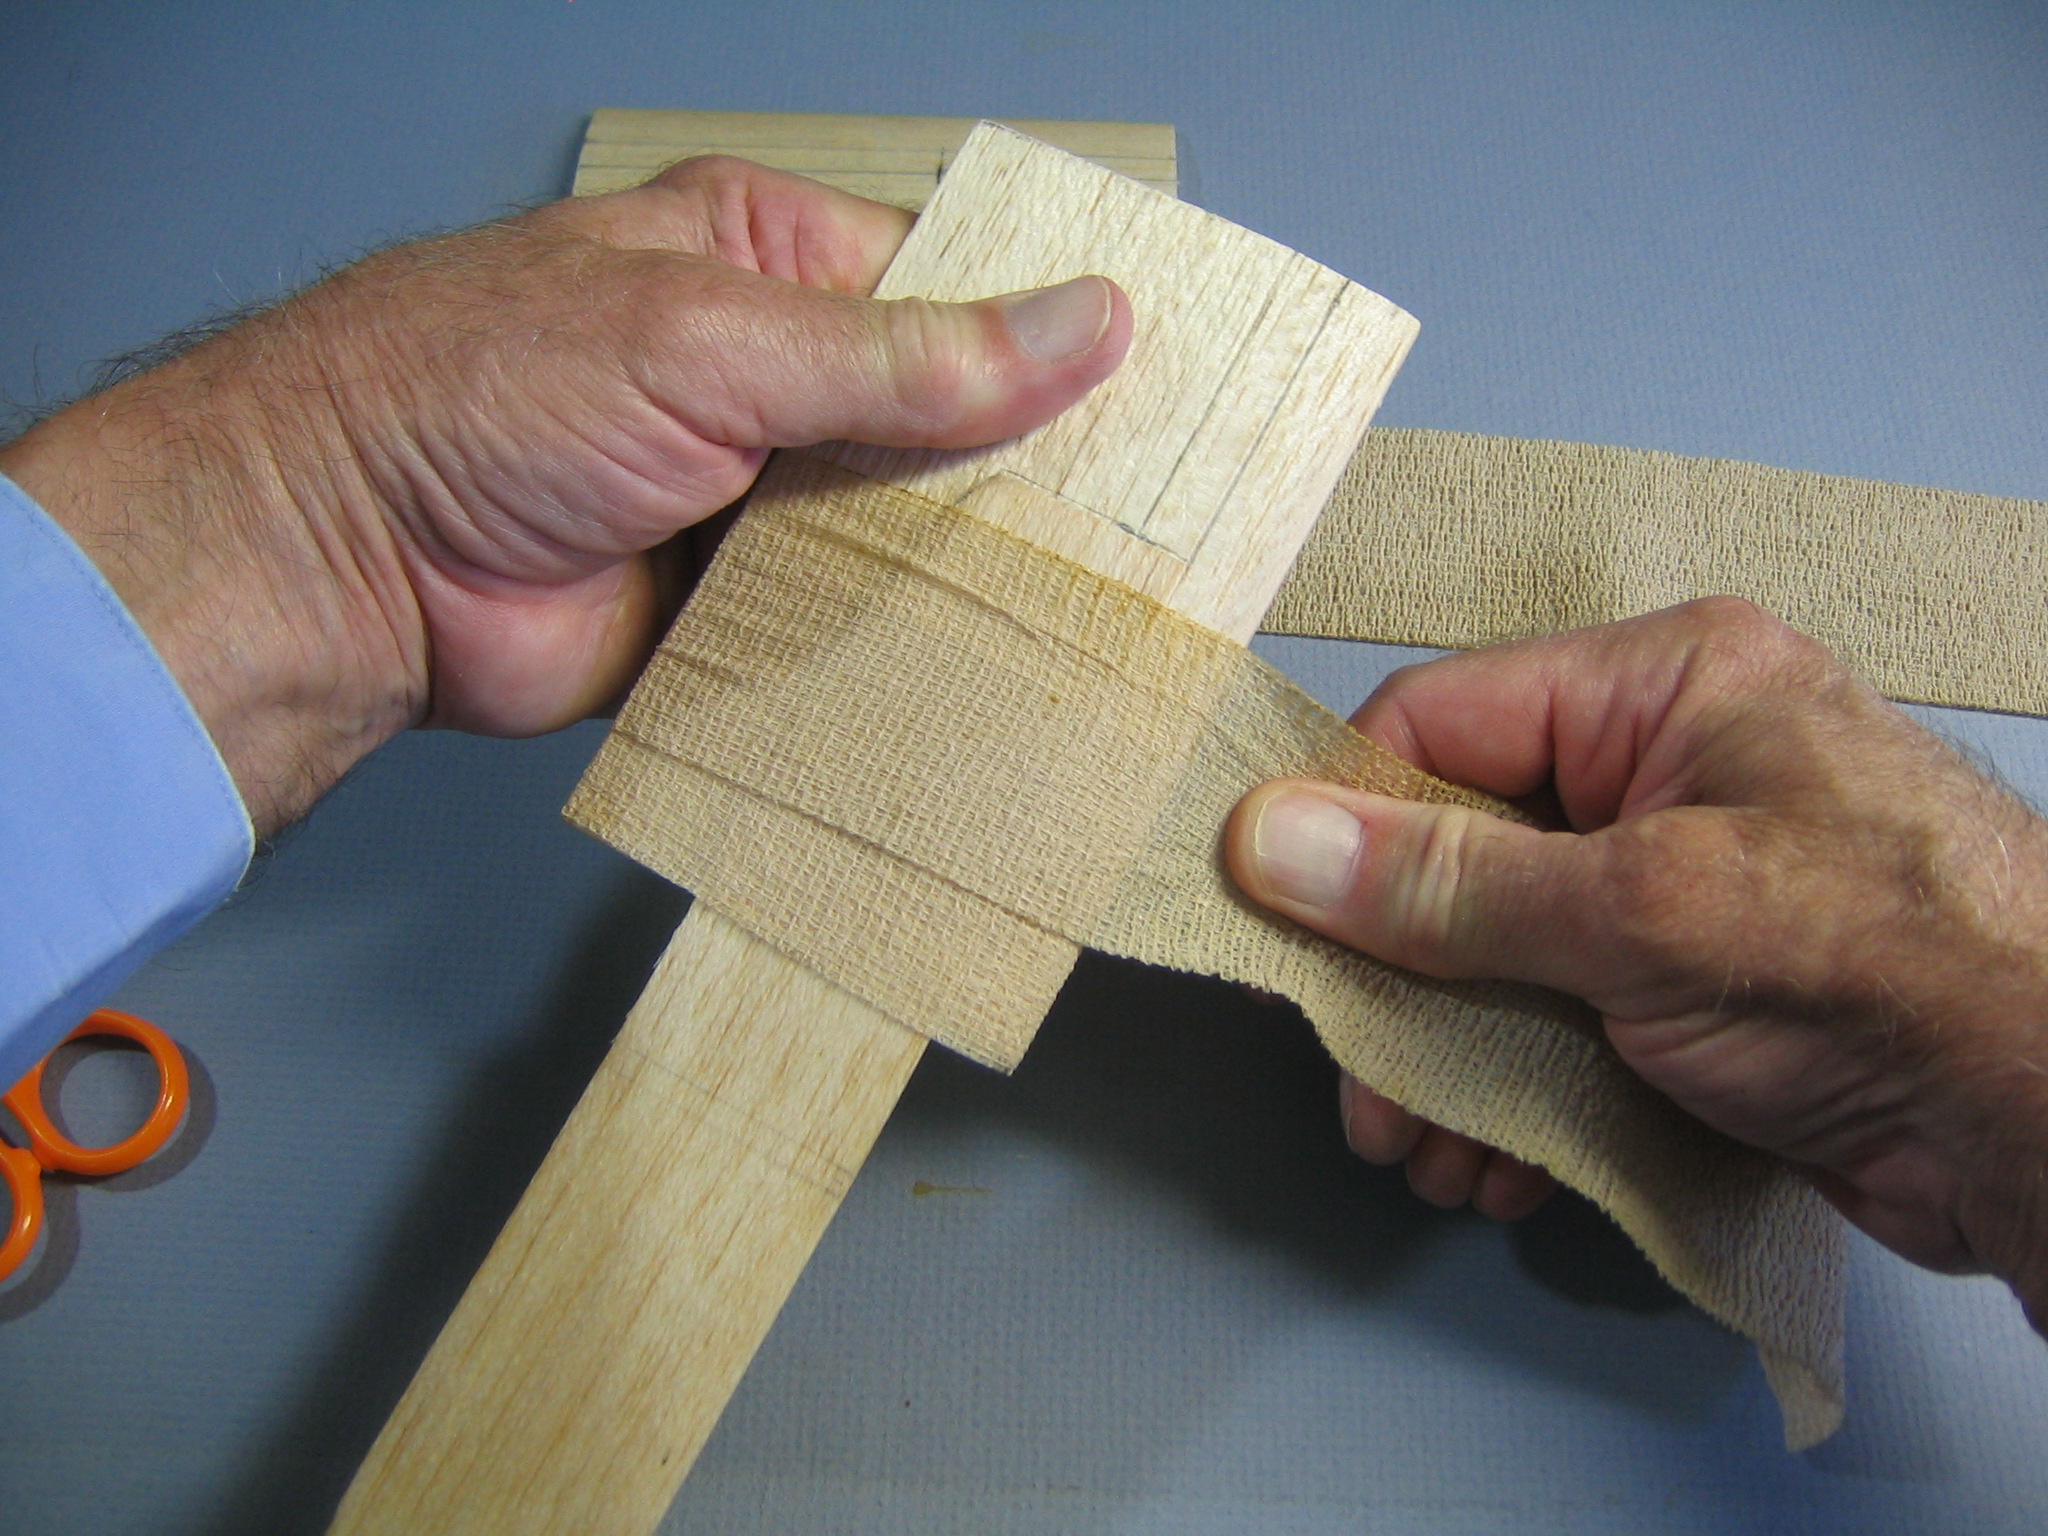 Pull the Ace Bandage tightly over the wing and wrap it around the form until the entire wing is pressed tightly to the surface of the board.
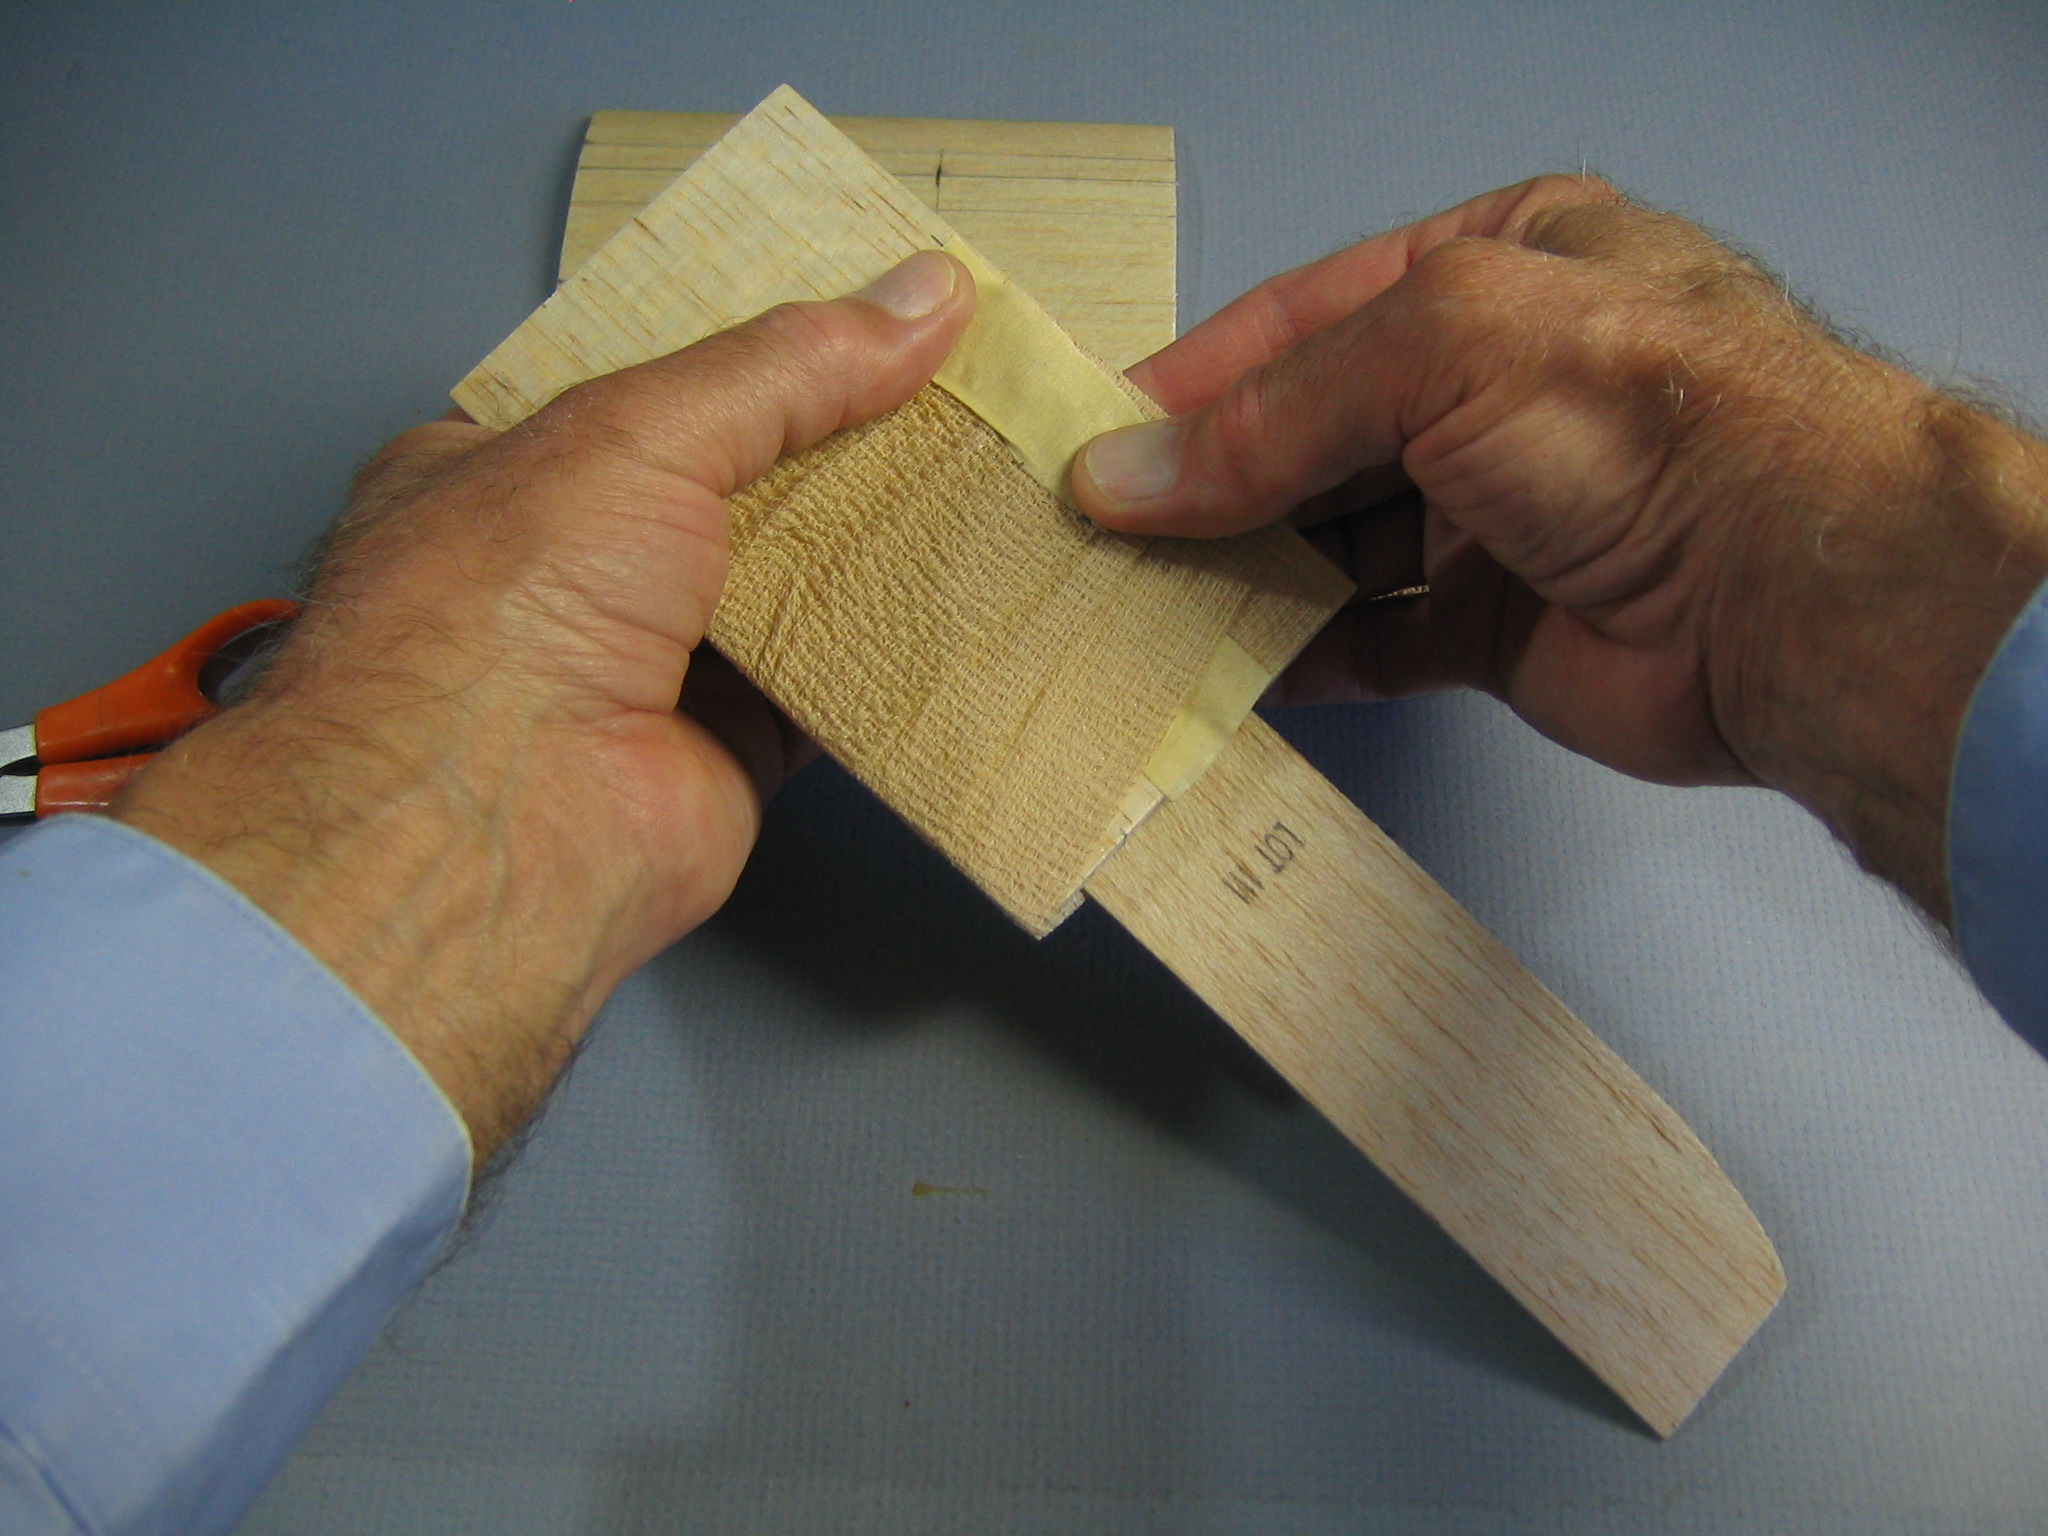 Tape the other end in place.
 Do the same with the other wing.
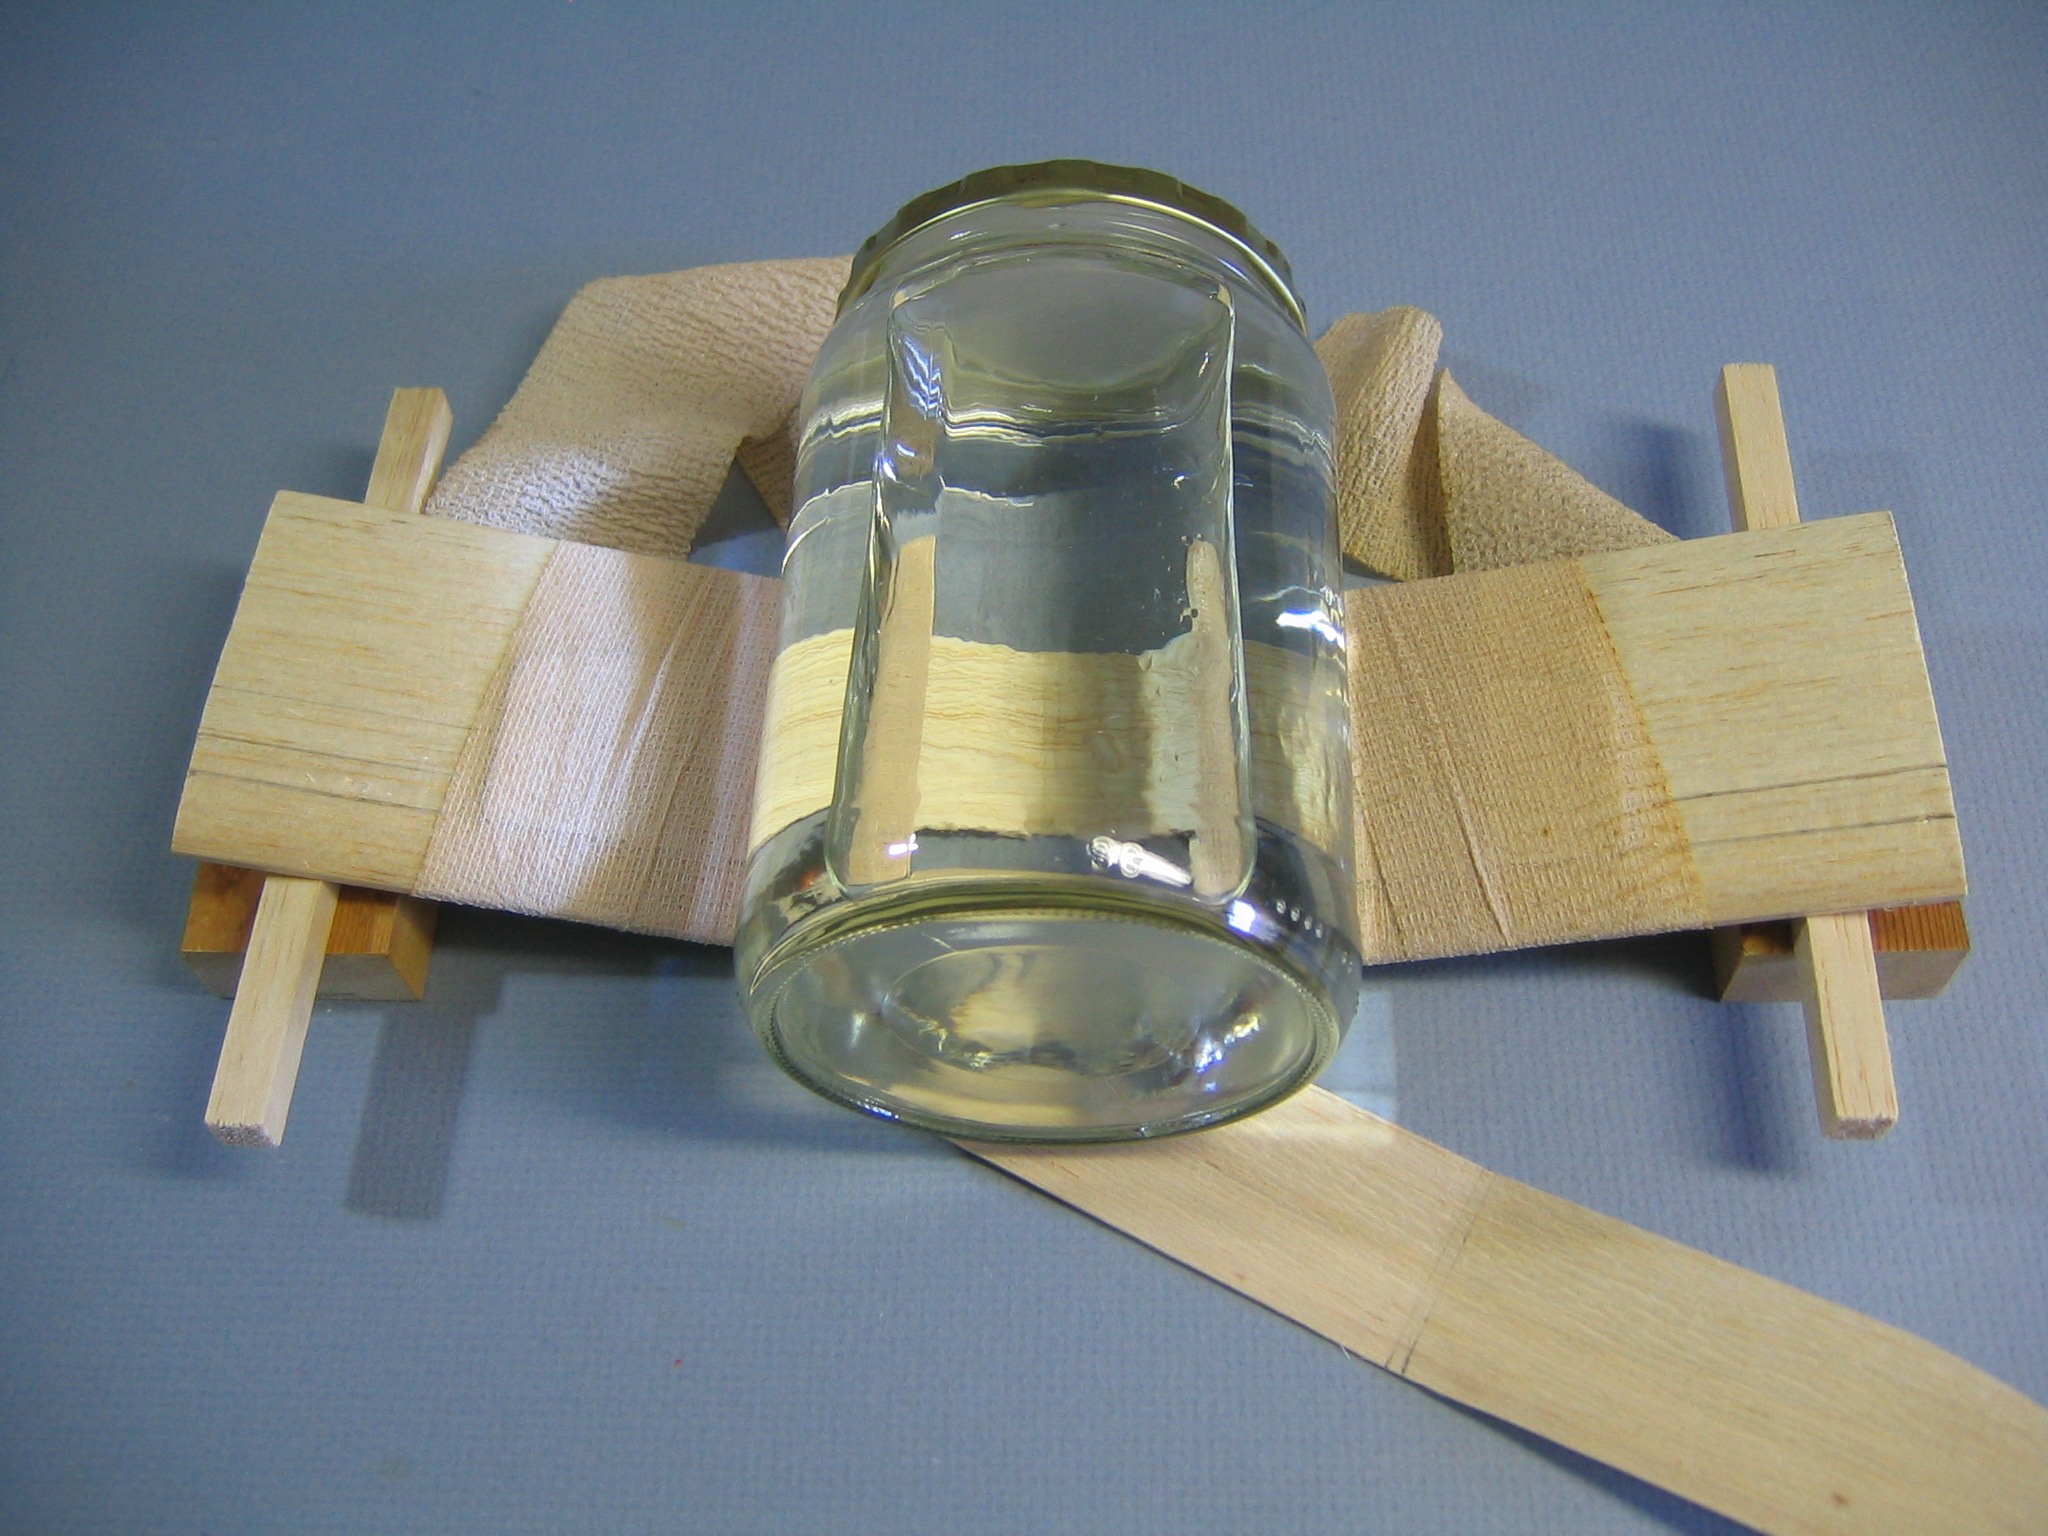
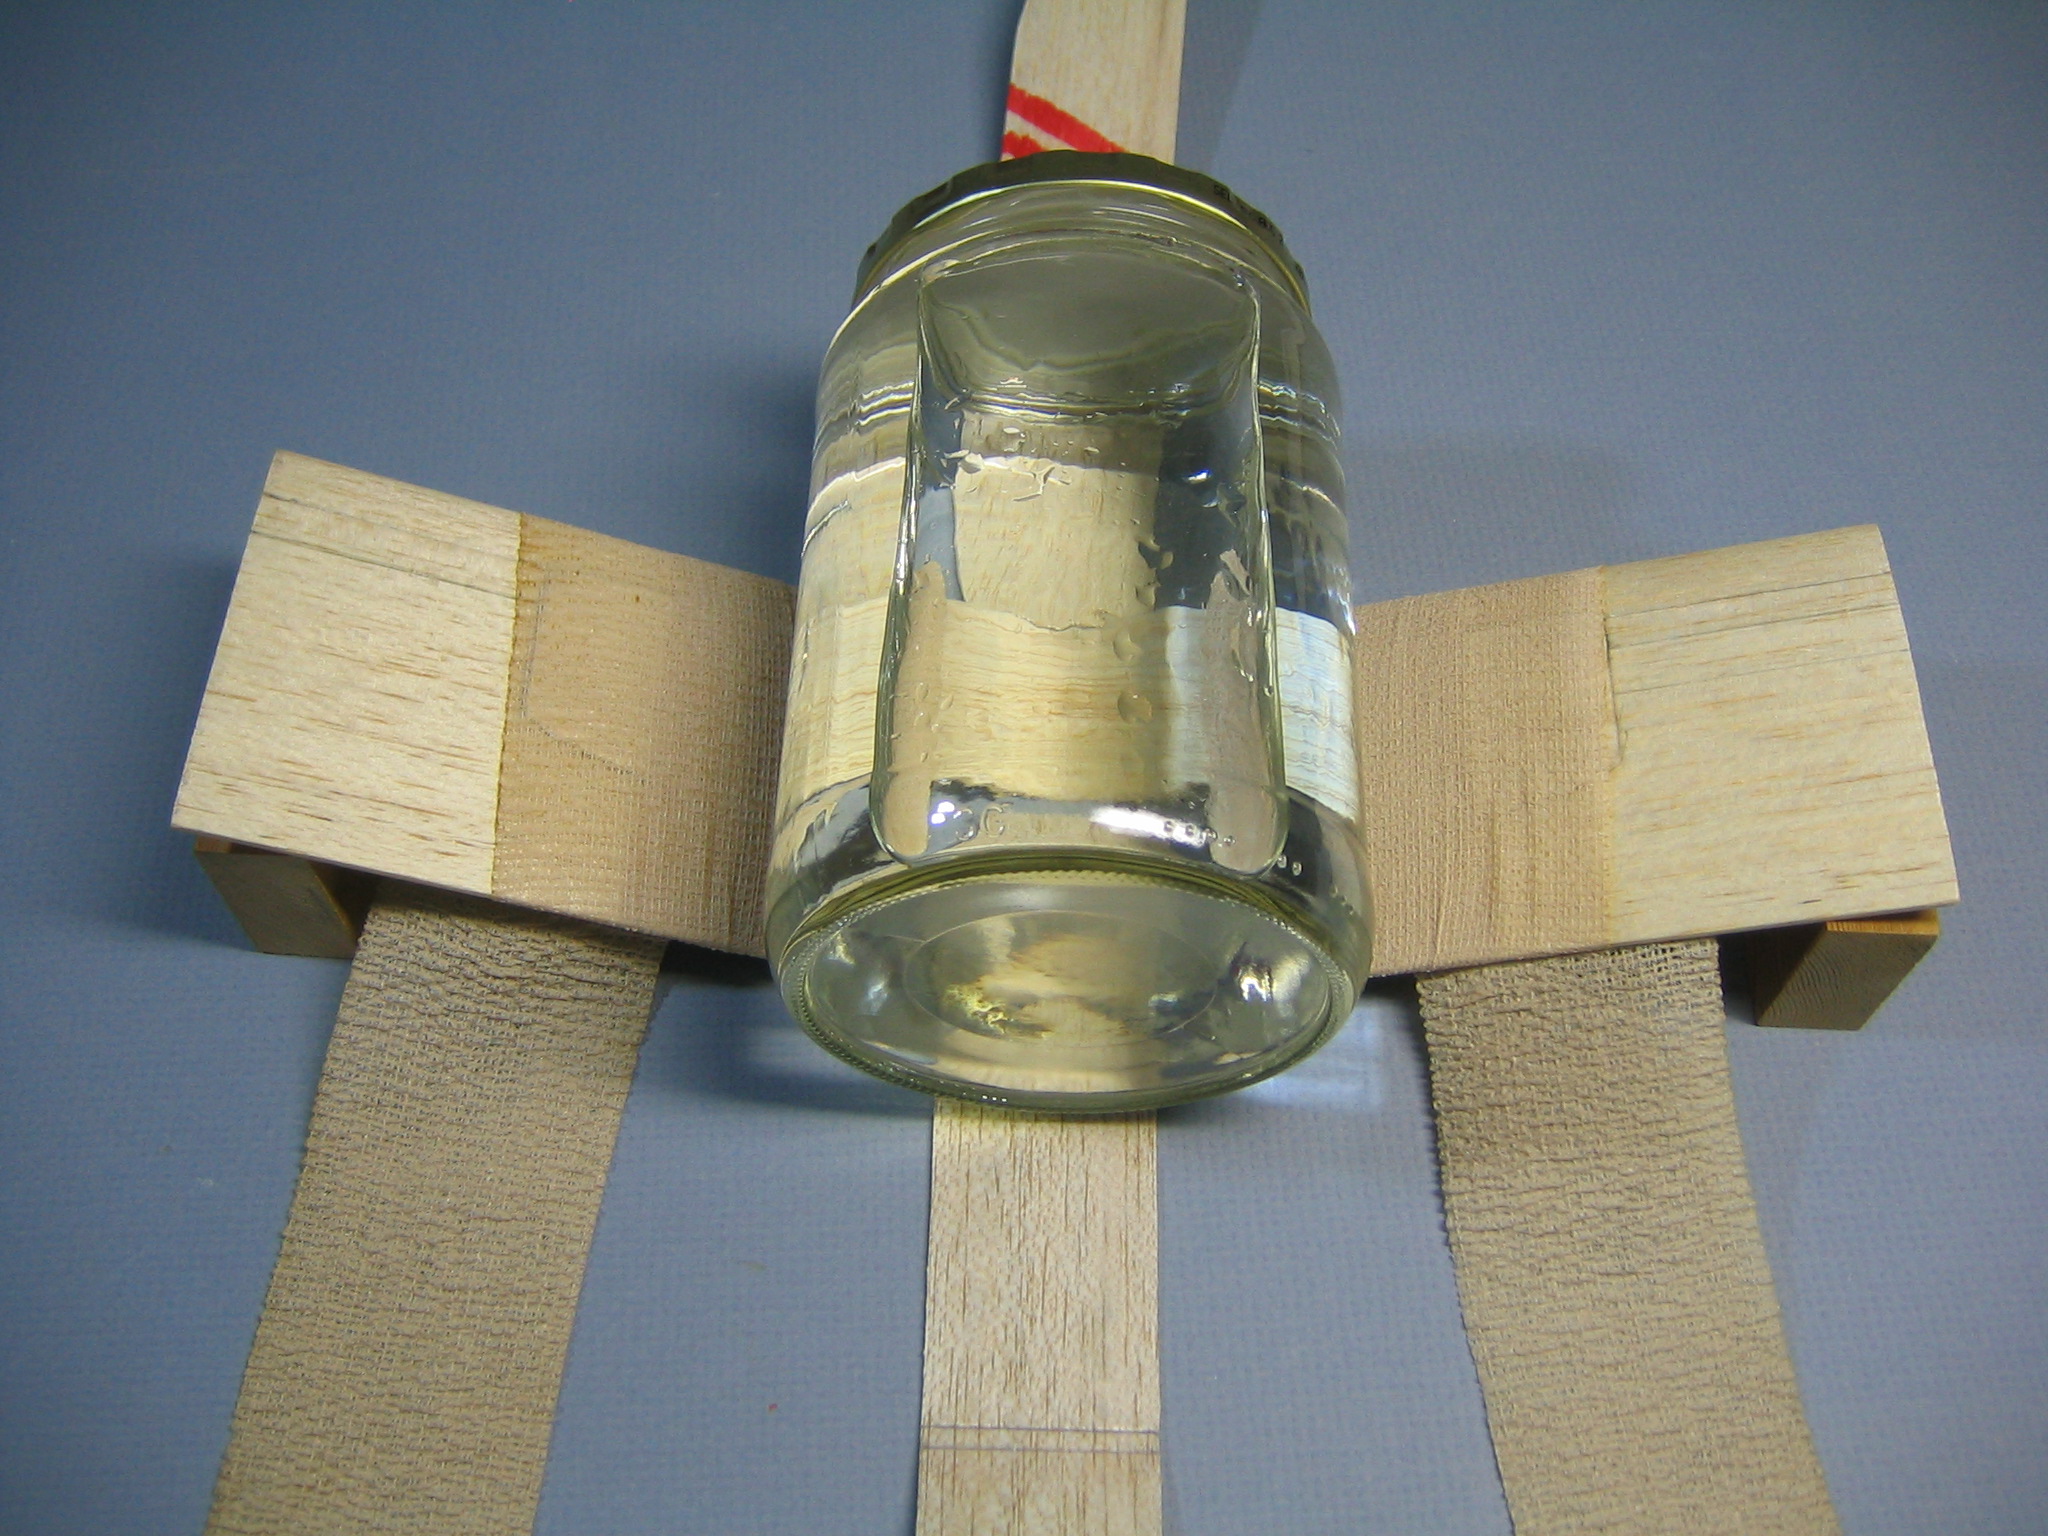
 Place the 1/4″ sticks under the wing tips and place the water bottle over the center of the wing. (Later I decided to increase the dihedral to get better rollout at the top of the loop. I tried 3/4″, 1″, 1 1/4″ and 1 1/2″ spacers under the wing tips.) Carefully adjust the bottle so it is exactly centered on the wing, perpendicular to the leading edge and level with the table top underneath. I placed wood blocks at the ends to hold them down flat on the sticks. Later you may decide to make wings with twist, but for now keep everything symmetrical.
Now let the wood dry completely. How long that will take depends on temperature and humidity, but overnight is probably sufficient. In a warm, sunny, dry place, it might not take as long. Softer wood may dry more quickly.
 While you are at it, put a bend in your fin to make it turn the plane. Start by soaking the fin in water.
 You can bend it around the ball of your thumb.
 Bend it so the convex side is to the right, so it will pull the tail to the right. It will dry more quickly because it is thinner and exposed directly to the air.
fine tuning your Guillow’s 25-1 Glider
My glider seemed to be symmetrical, but it was turning too much to the left. I couldn’t prevent it from spiraling in to the left.
 I had noticed that when I put it on the table, it tilted to the left.
 When I let the sun shine through the wing, it looked like there was more dense wood in the left wing.
 I don’t like to add weight to a glider, but sometimes there is no choice. I was able to get it to balance with just a tiny dab of clay on the right wingtip. Now it was flying much better.
After flying the glider for a while we get to the limit of what it can do. It can’t be thrown full strength, it simply loops back to the ground. For longer flights, we must get it to start its glide higher up. One way to do this is to reduce the loopyness. That can be done by reducing the angle between the wing and the tailplane. I had already tried gluing the tailplane to the flat bottom of the stick without success, the angle was too small. Next I tried sanding a slight taper in the bottom of the fuselage to produce an angle intermediate between that of the tailplane slot and the flat bottom of the fuselage.
 The tailplane is displaced vertically about 0.03″ along its length. I put a mark about 0.015″ up along the back edge of the fuselage.
 The tailplane slot is about 0.58″ long, so I put a mark 0.58″ from the back along the bottom of the stick.
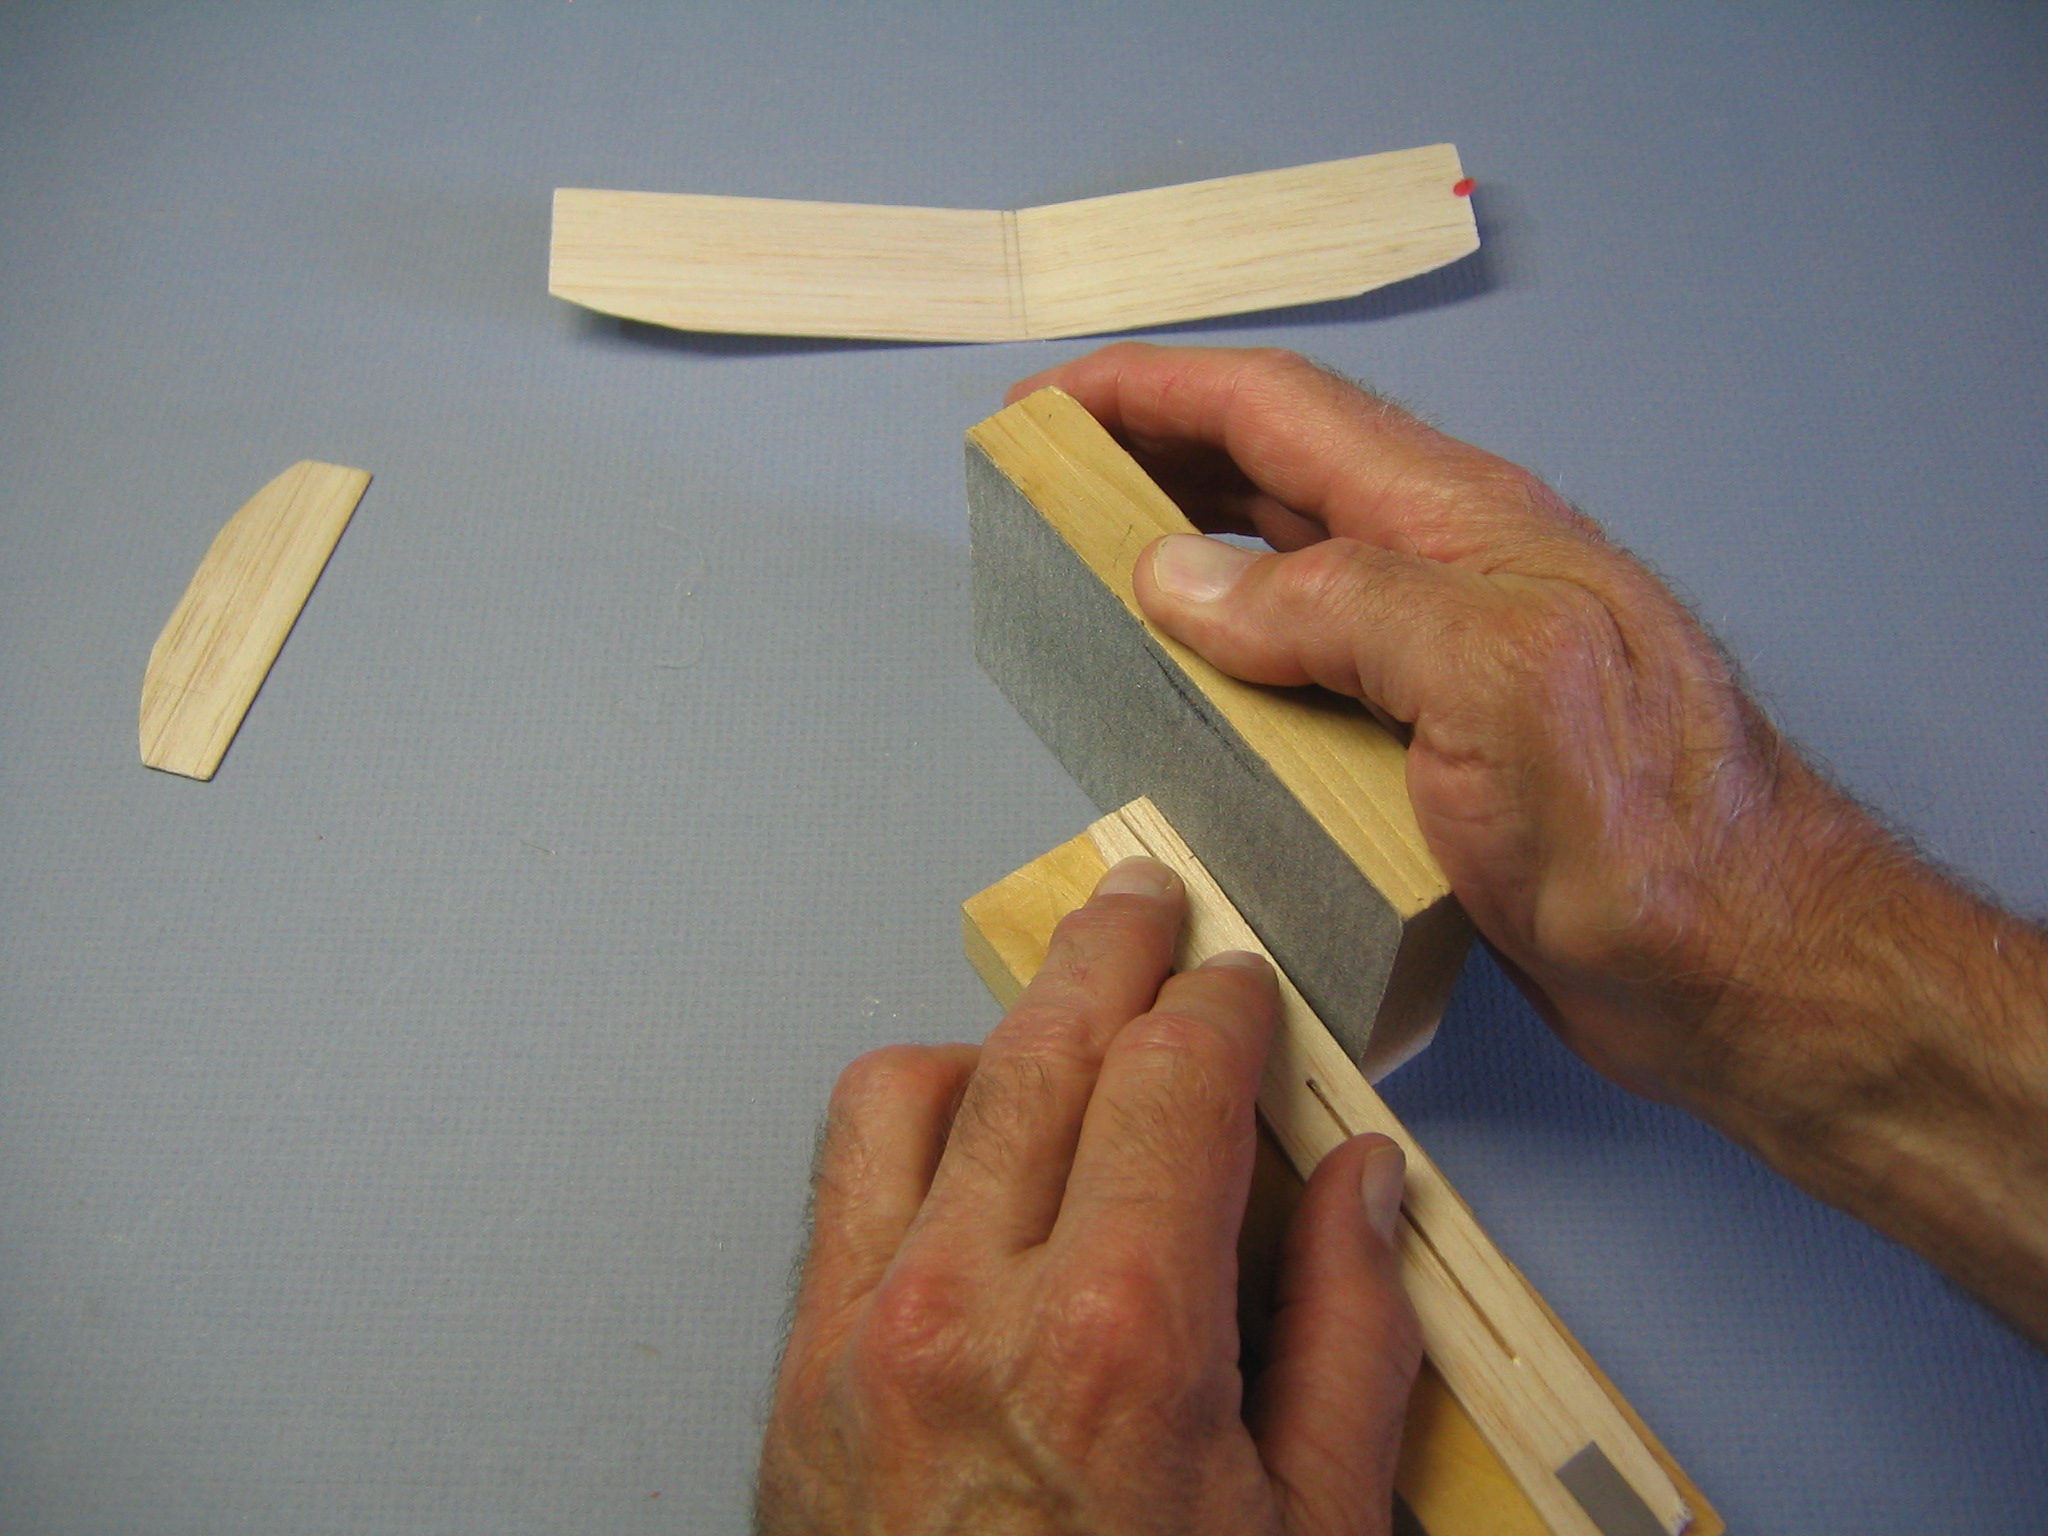 I put the fuselage flat on top of a block to space it up from the table and used a sanding block perpendicular to the table to sand a flat face between these two points.
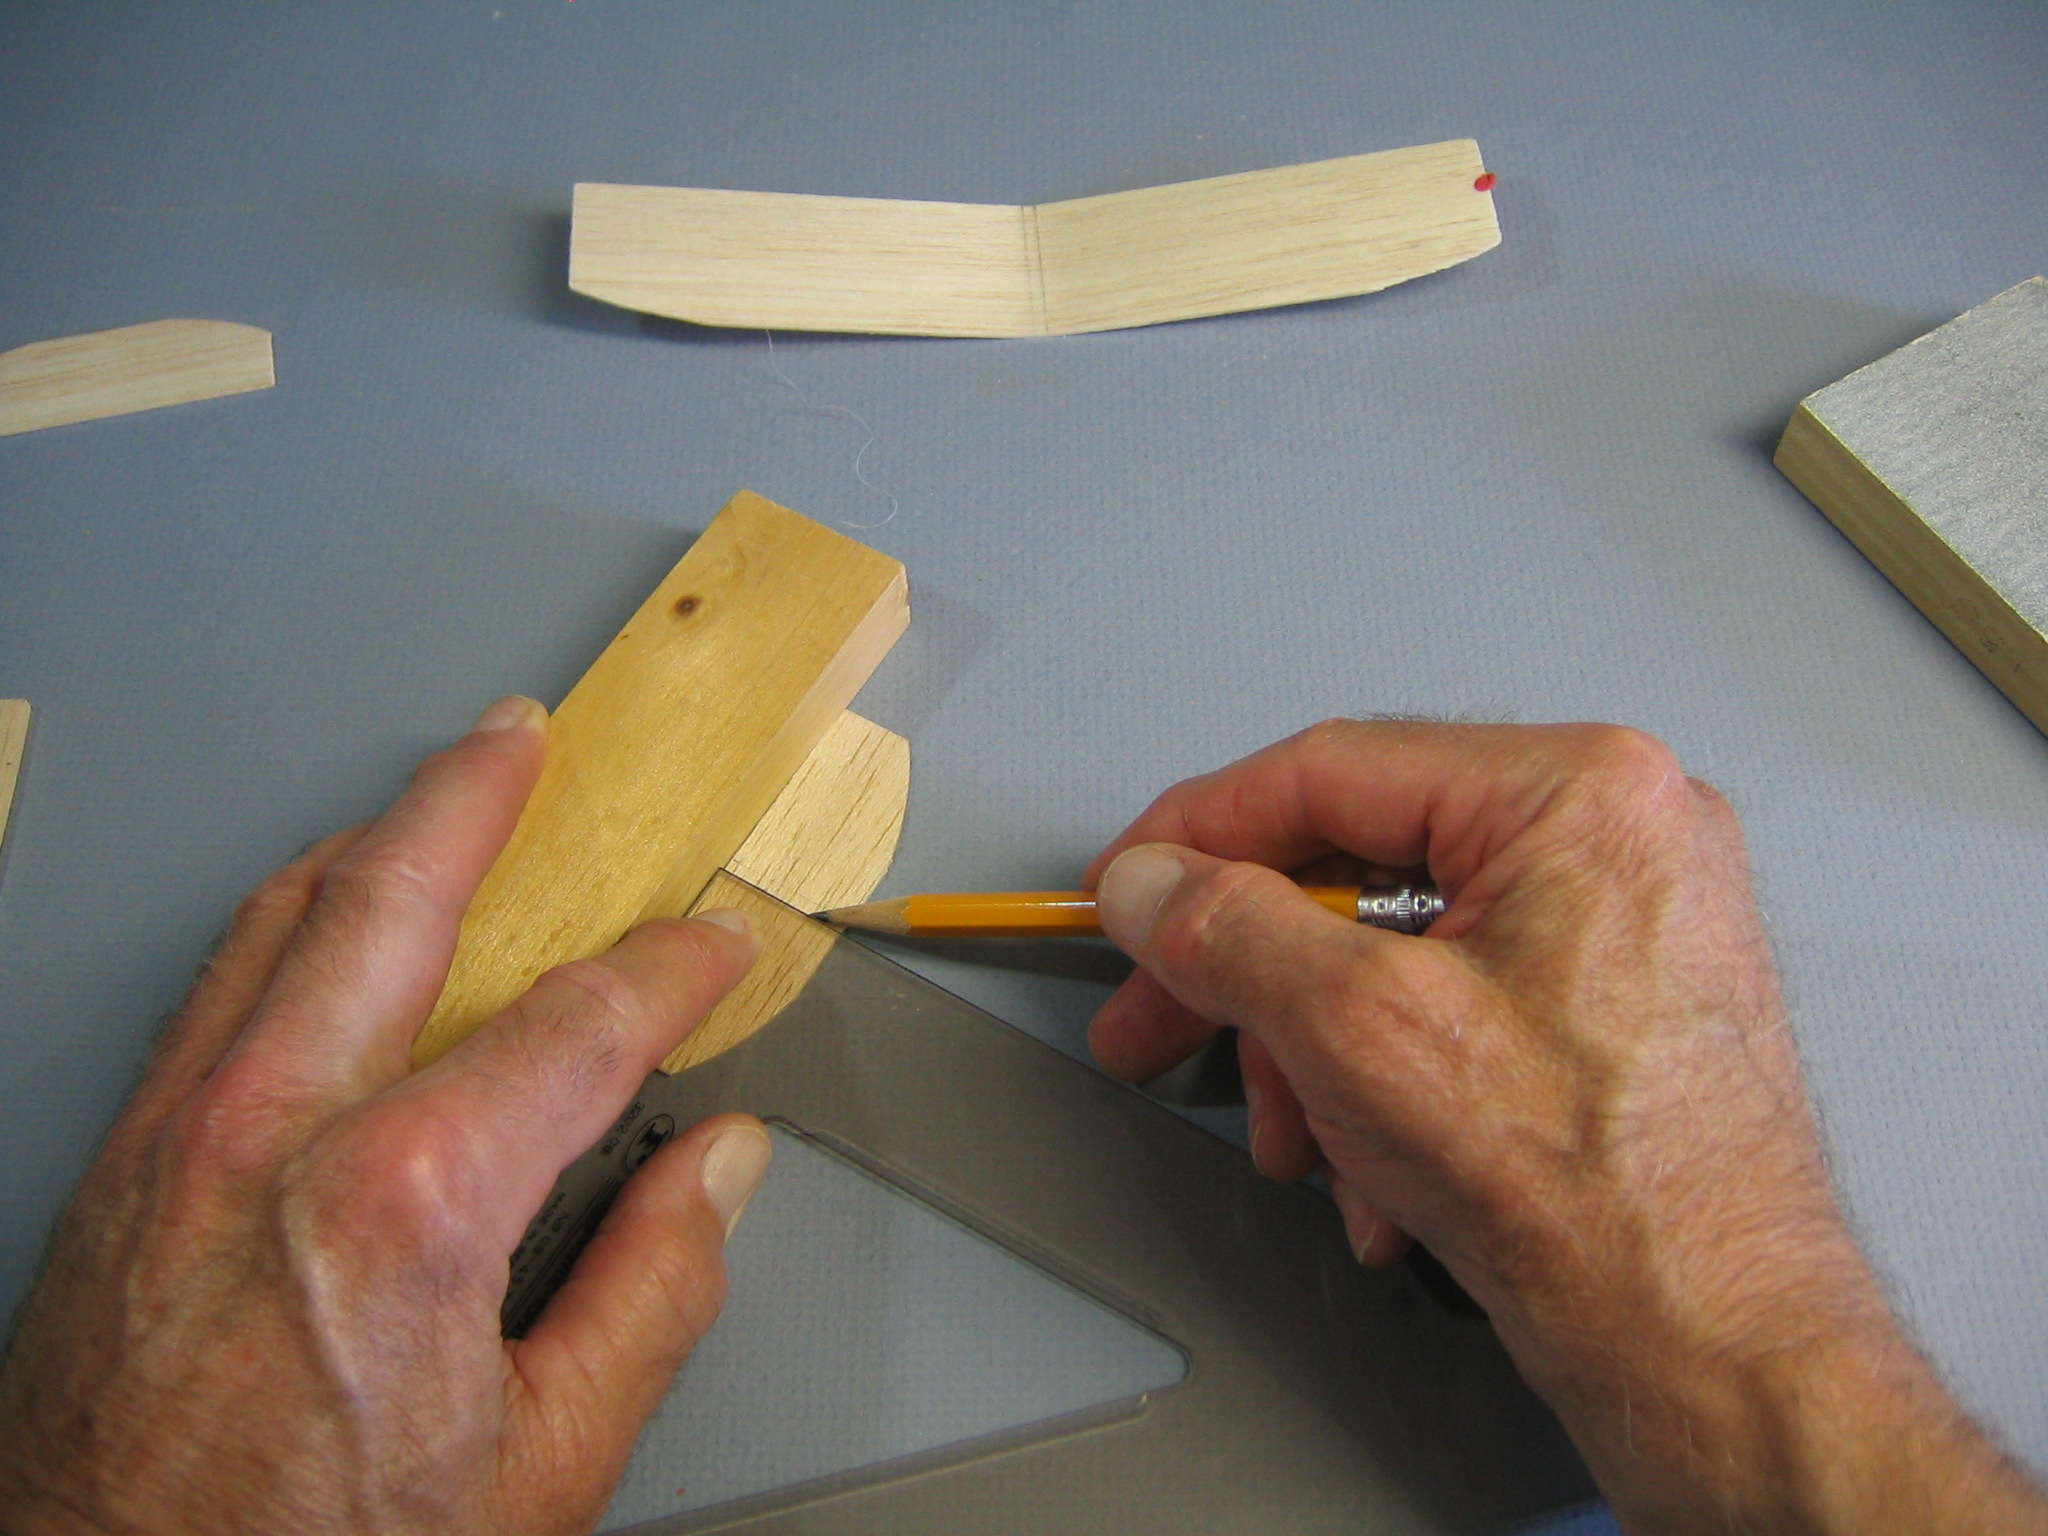 I lightly drew two parallel lines centered on the tailplane, 1/8″ apart.
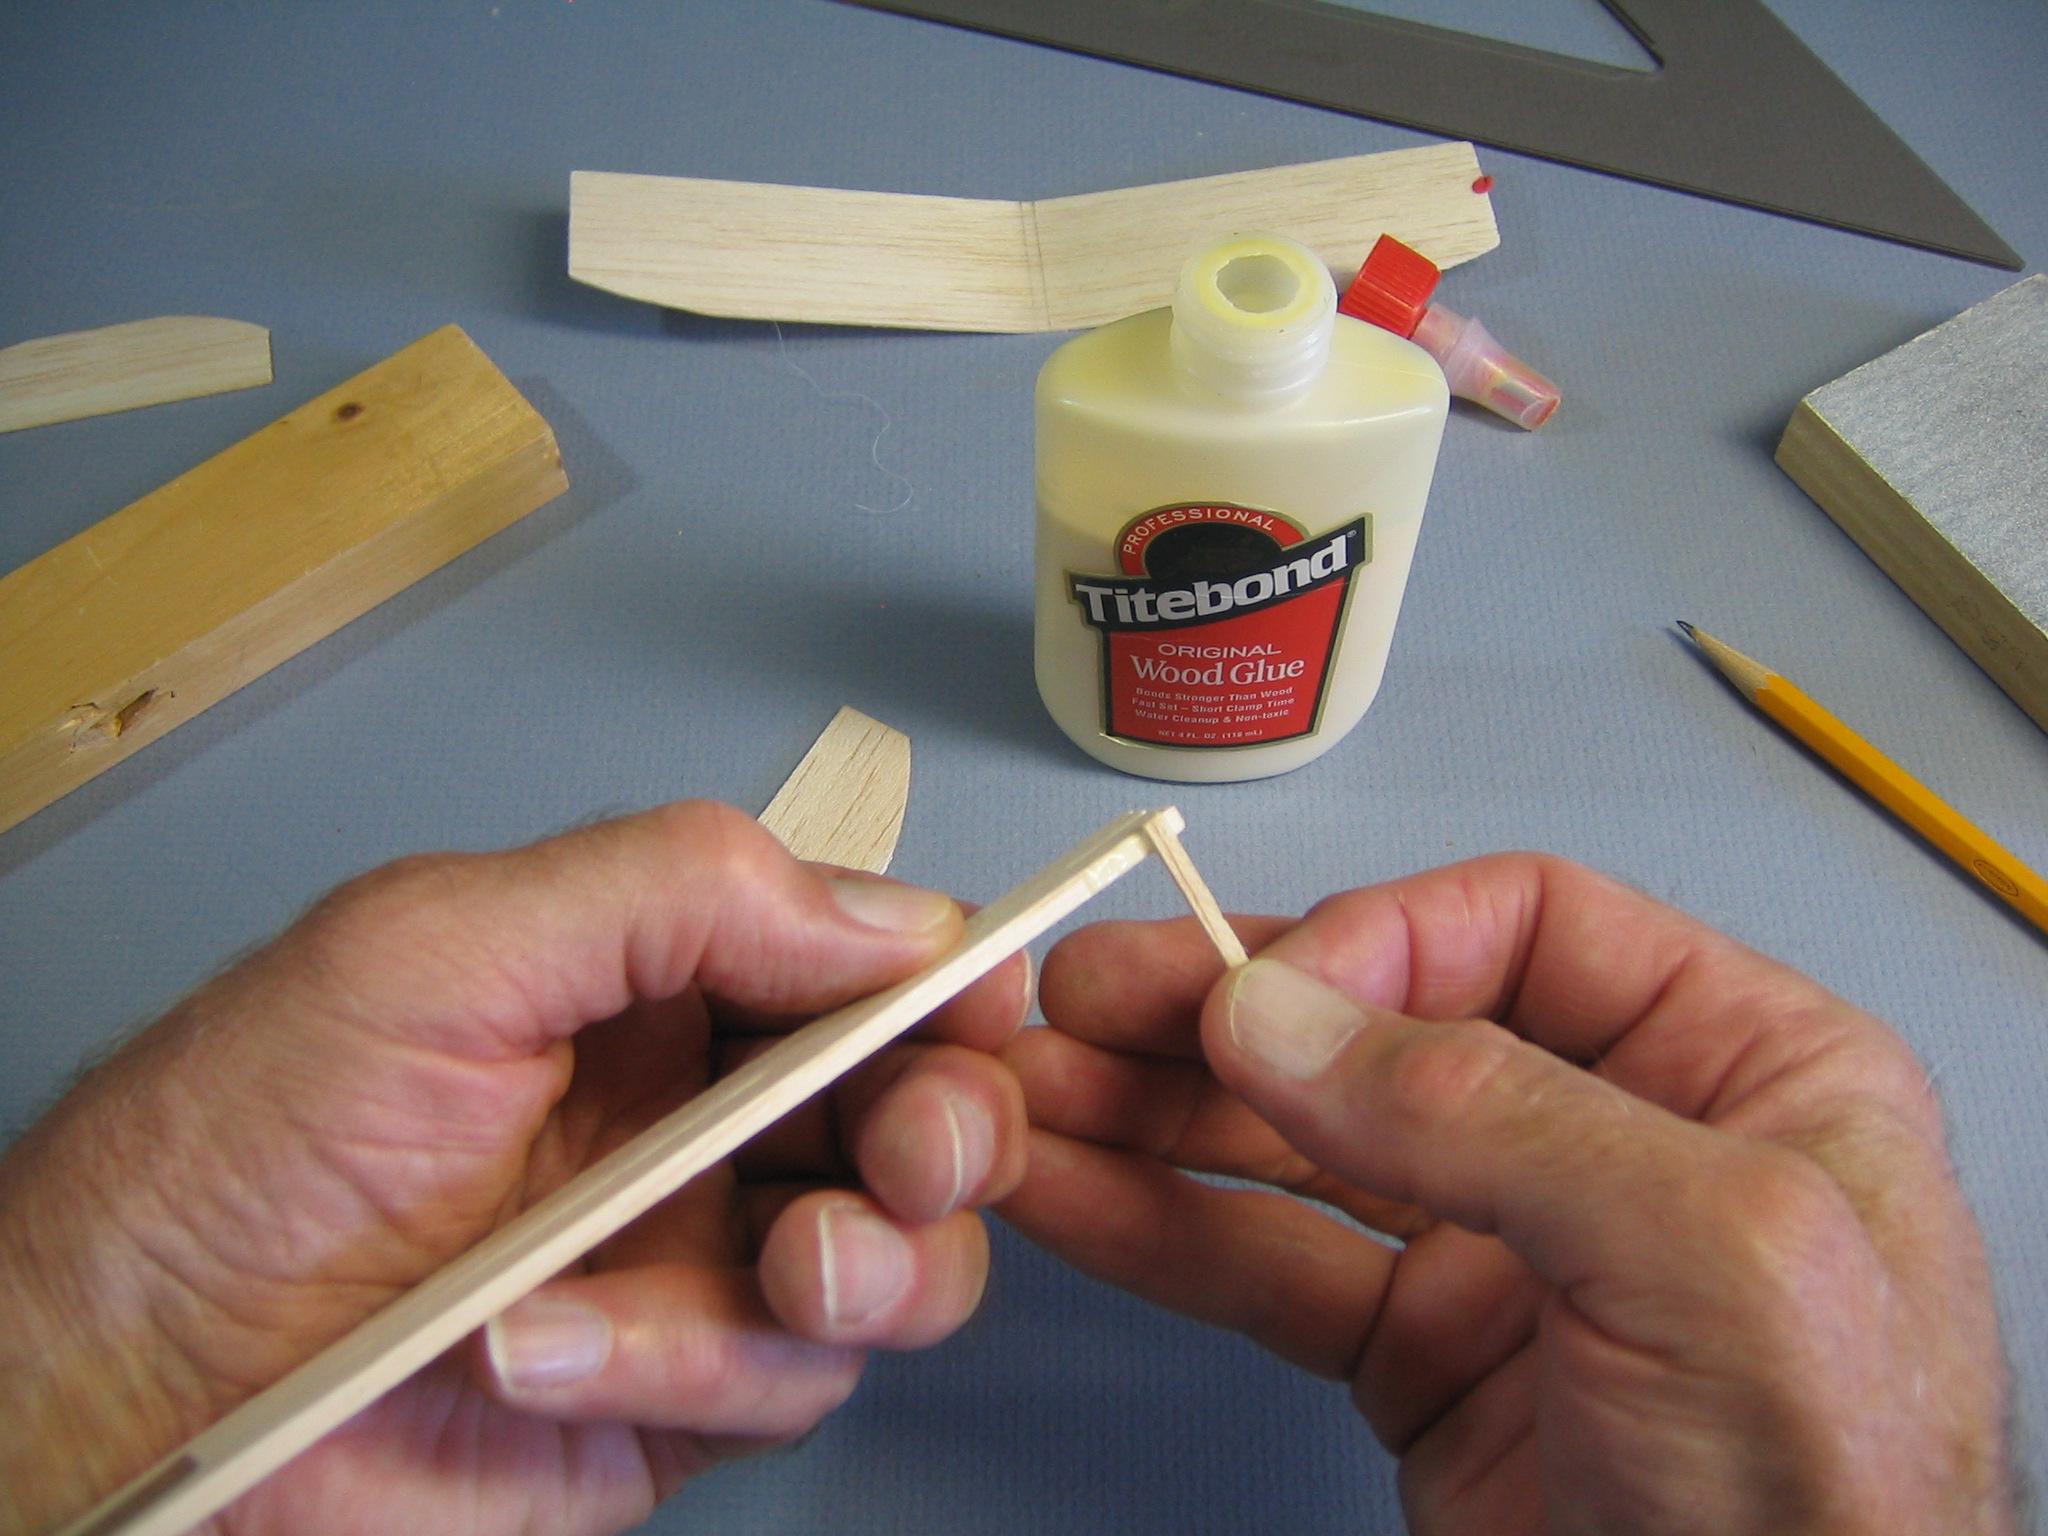 I applied glue to the tapered facet on the fuselage.
 I applied glue to the tailplane where it will contact the fuselage.
 I let the glue get tacky, then pressed the parts together.
 I checked that the tailplane was perpendicular to the fuselage.
 I set it aside to let the glue dry completely.
At a fast throw, this would go in a perfectly straight line. I was able to get it to loop again by gently bending the back of the tailplane up very slightly.
With that I was able to get good flights, but it was still not rolling out at the top. Roll is controlled by dihedral. This is an indication that the glider needs more dihedral.
 I soaked a wing and put it on the form with 3/4″ blocks under each tip. There will be some springback, harder wood more than softer wood.
 This resulted in about 1 1/16″ total dihedral offset, compared with the original 3/4″. This did a little better, but still not what I would like. Comparing this dihedral with that of competition gliders, I could see that this was not nearly enough. At the same time, I don’t want to bend the wood enough to break it.
 I resoaked the wing and put it back on the form with 1″ high blocks. Not enough.
 Finally I blocked the ends up 1 1/2″. I could see that the wood was beginning to buckle on the inside of the bend, so this is about as far as I will bend this piece of wood. If I want more dihedral, I must find a softer piece of wood.
This produced 1 1/4″ of dihedral. It was possible to get much better flights with this much dihedral, using a standard fuselage and tailplane and a fin with a little left turn bent into it. Launched at moderate speed with the wings banked about 75 to 80 degrees right and the nose pointed up about 45 degrees, it could go up about 20 feet and transition smoothly into a left turn.
what next?
I will experiment with flying it as a kite and as a tow glider, as I did with the Large Styrofoam Glider and the AMA Cub. I wonder whether I could get a propeller and rubber band motor on there.
Watch Tom Sanders’ AMA Education Program VIDEO on the 12″ Guillow’s Eagle glider.
After you have mastered your Guillow’s 25-1 Glider, you might like to try a rubber band powered Guillow’s Sky Streak. Visit my Sky Streak tutorial on EndlessLift.
You can also use these gliders for science and math instruction. See my report on Glider Science here on EndlessLift. How much horsepower do you think your glider uses? You can find out how to get the answer here.
Gary
Thank you, this was very helpful. I particularly like your approach of addressing one issue at a time, seeing the result, and moving on to the next issue.
Give Guillow’s factory address and precise description of what to order to get a pack of 20 or 50 or 100 gliders or whatever number of gliders sell as a package.
Reply dbaxter554@gmail.com
Thanks
There is a link in the article.
You did a great job.
Susan