The next step in building a model, after thoroughly studying the plan, is to buy the materials. If this is your first time buying materials to build an airplane, then this will also send you on a search for hobby stores, craft stores, art stores hardware stores and other places where model building supplies may be found. Much of what we buy these days is from the Internet. I will provide some information on that later.
Here is what you will need to build the Big Pussycat:
18″ of 1/8″ square balsa. (I recommend using the 1/8″ square for only the center panel of the wing, so only about 8″ length is needed.) This is sold in 36″ lengths. Check the dimensions, bring a little pocket ruler. Be sure it is balsa wood. Hobby displays often contain basswood and spruce, also. People sometimes put the sticks back in the wrong slot on the rack. Look for light weight wood. The easiest way to tell light from heavy is the color, light wood is lighter in color. You can make a balance for weighing wood from a 12″ piece of 1/8″ dowel, some thread and a penny, as is explained in Penny Balances on this site. At 7# density, this stick should weigh about 1 gram.
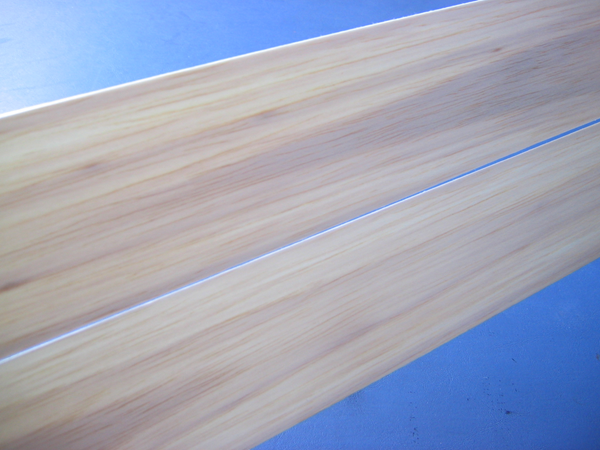
18″ of 1/16″ x 3″ sheet balsa (from which the 1/16″x 1/8″ and 1/16″ square will be stripped). This is sold in 36″ lengths. Again, get light wood. For judging the density of sheet balsa, hold the sheets up to the light. More light comes through lighter wood. There is usually a variation in density within a sheet. Look for sheets with straight grain pattern and not too much variation in density. At 7# density, this sheet should weigh about 12 grams.
Balsa is also classified according to its grain pattern apparent on the surface. The grain classification of balsa wood was developed by the Zaic family in their model aviation supply catalogs from about 1934. It applies mostly to sheet balsa. “A” grain is cut tangentially, “C” grain is cut radially and “B” grain is cut somewhere in between. A and C grain are unusual, most wood is B grain. That is what you are likely to find in the store and it will work fine. There are a lot of resources on the Internet explaining this and its significance, so I won’t go into any more detail. Just type “balsa grain” in the search window.
A 6″ Peck plastic prop, Peck Nylon bearing, brass washer and Peck prop shaft. These are distributed by Peck-Polymers in a set called the Small Designers Kit.
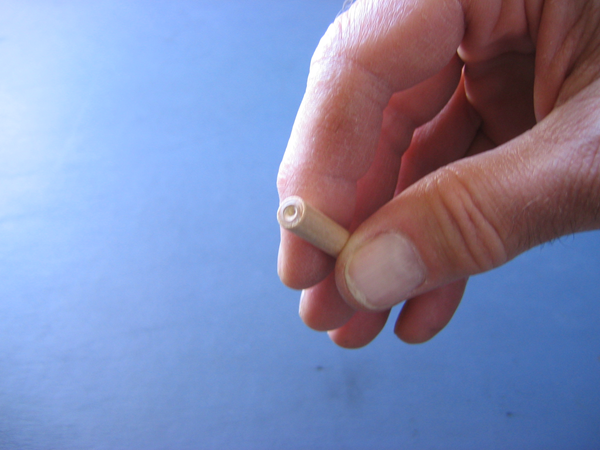
Two Peck 3/4″ plastic wheels, from the 3/4″ Peck Lightweight Wheels set containing six wheels. You can also build wheels from balsa sheet and 1/16″ aluminum tube. If you want to do that, buy some 1/16″ aluminum tube, it is sold in 12″ lengths.
8″ of 0.025″ steel wire (for the landing gear), sold in 36″ lengths. Keep it straight, don’t let the clerk bend it. Fold a square of tape over the ends to keep it from poking somebody.
1 5/8″ of 1/16″ aluminum tube, bamboo dowel or a round toothpick for the motor peg.
Tissue paper. Such a simple thing, such a difficult subject. What you want from tissue paper is light weight, strength and wet strength. Knowing the weight requires a balance. It is rated in units of weight per units of area, for example, ounces per square yard, grams per square meter or grams per 100 square inches. The preferred paper for this model is Esaki tissue made in Japan. It is shiny on one side, dull on the other. It weighs around 0.79 gram per 100 square inches. The blue paper I used on my first BP was used as gift wrap and weighed 1.10 gram per 100 square inches. A sample of domestic art tissue on hand weighed 1.15 gram per 100 square inches. I recently bought a 15 sheet rainbow pack of Amscan Craft Tissue at Michael’s that weighed 1.05 gram per 100 square inches. (You can see it in the picture in the Introduction.) It had adequate strength, even when wet. That is important, because when you pull it across the wet glue while attaching it, you don’t want it to come apart. The Big Pussycat has 116 square inches of tissue, so the difference between the lightest and heaviest tissues is 0.42 grams. That is about 6% of the finished 6.6 gram weight of my first Big Pussycat. That could spell the difference between winning and losing in a contest.
1/16″ and 3/32″ rubber strip, also sold by Peck Polymers. I have been using 1/16″ with good results. The 3/32″ might be necessary if your plane turns out heavy or you want to fly with the landing gear. Might as well get both. You can get rubber strip at much lower cost by buying it in bulk. If you decide to use other than a standard width, you will need a rubber stripper.
Model airplane cement, glue. Another complicated subject, there are many good choices. You want glue that is strong, not brittle and sands well. It should soften with water, acetone or other solvent in case something must be taken apart. Elmer’s, Titebond, Wilhold wood glue and other carpenter’s wood glues will work and soften with water. Sigment, Testors and Duco are good, soften with acetone, but they have the solvent smell that some find objectionable. The solvent glues must be bought by a parent. Be careful not to get the solvent glues on your clothes, they do not wash out with water. Stick glue can be used to attach tissue paper, but I prefer to use white glue thinned with an equal volume of water, applied with a small paint brush. Applying pressure with stick glue will break these delicate structures unless you are very careful.
The glue may be put in the plastic bottles with a pointed tip that allows more precise placement of small amounts of glue. There are tapered plastic tips that fit snugly over the end of the spout on the glue tubes that do the same thing. This also reduces the amount of glue that drips out of the tube when it is left lying on the table. You may dilute the glue a little with solvent, acetone such as is used for thinning fingernail polish (without any additives), or water, depending on the type of glue, when it has been in the bottle for a long time and has dried out. Sometimes I thin glue a little to help it penetrate the wood better.
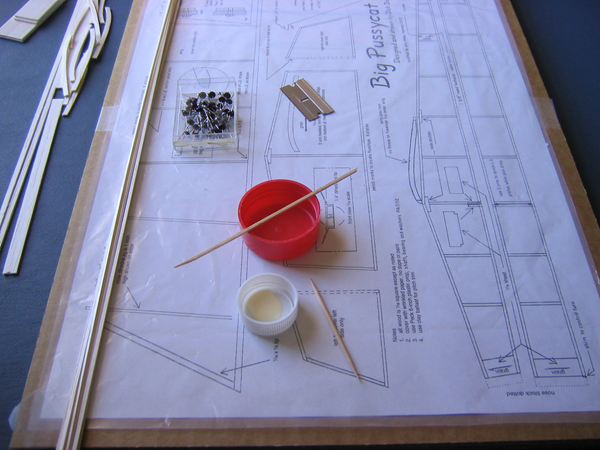
For my Big Pussycat I used Titebond, a water soluble wood glue. It has a wide spout for spreading glue on wood surfaces, not suitable for model building. For model building I put a small quantity in a plastic bottle cap and apply it with a sharpened bit of 1/16″ square balsa or a toothpick. A larger plastic bottle cap covers the small one to keep the glue from drying out while cutting, sanding or doing other activities not requiring glue. At the end of a building session, the bottle cap can be rinsed out, or the little remaining glue can be allowed to dry out and pulled loose. For spreading glue over larger surfaces, as when gluing the pieces of the nose block together, I use a small rectangle of cardboard, about 1/2″ x 3/4″, cut from a cereal box.
Tools
These will be illustrated throughout the instructions at the appropriate places. Some of these tools are necessary, others help make the work easier or more precise, but are not necessary. Tools may be bought at local hardware, art, craft or hobby stores or from the Internet. Some are home made.
You will need a 12″ x 18″ building board. Building boards may be bought. I have been using a balsa core, basswood sheathed drafting board, but you might like to make your own from corrugated cardboard boxes. You will need to know how to make a building board if you continue to make model airplanes. Click HERE to see “Make a Building Board” on this site.
We have been using wax paper or grocery store produce bags to keep the glue from sticking the wood assemblies to the paper plans. I have had problems with these materials for covering the plans. The wax paper absorbs glue and sticks to the assemblies. It can be scraped off with a razor blade, but I don’t like to spend the time. The wax can also dissolve into the solvent glues, possibly softening them. The polyethylene film produce bags don’t stick, but taping them pulls up ridges so it doesn’t lie flat. It takes a lot of trouble to get them flat. The bags inside cereal boxes are HDPE, translucent, but clearer than waxed paper, thicker than produce bags and does not as easily form ridges under tension. It is a bit wrinkled, but it flattens when taped down. Clear Mylar gift wrap is excellent for this purpose.
Tape for holding the plan and covering to the board.
Single-edge razor blades from craft, hardware or paint stores.
A balsa stripper from one of the model airplane suppliers, or make your own. We will be cutting several different widths, so an adjustable stripper is best.
Balsa glue sticks and card spreader for applying glue to parts. The glue sticks comes from my scrap box, or use a toothpick, and the spreader comes from a cereal box in the recycle bin, cut to size as required by the work.
Scissors for cutting covering paper.
Needle nose pliers for bending wire and removing pins from tight places.
Wire cutter suitable for 0.025″ steel wire. Some tools combine both a needle nose plier and a diagonal cutter.
Fine file for removing the sharp chisel ends from cut wire.
A 1/8″ diameter circular file is good for boring the holes for the motor peg and the prop bearing. A complete set of jeweler’s or machinists small files is handy and will contain one of these “rat tail” files. This makes nice, clean holes, where a drill will often split the wood.
Sanding block – sandpaper glued to a small wood block. I have glued 100 (coarse) and 150 (fine) grit paper to 3/4″ x 1 ½” x 3″ pine blocks. Use whatever bits of wood block you have that fit comfortably in your hand.
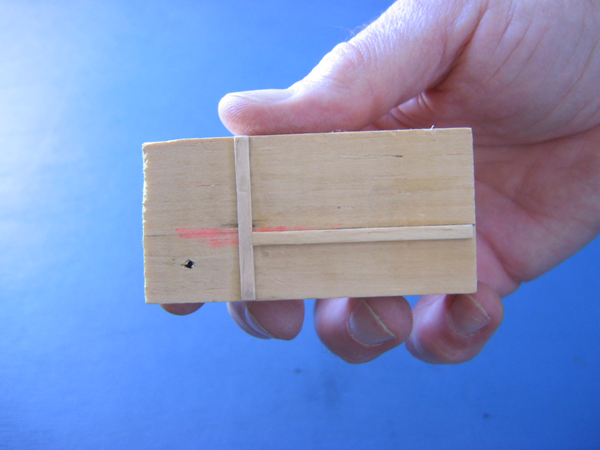
Sanding jig. This allows you to sand perfectly square ends on sticks or small plates of balsa. The sanding jig is a 3/4″ x 1 ½” x 3″ pine block with two strips of 1/16″ x 1/8″ hard balsa glued to one 1 ½” x 3″ face. One goes across the 1 ½” direction 7/8″ from one edge. I will call this one the stop. The other butts up against the first and runs down to the opposite end, 7/8″ from one of the 3″ edges. I will call this one the fence.
To square the end of a piece of balsa, place it snugly up against the stop with its end sticking a little out past the 3/4″ x 3″ face. With many gentle strokes of the fine sandpaper, sand the end down until the sandpaper is sliding flat on the 3/4″ x 3″ face of the block. To cut an upright with an angled top, put the squared end against the lower longeron, get it square, then align the edge of the razor blade with the inside edge of the top longeron and make a shallow crease with the razor blade. Cut the stick with the razor blade a tad beyond the crease. Place the marked end against the stop at the proper angle, judged by aligning the crease with the edge of the 3/4″ x 3″ face. Sand with many gentle sweeps of the sanding block, sanding in a direction that pushes the upright against the stop or against the block. The cross pieces may be sanded to a uniform 7/8″ length by placing them against the opposite side of the stop with the squared end against the fence. Mark them where they stick out beyond the edge of the block and cut them a tad long. Place them back on the sanding jig and sand the other end square. Several pieces can be sanded at the same time this way. Its use is shown in the pictures accompanying the text. You can cut the parts straight out with the razor blade if you like, but sanding the ends square makes stronger joints. The use of the sanding jig will be illustrated in the instructions at the appropriate places.
If you do a lot of sanding, wear a simple dust mask, or work outdoors with a breeze to blow the dust away from you. If you don’t like sanding, cut the pieces as accurately as you can with the razor blade.
Small wood blocks or other small weights for holding things in place.
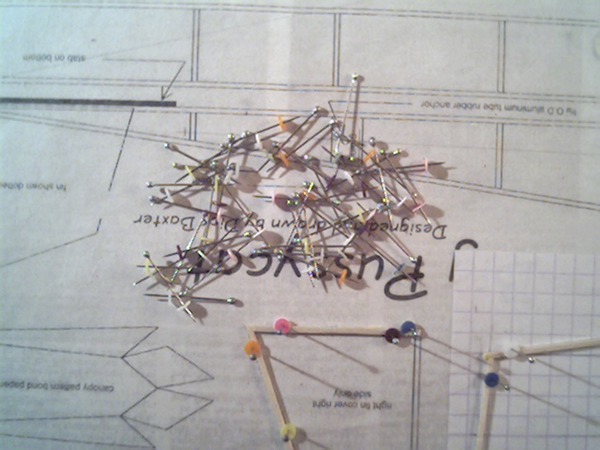
Seamstress pins, ball-headed ones are best, from craft, dressmakers or fabric shops. Many grocery or drug stores have a section of sewing notions that includes pins. There are also specialized model making pins, T-pins, insect pins and others.
Pin pusher, a 4″ length of 1/4″ wood dowel that has a dimple drilled in the end to engage the pin head, used to drive the pin into the board. Hold the shaft of the pin between two fingers while doing this to support the pin and prevent it buckling.
Pin clamps. Putting pins through thin strips of balsa weakens the wood. Sometimes we use 1/2″ lengths of 1/16″ x 1/8″ scrap balsa with a pin through it as a finger to hold the parts to the building board. These often split, are too soft to hold or can be used only once. Those shown here are made from pins and plastic disks punched out of HDPE plastic carton lids with a leather punch or paper punch. I dump a few of these plastic circles on the building board and push pins through them while they are lying flat on the board. Some of the thicker ones grip tighter than the thinner ones and can dent the wood if pressed hard. The pins might bend in the thicker, harder plastic, hold the pin with two fingers and push it through with the dowel pin pusher. Push them down just enough to hold the wood, not so hard that they dent the soft wood. The same can happen with the wood blocks if pressed hard on soft wood. Put one pin on either side of the stick to keep it in place. On the wings, the ribs will hold the spars from the inside. On the fuselage sides, the uprights will hold the longerons against the pins placed around the outside.
Find a box to keep all your tools together. At first a shoe box will be sufficient. Later you may want a box with compartments. You may want a separate box for flying supplies.
Shopping
We modelers have our favorite places to shop. We buy what we need, look at the tools, materials, supplies, new kits and check out the magazines. Look in your phone book or online for hobby, hardware, art and craft stores. You can find many things at grocery, drug or fabric stores. You may need to visit several places to get everything. Most hobby stores cater to the gas engine, radio control, ready to fly market and they are weak on the indoor free flight rubber power materials. It is especially hard to find light balsa wood.
The Internet is a great place to find indoor free flight materials. See our list of Suppliers.
Peck Polymers is now owned by Chuck Imergamo. He has everything you need, on the Internet at Peck Polymers.
FAI Model Supply is another good source of indoor materials, especially rubber strip, on the Internet at FAI.
Click HERE to go to Chapter 2.
One thought on “Big Pussycat Chapter 1 – Materials, Tools and Shopping”