The Academy of Model Aeronautics (AMA) has announced a postal contest for the new AMA Alpha. You can read the rules and order your planes from the postal contest site linked above.
Here is the guidance I would give to a kid entering this contest.
The rules specify flights are to be made indoors under a 30 foot high ceiling. The ceiling limits the amount of climb and power that you can use. Indoor models are typically flown circling to the left. The motor torque acting on the rear hook banks the plane left and that makes the plane fly in a left circle. There is no reason to make it fly in a right circle indoors; that would just waste energy.
When flying outdoors, things are different, but that is not the case here.
Motor lube allows you to get many more turns into the rubber and thus many more turns from the propeller, for longer flights. Using an O-ring on the motor makes it much easier to get the tightly wound, lubed motor off the winder and onto the rear hook without losing any turns. You can learn to make rubber motors on this site.
First trim the plane for best flight. You want a long, slow climb, a long cruise and a long slow descent, using all the energy you can get from the motor. The wing should be positioned for minimum sink. The balance of the AMA Alpha is done by sliding the wing clip fore and aft on the stick. I find that the center of gravity should be about 1″ behind the wing leading edge, about 1/8″ behind the trailing edge of the metal tab. Your plane may differ. Start there and try 1/8″ or 1/4″on either side of that and pick the best one. Even better, systematically test several wing positions yourself to find the best center of gravity position for Best Flight Time.
You should try a longer motor. The 12″ motor of the instructions will accept about 1,400 turns before breaking. Try using a motor about twice the distance between the hooks, 16″ long. This will take about 1,900 turns. If you are really ambitious, you may remove the rear hook and replace it with one farther aft, for an even longer motor. Try moving the motor hook to 12″ behind the prop hook and use a 24″ motor. Remember to reset the wing if you change the weight of the motor to get the center of gravity at the same best place on the wing.
Ideally you will have someone to hold the airplane and propeller while you wind the motor. You can wind by yourself by using a foot stooge. The AMA Alpha site shows a foot stooge, but it is unduly complex and cumbersome. I use this one.
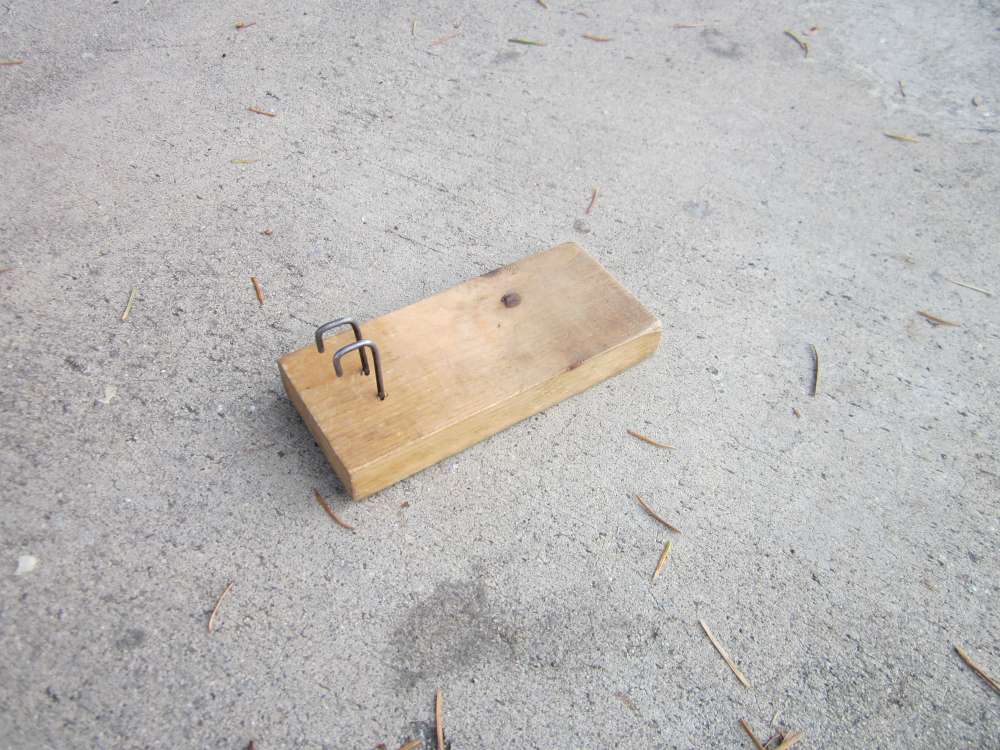
It is made from 3/4″ x 2 1/2″ x 5 1/2″ pine and coat hanger wire. The coat hanger wire is bent in a long U with the flat base of the U just wide enough to allow the ends to pass up through the holes drilled in the board. The ends are cut to about 2″ long, sharp ends filed round, bent over at right angles twice to form hooks about 9/16″ wide and 7/16″ deep. The holes are about 5/8″ apart and 1″ from the end. The two cup hooks used on the AMA stooge might work as well. This takes up less room and is easier to make. I can carry this in one pocket and the winder in the other.
The prop is held in the hooks, the stooge is held down with a foot and you can stretch the motor at least a little while winding.
Winding the motor stores potential torsional energy in the motor. The torque increases as you put ore turns into the motor. As the motor unwinds during flight, it delivers energy to the propeller. Potential energy is turned into kinetic energy. A flying rubber powered airplane is a study in energy.
Winding can be done fast at first, but must be slowed as the knee of the torque curve is passed and you move into the high torque spike. Winding puts energy into the motor and some comes out as heat. A hot motor will buck back and break prematurely. Winding slowly toward the high turns allows the heat to dissipate. This allows many more turns to be put into your motor and reduces the number of broken motors. You can see this when winding on a torque meter. Wind fast and pause, you can see the torque gradually go down as the heat dissipates. There is no sliding of the rubber, it is perfectly still. Using torque or turns to decide when to stop winding is uncertain. Feeling the rigidity of the motor is better. Giving slight tugs on the motor will tell you whether there is enough elasticity to take more turns. Pause occasionally to allow the motor to cool and give a little tug to feel the elasticity. If it does not want to give after letting it cool, it is time to stop winding. Actually, we are not going to wind to maximum turns under a 30 foot ceiling.
The AMA Alpha comes with a 20:1 winder. That means the winder puts 20 turns into the motor with every turn of the crank. Five turns of the crank puts one hundred turns into the motor. When counting to high numbers, it is convenient to count by hundreds. You can count like this:
One, two, three, four, ONE (that is 100 turns), one, two, three, four, TWO (that is 200 turns), one, two, three, four, THREE, one, two, three, four, FOUR, one, two, three, four, FIVE, one, two, three, four, SIX, one, two, three, four, SEVEN, one, two, three, four, EIGHT, one, two, three, four, NINE, one, two, three, four, TEN. We now have ten hundreds, or one thousand turns in the motor. Continue as desired. If the motor starts to fight back, proceed with caution as described above.
With a ceiling limitation, we do not wind to maximum turns. To stay under the ceiling we wind to some intermediate number and then back off. Initially we may wind to some torque that will take us to the ceiling. However, we are launching from the winding curve. The unwinding curve is below the winding curve. The torque falls very rapidly to the unwinding curve, then proceeds down. If we over wind and unwind down to the previous torque level, we will be starting at the same torque on the unwind curve with quite a few more turns. More turns equals more time. Not only that, but the unwind will be more gradual, the climb will be slower and we can actually start at a bit more torque with even more turns. This can be a slow iterative process, but it can be done quickly by simply backing off about 100 turns on every winding as you move up in total turns until the plane approaches the ceiling. You add or subtract turns according to whether the plane falls short or hits the ceiling.
Dave Gee has published a video which shows some of the troubles you can encounter when flying.
I expect Brandon will be getting flights of a minute. He can join the Wilbur Wright club when he gets 59 seconds or more. So can you. Wilbur’s best flight on that first day of flight on 17 December 1903 was 59 seconds.
The spiral dive at 1:08 is avoidable with more dihedral. The original design has dihedral on the center panel. That was eliminated when it was found that the foam wings would collapse at the root. The wing breakage was fixed by adding metal tabs that eliminated the dihedral. Those tabs can be bent to produce the proper dihedral, as I show here.
More important is the high bank angle during the entire flight allowed by the lack of dihedral. A bank implies a side slip which implies a downward motion. A downward motion is energy wasted. It is an increase in sink speed, which detracts from duration. Energy is time, conserve it. This sink is active during the entire flight. The airplane is banking left from the motor torque. The resulting side slip, in combination with proper dihedral, produces a countering right roll. Fixing this will also increase the circle radius.
You want the circle to be as big as you can safely fit inside the walls. The plane will circle left, with the center of the circle off the left wingtip. The plane should be launched so the center of the flight circle is at the center of the floor and the circle is a safe distance from the walls. That means launching near the center of the long wall, pointing the airplane along a direction parallel with the wall. Use small rudder deflections to fine tune the circle diameter. Bend the rudder to the right to make the plane go more to the right (larger circle) and bend the rudder to the left to make the plane go more to the left (smaller circle). (How many times have I seen someone going out with a fully wound motor, standing with their back to the wall and launching the plane straight out into the hall? It makes a half circle and crashes into the wall.)
An indoor plane should not be thrown when launched. That puts energy into the plane that is not needed in indoor flying. You are already going to hit the ceiling on rubber energy alone. The plane should be released at natural flight speed. Throwing is like launching from shoulder height. It takes time away from the power run. The throw gets the plane up fast. You want it to go up as slowly as possible. We are forced to start fast because of the torque curve, high torque at the start, but additional speed will detract from flight time. Speed is the enemy of duration. Let the motor fly the plane the entire time, no faster than necessary.
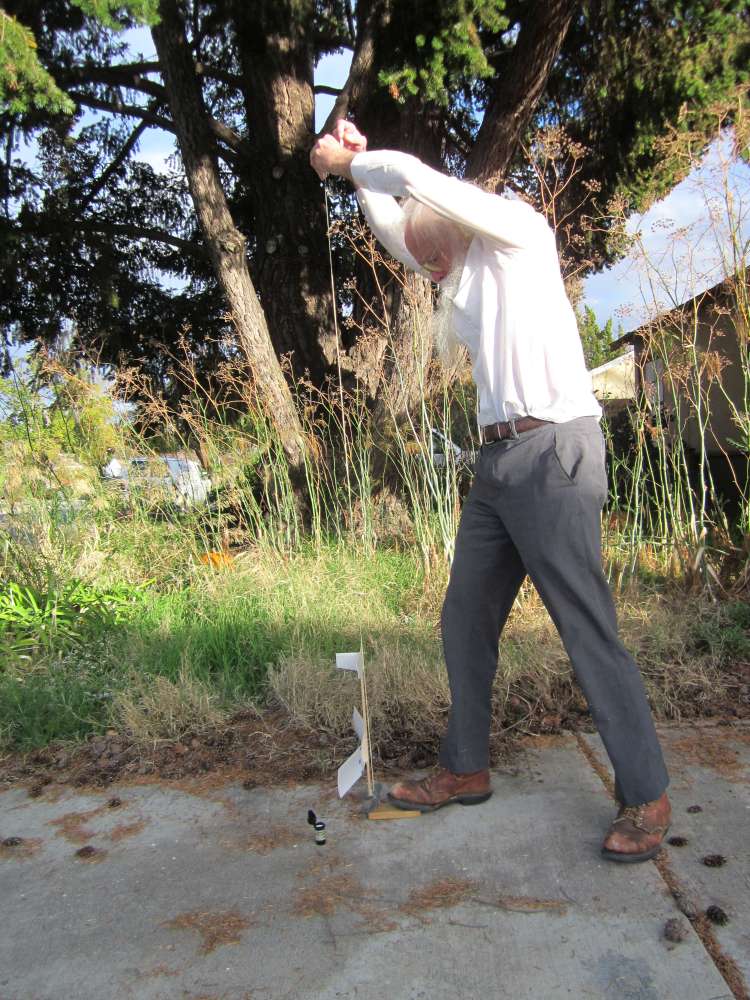
Starting from floor level allows you to take advantage of all available vertical space. The time you gain compared to launching from shoulder height is the time it would take for the plane to climb from floor level to shoulder height. Those few seconds can make the difference between winning or losing in a contest. To launch from floor level, you hold the stick from above just behind the wing. You hold the tip of the prop from above. You crouch down facing the wall, lean to the right and move your arms to the right, then move the plane rapidly left, releasing the propeller first and immediately releasing the stick, with the plane at its natural flight speed, attitude and angle of climb. The plane wants to fly a certain flight trajectory. You want to get it on that track in a way that doesn’t require the plane to waste energy making corrections. This is a lot like launching a hand launched glider, it takes practice. Watch the plane closely to see what it wants to do right after launch. This is where your skill as a pilot comes in. A better launch will get a better time.
Gary Hinze
I really have benefited from you Alpha build log and flying commentary. You done a wonderful job of clear instructions with excellent pictures.
Thank you so very much.
I looking forward to exploring the many, many other items on you website.
Thanks